Help - Search - Members - Calendar
Full Version: Flapper Restoration (aka Flap Control Box)
914World.com > The 914 Forums > 914World Garage
DennisV
How are folks going about restoring original flapper boxes?

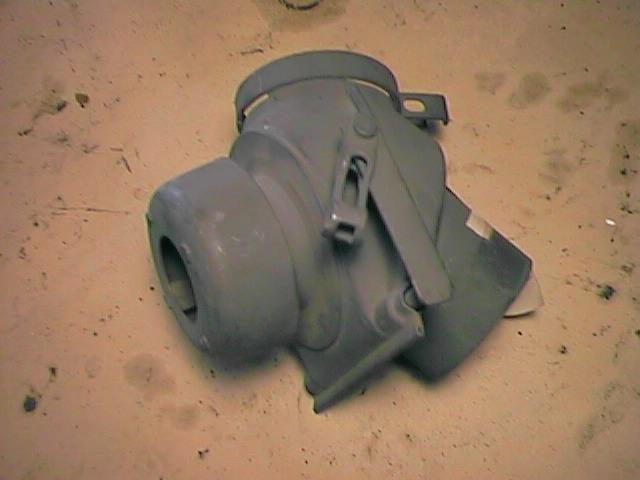
I had intended to bead blast and powder coat ours. Preparing to degrease them today, I see that they have a spring mechanism inside and what I think is a rubber sealing ring. I don't think those would much like the powder coating and required heat. Some other styles talked about on other forums get disassembled, but I don't see a way to get those components out without destroying the housing.

Perhaps bead blast and spray can is the best bet, and just accept the spring and sealing ring will get painted?

Thank you.

P.S. I've seem some discussion suggesting 914-6 were gray rather than black. Was that ever definitively answered? The color of ours is rust. sad.gif

Click to view attachment
Mikey914
May want to rethink the powder coat for this application. Unless you have a higher temp version you are running. Enamel works well here. They will see a fair bit of heat. A ceramic coat material is also a good option.
The powder may work, but over time it may get brittle.
DennisV
QUOTE(Mikey914 @ Sep 10 2022, 04:01 PM) *

Enamel works well here. They will see a fair bit of heat. A ceramic coat material is also a good option.

Thanks for your reply. Unless I get a better suggestion, I'll do something similar to what I did on our 356 preheat shaft with flaps, which is bead blast and then spray primer then paint with Dupli-Color Engine Enamel. It's not ideal for the rubber or moving parts, but I can't leave it like it is.
Mikey914
That's what I'd do.
bbrock
I replaced the gaskets on one using some exhaust gasket from the FLAPS and high temperature adhesive. You can't really restore them exactly like original because the gaskets are crimped into the flapper around the edge. But mine have held up and make a good seal.

Here's a bit on the process from my build thread, but pretty straight forward.
DennisV
QUOTE(bbrock @ Sep 10 2022, 05:07 PM) *

I replaced the gaskets on one using some exhaust gasket from the FLAPS and high temperature adhesive. You can't really restore them exactly like original because the gaskets are crimped into the flapper around the edge. But mine have held up and make a good seal.

Here's a bit on the process from my build thread, but pretty straight forward.

Holy crap! I thought I was obsessive. Nicely done Brent.

I like your initialism
QUOTE
NSPs (New Shit Parts)

Did you coin that? I hadn't seen it before. Has wide applicability unfortunately.
mepstein
I’ve blasted and powder coated a bunch of them. The air flow isn’t crazy hot and it seems to hold up great. I believe Bruce/bdstone does the same on the ones he restores.
bbrock
QUOTE(DennisV @ Sep 10 2022, 06:19 PM) *

QUOTE(bbrock @ Sep 10 2022, 05:07 PM) *

I replaced the gaskets on one using some exhaust gasket from the FLAPS and high temperature adhesive. You can't really restore them exactly like original because the gaskets are crimped into the flapper around the edge. But mine have held up and make a good seal.

Here's a bit on the process from my build thread, but pretty straight forward.

Holy crap! I thought I was obsessive. Nicely done Brent.

I like your initialism


lol-2.gif Yes, I've noticed you are afflicted with the same disease in your posts. beerchug.gif

QUOTE
QUOTE
NSPs (New Shit Parts)


Did you coin that? I hadn't seen it before. Has wide applicability unfortunately.


I forgot about that. As far as I know, that's an original. shades.gif
rgalla9146
You heard right, there has been discussion on color of the 914 6 valves but there is no
question that they are originally grey.
I have had some showing plenty of the original paint. Same color as original HEs
I dont have access to pics of them right now.
On the left HE in th picture the original color can be seen.
DennisV
QUOTE(rgalla9146 @ Sep 10 2022, 11:35 PM) *

You heard right, there has been discussion on color of the 914 6 valves but there is no
question that they are originally grey.
I have had some showing plenty of the original paint. Same color as original HEs

Hmm. From your photo that looks roughly the same as the gray that came on our 356 muffler. It's a very dull. I guess I'd call it flat primer gray. Does that seem like a decent description?

Would love to see more photos if you have them. What I can find via the Google machine, even for 914-6, are black or really poorly lit. Here are the two best I can find that one might call gray:

Heater Flappers for 914-6

IPB Image
rgalla9146

Yes, that grey
Stoddard sells it.
johnhora
Years ago before the Stoddard type paint a friend of mine who was a 356 restorer and made 356 mufflers showed me how to use cold galvanizing compound spray paint. His mufflers were on many 356 concours cars.

The prep was to blast the part then spray with cold galvanizing compound spray paint and then take the gas torch to the parts to bake.....I did this on a number of 911 mufflers and headers....worked great and the color was a perfect grey....

The flapper gets very hot since it directs air from the heat exchangers so you need something that can take high heat.


Click to view attachment


mb911
Powder would be fine. It melts at of 400 degrees in most cases.

I like the rustoluem high heat gray primer. Works and looks perfectClick to view attachment
DennisV
QUOTE(rgalla9146 @ Sep 11 2022, 06:03 AM) *

Yes, that grey

I had hoped that the Dupli-color Engine Enamel with Ceramic primer would be a good match. Assuming our 356 muffler is the correct hue, the Dupli-color is a bit too blue.
Muffler in background as purchased from Porsche. Dupli-color primed starter body in foreground.
Click to view attachment
DennisV
QUOTE(johnhora @ Sep 11 2022, 11:59 AM) *

The prep was to blast the part then spray with cold galvanizing compound spray paint and then take the gas torch to the parts to bake.....I did this on a number of 911 mufflers and headers....worked great and the color was a perfect grey....

Thanks for sharing @johnhora That is some interesting stuff. I had not seen it before.

Why did you torch it? I'm reading their spec sheet and is says:
QUOTE
Do not apply to surfaces, when heated, exceed 200°F (93°C).


Based on what little I know, I think 200°F would be right at the edge of the engine operating temperature. FWIW - The Dupli-color folks suggest the engine enamel with ceramic will resist temperatures up to 500°F intermittently.
johnhora
Dennis...
that's the way he taught me to do it and he was a true master at his craft....I never questioned him...I just did what he told me to do smile.gif
It seemed that baked on it made it very durable. Just spraying it on with out the baking it could scratch easier.....and the color came out better baked. I'm trying to see if I have one of the 911 mufflers around. The color is like what you show in you picture above....it's like a white/grey but with out any blue hue. I remember buying VW beetle mufflers years ago from the dealer and they were the same color
DennisV
I got around to glass bead blasting these last night. A couple surprises.

First: I thought under the rust I'd get to at least a chip of original paint. I went from rust to bare metal. Not a trace of paint.

Second: I assume the flapper inside would have a ring of rubber like substance for the seal. Similar to what our 356 had. Instead I found mesh screen. Went easy in the interior areas in the vicinity of that flap. So I don't think I simply blew it away without a trace.
Click to view attachment

Has anyone had success getting the caps off that are held down by the 4 bent over metal tabs? I would sure like to take them apart for better prep and paint, but it's not worth breaking them.
Click to view attachment
bbrock
QUOTE(DennisV @ Sep 16 2022, 04:02 PM) *

Second: I assume the flapper inside would have a ring of rubber like substance for the seal. Similar to what our 356 had. Instead I found mesh screen. Went easy in the interior areas in the vicinity of that flap. So I don't think I simply blew it away without a trace.


The mesh is what's left of a fiber gasket like your basic exhaust gasket material. I have assumed asbestos given the era they were made. Now you can see how those gaskets were crimped on to the flapper too.
DennisV
QUOTE(bbrock @ Sep 16 2022, 05:22 PM) *

The mesh is what's left of a fiber gasket like your basic exhaust gasket material. I have assumed asbestos given the era they were made. Now you can see how those gaskets were crimped on to the flapper too.

Hrm. So maybe even with a light touch the glass bead was too much. My guess is I couldn't tell the rust from the fiber and I unknowingly destroyed it.

Given where we're at, perhaps I should really attack it now with the bead blaster just to try to get any remaining material out of it for safety reasons. At least the media gets filtered in the cabinet and I was wearing a mask when I did it.

I guess the next question is can I salvage these flappers. It looks like @bbrock found a path. Guess there's nothing stoping me from powder coating now if I can get them apart. If anyone has any additional restoration tips or tales of caution, now is the time to share!
DennisV
Has anyone been successful in disassembling this style of flapper box for repainting and getting it back together without destroying it? Those crimps are really tight.

I don't see how I'll ever get good paint coverage inside while they're together, unless I dip them in something.
Aerostatwv
QUOTE(rgalla9146 @ Sep 11 2022, 09:03 AM) *

Yes, that grey
Stoddard sells it.


agree.gif I've used the Stoddard paint and it is close to original color. The coverage is awesome so you don't need multiple coats.

Chris
DennisV
QUOTE(Aerostatwv @ May 21 2023, 08:21 AM) *

I've used the Stoddard paint and it is close to original color. The coverage is awesome so you don't need multiple coats.

I couldn't find the Stoddard paint available anywhere. I think it was discontinued.

I did find Wurth Zinc Weld Thru primer. I sprayed some out and it is very close color match to our 356 muffler. Their spec sheet says: - Heat resistant up to 914ºF

I am currently stuck on how to get them apart for painting without destroying them. smash.gif
bdstone914
[Just paint them assembled. I dig out the old seals and blast the inside. I have powder coayed sexeral pairs but it may be overkill.
mepstein
I don’t take them apart. Just blast and powder coat.
914werke
agree.gif
As has been mentioned there is no rubber in them & while their purpose is to route heated air to the cabin, they dont get that hot.
I only powder coat the ones that are in new/great shape with the fiber seal still intact, otherwise ..paint.
Oh & I did try to dissasemble one to see if it was possible to renew seals....once. headbang.gif
DennisV
QUOTE(914werke @ May 21 2023, 10:31 AM) *

I only powder coat the ones that are in new/great shape with the fiber seal still intact, otherwise ..paint.

When you say "paint", I assume you mean rattle can spray. Did you use special nozzle for that? I am having a hard time seeing how to get paint to the inside flange of the cap for example. The angle just isn't there for a regular rattle can.

ar15.gif I guess there's always spray the bejesus out of it and let it run.

I guess with powder coat, you'd get the benefit of the electronic charge that would draw some paint to unseen areas?
914sgofast2
Someone asked if anyone has straightened the four tabs that hold the mushroom shaped air diffuser on. I did and the tabs are pretty strong. They straightened right out with no problems. I slipped a hose over them to do the factory “fix” for vapor lock on my 1970 model 914.
This is a "lo-fi" version of our main content. To view the full version with more information, formatting and images, please click here.
Invision Power Board © 2001-2024 Invision Power Services, Inc.