|
|
|
Porsche, and the Porsche crest are registered trademarks of Dr. Ing. h.c. F. Porsche AG.
This site is not affiliated with Porsche in any way. Its only purpose is to provide an online forum for car enthusiasts. All other trademarks are property of their respective owners. |
|
|

  |

| 9146C |
 Apr 23 2020, 10:51 AM Apr 23 2020, 10:51 AM
Post
#1
|
|
Member  Group: Members Posts: 228 Joined: 14-September 19 From: US Member No.: 23,460 Region Association: None |
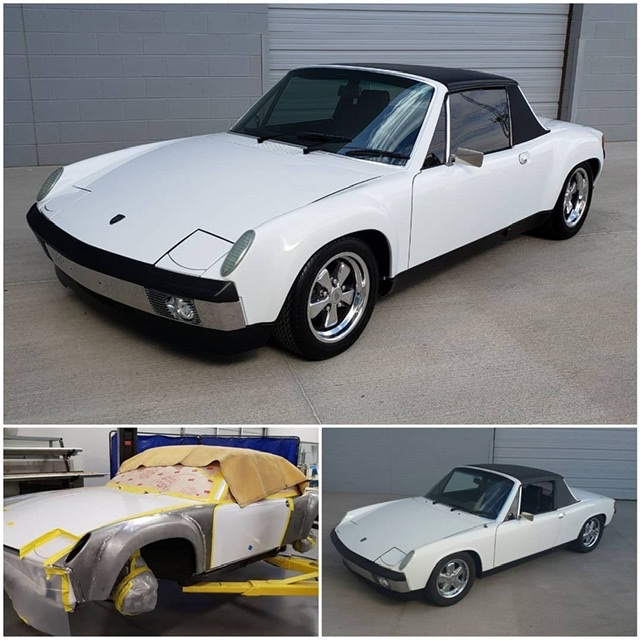
After completing more than 90% of my rustoration projects on the chassis, I am about to start the installation of the GT (metal) flares (AA purchase).
A question for those who have already done this...any tips/tricks/watch-outs or any advice on what you would have done differently? Thanks in advance! |
   |

 
|
| mepstein |
Apr 23 2020, 11:02 AM
Post
#2
|
|
914-6 GT in waiting Group: Members Posts: 19,307 Joined: 19-September 09 From: Landenberg, PA/Wilmington, DE Member No.: 10,825 Region Association: MidAtlantic Region |
I would ask Ben how he did his. He is a welding instructor so might be able to give you a quick tutorial. There are some tricks of the trade and getting the bottom corners correct takes a bit of finesse.
@MB911 |
|
|
|
| roblav1 |
Apr 23 2020, 11:11 AM
Post
#3
|
|
Senior Member Group: Members Posts: 528 Joined: 18-September 12 From: KY Member No.: 14,943 Region Association: MidAtlantic Region |
Welding shrinks everthing, butt weld is the only way to go, placement matters s lot, and get those Harbor Freight butt welding clamps. Weld small sections at a time. The more difficukt part for me was blending the transisions. The lower corners need some additional effort.
Fat finger spelling on this phone! |
|
|
|
| 9146C |
Apr 23 2020, 11:13 AM
Post
#4
|
|
Member Group: Members Posts: 228 Joined: 14-September 19 From: US Member No.: 23,460 Region Association: None |
Thanks for that feedback!
Somewhere I read that starting by tacking on the bottom (both ends) then slowly cutting/tacking in sections up to the middle. Right now, that's the plan...unless I hear something more interesting. Open to more feedback/opinions! |
|
|
|
| Root_Werks |
Apr 23 2020, 11:52 AM
Post
#5
|
|
Village Idiot Group: Members Posts: 8,331 Joined: 25-May 04 From: About 5NM from Canada Member No.: 2,105 Region Association: Pacific Northwest |
I've done a few sets, some have turned out better than others. Here's an old thread of the last set I installed which turned out really good:
http://www.914world.com/bbs2/index.php?sho...=89850&st=0 Your idea of starting at the ends (bottoms) and working toward the center is what we did. We'd cut a little, weld a little, cut, weld etc. One thing to watch for (among other things) is getting those lower corners tacked in correctly with the entire flare tight against the fender. Otherwise you wind up with a bubble or incorrect fit at the top. By the time I did this set, I had learned that lesson the hard way. |
|
|
|
| 9146C |
Apr 23 2020, 12:01 PM
Post
#6
|
|
Member Group: Members Posts: 228 Joined: 14-September 19 From: US Member No.: 23,460 Region Association: None |
QUOTE(Root_Werks @ Apr 23 2020, 11:52 AM)  I've done a few sets, some have turned out better than others. Here's an old thread of the last set I installed which turned out really good: http://www.914world.com/bbs2/index.php?sho...=89850&st=0 Your idea of starting at the ends (bottoms) and working toward the center is what we did. We'd cut a little, weld a little, cut, weld etc. The only thing to watch for (among other things) is getting those lower corners tacked in correctly with the entire flare tight against the fender. Otherwise you wind up with a bubble or incorrect fit at the top. Thank you for that link!!! You describe what I seem to have read somewhere else...much appreciated! |
|
|
|
| Cairo94507 |
Apr 23 2020, 12:15 PM
Post
#7
|
|
Michael Group: Members Posts: 9,811 Joined: 1-November 08 From: Auburn, CA Member No.: 9,712 Region Association: Northern California |
That is the very fun stuff as you get the flares on the chassis. They make such a huge change to the car. (IMG:style_emoticons/default/beerchug.gif)
|
 |
|
| tygaboy |
Apr 23 2020, 12:17 PM
Post
#8
|
|
914 Guru Group: Members Posts: 5,303 Joined: 6-October 15 From: Petaluma, CA Member No.: 19,241 Region Association: Northern California |
I'm no expert but I posted in a bit of detail about how I addressed the corners and match up. Starts on this page of my build, post #2169:
http://www.914world.com/bbs2/index.php?sho...900&st=2160 Hope this helps. |
|
|
|
| 9146C |
Apr 23 2020, 12:24 PM
Post
#9
|
|
Member Group: Members Posts: 228 Joined: 14-September 19 From: US Member No.: 23,460 Region Association: None |
QUOTE(tygaboy @ Apr 23 2020, 12:17 PM) I'm no expert but I posted in a bit of detail about how I addressed the corners and match up. Starts on this page of my build, post #2169: http://www.914world.com/bbs2/index.php?sho...900&st=2160 Hope this helps. Thank you for the link! I recall reading this post a few months back...beautiful build btw! |
|
|
|
| 9146C |
Apr 23 2020, 12:27 PM
Post
#10
|
|
Member Group: Members Posts: 228 Joined: 14-September 19 From: US Member No.: 23,460 Region Association: None |
QUOTE(Cairo94507 @ Apr 23 2020, 12:15 PM) That is the very fun stuff as you get the flares on the chassis. They make such a huge change to the car. (IMG:style_emoticons/default/beerchug.gif) LOL...when I started my "project", I wasn't initially expecting much more than adding the flares! Several panels/patches (and replacing the passenger longitudinal) later, I'm finally at the point of adding the GT flares! |
|
|
|
| 914forme |
Apr 23 2020, 12:38 PM
Post
#11
|
|
Times a wastin', get wrenchin'! Group: Members Posts: 3,896 Joined: 24-July 04 From: Dayton, Ohio Member No.: 2,388 Region Association: None |
Ben would be a good source, I will tell you this.
When I do these, or any patch work, I overlap, cleo them in place, then once I like the fit, I start to cut the back metal out. I do this by taking a narrow cut off blade and going into the over lap at an angle, 45 degrees. This allows the top metal to lay on top of the rear metal. I would do the initial tacks with MIG, and the do the rest in TIG. I can get the gap almost small enough that I can fusion weld the joint. No filler needed over a lot of the process. I do a spot at a time, and then once it cools I hammer these, an then add the next dot, and proceed. Takes a long time, with 1000s of small welds, but it comes out very nice. You can do the same thing with a MIG, I would use the softest filler and narrowest filler I could use. I could never get silicone-bronze feed well in my MIG, but love the softness for hammer welding. Since it is a fender flare, it is not a structural item like a suspension mount, softer wire will be your friend. @MB911 you go with your answer, and prove me wrong, as I am a hack compared to Ben. |
|
|
|
| Garland |
Apr 23 2020, 01:14 PM
Post
#12
|
|
Restoration Fanatic Group: Members Posts: 1,329 Joined: 8-January 04 From: ......Michigan...... Member No.: 1,535 Region Association: Upper MidWest |
From 2012 when a bunch of us got flares, the first link has a large list of project links.
QUOTE(Garland @ Oct 1 2017, 07:19 AM) Hears a great post I used for referance when installing mine. Lots of links. Great post on install links Heres mine, i reshaped the bottom of each flare, after alining the top center to the car. (if i did it again the only thing I would change, frt's 1/2" more foward) Running 9x16 on all 4 corners. Messure 10 times, and cut 1 time. I fit and welded mine before I had the wheels and tires. I focused strongly on the size of the tire space being equal, and distance from the hubs, using all of the flare, not just the outer look. Welded all 4 on. Then I got the wheel and tire size to fill the rear space. buying the rear set first, using them to check turning clearance on the front. The 9" fit! Got 2 more. Some say fit the flare to the wheel and tire. Using the tire as the guide, this will work also as a starting point. If you know the wheel and tire size you want to use. That was my biggest question. Michigan Build On paint: Great paint guy on you tube "The Gunman" (australian) i learned a lot watching him before I painted. |
|
|
|
| mb911 |
Apr 23 2020, 01:32 PM
Post
#13
|
|
914 Guru Group: Members Posts: 6,871 Joined: 2-January 09 From: Burlington wi Member No.: 9,892 Region Association: Upper MidWest |
I have done 5 cars worth of flares over the years.. My experience is butt joint with a chill plate behind the weld is best.. MIG or TIG does not really our way each other.. I MIG tack the flares up.. I use the factory dimensions and to be honest the Auto Atlanta flares I used only fit one way. I clamp a piece of plywood to the bottom lip of the arch of the stock fender and set the flare on it. Notch the bottom so you can slide the flare in tight and then tack the flare over the stock fender. Then take a cut off wheel right at the seam so that you cut the stock fender out and it will fall to the inside of the wheel well..
If you look at my build thread you will see that I MIG welded 3 of the four flares on (my 12 year old son did) then I TIG welded the last flare on.. The only advantage of TIG that I found was that you had fewer potential pin holes to deal with. |
|
|
|
| IronHillRestorations |
Apr 23 2020, 02:13 PM
Post
#14
|
|
I. I. R. C. Group: Members Posts: 6,724 Joined: 18-March 03 From: West TN Member No.: 439 Region Association: None |
I did my 2nd set in '06 a set about 5 years after that, and I'm about to do a set now. Here's my write up in Jan '07 PK's flair install All my installs have been with a MIG.
I think hammer welding may be the best process, but I don't know anyone who can do that, after that TIG, and then MIG. With hammer welding you take care of shrinkage with every weld, but it's totally technique oriented, and requires a pretty high skill level. Properly done hammer welds don't require much grinding, if any, and the gas fusion welds have the highest tensile strength and are more malleable, so any post welding panel beating is far less likely to crack a weld vrs MIG. The problem I have with TIG is I don't do it enough and it too very heavily reliant on technique, which only comes with practice. I spent a half a day working on butt welding TIG, but I wasn't happy with my welds, I was using a .045 MIG wire as filler rod, but need a lot (a LOT) more practice before I'd touch a car. I'm going back to what I know best and have the most experience, which is MIG. |
|
|
|
| IronHillRestorations |
Apr 23 2020, 02:19 PM
Post
#15
|
|
I. I. R. C. Group: Members Posts: 6,724 Joined: 18-March 03 From: West TN Member No.: 439 Region Association: None |
QUOTE(mb911 @ Apr 23 2020, 11:32 AM) I clamp a piece of plywood to the bottom lip of the arch of the stock fender and set the flare on it. Notch the bottom so you can slide the flare in tight and then tack the flare over the stock fender. Then take a cut off wheel right at the seam so that you cut the stock fender out and it will fall to the inside of the wheel well. Got any pictures? I'm having a hard time visualizing what you did Ben The flairs I'm using are fairly old factory ones, and I can tell you they are rough. The fronts are quite different, side to side |
|
|
|
| mb911 |
Apr 23 2020, 02:21 PM
Post
#16
|
|
914 Guru Group: Members Posts: 6,871 Joined: 2-January 09 From: Burlington wi Member No.: 9,892 Region Association: Upper MidWest |
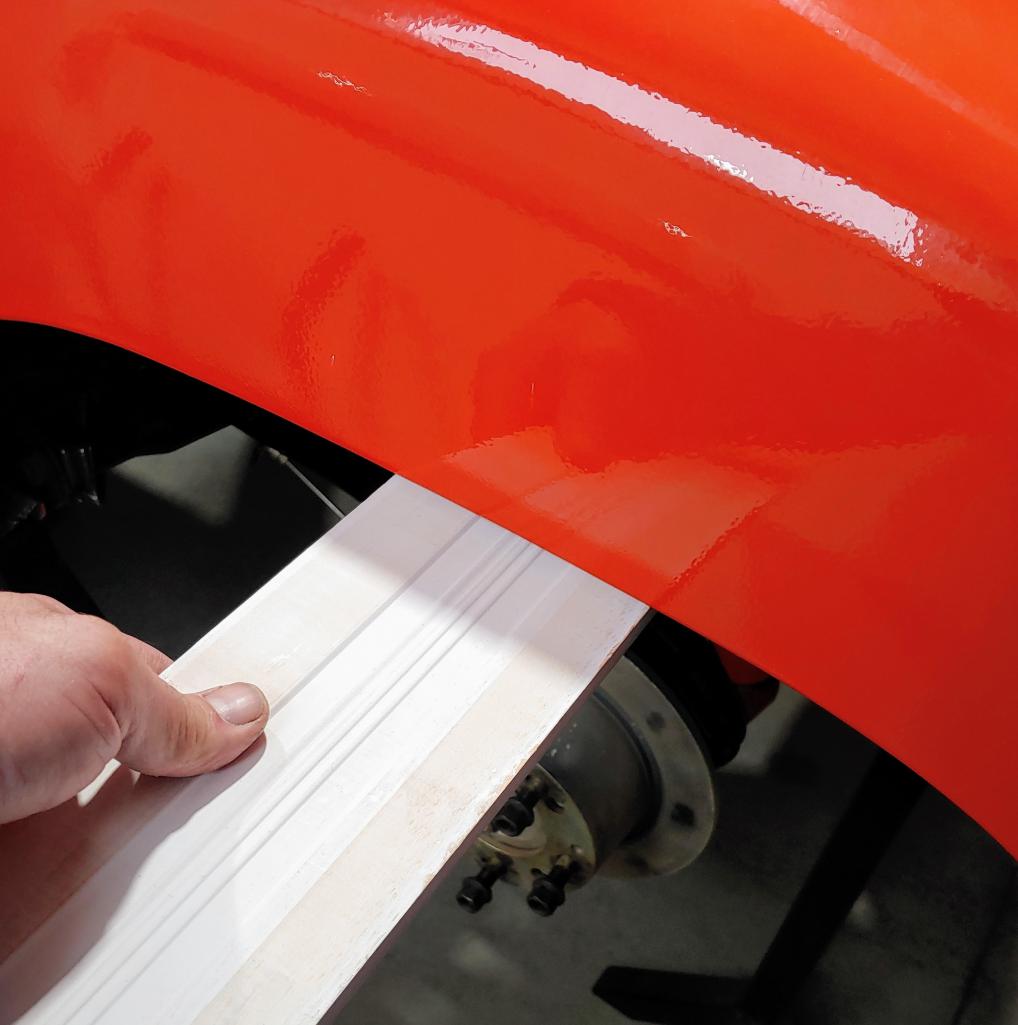
I don't but George turned me onto that 4 or 5 years ago.. Its just clamped to the fender lip..
|
|
|
|
| mb911 |
Apr 23 2020, 02:24 PM
Post
#17
|
|
914 Guru Group: Members Posts: 6,871 Joined: 2-January 09 From: Burlington wi Member No.: 9,892 Region Association: Upper MidWest |
This is the best I can simulate for you.. Imagine this is clamp to original fender lip..
 |
|
|
|
| IronHillRestorations |
Apr 23 2020, 02:36 PM
Post
#18
|
|
I. I. R. C. Group: Members Posts: 6,724 Joined: 18-March 03 From: West TN Member No.: 439 Region Association: None |
That helps, and makes sense. That way you have the same fender lip height
|
|
|
|
| 9146C |
Apr 23 2020, 03:09 PM
Post
#19
|
|
Member Group: Members Posts: 228 Joined: 14-September 19 From: US Member No.: 23,460 Region Association: None |
I really do appreciate everyone's comments and suggestions!
Thank you very much! |
|
|
|
| Coondog |
Apr 23 2020, 03:11 PM
Post
#20
|
|
Advanced Member Group: Members Posts: 2,089 Joined: 24-September 15 From: Apple Valley Calif Member No.: 19,195 Region Association: Southern California |
|
|
|
|
|
1 User(s) are reading this topic (1 Guests and 0 Anonymous Users)
0 Members:

|
Lo-Fi Version | Time is now: 2nd June 2024 - 07:50 AM |
Invision Power Board
v9.1.4 © 2024 IPS, Inc.