|
|
|
Porsche, and the Porsche crest are registered trademarks of Dr. Ing. h.c. F. Porsche AG.
This site is not affiliated with Porsche in any way. Its only purpose is to provide an online forum for car enthusiasts. All other trademarks are property of their respective owners. |
|
|

  |

| thomasotten |
 Nov 22 2003, 10:55 PM Nov 22 2003, 10:55 PM
Post
#1
|
|
Senior Member  Group: Members Posts: 1,574 Joined: 16-November 03 From: San Antonio, Texas Member No.: 1,349 |
What began as a suspension console replacement has no moved on to other areas. This was a small quarter sized hole, till I cleaned it up...
Attached thumbnail(s) 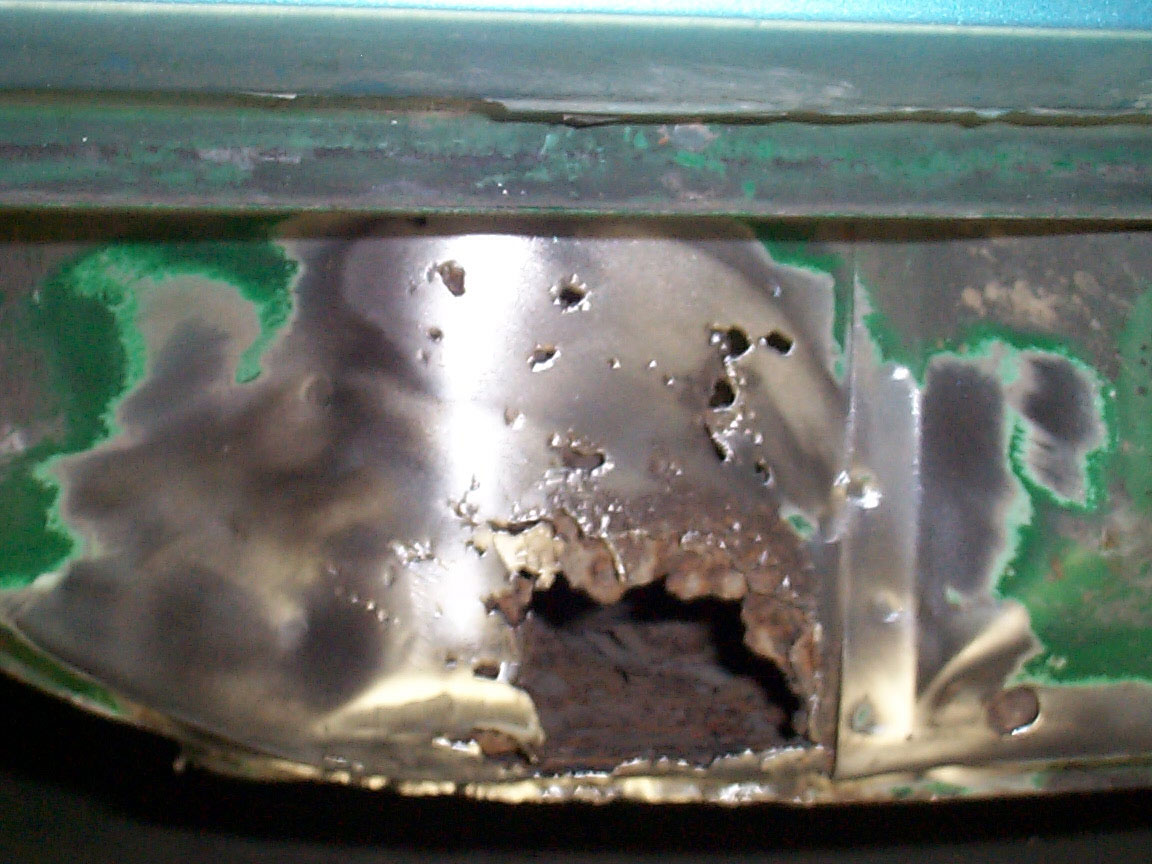
|
   |

 
|
| thomasotten |
Nov 22 2003, 11:00 PM
Post
#2
|
|
Senior Member Group: Members Posts: 1,574 Joined: 16-November 03 From: San Antonio, Texas Member No.: 1,349 |
Removed the outer layer with my dremel. Rusted under the jackpost as well, although the post was always sturdy. The inner layer will have to be cut out. Still havent got the top part of the jackpost off yet...
Attached thumbnail(s) 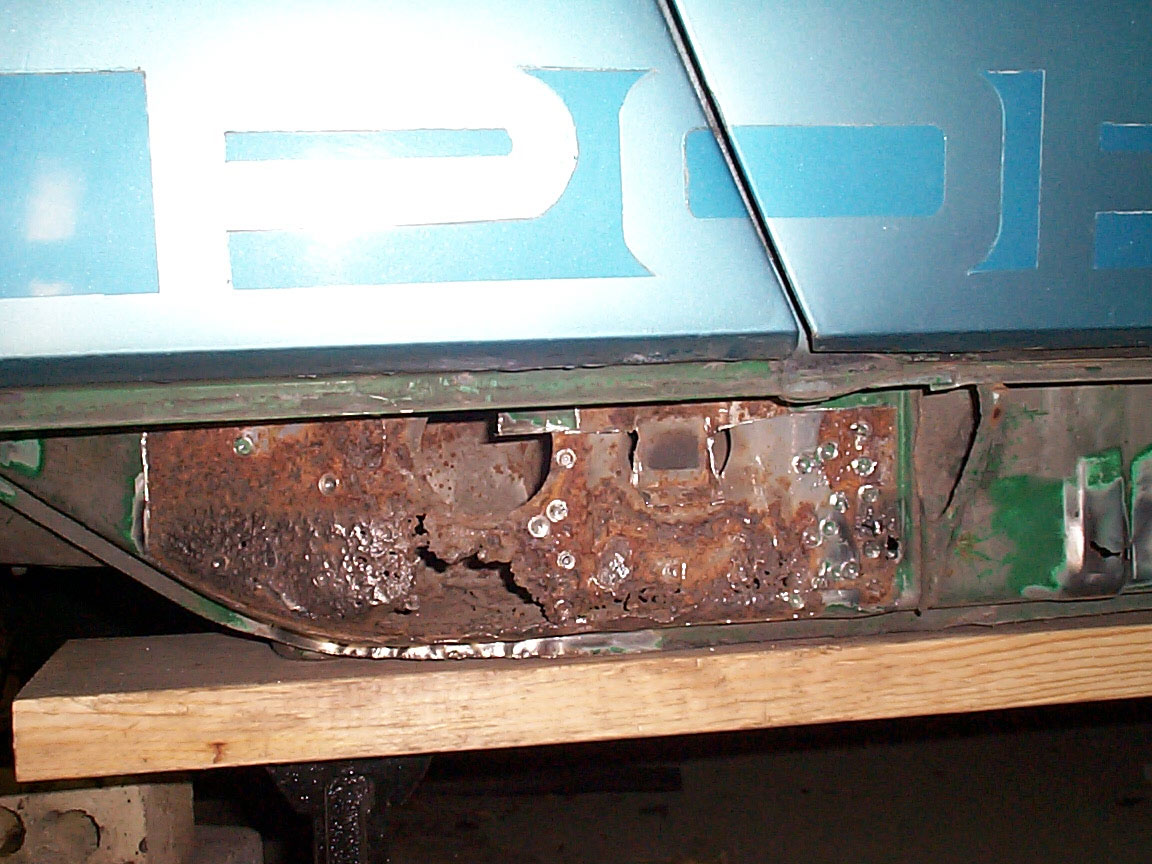
|
|
|
|
| thomasotten |
Nov 22 2003, 11:05 PM
Post
#3
|
|
Senior Member Group: Members Posts: 1,574 Joined: 16-November 03 From: San Antonio, Texas Member No.: 1,349 |
Somehow I will get this piece in there...somehow...
Attached image(s) 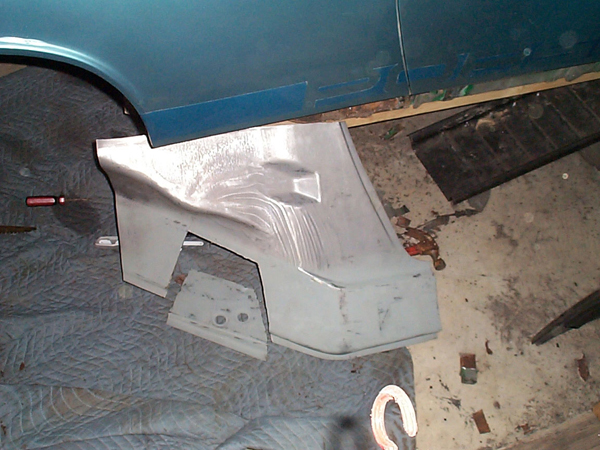
|
|
|
|
| Brad Roberts |
Nov 23 2003, 05:21 AM
Post
#4
|
|
914 Freak! Group: Members Posts: 19,148 Joined: 23-December 02 Member No.: 8 Region Association: None |
We are behind you all the way Thomas. Keep you head up. It will all go back together nicely. Just take your time.
B |
|
|
|
| DNHunt |
Nov 23 2003, 07:20 AM
Post
#5
|
|
914 Wizard? No way. I got too much to learn. Group: Members Posts: 4,099 Joined: 21-April 03 From: Gig Harbor, WA Member No.: 598 |
Thomas
I feel for you. Watching those holes appear is a sick feeling. But seeing that new piece of steel in there feels really good. And the sound of tapping on solid metal after it's back together can't be beat. (Had a 1 man steel drum band going in the garage). I kind of preferred welding in the big pieces. They were easier to hold in place. Cut back far enough to good metal. If you try to weld the weak thin patially rusted stuff, you'll burn through. (Think seeing holes appear now feels bad, burn through a few places) Putting it back together is great. If I can do it so can you. Hang in there. My avatar is me at my lowest. I had spent about 10 hours working on the car, most of it grinding and rewelding. I was dogmeat tired. Just getting ready to head out and degrease as the first step in repainting (feel rel good). You'll get there too. Dave |
|
|
|
| thomasotten |
Nov 23 2003, 09:09 AM
Post
#6
|
|
Senior Member Group: Members Posts: 1,574 Joined: 16-November 03 From: San Antonio, Texas Member No.: 1,349 |
Thanks guys, for the moral support. This stuff can get kinda frustrating at times. I have been working on this for two weekends already, starting on the inner console replacement. Grinding and cutting is all I have been doing. During the week, I practice welding scrap metal together. I just can't seem to make a good "spot weld" when I drill a hole smaller than 3/8". I was wondering Dave, did you have to do a lot of welds over, or were you pretty good the first time?
-Thomas |
|
|
|
| TimT |
Nov 23 2003, 09:25 AM
Post
#7
|
|
retired Group: Members Posts: 4,033 Joined: 18-February 03 From: Wantagh, NY Member No.: 313 |
Thom, I feel your pain. Im just finishing up a major rustoration on my 911. When you wled the "spotwelds" make sure the repair piece and existing steel are tightly clamped, use LOTS of vise grips. In the repair pieces for my car I punched 3/16 in holes to weld through. Something thats really helpful for projects like this is a auto-darkening welding shield...you dont lose your position while you flip the shield down.
The way I weld those rosette, or spot welds isstart the weld on the base metal, then weld "out" of the punched hole, just make sure the pieces are tightly clamped!! (IMG:style_emoticons/default/welder.gif) |
|
|
|
| DNHunt |
Nov 23 2003, 10:13 AM
Post
#8
|
|
914 Wizard? No way. I got too much to learn. Group: Members Posts: 4,099 Joined: 21-April 03 From: Gig Harbor, WA Member No.: 598 |
A lot of mine is butt welded. My biggest problem was trying nor to burn through. I did have to reweld some (well to be honest, quite a bit) because when ground down the welds I found gaps I had to close.
I found the smallest spot weld I could count on was 1/4. Tim is right about tightly fitting the pieces together. Clamps are great if you can use them but I found that I had to use pieces of wood wedged in to hold the pieces together. 2X4's running across the engine bay don't leave much room. I coughed up the money for an electronically darkening shield (like Tim descibed I think). Best money I've spent to date. It hard to pony up more money especially for something that does go on the car but it really helps if you can see. Dave |
|
|
|
| thomasotten |
Nov 23 2003, 10:32 AM
Post
#9
|
|
Senior Member Group: Members Posts: 1,574 Joined: 16-November 03 From: San Antonio, Texas Member No.: 1,349 |
Thanks Tim, for the spotweld tips.
Dave: did you use the same method that Tim used, "start the weld on the base metal, then weld "out" of the punched hole" ? Also, how did you get the top of the longitudinal clamped tightly? Or is that where the wood wedges came in? By the way, I am using .024 mig welding wire with .75 Argon, .25 C02. I started to use flux core, but that would always burn through the thin metal. Thanks again, guys for the advice. |
|
|
|
| DNHunt |
Nov 23 2003, 10:43 AM
Post
#10
|
|
914 Wizard? No way. I got too much to learn. Group: Members Posts: 4,099 Joined: 21-April 03 From: Gig Harbor, WA Member No.: 598 |
Same as Tim. Start in the middle and work the puddle out to the edges of the hole. It's really kinda fun when you getit working well.
Use anything you can to get pressure pushing the pieces together. I used 2X4's (lots of trips to the chop saw). Also start at one side or end and tack it down, then move away to another area and tack it down then come back and do some more, then back to the second area. Kinda like torquing something down. Dave |
|
|
|
| thomasotten |
Nov 27 2003, 03:34 PM
Post
#11
|
|
Senior Member Group: Members Posts: 1,574 Joined: 16-November 03 From: San Antonio, Texas Member No.: 1,349 |
The following two photos show the first piece of new metal going back into the car. I am preparing to weld in the suspension console, so I needed to at least fix the top of the longitudinal where the console will attach. I decided to break up the rust repair in small tasks, so I am focusing on the console, rather than the rest of the longitudinal at this instance. I was exited to at least get a piece of metal in without blowing holes through everything. That little piece of metal has a backing behind it so that I would have an eiser time welding the seem. I also spot welded three holes to the inner longitudinal, at least one of which I am very confident of its strenght.
Attached image(s) 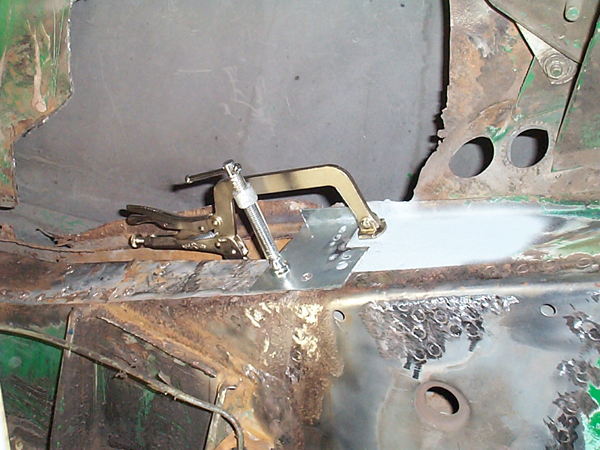
|
|
|
|
| thomasotten |
Nov 27 2003, 03:45 PM
Post
#12
|
|
Senior Member Group: Members Posts: 1,574 Joined: 16-November 03 From: San Antonio, Texas Member No.: 1,349 |
My welds look like crap, but they are strong (I hope). I practiced alot to do good welds, but getting in the tight engine compartment, with a bulky welding helmet on, and having to weld with your left hand when you are right handed is kind of tricky. I had to grind a few of them to do over, and some of the edges started blowing through, which had to be done over, carefully.
Attached image(s) 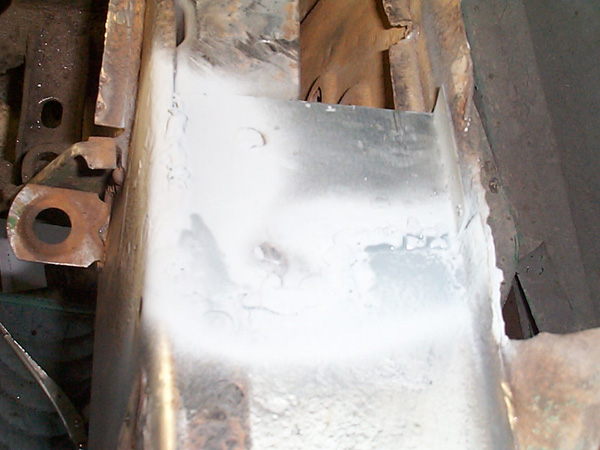
|
|
|
|
| Rleog |
Nov 27 2003, 08:18 PM
Post
#13
|
|
Senior Member Group: Members Posts: 611 Joined: 12-October 03 From: Middleton, MA Member No.: 1,239 Region Association: North East States |
You guys have no idea how valuable this info is to me. It's the same repair I have to make, and I've been mostly clueless on how to go about it.
Keep them pics coming. Thanks, Bob |
|
|
|
| thomasotten |
Nov 27 2003, 08:38 PM
Post
#14
|
|
Senior Member Group: Members Posts: 1,574 Joined: 16-November 03 From: San Antonio, Texas Member No.: 1,349 |
AutoAtlanta has a good section showing photos of a console replacement. (IMG:style_emoticons/default/welder.gif)
|
|
|
|
|
1 User(s) are reading this topic (1 Guests and 0 Anonymous Users)
0 Members:

|
Lo-Fi Version | Time is now: 30th April 2026 - 11:25 PM |
Invision Power Board
v9.1.4 © 2026 IPS, Inc.