|
|
|
Porsche, and the Porsche crest are registered trademarks of Dr. Ing. h.c. F. Porsche AG.
This site is not affiliated with Porsche in any way. Its only purpose is to provide an online forum for car enthusiasts. All other trademarks are property of their respective owners. |
|
|

  |

| david63 |
 May 17 2010, 08:52 AM May 17 2010, 08:52 AM
Post
#1
|
|
Member  Group: Members Posts: 96 Joined: 9-August 09 From: Parker Colorado Member No.: 10,653 Region Association: Rocky Mountains |
Currently enjoying my 914-6 GT look (I recently purchased Michel Richards original 914-6 GT look) and I have tried searching this forum for backpad, interior carpet, etc and can not seem to find pictures of interior with no backpad and carpet installed in that area. I have seen a post here in the past with lots of great pictures of conversions to the carpet look. If anyone can point me in the right direction I would appreciate it. I am planning on installing two GTS seats and removing the backpad. I realize I will have to fab the mounts for the passenger seat).
Thanks, |
   |

 
|
| MoveQik |
May 17 2010, 09:59 AM
Post
#2
|
|
What size wheels can I fit? Group: Members Posts: 4,645 Joined: 5-April 05 From: Scottsdale, AZ Member No.: 3,881 Region Association: Southwest Region |
Here is mine covered in perlon. I love the look compared to the backpad. (IMG:style_emoticons/default/biggrin.gif)
Attached image(s) 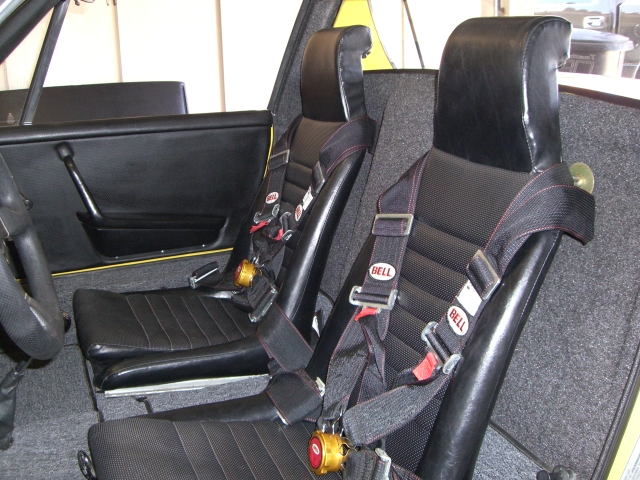
|
|
|
|
| MoveQik |
May 17 2010, 10:01 AM
Post
#3
|
|
What size wheels can I fit? Group: Members Posts: 4,645 Joined: 5-April 05 From: Scottsdale, AZ Member No.: 3,881 Region Association: Southwest Region |
Another...
I need to update my pics as I now have the GT style doors courtesy of Eric Shea's kit. It looks super clean. Attached image(s) 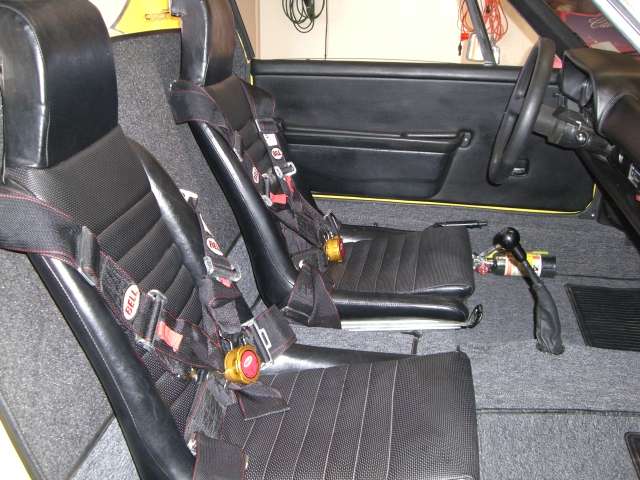
|
|
|
|
| xperu |
May 17 2010, 10:09 AM
Post
#4
|
|
TEXAS Group: Members Posts: 597 Joined: 13-June 06 From: League City Texas Member No.: 6,213 Region Association: None |
QUOTE(MoveQik @ May 17 2010, 11:01 AM)  Another... I need to update my pics as I now have the GT style doors courtesy of Eric Shea's kit. It looks super clean. I like the look, did you glue it to the firewall or is there a backing. I also have been thinking about doing this, so this post is timely. Mike |
|
|
|
| MoveQik |
May 17 2010, 10:20 AM
Post
#5
|
|
What size wheels can I fit? Group: Members Posts: 4,645 Joined: 5-April 05 From: Scottsdale, AZ Member No.: 3,881 Region Association: Southwest Region |
Dynamat, on the firewall and then I just used spray adhesive to adhere the perlon to the dynamat.
(IMG:http://www.914world.com/bbs2/uploads_offsite/i132.photobucket.com-3881-1274113295.1.jpg) (IMG:http://www.914world.com/bbs2/uploads_offsite/i132.photobucket.com-3881-1274113220.1.jpg) The roll bar... (IMG:http://www.914world.com/bbs2/uploads_offsite/i132.photobucket.com-3881-1274113220.2.jpg) |
|
|
|
| MoveQik |
May 17 2010, 10:24 AM
Post
#6
|
|
What size wheels can I fit? Group: Members Posts: 4,645 Joined: 5-April 05 From: Scottsdale, AZ Member No.: 3,881 Region Association: Southwest Region |
I had to cut a couple pieces of carpet for the bottom of the firewall and the area between the seats. Easy enough to do. Just cut the pieces and get a local shop to stitch the edging around it. I think they charged me about $20 bucks.
|
|
|
|
| Scott S |
May 17 2010, 12:03 PM
Post
#7
|
|
Small Member Group: Members Posts: 1,697 Joined: 30-April 03 From: Colorado Member No.: 633 |
mine...
Attached image(s) 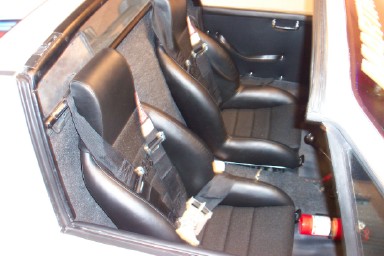
|
|
|
|
| carr914 |
May 17 2010, 12:29 PM
Post
#8
|
|
Racer from Birth Group: Members Posts: 118,404 Joined: 2-February 04 From: Tampa,FL Member No.: 1,623 Region Association: South East States |
 the other thing I like to do is take the backpad apart, put velcro on the Centerpiece and slap it back in. This looks good and hides any access hole you might have put through the firewall. 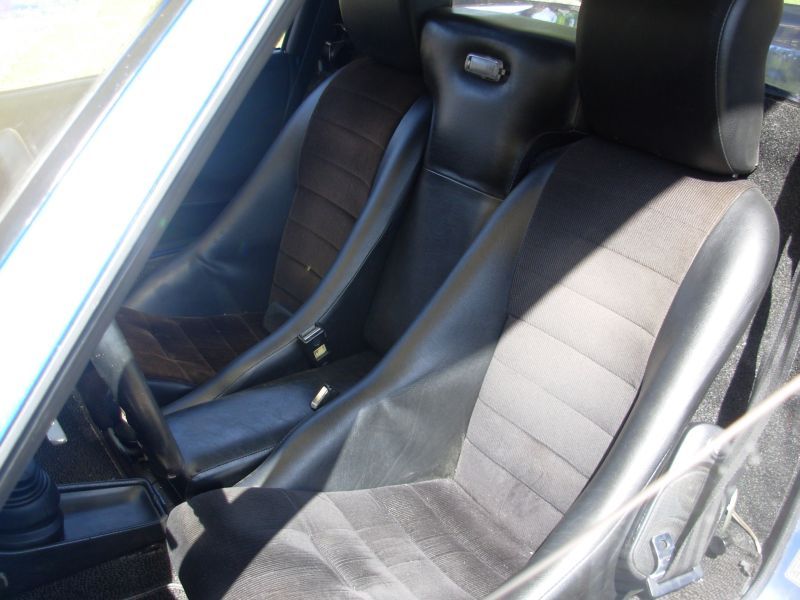 |
|
|
|
| david63 |
May 17 2010, 02:14 PM
Post
#9
|
|
Member Group: Members Posts: 96 Joined: 9-August 09 From: Parker Colorado Member No.: 10,653 Region Association: Rocky Mountains |
I appreciate you all taking time to reply to the post. I like the dynamat idea. I have an access hole to consider and am not sure if I want to go with the perlon or a black carpet? Can the different types of carpet be purchased in large pieces from some of the same vendors that sell the carpet kits so it could all be done at once. Wondering about how to do the access hole so it looks professional?
|
|
|
|
| budman5201 |
May 17 2010, 04:32 PM
Post
#10
|
|
Senior Member Group: Members Posts: 595 Joined: 1-April 07 From: tempe, az Member No.: 7,635 |
Someone should make a back pad already stitched carpet kit so a bunch of us could just buy it and install it.
|
|
|
|
| Scott S |
May 17 2010, 04:43 PM
Post
#11
|
|
Small Member Group: Members Posts: 1,697 Joined: 30-April 03 From: Colorado Member No.: 633 |
That would be tough, as it would have to be a molded part. The amount of curves and reccesses on the firewall is surprising. I initially cut mine with what I thought was plenty of overhang that I would simply trim off after it was glued in. It ended up being way to small. I then added an extra 16"+ to both dimensions and was able to get it in - after graciously using both a spray bottle and a heat gun to strecth and mold the perlon to all of the ins and outs. It was way more work than I expected. My fingers were raw afterwards.
|
|
|
|
| rfuerst911sc |
May 17 2010, 05:48 PM
Post
#12
|
|
Advanced Member Group: Members Posts: 2,158 Joined: 4-May 06 From: Dahlonega , Georgia Member No.: 5,980 Region Association: South East States |
How about stripping the OEM backpad of all the vinyl and then covering it with carpet or perlon ? The backer board is already molded to the firewall and I would think would be fairly easy to cover.
|
|
|
|
| Mike Bellis |
May 17 2010, 05:55 PM
Post
#13
|
|
Resident Electrician Group: Members Posts: 8,345 Joined: 22-June 09 From: Midlothian TX Member No.: 10,496 Region Association: None |
I did mine first with dynamat, then installed the factory sound pad. Then I covered it with black felt carpet from the local fabric store. Just spray glue it down. search for high temp spray glue for best results. Very easy to strech and looks nice.
|
|
|
|
| carr914 |
May 17 2010, 08:53 PM
Post
#14
|
|
Racer from Birth Group: Members Posts: 118,404 Joined: 2-February 04 From: Tampa,FL Member No.: 1,623 Region Association: South East States |
QUOTE(Scott Schroeder @ May 17 2010, 06:43 PM) That would be tough, as it would have to be a molded part. The amount of curves and reccesses on the firewall is surprising. I initially cut mine with what I thought was plenty of overhang that I would simply trim off after it was glued in. It ended up being way to small. I then added an extra 16"+ to both dimensions and was able to get it in - after graciously using both a spray bottle and a heat gun to strecth and mold the perlon to all of the ins and outs. It was way more work than I expected. My fingers were raw afterwards. (IMG:style_emoticons/default/agree.gif) |
|
|
|
| sww914 |
May 17 2010, 09:03 PM
Post
#15
|
|
Advanced Member Group: Members Posts: 2,439 Joined: 4-June 06 Member No.: 6,146 Region Association: None |
You need to either use un-backed carpet (trunk liner) or sew pieces together to form to the concave bits. The better glue is better.
|
|
|
|
| jgara962 |
May 17 2010, 11:18 PM
Post
#16
|
|
Yo, this is how I roll Group: Members Posts: 823 Joined: 5-April 05 From: Napa, CA Member No.: 3,879 Region Association: Northern California |
Here's mine that I did a few years ago.
Attached image(s) 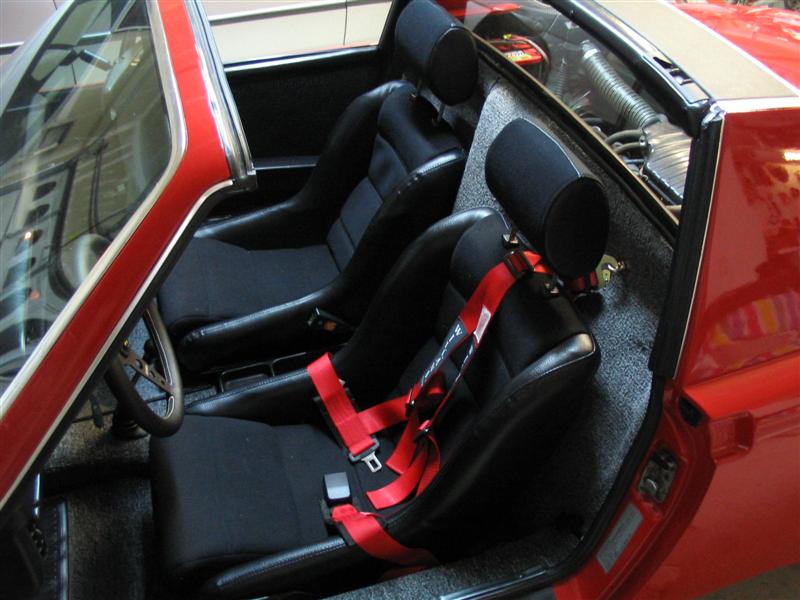
|
|
|
|
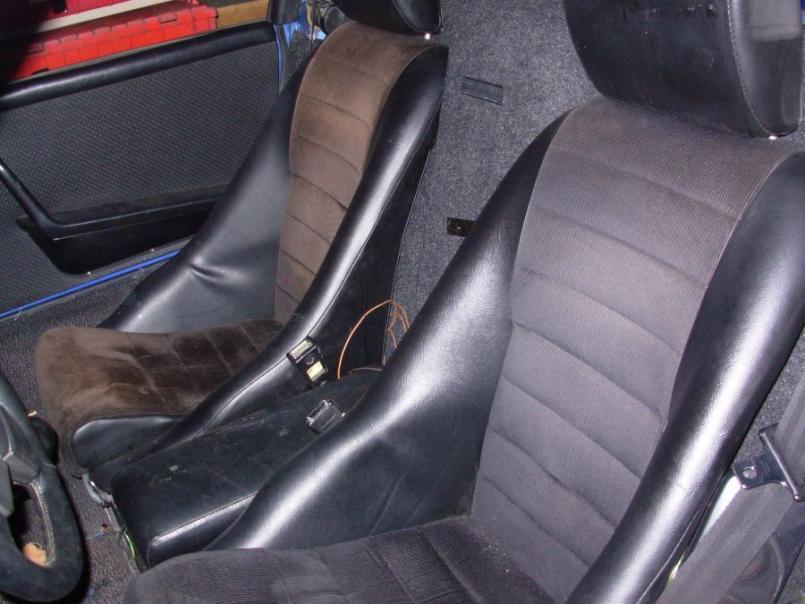
| effutuo101 |
May 18 2010, 09:50 AM
Post
#17
|
|
Advanced Member Group: Members Posts: 2,734 Joined: 10-April 05 From: Lemon Grove Member No.: 3,914 Region Association: Southern California |
QUOTE(rfuerst911sc @ May 17 2010, 04:48 PM) How about stripping the OEM backpad of all the vinyl and then covering it with carpet or perlon ? The backer board is already molded to the firewall and I would think would be fairly easy to cover. I did this on an initial run for my interior. It was very easy with a little bit of foam and using the process that Scott brings up with the heat gun (blow dryer) and some streaching. A staple gun, blow dryer and some spray on adhesive and I was done. It came out looking very nice. I opted to go a different direction in the end. Attached image(s) 
|
|
|
|
| Justinp71 |
May 18 2010, 12:03 PM
Post
#18
|
|
Senior Member Group: Members Posts: 1,583 Joined: 11-October 04 From: Sacramento, CA Member No.: 2,922 Region Association: None |
QUOTE(Scott Schroeder @ May 17 2010, 11:03 AM) mine... What seats are those? they look comfy and like they'll hold you in well... |
|
|
|
| RON S. |
May 18 2010, 01:10 PM
Post
#19
|
|
9140430841, FINALLY RUNNING Group: Members Posts: 1,211 Joined: 22-May 03 From: WALTERBORO,S.C. Member No.: 724 Region Association: South East States |
Here's mine I did a couple of years back. Pretty much the same as everyone else. I painted the contact cement on with a brush, and then formed the Perlon on. Ron Attached image(s) 
|
|
|
|
| andys |
May 18 2010, 01:29 PM
Post
#20
|
|
Advanced Member Group: Members Posts: 2,165 Joined: 21-May 03 From: Valencia, CA Member No.: 721 Region Association: None |
QUOTE(Scott Schroeder @ May 17 2010, 11:03 AM) mine... Scott, Can you tell us a little about those seats? Custom made with bolsters, or a purchased seat? Andys |
|
|
|
|
1 User(s) are reading this topic (1 Guests and 0 Anonymous Users)
0 Members:

|
Lo-Fi Version | Time is now: 6th May 2024 - 02:11 AM |
Invision Power Board
v9.1.4 © 2024 IPS, Inc.