|
|
|
Porsche, and the Porsche crest are registered trademarks of Dr. Ing. h.c. F. Porsche AG.
This site is not affiliated with Porsche in any way. Its only purpose is to provide an online forum for car enthusiasts. All other trademarks are property of their respective owners. |
|
|

  |

| Andyrew |
 Feb 1 2016, 12:19 AM Feb 1 2016, 12:19 AM
Post
#481
|
|
Spooling.... Please wait  Group: Members Posts: 13,380 Joined: 20-January 03 From: Riverbank, Ca Member No.: 172 Region Association: Northern California |
Finished up the cylinder head with new cam seals, a new cam chain timed correctly, new cam chain tensioner gaskets and new bolts torqued down the exhaust cam gear and intake cam. Didnt have any means of holding the cam in place so I used the old timing belt and screwed it down to the bench.
 Im still waiting for my rings to show up from Germany (IMG:style_emoticons/default/mad.gif) or else the engine would have been assembled this weekend. In the mean time I took some time and plastiguaged the crank bearings, all came to be the exact same on the far side of the spec .038 which I think should help keep the bearings lubed up for the high RPM's and HP this motor will see. Also I should note this engine will be receiving coated crank and rod bearings which will also help maintain the bottom end. 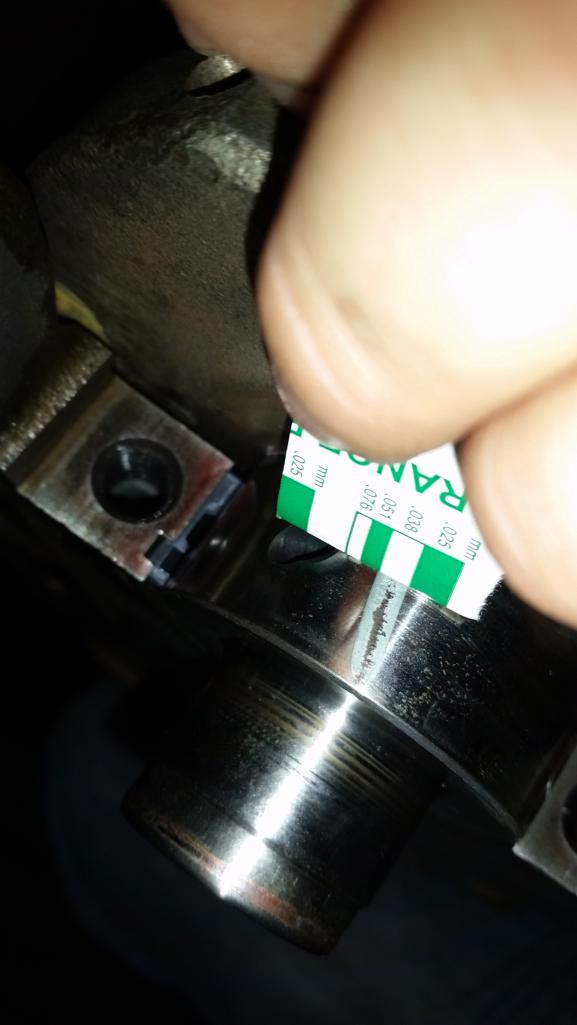 Threw in the oil pump drive with new seals. I have the oil pump itself cleaning in some purple power for all of today and tomorrow. I'll put it back together and check the service limit of the pump before I throw it back on the engine. 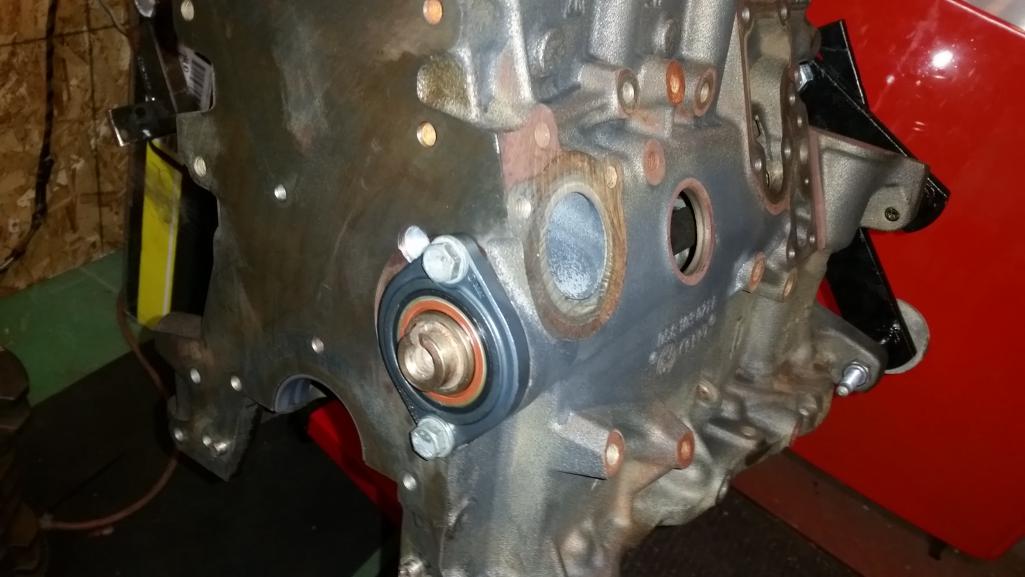 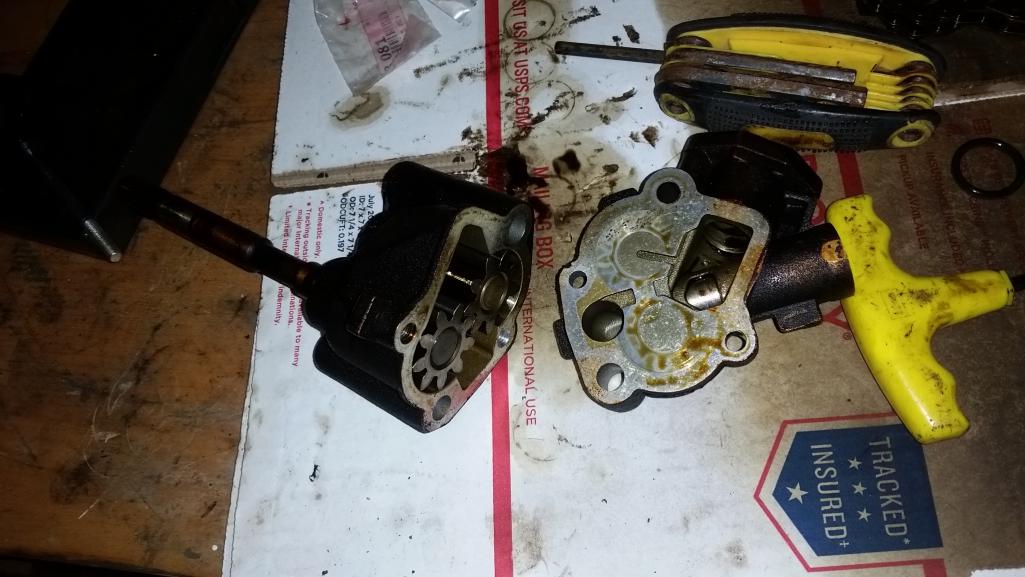 |
   |

 
|
| veekry9 |
Feb 1 2016, 02:18 AM
Post
#482
|
|
OldMember Group: Retired Members Posts: 3,068 Joined: 17-June 13 From: TO Member No.: 16,025 Region Association: Canada |
I am liking the longitudinal four layout,traditional with an F1 sting ('80's).
Still considering a version of my own starring the 944's S2,that I may get started on in a few years*. I am watching closely,knowing a stretch is needed for the big four,being so long. Have you any idea how many successful installs have been done? I had a look around and could find no reference to the type. You're gonna have a screamer,sounding like a champ car running the Drake and Offys..hmmm,methanol injection. Found one,a Honda S2000 I think,I'll look some more. I recall a thread about engine swap types,haven't found it though. As you're working on a new dash and console,a quick perusal of the work Amida is doing should generate some ideas. The methods he uses are straightforward and effective,beautiful. http://www.fiero.nl/forum/Forum3/HTML/000091-50.html Good for wiring diagrams,pcbs,chassis layouts,etc. http://www.gimp.org/ |
|
|
|
| Chris H. |
Feb 1 2016, 07:41 AM
Post
#483
|
|
Senior Member Group: Members Posts: 4,090 Joined: 2-January 03 From: Chicago 'burbs Member No.: 73 Region Association: Upper MidWest |
Looking good! That's a lot of progress. Nice thing is you won't have to worry that anything is wrong with it internally when you BOOOOOSSSTTT it.
Have to agree the inline 4 is such a smooth, balanced engine. Every time I get in my DD (old) TSX I think...hmmmm.... (IMG:style_emoticons/default/idea.gif) .... 2.4L, 200 ish hp... Am I the only one who looks at random cars on the road and assesses it's potential as a donor? |
|
|
|
| rick 918-S |
Feb 1 2016, 08:06 AM
Post
#484
|
|
Hey nice rack! -Celette Group: Members Posts: 21,295 Joined: 30-December 02 From: Now in Superior WI Member No.: 43 Region Association: Northstar Region |
Nice! Power on!
|
|
|
|
| Andyrew |
Feb 1 2016, 09:30 AM
Post
#485
|
|
Spooling.... Please wait Group: Members Posts: 13,380 Joined: 20-January 03 From: Riverbank, Ca Member No.: 172 Region Association: Northern California |
I agree certain inline 4's are really well balanced. I was suprized when I picked up the rotating assembly, they only took a tiny amount off the crank and added a small weld to the harmonic balancer. I didnt notice anything done to the piston assemblys either, but I had already weighed the rods to be exactly the same, didnt know about the pistons but they are generally pretty light.
|
|
|
|
| Andyrew |
Feb 8 2016, 03:15 PM
Post
#486
|
|
Spooling.... Please wait Group: Members Posts: 13,380 Joined: 20-January 03 From: Riverbank, Ca Member No.: 172 Region Association: Northern California |
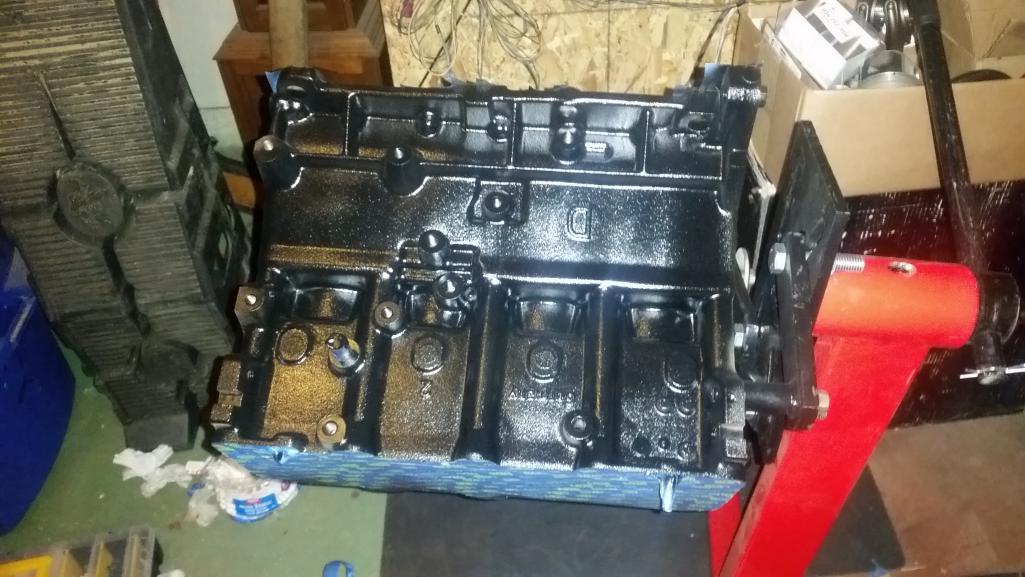
Got some wrinkle black paint on the valve cover and some black paint on the block last week (IMG:style_emoticons/default/smile.gif)
 Got the rings Friday! 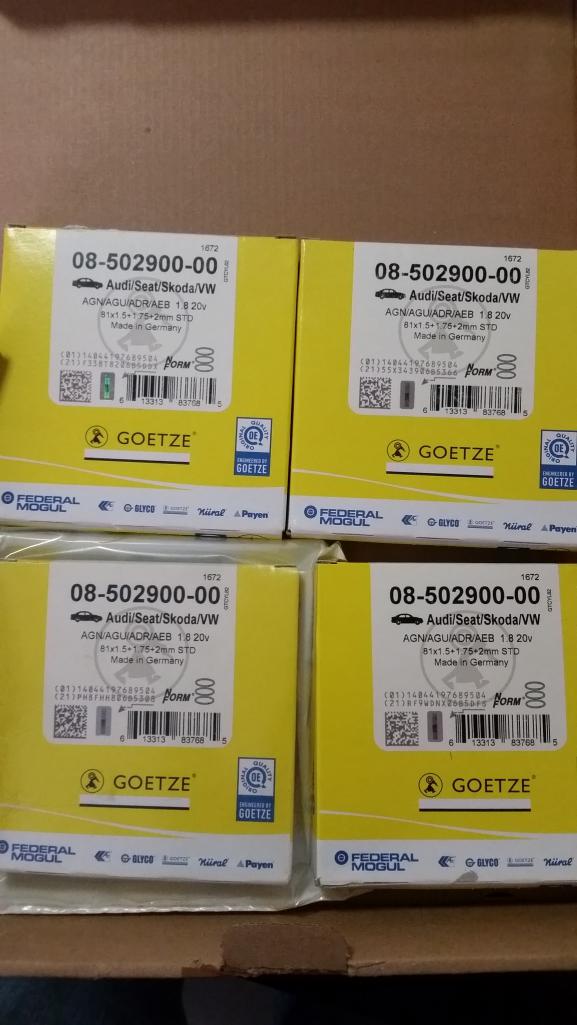 I spent some time and gapped them Friday evening. 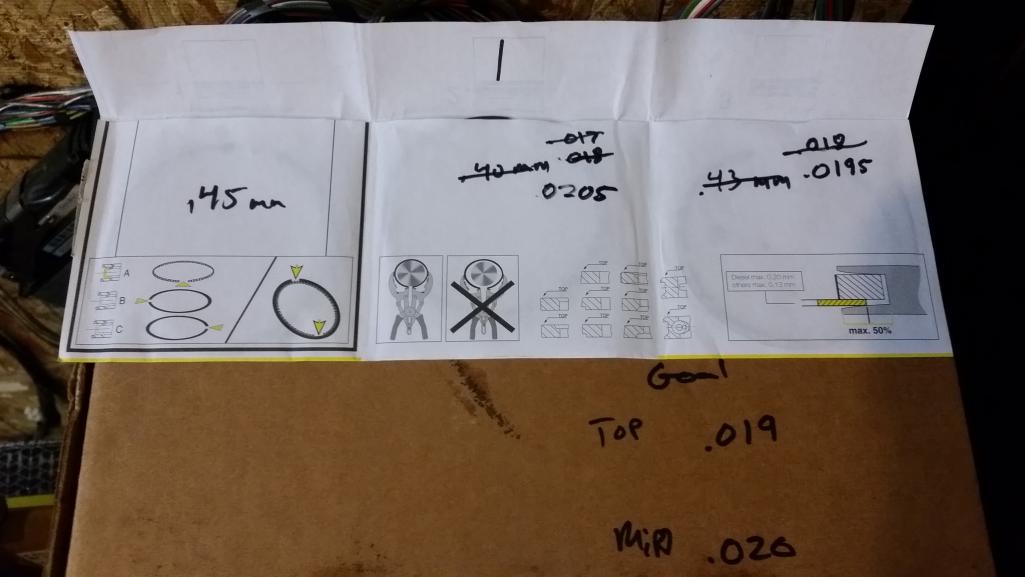 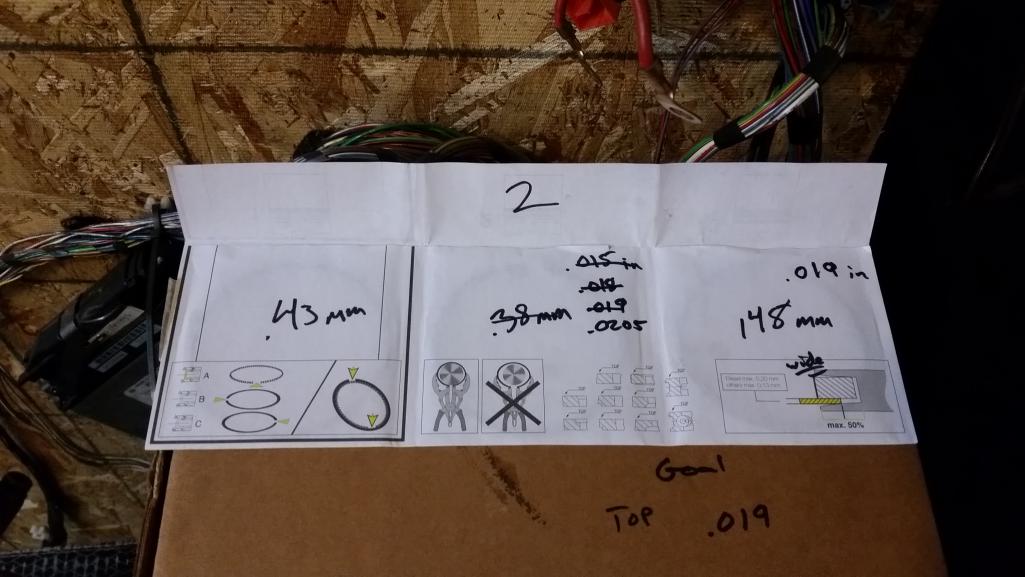 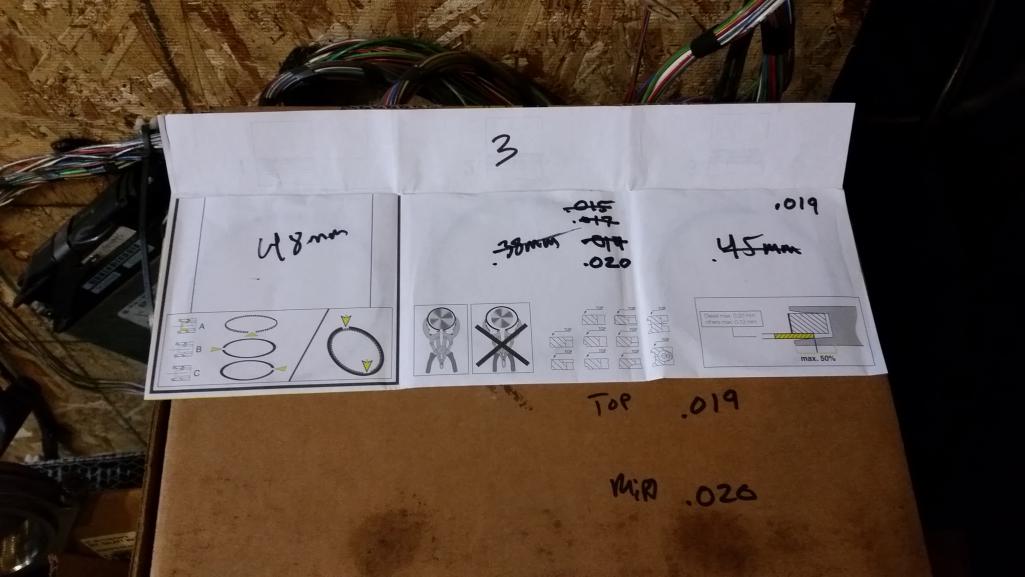 #4 is not shown, it is the same as #3. My goal was .019in top ring, .020 ring bottom ring and the oil ring was fine with any gap (Shown is in MM). The bottom ring needed to be .001in wider gap than the top. The top will expand with heat and similar builds have put .018in for the top ring, but since I am going to use water/meth on my higher boost 91 file and E85 for my max boost file, the cylinder temps should be relatively low. and therefore wont need so excessive gap differences. |
|
|
|
| Andyrew |
Feb 8 2016, 03:32 PM
Post
#487
|
|
Spooling.... Please wait Group: Members Posts: 13,380 Joined: 20-January 03 From: Riverbank, Ca Member No.: 172 Region Association: Northern California |
I also cleaned and started installing the crankshaft bearings caps. However when torquing the stretch bolts I had a very bad sound coming from the 3rd bolt I started stretching. The consensus so far is that I did not lube the heads of the bolts and it was binding on the bearing, also I had to much oil on the bolt itself and the oil was creating a physical barrier to stop the bolt from turning. I will be removing the bolts that I havent stretched yet, blow out the holes and reinstall the bolts. I will do this tonight when I get home.. Also, parts parts parts parts... 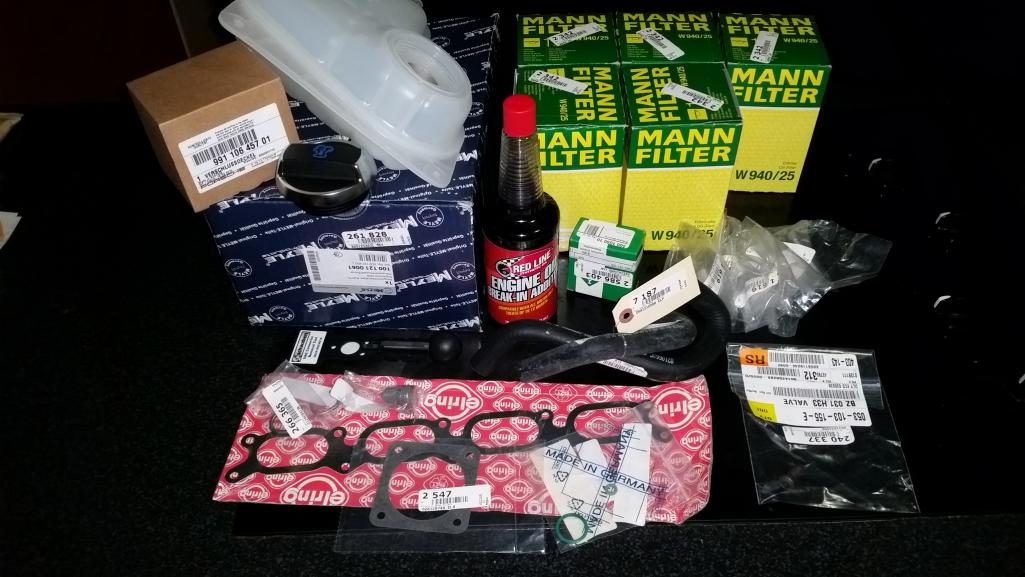 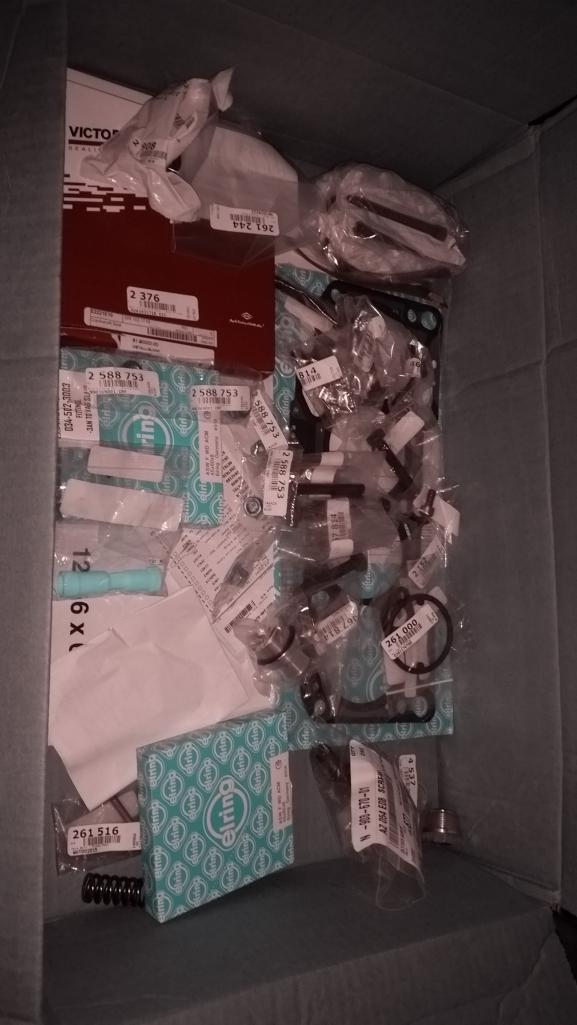 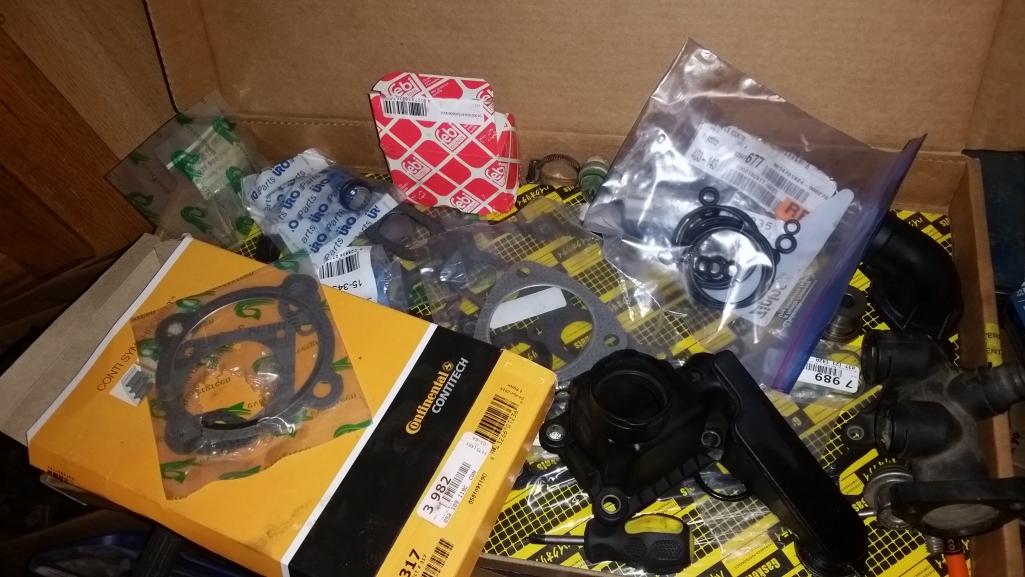 |
|
|
|
| Andyrew |
Feb 8 2016, 03:32 PM
Post
#488
|
|
Spooling.... Please wait Group: Members Posts: 13,380 Joined: 20-January 03 From: Riverbank, Ca Member No.: 172 Region Association: Northern California |
Valve cover
Attached thumbnail(s) 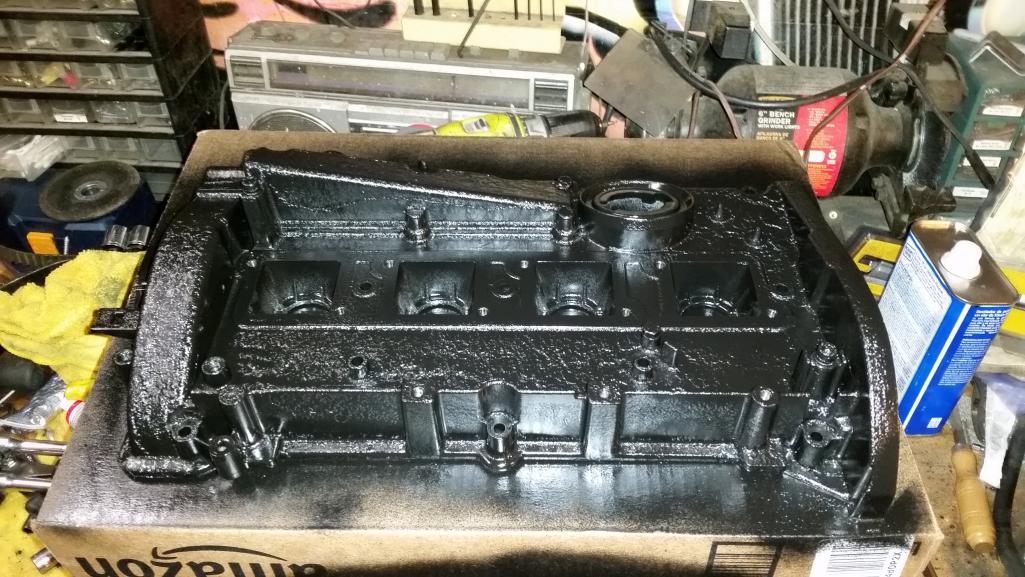
|
|
|
|
| dan10101 |
Feb 8 2016, 08:07 PM
Post
#489
|
|
TORQUE-o-holic Group: Members Posts: 1,140 Joined: 29-April 03 From: Eagle Point, Or Member No.: 626 Region Association: Pacific Northwest |
QUOTE(Andyrew @ Feb 8 2016, 01:32 PM)  Valve cover Did you see the Audi commercial where the old Astronaut was bored and depressed until his son took him out for a ride in his new Audi? It's not like I'm hinting or anything. |
|
|
|
| Andyrew |
Feb 8 2016, 10:14 PM
Post
#490
|
|
Spooling.... Please wait Group: Members Posts: 13,380 Joined: 20-January 03 From: Riverbank, Ca Member No.: 172 Region Association: Northern California |
Your welcome to the keys for as long as you want (IMG:style_emoticons/default/smile.gif)
|
|
|
|
| Andyrew |
Feb 11 2016, 02:56 PM
Post
#491
|
|
Spooling.... Please wait Group: Members Posts: 13,380 Joined: 20-January 03 From: Riverbank, Ca Member No.: 172 Region Association: Northern California |
Since I am not likely to post any progress from this weekend (IMG:style_emoticons/default/wub.gif) I'll post the current progress today.
I finished the installation of the crank without a hitch. I cleaned up the piston ring groves since they were not cleaned properly from the machine shop. Also removing the caps on the rods was a PITA! I installed the rods/pistons and crank 100% with assembly lube and dipped the piston rings in oil. 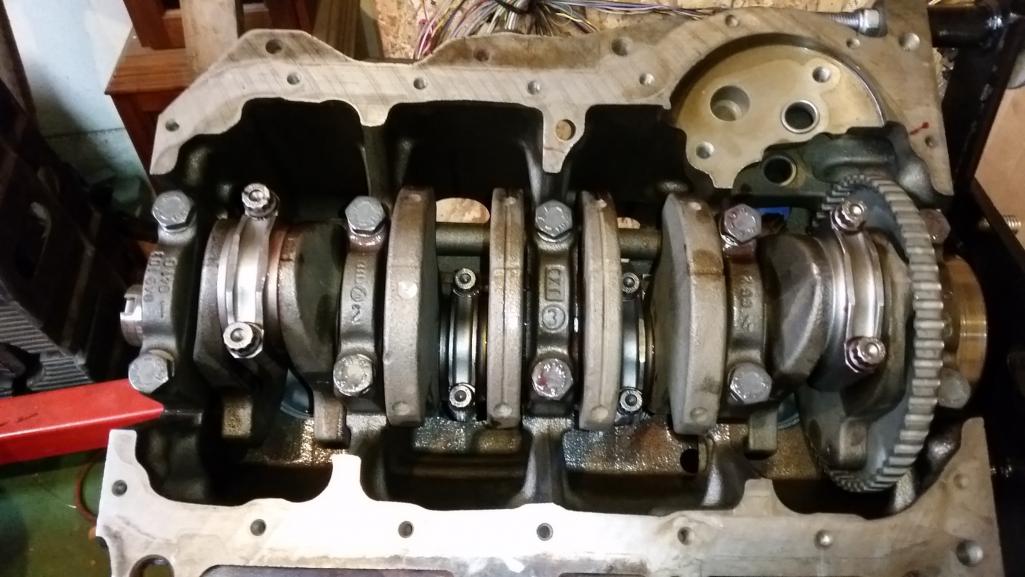 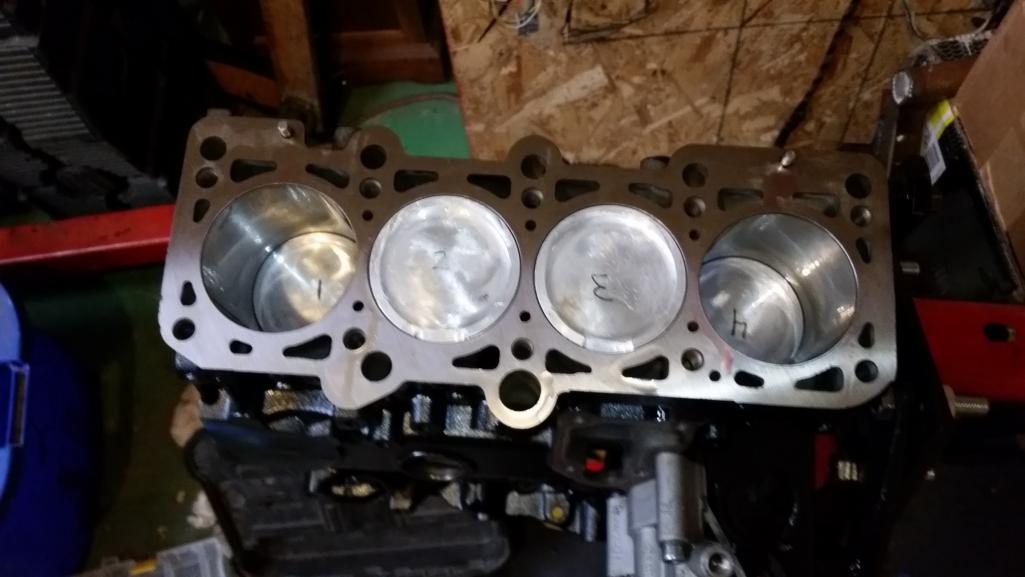 I also put the cylinder head on with new stretch bolts and lightly lubed the bolts and bolt heads with assembly lube. No issues on install of those (IMG:style_emoticons/default/smile.gif) Finally I installed the intake manifold. I am however missing a couple of nuts for the ends of the intake manifold so I need to grab some. 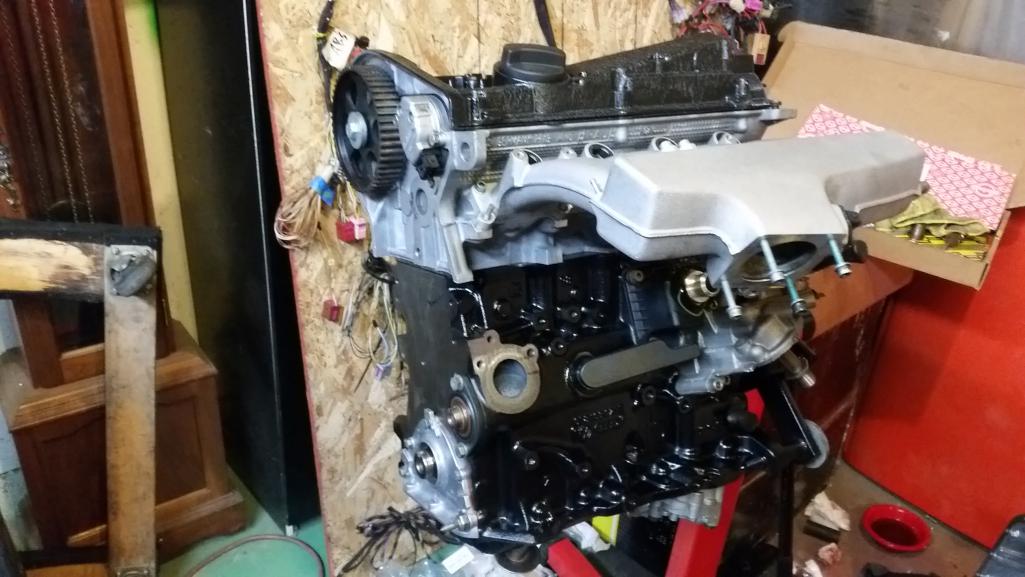 I tried installing my manual timing belt tensioner, but my grade 8.8 M6 bolts were stretching as I tried tightening them down to 20lb. Im going to go to the bolt store Friday to see if they have any grade 10.9 bolts and maybe those nuts I need. 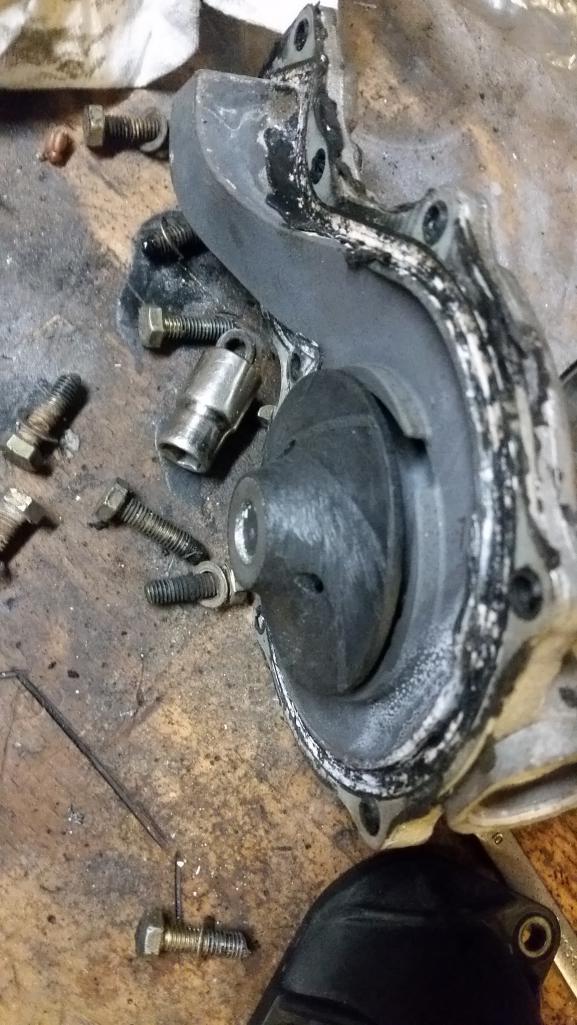 So I opened up and modified my water pump so it wont be a resistance for my electric water pump. I think it was the easiest option, maybe some day down the road I'll weld up a custom fitting but this wasnt in the cards at this point. |
|
|
|
| Andyrew |
Feb 24 2016, 09:07 AM
Post
#492
|
|
Spooling.... Please wait Group: Members Posts: 13,380 Joined: 20-January 03 From: Riverbank, Ca Member No.: 172 Region Association: Northern California |
Progress has been slow due to the holiday and I was away all last weekend for a guys weekend. Hopefully I can spend some time this weekend on it.
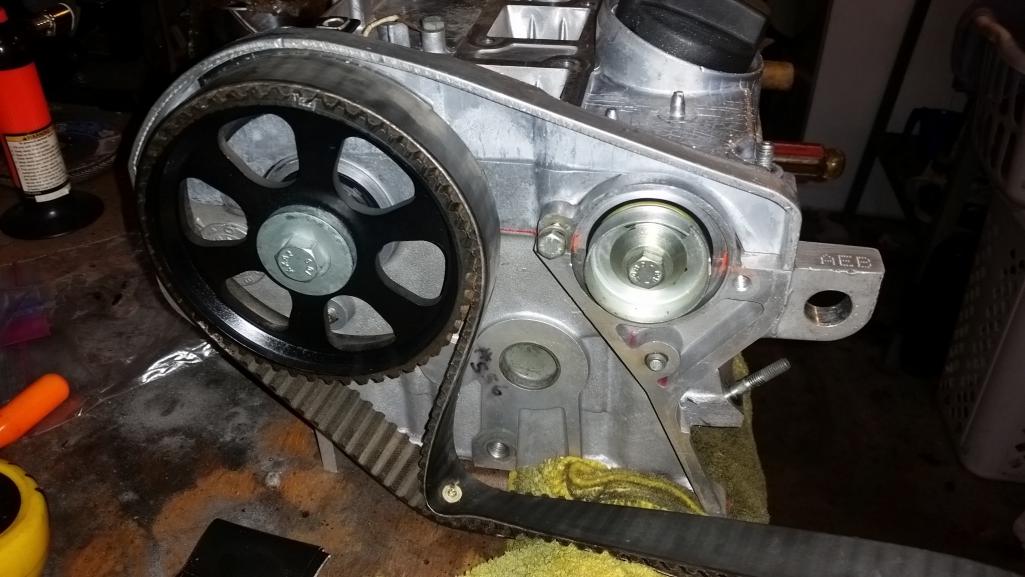
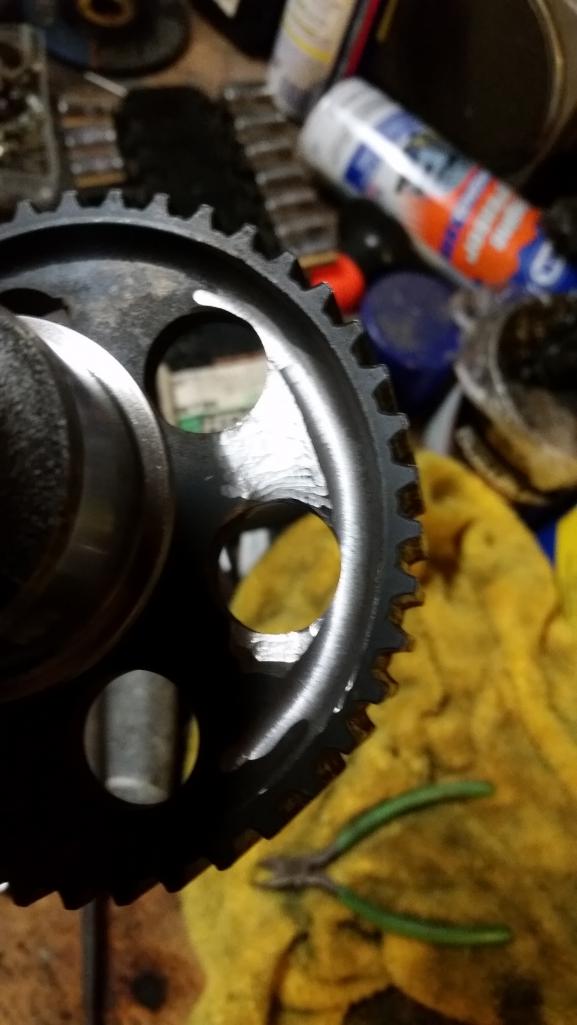
I bought some new M6 grade 8.8 bolts for the tensioner as I couldnt get any 10.9. Installed the tensioner and tried adjusting and noticed it wasnt tightening..... Apparently this is a common issue for this aftermarket $150 tensioner... (IMG:style_emoticons/default/mad.gif) The manufacturer has yet to comment on my warranty claim. 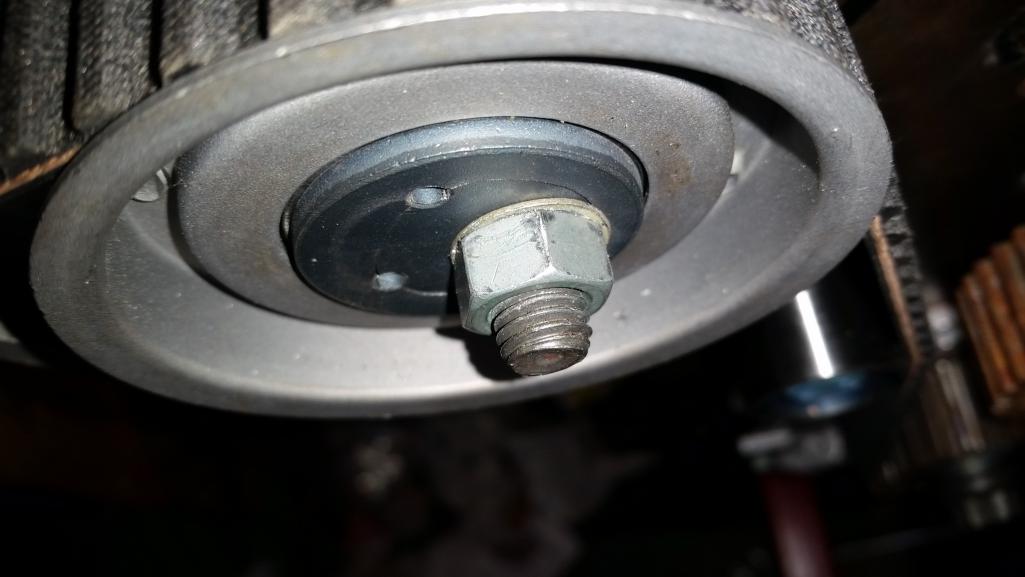 However I figured out how to make their $150 kit with the factory components, which makes me pretty angry. Its solid metal so I can tighten it down as many times as I want... 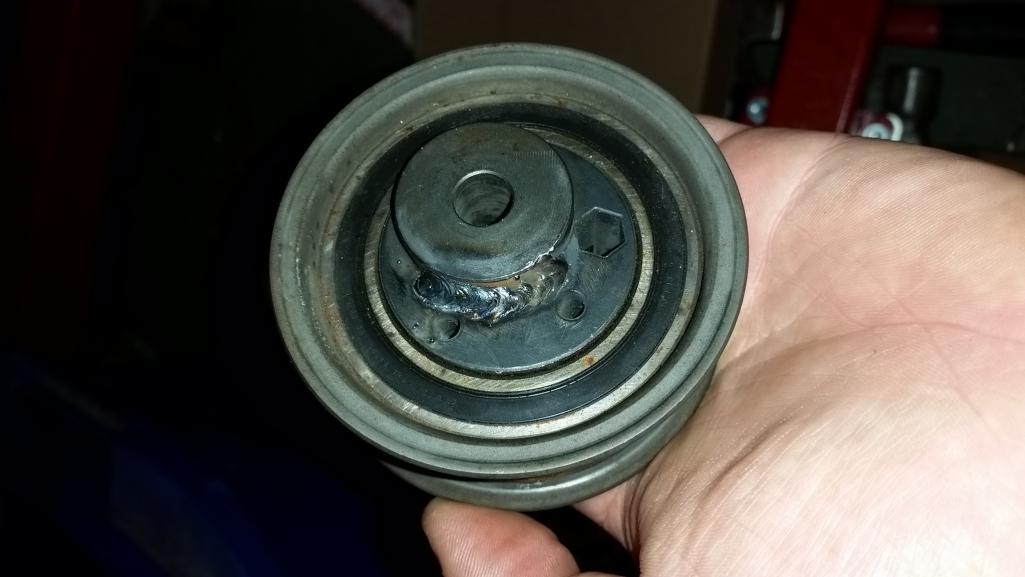 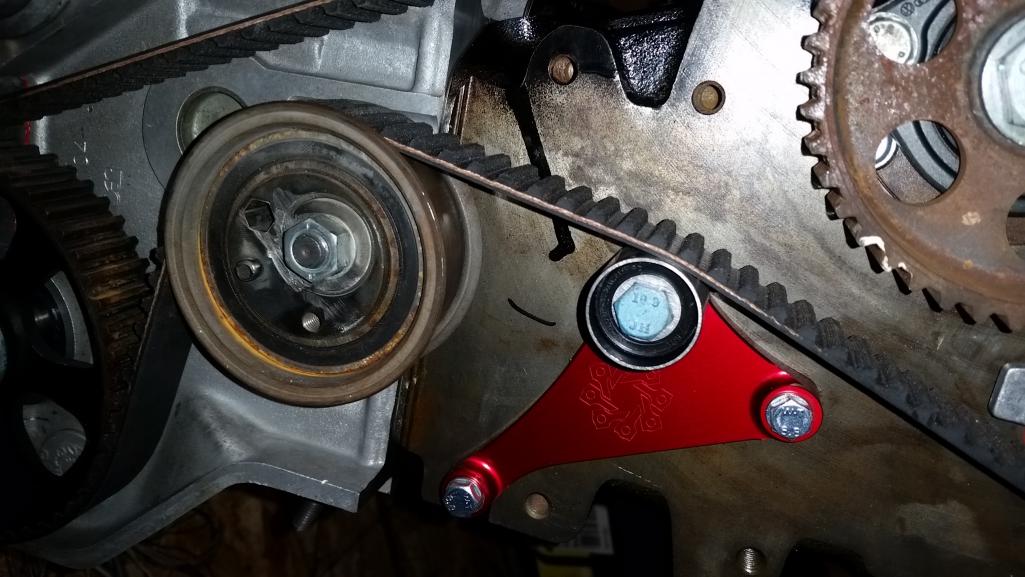 After this I tried turning the engine all the way around and it came to a hard stop. I checked all the valves and engine position and didnt find anything in the way. After a couple days of research I found out the problem was related to the oil pump shaft. The gear at the end of the shaft is near cylinder 4, my performance rods aparently require the gear to be clearanced 6mm or they hit. 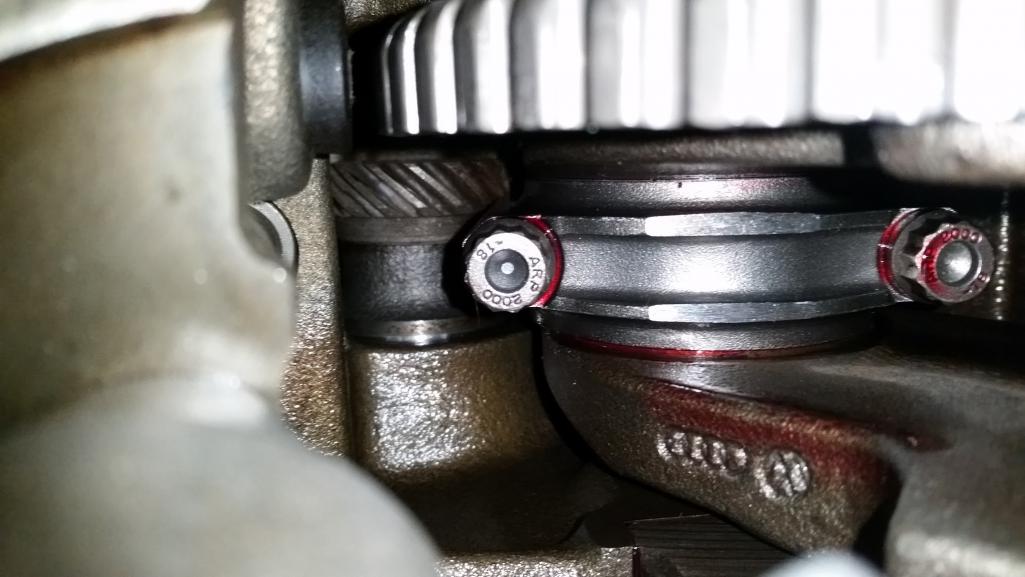 (IMG:http://www.914world.com/bbs2/uploads_offsite/scch-heads.com-172-1456326454.1.JPG) I have the shaft at the machine shop, they are machining it down and are going to balance the shaft when they are done (the shaft apparently is very unbalanced from the factory). It wont be lightened and polished like this one, but at least itll be balanced. (IMG:http://www.914world.com/bbs2/uploads_offsite/scch-heads.com-172-1456326455.2.JPG) |
|
|
|
| Andyrew |
Feb 24 2016, 09:16 AM
Post
#493
|
|
Spooling.... Please wait Group: Members Posts: 13,380 Joined: 20-January 03 From: Riverbank, Ca Member No.: 172 Region Association: Northern California |
And some more small updates. I didnt have a crank lock so I built one for the front and rear of the crank. Rear for the crank gear (not pictures) and front for the flywheel/clutch.
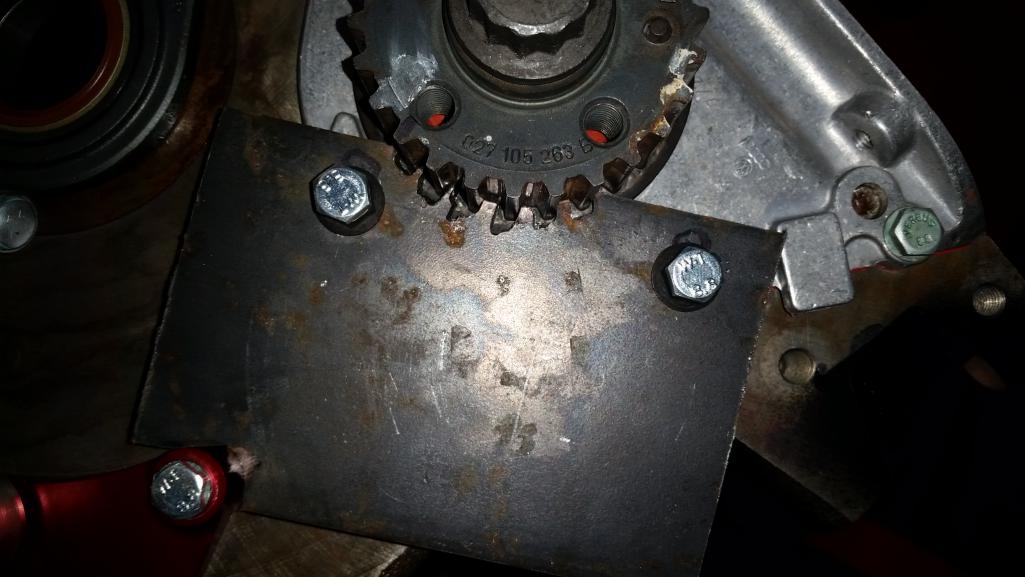  And I threw on the injectors/fuel rail/regulator.  |
|
|
|
| 76-914 |
Feb 24 2016, 09:55 AM
Post
#494
|
|
Repeat Offender & Resident Subaru Antagonist Group: Members Posts: 13,908 Joined: 23-January 09 From: Temecula, CA Member No.: 9,964 Region Association: Southern California |
Great progress!
|
|
|
|
| Andyrew |
Mar 1 2016, 04:10 PM
Post
#495
|
|
Spooling.... Please wait Group: Members Posts: 13,380 Joined: 20-January 03 From: Riverbank, Ca Member No.: 172 Region Association: Northern California |
Final update for February.
  Got my oil pump shaft back and installed it in the engine. The guys mentioned that it was extremely out of balance, makes me feel really good that I got it balanced (IMG:style_emoticons/default/smile.gif) 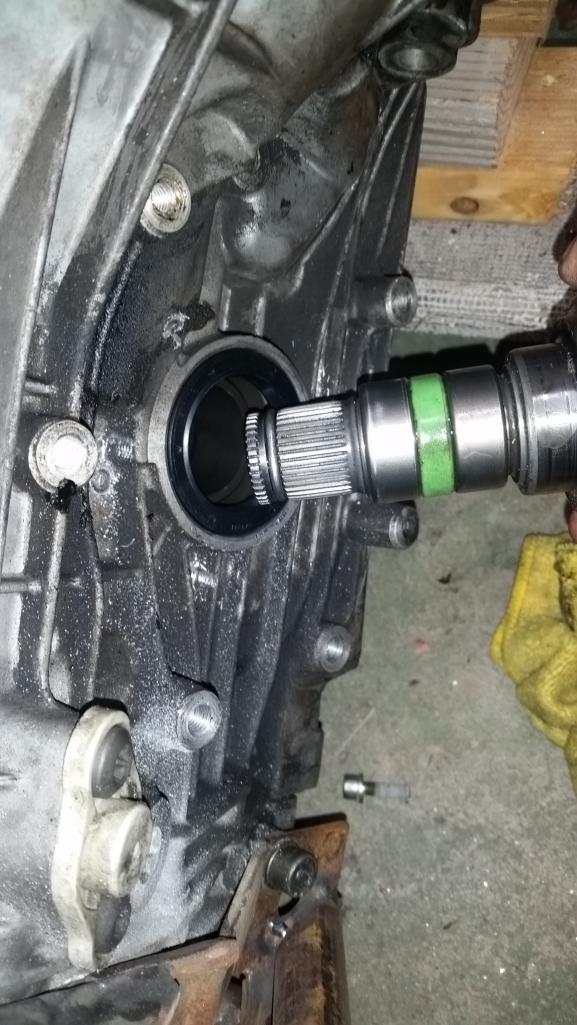 Removed the axle flanges and installed the new 100mm axle flanges with new C clips and flange seals (Oh and old crank bolts worked really well to thread through the 108mm flanges to pry against the trans and work the flange out). I had to use a hammer and dowel to drive the flanges in place, but they are in now and seem to be OK. If something happens then oh well, luckily these are all readily available parts so no real worries. 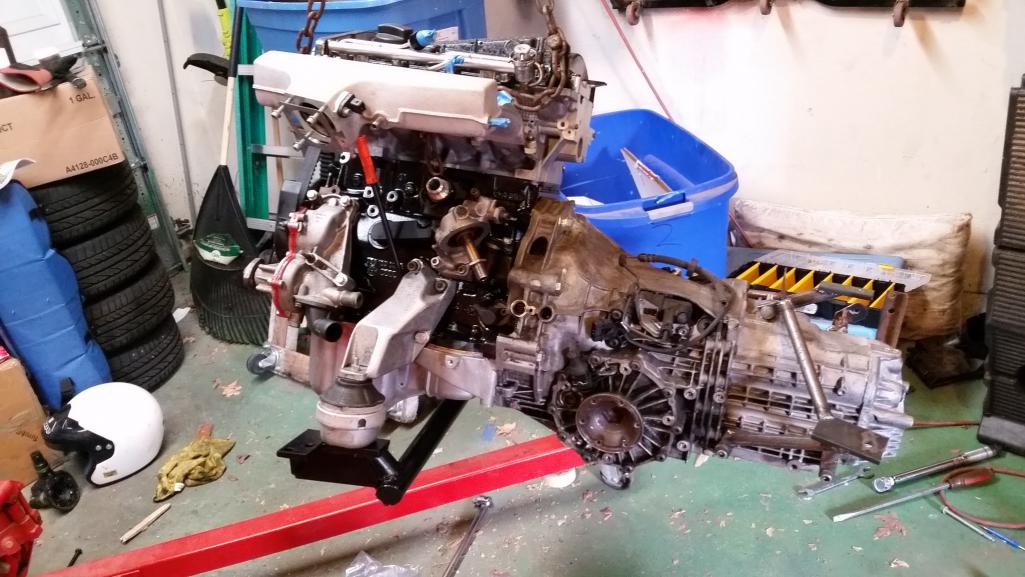 Mounted the engine to the trans, I didnt have the upper dust cover so I just shimmed the engine to the trans with a washer and moved the oil pan accordingly (according to the manual) since the trans has 3 bolts on the bottom that go to the pan. Took 3 trips to Home depot to get some bolts... All grade 10.9 vs the stock 8.8 which is nice. All torqued to 45ft lbs on the motor and 35ftlbs on the trans. |
|
|
|
| 914forme |
Mar 1 2016, 07:39 PM
Post
#496
|
|
Times a wastin', get wrenchin'! Group: Members Posts: 3,899 Joined: 24-July 04 From: Dayton, Ohio Member No.: 2,388 Region Association: None |
Making great progress here!
|
|
|
|
| Justinp71 |
Mar 2 2016, 02:23 PM
Post
#497
|
|
Senior Member Group: Members Posts: 1,647 Joined: 11-October 04 From: Sacramento, CA Member No.: 2,922 Region Association: None |
Looking Good! |
|
|
|
| Andyrew |
Mar 8 2016, 03:24 PM
Post
#498
|
|
Spooling.... Please wait Group: Members Posts: 13,380 Joined: 20-January 03 From: Riverbank, Ca Member No.: 172 Region Association: Northern California |
Test fit the engine with the trans/flanges so I could test fit other components for fitment.
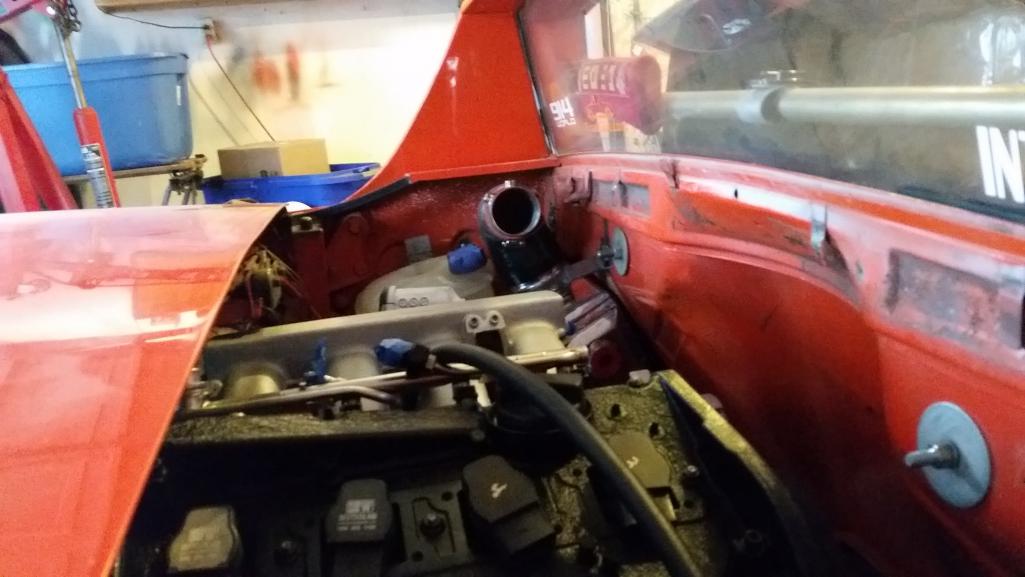 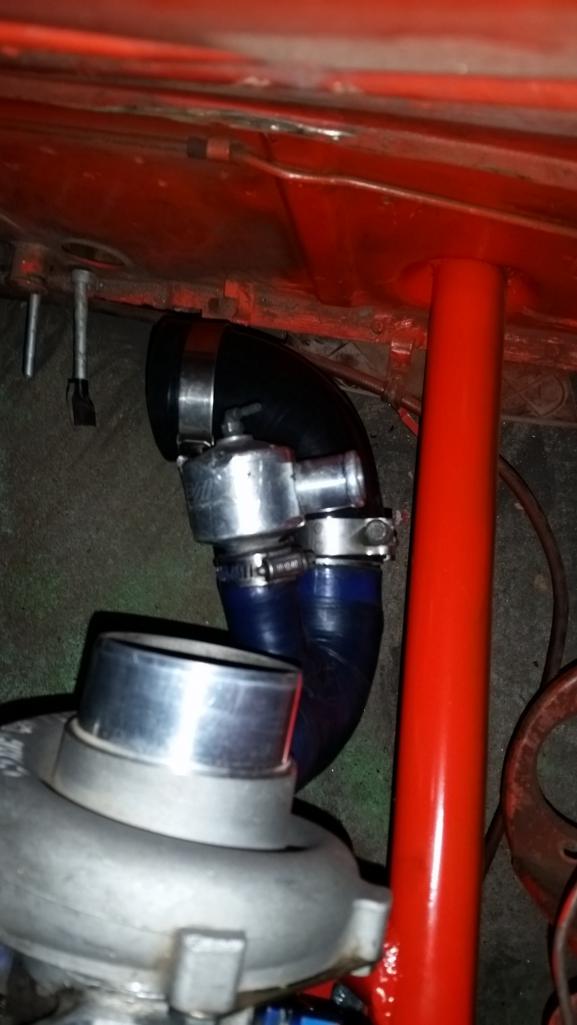 Turbo outlet and DV pipe test fit. Great clearance (IMG:style_emoticons/default/smile.gif) 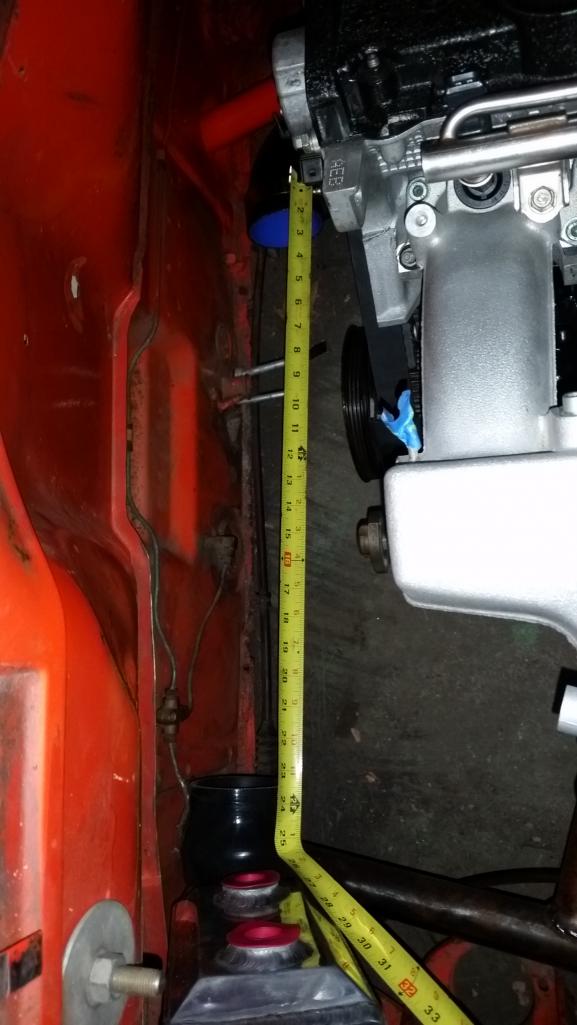 2' of aluminum pipe will be great here. I'll weld in the blow throught MAF fitting on this pipe. 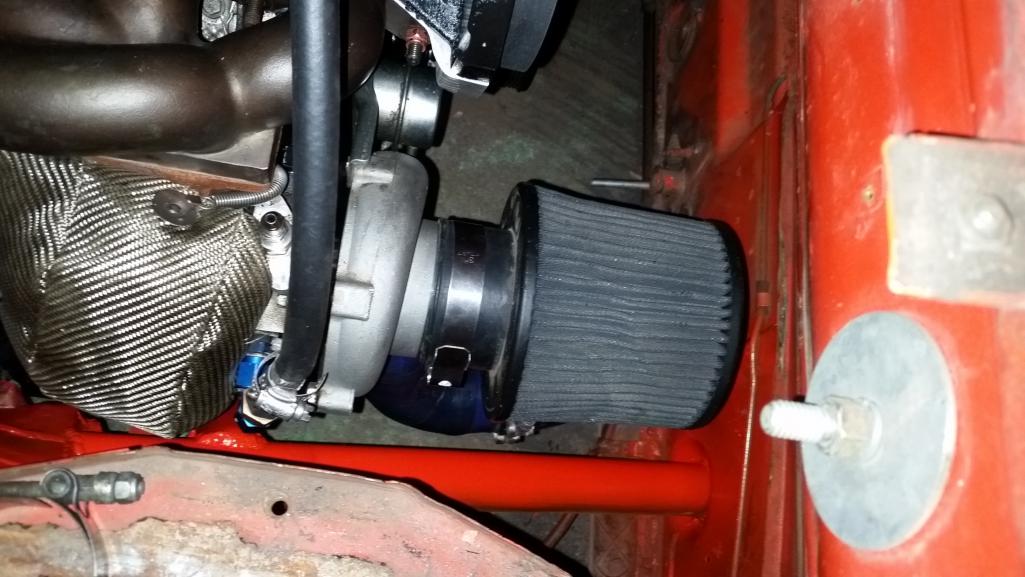 3" cone filter will work here for now. It will be located in the Pass fender after 3 month test period.  But the big news is the super locally available bus axles will work right now of the box (IMG:style_emoticons/default/smile.gif) I let the wheel hang and I still had ~1 1/2 total play in the axle. (IMG:style_emoticons/default/smile.gif) So if I blow an axle I should be able to go to any NAPA and get a replacement. Remember this is 100mm trans flange, Bus 100mm axles w/ stock 18 3/4" clip to clip length and renegade hybrids 100mm flange adapters on the stub axle to the stock 914 axle. This leaves me with two spare adapters (IMG:style_emoticons/default/smile.gif) (IMG:style_emoticons/default/cheer.gif) I can also help this with a grease fitting spacer or maybe my ABS rings that I am going to build later in the future. Been buying misc bits and pieces I find I am needing. I should be 100% on fuel fittings and lines now. AN stuff is expensive especially when you have to deal with E85... I think I have ~ 400 just in fuel lines/filters/fittings.. |
|
|
|
| matthepcat |
Mar 8 2016, 04:58 PM
Post
#499
|
|
Meat Popsicle Group: Members Posts: 1,462 Joined: 13-December 09 From: Saratoga CA Member No.: 11,125 Region Association: Northern California |
Nice work. This thread is nearing the fun stage for us observing...where cool noises happen.
|
|
|
|
| Mueller |
Mar 8 2016, 05:02 PM
Post
#500
|
|
914 Freak! Group: Members Posts: 17,155 Joined: 4-January 03 From: Antioch, CA Member No.: 87 Region Association: None |
Great progress....looks good in there!
|
|
|
|
|
204 User(s) are reading this topic (204 Guests and 0 Anonymous Users)
0 Members:

|
Lo-Fi Version | Time is now: 1st July 2026 - 12:09 AM |
Invision Power Board
v9.1.4 © 2026 IPS, Inc.