|
|
|
Porsche, and the Porsche crest are registered trademarks of Dr. Ing. h.c. F. Porsche AG.
This site is not affiliated with Porsche in any way. Its only purpose is to provide an online forum for car enthusiasts. All other trademarks are property of their respective owners. |
|
|

  |

| Andyrew |
 Aug 18 2018, 02:25 AM Aug 18 2018, 02:25 AM
Post
#679
|
|
Spooling.... Please wait  Group: Members Posts: 13,380 Joined: 20-January 03 From: Riverbank, Ca Member No.: 172 Region Association: Northern California |
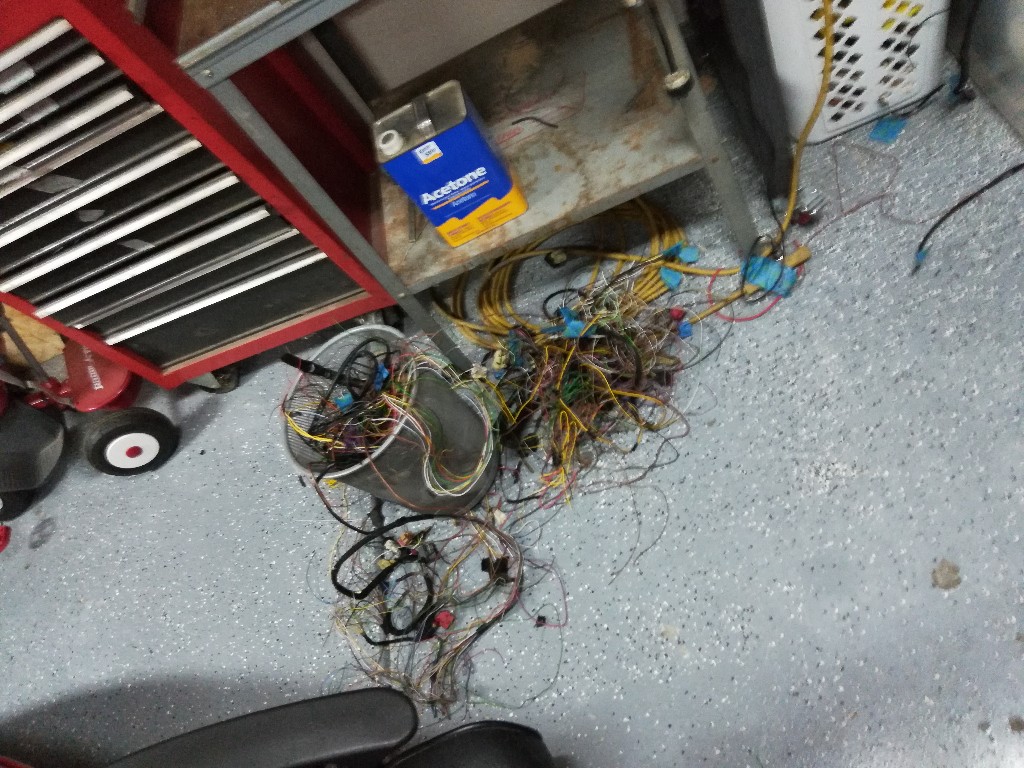
Cleared out some more wiring but as I was doing the light wiring I got worried that I was clearing out too much... So I removed the relay holder, the turn signal/wiper/headlight stalks and the ignition switch and my battery and set it all up on the bench. I was able to figure out the headlights but I didn't get the turn signals to work with a test light. So I'm going to finish up the wiring the best that I can tell for the lights and add some connectors at appropriate lengths and then I will put it in the car. I suspect that it needs more bulbs/resistance to work. The hazard switch works great and it's what holds the turn signal relay.
I spent a bit of time writing out all the wiring per the diagrams I have so I can confirm I did wire it up appropriately the first time. I have been having issues with one of the headlight fuses constantly going out so I suspect I have it on the wrong wire/ fuze/ something so that's one of my big things I'm working on solving with this wiring. The loom is substantially thinner at this point, and I have a lot of wires I still can remove/trim. Note I still have the engine harness to go through. I just decided to start with this as I'm going to be spending a considerable amount of time measuring and lengthening/shortening the wires for the engine harness. Attached thumbnail(s) 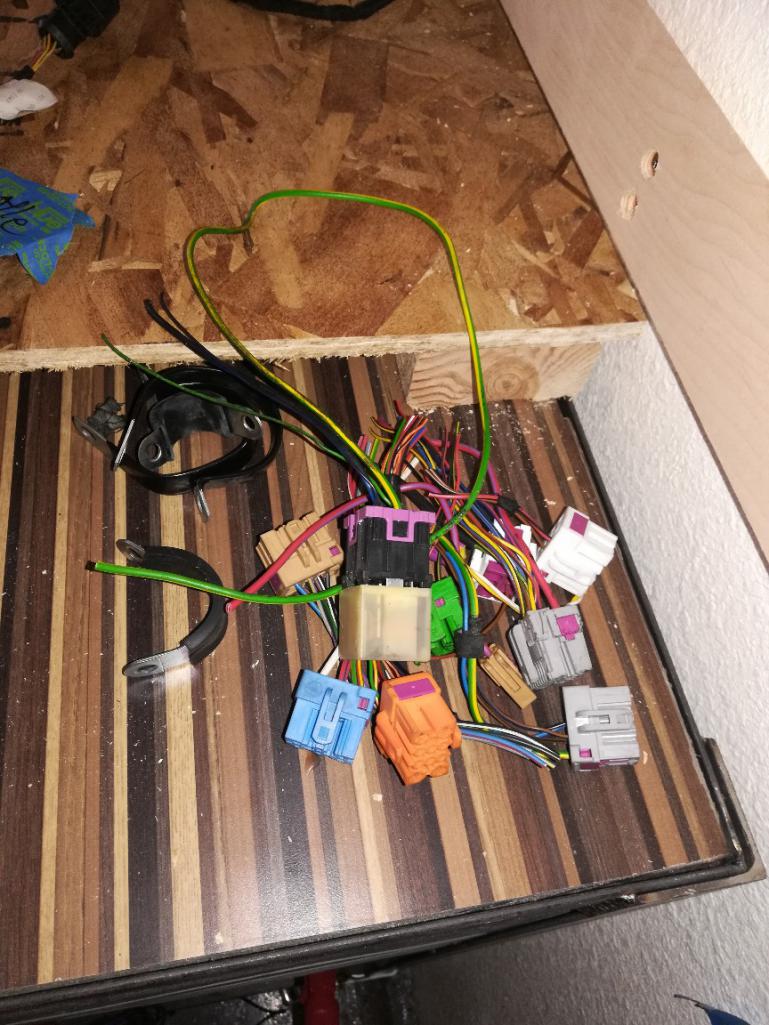 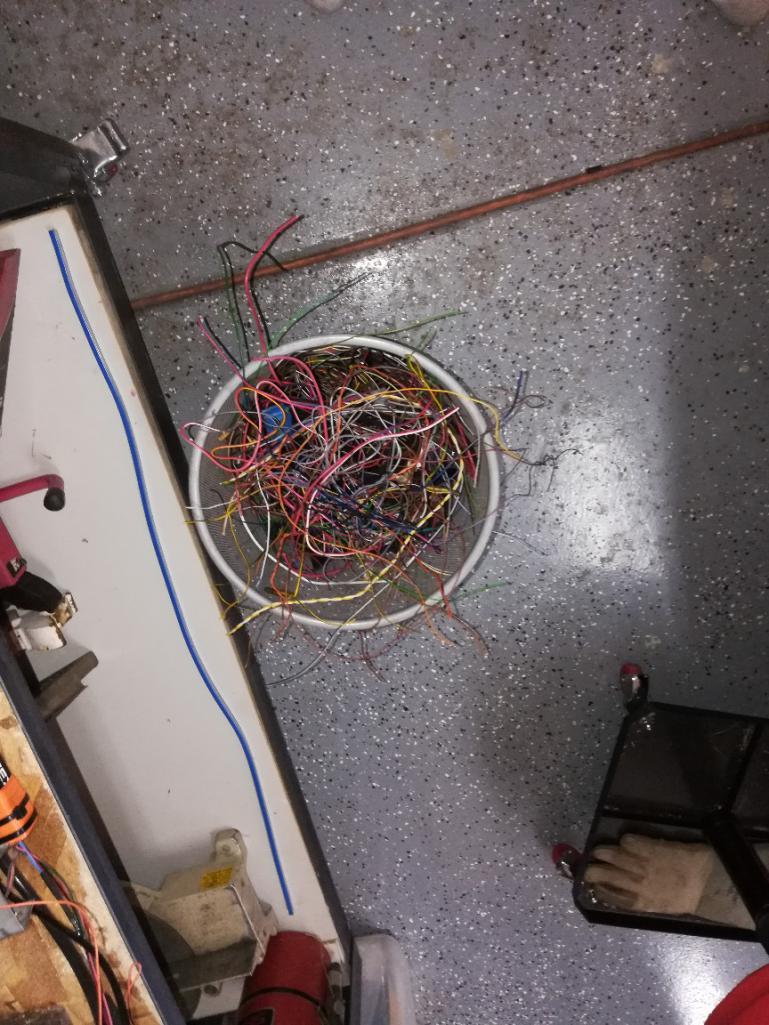 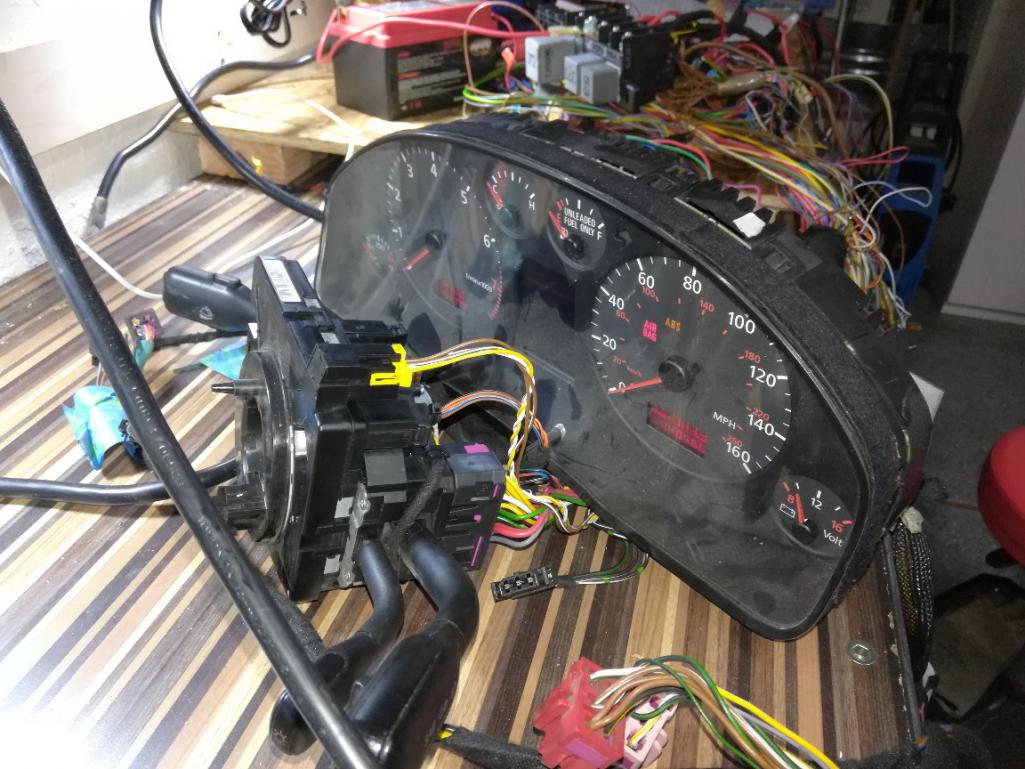 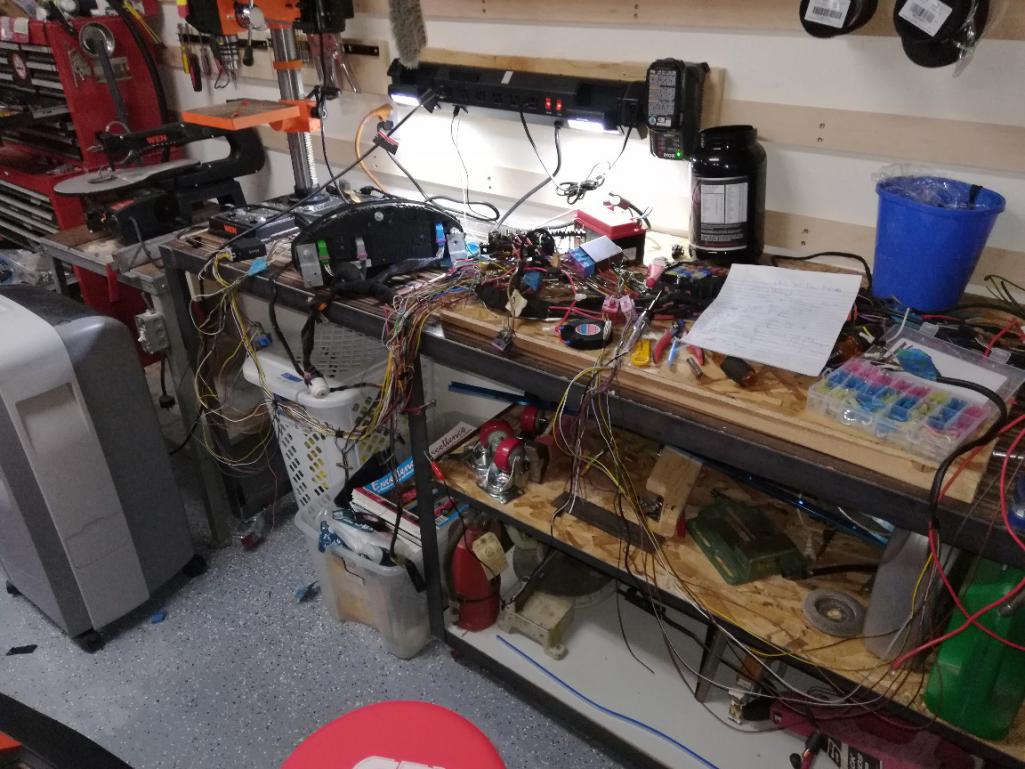
|
   |

 
|
| Andyrew |
Aug 22 2018, 08:42 PM
Post
#680
|
|
Spooling.... Please wait Group: Members Posts: 13,380 Joined: 20-January 03 From: Riverbank, Ca Member No.: 172 Region Association: Northern California |
I did someore trimming a couple nights ago, no pics. I went over the lights and turn signal situation and I have a bit more to do but I think I have it figured out. I am ready to start trimming the engine harness and in doing so I'll be able to trim the chassis harness a bit more as well. After all the triming I'll size everything to proper lengths and move from there.
Monday night I was modifying some steel frames for work (I rarely do this kind of stuff in my position, but I needed it done faster than my shop was going to be able to do it) and I got a piece of metal in my eye. I didn't notice it till yesterday after work and thus made an emergency trip to my optometrist, who luckily is a family friend and I can typically pull strings when needed like this. Got it out and after a hard night last night I am feeling better. Still blurry but I'm dialated pretty good and he took a bit of material out as there was a little rust. However it's healing well (follow-up appointment) so no worries there. Back on topic I decided to replace my failing welding helmet, and I took the advice of you guys and got a nice set of helping hands. I should have a little bit more progress this weekend. I should be testing the system sometime in the next month and then wrapping it for good. Attached thumbnail(s) 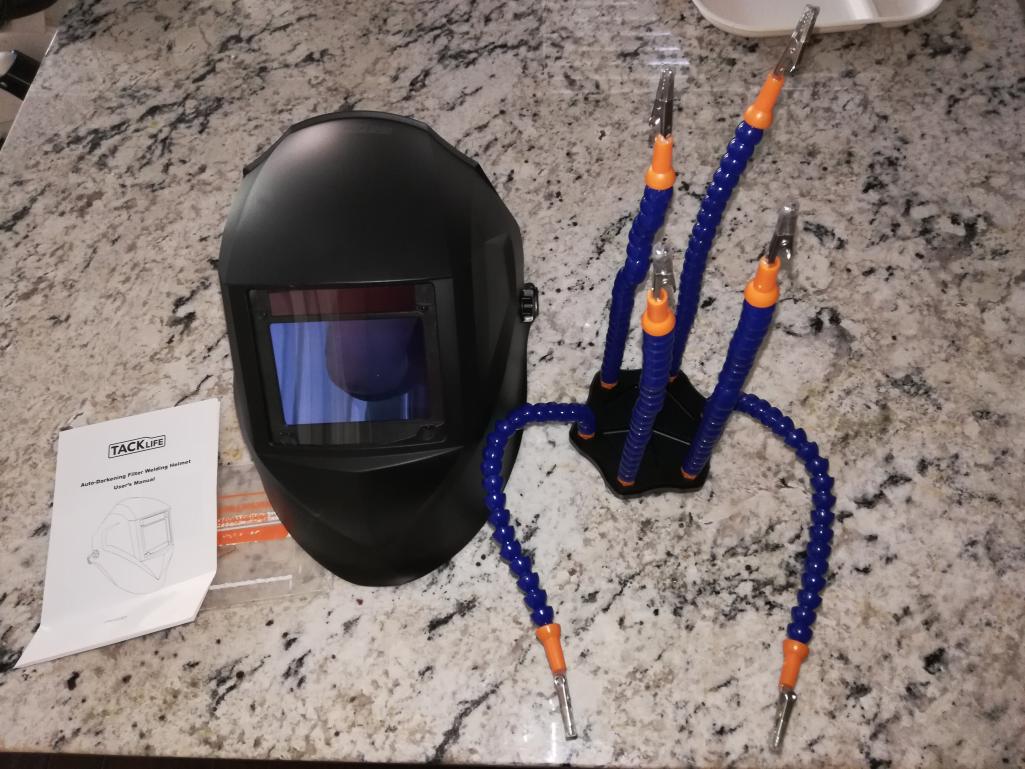
|
|
|
|
| dan10101 |
Aug 22 2018, 09:58 PM
Post
#681
|
|
TORQUE-o-holic Group: Members Posts: 1,140 Joined: 29-April 03 From: Eagle Point, Or Member No.: 626 Region Association: Pacific Northwest |
Hmm, DejaView all over again.
Or was it me last time... #Dadmodeon Wear your safety equipment!!! #Dadmodeoff Glad you got it taken care of. |
|
|
|
| Andyrew |
Aug 23 2018, 07:03 AM
Post
#682
|
|
Spooling.... Please wait Group: Members Posts: 13,380 Joined: 20-January 03 From: Riverbank, Ca Member No.: 172 Region Association: Northern California |
I was wearing my good goggles.. damn dremmels just kick out a ton of debris. I'm getting a full face mask to use over my goggles. When I am using the dremmel it typically shoots the Sparks directly in my face, and I have to be very close to see perfectly (IMG:style_emoticons/default/sad.gif)
|
|
|
|
| 76-914 |
Aug 23 2018, 08:22 AM
Post
#683
|
|
Repeat Offender & Resident Subaru Antagonist Group: Members Posts: 13,830 Joined: 23-January 09 From: Temecula, CA Member No.: 9,964 Region Association: Southern California |
Careful with those eyes. Replacement parts rival Porsche parts in price. Your heading down the right path. Should be a runner soon. Stay after it. (IMG:style_emoticons/default/beerchug.gif)
|
 |
|
| worn |
Aug 23 2018, 12:47 PM
Post
#684
|
|
Winner of the Utah Twisted Joint Award Group: Members Posts: 3,518 Joined: 3-June 11 From: Madison, WI Member No.: 13,152 Region Association: Upper MidWest |
QUOTE(Andyrew @ Aug 23 2018, 06:03 AM)  I was wearing my good goggles.. damn dremmels just kick out a ton of debris. I'm getting a full face mask to use over my goggles. When I am using the dremmel it typically shoots the Sparks directly in my face, and I have to be very close to see perfectly (IMG:style_emoticons/default/sad.gif) Have used the dremmel a lot and find that wire brush wheels are extremely dangerous. To the point where I had a piece of stainless brush wire pierce through my nose. Not really that keen on jewelry and it could have been my eye. |
|
|
|
| Andyrew |
Aug 23 2018, 12:52 PM
Post
#685
|
|
Spooling.... Please wait Group: Members Posts: 13,380 Joined: 20-January 03 From: Riverbank, Ca Member No.: 172 Region Association: Northern California |
QUOTE(worn @ Aug 23 2018, 11:47 AM) QUOTE(Andyrew @ Aug 23 2018, 06:03 AM) I was wearing my good goggles.. damn dremmels just kick out a ton of debris. I'm getting a full face mask to use over my goggles. When I am using the dremmel it typically shoots the Sparks directly in my face, and I have to be very close to see perfectly (IMG:style_emoticons/default/sad.gif) Have used the dremmel a lot and find that wire brush wheels are extremely dangerous. To the point where I had a piece of stainless brush wire pierce through my nose. Not really that keen on jewelry and it could have been my eye. Wire brush wheels are not my favorite thing either.. This was the tiny cutoff wheels with the EZ lock connector. I like them, they cut well, but when they wear down they just throw debris and finally explode. (IMG:http://www.914world.com/bbs2/uploads_offsite/i5.walmartimages.com-172-1535050352.1.jpeg) |
|
|
|
| Andyrew |
Aug 26 2018, 01:10 PM
Post
#686
|
|
Spooling.... Please wait Group: Members Posts: 13,380 Joined: 20-January 03 From: Riverbank, Ca Member No.: 172 Region Association: Northern California |
Cleaned up a bit more. Working on the connections to the 914 body harness/lights. Decided to try the new connector hardware. Works pretty good but it needs the special tool or else it's pretty difficult to install. I soldered them when I was done with crimping them.
Helping hands was nice (IMG:style_emoticons/default/smile.gif) Attached thumbnail(s) 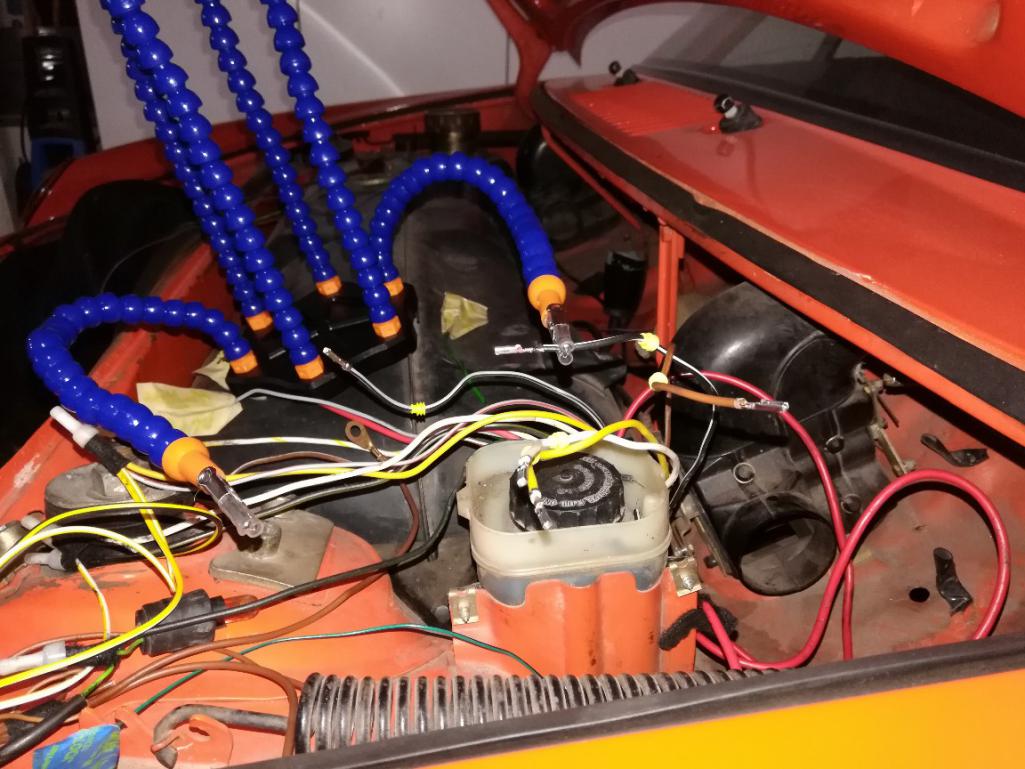 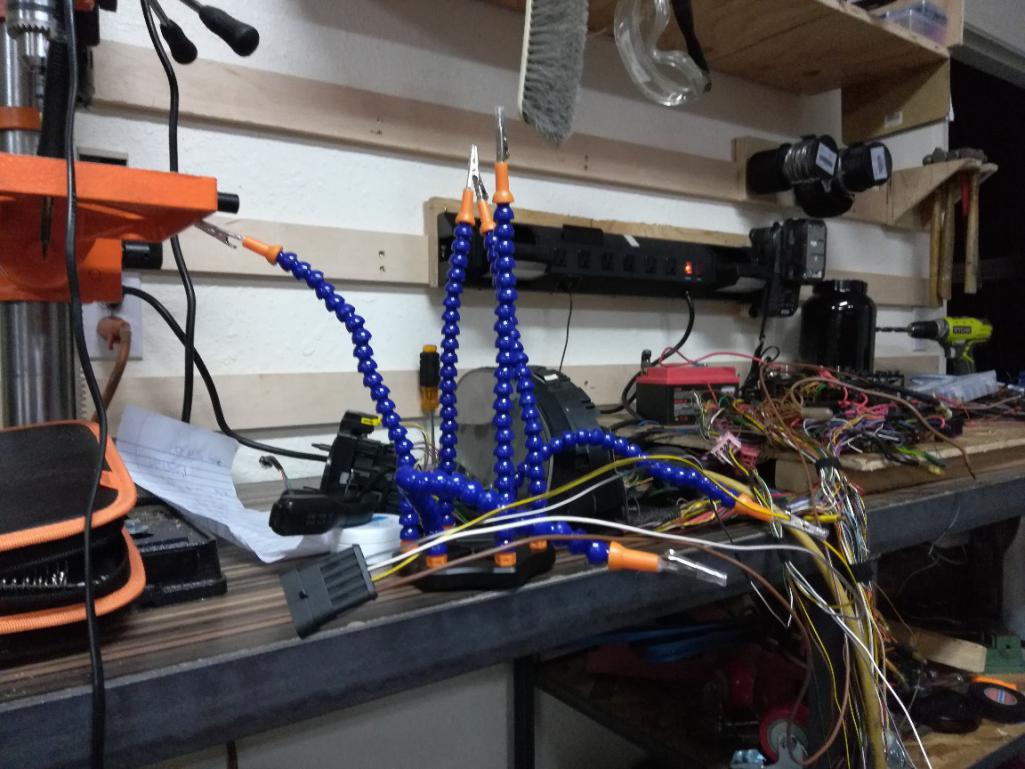 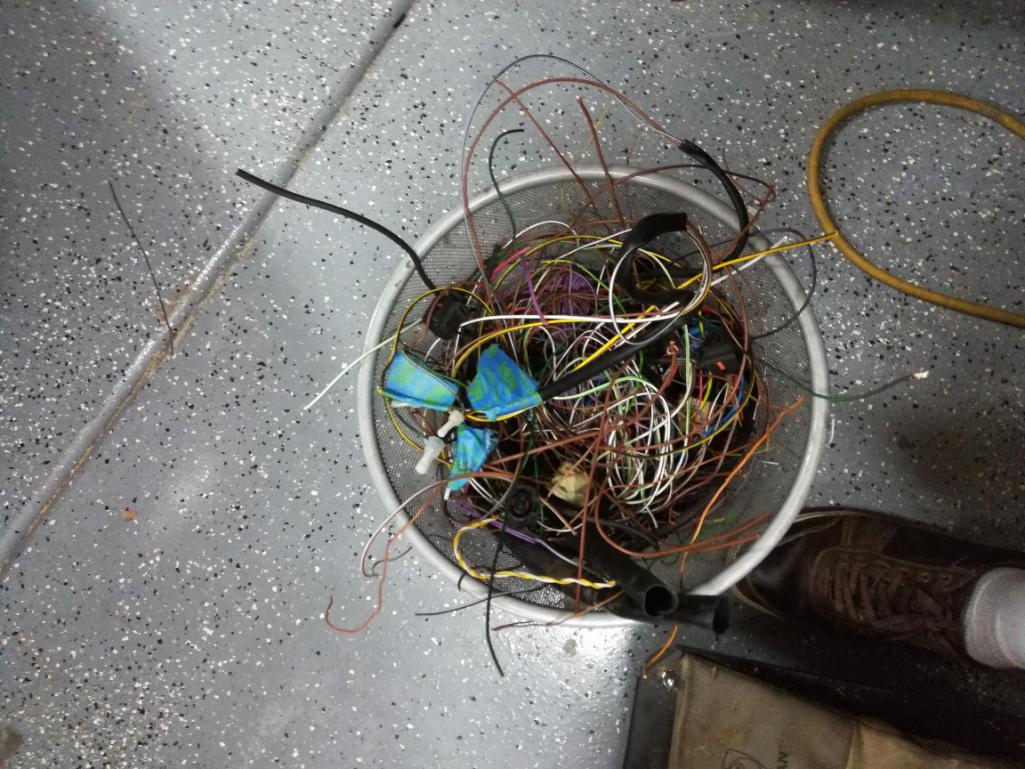
|
|
|
|
| Andyrew |
Sep 11 2018, 10:57 PM
Post
#687
|
|
Spooling.... Please wait Group: Members Posts: 13,380 Joined: 20-January 03 From: Riverbank, Ca Member No.: 172 Region Association: Northern California |
Been busy!
  I made the mistake of cutting out two connectors that ran to the rear of the car for lighting. The thing is when I cut things out I also cut the wires back as far as possible. I do however leave enough room to connect to the wire in the future if need be and put some heat shrink on each wire. So after 3 nights of research testing and scouring for like wire colors and size to splice back in I got it back... In the end the job will be cleaner. 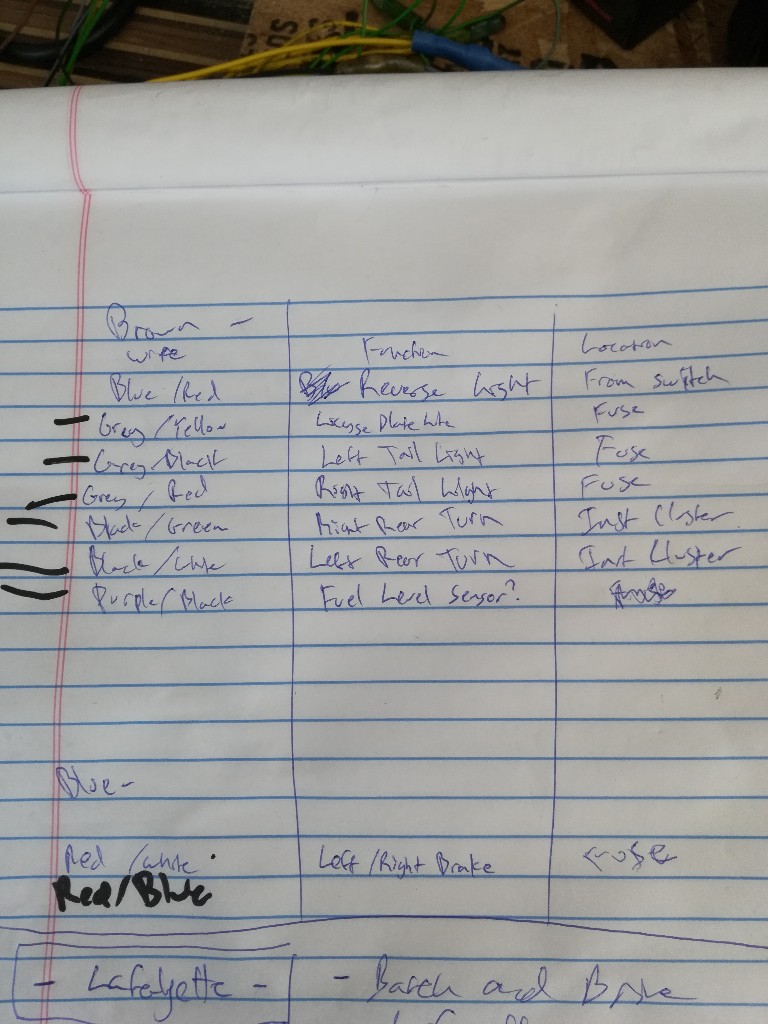 I got as far as air dare go on the main harness and went after the engine harness. 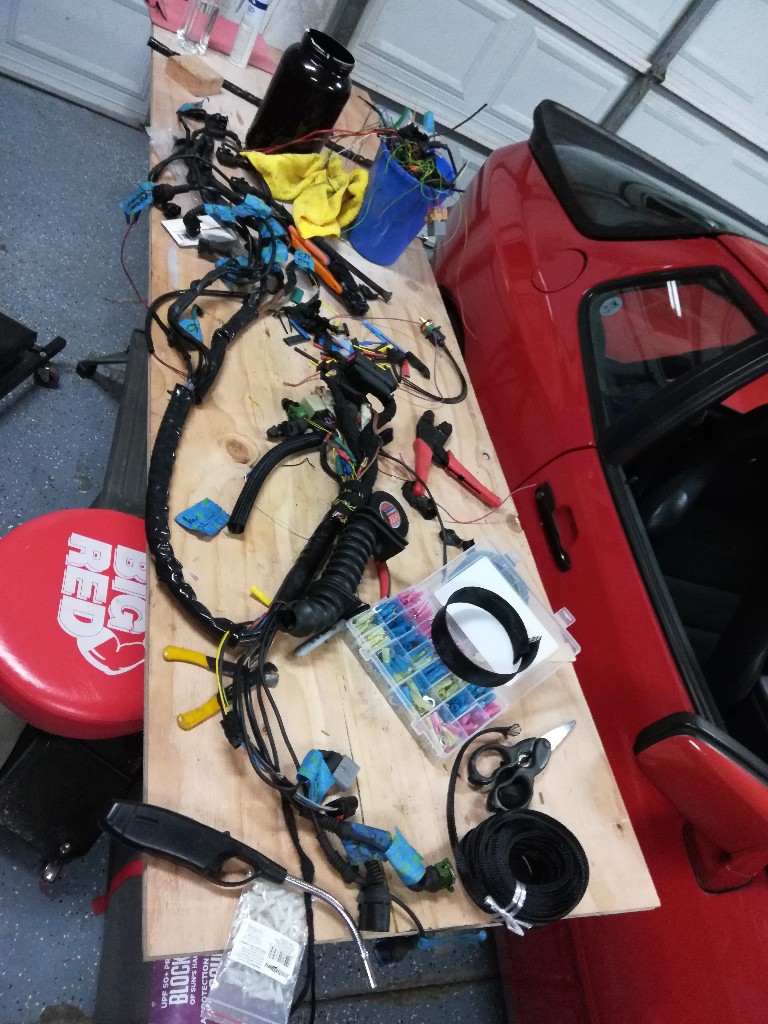 If you remember I wanted to extend the harness. Well I found a way of routing it that I don't need to. I'm going to put a couple extra inches Into the engine bay and maybe extend a wire or two but I think I'll be ok. If I need to extend it I'm extending it like 3 feet to wrap around the engine bay and be completely hidden. The blue bucket is full of removed wires, relays and connectors from the engine bay harness. Not pictured are 3 sensors that have resistors that Ishortened and moved out of the engine bay. A couple of pieces I got was a new temp sensor connector and sensor. I'm going to pray that this is the issue as I haven't found anything else wrong yet. I'll wire this in next.  Next step is to cut the hole in the firewall out of plain sight (like I did last time) and confirm the wires are long enough. Then connect everying up and test it all and look for issues. I've been bench testing the lights and guage cluster but that's it so far. Once everything is all good I'll finalize some connections run some wires for a pop up headlight switch, and finally wrap everything. I have some great wrap as well as some new super awesome heat shrink. This stuff is up to 2" wide!! When it's fully shrink it's about 1/8" thick! 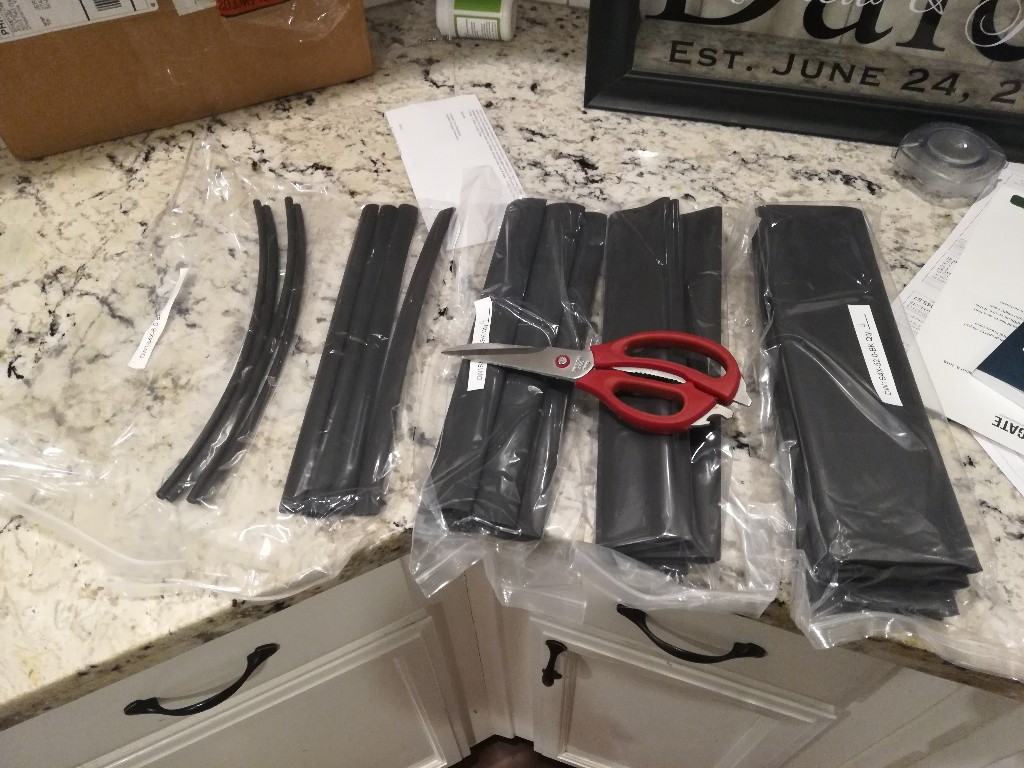 Some connectors I pinned up and heat shrunk below. 3:1 shrink ratio is also awesome. 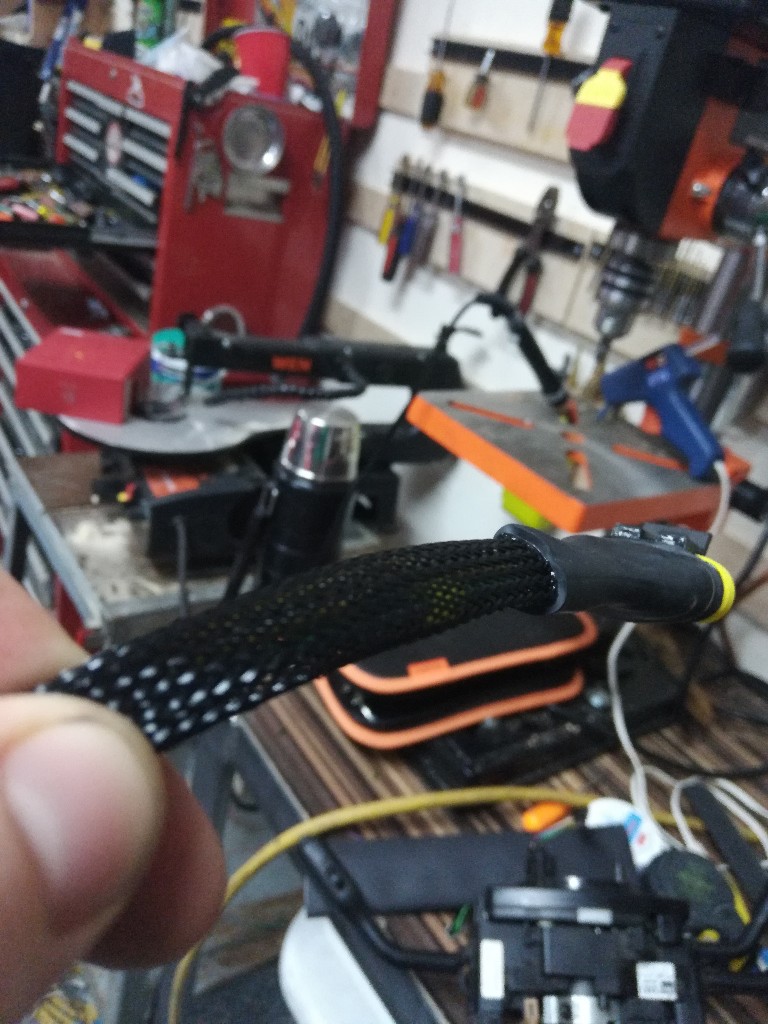 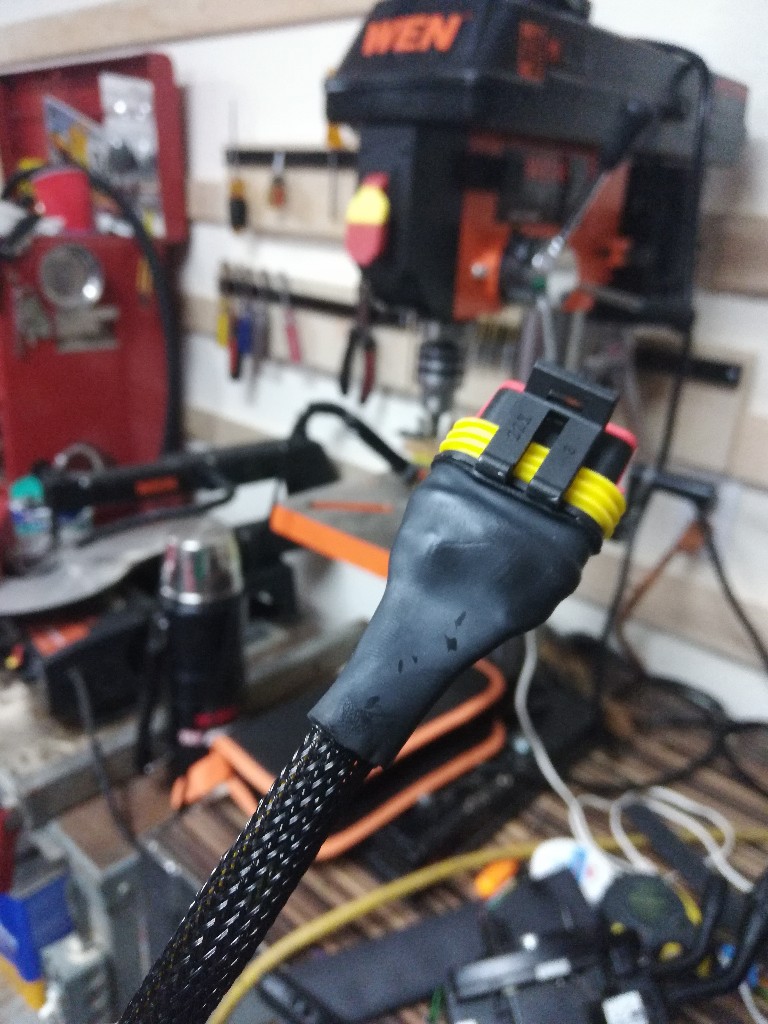 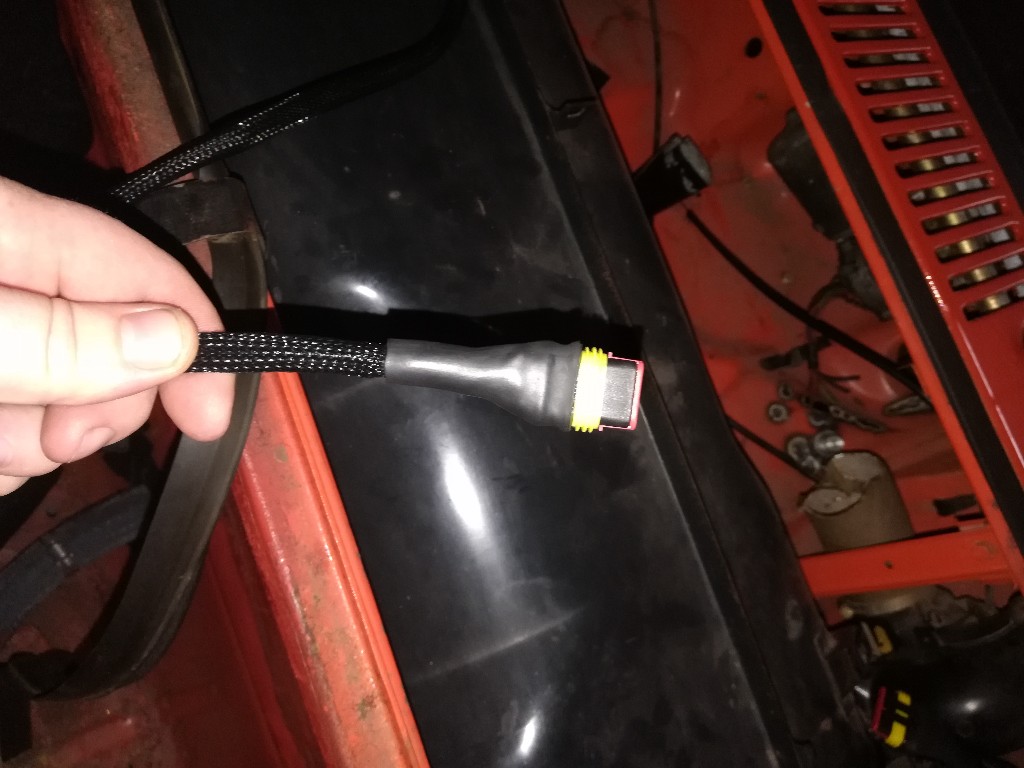 |
|
|
|
| 76-914 |
Sep 12 2018, 09:05 AM
Post
#688
|
|
Repeat Offender & Resident Subaru Antagonist Group: Members Posts: 13,830 Joined: 23-January 09 From: Temecula, CA Member No.: 9,964 Region Association: Southern California |
The temp sensor is the suspect, correct? Post a link to the 3:1 heat shrink. Is it marine grade? Stay after it. (IMG:style_emoticons/default/beerchug.gif)
|
|
|
|
| Andyrew |
Sep 12 2018, 09:41 AM
Post
#689
|
|
Spooling.... Please wait Group: Members Posts: 13,380 Joined: 20-January 03 From: Riverbank, Ca Member No.: 172 Region Association: Northern California |
QUOTE(76-914 @ Sep 12 2018, 08:05 AM) The temp sensor is the suspect, correct? Post a link to the 3:1 heat shrink. Is it marine grade? Stay after it. (IMG:style_emoticons/default/beerchug.gif) Temp sensor is what Bellis thinks it is, I've replaced it a couple times but never had a good connector in the harness so hopefully this ends up being the issue. If not, more spares (IMG:style_emoticons/default/dry.gif) My other thought is the crank position sensor, I havent gone through and checked the wiring on it yet but its on my short TO DO list prior to wrapping both harnesses. Sorry, its 4:1 shrink tube (IMG:style_emoticons/default/biggrin.gif) https://www.amazon.com/gp/product/B07FNC7VW...=UTF8&psc=1 This supplier has lots of sizes, I ordered 4 feet of each size I needed that should cover any size needed (4:1 is NICE) and shipping was only $6 total for a total order of $42. So far REALLY happy with it, I just need to shrink it on LOW heat with my heat gun as it melted my wrap on one of my wire bundles. Also when its cooled its almost completely stiff. It should do an amazing job protecting my connector wiring. Lastly its adhesive lined so it wont move on the connector. |
|
|
|
| Curbandgutter |
Sep 12 2018, 02:01 PM
Post
#690
|
|
Senior Member Group: Members Posts: 566 Joined: 8-March 13 From: Murrieta CA Member No.: 15,637 Region Association: Southern California |
OK now I know who to turn to when I get to wiring my car. Your work is top notch. I'll be calling you to find out where to get all those fancy connectors and sheathing.
By the way this is the mask that I use, it may be helpful for you as well. Here is the link: https://www.amazon.com/Uvex-Bionic-Polycarb...ASIN=B001VY3ACE  |
|
|
|
| Andyrew |
Sep 12 2018, 02:24 PM
Post
#691
|
|
Spooling.... Please wait Group: Members Posts: 13,380 Joined: 20-January 03 From: Riverbank, Ca Member No.: 172 Region Association: Northern California |
QUOTE(Curbandgutter @ Sep 12 2018, 01:01 PM) OK now I know who to turn to when I get to wiring my car. Your work is top notch. I'll be calling you to find out where to get all those fancy connectors and sheathing. By the way this is the mask that I use, it may be helpful for you as well. Here is the link: https://www.amazon.com/Uvex-Bionic-Polycarb...ASIN=B001VY3ACE I put that one on my wish list (IMG:style_emoticons/default/smile.gif) My welding helmet has a grind mode and I found one of my old face shields (stuck in a box from moving) so Im going to try that for now. But this is on the short list to buy (IMG:style_emoticons/default/smile.gif). This is the connectors. The single review is from me (IMG:style_emoticons/default/smile.gif) I bought a second box as they only came with 2 of each size and I was out of one of them (And liked them for the money). But for the money I like them a lot. I end up doing a tiny dab of solder on most pins. https://www.amazon.com/gp/product/B07FTRV25...=UTF8&psc=1 I use this tool, but it still needs some persuasion which can be done with this too. https://www.amazon.com/gp/product/B07G98DLB...=UTF8&psc=1 The sleeving im using is this kind. (different sizes). Its OK. As mentioned the heat gun will melt it on hot, so I have to be careful with this thick heat shrink https://www.amazon.com/gp/product/B074GM1PK...=UTF8&psc=1 |
|
|
|
| Mike Bellis |
Sep 12 2018, 11:22 PM
Post
#692
|
|
Resident Electrician Group: Members Posts: 8,347 Joined: 22-June 09 From: Midlothian TX Member No.: 10,496 Region Association: None |
I've had to commute in the 914 for the last 4-5 days. Today the car dropped into limp mode 4 times and has a check engine light. Each time I restarted and it came out of limp mode. Not sure what's going on. I'll hook my VagCom up to it tomorrow after work. Taking the wife's car tomorrow.
|
|
|
|
| Matty900 |
Sep 13 2018, 12:02 AM
Post
#693
|
|
Senior Member Group: Members Posts: 1,302 Joined: 21-February 15 From: Oregon Member No.: 18,454 Region Association: Pacific Northwest |
QUOTE(Andyrew @ Sep 11 2018, 09:57 PM) Been busy! I made the mistake of cutting out two connectors that ran to the rear of the car for lighting. The thing is when I cut things out I also cut the wires back as far as possible. I do however leave enough room to connect to the wire in the future if need be and put some heat shrink on each wire. So after 3 nights of research testing and scouring for like wire colors and size to splice back in I got it back... In the end the job will be cleaner. I got as far as air dare go on the main harness and went after the engine harness. If you remember I wanted to extend the harness. Well I found a way of routing it that I don't need to. I'm going to put a couple extra inches Into the engine bay and maybe extend a wire or two but I think I'll be ok. If I need to extend it I'm extending it like 3 feet to wrap around the engine bay and be completely hidden. The blue bucket is full of removed wires, relays and connectors from the engine bay harness. Not pictured are 3 sensors that have resistors that Ishortened and moved out of the engine bay. A couple of pieces I got was a new temp sensor connector and sensor. I'm going to pray that this is the issue as I haven't found anything else wrong yet. I'll wire this in next. Next step is to cut the hole in the firewall out of plain sight (like I did last time) and confirm the wires are long enough. Then connect everying up and test it all and look for issues. I've been bench testing the lights and guage cluster but that's it so far. Once everything is all good I'll finalize some connections run some wires for a pop up headlight switch, and finally wrap everything. I have some great wrap as well as some new super awesome heat shrink. This stuff is up to 2" wide!! When it's fully shrink it's about 1/8" thick! Some connectors I pinned up and heat shrunk below. 3:1 shrink ratio is also awesome. Looking good Andrew. One thing that caused me an issue on my Micro Squirt harness was the adhesive shrink wrap being too close to the plug at the main plugin. That had me replacing parts to try and hunt down the gremlin It put a lot of tension on the pins whenever we moved it in and out. It ended up opening up the pins at the outside (where the power wire was) just enough to cause a signal loss intermittently. I hope that makes sense. Anyway, keep up the good work (IMG:style_emoticons/default/popcorn[1].gif) |
|
|
|
| Andyrew |
Sep 13 2018, 06:03 AM
Post
#694
|
|
Spooling.... Please wait Group: Members Posts: 13,380 Joined: 20-January 03 From: Riverbank, Ca Member No.: 172 Region Association: Northern California |
Makes complete sense! I did however hot glue all the backsides of the pins so they won't move in the connector so I have a feeling that won't be an issue but you never know!
|
|
|
|
| Mike Bellis |
Sep 13 2018, 07:59 PM
Post
#695
|
|
Resident Electrician Group: Members Posts: 8,347 Joined: 22-June 09 From: Midlothian TX Member No.: 10,496 Region Association: None |
You need your VCDS...
Figured out my limp mode. Still have to fix it but it's wiring somewhere... (IMG:style_emoticons/default/sad.gif) See below. Low voltage and ABS are the normal codes. Throttle code was the cuase. 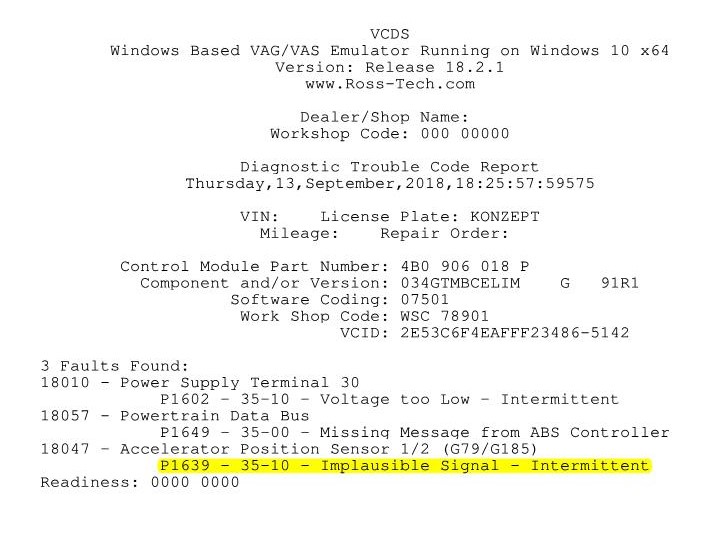 |
|
|
|
| Andyrew |
Sep 13 2018, 09:05 PM
Post
#696
|
|
Spooling.... Please wait Group: Members Posts: 13,380 Joined: 20-January 03 From: Riverbank, Ca Member No.: 172 Region Association: Northern California |
Only a couple wires to it. I have it fully blown out now if you want me to sent you any pics.
Yes I need to get my vcds (Obd2 reader specific to VW/Audifor those following at home) working. Maybe I'll hook it up tomorrow and see what issues I'm having. |
|
|
|
| Andyrew |
Sep 16 2018, 02:34 AM
Post
#697
|
|
Spooling.... Please wait Group: Members Posts: 13,380 Joined: 20-January 03 From: Riverbank, Ca Member No.: 172 Region Association: Northern California |
I stopped working on the engine harness as it's ready for me to test it. I went back to the dash harness (main harness) and added some more connectors.
Just as a side note, I'm pinning all these connectors by hand. It typically takes me 45mins per side to do these for say a 5 wire connector. It involves making sure the wires are long enough, adding if necessary then taping the wire leading up to the connector so they don't move, cutting them all to the same length, stripping 3/8" off each one (if it's a thick wire I can use my strippers, else I use a razor blade on the thin wires.) I then put the pin on and butt the second prong to the wire sleaving. Work the connection pins over with my tool so they will fold under each other or wrap the wire when crimped and crimp with my tool. Repeat for the rear pin holding the wire. Then squeeze up the insulating grommet. If it's a thin wire I fire up the soldering gun and tin the wires in the connector really quick. Once that's good I repeat for all the wires. Finally I tape them together at the ends and feed in the wire sleaving I use and cut to length burning the ends so they don't split. I throw some heat shrink down in multiples as well as my new super awesome 4:1 shrink in about a 2.5" length. I shove the wires in the connector making sure they go in all the way and click (Sometimes pulling them into place with a needle nose). Then push the weather seal into place by hand followed by a special tool I made to get them as deep as possible. Check to make sure all the pins are in the correct angle and hot glue the remaining space in the connector (1/4"). I slip the wire sleeve up to the edge of the connector while the glue is still hot and run one layer of tape to make sure it stays while heat shrinking. I apply the smaller heat shrink (both ends of the sleeping) and finalize it with the big heat shrink around the connector which takes some time and careful work with the heat gun. At this point I test the connections wait for the shrink to cool and admire my handiwork. Speaking of... this was 3 hours of work... 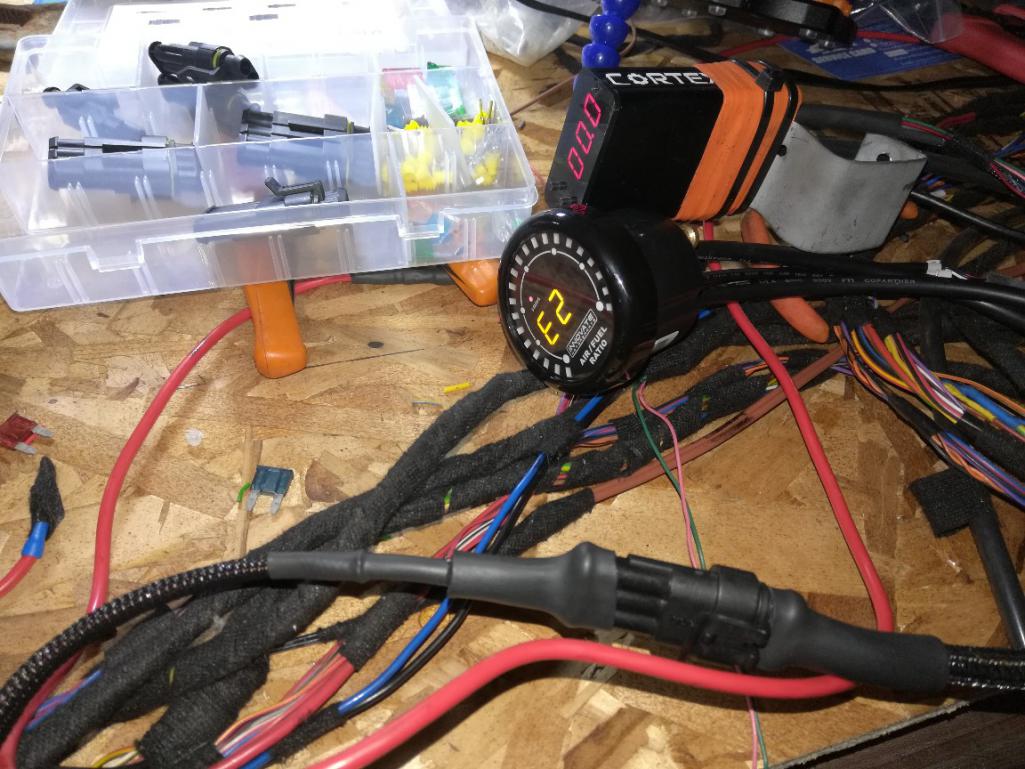 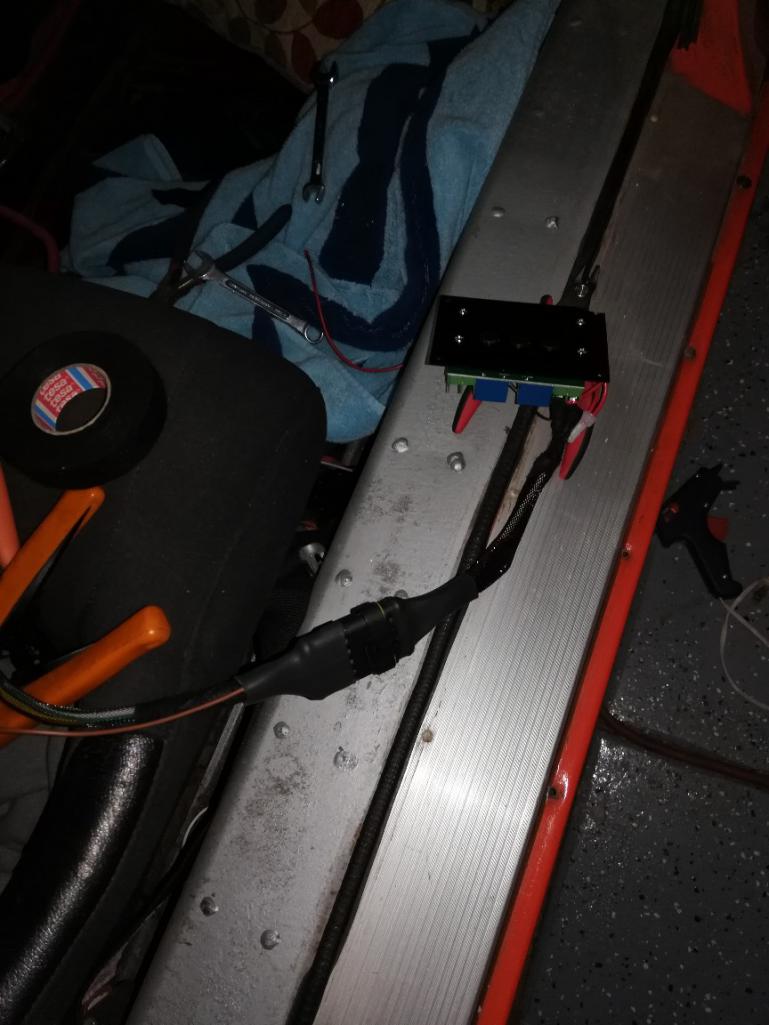 At this point I have been spending 10 hrs a week in the garage (typically from 9am to 1am, Friday and Saturday nights and a bit here and there. On this wiring for the past 5 weeks... I'm pretty tired of it now... It's relaxing and I can listen to some shows my wife and girl don't like but still. |
|
|
|
| daytona |
Sep 16 2018, 05:28 AM
Post
#698
|
|
daytona Group: Members Posts: 475 Joined: 13-April 14 From: Ormond Beach, Florida Member No.: 17,249 Region Association: South East States |
Hi Andrew,
You are doing a great job. Makes me want to redo the harness in my car. Got a question: the braided sleeve you are using; is that heat shrinkable as well? Thanks, Bill. |
|
|
|
|
1 User(s) are reading this topic (1 Guests and 0 Anonymous Users)
0 Members:

|
Lo-Fi Version | Time is now: 20th December 2025 - 12:30 AM |
Invision Power Board
v9.1.4 © 2025 IPS, Inc.