|
|
|
Porsche, and the Porsche crest are registered trademarks of Dr. Ing. h.c. F. Porsche AG.
This site is not affiliated with Porsche in any way. Its only purpose is to provide an online forum for car enthusiasts. All other trademarks are property of their respective owners. |
|
|

  |

| Andyrew |
 Apr 28 2019, 02:23 AM Apr 28 2019, 02:23 AM
Post
#761
|
|
Spooling.... Please wait  Group: Members Posts: 13,380 Joined: 20-January 03 From: Riverbank, Ca Member No.: 172 Region Association: Northern California |
Lot of work recently for not a lot of progress.
Replaced the trans with the spare I bought.Clutch, flywheel and pressure plate look good. This involved removing the stub axles and swapping them over. Only to find out I didn't grind the hole large enough for the stub axles in the LSD. So I test fit the system and I was only off a strong 1/8. Grinding of the stub axles it was! This portion of the axle is only for a guide. I left a hair on there. Should work well. Flanges are back in normal position. I had to swap shifts cables as I bent the end of one slightly and it wouldn't operate nicely. Fixed it on the bench when I was done swapping it. Adjusted the shift linkage mounts a bit and gave them s coat of silver (couldn't find black...) I test everything by hand and notice the clutch is weak. Seems like some air got in the system somehow. Go to bleed and the reservor cap is missing. Ordered a new one. I test the dash in the car and it seems like it grew some more. The foam stuff just isn't working so I'm scratching this dash. The steering column modifications require it anyways. Sigh I'm debating how to make the new dash. I think I'm going to template it out in steel rod, then fiberglass cloth over it or just use steel. It's a simple design but if I don't fiberglass immediately after trimming the foam it will expand and ruin the design. I'm thinking more and more I'll use some 22ga steel and some rod. I can work with it the easiest. It will add weight, but at this point I have very few choices that I'm comfortable with. Also Danish oil looks decent. Going to keep adding coats and do some fine sanding.. I need this thing running by next week so I can spend some time troubleshooting it. And this dash needs to be done to a level that I at least have the guages mounted. Too tired to load up pics. Here is the knob. Attached thumbnail(s) 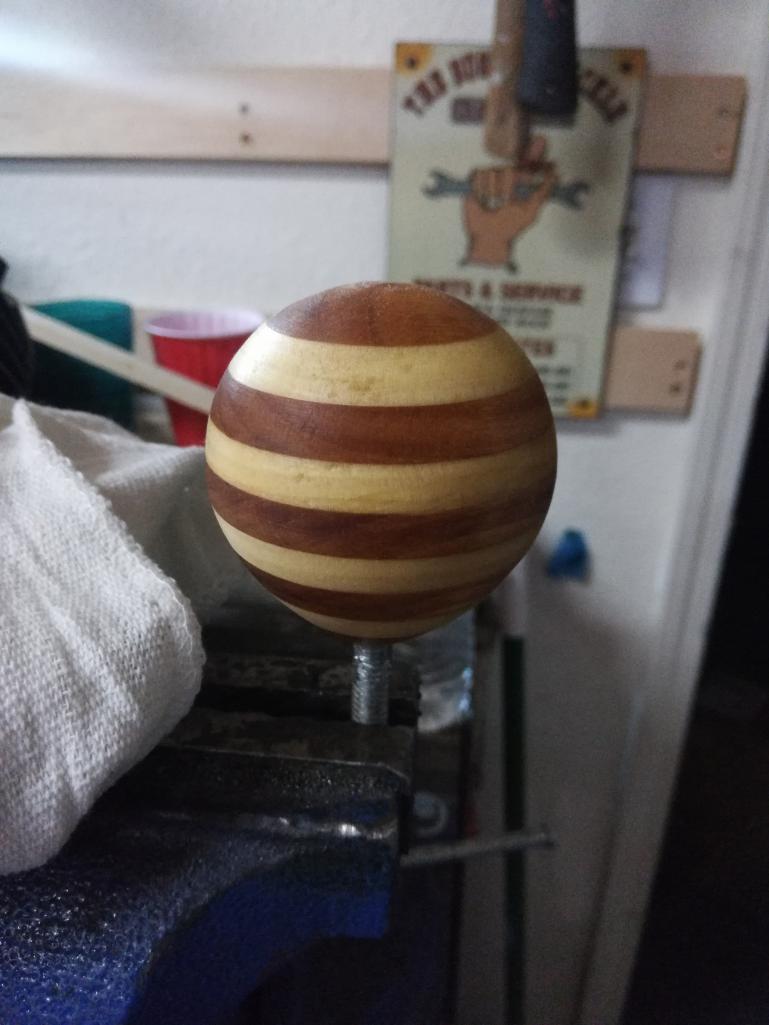
|
   |

 
|
| tygaboy |
Apr 28 2019, 07:18 AM
Post
#762
|
|
914 Guru Group: Members Posts: 5,720 Joined: 6-October 15 From: Petaluma, CA Member No.: 19,241 Region Association: Northern California |
Andrew - if you haven't already, you may want to check with Tap Plastics to see if they have a foam that is more thermally/dimensionally stable. Or, consider starting with pre-made foam blocks. Google "modeling foam".
When I was doing this sort of thing for the carbon gas tank I made for my motorcycle, I used (please don't laugh) foam, bondo, Popsicle sticks and hot glue to make the plug. Whatever it took to get a stable (enough) substructure that supported being top coated so I could then get the final shape and finish I needed. If there's anything I can do to help, please let me know. BTW, I just checked the dictionary for "custom fabrication". It's defined as "Lot of work for not a lot of progress." (IMG:style_emoticons/default/poke.gif) (IMG:style_emoticons/default/lol-2.gif) We are of a kind, your dad, you and me... |
|
|
|
| 76-914 |
Apr 28 2019, 07:56 AM
Post
#763
|
|
Repeat Offender & Resident Subaru Antagonist Group: Members Posts: 13,823 Joined: 23-January 09 From: Temecula, CA Member No.: 9,964 Region Association: Southern California |
(IMG:style_emoticons/default/agree.gif) Michaels, Hobby Lobby, etc stock the foam blocks that florist use. I hot glue them together and file or sand to shape. This type of styrofoam will not melt if you choose to use the styrene resin vs epoxy resin. If I need to make a small plug I will use modeling clay because foam can be a PITA to work with when going small. The downside is digging out the clay afterwards. (IMG:style_emoticons/default/beerchug.gif)
|
|
|
|
| Chris914n6 |
Apr 28 2019, 12:26 PM
Post
#764
|
|
Jackstands are my life. Group: Members Posts: 3,510 Joined: 14-March 03 From: Las Vegas, NV Member No.: 431 Region Association: Southwest Region |
^^ Wrap the foam in foil/tape and the resin won't matter.
You can also use sheet foam (couch cushions), glue in layers, and shape it with a carving knife. Coat in house paint & you have a decent base for fiberglass. I'd fab a simple metal frame for the gauges and cover with a dash mat. Make it pretty after WCR.... |
|
|
|
| Andyrew |
Apr 28 2019, 02:02 PM
Post
#765
|
|
Spooling.... Please wait Group: Members Posts: 13,380 Joined: 20-January 03 From: Riverbank, Ca Member No.: 172 Region Association: Northern California |
Thanks all for the advice (IMG:style_emoticons/default/smile.gif)
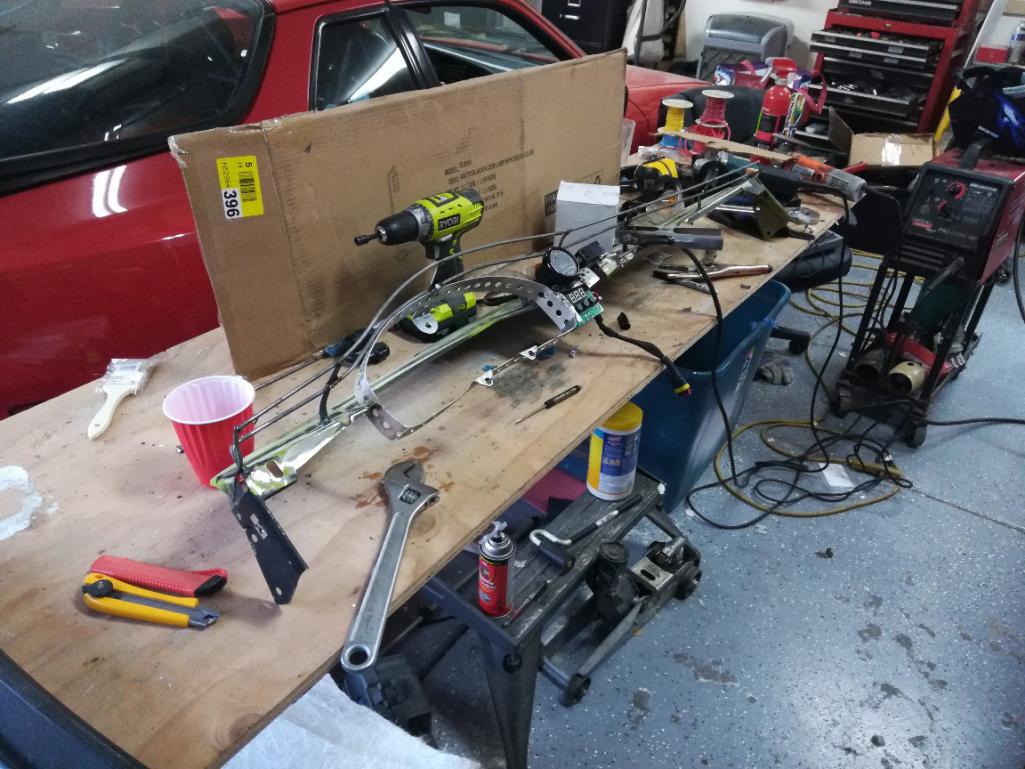
Got some steel strips and rods from the hardware store. I'm going to mock it up today and start going at it. I can get everything in place in steel much faster than fiberglass/foam since that's where my skills are at. First thing will be a casing for the guage cluster for it to lie in. I have that 75% done. Pictures when I come back from lunch. (IMG:style_emoticons/default/smile.gif) |
|
|
|
| Andyrew |
Apr 28 2019, 10:39 PM
Post
#766
|
|
Spooling.... Please wait Group: Members Posts: 13,380 Joined: 20-January 03 From: Riverbank, Ca Member No.: 172 Region Association: Northern California |
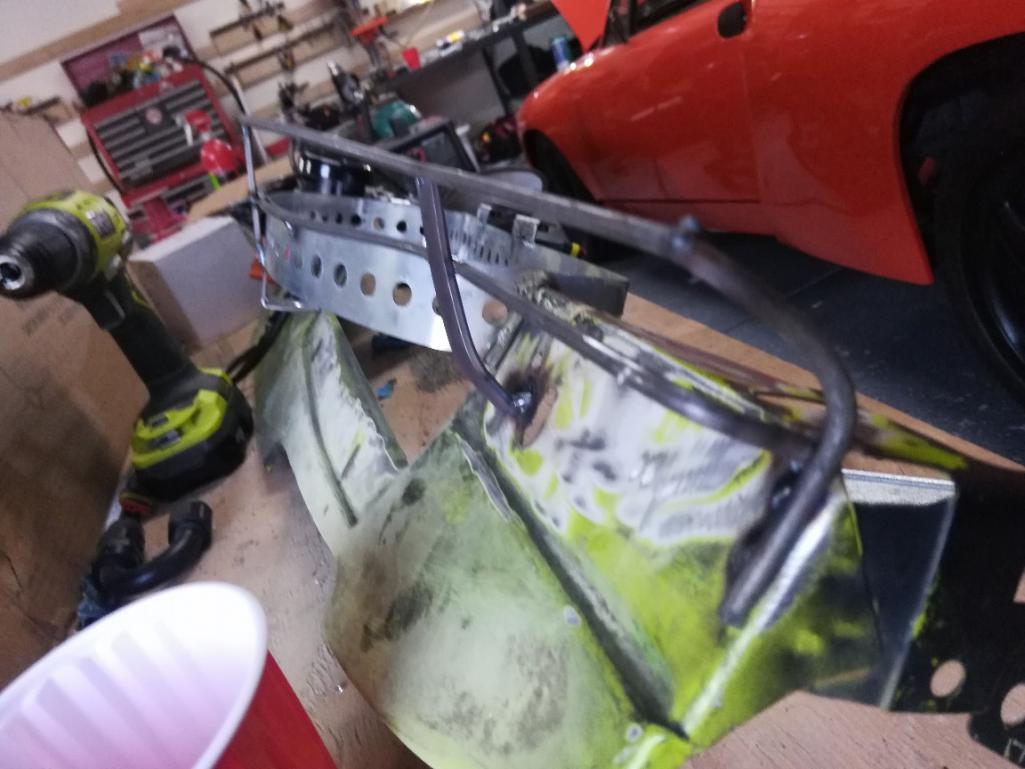
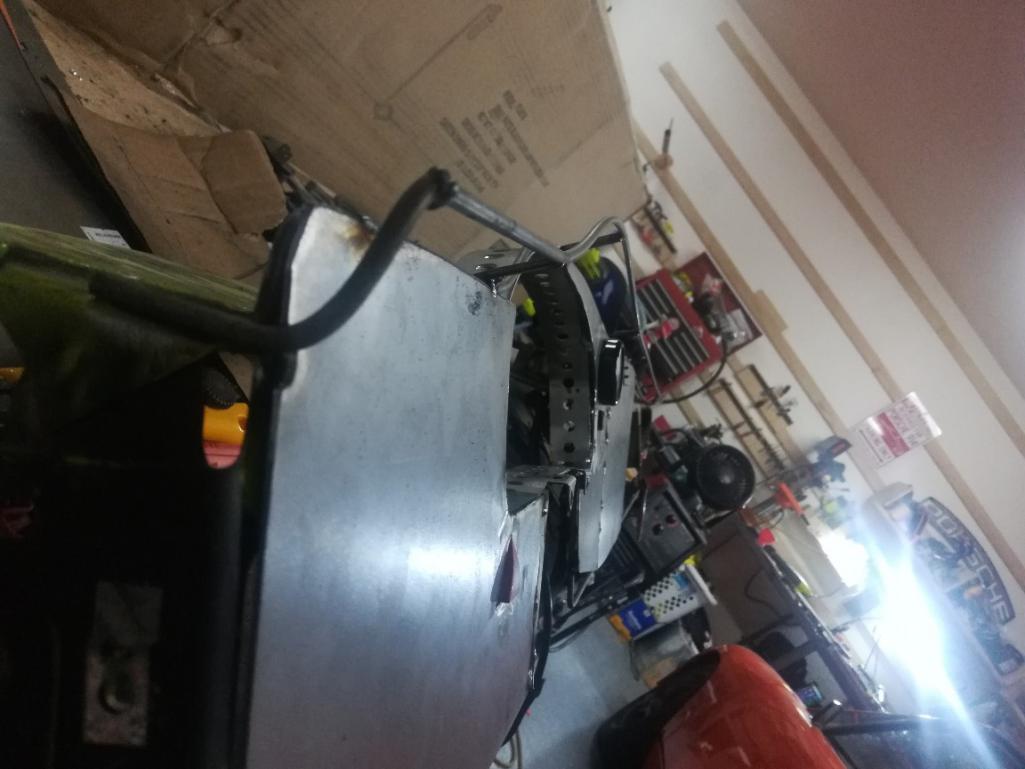
Guage cluster holder turned out nice. Bent it by hand, welded some tabs tacked it in place and removed the metal dash.
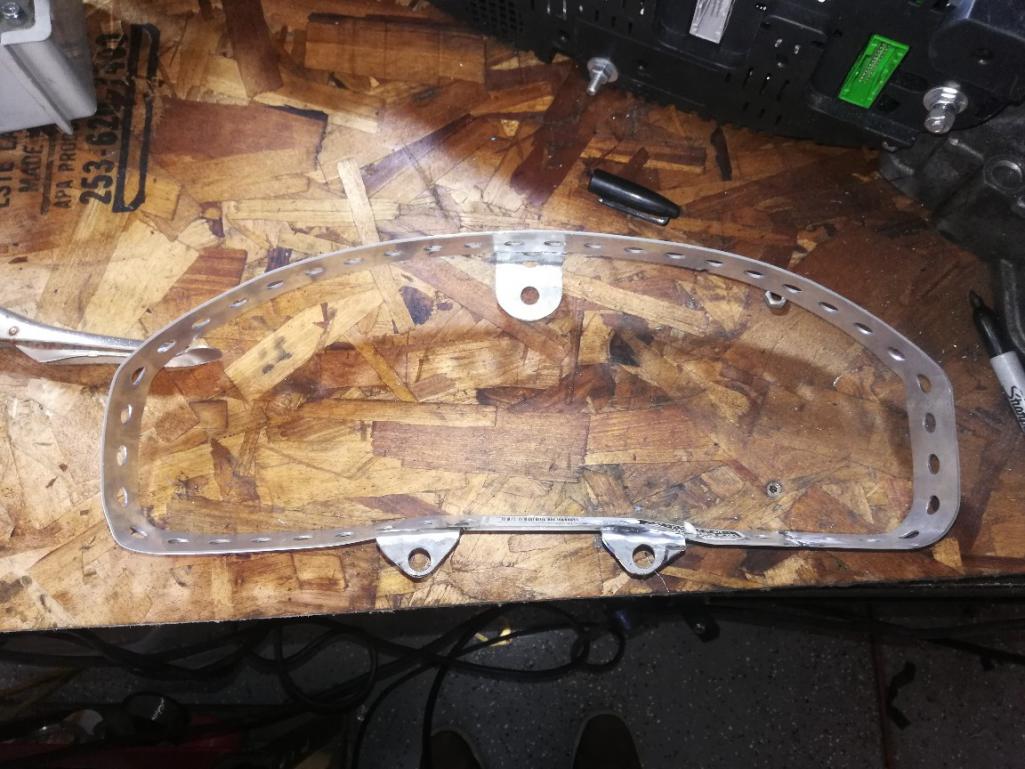 Wire framed the layout that I like. Added some supports and am mocking up placement of guages. 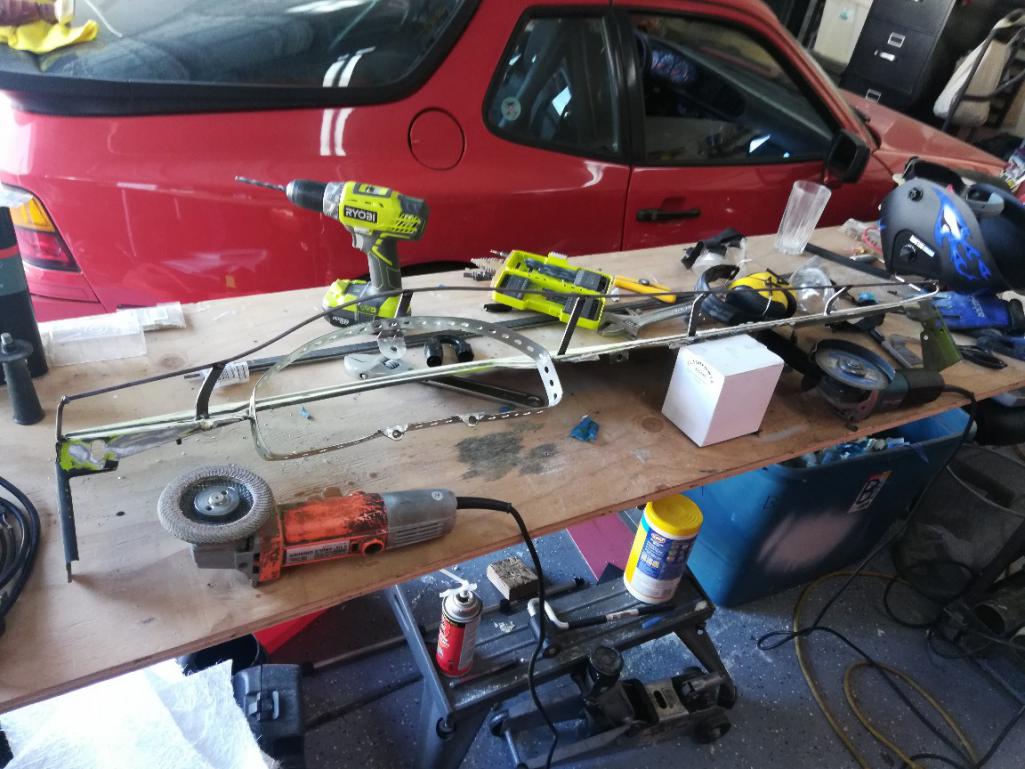 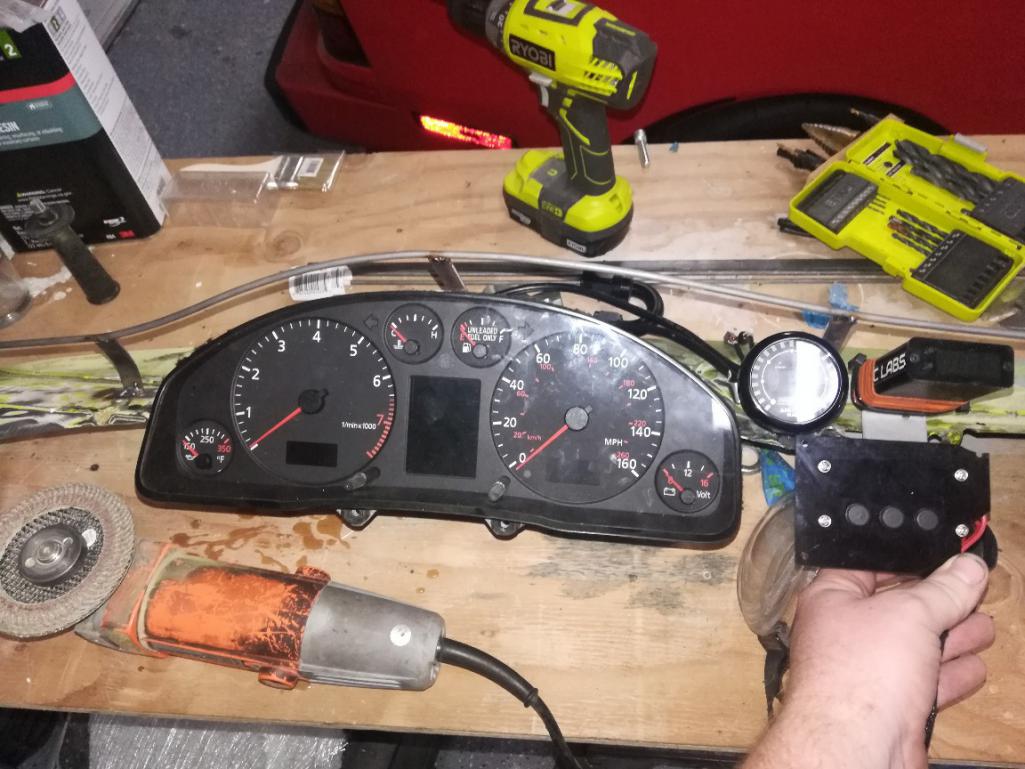 Nothing is set in stone. Thoughts on layout? The round one is AFR, small rectangle is boost, and large rectangle on the bottom is intercooler. I have another for water pump I am debating putting behind a door as I don't really need to watch it. Kind of hard to tell from the pics but I intend to do the say beauty overhang on as on the fiberglass piece. Should help with sun shading as well as the overall look. |
|
|
|
| Andyrew |
Apr 30 2019, 01:32 PM
Post
#767
|
|
Spooling.... Please wait Group: Members Posts: 13,380 Joined: 20-January 03 From: Riverbank, Ca Member No.: 172 Region Association: Northern California |
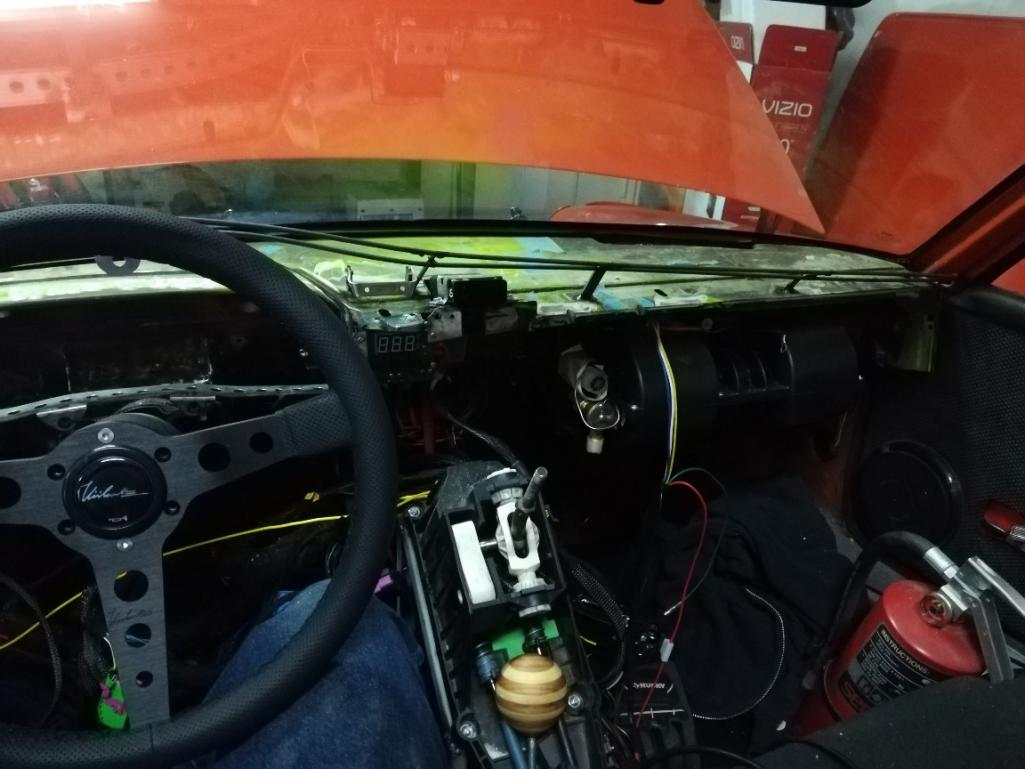
As part of the interior redo I decided my "WINK" mirror was a bit out of place and went for a BMW unit. 20 mins of modifications and it fits great.
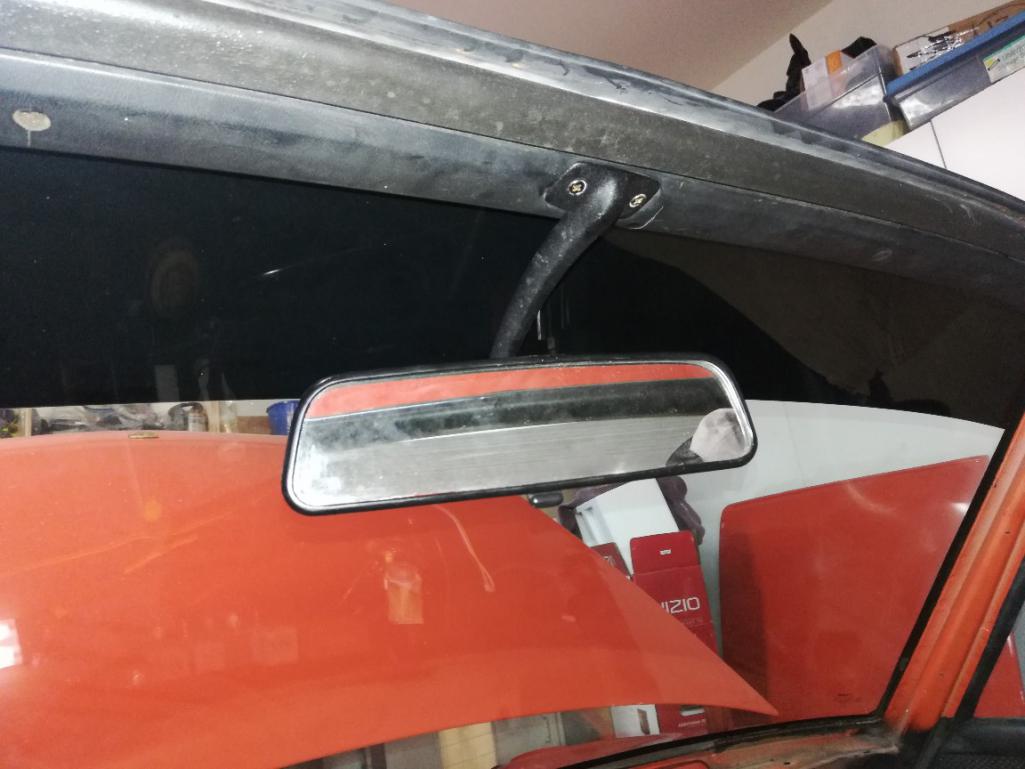 Mounted 3 guages last night. Focused on placement and LCD location (all three are red). 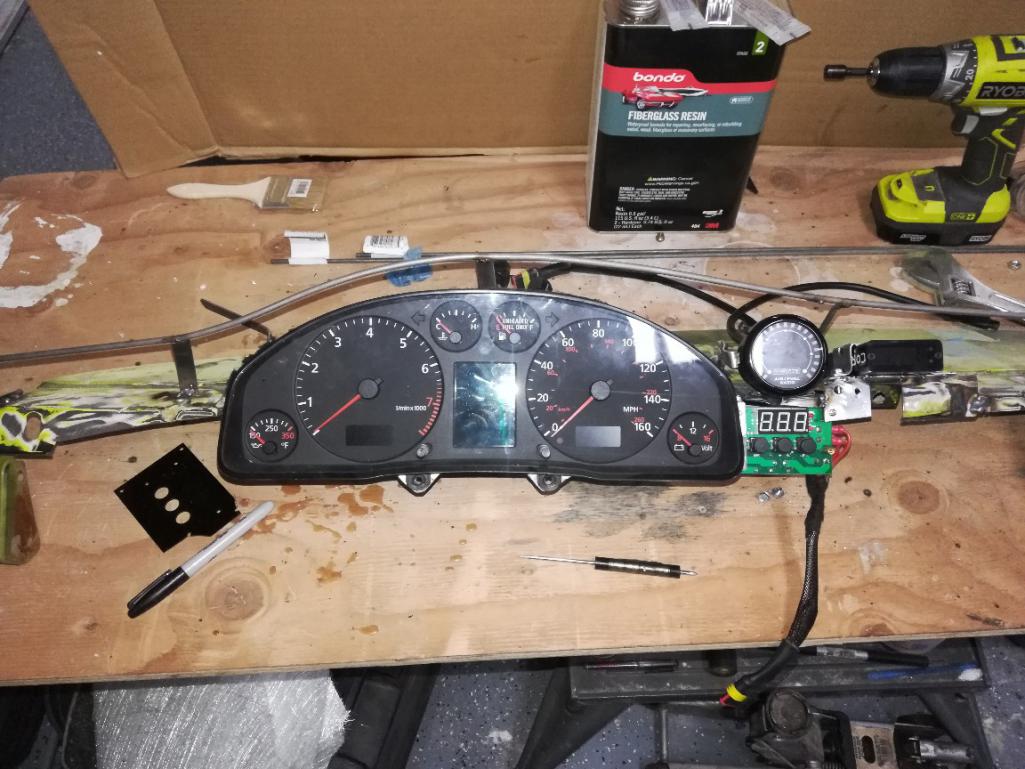 I've determined the best course for building this dash is to have the upper top removable for wiring and easy removal and then the front panel to be welded. Not 100% on that but it's what's in my head right now.  Next step is the backing for the front. I'd like about a1-2" lip.  |
|
|
|
| tygaboy |
Apr 30 2019, 04:01 PM
Post
#768
|
|
914 Guru Group: Members Posts: 5,720 Joined: 6-October 15 From: Petaluma, CA Member No.: 19,241 Region Association: Northern California |
Fab-ulous! I really enjoy watching you come up with ways of getting the results you want. Seems like we're in that same boat of "hmmm, I think I need to try that again!"
Looks really nice - keep up the great work and we'll see you on the 18th. |
|
|
|
| 76-914 |
Apr 30 2019, 06:01 PM
Post
#769
|
|
Repeat Offender & Resident Subaru Antagonist Group: Members Posts: 13,823 Joined: 23-January 09 From: Temecula, CA Member No.: 9,964 Region Association: Southern California |
I'm running the modified BMW mirror that lets me use the 914 visors. Same length as yours. It gave me a better field of view than the stock 914 mirror but I'm long waisted! See you at WCR.
|
|
|
|
| Andyrew |
Apr 30 2019, 11:08 PM
Post
#770
|
|
Spooling.... Please wait Group: Members Posts: 13,380 Joined: 20-January 03 From: Riverbank, Ca Member No.: 172 Region Association: Northern California |
     And my next challenge is moving the air box I made back a couple inches. 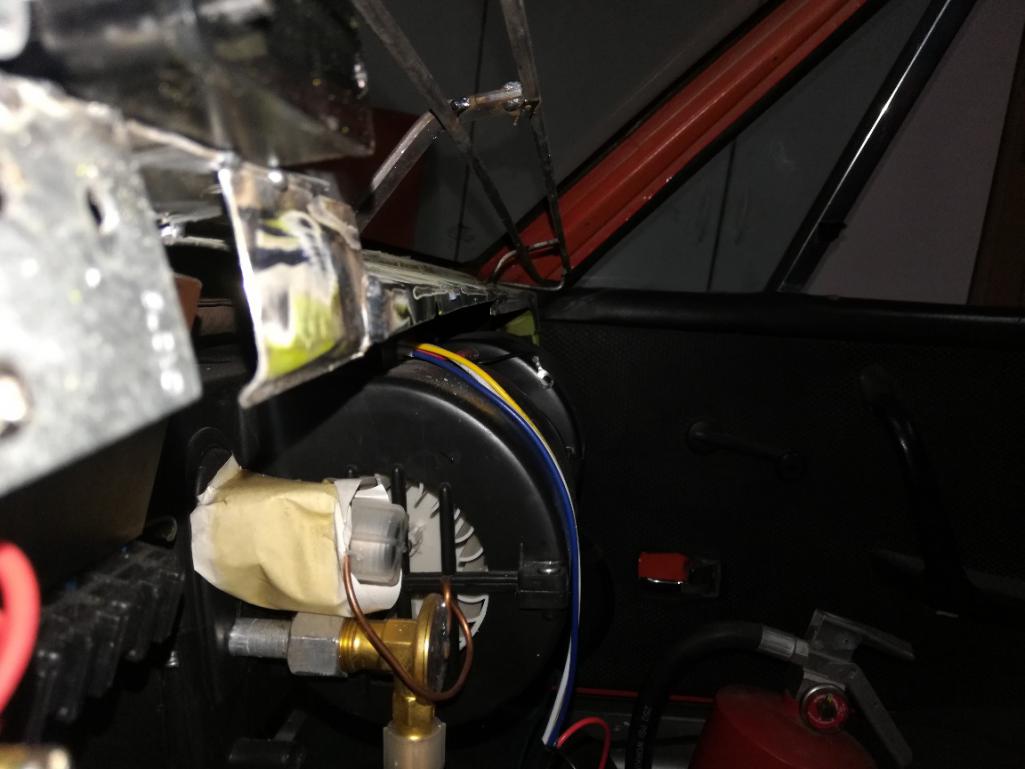 |
|
|
|
| Andyrew |
May 3 2019, 09:18 PM
Post
#771
|
|
Spooling.... Please wait Group: Members Posts: 13,380 Joined: 20-January 03 From: Riverbank, Ca Member No.: 172 Region Association: Northern California |
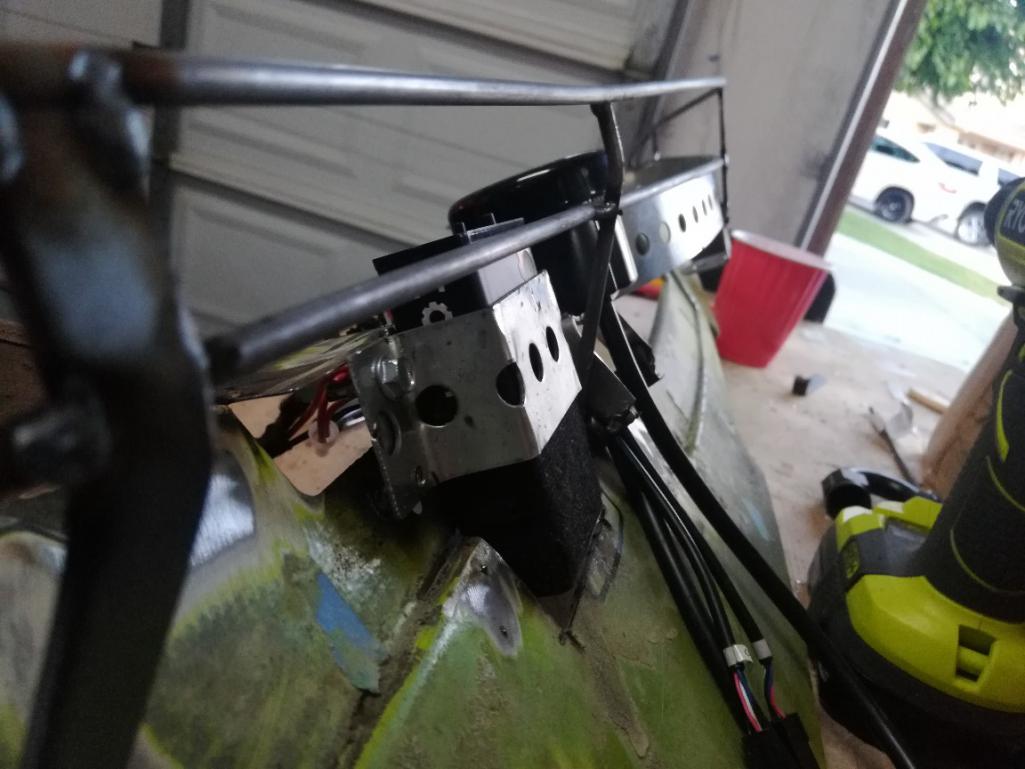
I opened up the firewall a bit more on the bottom and removed the old mounting system I built for the ac/heater box. I built a cage for the box just like I did for the guage cluster but I haven't mounted it. I'll work on that later, I just wanted to make sure I could get it all to work at a later date.
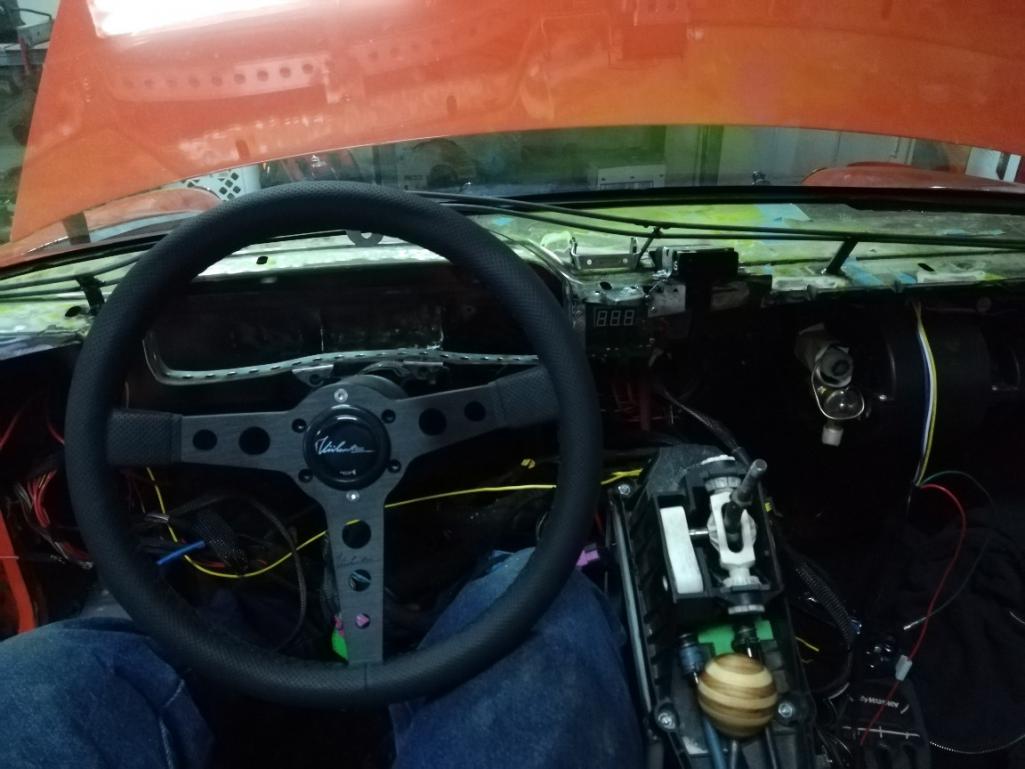
  I designed a layout for how the dash pieces will work and it's very similar to the original dash. I'm making everything out of steel as I can work with it much easier. 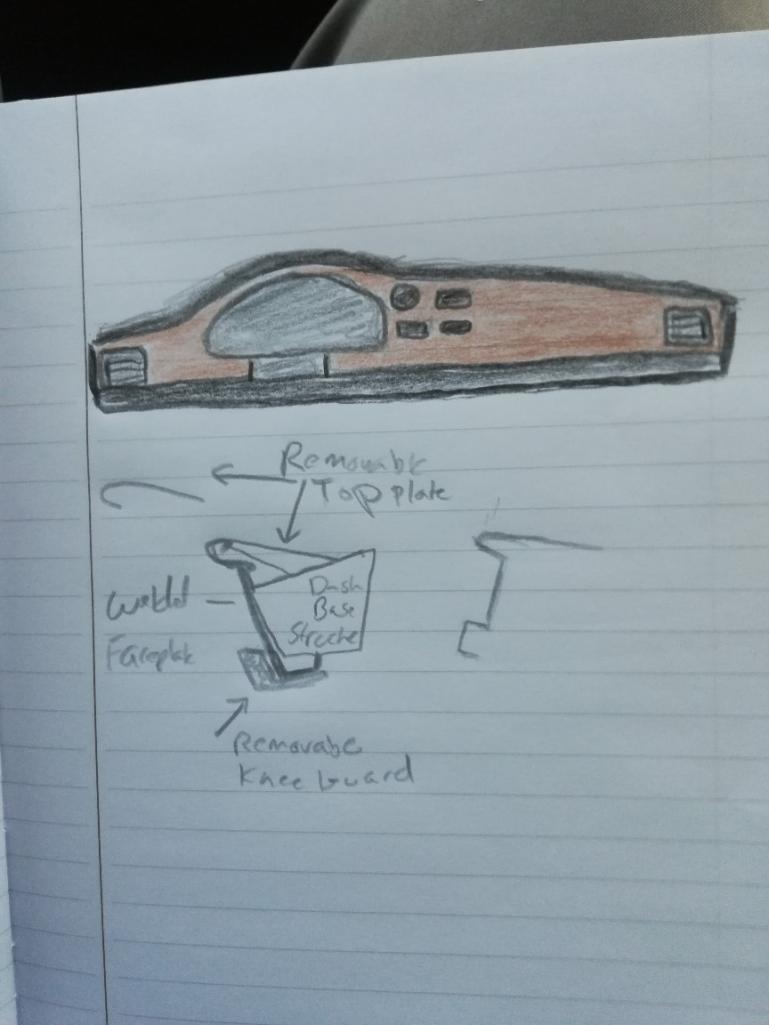 I mounted up the ignition switch and decided to put it on the left side just for fun. 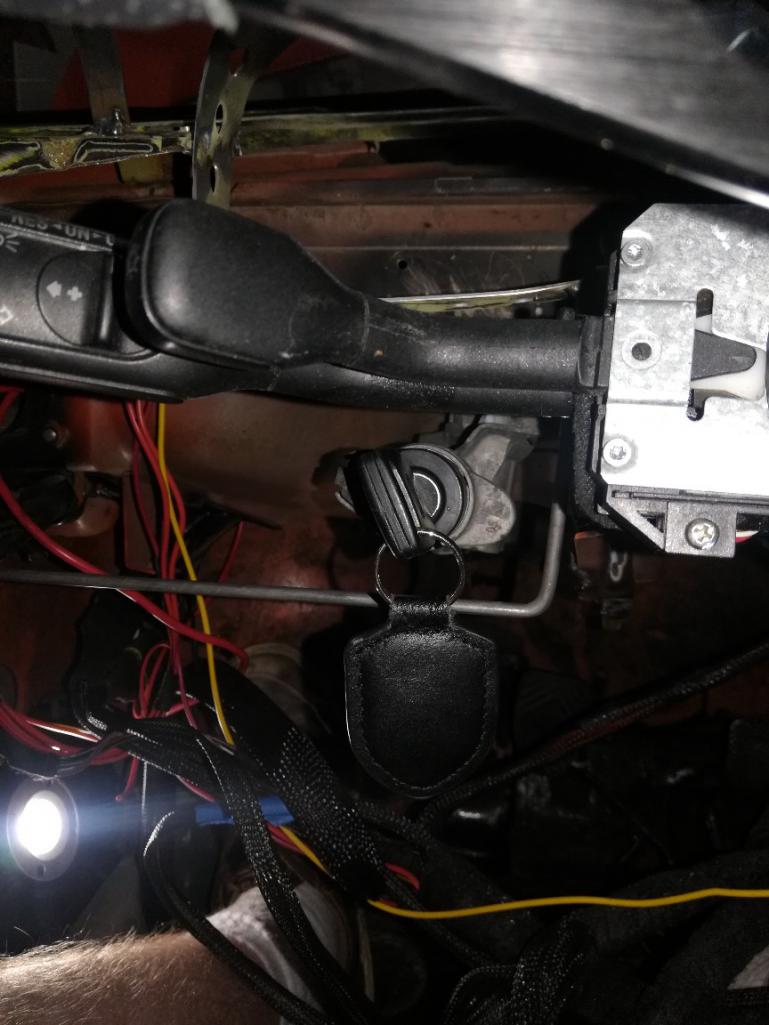 Working on the dash face I started with thin guage steel but thought against it and decided to go with thick guage steel to build a strong base for the dash. I'll go to thinner guage for the dash top and bottom. 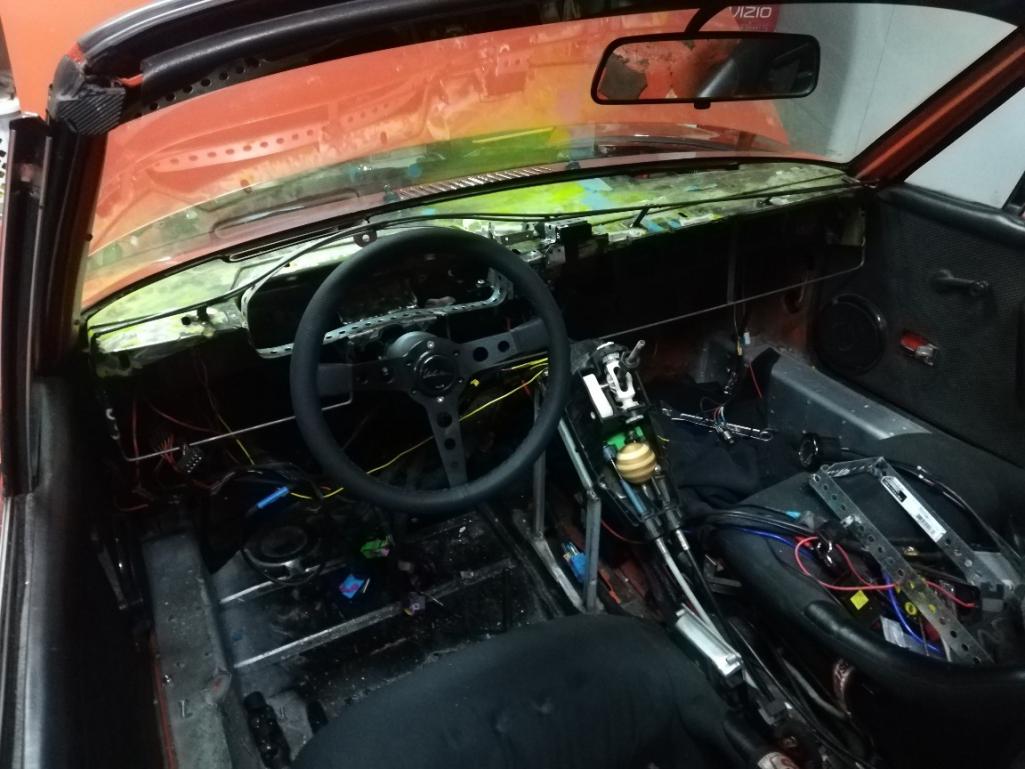 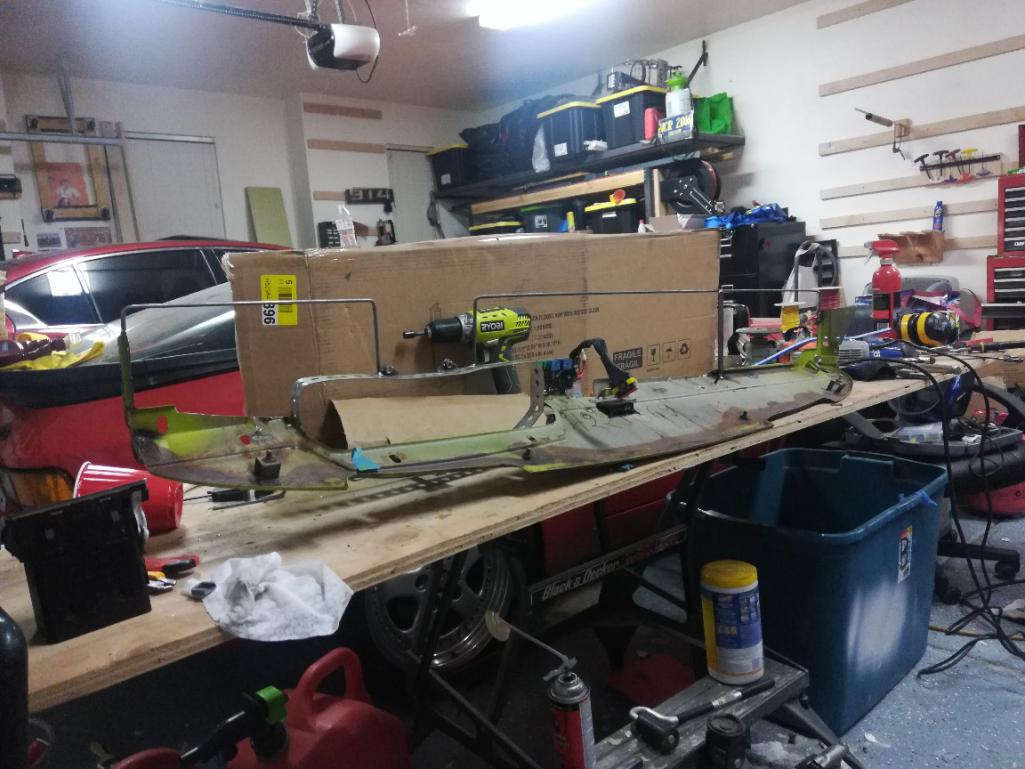 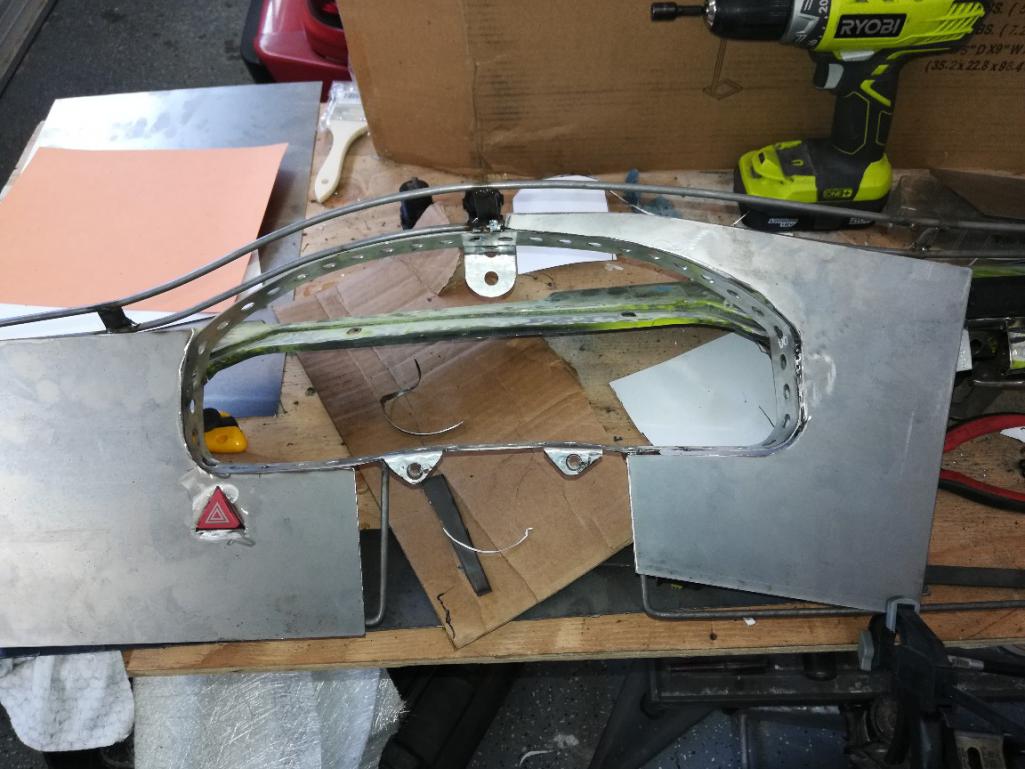 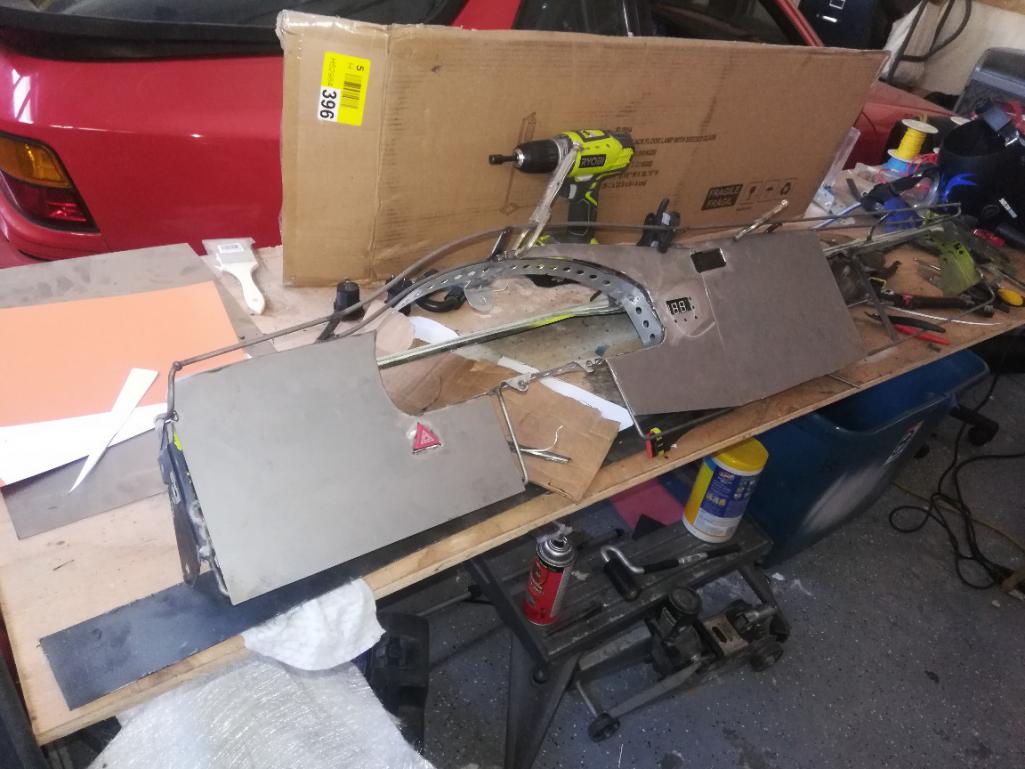 |
|
|
|
| Andyrew |
May 4 2019, 02:15 AM
Post
#772
|
|
Spooling.... Please wait Group: Members Posts: 13,380 Joined: 20-January 03 From: Riverbank, Ca Member No.: 172 Region Association: Northern California |
And from the last photo to here was 4 hrs of fiddling....
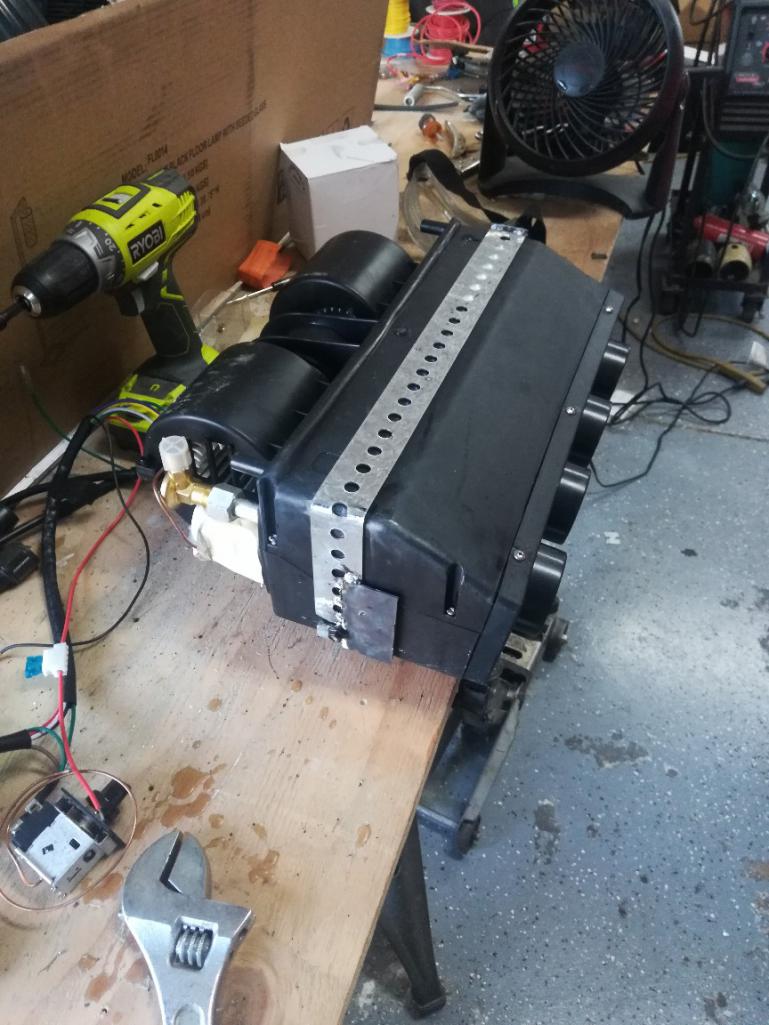
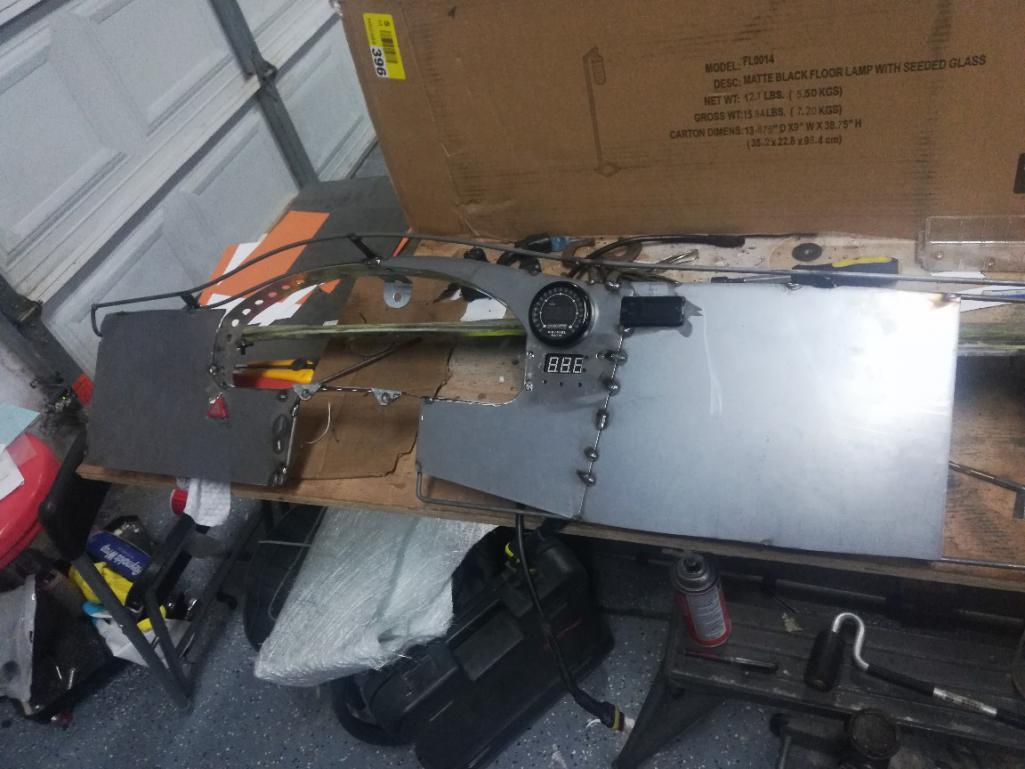  Figured out how I was going to be able to remove the intercooler fan controller Adjust fit some items, lots of metal needed some massaging over the knee to get lined up like I wanted. Cut in the hole for the AFR guage, and did a silly amount of trimming on the dash to get everything how I wanted. Also had to redo the mount. Dumb me thinks I can weld aluminum with steel.... Little things take a lot more time when a toddler is asleep.... Oh and in case your wondering... The holes on the bottom of the intercooler fan controller are for adjusting the temp the fan goes in. I wanted to be able to adjust it but knew I would rarely do so, so I added a small hole to be able to do so. I'll transfer the holes to the fabric when time comes. 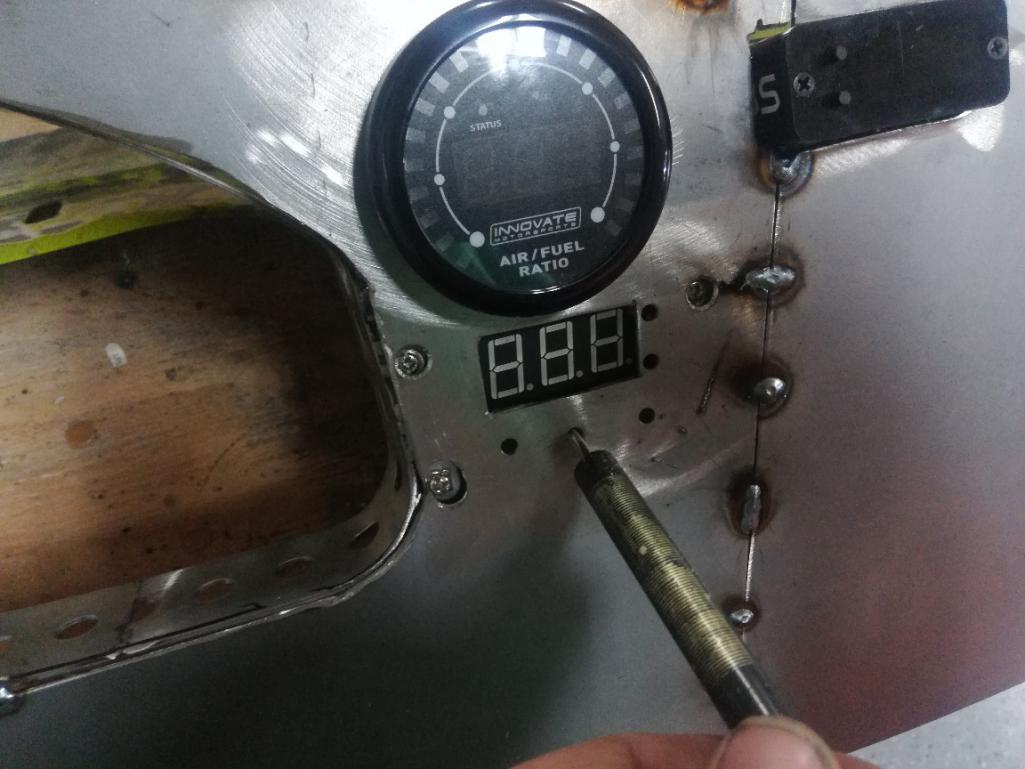 |
|
|
|
| sixnotfour |
May 4 2019, 02:28 AM
Post
#773
|
|
914 Wizard Group: Members Posts: 11,059 Joined: 12-September 04 From: Life Elevated..planet UT. Member No.: 2,744 Region Association: Rocky Mountains |
grinding noise was a lullaby for me.....dads home..
nice dash (IMG:style_emoticons/default/welder.gif) |
|
|
|
| tygaboy |
May 4 2019, 07:16 AM
Post
#774
|
|
914 Guru Group: Members Posts: 5,720 Joined: 6-October 15 From: Petaluma, CA Member No.: 19,241 Region Association: Northern California |
Andrew - Don't mean to hijack but:
If you'd like, bring the dash with you on the 18th and we (you!) can maybe give a go to measuring it out. We could translate that into a .dxf and we could cut you a face plate on the plasma table. I have some .050 aluminum and some 18 and 20 ga steel. Add some beading or a strategically placed break for some add'l strength? I'd be happy to walk you through the process so you'd be making it. Here's an example of some panels I did for the Lotus 7 replica. Just a thought... (IMG:style_emoticons/default/idea.gif) Attached thumbnail(s) 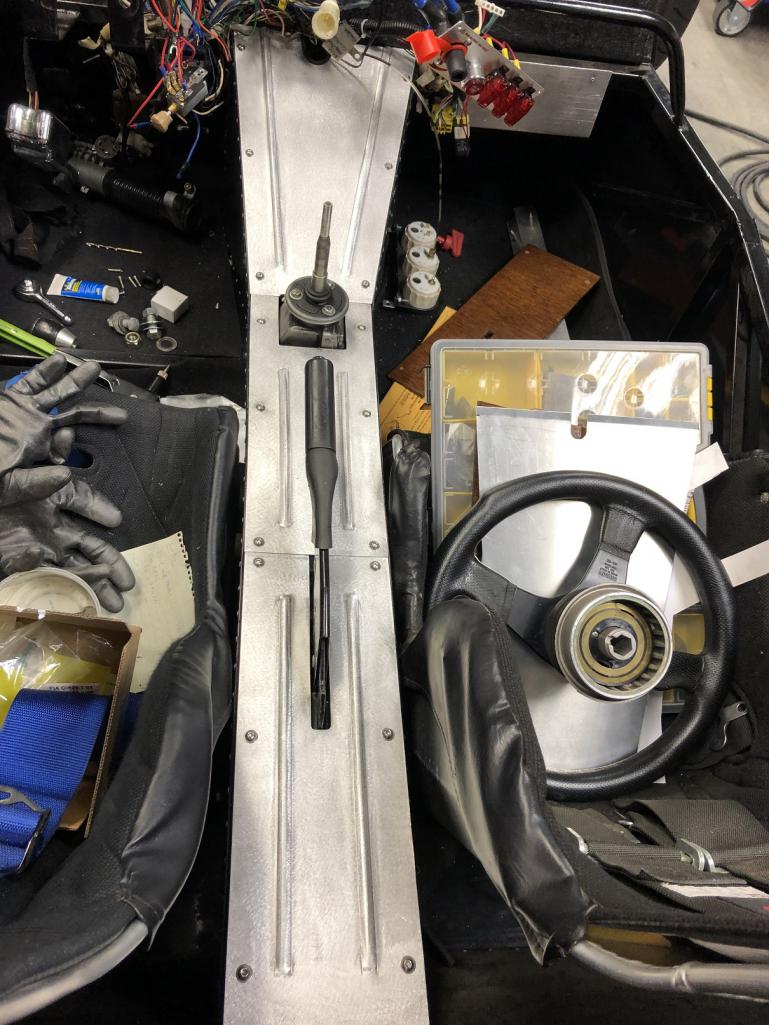
|
|
|
|
| Andyrew |
May 4 2019, 02:08 PM
Post
#775
|
|
Spooling.... Please wait Group: Members Posts: 13,380 Joined: 20-January 03 From: Riverbank, Ca Member No.: 172 Region Association: Northern California |
I'll take you up on that offer for the center console Chris. The dash is pretty much doneand I don't need any additional features to it for my design concept.
The center console on the other hand could definitely use some design characteristics as right now it'll just be flat panels. |
|
|
|
| Andyrew |
May 4 2019, 11:05 PM
Post
#776
|
|
Spooling.... Please wait Group: Members Posts: 13,380 Joined: 20-January 03 From: Riverbank, Ca Member No.: 172 Region Association: Northern California |
Progress on the dash.
Drilled the cutout for the ignition. 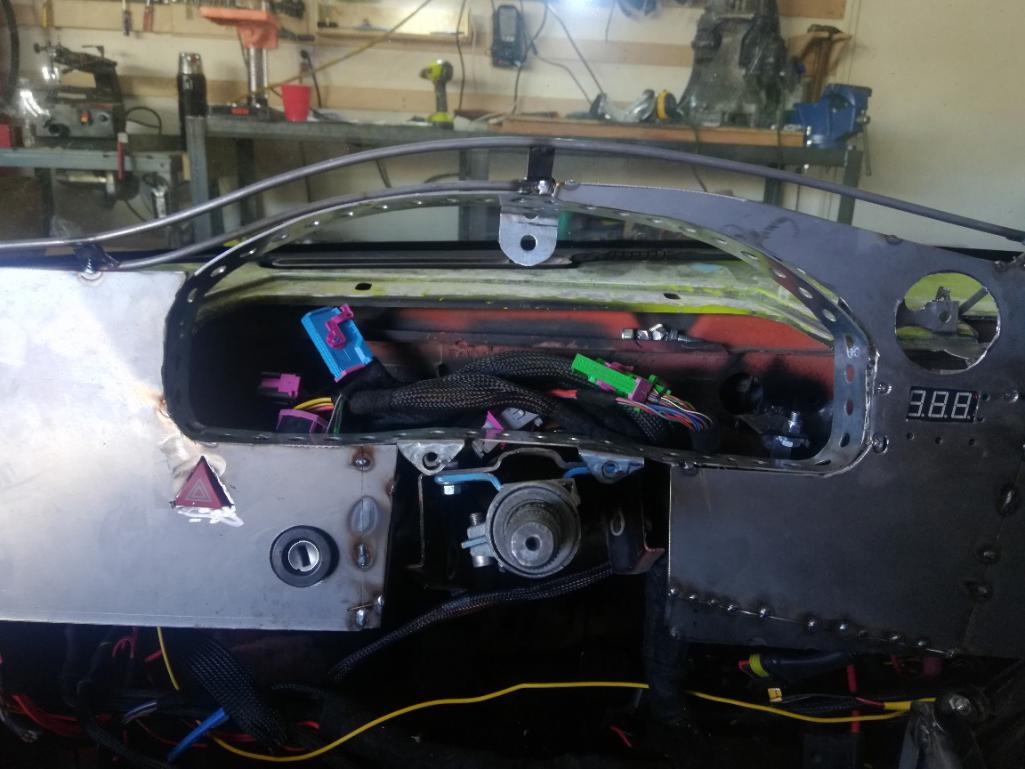 Dropped the relay box as the dash was resting on it. 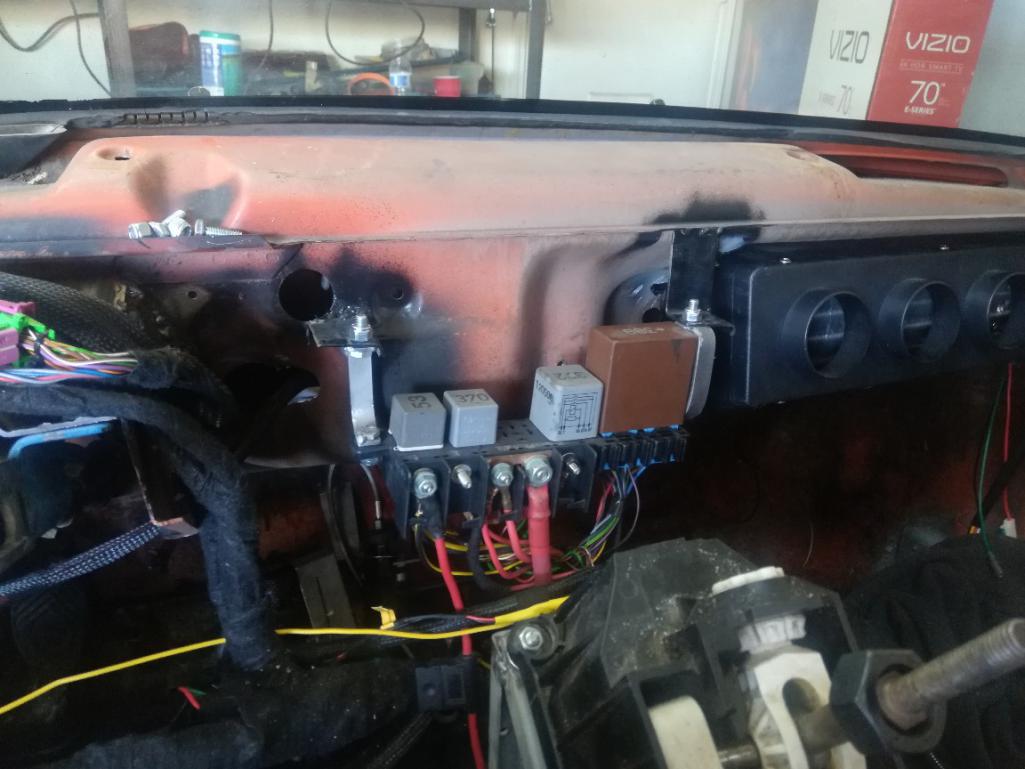 Added the rest of the dash face. 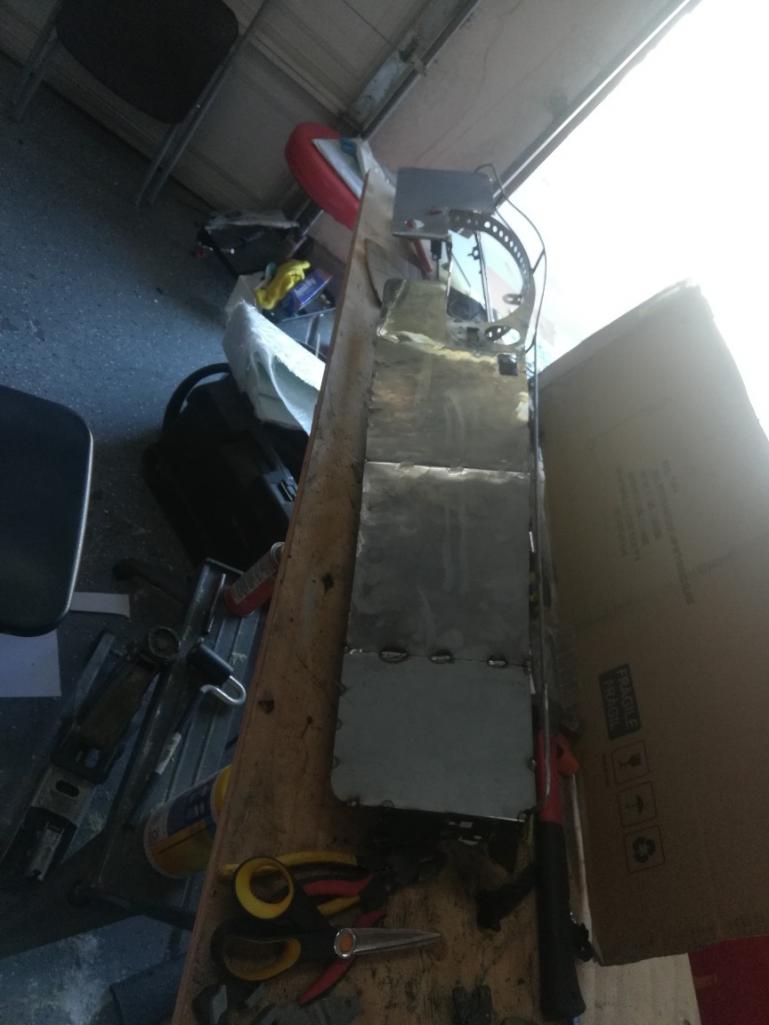 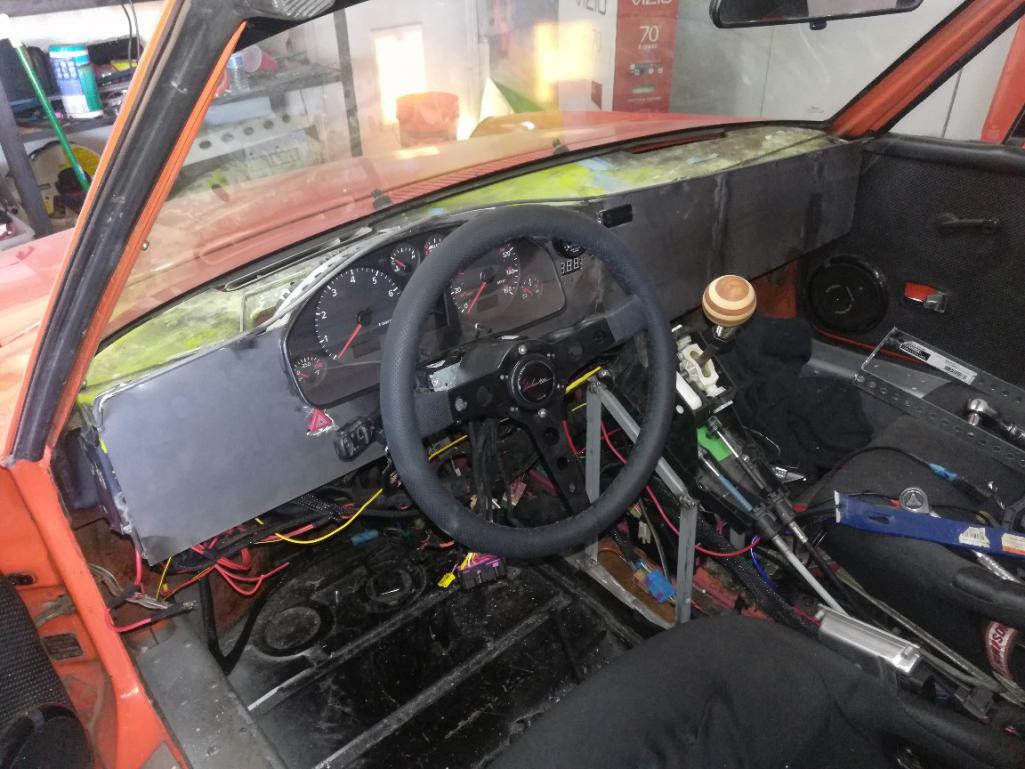 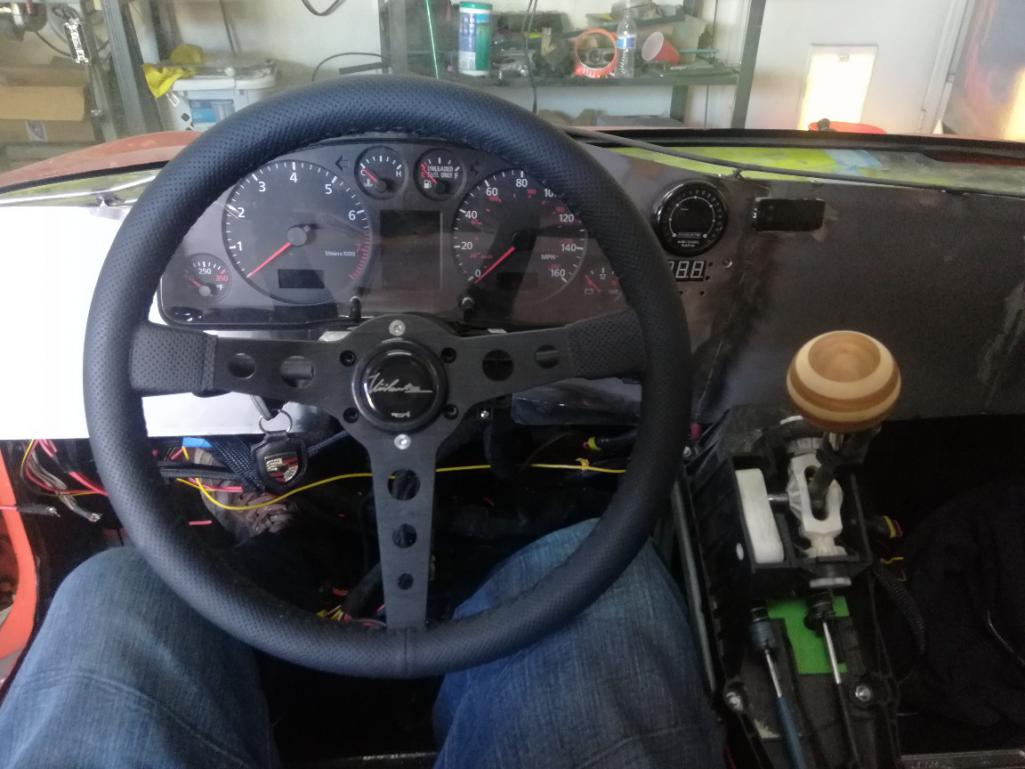 Figured out wire arrangements a bit and so far am pretty happy how things are laying out. Next on the list is getting back to mechanical. I'll need to bleed the clutch to see if I just accidentally got air in the lines or why my clutch is to the floor. |
|
|
|
| tygaboy |
May 5 2019, 07:08 AM
Post
#777
|
|
914 Guru Group: Members Posts: 5,720 Joined: 6-October 15 From: Petaluma, CA Member No.: 19,241 Region Association: Northern California |
(IMG:style_emoticons/default/smash.gif) (IMG:style_emoticons/default/welder.gif)
Isn't it "fun" as you try and bring to life the vision in your head? It's so interesting for me to watch someone else go through this. Seeing the "first I tried X, then realized Y so redid things because of Z." You're making great progress. I may have missed it but are you planning to paint or upholster the dash face? |
|
|
|
| Andyrew |
May 5 2019, 09:53 AM
Post
#778
|
|
Spooling.... Please wait Group: Members Posts: 13,380 Joined: 20-January 03 From: Riverbank, Ca Member No.: 172 Region Association: Northern California |
Chris, these kind of moments when things work are what makes it all worthwhile.
For the dash face, when I learned that 914rubber had built a hot press that they used with vinyl for recreating the 914 basketweve I asked if they could press some fabric of mine. Some money exchanged hands (wasn't cheep) and I got my hands on enough material in my color to do the dash face and door panels. I always wanted brown leather interior on a car so here we are... A couple posts up I updated my drawing of my dash concept. The brown is this material. Attached thumbnail(s) 
|
|
|
|
| tygaboy |
May 5 2019, 10:16 AM
Post
#779
|
|
914 Guru Group: Members Posts: 5,720 Joined: 6-October 15 From: Petaluma, CA Member No.: 19,241 Region Association: Northern California |
|
|
|
|
| 76-914 |
May 5 2019, 05:04 PM
Post
#780
|
|
Repeat Offender & Resident Subaru Antagonist Group: Members Posts: 13,823 Joined: 23-January 09 From: Temecula, CA Member No.: 9,964 Region Association: Southern California |
If you were going to leave it as is I would have dubbed thee "Mad Max". (IMG:style_emoticons/default/biggrin.gif)
|
|
|
|
|
1 User(s) are reading this topic (1 Guests and 0 Anonymous Users)
0 Members:

|
Lo-Fi Version | Time is now: 6th December 2025 - 01:37 PM |
Invision Power Board
v9.1.4 © 2025 IPS, Inc.