|
|

|
Porsche, and the Porsche crest are registered trademarks of Dr. Ing. h.c. F. Porsche AG.
This site is not affiliated with Porsche in any way. Its only purpose is to provide an online forum for car enthusiasts. All other trademarks are property of their respective owners. |
|
|
  |
| 76-914 |
 May 23 2019, 08:23 AM May 23 2019, 08:23 AM
Post
#821
|
|
Repeat Offender & Resident Subaru Antagonist           Group: Members Posts: 13,835 Joined: 23-January 09 From: Temecula, CA Member No.: 9,964 Region Association: Southern California 
|
I can hear some air by the master so who knows.... the whole thing is not well layed out for a good bleeding. Really needs a power bleeder and not s vacuum bleeder. Ugh. My reservoir is the highest point I'm my system. The lowest is where it exits the tunnel via the clutch tube. From there it is strapped up against the engine/trans, then level about 1' then up to the slave. In order to bleed the system I remove the strap at the engine/trans creating a temporary "new" low spot. Next I break the flare nut loose at the slave cylinder and wait to let gravity do it's job. The next morning I top off the reservoir then pump clutch and bleed the remainder of the air and clamp. Finally the tube is strapped back to the engine/trans. I didn't plan or foresee this method. I just got lucky. There aren't any "peaks and valleys" in the line. It flows downhill from reservoir to MC to the low spot I "create" by removing a strap. And that low point is only 2' from and directly below the SC. I'd say stay after it but I don't believe you need any encouragement at this point. See you at WCR. |
| dan10101 |
 May 23 2019, 08:29 AM May 23 2019, 08:29 AM
Post
#822
|
|
TORQUE-o-holic    Group: Members Posts: 1,140 Joined: 29-April 03 From: Eagle Point, Or Member No.: 626 Region Association: Pacific Northwest |
Tried the metal slave cyl. The quality on the unit looks great. But the damn bleed screw is metal on metal.... What idiot thought that would work? Won't hold pressure, bleed screw was cast so I cleaned up the castings and still no go. Damn thing needs a rubber seal. I might experiment with one sometime later but I have a spare plastic slave. First things first was to try and get fluid to pull through the line... No luck. I'm going to need someone else to help me with this as this fkin thing is not working. I messaged a friend so hopefully tomorrow or Friday I'll have the clutch properly bled. ... Send me a pict of your slave, I have a spare, it's a pull type. I'll bring my Mityvac pressure bleeder down JIC. I just need to see your reservoir cap. |
| Andyrew |
 May 23 2019, 08:36 AM May 23 2019, 08:36 AM
Post
#823
|
|
Spooling.... Please wait           Group: Members Posts: 13,380 Joined: 20-January 03 From: Riverbank, Ca Member No.: 172 Region Association: Northern California 
|
Tried the metal slave cyl. The quality on the unit looks great. But the damn bleed screw is metal on metal.... What idiot thought that would work? Won't hold pressure, bleed screw was cast so I cleaned up the castings and still no go. Damn thing needs a rubber seal. I might experiment with one sometime later but I have a spare plastic slave. First things first was to try and get fluid to pull through the line... No luck. I'm going to need someone else to help me with this as this fkin thing is not working. I messaged a friend so hopefully tomorrow or Friday I'll have the clutch properly bled. ... Send me a pict of your slave, I have a spare, it's a pull type. I'll bring my Mityvac pressure bleeder down JIC. I just need to see your reservoir cap. Its tiny. Think motorcycle. Like 1.5" I was thinking I would get a spare cap, drill a hole in it and put a nipple on it so I can pressurize it. https://www.ebay.com/itm/For-Audi-Porsche-B...7M/152549321531 |
| Andyrew |
 May 23 2019, 08:38 AM May 23 2019, 08:38 AM
Post
#824
|
|
Spooling.... Please wait           Group: Members Posts: 13,380 Joined: 20-January 03 From: Riverbank, Ca Member No.: 172 Region Association: Northern California 
|
I can hear some air by the master so who knows.... the whole thing is not well layed out for a good bleeding. Really needs a power bleeder and not s vacuum bleeder. Ugh. My reservoir is the highest point I'm my system. The lowest is where it exits the tunnel via the clutch tube. From there it is strapped up against the engine/trans, then level about 1' then up to the slave. In order to bleed the system I remove the strap at the engine/trans creating a temporary "new" low spot. Next I break the flare nut loose at the slave cylinder and wait to let gravity do it's job. The next morning I top off the reservoir then pump clutch and bleed the remainder of the air and clamp. Finally the tube is strapped back to the engine/trans. I didn't plan or foresee this method. I just got lucky. There aren't any "peaks and valleys" in the line. It flows downhill from reservoir to MC to the low spot I "create" by removing a strap. And that low point is only 2' from and directly below the SC. I'd say stay after it but I don't believe you need any encouragement at this point. See you at WCR. I've got a decent amount of loops in the line and I tried that last night essentially. We will see what actually happened. I really think pressure is required from the reservoir side. |
| Andyrew |
 May 23 2019, 08:39 AM May 23 2019, 08:39 AM
Post
#825
|
|
Spooling.... Please wait           Group: Members Posts: 13,380 Joined: 20-January 03 From: Riverbank, Ca Member No.: 172 Region Association: Northern California 
|
Andrew - Great meeting you at Chris' shop last weekend. I hope to see your car one of these times. It sounds amazing. Cheers, Michael You to Michael! It was fun chatting with you and your brother (IMG:style_emoticons/default/smile.gif) |
| Andyrew |
 May 23 2019, 08:42 AM May 23 2019, 08:42 AM
Post
#826
|
|
Spooling.... Please wait           Group: Members Posts: 13,380 Joined: 20-January 03 From: Riverbank, Ca Member No.: 172 Region Association: Northern California 
|
@Andyrew - Let's pick a date that works to have you come over and do more fab work. Also, let me know if you want me to send the panel you left here or if you're OK waiting til you're here next. Talk soon! Chris Agreed. I've been debating back and forth about what makes sense for me, to try and make another day up there or to just push forward myself here and have you ship it... I need another bend in it which is why it was on the brake, but I was trying to figure out the measurement and how to use your machine. It really makes a lot of sense for me to come up there again with the car. I could get the center console done as well as the lower and possibly the upper dash pretty much in a day. (You know my quality standards so I would just bust through those things now that im familiar with many of your tools a bit more) |
| Andyrew |
 May 25 2019, 02:39 AM May 25 2019, 02:39 AM
Post
#827
|
|
Spooling.... Please wait           Group: Members Posts: 13,380 Joined: 20-January 03 From: Riverbank, Ca Member No.: 172 Region Association: Northern California 
|
Ok some progress.
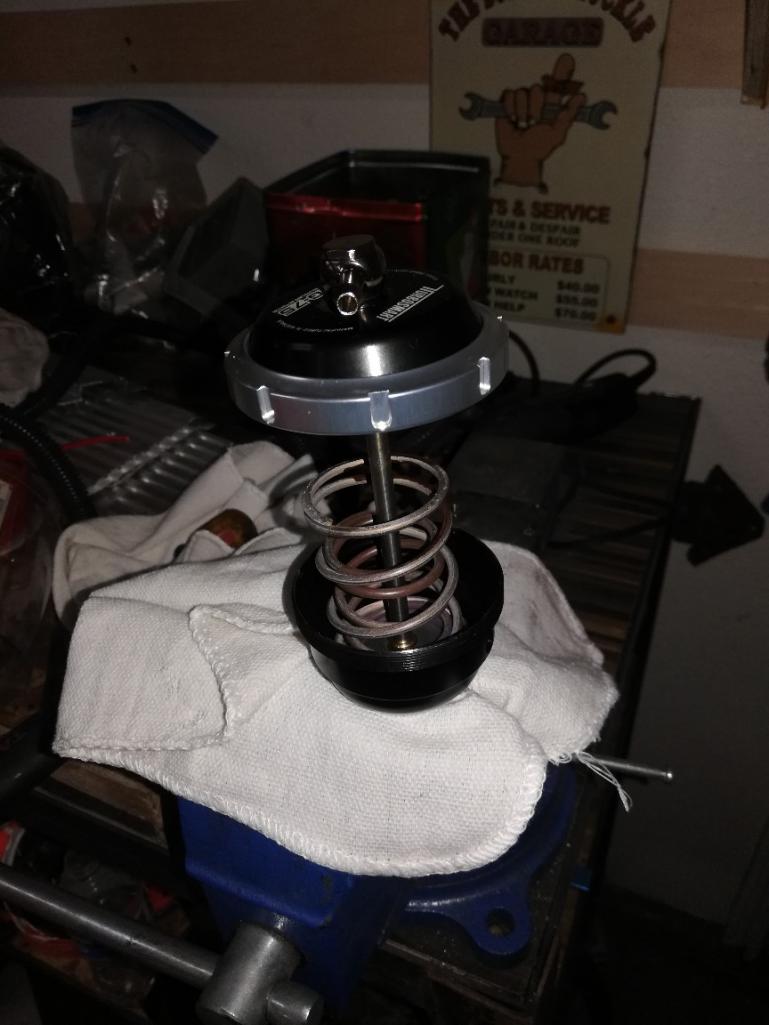 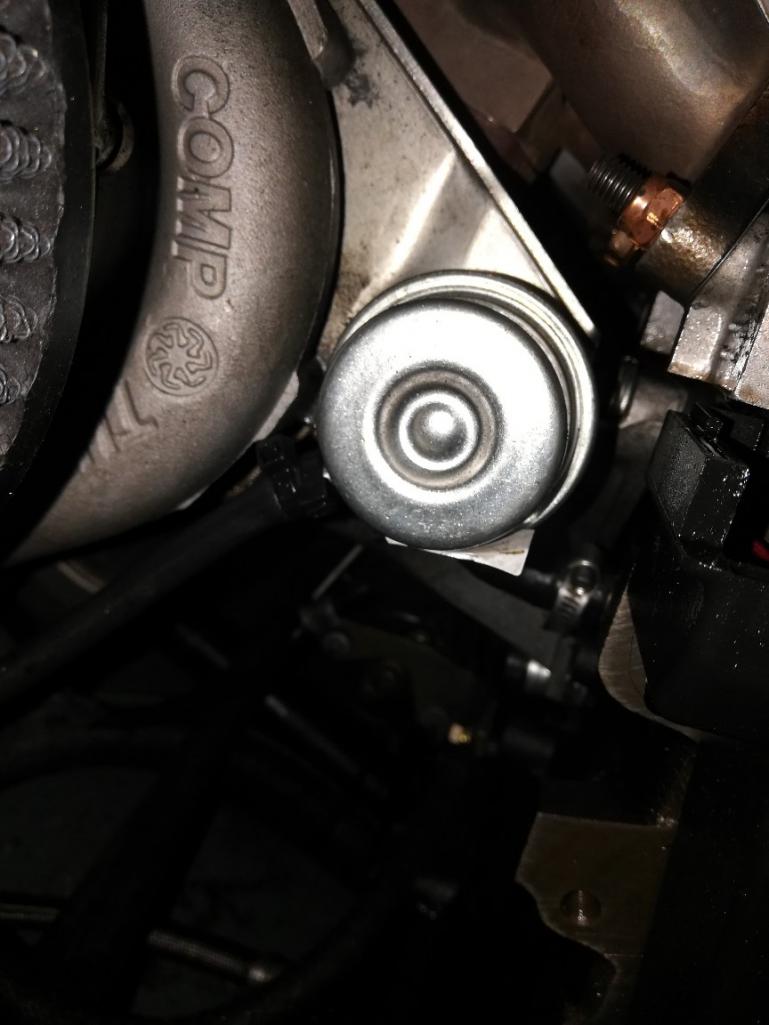 Wastegate came in. I took out a spring so it's 7psi now. It's a bit bigger so fitting it will be difficult. We'll have to work on that after WCR. Too bad, I was hoping to pump it up to 400whp when my dad came down so we could have some nice roll racing. Another note. My tuner said he's going to tune another ECU of mine, I bought a tuner cable for dirt and I'll be able to tune like he does. He's a nice guy and has shown me a bunch. He'll be down tomorrow to set me up. We'll work on it a bit and do some remote tuning and editing. I told him I want an E85 file and I'll just get set up with whatever files I want and I can swap them whenever at a gas station or swap ecu's if something happens. Anyways I'm pretty excited about that (IMG:style_emoticons/default/smile.gif) I removed the brake master and got the lines really flat. I removed the slave and left the line open to the vacuum. It still didn't pull anything so I suspect there was just to much air with me fiddling with it. I decided to cycle the master a bit and finally was getting somewhere. I kept cycling it and it seemed to just pull fluid from the reservor and push it out the line. I did this till the line seemed clear. Then connected the slave and installed it. 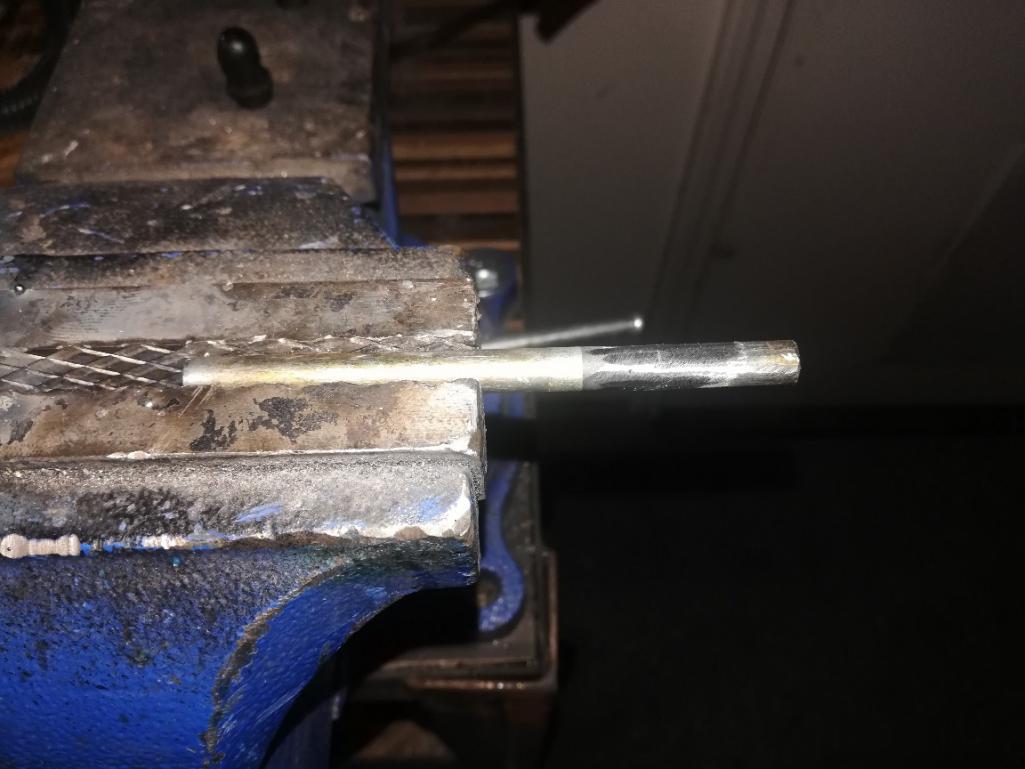 Side note I extended the rod for the slave a bit more than I had previously. Which required me to weld on an extension instead of just using some tiny nuts in the end caps. Added another 1/4". This means that I should have more total travel with my pressure plate. If it's too much and I get slipping I'll cut it down a hair. Back to bleeding. Im going to do some more hand bleeding and then I'll be getting a friend, installing the master and trying it some more. I can't get any more out of the pedal unless I redesign it and then it would only be an extra 1/8* of travel. So I don't think that's enough to worry about. If this doesn't work then it's a new clutch/pressure plate. I have a couple available. 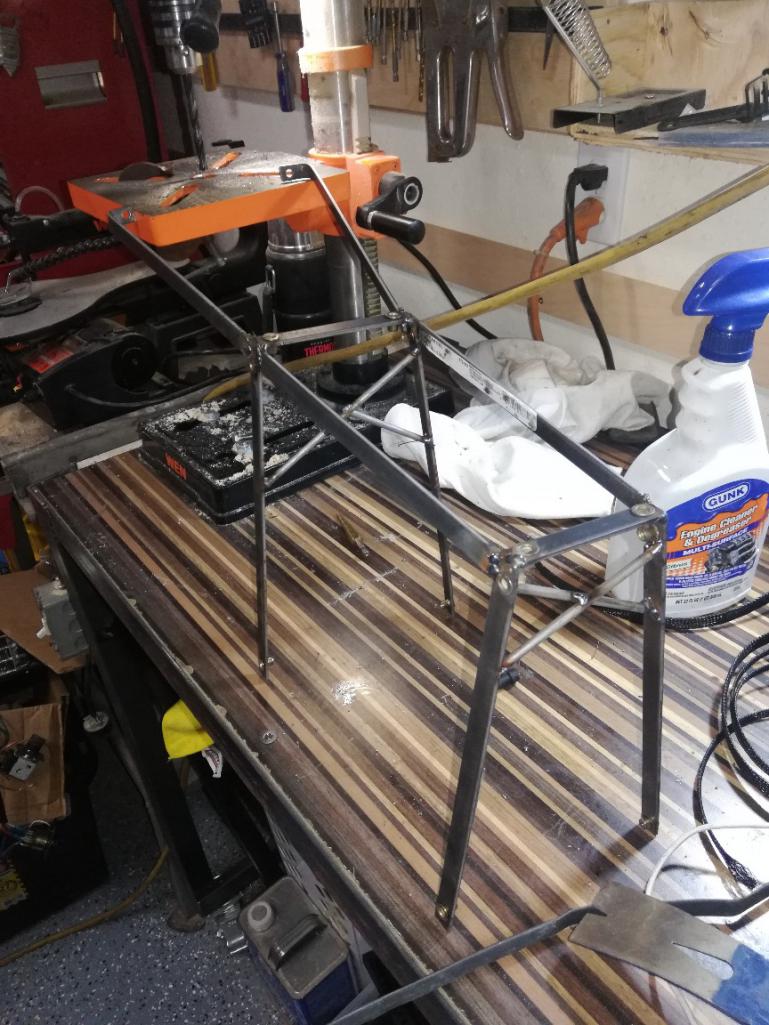 Back to actual progress... I started working on the center console. Biggest problem is I have all the wiring in the car and the new seats all mounted. So I needed to be very careful when handling the steel and any welding. But I got the center cage done. Dimensions based on my steel pieces. I also trimmed them a bit to fit, but more trimming will be necessary when I add carpet and such.. I'll have to redesign the top pieces or at least the back and I'm still figuring out the seam between the two as I'm debating on black sides and brown accent top. Still up in the air. PS Chris I was trying to get the girls to go to 6 flags one of these days and I would just drop them off but that's looking like a no... |
| tygaboy |
 May 25 2019, 06:26 AM May 25 2019, 06:26 AM
Post
#828
|
|
914 Guru      Group: Members Posts: 5,738 Joined: 6-October 15 From: Petaluma, CA Member No.: 19,241 Region Association: Northern California 
|
Andrew - On planning some more time back at my shop, just give me a bit of a heads up and I can make most any date/time work.
Chris |
| Andyrew |
 May 26 2019, 02:20 AM May 26 2019, 02:20 AM
Post
#829
|
|
Spooling.... Please wait           Group: Members Posts: 13,380 Joined: 20-January 03 From: Riverbank, Ca Member No.: 172 Region Association: Northern California 
|
More progress on the center console... My friend to help me bleed the clutch and my tuner we're a no show. Probably do family things tomorrow and Monday but we'll see. I really need to get the clutch dialed in by Tuesday or know if I need a replacement.
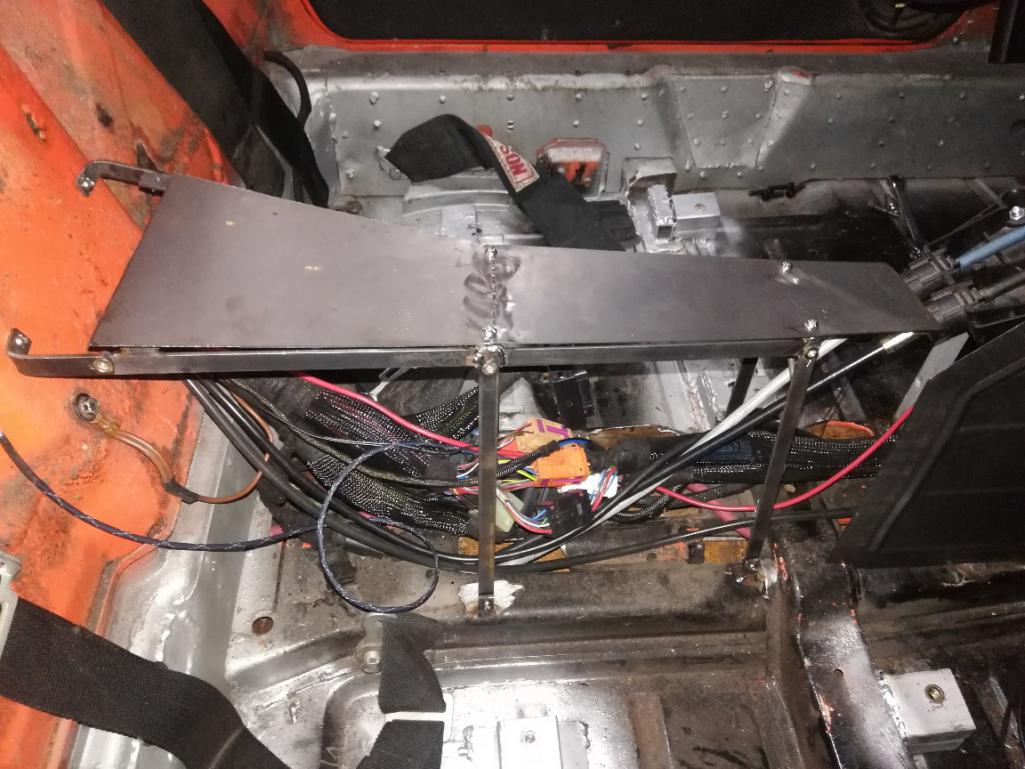 Finished the mounting of the center console base then trimmed the sides to fit. 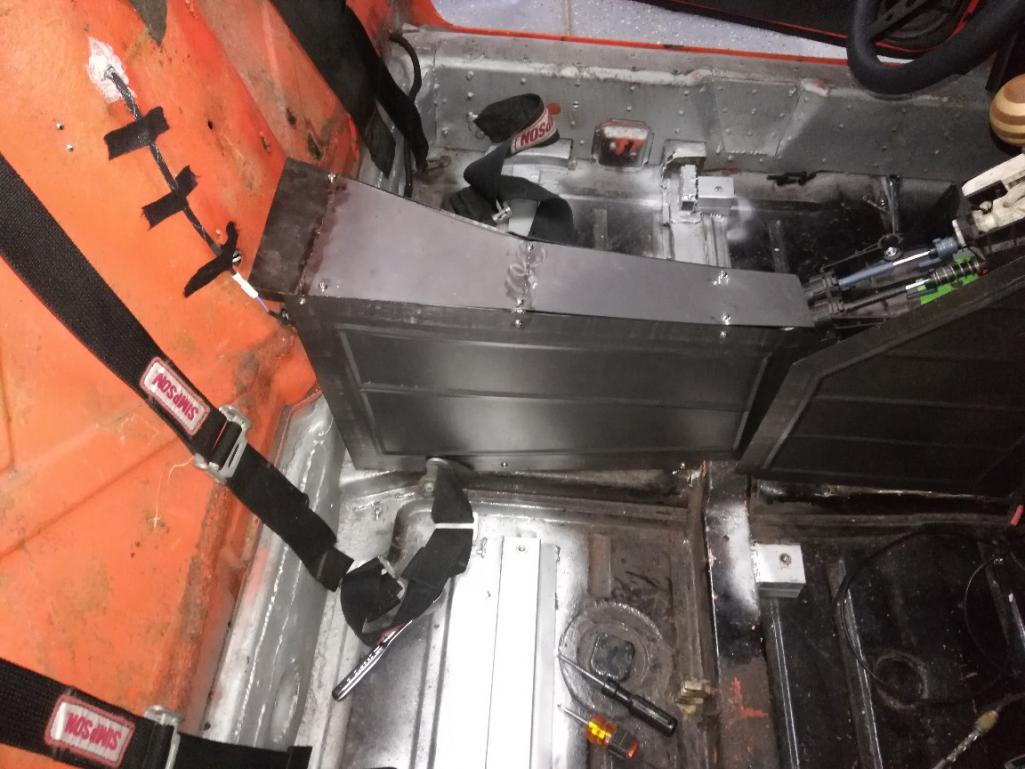 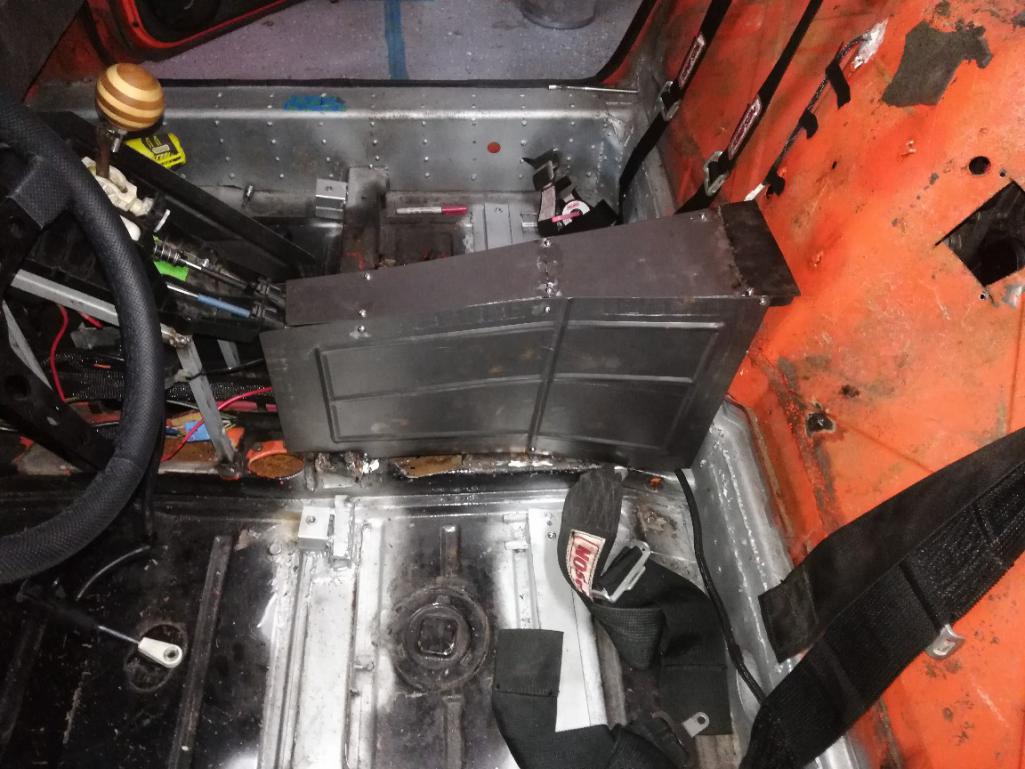 Then I worked on the top portion and got it squared away and fitting decent. This was most of my day. Not a lot but the rear section is done as far as the sheet metal is concerned. I will probably drive it to WCR this way. 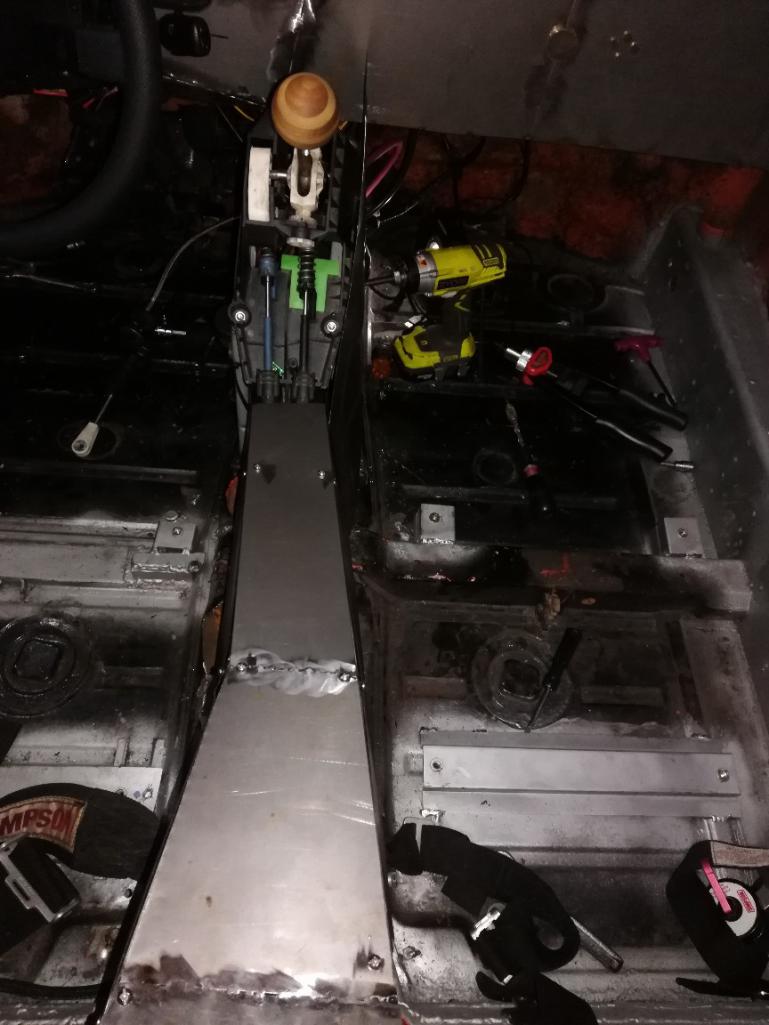 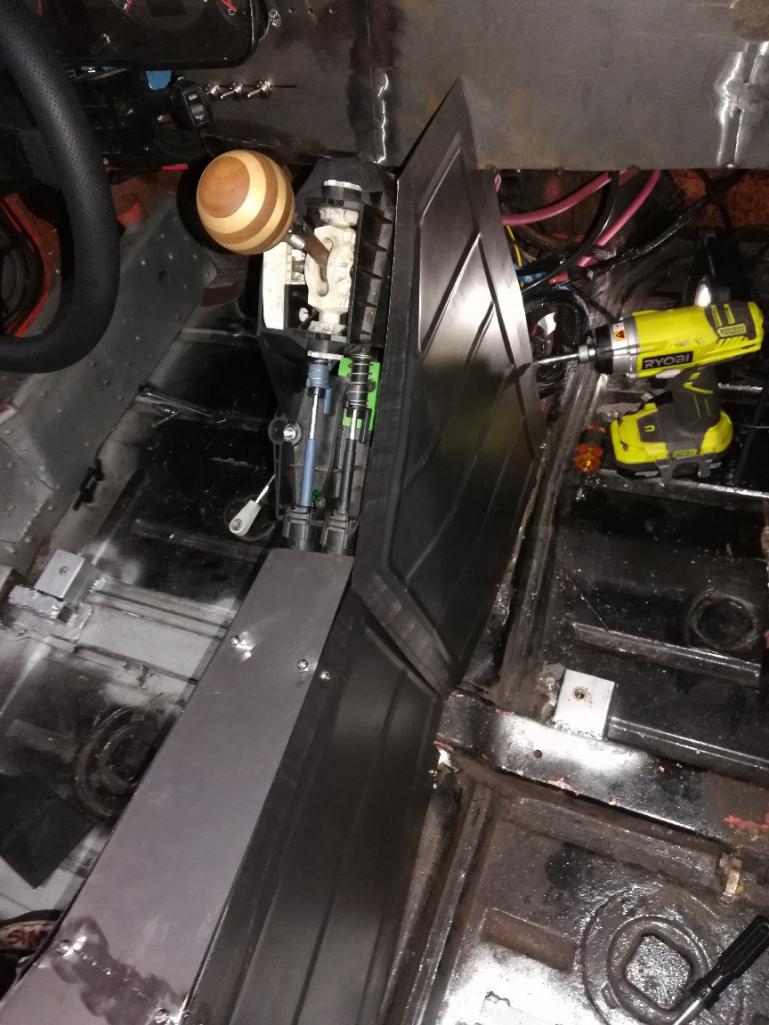 Frony/middle section with the shifter is difficult due to the curve in the top/base. After a couple tries I got the piece bent that I have and it looks good. I did the lower easy mounts but need to work on the upper mounts. Then I'll need the other side from Chris as well as to do the top portion. Excited on the progress (IMG:style_emoticons/default/smile.gif) |
| Cairo94507 |
 May 26 2019, 07:25 AM May 26 2019, 07:25 AM
Post
#830
|
|
Michael           Group: Members Posts: 10,541 Joined: 1-November 08 From: Auburn, CA Member No.: 9,712 Region Association: Northern California 
|
Hi Andrew,
I look forward to seeing your car at WCR. (IMG:style_emoticons/default/beerchug.gif) Michael |
| tygaboy |
 May 26 2019, 07:29 AM May 26 2019, 07:29 AM
Post
#831
|
|
914 Guru      Group: Members Posts: 5,738 Joined: 6-October 15 From: Petaluma, CA Member No.: 19,241 Region Association: Northern California 
|
Full custom fabrication! (IMG:style_emoticons/default/smash.gif) (IMG:style_emoticons/default/welder.gif) (IMG:style_emoticons/default/aktion035.gif)
|
| Andyrew |
 May 27 2019, 01:20 AM May 27 2019, 01:20 AM
Post
#832
|
|
Spooling.... Please wait           Group: Members Posts: 13,380 Joined: 20-January 03 From: Riverbank, Ca Member No.: 172 Region Association: Northern California 
|
Alina hadn't had her nap and it was almost 3pm. So we decided to go drive. Her naps are about 2 hours... So where do we drive? Petaluma to grab the piece I left at Chris's. Thanks Chris for letting me swing by on such short notice!! (IMG:style_emoticons/default/smilie_pokal.gif)
Alina went to sleep almost immediately in the car... Had a nice dinner at a local Petaluma restaurant that had a great playground and had some nice BBQ. Got home and couldn't resist myself I wanted to see where we were with fitment of the panel. I knew this one would take some more work... We'll like the other one I needed to bend it and since I don't have nice press brakes I make do (IMG:style_emoticons/default/smile.gif) 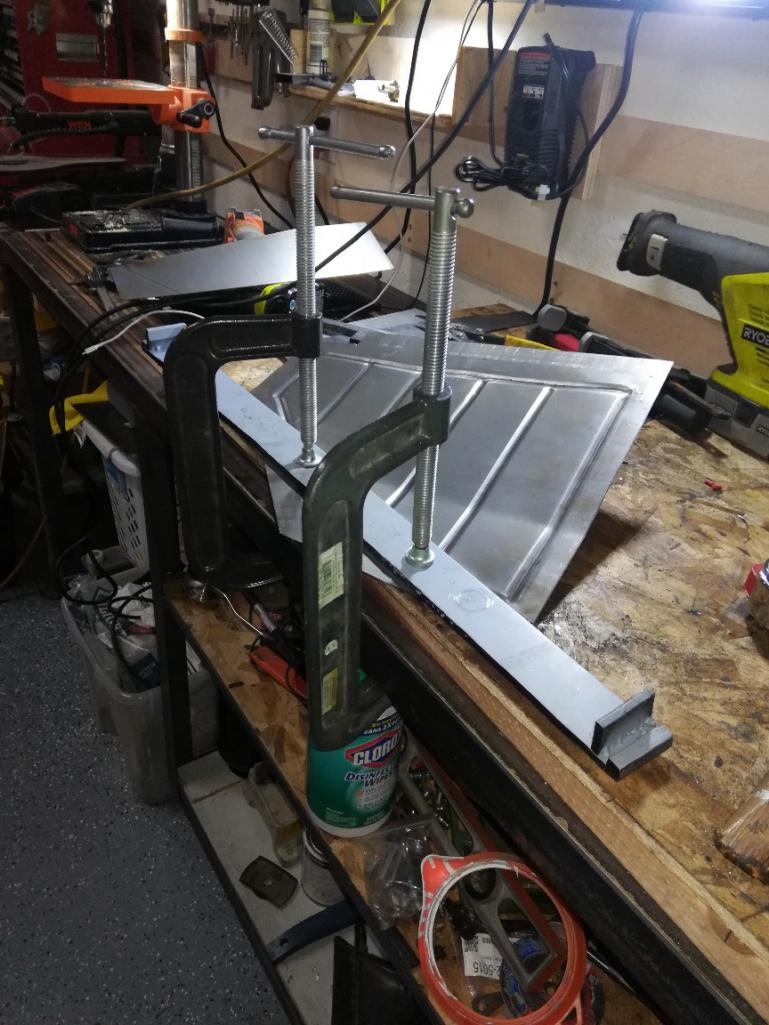 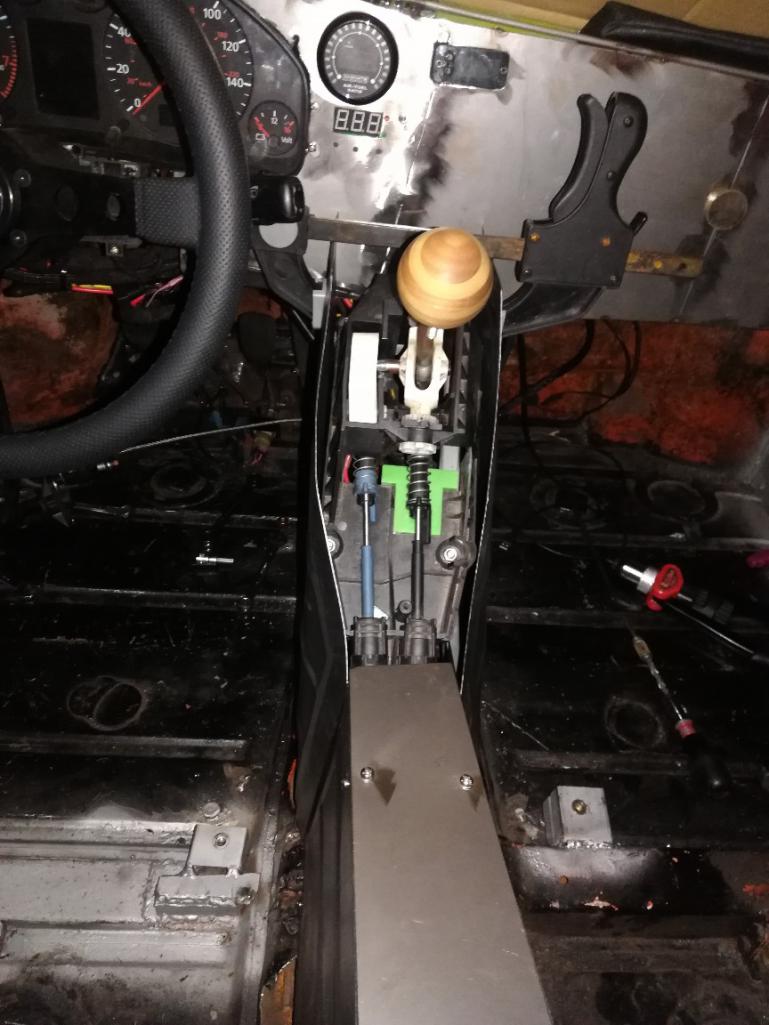 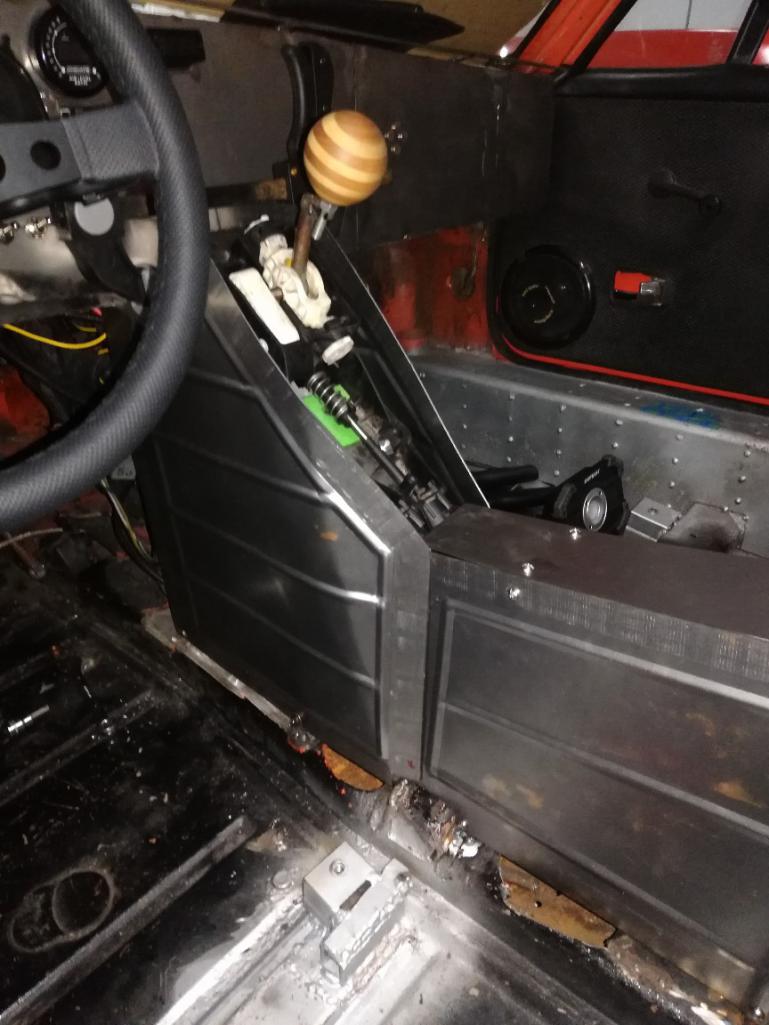 Couple go around to get this one right. But happy with it. I need to work on mounting it and the other side. But I pulled them together loosly and checked out the top. 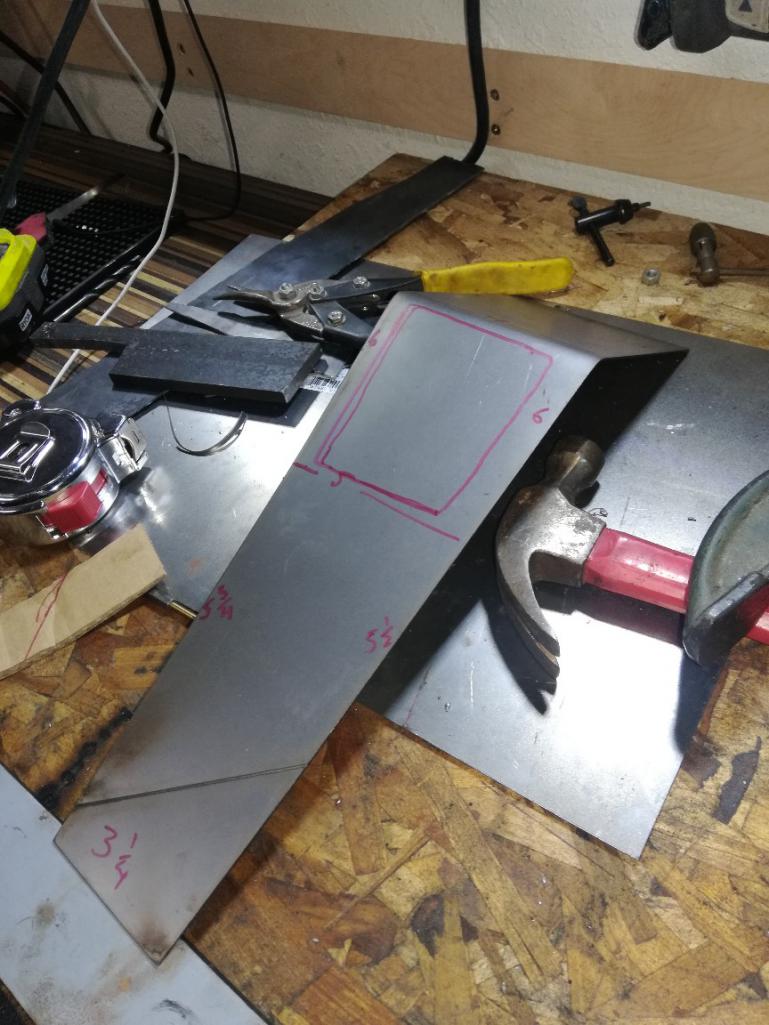 Some measurements and I'll need to make a new piece for the top I think. I'll cut out the shifter hole and see what I think. I also need to figure out how to mount this one. Outside the box thinking might be necessary. |
| 914 Ranch |
 May 27 2019, 02:27 AM May 27 2019, 02:27 AM
Post
#833
|
|
Team Sharp where the 914 grow wings    Group: Members Posts: 1,511 Joined: 29-January 16 From: TheNorth Shore Retreat. Deland Member No.: 19,611 Region Association: South East States |
Andrew, you and I have been thinking outside the box so long that I forgot where I put that fucking box. Now I just toss the piescs at the car and some how they seem to guide me to the solution. I believe that is form fallowing function.
Man I want a bead roller. |
| dan10101 |
 May 27 2019, 08:49 AM May 27 2019, 08:49 AM
Post
#834
|
|
TORQUE-o-holic    Group: Members Posts: 1,140 Joined: 29-April 03 From: Eagle Point, Or Member No.: 626 Region Association: Pacific Northwest |
A man on a mission!
(IMG:style_emoticons/default/piratenanner.gif) (IMG:style_emoticons/default/piratenanner.gif) (IMG:style_emoticons/default/piratenanner.gif) |
| Andyrew |
 May 28 2019, 01:48 PM May 28 2019, 01:48 PM
Post
#835
|
|
Spooling.... Please wait           Group: Members Posts: 13,380 Joined: 20-January 03 From: Riverbank, Ca Member No.: 172 Region Association: Northern California 
|
Received my tow bar from @914werks. Nice looking product! Very heavy duty.
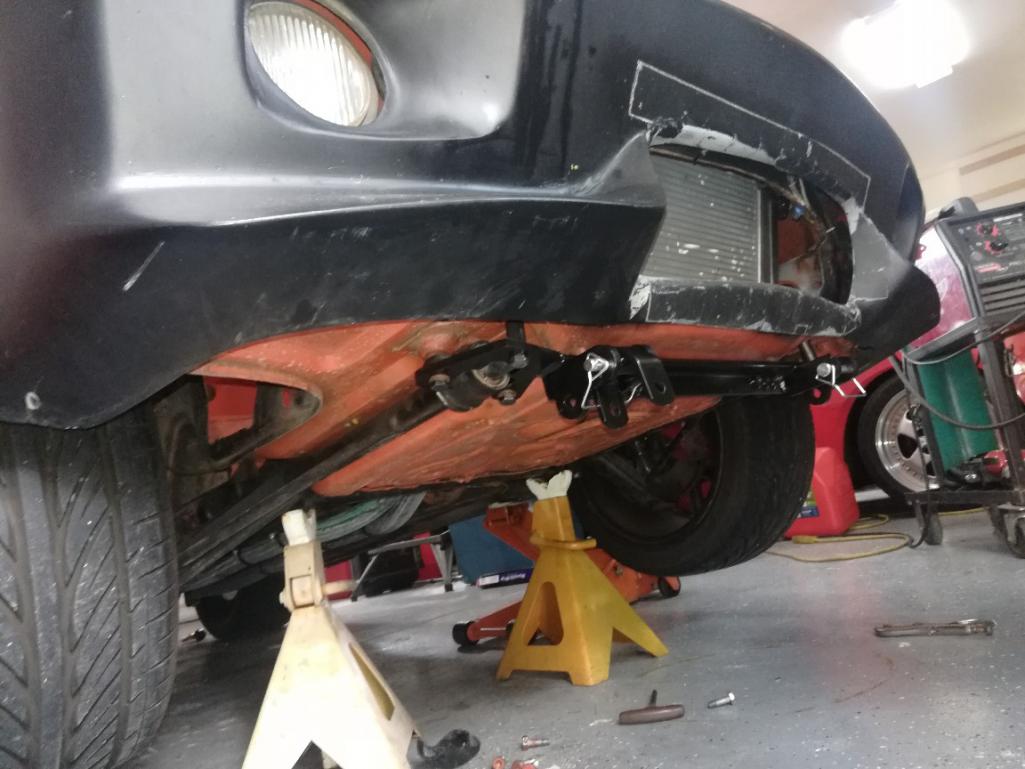 Not designed for a 916 bumper so I'll just trim my bumper to fit as its probably going to be changed at some point. 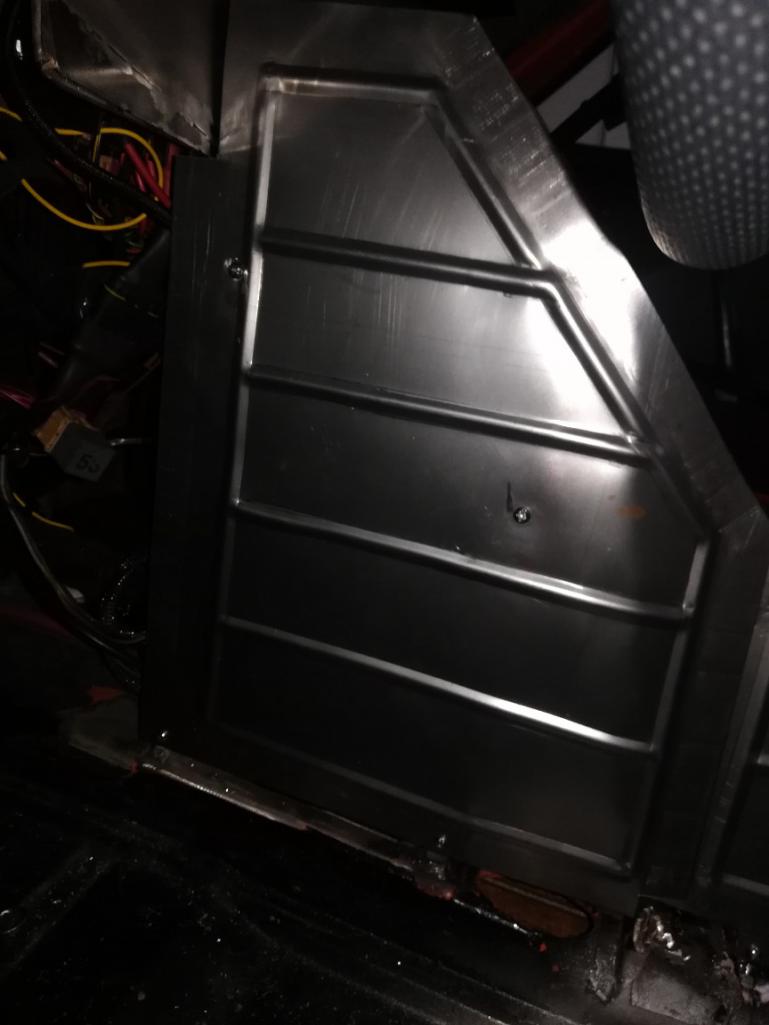 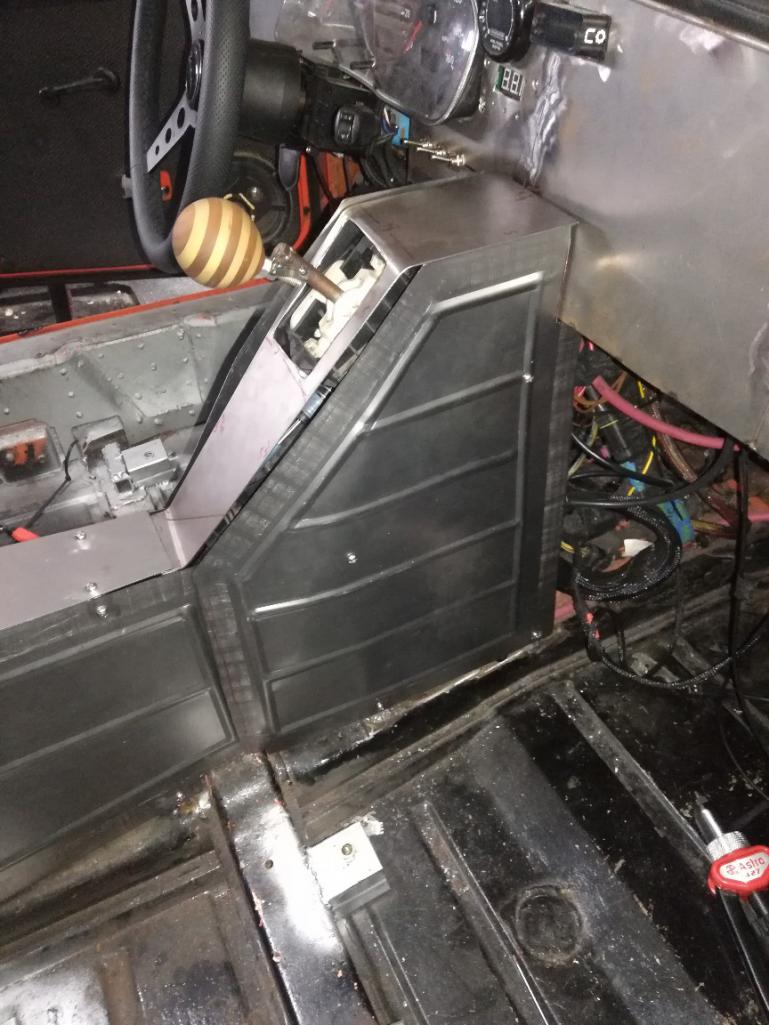 Mounting of the actual pieces. Some shims needed to be made to fit it right. But 4 bolts holding each piece firm. 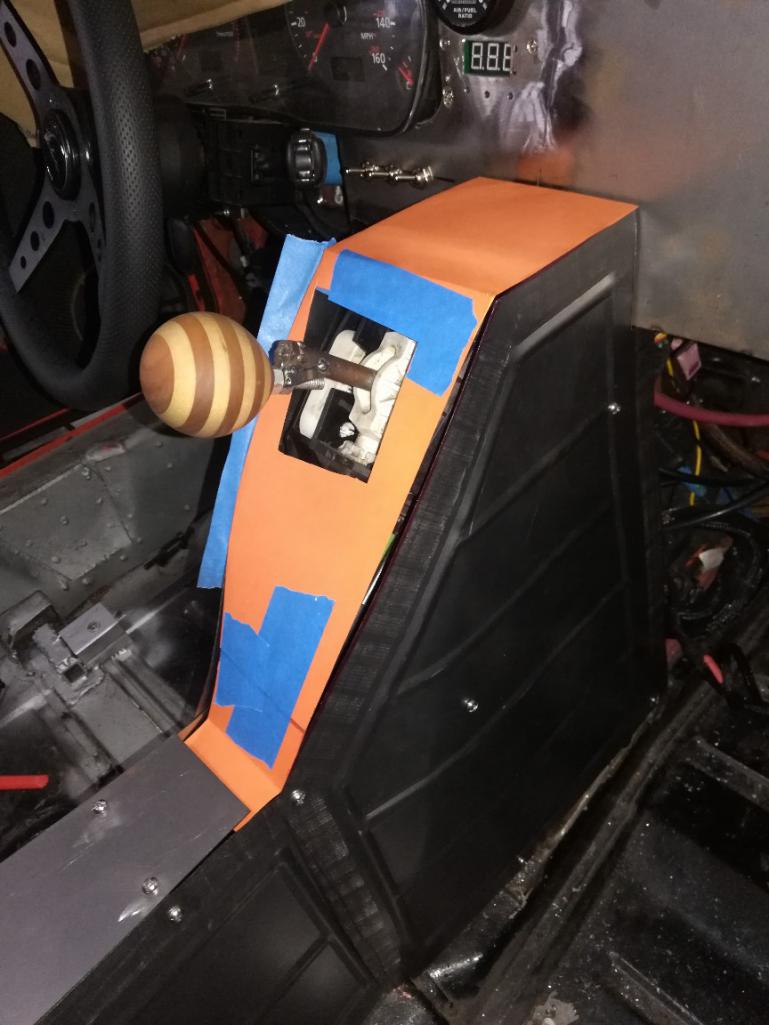 Construction paper to the rescue for the new shifter plate. 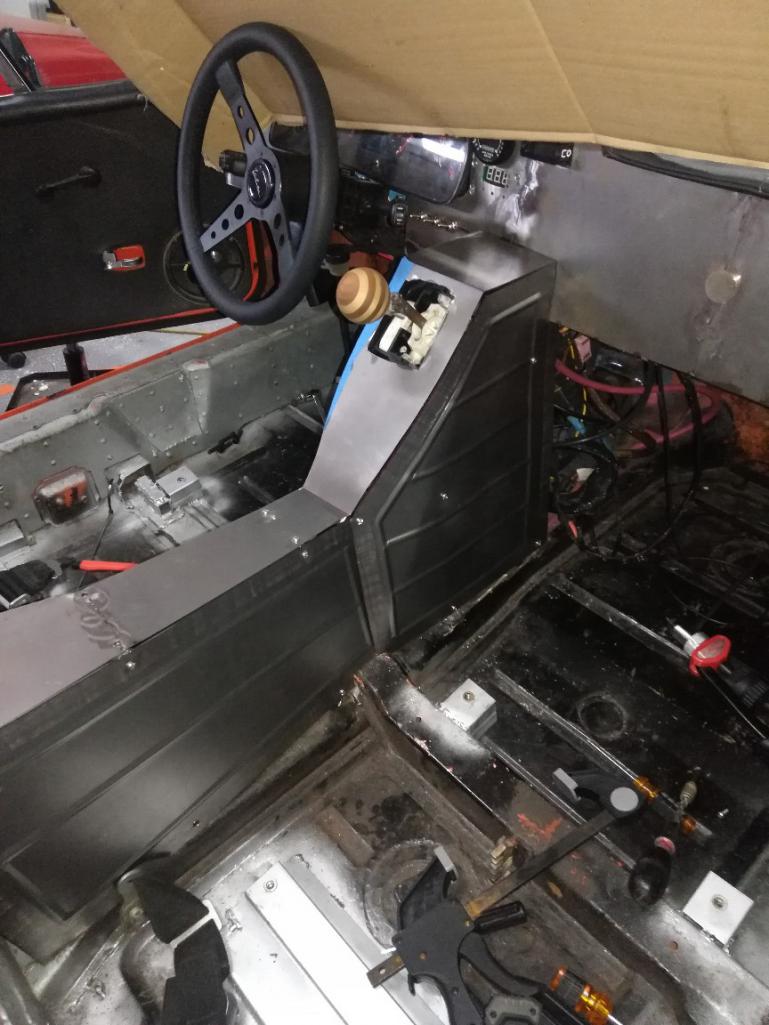 And new shifter plate in place, not mounted. I've determined im going to build a removable upper cage to hold the plate in place, Should be pretty simple to build, probably a couple hours. |
| tygaboy |
 May 28 2019, 03:39 PM May 28 2019, 03:39 PM
Post
#836
|
|
914 Guru      Group: Members Posts: 5,738 Joined: 6-October 15 From: Petaluma, CA Member No.: 19,241 Region Association: Northern California 
|
That there is some real progress! WCR, here it comes! (IMG:style_emoticons/default/aktion035.gif)
|
| Andyrew |
 Jun 1 2019, 07:34 PM Jun 1 2019, 07:34 PM
Post
#837
|
|
Spooling.... Please wait           Group: Members Posts: 13,380 Joined: 20-January 03 From: Riverbank, Ca Member No.: 172 Region Association: Northern California 
|
The 914 and 951 have a different stablemate for the week (IMG:style_emoticons/default/smile.gif)
Stay tuned for fun progress. (IMG:style_emoticons/default/w00t.gif) Attached thumbnail(s) 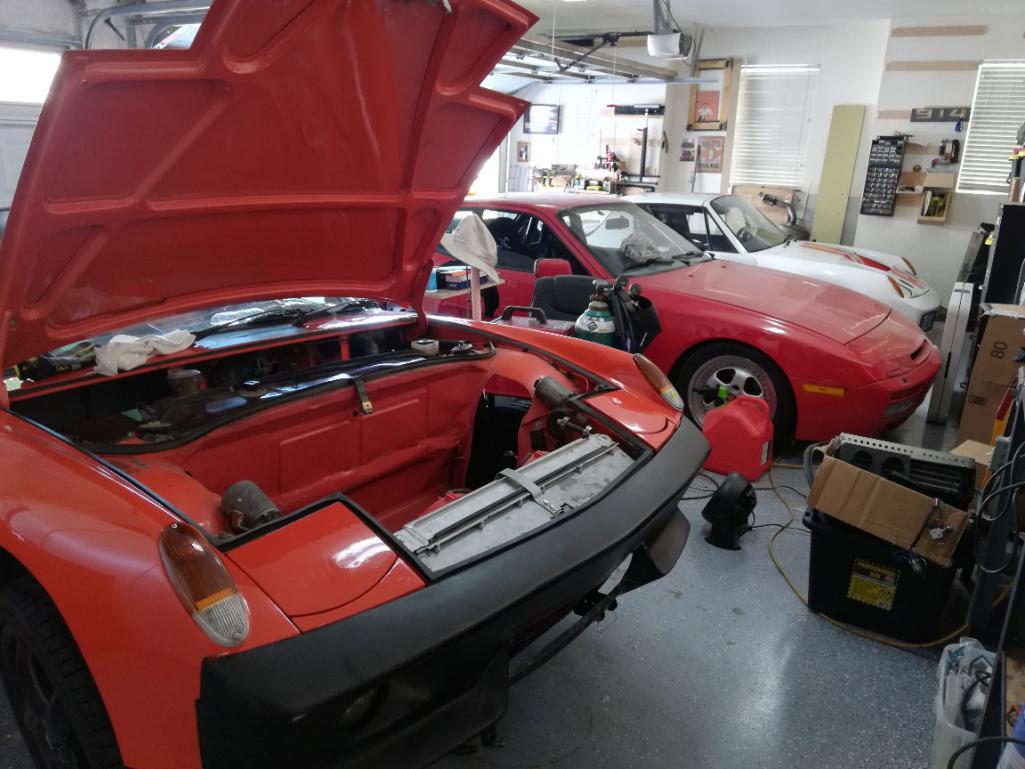
|
| Andyrew |
 Jun 3 2019, 12:01 AM Jun 3 2019, 12:01 AM
Post
#838
|
|
Spooling.... Please wait           Group: Members Posts: 13,380 Joined: 20-January 03 From: Riverbank, Ca Member No.: 172 Region Association: Northern California 
|
Dad and I redid the clutch reservoir and used a spare of his mounted next to the brake. This gave us an easier bleed and we could pressurize it with his system. Not that it helped. It was still a very difficult bleed.
We're going to try bleeding it again. Still difficult to get into first. But it does shift. 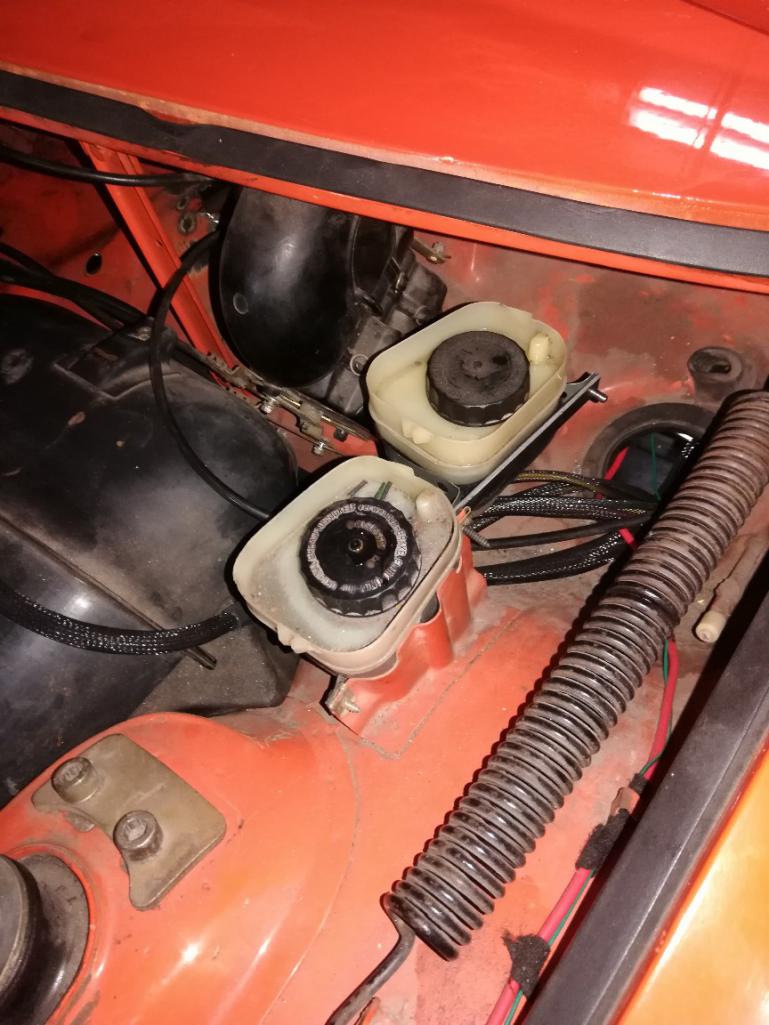 Changed front shocks to Koni Yellows 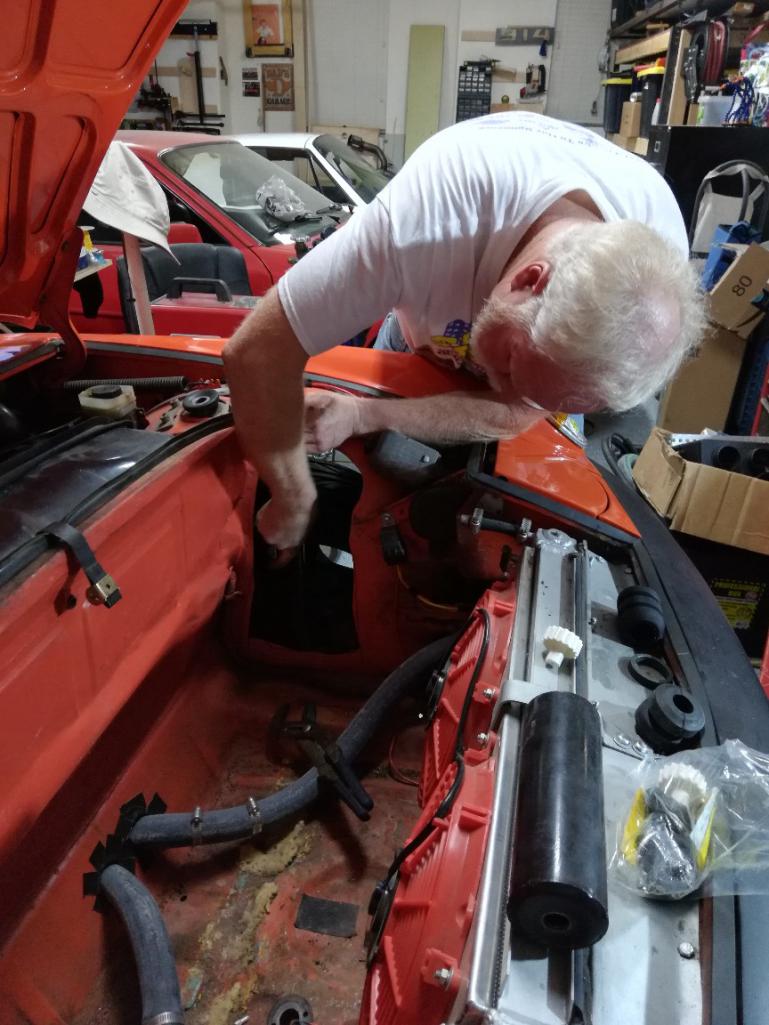 Changed the valve cover gasket. Hopefully this fixes the leak. 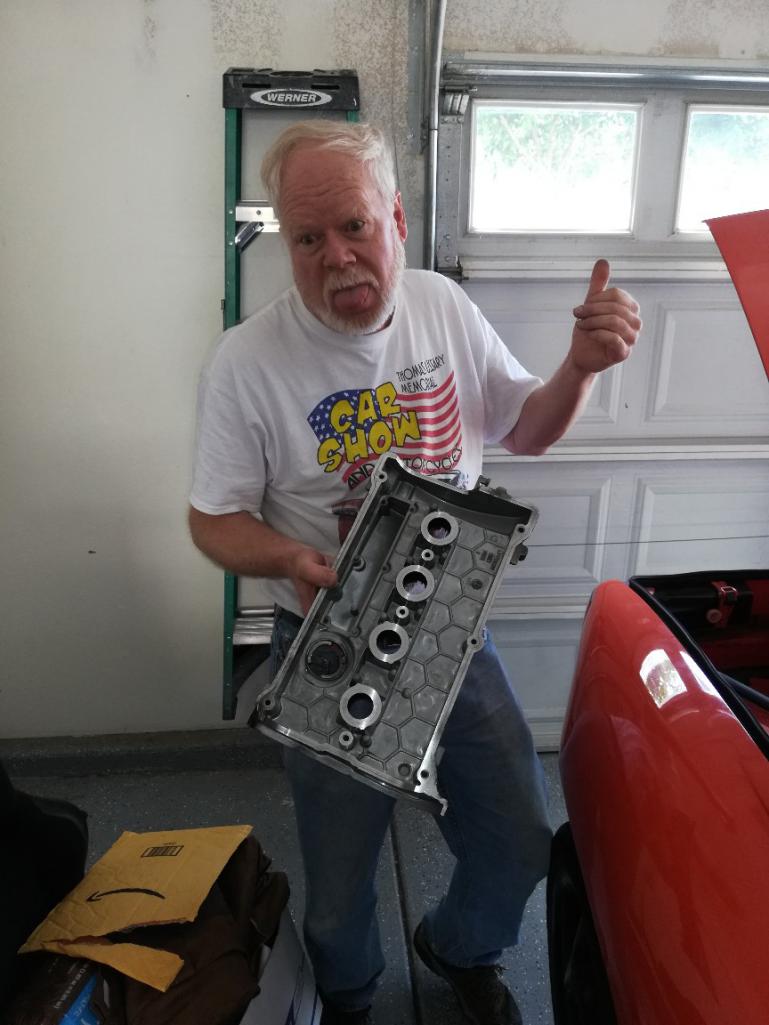 Spent a lot of time on the center console. You can see the shifter solution I made. Really happy with it. 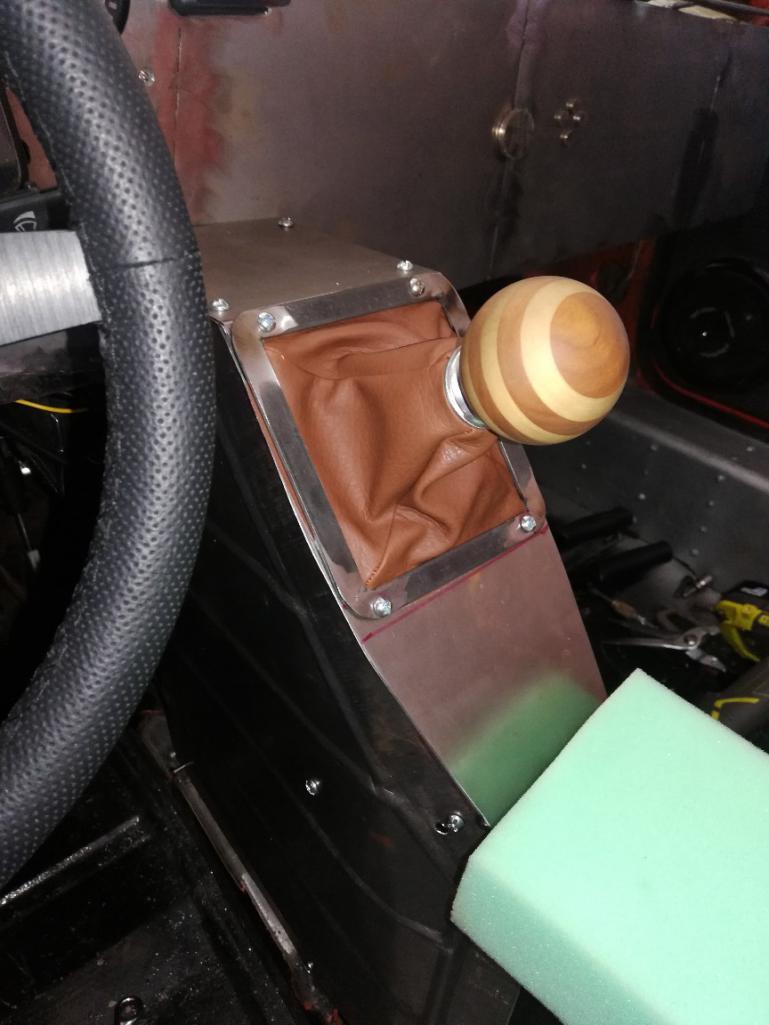 And the big question is black or brown 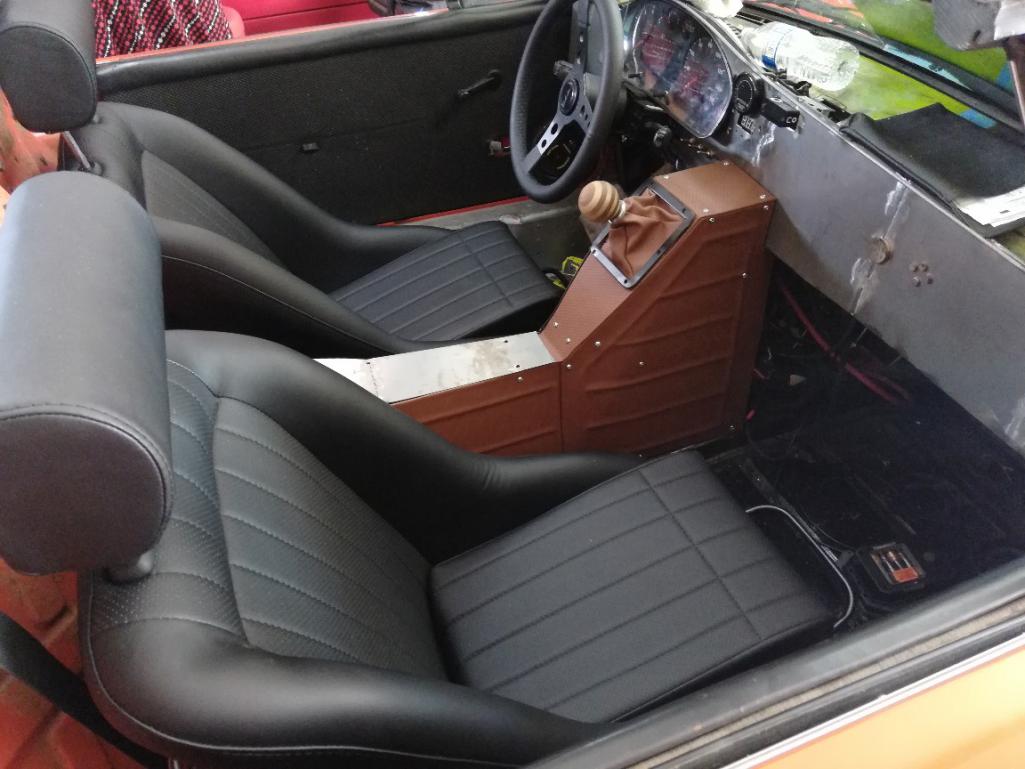 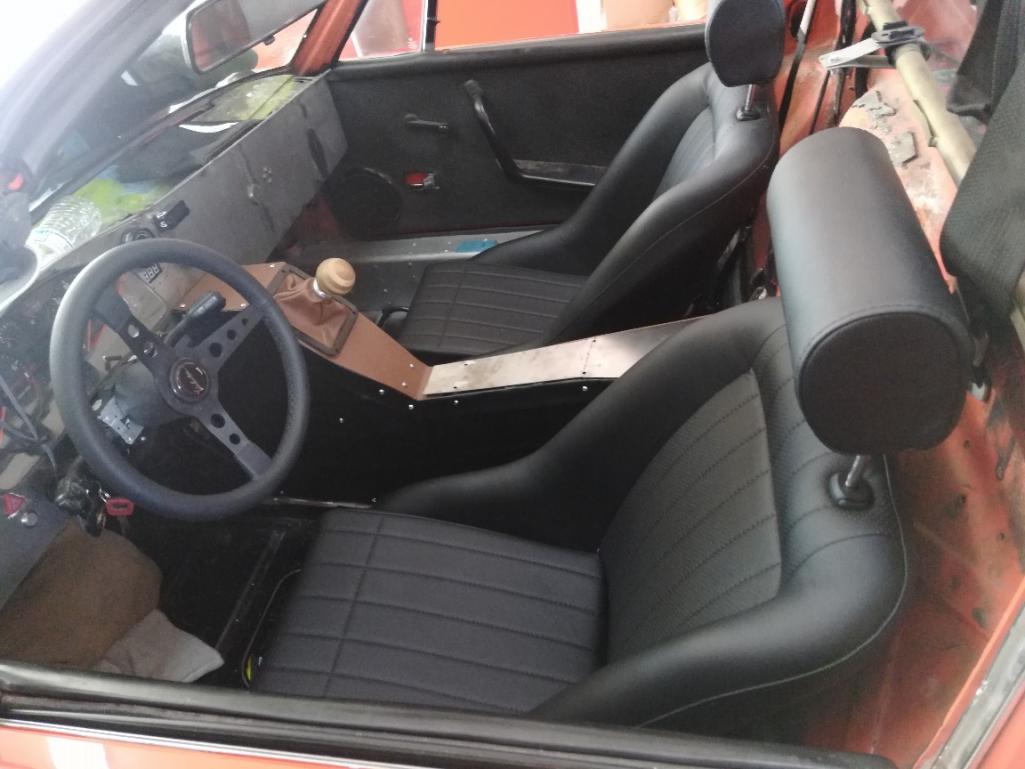 I'm leaning towards brown. But not sure. I'll powder coat the screws whatever color I need them. Shifter trim will stay black for contrast and the foam arm rest needs to be done still. Also my tuner came by and set me up with the ability to change my tune myself. (IMG:style_emoticons/default/piratenanner.gif) My wife and I went for a quick drive. She liked it, but the clutch still needs work. LSD is working well though, put down good power in first! |
| tygaboy |
 Jun 3 2019, 06:50 AM Jun 3 2019, 06:50 AM
Post
#839
|
|
914 Guru      Group: Members Posts: 5,738 Joined: 6-October 15 From: Petaluma, CA Member No.: 19,241 Region Association: Northern California 
|
Andrew - Looking good! Also good to hear you're making progress on the drive-ability items.
On the console, it's totally a personal taste thing but the brown will likely make the beading detail more noticeable, which I happen to like! Hi to your dad for me. |
| Cairo94507 |
 Jun 3 2019, 07:26 AM Jun 3 2019, 07:26 AM
Post
#840
|
|
Michael           Group: Members Posts: 10,541 Joined: 1-November 08 From: Auburn, CA Member No.: 9,712 Region Association: Northern California 
|
I like the idea of the contrast with the brown. If you cover the console in black it might get kind of lost in all the black. It's nice piece and the brown will look nice. Love the seats BTW. (IMG:style_emoticons/default/beerchug.gif)
|
  |
5 User(s) are reading this topic (5 Guests and 0 Anonymous Users)
0 Members:

|
Lo-Fi Version | Time is now: 8th January 2026 - 10:33 PM |
Invision Power Board
v9.1.4 © 2026 IPS, Inc.


