|
|

|
Porsche, and the Porsche crest are registered trademarks of Dr. Ing. h.c. F. Porsche AG.
This site is not affiliated with Porsche in any way. Its only purpose is to provide an online forum for car enthusiasts. All other trademarks are property of their respective owners. |
|
|
  |
| saigon71 |
 Dec 11 2011, 02:39 PM Dec 11 2011, 02:39 PM
Post
#101
|
|
Advanced Member     Group: Members Posts: 2,019 Joined: 1-June 09 From: Dillsburg, PA Member No.: 10,428 Region Association: MidAtlantic Region 

|
(IMG:style_emoticons/default/first.gif) SO you'll be driving it to Hershey in a few months right ?? (IMG:style_emoticons/default/poke.gif) (IMG:style_emoticons/default/poke.gif) Yep, I will be joining the caravan in South Central PA. Its pretty cool seeing this thing start to come back to life. (IMG:style_emoticons/default/aktion035.gif) |
| saigon71 |
 Dec 14 2011, 09:09 PM Dec 14 2011, 09:09 PM
Post
#102
|
|
Advanced Member     Group: Members Posts: 2,019 Joined: 1-June 09 From: Dillsburg, PA Member No.: 10,428 Region Association: MidAtlantic Region 

|
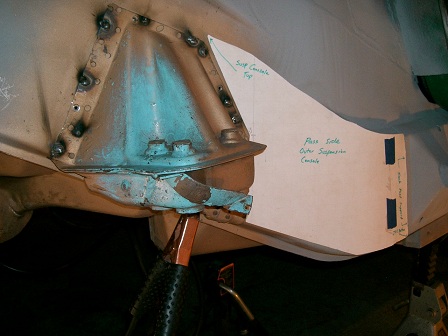
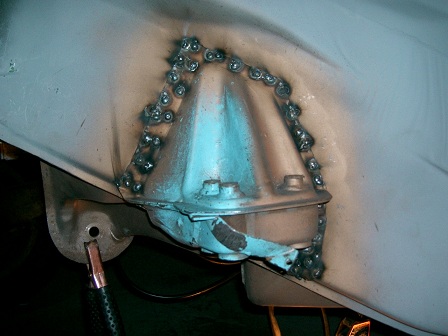
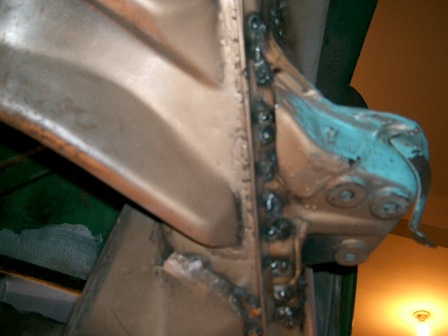
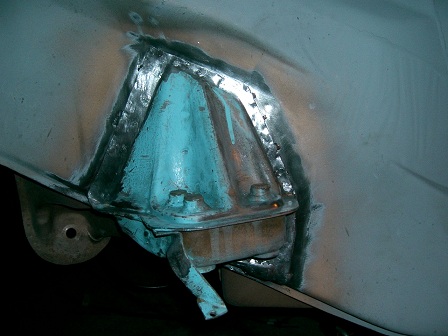
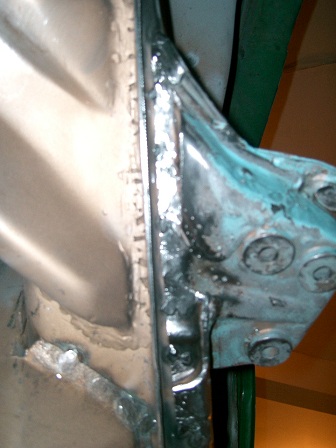
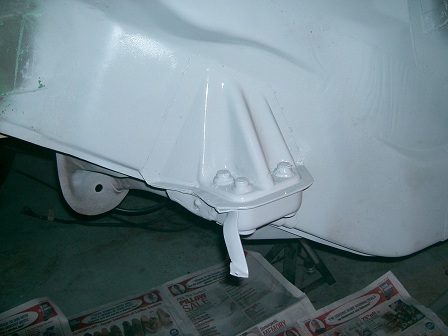
Welded the outer suspension console on today. Pretty smooth installation overall with the sheet metal screws holding things in place. Cycled between welding and cooling with compressed air. Put two coats of primer on:
      Brushed two coats of acrylic enamel on in the area below the tank on the passenger side: 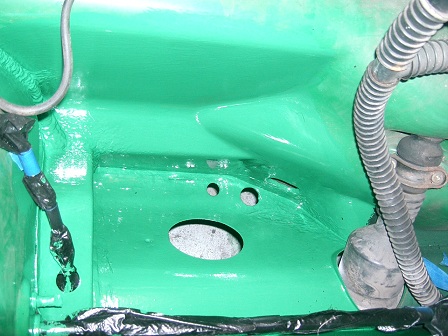 |
| jsayre914 |
 Dec 15 2011, 12:52 PM Dec 15 2011, 12:52 PM
Post
#103
|
|
Speed Up !!!     Group: Members Posts: 3,210 Joined: 10-February 08 From: Timonium MD 21093 Member No.: 8,696 Region Association: MidAtlantic Region |
Great work Bob !!
Looks like you will have it up and running in the next few days (IMG:style_emoticons/default/rolleyes.gif) Hershey is gettn closer |
| saigon71 |
 Dec 20 2011, 04:36 PM Dec 20 2011, 04:36 PM
Post
#104
|
|
Advanced Member     Group: Members Posts: 2,019 Joined: 1-June 09 From: Dillsburg, PA Member No.: 10,428 Region Association: MidAtlantic Region 

|
Been rollin pretty good on the teener...
I had to cut back about 3/4" of the engine bay seal channel up front for proper fit. Tack welded channel back on: 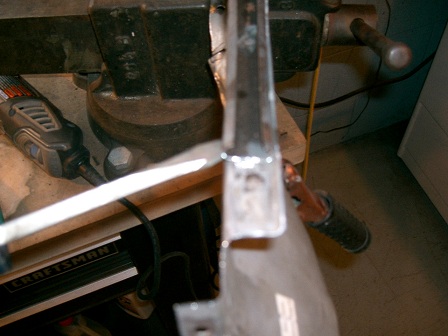 Started fitting the passenger side lower door sill. I took measurements from the drivers side from the sill seam to the jack post - 3 3/4". With the replacement all the way forward, the passenger side was 3 5/8". I trimmed the front of the piece 1/8" and re-bent as needed. This was one of the easier replacement panels for me to fit: 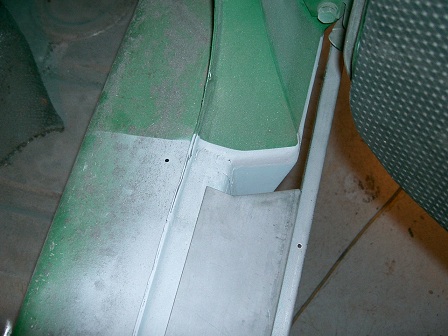 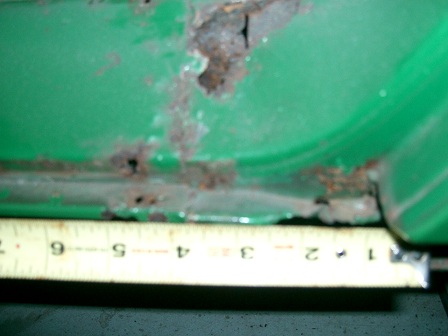 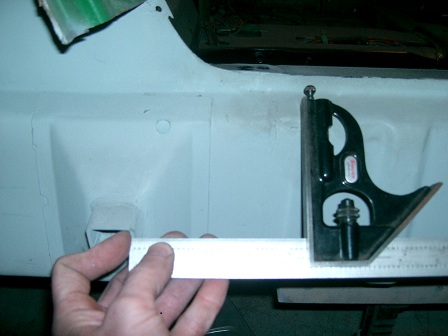 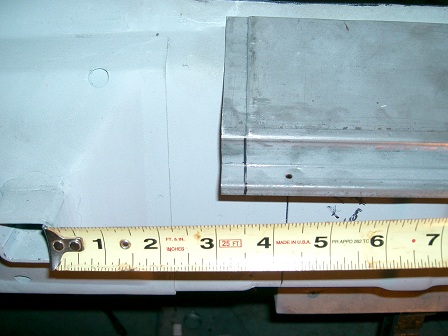 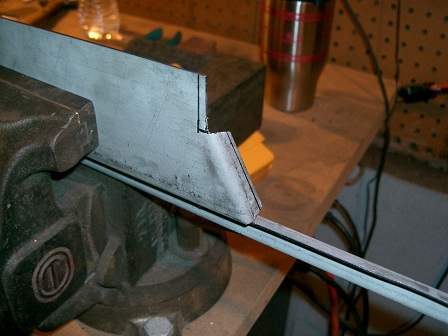 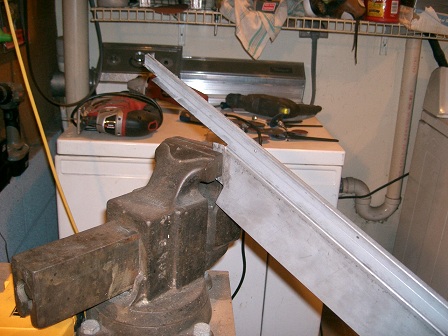 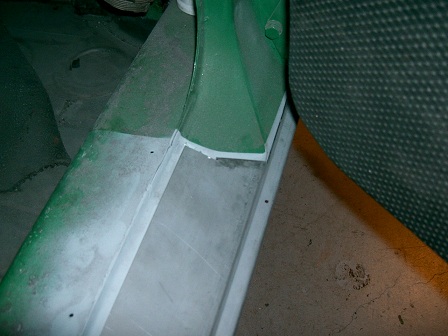 I realized that some areas would be tough to get to after the engine shelf is installed, so I prepped the area below for ospho and primer: 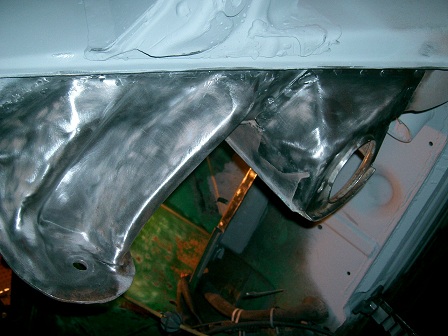 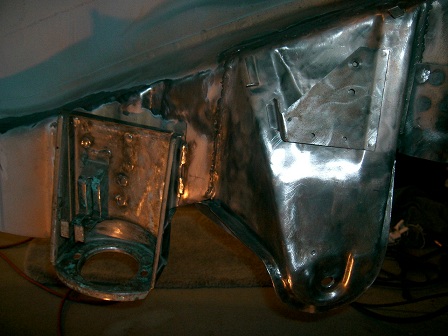 Drilled rosette holes where possible on the engine shelf & gave all areas two coats of weld thru primer: 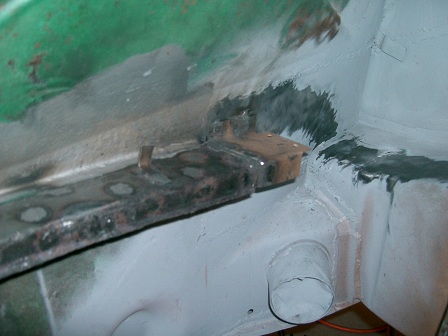 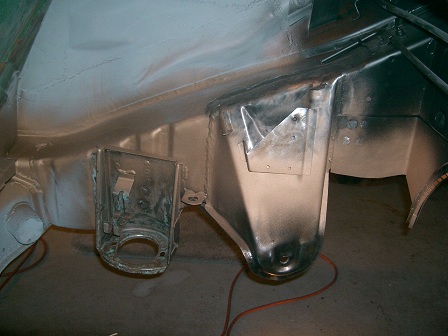 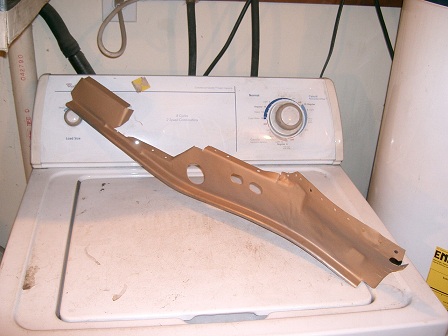 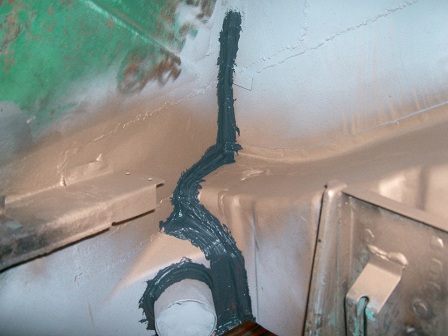 Started fitting the sill triangles as well...measured the drivers side setup and used these measurements for the passenger side. It was 24 11/16" from the front triangle to the middle triangle and 4 1/2" from the rear triangle to the jack post: 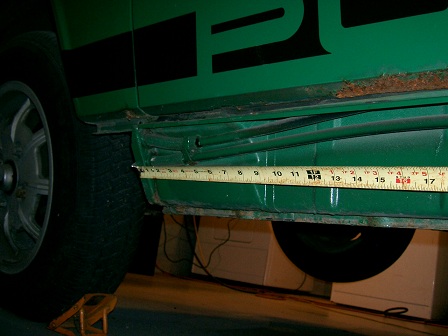 |
| saigon71 |
 Dec 22 2011, 06:27 AM Dec 22 2011, 06:27 AM
Post
#105
|
|
Advanced Member     Group: Members Posts: 2,019 Joined: 1-June 09 From: Dillsburg, PA Member No.: 10,428 Region Association: MidAtlantic Region 

|
Welded in the brake line attachment point on the passenger side and made/welded a metal strap out of sheet metal for the front engine shelf to replace one that was rusted away:
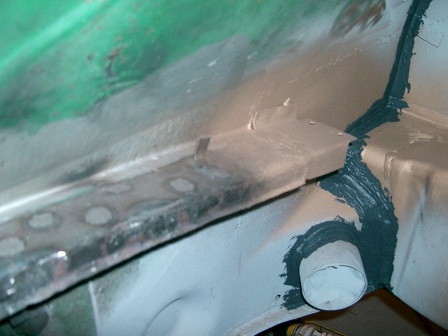 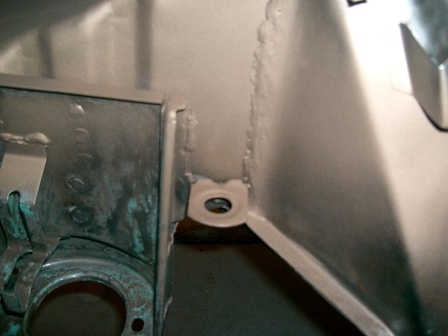 Welded the engine shelf in. I rosette welded this piece in when possible and "stitch" welded areas where there wasn't enough metal to drill for a rosette: 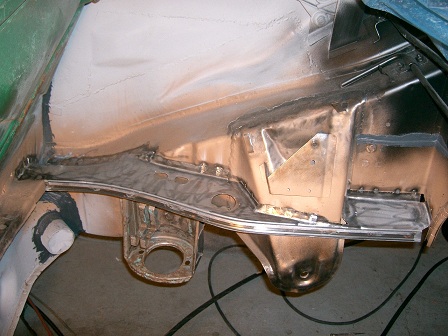 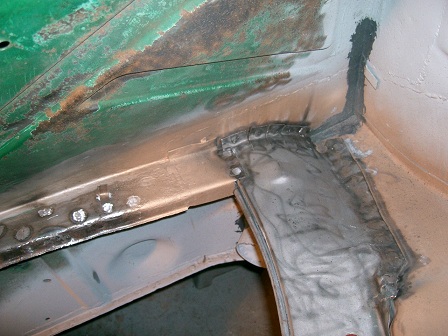 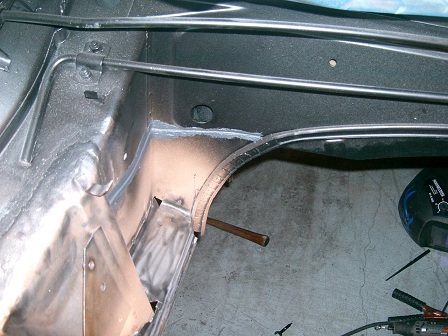 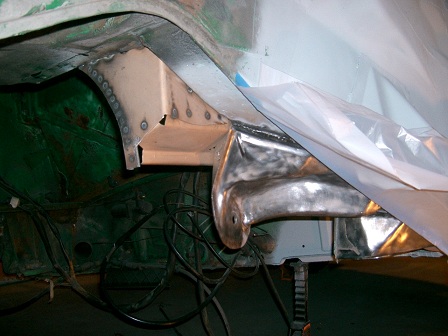 Attached the door sill with sheet metal screws to make fitting the sill triangles easier: 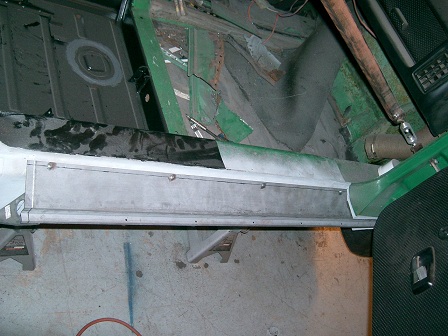 |
| saigon71 |
 Dec 30 2011, 12:09 PM Dec 30 2011, 12:09 PM
Post
#106
|
|
Advanced Member     Group: Members Posts: 2,019 Joined: 1-June 09 From: Dillsburg, PA Member No.: 10,428 Region Association: MidAtlantic Region 

|
Cut and installed another section of engine bay seal channel in the front of the engine bay...had to make relief cuts to get the right bend:
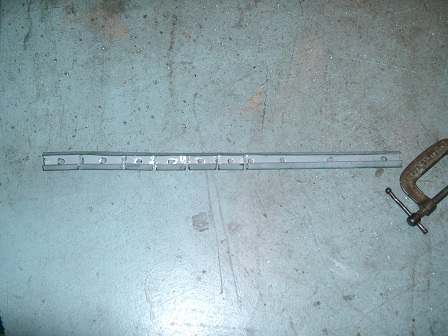 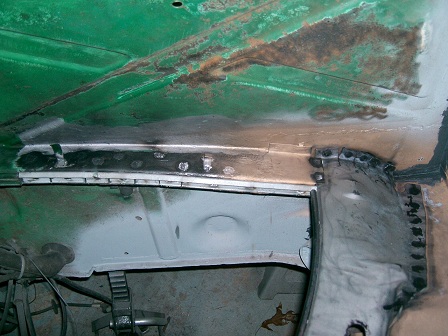 Fitted and welded the passenger side rear jacking donut replacement. I had to go back and re-grind some welds on the fabricated floorpan for proper fit. Additionally, I had to trim the piece a little and mess with the curve. The bottle jack worked well holding this thing in place. After it was tacked in place, I removed the jack and used a hammer and a large drift for any final tweaking to the metal. Finished it off with two coats of rust encapsulator: 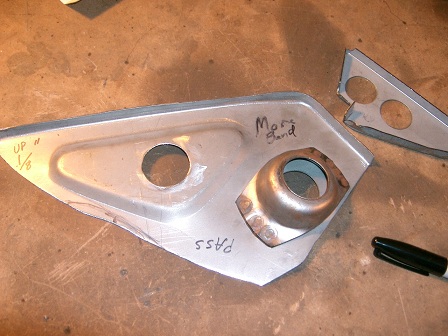 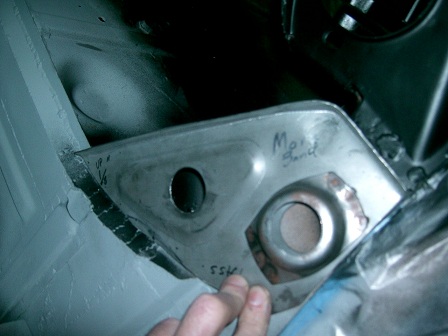 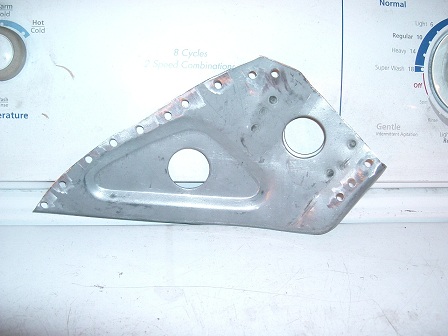 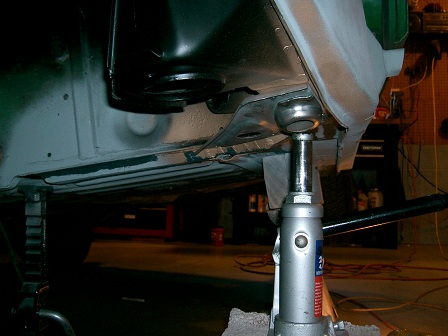 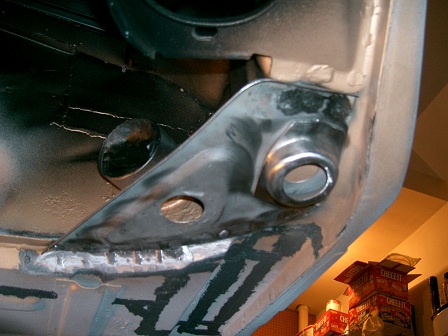 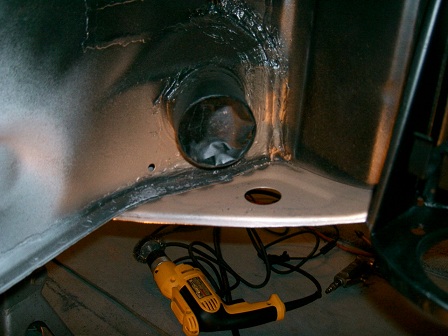 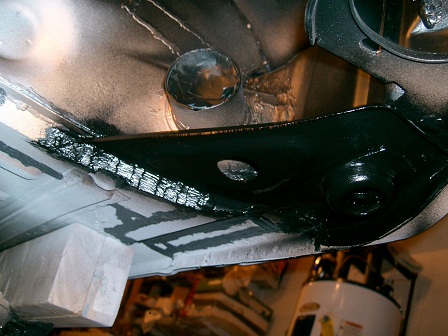 Sprayed a coat of rust converter on consoles and engine mount. I was amazed at how much surface rust already formed on these pieces: 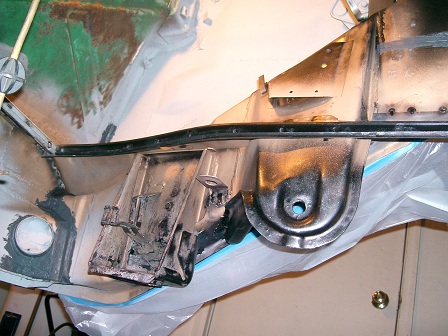 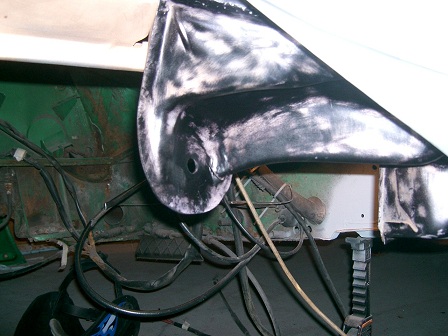 Followed up with two coats of rust encapsulator: 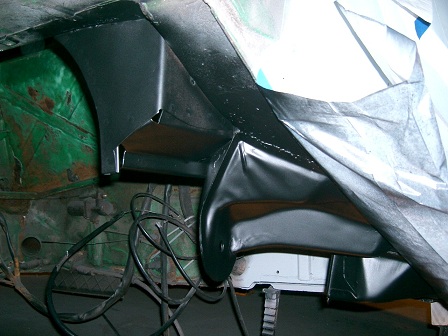 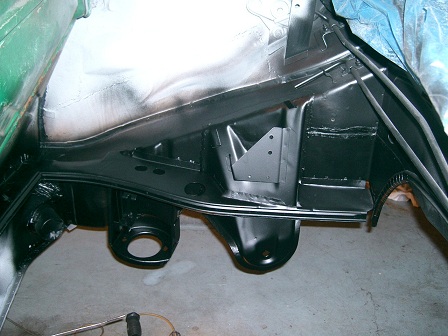 |
| saigon71 |
 Dec 30 2011, 12:19 PM Dec 30 2011, 12:19 PM
Post
#107
|
|
Advanced Member     Group: Members Posts: 2,019 Joined: 1-June 09 From: Dillsburg, PA Member No.: 10,428 Region Association: MidAtlantic Region 

|
Prepped the passenger fender area for welding:
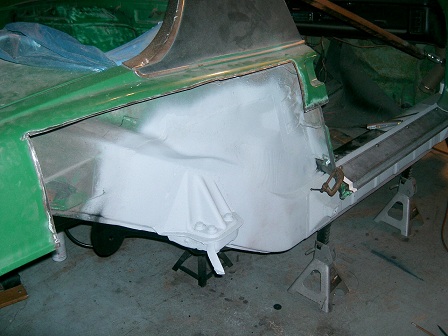 The engine shelf on the passenger side looked a little higher than it should be so with the rear trunk closed all the way (and fitting evenly), I measured from the underside of the trunk to the bottom of the shelf on both sides. Drivers side came in at 17 9/16 and passenger side was 17 1/2...going with "close enough" on this one. 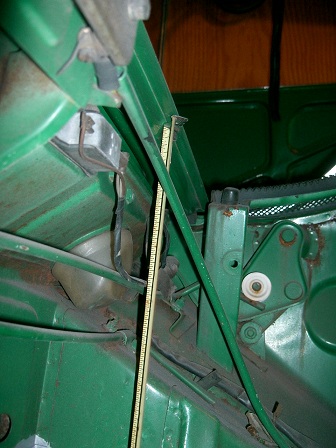 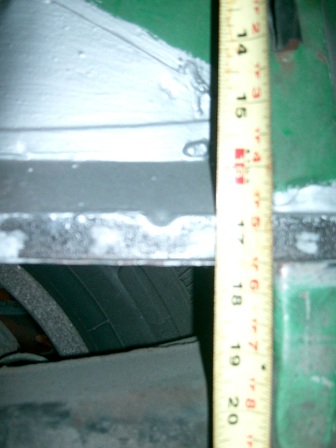 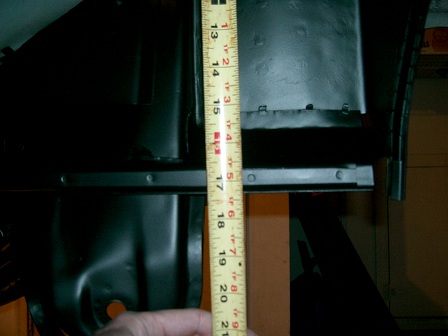 Snapped some pics of the old longitudinal and the reason for this thread... 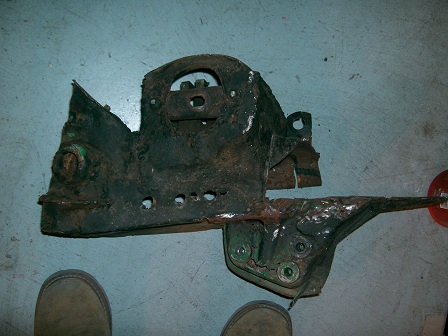 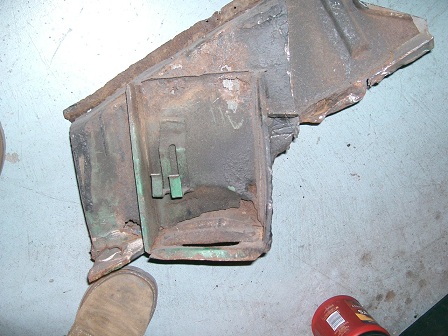 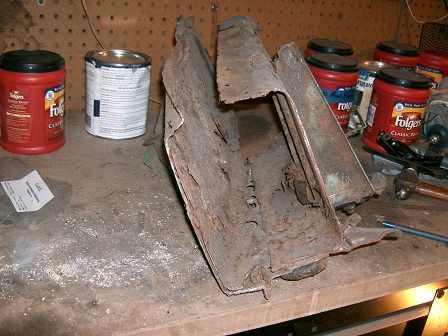 |
| Ferg |
 Dec 30 2011, 12:26 PM Dec 30 2011, 12:26 PM
Post
#108
|
|
914 Guru      Group: Members Posts: 5,948 Joined: 8-January 03 From: Boulder CO Member No.: 116 Region Association: None 
|
Impressive (IMG:style_emoticons/default/welder.gif)
|
| saigon71 |
 Dec 30 2011, 12:30 PM Dec 30 2011, 12:30 PM
Post
#109
|
|
Advanced Member     Group: Members Posts: 2,019 Joined: 1-June 09 From: Dillsburg, PA Member No.: 10,428 Region Association: MidAtlantic Region 

|
Wanted to verify the sill angle, so I leveled the car and used a HF magnetic inclinometer in the same spot on both sides of the car. Drivers side - 27 degrees, passenger 26. Angle was easy to adjust with the sill screwed on:
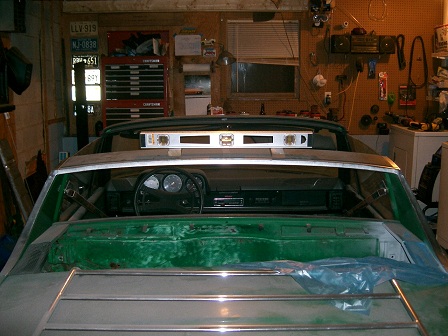 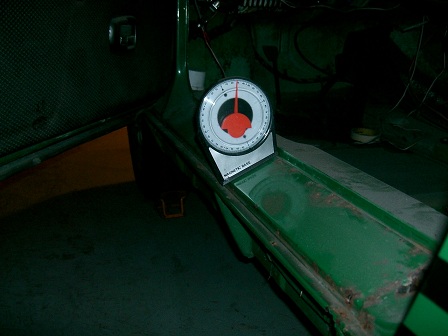 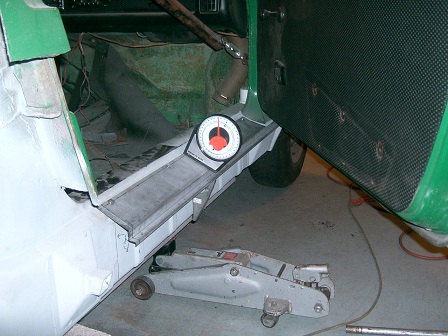 Started fitting the lower rear part of the door jamb that had been removed for rust repair. I picked up a set of body panel welding clamps at HF - definately a good $8 purchase to help hold things in place. Had to fabricate a piece to connect the sill with the jamb. I used a scrap of metal from a RD replacement panel for better corrosion protection (galvanneal): 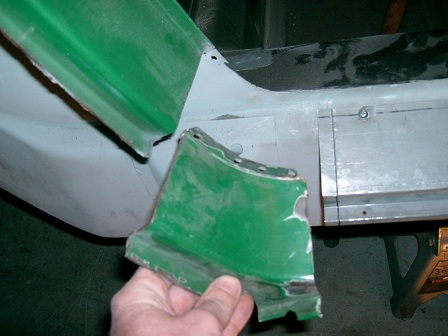 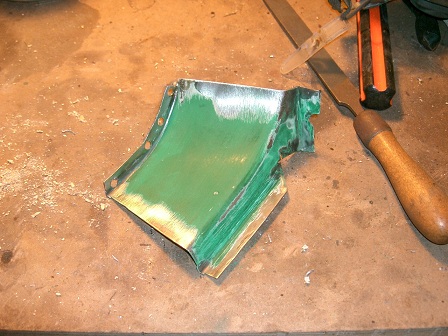 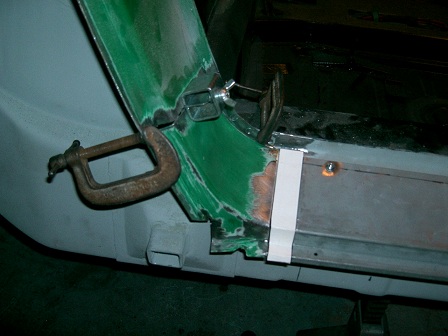 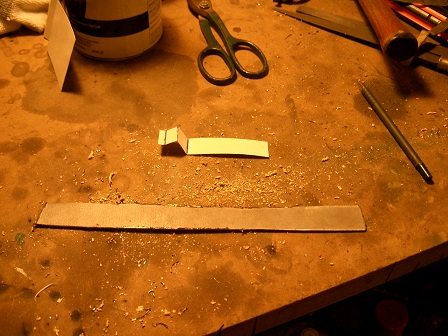 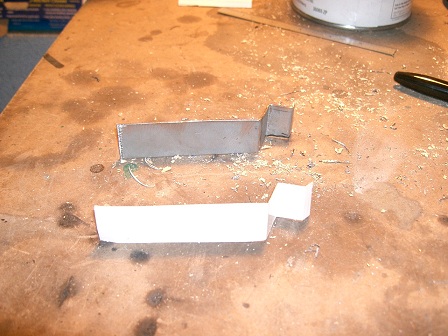 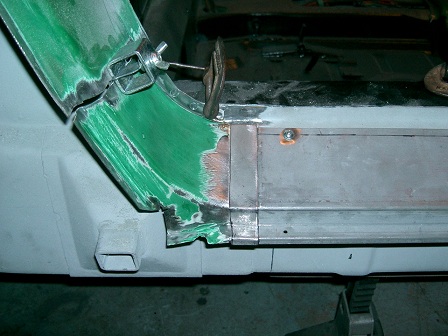 |
| 3d914 |
 Dec 31 2011, 05:40 PM Dec 31 2011, 05:40 PM
Post
#110
|
|
Senior Member    Group: Members Posts: 1,275 Joined: 24-September 03 From: Benson, AZ Member No.: 1,191 Region Association: Southwest Region |
Amazing work. You've really taken on some serious rust. I thought mine was enough work. Hat's off to ya.
Curious - you mention repeatedly about using "One coat ospho, two coats Rust Bullet". Why both - don't they do the same thing? |
| sfrenck |
 Dec 31 2011, 06:30 PM Dec 31 2011, 06:30 PM
Post
#111
|
|
Member   Group: Members Posts: 492 Joined: 28-February 10 From: Wilmington, DE Member No.: 11,411 Region Association: MidAtlantic Region 
|
Inspirational work. Makes me want to go out and start hacking my POS passenger long out and fix it.
Keep it up (IMG:style_emoticons/default/beerchug.gif) |
| saigon71 |
 Jan 1 2012, 10:04 AM Jan 1 2012, 10:04 AM
Post
#112
|
|
Advanced Member     Group: Members Posts: 2,019 Joined: 1-June 09 From: Dillsburg, PA Member No.: 10,428 Region Association: MidAtlantic Region 

|
Amazing work. You've really taken on some serious rust. I thought mine was enough work. Hat's off to ya. Curious - you mention repeatedly about using "One coat ospho, two coats Rust Bullet". Why both - don't they do the same thing? If I understand correctly, Ospho only neutralizes the rust. Rust bullet forms a very strong protective coating over the rusty metal. It may be overkill. (IMG:style_emoticons/default/dry.gif) I have used numerous different kinds of rust treatment/protection on this project...time will tell which are the most effective after I get the car on the road. (IMG:style_emoticons/default/driving.gif) |
| saigon71 |
 Jan 4 2012, 09:45 AM Jan 4 2012, 09:45 AM
Post
#113
|
|
Advanced Member     Group: Members Posts: 2,019 Joined: 1-June 09 From: Dillsburg, PA Member No.: 10,428 Region Association: MidAtlantic Region 

|
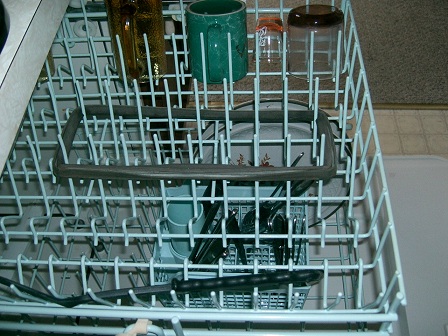
Upon advice from the world after seeing the rust in the gas tank area, I needed to check the airbox seal. It wasn't to bad, so I popped it in the dishwasher for a good cleaning. I broke one of the plastic arms for the spring clips...but the airbox will still seal well so I am not going to worry about it. Cleaned out the nest in there and blew out with compressed air:
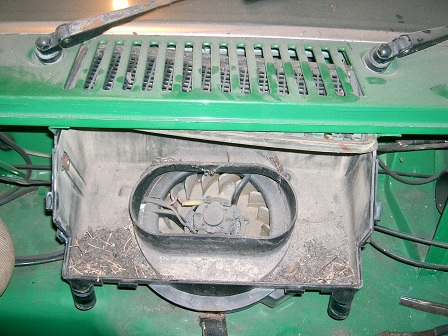 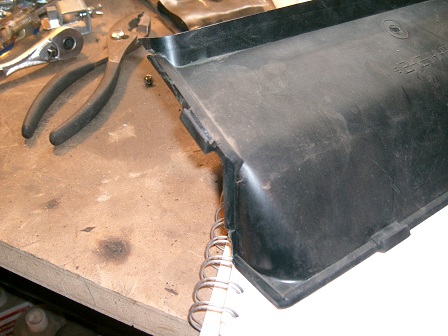  Prepped the passenger rear fender for re-installation. There was a decent amount of surface rust, so I applied a coat of ospho. The stub of the fender to outer suspension mount brace had to be removed as well: 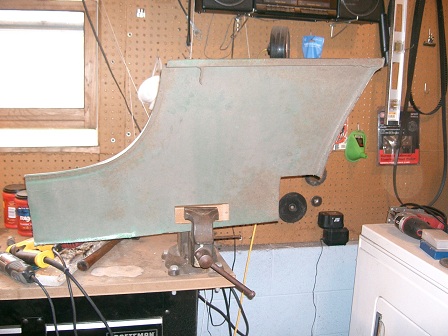 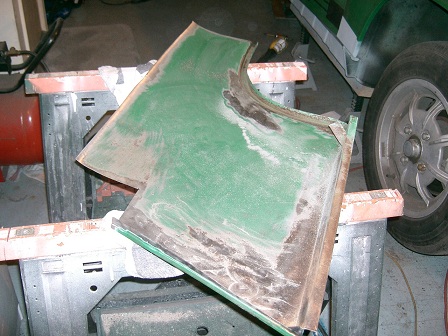 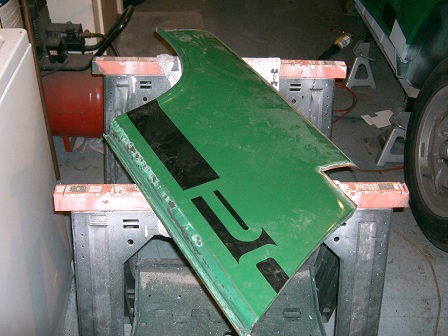 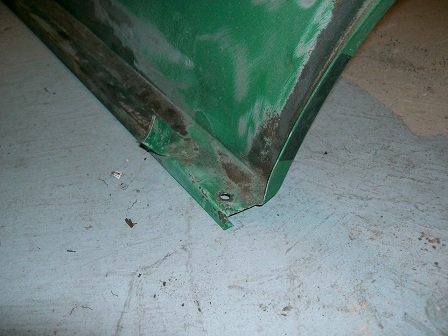 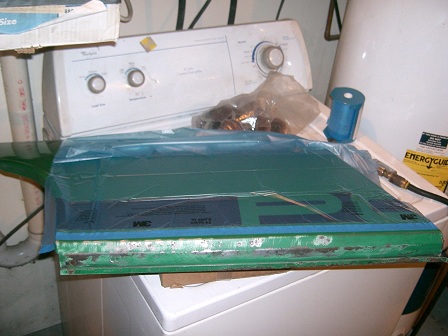 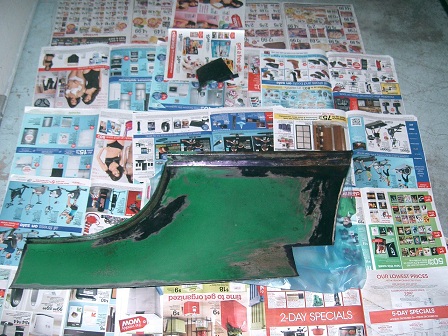 Fitted the rear fender for welding - everything lined up quite well: 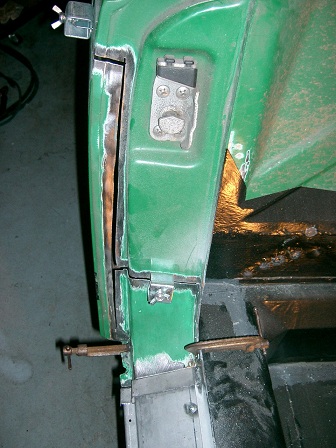 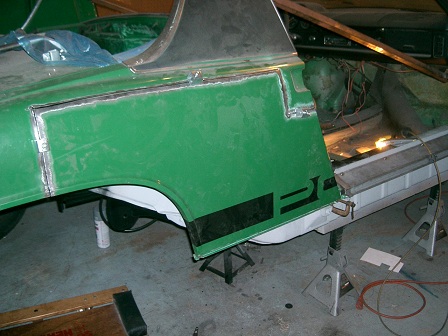 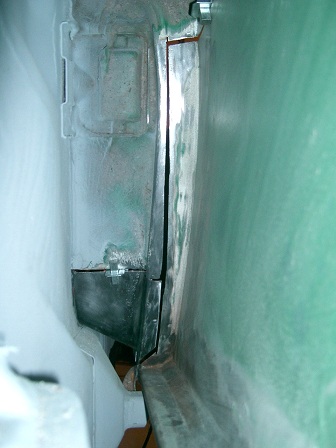 |
| saigon71 |
 Jan 4 2012, 10:01 AM Jan 4 2012, 10:01 AM
Post
#114
|
|
Advanced Member     Group: Members Posts: 2,019 Joined: 1-June 09 From: Dillsburg, PA Member No.: 10,428 Region Association: MidAtlantic Region 

|
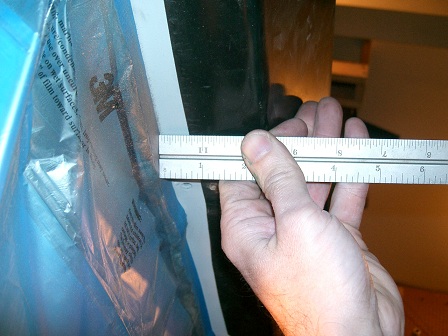
With everything in place, I wanted to make sure that the outer rocker fit properly. I referenced the drivers side...passenger side matched near perfectly. I measured from the lower rocker seam to the outer rocker panel and both sides came in at 11/16":
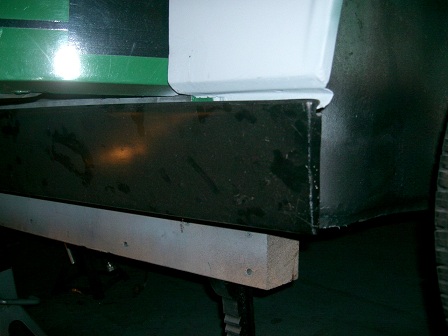 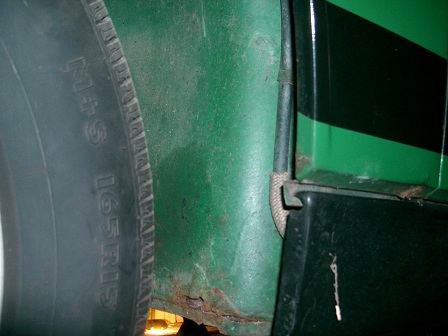  Prepped the front passenger floorpan for ospho. There was only light rust in this area. Backing plate for lower front fender repair will be seam sealed: 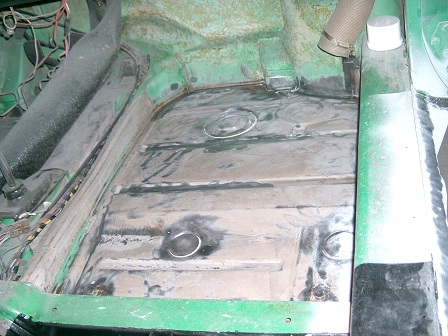 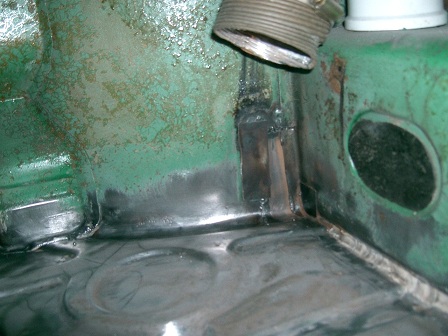 Shot two coats of weld thru primer on the sill and inner rocker: 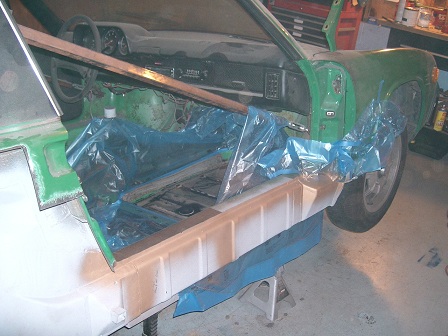 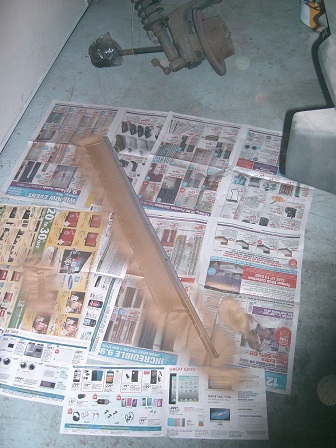 With everything in place, I took a measurement from the inner rocker seam to the edge of the new door sill. Measurement was 3/16" greater on the passenger side. With all metal components lining up well and the outer rocker fitting well, I decided to roll with it: 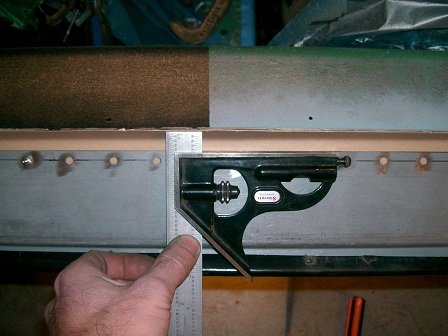 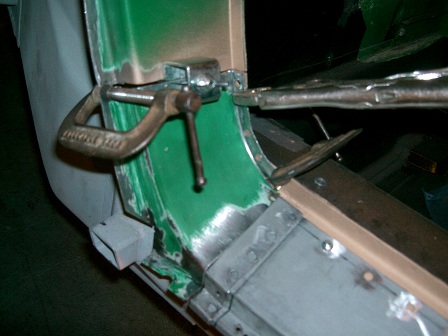 I am pleased to report that I am becoming a good mig welder. (IMG:style_emoticons/default/biggrin.gif) I hated taking the door off again after getting it to fit well, but I figured it may save me some grief while welding the front areas of the sill. Started with a few tack welds to hold everything in place. I needed to apply a little torque on the sill with vice grips for proper alignment where the new sill meets the rear door jamb: 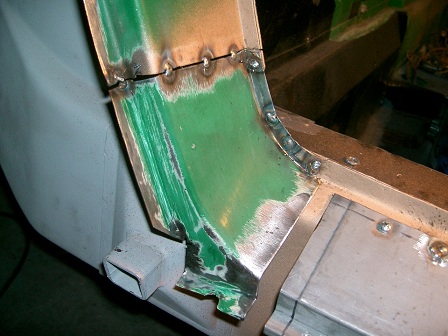 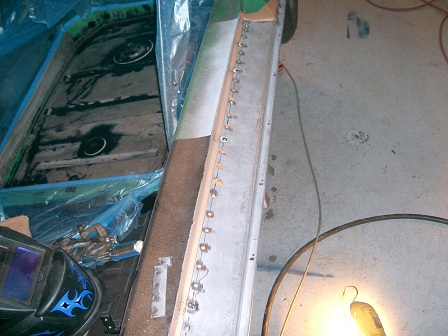 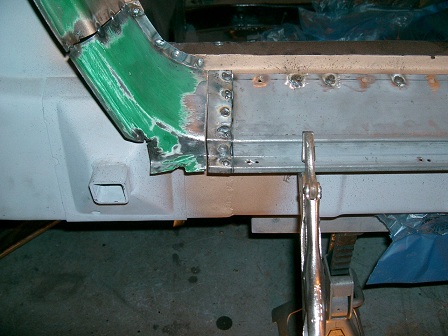 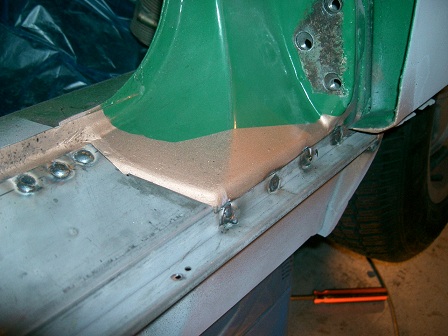 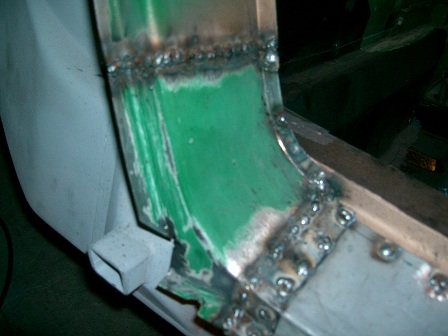 |
| saigon71 |
 Jan 4 2012, 10:16 AM Jan 4 2012, 10:16 AM
Post
#115
|
|
Advanced Member     Group: Members Posts: 2,019 Joined: 1-June 09 From: Dillsburg, PA Member No.: 10,428 Region Association: MidAtlantic Region 

|
One of my poker buddies stopped over last weekend. We were in the garage and he asked what was going on with this piece of shit car. Told him that the plan was to drive it to Hershey in April. He said - no way that is happening, care to wager some cash on it? I agreed. The bet is that the car has to make it to Hershey under its own power. (IMG:style_emoticons/default/driving.gif)
Forget personal pride or a sense of accomplishment - I need to win this bet! (IMG:style_emoticons/default/aktion035.gif) With winter setting in, I have more garage time. I started keeping the heat on low in the shop at all times so paint & rust proofing will cure properly. |
| jsayre914 |
 Jan 4 2012, 04:00 PM Jan 4 2012, 04:00 PM
Post
#116
|
|
Speed Up !!!     Group: Members Posts: 3,210 Joined: 10-February 08 From: Timonium MD 21093 Member No.: 8,696 Region Association: MidAtlantic Region |
(IMG:style_emoticons/default/stirthepot.gif)
How much we talkin bout (IMG:style_emoticons/default/popcorn[1].gif) |
| FourBlades |
 Jan 4 2012, 07:35 PM Jan 4 2012, 07:35 PM
Post
#117
|
|
From Wreck to Rockin     Group: Members Posts: 2,056 Joined: 3-December 07 From: Brevard, FL Member No.: 8,414 Region Association: South East States 
|
Great work man!
You are really making some progress. (IMG:style_emoticons/default/first.gif) You might want to install the door and check the gaps while welding the rear fender back on. You can easily adjust if needed now, but once it is welded up it is hard to fix later. John |
| saigon71 |
 Jan 5 2012, 05:59 PM Jan 5 2012, 05:59 PM
Post
#118
|
|
Advanced Member     Group: Members Posts: 2,019 Joined: 1-June 09 From: Dillsburg, PA Member No.: 10,428 Region Association: MidAtlantic Region 

|
(IMG:style_emoticons/default/stirthepot.gif) How much we talkin bout (IMG:style_emoticons/default/popcorn[1].gif) Just a few bucks, nothing major...its the principle of the thing. (IMG:style_emoticons/default/biggrin.gif) |
| saigon71 |
 Jan 5 2012, 06:03 PM Jan 5 2012, 06:03 PM
Post
#119
|
|
Advanced Member     Group: Members Posts: 2,019 Joined: 1-June 09 From: Dillsburg, PA Member No.: 10,428 Region Association: MidAtlantic Region 

|
Great work man! You are really making some progress. (IMG:style_emoticons/default/first.gif) You might want to install the door and check the gaps while welding the rear fender back on. You can easily adjust if needed now, but once it is welded up it is hard to fix later. John Good call John. Found some nice rust on the underside of the passenger door that will be easier to fix with the door off so it may be a few days before the fender gets back on. (IMG:style_emoticons/default/dry.gif) |
| saigon71 |
 Jan 5 2012, 06:35 PM Jan 5 2012, 06:35 PM
Post
#120
|
|
Advanced Member     Group: Members Posts: 2,019 Joined: 1-June 09 From: Dillsburg, PA Member No.: 10,428 Region Association: MidAtlantic Region 

|
Considering how critical this area is to the strength of the car, I ran a bead of weld on the backside of the door jamb & sill:
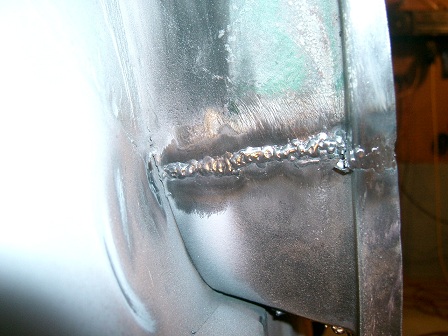 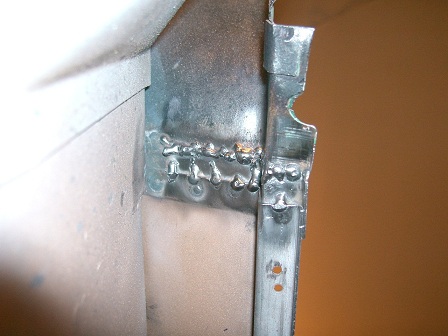 Fitted the sill triangles. They didn't need much and held themselves in place for welding. I have struggled with small rosette welds and can't describe what goes wrong without cueing a barrage of "that's what she said" jokes. (IMG:style_emoticons/default/biggrin.gif) So I tacked welded them on both sides: 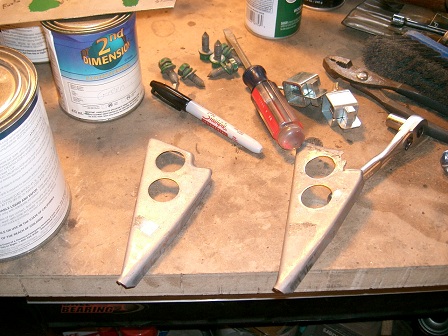 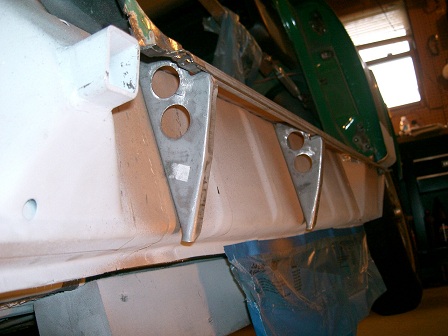 Ground down the welds on this piece. Scrubbed everything down with scotch brite and shot two coats of primer. Overall it turned out well, but the primer revealed a few low spots at the seams that will need to be re-welded. 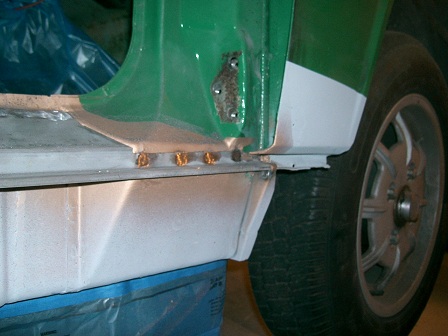 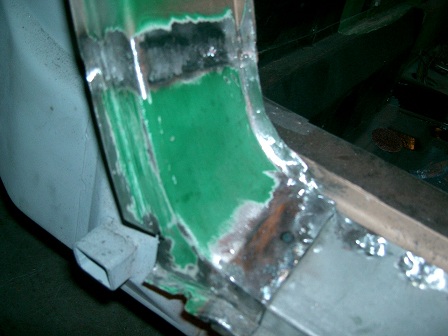 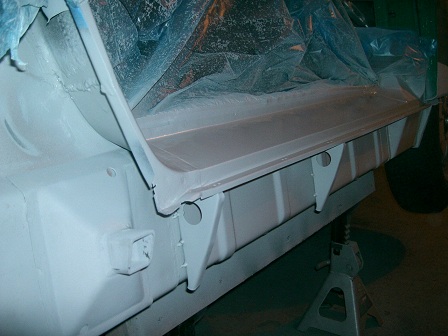 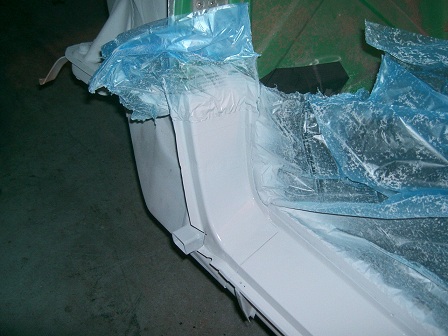 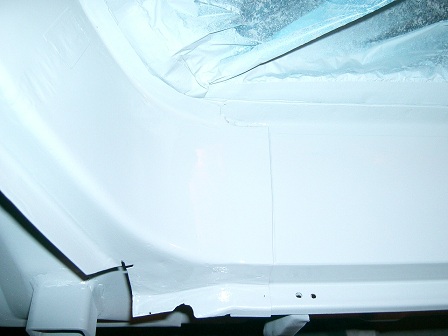 Ospho'd and sprayed undercoating on the outer edge of the floor: 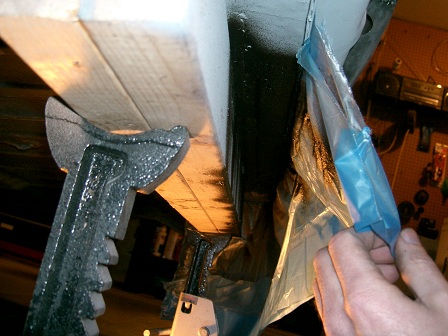 |
  |
1 User(s) are reading this topic (1 Guests and 0 Anonymous Users)
0 Members:

|
Lo-Fi Version | Time is now: 15th December 2025 - 02:12 PM |
Invision Power Board
v9.1.4 © 2025 IPS, Inc.


