|
|
|
Porsche, and the Porsche crest are registered trademarks of Dr. Ing. h.c. F. Porsche AG.
This site is not affiliated with Porsche in any way. Its only purpose is to provide an online forum for car enthusiasts. All other trademarks are property of their respective owners. |
|
|

  |

| michelko |
 Jan 6 2012, 03:47 AM Jan 6 2012, 03:47 AM
Post
#121
|
|
Senior Member  Group: Members Posts: 867 Joined: 30-November 03 From: Germany, Lambsheim Member No.: 1,404 Region Association: None |
Hi there,
reminds me to my projekt, but differnt colour. Very clean work. Keep on (IMG:style_emoticons/default/smilie_pokal.gif) |
   |

 
|
| saigon71 |
Jan 7 2012, 08:46 AM
Post
#122
|
|
Advanced Member Group: Members Posts: 2,019 Joined: 1-June 09 From: Dillsburg, PA Member No.: 10,428 Region Association: MidAtlantic Region |
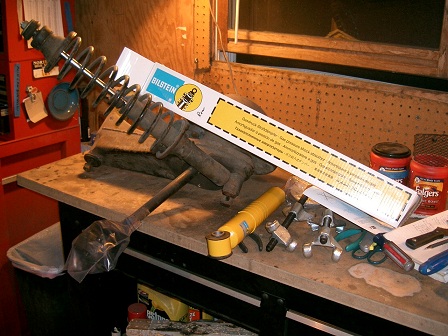
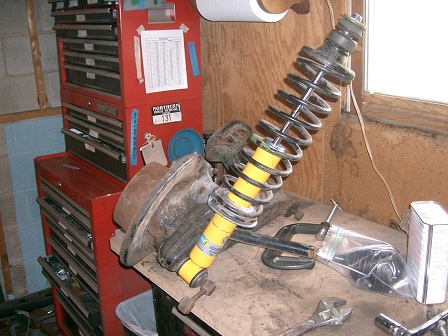
Started mounting the new Billstein shock on the passenger side. The nut holding the bottom of the old shock was frozen. Tried penetrating fluid and a big hammer with the console clamped to the workbench. I don't have a regular torch to heat the nut with, so I used a heat gun - it actually worked. I am sticking with stock springs initially...may end up switching to 140's later on. I will have to move the lower spring mount up on the shock about 1 1/8" by moving the circlip.
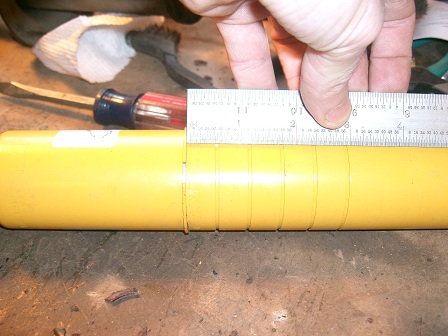
    Noticed some rust on the bottom of the passenger door. Removed the seal for inspection. There is some surface rust and about a 2 inch area rusted through. I don't have time to fix this the right way, so it got cleaned & ospho'd. I will do the best I can to rustproof this area until I can do it right or buy a good set of used doors: 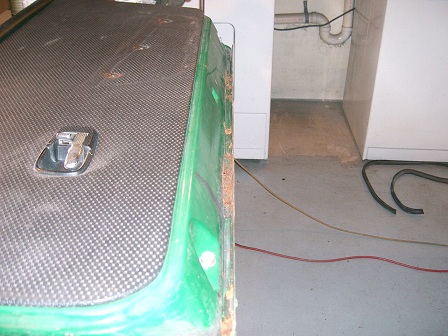 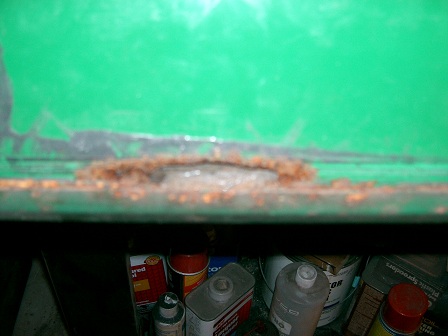   Garage at capacity:  Two coats of rust encapsulator on the passenger front floor pan & applied undercoating to new metal in the rear passenger floorpan:  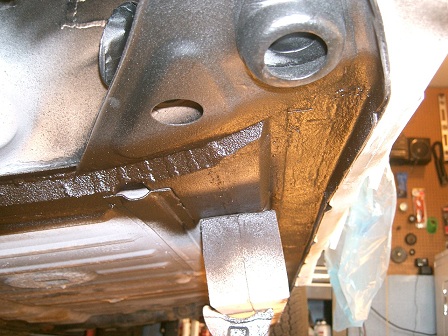 Went back and added some weld to the upper seam of the door jamb: 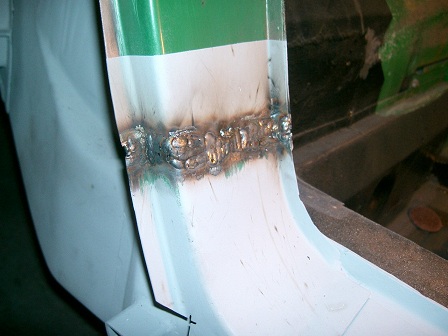  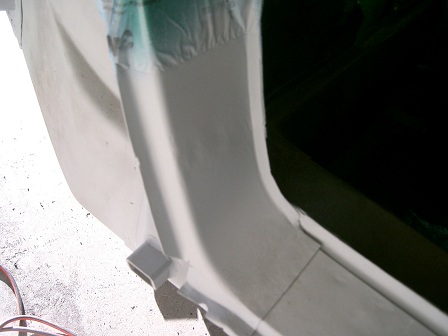 I hated the idea of putting the gas tank back in with the original carpet pads because they hold water. Wandering around Home Depot, I think I found a cheap solution - polyethelene pipe wrap. Cut three pieces and tie wrapped them overnight to help flatten them out. Removed remaining carpet and cleaned mounting area: 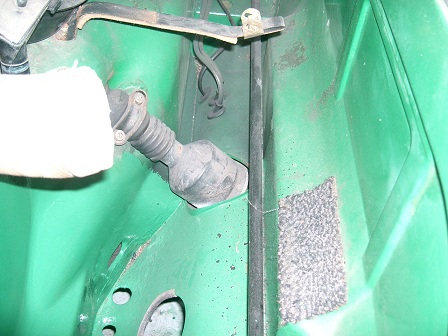 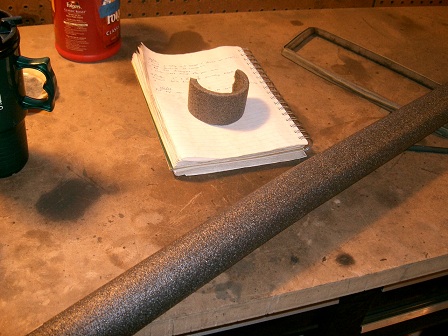 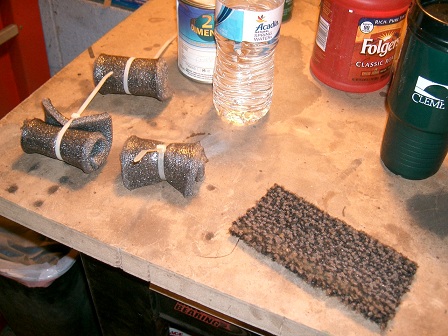 |
|
|
|
| Socalandy |
Jan 7 2012, 09:00 AM
Post
#123
|
|
Its got to be Yellow!!! Group: Members Posts: 2,432 Joined: 29-August 09 From: Orange Member No.: 10,742 Region Association: Southern California |
great progress!!! I'm dealing with my doors now and yours are way better. Need to cut the seal channel to patch the rot holes
|
|
|
|
| saigon71 |
Jan 7 2012, 09:37 AM
Post
#124
|
|
Advanced Member Group: Members Posts: 2,019 Joined: 1-June 09 From: Dillsburg, PA Member No.: 10,428 Region Association: MidAtlantic Region |
QUOTE(Socalandy @ Jan 7 2012, 10:00 AM)  great progress!!! I'm dealing with my doors now and yours are way better. Need to cut the seal channel to patch the rot holes Please post pics of your door repair so I know what I am in for! (IMG:style_emoticons/default/biggrin.gif) The drivers side door is MUCH worse on my car. Both will be fixed or replaced properly after the car is on the road. I need to start driving this thing. (IMG:style_emoticons/default/driving.gif) |
|
|
|
| Socalandy |
Jan 7 2012, 09:48 AM
Post
#125
|
|
Its got to be Yellow!!! Group: Members Posts: 2,432 Joined: 29-August 09 From: Orange Member No.: 10,742 Region Association: Southern California |
I will, I think I may be posting to many pics on my resto and SirAndy will start asking for dues!! (IMG:style_emoticons/default/ohmy.gif)
|
|
|
|
| saigon71 |
Jan 7 2012, 09:51 AM
Post
#126
|
|
Advanced Member Group: Members Posts: 2,019 Joined: 1-June 09 From: Dillsburg, PA Member No.: 10,428 Region Association: MidAtlantic Region |
QUOTE(michelko @ Jan 6 2012, 04:47 AM) Hi there, reminds me to my projekt, but differnt colour. Very clean work. Keep on (IMG:style_emoticons/default/smilie_pokal.gif) Thanks! Adriatic Blue is my favorite color on teeners...followed closely by Zambezi Green. (IMG:style_emoticons/default/biggrin.gif) |
|
|
|
| saigon71 |
Jan 8 2012, 10:43 AM
Post
#127
|
|
Advanced Member Group: Members Posts: 2,019 Joined: 1-June 09 From: Dillsburg, PA Member No.: 10,428 Region Association: MidAtlantic Region |
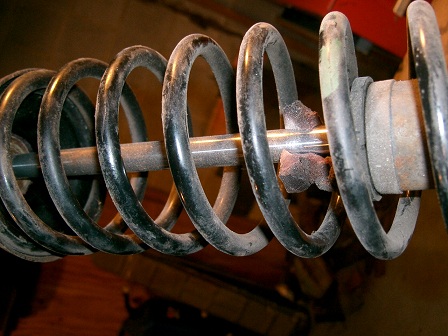
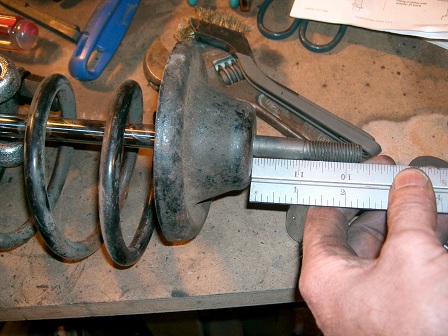
Finished putting the new Billstein on the trailing arm. The factory shock was slightly pre-loaded when I removed the hold down nut on the old spring. I ended up using the 2nd groove from the top for the circlip that holds the lower spring holder to match the spring load:
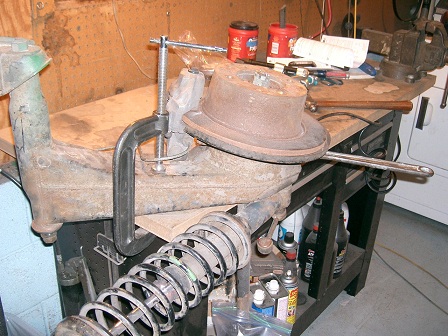
  Took a look at the lower suspension consoles. The factory had "caps" of 14 GA metal that tie the inner and outer suspension console together. I snapped a shot of the cross section from another chunk of long. Other than buying 14 GA metal and beating out these parts, has anyone found a good solution for making these?  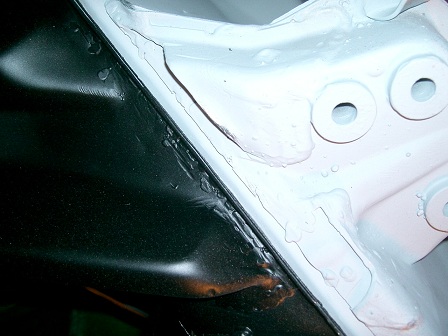 Loaded up the parts cleaner for another round: 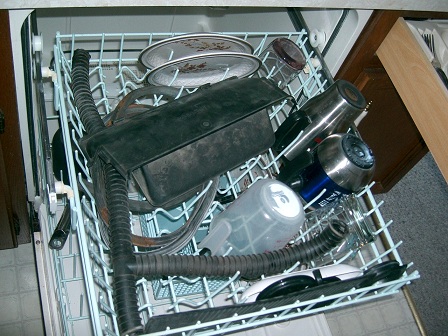 Glued the new gas tank vibration dampeners in with 3M weatherstrip adhesive: 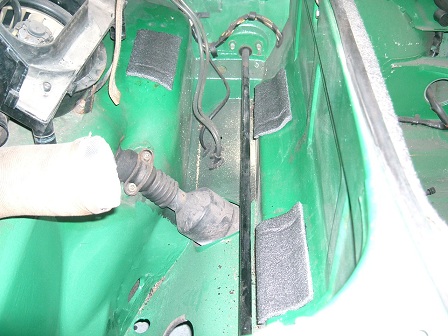 Seam sealed front passenger floor pan: 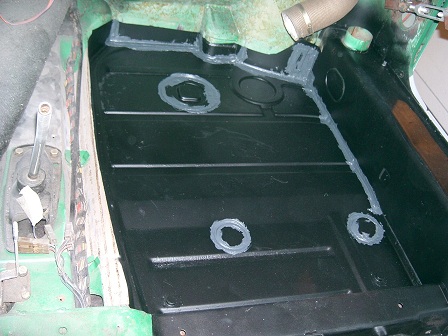 I realized that I probably won't have time to give this car a complete and proper paint job before Hershey, but want it to be presentable. Tested what two coats of brushed on acrylic enamel would look like on the door sill: 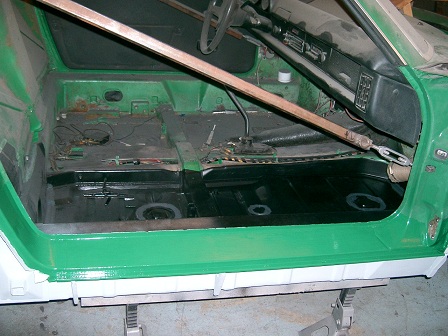 Started fitting the battery tray...have some questions about placement on a separate thread: 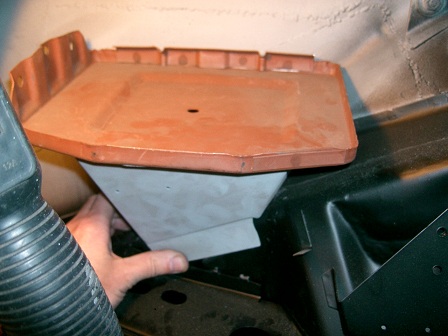 |
|
|
|
| AndyB |
Jan 8 2012, 06:54 PM
Post
#128
|
|
The Governor is watching me Group: Members Posts: 1,115 Joined: 10-April 10 From: Philadelphia New York Member No.: 11,595 Region Association: North East States |
Who cares what it looks like at Hershey as long as its there (IMG:style_emoticons/default/drunk.gif) Making lots of progress Bob
|
|
|
|
| hot_shoe914 |
Jan 8 2012, 08:52 PM
Post
#129
|
|
on ramp passer Group: Members Posts: 3,807 Joined: 20-November 07 From: Earle, Ar. Member No.: 8,354 Region Association: None |
QUOTE(Scarlet75 @ Jan 8 2012, 06:54 PM) Who cares what it looks like at Hershey as long as its there (IMG:style_emoticons/default/drunk.gif) Making lots of progress Bob (IMG:style_emoticons/default/agree.gif) (IMG:style_emoticons/default/agree.gif) (IMG:style_emoticons/default/agree.gif) |
|
|
|
| saigon71 |
Jan 11 2012, 08:35 AM
Post
#130
|
|
Advanced Member Group: Members Posts: 2,019 Joined: 1-June 09 From: Dillsburg, PA Member No.: 10,428 Region Association: MidAtlantic Region |
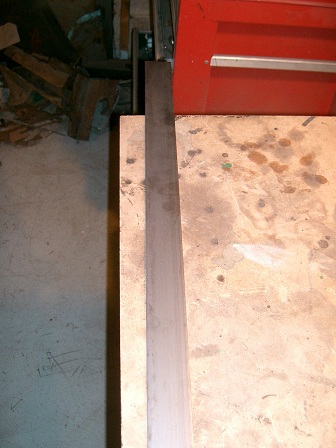
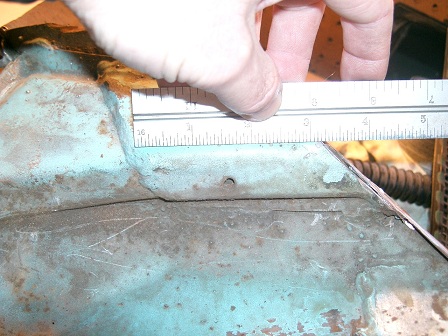
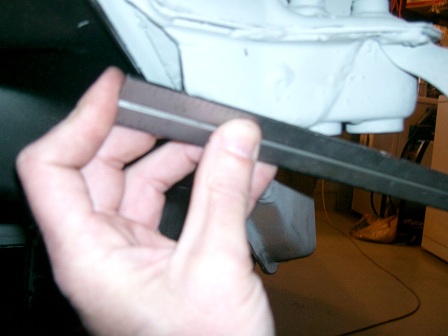
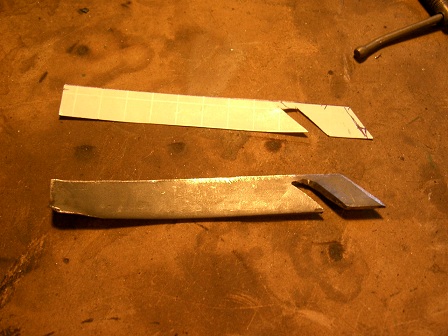
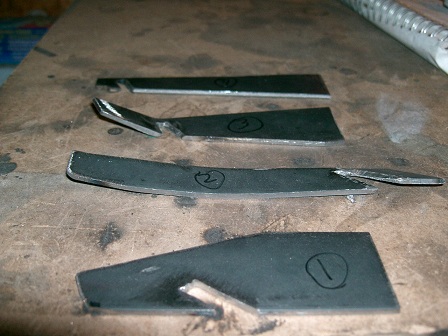
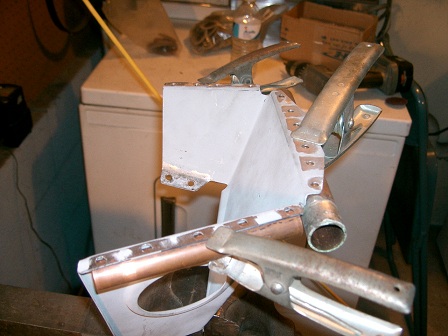
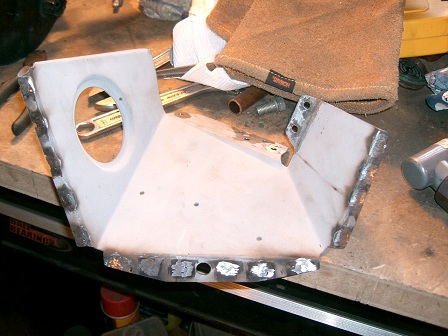
Original suspension "caps" were made from 14GA metal (~.075"). I picked up some 1 1/2" flat steel for $12 at the local hardware store that measured .100" thick. These things are complicated because they twist in some areas along the consoles. I opted to make these pieces in two stages...side pieces welded in first, then tie them together. Made a template for each piece and hammered them out. I was able to get the most of the twist with a big pair of vice grips and fine tuned with a ball peen hammer against the suspension consoles. I still had parts of the old caps on the outer console that I plan using:
         Sprayed two coats of Rust Encapsulator on the rusty areas of the lower passenger door: 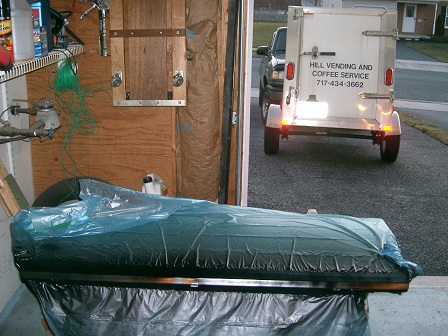 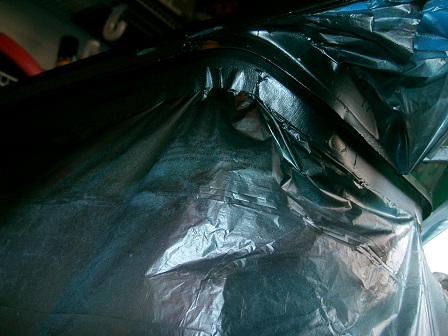 Bolted/clamped the battery tray together so I could see how it wanted to fit and compared measurements to those received from the world. I came up with 3 3/4" from the leading edge of the tray to the firewall (without pad) and 11" from the top edge of the engine bay body panel to the tray. The vertical matches perfectly and I am close horizontally. I still need to level the car again to make sure the battery tray is level for final fit:  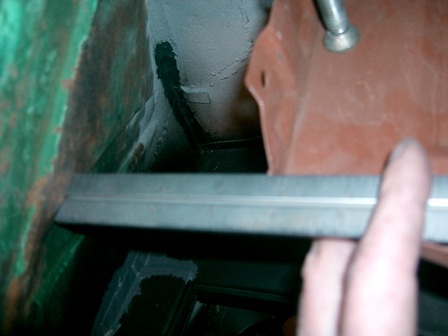 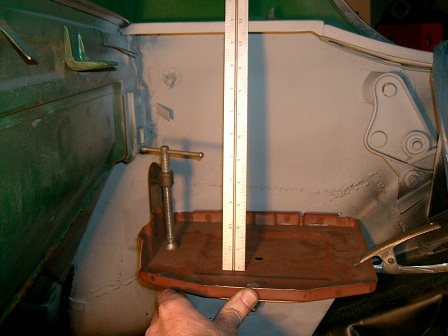 |
|
|
|
| saigon71 |
Jan 13 2012, 08:34 AM
Post
#131
|
|
Advanced Member Group: Members Posts: 2,019 Joined: 1-June 09 From: Dillsburg, PA Member No.: 10,428 Region Association: MidAtlantic Region |
While welding upside down, a chunk of hot crag fell on my chest & burnt through my sweatshirt. The burn looks like a comet, because as a reaction to the searing pain, I rolled on my side causing the molten metal to roll across my chest leaving a very nice line! This only needed to happen once for me to pick up a welding apron. (IMG:style_emoticons/default/dry.gif)
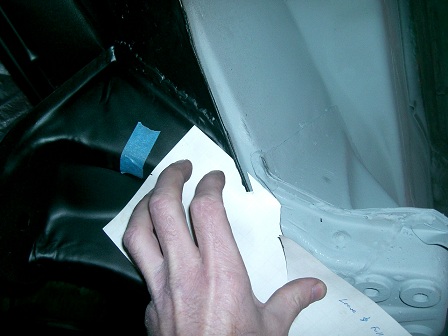
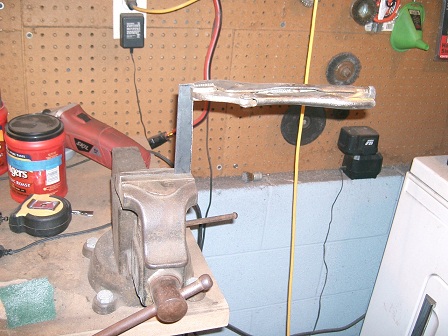
Finished making the caps for the suspension consoles yesterday and tack welded them on. I want to wait until the door is back on and I can verify door gaps before seam welding these pieces, as three chunks of the car are joined with these. The factory piece had drain holes in it on the bottom, so I added them on my reproduction pieces: 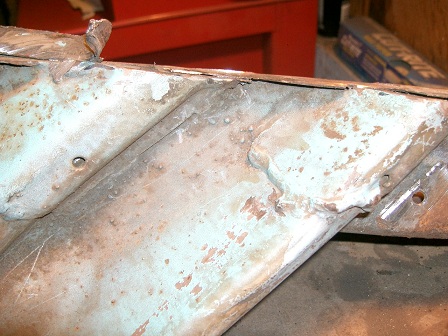 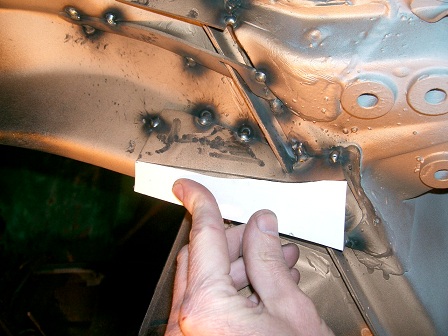 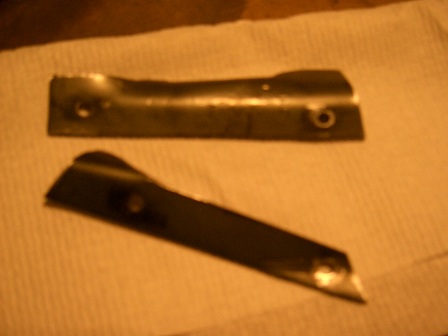 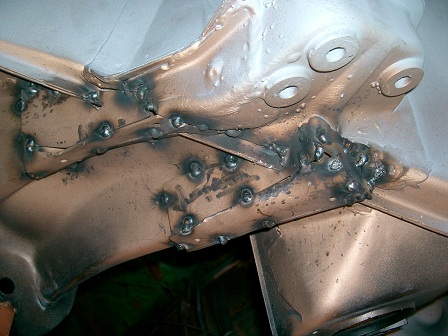 Finished up the "quick fix" on the passenger door. Shot two coats of hi-build primer on a low area, sanded, then two coats of Zambezi Green acrylic enamel from an aerosol can. There is absolutely a paint line, but it will look OK from about 20ft: 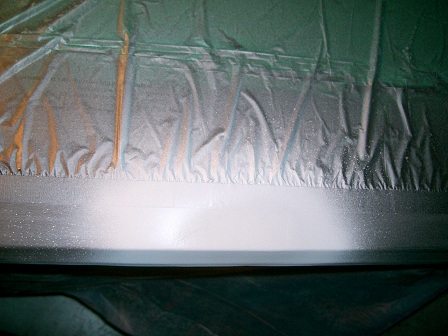 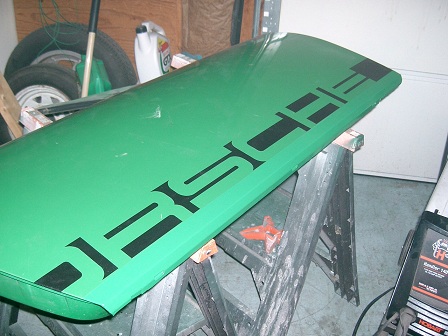 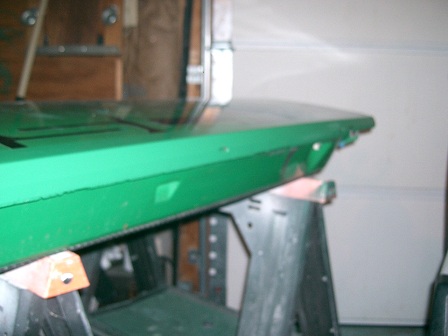 The air duct in the door jamb is loaded with surface rust and started pitting in some areas. Wire brushed with a dremmel tool and sprayed with ospho: 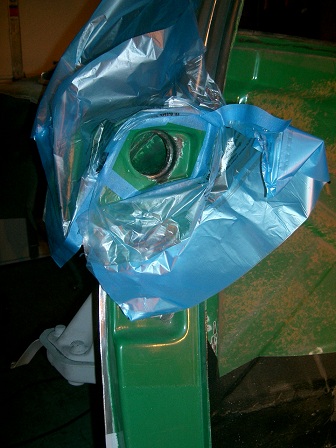  |
|
|
|
| saigon71 |
Jan 13 2012, 09:02 AM
Post
#132
|
|
Advanced Member Group: Members Posts: 2,019 Joined: 1-June 09 From: Dillsburg, PA Member No.: 10,428 Region Association: MidAtlantic Region |
The last thing I want is to get hung up with the DMV a week before Hershey, so I started looking into classic/antique plates for the car. It looks like you have to take pictures of the car to submit with your application which would not bode well for me right now. Depending on the timing of everything, I may have to get a regular registration this year and apply for antique or classic plates next year.
|
|
|
|
| jsayre914 |
Jan 13 2012, 11:23 AM
Post
#133
|
|
Speed Up !!! Group: Members Posts: 3,210 Joined: 10-February 08 From: Timonium MD 21093 Member No.: 8,696 Region Association: MidAtlantic Region |
QUOTE(saigon71 @ Jan 13 2012, 10:02 AM) The last thing I want is to get hung up with the DMV a week before Hershey, so I started looking into classic/antique plates for the car. It looks like you have to take pictures of the car to submit with your application which would not bode well for me right now. Depending on the timing of everything, I may have to get a regular registration this year and apply for antique or classic plates next year. No Way Ask Zach for pictures of his car, front side and back (No Tag) Then you need a pic of the vin on your car. They also required me to bring a rubbing of the vin, which is impossible for our cars unless you are missing a windshield. If I can help I will. Joseph |
|
|
|
| saigon71 |
Jan 14 2012, 08:36 AM
Post
#134
|
|
Advanced Member Group: Members Posts: 2,019 Joined: 1-June 09 From: Dillsburg, PA Member No.: 10,428 Region Association: MidAtlantic Region |
It's possible I had one too many beers working late on the car the other night. (IMG:style_emoticons/default/beerchug.gif) Without thinking it through, I drilled holes for rosette welds in the bracket of the battery tray thinking I would weld it all together before installation. The problem is that I would have no real access to the rear metal tab on the bracket that gets welded to the long. I tried bending the tab the opposite way, but it rested on the innser suspension console, not the long. The holes needed to be filled. I found some old copper pipe to clamp on & use as a backer:
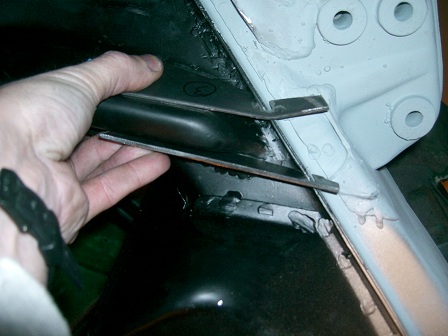
  I have decided to wait untill the car is on all fours to install the battery tray...it will be easier to get it perfectly level. Pulled the engine bay cover out of the shed to address some rust: 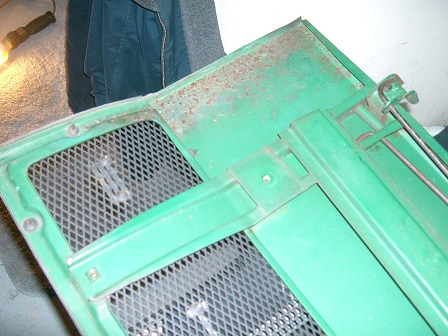 My lower passenger door seal was in remarkably good shape. Ran it through the dishwasher twice, treated it with RV slide out seal conditioner and put it back on. The "J Man" stopped over to help fit the passenger door. Wanted to have this in place to check door gaps before final welding on the caps on the suspension consoles and the passenger fender. We put the top on as well to make sure everything still lined up. Everything looks about as good as it can with old seals...it was nice to see after all this work: 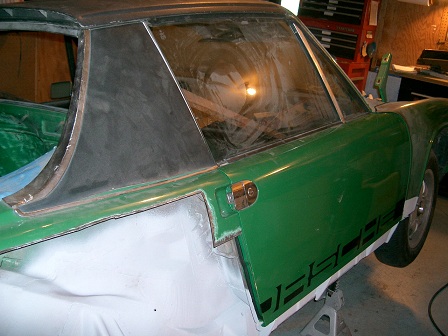 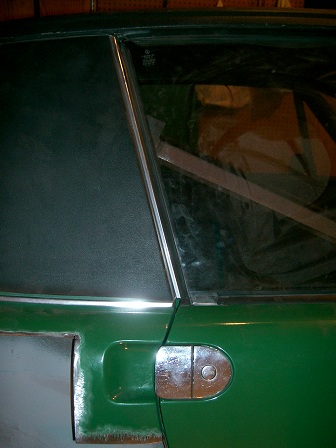 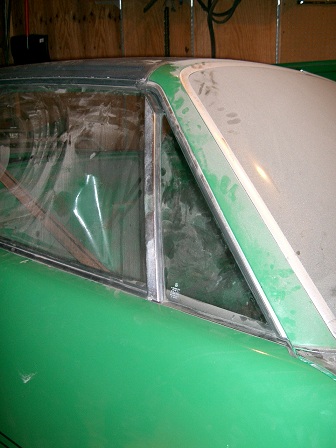 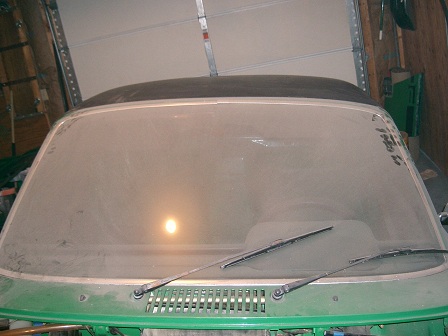 |
|
|
|
| saigon71 |
Jan 14 2012, 08:47 AM
Post
#135
|
|
Advanced Member Group: Members Posts: 2,019 Joined: 1-June 09 From: Dillsburg, PA Member No.: 10,428 Region Association: MidAtlantic Region |
QUOTE(jsayre914 @ Jan 13 2012, 12:23 PM) QUOTE(saigon71 @ Jan 13 2012, 10:02 AM) The last thing I want is to get hung up with the DMV a week before Hershey, so I started looking into classic/antique plates for the car. It looks like you have to take pictures of the car to submit with your application which would not bode well for me right now. Depending on the timing of everything, I may have to get a regular registration this year and apply for antique or classic plates next year. No Way Ask Zach for pictures of his car, front side and back (No Tag) Then you need a pic of the vin on your car. They also required me to bring a rubbing of the vin, which is impossible for our cars unless you are missing a windshield. If I can help I will. Joseph Joe: Did you go with antique or classic plates? I want to be able to drive this car as a daily driver most of the year. Based on this, I was thinking that classic may be the way to go. I will see what kind of progress I make over the next month and decide from there. Hell, Zach's car is almost the same color! Bob |
|
|
|
| okieflyr |
Jan 14 2012, 09:07 AM
Post
#136
|
|
9fauxteen Group: Members Posts: 816 Joined: 9-January 05 From: Phila PA Member No.: 3,426 Region Association: North East States |
QUOTE(jsayre914 @ Jan 13 2012, 12:23 PM) QUOTE(saigon71 @ Jan 13 2012, 10:02 AM) The last thing I want is to get hung up with the DMV a week before Hershey, so I started looking into classic/antique plates for the car. It looks like you have to take pictures of the car to submit with your application which would not bode well for me right now. Depending on the timing of everything, I may have to get a regular registration this year and apply for antique or classic plates next year. No Way Ask Zach for pictures of his car, front side and back (No Tag) Then you need a pic of the vin on your car. They also required me to bring a rubbing of the vin, which is impossible for our cars unless you are missing a windshield. If I can help I will. Joseph IIRC, they are looking for pics of the car in an unmodified state, as it came from the factory. No window tint included. There are specific picture angles required as well. I took a rubbing from the front stamped VIN on the right front fender. When you insure the car, they may want pics of the car as well whether it is collecter or regular just given the age. |
|
|
|
| okieflyr |
Jan 14 2012, 09:21 AM
Post
#137
|
|
9fauxteen Group: Members Posts: 816 Joined: 9-January 05 From: Phila PA Member No.: 3,426 Region Association: North East States |
Bob, I admire the time and work that you've put into your resto work. The PO of my car did alot of metal with the pans and such. But I could see a difference in the quality of work as he progressed in different areas of the car as I think he was getting tired or in a hurry. I'm gearing up to do some rustoration work in the areas he didn't do as well and the downtime is going to drive me nuts. So where I'm headed is, keep taking your time for your quality work. If you miss your Hershey deadline it will be a bummer because youv'e worked so hard and we won't get to see it, but you won't have any "I wish I had" regrets down the road. Keep up the good work, you are my inspiration!
|
|
|
|
| saigon71 |
Jan 14 2012, 09:40 AM
Post
#138
|
|
Advanced Member Group: Members Posts: 2,019 Joined: 1-June 09 From: Dillsburg, PA Member No.: 10,428 Region Association: MidAtlantic Region |
QUOTE(okieflyr @ Jan 14 2012, 10:21 AM) Bob, I admire the time and work that you've put into your resto work. The PO of my car did alot of metal with the pans and such. But I could see a difference in the quality of work as he progressed in different areas of the car as I think he was getting tired or in a hurry. I'm gearing up to do some rustoration work in the areas he didn't do as well and the downtime is going to drive me nuts. So where I'm headed is, keep taking your time for your quality work. If you miss your Hershey deadline it will be a bummer because youv'e worked so hard and we won't get to see it, but you won't have any "I wish I had" regrets down the road. Keep up the good work, you are my inspiration! (IMG:style_emoticons/default/biggrin.gif) Man, thanks Kevin. Your advice is top shelf! This project has taken on a life of its own...much more than I bargained for. (IMG:style_emoticons/default/headbang.gif) Keeping up the quality has been a concern all along for me and I normally call it a day when I get frustrated or burned out on the car. I have rushed projects in the past with poor results & recognize how bad it would suck to have to re-do major stuff that was rushed. I don't want to be dropping the engine/tranny again for rust repair in the engine bay area, so fixing these areas correctly is the #1 priority before Hershey...I am OK with finishing other rust work down the road. |
|
|
|
| saigon71 |
Jan 17 2012, 10:34 PM
Post
#139
|
|
Advanced Member Group: Members Posts: 2,019 Joined: 1-June 09 From: Dillsburg, PA Member No.: 10,428 Region Association: MidAtlantic Region |
The Optima 34R arrived today. I look forward to installing it.
Finished zipping up all the seams on the suspension console caps. This was the hottest setting I had used so far on the welder. I turned down the wire feed where the gaps were close, took my time, cooled with compressed air often, and wore a welding vest. (IMG:style_emoticons/default/smile.gif) Went back and touched up a few areas with the mig. Pics are after grinding. 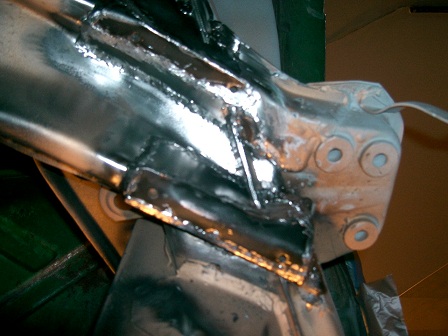 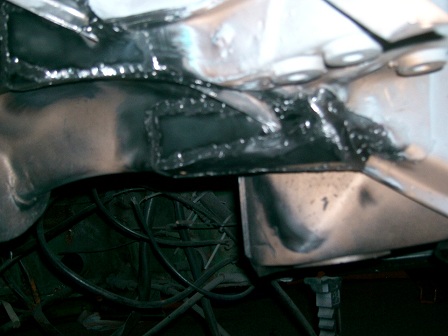 There was one small area on the engine deck lid that had some surface rust. Wire brushed it and applied ospho. Took inventory of the P O R S C H E letters I had picked up at swap meets. I had a few duplicates, but couldnt make a set that all had the studs. Dremmeled the plasitc studs off, drilled the letters & installed #6 X 32 machine screws with the heads cut off. They will work well with the nylon nuts from home depot: 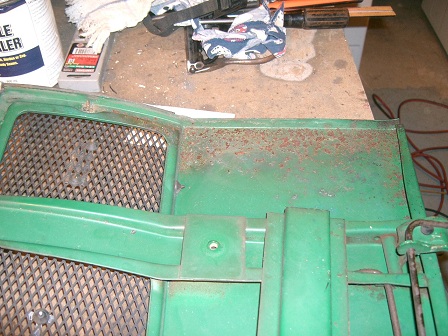 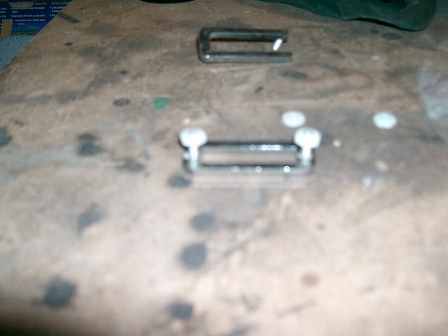 |
|
|
|
| ChrisFoley |
Jan 18 2012, 10:34 AM
Post
#140
|
|
I am Tangerine Racing Group: Members Posts: 8,019 Joined: 29-January 03 From: Bolton, CT Member No.: 209 Region Association: None |
I guess I haven't been following this thread close enough Bob, sorry!
I have templates to make the console caps - shaped from single pieces of 14ga. (I could have sent you a jpeg) Looks real good! |
|
|
|
|
1 User(s) are reading this topic (1 Guests and 0 Anonymous Users)
0 Members:

|
Lo-Fi Version | Time is now: 7th March 2026 - 03:32 AM |
Invision Power Board
v9.1.4 © 2026 IPS, Inc.