|
|
|
Porsche, and the Porsche crest are registered trademarks of Dr. Ing. h.c. F. Porsche AG.
This site is not affiliated with Porsche in any way. Its only purpose is to provide an online forum for car enthusiasts. All other trademarks are property of their respective owners. |
|
|

  |

| 3d914 |
 Jan 22 2014, 12:08 PM Jan 22 2014, 12:08 PM
Post
#181
|
|
Senior Member  Group: Members Posts: 1,275 Joined: 24-September 03 From: Benson, AZ Member No.: 1,191 Region Association: Southwest Region |
Lookin really nice, Mike. I'm sooo jealous!
|
   |

 
|
| OU8AVW |
Jan 22 2014, 07:48 PM
Post
#182
|
|
Yacht Rigger Group: Members Posts: 1,804 Joined: 1-October 08 From: Granbury, TX Member No.: 9,601 Region Association: Southwest Region |
Thanks guys. No garage time today, it's 6 outside and I'm working in a tent (IMG:style_emoticons/default/dry.gif)
|
|
|
|
| OU8AVW |
Feb 3 2014, 12:09 PM
Post
#183
|
|
Yacht Rigger Group: Members Posts: 1,804 Joined: 1-October 08 From: Granbury, TX Member No.: 9,601 Region Association: Southwest Region |
I worked on the front signals this weekend. Got them painted and partially installed. I bounce around allot as required knowledge and needed parts send me back to the computer (IMG:style_emoticons/default/biggrin.gif)
NOS Euro lenses look sweet! My housing seals seals were in perfect shape too. I replaced the harness seals behind the housing with some good used units. This forced me to replace the connections, they were toast anyway. I'm finding that a fine 3m pad and some tire cleaner cleans up the rubber real nice. Then a quick coat of silicone to give it that dull shine. 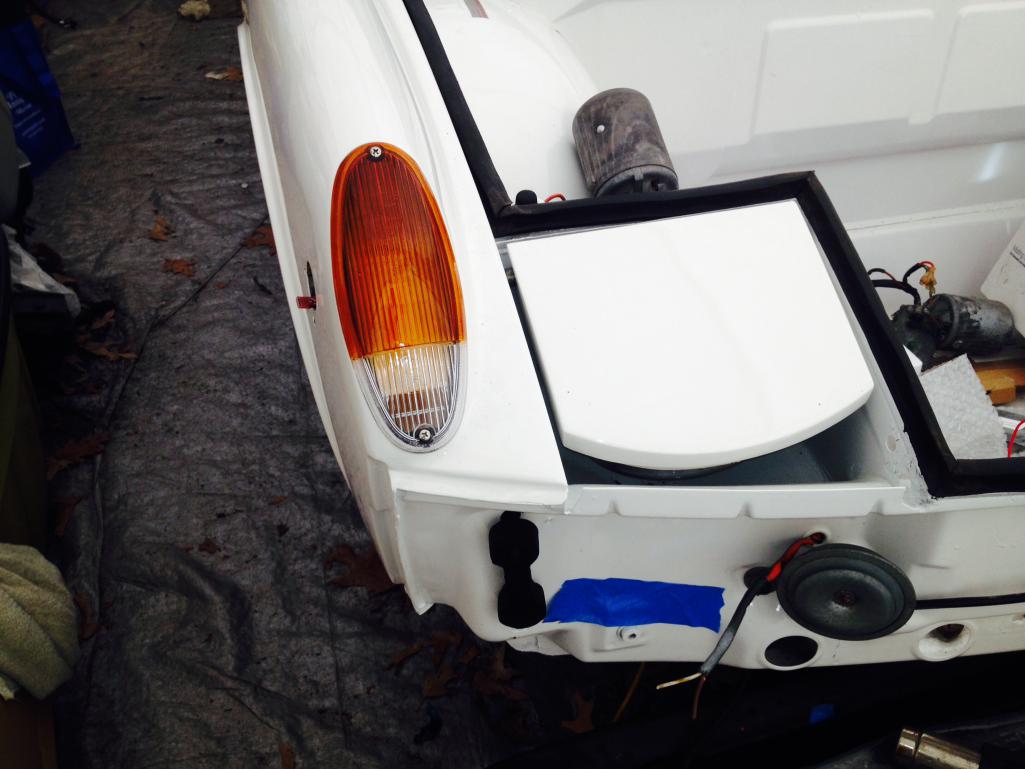 |
|
|
|
| CptTripps |
Feb 3 2014, 01:50 PM
Post
#184
|
|
:: Punch and Pie :: Group: Members Posts: 3,586 Joined: 26-December 04 From: Tuscaloosa, AL and Akron, OH Member No.: 3,342 Region Association: Upper MidWest |
Looking good man...
|
|
|
|
| OU8AVW |
Feb 8 2014, 07:59 PM
Post
#185
|
|
Yacht Rigger Group: Members Posts: 1,804 Joined: 1-October 08 From: Granbury, TX Member No.: 9,601 Region Association: Southwest Region |
Started my transmission rebuild Friday. My amigo Eric gave me a hand. I had the tailshift that came with the car and a sideshift i bought from a member here (who's name i will not mention, you'll see why....)
The hope was to make on good sideshift trans out of these two. Sideshift on the bench ready for disassembly. 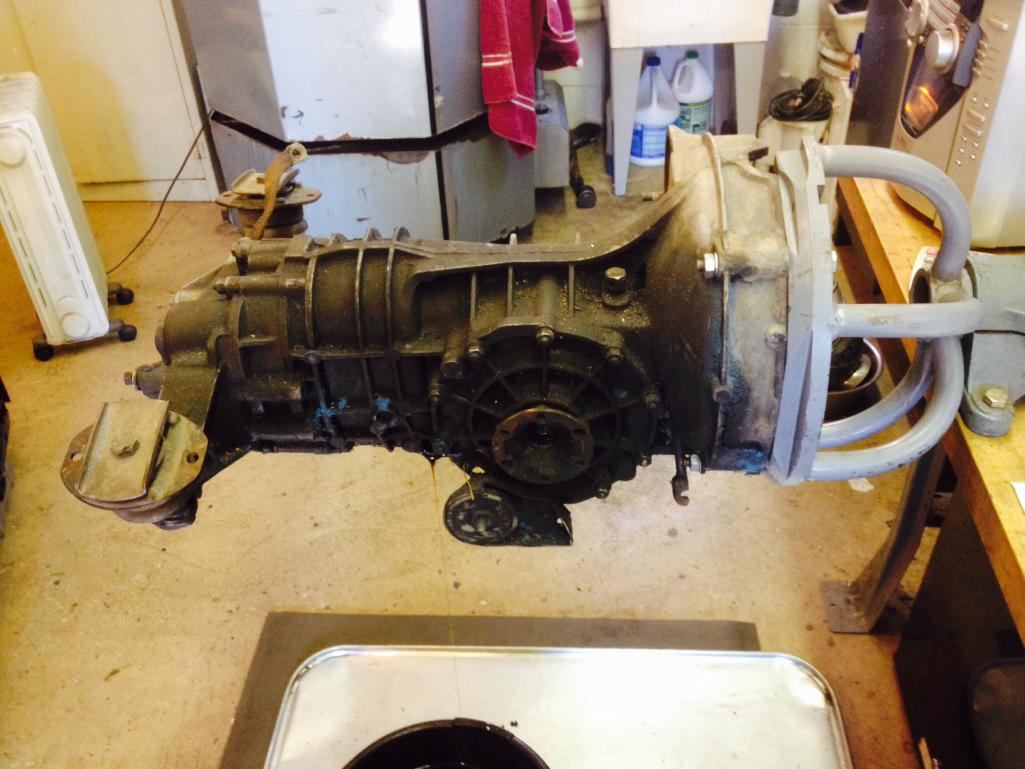 Coming apart. The DAPO put this together without any gaskets. The problem with this is that the pinion lash was off..... 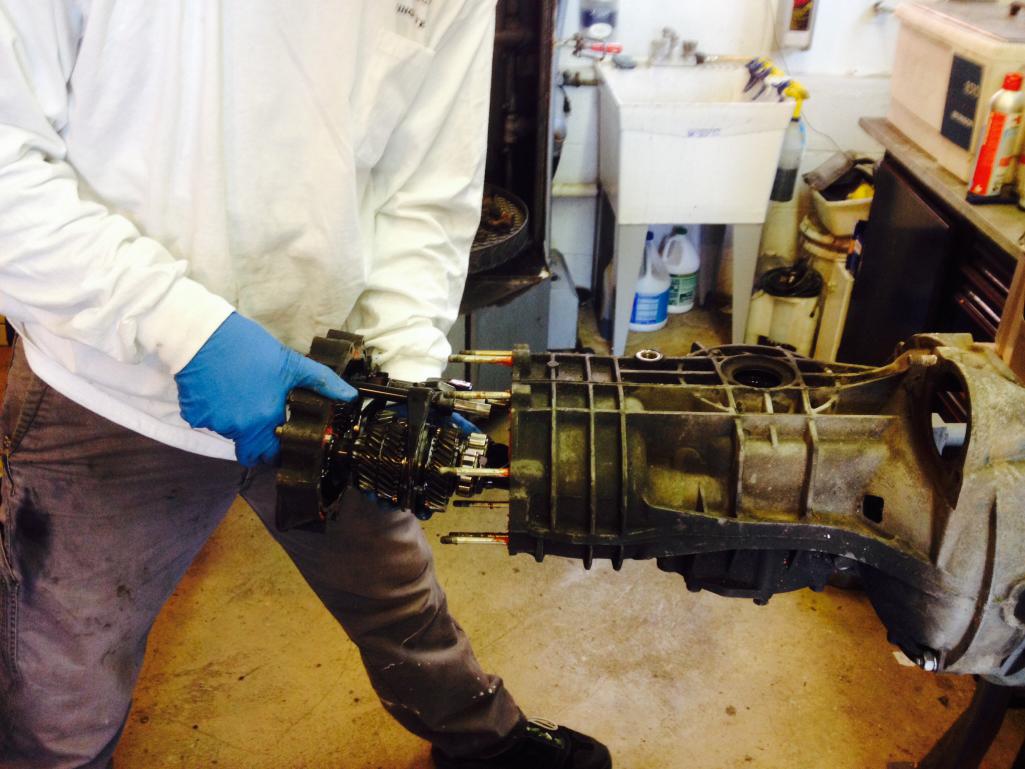 |
|
|
|
| OU8AVW |
Feb 8 2014, 08:06 PM
Post
#186
|
|
Yacht Rigger Group: Members Posts: 1,804 Joined: 1-October 08 From: Granbury, TX Member No.: 9,601 Region Association: Southwest Region |
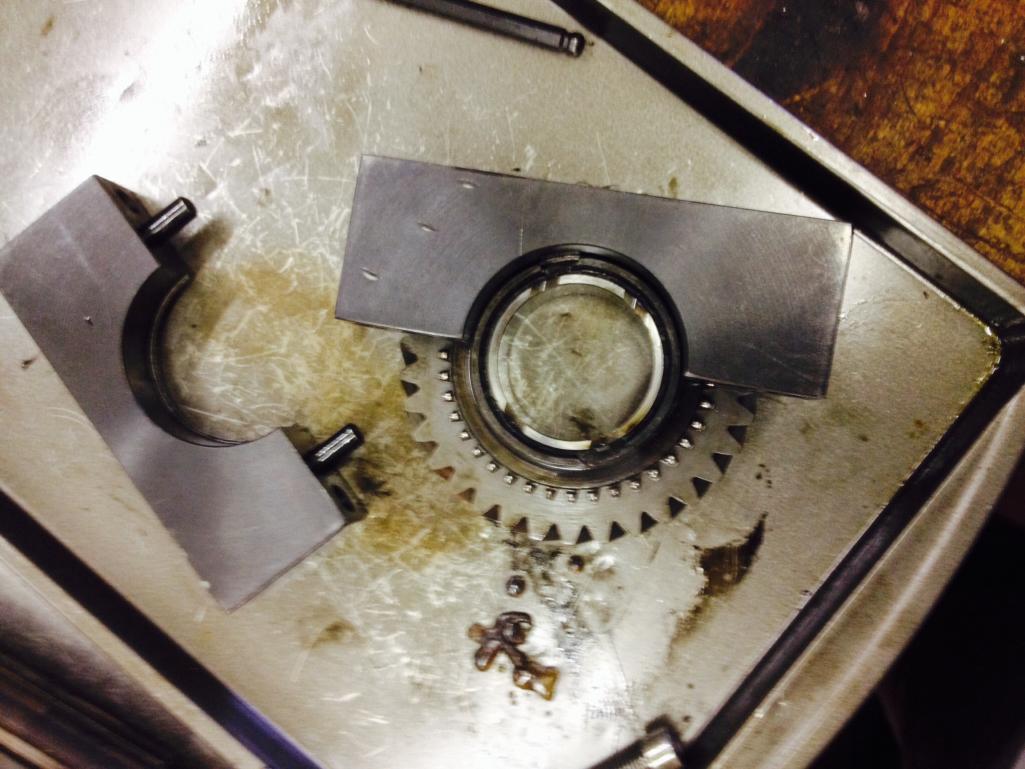
Because the pinion lash was off the pinion went too far into the pinion gear causing wear on the pinion. The pinion and the gear are a matched set. There are numbers that correlate to each other.
 So we pressed out the main shaft and pinion from the intermediate plate. The factory tool is pushing evenly on both shafts so they come out together. Much more accurate than a hammer (IMG:style_emoticons/default/biggrin.gif) 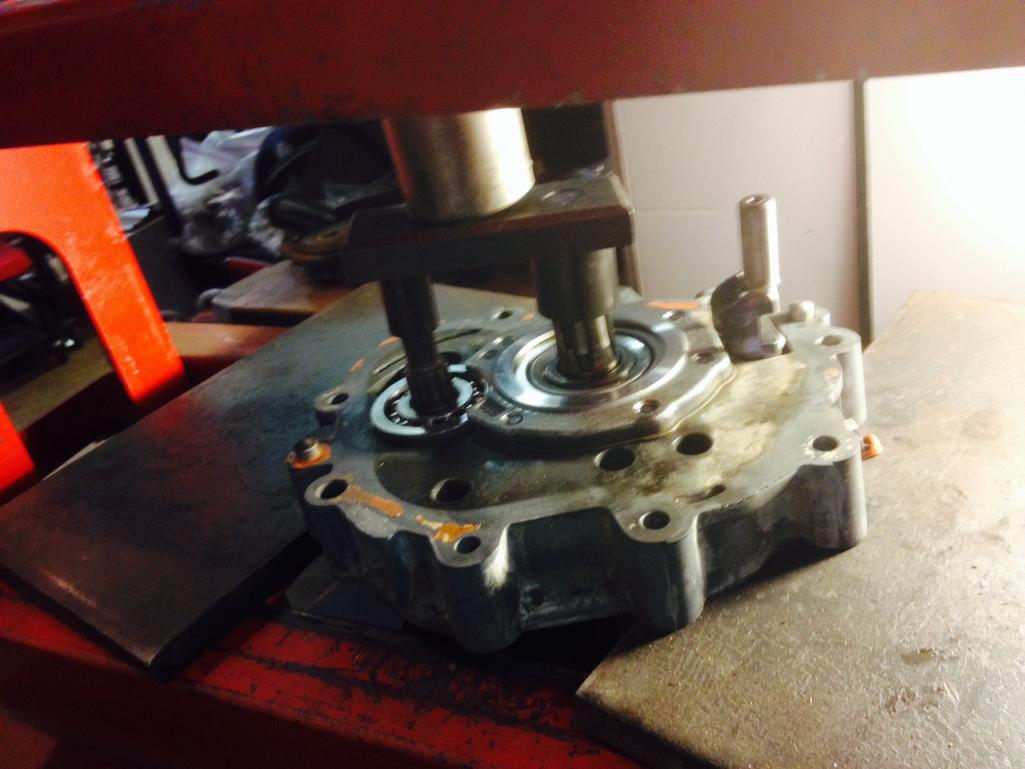 |
|
|
|
| OU8AVW |
Feb 8 2014, 08:17 PM
Post
#187
|
|
Yacht Rigger Group: Members Posts: 1,804 Joined: 1-October 08 From: Granbury, TX Member No.: 9,601 Region Association: Southwest Region |
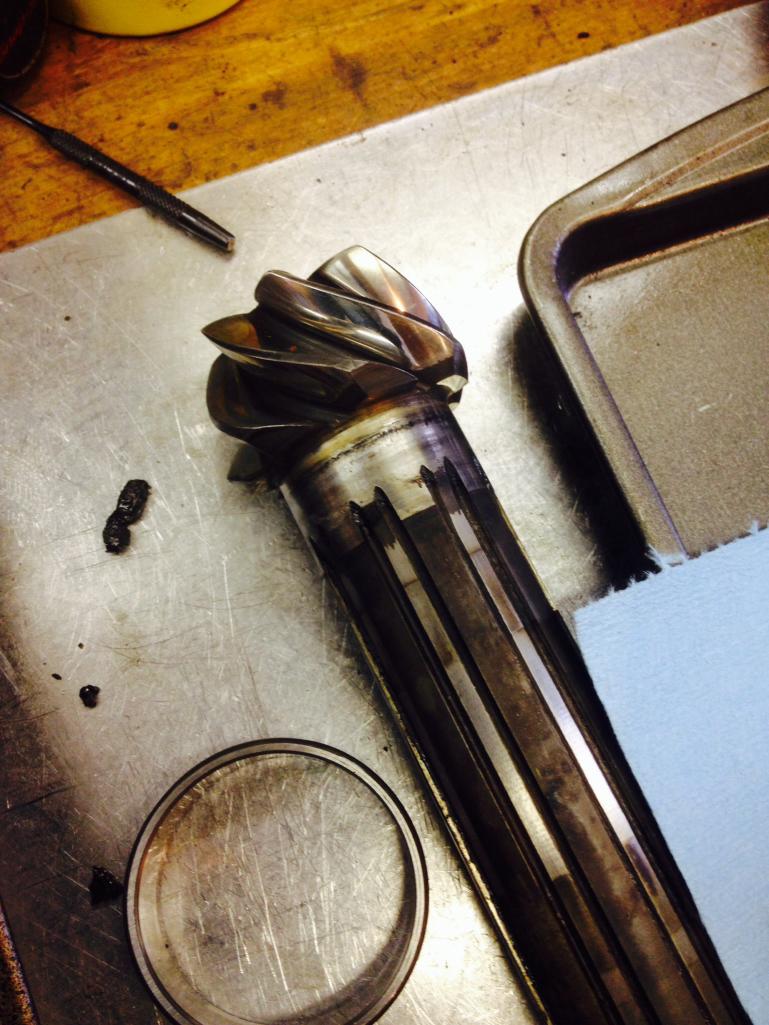
Ok, so far i have a bad pinion, first gear was bad and fifth gear was toast too. All this transmission's dog teeth were suspect as were the syncros. Hopefully the second tranny would be in better shape. Remember, this was a working trans i bought here (IMG:style_emoticons/default/blink.gif)
So we pulled the tailshift appart.... Not so good..... 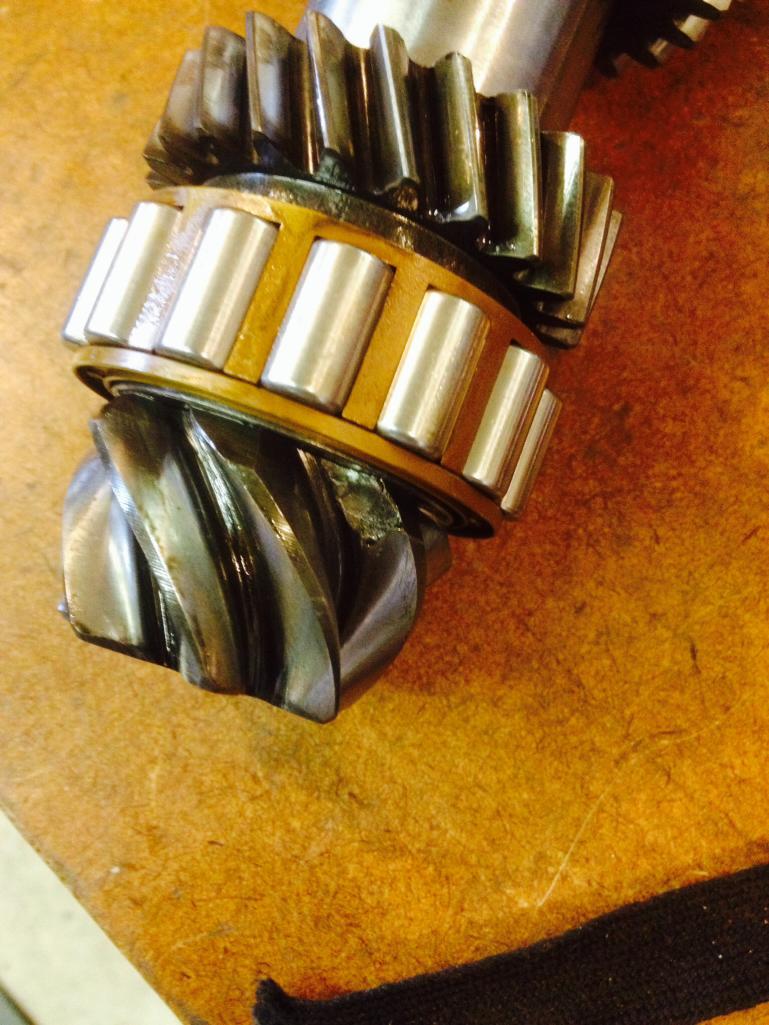 Fortunately Eric had a reasonable pinion and gear. First the bad gear comes off the differential and gets swapped out. We used a big torque wrench to get these to 80lbs...  Then the locking washers are installed. Now I'll have Porsche not VW spec pinion. There is a difference. The Porsche parts are measured and factory tested. Notations are seen on the parts.... 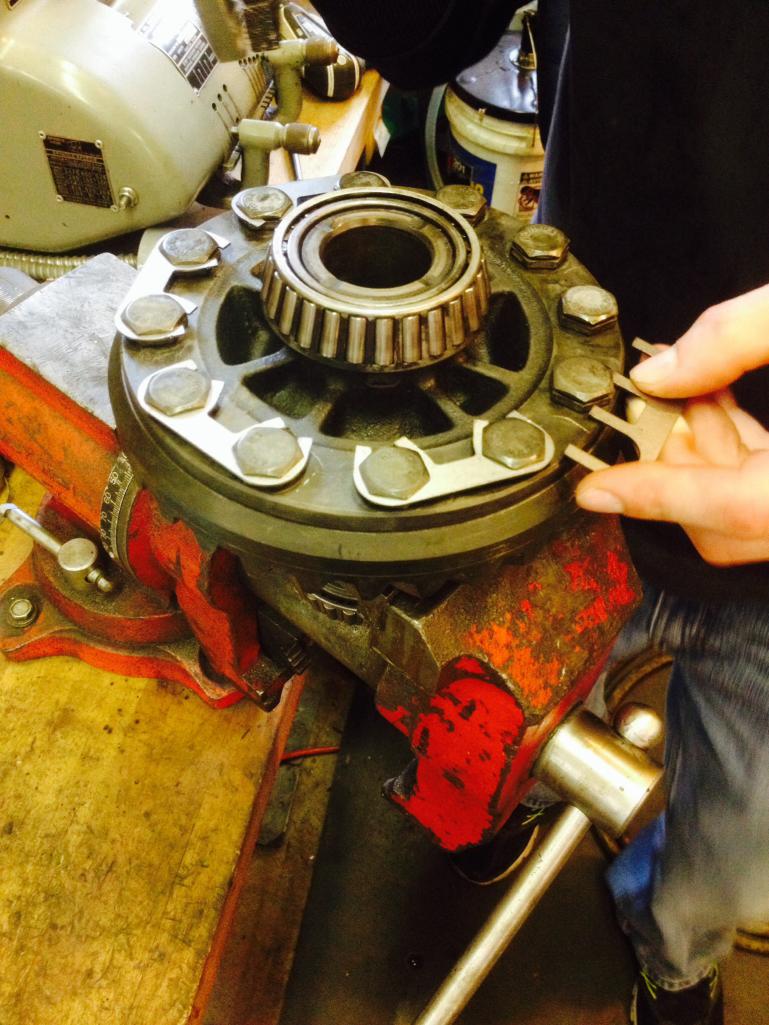 |
|
|
|
| OU8AVW |
Feb 8 2014, 08:24 PM
Post
#188
|
|
Yacht Rigger Group: Members Posts: 1,804 Joined: 1-October 08 From: Granbury, TX Member No.: 9,601 Region Association: Southwest Region |
Next we strip all the shafts and start the hunt for good parts....
More factory tools make this job much easier. 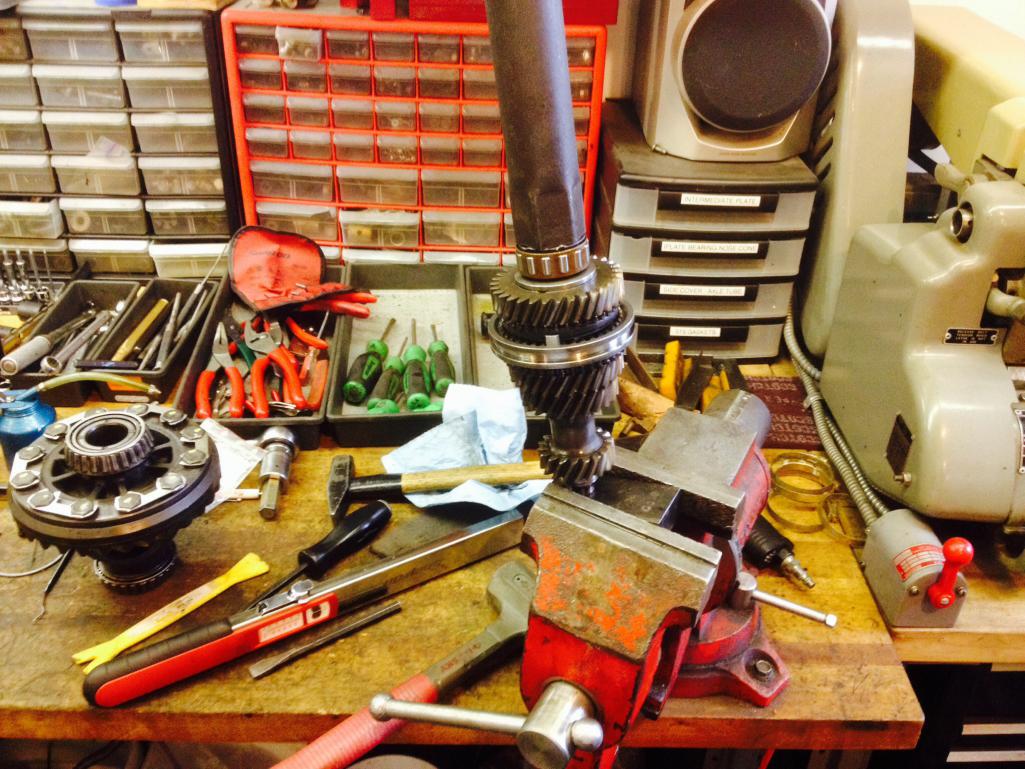 Next we chalk the shaft up in the lathe to make sure it's straight and we use a little 3m pad on the sealing surfaces to ensure they are smooth. This one checks out. 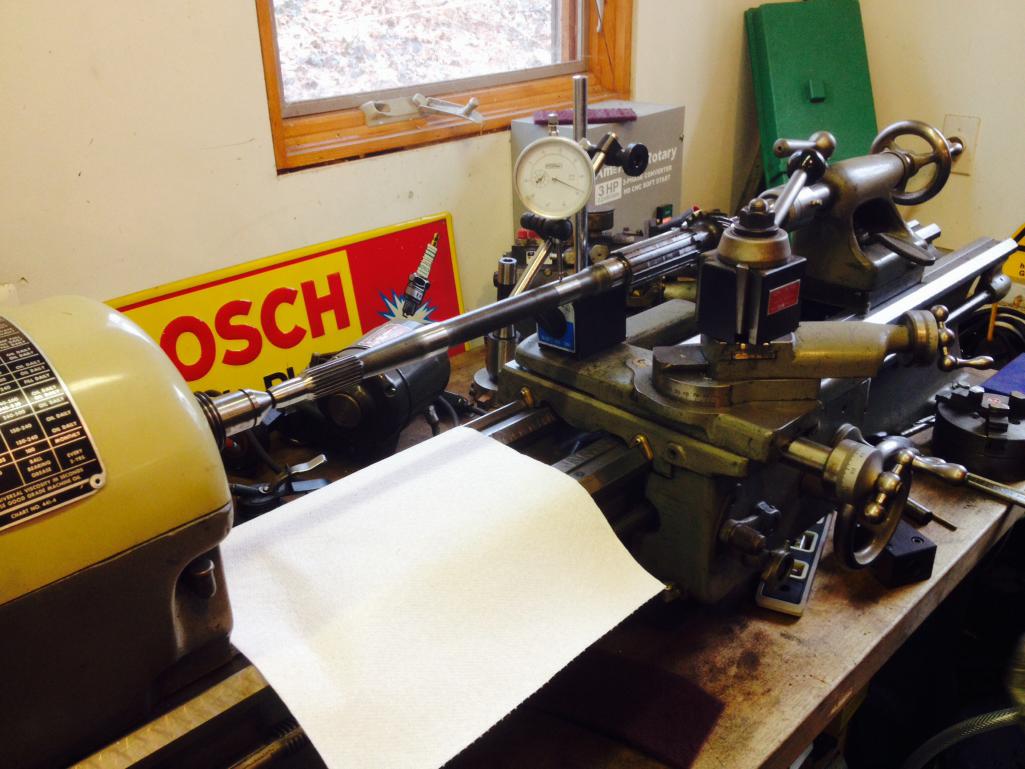 |
|
|
|
| OU8AVW |
Feb 8 2014, 08:33 PM
Post
#189
|
|
Yacht Rigger Group: Members Posts: 1,804 Joined: 1-October 08 From: Granbury, TX Member No.: 9,601 Region Association: Southwest Region |
Now to dig into the gears and sliders. I was in need of a few sliders that we sourced from eric's stash and the other trany. We made sure all the gears stayed matched pairs. Another slick tool holds the recess on the slider.
 Then the gear can be pressed out. This tool will also work to install the slider and gear back together. 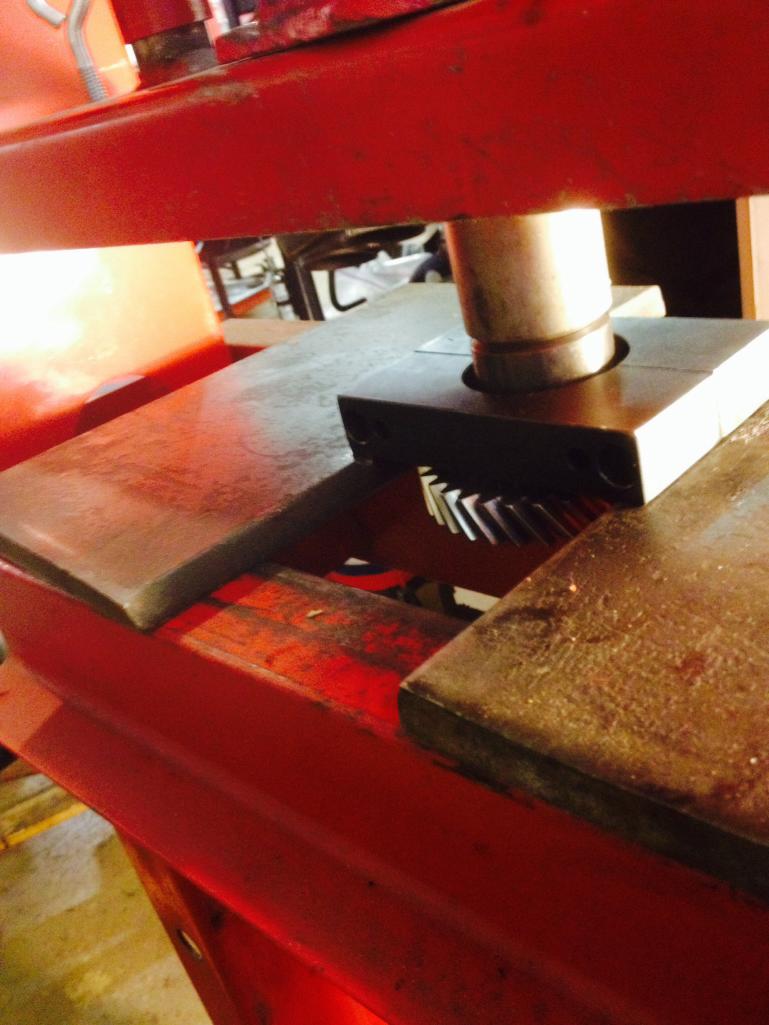 |
|
|
|
| OU8AVW |
Feb 8 2014, 08:37 PM
Post
#190
|
|
Yacht Rigger Group: Members Posts: 1,804 Joined: 1-October 08 From: Granbury, TX Member No.: 9,601 Region Association: Southwest Region |
The gears go back together with new syncros and updated brakes.
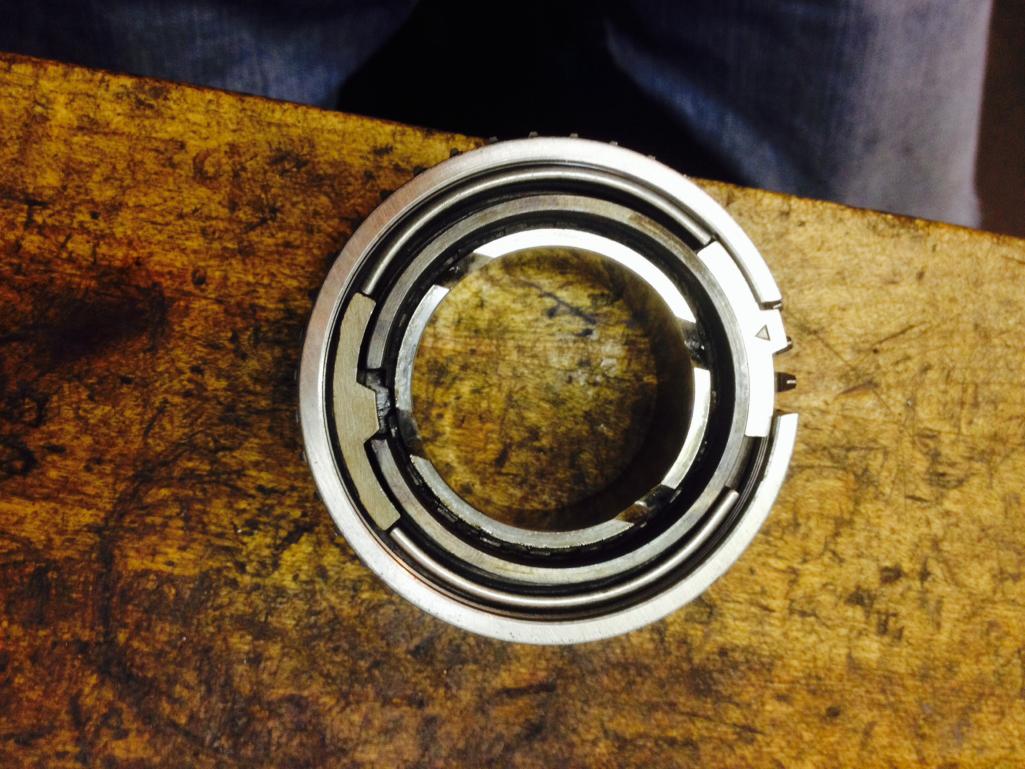 I spent some time detailing the case today. More on that next time.... I should be doing the assembly next week with new bearings and seals. I do need a nice 5th gear (ZD). Everything else is fully pimped (IMG:style_emoticons/default/biggrin.gif) |
|
|
|
| Bulldog9 |
Feb 9 2014, 10:50 AM
Post
#191
|
|
Senior Member Group: Members Posts: 706 Joined: 21-August 13 From: United States Member No.: 16,283 Region Association: MidAtlantic Region |
dude, kudos on tackling this. Transmissions scare me... I of course am not doing anything on mine except clean up the outside, and changing the fluid......
|
|
|
|
| type47 |
Feb 10 2014, 08:40 AM
Post
#192
|
|
Viermeister Group: Members Posts: 4,254 Joined: 7-August 03 From: Vienna, VA Member No.: 994 Region Association: MidAtlantic Region |
Nice! I did the trans clinic this last weekend and all those photos and discriptions are what we went through with ours.
|
|
|
|
| computers4kids |
Feb 10 2014, 10:56 AM
Post
#193
|
|
Love these little cars! Group: Members Posts: 2,443 Joined: 11-June 05 From: Port Townsend, WA Member No.: 4,253 Region Association: None |
I learned so much at one of Evil's clinics-very rewarding. You're a brave soul tackling one without Evil. Having those custom tools is will make all the difference.
|
|
|
|
| OU8AVW |
Feb 10 2014, 01:33 PM
Post
#194
|
|
Yacht Rigger Group: Members Posts: 1,804 Joined: 1-October 08 From: Granbury, TX Member No.: 9,601 Region Association: Southwest Region |
Evil is the man. He's like the Obi Wan Kenobi of transmissions.
Eric is Yoda (IMG:style_emoticons/default/biggrin.gif) I am far from doing this alone. |
|
|
|
| OU8AVW |
Feb 18 2014, 12:44 PM
Post
#195
|
|
Yacht Rigger Group: Members Posts: 1,804 Joined: 1-October 08 From: Granbury, TX Member No.: 9,601 Region Association: Southwest Region |
Cool little project. I installed a battery switch using a Porsche center cap as a centering plate.
I machined it to fit.... 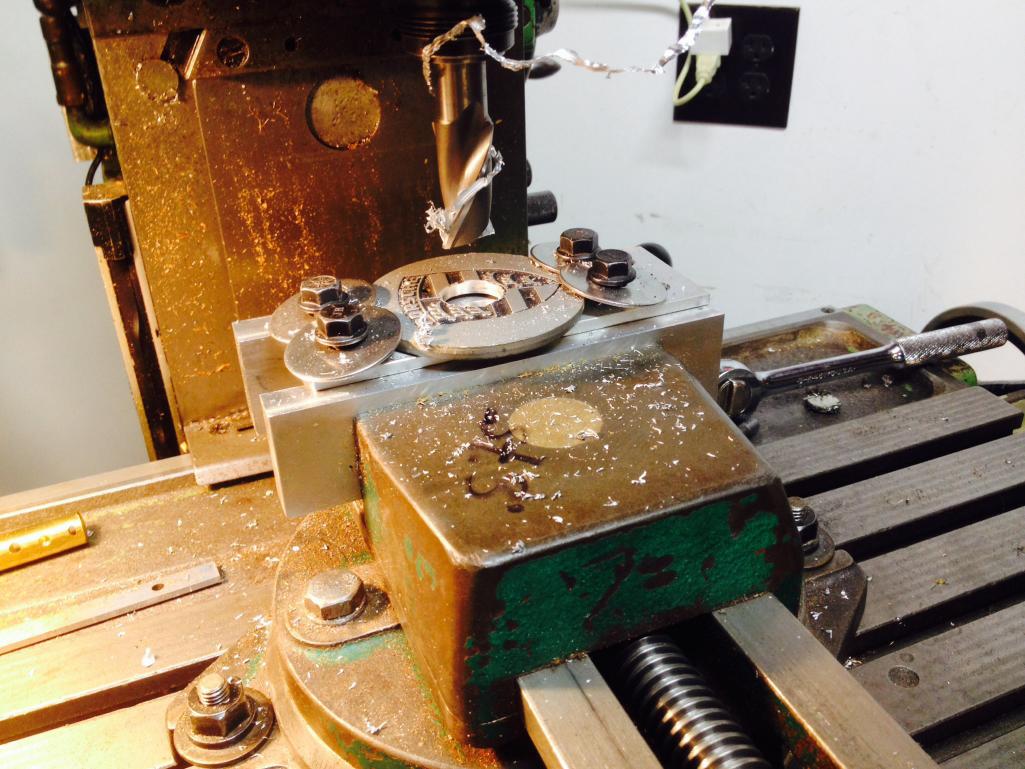 Finis.... 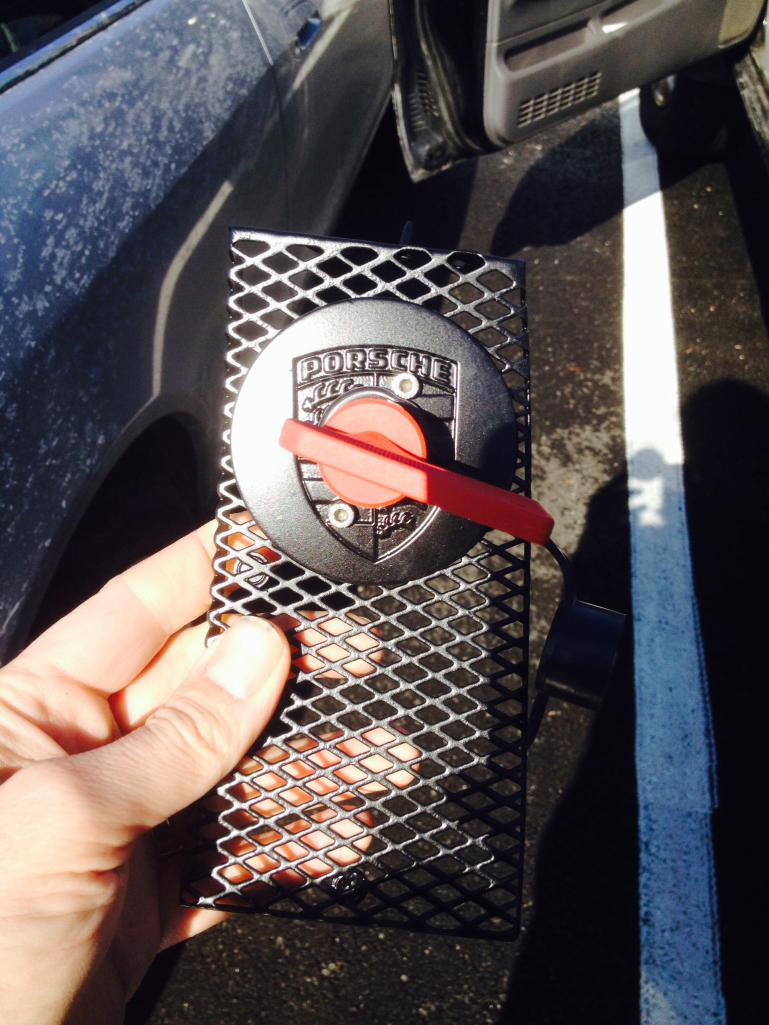 |
|
|
|
| OU8AVW |
Mar 19 2014, 09:11 AM
Post
#196
|
|
Yacht Rigger Group: Members Posts: 1,804 Joined: 1-October 08 From: Granbury, TX Member No.: 9,601 Region Association: Southwest Region |
Making steady progress.....
Installed my fresh air system 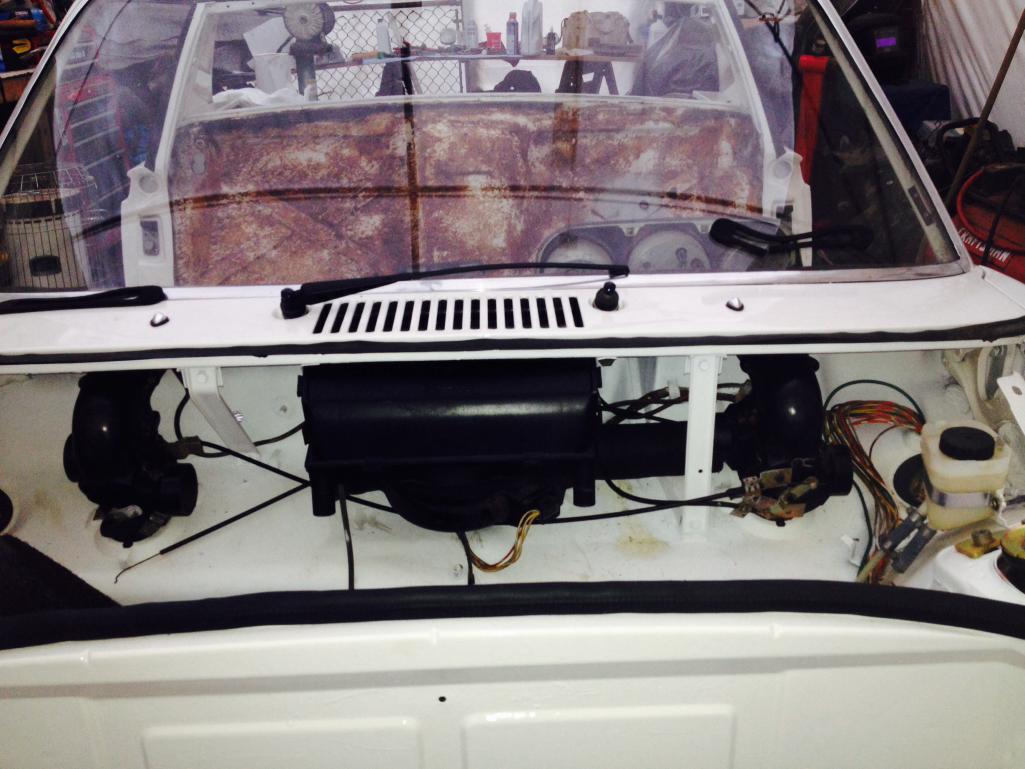 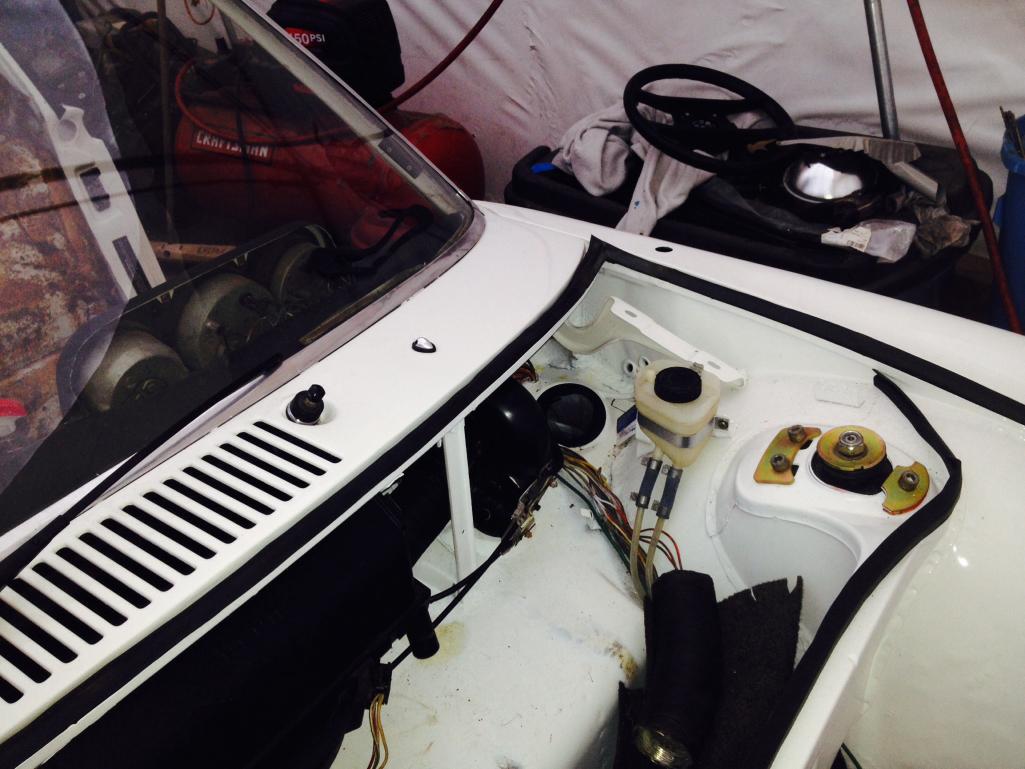 Sorted the lights, running lights and Pilot lights 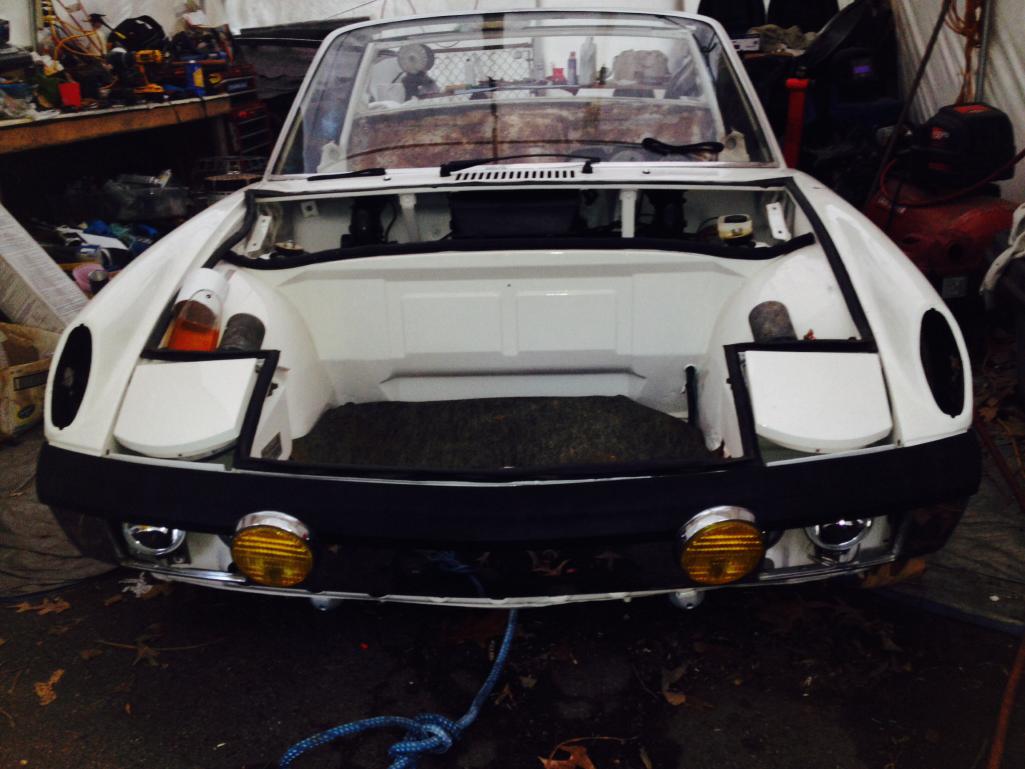 Dash face and heater controls in.... 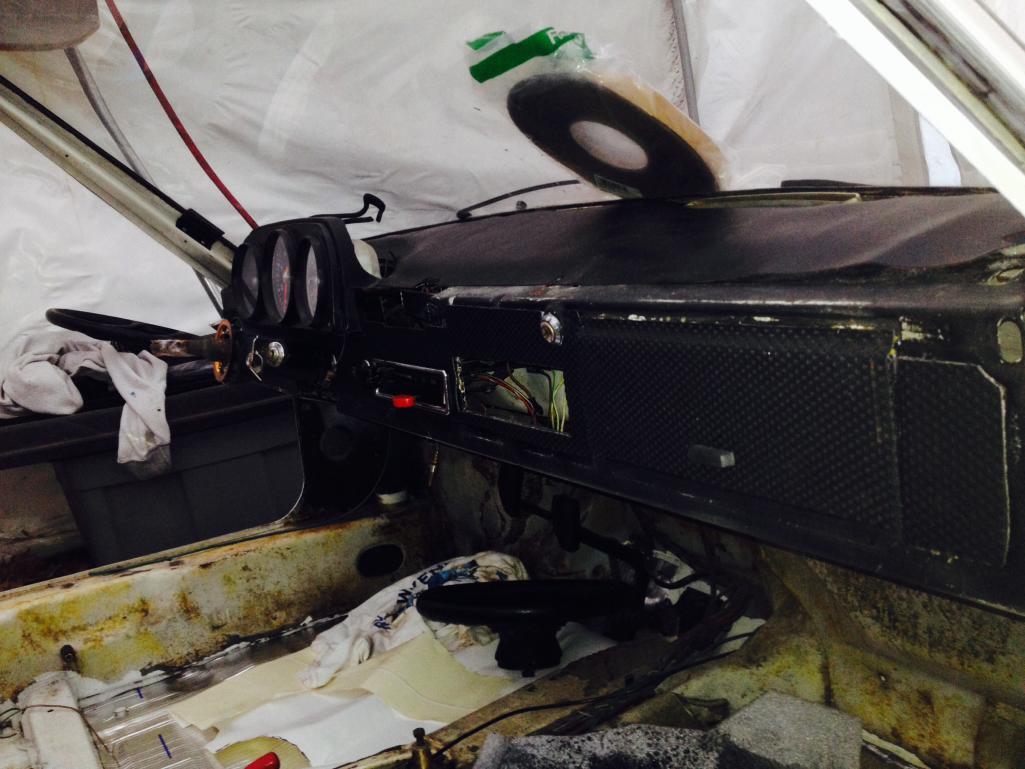 |
|
|
|
| CptTripps |
Mar 19 2014, 11:22 AM
Post
#197
|
|
:: Punch and Pie :: Group: Members Posts: 3,586 Joined: 26-December 04 From: Tuscaloosa, AL and Akron, OH Member No.: 3,342 Region Association: Upper MidWest |
Keep on it man....it'll all come together real fast!
|
|
|
|
| OU8AVW |
Mar 22 2014, 11:29 AM
Post
#198
|
|
Yacht Rigger Group: Members Posts: 1,804 Joined: 1-October 08 From: Granbury, TX Member No.: 9,601 Region Association: Southwest Region |
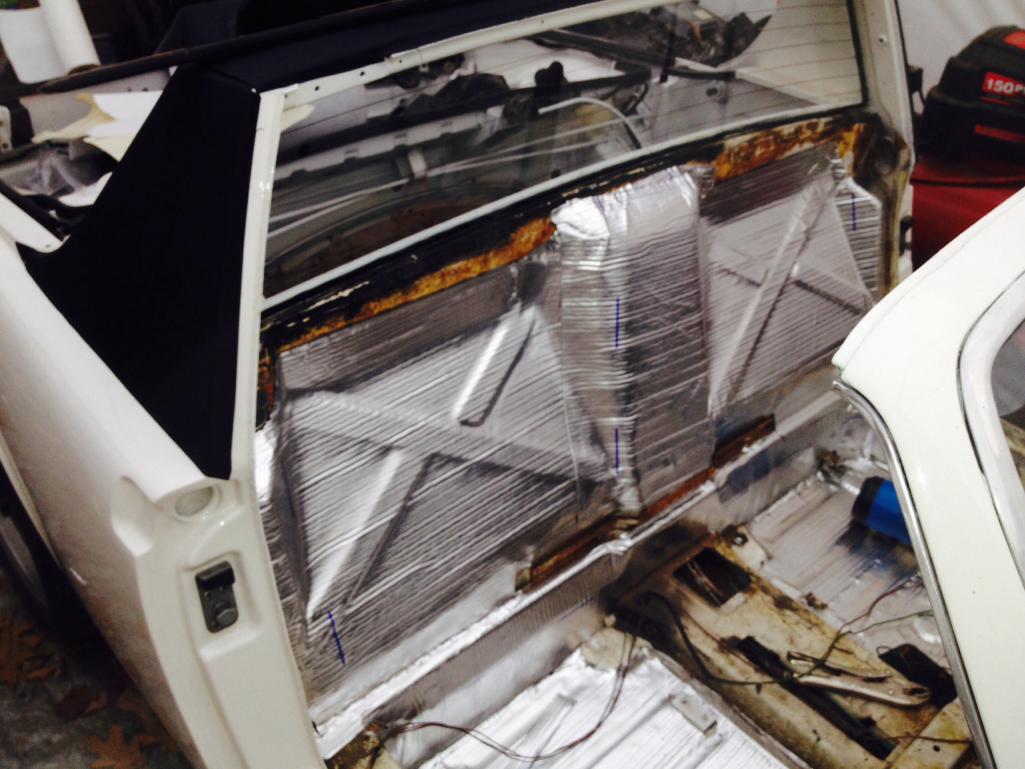
Installed the rear window and more sound deadening. I'm using peel and seal roofing material. Cheap and effective.
 |
|
|
|
| OU8AVW |
Mar 28 2014, 07:55 AM
Post
#199
|
|
Yacht Rigger Group: Members Posts: 1,804 Joined: 1-October 08 From: Granbury, TX Member No.: 9,601 Region Association: Southwest Region |
Transmission build continues. We did the pinion depth setting. The pinion and all gears were installed with a single gasket. The setting was checked with a factory tool and dial indicator. It was .20mm to far in. The gaskets are .25mm thick so we added a second gasket. It came up perfect.
This tool approximates a diff and uses the same bearings. A dial indicator is held inside that can be seen inside the hole. It bears on the tip of the pinion shaft. 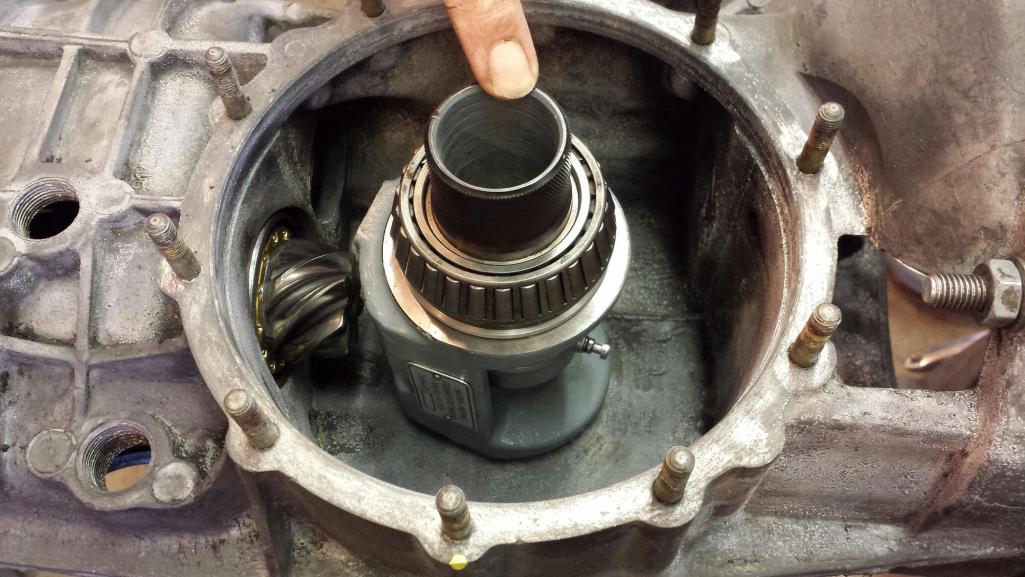 |
|
|
|
| OU8AVW |
Mar 28 2014, 08:00 AM
Post
#200
|
|
Yacht Rigger Group: Members Posts: 1,804 Joined: 1-October 08 From: Granbury, TX Member No.: 9,601 Region Association: Southwest Region |
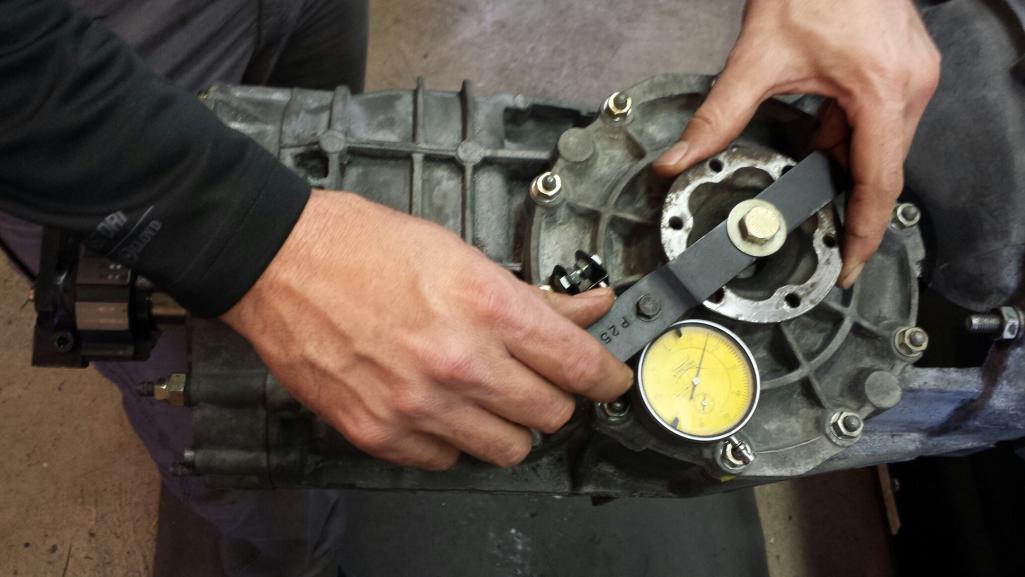
Next we set the lash. This factory tool attaches to the output shaft. We used a spacer to lock the shaft and pinion so the whole assembly rotates. .15-.20mm is optimal. Mine was .17mm. Done! We also set the drag while we were at it. Drag is a product of how much shim installed, lash is adjusted by where the shims are installed, port or starboard side of the diff.
 |
|
|
|
|
1 User(s) are reading this topic (1 Guests and 0 Anonymous Users)
0 Members:

|
Lo-Fi Version | Time is now: 15th June 2026 - 10:50 AM |
Invision Power Board
v9.1.4 © 2026 IPS, Inc.