|
|
|
Porsche, and the Porsche crest are registered trademarks of Dr. Ing. h.c. F. Porsche AG.
This site is not affiliated with Porsche in any way. Its only purpose is to provide an online forum for car enthusiasts. All other trademarks are property of their respective owners. |
|
|

  |

| OU8AVW |
 Jan 17 2013, 08:42 AM Jan 17 2013, 08:42 AM
Post
#81
|
|
Yacht Rigger  Group: Members Posts: 1,804 Joined: 1-October 08 From: Granbury, TX Member No.: 9,601 Region Association: Southwest Region |
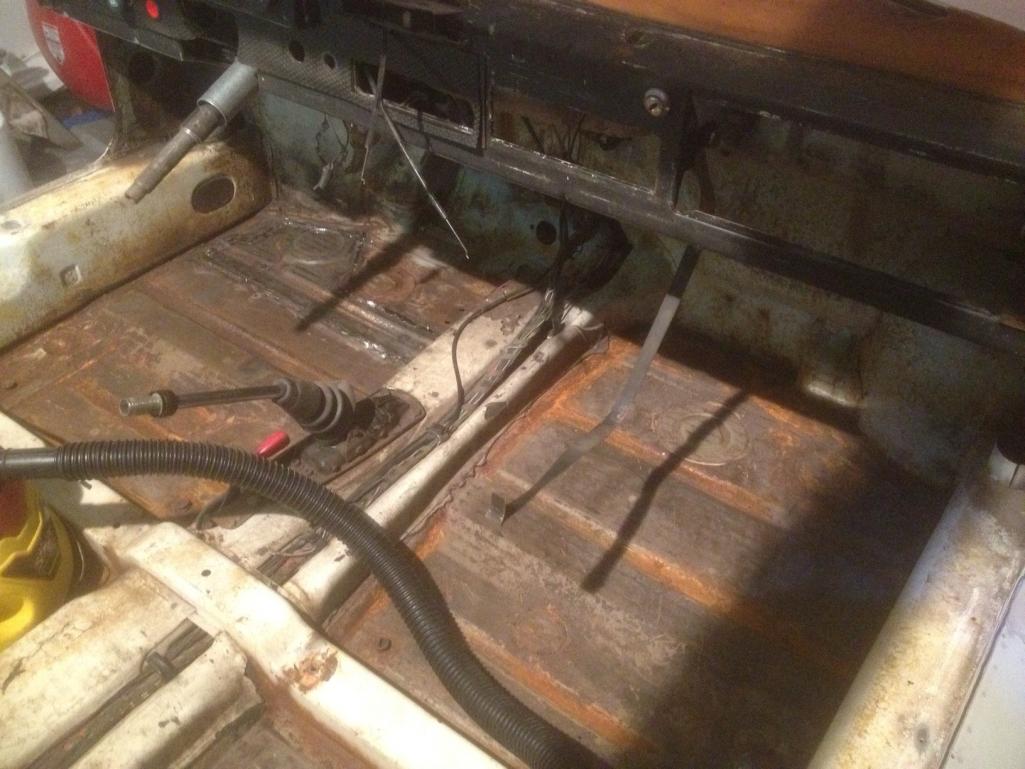
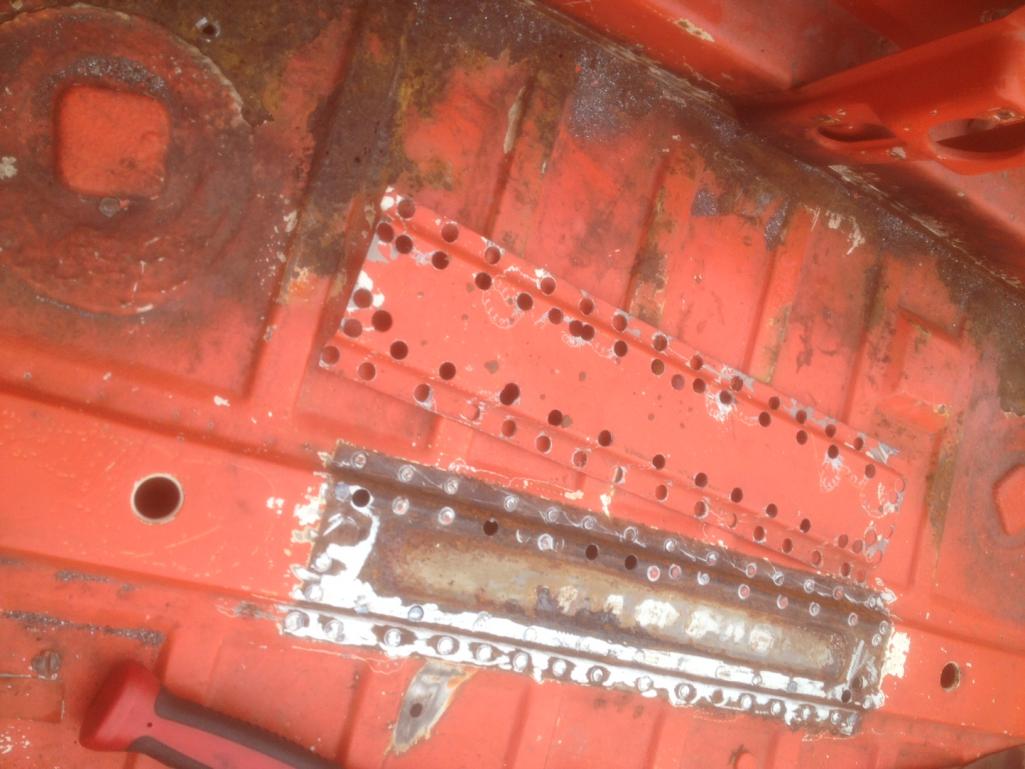
Got the car all sorted in my workspace and started patching the floors. The pans were in pretty good shape with a few exceptions and I can't really afford all new pans, so a few well placed patches will suffice. My welding skill got much better as I went along.
   |
   |

 
|
| OU8AVW |
Jan 17 2013, 09:21 AM
Post
#82
|
|
Yacht Rigger Group: Members Posts: 1,804 Joined: 1-October 08 From: Granbury, TX Member No.: 9,601 Region Association: Southwest Region |
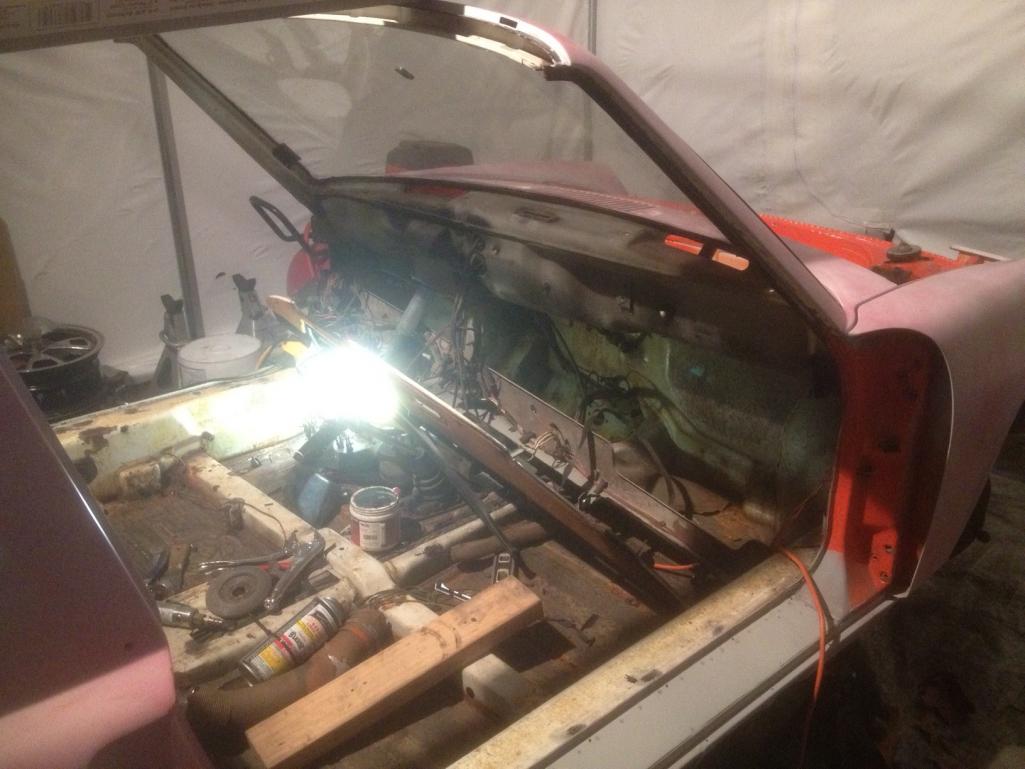
Pulled my dash out to make it ready for new vinyl. My friends at the sail loft/canvas shop have some special UV stable upholstery I'm going to check out.
 |
|
|
|
| OU8AVW |
Jan 24 2013, 03:07 PM
Post
#83
|
|
Yacht Rigger Group: Members Posts: 1,804 Joined: 1-October 08 From: Granbury, TX Member No.: 9,601 Region Association: Southwest Region |
|
|
|
|
| OU8AVW |
Feb 11 2013, 09:03 AM
Post
#84
|
|
Yacht Rigger Group: Members Posts: 1,804 Joined: 1-October 08 From: Granbury, TX Member No.: 9,601 Region Association: Southwest Region |
I started to remove the rear trunk pan. Using an air saw was very effective. Until the thing locked up on me. I'll buy another as this one was an old $40 unit that I borrowed from a friend.
 |
|
|
|
| OU8AVW |
Feb 11 2013, 09:12 AM
Post
#85
|
|
Yacht Rigger Group: Members Posts: 1,804 Joined: 1-October 08 From: Granbury, TX Member No.: 9,601 Region Association: Southwest Region |
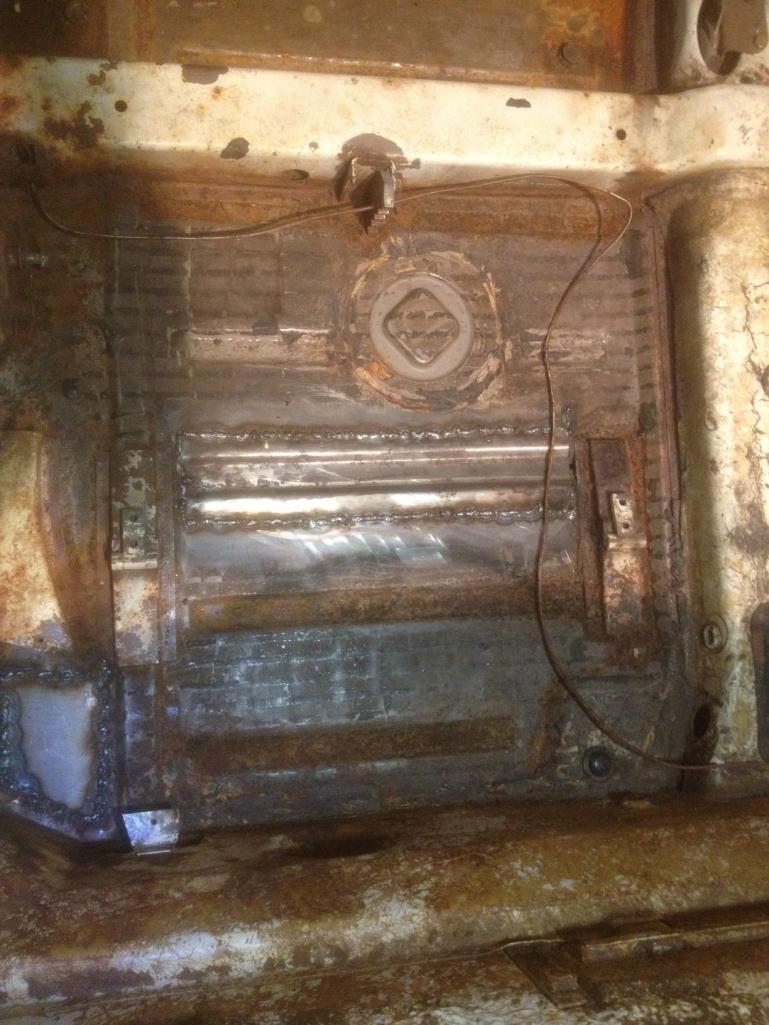
So, I just got my replacement panel from Restoration Designs for the trunk. What a beautiful part. I was thinking about making the cut just forward of the aft curve of the support, see image. Then using a flange tool to flange the car to accept the new part overlapping the car. This will let me do a better job of welding these pieces together. The rest of the spot welding can be done like the factory from the outside of the rear apron. The original brace can then attach on top of the cross member.
What do you think? (IMG:style_emoticons/default/sawzall-smiley.gif)  |
|
|
|
| 914itis |
Feb 11 2013, 12:13 PM
Post
#86
|
|
Advanced Member Group: Members Posts: 2,892 Joined: 9-October 10 From: New York City Member No.: 12,256 Region Association: North East States |
QUOTE(OU8AVW @ Feb 23 2012, 08:58 PM)  I played hookie from work yesterday and continued prepping for paint. I got a doner floor pan that I'm going to use for some patchwork on the driver's side. All and all not too bad. How did you approach these rust holes? Did you replace the panel or just clean and weld using small pieces? |
|
|
|
| OU8AVW |
Feb 12 2013, 08:58 AM
Post
#87
|
|
Yacht Rigger Group: Members Posts: 1,804 Joined: 1-October 08 From: Granbury, TX Member No.: 9,601 Region Association: Southwest Region |
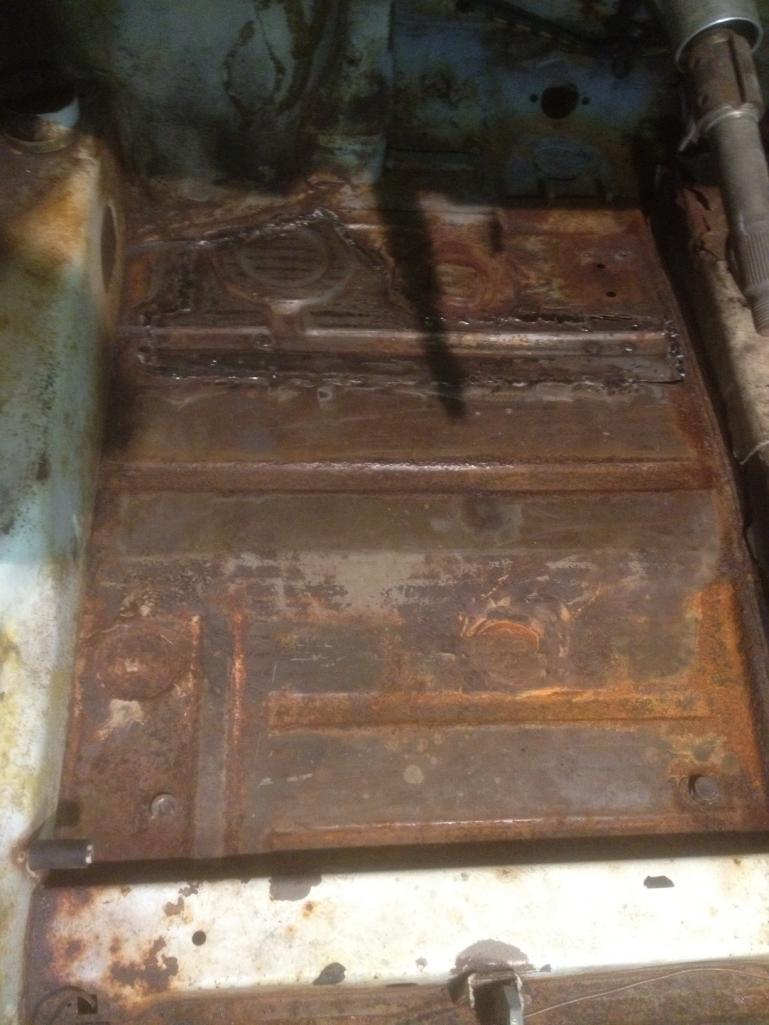
QUOTE(914itis @ Feb 11 2013, 10:13 AM) QUOTE(OU8AVW @ Feb 23 2012, 08:58 PM) I played hookie from work yesterday and continued prepping for paint. I got a doner floor pan that I'm going to use for some patchwork on the driver's side. All and all not too bad. How did you approach these rust holes? Did you replace the panel or just clean and weld using small pieces? I cleaned and welded small patches. The pans were in fair shape, just a three spots that had rust-through. I cut out the sections and then used them as a template for cutting a doner I bought on this board. Not the best way to do it, but cost effective and easier than whole pans. I'm building this car to be a fun driver so it works for me. Carpet and undercoating will cover the patches..... |
|
|
|
| OU8AVW |
Feb 15 2013, 05:26 AM
Post
#88
|
|
Yacht Rigger Group: Members Posts: 1,804 Joined: 1-October 08 From: Granbury, TX Member No.: 9,601 Region Association: Southwest Region |
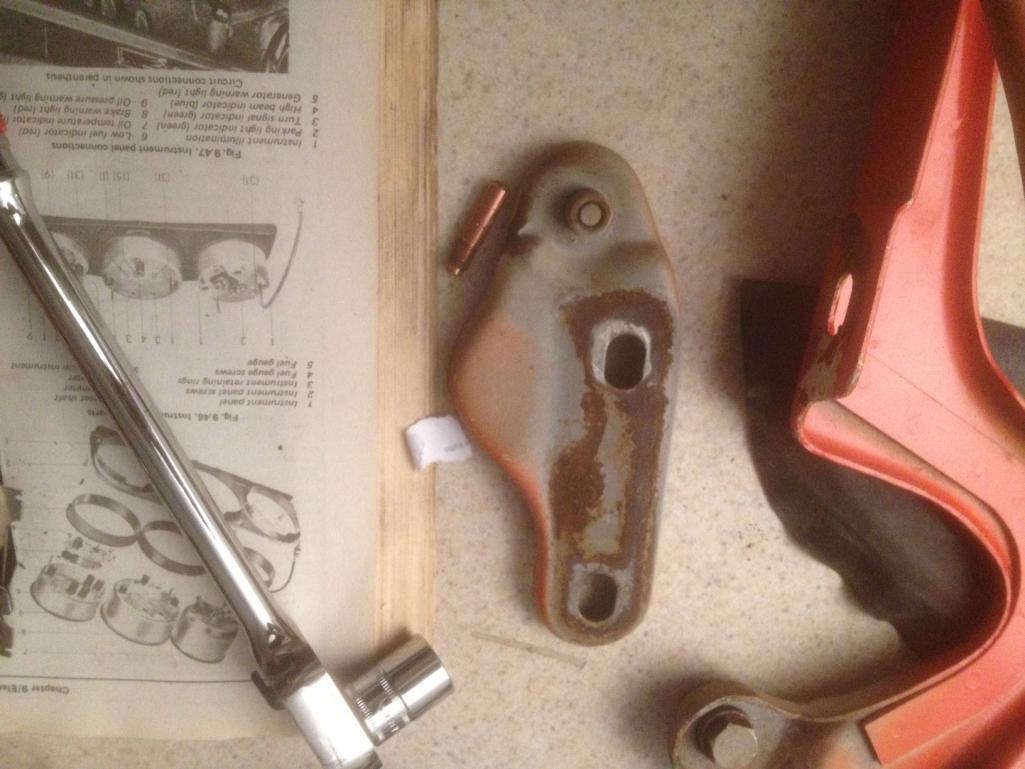
 Welded on a new engine lid bracket 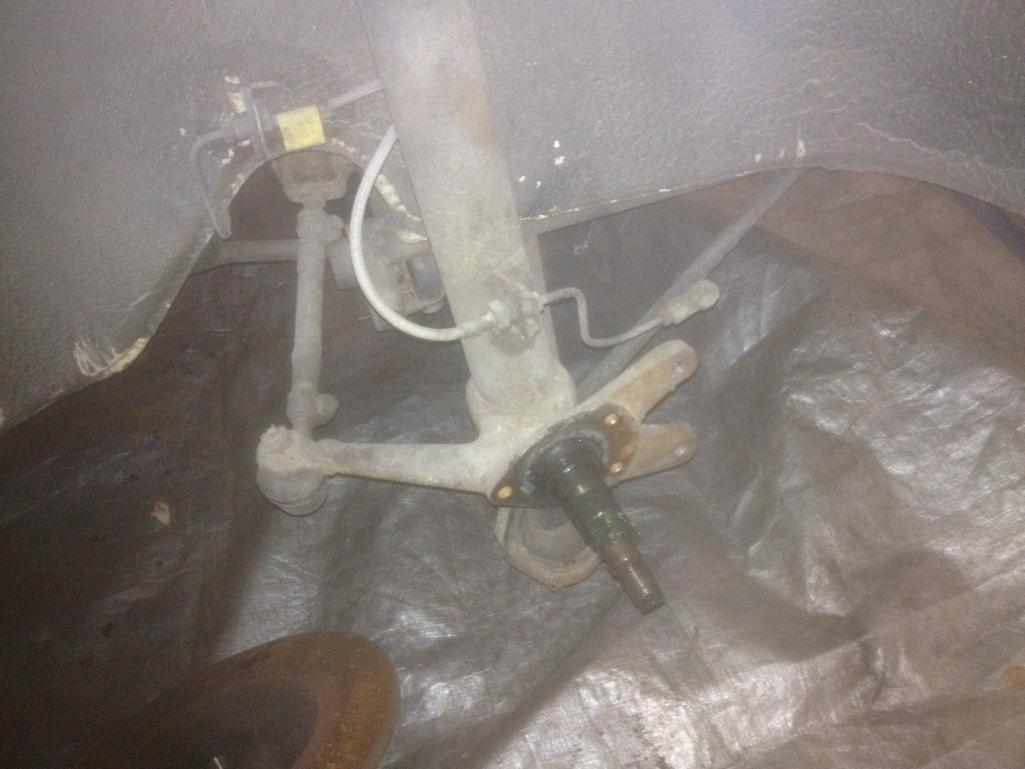 Tore down my front end a bit 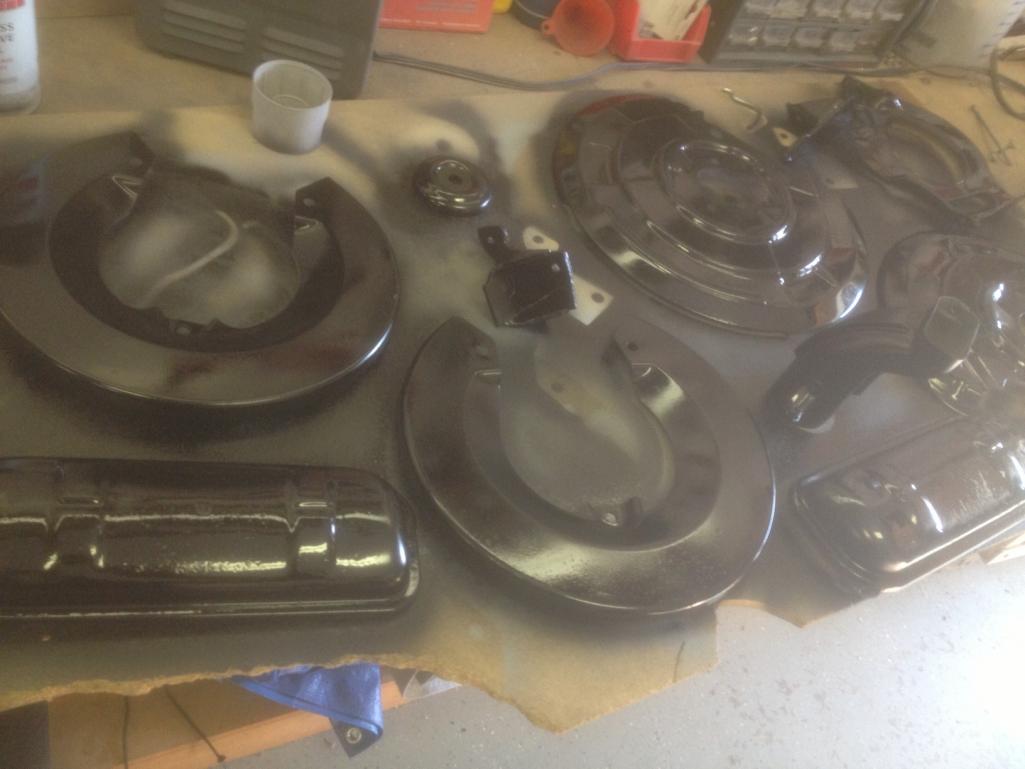 Painted dust shields  Cleaning up CV Joints |
|
|
|
| OU8AVW |
Feb 18 2013, 11:50 AM
Post
#89
|
|
Yacht Rigger Group: Members Posts: 1,804 Joined: 1-October 08 From: Granbury, TX Member No.: 9,601 Region Association: Southwest Region |
I had some time this weekend and got the rear trunk pan removed. I cut along the trailing edge of the trans support. An air saw got the aft end of the pan removed close enough to the welds that I could grind down the remaining material with little effort.
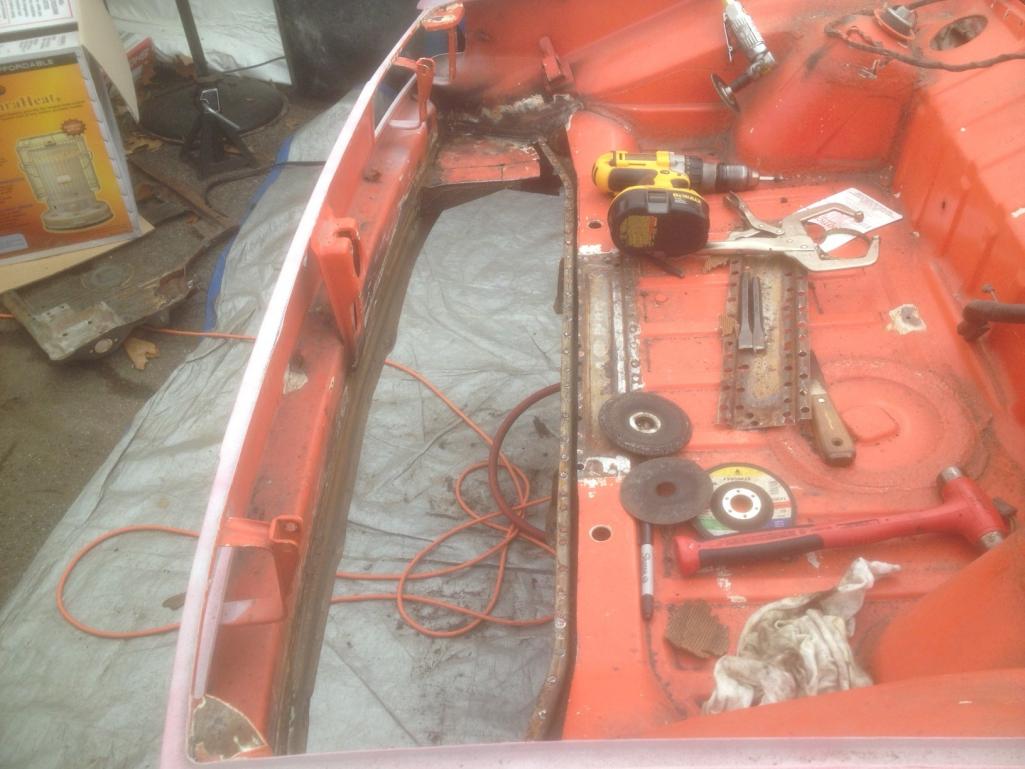 Attached thumbnail(s) 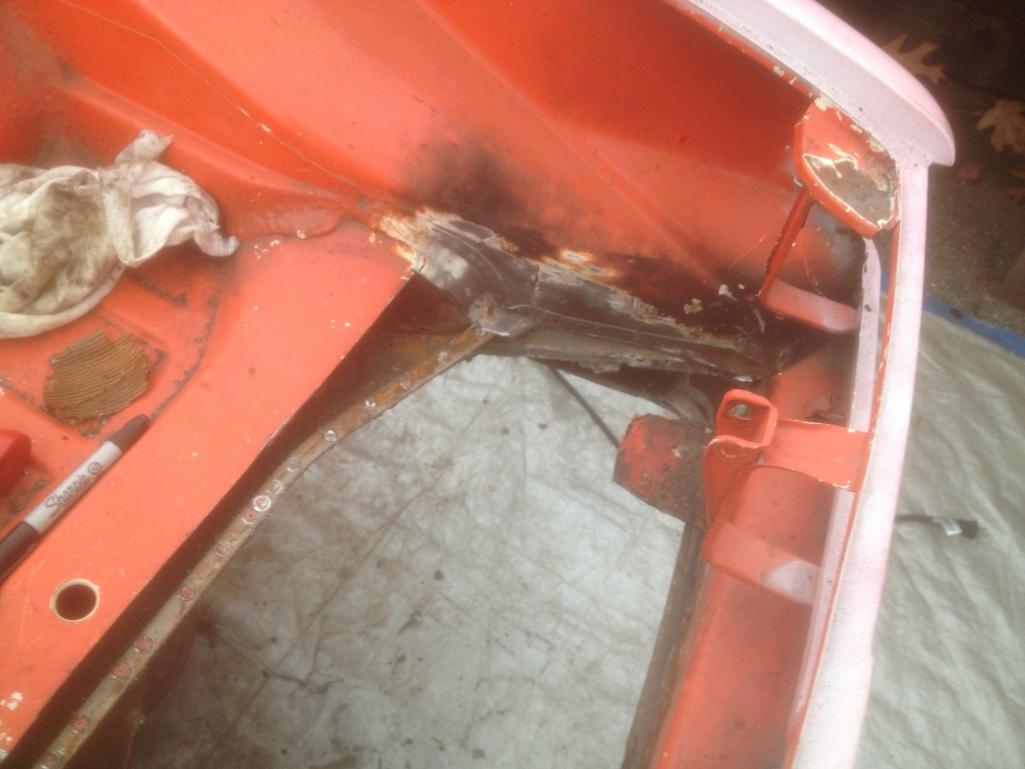
|
|
|
|
| FourBlades |
Feb 18 2013, 12:25 PM
Post
#90
|
|
From Wreck to Rockin Group: Members Posts: 2,056 Joined: 3-December 07 From: Brevard, FL Member No.: 8,414 Region Association: South East States |
|
|
|
|
| OU8AVW |
Feb 20 2013, 10:28 AM
Post
#91
|
|
Yacht Rigger Group: Members Posts: 1,804 Joined: 1-October 08 From: Granbury, TX Member No.: 9,601 Region Association: Southwest Region |
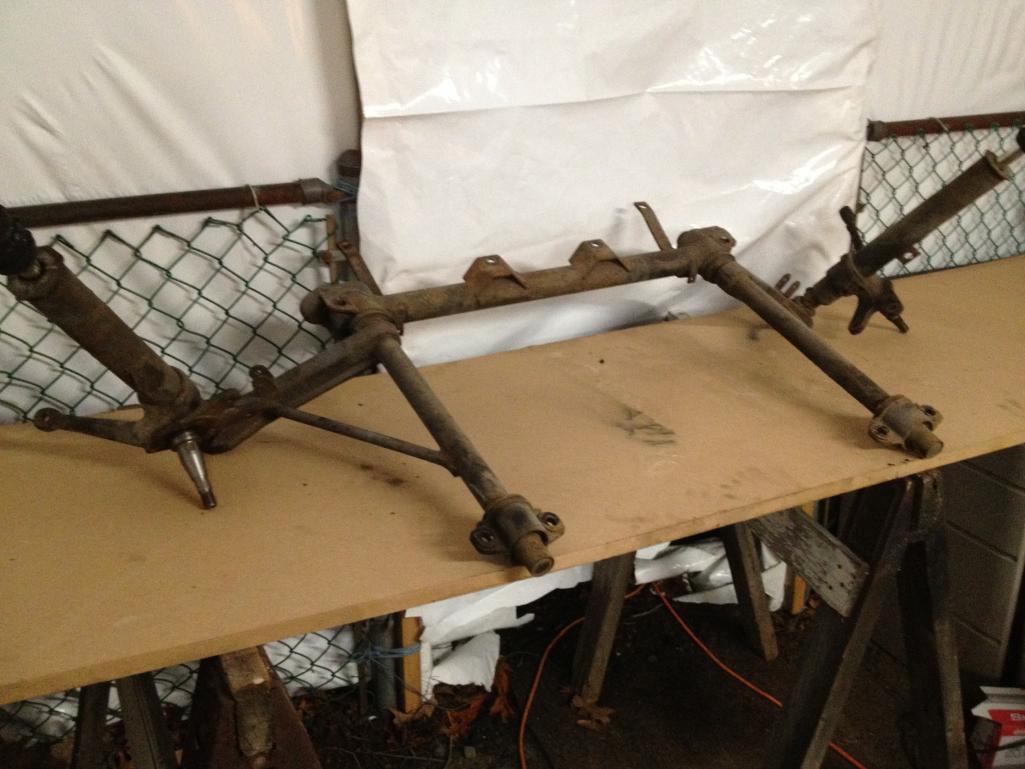
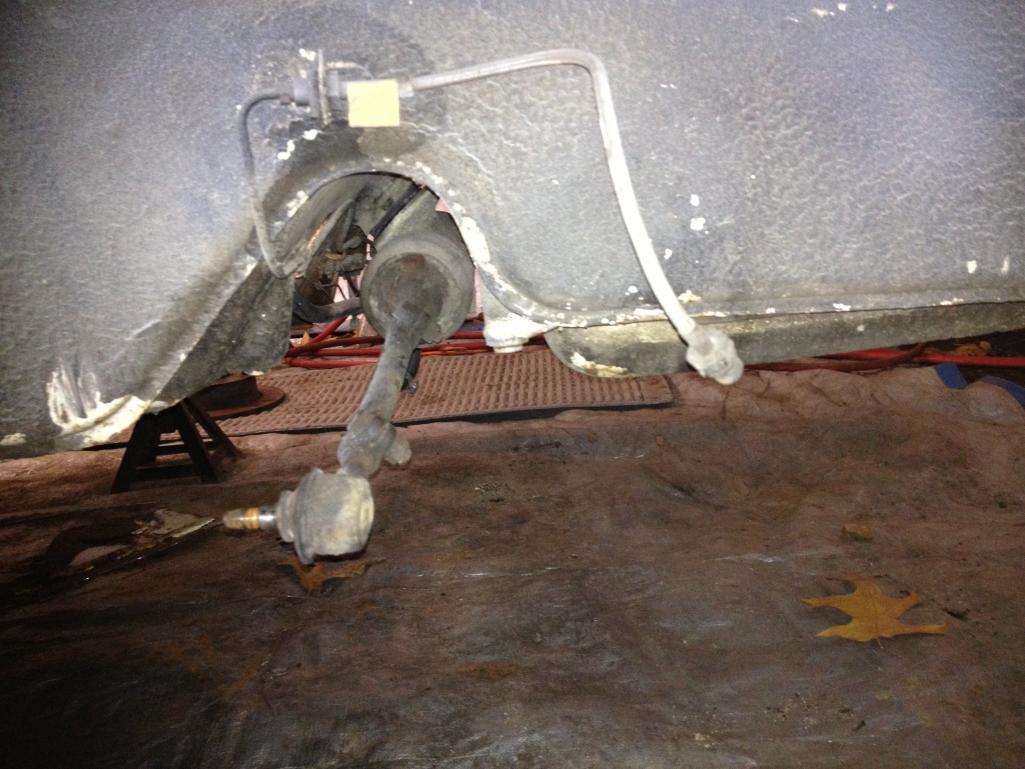
Front end is oot....
 |
|
|
|
| OU8AVW |
Feb 20 2013, 10:28 AM
Post
#92
|
|
Yacht Rigger Group: Members Posts: 1,804 Joined: 1-October 08 From: Granbury, TX Member No.: 9,601 Region Association: Southwest Region |
 |
|
|
|
| OU8AVW |
Feb 20 2013, 10:29 AM
Post
#93
|
|
Yacht Rigger Group: Members Posts: 1,804 Joined: 1-October 08 From: Granbury, TX Member No.: 9,601 Region Association: Southwest Region |
 |
|
|
|
| OU8AVW |
Feb 20 2013, 10:37 AM
Post
#94
|
|
Yacht Rigger Group: Members Posts: 1,804 Joined: 1-October 08 From: Granbury, TX Member No.: 9,601 Region Association: Southwest Region |
Ok, any tips on removing the torsion bars? I got the A-arms off the crossbeam but I cant's get the torsion bars free....
 |
|
|
|
| FourBlades |
Feb 20 2013, 11:14 AM
Post
#95
|
|
From Wreck to Rockin Group: Members Posts: 2,056 Joined: 3-December 07 From: Brevard, FL Member No.: 8,414 Region Association: South East States |
It is dirt in the splines holding it in. Turn it vertical and shoot some PB blaster down there. Wait a few hours then turn it over and wiggle it and whack it. It should come out. John |
|
|
|
| boogie_man |
Feb 20 2013, 11:34 AM
Post
#96
|
|
Member Group: Members Posts: 308 Joined: 22-April 11 From: So Cal Member No.: 12,969 Region Association: Southern California |
Nice work, that is going to look awesome. Keep the pix coming....
|
|
|
|
| nathansnathan |
Feb 20 2013, 12:09 PM
Post
#97
|
|
Senior Member Group: Members Posts: 1,052 Joined: 31-May 10 From: Laguna Beach, CA Member No.: 11,782 Region Association: None |
914 post count there (IMG:style_emoticons/default/smile.gif) , awesome job on the trunk floor.
|
|
|
|
| OU8AVW |
Feb 25 2013, 04:49 PM
Post
#98
|
|
Yacht Rigger Group: Members Posts: 1,804 Joined: 1-October 08 From: Granbury, TX Member No.: 9,601 Region Association: Southwest Region |
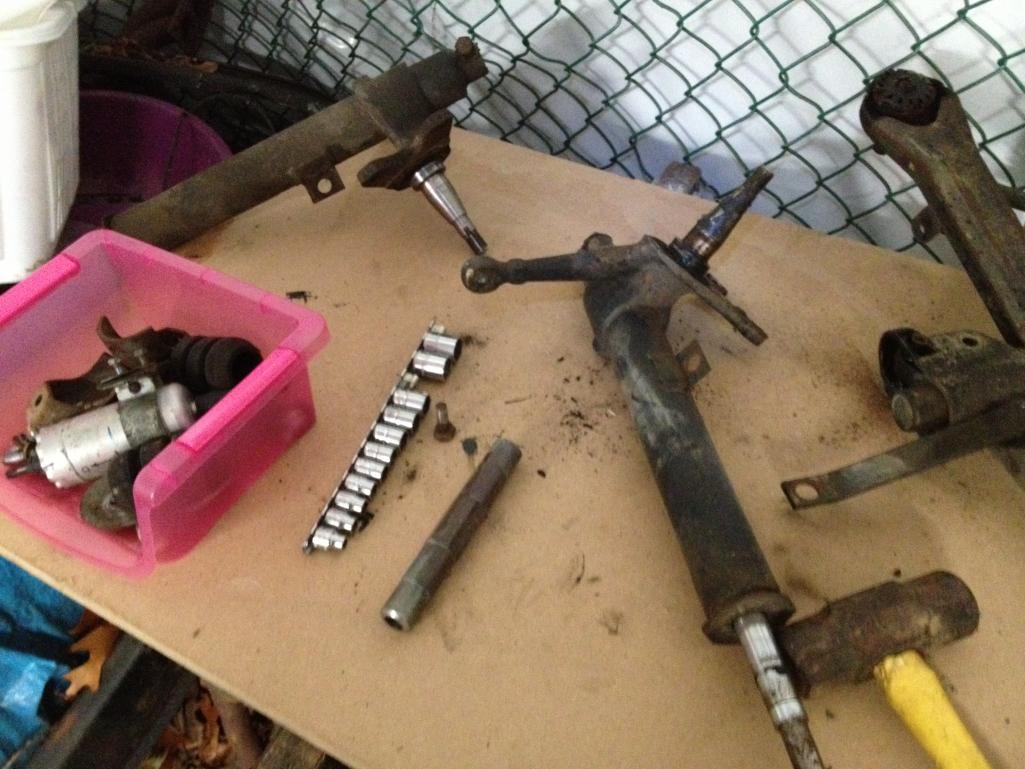
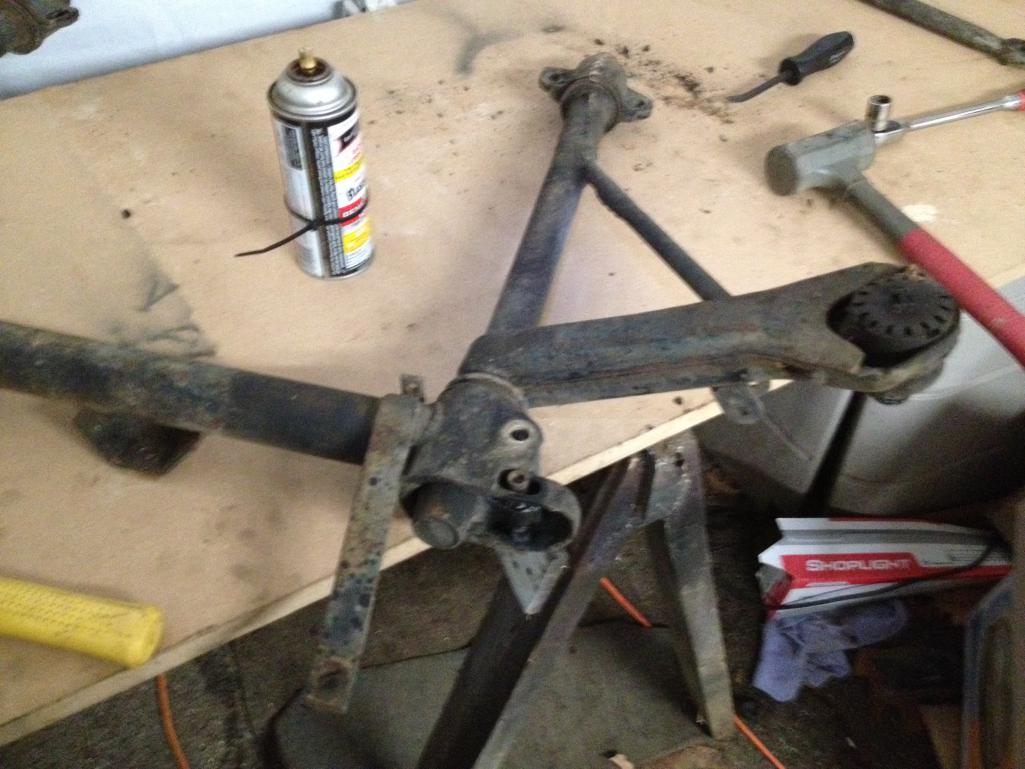
Working on the restoration of the front suspension. Removing the torsion bars and bushings....
The torsion bars were pretty frozen so I drilled out the forward caps with an anular ring cutter and used a Mini Inductor to heat things up. 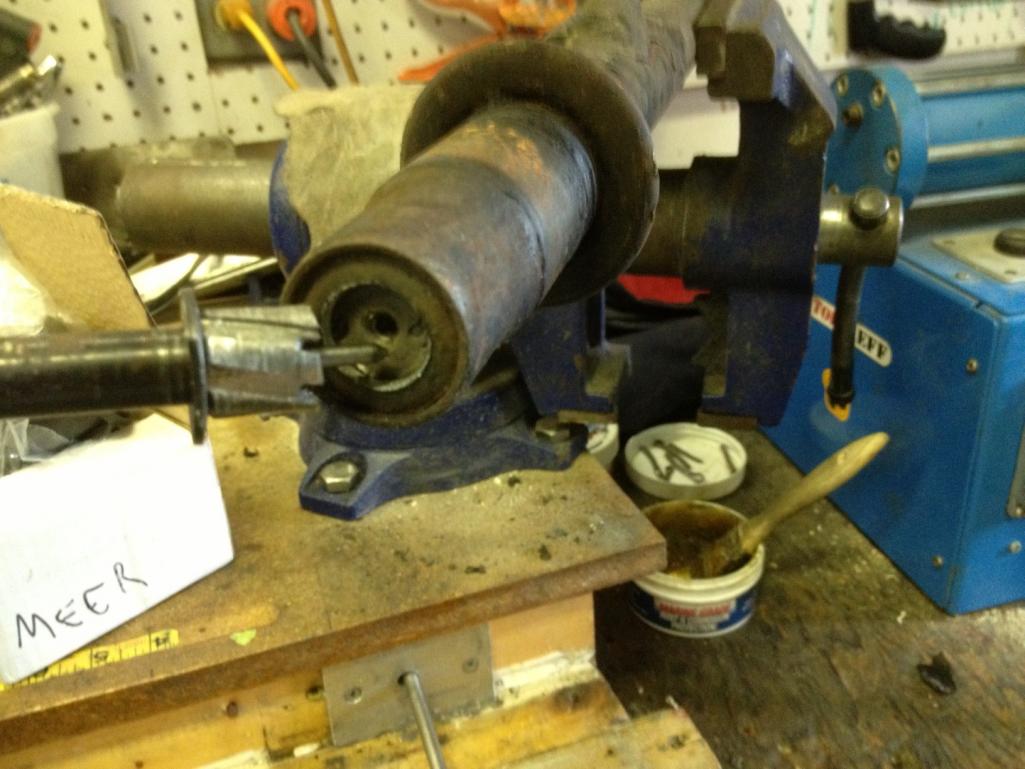 Cool tool! It uses an electrical field to heat metal to white hot is seconds. The tool itself stays cool to the touch as does any non-metallic items in the field. 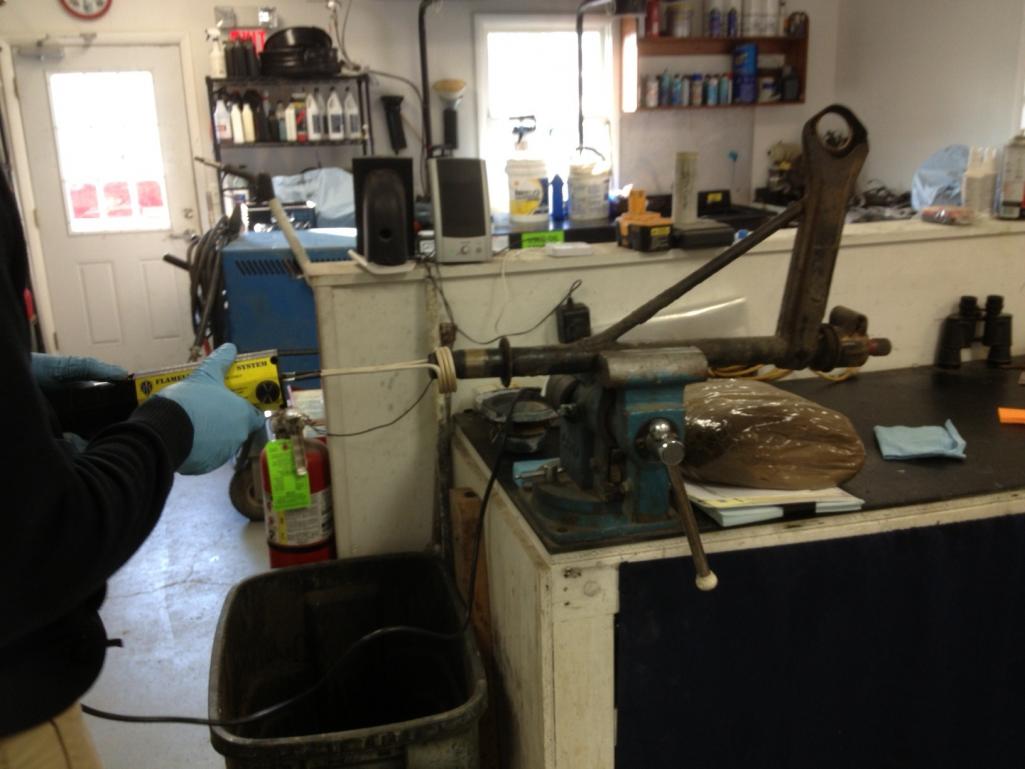 Heats up in less than 30 seconds 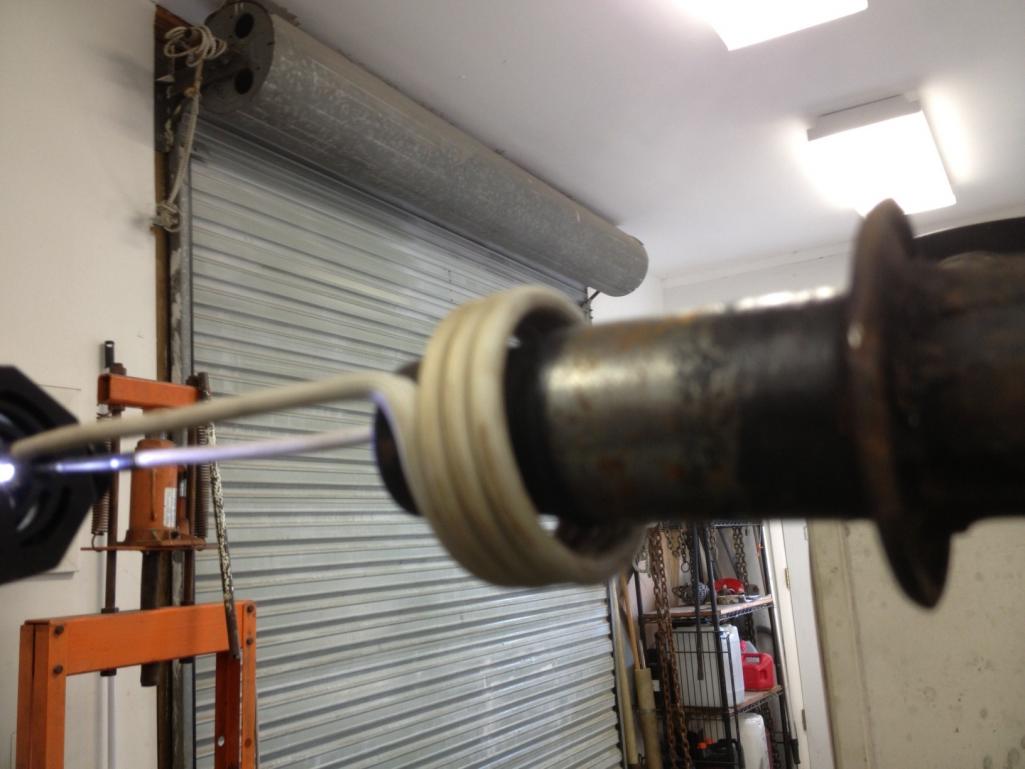 Then a little pressure with the press. 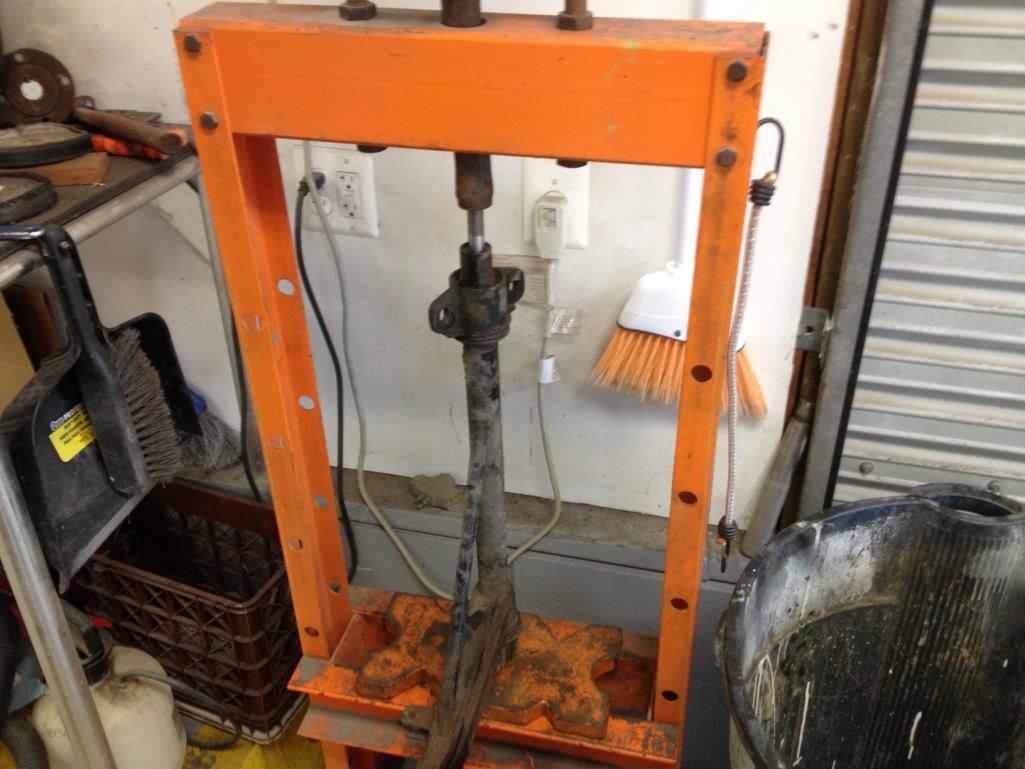 |
|
|
|
| OU8AVW |
Mar 1 2013, 10:48 AM
Post
#99
|
|
Yacht Rigger Group: Members Posts: 1,804 Joined: 1-October 08 From: Granbury, TX Member No.: 9,601 Region Association: Southwest Region |
I had a strut cap walk away (IMG:style_emoticons/default/dry.gif)
I have asked Rich is he has one, I may be in the market. You know it's going to turn up the second a replacement arrives....  |
|
|
|
| OU8AVW |
Mar 1 2013, 10:50 AM
Post
#100
|
|
Yacht Rigger Group: Members Posts: 1,804 Joined: 1-October 08 From: Granbury, TX Member No.: 9,601 Region Association: Southwest Region |
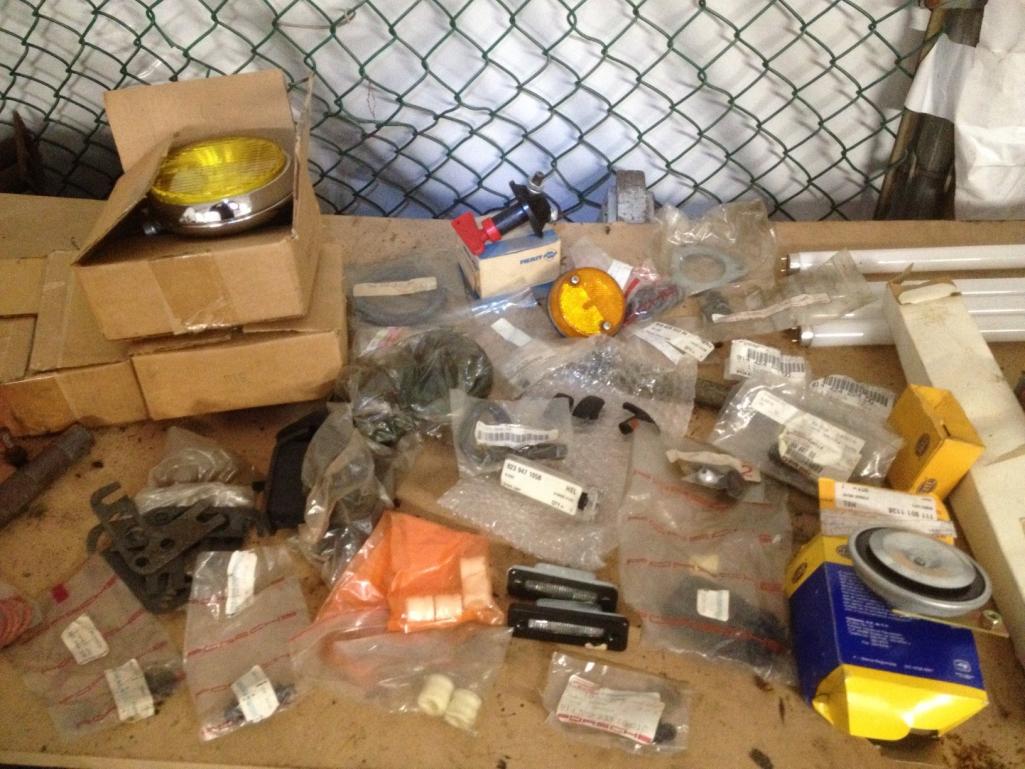
I pulled out my stash of NOS goodies to make sure I don't buy stuff I already have.
 |
|
|
|
|
1 User(s) are reading this topic (1 Guests and 0 Anonymous Users)
0 Members:

|
Lo-Fi Version | Time is now: 15th June 2026 - 07:43 AM |
Invision Power Board
v9.1.4 © 2026 IPS, Inc.