|
|
|
Porsche, and the Porsche crest are registered trademarks of Dr. Ing. h.c. F. Porsche AG.
This site is not affiliated with Porsche in any way. Its only purpose is to provide an online forum for car enthusiasts. All other trademarks are property of their respective owners. |
|
|

  |

| Chris914n6 |
 Jun 7 2017, 10:56 PM Jun 7 2017, 10:56 PM
Post
#821
|
|
Jackstands are my life.  Group: Members Posts: 3,510 Joined: 14-March 03 From: Las Vegas, NV Member No.: 431 Region Association: Southwest Region |
QUOTE(burton73 @ Jun 7 2017, 09:12 AM)  You could build the shape out of canvas like you said and then coat it with fiberglass and polyester lamenting resin. I had a fiend do that to build a kayak when I was 11 You would have an item to sell if you used a standard cooling that guys building any water cooled 914 could use. I had heat blowing into my cabin in my old SBC set up in the 70s. “If you want to run cool, you got run on heavy heavy fuel” No I just always thought it was not a good idea to warm up the gas. Bob B Fleece or tshirt cloth would be better, then fiberglass mat the inside for strength. It's how custom speaker enclosures are done. http://www.tribalvisiontruck.com/newsubbox.htm (IMG:http://www.914world.com/bbs2/uploads_offsite/www.tribalvisiontruck.com-431-1496897817.1.jpg) |
   |

 
|
| motoTrooper |
Jul 17 2017, 10:14 AM
Post
#822
|
|
Newbie Group: Members Posts: 39 Joined: 18-March 16 From: Palo Alto Member No.: 19,774 Region Association: None |
Just checking in on the thread here to see if Photobucket had erased all the awesome photo documentation on this site. Still there! Whoo hoo!
|
|
|
|
| motoTrooper |
Aug 24 2017, 03:54 PM
Post
#823
|
|
Newbie Group: Members Posts: 39 Joined: 18-March 16 From: Palo Alto Member No.: 19,774 Region Association: None |
Hey Chris, I started a video series on my Lancia that you inspired with your build thread. This introduction is a bit long and raw and subsequent videos will be shorter and more focused. They will however still be somewhat silly, like me.
https://www.youtube.com/watch?v=u2MQ3dORePI |
|
|
|
| 76-914 |
Aug 24 2017, 06:59 PM
Post
#824
|
|
Repeat Offender & Resident Subaru Antagonist Group: Members Posts: 13,828 Joined: 23-January 09 From: Temecula, CA Member No.: 9,964 Region Association: Southern California |
914 world calling Chris. Looking for updates. We need our fix. (IMG:style_emoticons/default/happy11.gif) (IMG:style_emoticons/default/beerchug.gif) Kent
|
|
|
|
| 914forme |
Aug 25 2017, 06:08 PM
Post
#825
|
|
Times a wastin', get wrenchin'! Group: Members Posts: 3,896 Joined: 24-July 04 From: Dayton, Ohio Member No.: 2,388 Region Association: None |
(IMG:style_emoticons/default/agree.gif) You might get called out on the slacker thread (IMG:style_emoticons/default/poke.gif)
It would take the heat off me (IMG:style_emoticons/default/rolleyes.gif) |
|
|
|
| Chris H. |
Aug 26 2017, 09:33 AM
Post
#826
|
|
Senior Member Group: Members Posts: 4,070 Joined: 2-January 03 From: Chicago 'burbs Member No.: 73 Region Association: Upper MidWest |
Ha! Yes I will update this weekend. The short answer is that unless you have "Bob level" skills, Megasquirting an older Subaru engine using the stock VR sensors is not that easy. I have it up and running on the stock ECU again and it's been behaving very well. I'll post some pics very soon. Was avoiding responding because people are subscribed to this thread and the update is a DUD (IMG:style_emoticons/default/biggrin.gif) .
I have to say very quietly that I am less interested in the 914 and more interested in the Vanagon now. Would love to get it up and running but wow what a chore! It's literally just like an old "garage find" 914. Someone put it away very carefully a LONG time ago and it's been sitting ever since. Every system, seal, pump, etc has to be gone through. The boys is totally rust free, amazingly. The engine has a broken head stud though, and that mother f&(*&(*&r does not want to come out (IMG:style_emoticons/default/headbang.gif) . |
|
|
|
| 76-914 |
Aug 26 2017, 10:33 AM
Post
#827
|
|
Repeat Offender & Resident Subaru Antagonist Group: Members Posts: 13,828 Joined: 23-January 09 From: Temecula, CA Member No.: 9,964 Region Association: Southern California |
QUOTE(Chris H. @ Aug 26 2017, 08:33 AM) Ha! Yes I will update this weekend. The short answer is that unless you have "Bob level" skills, Megasquirting an older Subaru engine using the stock VR sensors is not that easy. I have it up and running on the stock ECU again and it's been behaving very well. I'll post some pics very soon. Was avoiding responding because people are subscribed to this thread and the update is a DUD (IMG:style_emoticons/default/biggrin.gif) . I have to say very quietly that I am less interested in the 914 and more interested in the Vanagon now. Would love to get it up and running but wow what a chore! It's literally just like an old "garage find" 914. Someone put it away very carefully a LONG time ago and it's been sitting ever since. Every system, seal, pump, etc has to be gone through. The boys is totally rust free, amazingly. The engine has a broken head stud though, and that mother f&(*&(*&r does not want to come out (IMG:style_emoticons/default/headbang.gif) . (IMG:style_emoticons/default/poke.gif) If you ever get that 914 running correctly you'll forget about that Bus. (IMG:style_emoticons/default/av-943.gif) |
|
|
|
| A&P Mech |
Aug 26 2017, 12:34 PM
Post
#828
|
|
Member Group: Members Posts: 401 Joined: 10-September 13 From: United States Member No.: 16,371 Region Association: Rocky Mountains |
QUOTE(76-914 @ Aug 26 2017, 10:33 AM) QUOTE(Chris H. @ Aug 26 2017, 08:33 AM) Ha! Yes I will update this weekend. The short answer is that unless you have "Bob level" skills, Megasquirting an older Subaru engine using the stock VR sensors is not that easy. I have it up and running on the stock ECU again and it's been behaving very well. I'll post some pics very soon. Was avoiding responding because people are subscribed to this thread and the update is a DUD (IMG:style_emoticons/default/biggrin.gif) . I have to say very quietly that I am less interested in the 914 and more interested in the Vanagon now. Would love to get it up and running but wow what a chore! It's literally just like an old "garage find" 914. Someone put it away very carefully a LONG time ago and it's been sitting ever since. Every system, seal, pump, etc has to be gone through. The boys is totally rust free, amazingly. The engine has a broken head stud though, and that mother f&(*&(*&r does not want to come out (IMG:style_emoticons/default/headbang.gif) . (IMG:style_emoticons/default/poke.gif) If you ever get that 914 running correctly you'll forget about that Bus. (IMG:style_emoticons/default/av-943.gif) (IMG:style_emoticons/default/agree.gif) |
|
|
|
| 914forme |
Aug 26 2017, 03:10 PM
Post
#829
|
|
Times a wastin', get wrenchin'! Group: Members Posts: 3,896 Joined: 24-July 04 From: Dayton, Ohio Member No.: 2,388 Region Association: None |
Not sure why your screwing with a broken head stud.
Join the dark side Luke er I mean Chris (IMG:style_emoticons/default/happy11.gif) Seems to me that brick is calling for an Subaru of it's own. |
|
|
|
| Chris H. |
Aug 27 2017, 10:25 AM
Post
#830
|
|
Senior Member Group: Members Posts: 4,070 Joined: 2-January 03 From: Chicago 'burbs Member No.: 73 Region Association: Upper MidWest |
QUOTE(914forme @ Aug 26 2017, 04:10 PM) Not sure why your screwing with a broken head stud. Join the dark side Luke er I mean Chris (IMG:style_emoticons/default/happy11.gif) Seems to me that brick is calling for an Subaru of it's own. Yeah I was hoping I could just get the current engine running with new seals and convert it when i had the time and energy. $100 for the awesome kit from Van-Again.com...why not? The heads look great...no cracks at all. Valves seats are fine. Unfortunately where I am stuck is that the head stud snapped in a tough spot and I MIGHT have to take the cylinder barrels out....at that point you HAVE to re-ring it, which means "hey, might as well just rebuild it.." but it's a 1.9. Probably not worth the effort for 83 HP. You can buy an entire JDM 2.0L Subaru engine for about $700. 138 hp. Which one of these is not like the other? 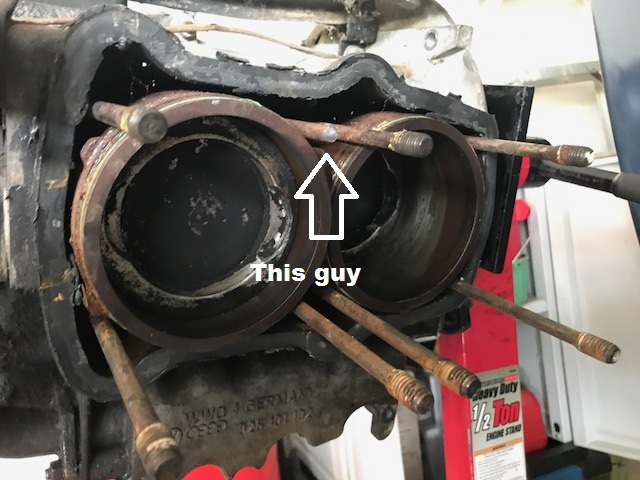 Question for you Steve, or another welding guru...I welded a nut on the end of that thing but it just would not adhere to it. a 12mm screws half way on so it was a great fit. I could fill the whole inside of the thing up but it would just twist right off. Not hot enough or what? The nut is not treated or galvanized. Assuming the stud is just a tougher material so it may need more heat. |
|
|
|
| motoTrooper |
Aug 29 2017, 05:56 PM
Post
#831
|
|
Newbie Group: Members Posts: 39 Joined: 18-March 16 From: Palo Alto Member No.: 19,774 Region Association: None |
Maybe preheat it with a blowtorch and initially weld a blob on the end to see if it sticks? Then try the bolt or nut trick?
|
|
|
|
| Chris914n6 |
Aug 29 2017, 06:59 PM
Post
#832
|
|
Jackstands are my life. Group: Members Posts: 3,510 Joined: 14-March 03 From: Las Vegas, NV Member No.: 431 Region Association: Southwest Region |
QUOTE(motoTrooper @ Aug 29 2017, 04:56 PM) Maybe preheat it with a blowtorch and initially weld a blob on the end to see if it sticks? Then try the bolt or nut trick? (IMG:style_emoticons/default/agree.gif) Studs are hardened steel so you need to weld a blob on the end then weld the nut to the blob. Before that PB Blaster the theaded end and let it soak overnight. I also like to tap it with a hammer a few time to try to break the corrosion bond. If you can get a pipe wrench in there sometimes that will work too. |
|
|
|
| flmont |
Aug 29 2017, 07:53 PM
Post
#833
|
|
Senior Member Group: Members Posts: 881 Joined: 21-October 08 From: Tucson,Az Member No.: 9,676 Region Association: Southwest Region |
maybe a visegrip with a cheater bar,if you could even clamp it strong enough. (IMG:style_emoticons/default/idea.gif)
|
|
|
|
| Chris H. |
Feb 17 2018, 11:23 AM
Post
#834
|
|
Senior Member Group: Members Posts: 4,070 Joined: 2-January 03 From: Chicago 'burbs Member No.: 73 Region Association: Upper MidWest |
I'm back at it people! Had a pretty strange year at work but you all know how that goes. Thanks to my pals who checked on me and who didn't get too upset when I went completely dark for several months.
So for the elephant in the garage let me just address the Megasquirting...the car would never quite run right above idle, so I went back to the stock ECU just to confirm everything was OK. It was very hard to start when I switched back, but ran fine once it got through the first minute or so. Turns out it was a bad temp sensor. No resistance at all. Unfortunately in the older Subaru engines the temp SENSOR is separate from the temp SENDER so there was nothing obvious that would tell me there was a problem. I think I will still keep the stock ECU in place for now. Lesson learned...change every inexpensive sensor on a donor engine. Even if it's ok at the moment, it will eventually go bad. This $20 sensor caused me hours of pain. Another issue...the VW "globe" coolant reservoir started to leak a bit at the seam. I only noticed it while driving it that one last time for the season. Small amount of steam was coming out, barely visible and intermittent, but it would have been a big problem later on. I'll be switching it to this:  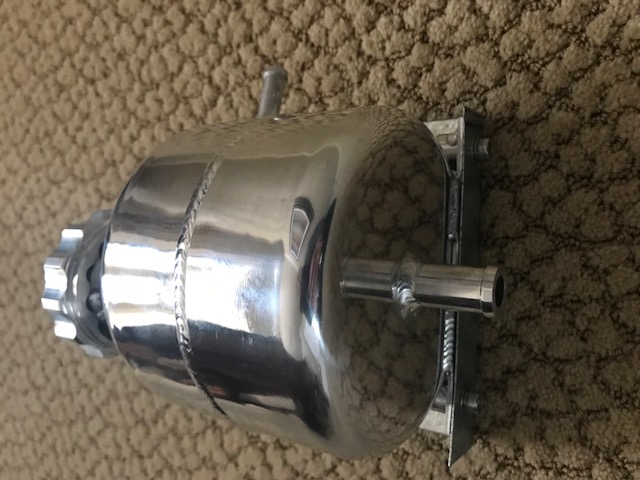 Aftermarket aluminum tank designed for the Mini (2000-2005ish). It's a nice size and not too pricey at ~$60. Disregard the mounting bracket I made. It doesn't come with that. His a nice mounting plate on the side with two allen bolts (included). Apparently the Mini plastic tanks had a tendency to split at the seam as well which is the reason these were made. I would recommend the one with the 3rd outlet at the filler neck so that you can attach an overflow tank hose to it. There are two types out there and one does not have a 3rd outlet. 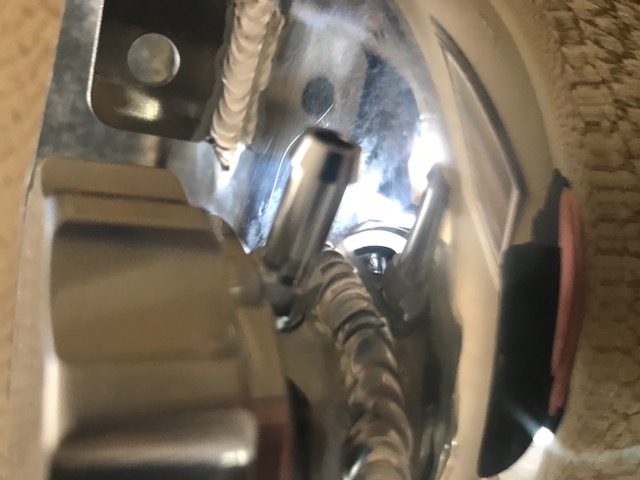 Then a universal unpressurized overflow tank. 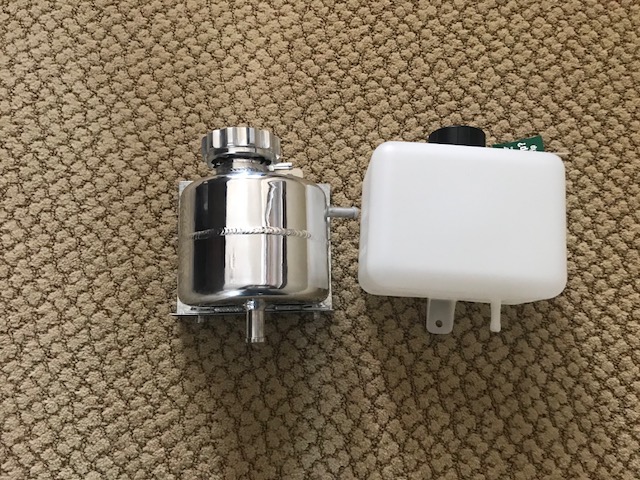 This will resolve the other ongoing problem with the globe, which was that during the "self bleed" period it would puke a small amount of antifreeze out the hidden drain hose in the back making a mess. It was fine once the level was set and all of the air bled out but not great for the first few runs. |
|
|
|
| Chris H. |
Feb 17 2018, 11:30 AM
Post
#835
|
|
Senior Member Group: Members Posts: 4,070 Joined: 2-January 03 From: Chicago 'burbs Member No.: 73 Region Association: Upper MidWest |
And hey check out my new "3.3" badge made by Mueller. Very nice quality aluminum emblem. Check the detail with the ridge on the outer edge and all.
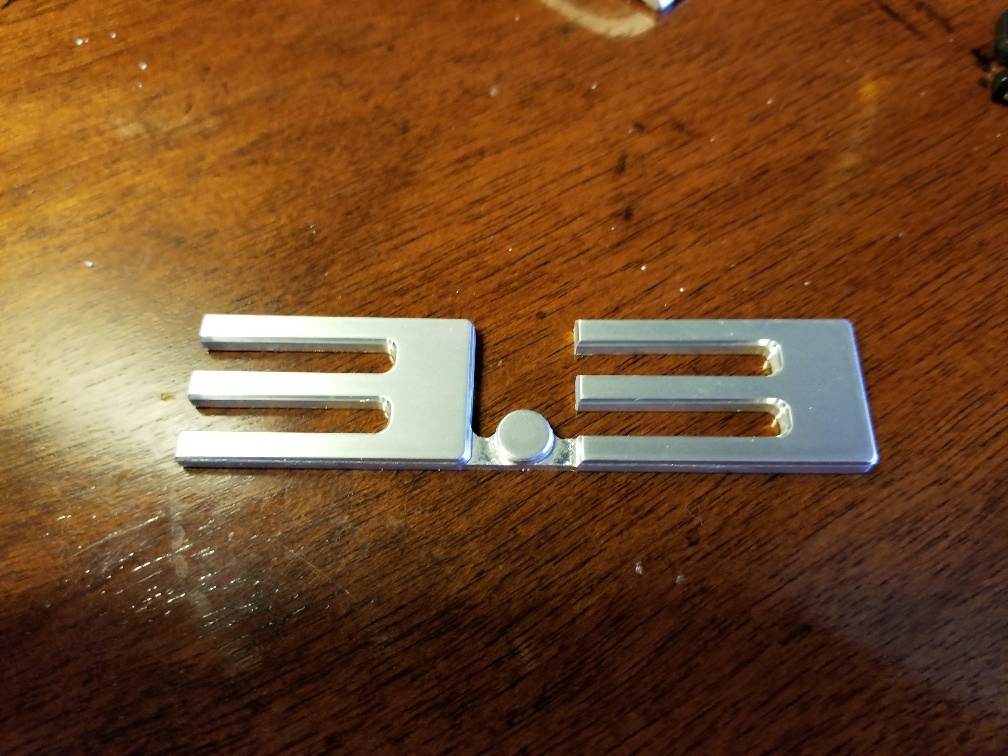 Note how wide the Porsche font is. The "3.3" is in the exact same scale as the 1.8. 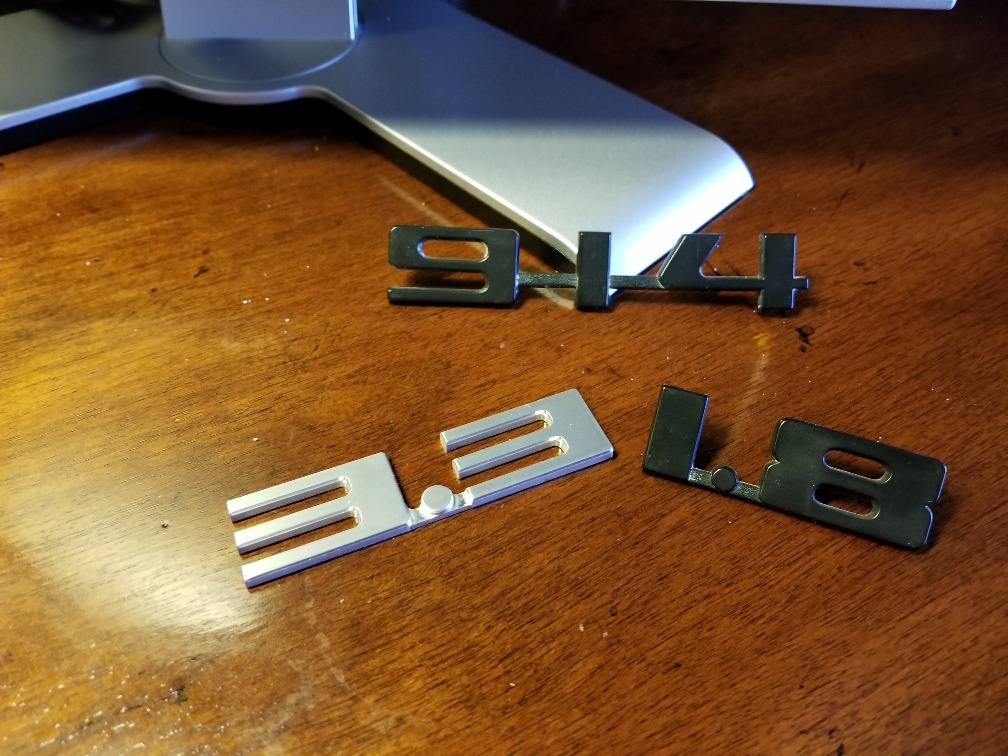 He can make any number/letter combo you want and it's very reasonably priced, especially for a custom request. I'll be painting mine black to match the "914". |
|
|
|
| Andyrew |
Feb 17 2018, 11:58 AM
Post
#836
|
|
Spooling.... Please wait Group: Members Posts: 13,380 Joined: 20-January 03 From: Riverbank, Ca Member No.: 172 Region Association: Northern California |
I like the coolant tank! And one can never have to many Mueller parts!
|
|
|
|
| Chris H. |
Feb 17 2018, 12:31 PM
Post
#837
|
|
Senior Member Group: Members Posts: 4,070 Joined: 2-January 03 From: Chicago 'burbs Member No.: 73 Region Association: Upper MidWest |
Thanks Andrew. I'll be installing it early next week so I will report back on the performance.
BTW in case anyone is looking at the Vanagon engine posts, yes, I did finally get that stud out. Here that stubborn SOB is next to its replacement. 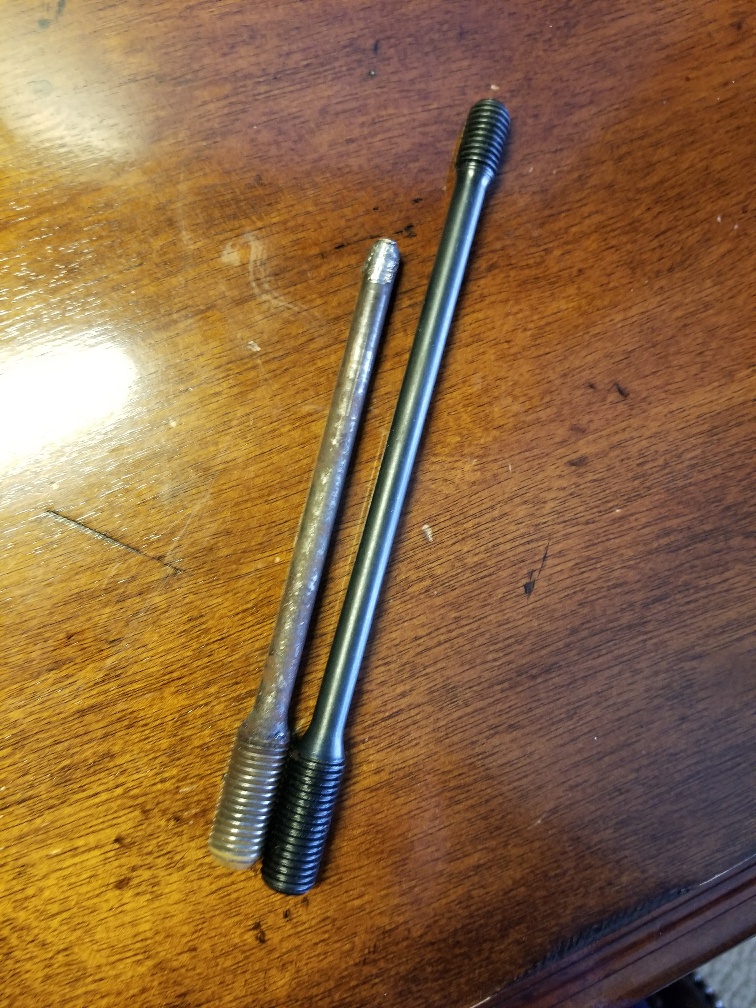 After trying several methods, including drilling a small hole in it and using a "tee", welding a nut to it, etc., I finally coughed up $20 on this extractor and it came out easily. 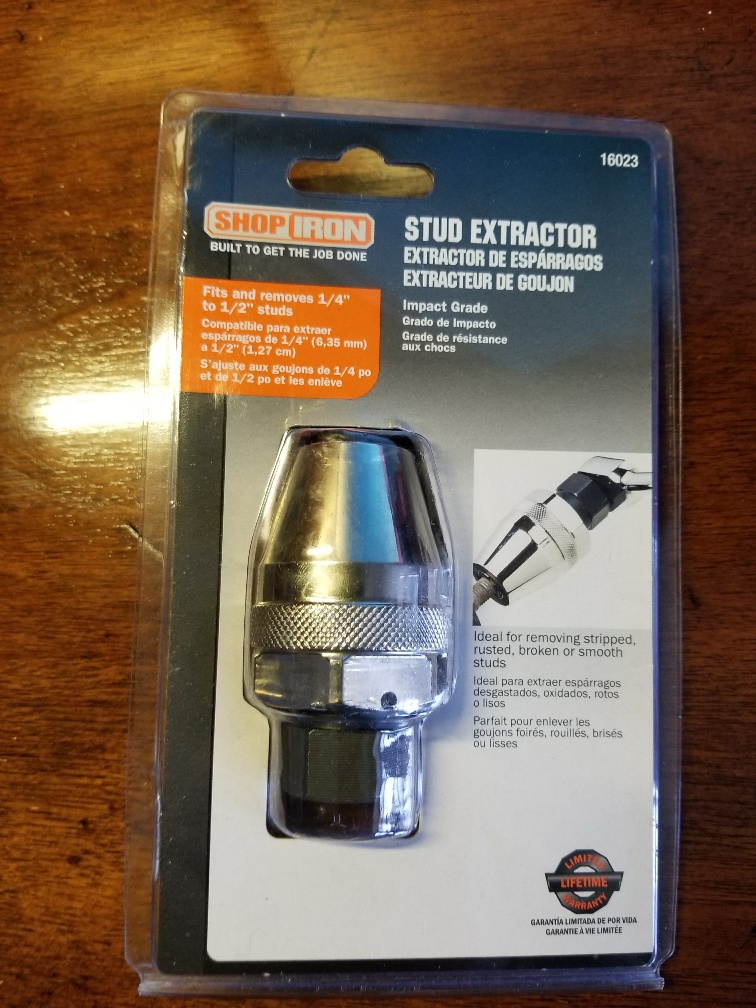 I soaked it in PB Blaster for a week straight beforehand. That definitely helped. |
|
|
|
| 76-914 |
Feb 17 2018, 07:17 PM
Post
#838
|
|
Repeat Offender & Resident Subaru Antagonist Group: Members Posts: 13,828 Joined: 23-January 09 From: Temecula, CA Member No.: 9,964 Region Association: Southern California |
Yeah. Happy your back at it, Chris. Does this mean you’ll be posting pictures w:o being Hounded. (IMG:style_emoticons/default/happy11.gif)
|
|
|
|
| 914forme |
Feb 17 2018, 07:55 PM
Post
#839
|
|
Times a wastin', get wrenchin'! Group: Members Posts: 3,896 Joined: 24-July 04 From: Dayton, Ohio Member No.: 2,388 Region Association: None |
QUOTE(Chris H. @ Feb 17 2018, 01:31 PM) After trying several methods, including drilling a small hole in it and using a "tee", welding a nut to it, etc., I finally coughed up $20 on this extractor and it came out easily. I soaked it in PB Blaster for a week straight beforehand. That definitely helped. Yep, that is the correct tool for the job. Welding on a rusted hardened steel stud over 30 years old would never be my first choice. And if it was It would be my last. If you are going to use the welder as the tool of choice. I would cut them off closer to the base of the stud. If you have some threads there that is even better, put a nut on it, screw it down as far as it can go, but leave a bit of it for a valley. So nut sits a bit proud. I would then heat it with a small torch, burn off the crap. You can't weld dirt. You then take your MIG, I would prefer to use a TIG for this. And you go for the center of the stud, you get it nice and hot. And then work your way out. I would use flux core as it can handle a bit of crap in the weld if something cuts loose. If doing this with a TIG, you preheat the stud, to fire red, with a torch. That will allow impurities to burn off. And then you can TIG clean metal. With the TIG you can get the tungsten down and start heating the stud before you get into the nut. You can then get them to almost fusion weld the nut to the stud, then you can work out and start adding filler. With this, you could then grind it and polish it up and make it look like a bolt. You want to get heat all the way down the stud length, if you don't part of it will not be hardened. When you apply torque to the stud to try and remove it, it will stretch and snap right at the transition from soft to hardened metal. And you will be (IMG:style_emoticons/default/headbang.gif) I have also been know to take a impact socket, prep it up, and weld it to the stud. BTW, if you want the best stud freer around. You take some acetone, and automatic transmission fluid, you mix it together, and you spray, brush, drip, soak, whatever the offending part. It works like a champ (IMG:style_emoticons/default/shades.gif) Another thing I like to do is (IMG:style_emoticons/default/smash.gif) the head of the offensive stuck part, that allows the stuff to migrate down into the opening a bit easier. I even have a hammer that fits in an air chisel for just such an offensive item. |
|
|
|
| mepstein |
Feb 17 2018, 08:14 PM
Post
#840
|
|
914-6 GT in waiting Group: Members Posts: 20,289 Joined: 19-September 09 From: Landenberg, PA/Wilmington, DE Member No.: 10,825 Region Association: MidAtlantic Region |
We use map gas on on the area around every stud then a snap on stud remover. Heat 2-3 min and then unscrew. I've done a couple hundred this way and never a problem. If I get any real resistance, I add another minute with the torch. Pretty effortless.
If the stud is broken close to the case, then I have our guy weld a nut, I heat the case and then remove. If there is someone to help, one person heats one stud while the previously heated stud is removed. We had some bozo cut off balljoints from a strut. Left the shaft in the strut. We welded on a nut, sprayed some penetrating oil and clamped the nut in a vise while turning the strut. Made it easy. |
 |
|
|
2 User(s) are reading this topic (2 Guests and 0 Anonymous Users)
0 Members:

|
Lo-Fi Version | Time is now: 14th December 2025 - 11:45 AM |
Invision Power Board
v9.1.4 © 2025 IPS, Inc.