|
|
|
Porsche, and the Porsche crest are registered trademarks of Dr. Ing. h.c. F. Porsche AG.
This site is not affiliated with Porsche in any way. Its only purpose is to provide an online forum for car enthusiasts. All other trademarks are property of their respective owners. |
|
|

  |

| dlee6204 |
 Jul 19 2016, 06:40 PM Jul 19 2016, 06:40 PM
Post
#81
|
|
Howdy  Group: Members Posts: 2,162 Joined: 30-April 06 From: Burnsville, NC Member No.: 5,956 |
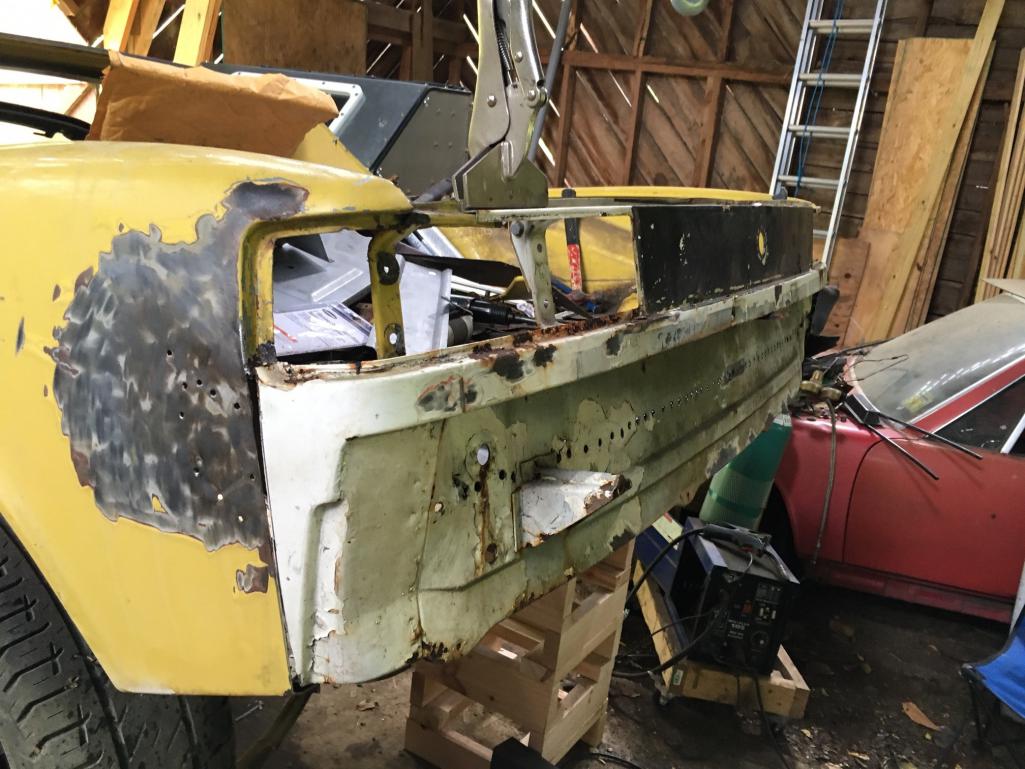
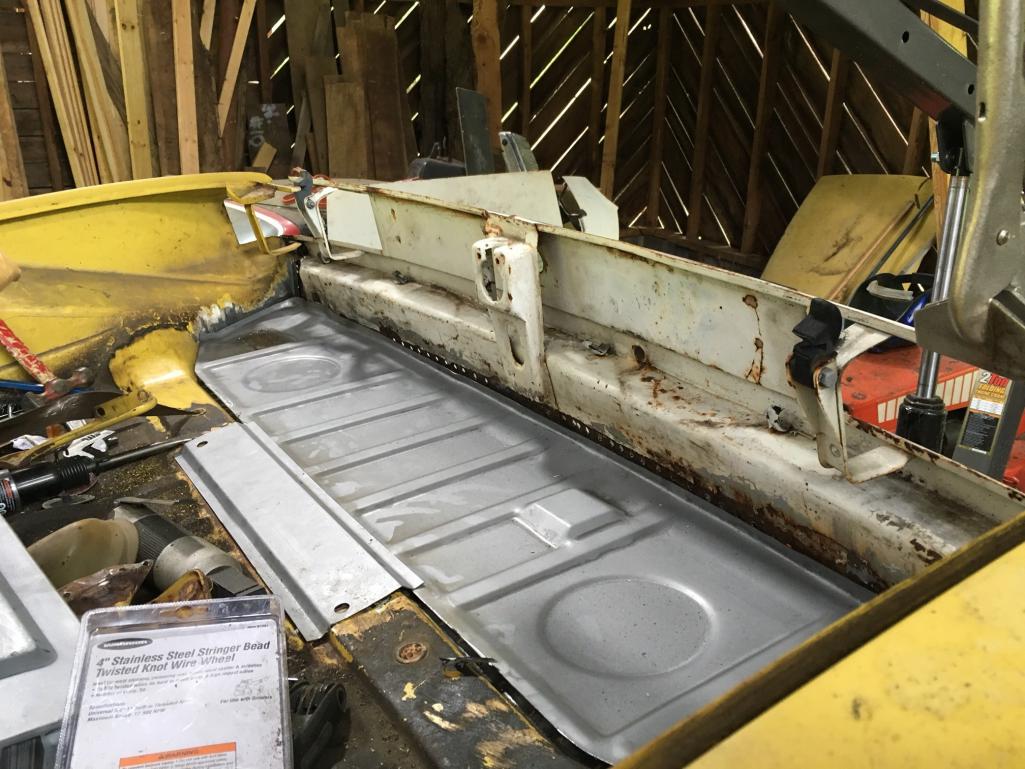
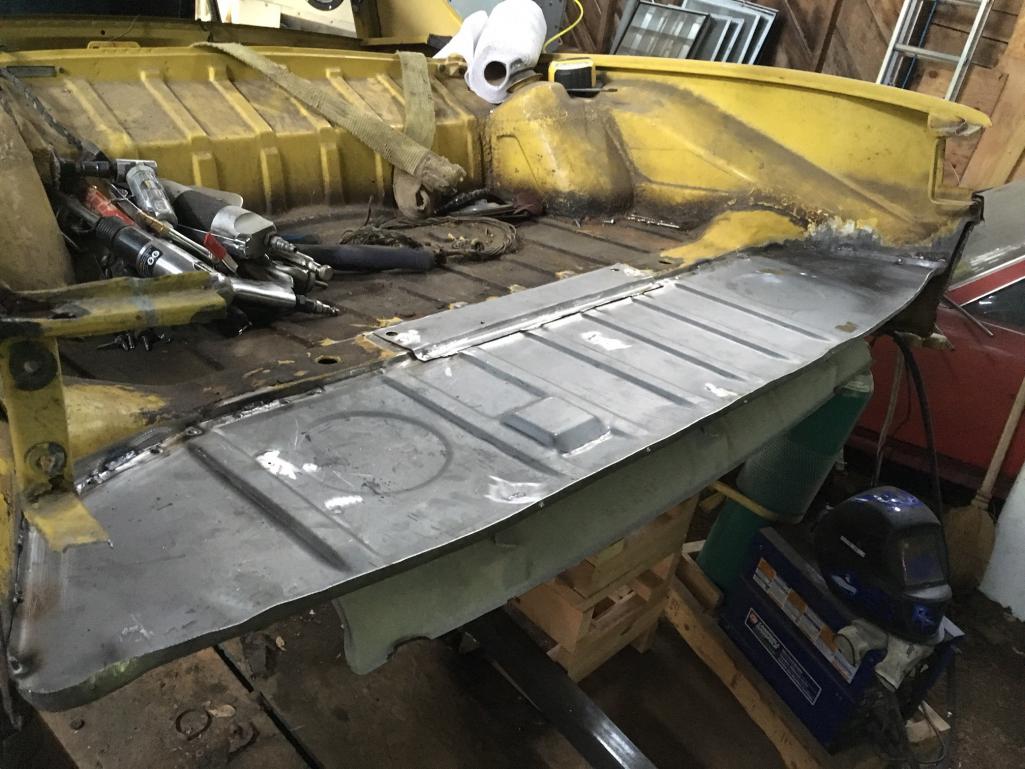
I cut a replacement panel off a parts car and before to trim it to fit.
  |
   |

 
|
| dlee6204 |
Jul 19 2016, 06:47 PM
Post
#82
|
|
Howdy Group: Members Posts: 2,162 Joined: 30-April 06 From: Burnsville, NC Member No.: 5,956 |
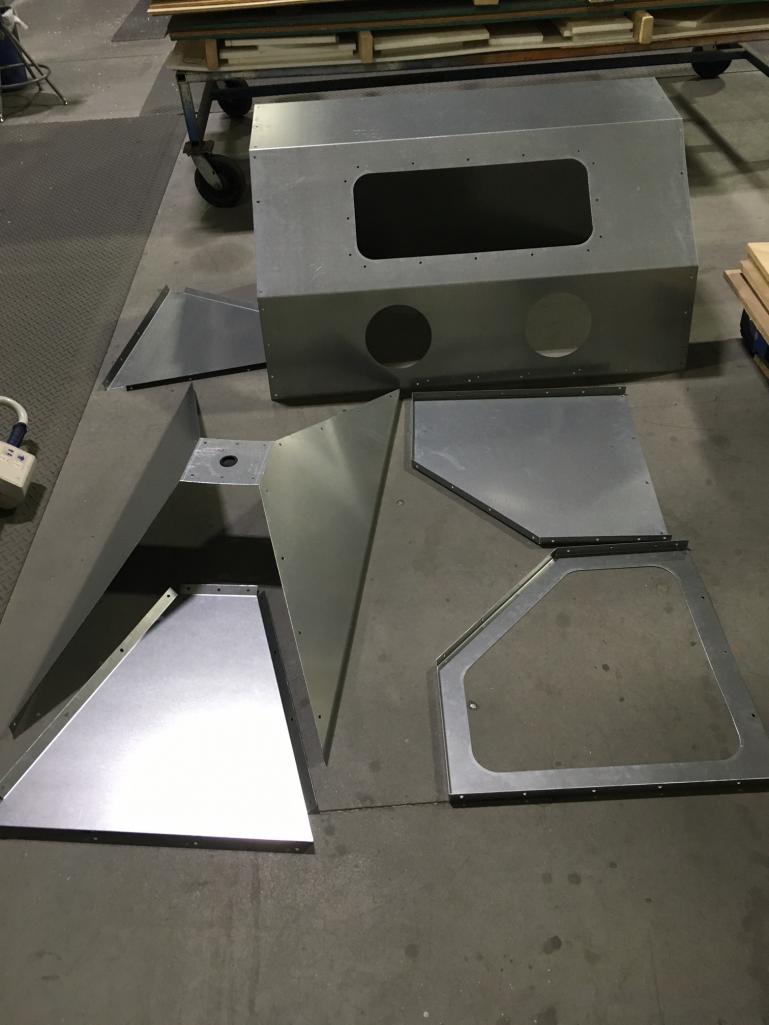
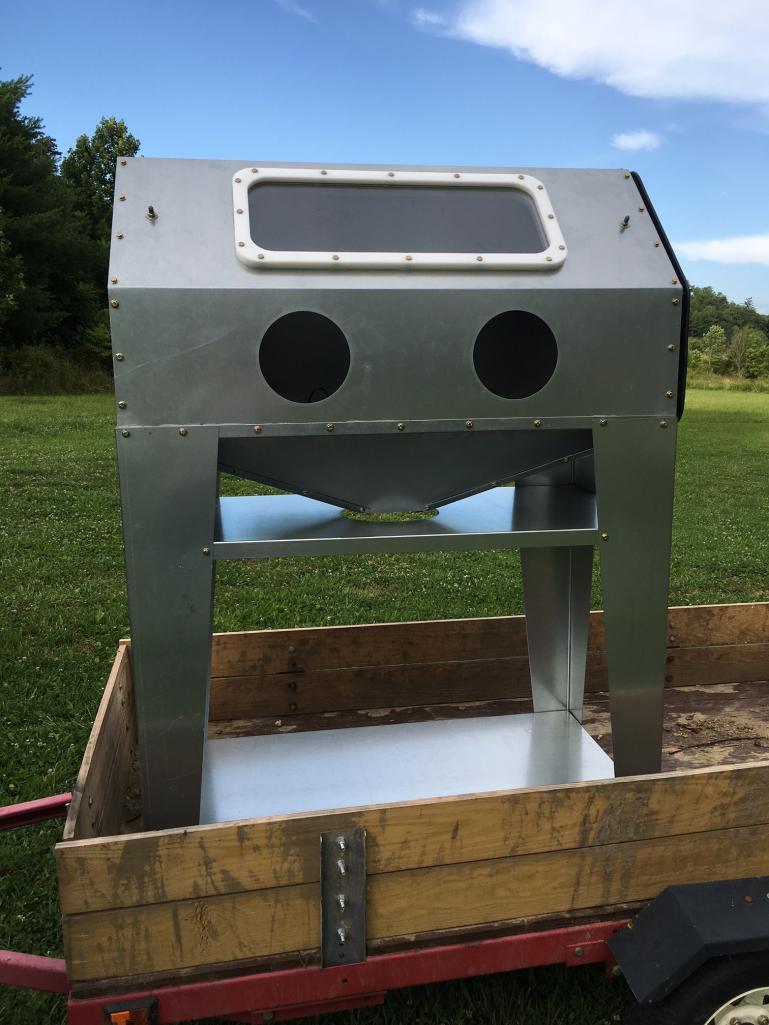
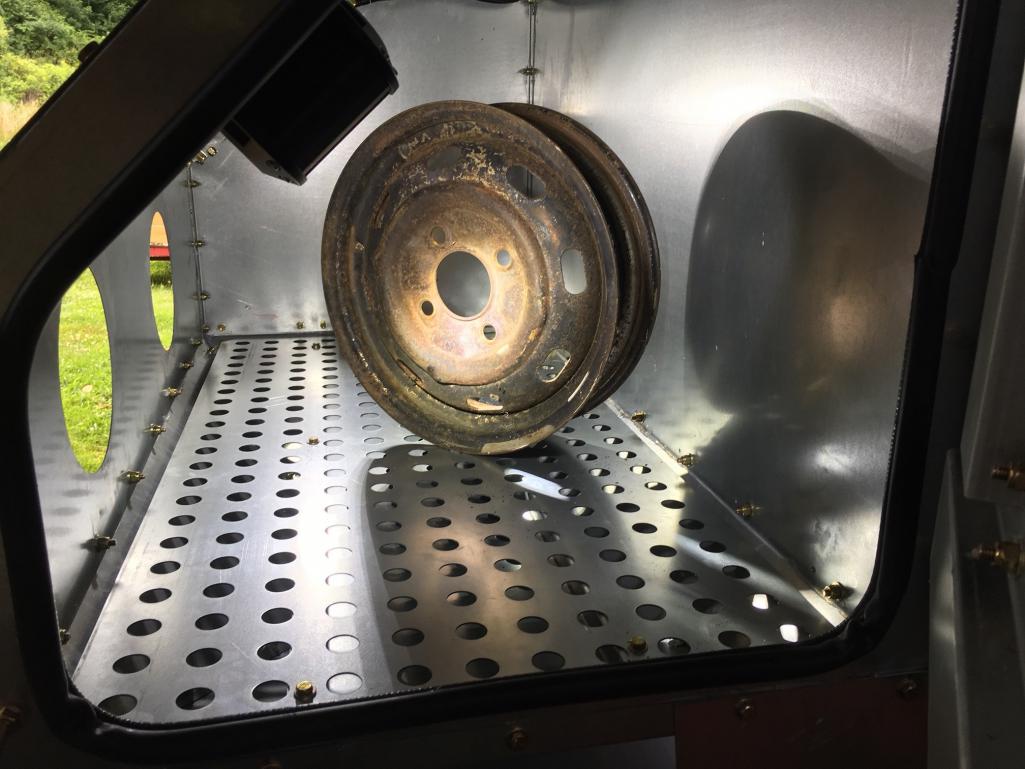
I haven't made as much progress as I would like as of lately because I have been working on my side project... I have been building myself a media blast cabinet. Cabinet is made out of galvanized steel and is approximately '2x2'x4'. I have a few small items to complete on it before its ready for blasting but so far I am very pleased with how it turned out.
   |
|
|
|
| 914forme |
Jul 20 2016, 04:59 AM
Post
#83
|
|
Times a wastin', get wrenchin'! Group: Members Posts: 3,899 Joined: 24-July 04 From: Dayton, Ohio Member No.: 2,388 Region Association: None |
Wow nice work on that blast cabinet
|
|
|
|
| tygaboy |
Jul 20 2016, 08:20 AM
Post
#84
|
|
914 Guru Group: Members Posts: 5,829 Joined: 6-October 15 From: Petaluma, CA Member No.: 19,241 Region Association: Northern California |
Really enjoying your resto! I have to replace my rear panel so I'm following closely. Keep it going! (IMG:style_emoticons/default/popcorn[1].gif)
|
|
|
|
| dlee6204 |
Jul 21 2016, 06:15 PM
Post
#85
|
|
Howdy Group: Members Posts: 2,162 Joined: 30-April 06 From: Burnsville, NC Member No.: 5,956 |
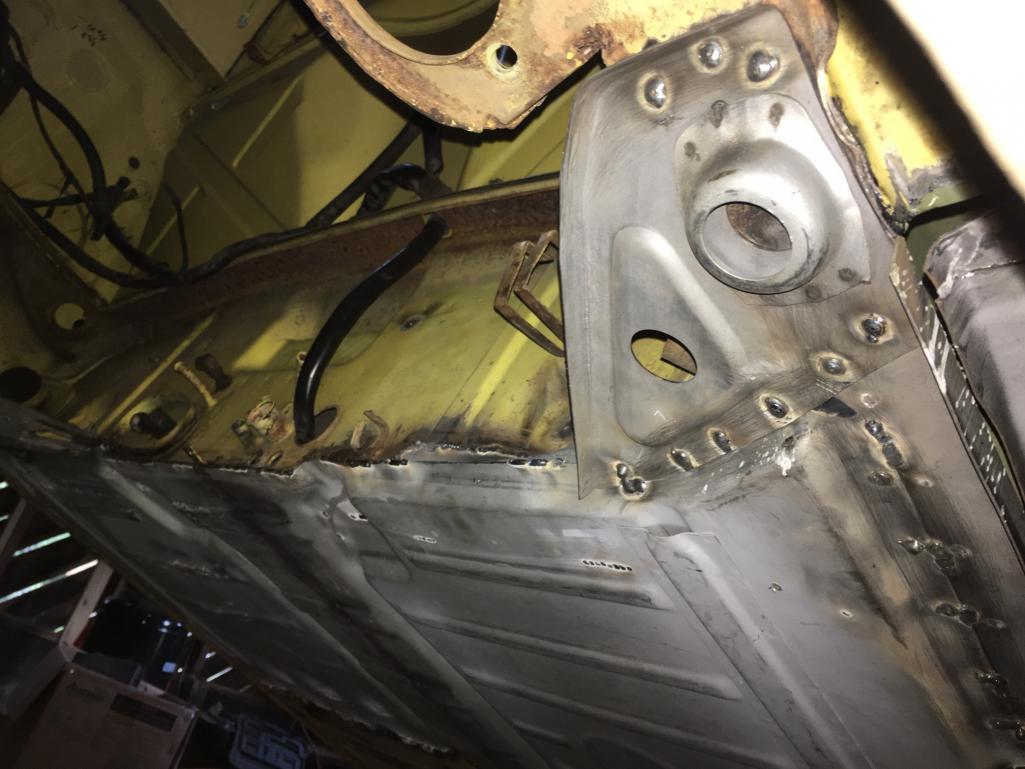
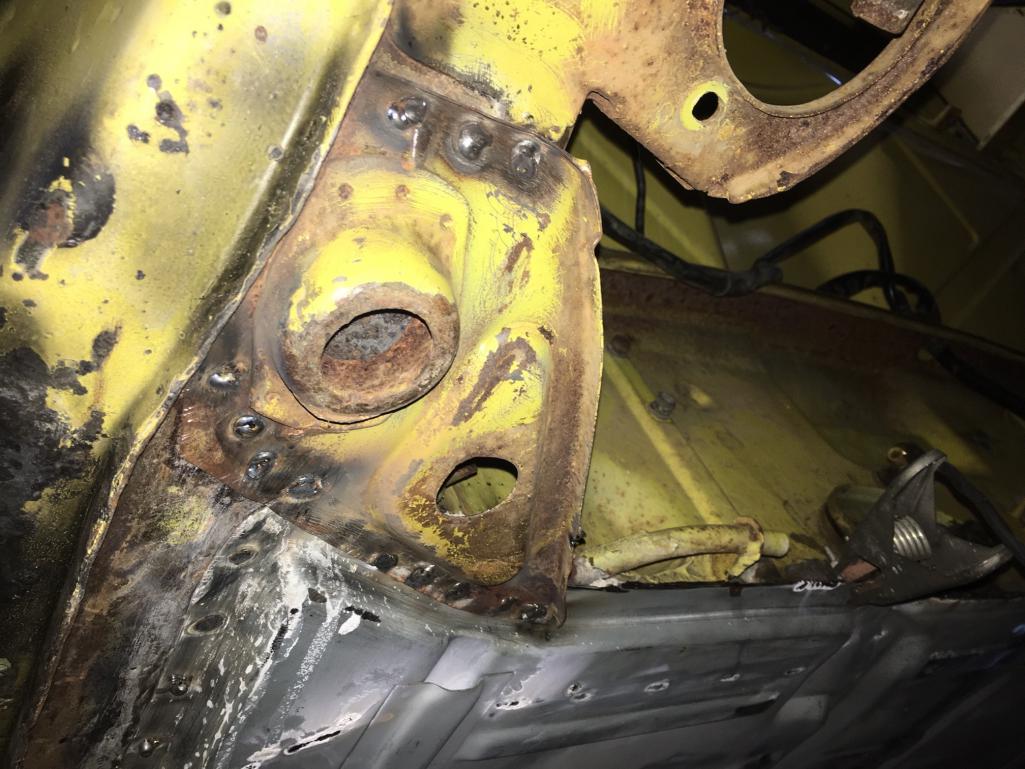
I reached a milestone tonight and finished all welding underneath the car! (IMG:style_emoticons/default/first.gif) (IMG:style_emoticons/default/welder.gif) No more molten balls of lava falling on me while I work. I installed the rear jacking triangles and completed the last few areas of welding on the floorpan.
  |
|
|
|
| 76-914 |
Jul 21 2016, 06:22 PM
Post
#86
|
|
Repeat Offender & Resident Subaru Antagonist Group: Members Posts: 13,902 Joined: 23-January 09 From: Temecula, CA Member No.: 9,964 Region Association: Southern California |
Well, now that your out from under it I should tell you HF has leather welders aprons for < $10. Great progress! (IMG:style_emoticons/default/beerchug.gif)
|
|
|
|
| dlee6204 |
Jul 24 2016, 06:44 PM
Post
#87
|
|
Howdy Group: Members Posts: 2,162 Joined: 30-April 06 From: Burnsville, NC Member No.: 5,956 |
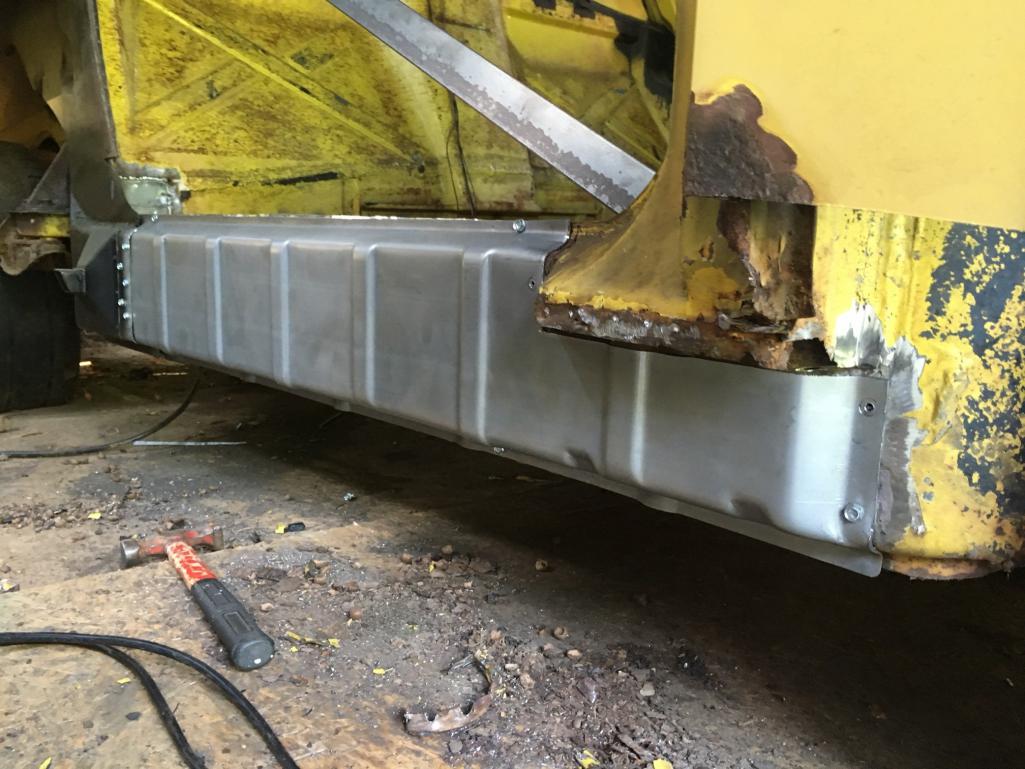
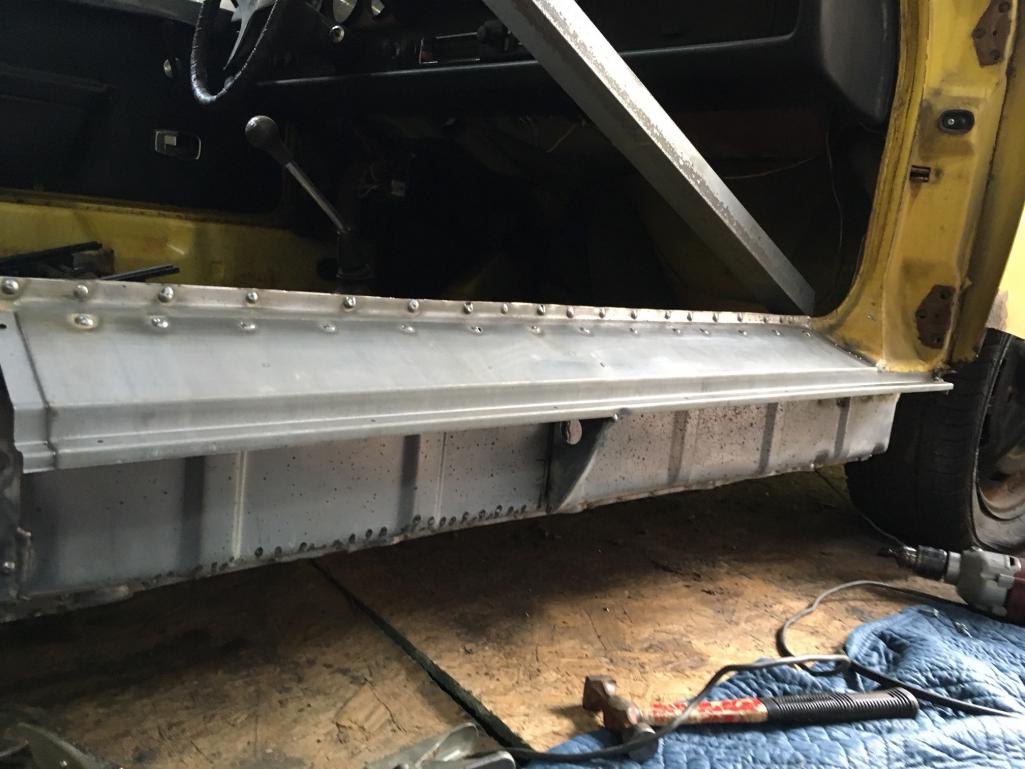
I had a very productive weekend. I set out to complete the very last structural repair and replace the passenger inner rocker.
After drilling spot welds, the rocker came off quite easily. There was no shortage of nuts and acorns that came out once off. Luckily the entire inner long was solid and I had to do no additional repairs. Just wire wheel, paint, and install the new one. 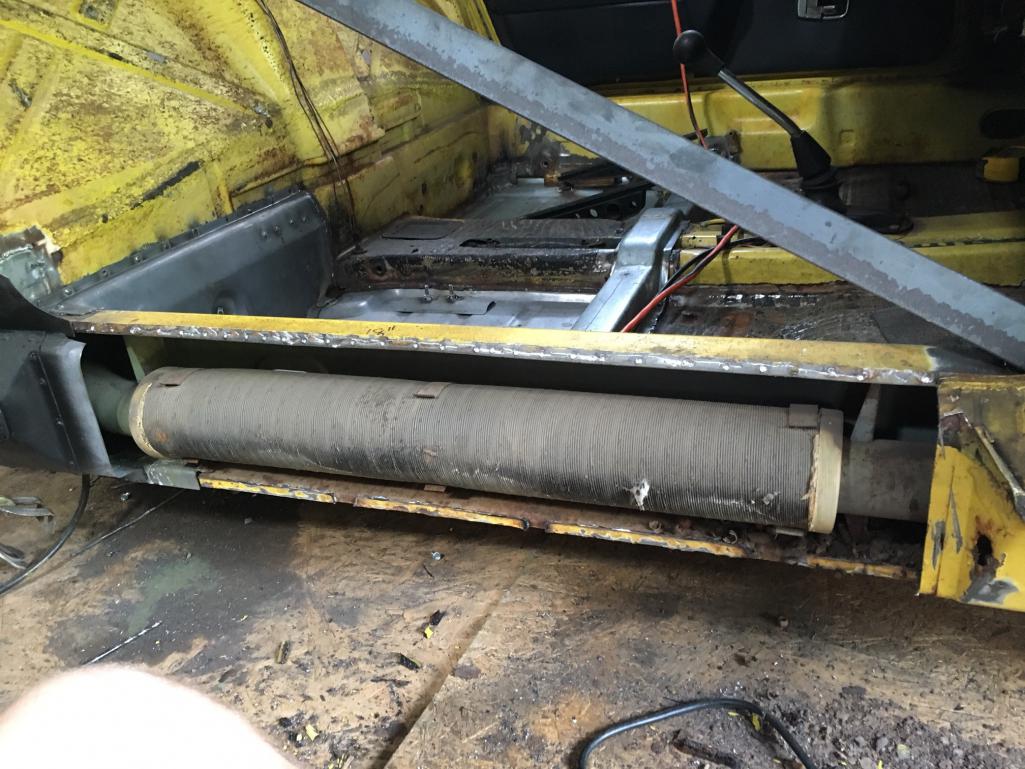 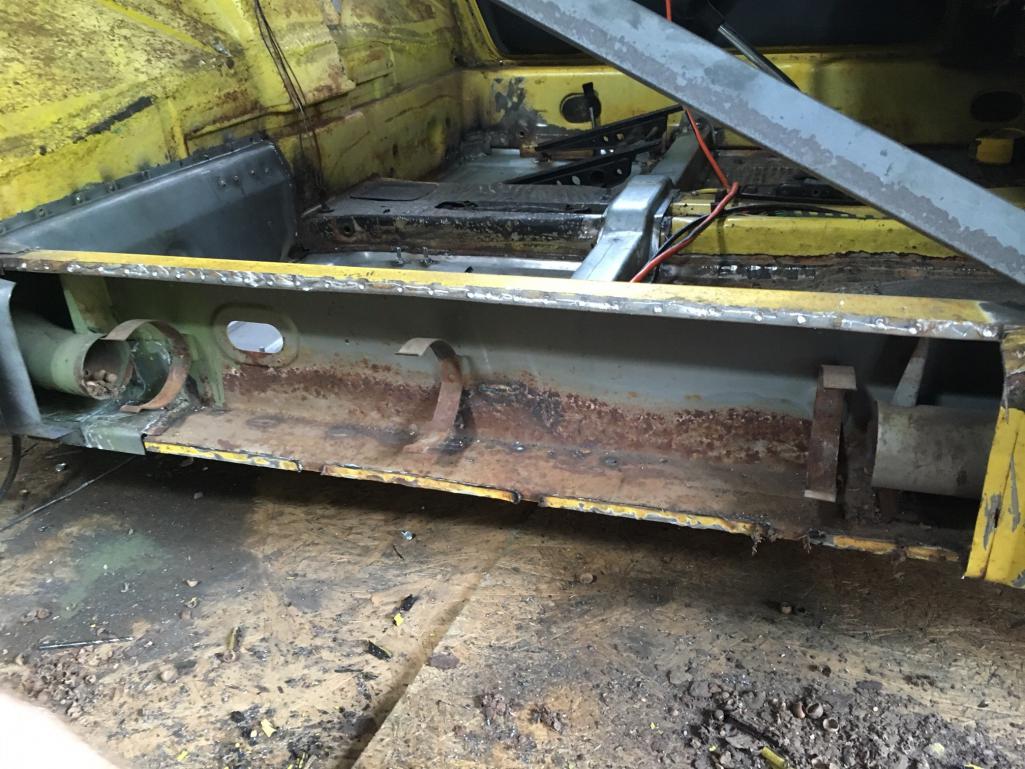 This onion has many layers. 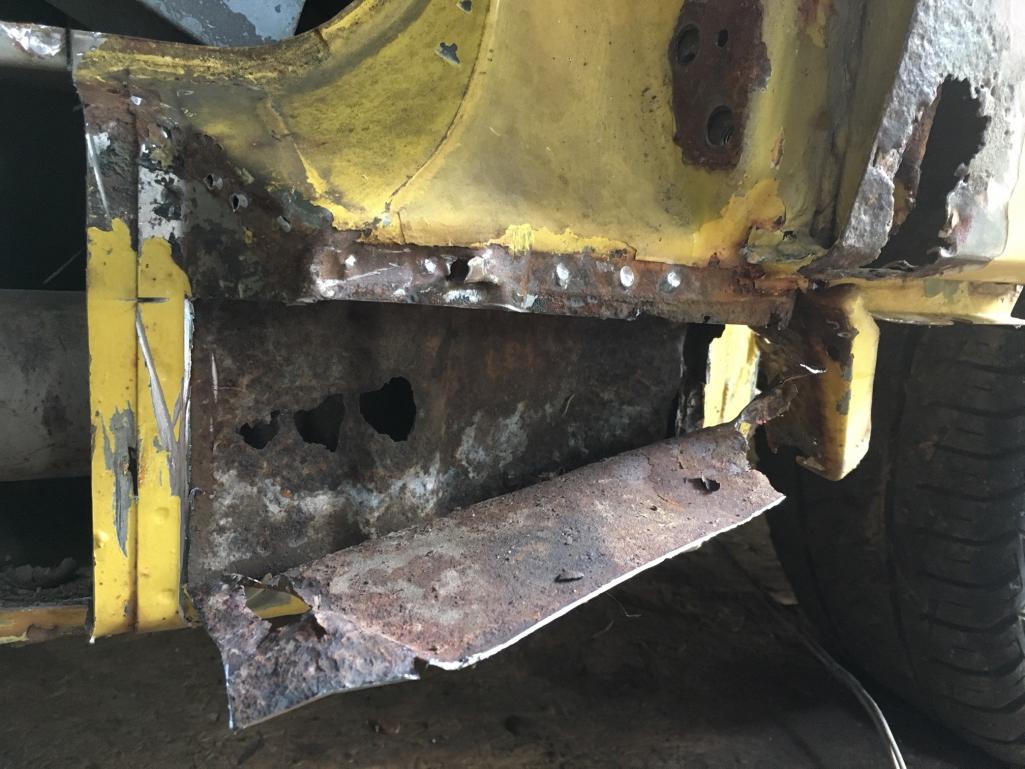 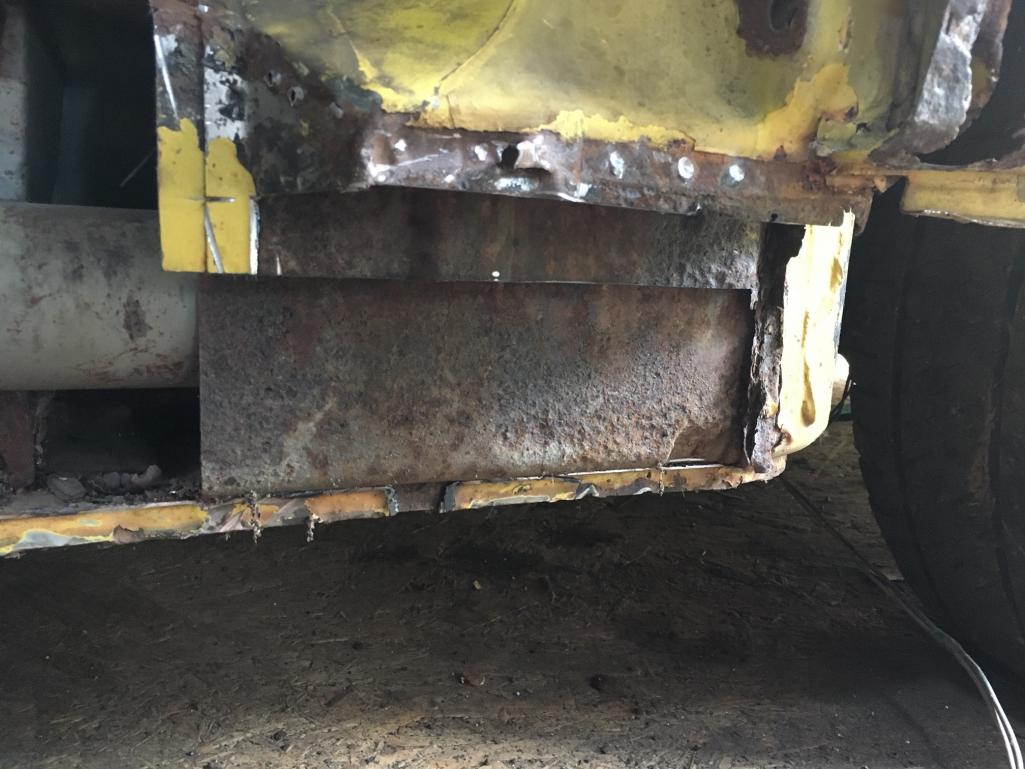 |
|
|
|
| dlee6204 |
Jul 24 2016, 06:45 PM
Post
#88
|
|
Howdy Group: Members Posts: 2,162 Joined: 30-April 06 From: Burnsville, NC Member No.: 5,956 |
|
|
|
|
| dlee6204 |
Jul 24 2016, 06:50 PM
Post
#89
|
|
Howdy Group: Members Posts: 2,162 Joined: 30-April 06 From: Burnsville, NC Member No.: 5,956 |
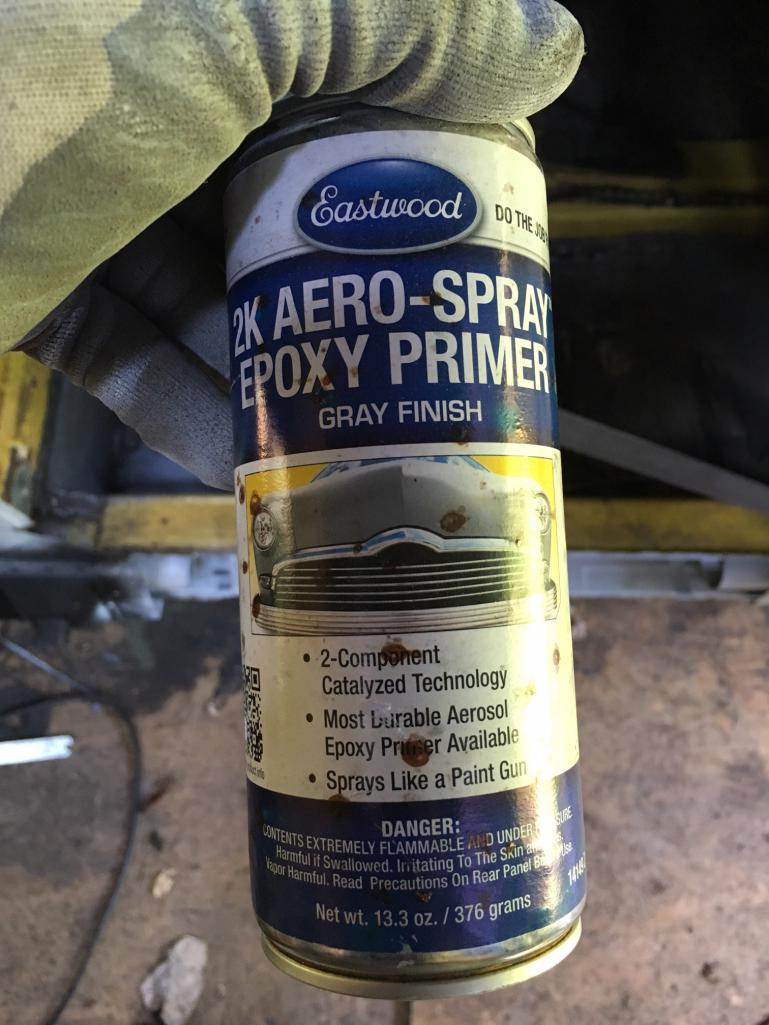
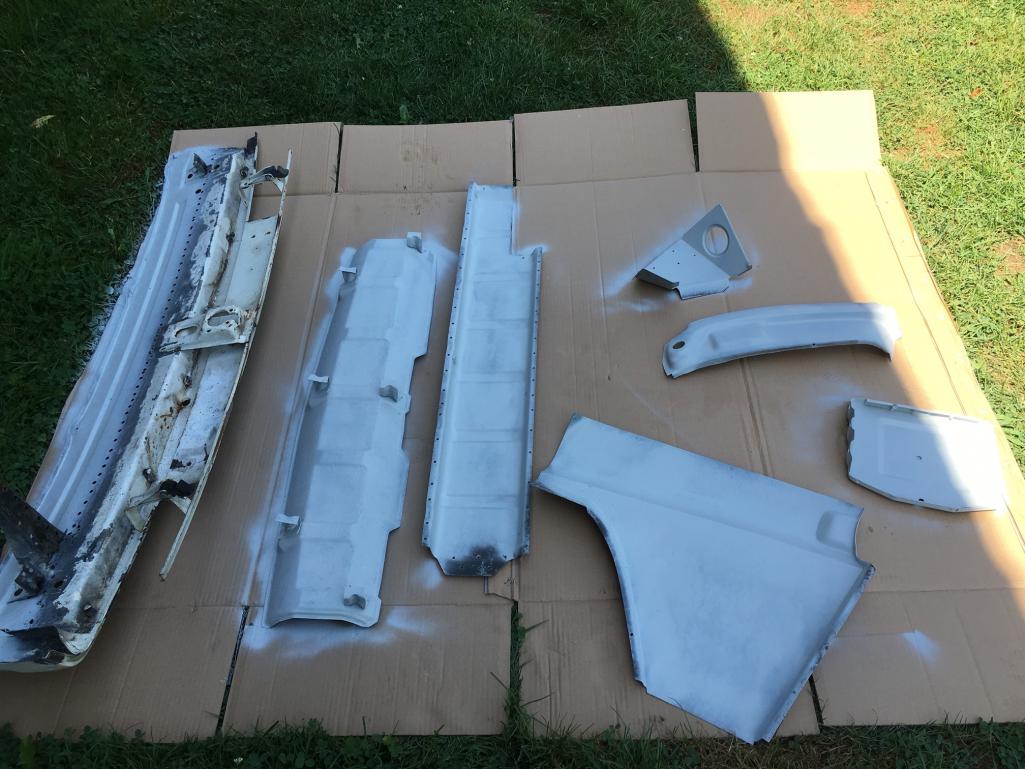
This was the perfect opportunity to try out Eastwood's two part Epoxy in a can. I coated inside the long and the back side of a few parts that I still have to install. Overall its a pretty decent product. It sprayed well and it had more in the can than I thought. It was great for a smaller area. When I paint other areas of the car though, I will use regular spray gun epoxy.
    |
|
|
|
| dlee6204 |
Jul 24 2016, 06:58 PM
Post
#90
|
|
Howdy Group: Members Posts: 2,162 Joined: 30-April 06 From: Burnsville, NC Member No.: 5,956 |
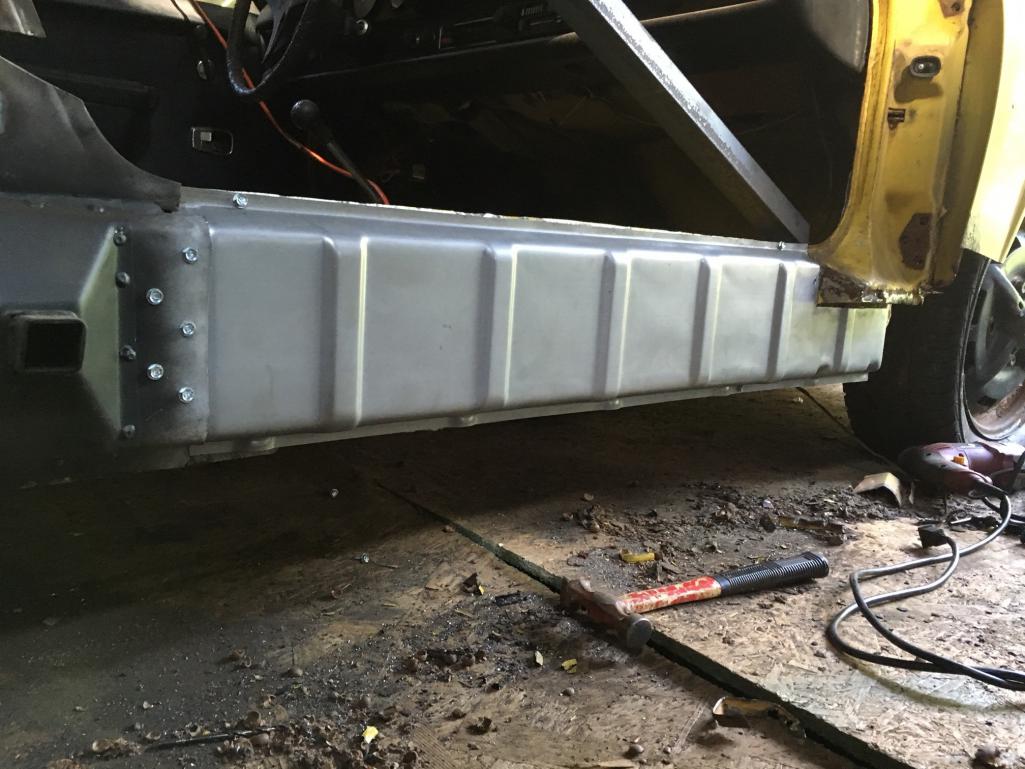
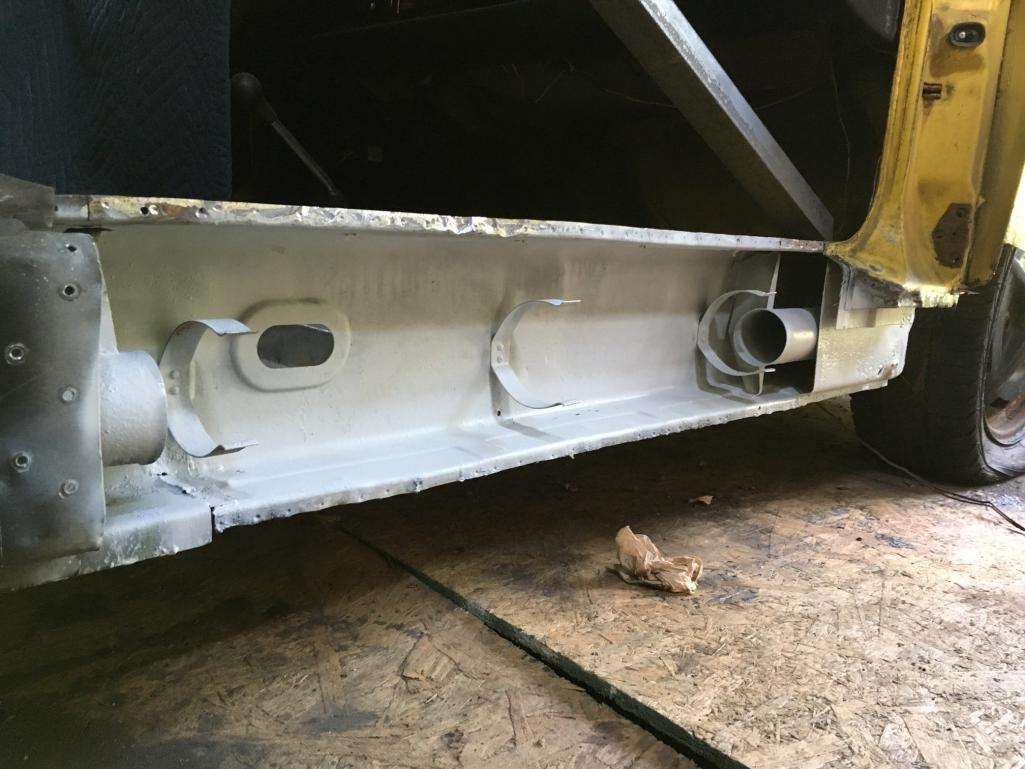
Ready for install. 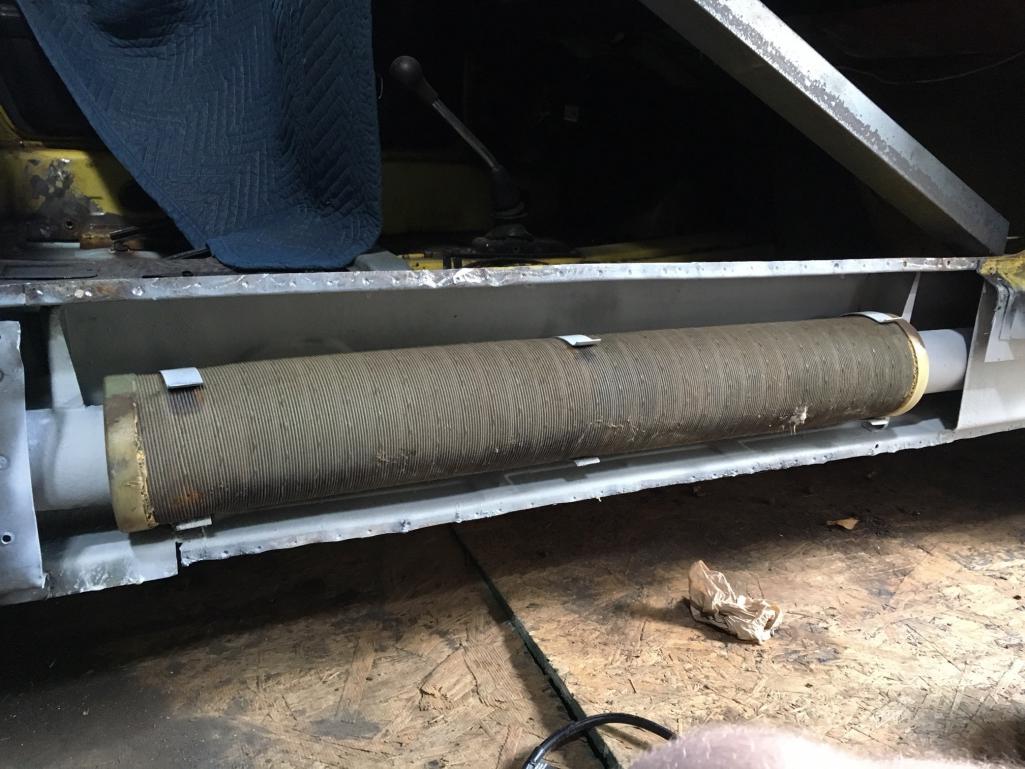 (IMG:style_emoticons/default/welder.gif) (IMG:style_emoticons/default/welder.gif) (IMG:style_emoticons/default/welder.gif) 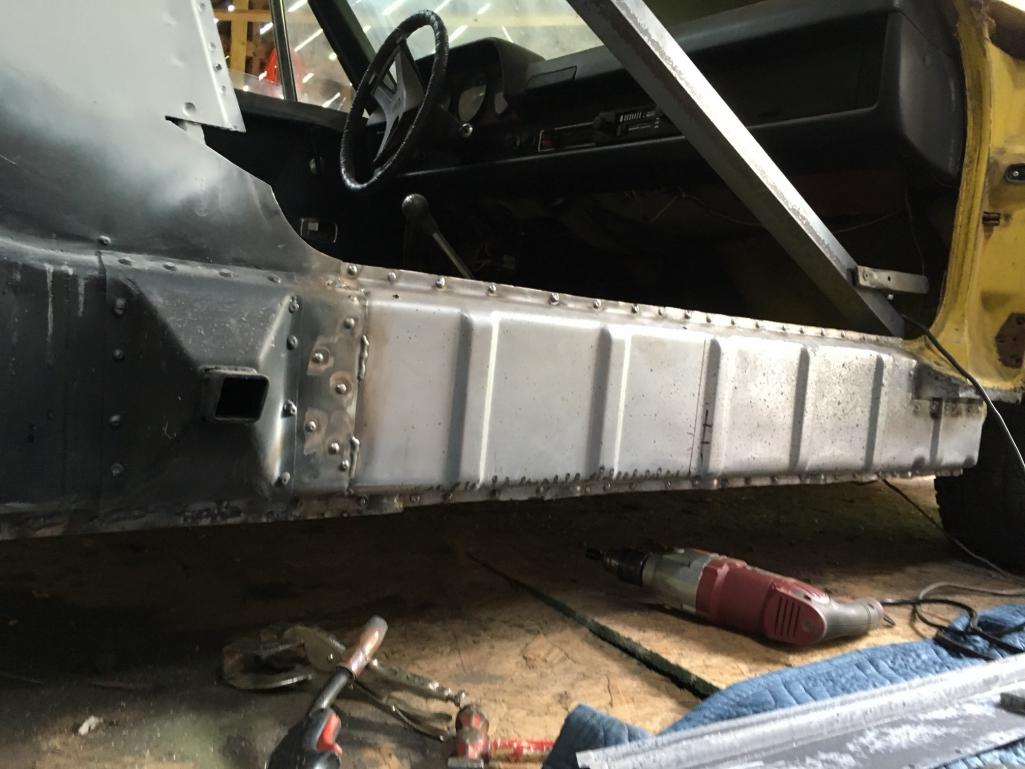 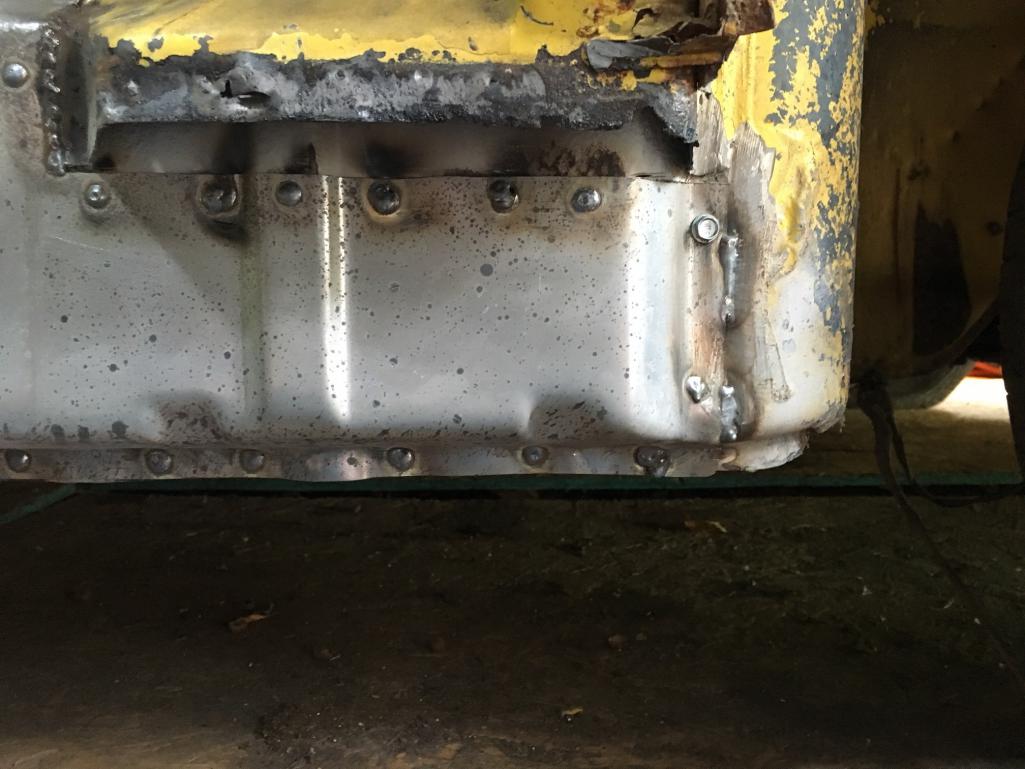 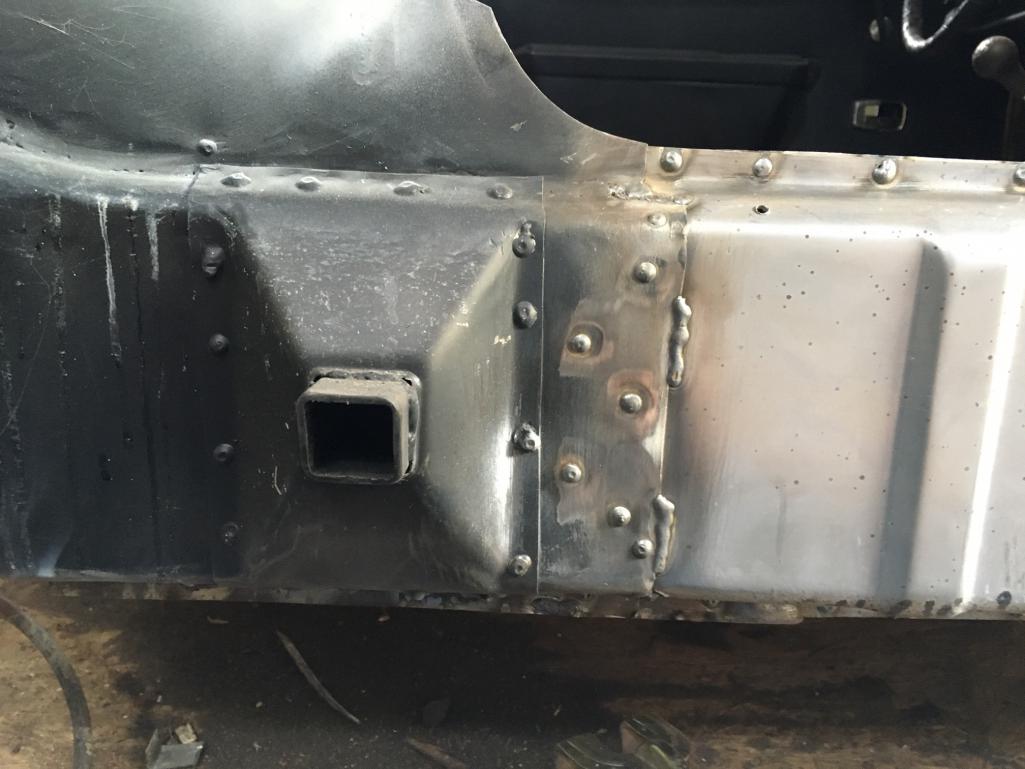 |
|
|
|
| dlee6204 |
Jul 24 2016, 07:02 PM
Post
#91
|
|
Howdy Group: Members Posts: 2,162 Joined: 30-April 06 From: Burnsville, NC Member No.: 5,956 |
Sill plate welded on. (IMG:style_emoticons/default/welder.gif)
 Ground down all my welds up top. Also Removed my door opening brace. 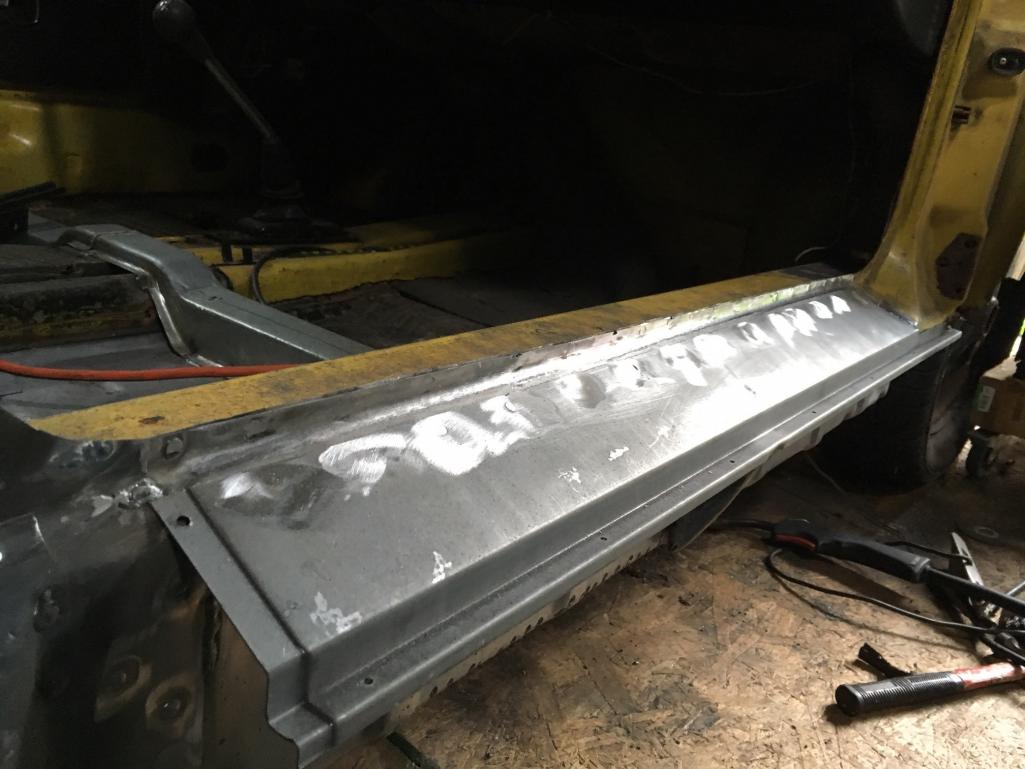 Removed brace and reinstalled door. Gaps are still perfect! Awesome! (IMG:style_emoticons/default/thumb3d.gif) 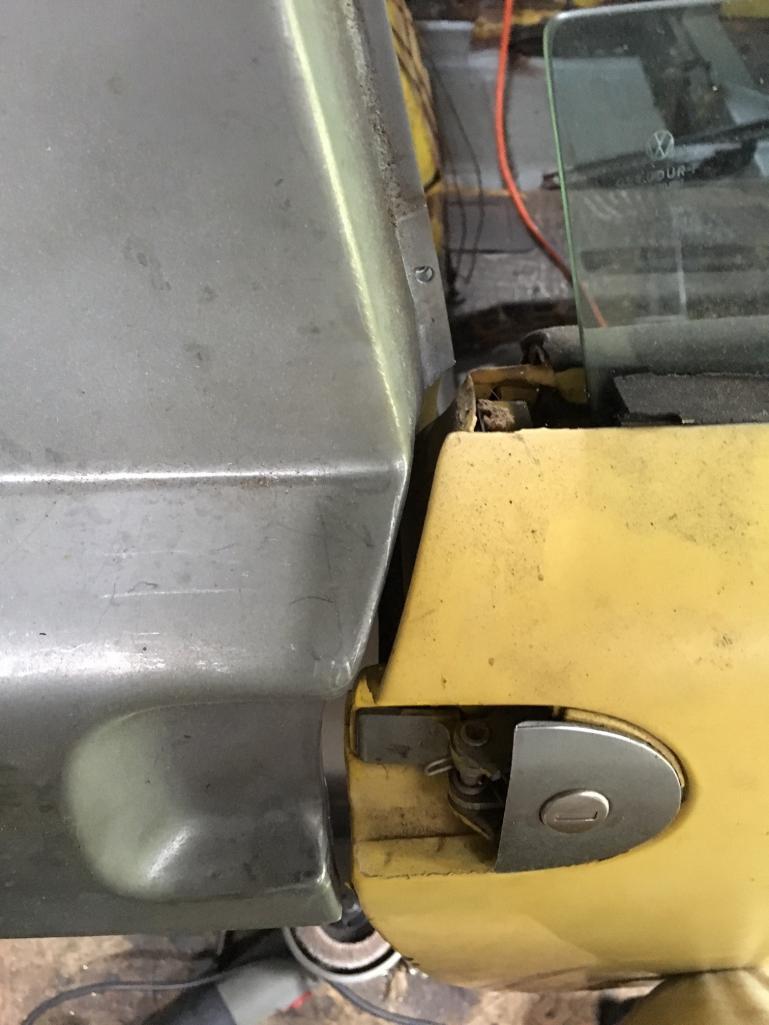 Also installed the battery tray. I coated the backside with epoxy of both pieces before installing. 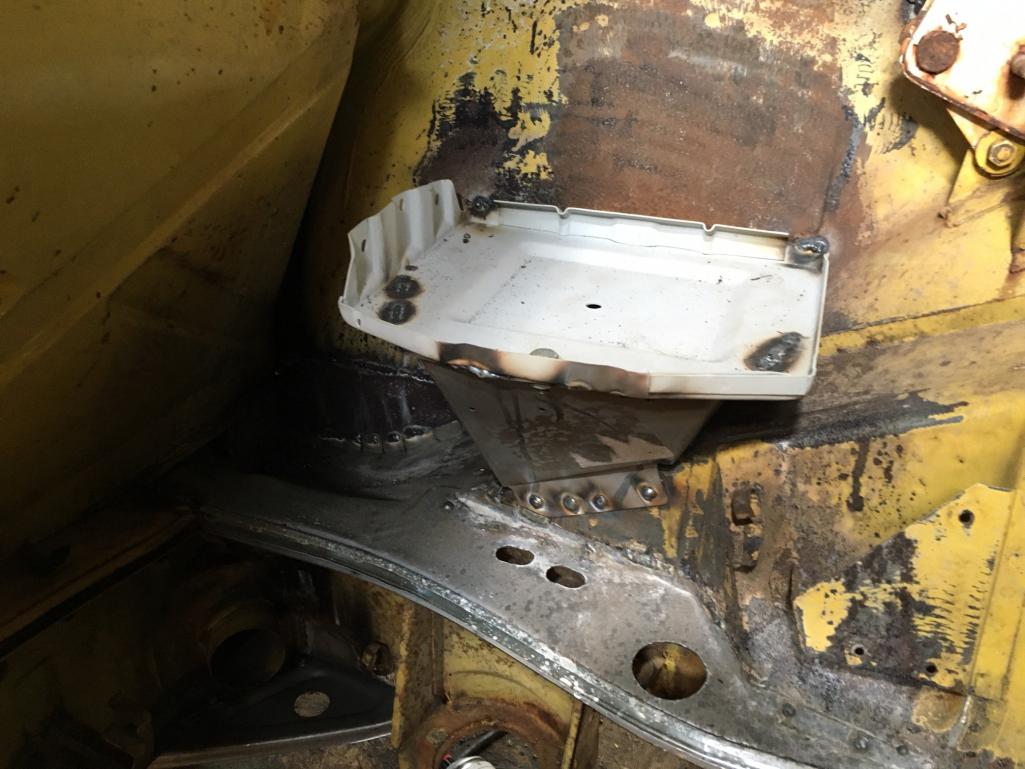 |
|
|
|
| dlee6204 |
Jul 24 2016, 07:05 PM
Post
#92
|
|
Howdy Group: Members Posts: 2,162 Joined: 30-April 06 From: Burnsville, NC Member No.: 5,956 |
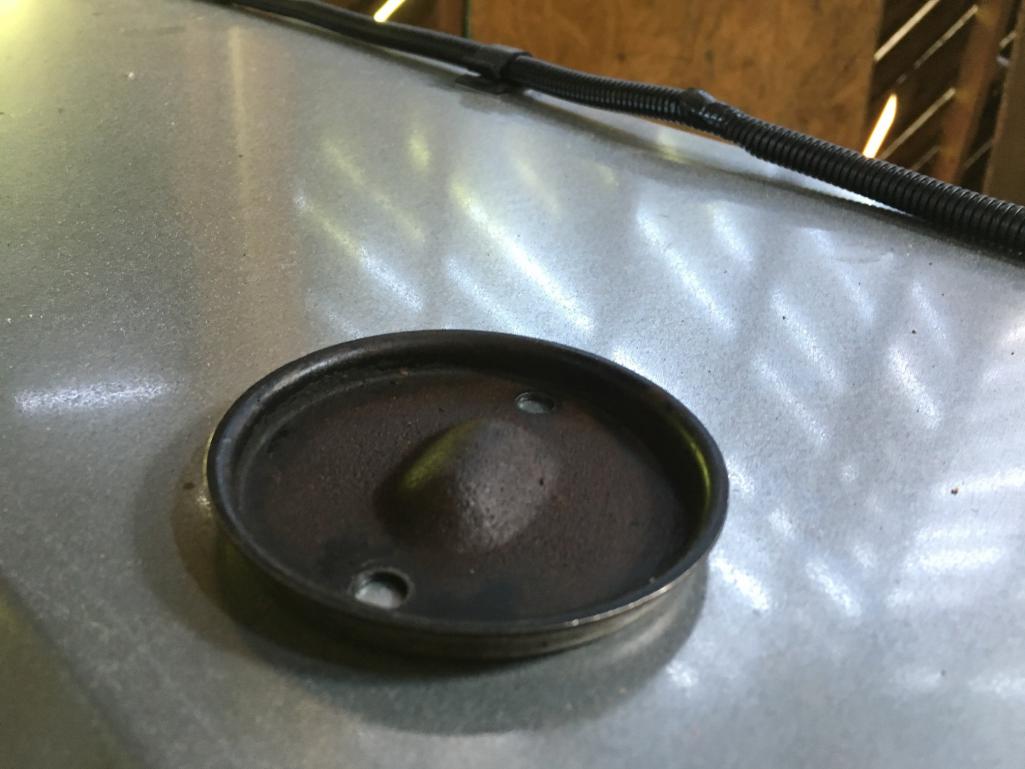
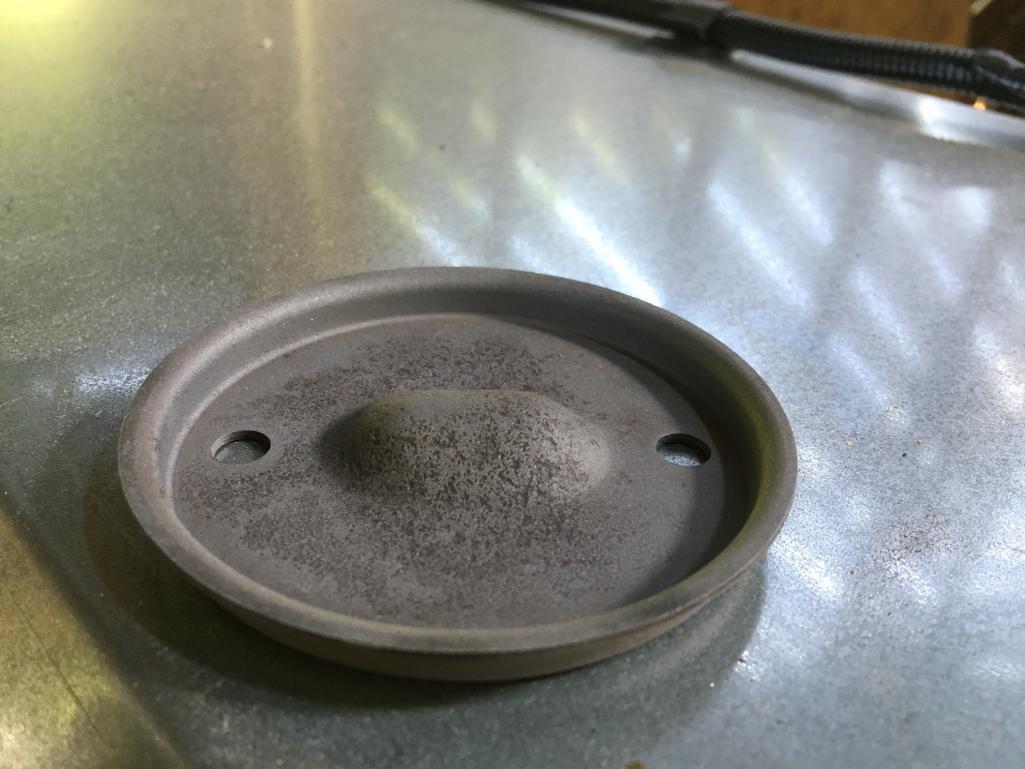
I also gave my blast cabinet a test run. I could only do very small parts because I don't have a big enough compressor (yet). Using aluminum oxide as the media.
  |
|
|
|
| JoeDees |
Jul 24 2016, 07:17 PM
Post
#93
|
|
Senior Member Group: Members Posts: 515 Joined: 10-November 14 From: Northern Kentucky Member No.: 18,106 Region Association: None |
This build has become a freight train rolling unstopably along! I love it!
|
|
|
|
| trojanhorsepower |
Jul 25 2016, 07:00 PM
Post
#94
|
|
Senior Member Group: Members Posts: 1,051 Joined: 21-September 03 From: Marion, NC Member No.: 1,179 Region Association: None |
Looks great Doug!
Glad your blaster is working. If you are able to get a new compressor I would recommend a two stage unit. Quincy has a nice unit. Kinda high, but will give you enough air to run your whole shop, forever. |
|
|
|
| dlee6204 |
Jul 30 2016, 07:38 PM
Post
#95
|
|
Howdy Group: Members Posts: 2,162 Joined: 30-April 06 From: Burnsville, NC Member No.: 5,956 |
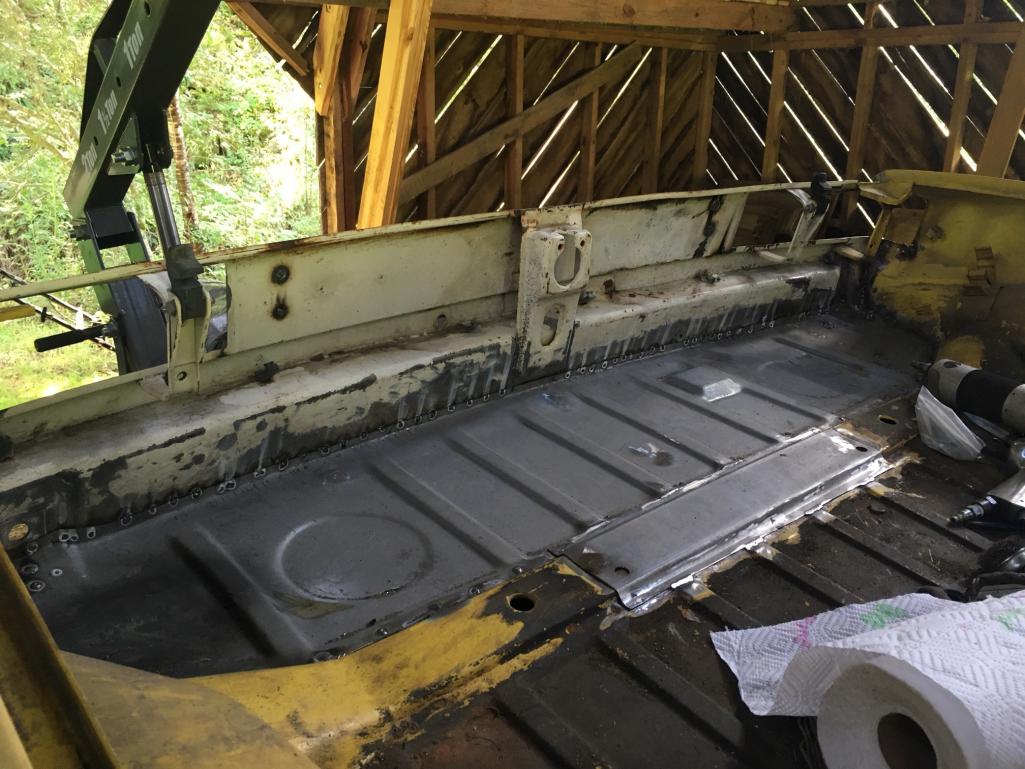
Got the rear trunk, reinforcement, and heat shield welded in. Hopefully the back will go on tomorrow. (IMG:style_emoticons/default/shades.gif)
  |
|
|
|
| dlee6204 |
Jul 30 2016, 07:41 PM
Post
#96
|
|
Howdy Group: Members Posts: 2,162 Joined: 30-April 06 From: Burnsville, NC Member No.: 5,956 |
QUOTE(DirtyCossack @ Jul 24 2016, 09:17 PM)  This build has become a freight train rolling unstopably along! I love it! Thanks. I'm trying to stay as focused as possible. I'm looking forward to finishing the welding and taking a little break. |
|
|
|
| raynekat |
Jul 30 2016, 08:07 PM
Post
#97
|
|
Advanced Member Group: Members Posts: 2,171 Joined: 30-December 14 From: Coeur d'Alene, Idaho Member No.: 18,263 Region Association: Pacific Northwest |
Doug Dude.....you are a one man wrecking crew....in the best sense of that term.
Well done. Really making a lot of serious progress on your project. Keep up the great work and keep those pics coming.... |
|
|
|
| dlee6204 |
Jul 31 2016, 12:58 PM
Post
#98
|
|
Howdy Group: Members Posts: 2,162 Joined: 30-April 06 From: Burnsville, NC Member No.: 5,956 |
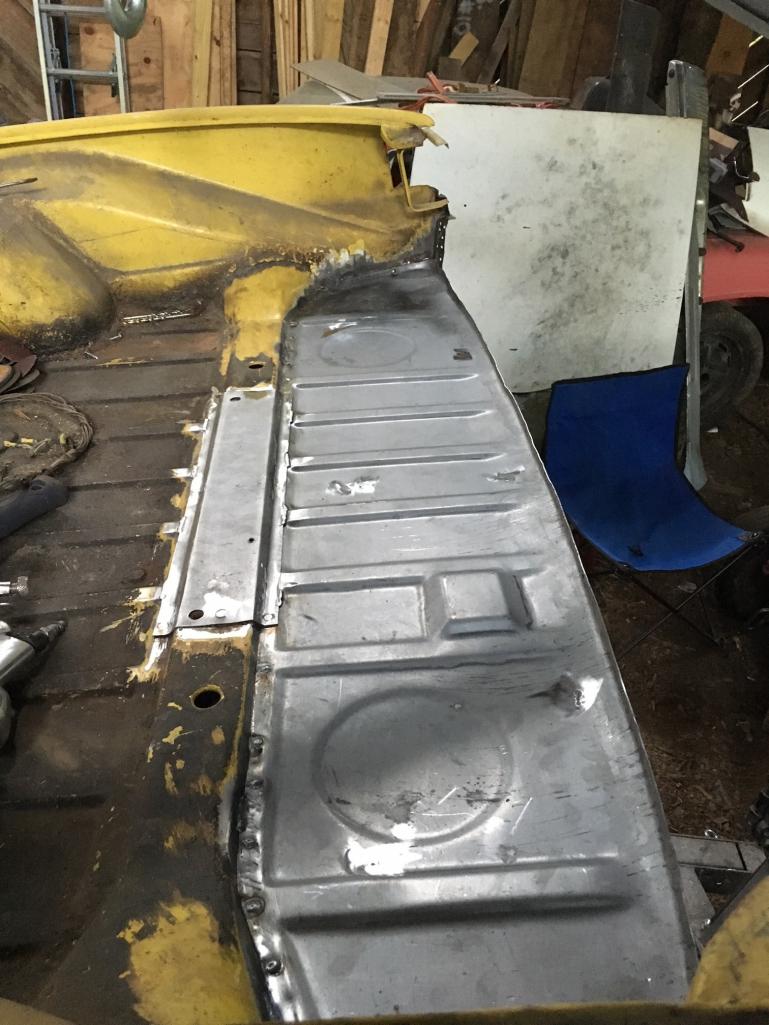
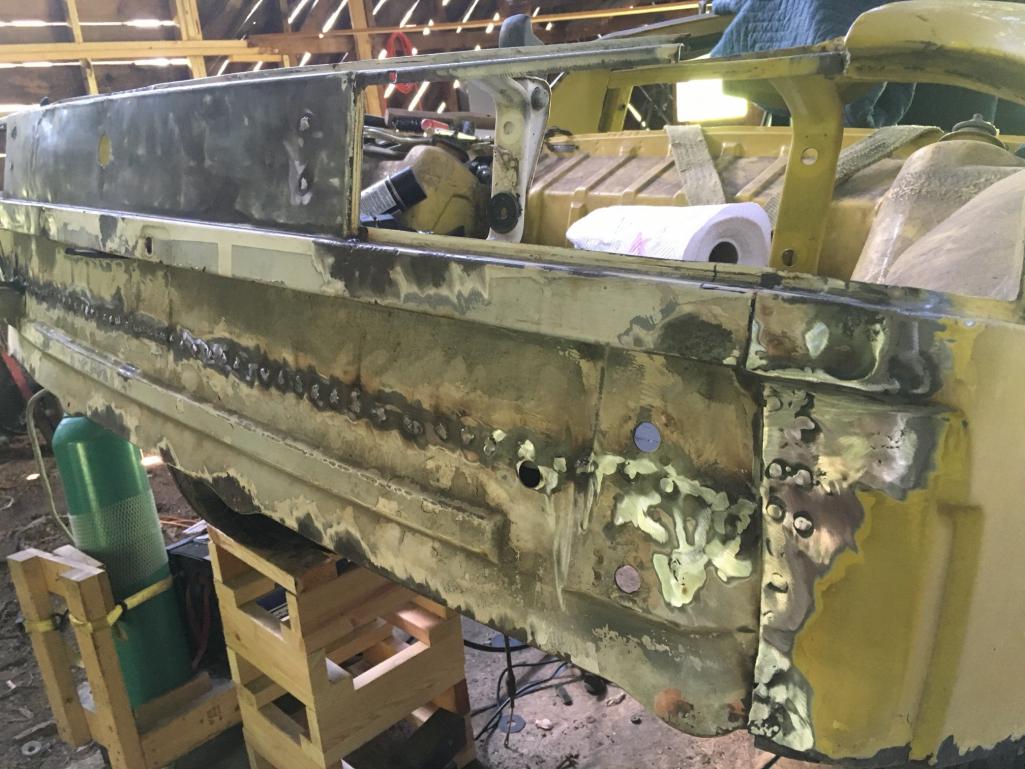
Got the rear panel welded in.
  |
|
|
|
| dlee6204 |
Jul 31 2016, 01:01 PM
Post
#99
|
|
Howdy Group: Members Posts: 2,162 Joined: 30-April 06 From: Burnsville, NC Member No.: 5,956 |
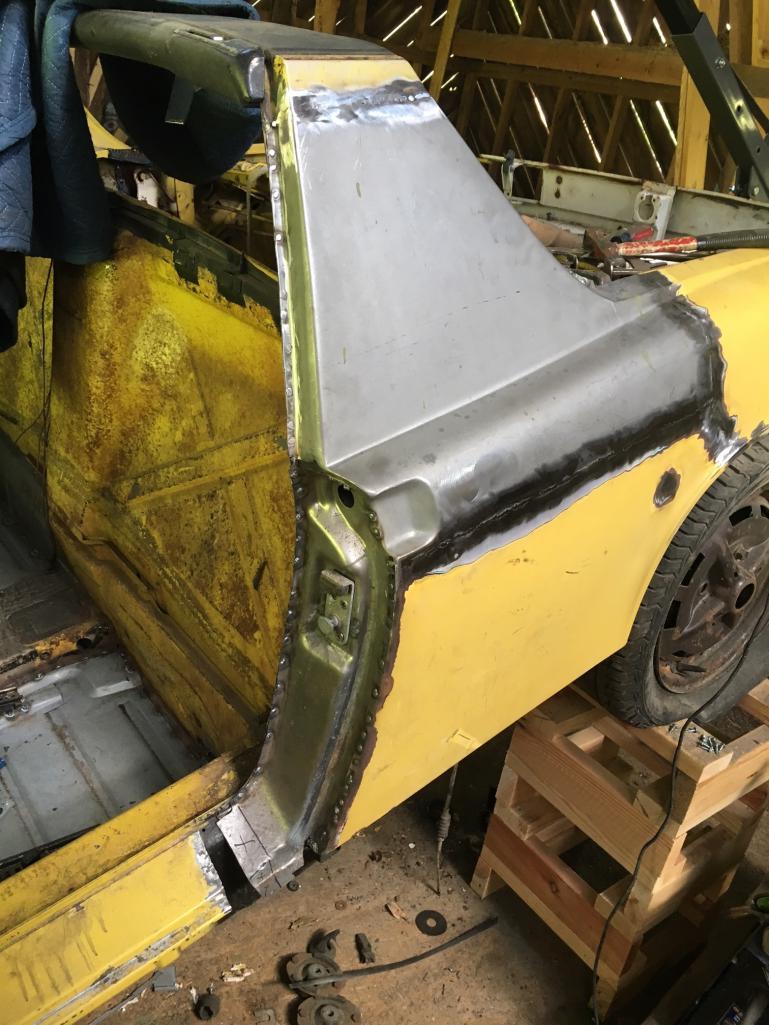
Also got the driver's side sail panel, door jamb, and rear quarter welded on. Still have some work to do where the door jamb meets the sill. Unfortunately I'm going to run out of welding gas soon so I have to get a new bottle before more progress can be made.
 |
|
|
|
| porschetub |
Jul 31 2016, 04:43 PM
Post
#100
|
|
914 Guru Group: Members Posts: 5,124 Joined: 25-July 15 From: New Zealand Member No.: 18,995 Region Association: None |
Very enjoyable reading,great work appears you aren't dawned by a bit of rust,keep it up and good luck getting to paint stage.
|
|
|
|
|
11 User(s) are reading this topic (11 Guests and 0 Anonymous Users)
0 Members:

|
Lo-Fi Version | Time is now: 23rd June 2026 - 01:07 PM |
Invision Power Board
v9.1.4 © 2026 IPS, Inc.