|
|
|
Porsche, and the Porsche crest are registered trademarks of Dr. Ing. h.c. F. Porsche AG.
This site is not affiliated with Porsche in any way. Its only purpose is to provide an online forum for car enthusiasts. All other trademarks are property of their respective owners. |
|
|

  |

| 914pipe |
 Aug 12 2017, 09:41 PM Aug 12 2017, 09:41 PM
Post
#161
|
|
Say......TEEEEEEEN!!!!!  Group: Members Posts: 346 Joined: 31-July 04 From: Puerto Rico, now NC Member No.: 2,422 Region Association: South East States |
Awesome!!! (IMG:style_emoticons/default/aktion035.gif)
|
   |

 
|
| whitetwinturbo |
Aug 14 2017, 11:21 PM
Post
#162
|
|
Honey, does this wing make my ass look fat? Group: Members Posts: 1,391 Joined: 22-October 11 From: Newport Beach/Kalefornya/USA Member No.: 13,704 Region Association: Southern California |
Love the homemade paint booth (IMG:style_emoticons/default/piratenanner.gif)
|
|
|
|
| Matty900 |
Aug 27 2017, 07:16 PM
Post
#163
|
|
Senior Member Group: Members Posts: 1,310 Joined: 21-February 15 From: Oregon Member No.: 18,454 Region Association: Pacific Northwest |
(IMG:style_emoticons/default/smilie_pokal.gif) Nice work. Looking forward to seeing it at Okteenerfest (IMG:style_emoticons/default/beerchug.gif)
|
|
|
|
| Matty900 |
Aug 27 2017, 07:24 PM
Post
#164
|
|
Senior Member Group: Members Posts: 1,310 Joined: 21-February 15 From: Oregon Member No.: 18,454 Region Association: Pacific Northwest |
QUOTE(Garland @ May 1 2017, 09:07 AM)  2017 Build progress : This month was finish up the interior. Finished the dash face with one long piece, and no radio opening, and only 2 switches will be mounted. I wanted a clean look. Its a 73 but deleted the side dash vents for the early car look. Installed EZ-Cool on top of the rattle trap, a light spray of 3M 77 worked well. Time to order the carpet from 914 Rubber, been waiting a life time for new carpet. I have always used original carpet from one car or another never bought carpet before. Installed the pedal cluster, and cut a floor mat for under the drivers seat from some of the old carpet. Used Wurth Cockpit Care on the trim pieces, and a good cleaning. Here are some more pictures, and I am working toward being ready for Okteenerfest. Body work and paint need to get started soon. Wanted to point out the vendor I got the EZ-Cool at best price, and a small vendor. Harbour Supply (not Amazon $$$) I am getting ready to do this on my car. It looks like they have several options for sizes. What one did you use and how much do I need? |
|
|
|
| Garland |
Aug 28 2017, 08:11 PM
Post
#165
|
|
Restoration Fanatic Group: Members Posts: 1,431 Joined: 8-January 04 From: ......Michigan...... Member No.: 1,535 Region Association: Upper MidWest |
100 Square feet will do the entire interior, and the interior of the back wall. Then I bought a second roll and did the doors and engine compartment side of the back wall. With a lot left over.
|
|
|
|
| Garland |
Aug 29 2017, 07:56 PM
Post
#166
|
|
Restoration Fanatic Group: Members Posts: 1,431 Joined: 8-January 04 From: ......Michigan...... Member No.: 1,535 Region Association: Upper MidWest |
Staring with the doors I wanted to add EZ-cool, and the plastic liner. I did 2 pieces to fit them fully to the door.
Added the thresholds with rivets. Targa lower trim, bumpers, valances, and more. Also replaced the engine side back wall with a light weight replacement, It blocks the heat very well. 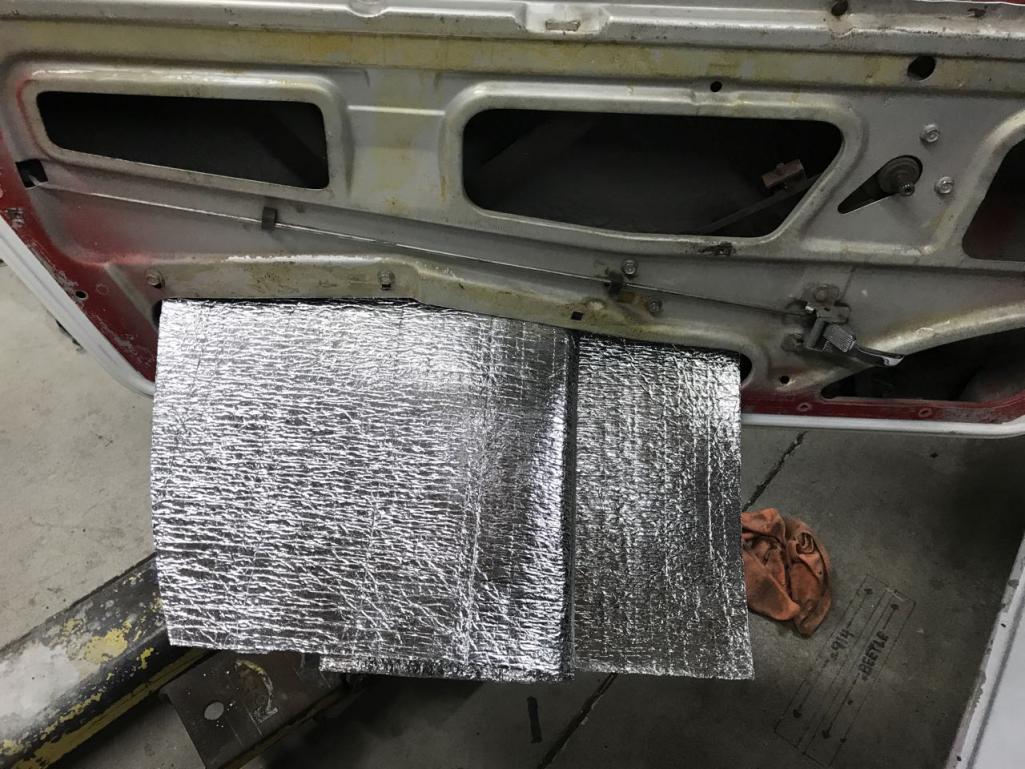 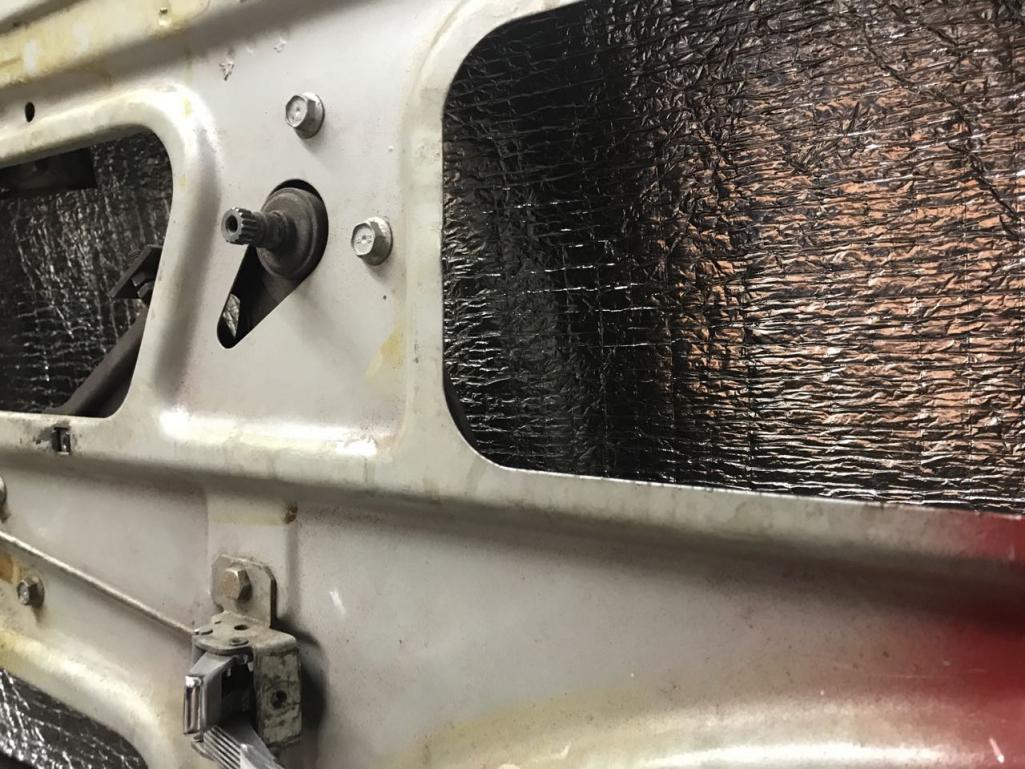 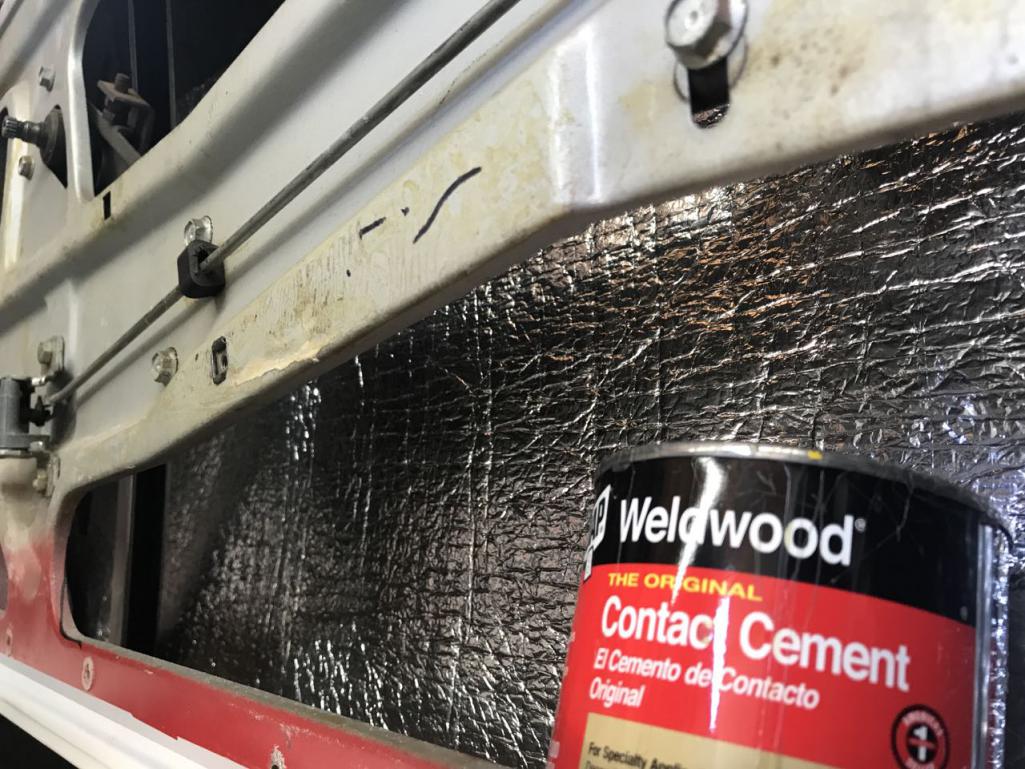  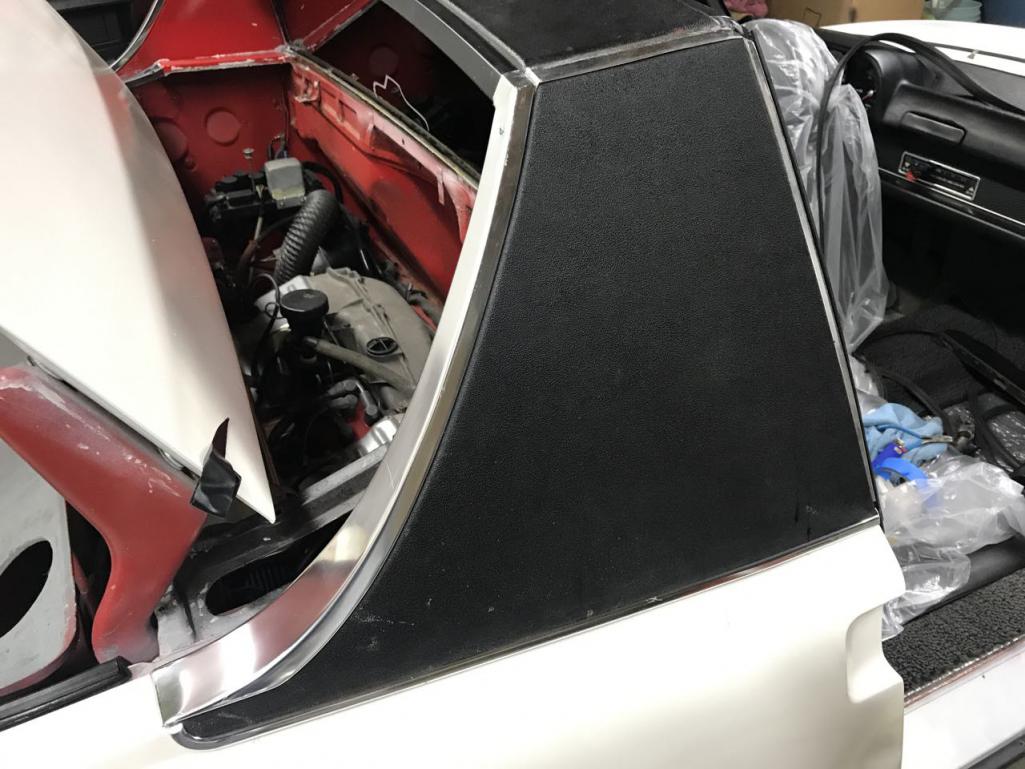 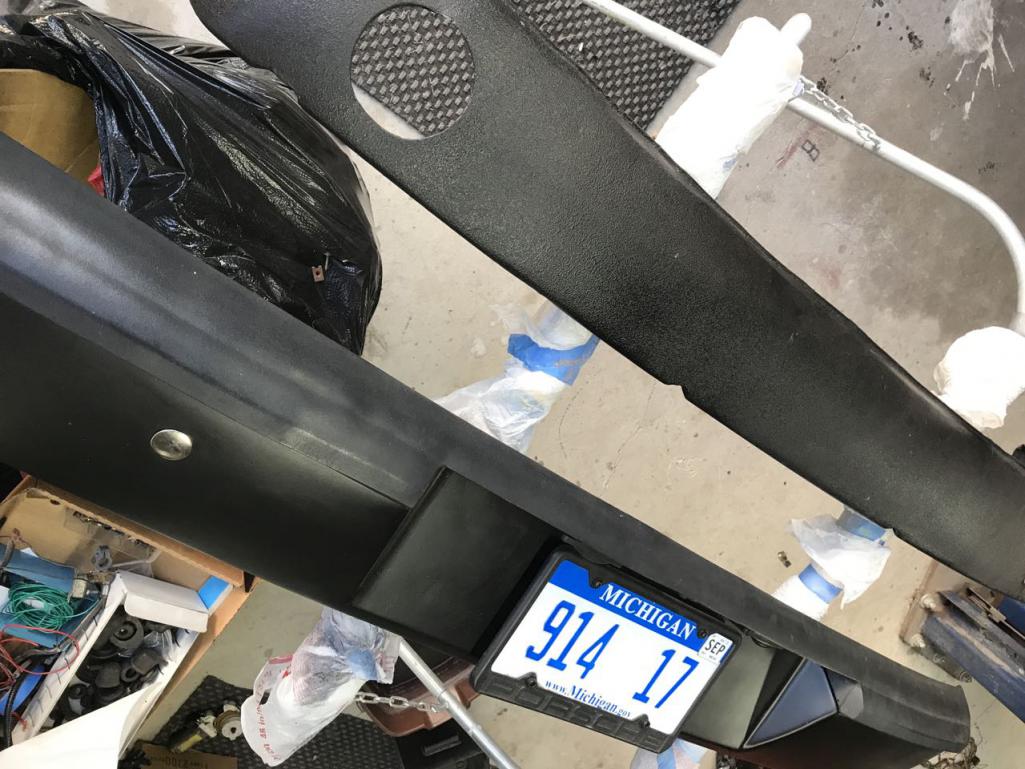 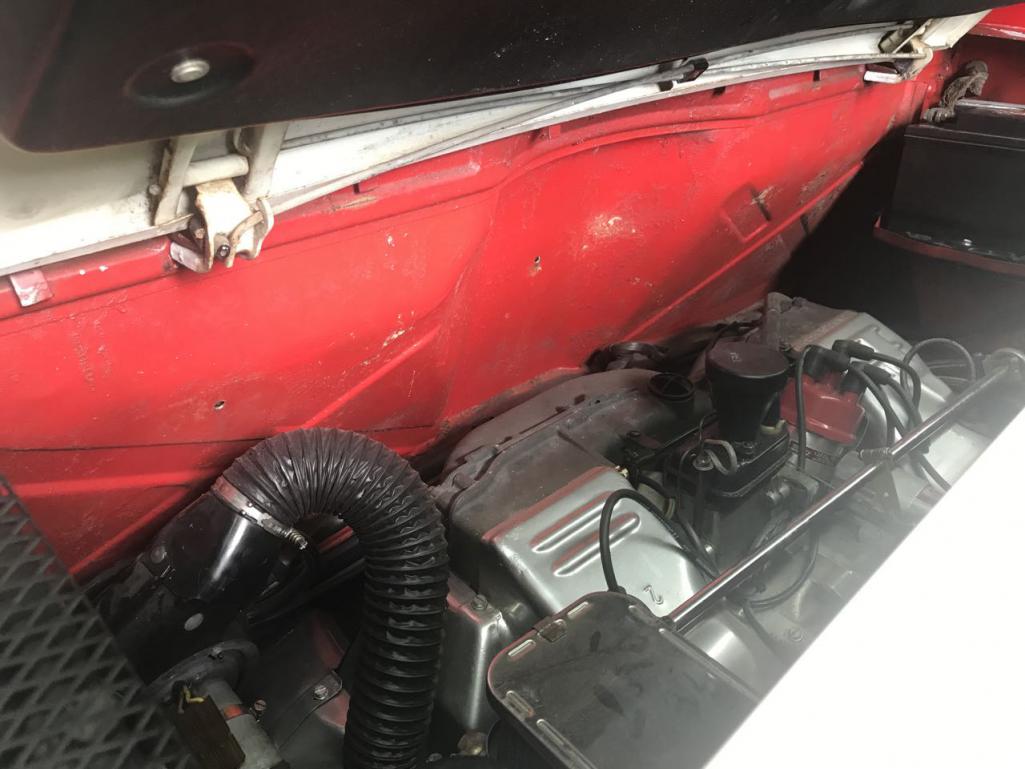 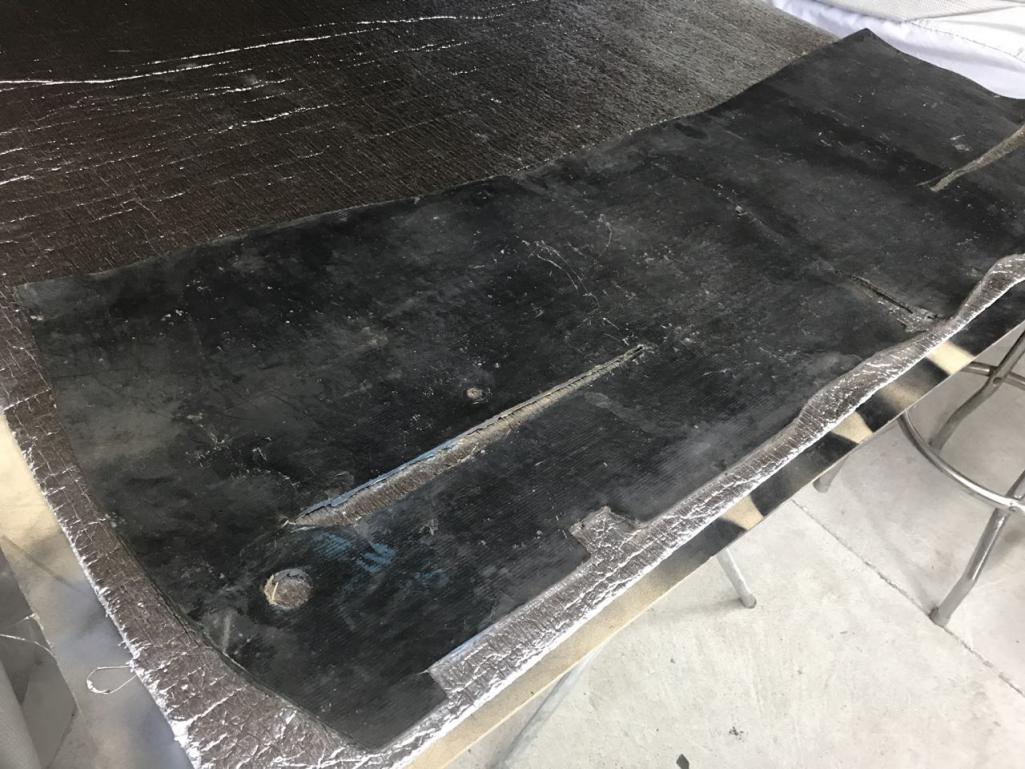 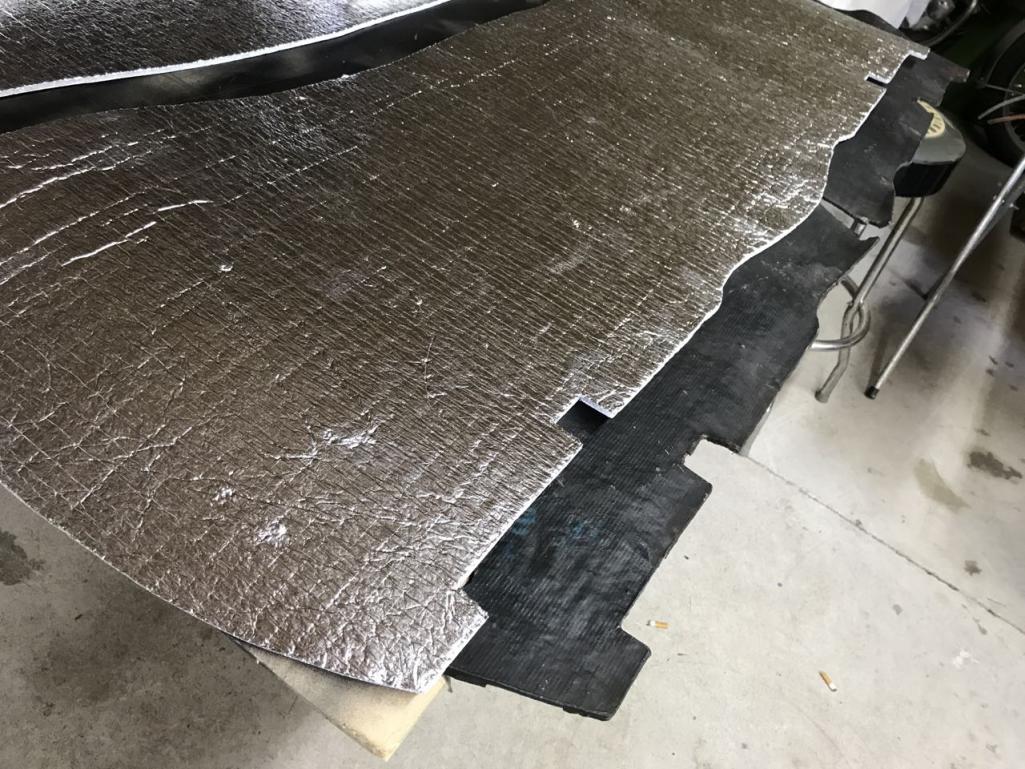 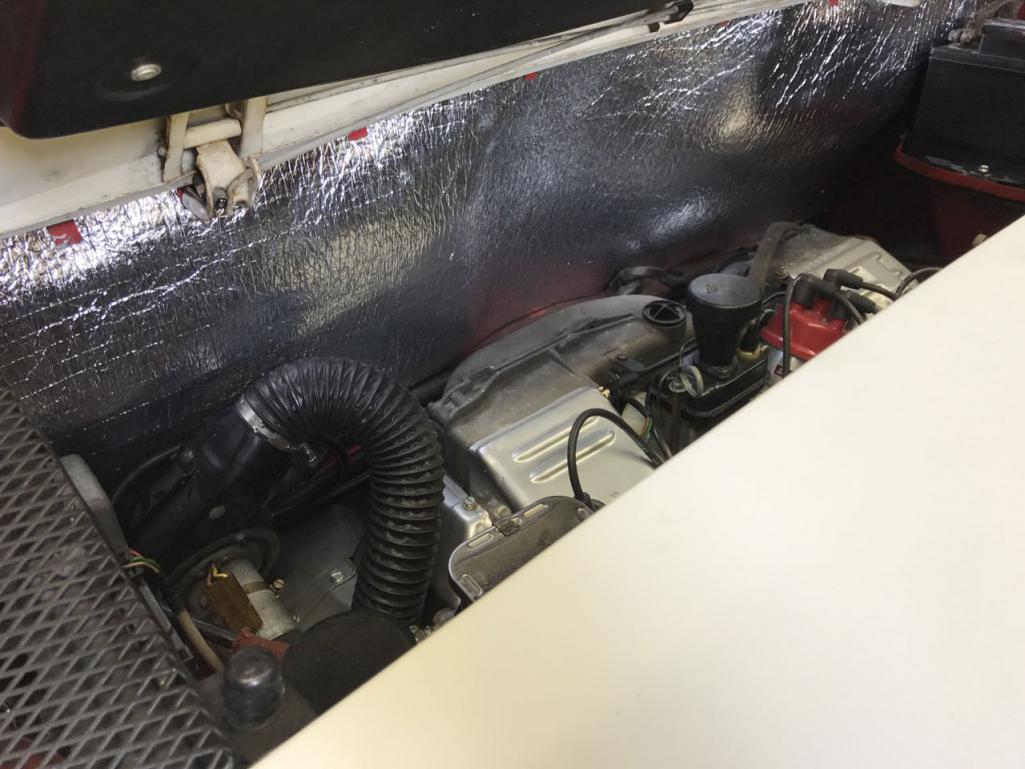 |
|
|
|
| Garland |
Aug 29 2017, 08:16 PM
Post
#167
|
|
Restoration Fanatic Group: Members Posts: 1,431 Joined: 8-January 04 From: ......Michigan...... Member No.: 1,535 Region Association: Upper MidWest |
Windshield trim
I went with new. Installing the glass in the correct location allows the trim to fit correctly. Installed the clips with a push. I used blocks from a factory installed glass for the fit location. Trim assembled together before pushing onto clips. Rubber mallet, very softly, and good fit. 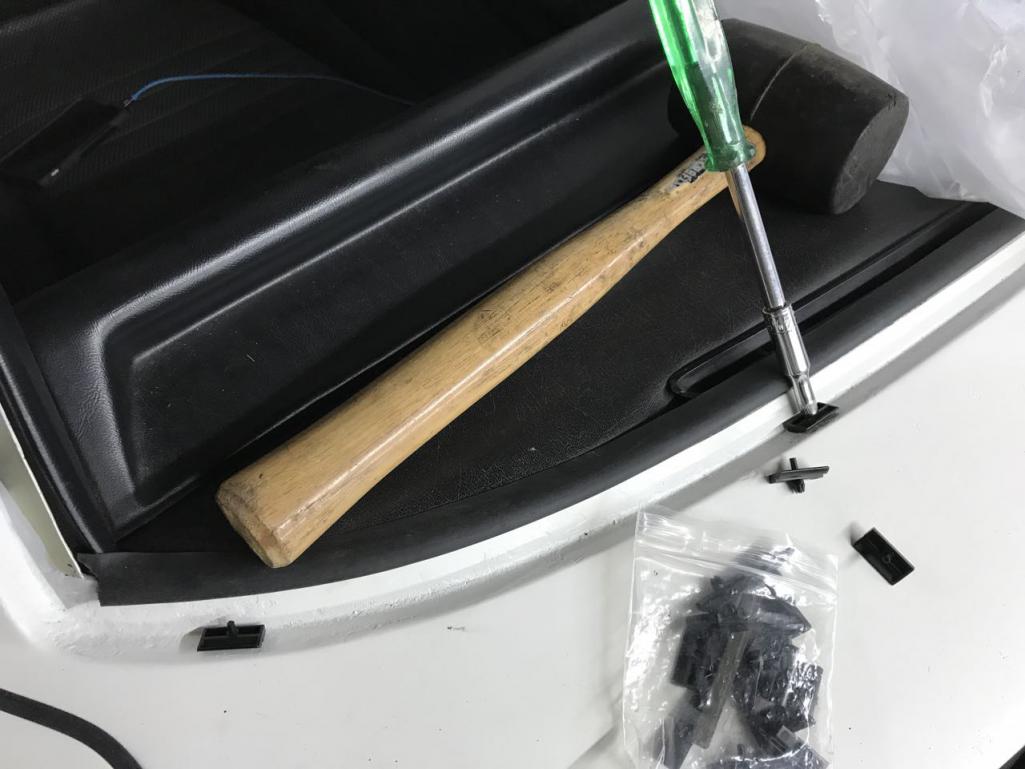 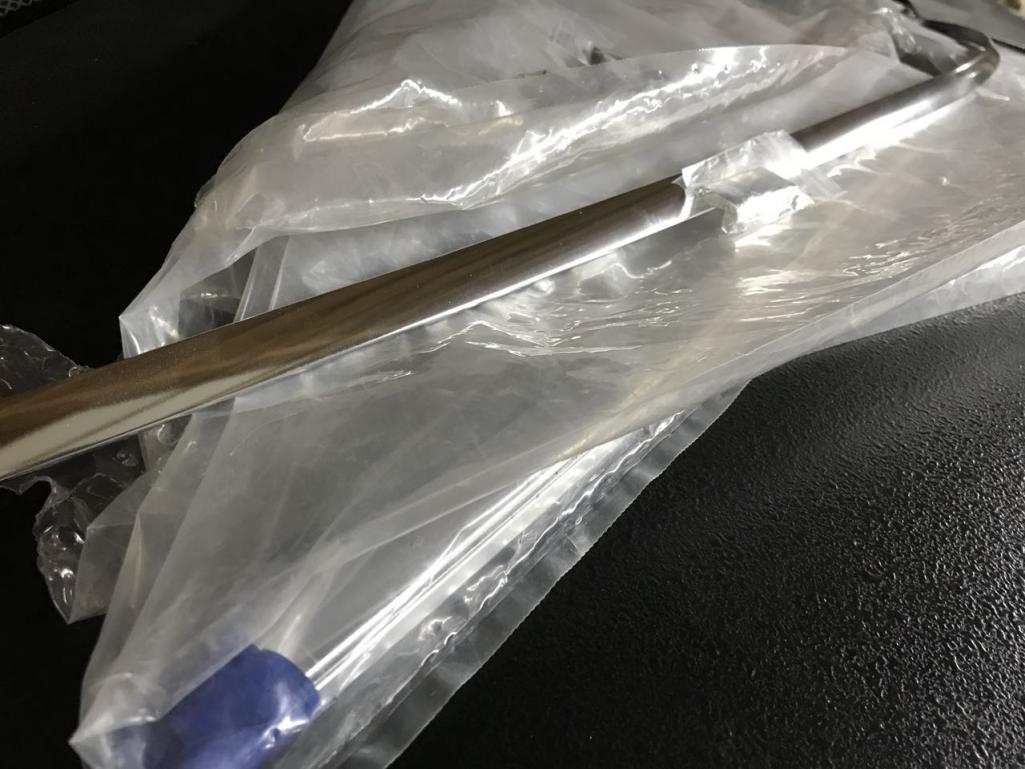 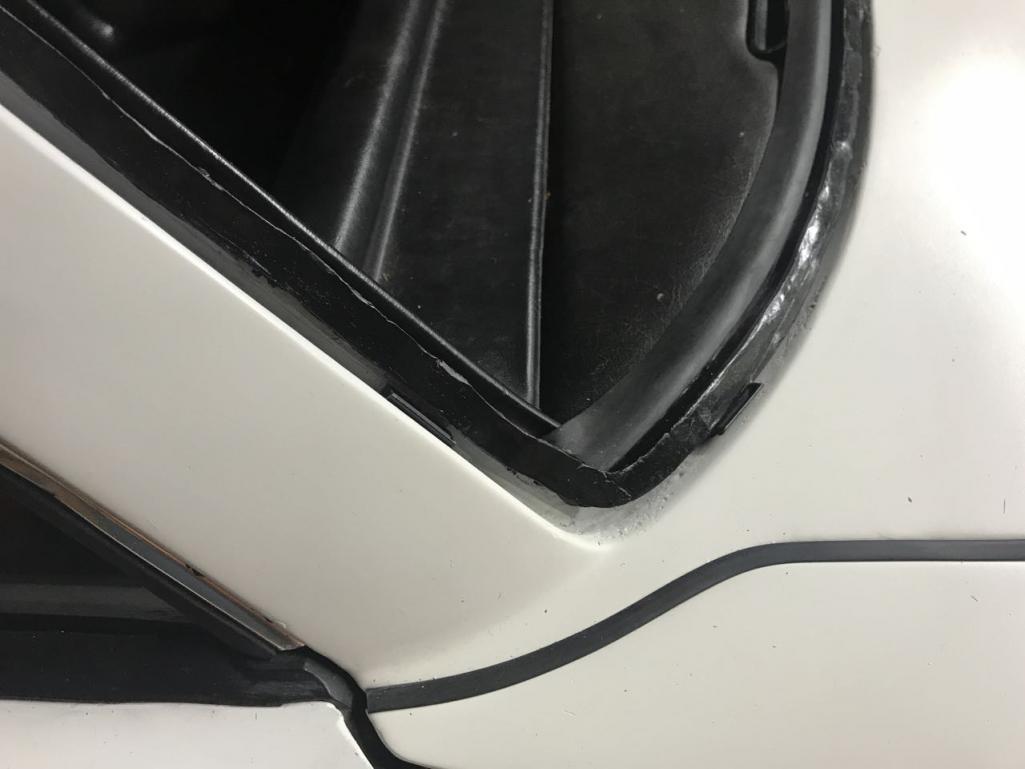 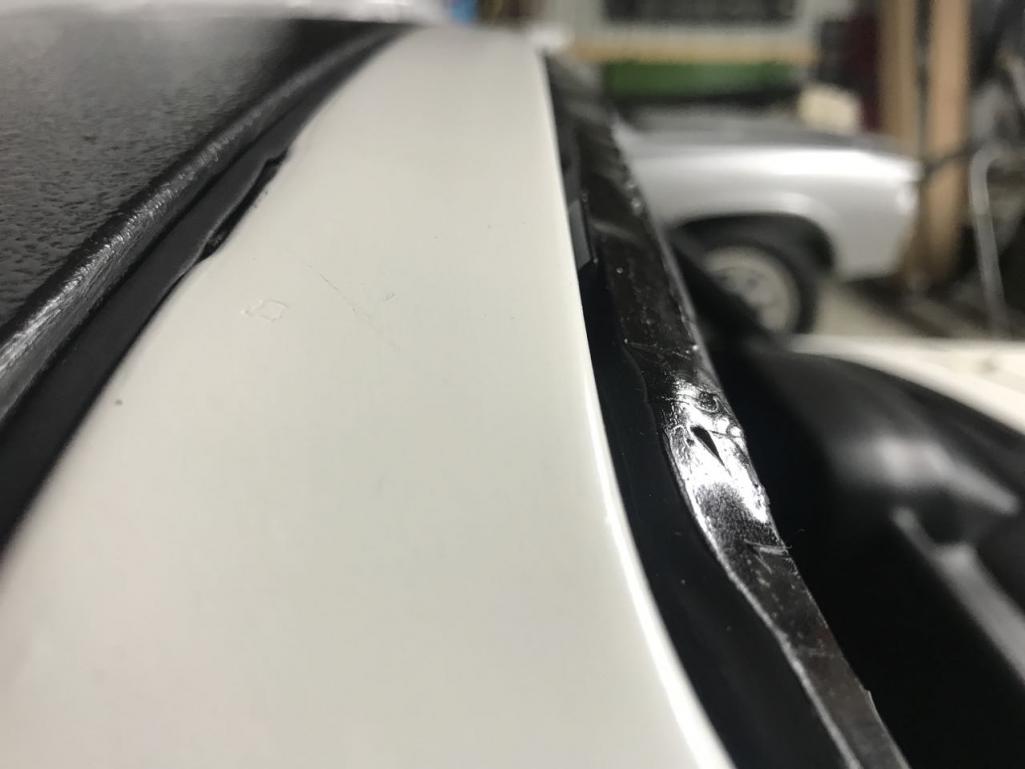 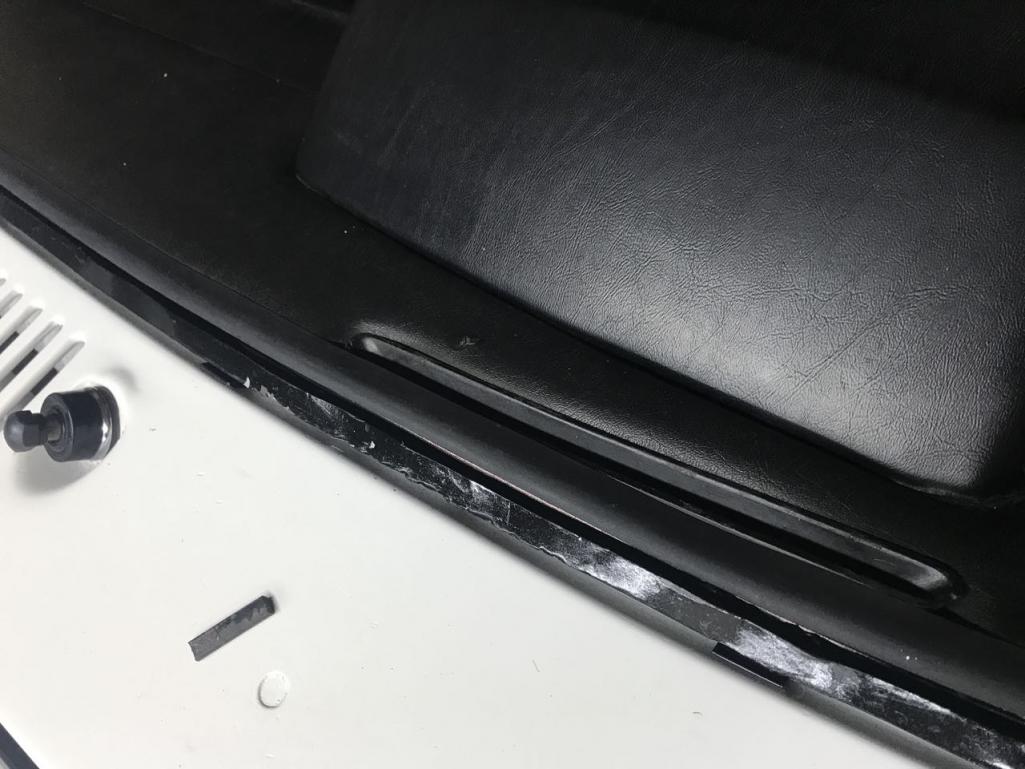 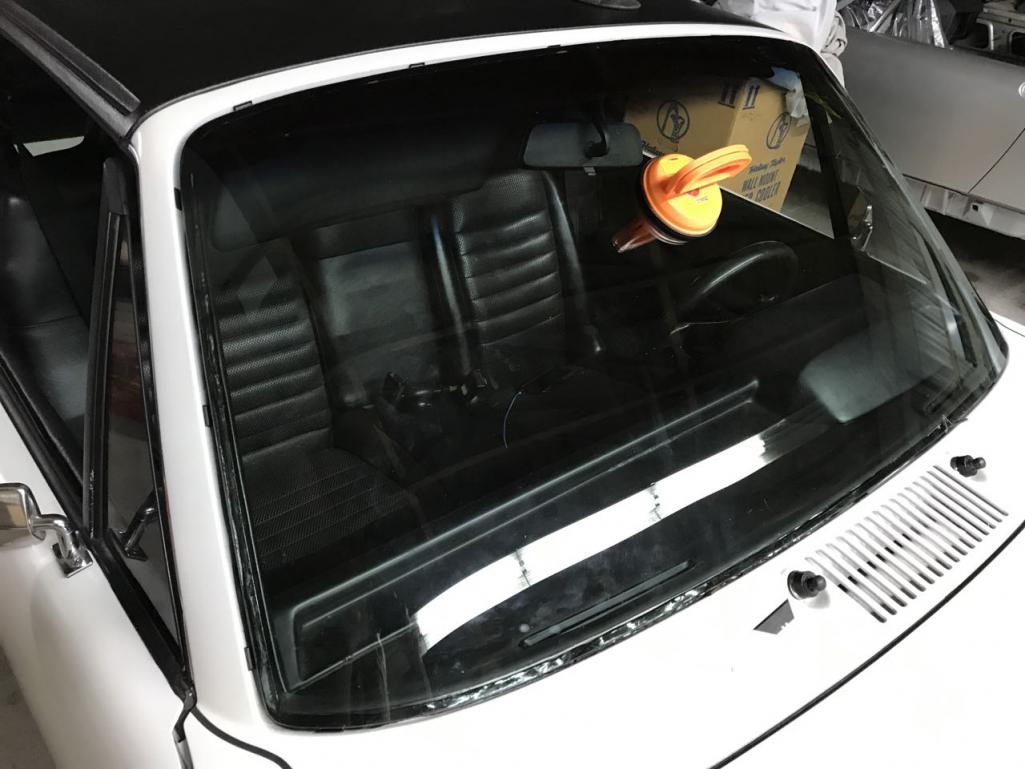 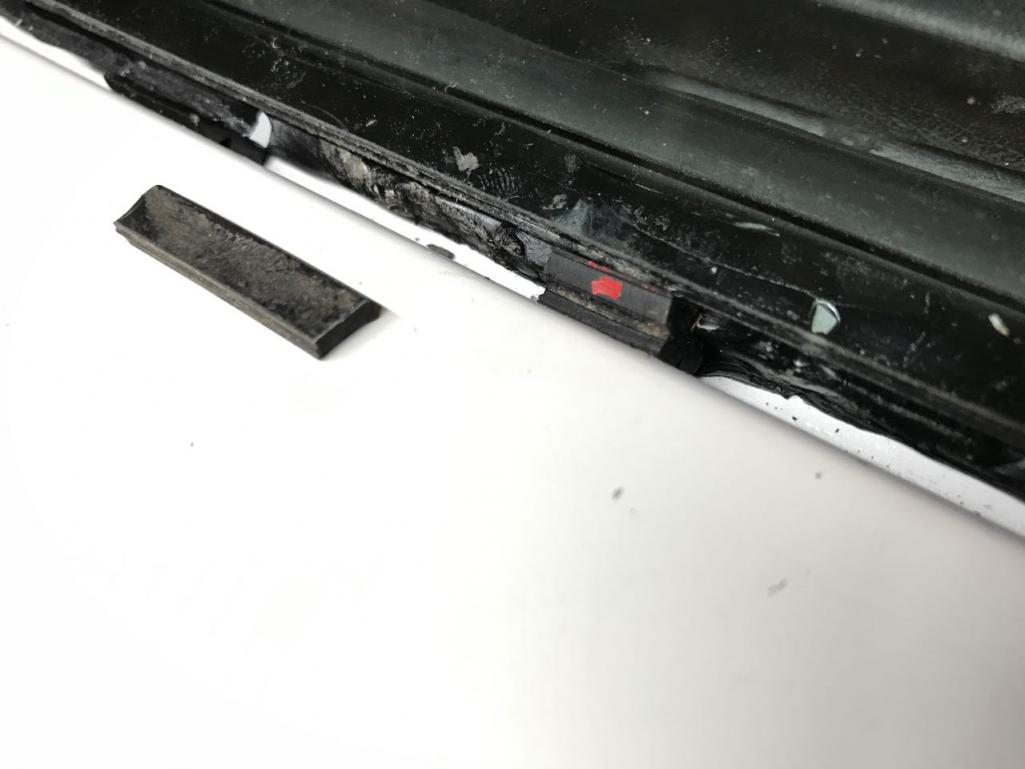 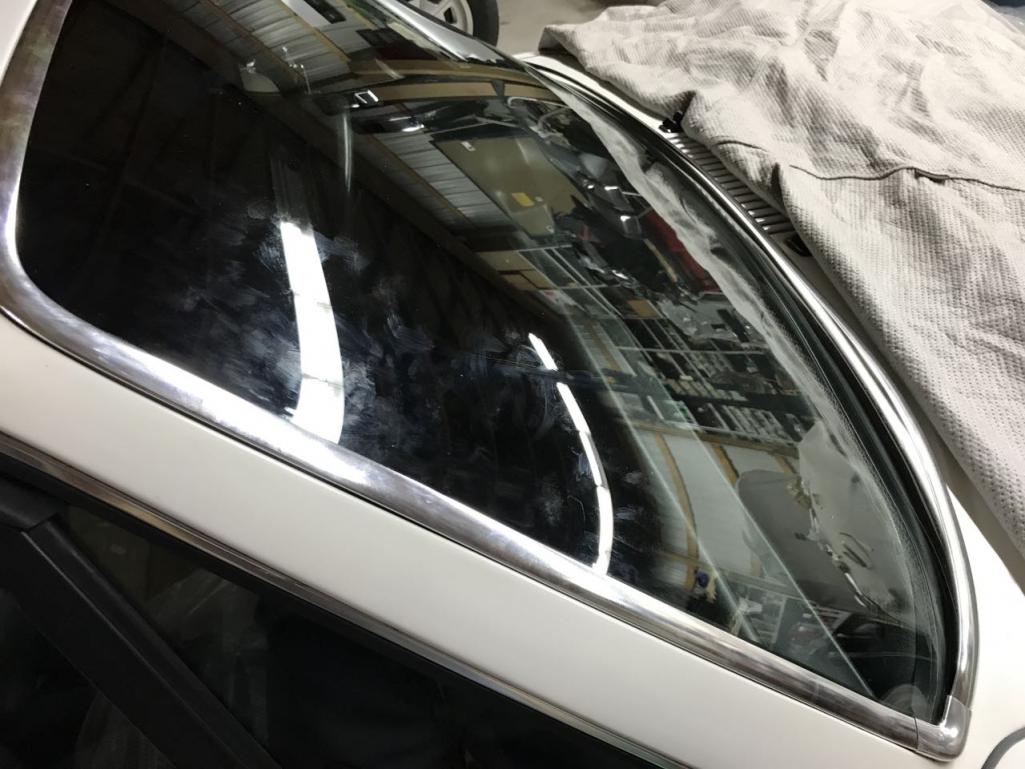   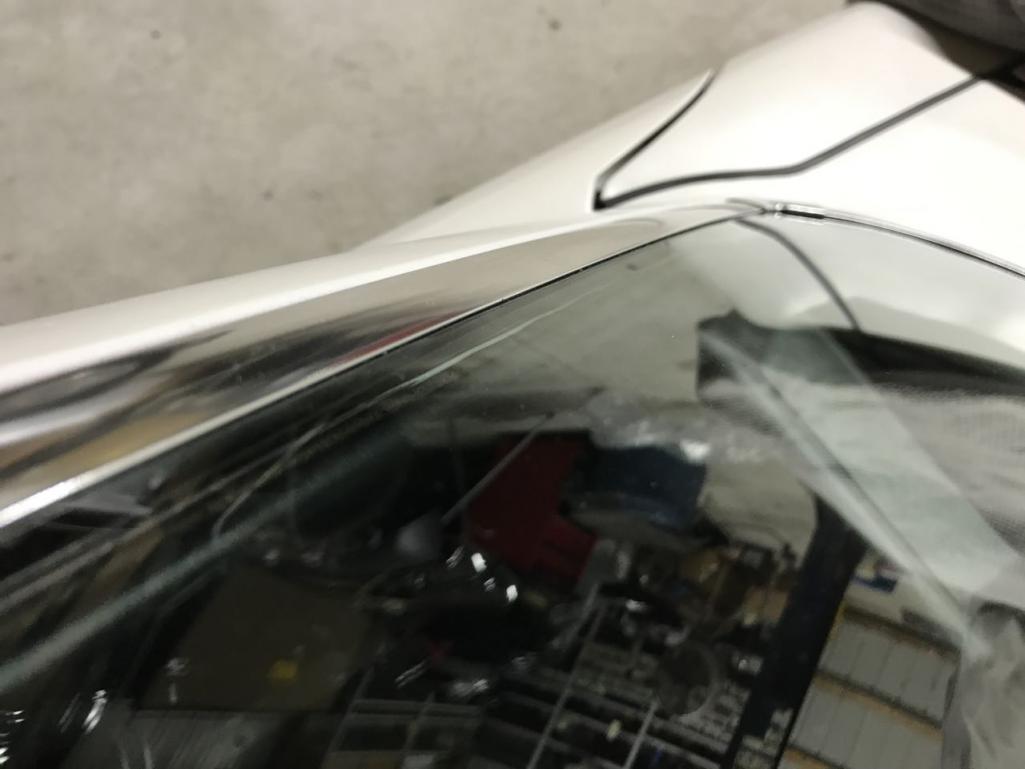 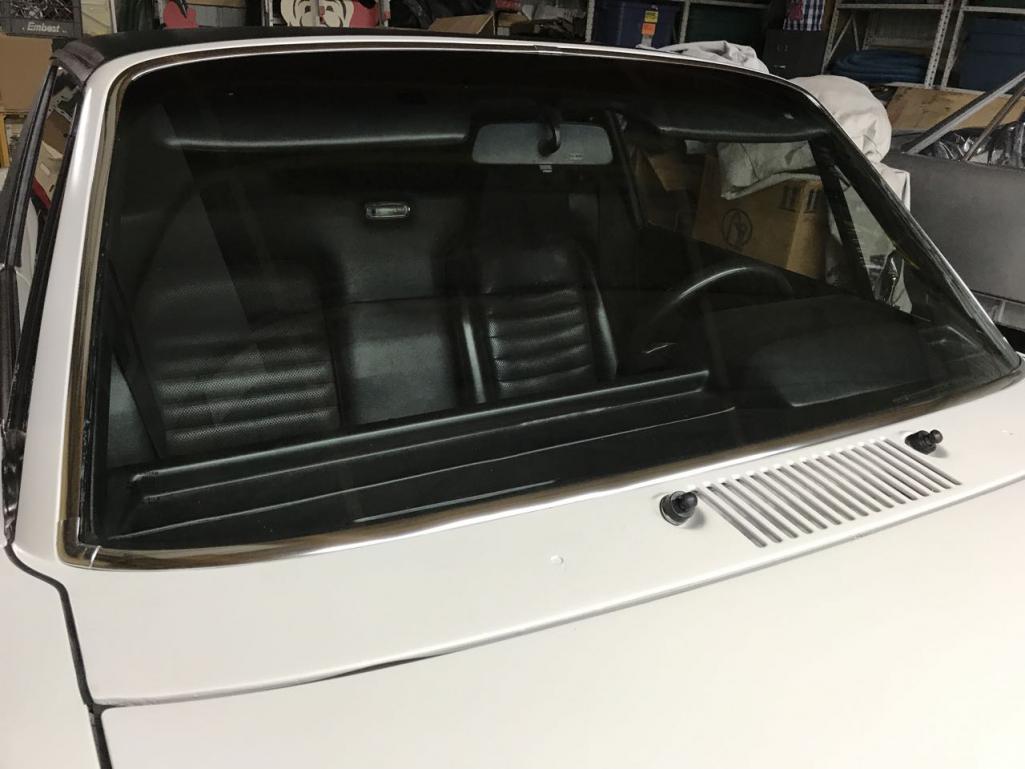 |
|
|
|
| Garland |
Aug 29 2017, 08:23 PM
Post
#168
|
|
Restoration Fanatic Group: Members Posts: 1,431 Joined: 8-January 04 From: ......Michigan...... Member No.: 1,535 Region Association: Upper MidWest |
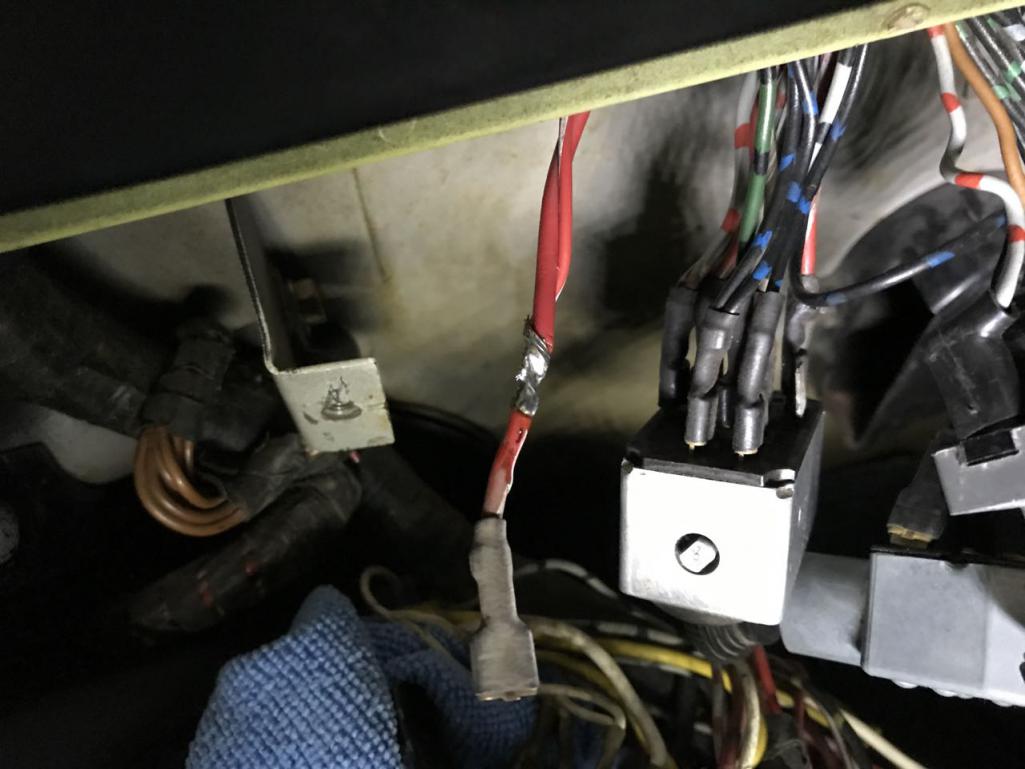
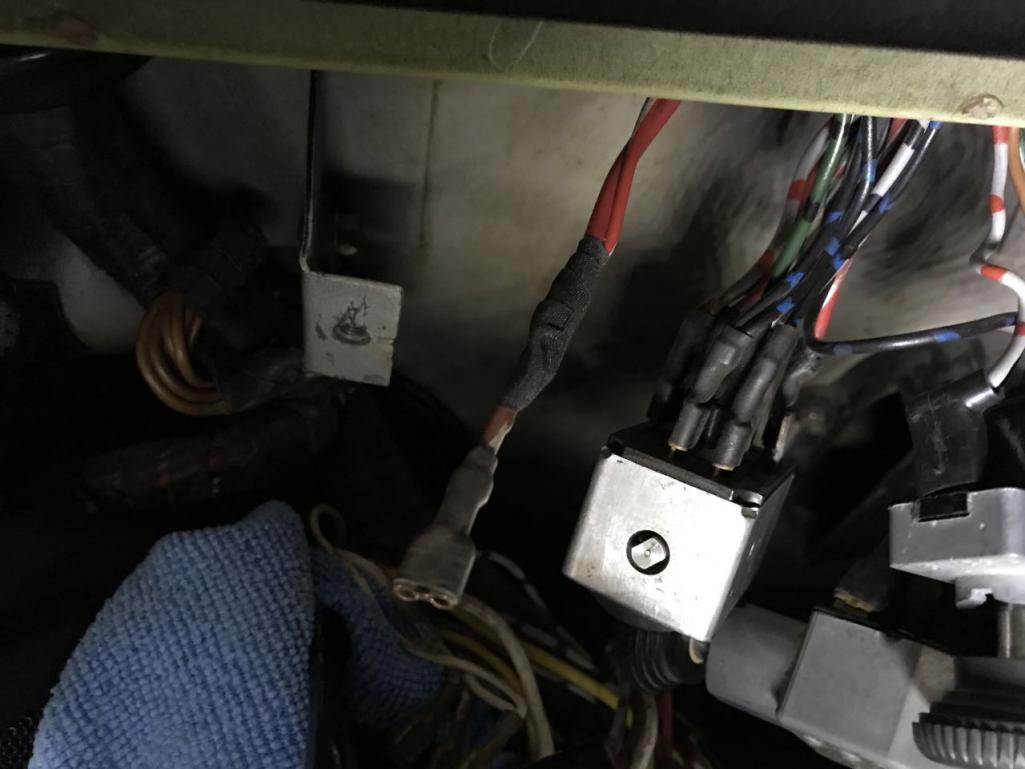
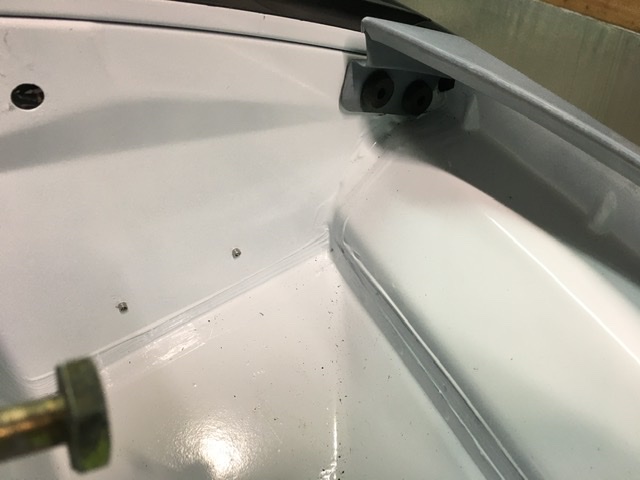
Concern with slightly dimming headlamps, found a well hidden failed terminal on the headlamp switch. Solder in, and cloth taped up.
   |
|
|
|
| Garland |
Aug 29 2017, 08:45 PM
Post
#169
|
|
Restoration Fanatic Group: Members Posts: 1,431 Joined: 8-January 04 From: ......Michigan...... Member No.: 1,535 Region Association: Upper MidWest |
914 rubber for the carpet, and windshield needs. Can't say enough.
Umbrella cover beautiful, and fits perfect, from Perry Klehl I still need to wet sand and polish out the paint, but Im starting to like the soft slight flat look. 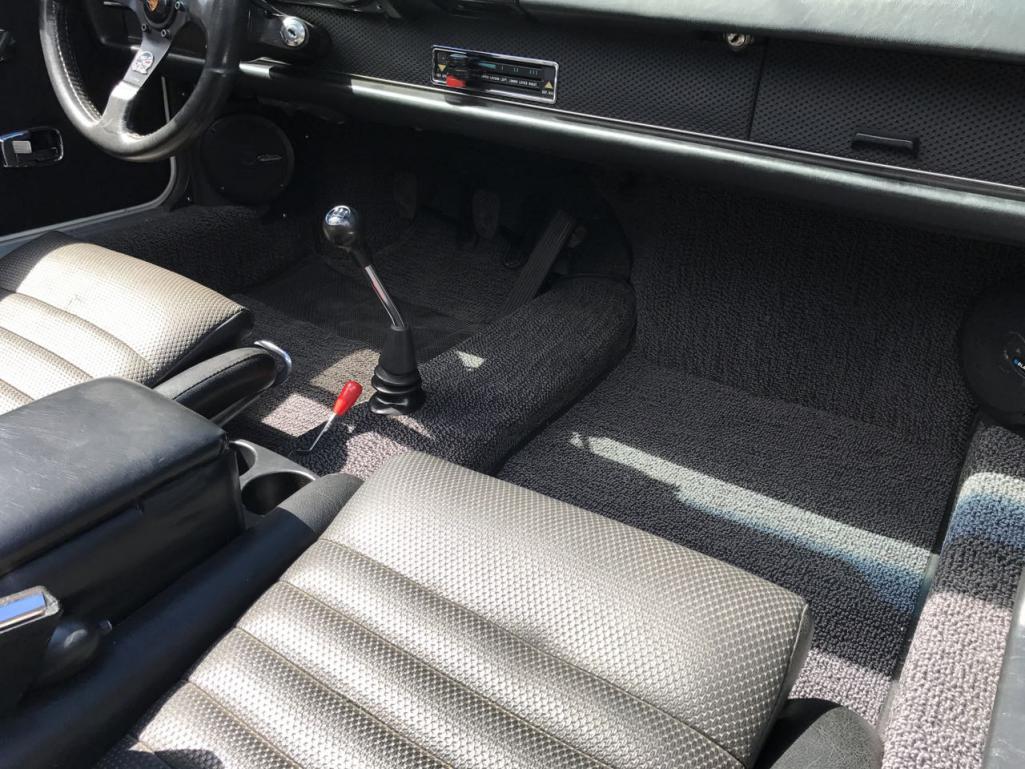 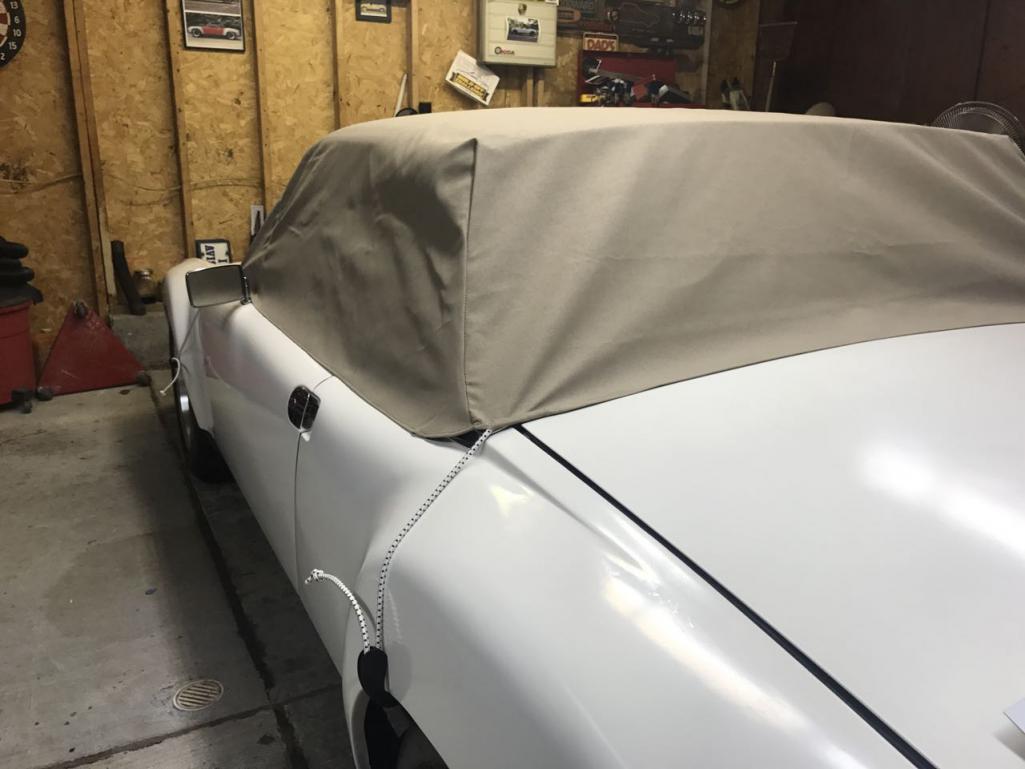 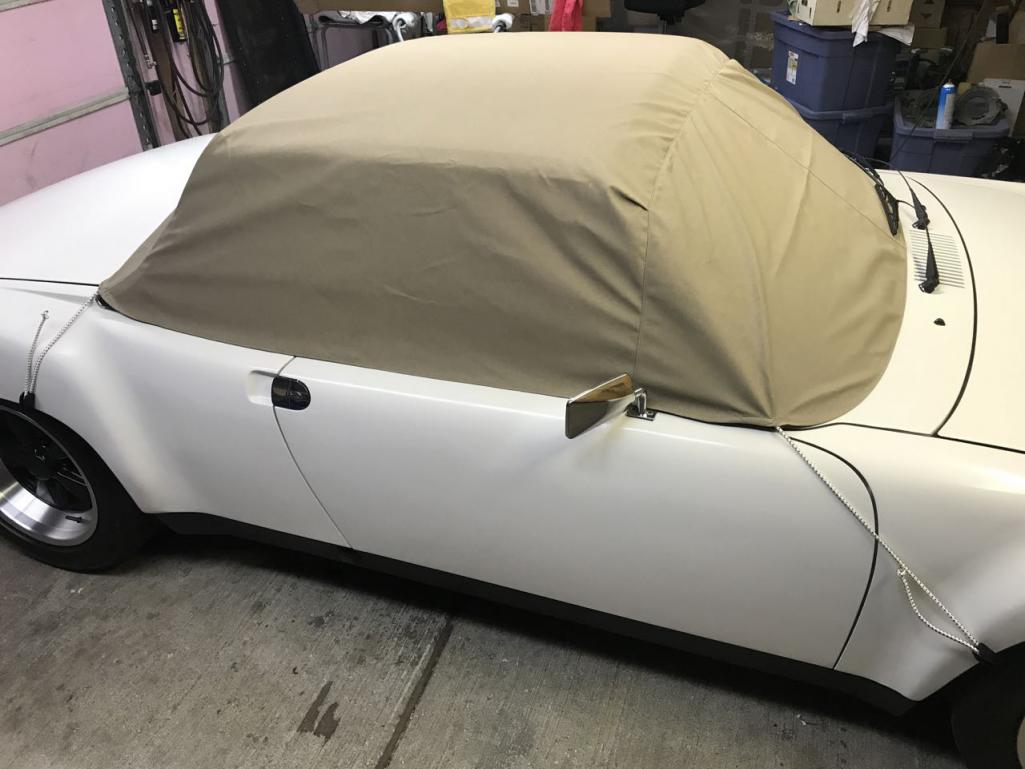 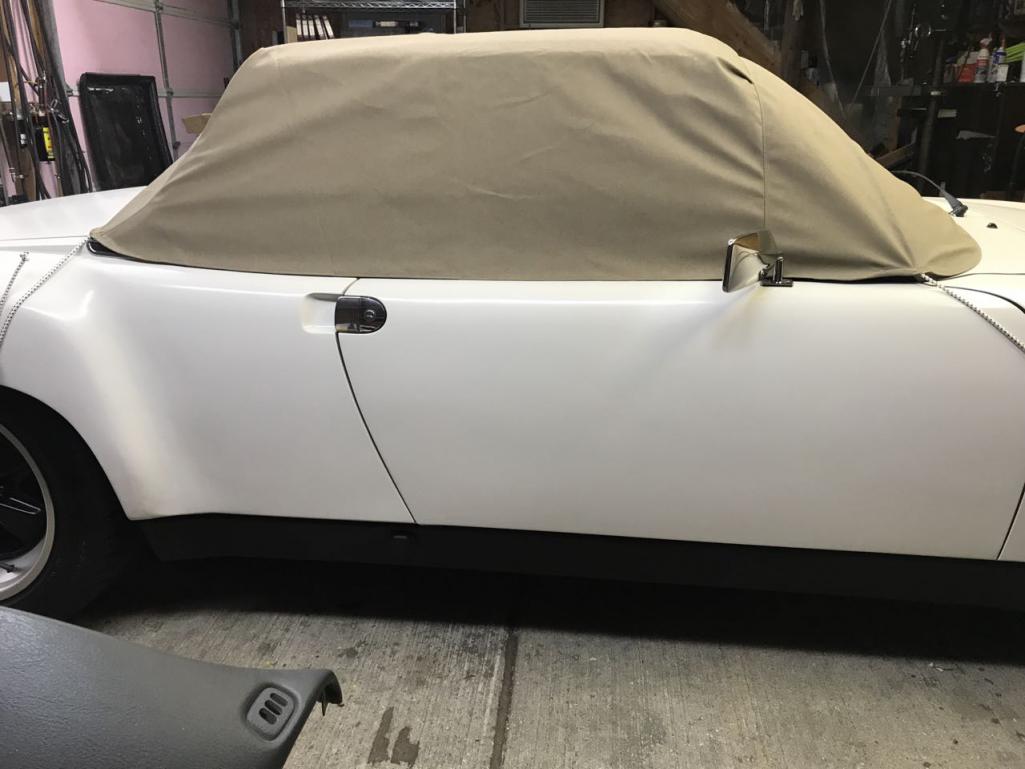 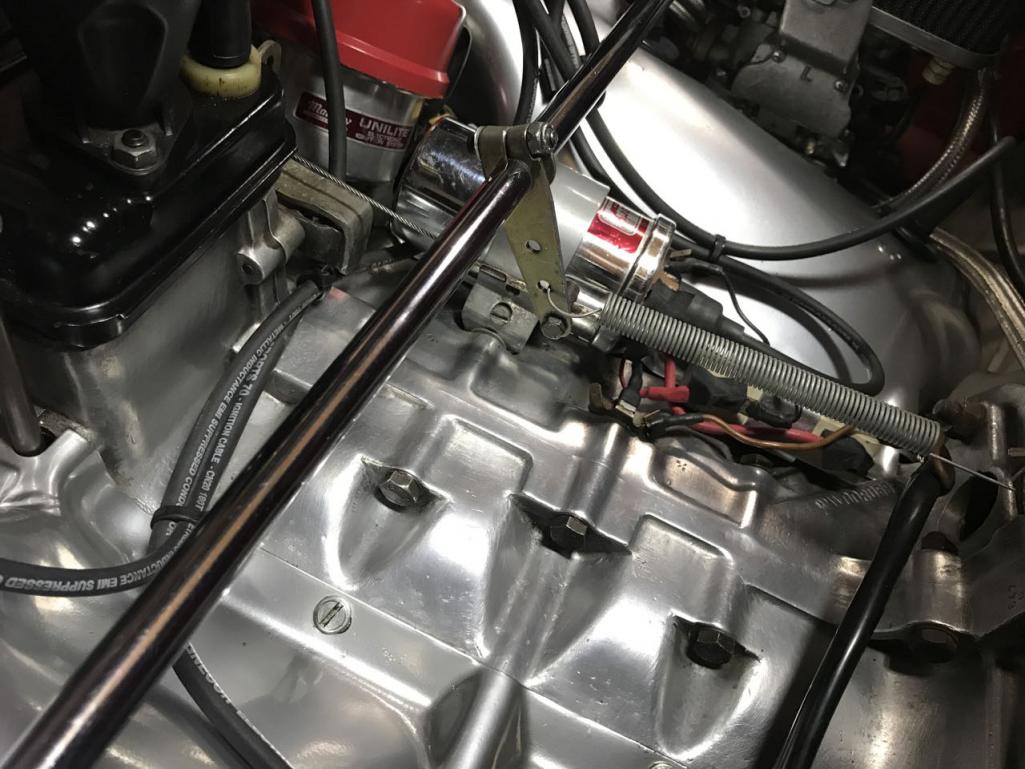 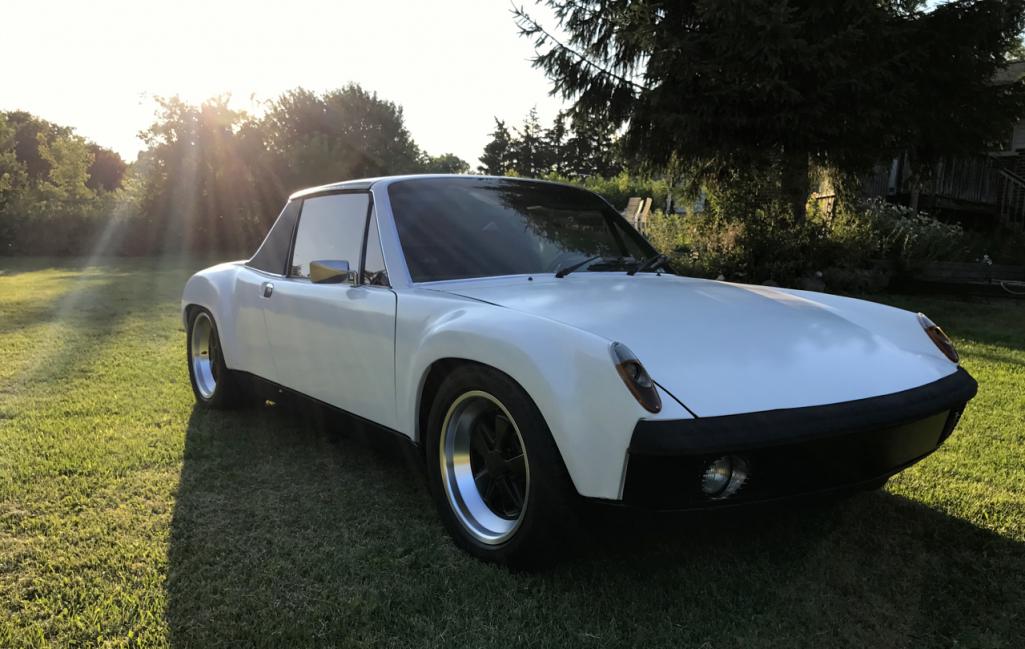 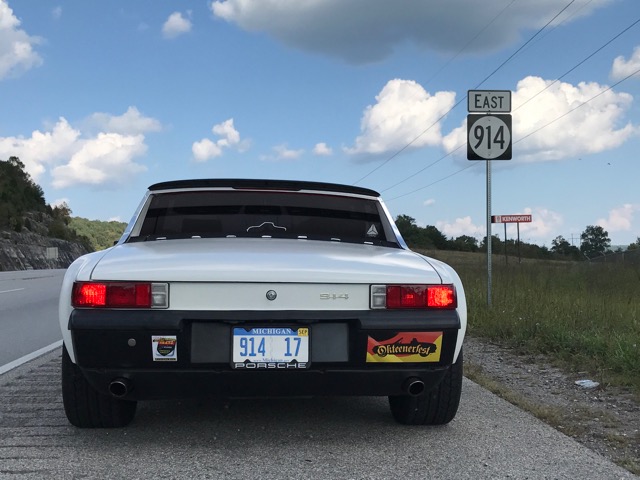 |
|
|
|
| Garland |
Dec 4 2017, 10:54 AM
Post
#170
|
|
Restoration Fanatic Group: Members Posts: 1,431 Joined: 8-January 04 From: ......Michigan...... Member No.: 1,535 Region Association: Upper MidWest |
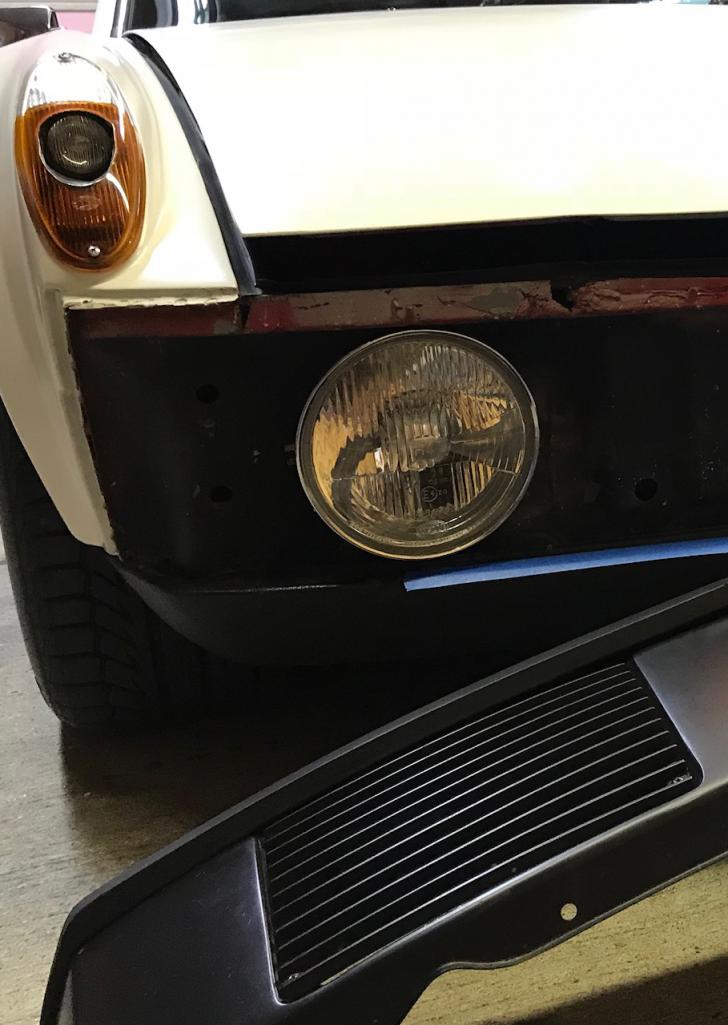
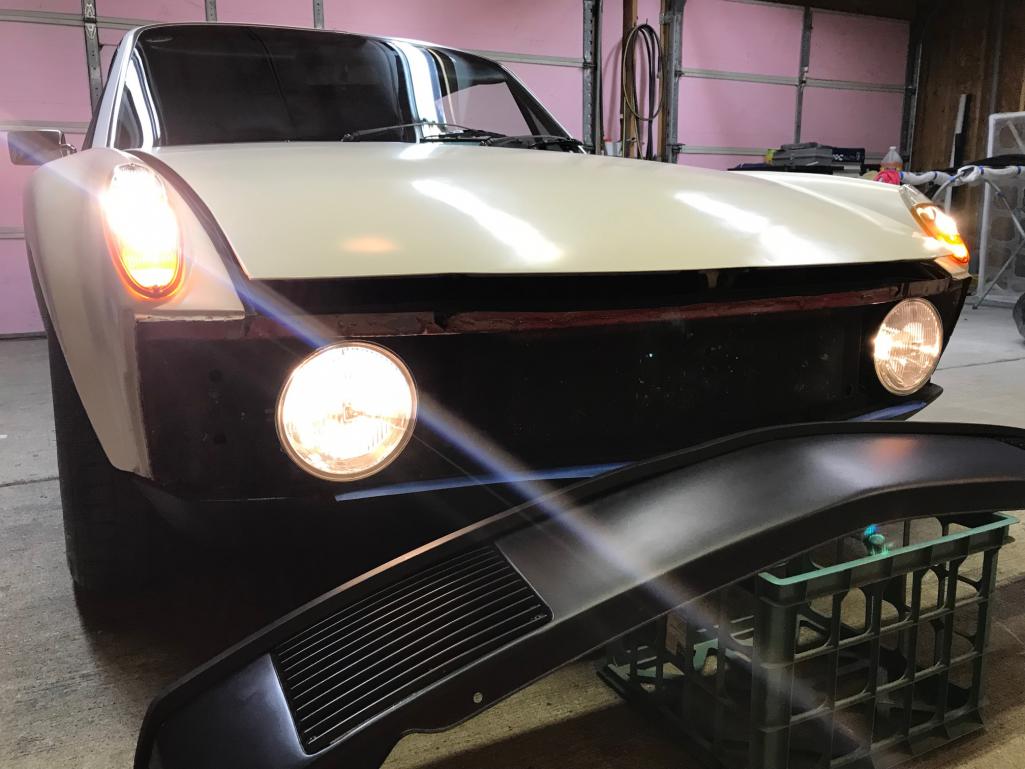
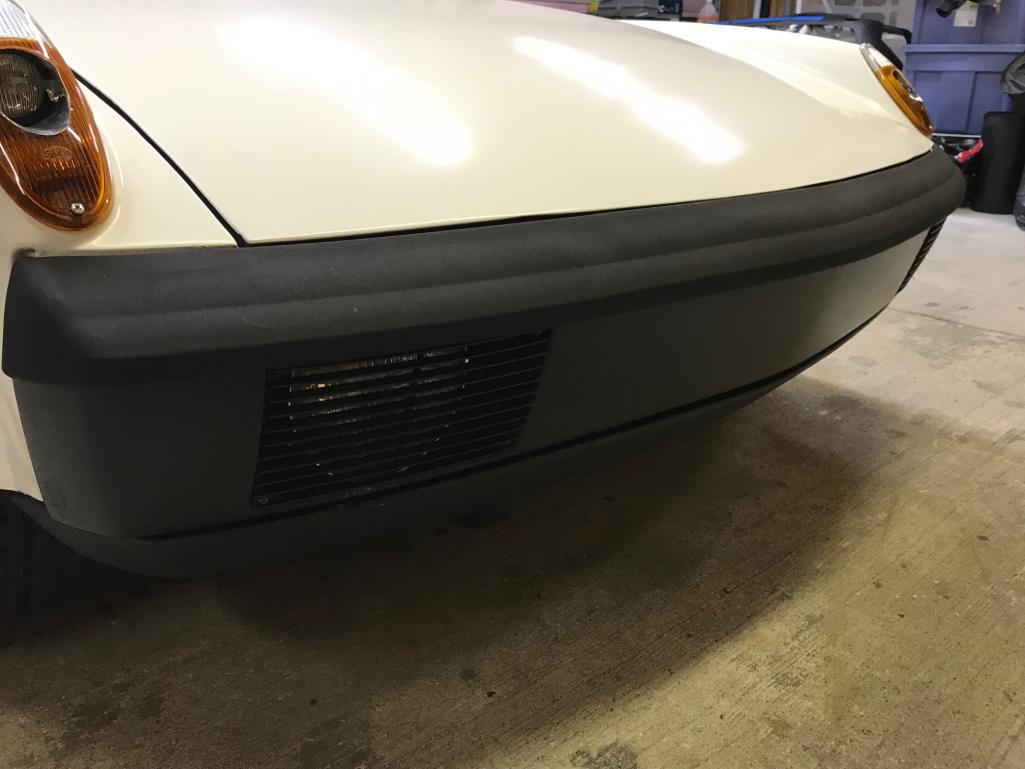
Lamps in the turn buckets are working great, just wanted to light things up a little better. So added hi-low beams behind the bumper, had to work the sheet metal a bit so the bumper would fit. Now I have hi beams!
   |
|
|
|
| whitetwinturbo |
Dec 5 2017, 12:09 AM
Post
#171
|
|
Honey, does this wing make my ass look fat? Group: Members Posts: 1,391 Joined: 22-October 11 From: Newport Beach/Kalefornya/USA Member No.: 13,704 Region Association: Southern California |
|
|
|
|
| 914forme |
Dec 5 2017, 04:44 PM
Post
#172
|
|
Times a wastin', get wrenchin'! Group: Members Posts: 3,899 Joined: 24-July 04 From: Dayton, Ohio Member No.: 2,388 Region Association: None |
QUOTE(Garland @ Dec 4 2017, 11:54 AM) Lamps in the turn buckets are working great, just wanted to light things up a little better. So added hi-low beams behind the bumper, had to work the sheet metal a bit so the bumper would fit. Now I have hi beams! Would to see these in a night shot. I like the look, and still like this car a lot. Great build |
|
|
|
| Garland |
Aug 8 2019, 10:37 AM
Post
#173
|
|
Restoration Fanatic Group: Members Posts: 1,431 Joined: 8-January 04 From: ......Michigan...... Member No.: 1,535 Region Association: Upper MidWest |
Well it’s been a while for an update, just got back from Canadian tire motorsports Park, and the re-creation of the 914 pace car drive on the track. What a great group of 914’ers to our north. And A beautiful country.
Before leaving I moved my crank case breather from the carburetor, to a catch tank. I had to add additional hose to reach the tank. Well once I arrived at the track I noticed my ongoing rear main seal leak seemed worse. And that I was starting to collect some oil between the tins on the top of the motor. I thought maybe this was just seepage from the vent connection. Last night I got a good look after washing it down, and running it for a short time. Found that the additional line I used had blockage and acted basically as a plug to the crank case ventilation, forcing pressure to the seals. I’ll replace the rear main, and the oil cooler seals that I think was the front oil leak failure under extreme pressure. But going to run the engine with the shroud off and out of the car after cleanup to be sure. In addition I had a very hard time with the shifter linkage on the way back. While pulling the engine I found the rear set pin loose, and at the trans under the linkage cover. The shaft was bound in place so it would not slide out. But shift linkage was rotating freely. Hard to believe I was ever able to reach 1st, or rev. Need to be roadworthy for Okteenerfest, and a couple of short drives before that. Rear main leak 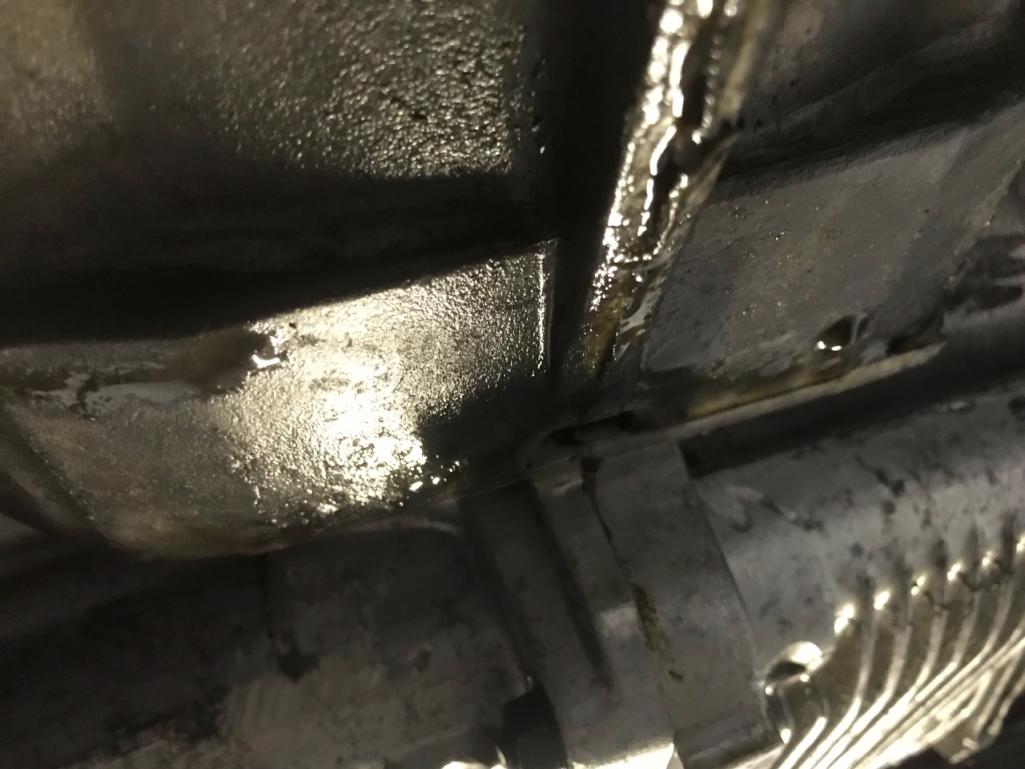 Front leak 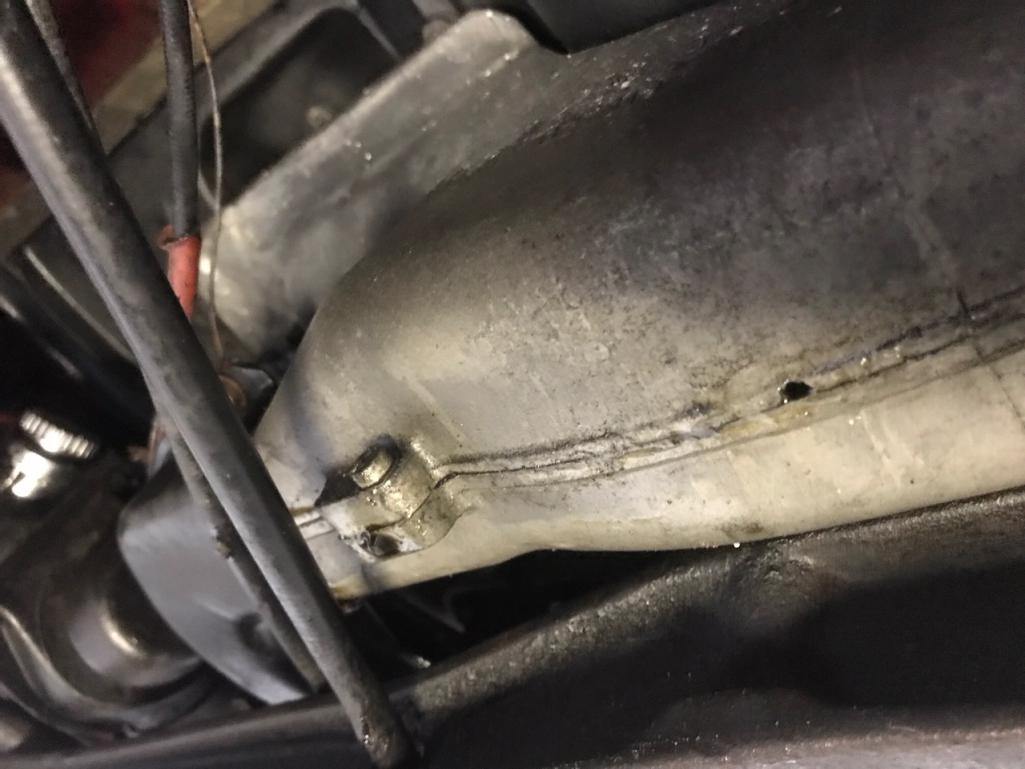 Oil cooler 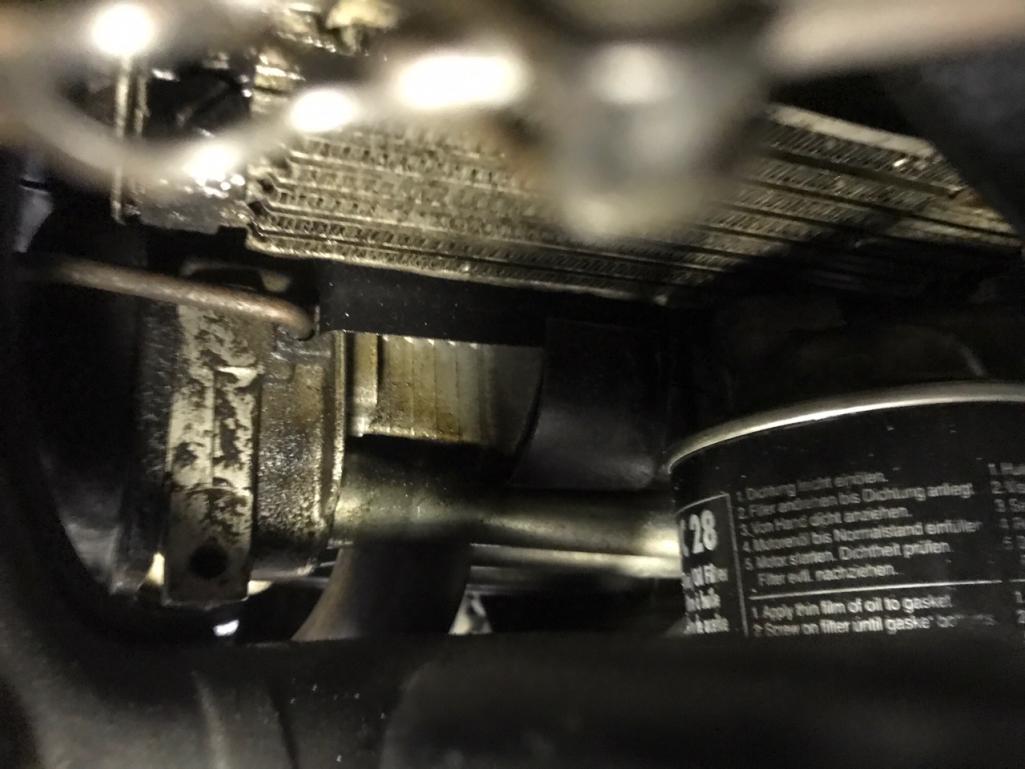 Shifter pin 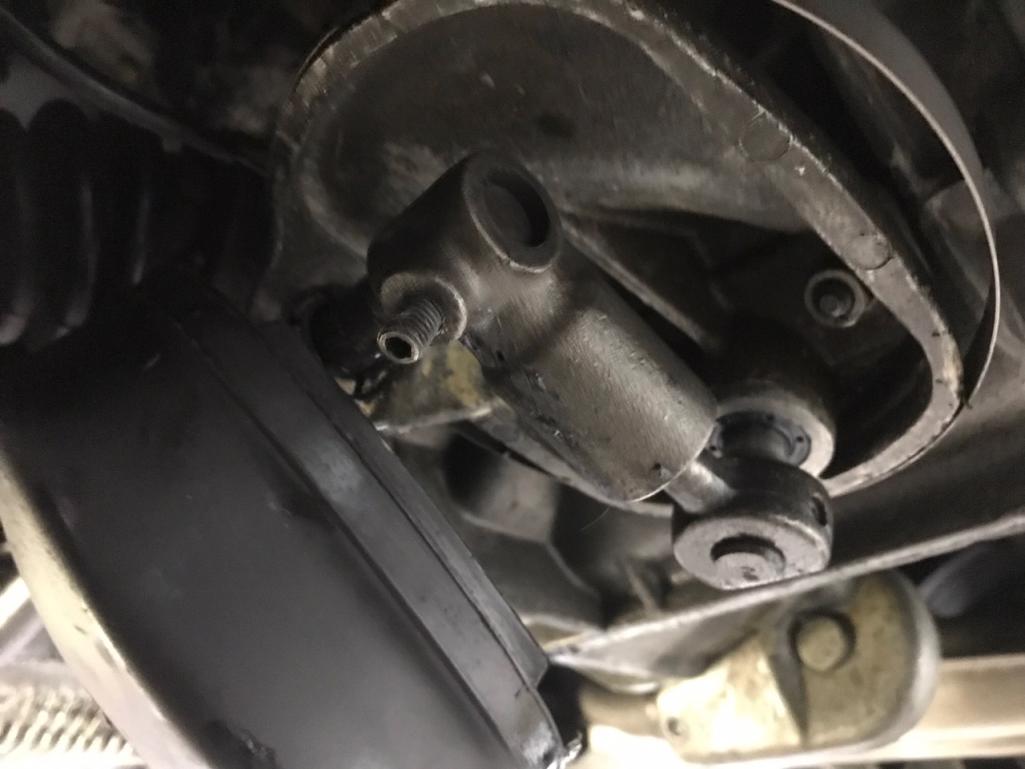 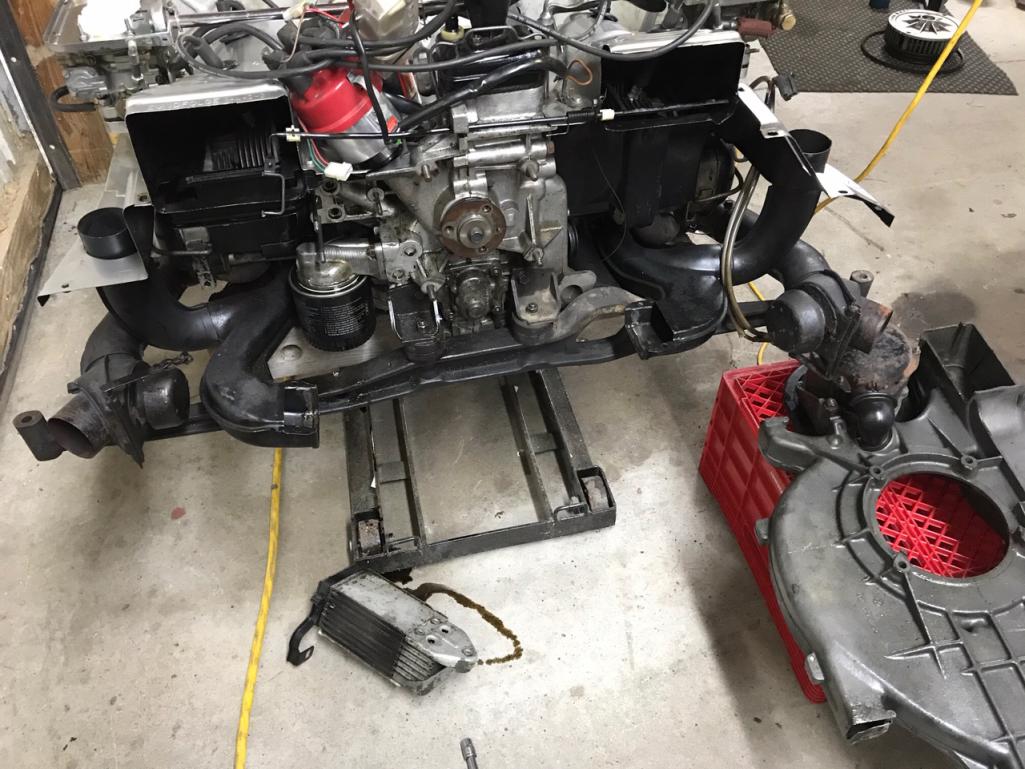 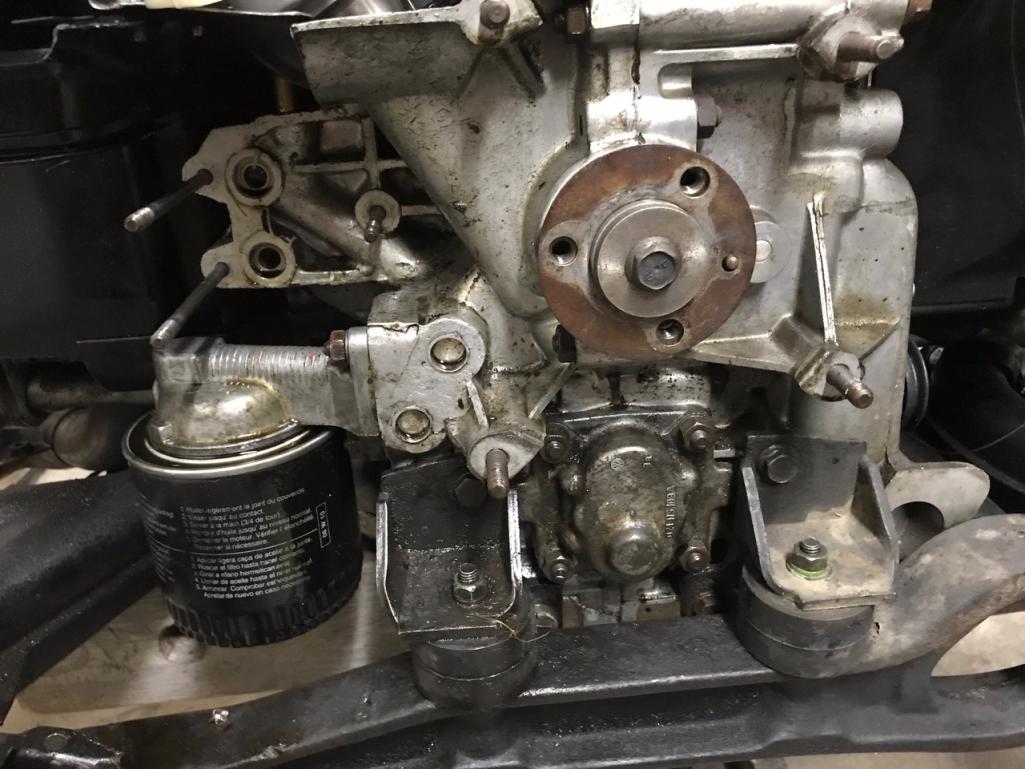 |
|
|
|
| Garland |
Aug 8 2019, 10:49 AM
Post
#174
|
|
Restoration Fanatic Group: Members Posts: 1,431 Joined: 8-January 04 From: ......Michigan...... Member No.: 1,535 Region Association: Upper MidWest |
Updates:
Wider 3rd brake lamp Rear valance venting Tail panel Red accent lighting 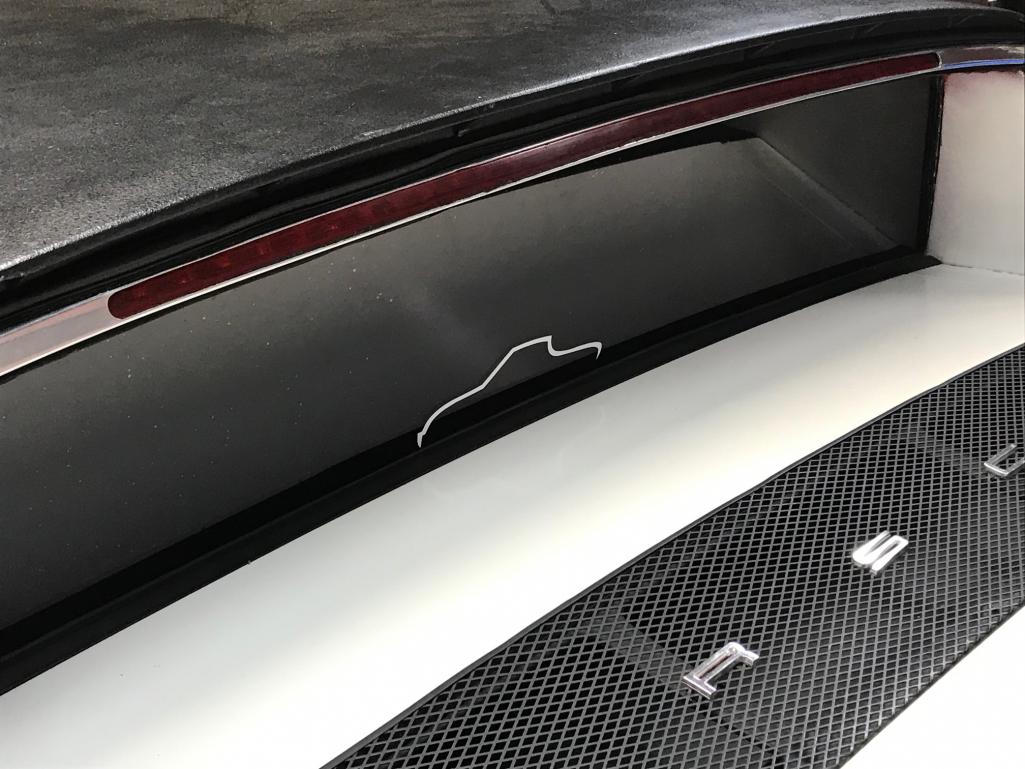 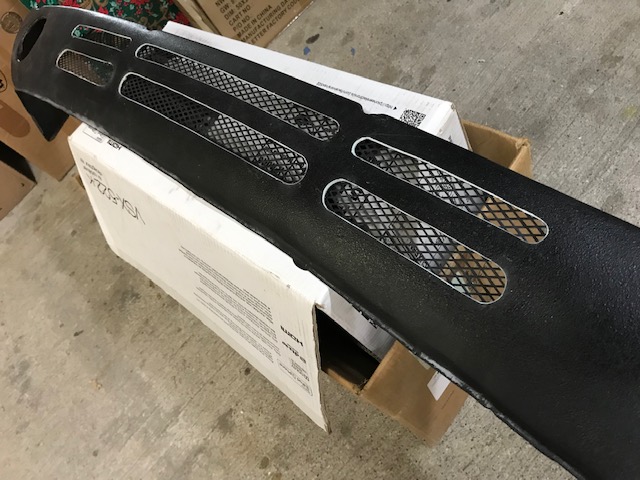 |
|
|
|
| Garland |
Nov 16 2019, 10:14 AM
Post
#175
|
|
Restoration Fanatic Group: Members Posts: 1,431 Joined: 8-January 04 From: ......Michigan...... Member No.: 1,535 Region Association: Upper MidWest |
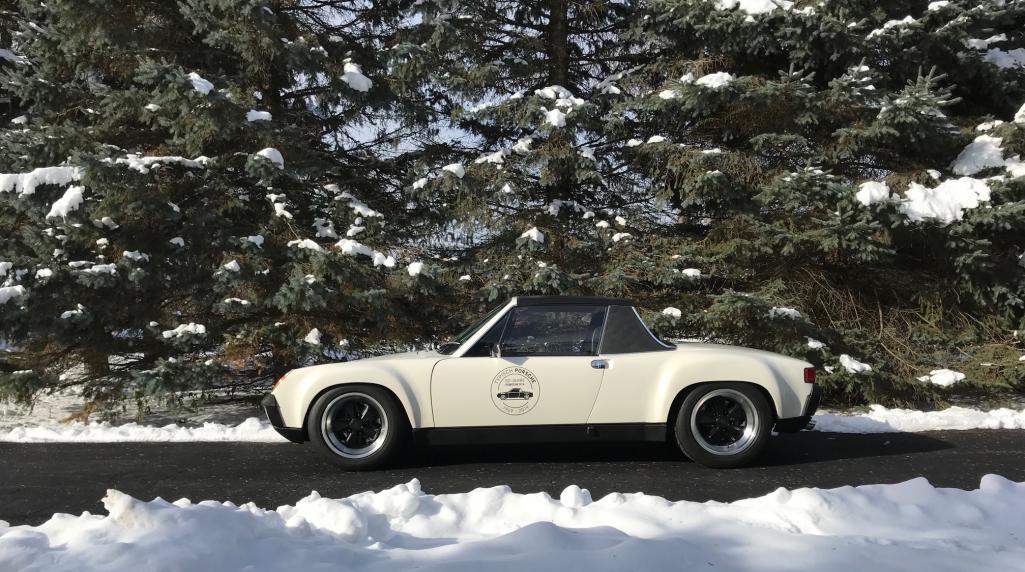
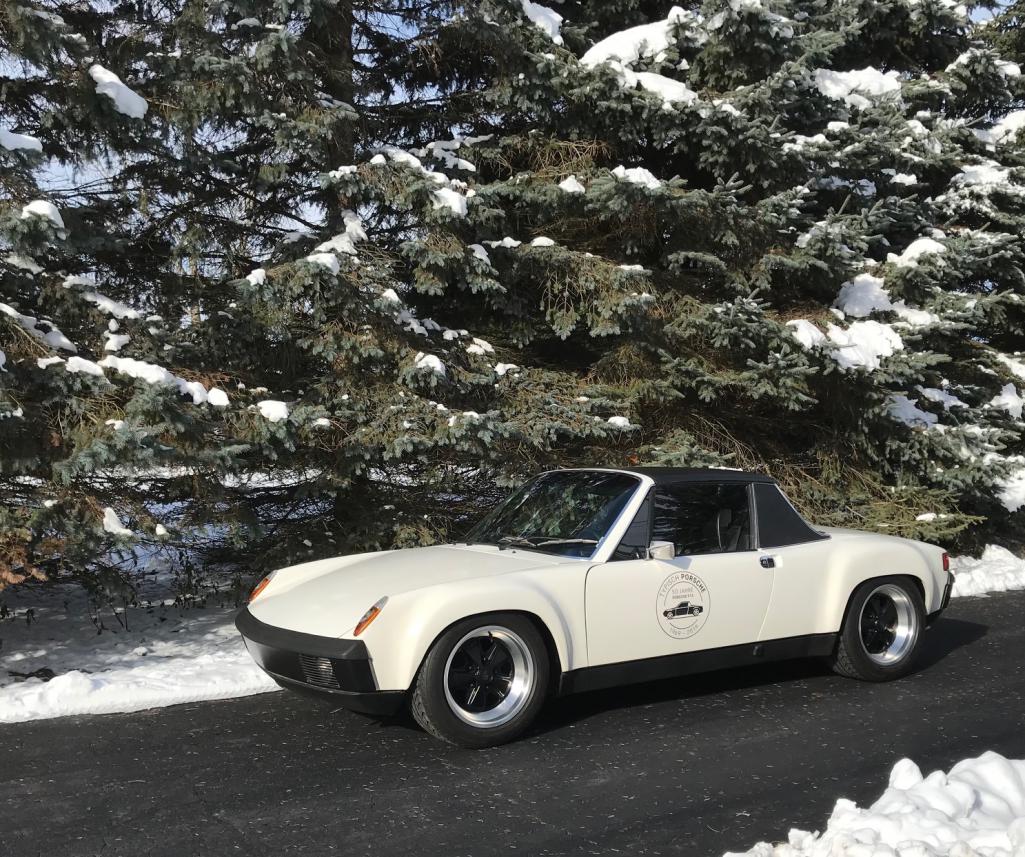
Went for a drive, had to snap a shot, or two.
  |
|
|
|
| Garland |
Aug 15 2023, 05:23 PM
Post
#176
|
|
Restoration Fanatic Group: Members Posts: 1,431 Joined: 8-January 04 From: ......Michigan...... Member No.: 1,535 Region Association: Upper MidWest |
2023 update:
This 914 has been driven and performing great, since the build. Last week, I decided to go back to pop-up factory headlamps. Donor parts became easily obtainable, so I went ahead and pull the trigger on the saws all. I like the modified look, and the customized hood, and with LED’s @nd additional lamps in the turn signal housings, they were sufficient. It was 7 years ago I did the delete, for the build off, and now getting ready for a long drive to Okteenerfest, I decided also, now is a good time to do this. The housings and the replacement hood came from the same vehicle, at a local scrap yard. My VIN Plate, back on the car, along with factory fog lamps. Also had to create a wiring harness from bits and pieces, then splice it in. Ill be done in plenty of time for Okteenerfest. 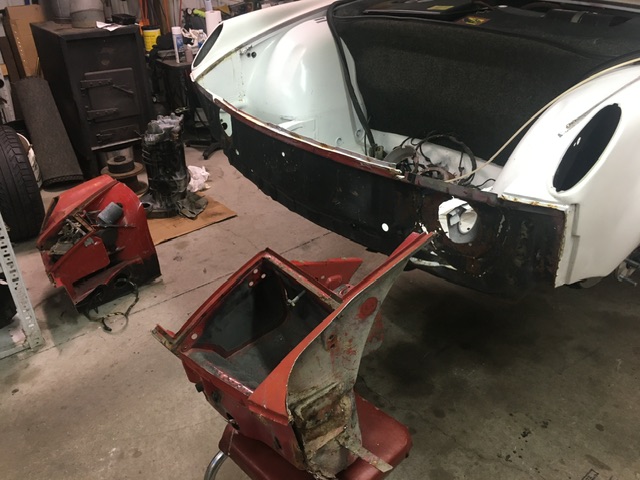 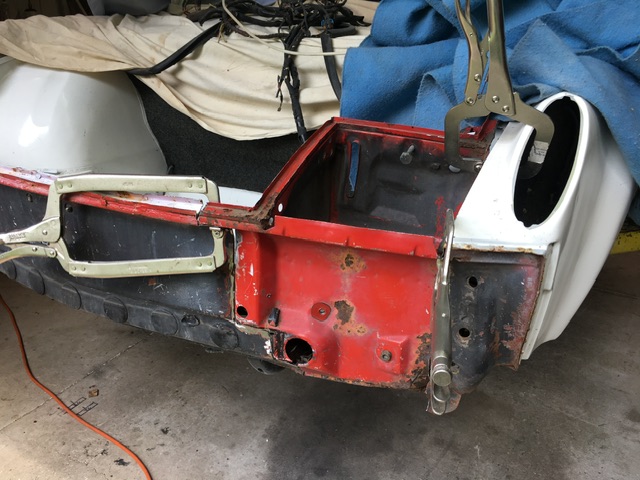 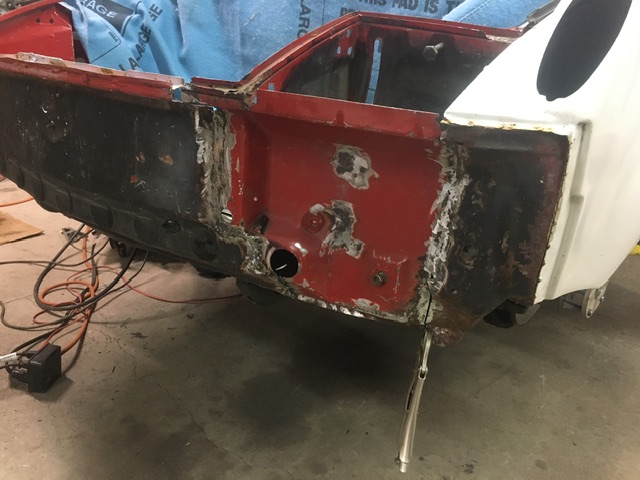 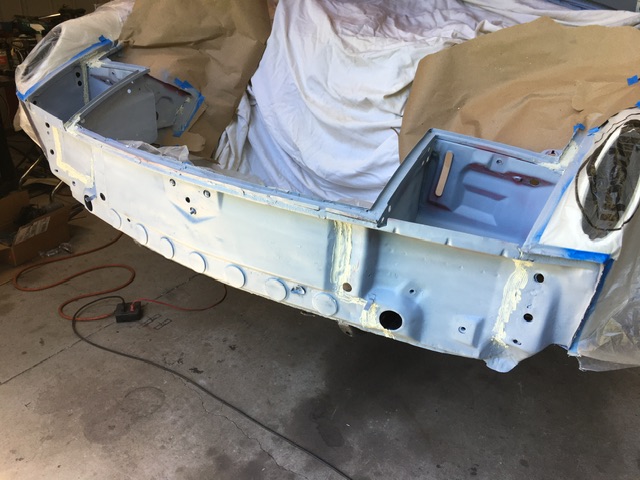 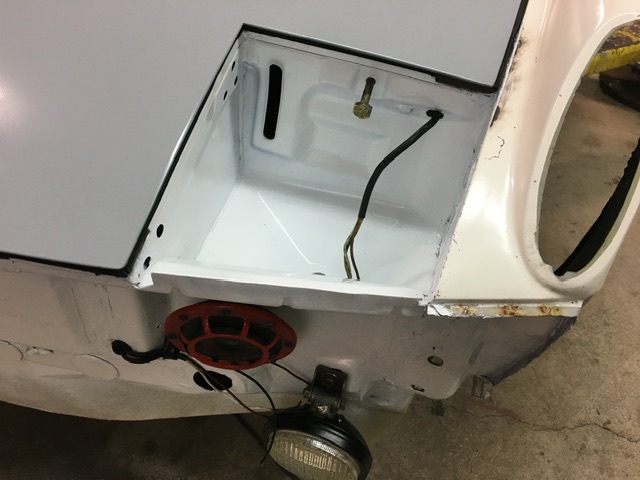 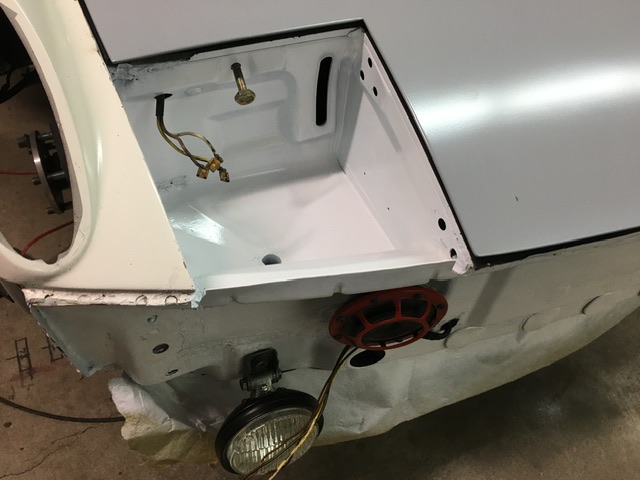 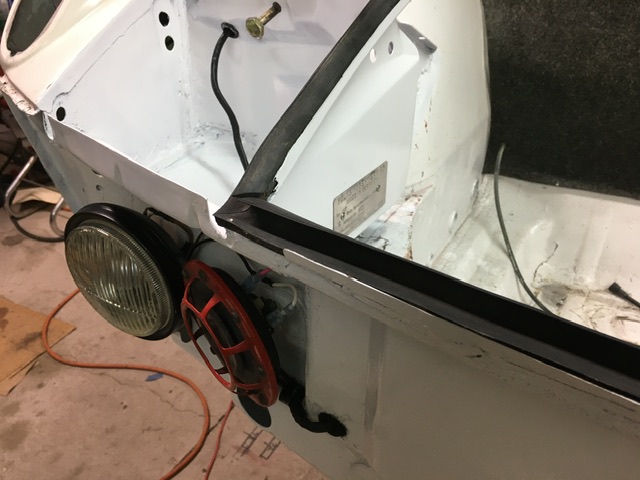 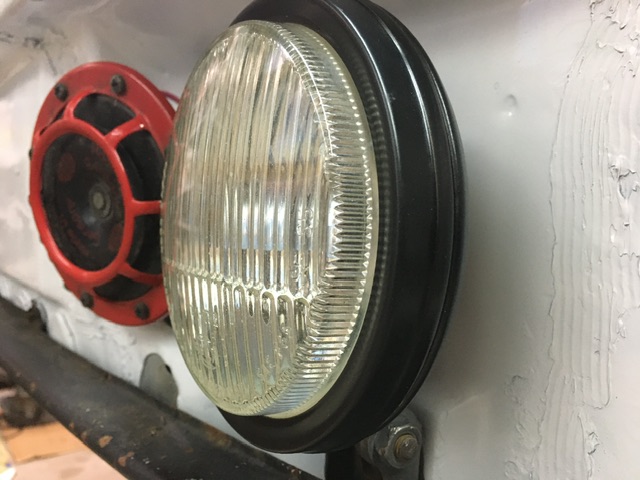 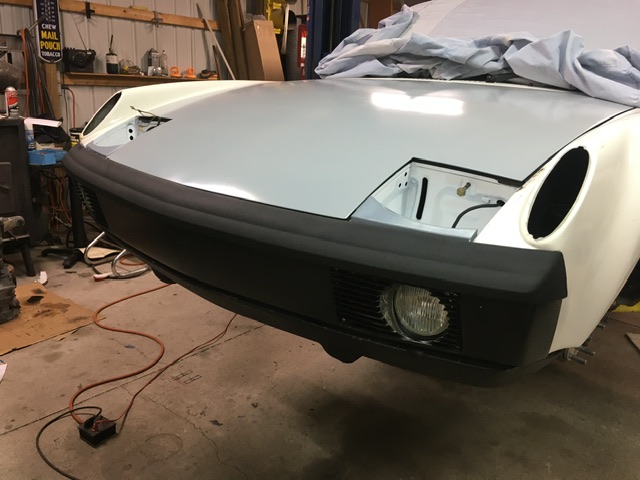 Attached image(s) 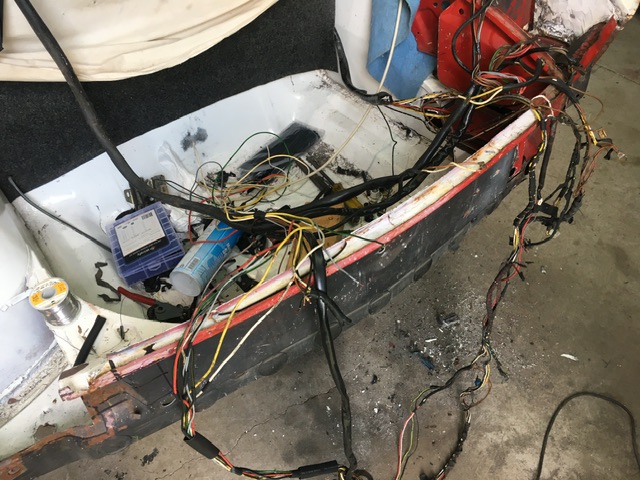 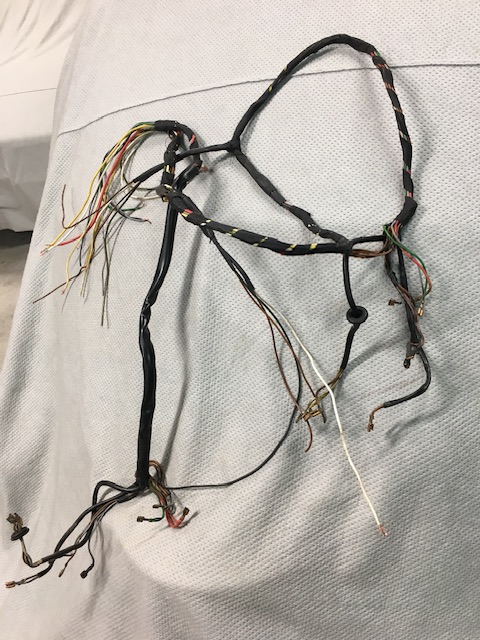
|
|
|
|
| Cairo94507 |
Aug 15 2023, 05:41 PM
Post
#177
|
|
Michael Group: Members Posts: 10,710 Joined: 1-November 08 From: Auburn, CA Member No.: 9,712 Region Association: Northern California |
Very nice work. (IMG:style_emoticons/default/beerchug.gif)
|
|
|
|
| Chris H. |
Aug 15 2023, 07:51 PM
Post
#178
|
|
Senior Member Group: Members Posts: 4,093 Joined: 2-January 03 From: Chicago 'burbs Member No.: 73 Region Association: Upper MidWest |
(IMG:style_emoticons/default/agree.gif) You got some real skills there Garland. Great job.
|
|
|
|
| Garland |
Aug 16 2023, 06:27 AM
Post
#179
|
|
Restoration Fanatic Group: Members Posts: 1,431 Joined: 8-January 04 From: ......Michigan...... Member No.: 1,535 Region Association: Upper MidWest |
The headlamp Mechanicals are at the media blaster, so when they get back, along with the box of loose ends, I’ll be able to finish up and, fitting and mounting the doors.
  |
|
|
|
| Garland |
Aug 19 2023, 01:05 PM
Post
#180
|
|
Restoration Fanatic Group: Members Posts: 1,431 Joined: 8-January 04 From: ......Michigan...... Member No.: 1,535 Region Association: Upper MidWest |
QUOTE(Mikey914 @ Nov 13 2020, 10:49 AM) Personally, I prefer the stock look, but upgraded LED but I like the classic look of the car. I do think there is some cool stuff out there, but that's just me. Check out the link below on this topic. And a couple of pictures of the classic look update. 914 World, Pop up headlight delete link 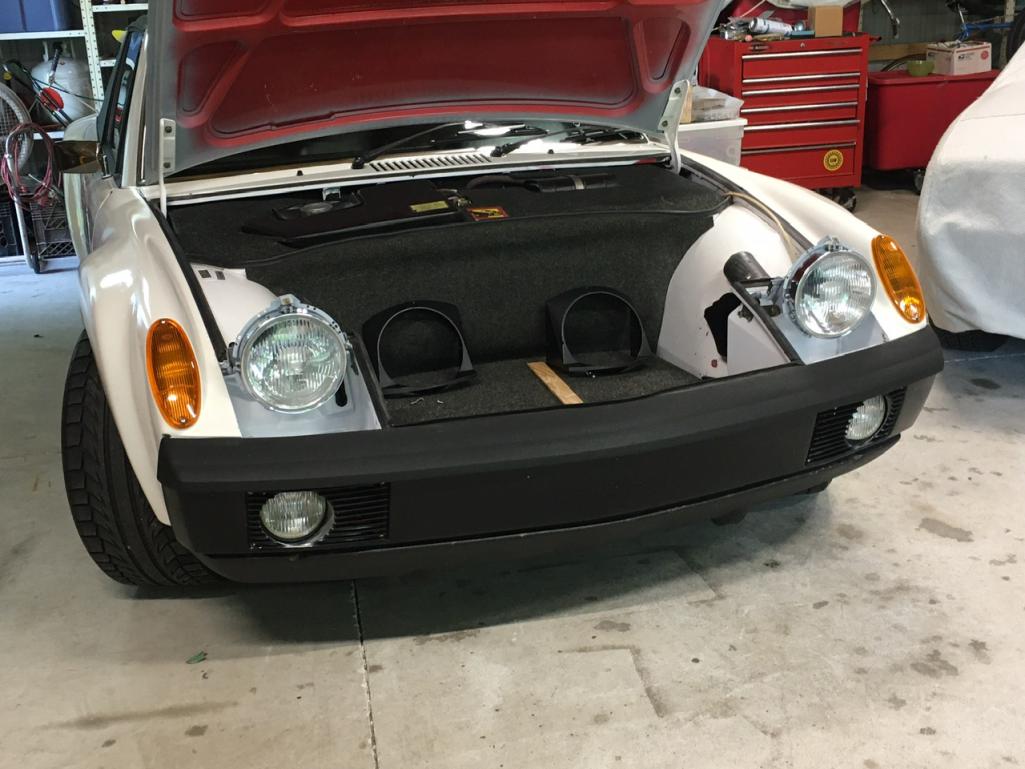 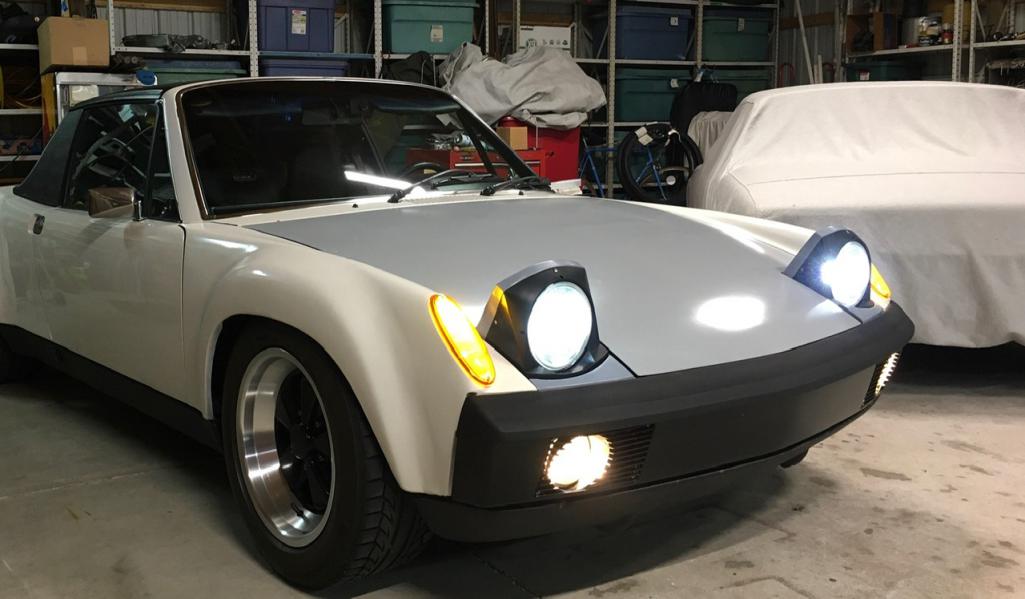 |
|
|
|
|
1 User(s) are reading this topic (1 Guests and 0 Anonymous Users)
0 Members:

|
Lo-Fi Version | Time is now: 19th July 2026 - 08:43 PM |
Invision Power Board
v9.1.4 © 2026 IPS, Inc.