|
|
|
Porsche, and the Porsche crest are registered trademarks of Dr. Ing. h.c. F. Porsche AG.
This site is not affiliated with Porsche in any way. Its only purpose is to provide an online forum for car enthusiasts. All other trademarks are property of their respective owners. |
|
|

  |

| whitetwinturbo |
 Mar 31 2016, 10:19 PM Mar 31 2016, 10:19 PM
Post
#61
|
|
Honey, does this wing make my ass look fat?  Group: Members Posts: 1,391 Joined: 22-October 11 From: Newport Beach/Kalefornya/USA Member No.: 13,704 Region Association: Southern California |
QUOTE(Garland @ Jan 27 2016, 07:28 PM)  Back at it over the last few weeks, installed 5 Lug package from PMB Performance. Pressed in new bearings, and seals. Turbo tie rod ends, rack spacers, and shorter firmer springs and shocks. Also went with a pair of old front calipers I had from the 70's these are Girling calipers, that were tested for use on some VW's. Had to trim the calipers a bit to fit the rotors. But they mount right up to the strut housing, no adjustment required. Is this the stock vs turbo tie rod? 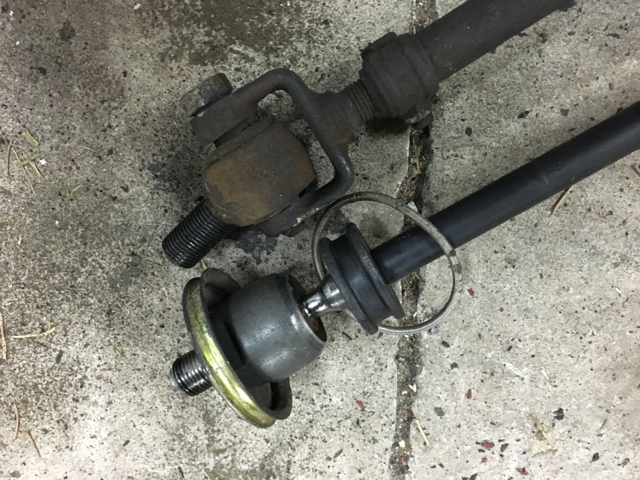 |
   |

 
|
| Garland |
Mar 31 2016, 10:48 PM
Post
#62
|
|
Restoration Fanatic Group: Members Posts: 1,431 Joined: 8-January 04 From: ......Michigan...... Member No.: 1,535 Region Association: Upper MidWest |
Yes and theres a picture of it installed also.
|
|
|
|
| whitetwinturbo |
Mar 31 2016, 10:52 PM
Post
#63
|
|
Honey, does this wing make my ass look fat? Group: Members Posts: 1,391 Joined: 22-October 11 From: Newport Beach/Kalefornya/USA Member No.: 13,704 Region Association: Southern California |
...........I must have missed the installed pic...can you re post it?
|
|
|
|
| Garland |
Apr 1 2016, 07:05 AM
Post
#64
|
|
Restoration Fanatic Group: Members Posts: 1,431 Joined: 8-January 04 From: ......Michigan...... Member No.: 1,535 Region Association: Upper MidWest |
QUOTE(whitetwinturbo @ Mar 31 2016, 10:52 PM) ...........I must have missed the installed pic...can you re post it? 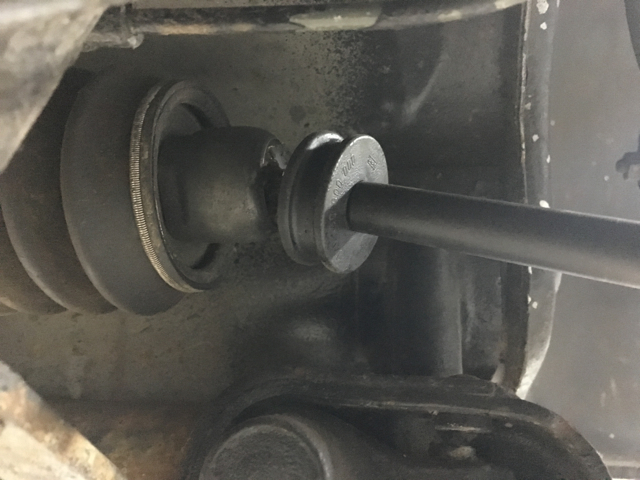 |
|
|
|
| whitetwinturbo |
Apr 1 2016, 12:41 PM
Post
#65
|
|
Honey, does this wing make my ass look fat? Group: Members Posts: 1,391 Joined: 22-October 11 From: Newport Beach/Kalefornya/USA Member No.: 13,704 Region Association: Southern California |
QUOTE(Garland @ Apr 1 2016, 06:05 AM) QUOTE(whitetwinturbo @ Mar 31 2016, 10:52 PM) ...........I must have missed the installed pic...can you re post it? (IMG:style_emoticons/default/grouphug.gif) |
|
|
|
| Garland |
Apr 1 2016, 01:58 PM
Post
#66
|
|
Restoration Fanatic Group: Members Posts: 1,431 Joined: 8-January 04 From: ......Michigan...... Member No.: 1,535 Region Association: Upper MidWest |
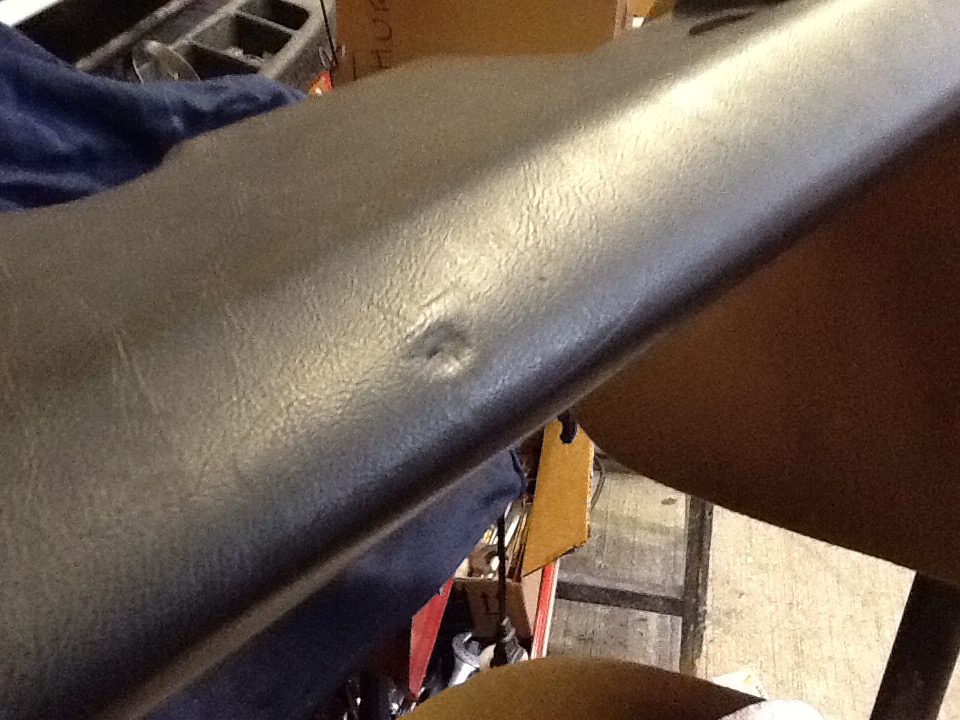
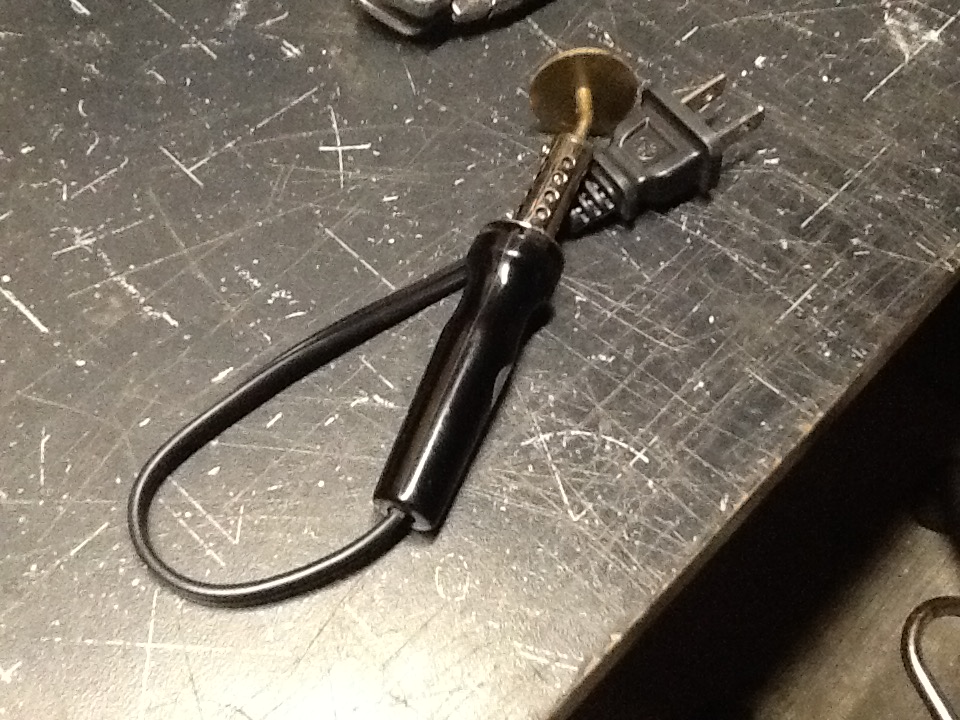
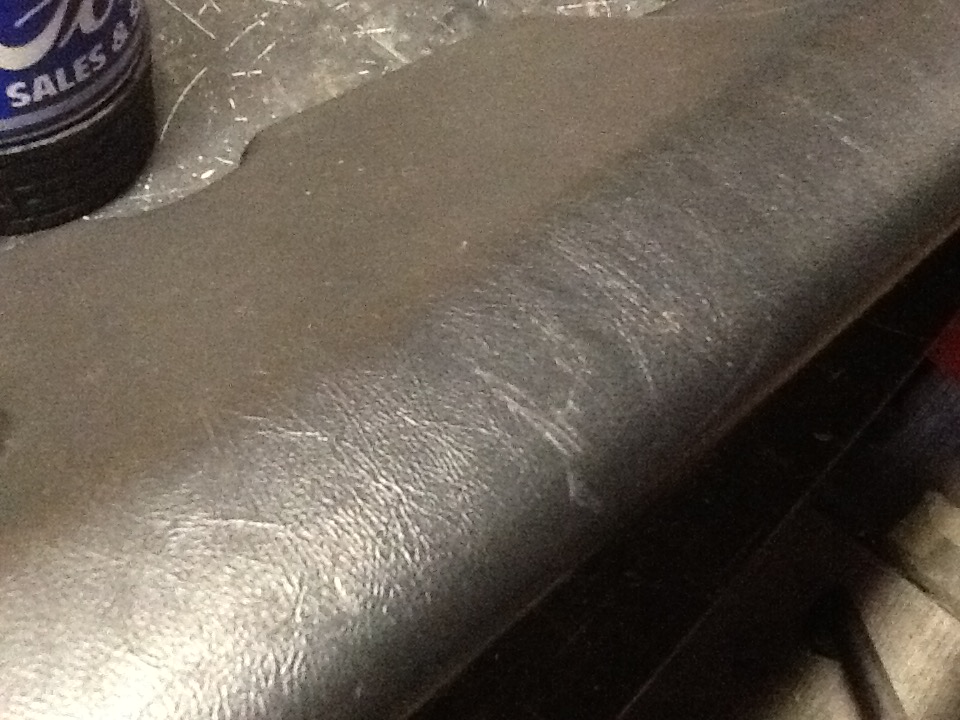
Here is a idea that I tried, and it worked. The tool is used for heating material for repairing cuts or marks in seats. I only used a piece of cloth under the coin sized heated part of the tool. Moving it around in small circles over the damage for about 40 sec. After a few minuets the dent lifted up almost flush!
      |
|
|
|
| whitetwinturbo |
Apr 1 2016, 02:02 PM
Post
#67
|
|
Honey, does this wing make my ass look fat? Group: Members Posts: 1,391 Joined: 22-October 11 From: Newport Beach/Kalefornya/USA Member No.: 13,704 Region Association: Southern California |
|
|
|
|
| Garland |
Apr 30 2016, 10:29 PM
Post
#68
|
|
Restoration Fanatic Group: Members Posts: 1,431 Joined: 8-January 04 From: ......Michigan...... Member No.: 1,535 Region Association: Upper MidWest |
Headlamps on hold, still working out the bugs.
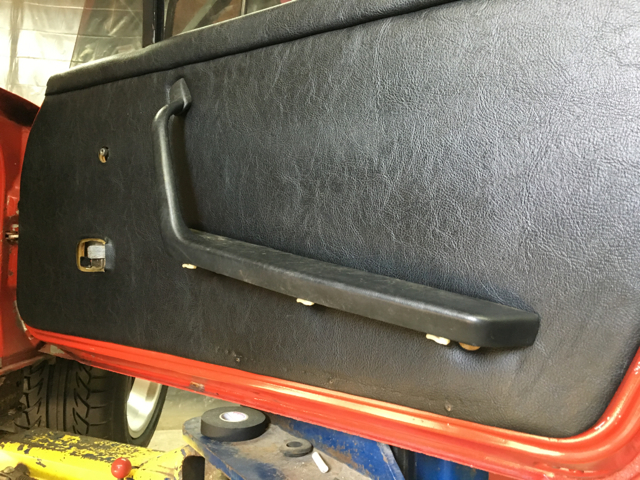
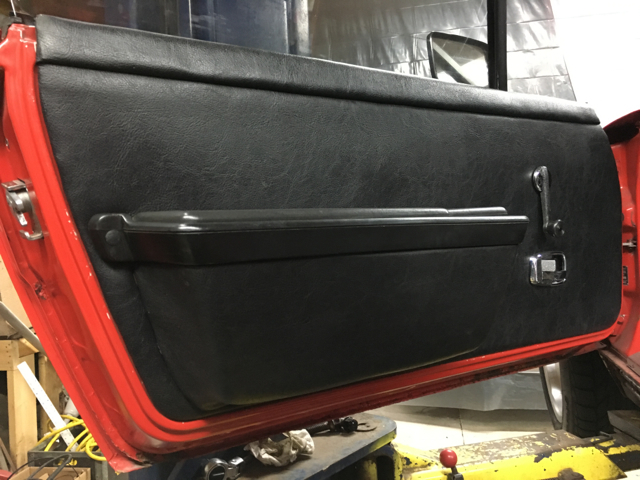
On the interior, I changed out a early "sinning leather" for an early "leather". I like the more flat sheen of the now installed interior. As I said the headlamps are going slowly, but I am making progress. The interior I had stored for years, was warped on the corners of the back pad, and the door panels also needed some work. Here is the "shinny leather", and all its flaws, and a close up of the less gloss, and thicker mill, "leather" 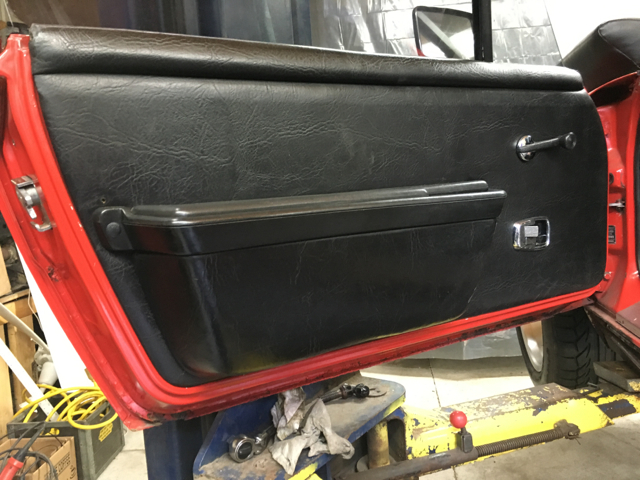 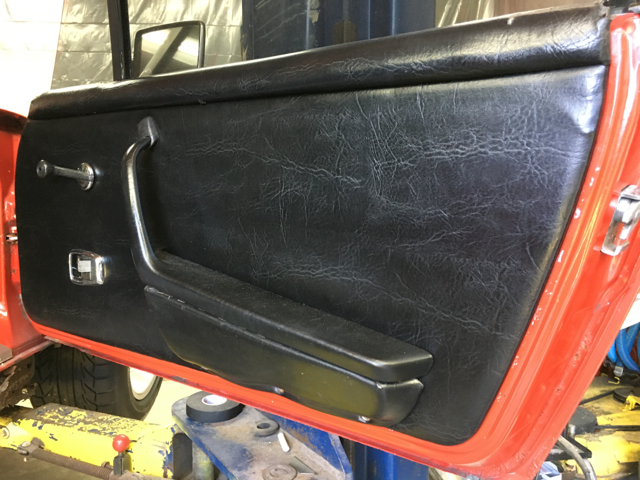  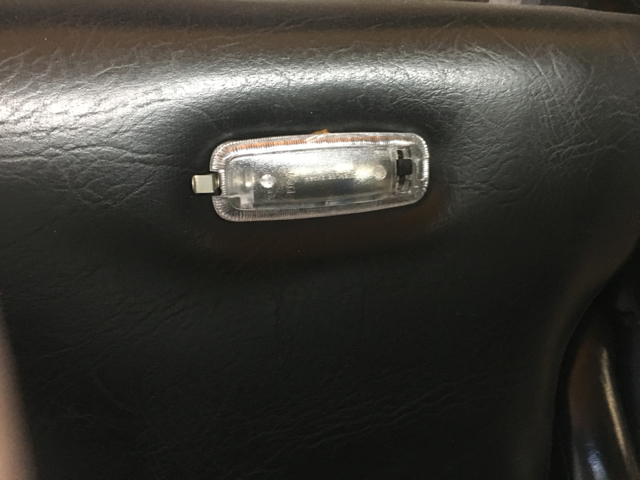 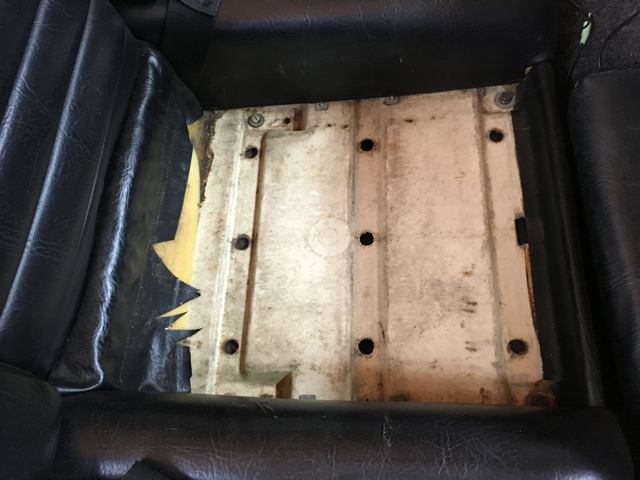 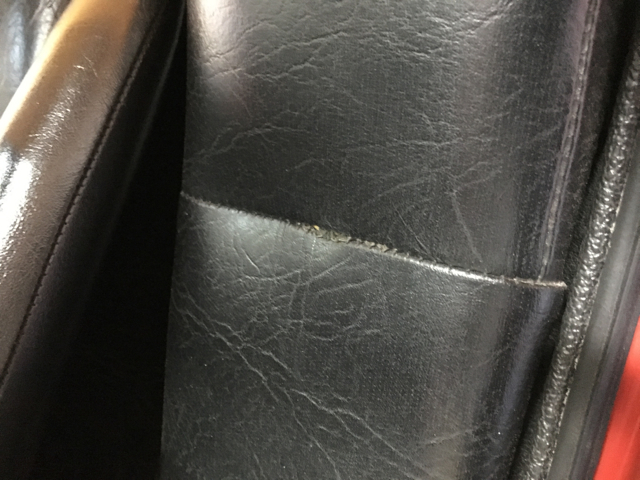 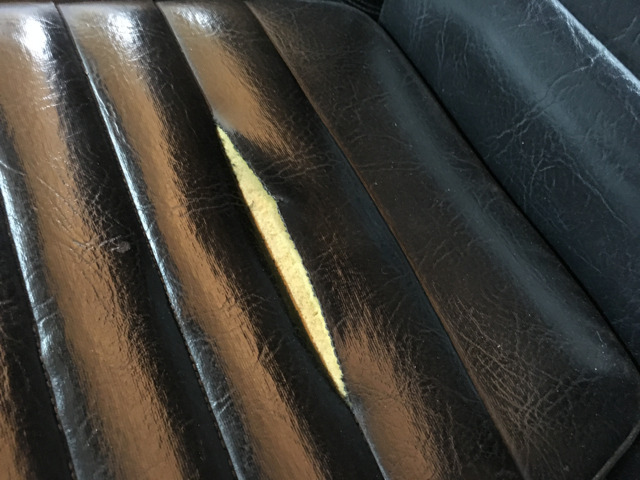  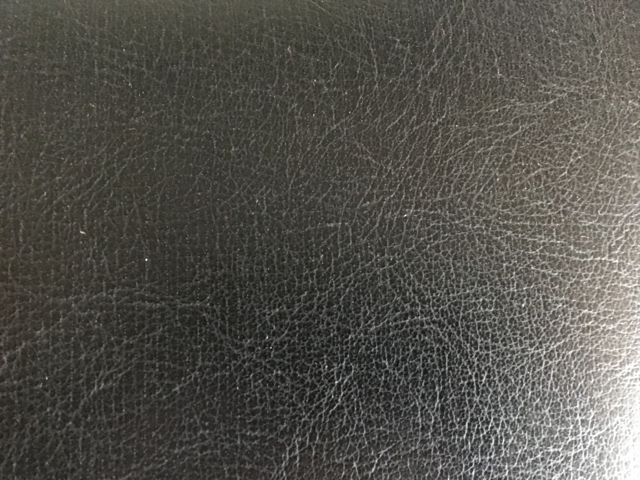 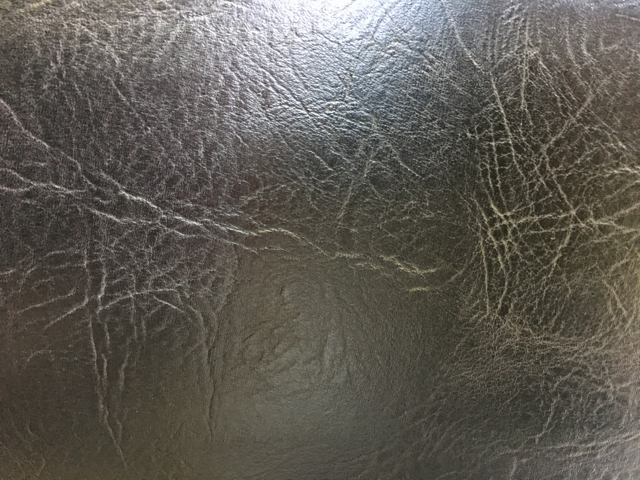 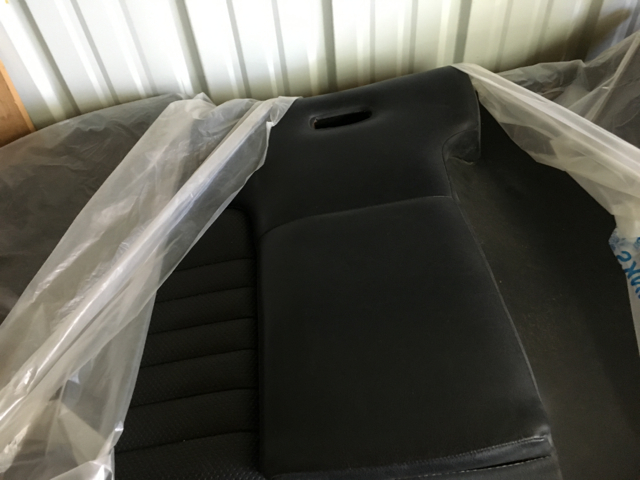 |
|
|
|
| Garland |
Apr 30 2016, 10:40 PM
Post
#69
|
|
Restoration Fanatic Group: Members Posts: 1,431 Joined: 8-January 04 From: ......Michigan...... Member No.: 1,535 Region Association: Upper MidWest |
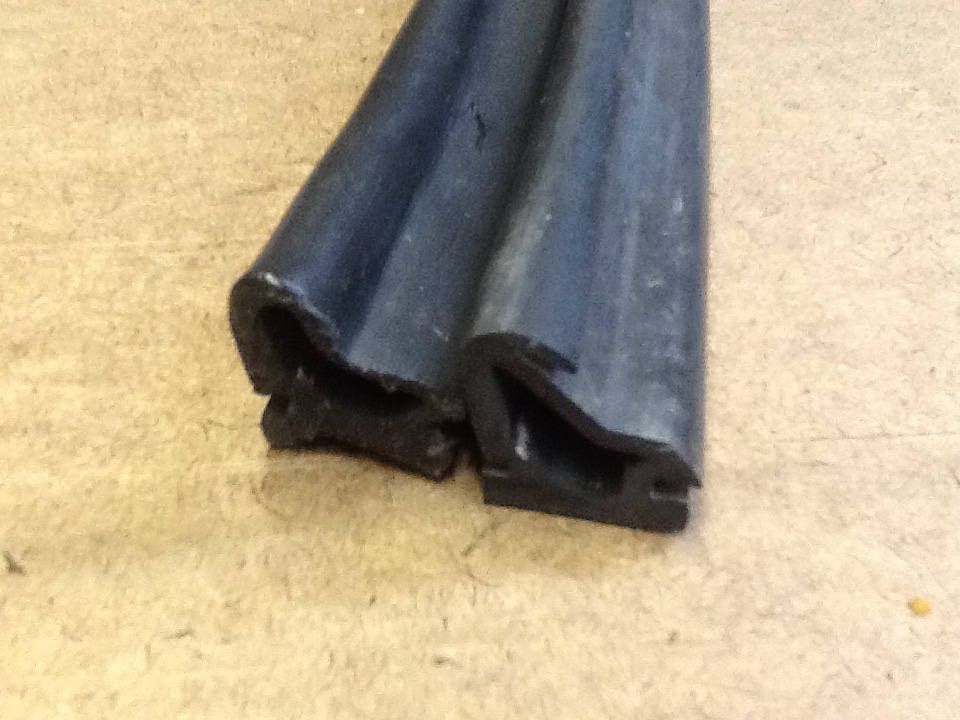
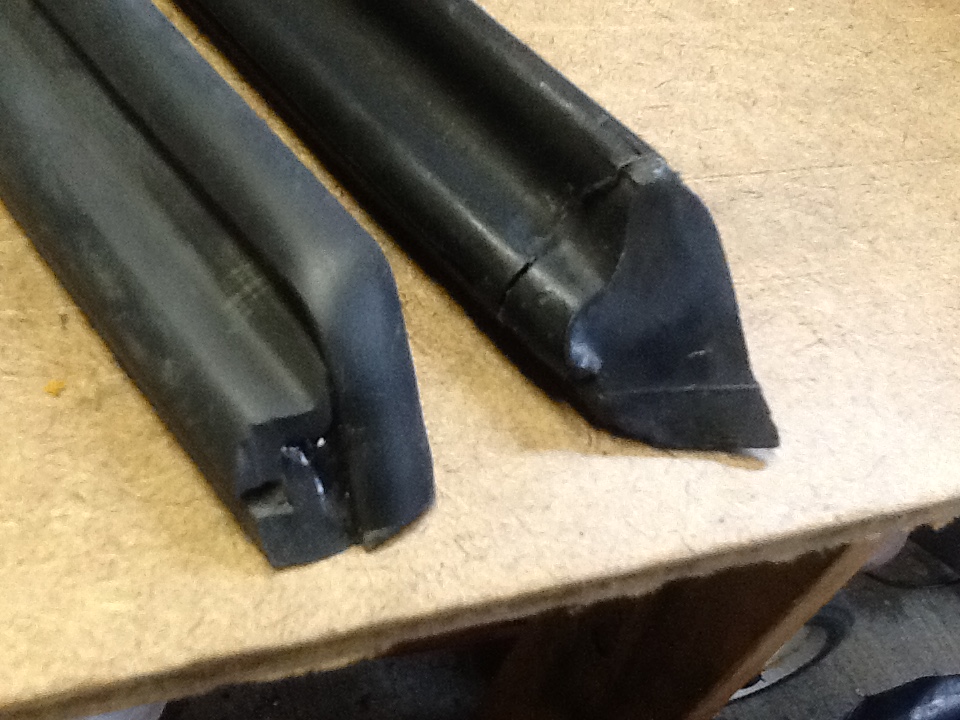
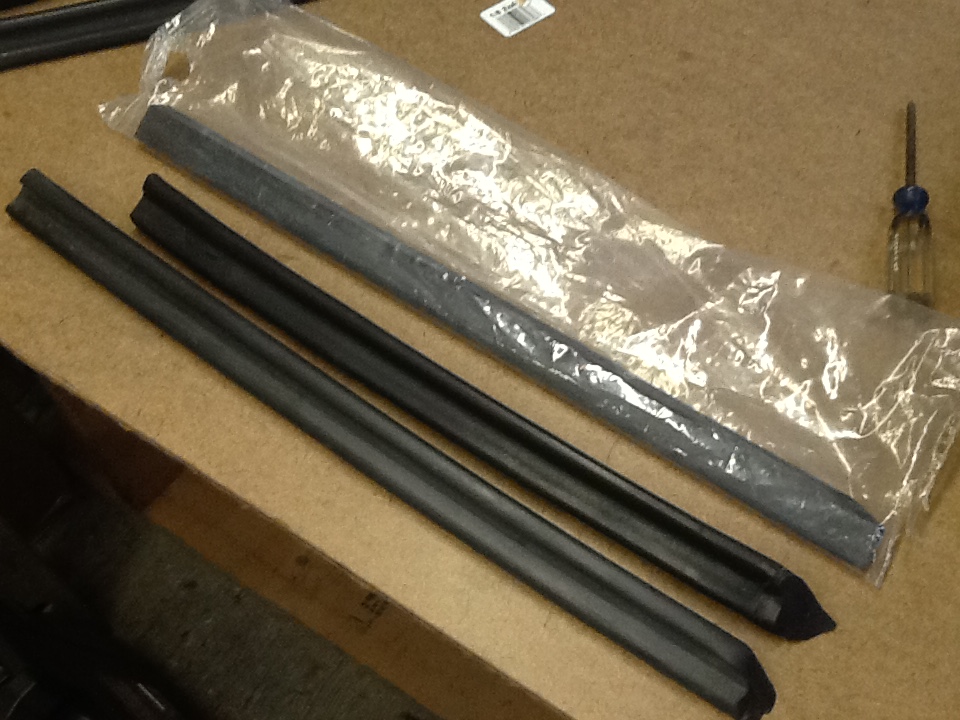
Steam seemed the best idea, so out with the tea pot and after steaming a few times, and blocking out. worked out well.
Also changed out the top padding and fiber board strip only, the rest of the panel held up well.  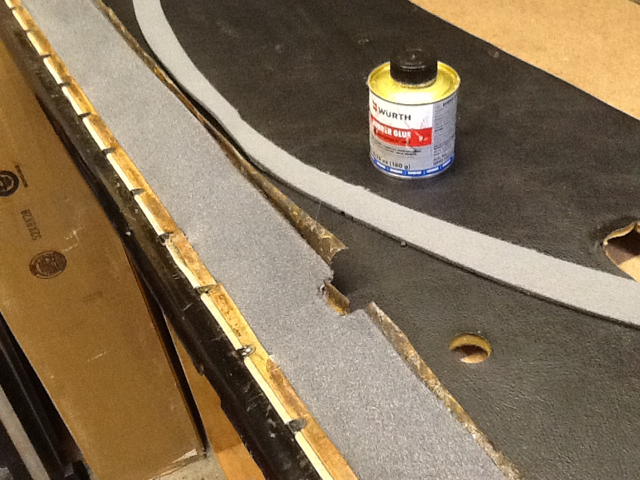  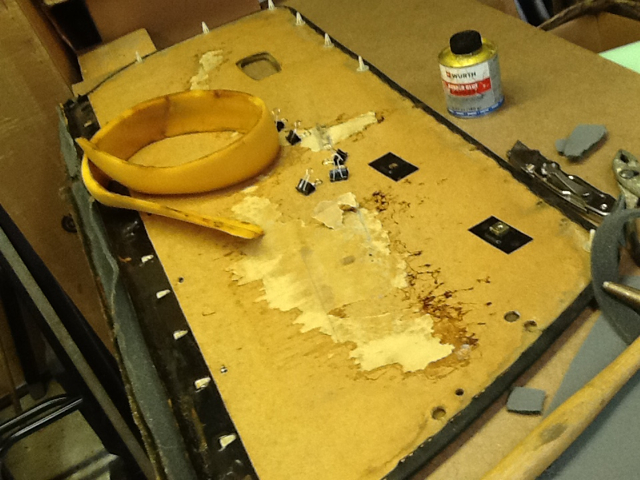 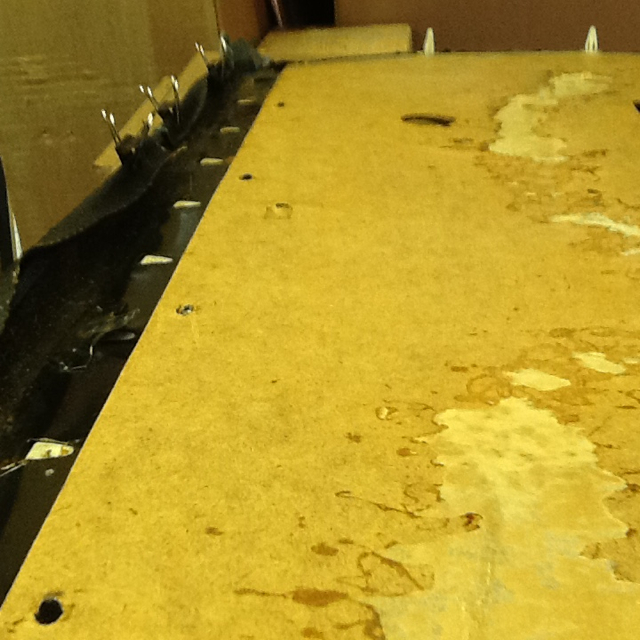  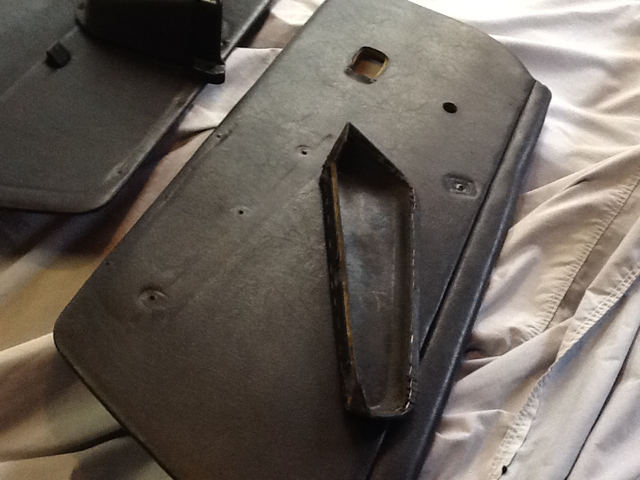 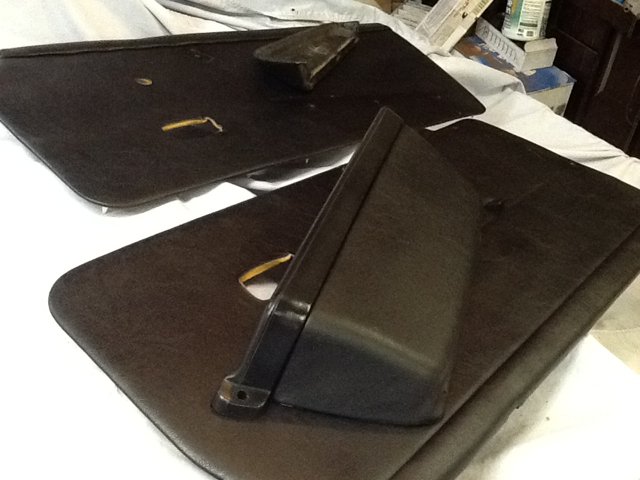 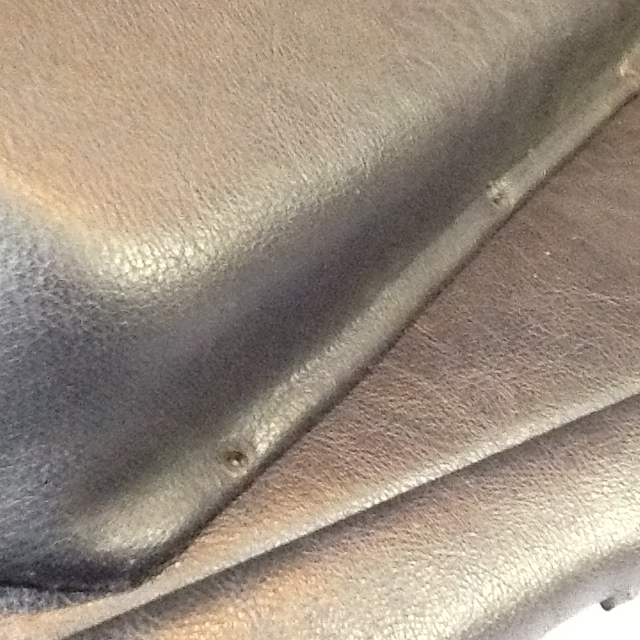 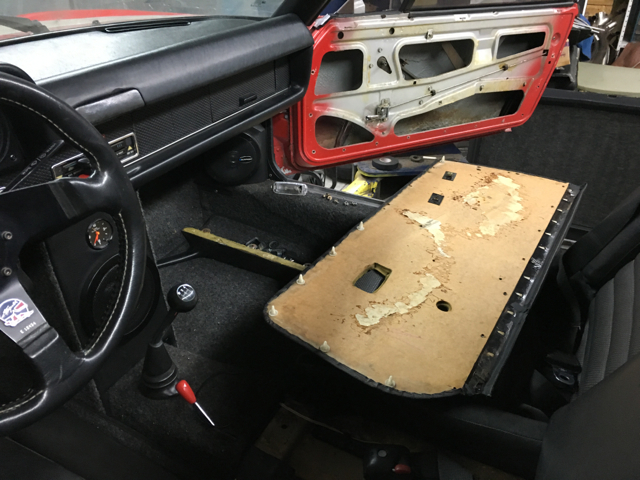  |
|
|
|
| Garland |
Apr 30 2016, 10:49 PM
Post
#70
|
|
Restoration Fanatic Group: Members Posts: 1,431 Joined: 8-January 04 From: ......Michigan...... Member No.: 1,535 Region Association: Upper MidWest |
Finishing up
  Using a early interior, living in the 70's, well early 70's! 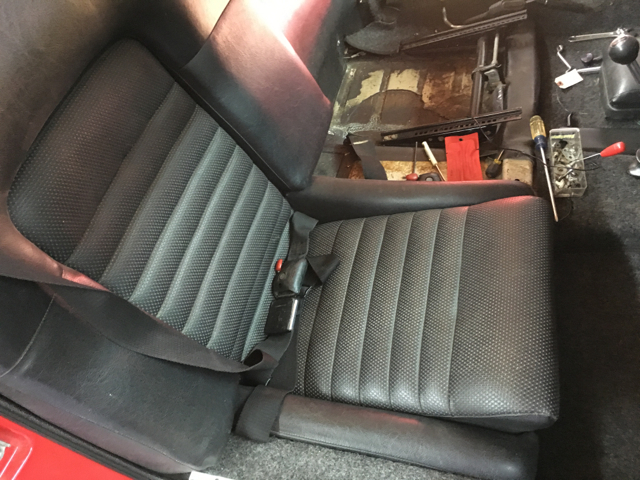 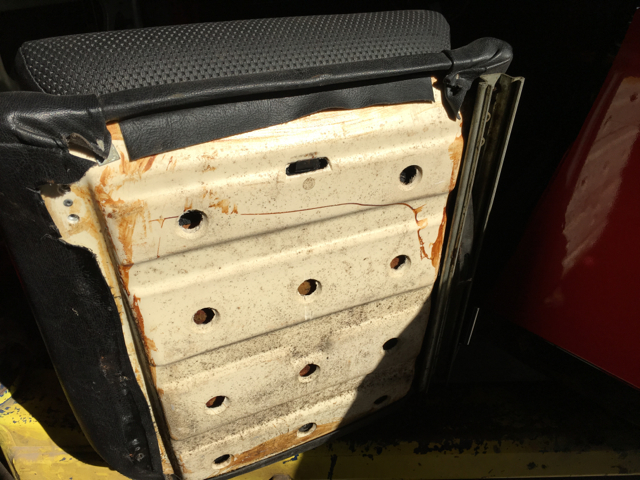 Original riveted handle, still attached. 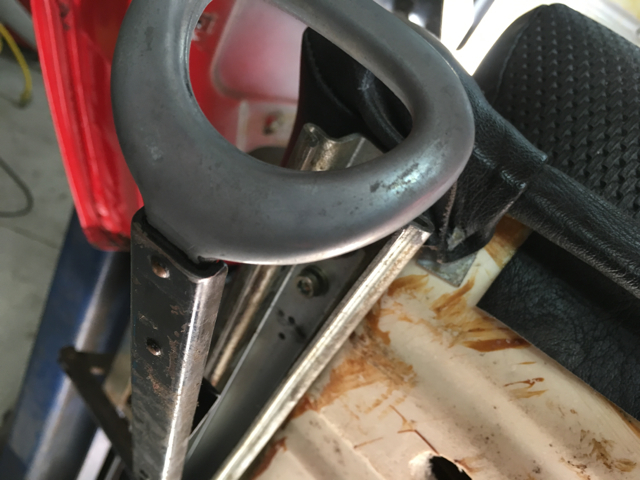 Early interior, requires a early drivers seat. lots of room to reach an early hand brake. 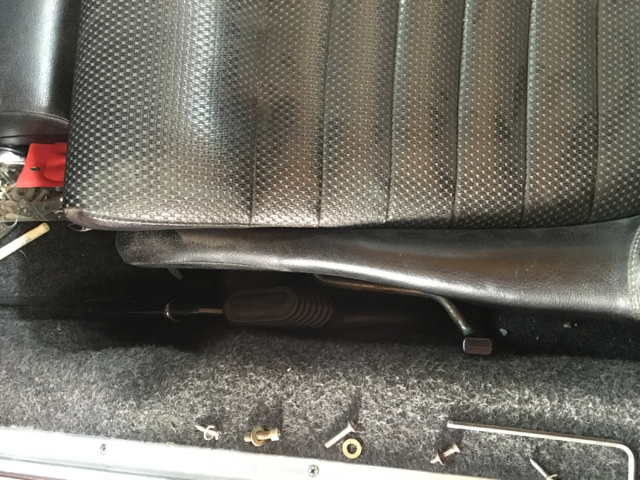 No changes to dash. 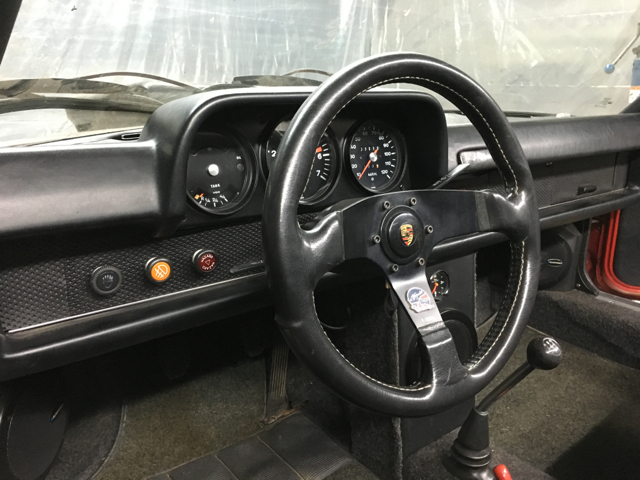 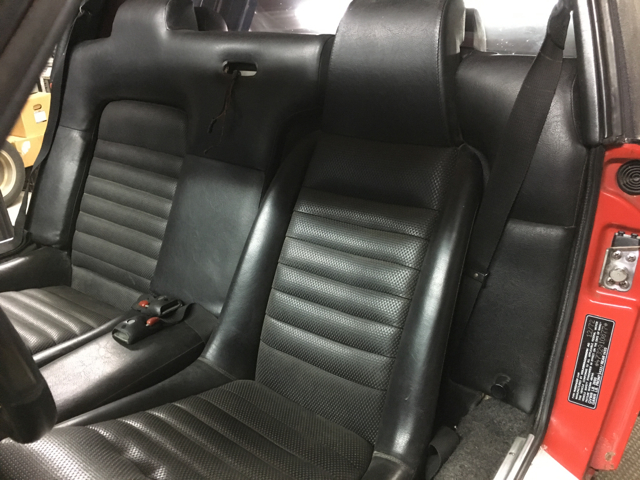 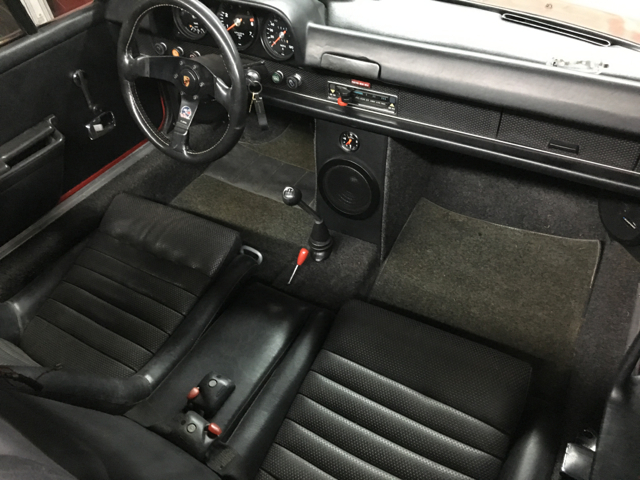 Before 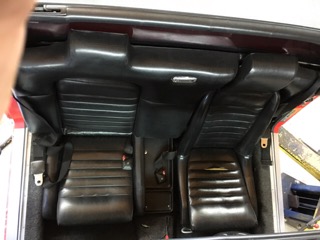 After After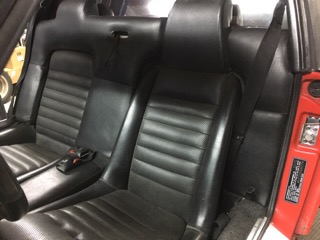 |
|
|
|
| Garland |
Jul 4 2016, 10:41 PM
Post
#71
|
|
Restoration Fanatic Group: Members Posts: 1,431 Joined: 8-January 04 From: ......Michigan...... Member No.: 1,535 Region Association: Upper MidWest |
Headlamps have become a daunting task. Each time I think I have it right, I over think it and start again. The housing is not square, the tuBe for the monts is on a angle. When rotating the housing the geometry changes. I'm getting close, and looking at additional lamps in the turn signal buckets.
I found disscustion about turbo tie rods, well what I got from eBay a few years back looks now to be fake. So....I got a set for a great price here on the form and installed them correctly. Much better with the steering stops, and now I have the bellows to. A lot of catch up and correction this month. Found the front spacers were to large, poor clearance to the fender. Originally I had 10mm in the rear, and 20 in the front. 10 all around should work, waiting on the new front spacers to arrive. 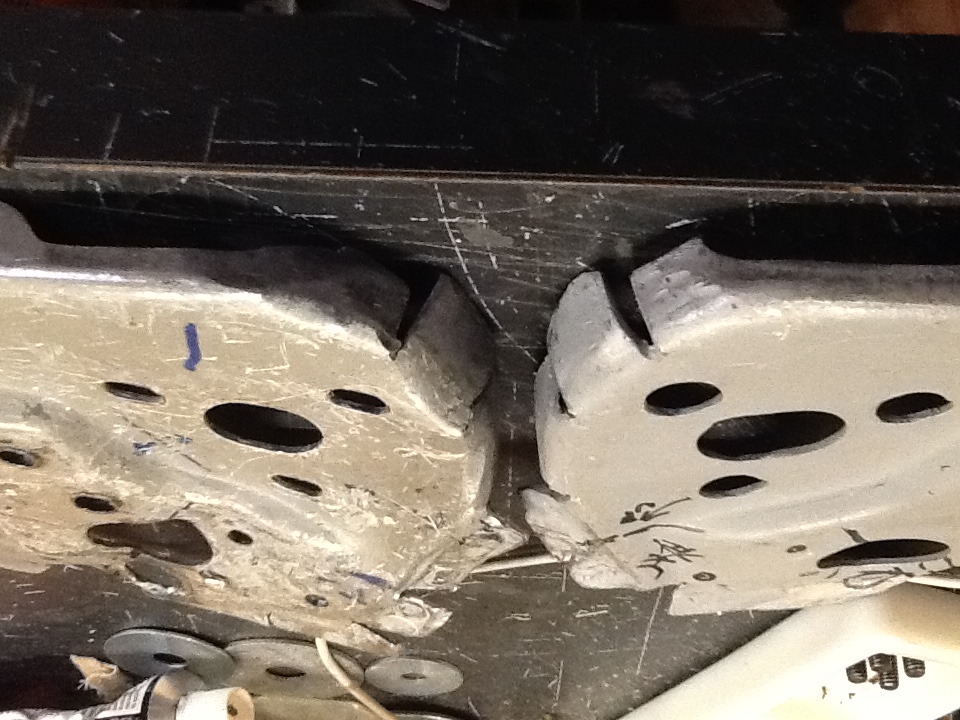  |
|
|
|
| Garland |
Jul 4 2016, 11:06 PM
Post
#72
|
|
Restoration Fanatic Group: Members Posts: 1,431 Joined: 8-January 04 From: ......Michigan...... Member No.: 1,535 Region Association: Upper MidWest |
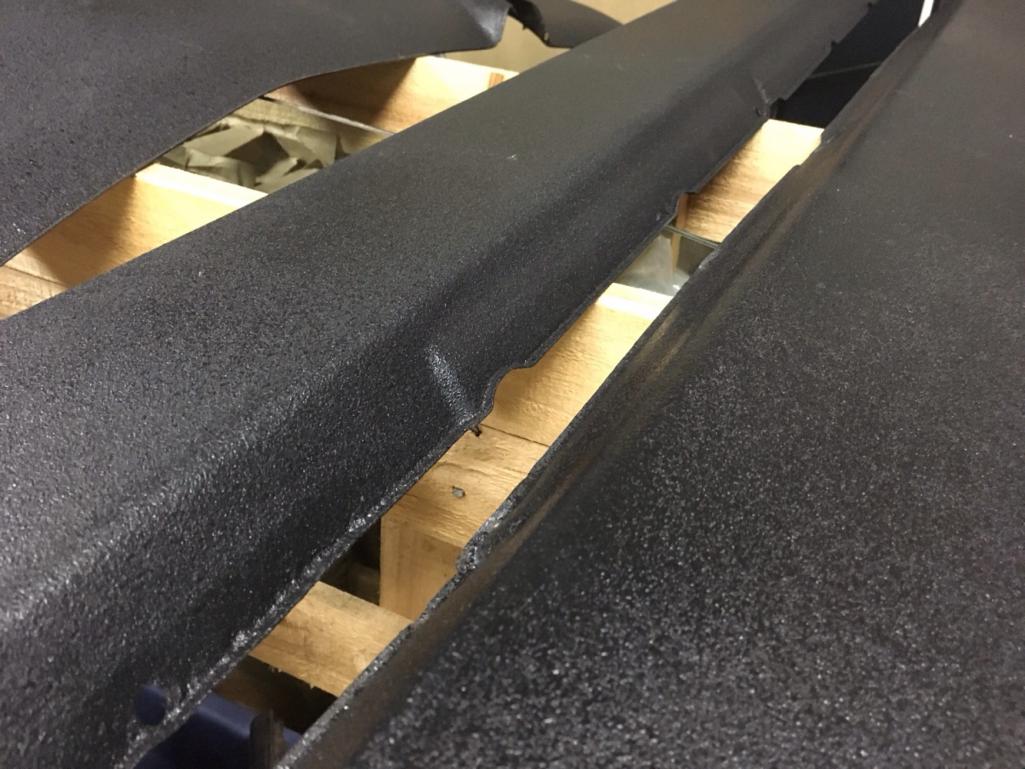
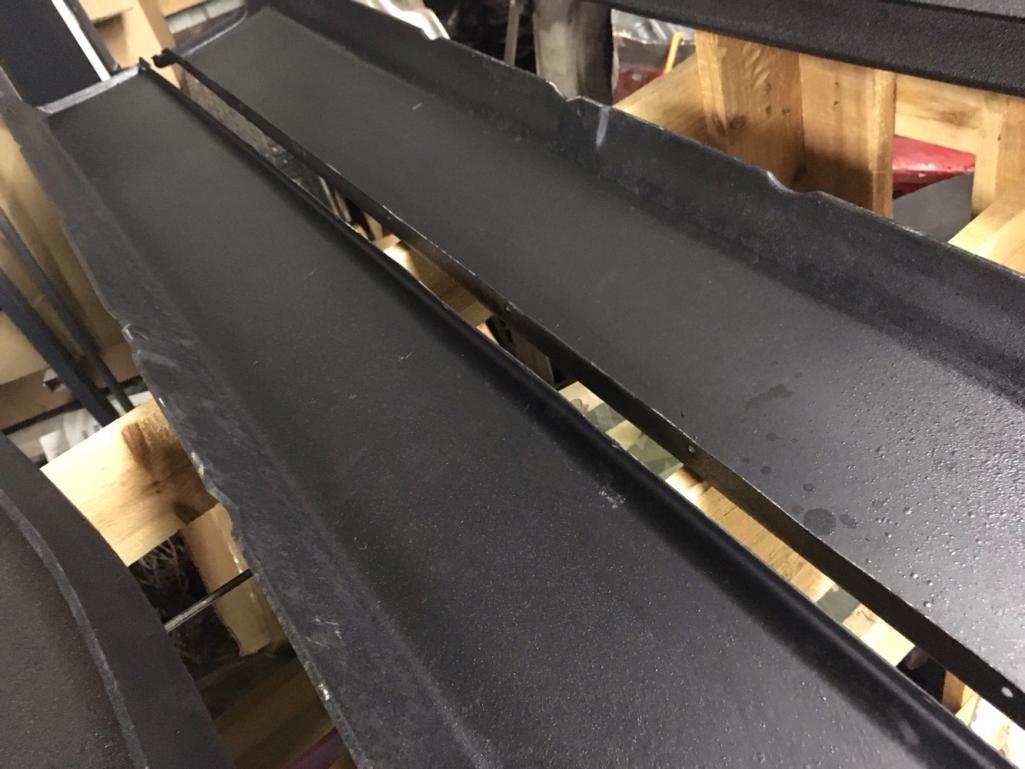
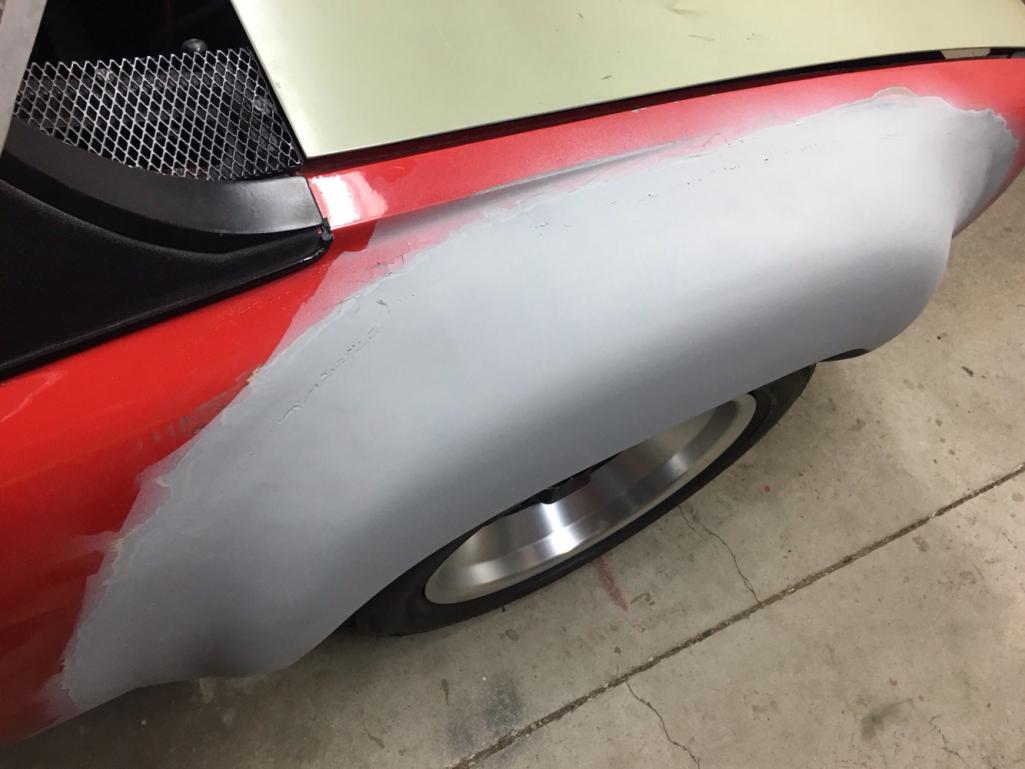
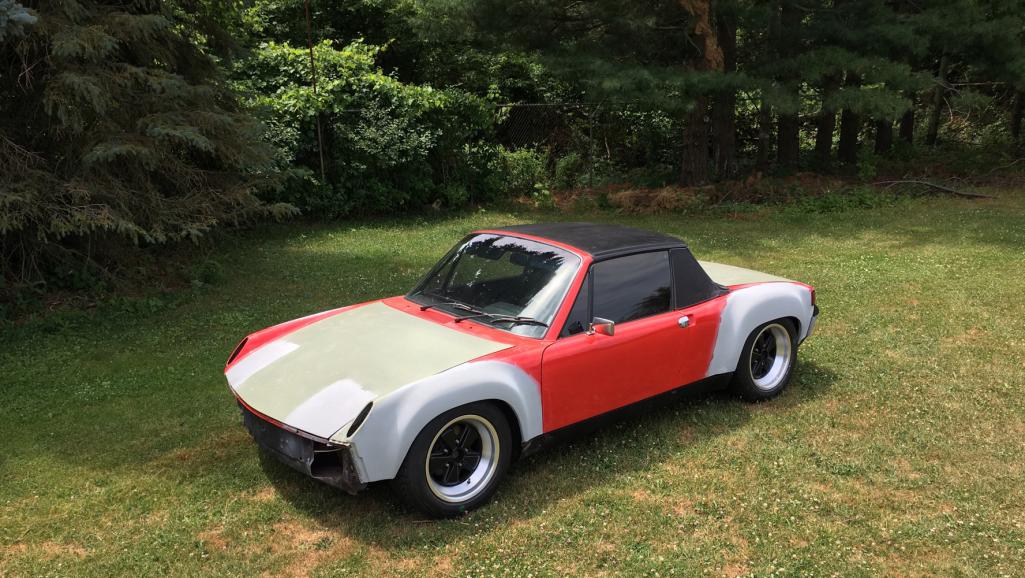
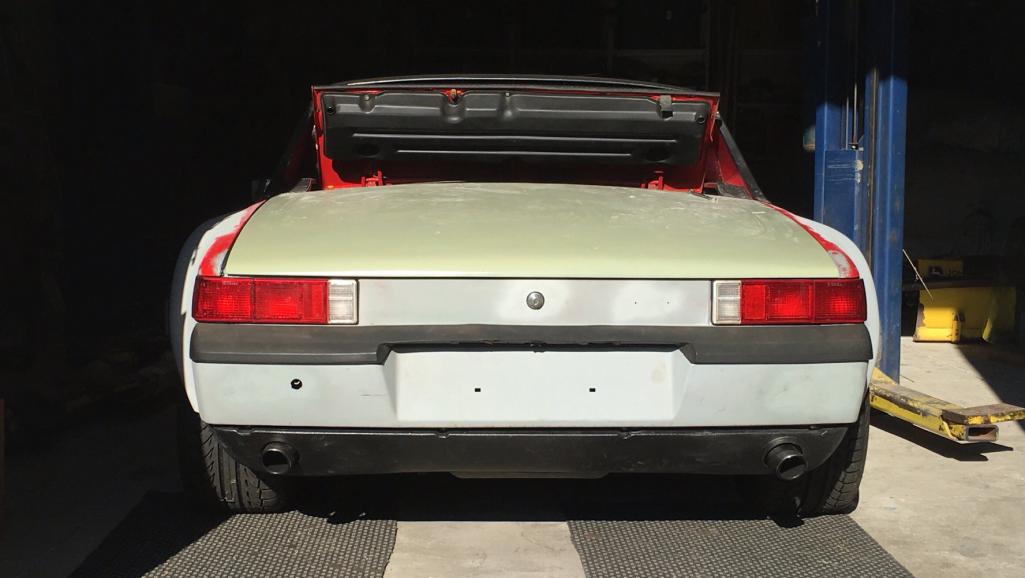
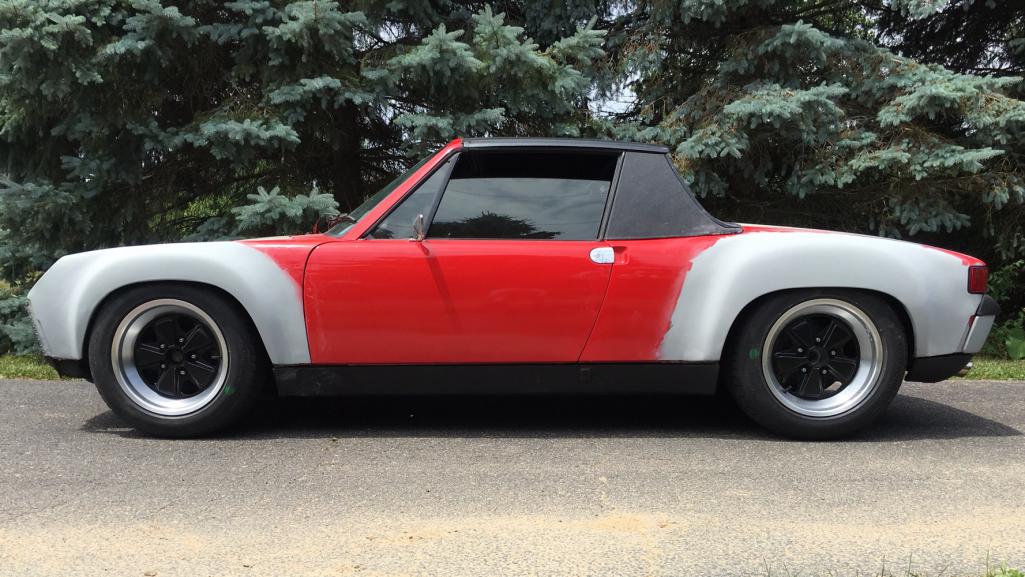
Spent free time on the flares, and valances. Little body filler, and texture finish on the valances, filler and primer on the flares. Still working on the front end and lighting.
        |
|
|
|
| Andyrew |
Jul 4 2016, 11:58 PM
Post
#73
|
|
Spooling.... Please wait Group: Members Posts: 13,381 Joined: 20-January 03 From: Riverbank, Ca Member No.: 172 Region Association: Northern California |
Lookin good! That texture is nice!
|
|
|
|
| Olympic 914 |
Jul 5 2016, 06:35 AM
Post
#74
|
|
Group: Members Posts: 1,789 Joined: 7-July 11 From: Pittsburgh PA Member No.: 13,287 Region Association: North East States |
QUOTE(Andyrew @ Jul 5 2016, 01:58 AM) Lookin good! That texture is nice! (IMG:style_emoticons/default/agree.gif) (IMG:style_emoticons/default/thumb3d.gif) After seeing how nice they turned out I may consider it for mine. |
|
|
|
| 914forme |
Jul 5 2016, 08:46 AM
Post
#75
|
|
Times a wastin', get wrenchin'! Group: Members Posts: 3,899 Joined: 24-July 04 From: Dayton, Ohio Member No.: 2,388 Region Association: None |
(IMG:style_emoticons/default/agree.gif) thats what I love about build threads, getting ideas and products I would have never tried.
Keep up the great work. |
|
|
|
| Garland |
Jul 5 2016, 04:45 PM
Post
#76
|
|
Restoration Fanatic Group: Members Posts: 1,431 Joined: 8-January 04 From: ......Michigan...... Member No.: 1,535 Region Association: Upper MidWest |
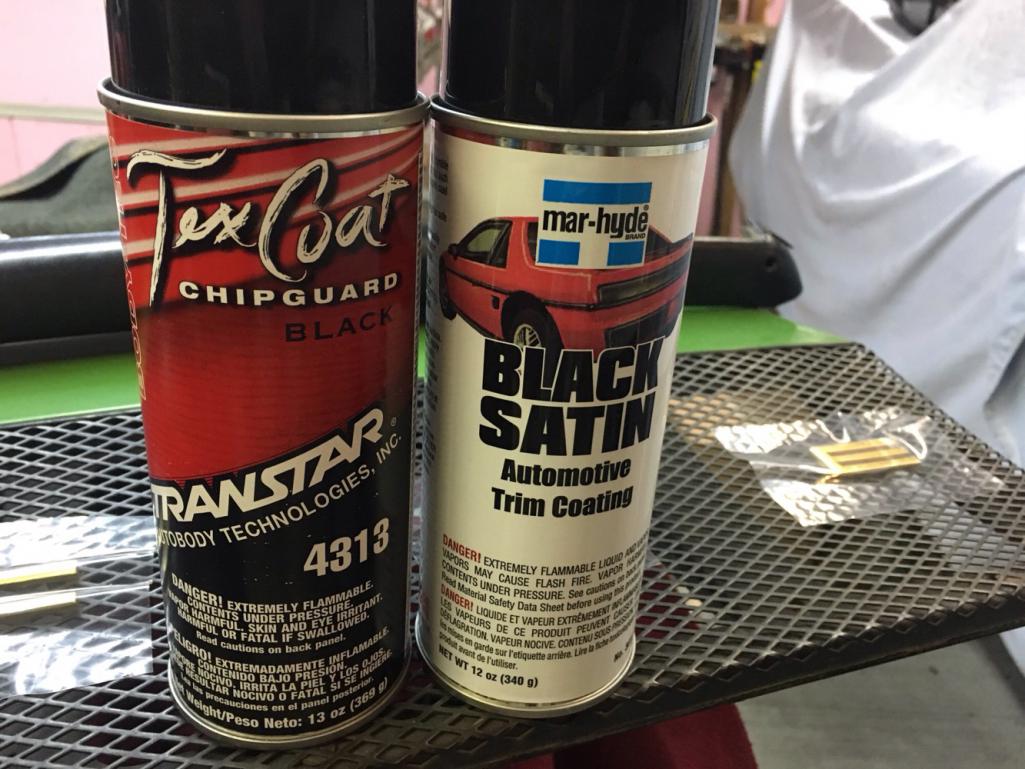
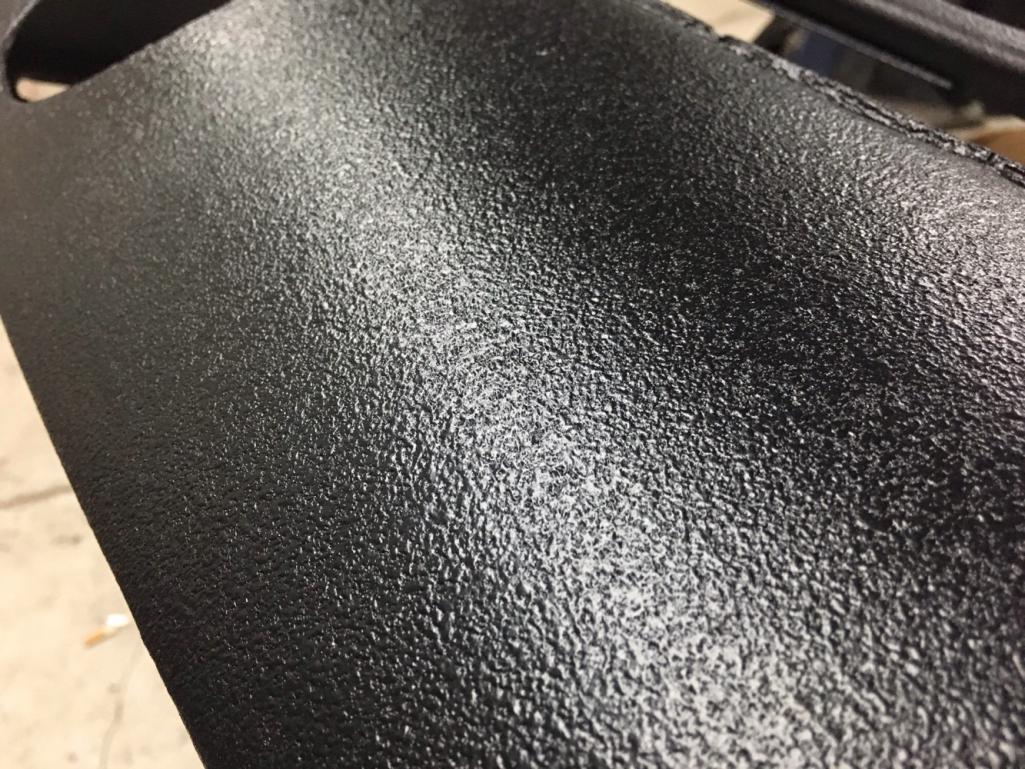
When spraying the Transtar, you can achieve different textures, with distance, and speed. I sprayed 3' away, fast sweeps multiple coats, with full pressure on the nozzle. Multiple coats, from different distances, over the trim black, is very close to factory.
They look good to me, but I have had them turn out closer to factory look in the past. Pratice before spraying pays off. |
|
|
|
| Garland |
Jul 23 2016, 08:58 AM
Post
#77
|
|
Restoration Fanatic Group: Members Posts: 1,431 Joined: 8-January 04 From: ......Michigan...... Member No.: 1,535 Region Association: Upper MidWest |
Thank you to all that are following, and or commenting.
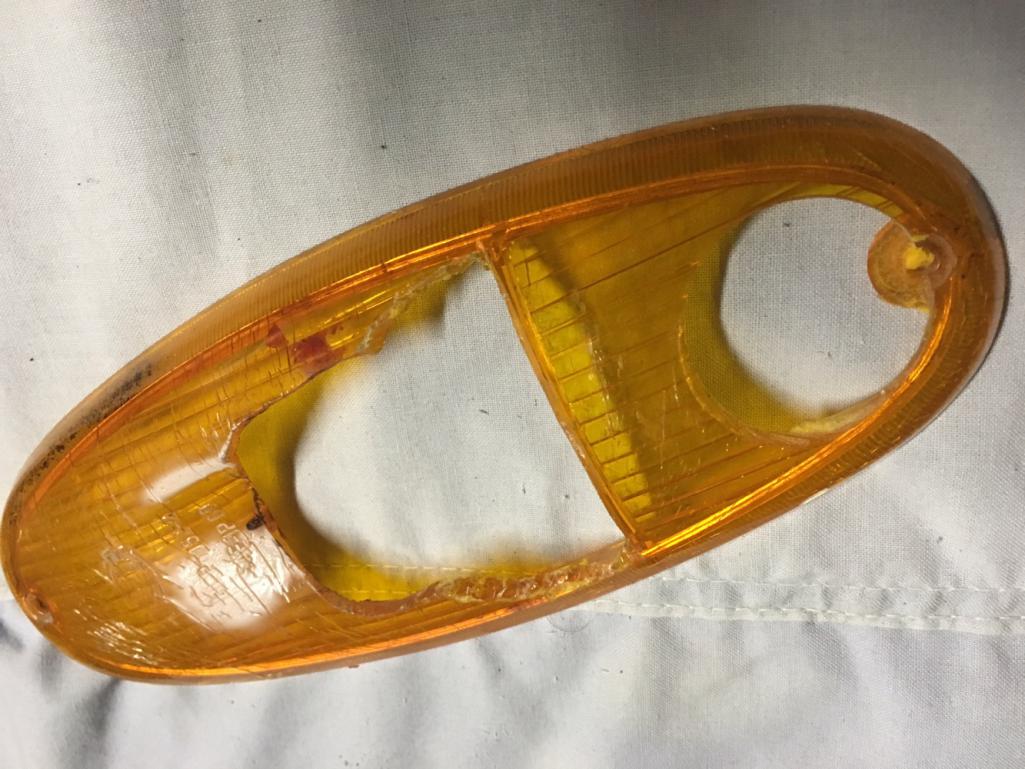
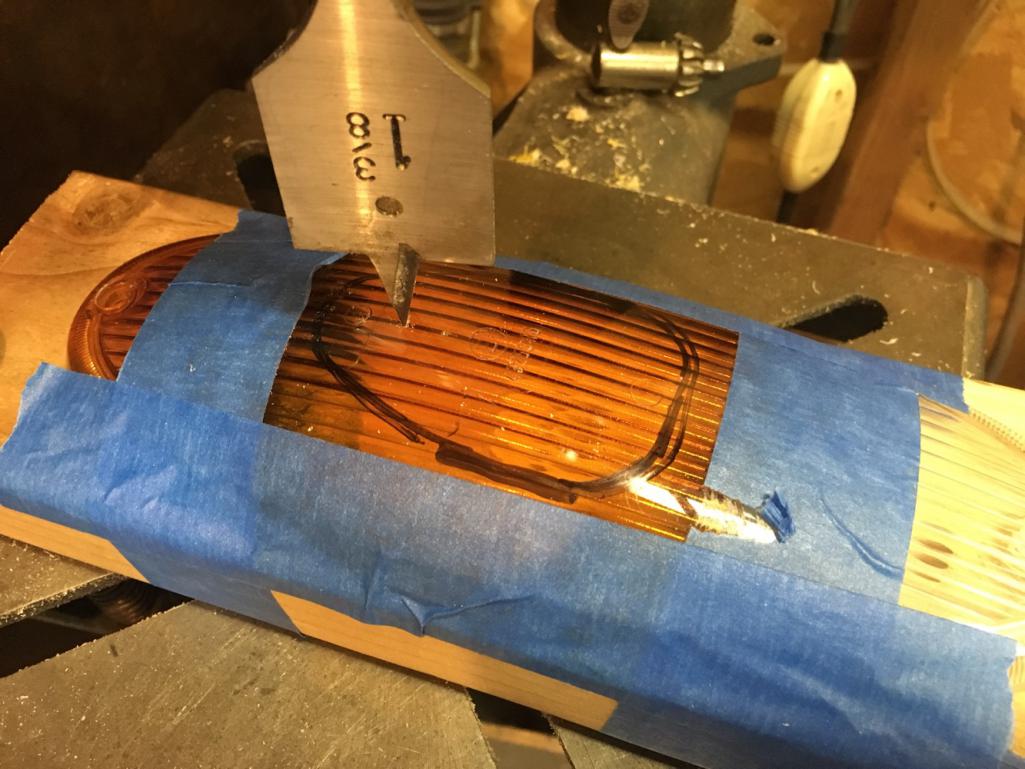
I agree that to be leagal the motorized original lamps I the fog lamp location won't do. So, I am adding HELLA Micro DE Series 12V/35W Xenon Driving Lamps to the turn buckets. 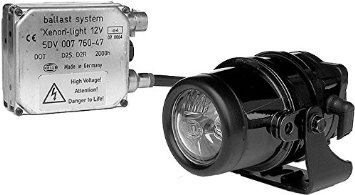 I have seen this size lamp added by others here, thanks for the inspiration. First I turned the bucket upside down, this will allow me and I use the factory sockets for the turn and running lamps. I had already modified the housings with the 2nd socket. 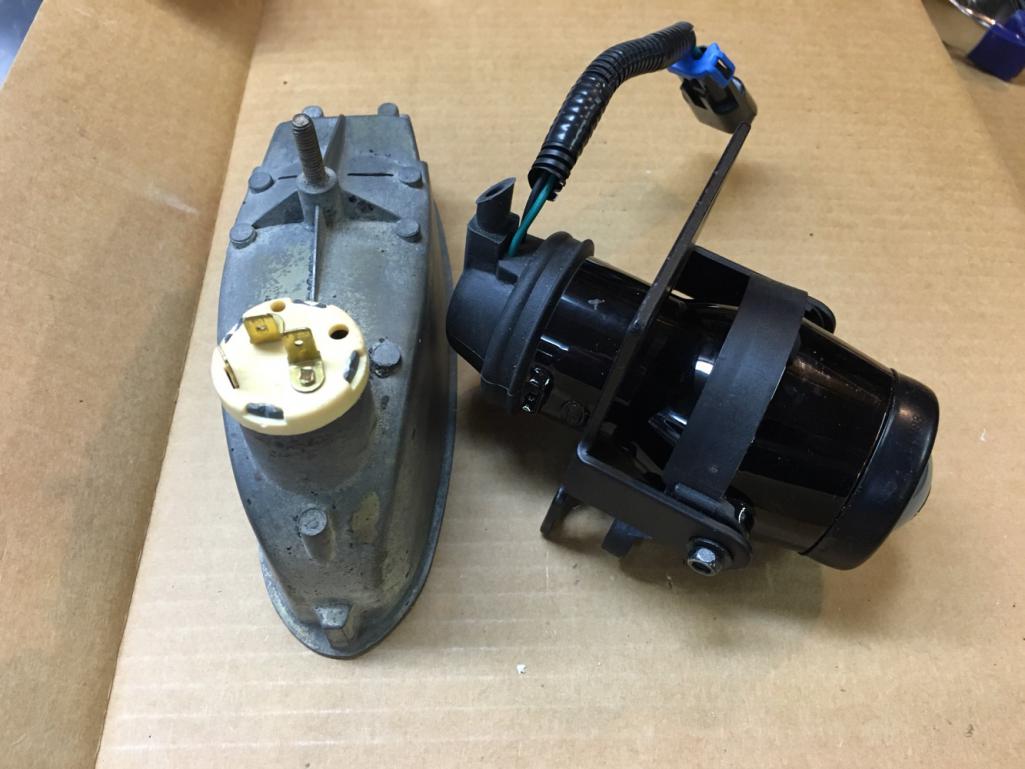 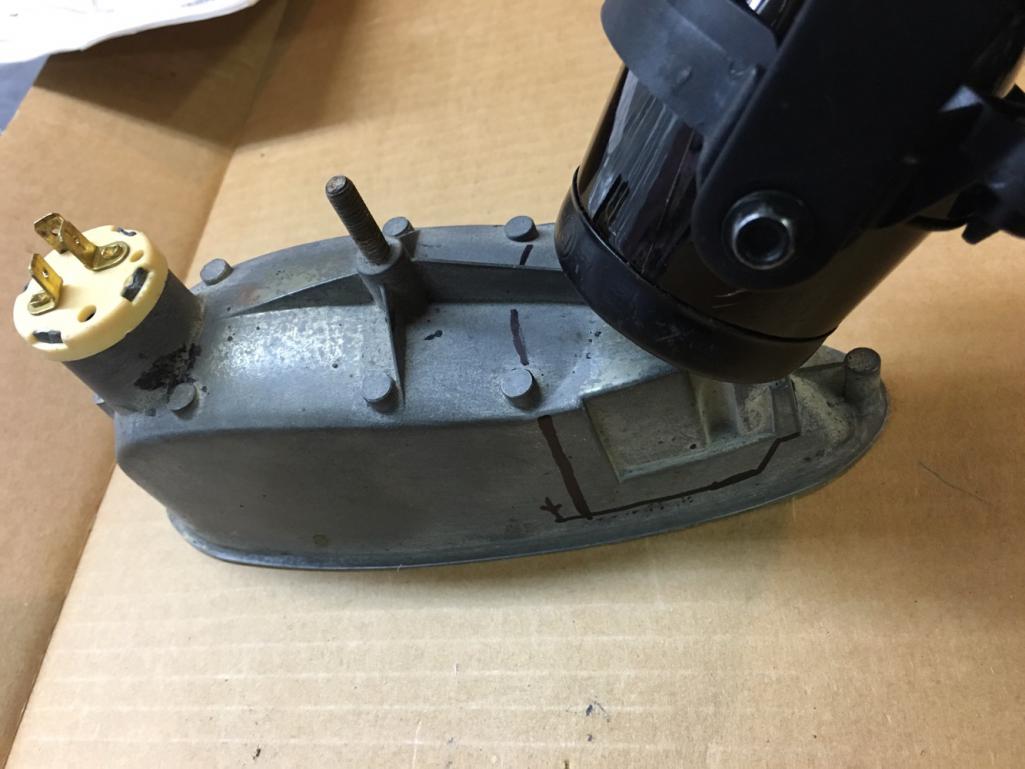 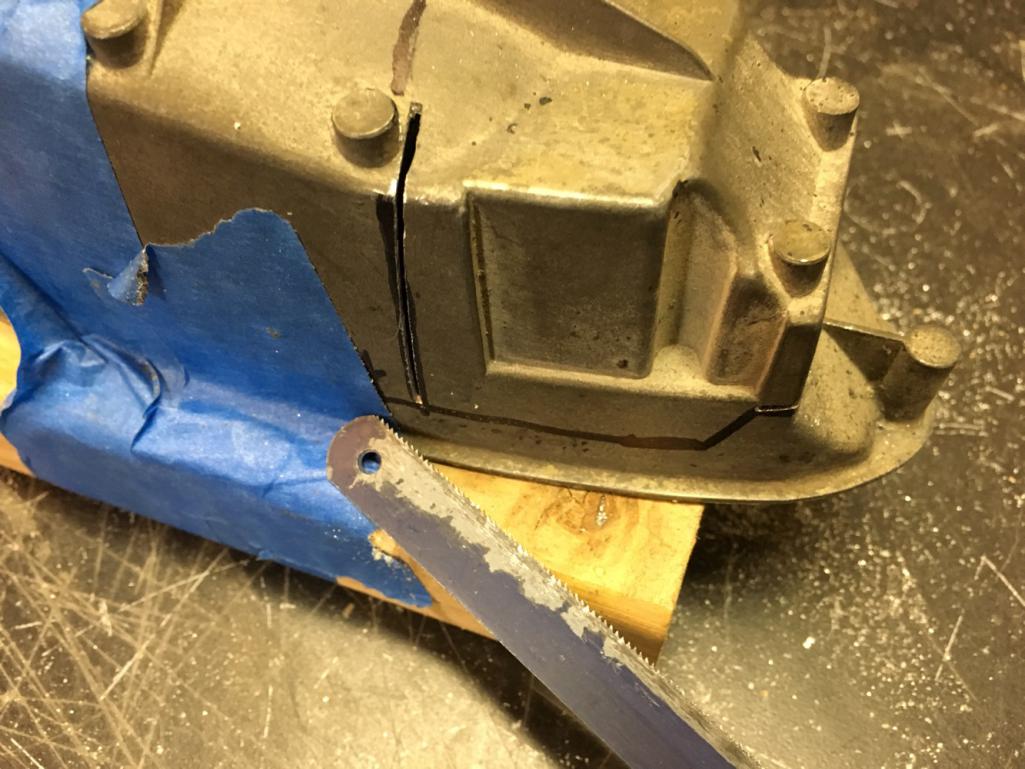 Plotting out the locations, and making many cuts, and lots of time with the file, to minimize the size of the hole. 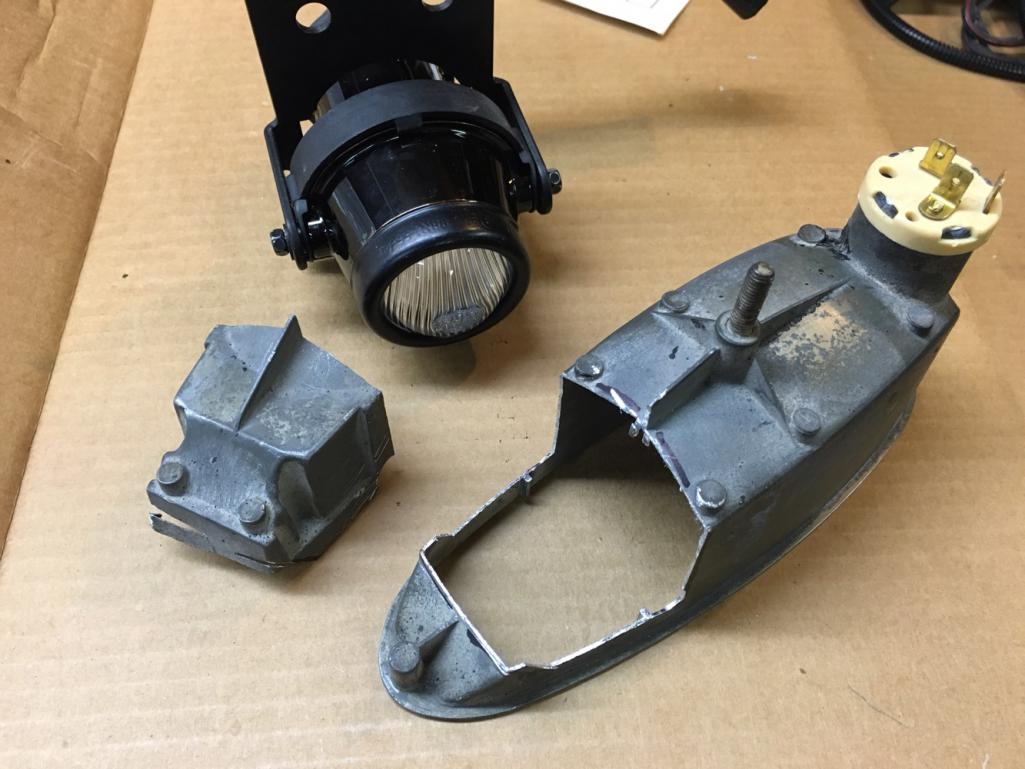 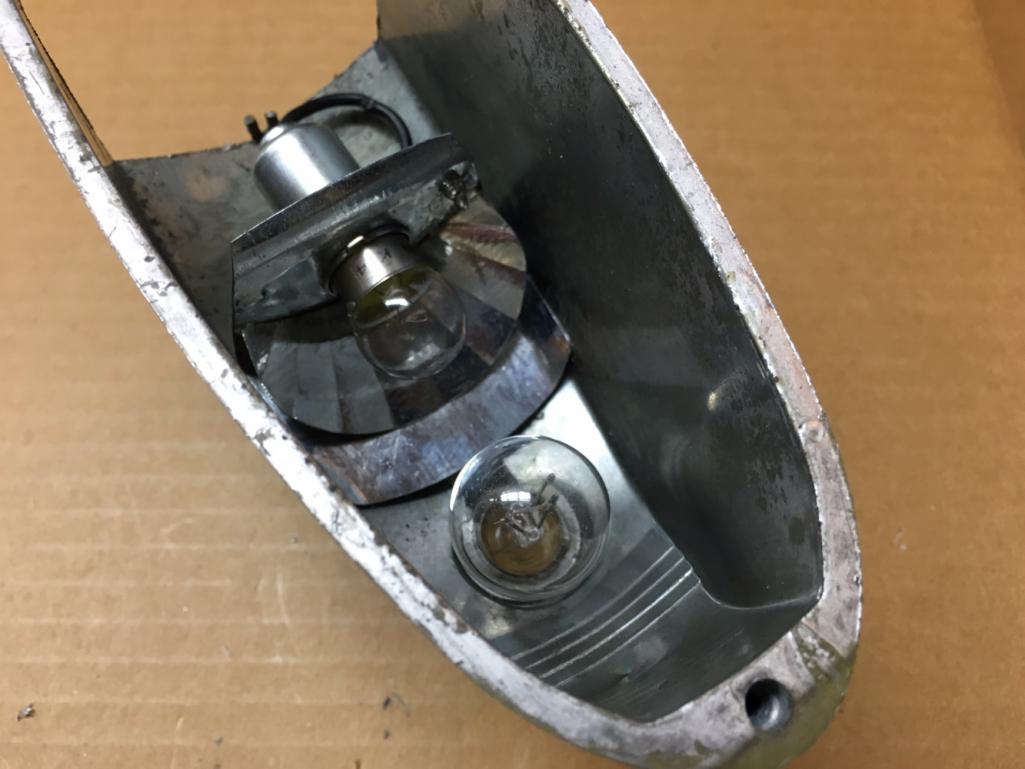 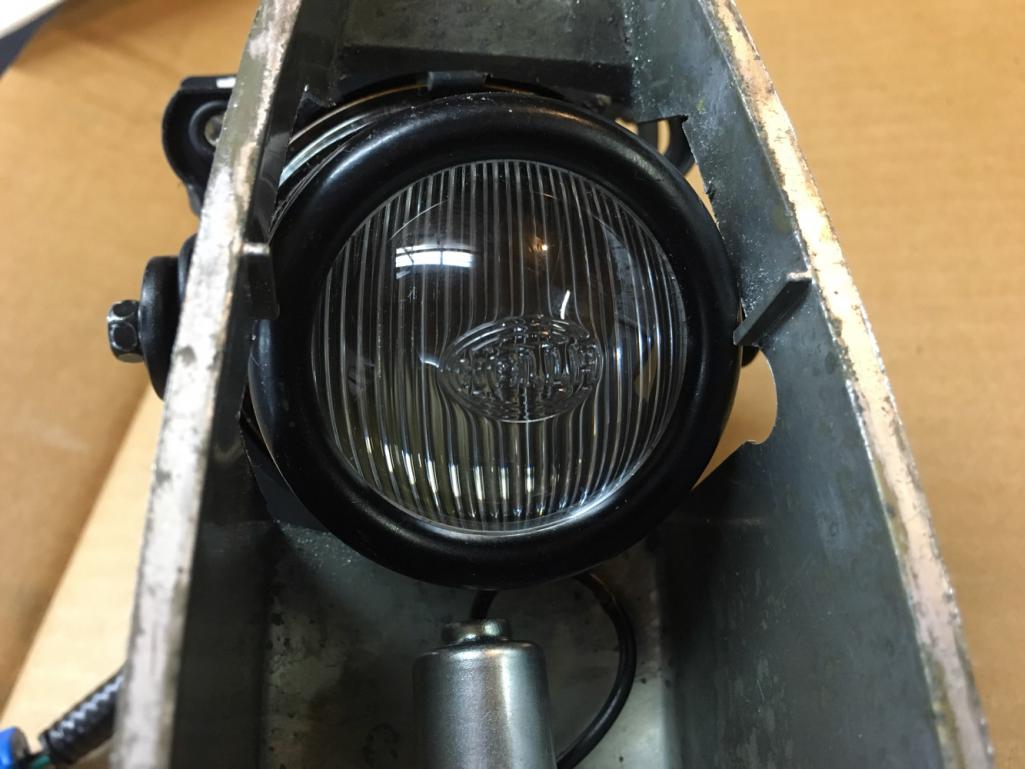 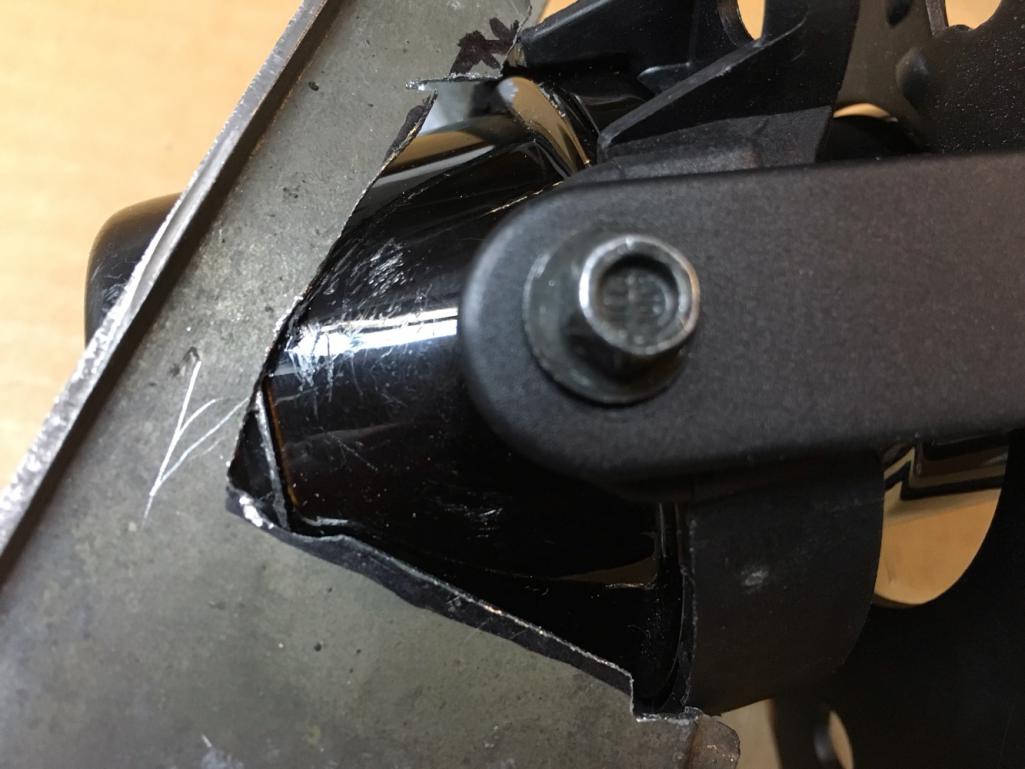 Used wax to figure out the size and shape of the scoop from the lens to the lamp. 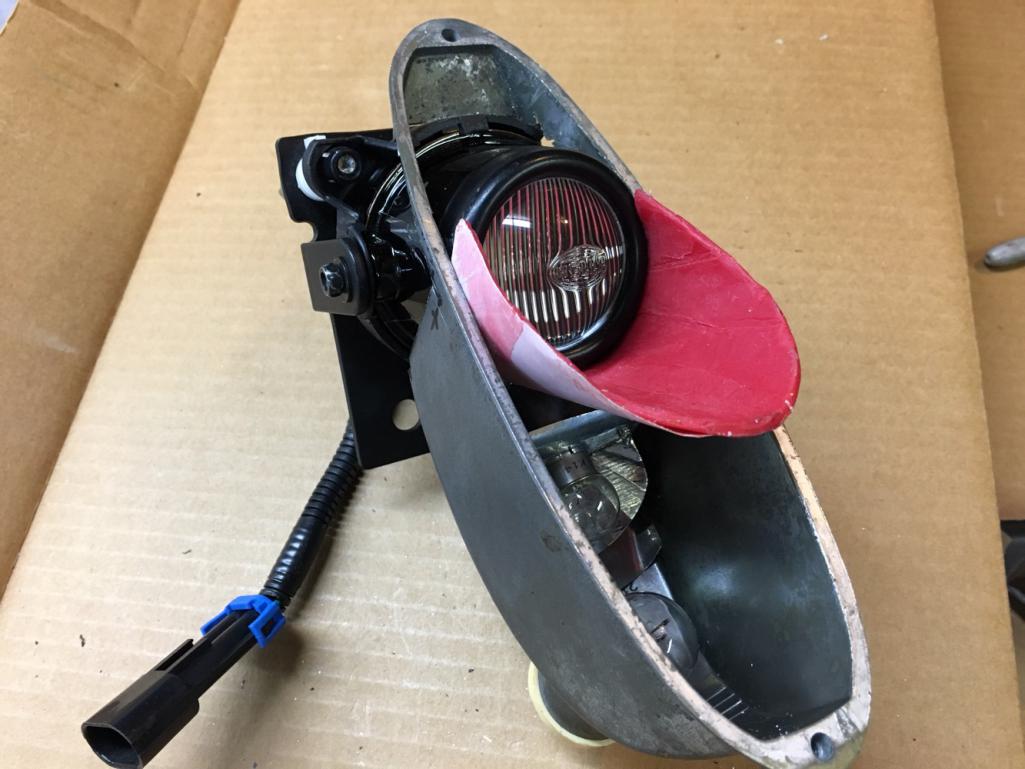 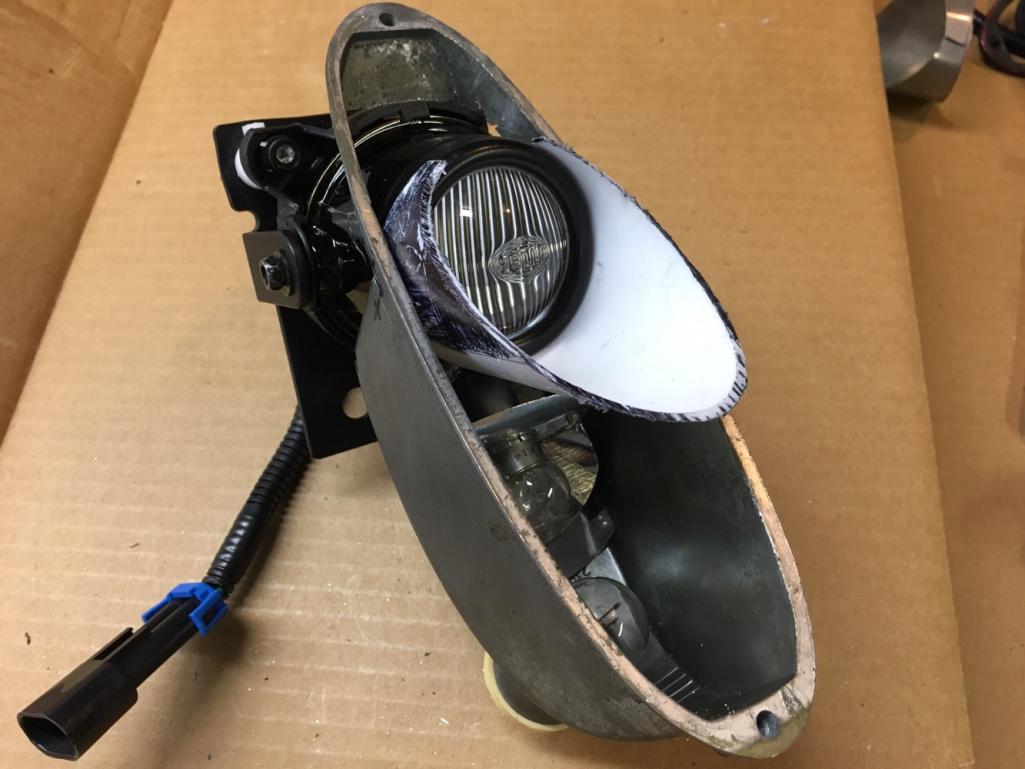 Added a bracket to the driving lamp, so it mounts to the fender independent of the buckets. I'll use a flexible seal between the two from moisture and vibration. This way I will still be able to adjust the lamp direction using the adjustment screws. 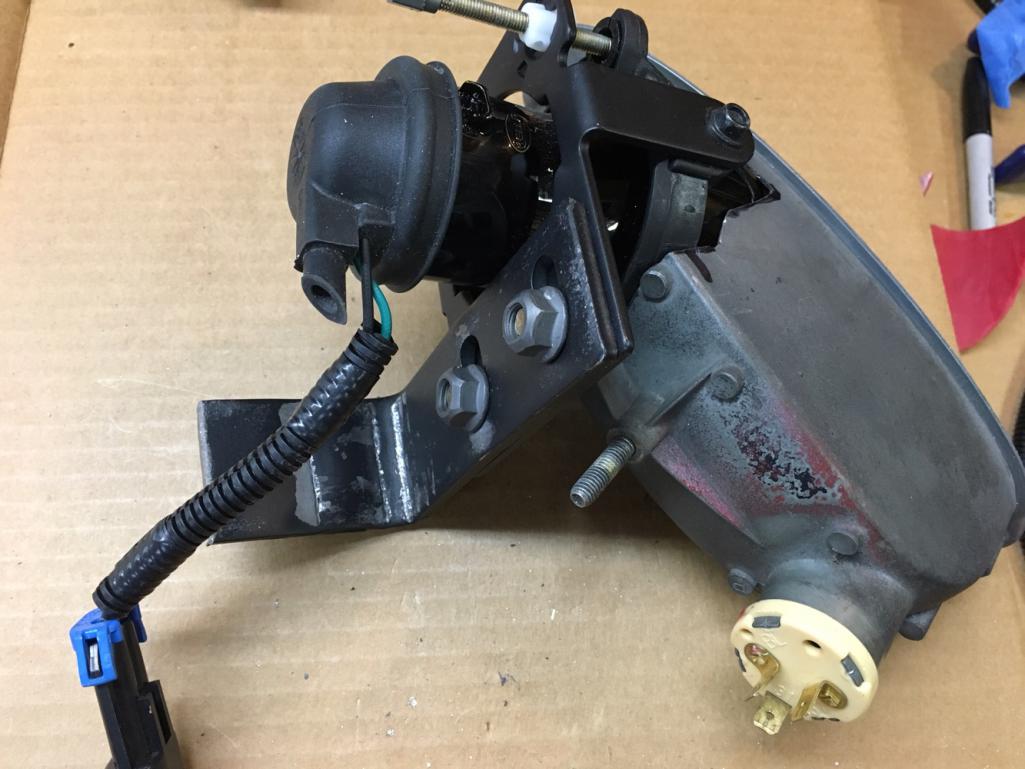 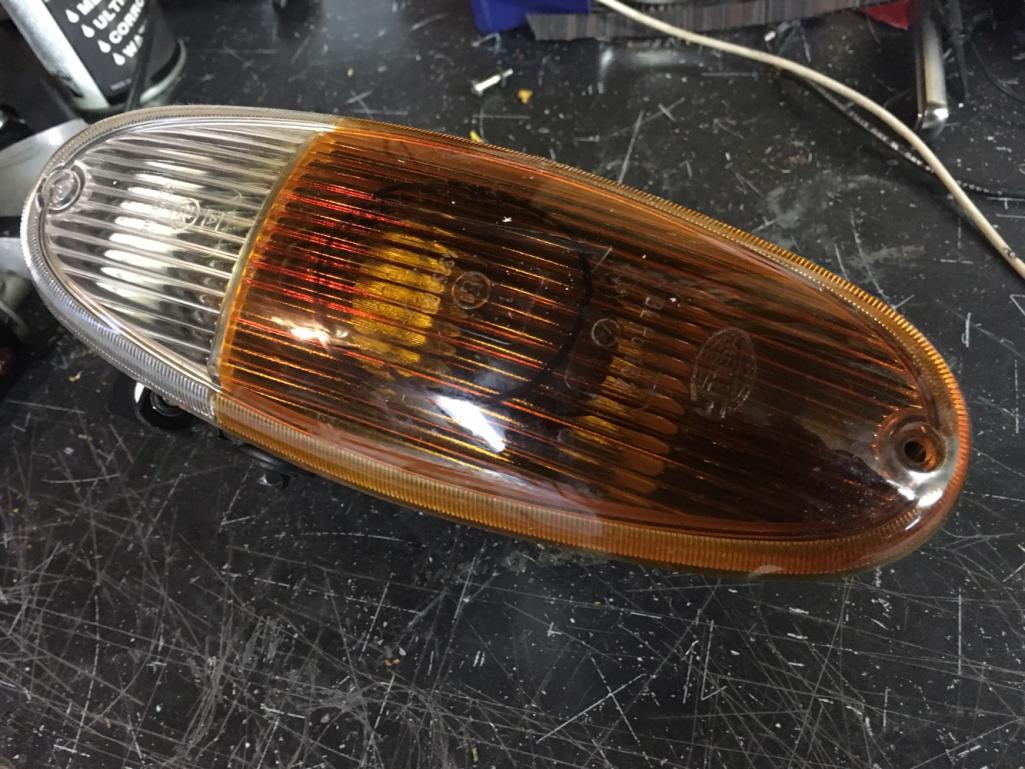 Cutting the lens. Tried hole saw and metal, and wood drills. Heat was a idea but discoloration was a problum. I think I could have got the lens to the correct temp, but hard to control even temp across the lens. So I am going with a wood drill, and saw blade. (IMG:style_emoticons/default/sawzall-smiley.gif) |
|
|
|
| Garland |
Jul 23 2016, 09:11 AM
Post
#78
|
|
Restoration Fanatic Group: Members Posts: 1,431 Joined: 8-January 04 From: ......Michigan...... Member No.: 1,535 Region Association: Upper MidWest |
OK, well here's a few sample cuts, drills, and temp changes on a scrape lens.
 |
|
|
|
| Garland |
Jul 23 2016, 11:01 AM
Post
#79
|
|
Restoration Fanatic Group: Members Posts: 1,431 Joined: 8-January 04 From: ......Michigan...... Member No.: 1,535 Region Association: Upper MidWest |
Here I go
 |
|
|
|
| Darren C |
Jul 23 2016, 01:16 PM
Post
#80
|
|
Member Group: Members Posts: 392 Joined: 26-December 14 From: Chichester UK Member No.: 18,255 Region Association: England |
I can't bear to look.......That wood bit could snag and break the lens real easy.
You might want to try a hole saw instead. Good luck. |
|
|
|
|
1 User(s) are reading this topic (1 Guests and 0 Anonymous Users)
0 Members:

|
Lo-Fi Version | Time is now: 20th July 2026 - 02:18 PM |
Invision Power Board
v9.1.4 © 2026 IPS, Inc.