

 How to inspect the underside and longs without a lift, - Exhaust shield some assembly required How to inspect the underside and longs without a lift, - Exhaust shield some assembly required |
|
|

|
Porsche, and the Porsche crest are registered trademarks of Dr. Ing. h.c. F. Porsche AG.
This site is not affiliated with Porsche in any way. Its only purpose is to provide an online forum for car enthusiasts. All other trademarks are property of their respective owners. |
|
|
  |
| seanpaulmc |
 Apr 3 2026, 05:43 PM Apr 3 2026, 05:43 PM
Post
#181
|
|
Member  Group: Members Posts: 463 Joined: 6-December 16 From: Orlando, FL Member No.: 20,649 Region Association: South East States 
 |
To install the tail light for trial fitting I still have to finish trimming and welding of the inner fender. The white line is about where it’s needs to be cut back.
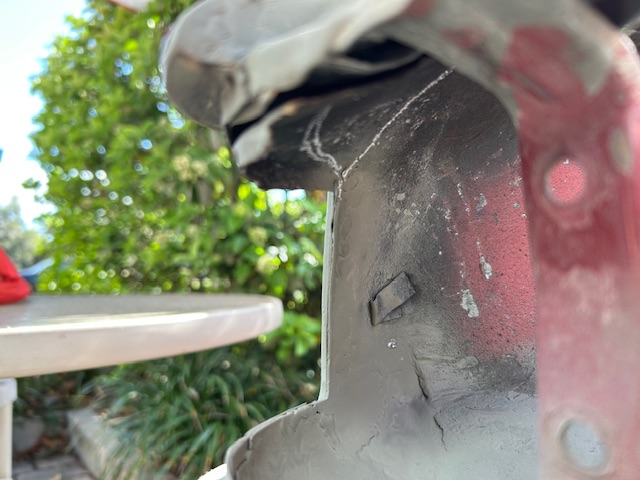 Trimmed out of the way. 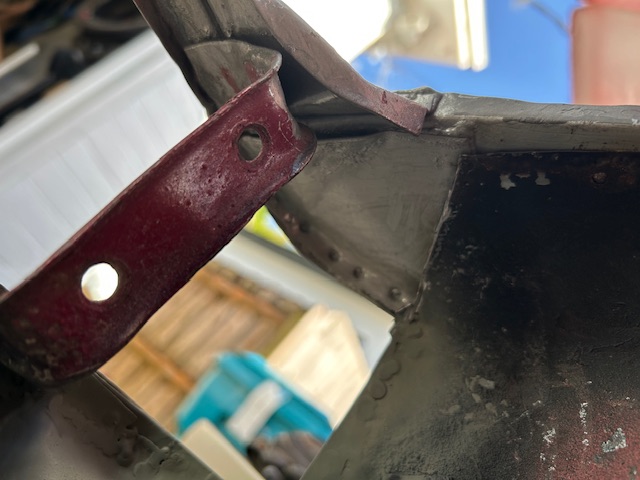 Considering the hackery involved with “repairing” this corner of the car, the fit of the replacement tail light is pretty good. 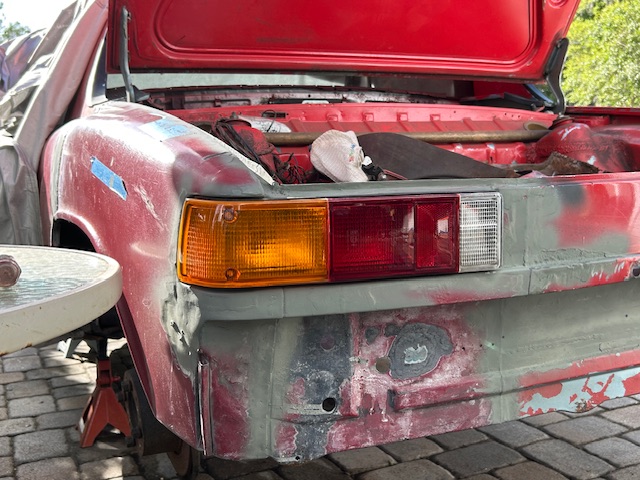 This is with the bolts holding the light assembly slightly tightened. The fit is good but there is a gap in the top edge which I think is mostly due to me removing the lead in this joint before I had a real plan for this corner. It will need to be re-leaded to complete the joint anyways. 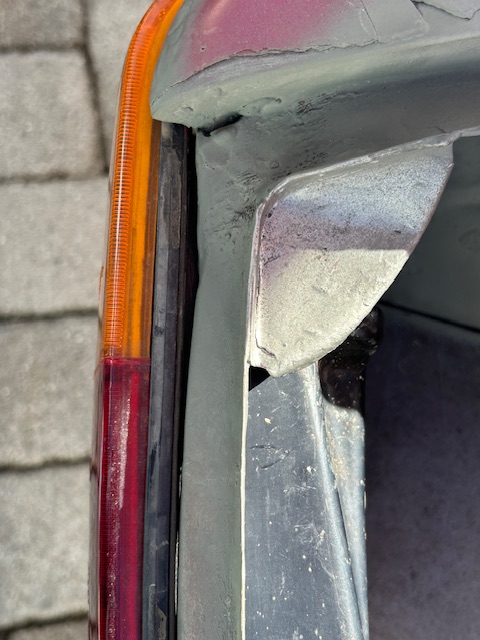 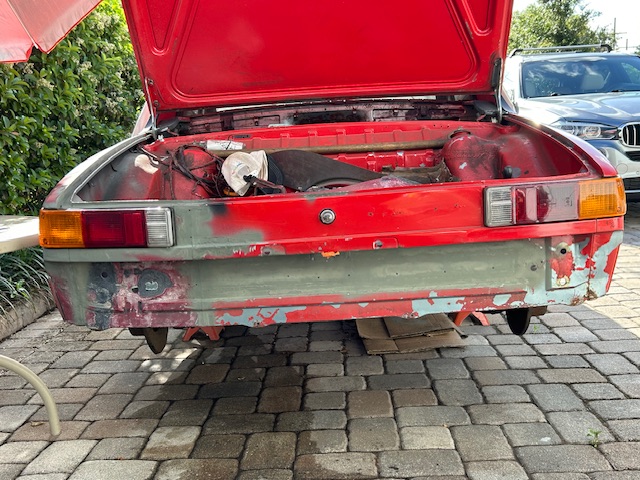 Being a first timer at this I can work with this. |
   |

 
|
| 930cabman |
Apr 3 2026, 06:34 PM
Post
#182
|
|
Advanced Member Group: Members Posts: 4,833 Joined: 12-November 20 From: Buffalo Member No.: 24,877 Region Association: North East States
|
I would consider sealing the light/body intersection with a sealant of your choice.
I like Dow Corning 756 paintable silicone |
|
|
|
| seanpaulmc |
Apr 12 2026, 06:29 PM
Post
#183
|
|
Member Group: Members Posts: 463 Joined: 6-December 16 From: Orlando, FL Member No.: 20,649 Region Association: South East States
|
This weekend worked on finishing up the quarter panel donor replacement with some grinding and patching.
You remember the original tail panel piece that was removed. 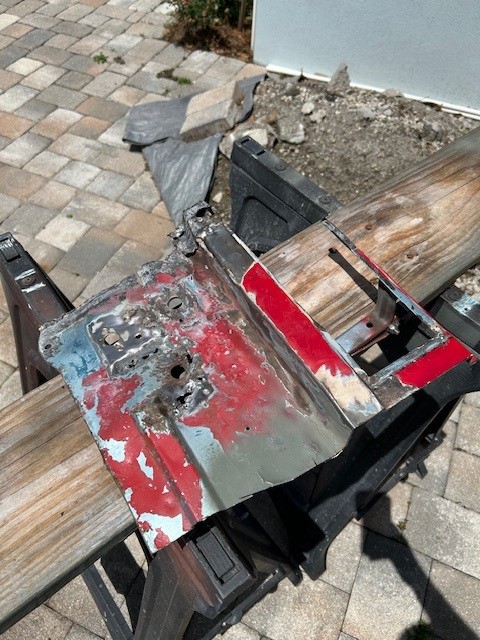 There's still some life to it. I'll just take this little piece here. 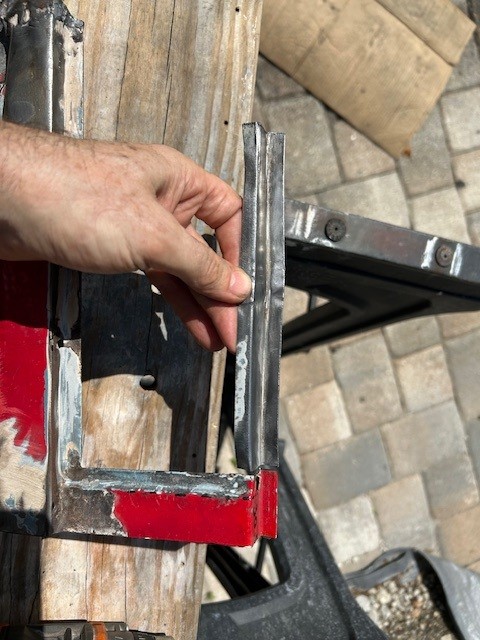 And put it right here. 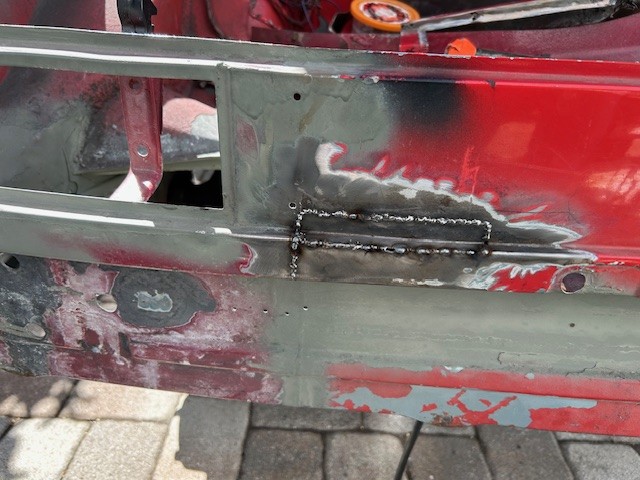 I think all the big holes are done now. |
|
|
|
| seanpaulmc |
Apr 12 2026, 06:52 PM
Post
#184
|
|
Member Group: Members Posts: 463 Joined: 6-December 16 From: Orlando, FL Member No.: 20,649 Region Association: South East States
|
I am pretty happy with the outcome of the quarter panel graft. It certainly exceeds my expectations (there weren't any). I mean, it really couldn't have been any worse than the last guy, right? If you don't believe me, go look at post 125.
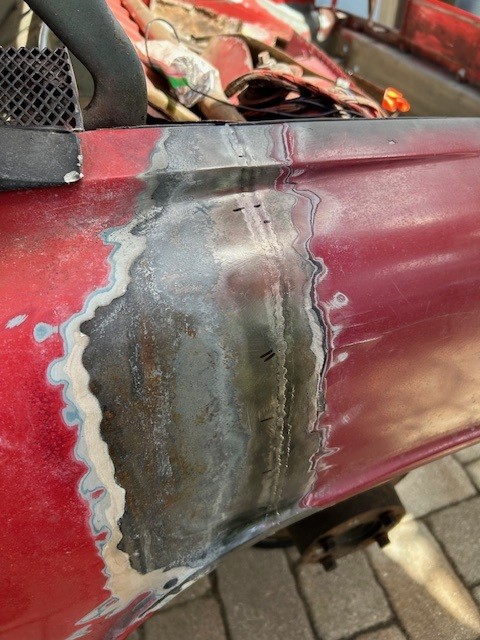 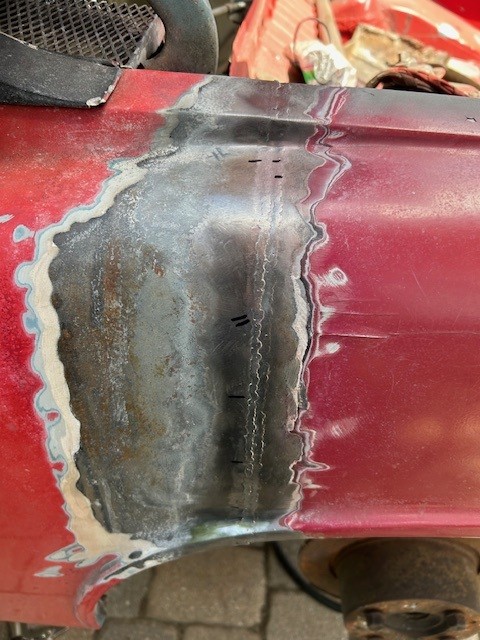 Since the layering of filler on both the existing panel and the donor panel make it hard to visually check the straightness of the welded seam, I used a small straight edge to check it. 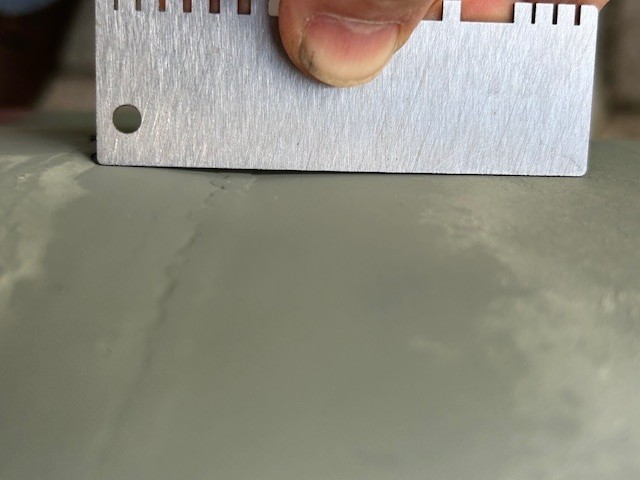 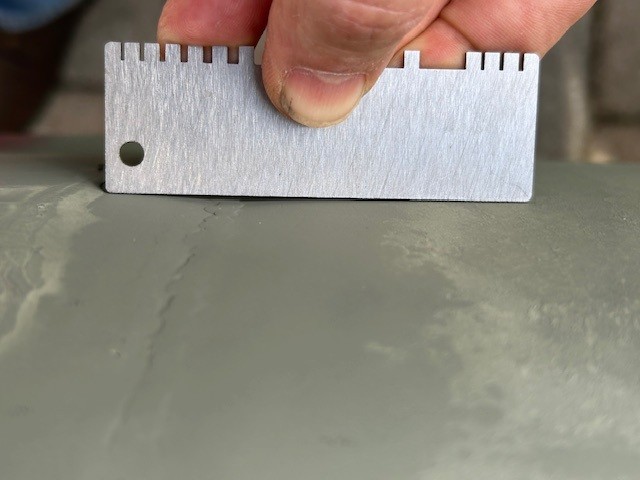 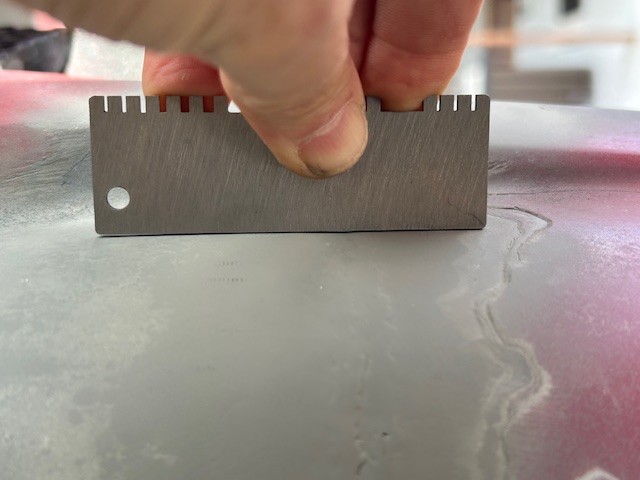 It could benefit with a little more hammer and dolly work or a planishing hammer (don't have) but it is surprisingly not terrible. And it will certainly use a lot less than the gobs of filler that were on this panel when I got it. It was back in post #142 that I got the nerve to take the offending quarter panel off. It feels good to have it back together finally. 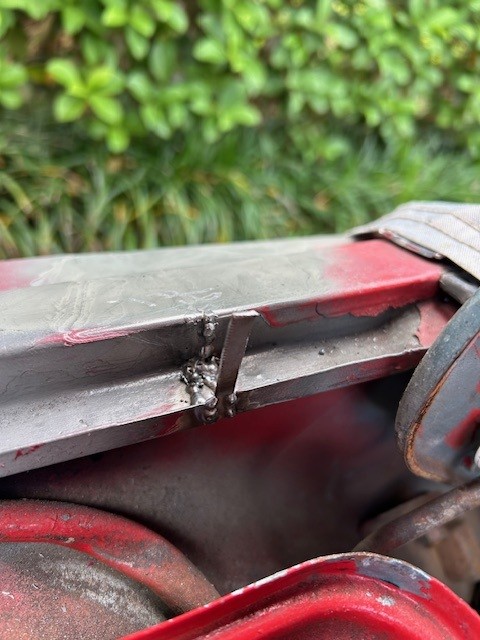 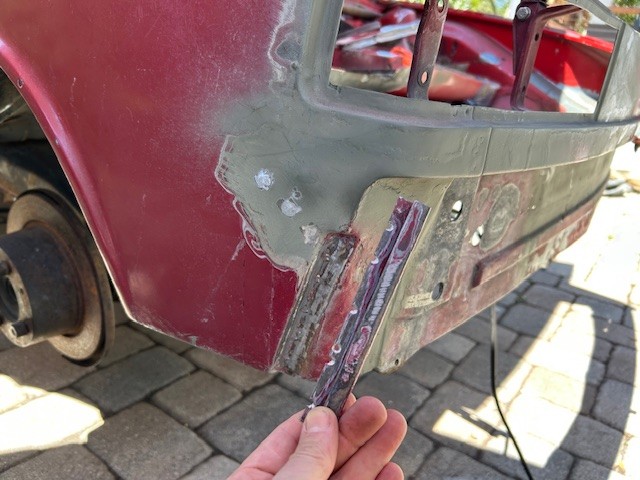 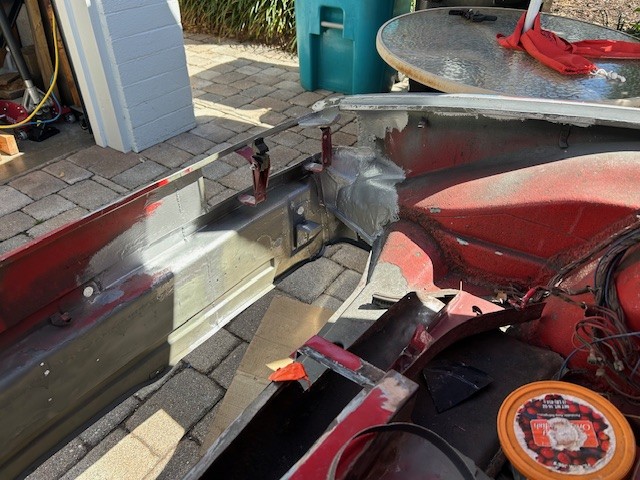 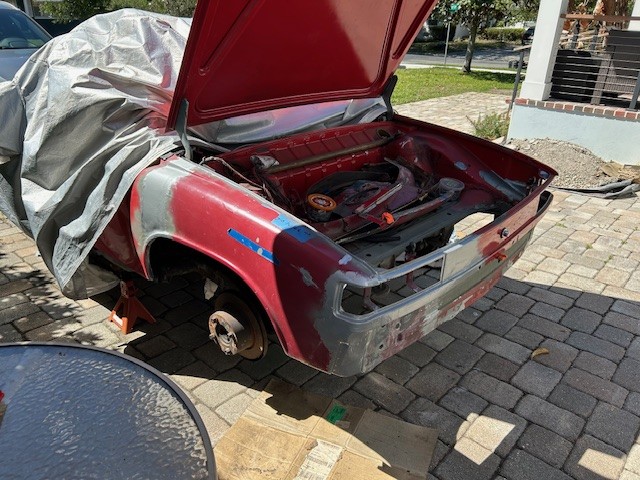 Still working to make this a solid tub. Body and paint will be some time off in the future. Recall it was in post 122 when I started ripping into this trunk with all it's rotten metal. |
|
|
|
| friethmiller |
Apr 12 2026, 08:20 PM
Post
#185
|
|
Senior Member Group: Members Posts: 1,534 Joined: 10-February 19 From: Austin, TX Member No.: 22,863 Region Association: Southwest Region
|
Boss! (IMG:style_emoticons/default/first.gif)
|
|
|
|
| Montreal914 |
Apr 12 2026, 10:05 PM
Post
#186
|
|
Advanced Member Group: Members Posts: 2,198 Joined: 8-August 10 From: Claremont, CA Member No.: 12,023 Region Association: Southern California
|
Looking good! (IMG:style_emoticons/default/smile.gif)
|
|
|
|
| seanpaulmc |
Apr 18 2026, 06:42 PM
Post
#187
|
|
Member Group: Members Posts: 463 Joined: 6-December 16 From: Orlando, FL Member No.: 20,649 Region Association: South East States
|
For the two of those who might be paying attention here's the latest update.
Lest we forget where we started, here is the removed, original trunk pan. 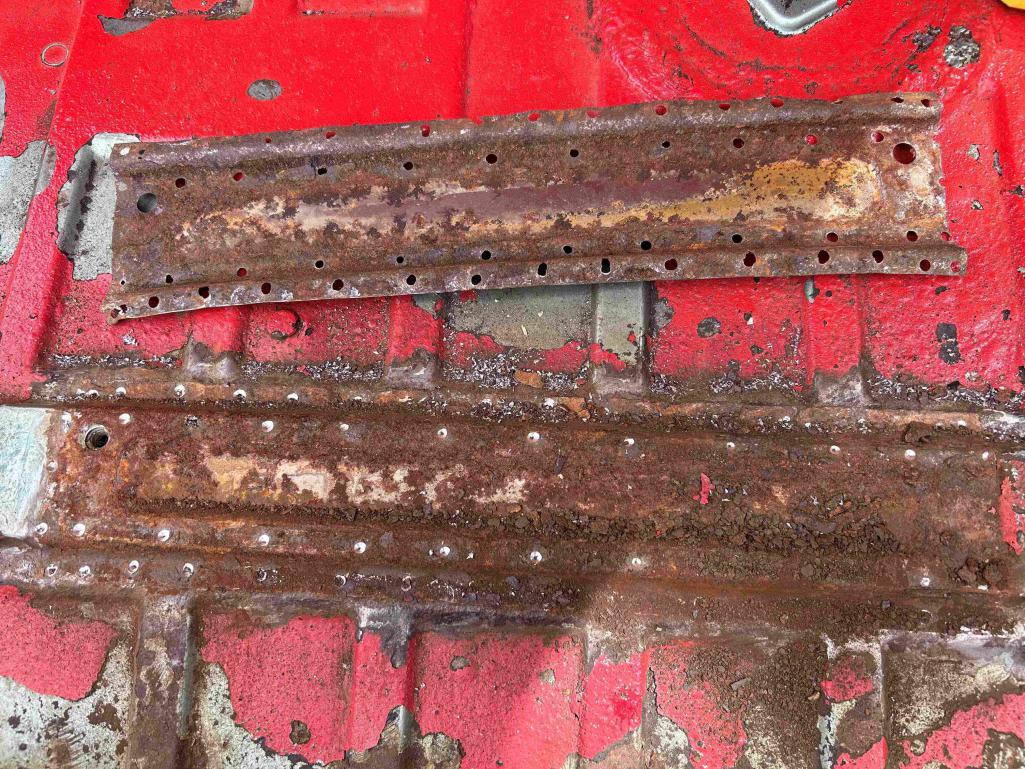 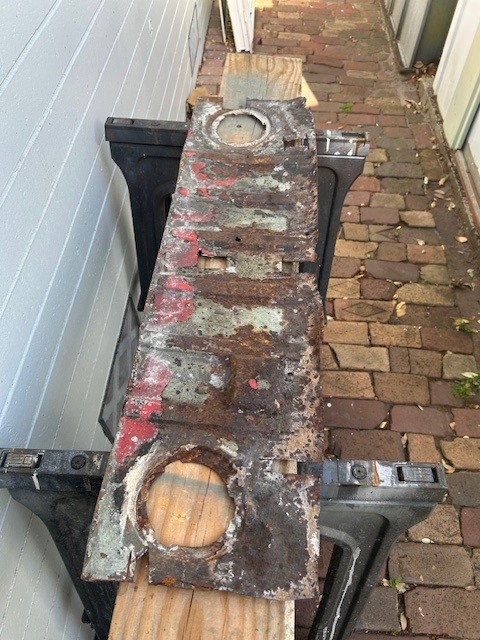 I understand the body number is supposed to be stamped into this trunk pan but I can't find it. As you can see this panel has been consumed by the tin worm. 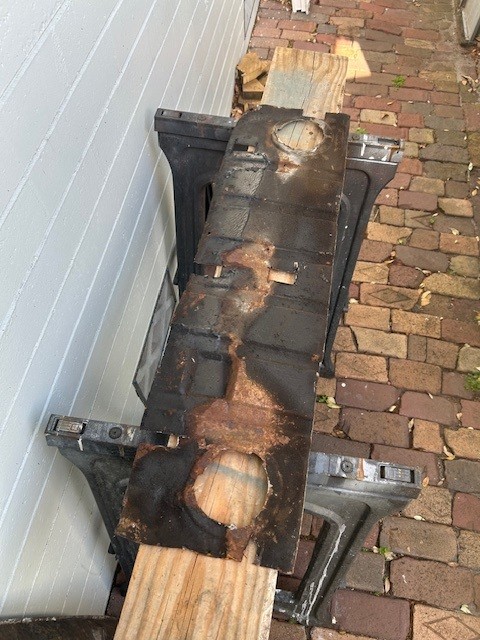 So I've got a good section of replacement trunk metal that I got from Eric and I've already fitted it before going down the rabbit hole of the quarter panel job. However, there are still some details to do before welding in the trunk pan. 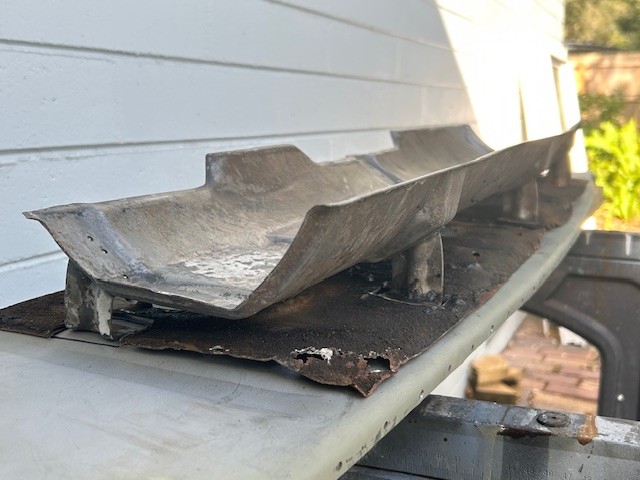 The exhaust shield also needs to be resurrected and attached to the trunk pan in order to avoid welding on my back underneath the car as much as possible. I've decided to make the exhaust shield bolt on with inspiration from Bob's build but have modified it to my own craziness. Here's what we start with. 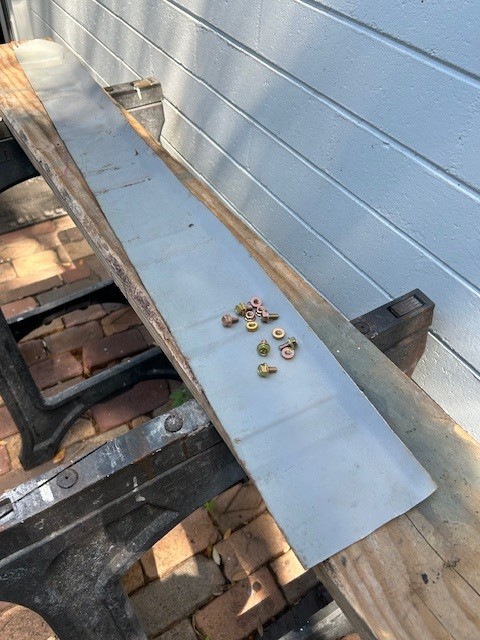 The brackets, new and old. Conjured, fabricated, and assembled. 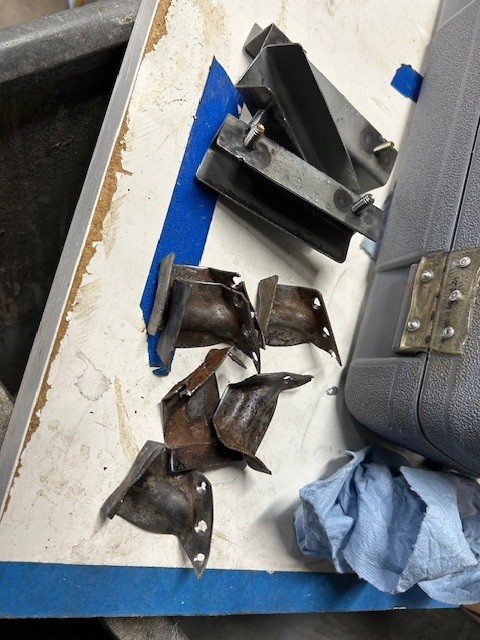 Two ends and a center support. 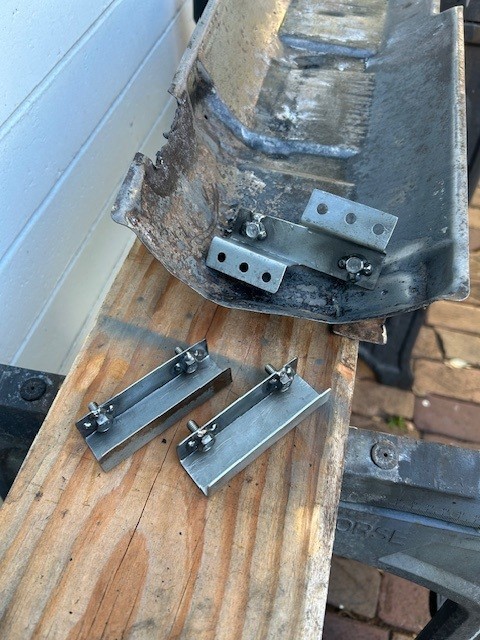 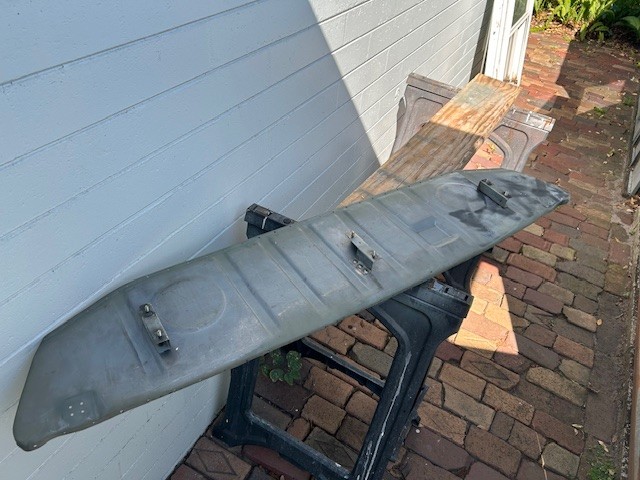 Bob's method was easier. I don't know why I make things harder on myself. 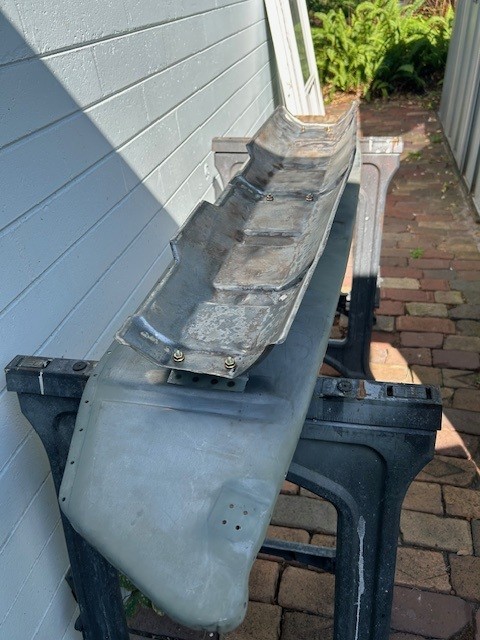 I am pleased with the results. Looking forward to having the trunk pan installed one of these days. |
|
|
|
| porschetub |
Apr 18 2026, 09:19 PM
Post
#188
|
|
914 Guru Group: Members Posts: 5,176 Joined: 25-July 15 From: New Zealand Member No.: 18,995 Region Association: None |
Mines a 73 and I can't find those numbers on that panel and my car is low mileage and very original ,don't know the answer to this ...someone may know ?? TIA.
|
|
|
|
| 930cabman |
Apr 19 2026, 07:14 AM
Post
#189
|
|
Advanced Member Group: Members Posts: 4,833 Joined: 12-November 20 From: Buffalo Member No.: 24,877 Region Association: North East States
|
FYI, the RD trunk panel is a close match to the early cars, later cars require some creative fitting/welding at the rearmost corners
|
|
|
|
| seanpaulmc |
Apr 19 2026, 05:33 PM
Post
#190
|
|
Member Group: Members Posts: 463 Joined: 6-December 16 From: Orlando, FL Member No.: 20,649 Region Association: South East States
|
I told myself I wasn’t going to fix it. Leave it alone. It just isn’t worth it.
Weld repair on the exhaust shield. The exhaust shield that no one anywhere is going to see or care about! 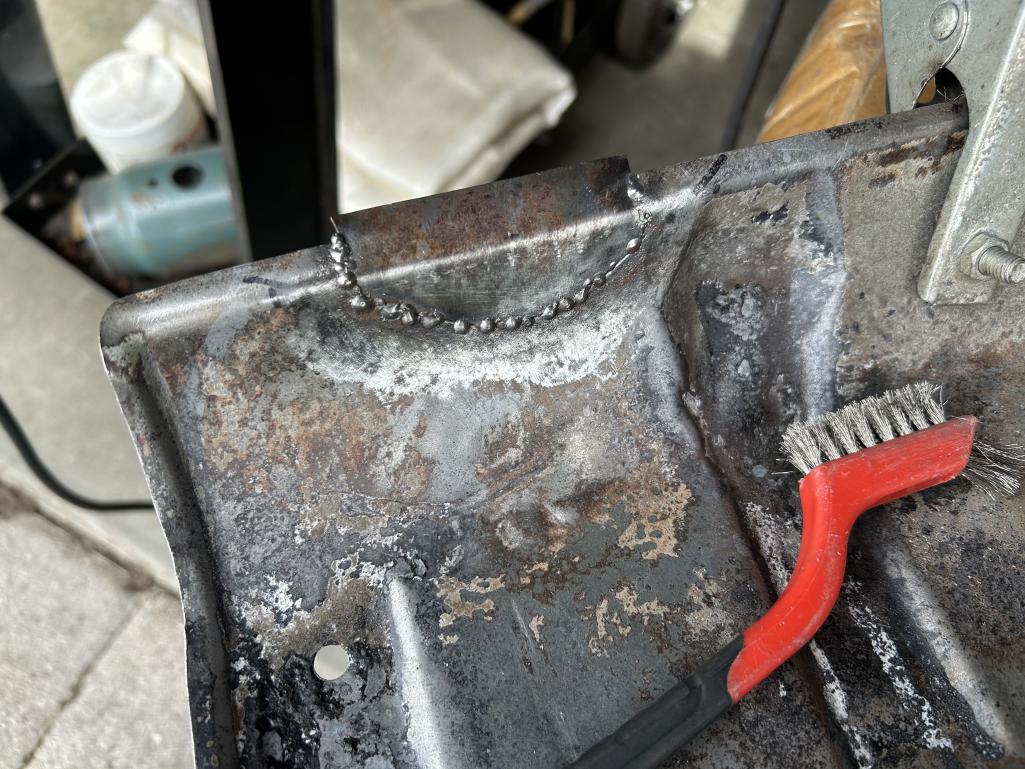 I want to know when does the crazy take root? Am I just predisposed, is it the inhalation of rust dust from all the grinding repair work, or have I been working out in the sun just a little too long? Sheesh! (IMG:style_emoticons/default/screwy.gif) |
|
|
|
| friethmiller |
Apr 19 2026, 06:07 PM
Post
#191
|
|
Senior Member Group: Members Posts: 1,534 Joined: 10-February 19 From: Austin, TX Member No.: 22,863 Region Association: Southwest Region
|
QUOTE(seanpaulmc @ Apr 19 2026, 06:33 PM)  I told myself I wasn’t going to fix it. Leave it alone. It just isn’t worth it. I want to know when does the crazy take root? Am I just predisposed, is it the inhalation of rust dust from all the grinding repair work, or have I been working out in the sun just a little too long? Sheesh! (IMG:style_emoticons/default/screwy.gif) Well done! Yep! It had to be fixed. No doubt in my mind. I don't see what the big deal is here. LOL! (IMG:style_emoticons/default/happy11.gif) |
|
|
|
| Montreal914 |
Apr 19 2026, 11:11 PM
Post
#192
|
|
Advanced Member Group: Members Posts: 2,198 Joined: 8-August 10 From: Claremont, CA Member No.: 12,023 Region Association: Southern California
|
QUOTE(seanpaulmc @ Apr 19 2026, 04:33 PM) The exhaust shield that no one anywhere is going to see or care about! I want to know when does the crazy take root? Am I just predisposed, is it the inhalation of rust dust from all the grinding repair work, or have I been working out in the sun just a little too long? Sheesh! (IMG:style_emoticons/default/screwy.gif) I was recently thinking similarly. (IMG:style_emoticons/default/idea.gif) Crazy how much our philosophical minds can run while spending all of this time working on these. I concluded there is no crazyness here, only satisfaction of work well done and high personal standards. (IMG:style_emoticons/default/sunglasses.gif) Before you know it, someone else will ask you: I think my heat shield is getting rusted, how is the one on your car? (IMG:style_emoticons/default/laugh.gif) |
|
|
|
| 930cabman |
Apr 20 2026, 04:44 AM
Post
#193
|
|
Advanced Member Group: Members Posts: 4,833 Joined: 12-November 20 From: Buffalo Member No.: 24,877 Region Association: North East States
|
QUOTE(Montreal914 @ Apr 19 2026, 11:11 PM) QUOTE(seanpaulmc @ Apr 19 2026, 04:33 PM) The exhaust shield that no one anywhere is going to see or care about! I want to know when does the crazy take root? Am I just predisposed, is it the inhalation of rust dust from all the grinding repair work, or have I been working out in the sun just a little too long? Sheesh! (IMG:style_emoticons/default/screwy.gif) I was recently thinking similarly. (IMG:style_emoticons/default/idea.gif) Crazy how much our philosophical minds can run while spending all of this time working on these. I concluded there is no crazyness here, only satisfaction of work well done and high personal standards. (IMG:style_emoticons/default/sunglasses.gif) Before you know it, someone else will ask you: I think my heat shield is getting rusted, how is the one on your car? (IMG:style_emoticons/default/laugh.gif) OCD (IMG:style_emoticons/default/idea.gif) |
|
|
|
|
64 User(s) are reading this topic (64 Guests and 0 Anonymous Users)
0 Members:

|
Lo-Fi Version | Time is now: 23rd September 2026 - 02:15 AM |
Invision Power Board
v9.1.4 © 2026 IPS, Inc.