|
|
|
Porsche, and the Porsche crest are registered trademarks of Dr. Ing. h.c. F. Porsche AG.
This site is not affiliated with Porsche in any way. Its only purpose is to provide an online forum for car enthusiasts. All other trademarks are property of their respective owners. |
|
|

  |

| DRPHIL914 |
 Aug 22 2022, 04:28 PM Aug 22 2022, 04:28 PM
Post
#41
|
|
Dr. Phil  Group: Members Posts: 5,956 Joined: 9-December 09 From: Kennesaw, GA Member No.: 11,106 Region Association: South East States |
good work! keep on trucking! great you are saving it!
Phil |
   |

 
|
| Dave_Darling |
Aug 22 2022, 05:22 PM
Post
#42
|
|
914 Idiot Group: Members Posts: 15,356 Joined: 9-January 03 From: Silicon Valley / Kailua-Kona Member No.: 121 Region Association: Northern California |
Double-check the roll pin on your pedal cluster that holds the clutch pedal onto the cross-shaft. Earlier versions of the bronze bushing kit used a standard roll pin that is not up to the job in the longer term. The original pin is a spiral pin that has a lot more meat and is tougher. I think I have heard that newer bronze bushing kits also come with spiral pins, but I'm not sure--and it's worth taking a minute to check.
--DD |
|
|
|
| seanpaulmc |
Aug 22 2022, 05:26 PM
Post
#43
|
|
Member Group: Members Posts: 458 Joined: 6-December 16 From: Orlando, FL Member No.: 20,649 Region Association: South East States |
QUOTE(Dave_Darling @ Aug 22 2022, 07:22 PM)  Double-check the roll pin on your pedal cluster that holds the clutch pedal onto the cross-shaft. Earlier versions of the bronze bushing kit used a standard roll pin that is not up to the job in the longer term. The original pin is a spiral pin that has a lot more meat and is tougher. I think I have heard that newer bronze bushing kits also come with spiral pins, but I'm not sure--and it's worth taking a minute to check. --DD Thanks for the advice, Dave. The bronze bushing kit did come with a roll pin similar to the original. It was not just a solid pin. I, however, re-used the original roll pin based on that very advice I'd seen throughout some pedal rebuilds. Thanks! |
|
|
|
| 930cabman |
Aug 23 2022, 08:37 AM
Post
#44
|
|
Advanced Member Group: Members Posts: 4,773 Joined: 12-November 20 From: Buffalo Member No.: 24,877 Region Association: North East States |
Great progress and all this while working on your back, outdoors (IMG:style_emoticons/default/beerchug.gif)
Thanks for the updates and keep your momentum moving forward |
|
|
|
| seanpaulmc |
Aug 26 2022, 08:09 AM
Post
#45
|
|
Member Group: Members Posts: 458 Joined: 6-December 16 From: Orlando, FL Member No.: 20,649 Region Association: South East States |
For a Safe, Quick, and simple way to remove the spring and retaining pin from the seat frame rails see thread here...
Spring and roll pin removal from seat frame 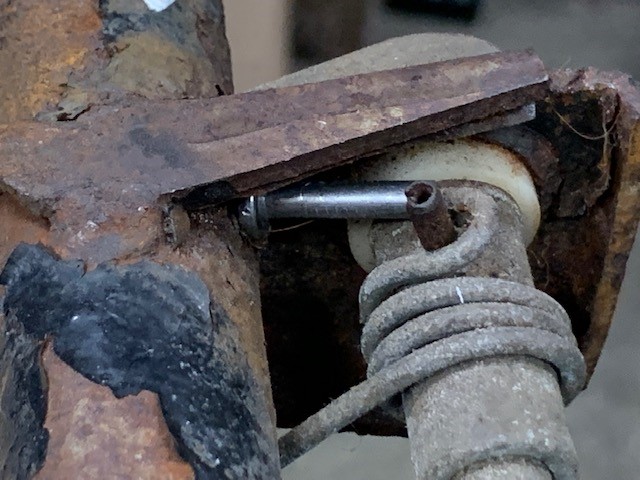 Be safe. |
|
|
|
| seanpaulmc |
Aug 26 2022, 08:24 AM
Post
#46
|
|
Member Group: Members Posts: 458 Joined: 6-December 16 From: Orlando, FL Member No.: 20,649 Region Association: South East States |
Working towards installation of the passenger side floor.
Do these interior holes on the bracket get welded? 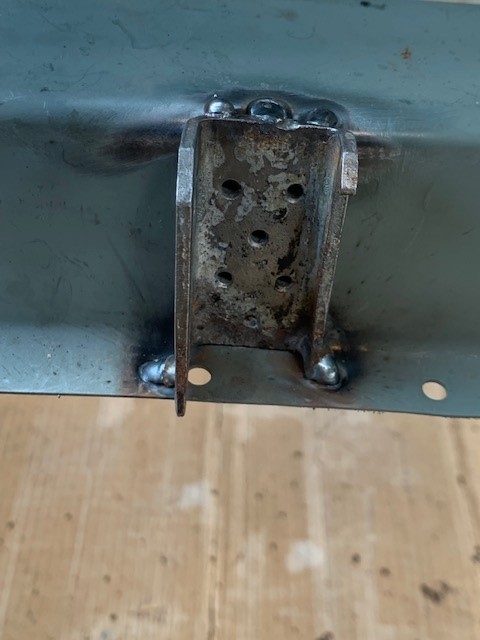 Fit up of seat hinges. 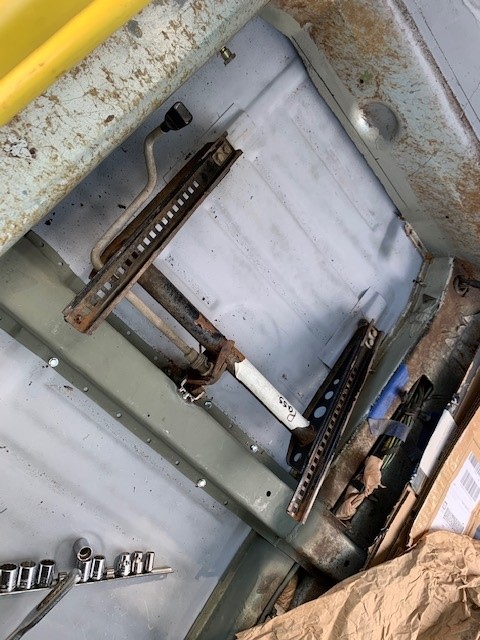 Floor pan taken back off to get access to fully weld seat hinges.  Floor pan is now ready for the rain this weekend. If the rain shuts me down on the floor install, then I have transaxle to get cleaned for transportation. Anyone have recommendations on what to use to clean the off the transaxle? TIA! -Sean |
|
|
|
| 930cabman |
Aug 26 2022, 04:51 PM
Post
#47
|
|
Advanced Member Group: Members Posts: 4,773 Joined: 12-November 20 From: Buffalo Member No.: 24,877 Region Association: North East States |
From what I know it was coated with cosmoline when new for protection. If I recall correctly Bbrock's build covered this topic
|
|
|
|
| seanpaulmc |
Feb 21 2023, 06:57 PM
Post
#48
|
|
Member Group: Members Posts: 458 Joined: 6-December 16 From: Orlando, FL Member No.: 20,649 Region Association: South East States |
Well it’s been a while.
Where was I? Right, a life on jack stands… The passenger floor - front to back - is in with a new cross brace. This photo is from before the welding. 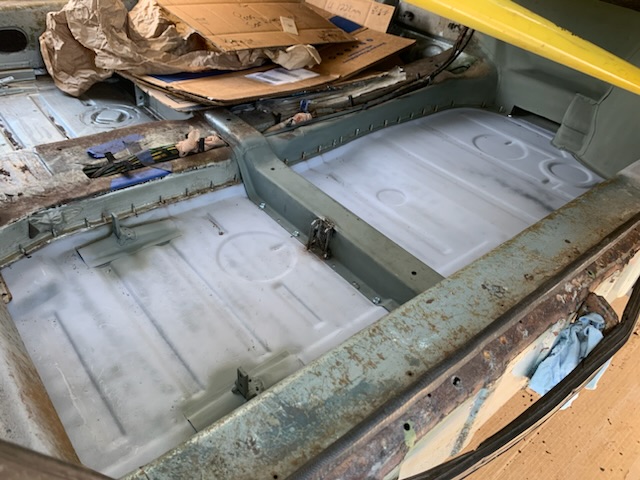 Inner firewall patched (hellhole). 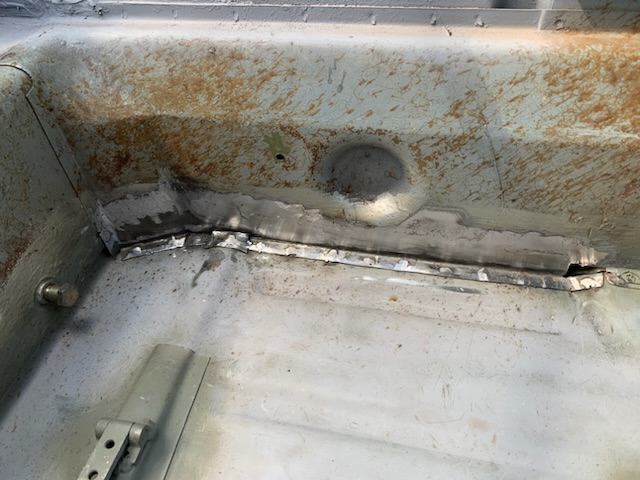 Outer firewall patched (hellhole). 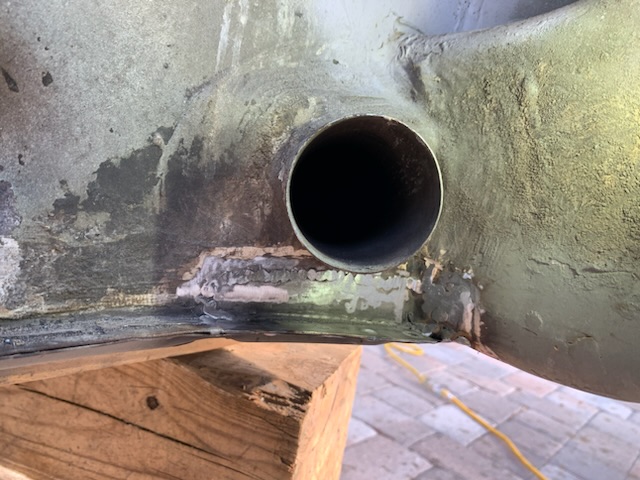 Corner triangle replaced (hellhole). 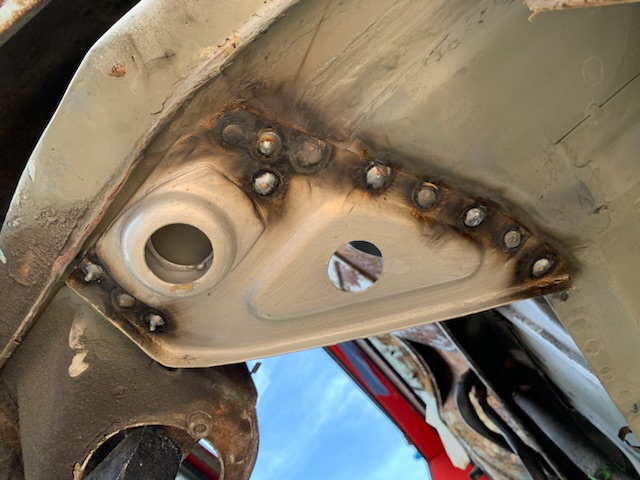 Looks a little better now than when I got it. And, surely a lot stronger. 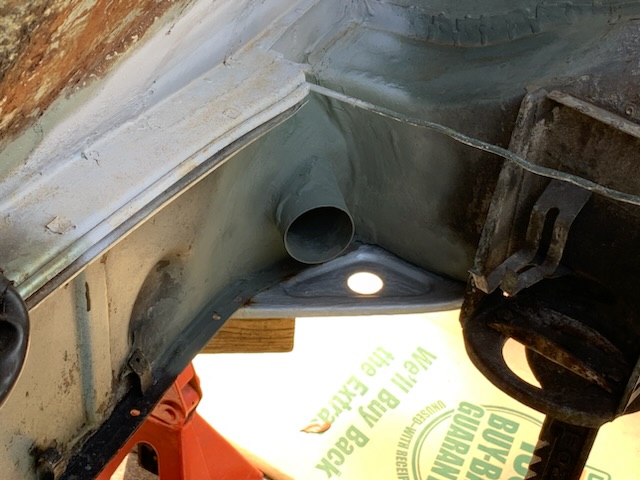 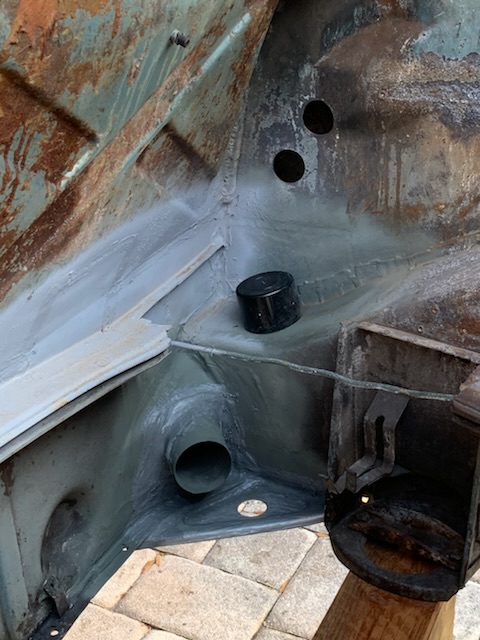 Now it needs a new engine shelf and some decisions need to be made about where to relocate the battery. I’m fairly certain I won’t put it back in the original location with this now being a Florida. But there’s more to do before I get to that - front of the floor board at the bulkhead, replacement of the door sill, and all the layers to the A-pillar support. 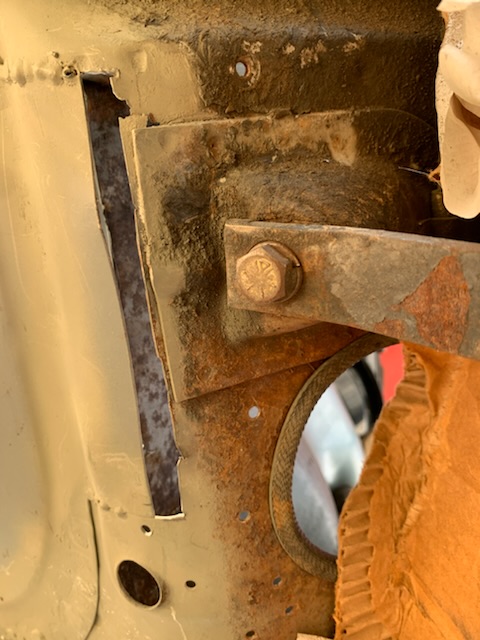 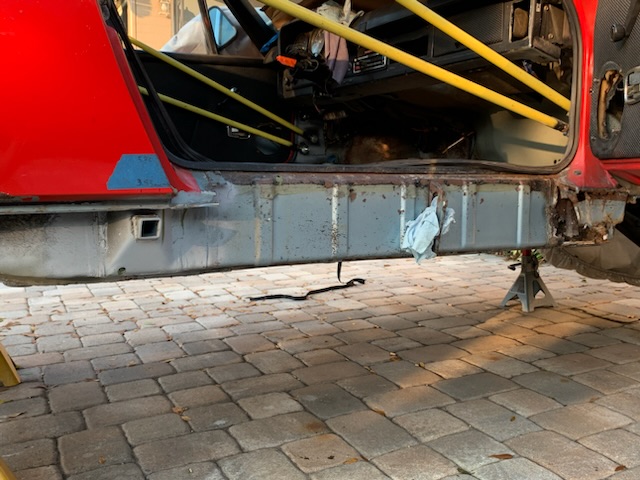 Hope you all enjoy the progress report. Thanks for looking! Attached image(s) 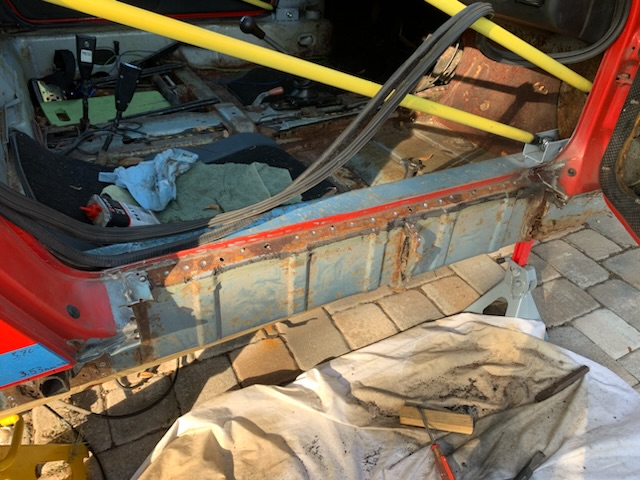
|
|
|
|
| Cairo94507 |
Feb 22 2023, 08:25 AM
Post
#49
|
|
Michael Group: Members Posts: 10,725 Joined: 1-November 08 From: Auburn, CA Member No.: 9,712 Region Association: Northern California |
Great work and progress. (IMG:style_emoticons/default/beerchug.gif)
|
|
|
|
| seanpaulmc |
Feb 23 2023, 09:15 AM
Post
#50
|
|
Member Group: Members Posts: 458 Joined: 6-December 16 From: Orlando, FL Member No.: 20,649 Region Association: South East States |
Looking for some pictures of how this section at the passenger A-pillar support is supposed to come together before I tear into it. I understand there are three layers, but obviously not on my car.
 Thank you. |
|
|
|
| 930cabman |
Feb 23 2023, 10:13 AM
Post
#51
|
|
Advanced Member Group: Members Posts: 4,773 Joined: 12-November 20 From: Buffalo Member No.: 24,877 Region Association: North East States |
Quality of workmanship looks great, keep it going (IMG:style_emoticons/default/cheer.gif)
is this an original Marathon Blue car? |
|
|
|
| Cairo94507 |
Feb 23 2023, 10:18 AM
Post
#52
|
|
Michael Group: Members Posts: 10,725 Joined: 1-November 08 From: Auburn, CA Member No.: 9,712 Region Association: Northern California |
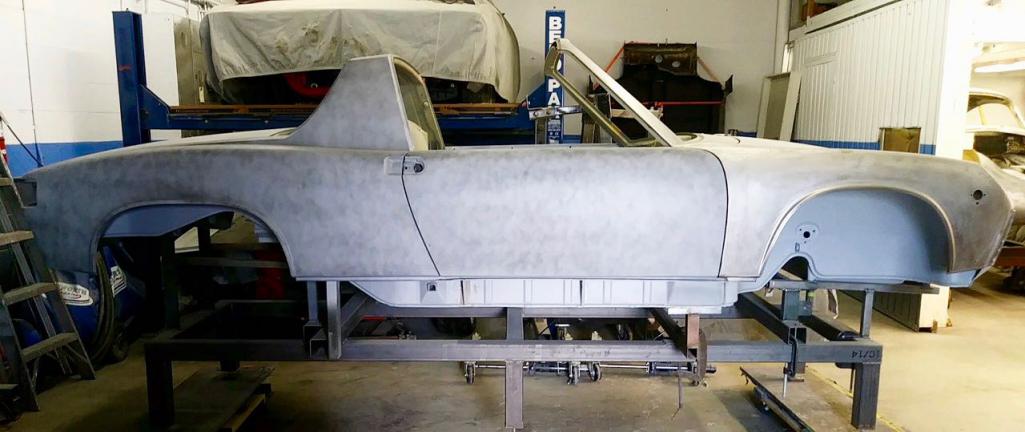
Here is the best shot I have of my car when we were getting it ready for paint. I looked through all of my pictures and can't find one that is a better shot of that area:
 |
|
|
|
| Root_Werks |
Feb 23 2023, 10:36 AM
Post
#53
|
|
Village Idiot Group: Members Posts: 9,037 Joined: 25-May 04 From: About 15NM from Canada Member No.: 2,105 Region Association: Pacific Northwest |
Marc and I used a Borescope camera to inspect inside the Longs before he bought his LE. There is a "vent" hole in the engine bay you have to reach back and up to get to. Easy to snake the camera through the hole and down a few feet to the "hell hole" area. Gives you a very clear picture what condition the Longs are in.
|
|
|
|
| seanpaulmc |
Feb 23 2023, 10:40 AM
Post
#54
|
|
Member Group: Members Posts: 458 Joined: 6-December 16 From: Orlando, FL Member No.: 20,649 Region Association: South East States |
QUOTE(930cabman @ Feb 23 2023, 11:13 AM) Quality of workmanship looks great, keep it going (IMG:style_emoticons/default/cheer.gif) is this an original Marathon Blue car? Yes, Marathon Blue Metallic. Which is really a nice color. Paint now is in really poor condition. It’ll definitely get painted in the future. Since it is a mix of parts and nothing special, other than being mine, future color palette is wide open. |
|
|
|
| 930cabman |
Feb 23 2023, 11:26 AM
Post
#55
|
|
Advanced Member Group: Members Posts: 4,773 Joined: 12-November 20 From: Buffalo Member No.: 24,877 Region Association: North East States |
QUOTE(seanpaulmc @ Feb 23 2023, 11:40 AM) QUOTE(930cabman @ Feb 23 2023, 11:13 AM) Quality of workmanship looks great, keep it going (IMG:style_emoticons/default/cheer.gif) is this an original Marathon Blue car? Yes, Marathon Blue Metallic. Which is really a nice color. Paint now is in really poor condition. It’ll definitely get painted in the future. Since it is a mix of parts and nothing special, other than being mine, future color palette is wide open. Cast my vote for Marathon Blue (IMG:style_emoticons/default/aktion035.gif) |
|
|
|
| seanpaulmc |
Feb 25 2023, 06:54 PM
Post
#56
|
|
Member Group: Members Posts: 458 Joined: 6-December 16 From: Orlando, FL Member No.: 20,649 Region Association: South East States |
Today…
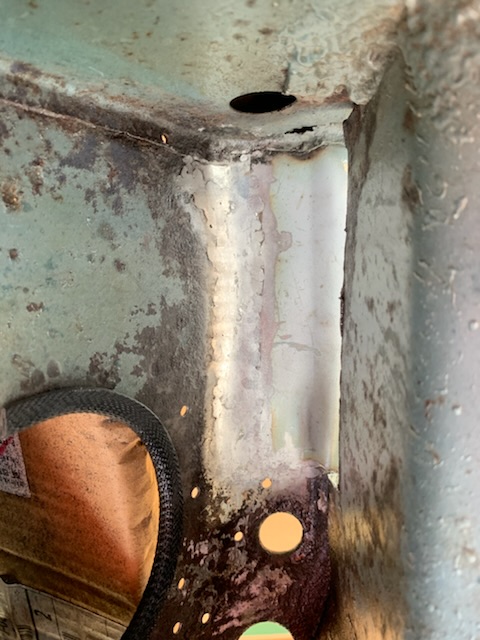  …all day. (IMG:style_emoticons/default/headbang.gif) Remarkably time consuming. Or, I’m just remarkably slow. I may dress the outside some more but leaving that for another time to decide. Need to put it aside for now. Was thinking I might need to add extra strength in this area before getting the welding done so I made this backing plate. Now that the patch is in I’m not sure it’s warranted. What do you all think - yes, no with the reinforcement? 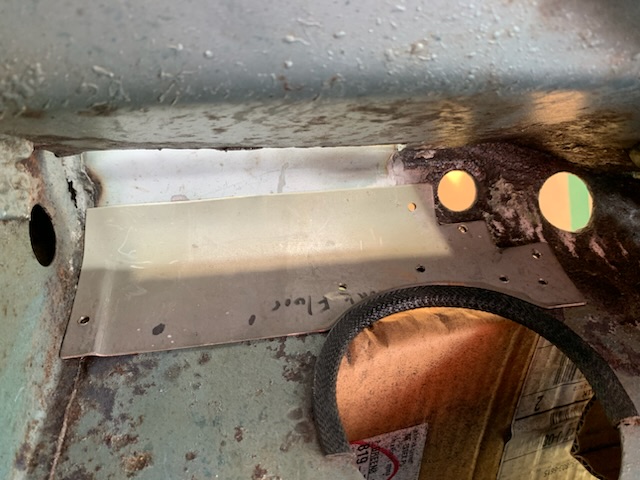 Anyone ever see a need to reinforce this area? |
|
|
|
| seanpaulmc |
Mar 11 2023, 07:43 PM
Post
#57
|
|
Member Group: Members Posts: 458 Joined: 6-December 16 From: Orlando, FL Member No.: 20,649 Region Association: South East States |
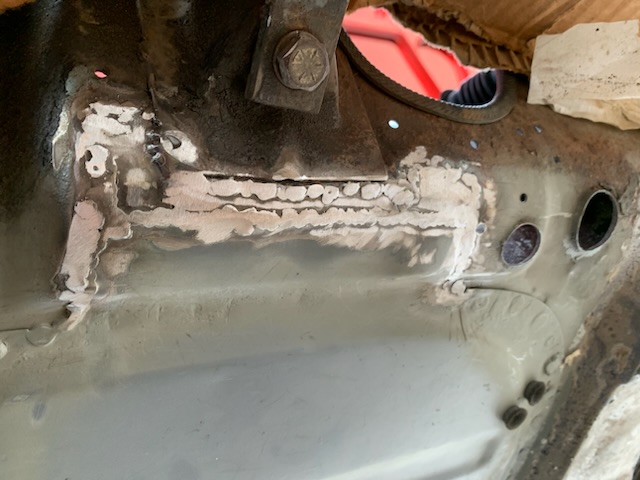
Another patch panel. (IMG:style_emoticons/default/welder.gif)
Passenger footwell - floorpan to bulkhead. 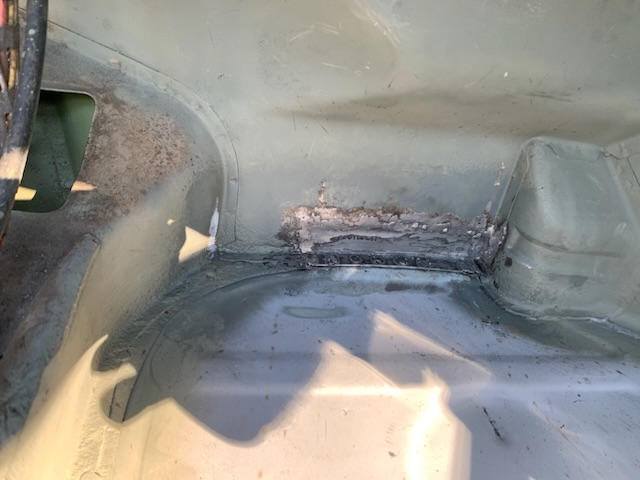 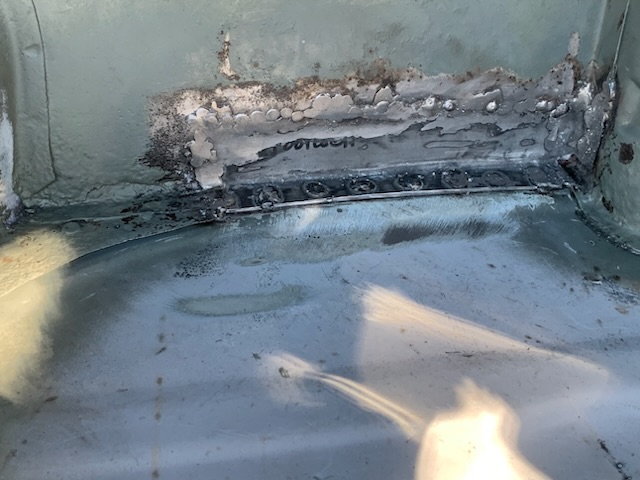 Some cleanup to do and some primer still. |
|
|
|
| seanpaulmc |
Mar 11 2023, 07:53 PM
Post
#58
|
|
Member Group: Members Posts: 458 Joined: 6-December 16 From: Orlando, FL Member No.: 20,649 Region Association: South East States |
Moved on to peeling back the rusty onion of the A-pillar corner. (IMG:style_emoticons/default/sawzall-smiley.gif)
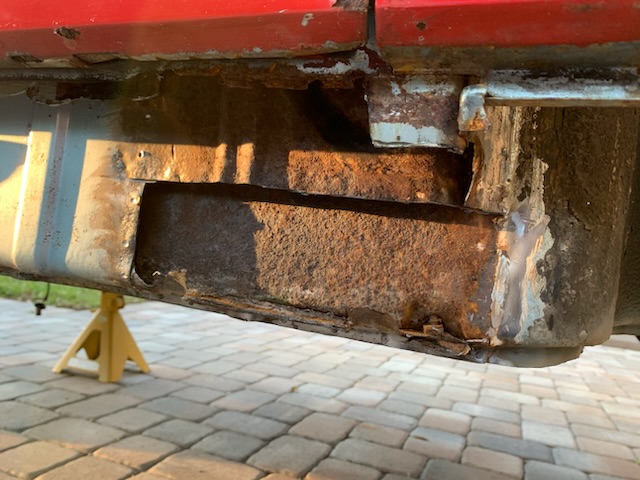 Still looking for good photos of how this should go back together. Please post them if you’ve got’em. Thanks |
|
|
|
| seanpaulmc |
Apr 20 2023, 12:32 PM
Post
#59
|
|
Member Group: Members Posts: 458 Joined: 6-December 16 From: Orlando, FL Member No.: 20,649 Region Association: South East States |
Really for the first time I feel like I am making an improvement rather than replacing or repairing…
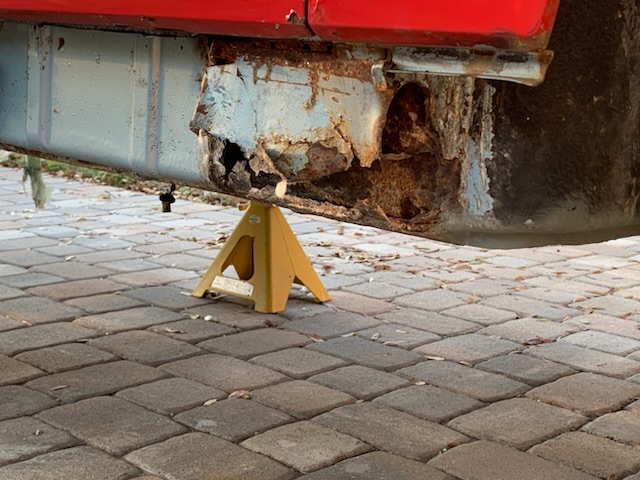
Off the jack stands for the first time in ??? With her shoes back on, I started on the inner stiffening kit. Just getting started on it but you’ve all seen this before. 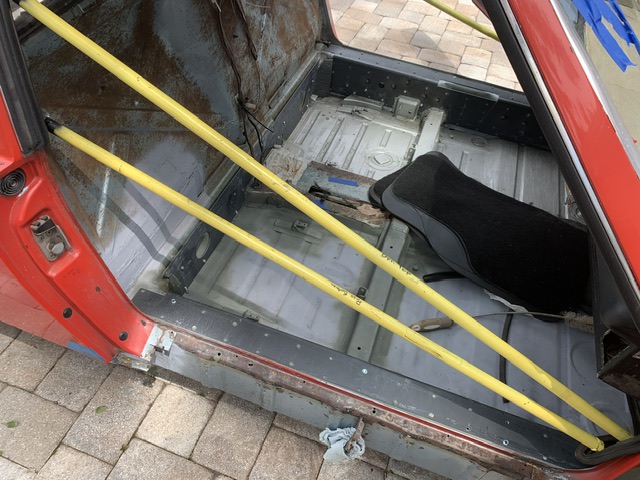 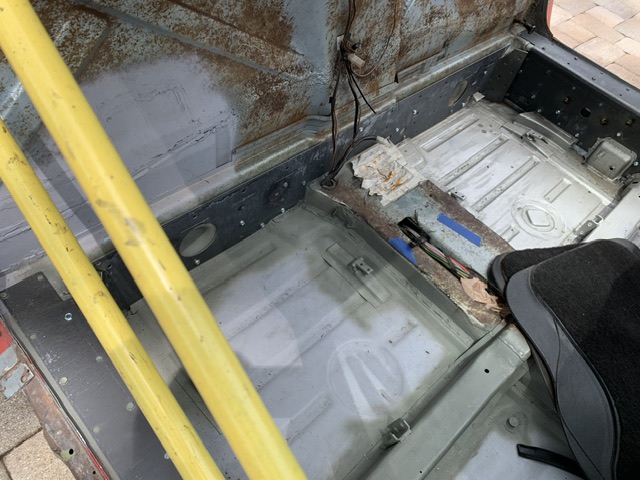 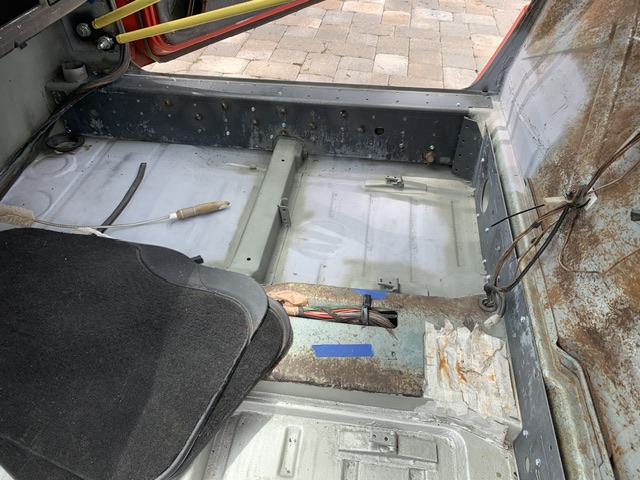 The top is on and I have it braced so I hope the gaps won’t shift too much. They’re already uneven from side to side from when I got the car and the obvious accident damage but they’re workable. I’m going at it slowly with aim to finish this weekend. The whole piece has been osphoe’d, cleaned, and then hit with self etching primer on the inside before being installed. I didn’t remove any paint from the longs prior. I wanted to leave as much coverage as possible. So, before welding I have a tiny wire brush from my dremel in my cordless drill to clean the metal before starting a weld. It has worked well. Once this is done, I look forward to finally having a solid chassis to work with. There is still a lot of other metal work to do but once it’s solid I can work towards a rolling restoration. Thanks for watching! |
|
|
|
| 930cabman |
Apr 20 2023, 01:25 PM
Post
#60
|
|
Advanced Member Group: Members Posts: 4,773 Joined: 12-November 20 From: Buffalo Member No.: 24,877 Region Association: North East States |
Lookin good, keep on truckin and you will be motoring before you know
|
|
|
|
|
41 User(s) are reading this topic (41 Guests and 0 Anonymous Users)
0 Members:

|
Lo-Fi Version | Time is now: 31st July 2026 - 07:47 PM |
Invision Power Board
v9.1.4 © 2026 IPS, Inc.