|
|

|
Porsche, and the Porsche crest are registered trademarks of Dr. Ing. h.c. F. Porsche AG.
This site is not affiliated with Porsche in any way. Its only purpose is to provide an online forum for car enthusiasts. All other trademarks are property of their respective owners. |
|
|
  |
| ValcoOscar |
 Jan 6 2022, 03:58 PM Jan 6 2022, 03:58 PM
Post
#61
|
|
Garage Life     Group: Members Posts: 2,381 Joined: 19-November 13 From: SoCal Member No.: 16,669 Region Association: Southern California 

|
Very nice Jeremy-
(IMG:style_emoticons/default/beerchug.gif) I have always admired the sound and smoothness of 914 Suby conversions. I see lots of smiles in your future. Keep at it. Ask me how I know (IMG:style_emoticons/default/idea.gif) Hit me up if you're ever in SoCal Oscar |
| Mayne |
 Jan 7 2022, 11:41 AM Jan 7 2022, 11:41 AM
Post
#62
|
|
Member   Group: Members Posts: 254 Joined: 28-February 17 From: NM Member No.: 20,880 Region Association: None |
Very nice Jeremy- (IMG:style_emoticons/default/beerchug.gif) I have always admired the sound and smoothness of 914 Suby conversions. I see lots of smiles in your future. Keep at it. Ask me how I know (IMG:style_emoticons/default/idea.gif) Hit me up if you're ever in SoCal Oscar Thanks for the kind words, and the invite, Oscar! |
| Mayne |
 Jan 10 2022, 09:11 PM Jan 10 2022, 09:11 PM
Post
#63
|
|
Member   Group: Members Posts: 254 Joined: 28-February 17 From: NM Member No.: 20,880 Region Association: None |
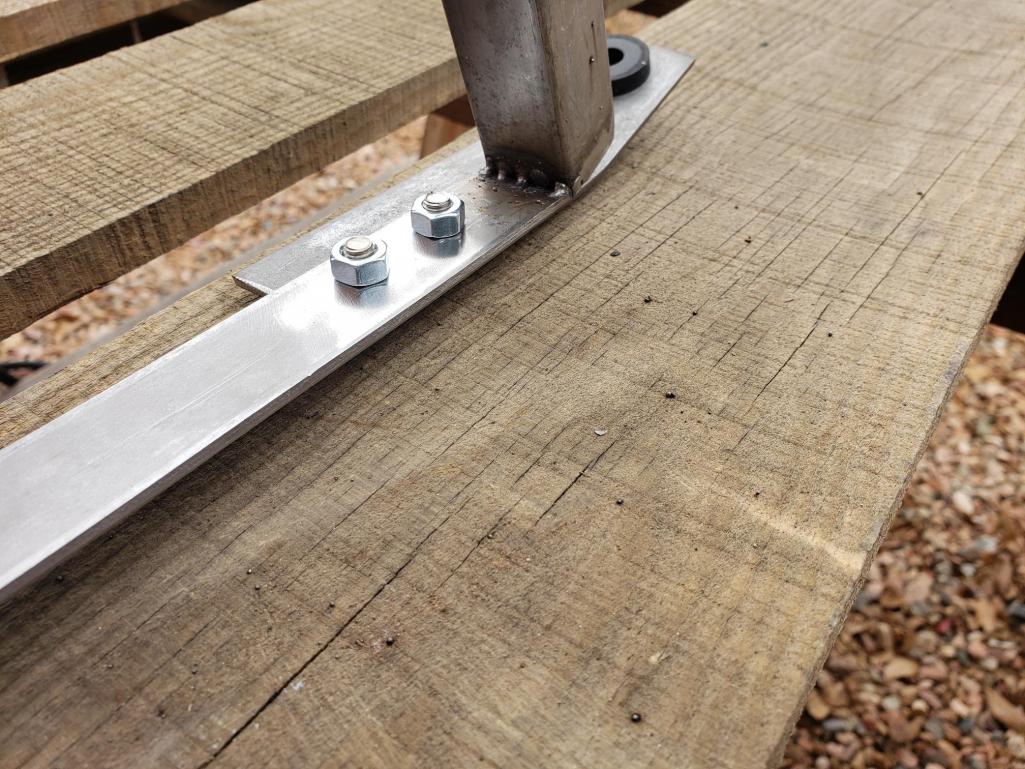
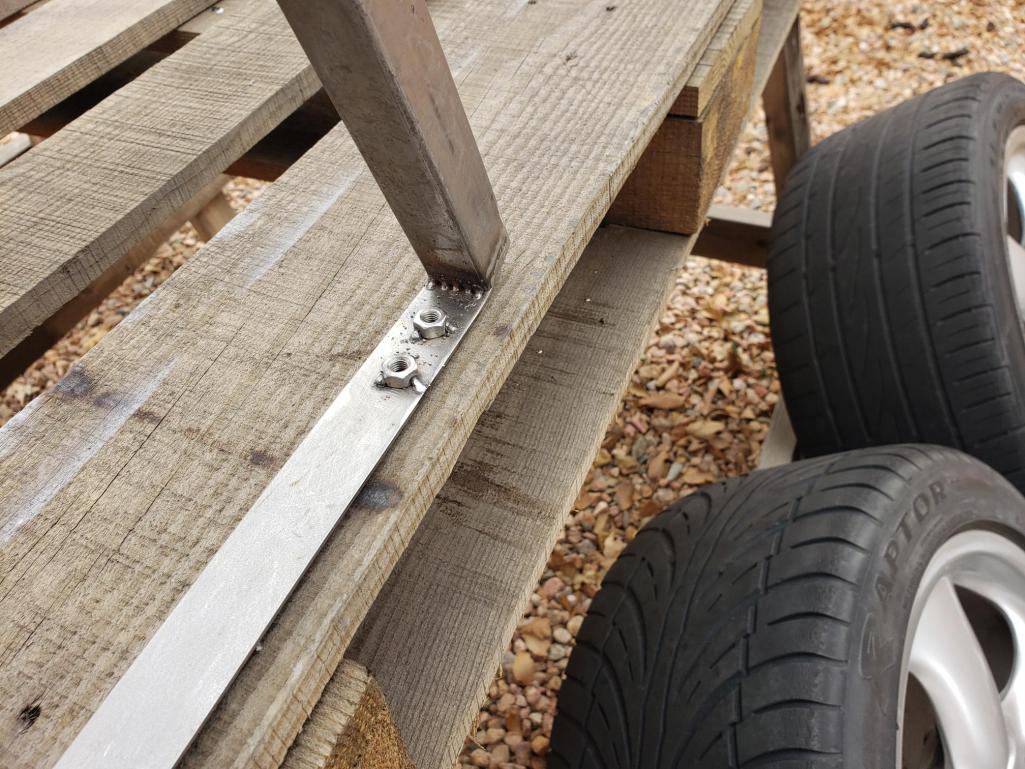
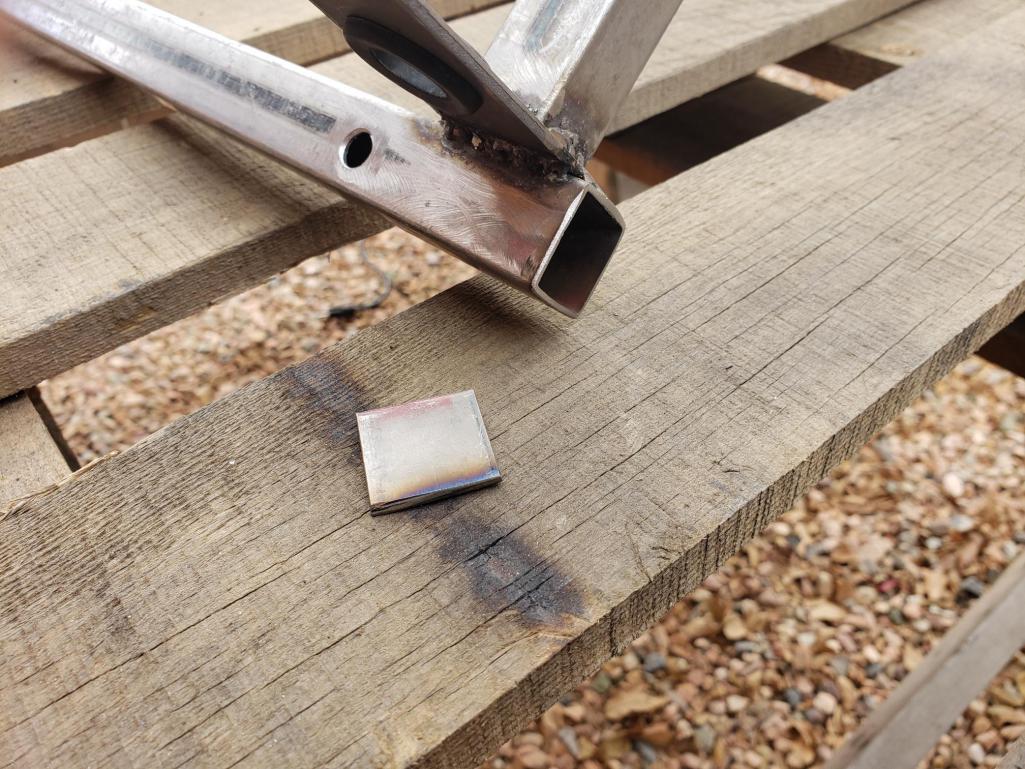
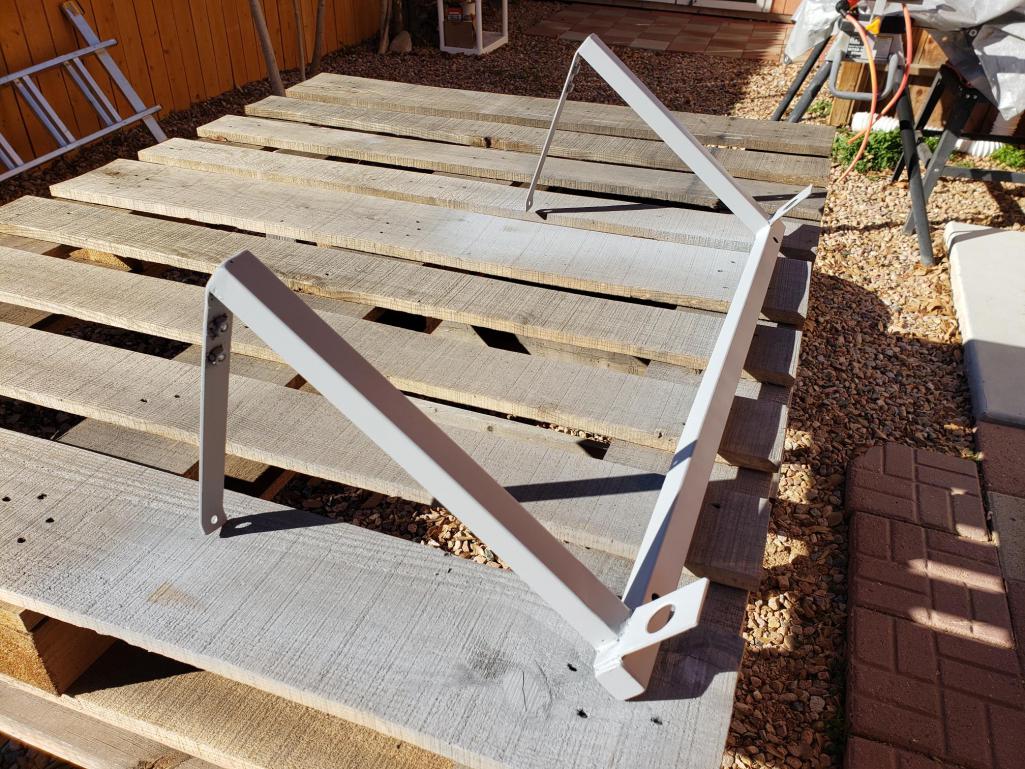
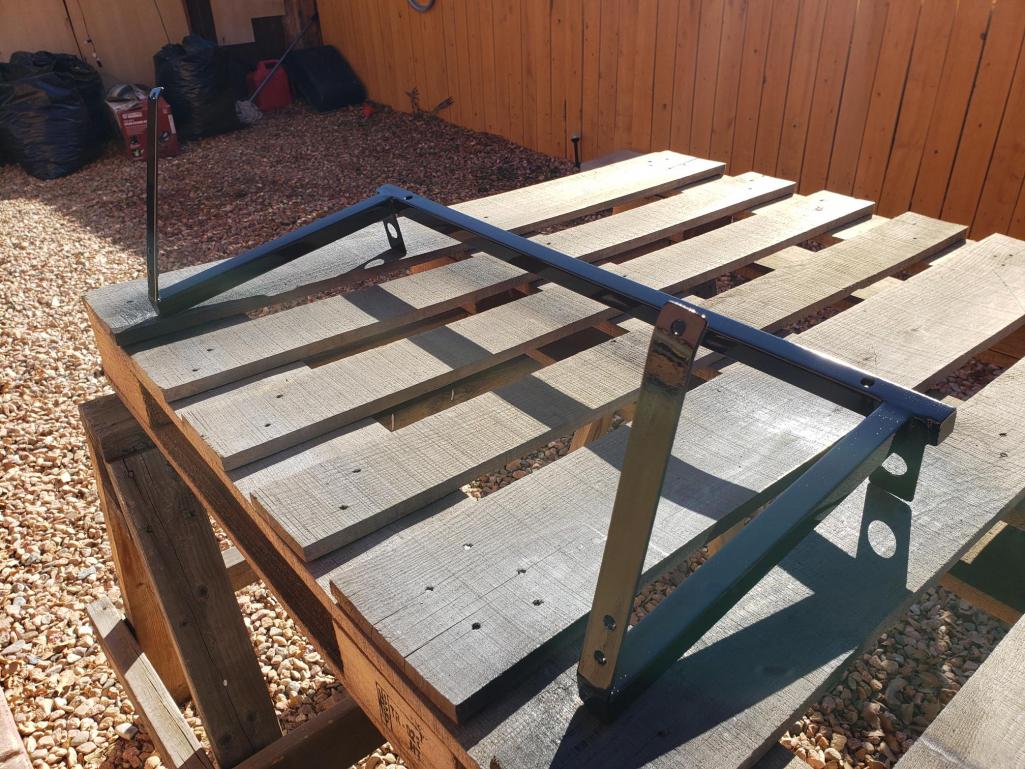
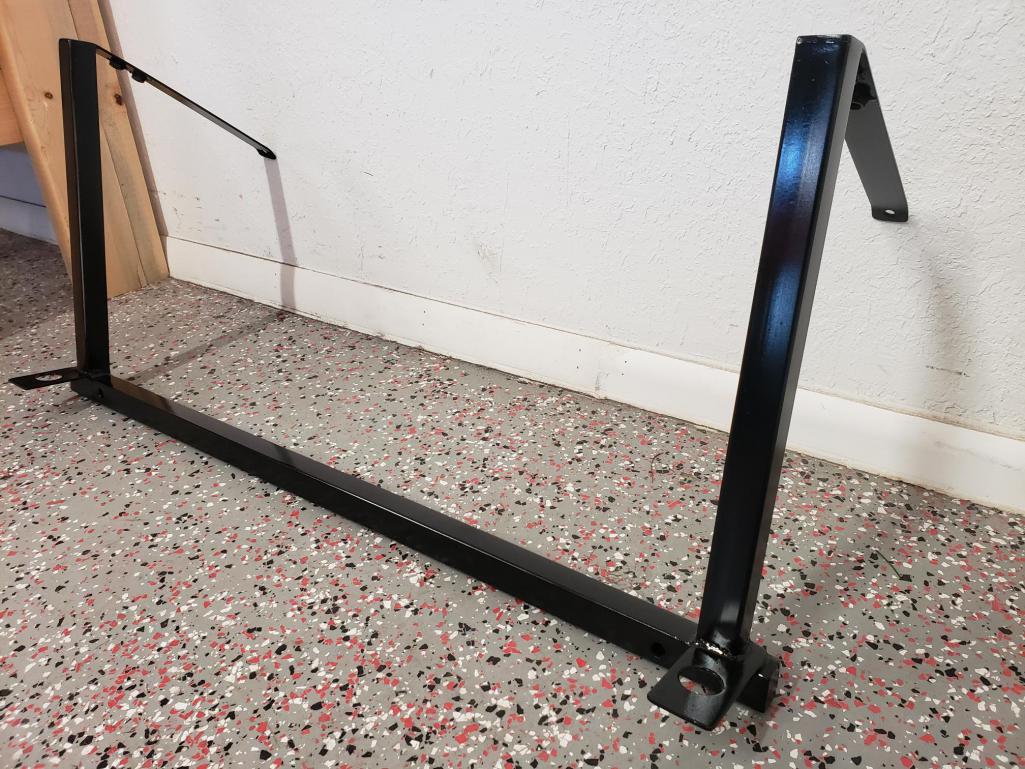
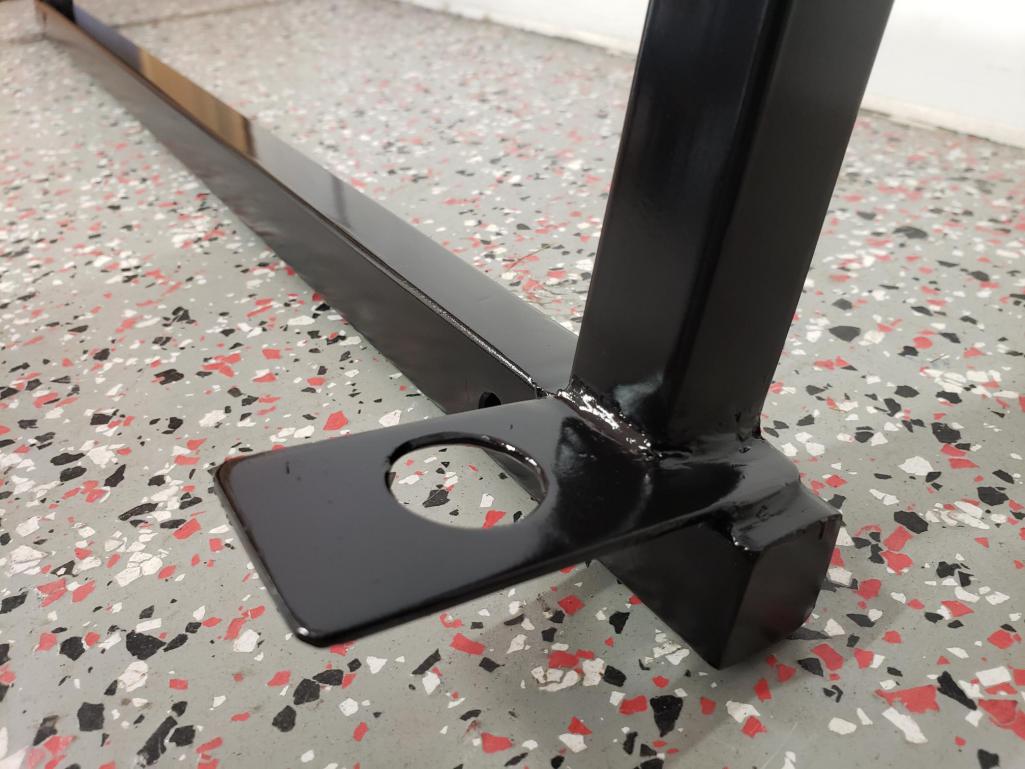
Made a little more progress on the radiator frame over the weekend. I welded on nuts to the frame arms to mount the tabs that will be grommeted to the radiator. I trimmed the lower frame crossmember, then cut tabs from 1" bar steel to cap off the ends. Did some more grinding on the welds, then finished them off with some JB Weld. Primed, then painted with gloss black VHT Chassis paint. Powdercoating would have been nice, but not in the budget at the moment.
       |
| Mayne |
 Jan 25 2022, 03:16 PM Jan 25 2022, 03:16 PM
Post
#64
|
|
Member   Group: Members Posts: 254 Joined: 28-February 17 From: NM Member No.: 20,880 Region Association: None |
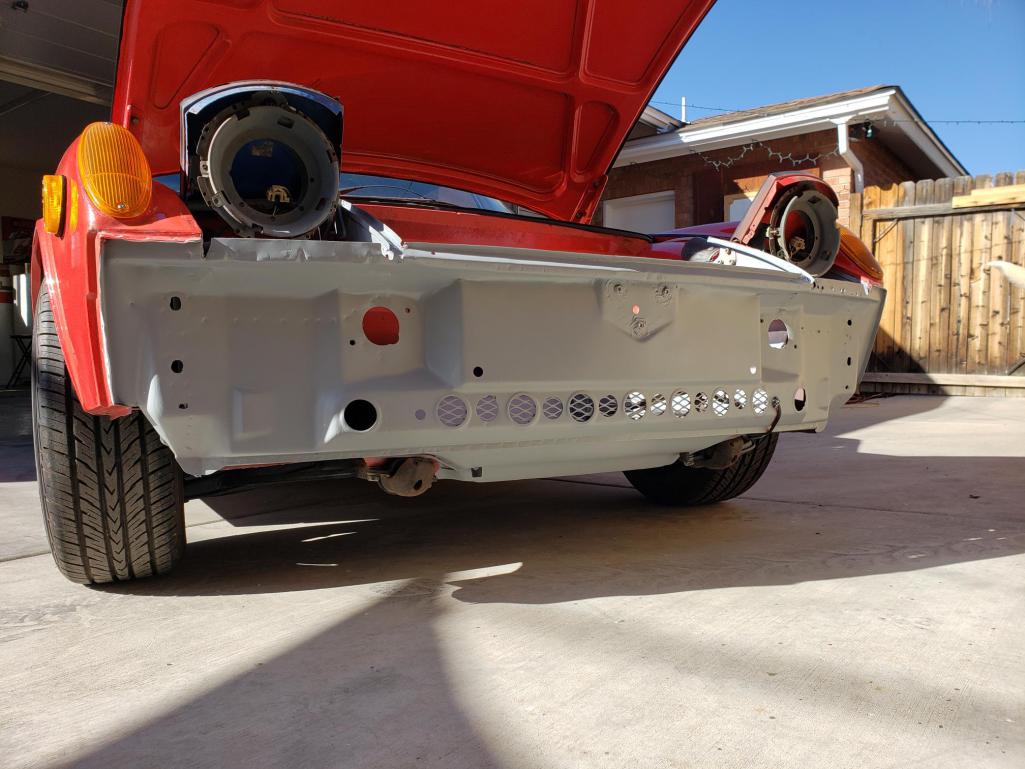
In working on the front of the car so much, I decided to deal with some body damage that has bugged me for as long as I've owned the car. I wasn't really planning on doing it at this stage, because I really want to complete the Subaru 6 conversion to the point of running and driving before I tackle body and paint. But dealing with the front end damage (to some extent, at least) makes me feel better moving forward.
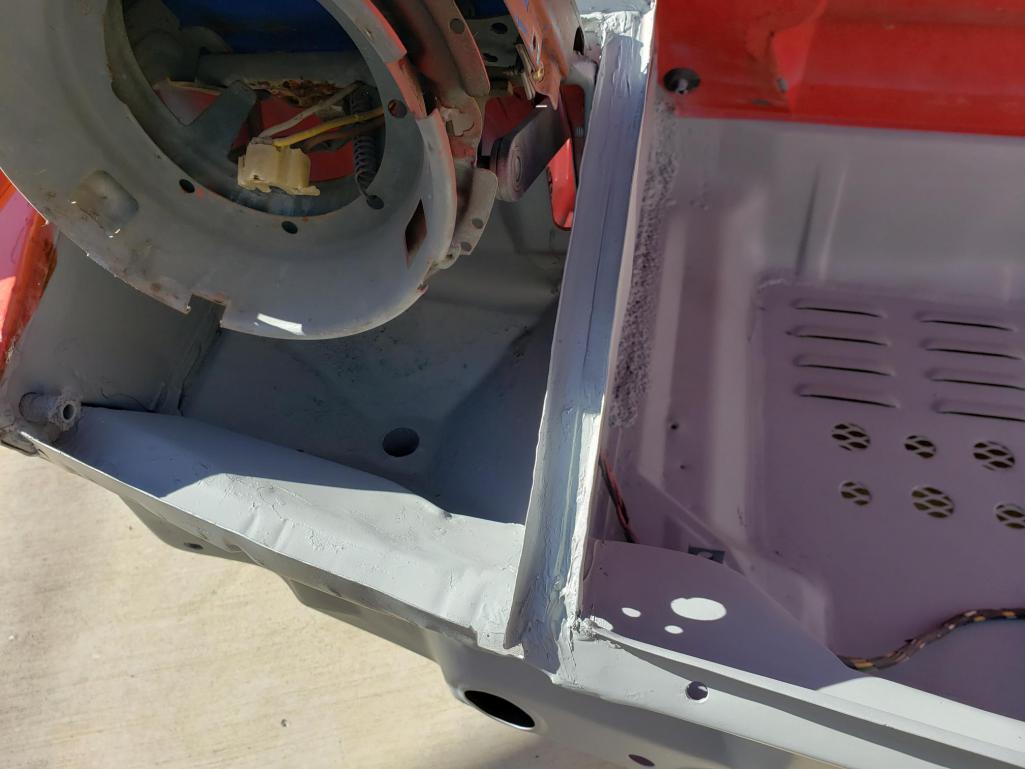
I also plan to do similar work in the engine bay before putting the new engine in, so when it is finally time to strip it down for paint, much of the "B surface" work will be pretty good. I know many people start with paint and body, then do the powertrain, but for me it makes the most sense to do any cutting, welding and modifying to the body first so I don't have to cut into a freshly painted body (though I'm sure some of that will have to happen anyway). I detailed some of this in a separate thread recently, so I'm just getting all the info into the build thread here. Body damage and surface rust. The structure was reasonably pulled, but there was no effort to treat the bare metal, so a lot of superficial rust: 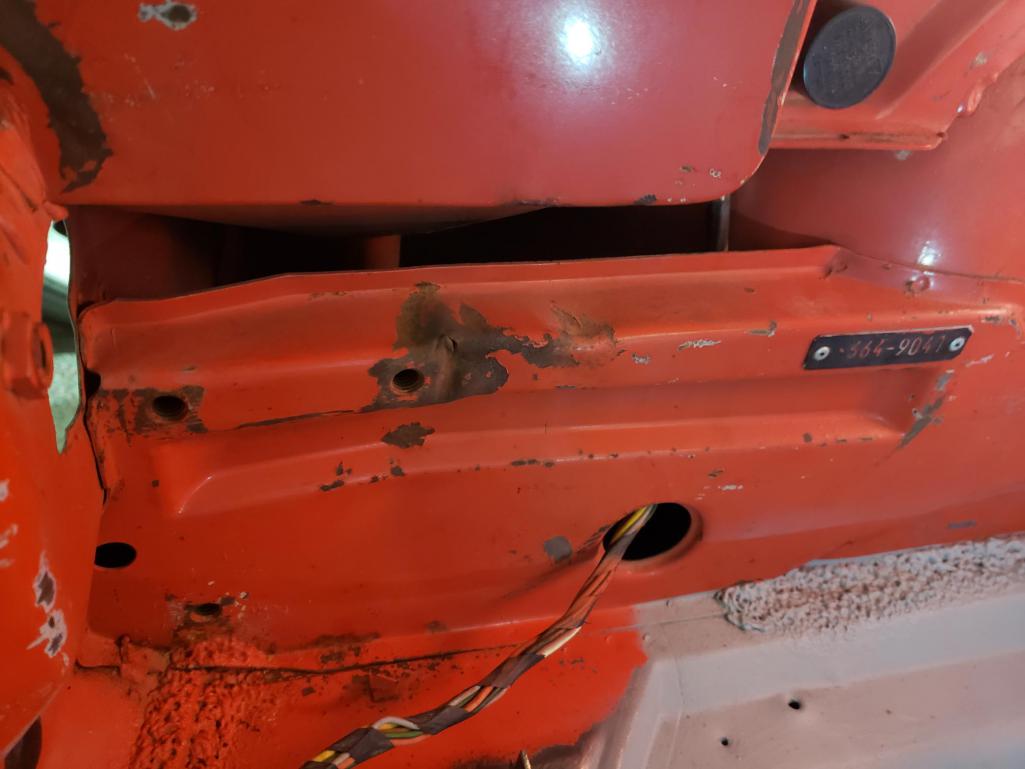 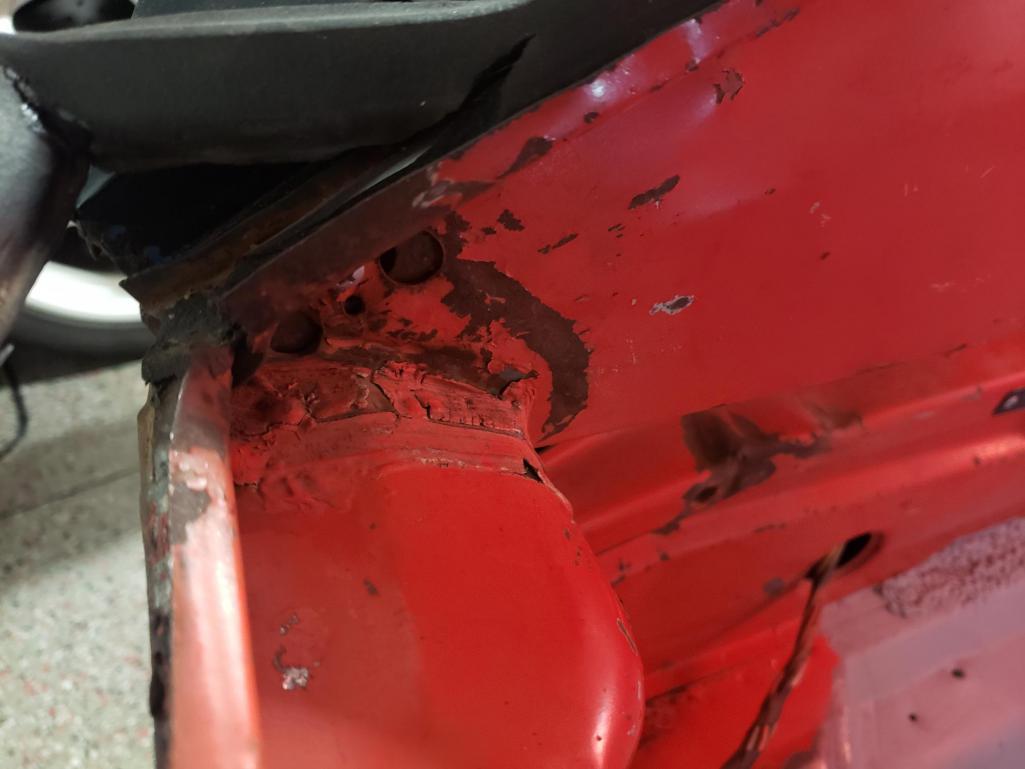 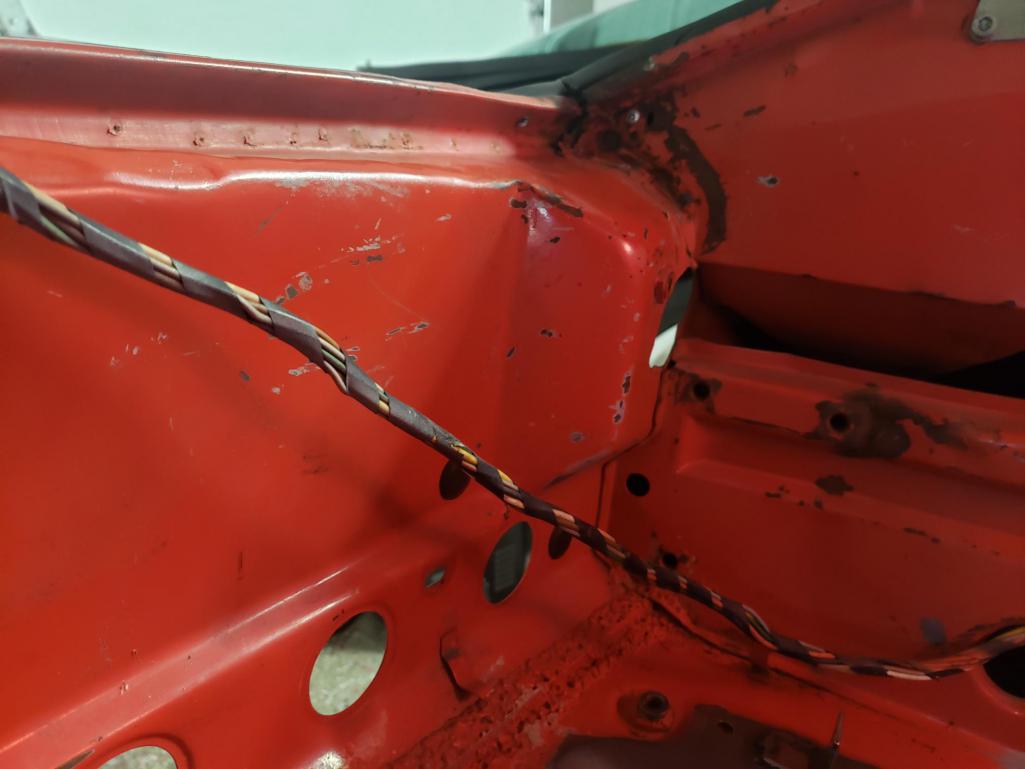 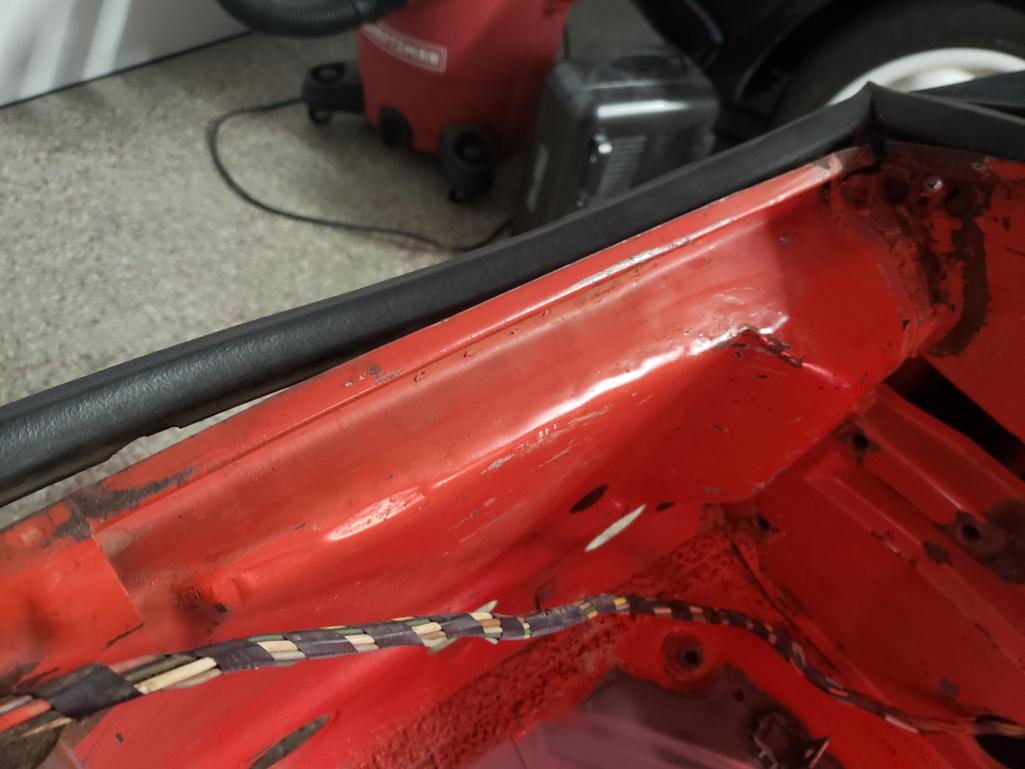 I cut the worst of the kink, then put a ratcheting strap on it to pull it inward a little. This really didn't move it too much, though maybe if I had cut it more, it would have. At any rate, added some metal to the opening and welded it up. I did some hammer and dolly work, then added some filler and seam sealer. 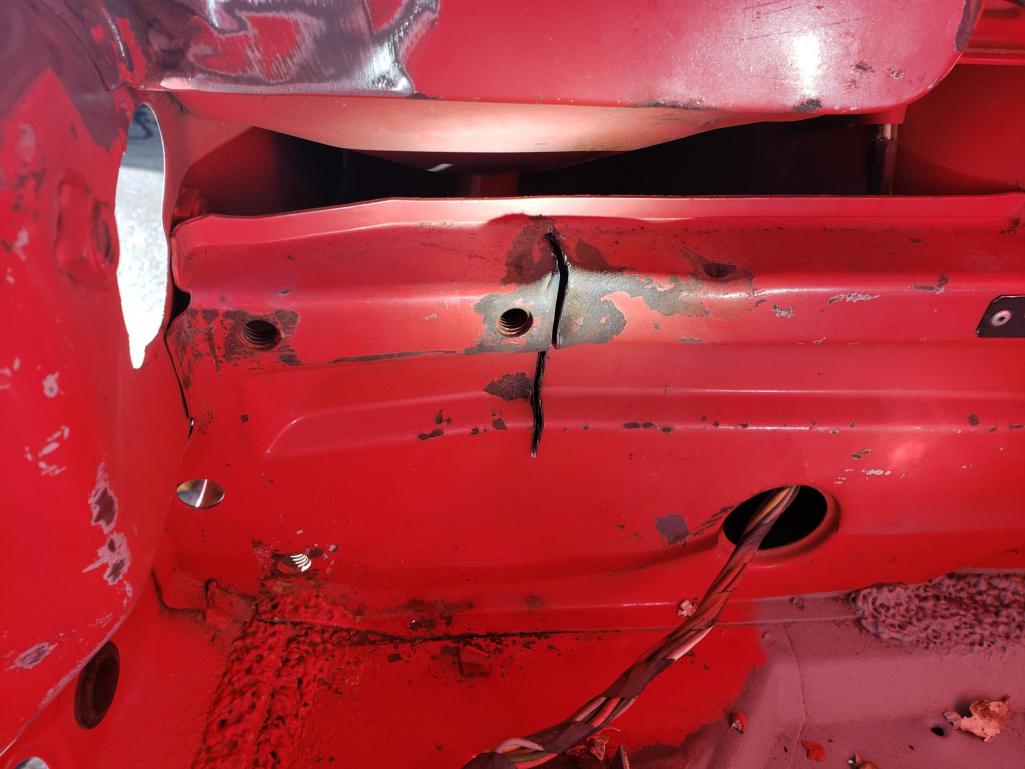 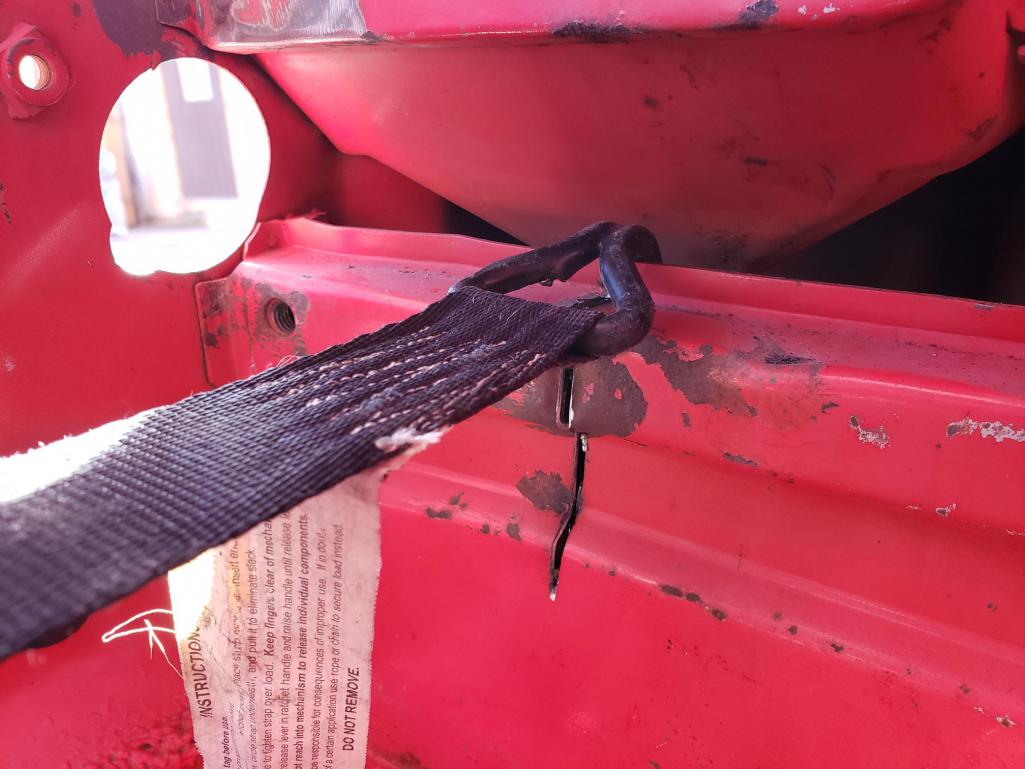 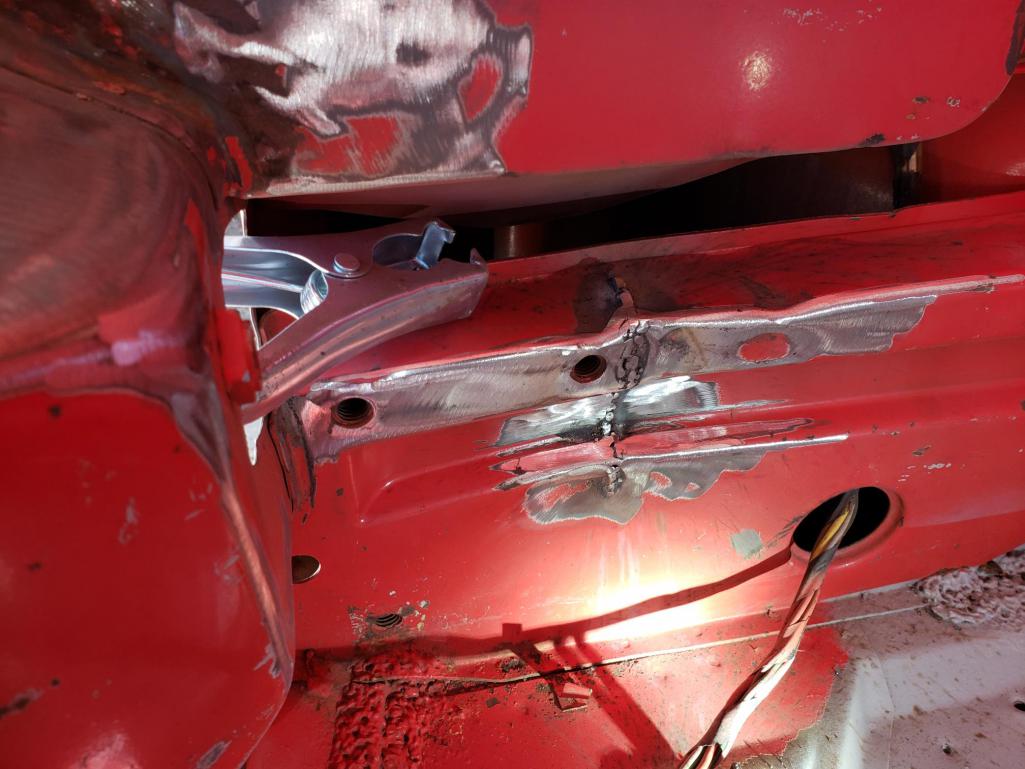 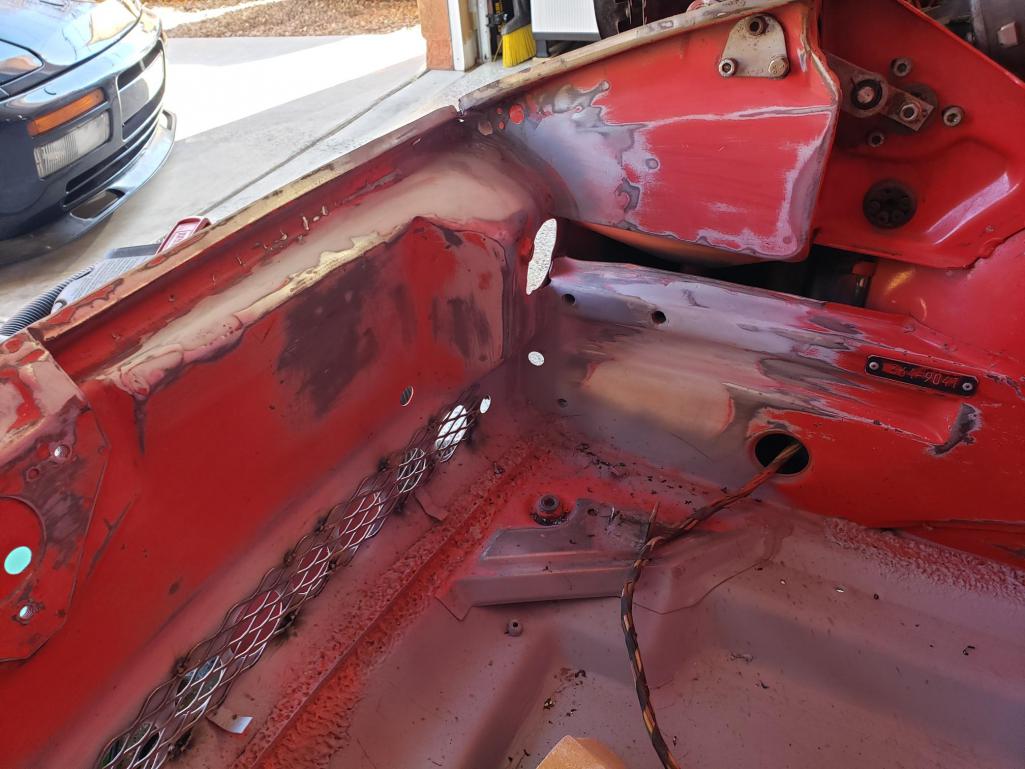 Before priming, I added extra holes between the factory holes in the nose for better airflow to the radiator. I cut some mesh, which wasn't quite long enough to span the distance. A few spot welds made it into one piece and I tacked it into place. 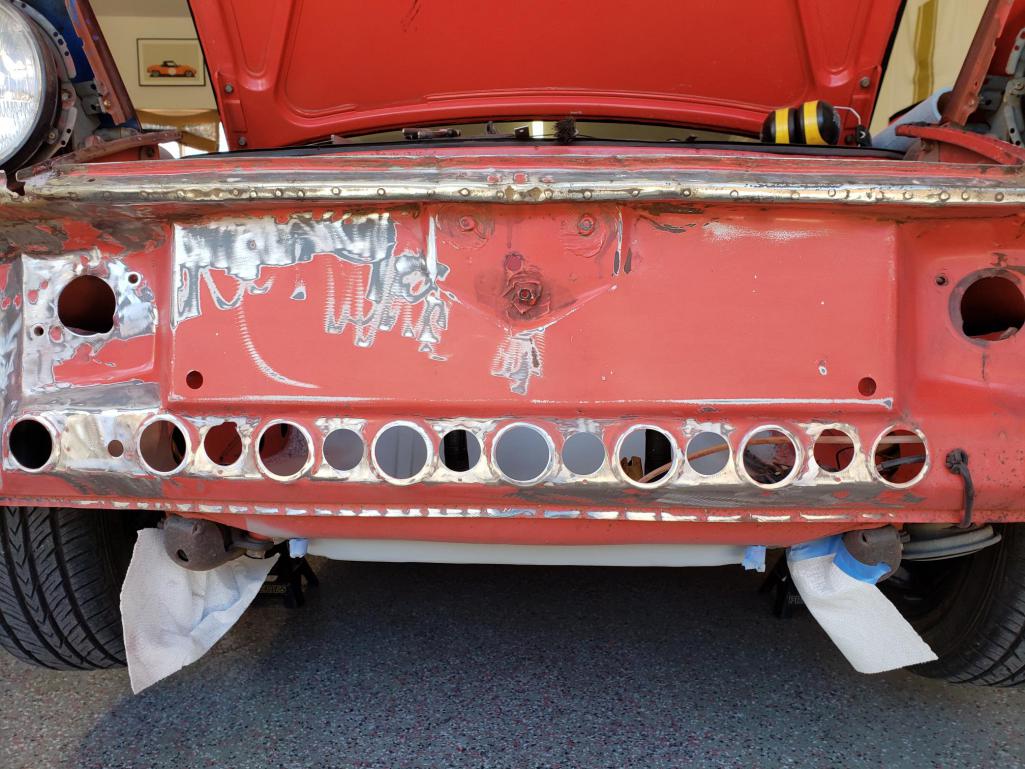 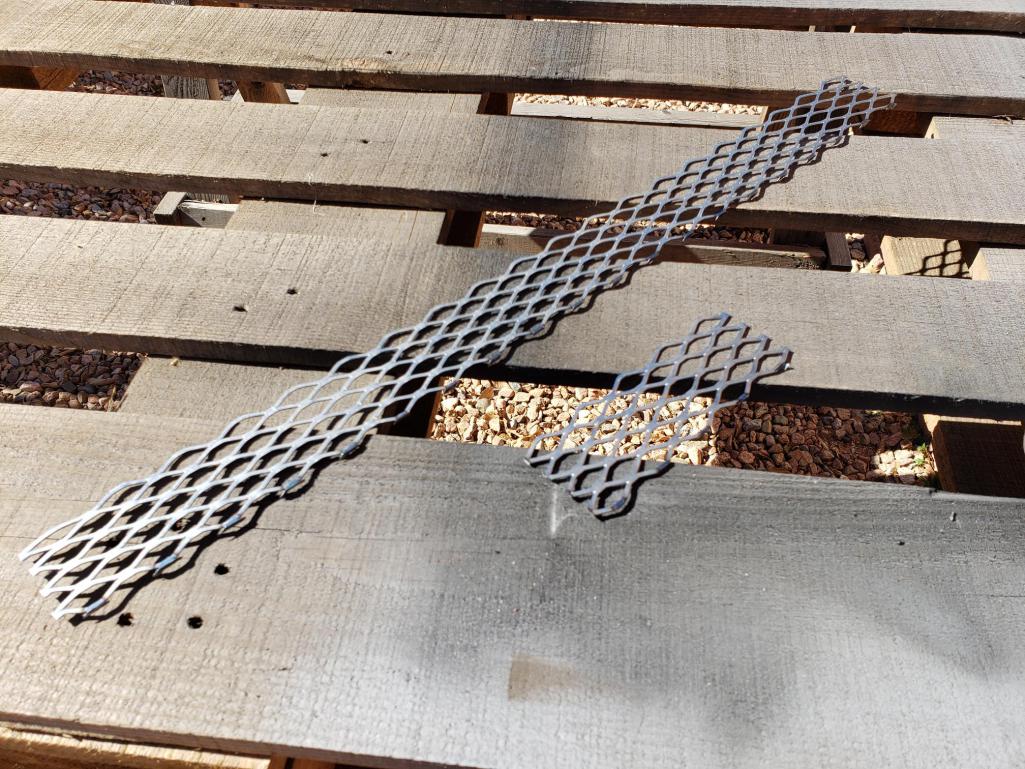 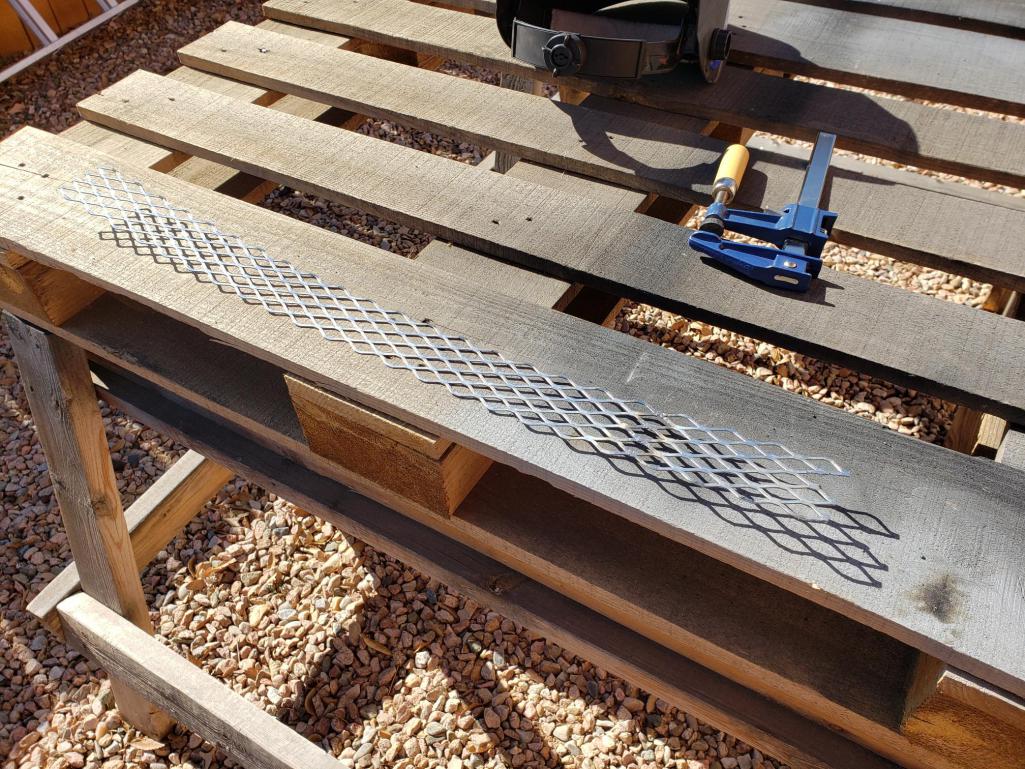 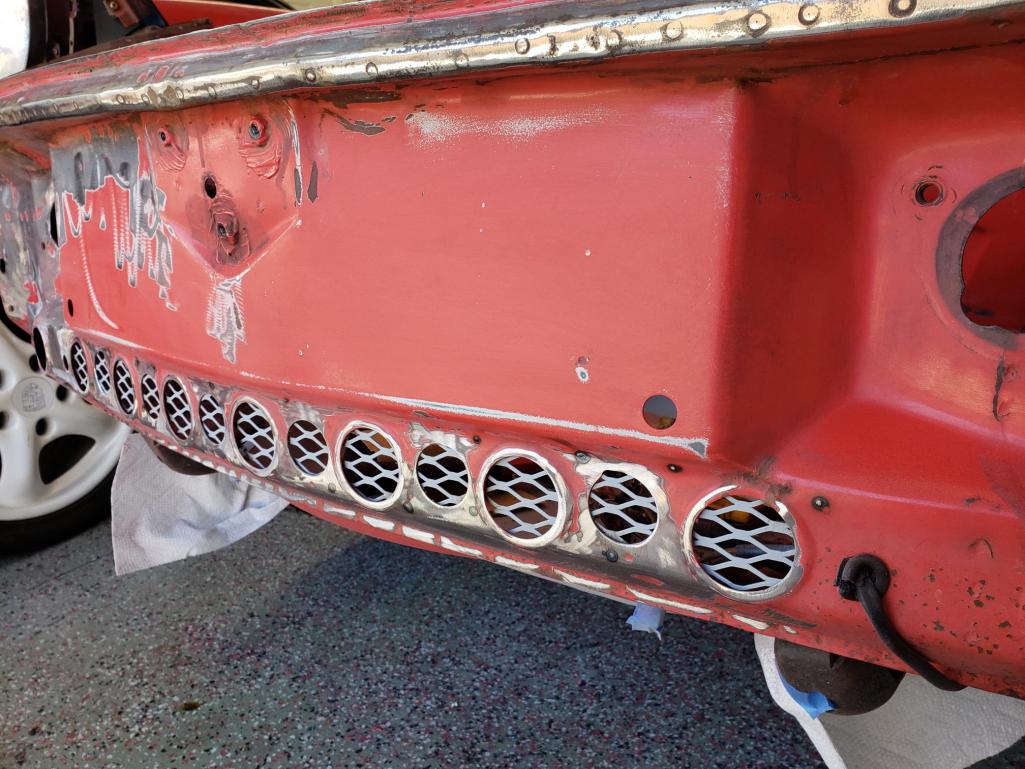 |
| Mayne |
 Jan 25 2022, 03:30 PM Jan 25 2022, 03:30 PM
Post
#65
|
|
Member   Group: Members Posts: 254 Joined: 28-February 17 From: NM Member No.: 20,880 Region Association: None |
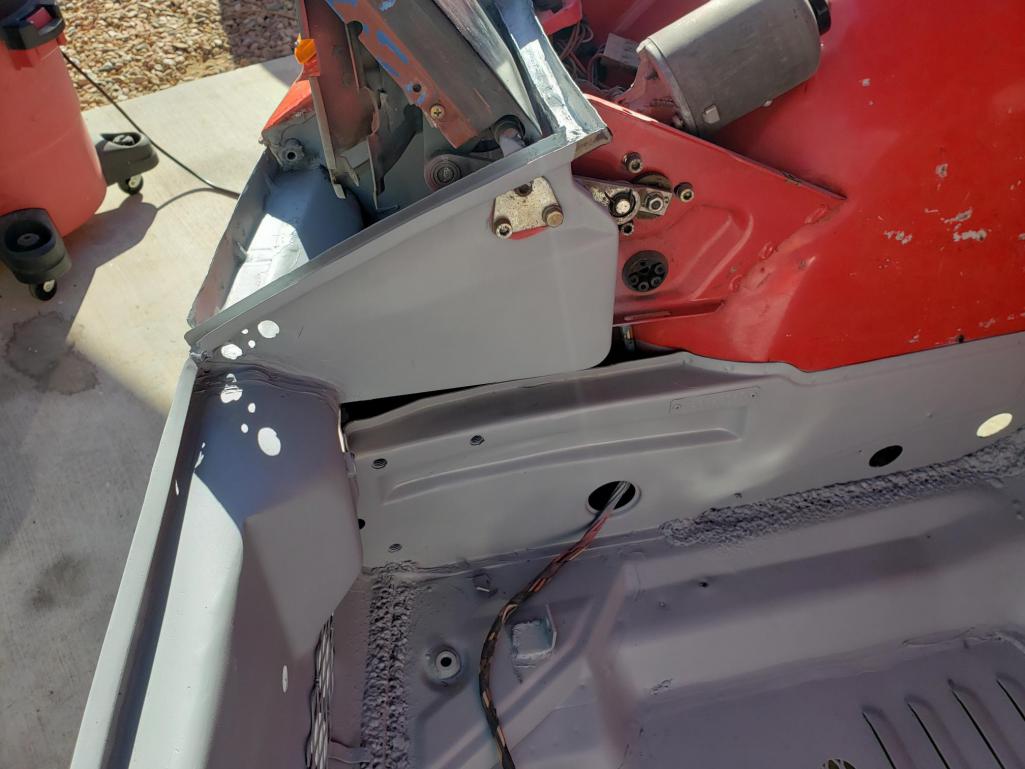
I stripped as much of the paint on the nose as I could, then taped it off and sprayed several coats of primer/surfacer. I got into the buckets below the headlights and treated some surface rust in there (as well as removing a substantial rodent nest!).
 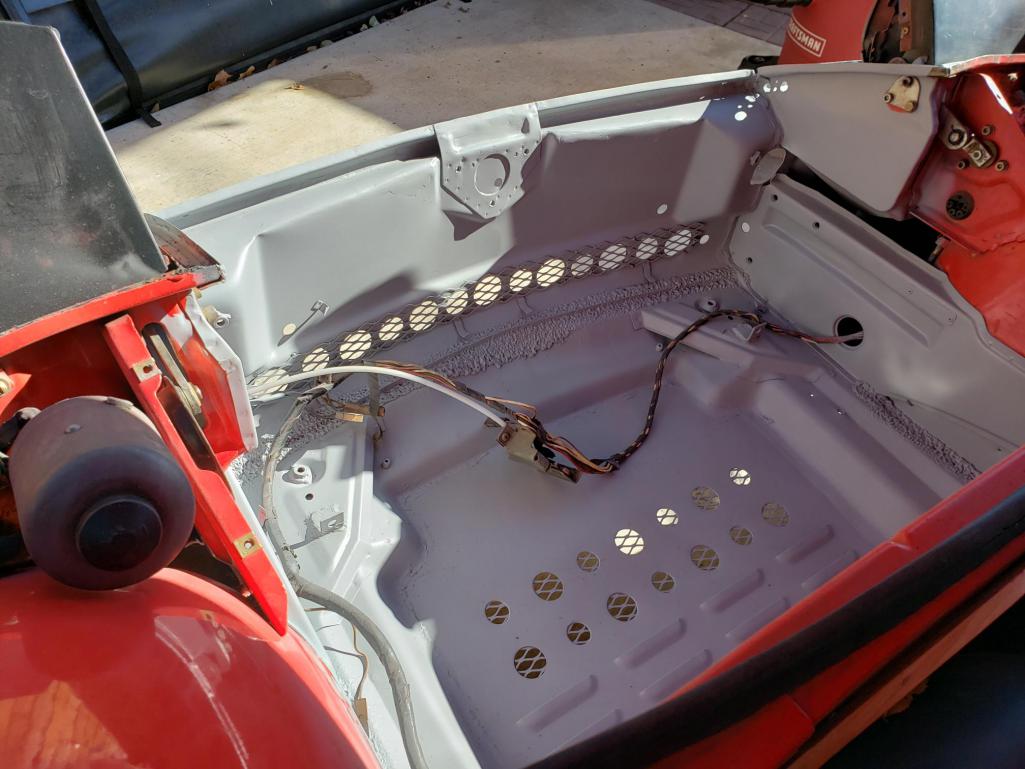 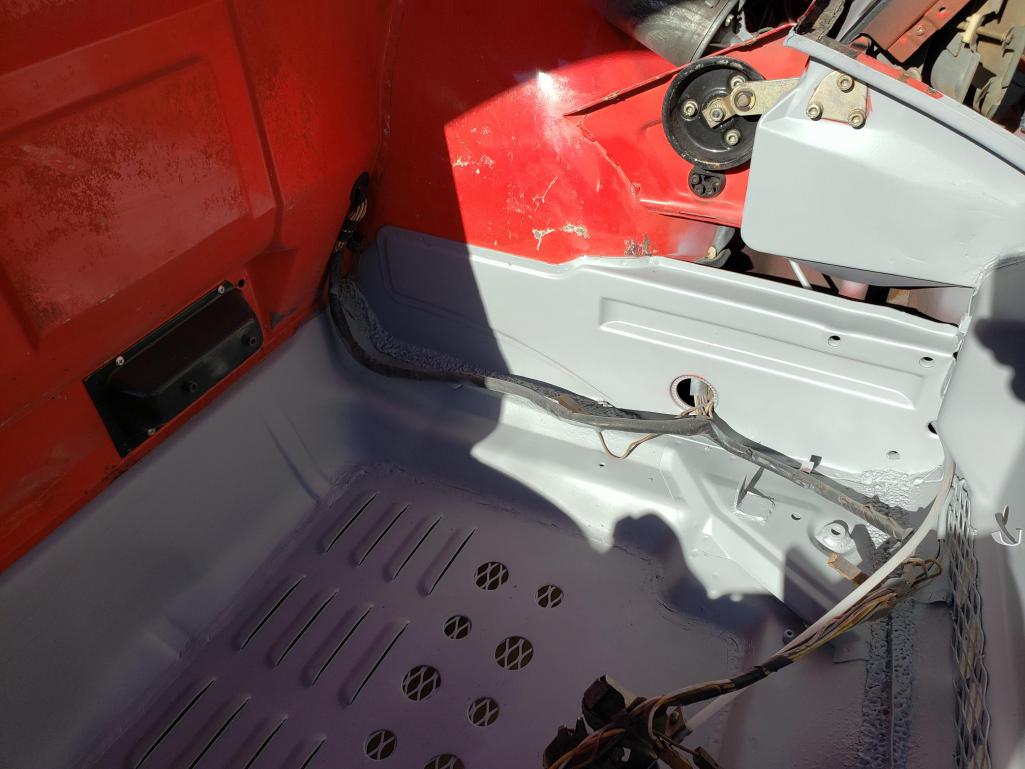 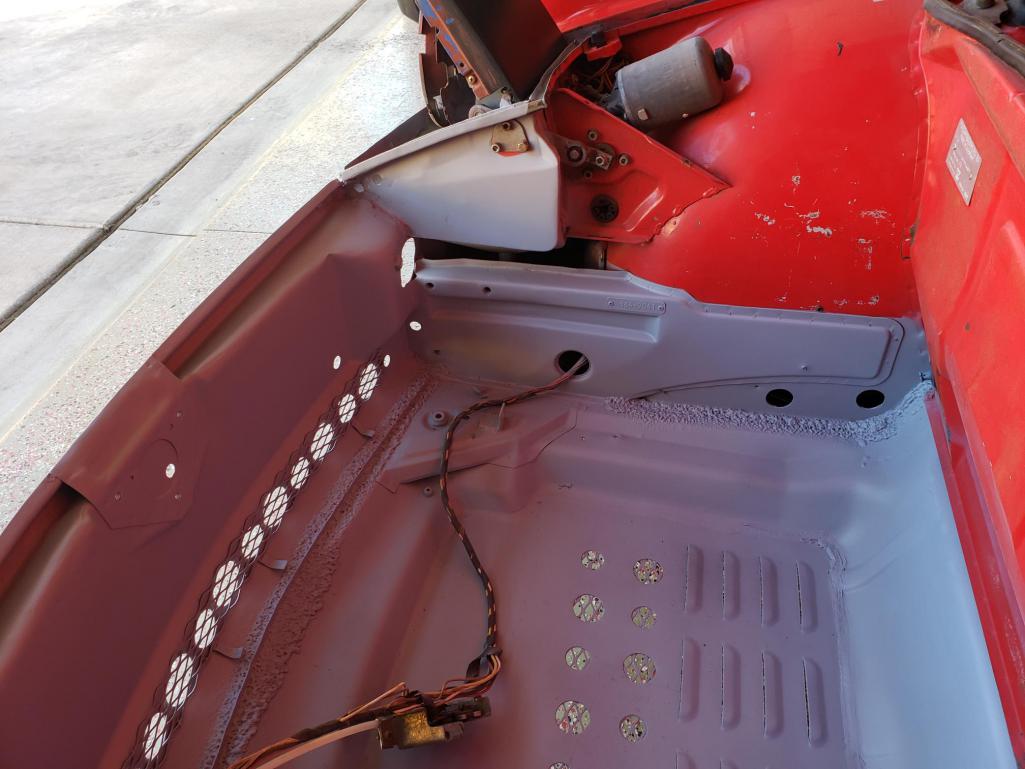 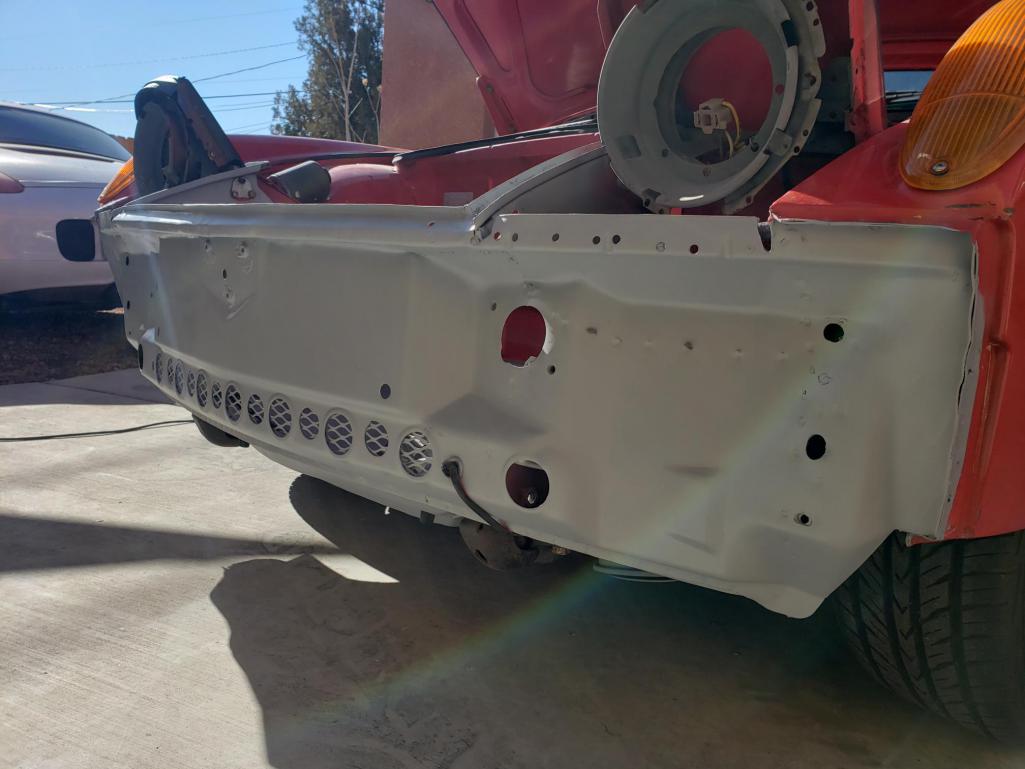   Now that the body work was decent, I finally got to install the radiator with my painted frame. The upper mounting tabs are just in bare metal, since I'm not sure how I want to finish them. Once the shrouds are in place, they will be about the only visible brackets. I'm considering drilling some "lightening" holes for aesthetics, burnishing the metal more, then clearing, but we'll see. But now that the radiator is in and I'm content with the mounting, I can start mocking up the lower and upper shrouds, maybe out of 1/16" aluminum. 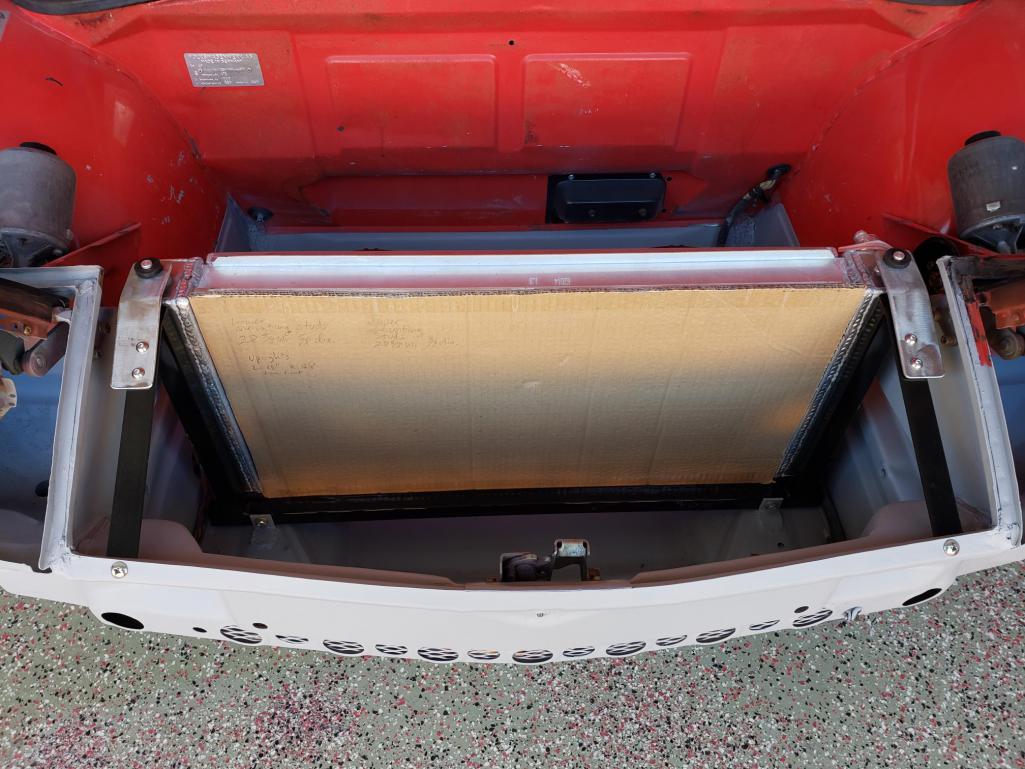 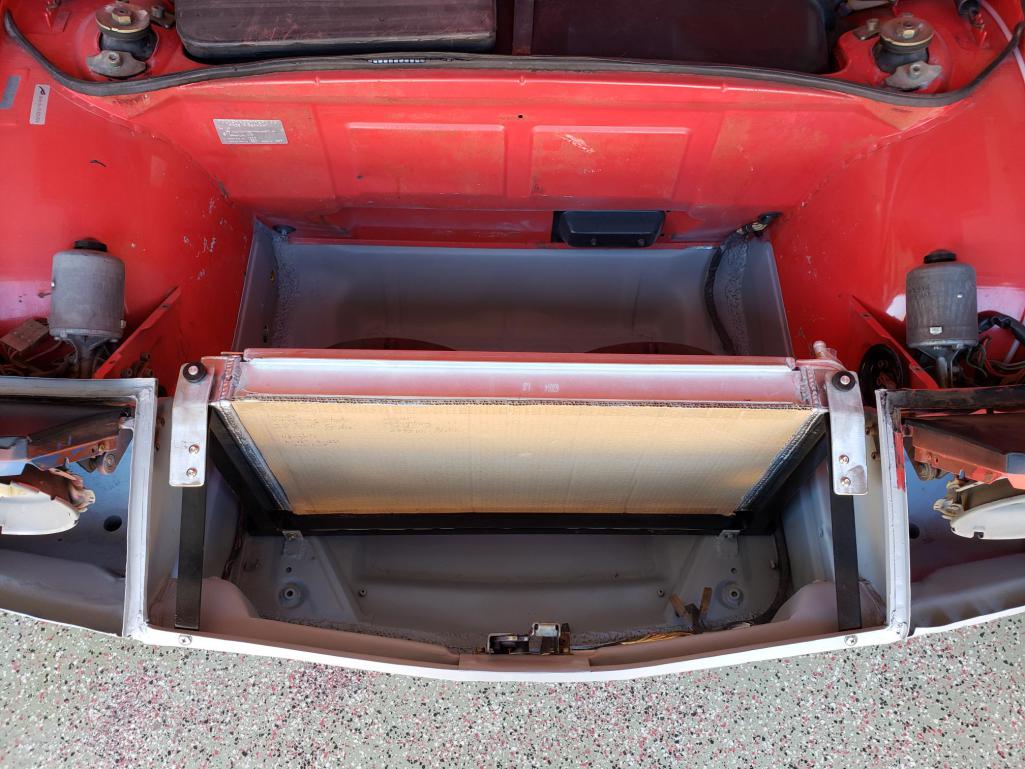 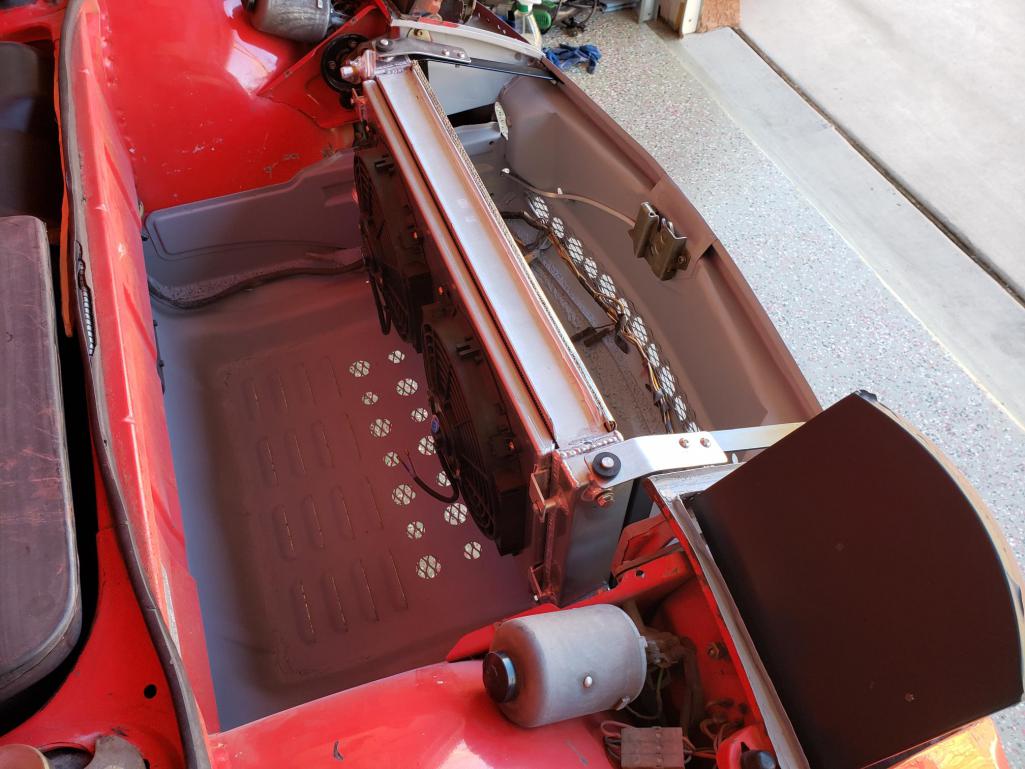 That's it for now! |
| Eric_Shea |
 Jan 26 2022, 06:27 PM Jan 26 2022, 06:27 PM
Post
#66
|
|
PMB Performance                Group: Admin Posts: 19,274 Joined: 3-September 03 From: Salt Lake City, UT Member No.: 1,110 Region Association: Rocky Mountains  |
Did you and Zach ever do that 5-lug video?
|
| tazz9924 |
 Jan 26 2022, 07:43 PM Jan 26 2022, 07:43 PM
Post
#67
|
|
Senior Member    Group: Members Posts: 703 Joined: 31-May 15 From: Mooresville NC Member No.: 18,779 Region Association: None |
I would be worried about cooling with your setup. You will definitely need to duct the front to make it effective and in the rear there is hardly anywhere for it to go. The radiator needs a lot of fresh airflow in and out. If you don’t do ducting you will need larger holes.
From a trusted source of mine: With a well-designed inlet duct, the opening for your intercooler, radiator, oil cooler, etc. should be about 1/3 the surface area of the heat exchanger. If your intercooler core is 20” x 30” (600 square inches), In a perfect world, you’d then create an outlet duct that would then shrink down to the 1/3 size again and dump into a low-pressure zone Food for thought anyway. maybe you have some good plans (IMG:style_emoticons/default/popcorn[1].gif) |
| Mayne |
 Jan 26 2022, 09:07 PM Jan 26 2022, 09:07 PM
Post
#68
|
|
Member   Group: Members Posts: 254 Joined: 28-February 17 From: NM Member No.: 20,880 Region Association: None |
Did you and Zach ever do that 5-lug video? Hey Eric! I thought Zach was going to send you the video, but I did post it earlier in the thread here. But at any rate, here are links to the two-part video: Five-lug swap-part 1 Five lug swap-part 2 (IMG:style_emoticons/default/beerchug.gif) |
| Mayne |
 Jan 26 2022, 09:12 PM Jan 26 2022, 09:12 PM
Post
#69
|
|
Member   Group: Members Posts: 254 Joined: 28-February 17 From: NM Member No.: 20,880 Region Association: None |
I would be worried about cooling with your setup. You will definitely need to duct the front to make it effective and in the rear there is hardly anywhere for it to go. The radiator needs a lot of fresh airflow in and out. If you don’t do ducting you will need larger holes. From a trusted source of mine: With a well-designed inlet duct, the opening for your intercooler, radiator, oil cooler, etc. should be about 1/3 the surface area of the heat exchanger. If your intercooler core is 20” x 30” (600 square inches), In a perfect world, you’d then create an outlet duct that would then shrink down to the 1/3 size again and dump into a low-pressure zone Food for thought anyway. maybe you have some good plans (IMG:style_emoticons/default/popcorn[1].gif) I appreciate the input! I agree I'm flirting with a lack of airflow, though I do plan to fully duct the setup on both sides. I post on the Watered Down Facebook group as well, and Kent has been commenting on the design and seems to think it might work. My thinking is, that when it's all up and running, if I have cooling issues, I can drill or cut more openings without a major headache. I'm also banking on the low cooling demands of the EZ30 vs. a SBC or LS. We'll see! |
| 76-914 |
 Jan 26 2022, 10:53 PM Jan 26 2022, 10:53 PM
Post
#70
|
|
Repeat Offender & Resident Subaru Antagonist           Group: Members Posts: 13,494 Joined: 23-January 09 From: Temecula, CA Member No.: 9,964 Region Association: Southern California 
|
He should be OK. Here are both of my Subaru conversions and their openings for reference. On the 70 with the green & yellow bumper I cut out 5 of the centermost holes creating an oval opening and it cools fine. Jeremy is using 7 holes and has opened up smaller holes in-between each of those. Worst case is he'd need to open it up by removing the material between the holes. The EZ30's don't require much of an opening. Even with AC. HighJack over.
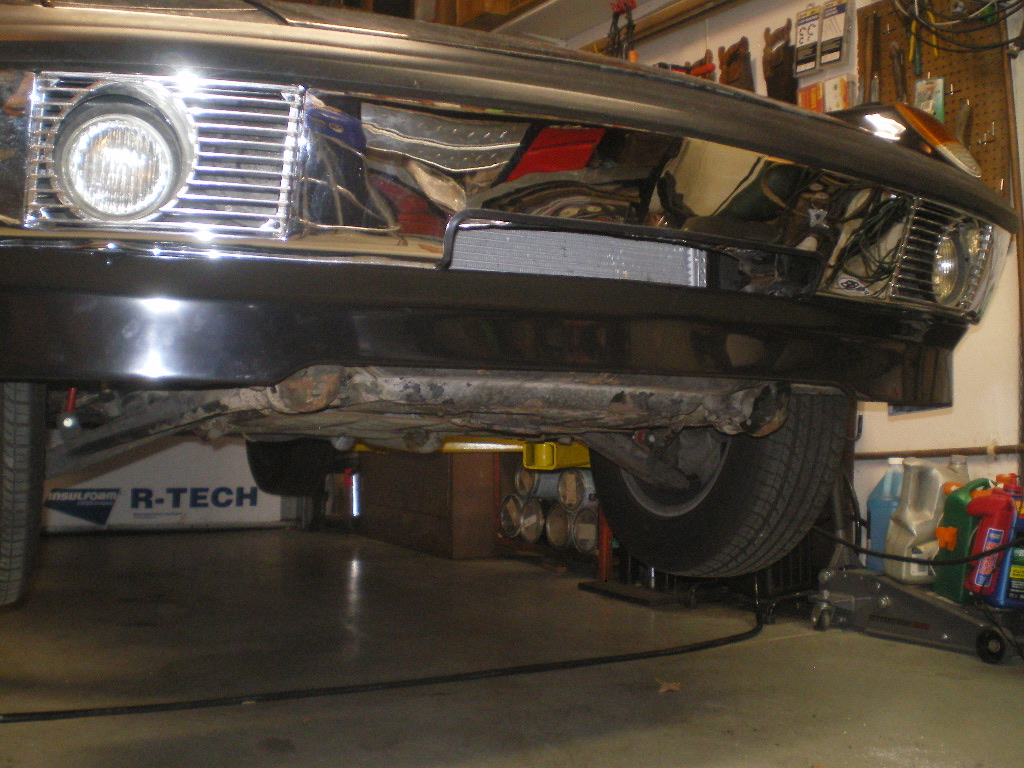 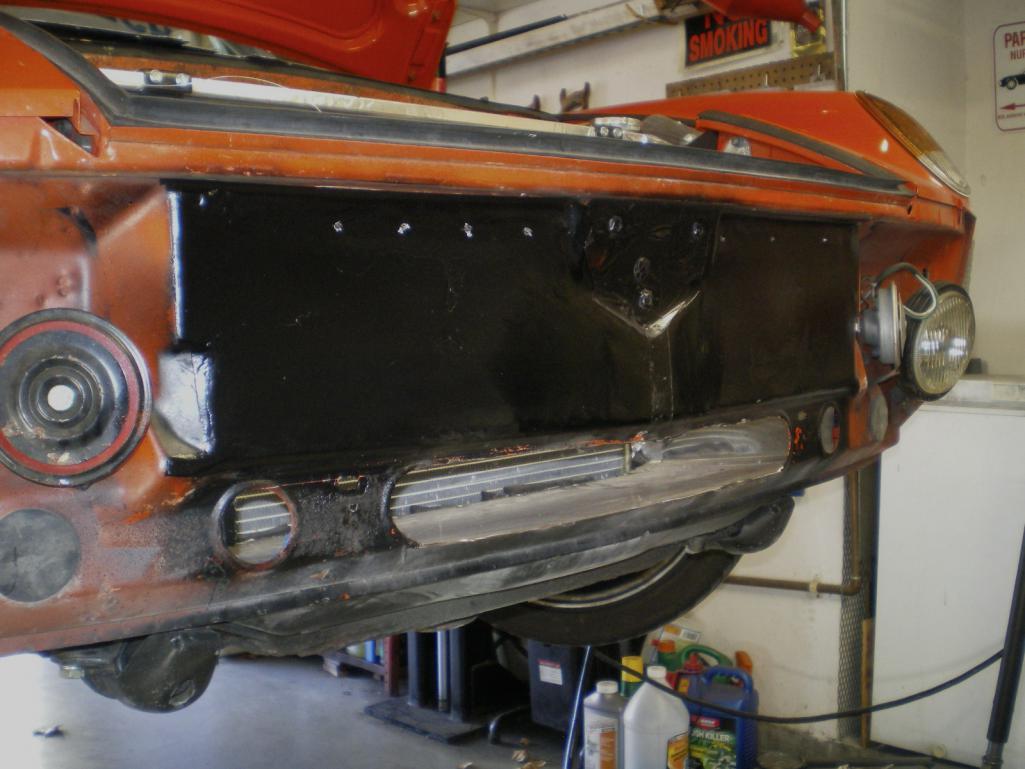 |
| tazz9924 |
 Jan 28 2022, 03:42 AM Jan 28 2022, 03:42 AM
Post
#71
|
|
Senior Member    Group: Members Posts: 703 Joined: 31-May 15 From: Mooresville NC Member No.: 18,779 Region Association: None |
He should be OK. Here are both of my Subaru conversions and their openings for reference. On the 70 with the green & yellow bumper I cut out 5 of the centermost holes creating an oval opening and it cools fine. Jeremy is using 7 holes and has opened up smaller holes in-between each of those. Worst case is he'd need to open it up by removing the material between the holes. The EZ30's don't require much of an opening. Even with AC. HighJack over.   I like how you did that, i wish i cut my hole open like that in a past life instead of cutting the bumper out so much. What does the backside of that look like? i went through the fender wells but i do really like the floor exit for non race car kinda swaps. I was just more worried about exit, but he is right that he can cut more holes. Especially with ducting it’ll be better. If theres good water proof ducting and you have the grating, why not just cut it out so you don’t need to figure out if it works good enough on a hot day. Keep up the work though! |
| Mayne |
 May 27 2022, 08:41 AM May 27 2022, 08:41 AM
Post
#72
|
|
Member   Group: Members Posts: 254 Joined: 28-February 17 From: NM Member No.: 20,880 Region Association: None |
Time for a little update here. Up next was making aluminum sheet ducting on both sides of the radiator. I started with the inlet side:
Card stock template (card stock is silver, so not metal yet): 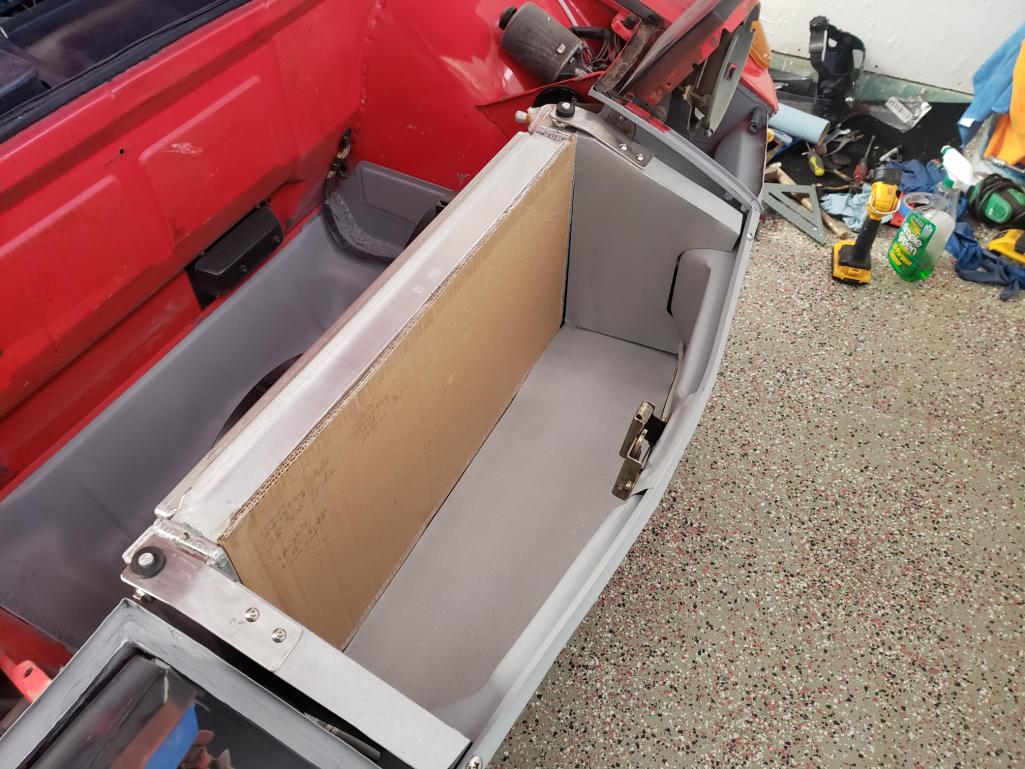 Metal brake ordered from Jegs:  First delivery of aluminum sheet, fairly light duty at .050:  Duct floor:   Duct floor and walls riveted together. I'm using weather stripping with "top bulb" rubber tube to help fill in an irregular edges: 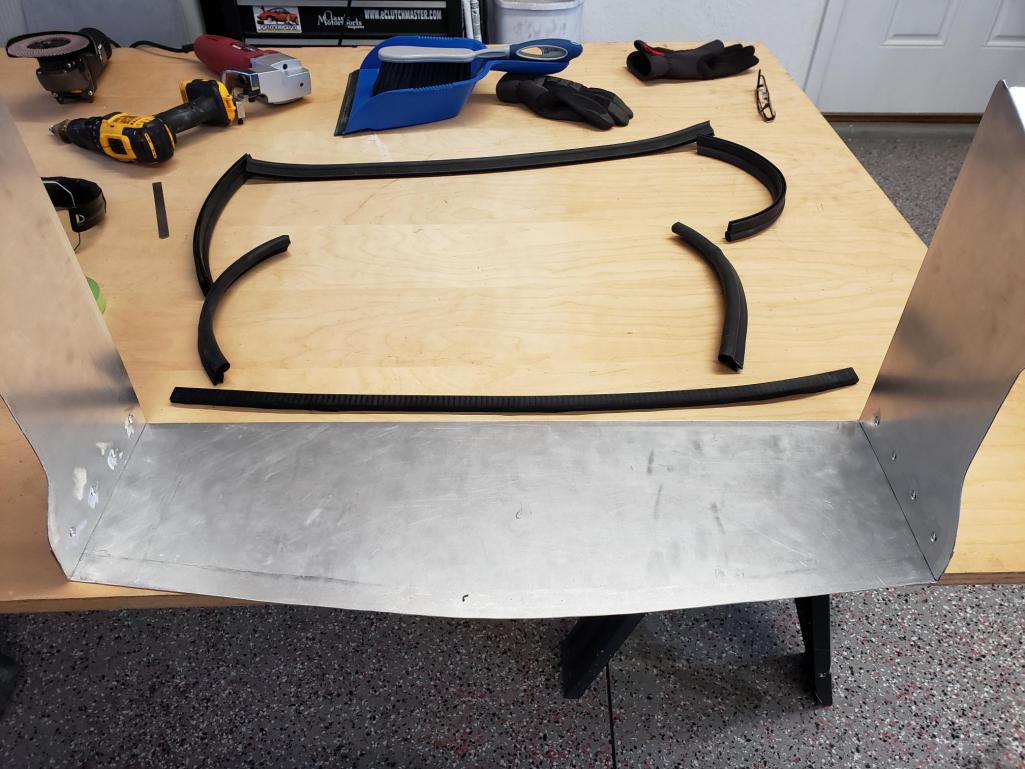 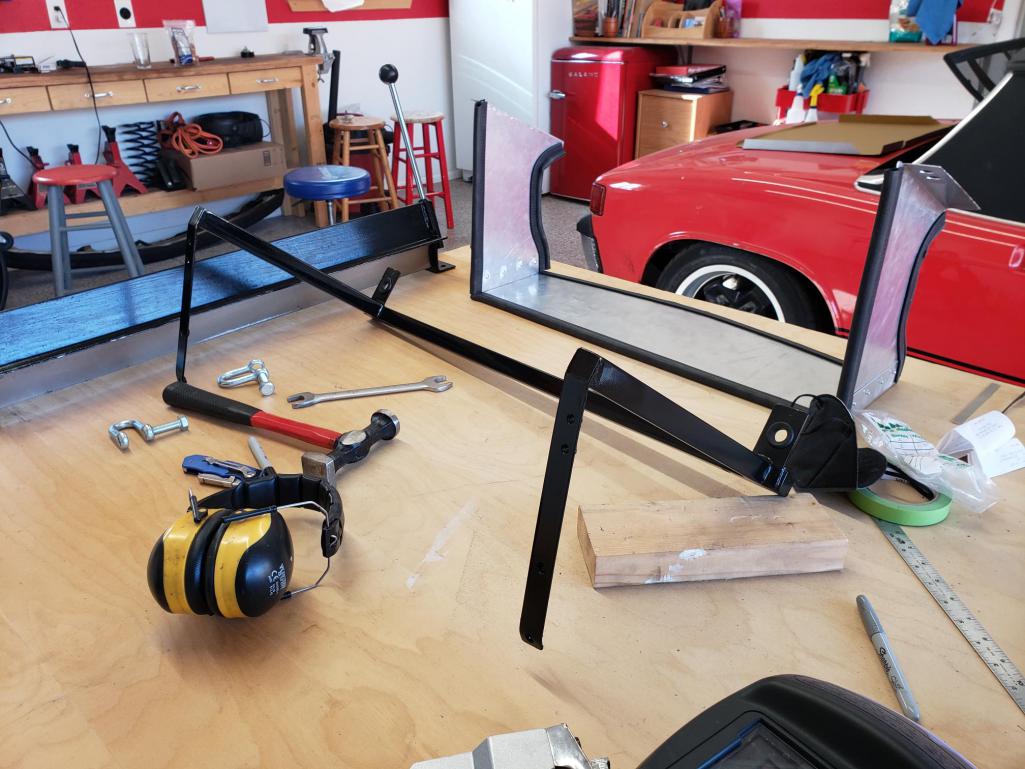 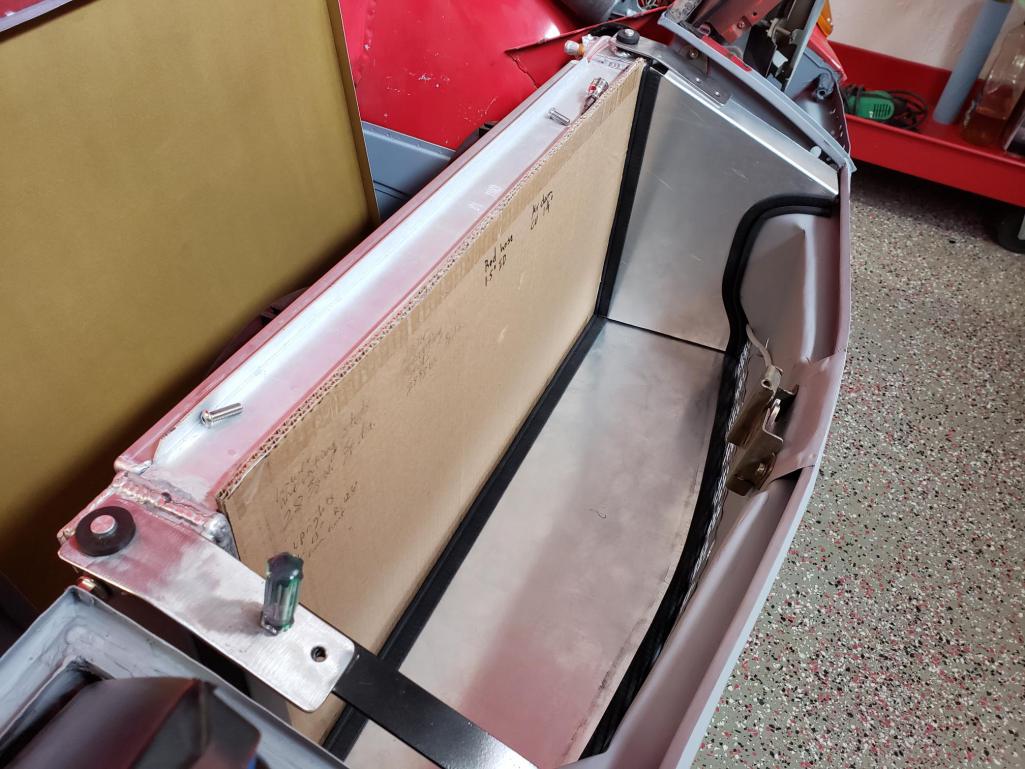 Here's the top and a close-up of the rough opening for the latch. I'll figure out some way to finish it off a bit. Also a close-up of mounting method. 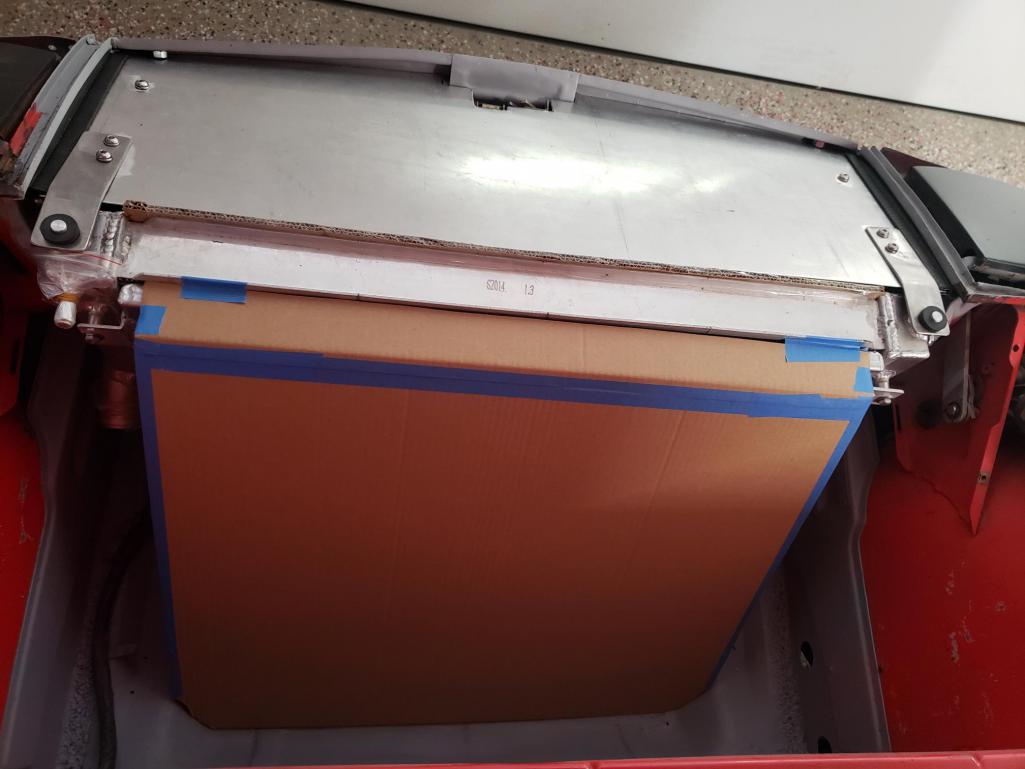 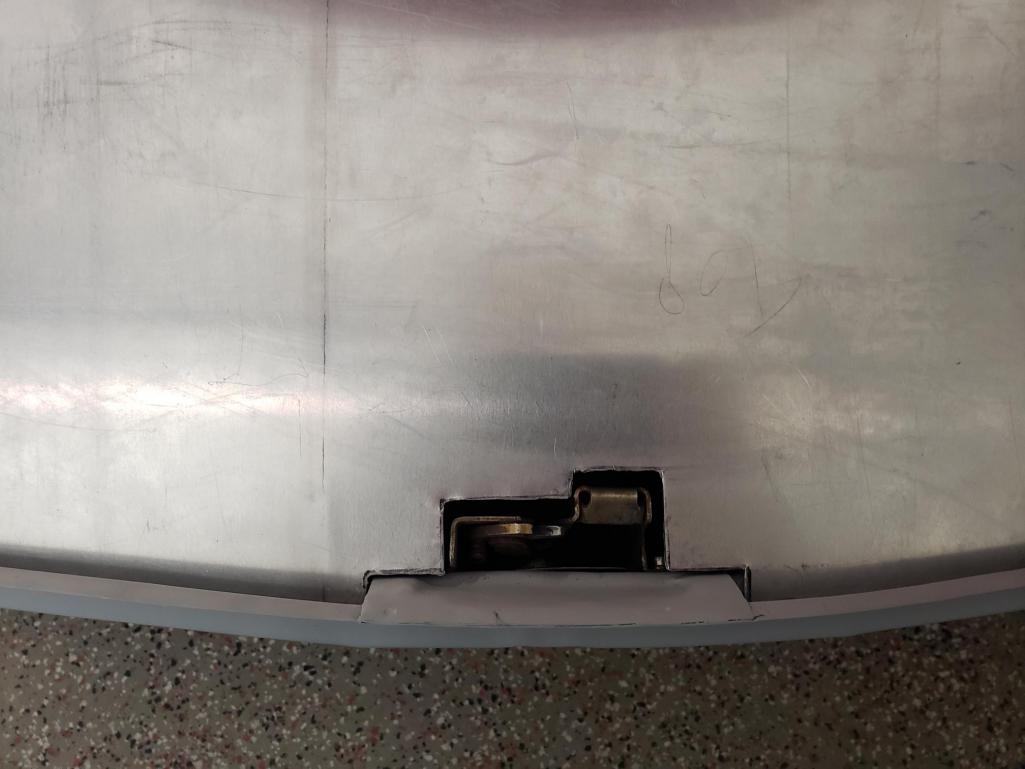 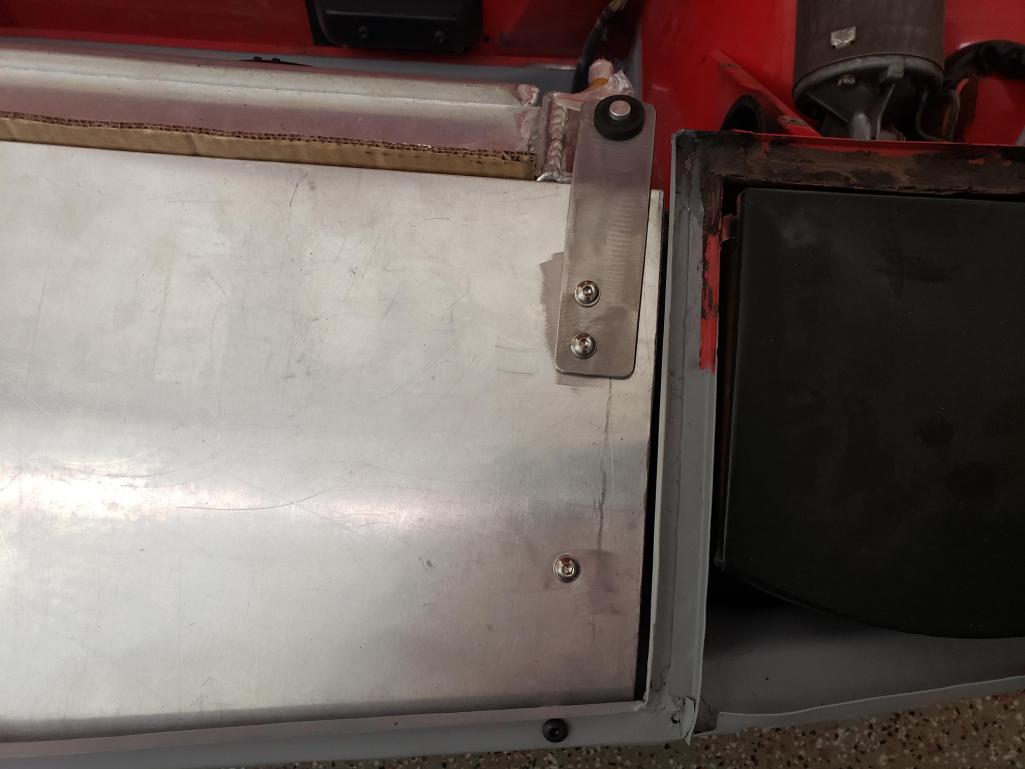 More to come! |
| mepstein |
 May 27 2022, 08:45 AM May 27 2022, 08:45 AM
Post
#73
|
|
914-6 GT in waiting                Group: Members Posts: 19,255 Joined: 19-September 09 From: Landenberg, PA/Wilmington, DE Member No.: 10,825 Region Association: MidAtlantic Region 
|
Looking good. (IMG:style_emoticons/default/beerchug.gif)
|
| Shivers |
 May 27 2022, 08:45 AM May 27 2022, 08:45 AM
Post
#74
|
|
Senior Member     Group: Members Posts: 2,368 Joined: 19-October 20 From: La Quinta, CA Member No.: 24,781 Region Association: Southern California |
Nice work
|
| Mayne |
 May 27 2022, 08:54 AM May 27 2022, 08:54 AM
Post
#75
|
|
Member   Group: Members Posts: 254 Joined: 28-February 17 From: NM Member No.: 20,880 Region Association: None |
At that point, I got a little delivery (IMG:style_emoticons/default/evilgrin.gif) :
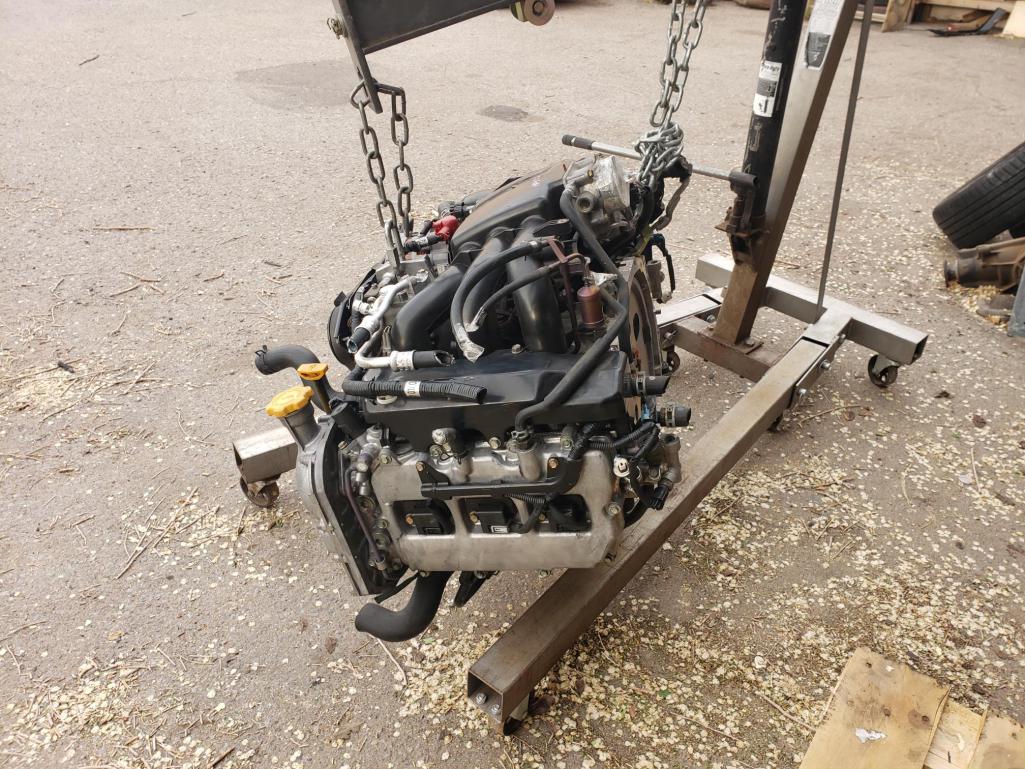 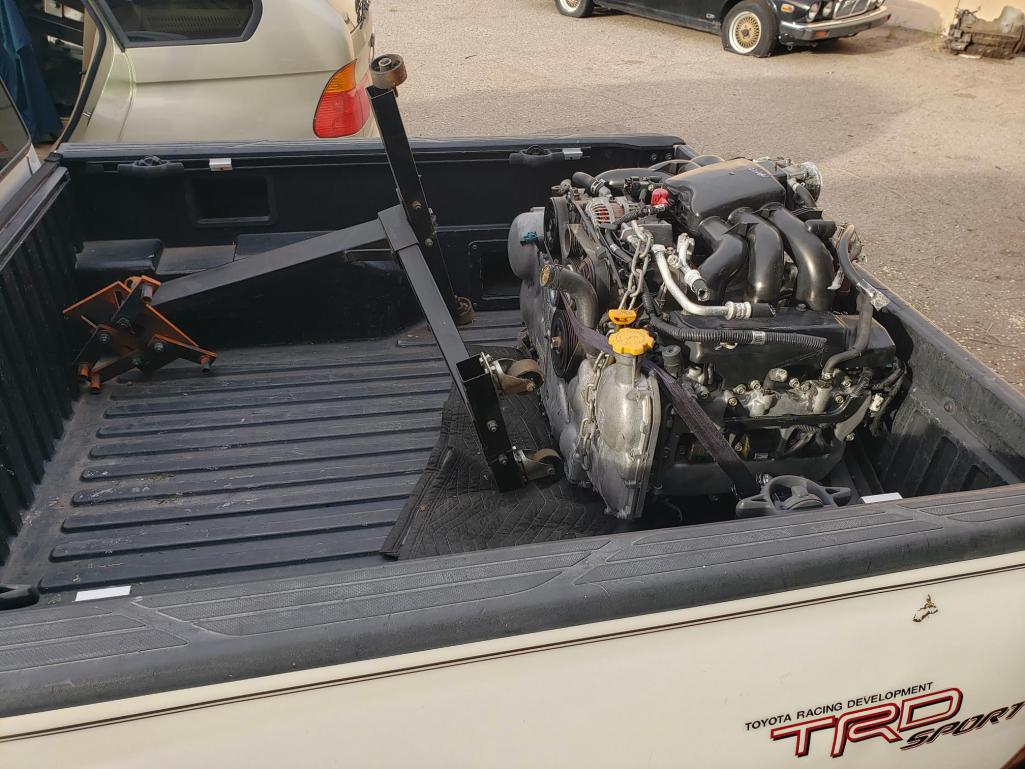 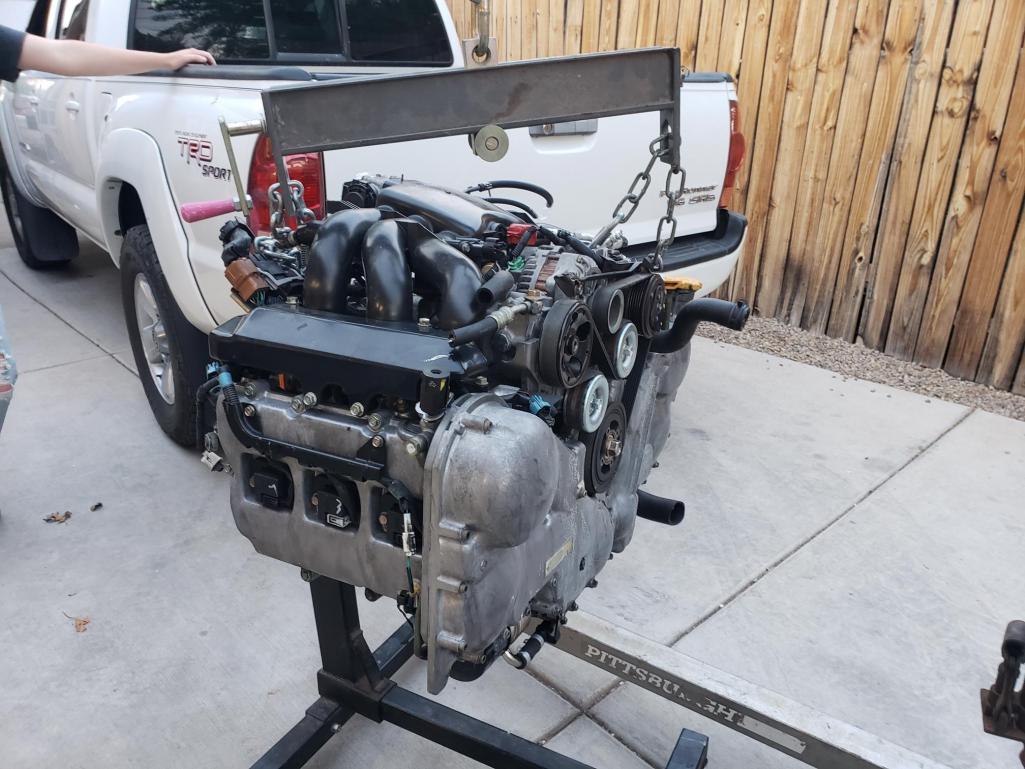 EZ30R, should motivate the car down the road. Also, picked up a disgustingly dirty Impreza 5MT locally for $140, with starter, flywheel, engine bolts, and trans mount. Also picked up a nice quality trans end plate locally for $50: 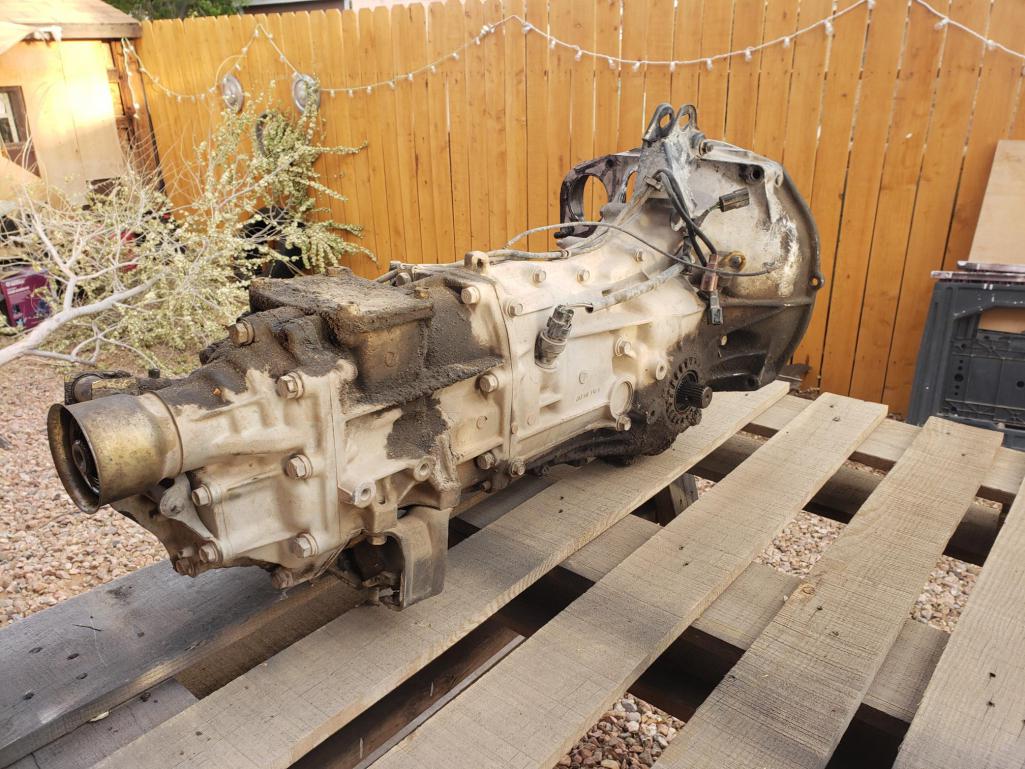 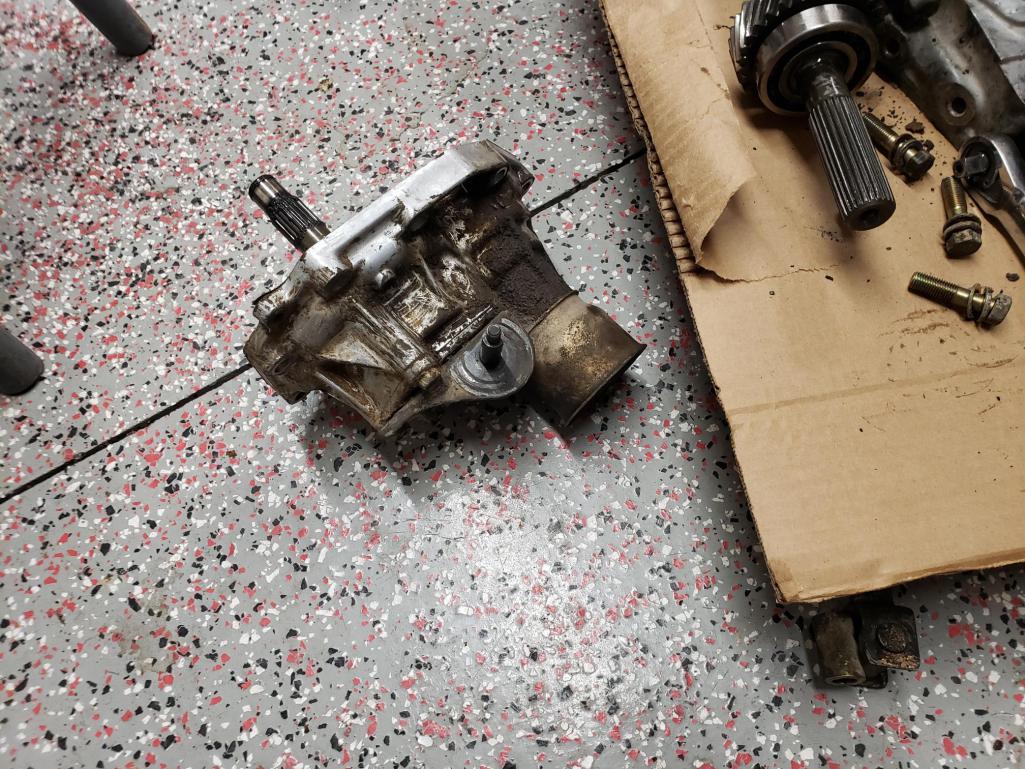 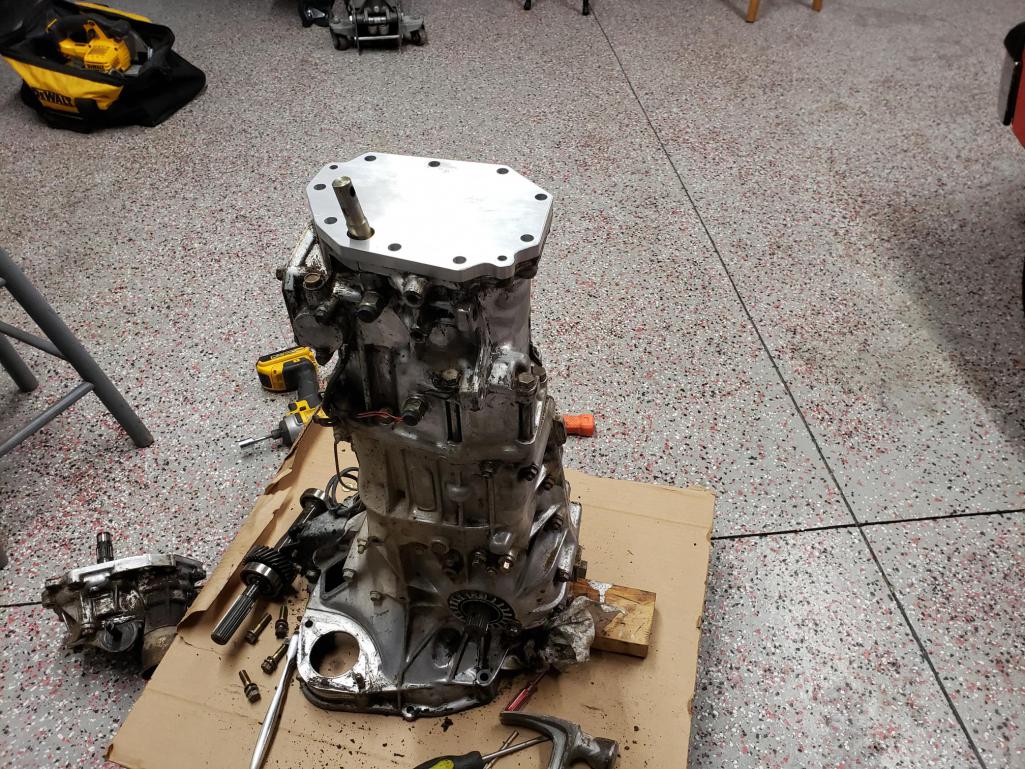 Still waiting on the Subaru Gears rear drive lockout collar, all the way from Down Under. Attached thumbnail(s) 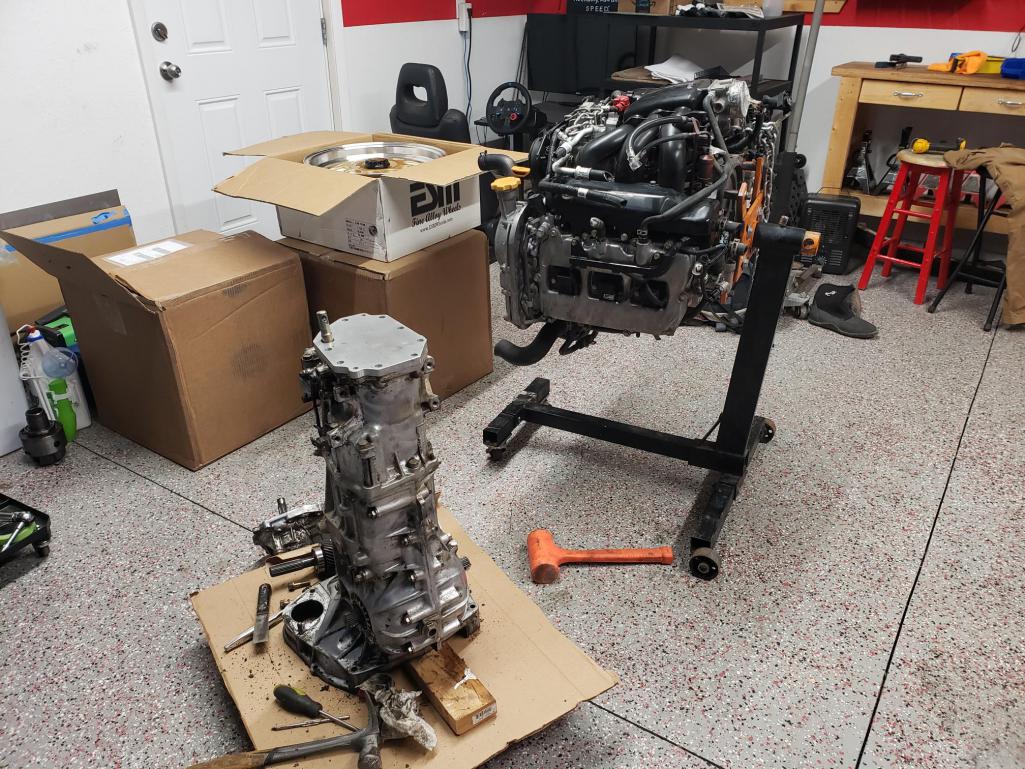
|
| Mayne |
 May 27 2022, 09:05 AM May 27 2022, 09:05 AM
Post
#76
|
|
Member   Group: Members Posts: 254 Joined: 28-February 17 From: NM Member No.: 20,880 Region Association: None |
Next up was getting on to the exit side of the radiator.
Template (aluminum sheet is expensive so I don't want to do it twice if possible): 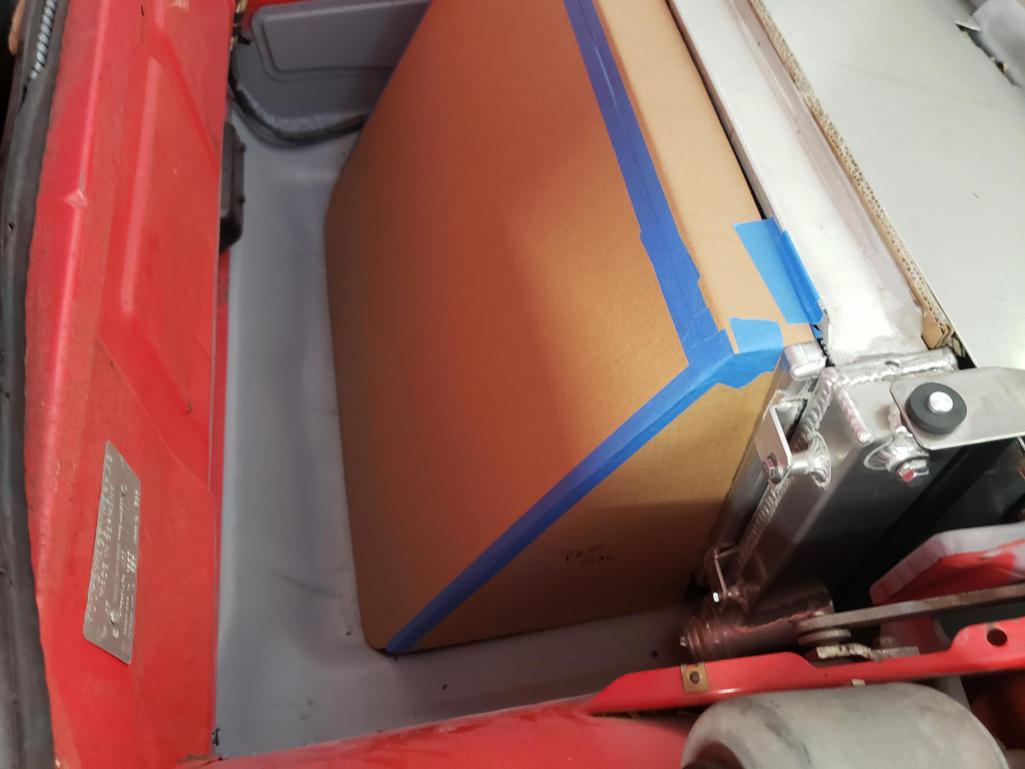 Taped up sheet metal before riveting: 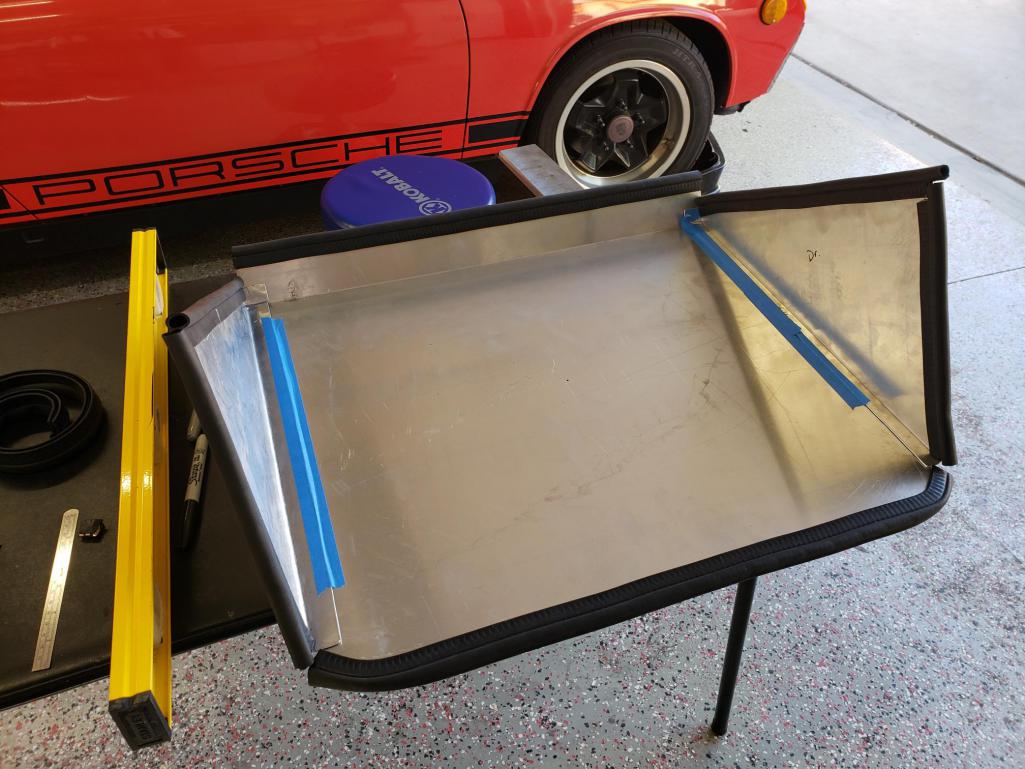 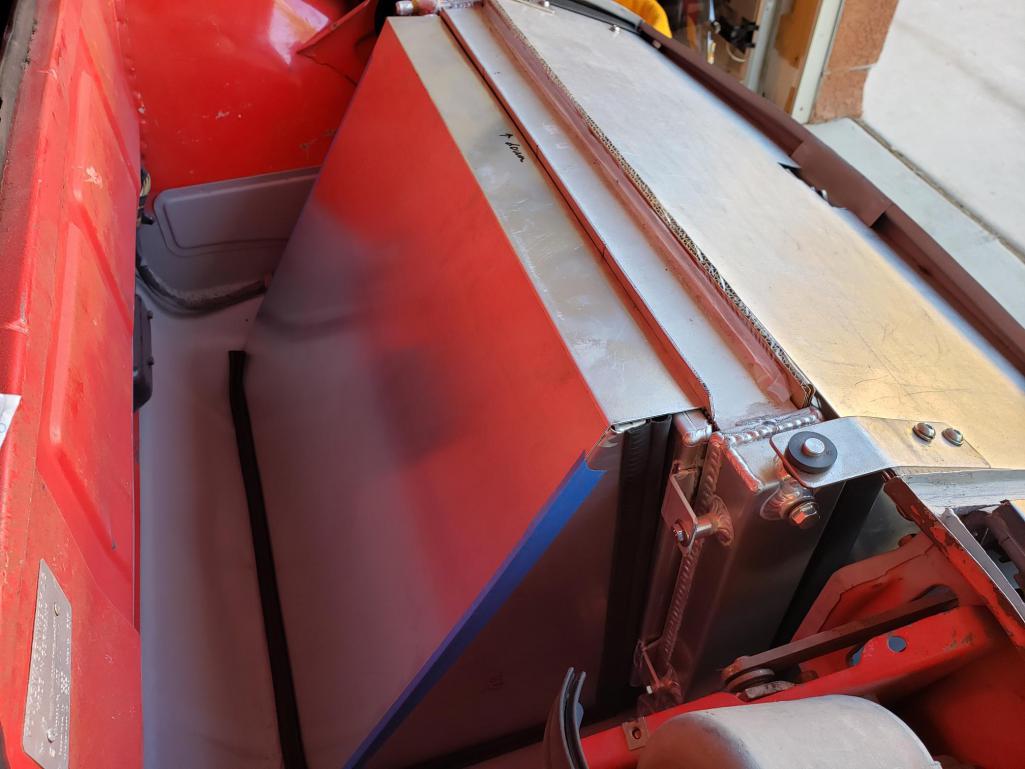 Riveting content: 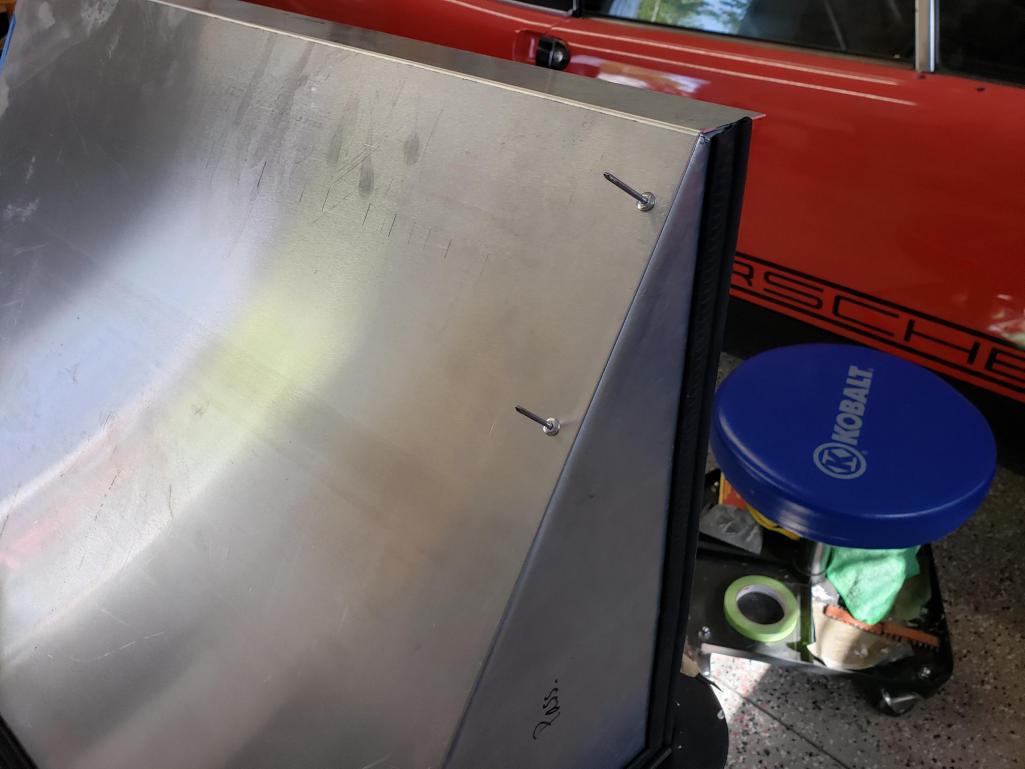 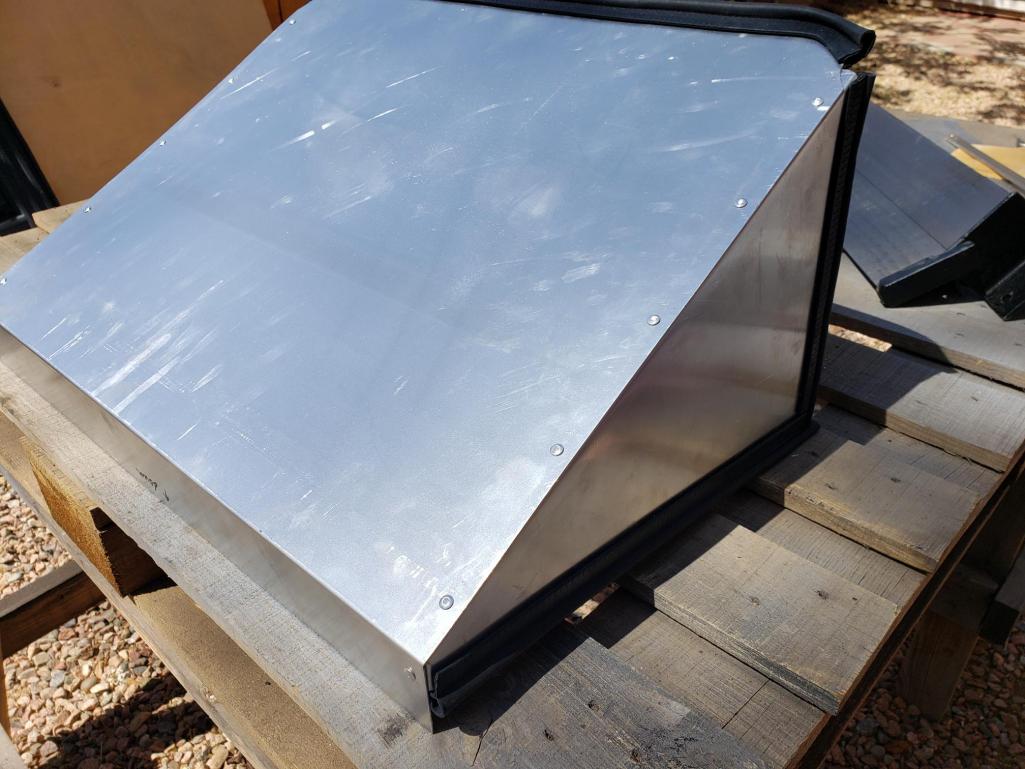 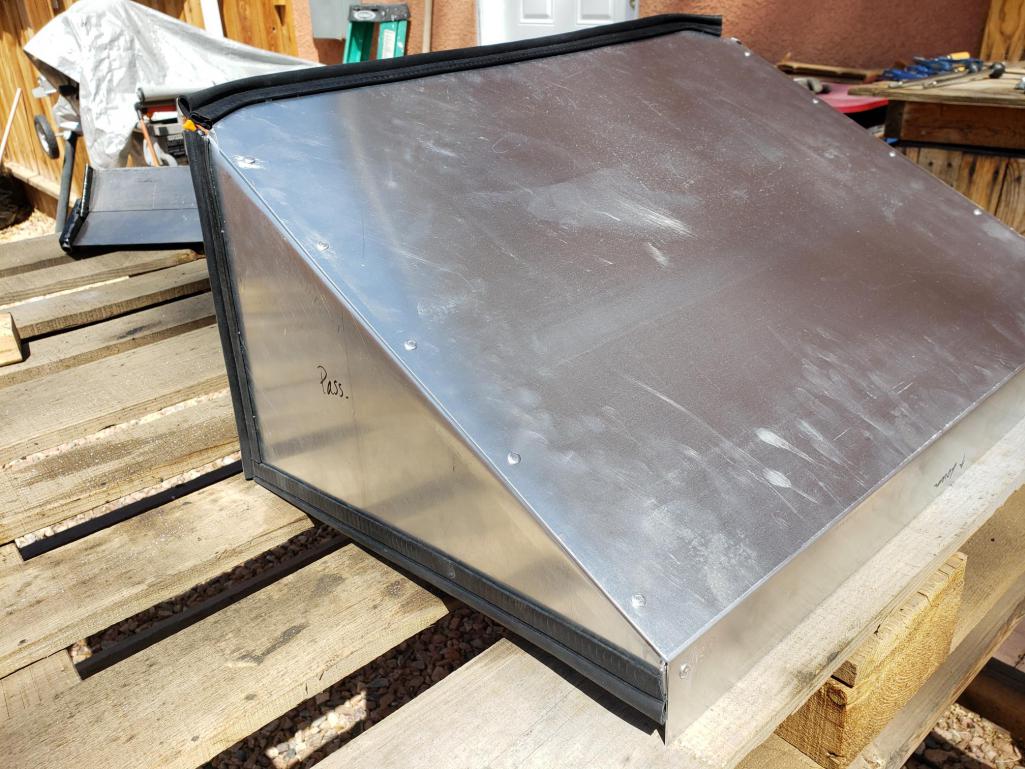 And in place, but I haven't decided how to mount it yet. 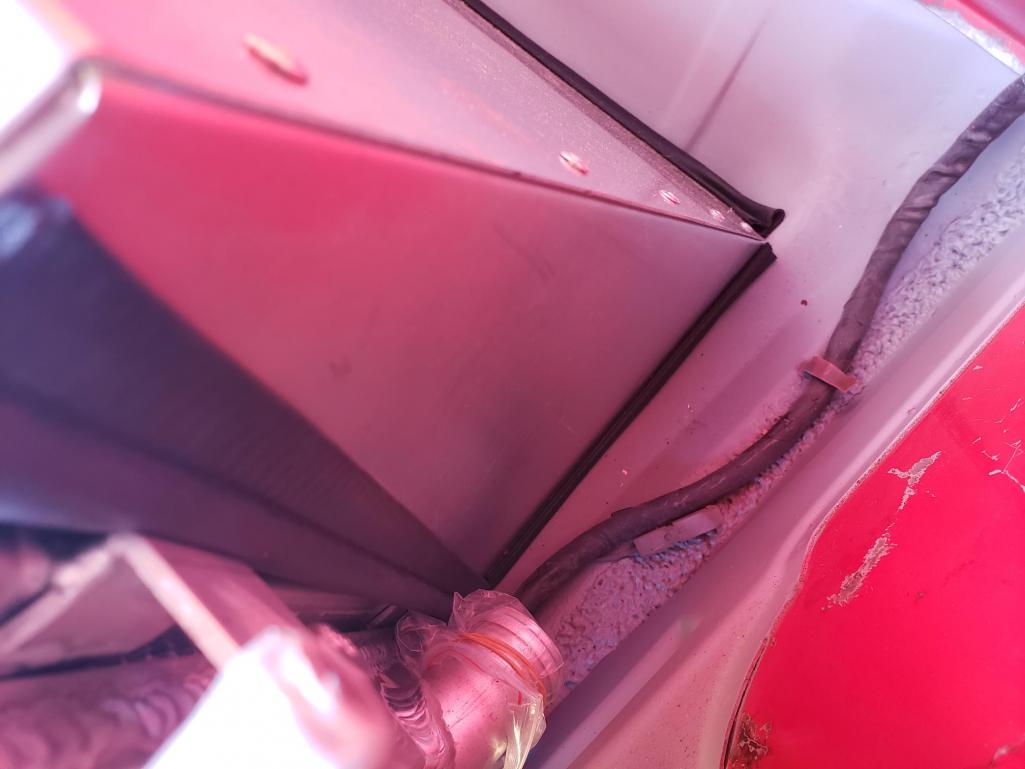 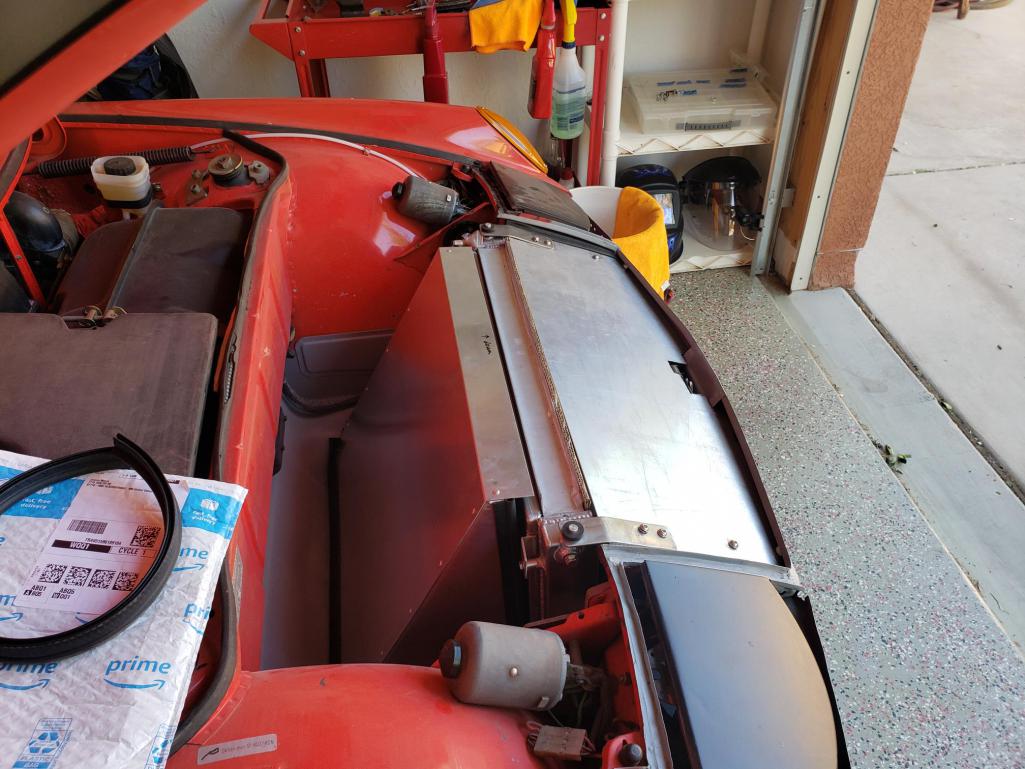 My cradle is built and being delivered as I write this from JWK-Engineering. Drove the car for the last time last week with the air-cooled Type 4 and took a video of it running. If anyone is in the market for a running 1.7 with dual Webers and a side-shift 901, let me know. |
| Literati914 |
 May 27 2022, 08:30 PM May 27 2022, 08:30 PM
Post
#77
|
|
Senior Member    Group: Members Posts: 1,456 Joined: 16-November 06 From: Dallas, TX Member No.: 7,222 Region Association: Southwest Region |
This is coming along nicely Jeremy, I’m following your build especially now that your doing the conversion Suby (I got one of them too that I’ll be dealing with eventually) - good work so far (IMG:style_emoticons/default/smilie_pokal.gif)
A couple things I wanted to ask about - what exactly did you do to the dash? .. and also, I was wondering how much of the original ‘lumpy’ texture from the factory was on your roof when you shot it with the rocker guard? Did you sand it smooth first or go over original texture? Yours looks nice but I’m considering using it over a well aged original texture roof and was hoping for some of the original dimensionality to come thru. Not sure if doing that would produce good results though. . |
| Mayne |
 May 28 2022, 06:08 AM May 28 2022, 06:08 AM
Post
#78
|
|
Member   Group: Members Posts: 254 Joined: 28-February 17 From: NM Member No.: 20,880 Region Association: None |
This is coming along nicely Jeremy, I’m following your build especially now that your doing the conversion Suby (I got one of them too that I’ll be dealing with eventually) - good work so far (IMG:style_emoticons/default/smilie_pokal.gif) A couple things I wanted to ask about - what exactly did you do to the dash? .. and also, I was wondering how much of the original ‘lumpy’ texture from the factory was on your roof when you shot it with the rocker guard? Did you sand it smooth first or go over original texture? Yours looks nice but I’m considering using it over a well aged original texture roof and was hoping for some of the original dimensionality to come thru. Not sure if doing that would produce good results though. . For the dash, I used red body filler (for small scratches and pinholes) to fill in cracks, sanded, then painted it with flat black vinyl paint. It has not held up too well, so the next step will be to put on a moulded dash cover that I have hanging around. Eventually, I hope to just do a complete 914Rubber dash. For the top, I just sprayed the rocker guard over the existing texture. I’m not sure if it was original. The rocker guard doesn’t build up much texture on its own, so I think you’d be fine to spray over what you have. |
| Front yard mechanic |
 May 28 2022, 06:42 AM May 28 2022, 06:42 AM
Post
#79
|
|
Senior Member    Group: Members Posts: 1,158 Joined: 23-July 15 From: New Mexico Member No.: 18,984 Region Association: None 
|
Looking good (IMG:style_emoticons/default/flag.gif)
|
| Mayne |
 Jul 2 2022, 12:54 PM Jul 2 2022, 12:54 PM
Post
#80
|
|
Member   Group: Members Posts: 254 Joined: 28-February 17 From: NM Member No.: 20,880 Region Association: None |
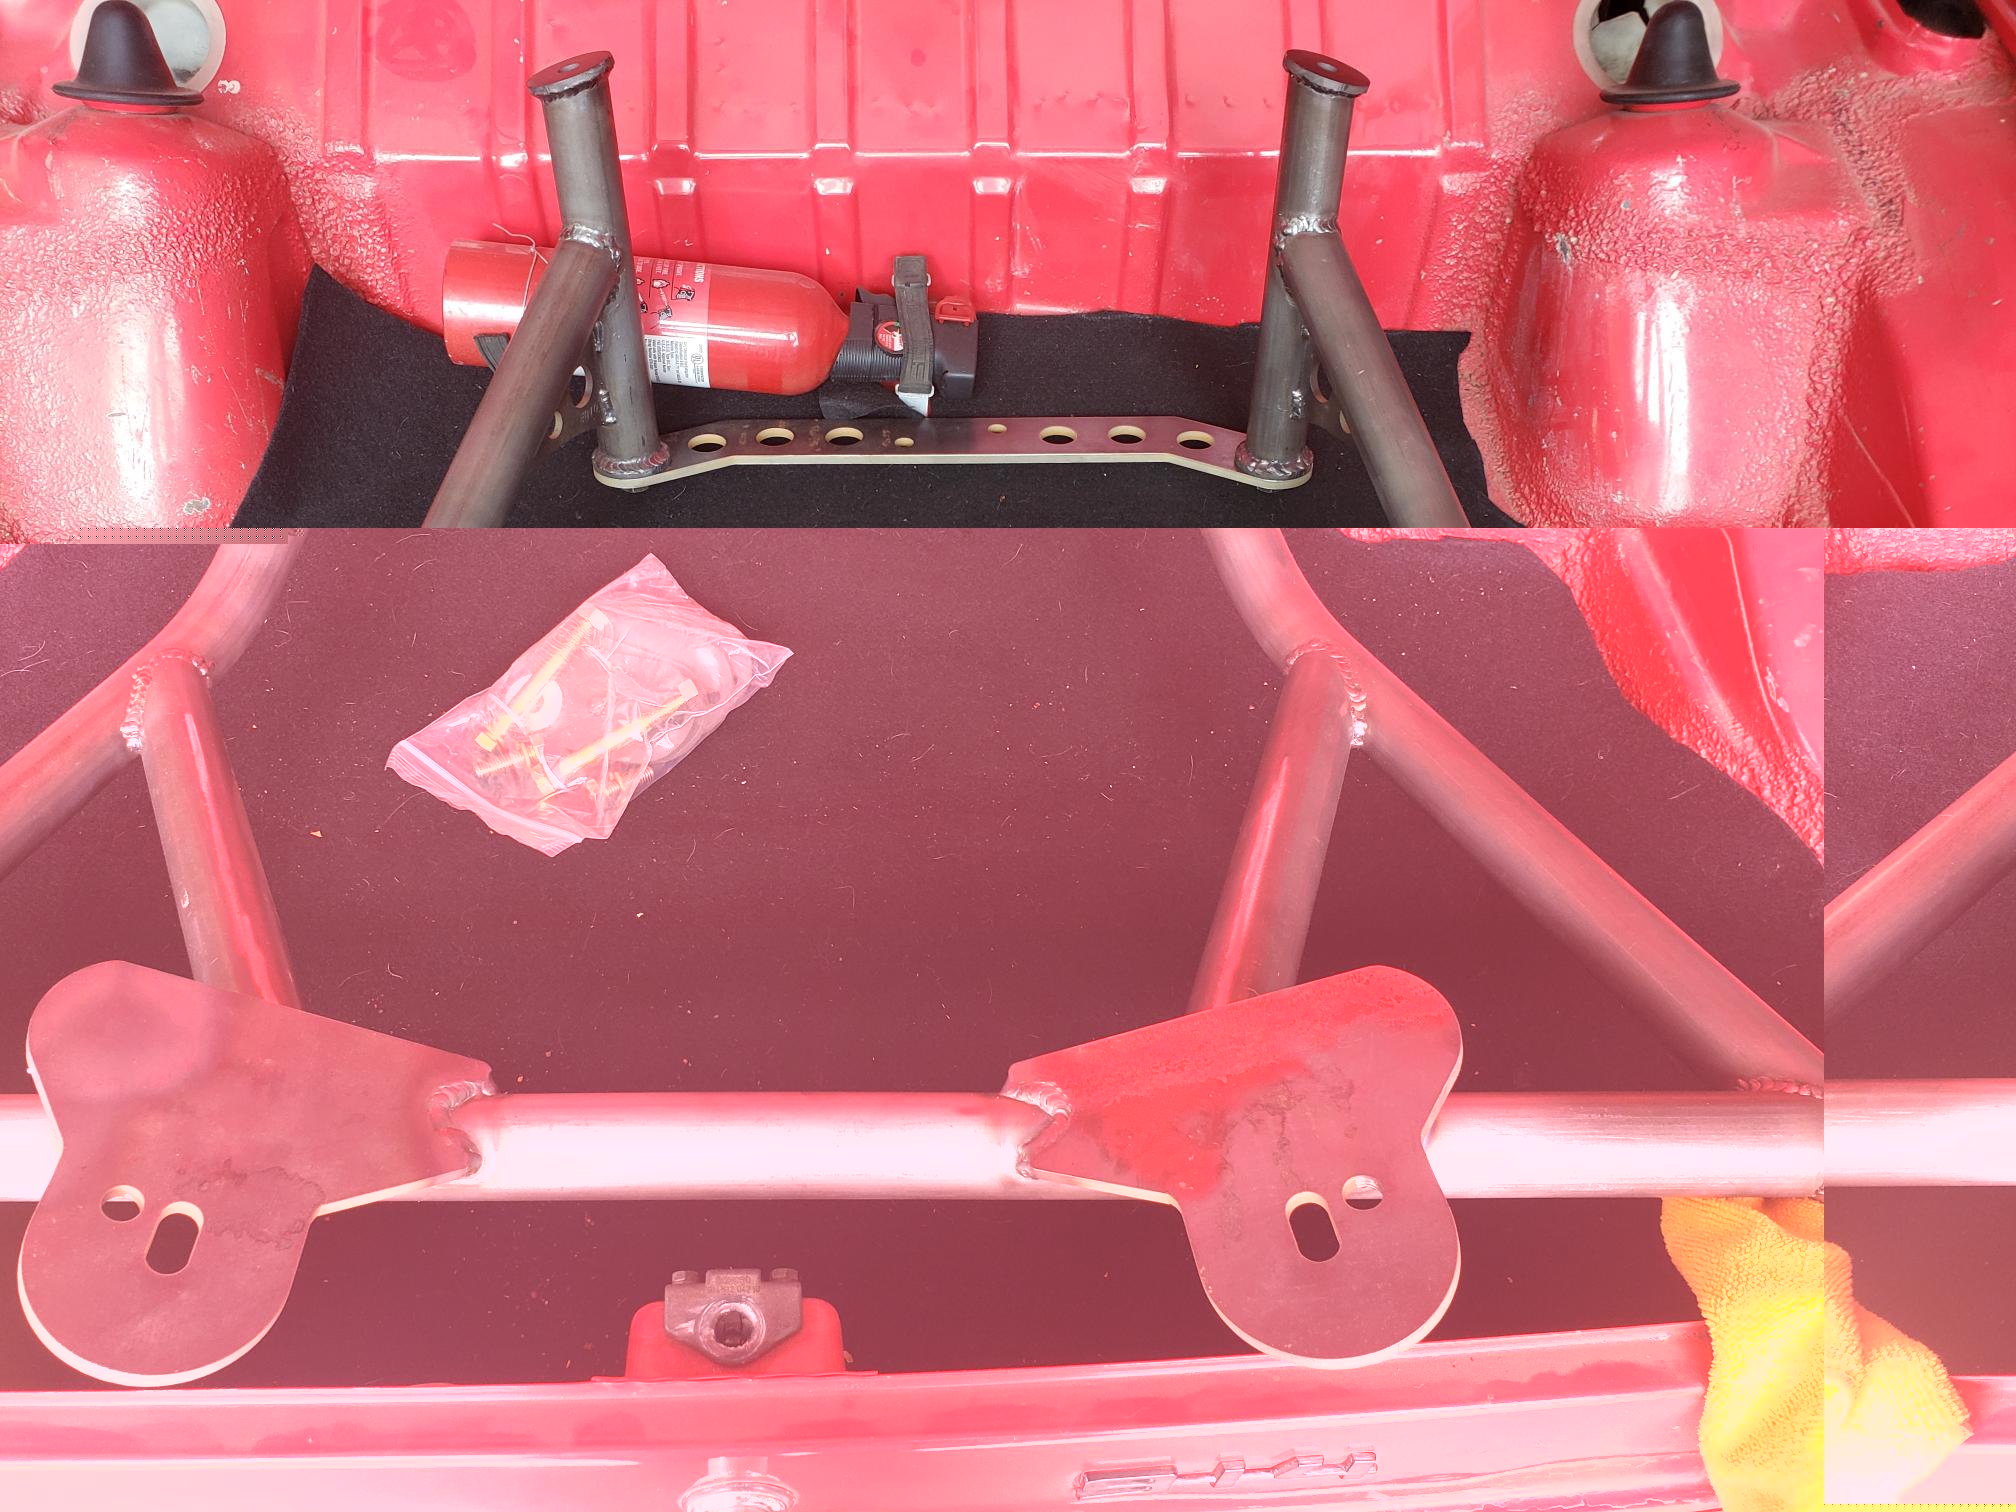
Slow but steady progress still being made here. I got my cradle from JWK Engineering and it looks to be a well made and solid piece. It includes the mount bracket for the Subaru transmission and new mounting hardware.
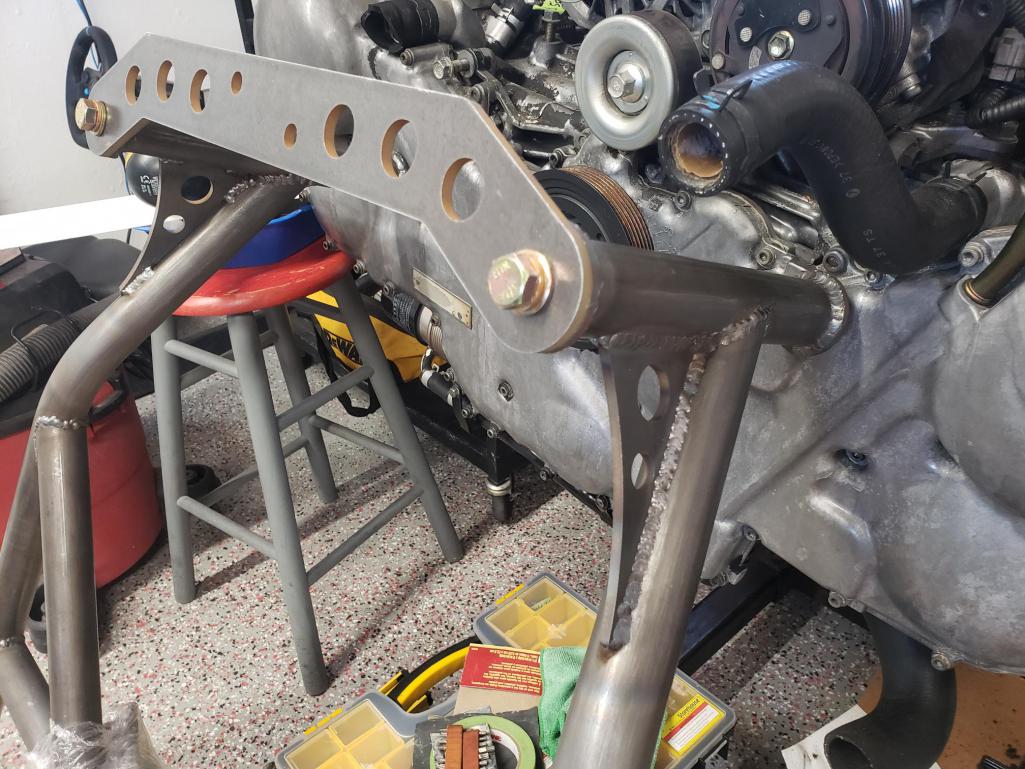 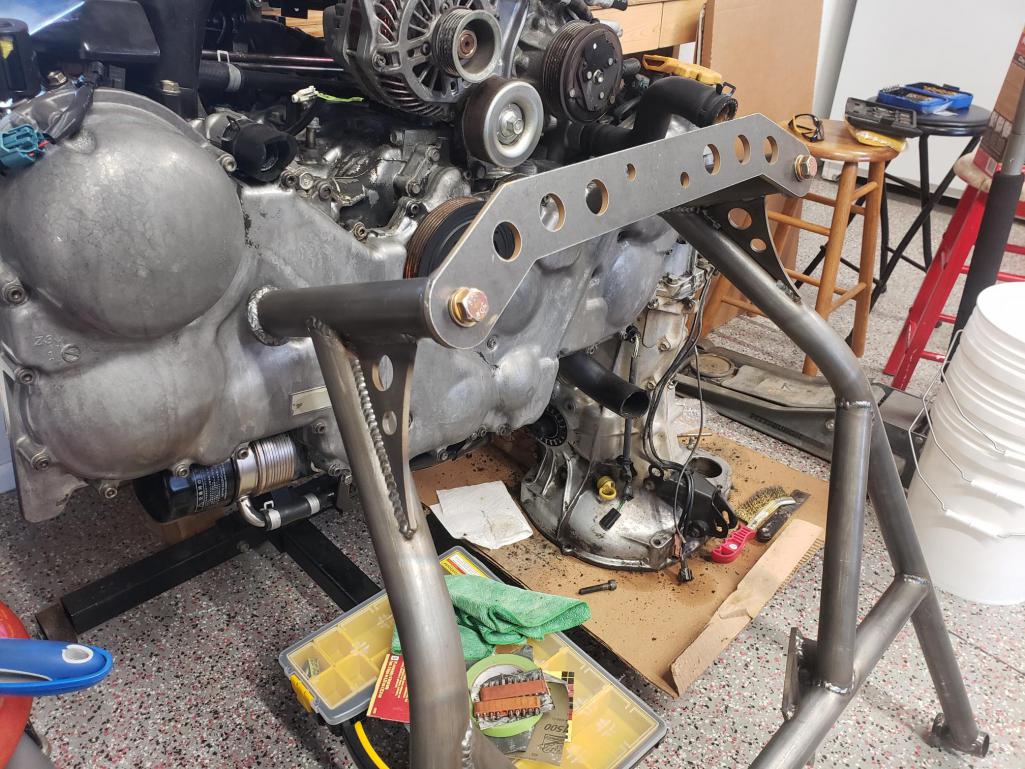 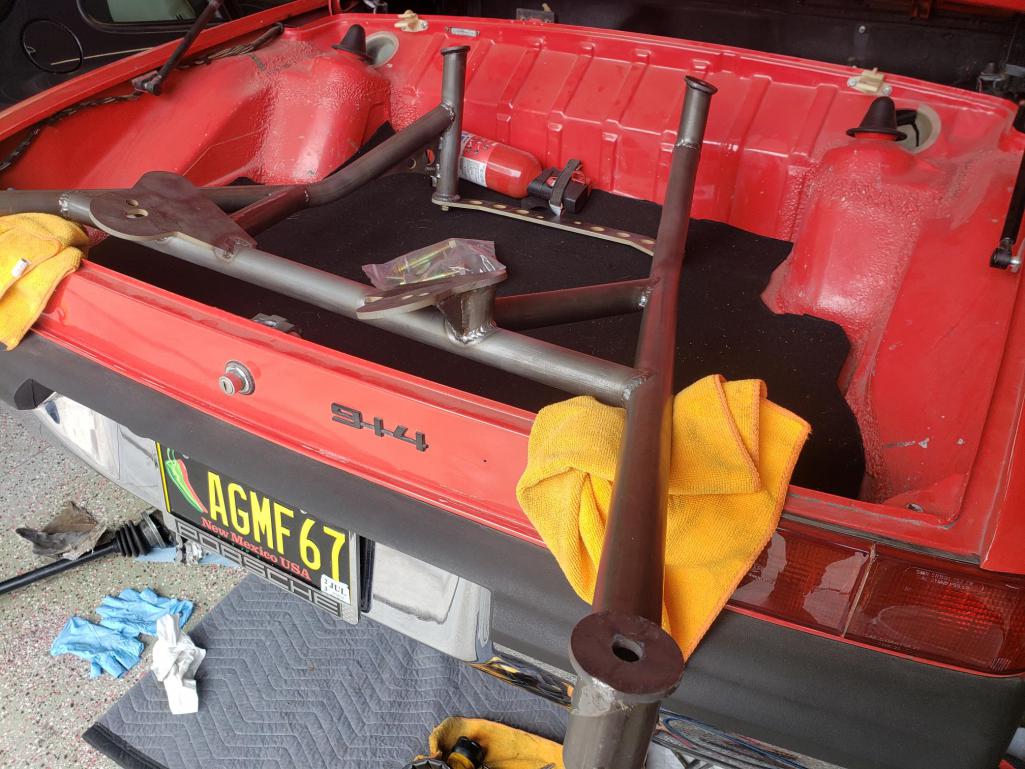  So that got me motivated to remove the Type IV engine and gearbox. Sold the entire drivetrain locally and gained some mad money to buy more parts. 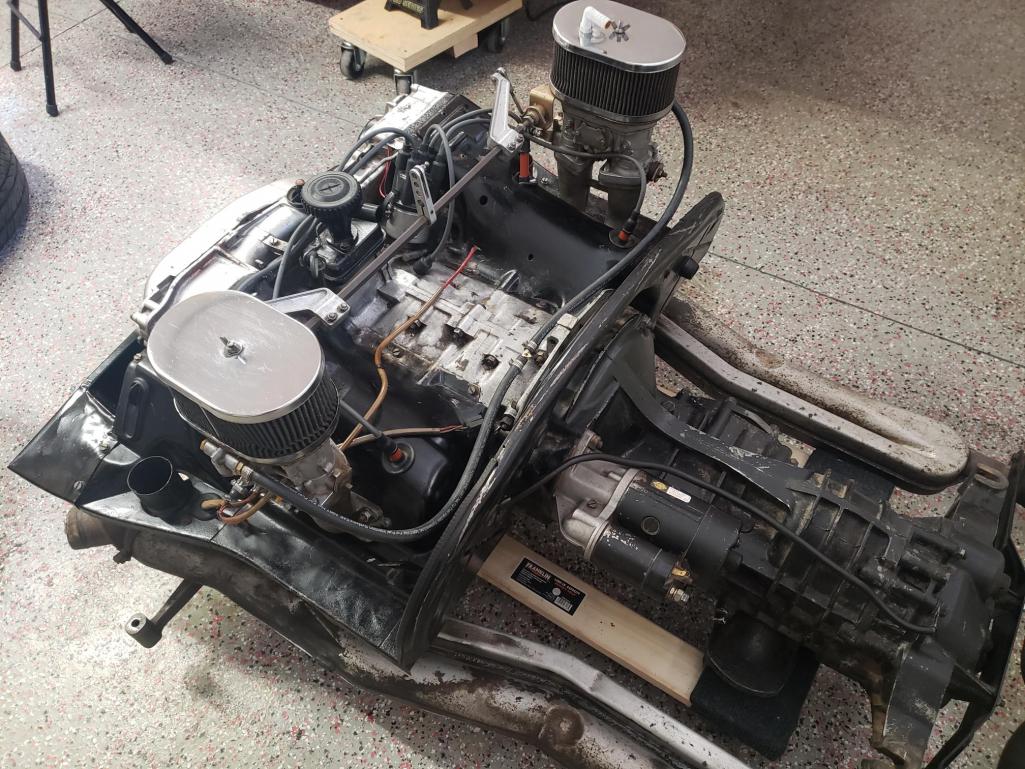 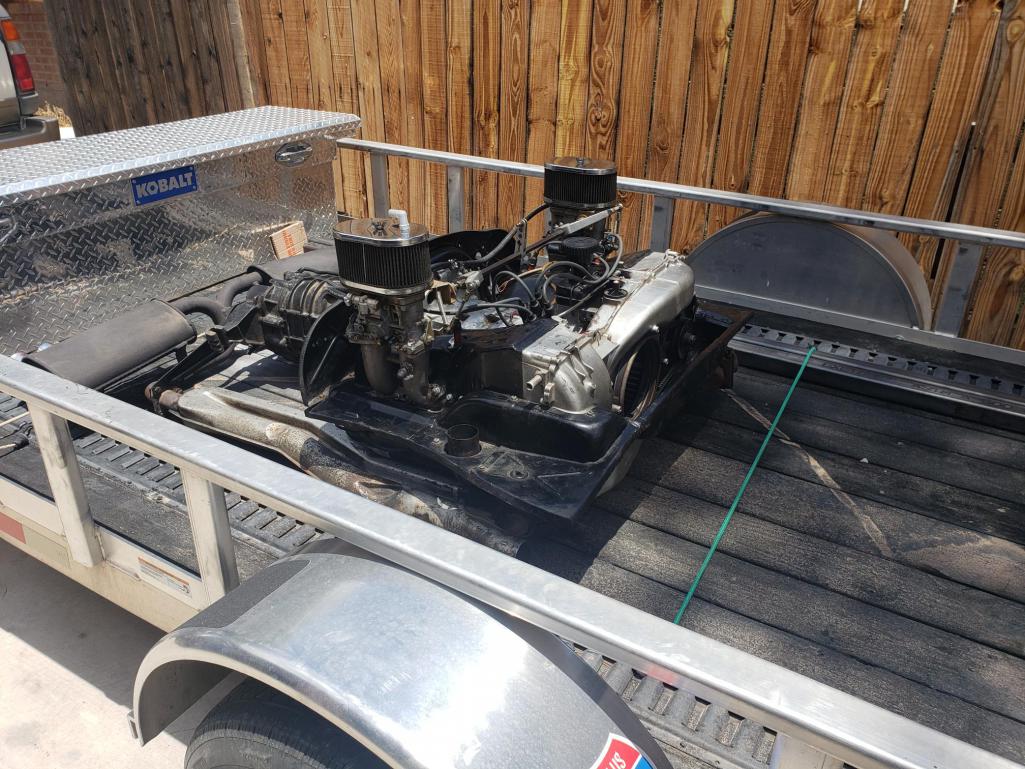 Also got my rear dif lockout from Subaru Gears; a beautiful piece, I think. 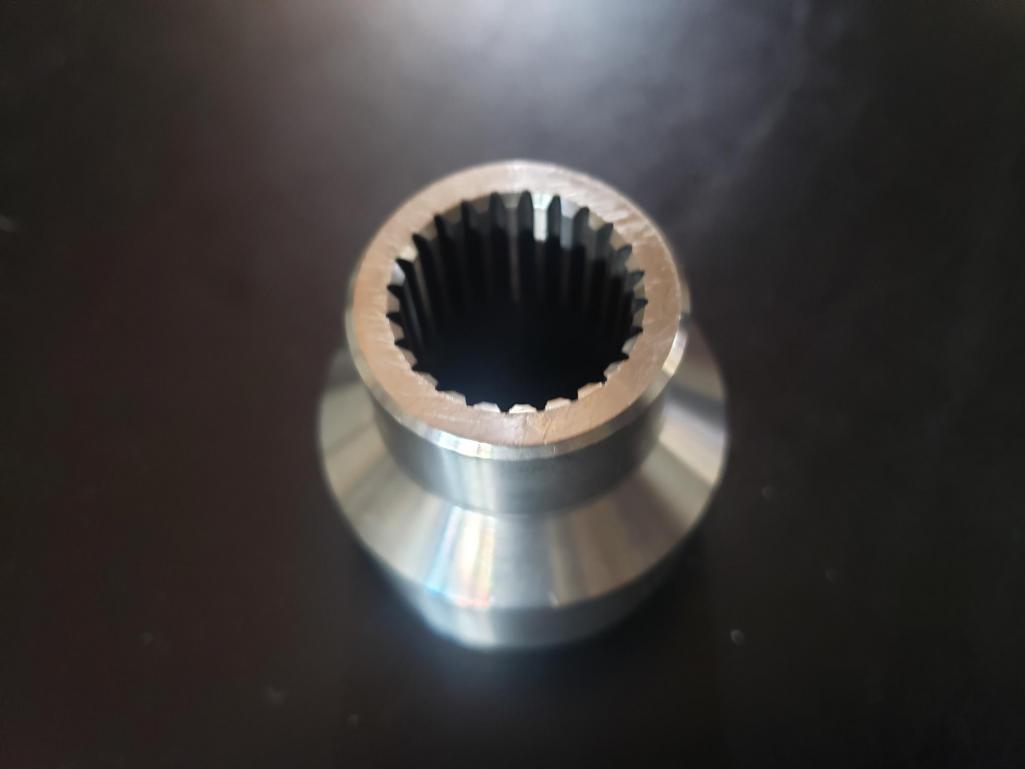 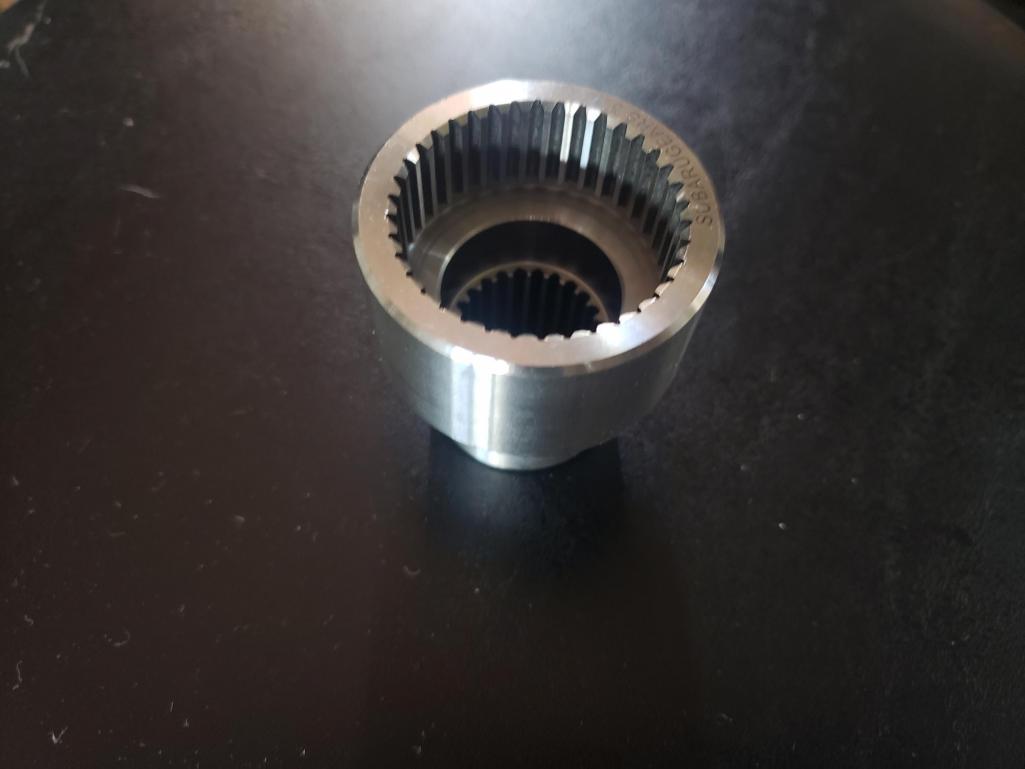 I'll be using an MR2 shifter, so I picked one up on eBay for what seems to me like too much money. But there ya go... And yes, they're all rusty looking, but i have some plans for that. 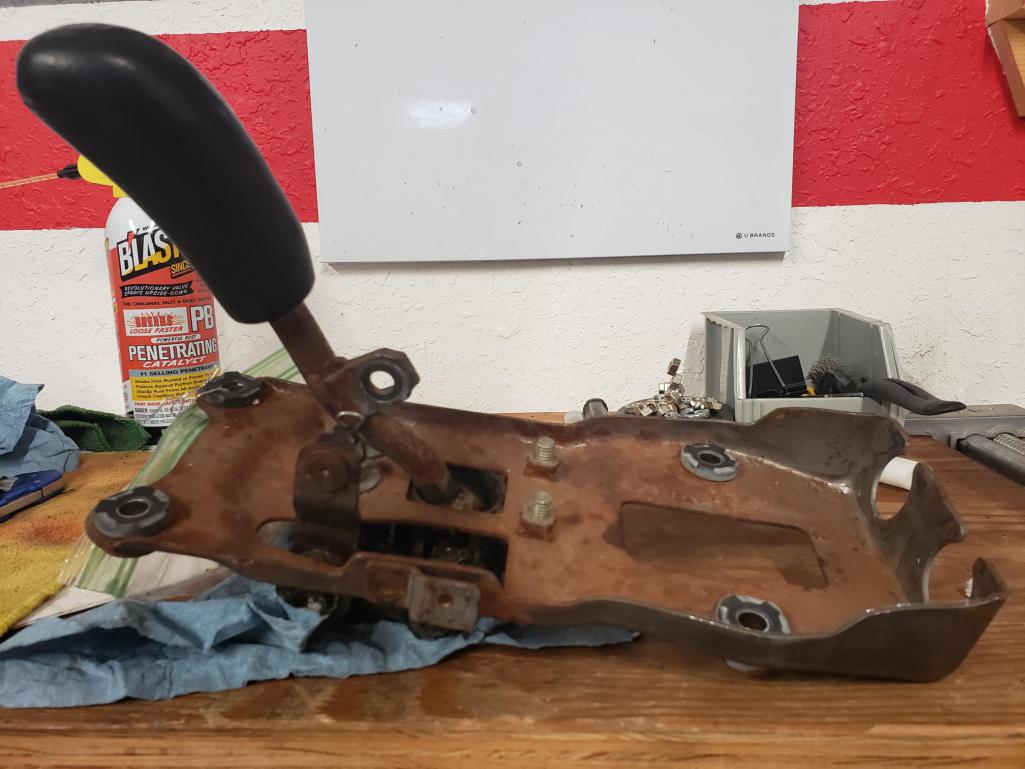 Hell hole repairs will be next! (IMG:style_emoticons/default/headbang.gif) |
  |
1 User(s) are reading this topic (1 Guests and 0 Anonymous Users)
0 Members:

|
Lo-Fi Version | Time is now: 5th May 2024 - 11:10 AM |
Invision Power Board
v9.1.4 © 2024 IPS, Inc.


