|
|
|
Porsche, and the Porsche crest are registered trademarks of Dr. Ing. h.c. F. Porsche AG.
This site is not affiliated with Porsche in any way. Its only purpose is to provide an online forum for car enthusiasts. All other trademarks are property of their respective owners. |
|
|

  |

| Literati914 |
 Oct 29 2021, 08:09 PM Oct 29 2021, 08:09 PM
Post
#141
|
|
Advanced Member  Group: Members Posts: 2,148 Joined: 16-November 06 From: Dallas, TX Member No.: 7,222 Region Association: Southwest Region |
done with that:
Attached thumbnail(s) 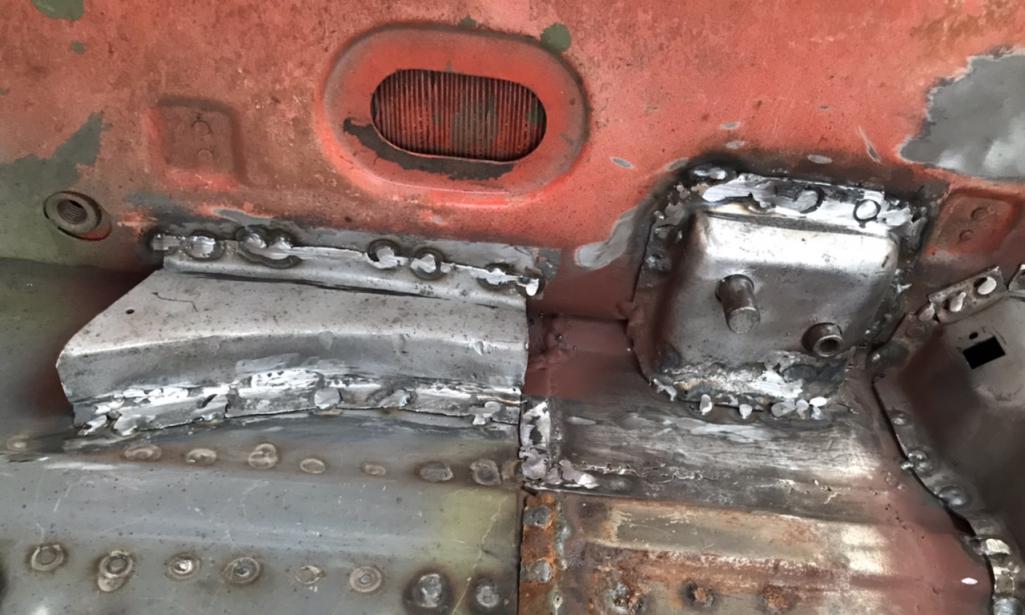
|
   |

 
|
| Literati914 |
Oct 29 2021, 08:12 PM
Post
#142
|
|
Advanced Member Group: Members Posts: 2,148 Joined: 16-November 06 From: Dallas, TX Member No.: 7,222 Region Association: Southwest Region |
Finally, I replaced the lid to the factory access hole, welding it - just ‘cause (IMG:style_emoticons/default/confused24.gif)
Attached thumbnail(s) 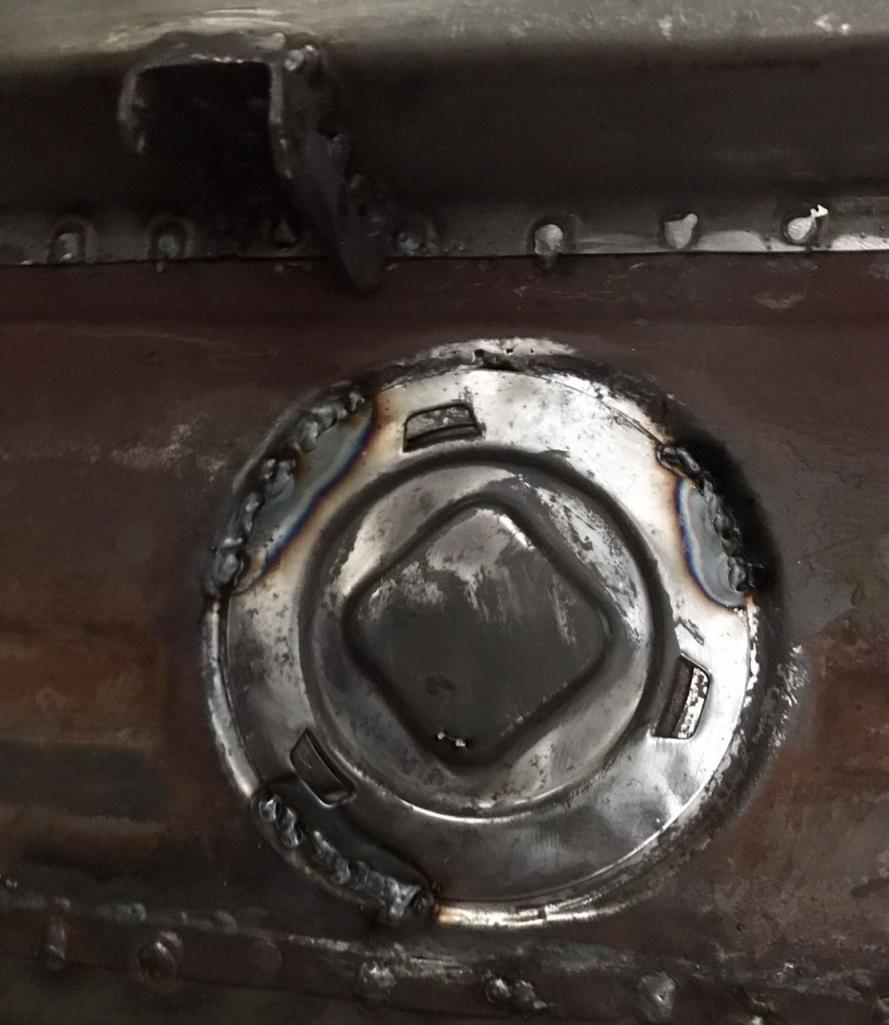
|
|
|
|
| Literati914 |
Nov 2 2021, 08:11 PM
Post
#143
|
|
Advanced Member Group: Members Posts: 2,148 Joined: 16-November 06 From: Dallas, TX Member No.: 7,222 Region Association: Southwest Region |
Time for installing seat brackets and hinges to the floor. Here again I’m reusing the old hinges, all except one which was too rusted. There was more prep to getting these ready for welding than I assumed. So it took a couple days and both times I finished near dark.. therefor the welds were a bit chunky but the brackets ain’t going nowhere!
Attached thumbnail(s) 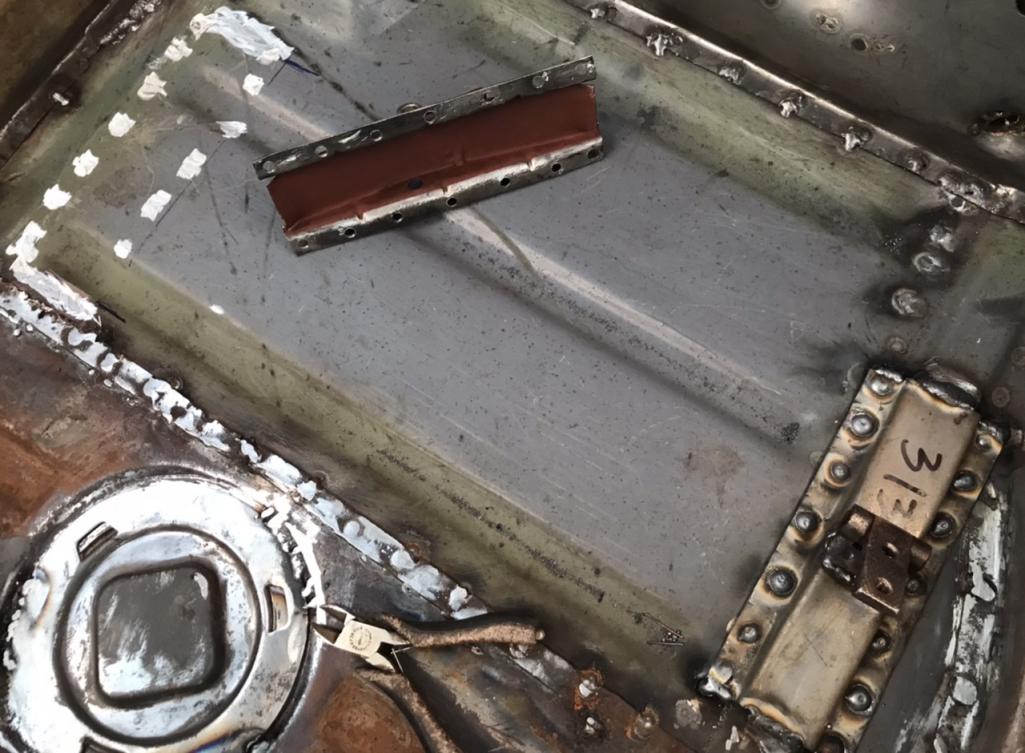
|
|
|
|
| Literati914 |
Nov 2 2021, 08:16 PM
Post
#144
|
|
Advanced Member Group: Members Posts: 2,148 Joined: 16-November 06 From: Dallas, TX Member No.: 7,222 Region Association: Southwest Region |
Drivers side done. Had to install the brackets to the bottom of the Large seat rail assembly, then fit the middle adjuster in place to get the correct placement of the floor brackets before welding (as advised).
Attached thumbnail(s) 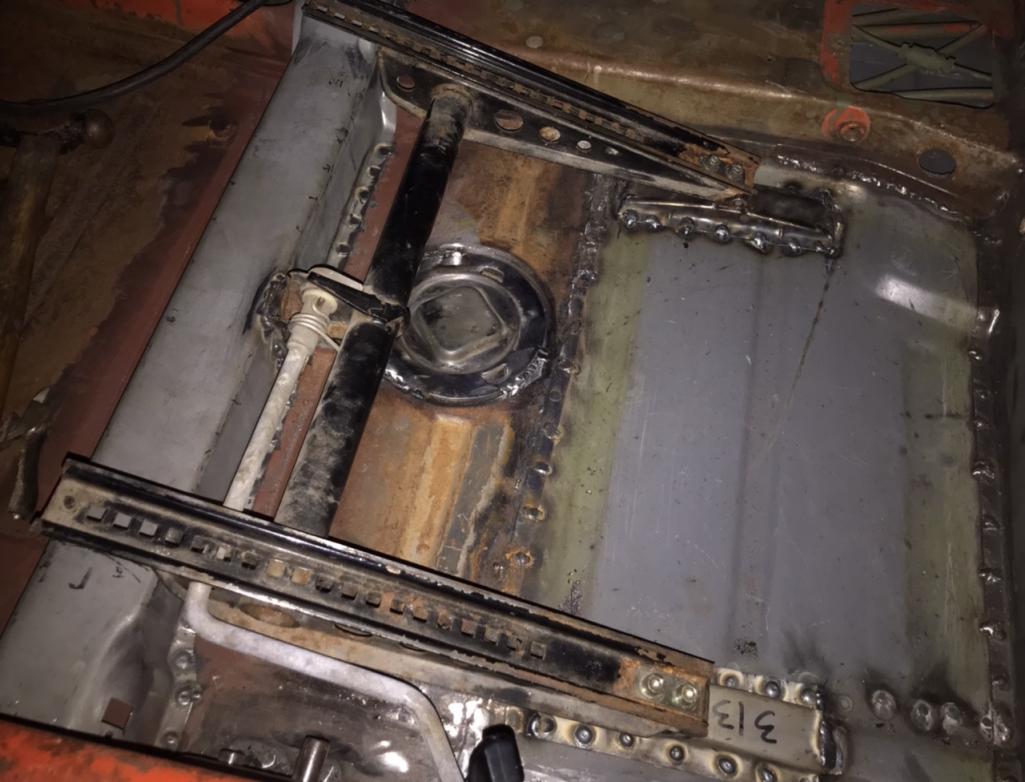
|
|
|
|
| Literati914 |
Nov 2 2021, 08:17 PM
Post
#145
|
|
Advanced Member Group: Members Posts: 2,148 Joined: 16-November 06 From: Dallas, TX Member No.: 7,222 Region Association: Southwest Region |
Passenger Side prepared for brackets:
Attached thumbnail(s) 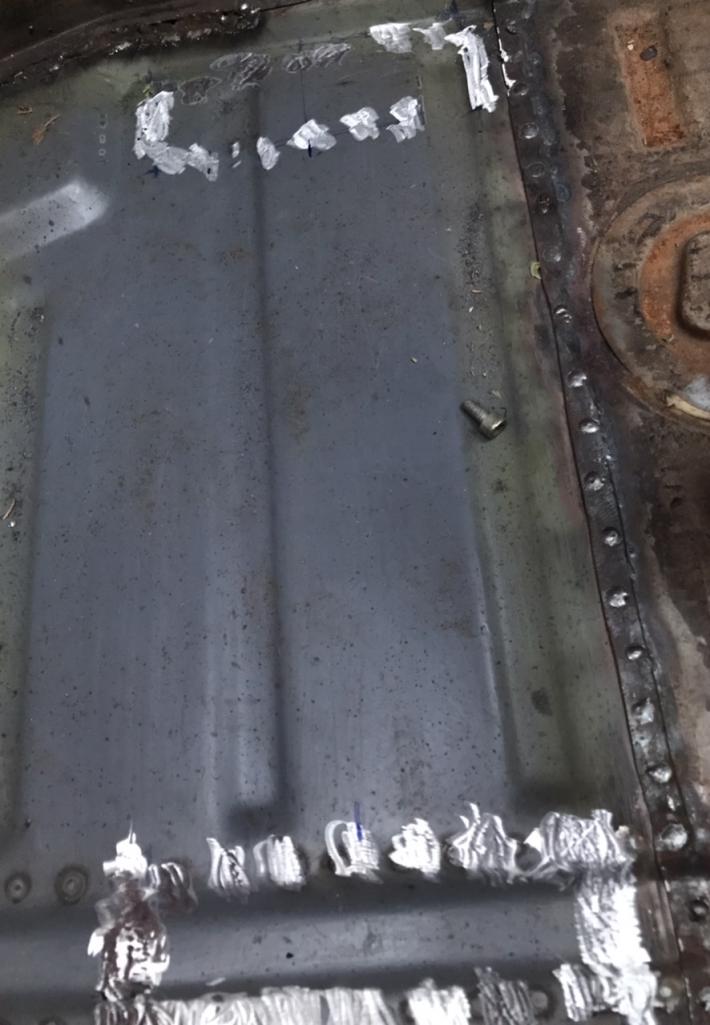
|
|
|
|
| Literati914 |
Nov 2 2021, 08:20 PM
Post
#146
|
|
Advanced Member Group: Members Posts: 2,148 Joined: 16-November 06 From: Dallas, TX Member No.: 7,222 Region Association: Southwest Region |
Note: I believe you could measure 11” from the crossmember back to the middle of the pivot pin on the floor hinge and get a proper placement, but YMMV
..and, done: Attached thumbnail(s) 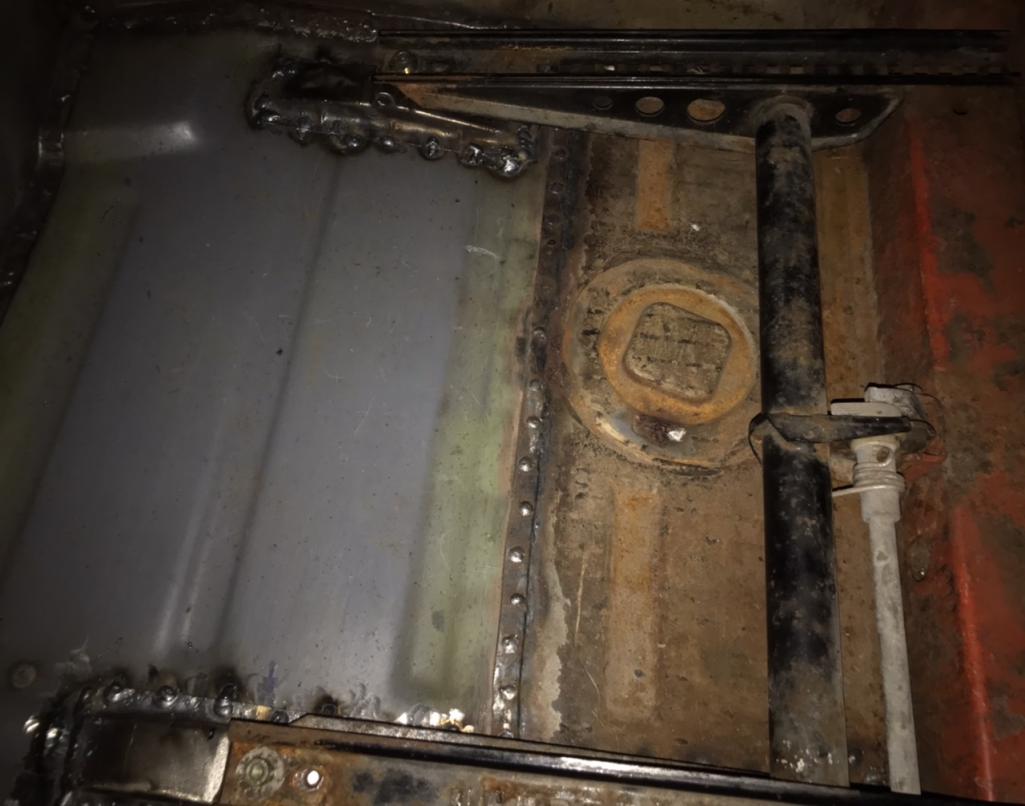
|
|
|
|
| autopro |
Nov 3 2021, 12:55 PM
Post
#147
|
|
Member Group: Members Posts: 306 Joined: 14-January 18 From: San Diego / Tijuana Member No.: 21,797 Region Association: Southern California |
Great! Glad it worked out for you.
|
|
|
|
| Literati914 |
Nov 5 2021, 08:26 PM
Post
#148
|
|
Advanced Member Group: Members Posts: 2,148 Joined: 16-November 06 From: Dallas, TX Member No.: 7,222 Region Association: Southwest Region |
My stock jack points both needed a little work, neither were really all that bad but the outer shells both had some rusted out areas. Here’s where I cut away the bad area on the passenger side:
Attached thumbnail(s) 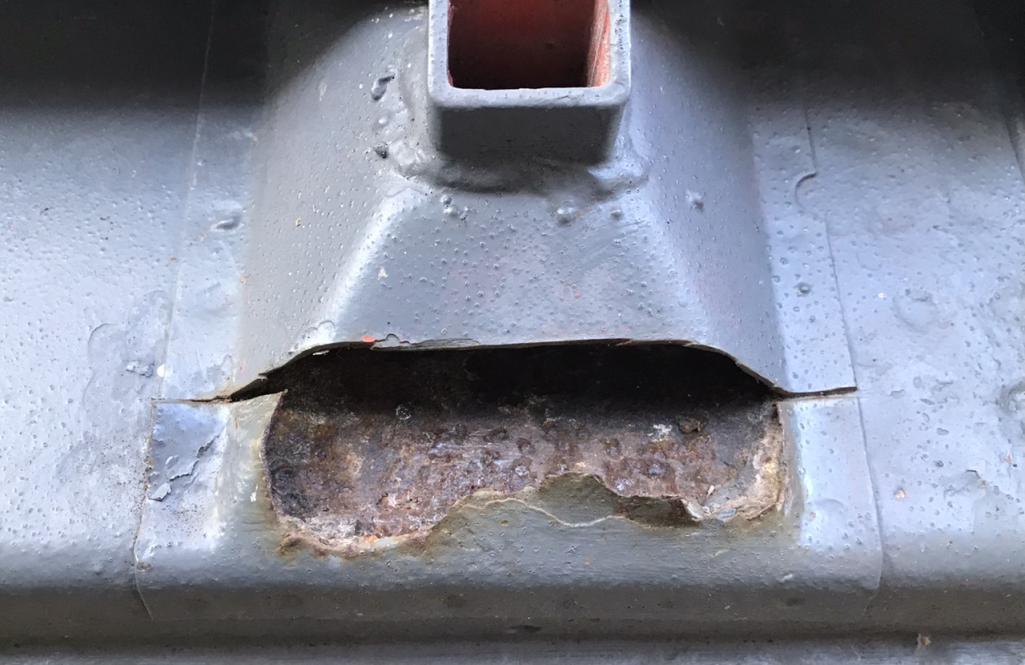
|
|
|
|
| Literati914 |
Nov 5 2021, 08:28 PM
Post
#149
|
|
Advanced Member Group: Members Posts: 2,148 Joined: 16-November 06 From: Dallas, TX Member No.: 7,222 Region Association: Southwest Region |
The metal was pitted so I found a convenient piece of left over sheet metal to overlay and hopefully prolong the life of this area:
Attached thumbnail(s) 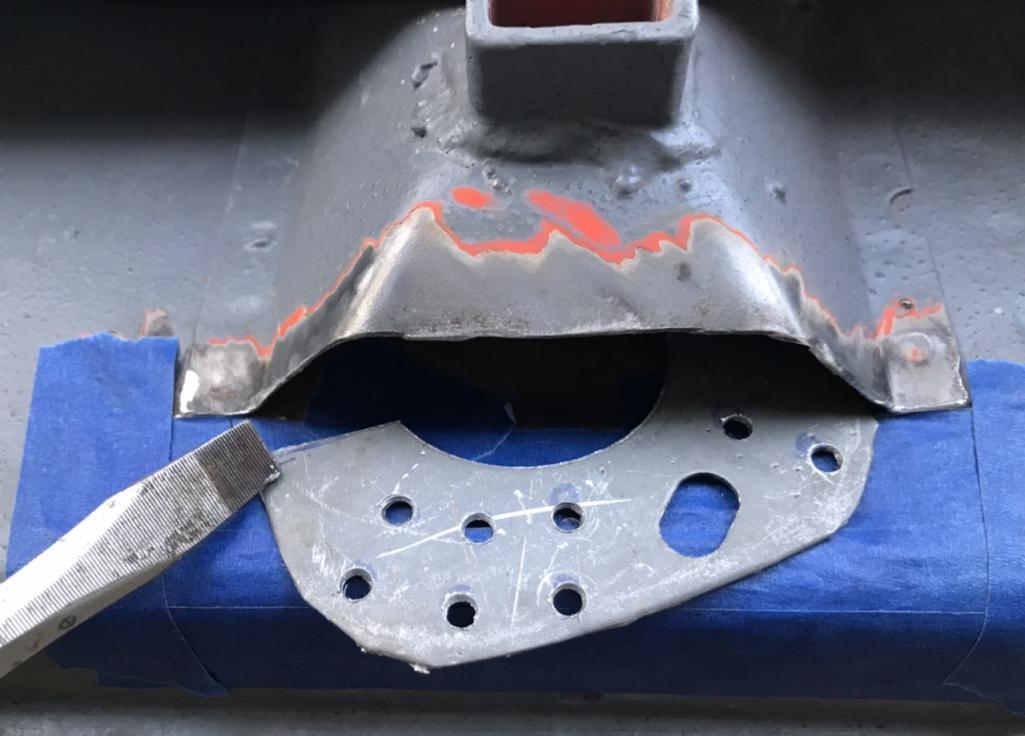
|
|
|
|
| Literati914 |
Nov 5 2021, 08:29 PM
Post
#150
|
|
Advanced Member Group: Members Posts: 2,148 Joined: 16-November 06 From: Dallas, TX Member No.: 7,222 Region Association: Southwest Region |
Welded it in and smoothed it out a little :
Attached thumbnail(s) 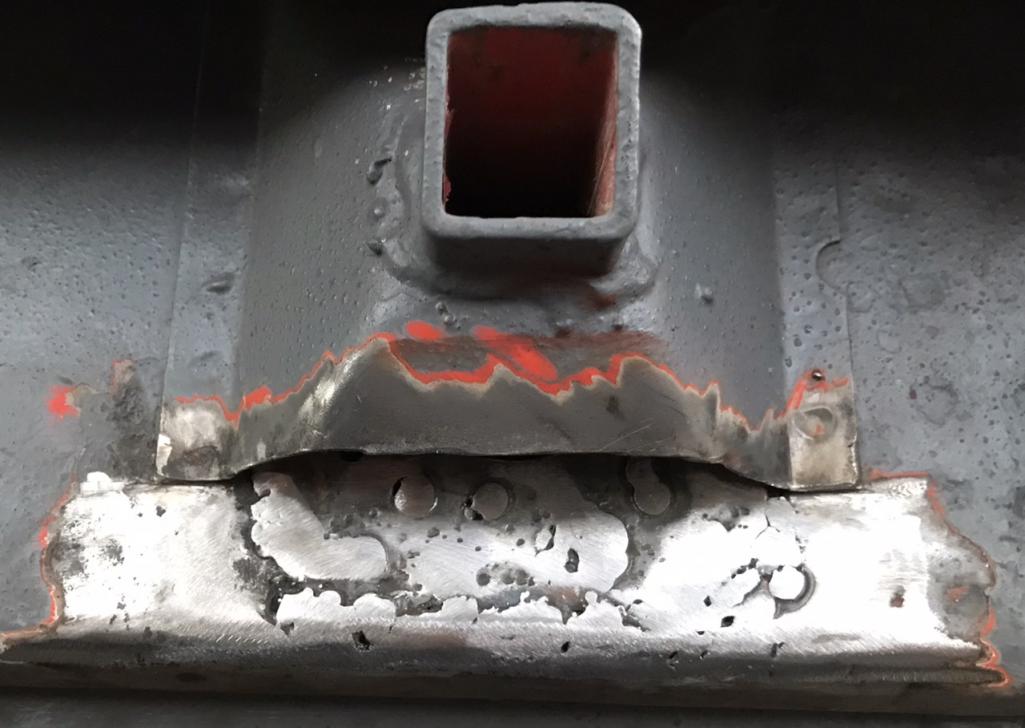
|
|
|
|
| Literati914 |
Nov 5 2021, 08:33 PM
Post
#151
|
|
Advanced Member Group: Members Posts: 2,148 Joined: 16-November 06 From: Dallas, TX Member No.: 7,222 Region Association: Southwest Region |
Sprayed some protective paint inside the cavity and cut the needed section from a RD piece I’d picked up some time back:
Attached thumbnail(s) 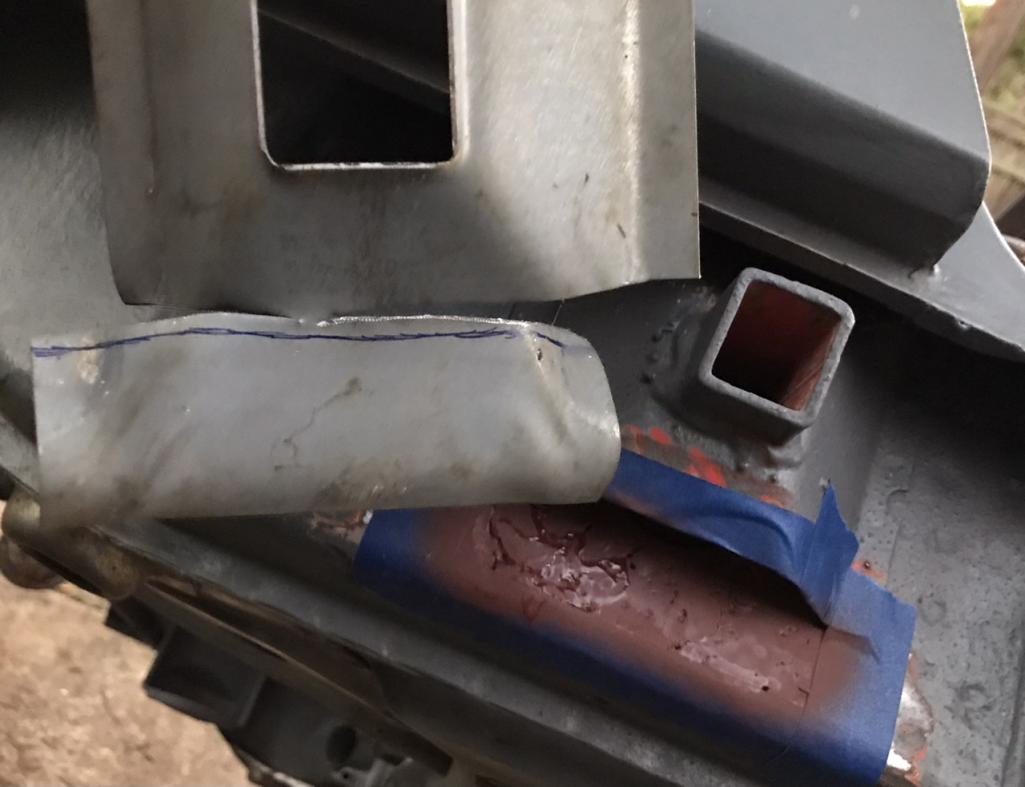
|
|
|
|
| Literati914 |
Nov 5 2021, 08:34 PM
Post
#152
|
|
Advanced Member Group: Members Posts: 2,148 Joined: 16-November 06 From: Dallas, TX Member No.: 7,222 Region Association: Southwest Region |
Passenger side done:
Attached thumbnail(s) 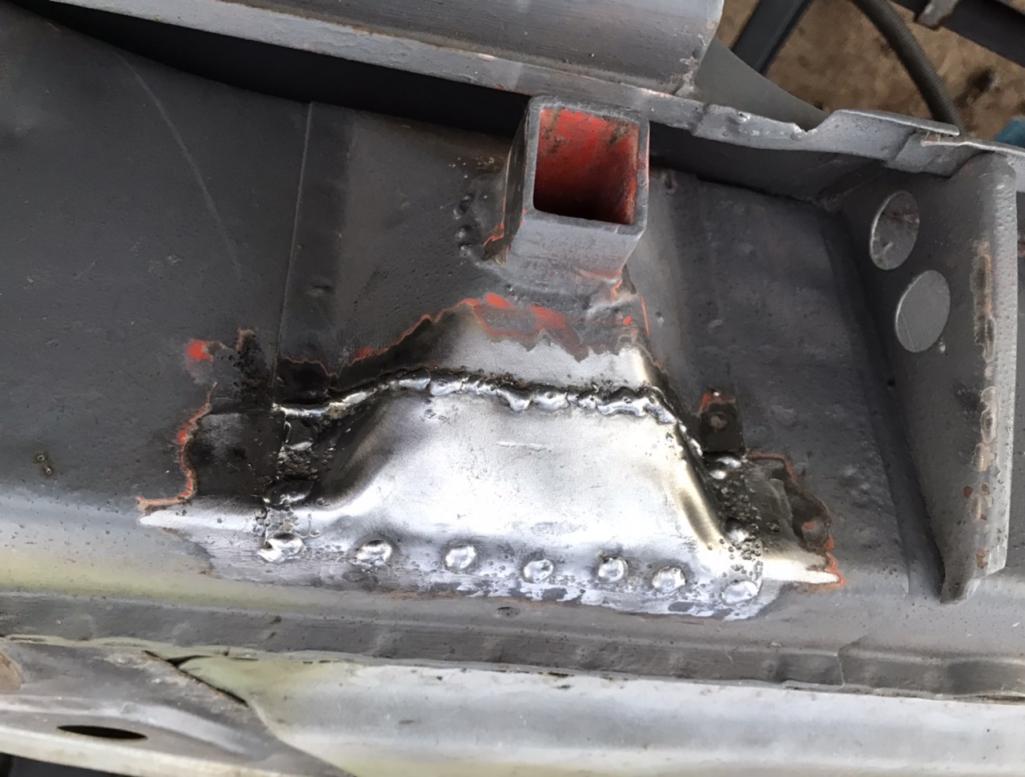
|
|
|
|
| Literati914 |
Nov 5 2021, 08:36 PM
Post
#153
|
|
Advanced Member Group: Members Posts: 2,148 Joined: 16-November 06 From: Dallas, TX Member No.: 7,222 Region Association: Southwest Region |
Attached thumbnail(s) 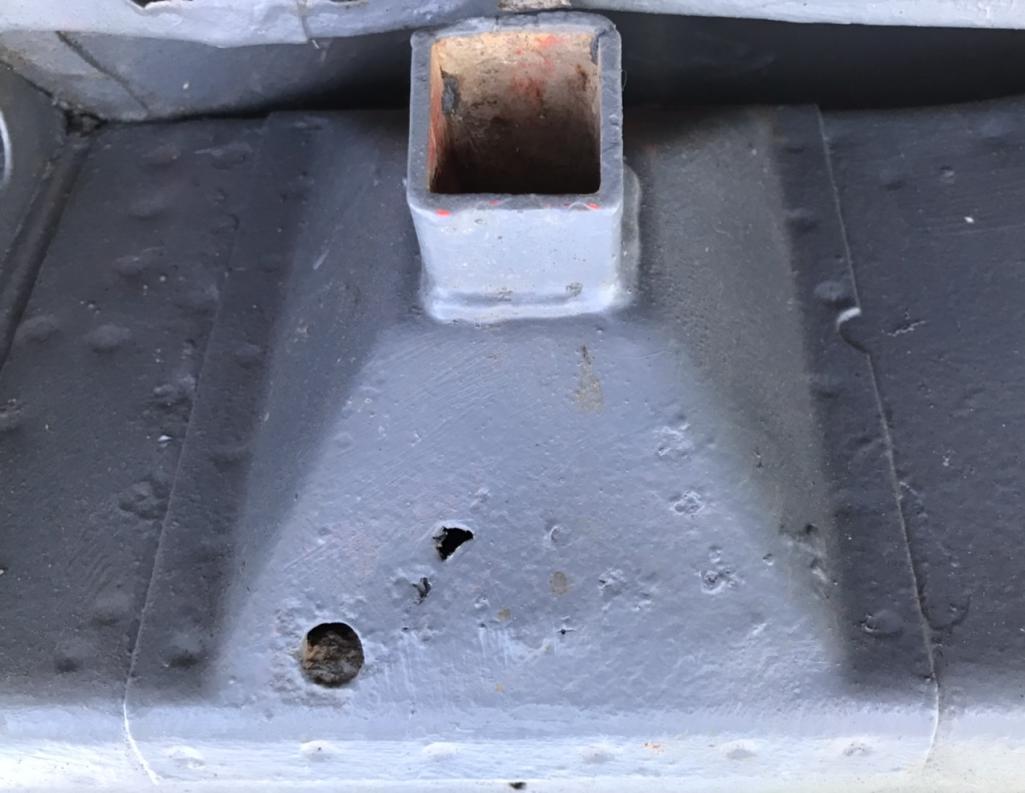
|
|
|
|
| Literati914 |
Nov 5 2021, 08:38 PM
Post
#154
|
|
Advanced Member Group: Members Posts: 2,148 Joined: 16-November 06 From: Dallas, TX Member No.: 7,222 Region Association: Southwest Region |
Cut it open, painted cavity with rust incapcilater:
Attached thumbnail(s) 
|
|
|
|
| Literati914 |
Nov 5 2021, 08:40 PM
Post
#155
|
|
Advanced Member Group: Members Posts: 2,148 Joined: 16-November 06 From: Dallas, TX Member No.: 7,222 Region Association: Southwest Region |
Driver side welded up:
Attached thumbnail(s) 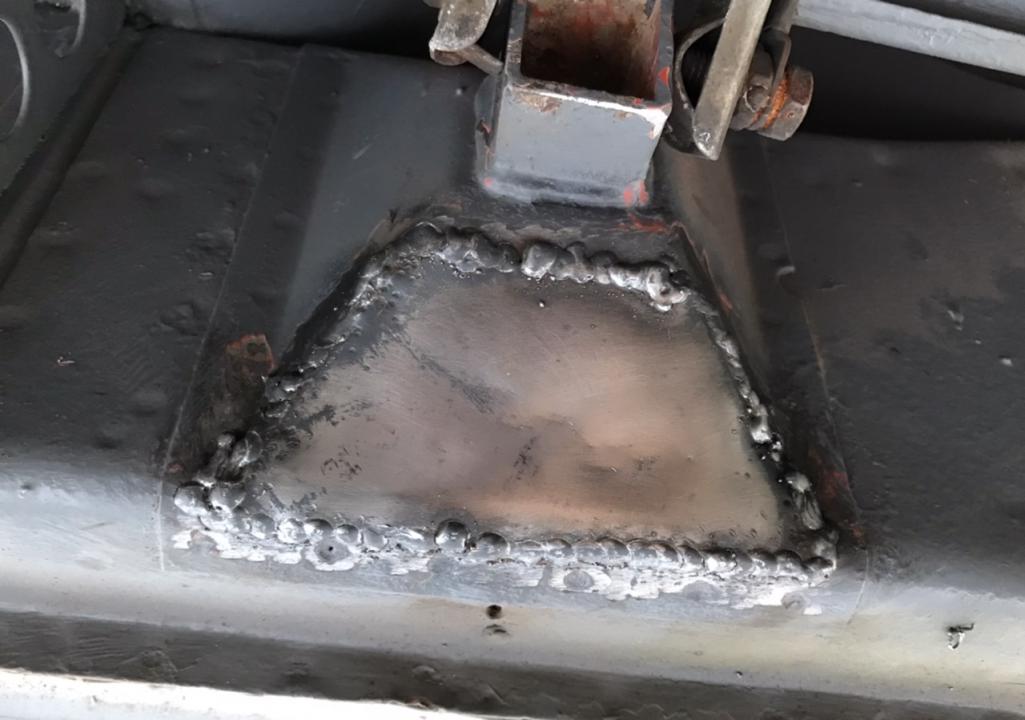
|
|
|
|
| Literati914 |
Nov 5 2021, 08:42 PM
Post
#156
|
|
Advanced Member Group: Members Posts: 2,148 Joined: 16-November 06 From: Dallas, TX Member No.: 7,222 Region Association: Southwest Region |
Then I fabricated (IMG:style_emoticons/default/biggrin.gif) the tab that sits above the parking brake cable holes:
Attached thumbnail(s) 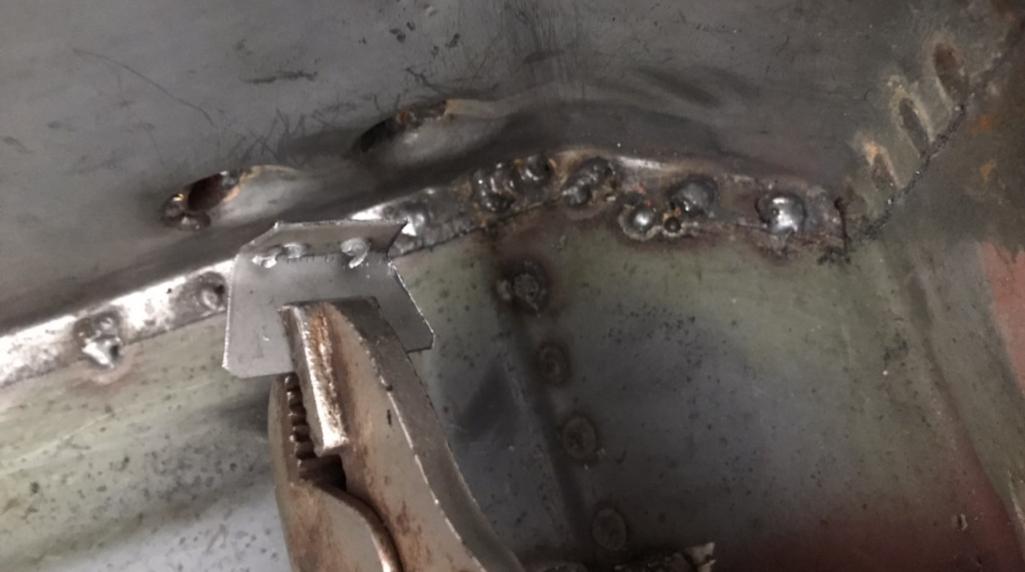
|
|
|
|
| Literati914 |
Nov 5 2021, 08:43 PM
Post
#157
|
|
Advanced Member Group: Members Posts: 2,148 Joined: 16-November 06 From: Dallas, TX Member No.: 7,222 Region Association: Southwest Region |
Hope I got it stuck in the right place cause it was dark when I welded it in:
Attached thumbnail(s) 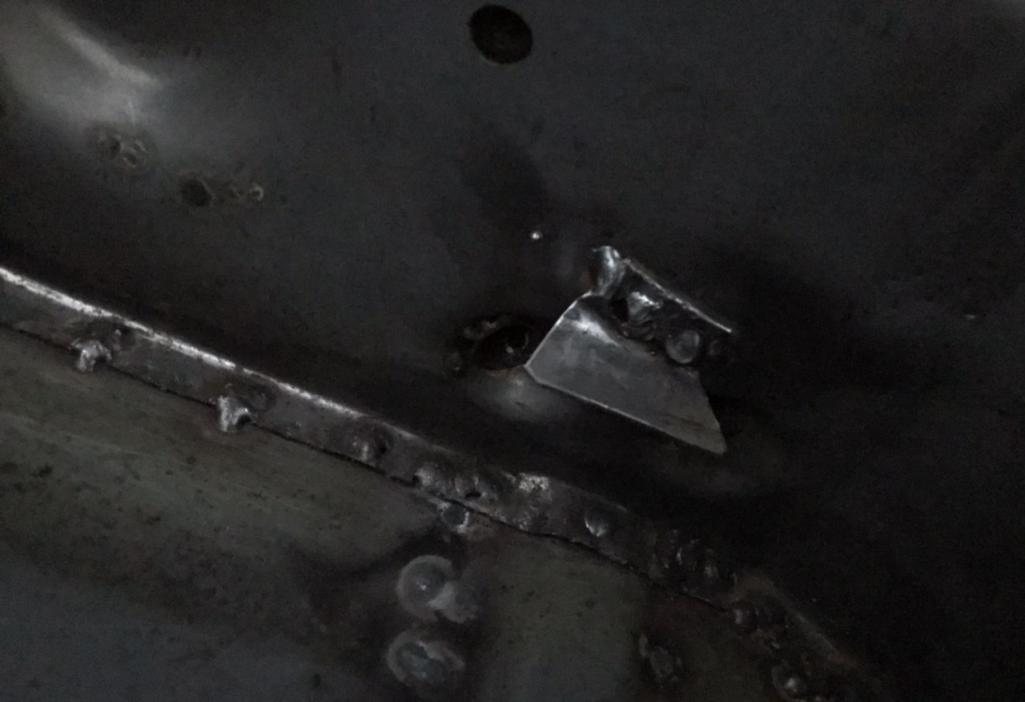
|
|
|
|
| Literati914 |
Nov 5 2021, 08:47 PM
Post
#158
|
|
Advanced Member Group: Members Posts: 2,148 Joined: 16-November 06 From: Dallas, TX Member No.: 7,222 Region Association: Southwest Region |
And just cause I’m a glutton for punishment, I decided to continue my welding in the dark non-sense! This time, the thin little metal strap for holding down the wiring under the passenger seat:
Attached thumbnail(s) 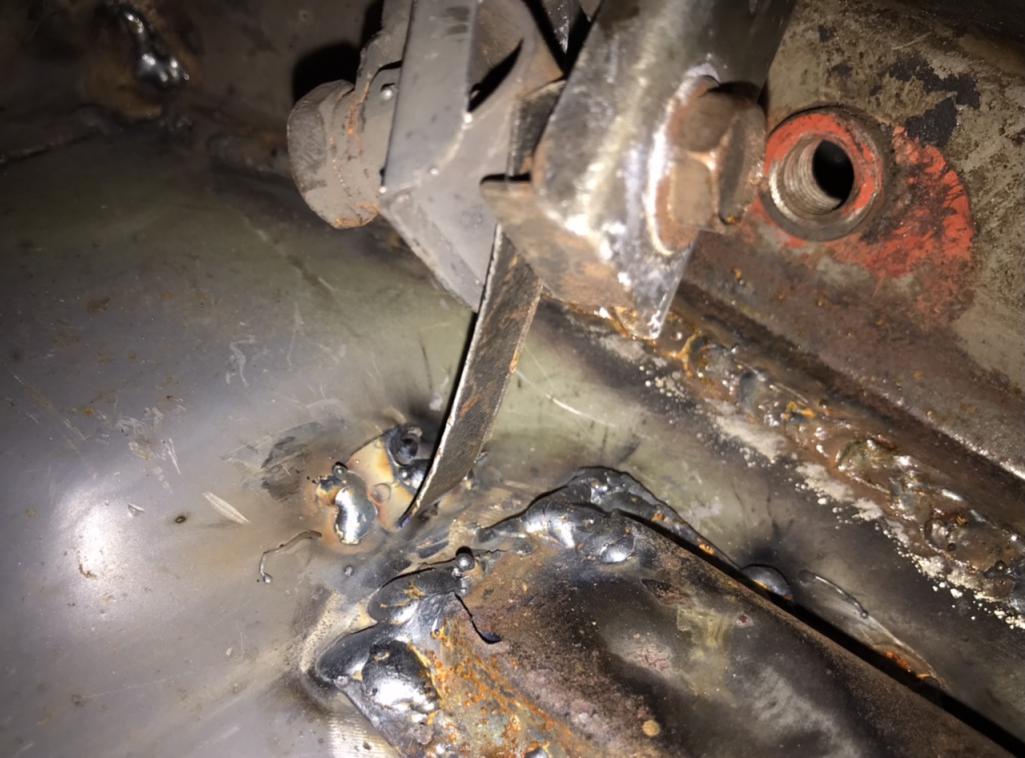
|
|
|
|
| Literati914 |
Nov 15 2021, 09:29 PM
Post
#159
|
|
Advanced Member Group: Members Posts: 2,148 Joined: 16-November 06 From: Dallas, TX Member No.: 7,222 Region Association: Southwest Region |
Next on the agenda is to repair the rusted out area that the frunk handle pull mounts to.. under the dash on the driver’s side. I made this repair over a few days work. First picture highlights the rusted out holes, but the area in between was pitted and thin so I opted to cut a large area out:
Attached thumbnail(s) 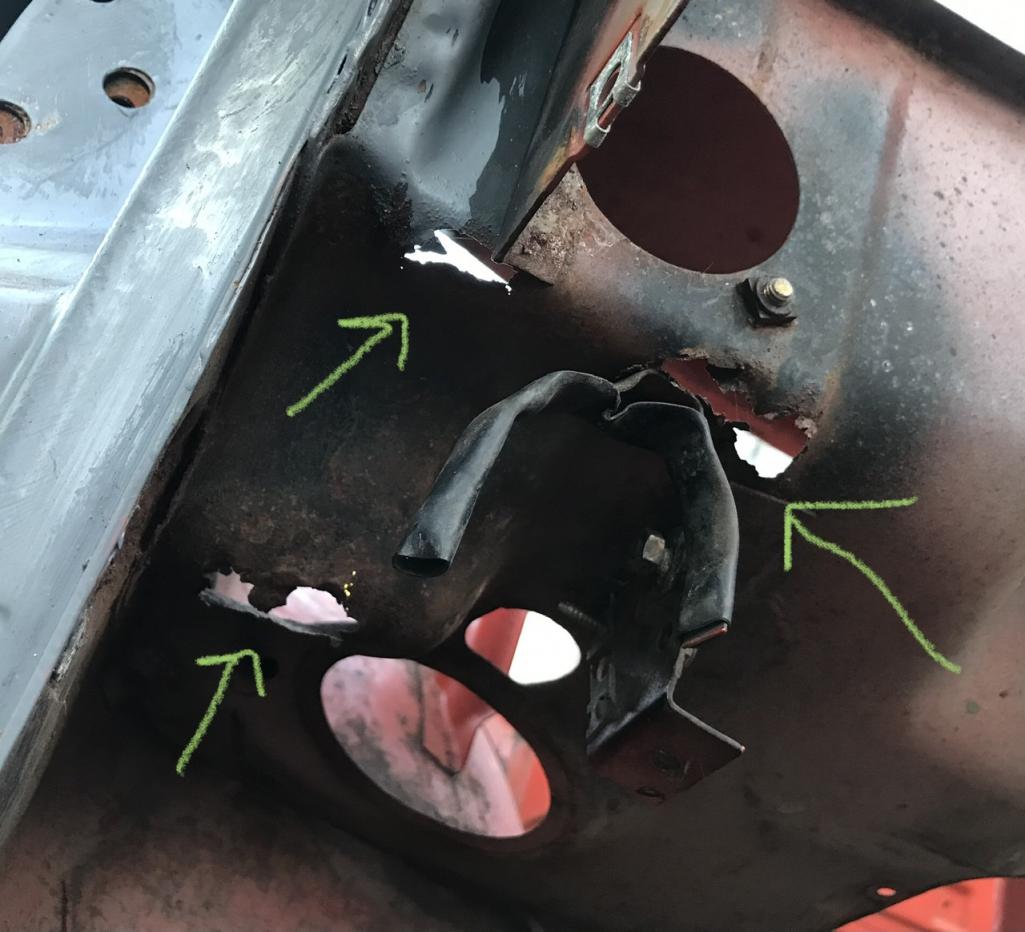
|
|
|
|
| Literati914 |
Nov 15 2021, 09:31 PM
Post
#160
|
|
Advanced Member Group: Members Posts: 2,148 Joined: 16-November 06 From: Dallas, TX Member No.: 7,222 Region Association: Southwest Region |
Same area from the topside:
Attached thumbnail(s) 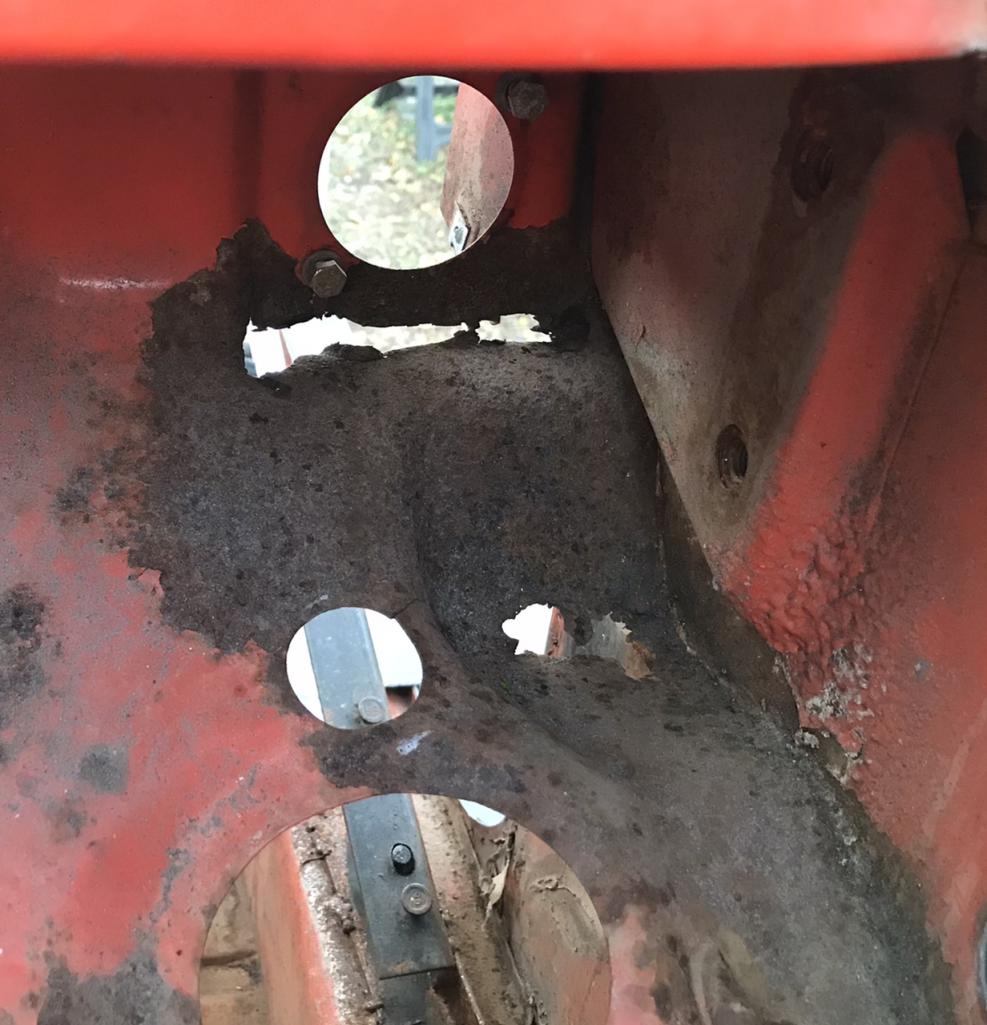
|
|
|
|
|
1 User(s) are reading this topic (1 Guests and 0 Anonymous Users)
0 Members:

|
Lo-Fi Version | Time is now: 27th November 2025 - 04:39 PM |
Invision Power Board
v9.1.4 © 2025 IPS, Inc.