|
|
|
Porsche, and the Porsche crest are registered trademarks of Dr. Ing. h.c. F. Porsche AG.
This site is not affiliated with Porsche in any way. Its only purpose is to provide an online forum for car enthusiasts. All other trademarks are property of their respective owners. |
|
|

  |

| Literati914 |
 Dec 12 2021, 06:51 PM Dec 12 2021, 06:51 PM
Post
#181
|
|
Advanced Member  Group: Members Posts: 2,148 Joined: 16-November 06 From: Dallas, TX Member No.: 7,222 Region Association: Southwest Region |
Been away from this project for a while, but got back on it the other day. This time I addressed the holes that were drilled in the rear center panel when a previous owner mounted one of the long reflectors (w/ Porsche script). I began this repair yesterday after I’d misplaced my phone (camera) for half the day, so no before shots unfortunately.. and no pics where I filled the holes with metal and welded them closed. Here’s a pic of the area leveled with FG filler though:
Attached thumbnail(s) 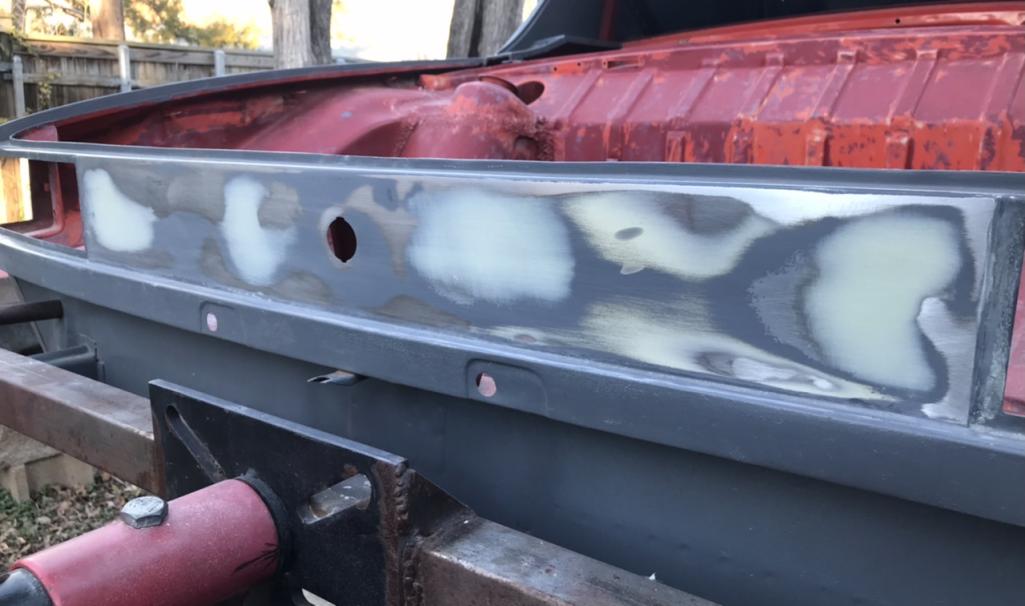
|
   |

 
|
| Literati914 |
Dec 12 2021, 06:53 PM
Post
#182
|
|
Advanced Member Group: Members Posts: 2,148 Joined: 16-November 06 From: Dallas, TX Member No.: 7,222 Region Association: Southwest Region |
Lightly primed.. and check this one off the list. Next is on to the seal channel for the front trunk (frunk (IMG:style_emoticons/default/rolleyes.gif) )
Attached thumbnail(s) 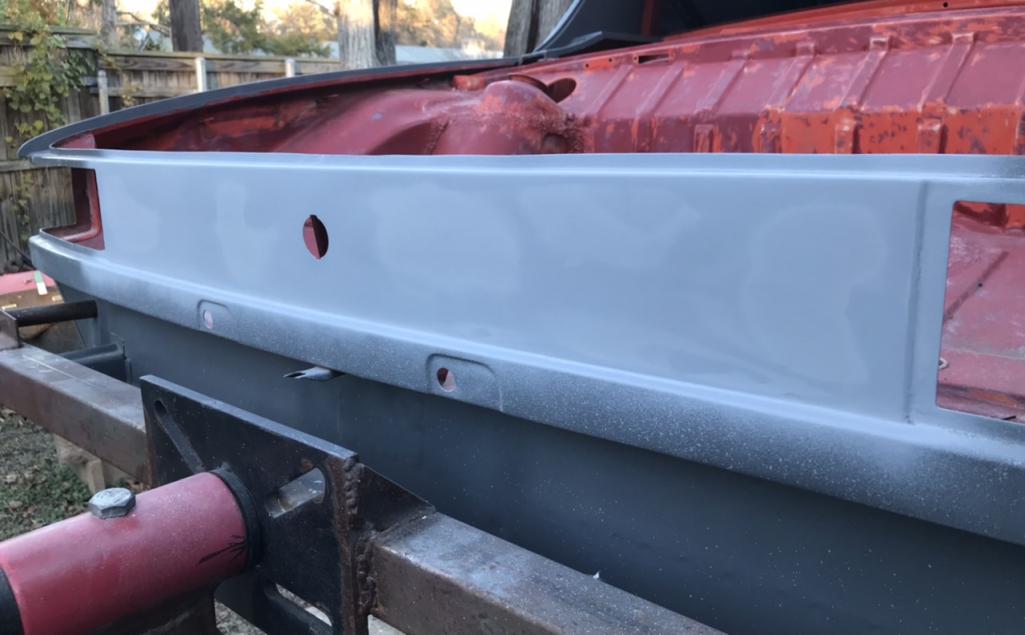
|
|
|
|
| Literati914 |
Dec 17 2021, 11:06 PM
Post
#183
|
|
Advanced Member Group: Members Posts: 2,148 Joined: 16-November 06 From: Dallas, TX Member No.: 7,222 Region Association: Southwest Region |
Next, I needed to fix all the holes in the front part of the seal channel for the frunk.. including the perimeters of the headlight bucket areas. Here’s some before shots showing some of the rusted parts.
Attached thumbnail(s) 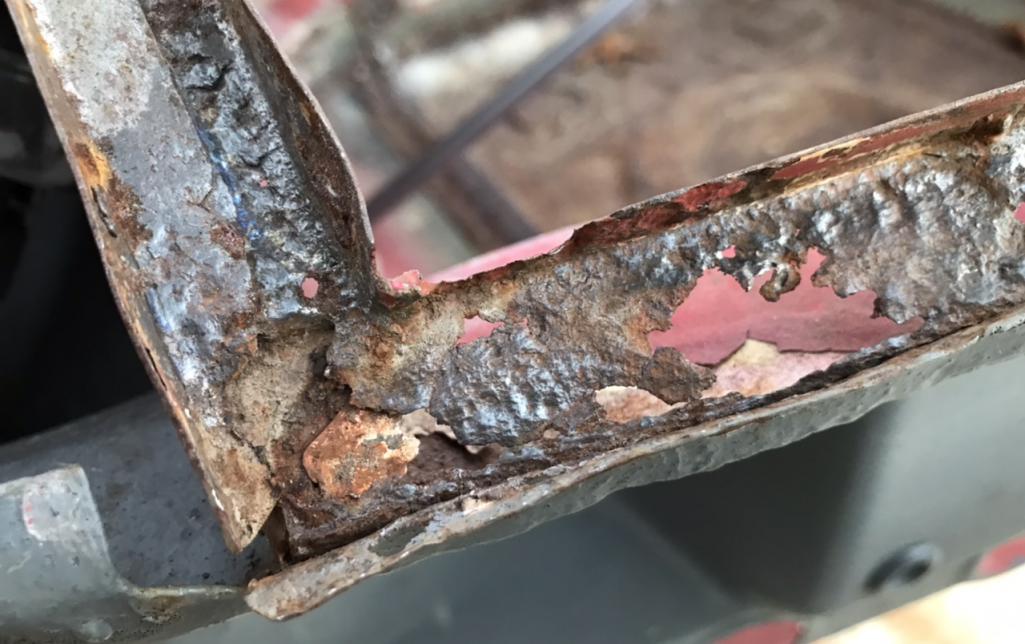
|
|
|
|
| Literati914 |
Dec 17 2021, 11:08 PM
Post
#184
|
|
Advanced Member Group: Members Posts: 2,148 Joined: 16-November 06 From: Dallas, TX Member No.: 7,222 Region Association: Southwest Region |
More ugly :
Attached thumbnail(s) 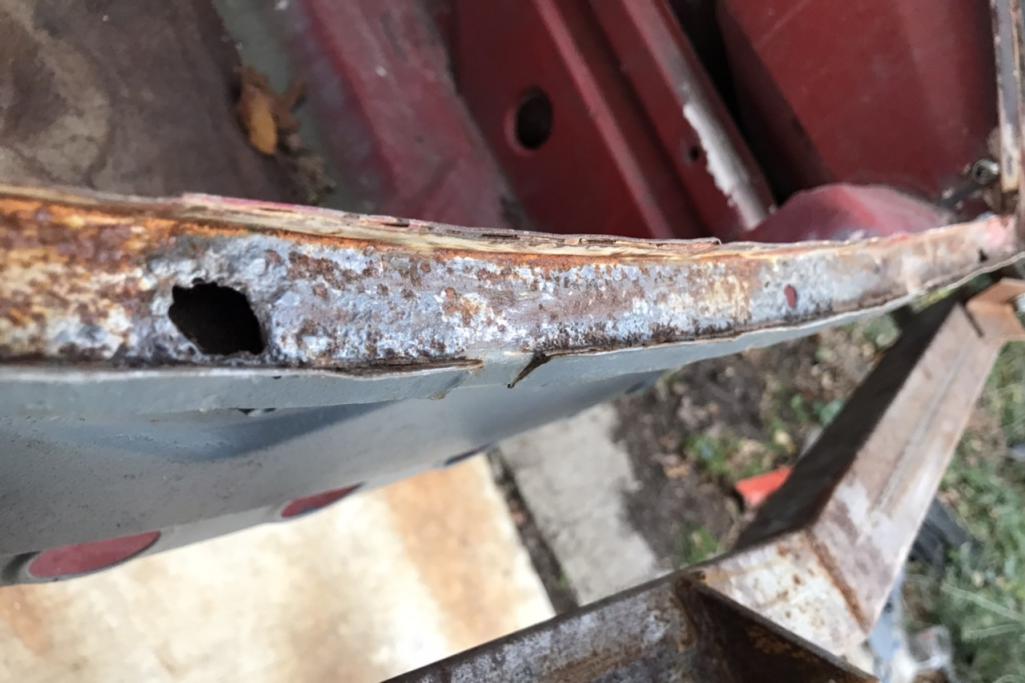
|
|
|
|
| Literati914 |
Dec 17 2021, 11:10 PM
Post
#185
|
|
Advanced Member Group: Members Posts: 2,148 Joined: 16-November 06 From: Dallas, TX Member No.: 7,222 Region Association: Southwest Region |
Attached thumbnail(s) 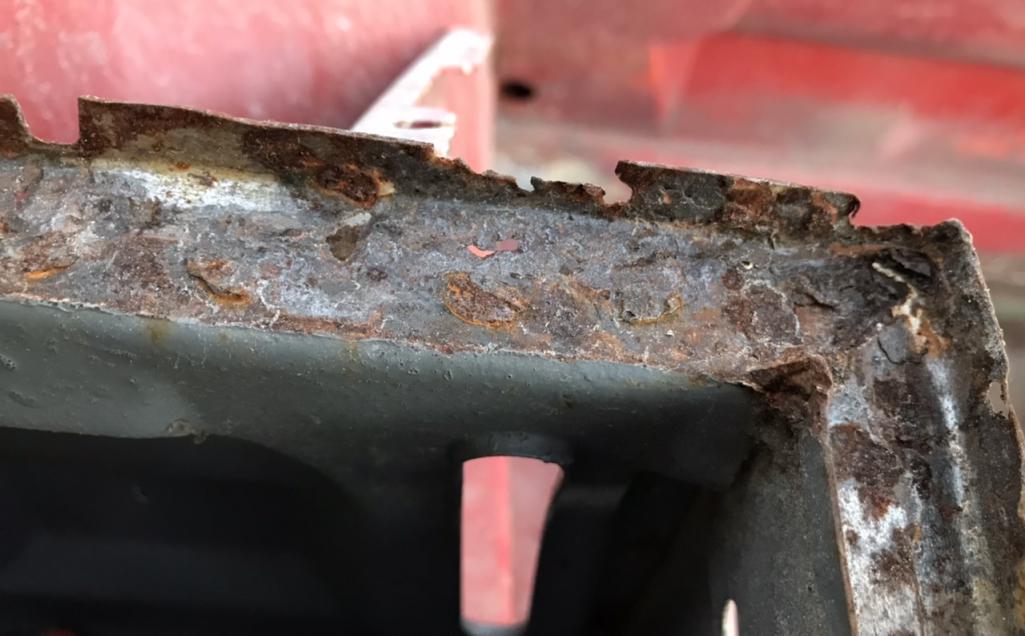
|
|
|
|
| Literati914 |
Dec 17 2021, 11:17 PM
Post
#186
|
|
Advanced Member Group: Members Posts: 2,148 Joined: 16-November 06 From: Dallas, TX Member No.: 7,222 Region Association: Southwest Region |
Some typical repair techniques performed :
Attached thumbnail(s) 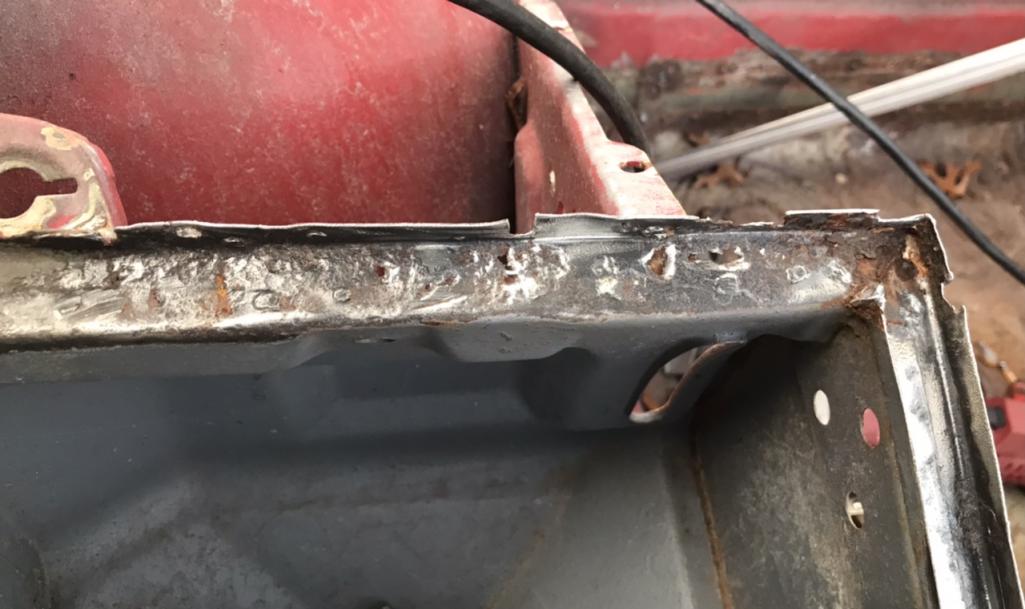
|
|
|
|
| Literati914 |
Dec 17 2021, 11:18 PM
Post
#187
|
|
Advanced Member Group: Members Posts: 2,148 Joined: 16-November 06 From: Dallas, TX Member No.: 7,222 Region Association: Southwest Region |
Crap cut away:
Attached thumbnail(s) 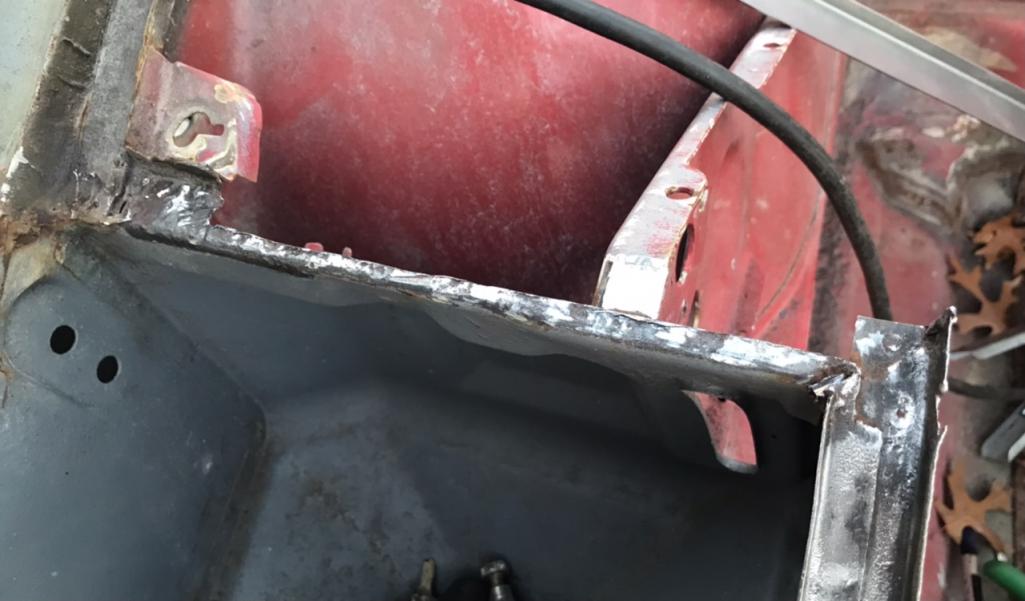
|
|
|
|
| Literati914 |
Dec 17 2021, 11:19 PM
Post
#188
|
|
Advanced Member Group: Members Posts: 2,148 Joined: 16-November 06 From: Dallas, TX Member No.: 7,222 Region Association: Southwest Region |
Patch made and ready :
Attached thumbnail(s) 
|
|
|
|
| Literati914 |
Dec 17 2021, 11:21 PM
Post
#189
|
|
Advanced Member Group: Members Posts: 2,148 Joined: 16-November 06 From: Dallas, TX Member No.: 7,222 Region Association: Southwest Region |
And welded in place, and it’s front edge piece made up..
Attached thumbnail(s) 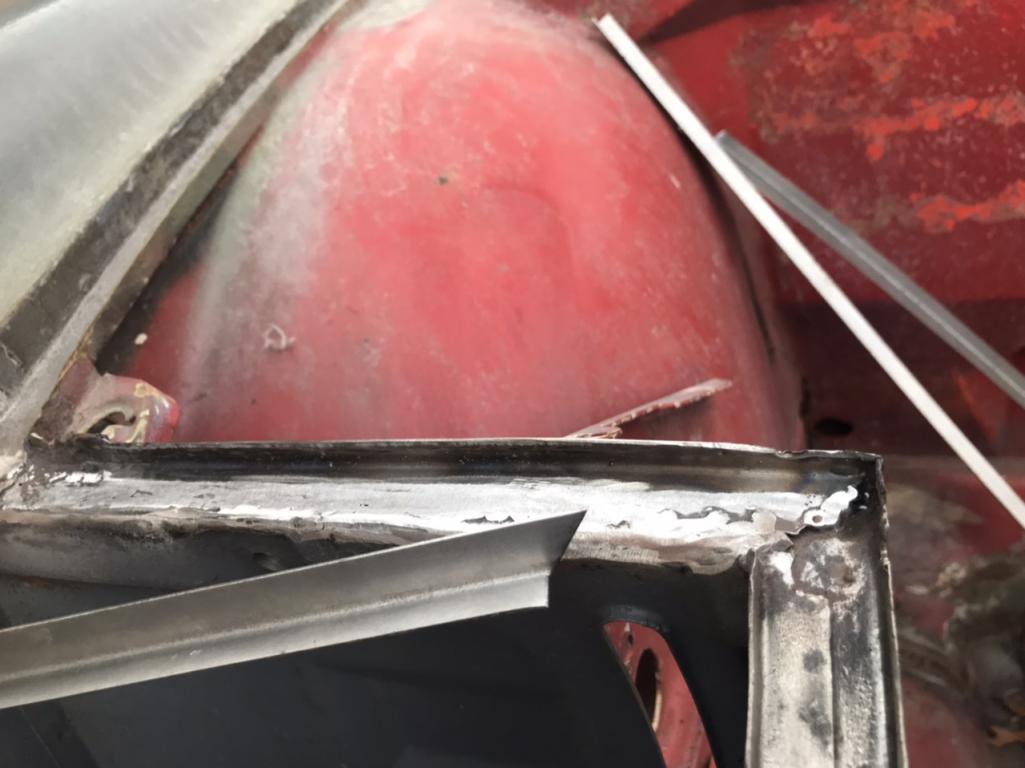
|
|
|
|
| Literati914 |
Dec 17 2021, 11:31 PM
Post
#190
|
|
Advanced Member Group: Members Posts: 2,148 Joined: 16-November 06 From: Dallas, TX Member No.: 7,222 Region Association: Southwest Region |
A picture of the completed bucket perimeter area… took lots of pics but it’s all the same thing through out the entire main seal channel. All this took about 5 x as long as I thought it would (IMG:style_emoticons/default/biggrin.gif) . I only have one small dime size hole to repair in this channel now, it’s up near the driver’s side wiper arm area. More on that later. Here’s a sample of the finished work covered in rust preventative paint, just before I leveled the channel with FG filler, mainly to fill weld seams:
Attached thumbnail(s) 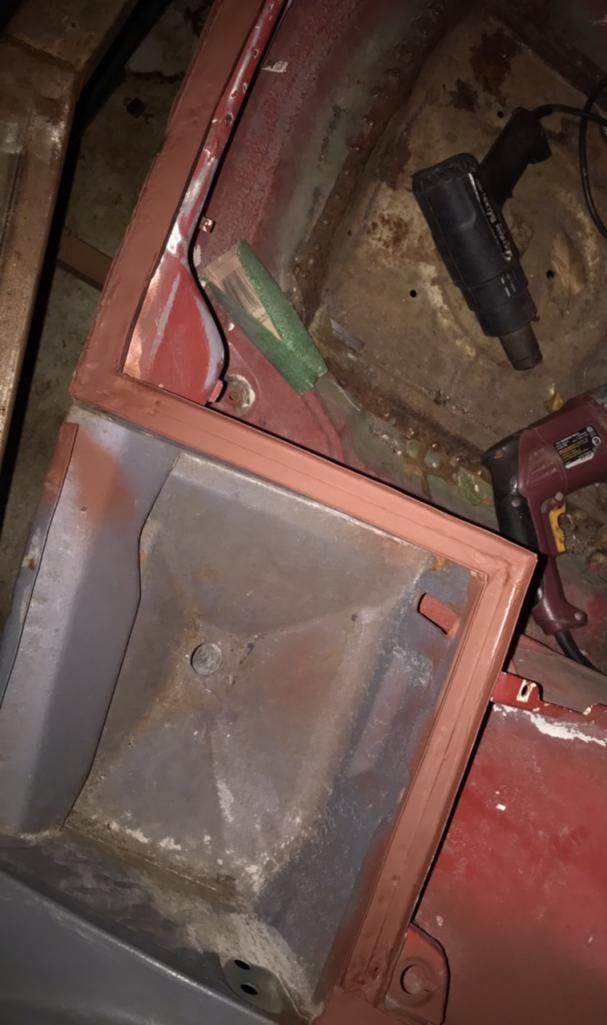
|
|
|
|
| Puebloswatcop |
Dec 18 2021, 09:34 AM
Post
#191
|
|
Senior Member Group: Members Posts: 1,683 Joined: 27-December 14 From: Mineola, Texas Member No.: 18,258 Region Association: Southwest Region |
QUOTE(Literati914 @ Jul 26 2021, 09:39 PM)  ^ frustrating, when I use the forums 'attachment' buttons for pics, they get turned in all kinds of directions - is there something I can do to fix this? My Phone makes the pictures to large and will make them fit any way the site wants. I have to go in and edit them down to about 25% of their original size. . |
|
|
|
| Literati914 |
Mar 10 2022, 10:34 PM
Post
#192
|
|
Advanced Member Group: Members Posts: 2,148 Joined: 16-November 06 From: Dallas, TX Member No.: 7,222 Region Association: Southwest Region |
What !!! You mean I was finally able to get something 914 related done? (IMG:style_emoticons/default/dry.gif)
Ok not directly to car on the rotisserie but at least something. I’m having to add sway bar tabs to a set of front a-arms because my other two sets that already have them (from the factory) are still mounted on cars (IMG:style_emoticons/default/headbang.gif) that’ll need to be jockied around so I can not dismantle those. So yea, I got to break the welder out for the first time in months. I will media blast this set later but for now I used the grinder to get to shined metal for welding: Attached thumbnail(s) 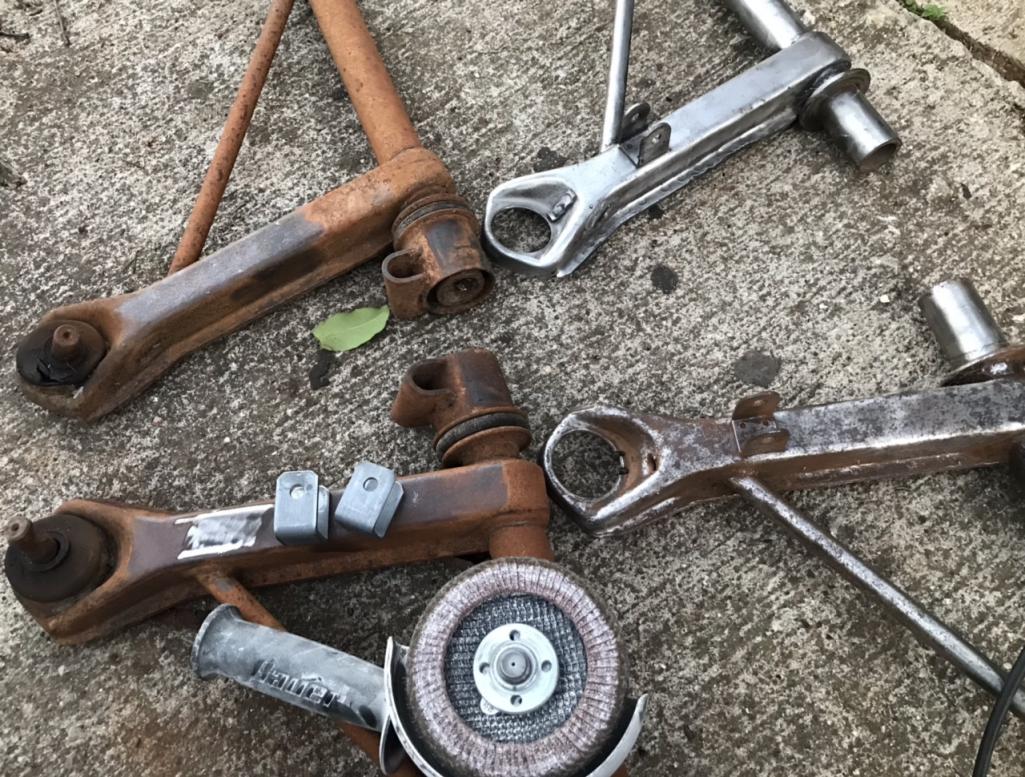
|
|
|
|
| Literati914 |
Mar 10 2022, 10:35 PM
Post
#193
|
|
Advanced Member Group: Members Posts: 2,148 Joined: 16-November 06 From: Dallas, TX Member No.: 7,222 Region Association: Southwest Region |
I used a fourth set that I have to guide in placement of the sway bracket:
Attached thumbnail(s) 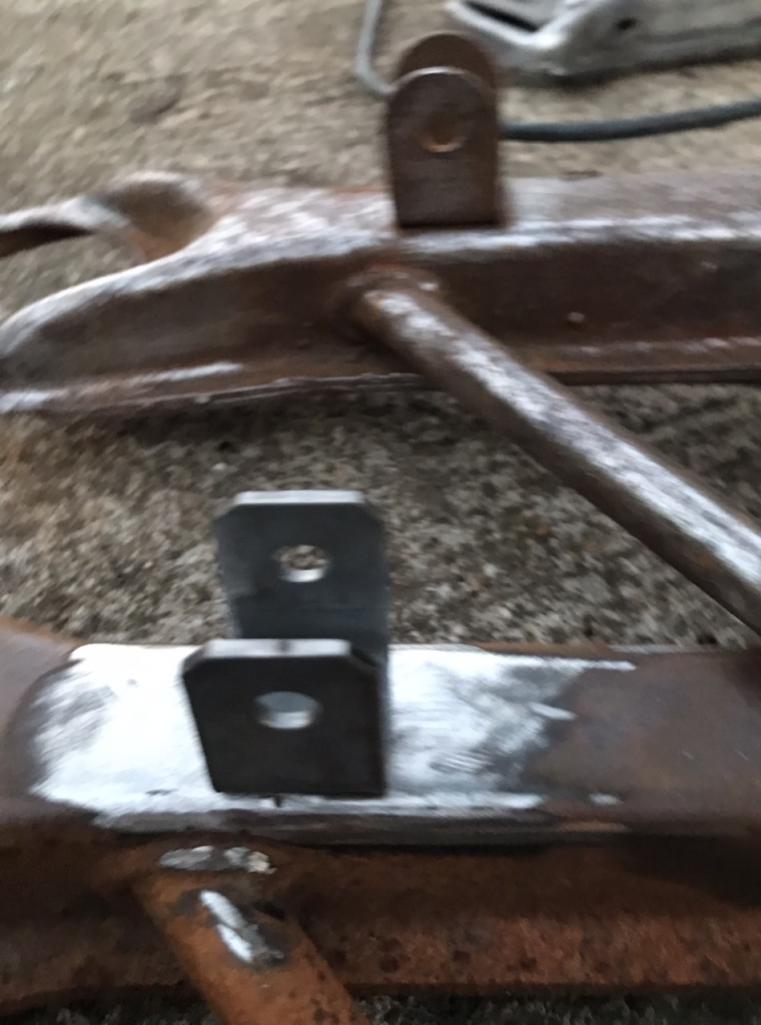
|
|
|
|
| Literati914 |
Mar 10 2022, 10:39 PM
Post
#194
|
|
Advanced Member Group: Members Posts: 2,148 Joined: 16-November 06 From: Dallas, TX Member No.: 7,222 Region Association: Southwest Region |
I’m looking forward to getting back to this project, and this small accomplishment was kinda motivating tbh. Here the completed tabs. I’ll dissemble the arms later (Wish me luck - these things are rusty!!) :
Attached thumbnail(s) 
|
|
|
|
| ClayPerrine |
Mar 10 2022, 10:43 PM
Post
#195
|
|
Life's been good to me so far..... Group: Admin Posts: 16,526 Joined: 11-September 03 From: Hurst, TX. Member No.: 1,143 Region Association: NineFourteenerVille |
QUOTE(Literati914 @ Mar 10 2022, 10:39 PM) I’m looking forward to getting back to this project, and this small accomplishment was kinda motivating tbh. Here the completed tabs. I’ll dissemble the arms later (Wish me luck - these things are rusty!!) : I have about a dozen sets in my garage, most of which have the sway bar tabs. You could have just come over and picked out a set. Clay |
|
|
|
| Literati914 |
Mar 10 2022, 11:11 PM
Post
#196
|
|
Advanced Member Group: Members Posts: 2,148 Joined: 16-November 06 From: Dallas, TX Member No.: 7,222 Region Association: Southwest Region |
Oh well.. thanks anyway Clay! There was something I was thinking of hitting you up for the other day, but I’ve forgotten what it was now. (IMG:style_emoticons/default/beer3.gif)
. |
|
|
|
| ClayPerrine |
Mar 11 2022, 08:43 AM
Post
#197
|
|
Life's been good to me so far..... Group: Admin Posts: 16,526 Joined: 11-September 03 From: Hurst, TX. Member No.: 1,143 Region Association: NineFourteenerVille |
QUOTE(Literati914 @ Mar 10 2022, 11:11 PM) Oh well.. thanks anyway Clay! There was something I was thinking of hitting you up for the other day, but I’ve forgotten what it was now. (IMG:style_emoticons/default/beer3.gif) . Memory is the second thing to go... and I forgot what the first one was. (IMG:style_emoticons/default/lol-2.gif) |
|
|
|
| Puebloswatcop |
Mar 11 2022, 07:29 PM
Post
#198
|
|
Senior Member Group: Members Posts: 1,683 Joined: 27-December 14 From: Mineola, Texas Member No.: 18,258 Region Association: Southwest Region |
Coming along very nicely Doug. I should have had you come do my front trunk channel. I hate it, mine rusted through up near the fender to cowel joints.
|
|
|
|
| Literati914 |
Mar 20 2022, 11:24 PM
Post
#199
|
|
Advanced Member Group: Members Posts: 2,148 Joined: 16-November 06 From: Dallas, TX Member No.: 7,222 Region Association: Southwest Region |
I got around to stripping these old A-arms of their bushings and ball joints - they did put up a bit of a fight I must say (IMG:style_emoticons/default/smash.gif)
Attached thumbnail(s) 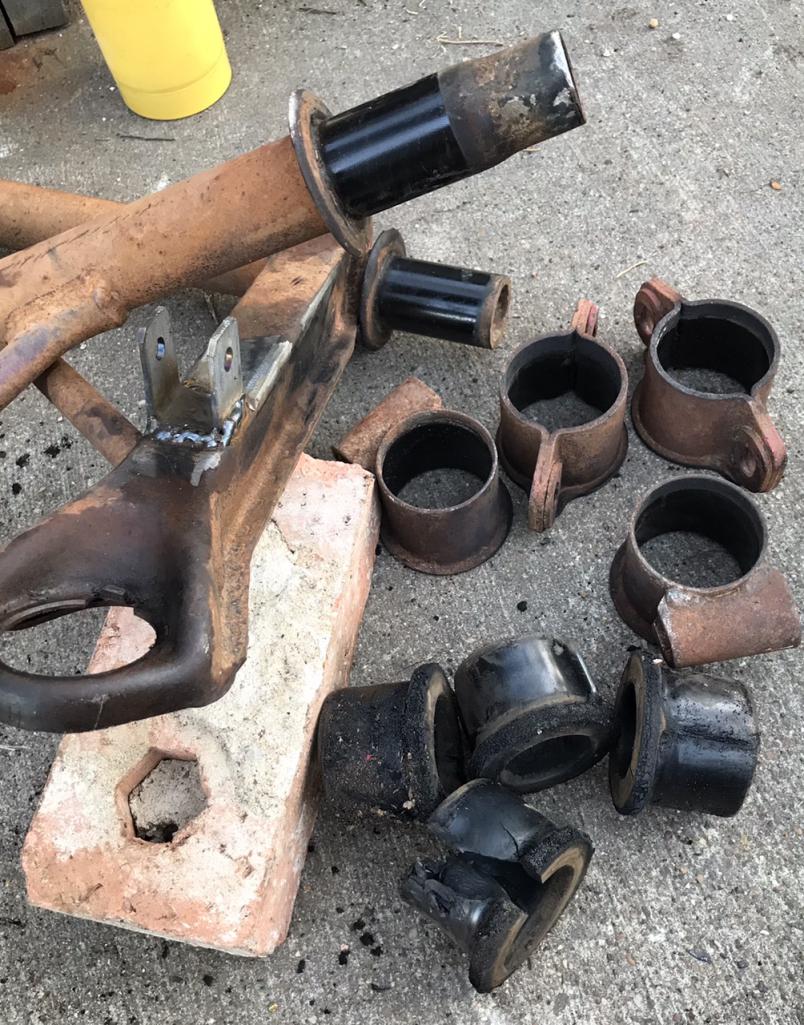
|
|
|
|
| Literati914 |
Mar 20 2022, 11:28 PM
Post
#200
|
|
Advanced Member Group: Members Posts: 2,148 Joined: 16-November 06 From: Dallas, TX Member No.: 7,222 Region Association: Southwest Region |
Then I decided to patch a hole in the bottom of a stock 2.0L air box that I have. I’m not sure which car this will be used on, or if I’ll use it at all but I figured it needed to be repaired before I proceed with sandblasting stuff.
Before: Attached thumbnail(s) 
|
|
|
|
|
1 User(s) are reading this topic (1 Guests and 0 Anonymous Users)
0 Members:

|
Lo-Fi Version | Time is now: 27th November 2025 - 05:14 PM |
Invision Power Board
v9.1.4 © 2025 IPS, Inc.