|
|
|
Porsche, and the Porsche crest are registered trademarks of Dr. Ing. h.c. F. Porsche AG.
This site is not affiliated with Porsche in any way. Its only purpose is to provide an online forum for car enthusiasts. All other trademarks are property of their respective owners. |
|
|

  |

| Literati914 |
 Jul 8 2023, 12:23 PM Jul 8 2023, 12:23 PM
Post
#241
|
|
Advanced Member  Group: Members Posts: 2,148 Joined: 16-November 06 From: Dallas, TX Member No.: 7,222 Region Association: Southwest Region |
Yeah I was thinking along those lines as a first step and whether I put something behind it. I was thinking a small rubber backed cover with a machine screw thru it and a large washer on the other side also rubber backed (sandwich the lock hole), the add the roundel with rtv along its back perimeter.
|
   |

 
|
| Literati914 |
Oct 4 2023, 09:47 AM
Post
#242
|
|
Advanced Member Group: Members Posts: 2,148 Joined: 16-November 06 From: Dallas, TX Member No.: 7,222 Region Association: Southwest Region |
Ok it’s been a while since I’ve updated my build thread so here goes: I’ve been working on my wiring harness for much too long. I add some wiring for extra accessories while it was out of the car and convenient to do so. But now I’ve finally got it (mostly) reinstalled. Here you can see that I rearranged the placement of the stock relays in order to added an extra for aux. fogs.
Attached image(s) 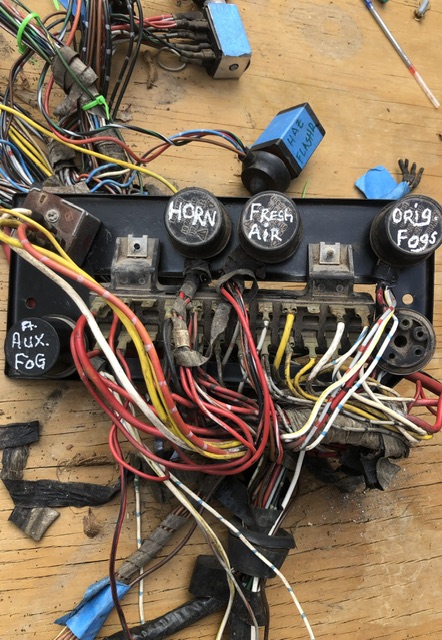
|
|
|
|
| Literati914 |
Oct 4 2023, 09:53 AM
Post
#243
|
|
Advanced Member Group: Members Posts: 2,148 Joined: 16-November 06 From: Dallas, TX Member No.: 7,222 Region Association: Southwest Region |
And here’s my lambda controller, I’ve opened up the hole in the firewall (where the shift rod used to pivot -early shift rods ) to accommodate the lambda wiring and the CHT thermocouple wire.
Attached image(s) 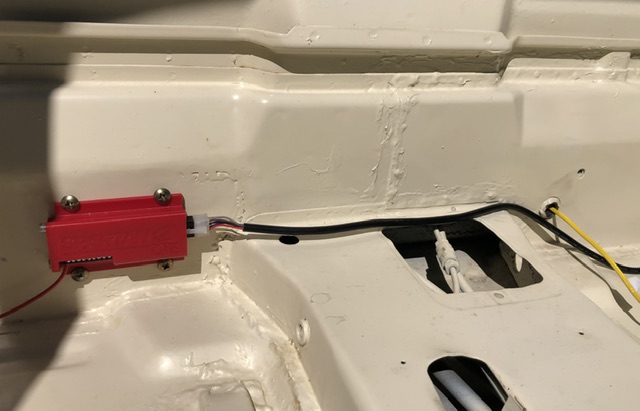
|
|
|
|
| Literati914 |
Oct 4 2023, 09:56 AM
Post
#244
|
|
Advanced Member Group: Members Posts: 2,148 Joined: 16-November 06 From: Dallas, TX Member No.: 7,222 Region Association: Southwest Region |
Engine side.. had to buy a 3/4” drill bit to open it
Up enough and it’ll get grommets in both sides. Attached image(s) 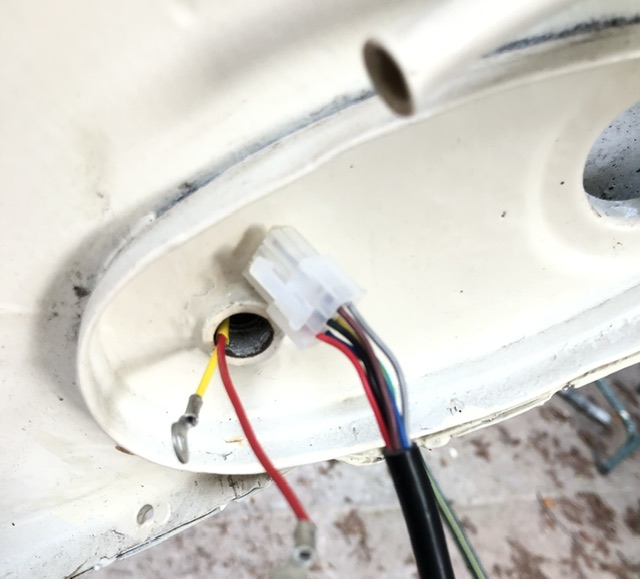
|
|
|
|
| Literati914 |
Oct 4 2023, 09:59 AM
Post
#245
|
|
Advanced Member Group: Members Posts: 2,148 Joined: 16-November 06 From: Dallas, TX Member No.: 7,222 Region Association: Southwest Region |
I stripped my fuse block before installing the harness and cleaned all of the male and female terminals.
Attached image(s) 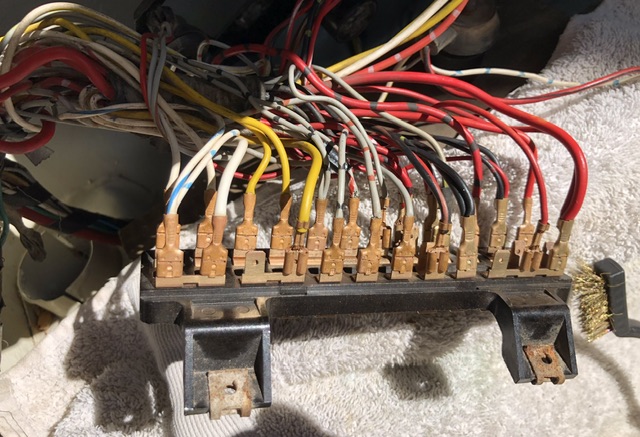
|
|
|
|
| Literati914 |
Oct 4 2023, 10:03 AM
Post
#246
|
|
Advanced Member Group: Members Posts: 2,148 Joined: 16-November 06 From: Dallas, TX Member No.: 7,222 Region Association: Southwest Region |
This shot shows my custom dash layout. On the left of the Column I’m adding an A/F gauge (14point7) and on the right side will be the aux. fog light switch, Dakota digital CHT gauge and an analog voltmeter.
Attached image(s) 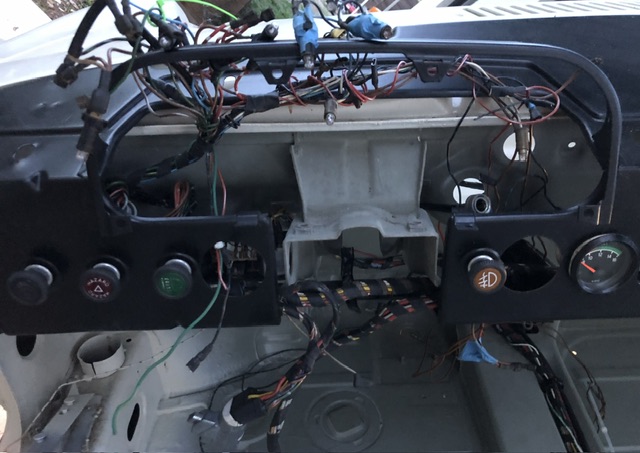
|
|
|
|
| Literati914 |
Oct 4 2023, 10:08 AM
Post
#247
|
|
Advanced Member Group: Members Posts: 2,148 Joined: 16-November 06 From: Dallas, TX Member No.: 7,222 Region Association: Southwest Region |
Having the harness back where it belongs is nice, after all this time!! I’ve added some wires, both front and back for an eventual A/C project.
Attached image(s) 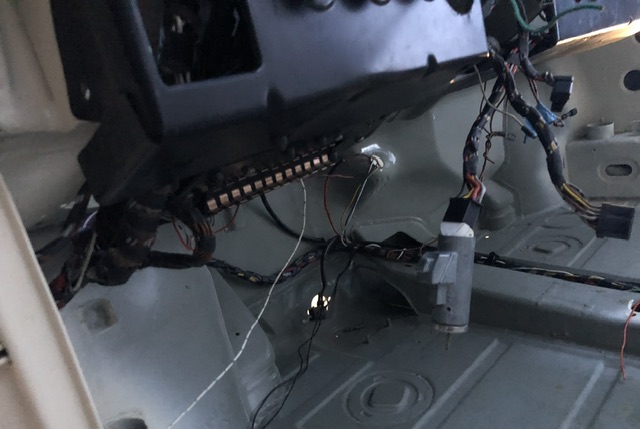
|
|
|
|
| Literati914 |
Oct 4 2023, 10:12 AM
Post
#248
|
|
Advanced Member Group: Members Posts: 2,148 Joined: 16-November 06 From: Dallas, TX Member No.: 7,222 Region Association: Southwest Region |
Stripes.. the cars not polished out yet but you get the idea.
Attached image(s) 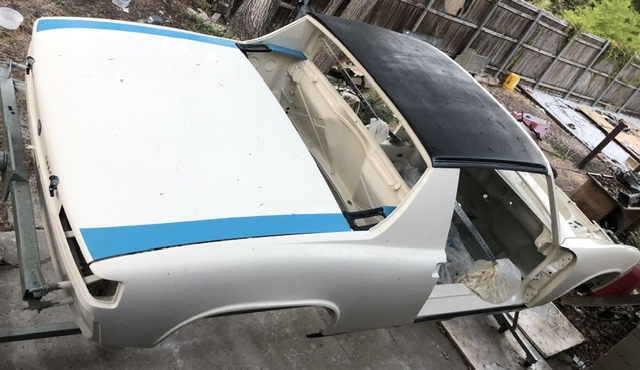
|
|
|
|
| Literati914 |
Oct 4 2023, 10:17 AM
Post
#249
|
|
Advanced Member Group: Members Posts: 2,148 Joined: 16-November 06 From: Dallas, TX Member No.: 7,222 Region Association: Southwest Region |
I’m not sure if I’m in love with the paint scheme yet.. but it’s fun and I figure I could always change it.
Attached image(s) 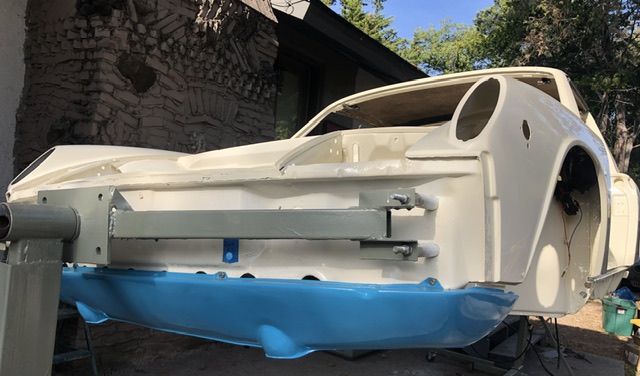
|
|
|
|
| Literati914 |
Dec 15 2023, 09:05 AM
Post
#250
|
|
Advanced Member Group: Members Posts: 2,148 Joined: 16-November 06 From: Dallas, TX Member No.: 7,222 Region Association: Southwest Region |
I got a lot of stuff done since last report, so here’s a little update on my project. I got this car off the rotisserie a few weeks back, installed the windshield, main rubber seals (all new targa seals, a-pillar, b, doors & threshold, etc, etc), reassembled and installed the doors. In short it now stays dry when rained on (IMG:style_emoticons/default/piratenanner.gif)
Attached image(s) 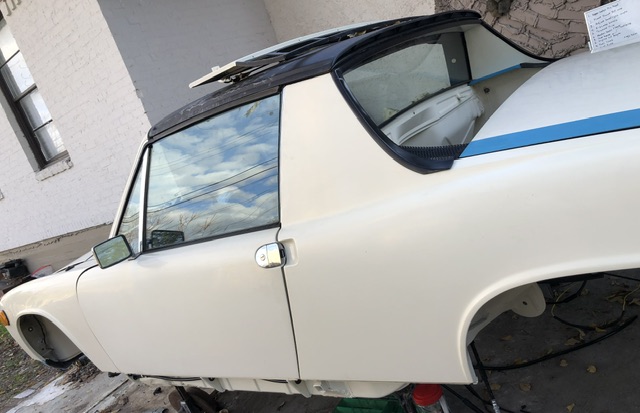
|
|
|
|
| Literati914 |
Dec 15 2023, 09:09 AM
Post
#251
|
|
Advanced Member Group: Members Posts: 2,148 Joined: 16-November 06 From: Dallas, TX Member No.: 7,222 Region Association: Southwest Region |
Here’s a shot showing how I had to reroute the wiring loom in the engine compartment because it got too bulky for the traditional route and was fouling the trunk hinge on the driver side (because of extra wiring off the battery - more on that later)
Attached image(s) 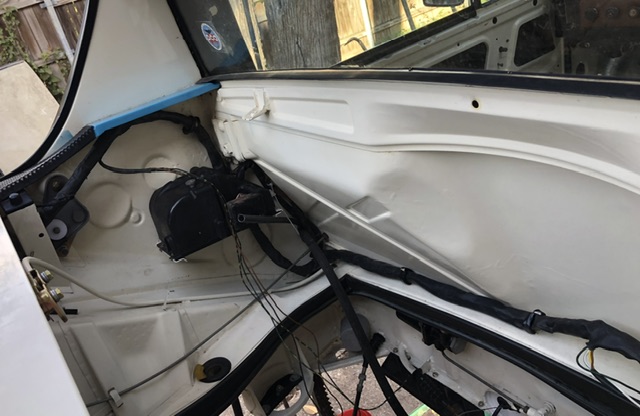
|
|
|
|
| Literati914 |
Dec 15 2023, 09:10 AM
Post
#252
|
|
Advanced Member Group: Members Posts: 2,148 Joined: 16-November 06 From: Dallas, TX Member No.: 7,222 Region Association: Southwest Region |
And I’ve started the dash remodel
Attached image(s) 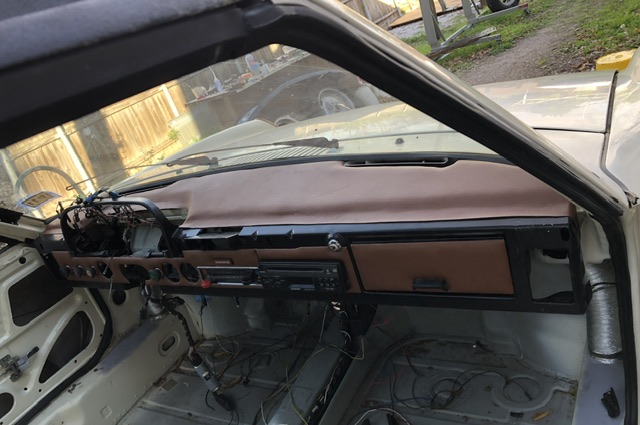
|
|
|
|
| East coaster |
Dec 15 2023, 09:25 AM
Post
#253
|
|
Senior Member Group: Members Posts: 1,896 Joined: 28-March 03 From: Millville, NJ Member No.: 487 Region Association: None |
Looking good!
|
 |
|
| dstudeba |
Dec 15 2023, 11:09 AM
Post
#254
|
|
Member Group: Members Posts: 118 Joined: 3-December 21 From: San Diego Member No.: 26,128 Region Association: Southern California |
I am intrigued by your dash remodel. Are you making it up or are you following/modifying a previous example?
|
|
|
|
| Literati914 |
Dec 15 2023, 11:40 AM
Post
#255
|
|
Advanced Member Group: Members Posts: 2,148 Joined: 16-November 06 From: Dallas, TX Member No.: 7,222 Region Association: Southwest Region |
QUOTE(dstudeba @ Dec 15 2023, 11:09 AM)  I am intrigued by your dash remodel. Are you making it up or are you following/modifying a previous example? I guess you'd say I'm making it up, for the dash face: I've basically just taken the existing stock pieces that were covered w/basketweave (and double side taped to the face at the factory) - stripped those and upholstered them with a very thin foam and new vinyl. TBH, I would so much rather just find a matching "saddle" basketweave to use without foam as original. This will look good but the basketweave is just a little more subtle and right. For the top, I've just done the same but with slightly thicker foam. Then my original upper dash will get a cover-lay shell (original black) and get installed with the original knee pad section below. . |
|
|
|
| Literati914 |
Mar 21 2024, 01:27 PM
Post
#256
|
|
Advanced Member Group: Members Posts: 2,148 Joined: 16-November 06 From: Dallas, TX Member No.: 7,222 Region Association: Southwest Region |
Quick update :
Got my master cylinder installed, fuel pump mocked up next to the steering rack, installed the pedal box and floor board Attached image(s) 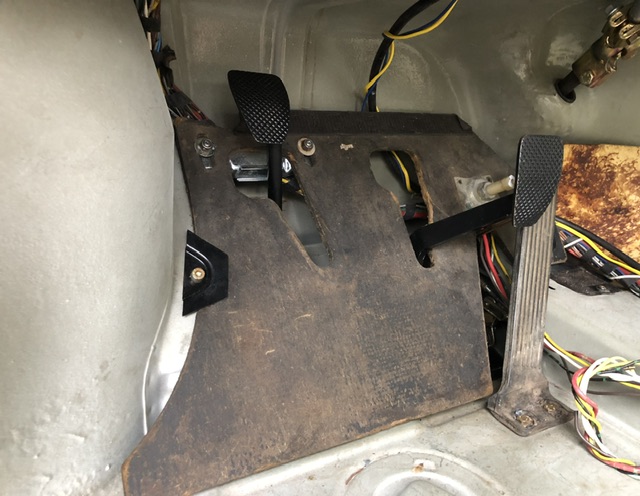
|
|
|
|
| Literati914 |
Mar 21 2024, 01:30 PM
Post
#257
|
|
Advanced Member Group: Members Posts: 2,148 Joined: 16-November 06 From: Dallas, TX Member No.: 7,222 Region Association: Southwest Region |
I installed my upper dash (w/ dash cap), refaced the front after changing my mind on the vinyl.. this wool herringbone material will be on the seat insert also
Attached image(s) 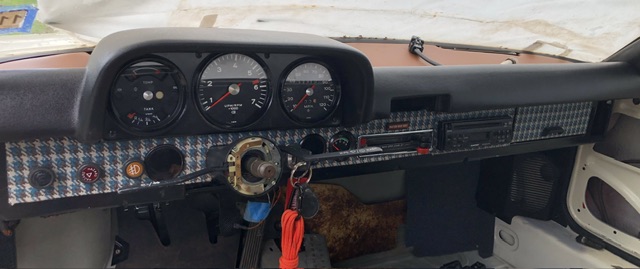
|
|
|
|
| Literati914 |
Mar 21 2024, 01:32 PM
Post
#258
|
|
Advanced Member Group: Members Posts: 2,148 Joined: 16-November 06 From: Dallas, TX Member No.: 7,222 Region Association: Southwest Region |
Installed my AF gauge
Attached image(s) 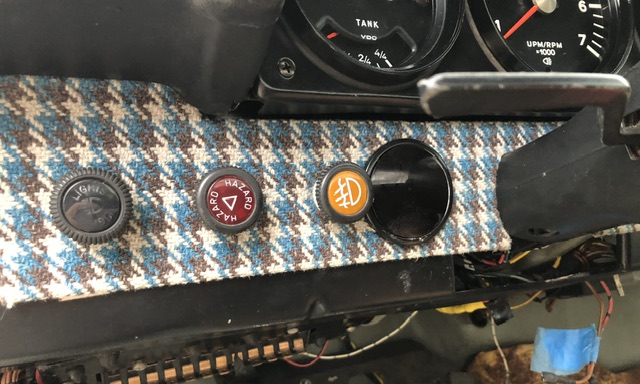
|
|
|
|
| Literati914 |
Mar 21 2024, 01:33 PM
Post
#259
|
|
Advanced Member Group: Members Posts: 2,148 Joined: 16-November 06 From: Dallas, TX Member No.: 7,222 Region Association: Southwest Region |
CHT gauge and a voltmeter too
Attached image(s) 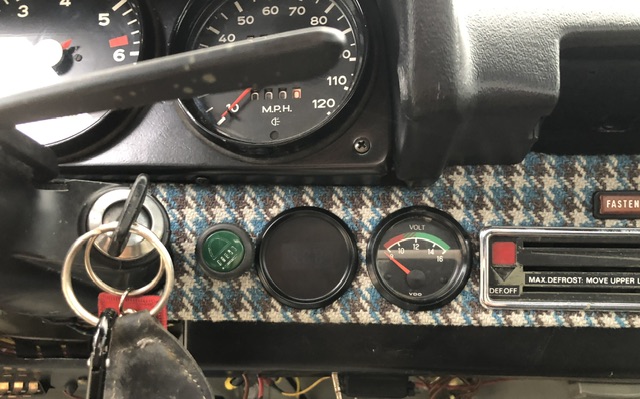
|
|
|
|
| Literati914 |
Mar 21 2024, 01:37 PM
Post
#260
|
|
Advanced Member Group: Members Posts: 2,148 Joined: 16-November 06 From: Dallas, TX Member No.: 7,222 Region Association: Southwest Region |
I took the main gauges apart and added the strip LEDs for illumination, painted the needles and exterior rings- and of course got them installed (no small feet that), oh and added a silver dot to the combo gauge
Attached image(s) 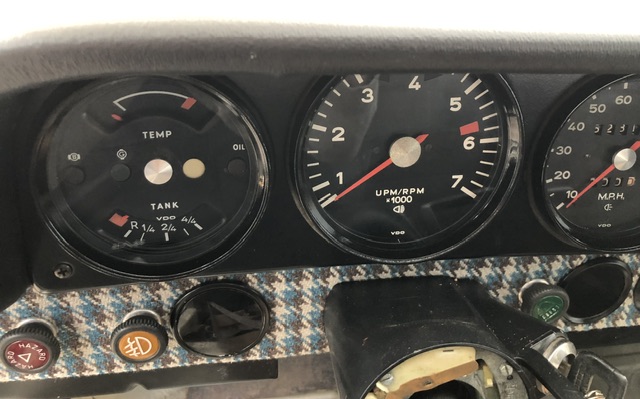
|
|
|
|
|
2 User(s) are reading this topic (2 Guests and 0 Anonymous Users)
0 Members:

|
Lo-Fi Version | Time is now: 27th November 2025 - 05:54 PM |
Invision Power Board
v9.1.4 © 2025 IPS, Inc.