|
|

|
Porsche, and the Porsche crest are registered trademarks of Dr. Ing. h.c. F. Porsche AG.
This site is not affiliated with Porsche in any way. Its only purpose is to provide an online forum for car enthusiasts. All other trademarks are property of their respective owners. |
|
|
  |
| Literati914 |
 Sep 12 2021, 06:31 PM Sep 12 2021, 06:31 PM
Post
#61
|
|
Advanced Member     Group: Members Posts: 2,196 Joined: 16-November 06 From: Dallas, TX Member No.: 7,222 Region Association: Southwest Region |
Now to tackle the loose clutch tube bracket midway down the tunnel.. in this pic a small section of the tunnel has been peeled back and my pen is pointing to where the bracket snapped, and pulled the tube towards the front of the car.
|
| Literati914 |
 Sep 12 2021, 06:31 PM Sep 12 2021, 06:31 PM
Post
#62
|
|
Advanced Member     Group: Members Posts: 2,196 Joined: 16-November 06 From: Dallas, TX Member No.: 7,222 Region Association: Southwest Region |
Now to tackle the loose clutch tube bracket midway down the tunnel.. in this pic a small section of the tunnel has been peeled back and my pen is pointing to where the bracket snapped, and pulled the tube towards the front of the car.
Attached thumbnail(s) 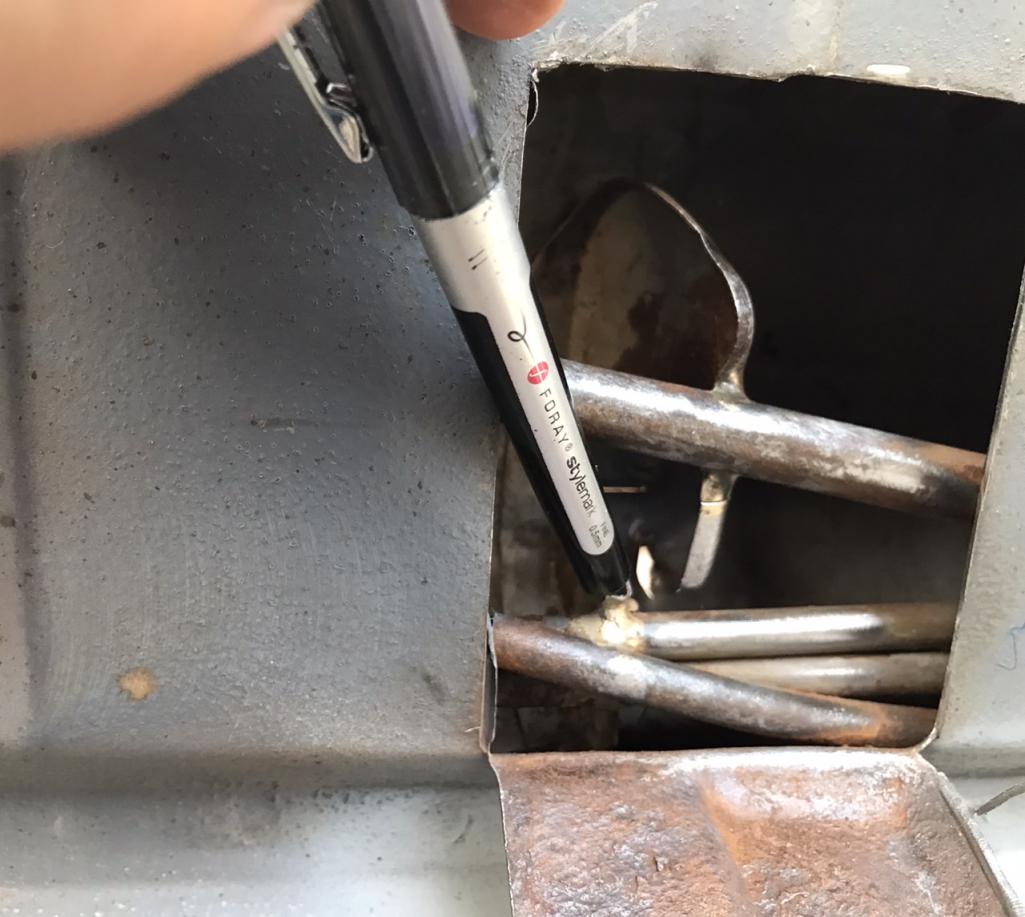
|
| Literati914 |
 Sep 12 2021, 06:36 PM Sep 12 2021, 06:36 PM
Post
#63
|
|
Advanced Member     Group: Members Posts: 2,196 Joined: 16-November 06 From: Dallas, TX Member No.: 7,222 Region Association: Southwest Region |
Bracket realigned and rewelded… I didn’t shoot a pic but I rewelded the tube to the inside of the rear firewall, the correct length exposed now. All is VERY solid! Well, I will need to address the typical clutch tube repair at the front of the tunnel, but that’s for later..
Attached thumbnail(s) 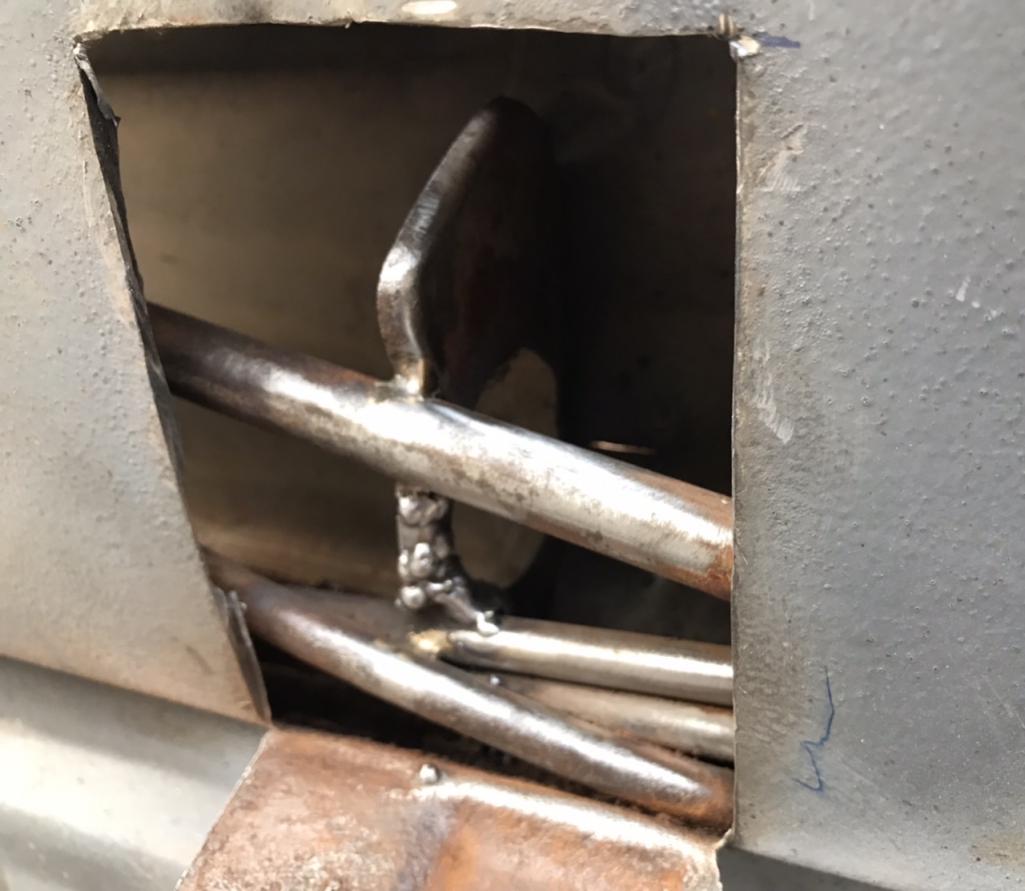
|
| Literati914 |
 Sep 12 2021, 06:36 PM Sep 12 2021, 06:36 PM
Post
#64
|
|
Advanced Member     Group: Members Posts: 2,196 Joined: 16-November 06 From: Dallas, TX Member No.: 7,222 Region Association: Southwest Region |
Closed up, worked down and lightly primed
Attached thumbnail(s) 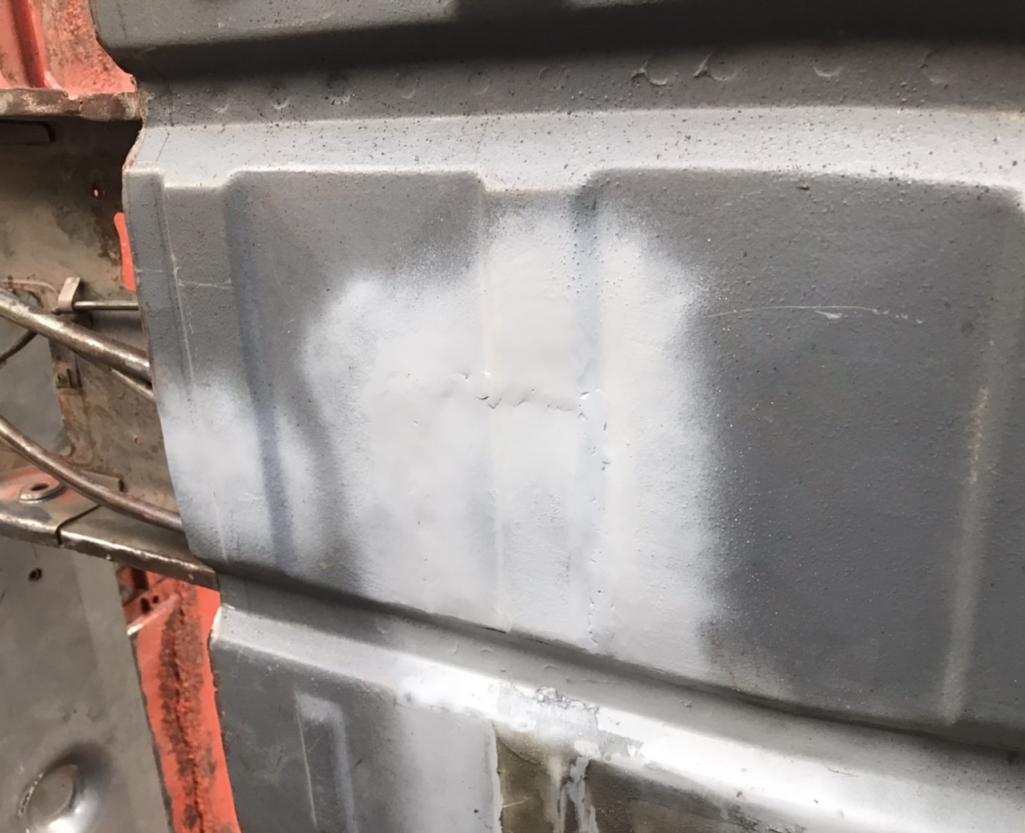
|
| bkrantz |
 Sep 12 2021, 07:17 PM Sep 12 2021, 07:17 PM
Post
#65
|
|
914 Guru      Group: Members Posts: 8,583 Joined: 3-August 19 From: SW Colorado Member No.: 23,343 Region Association: Rocky Mountains 
|
Nice.
One step at a time. |
| ClayPerrine |
 Sep 13 2021, 12:09 PM Sep 13 2021, 12:09 PM
Post
#66
|
|
Life's been good to me so far.....                Group: Admin Posts: 16,535 Joined: 11-September 03 From: Hurst, TX. Member No.: 1,143 Region Association: NineFourteenerVille 
|
This is amazing work. I so need to come see it in person.
Clay |
| Literati914 |
 Sep 13 2021, 03:13 PM Sep 13 2021, 03:13 PM
Post
#67
|
|
Advanced Member     Group: Members Posts: 2,196 Joined: 16-November 06 From: Dallas, TX Member No.: 7,222 Region Association: Southwest Region |
Thanks guys! Clay I look forward to having you out at some point.. want to show you my Volvo 1800E too, it’s shoe-horned in between the house and the fence at the moment tho.
I got around to thoroughly coating the interior of the tunnel, the area between the rear firewalls, and longs (as much as possible) - with Eastwood’s Internal Frame paint. Attached thumbnail(s) 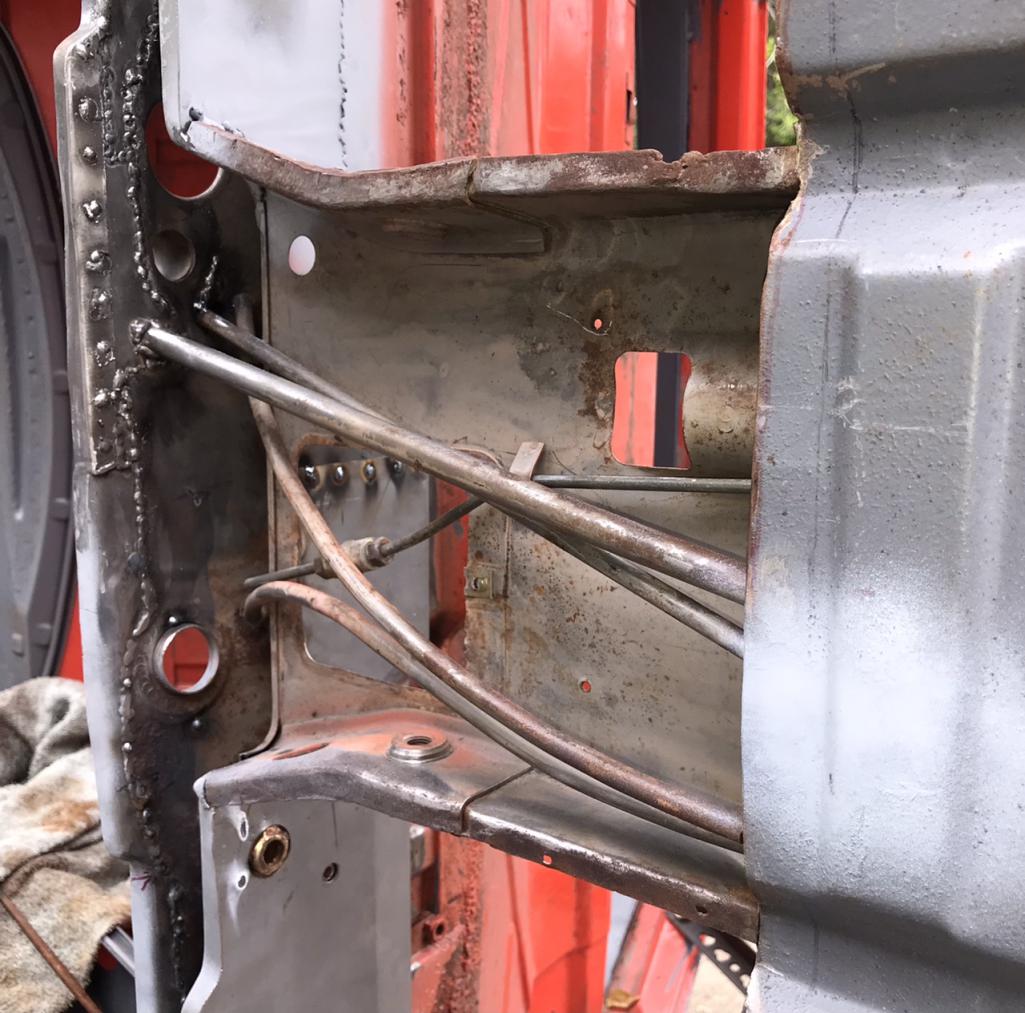
|
| Literati914 |
 Sep 13 2021, 03:19 PM Sep 13 2021, 03:19 PM
Post
#68
|
|
Advanced Member     Group: Members Posts: 2,196 Joined: 16-November 06 From: Dallas, TX Member No.: 7,222 Region Association: Southwest Region |
I attached the flexible nozzle to a long flexy thin rod which was helpful in getting the paint where it needed to be. The nozzle sprays the paint in a radial fan pattern.
Attached thumbnail(s) 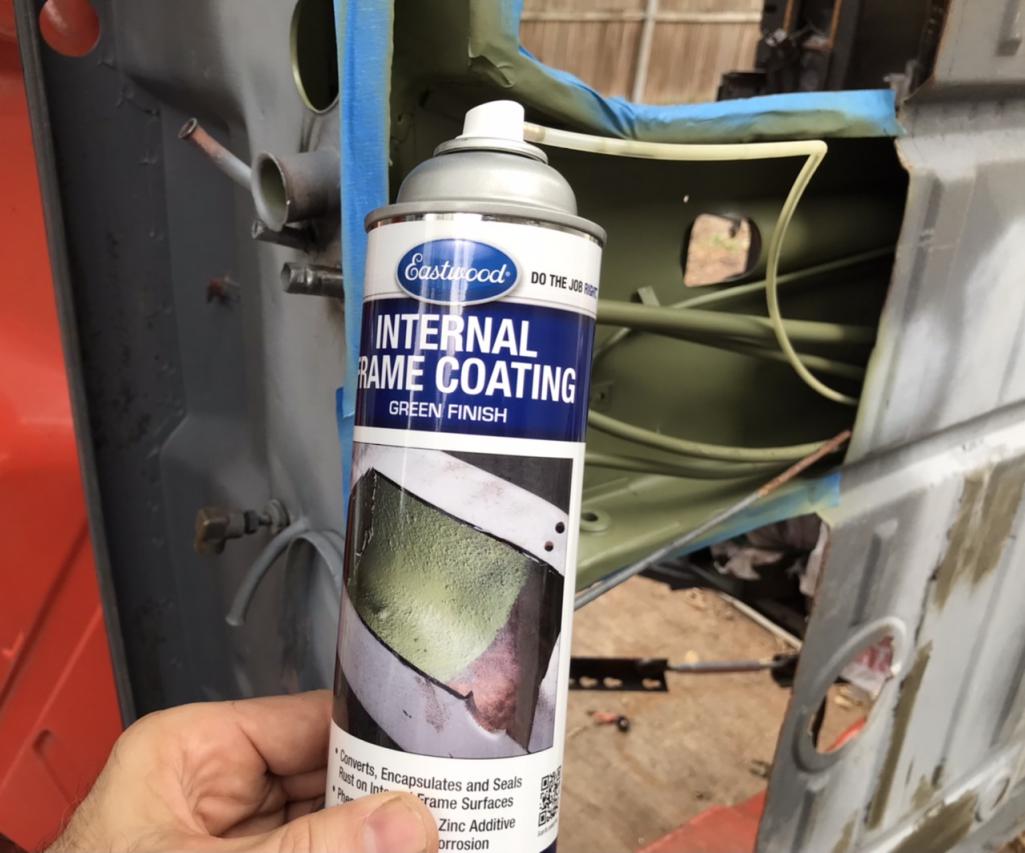
|
| Literati914 |
 Sep 13 2021, 03:20 PM Sep 13 2021, 03:20 PM
Post
#69
|
|
Advanced Member     Group: Members Posts: 2,196 Joined: 16-November 06 From: Dallas, TX Member No.: 7,222 Region Association: Southwest Region |
Done
Attached thumbnail(s) 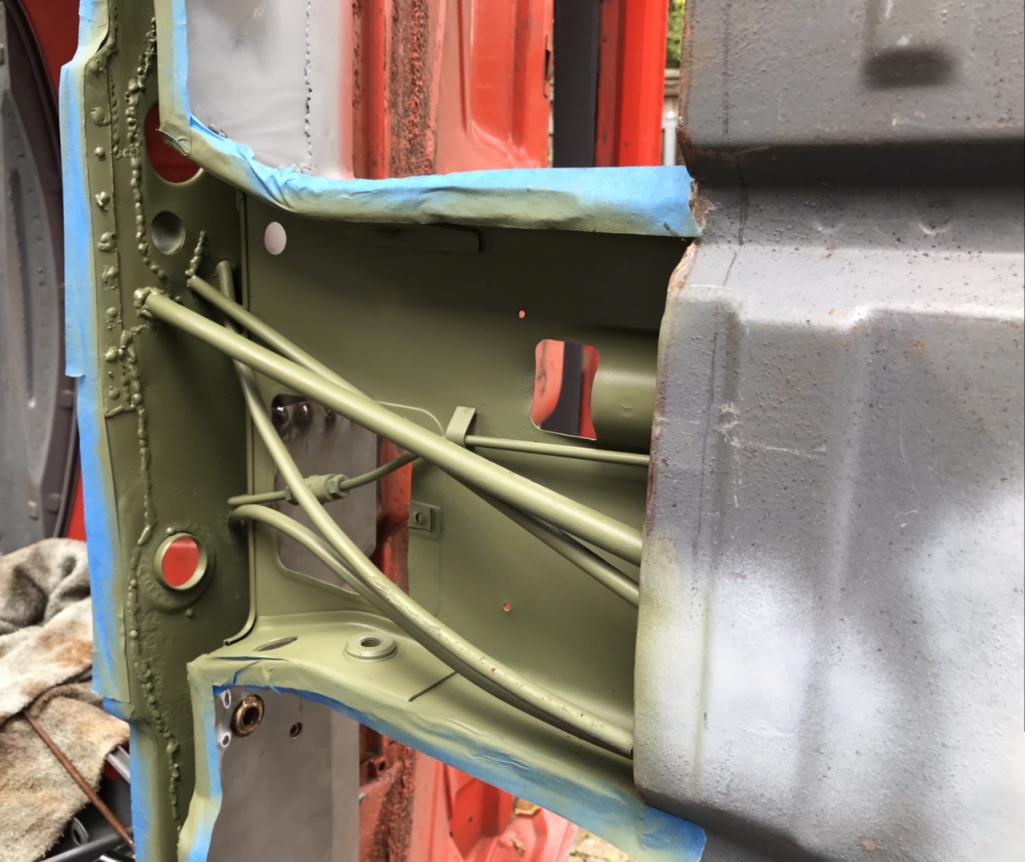
|
| Literati914 |
 Sep 13 2021, 03:24 PM Sep 13 2021, 03:24 PM
Post
#70
|
|
Advanced Member     Group: Members Posts: 2,196 Joined: 16-November 06 From: Dallas, TX Member No.: 7,222 Region Association: Southwest Region |
I’ve got this stuff running out of the longs but could only do so much with the heater tubes installed. Still though I think I got it in the most significant areas, around where the firewalls intersect. Here’s the tunnel, topside.
Attached thumbnail(s) 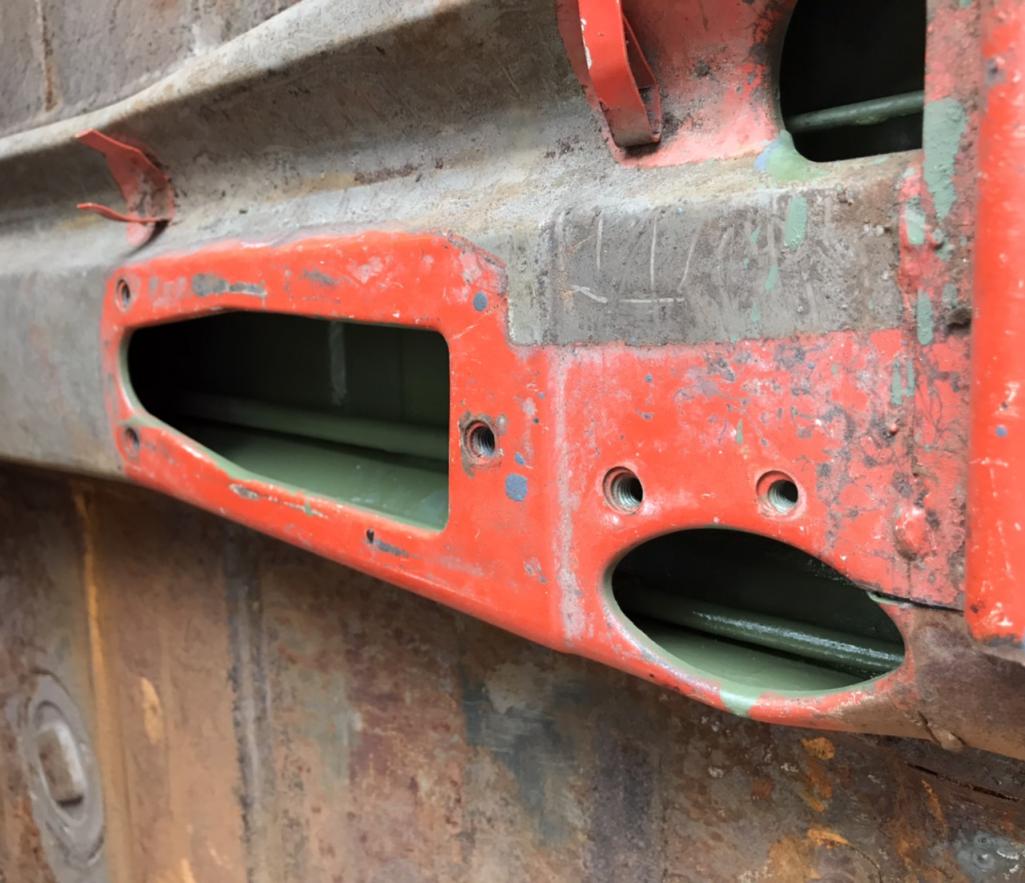
|
| Literati914 |
 Sep 13 2021, 06:07 PM Sep 13 2021, 06:07 PM
Post
#71
|
|
Advanced Member     Group: Members Posts: 2,196 Joined: 16-November 06 From: Dallas, TX Member No.: 7,222 Region Association: Southwest Region |
Wanted to polish off a bottle .. no, not that kinda bottle - welding gas! So I did some preventative work to the hinge brackets, both sides (engine lid to body).
Attached thumbnail(s) 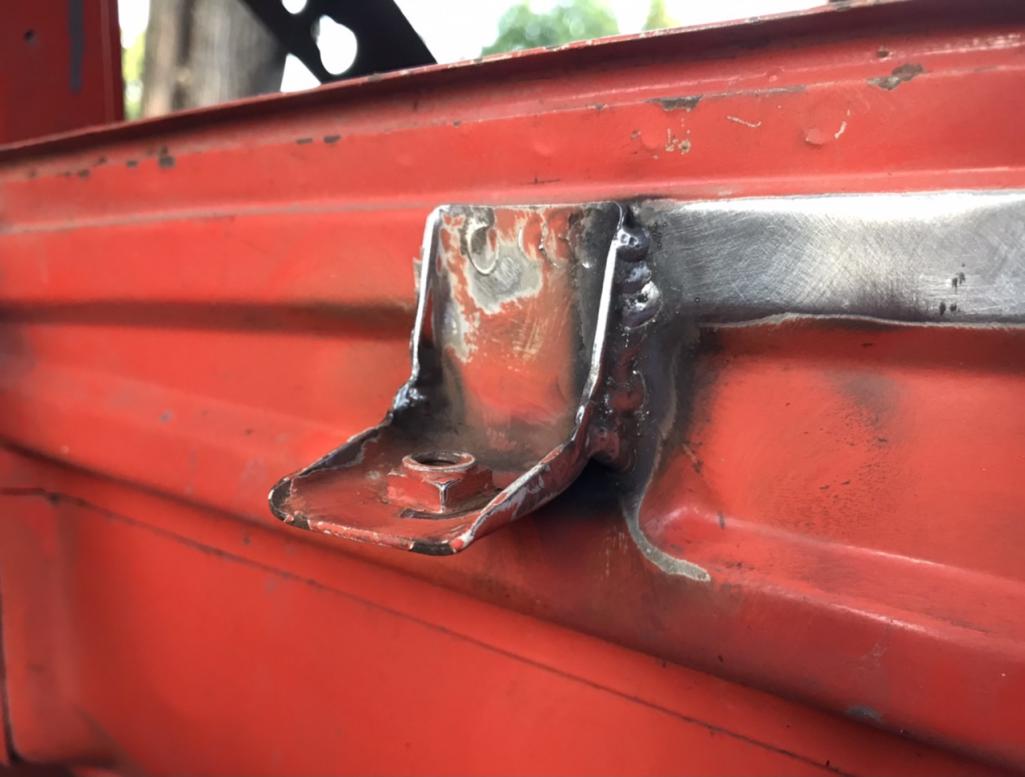
|
| Literati914 |
 Sep 13 2021, 06:10 PM Sep 13 2021, 06:10 PM
Post
#72
|
|
Advanced Member     Group: Members Posts: 2,196 Joined: 16-November 06 From: Dallas, TX Member No.: 7,222 Region Association: Southwest Region |
Does anyone know if there is a reference measurement for the rear deck lid hinge mount… mine as all over the place on the passenger’s side. Looks like it’s been moved a couple of times and I want to weld it in, get rid of those screws .. take a look and advise please:
Attached thumbnail(s) 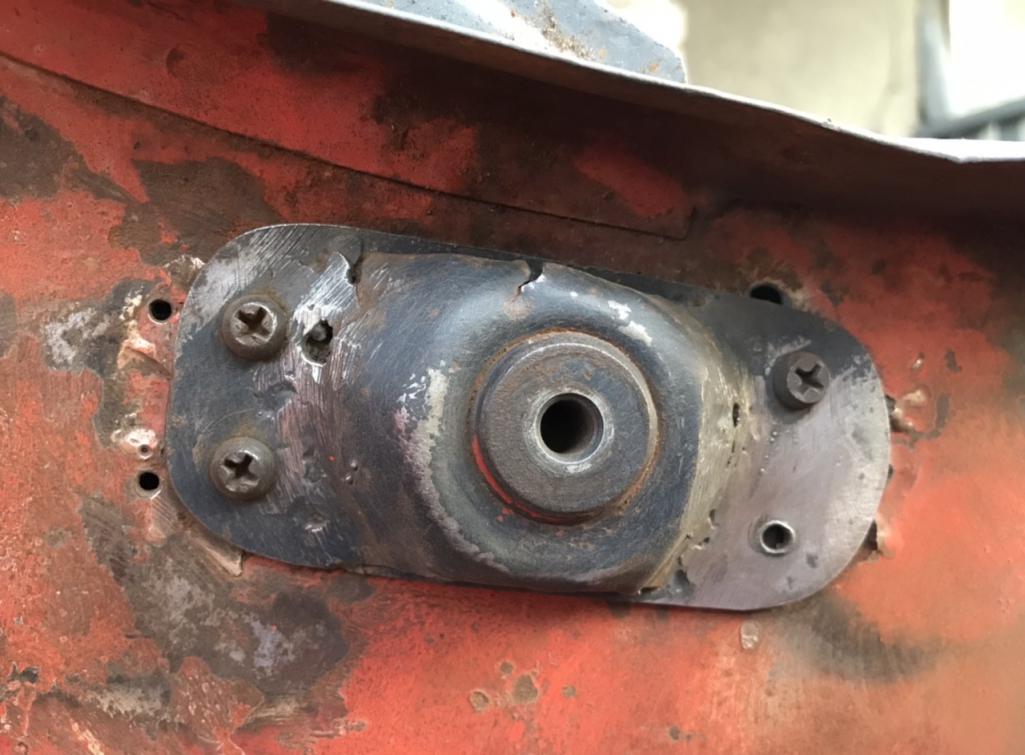
|
| ClayPerrine |
 Sep 14 2021, 06:50 AM Sep 14 2021, 06:50 AM
Post
#73
|
|
Life's been good to me so far.....                Group: Admin Posts: 16,535 Joined: 11-September 03 From: Hurst, TX. Member No.: 1,143 Region Association: NineFourteenerVille 
|
Does anyone know if there is a reference measurement for the rear deck lid hinge mount… mine as all over the place on the passenger’s side. Looks like it’s been moved a couple of times and I want to weld it in, get rid of those screws .. take a look and advise please: I am NOT a body man, I pay to have this done. But I was told by Richard Fisher that he puts the hinges on the lid and puts the lid in place, with the seal, then he tacks the hinge in place. That way everything fits correctly before the welding is done. Hope that helps. Clay |
| Literati914 |
 Sep 14 2021, 10:23 AM Sep 14 2021, 10:23 AM
Post
#74
|
|
Advanced Member     Group: Members Posts: 2,196 Joined: 16-November 06 From: Dallas, TX Member No.: 7,222 Region Association: Southwest Region |
Yes that makes perfect since, thanks!
. |
| Literati914 |
 Sep 27 2021, 07:41 PM Sep 27 2021, 07:41 PM
Post
#75
|
|
Advanced Member     Group: Members Posts: 2,196 Joined: 16-November 06 From: Dallas, TX Member No.: 7,222 Region Association: Southwest Region |
Rusted through areas of the floor and firewalls are officially replaced. We have fresh clean metal there and buttoned up now - feels like a bit of a milestone.
I used the internal frame paint (shown earlier) as weld thru primer between the floor and tunnel/firewall sections, which is high in zinc and worked out great. I welded these panels on the outside of the car as well as the inside.. probably over kill but at least I can say it’s thoroughly done. Attached thumbnail(s) 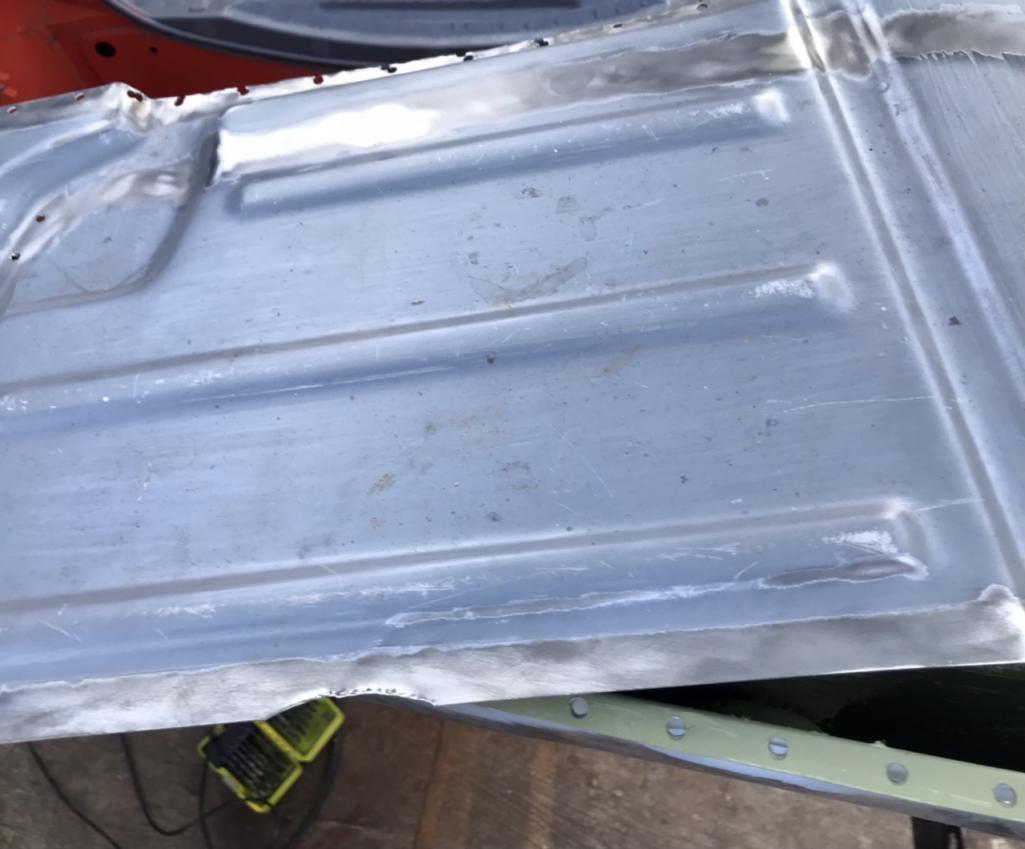
|
| Literati914 |
 Sep 27 2021, 07:43 PM Sep 27 2021, 07:43 PM
Post
#76
|
|
Advanced Member     Group: Members Posts: 2,196 Joined: 16-November 06 From: Dallas, TX Member No.: 7,222 Region Association: Southwest Region |
In process
Attached thumbnail(s) 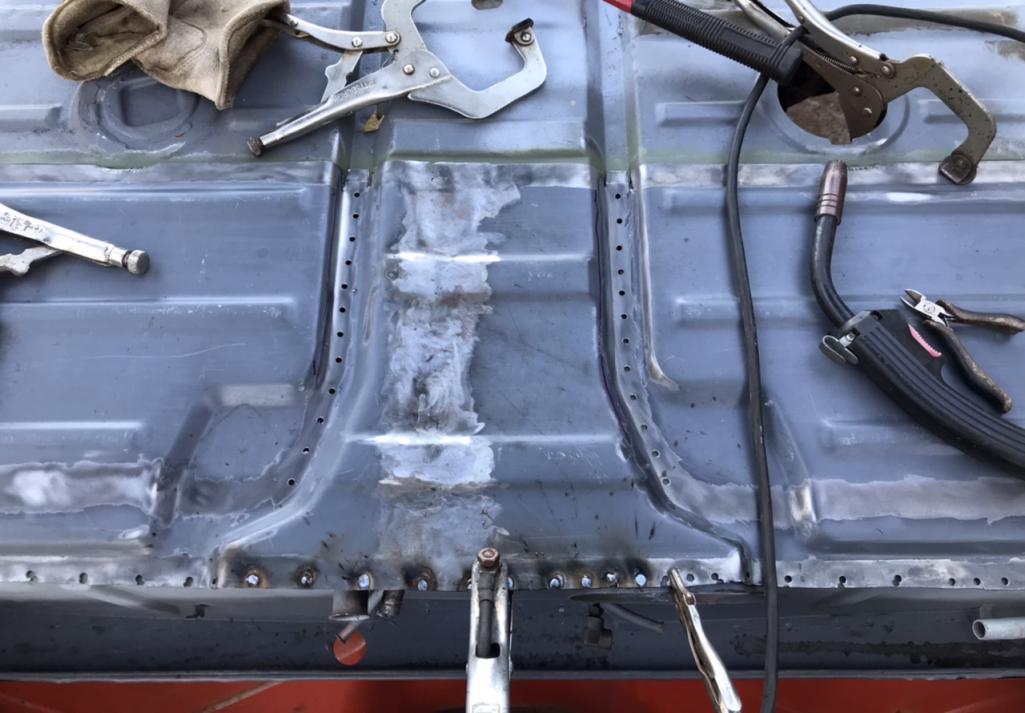
|
| Literati914 |
 Sep 27 2021, 07:44 PM Sep 27 2021, 07:44 PM
Post
#77
|
|
Advanced Member     Group: Members Posts: 2,196 Joined: 16-November 06 From: Dallas, TX Member No.: 7,222 Region Association: Southwest Region |
.. and completed - I’ve got solid floors again !! (IMG:style_emoticons/default/piratenanner.gif)
Attached thumbnail(s) 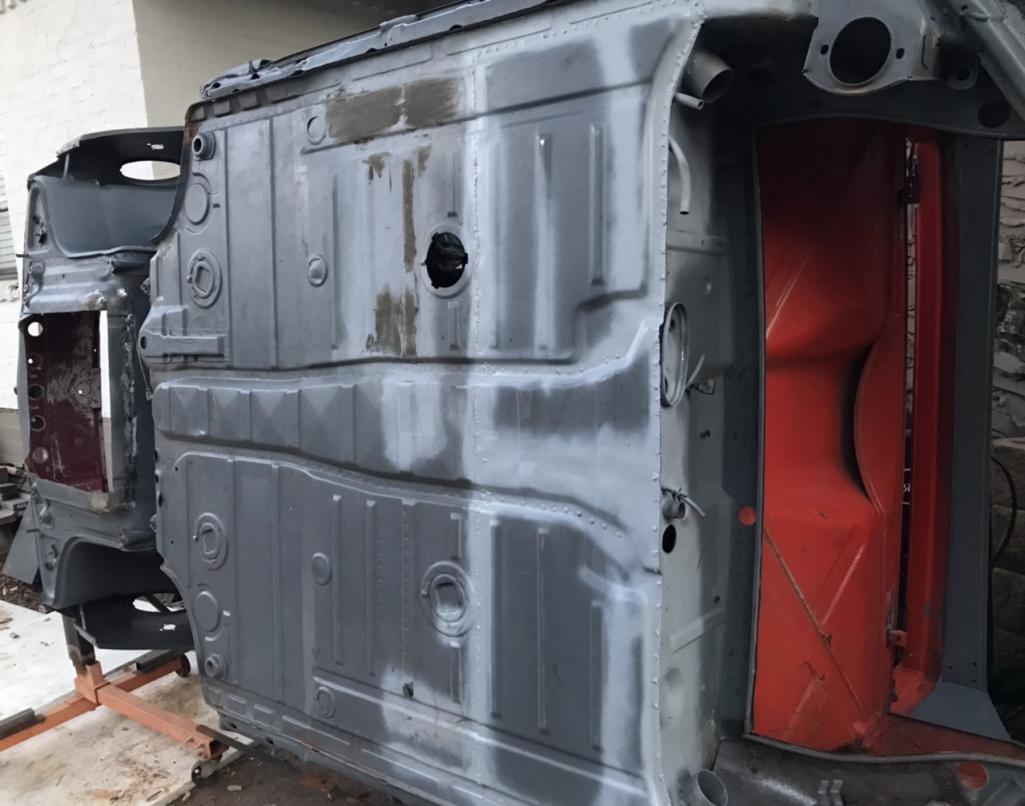
|
| mbseto |
 Sep 28 2021, 06:54 AM Sep 28 2021, 06:54 AM
Post
#78
|
|
Senior Member    Group: Members Posts: 1,257 Joined: 6-August 14 From: Cincy Member No.: 17,743 Region Association: North East States |
Good persistence, good looking progress!
|
| Literati914 |
 Sep 28 2021, 07:00 PM Sep 28 2021, 07:00 PM
Post
#79
|
|
Advanced Member     Group: Members Posts: 2,196 Joined: 16-November 06 From: Dallas, TX Member No.: 7,222 Region Association: Southwest Region |
Good persistence, good looking progress! Thanks, I set myself a paint date goal of mid- October.. so that’s my motivation as of late. Ok so I installed the external seat supports .. coated the internal side with internal frame paint. Attached thumbnail(s) 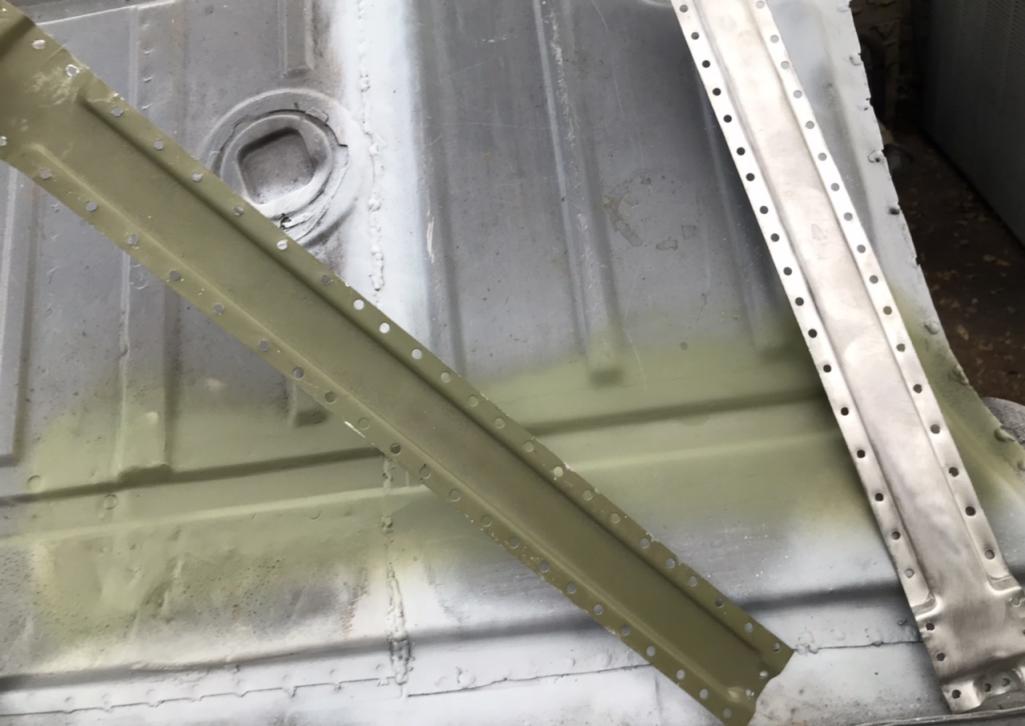
|
| Literati914 |
 Sep 28 2021, 07:01 PM Sep 28 2021, 07:01 PM
Post
#80
|
|
Advanced Member     Group: Members Posts: 2,196 Joined: 16-November 06 From: Dallas, TX Member No.: 7,222 Region Association: Southwest Region |
Here it is all buttoned up:
Attached thumbnail(s) 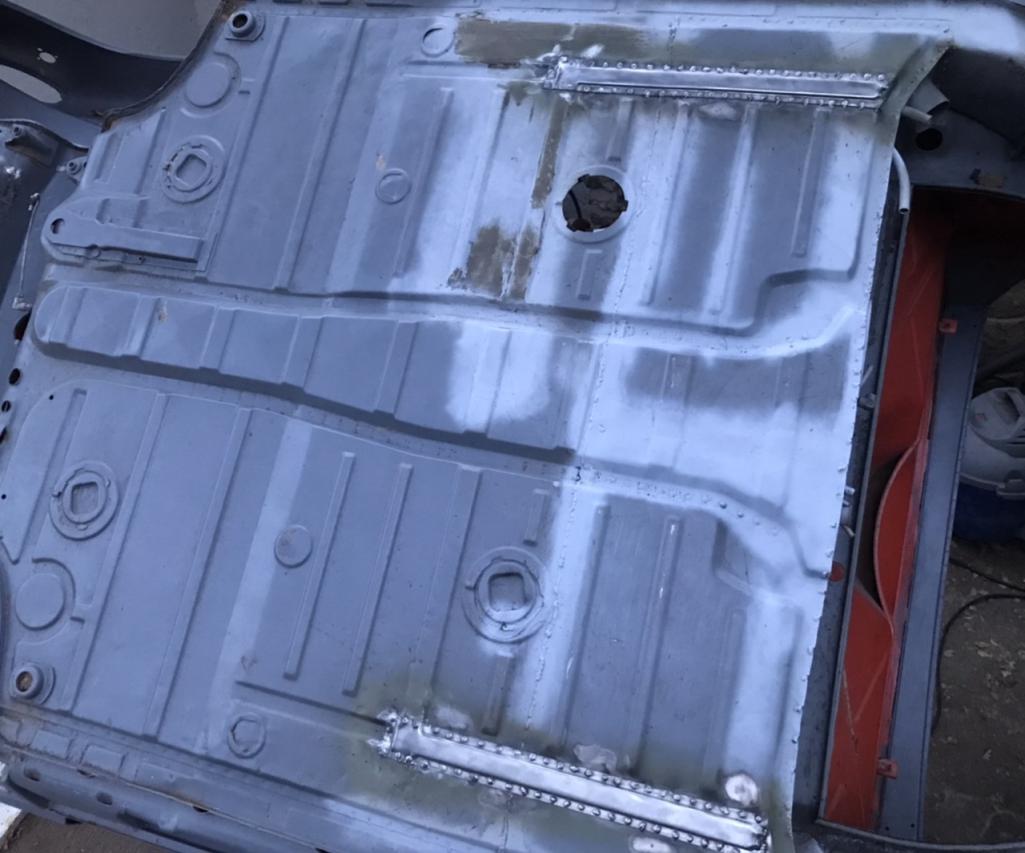
|
  |
1 User(s) are reading this topic (1 Guests and 0 Anonymous Users)
0 Members:

|
Lo-Fi Version | Time is now: 23rd January 2026 - 01:35 PM |
Invision Power Board
v9.1.4 © 2026 IPS, Inc.


