|
|
|
Porsche, and the Porsche crest are registered trademarks of Dr. Ing. h.c. F. Porsche AG.
This site is not affiliated with Porsche in any way. Its only purpose is to provide an online forum for car enthusiasts. All other trademarks are property of their respective owners. |
|
|

  |

| mgarrison |
 Jan 7 2024, 01:40 PM Jan 7 2024, 01:40 PM
Post
#321
|
|
Member  Group: Members Posts: 416 Joined: 14-February 20 From: Chandler, AZ Member No.: 23,922 Region Association: Southwest Region |
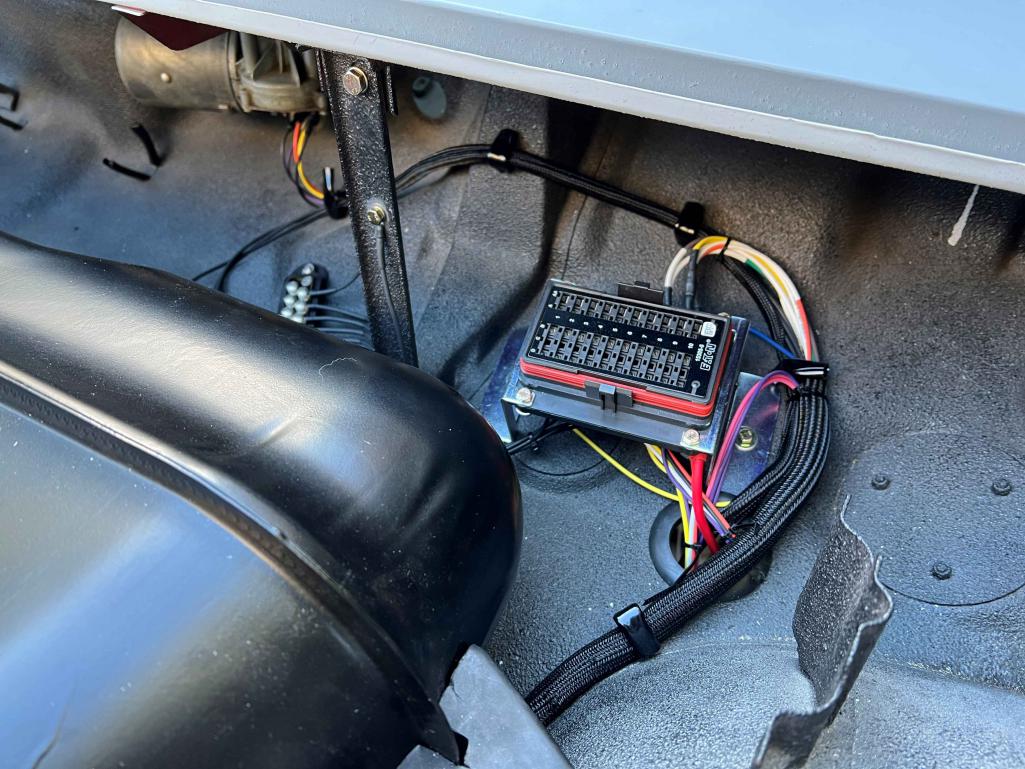
I finished wiring up my fuse block. Still need to dress in the wire bundles a bit better, but not looking too bad...
 |
   |

 
|
| mgarrison |
Jan 7 2024, 01:47 PM
Post
#322
|
|
Member Group: Members Posts: 416 Joined: 14-February 20 From: Chandler, AZ Member No.: 23,922 Region Association: Southwest Region |
It was a BIG day in the backyard 914 "garage" today! I feel like quoting Dr. Frankenstein "It's Alive!" (IMG:style_emoticons/default/happy11.gif)
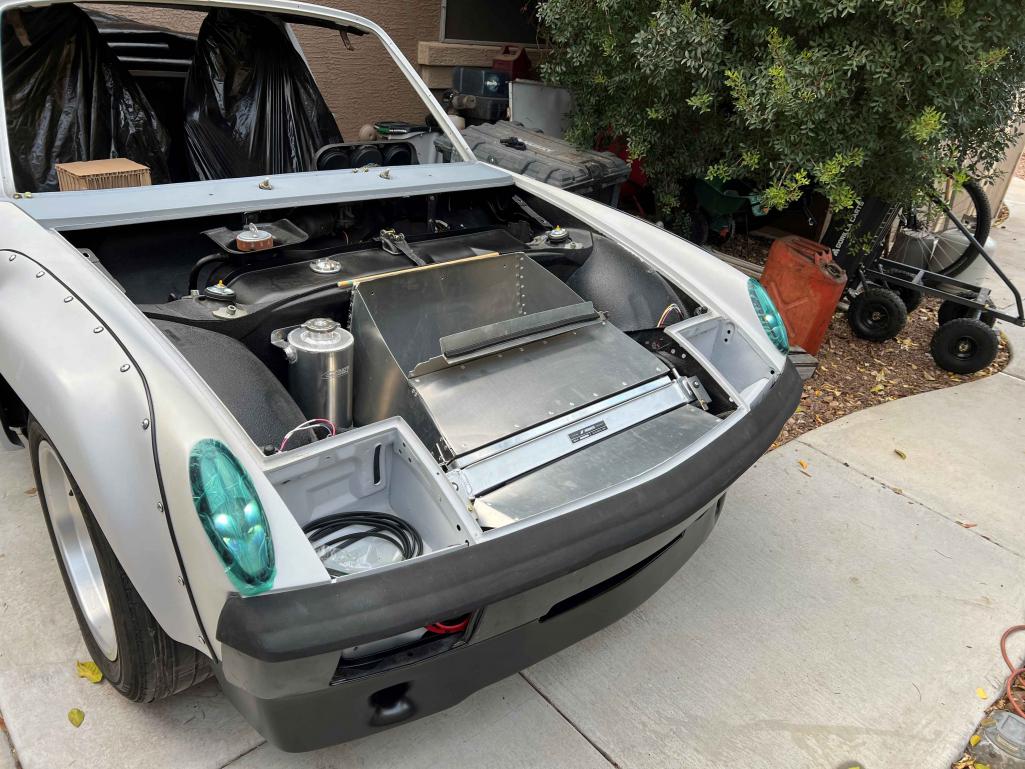 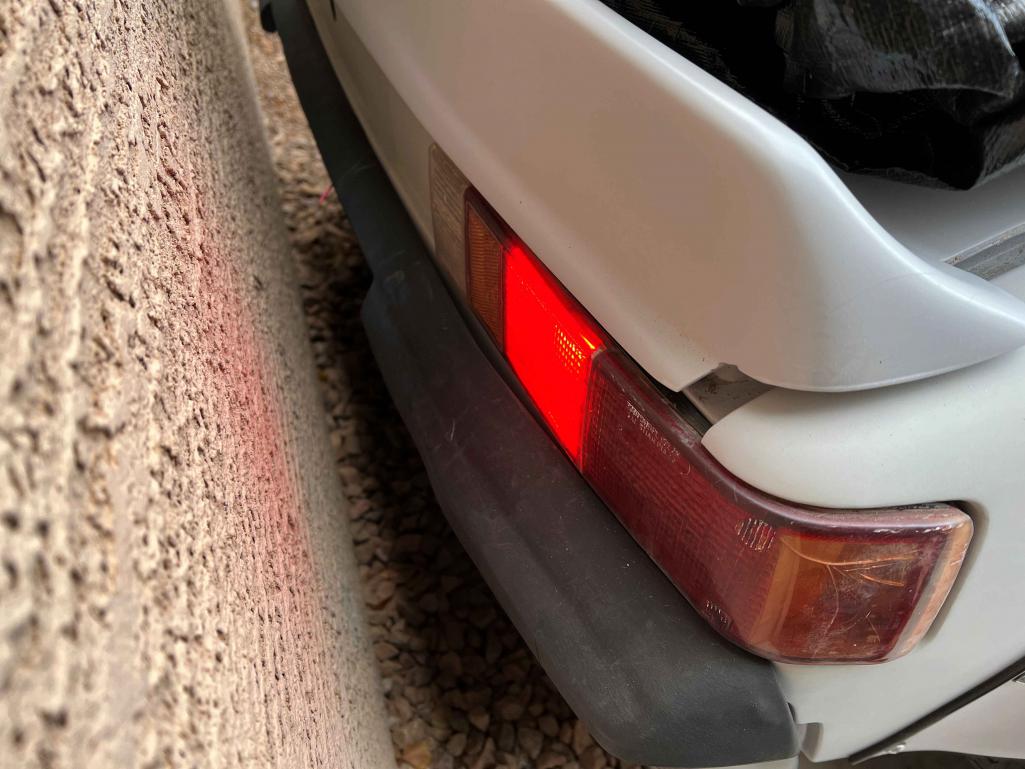 It's just the parking/running lights, but it still feels like a major milestone! (IMG:style_emoticons/default/smilie_pokal.gif) I used the Miata battery and some crazy Chinese battery terminals that appear to use old bicycle wheel quick releases (IMG:style_emoticons/default/blink.gif) 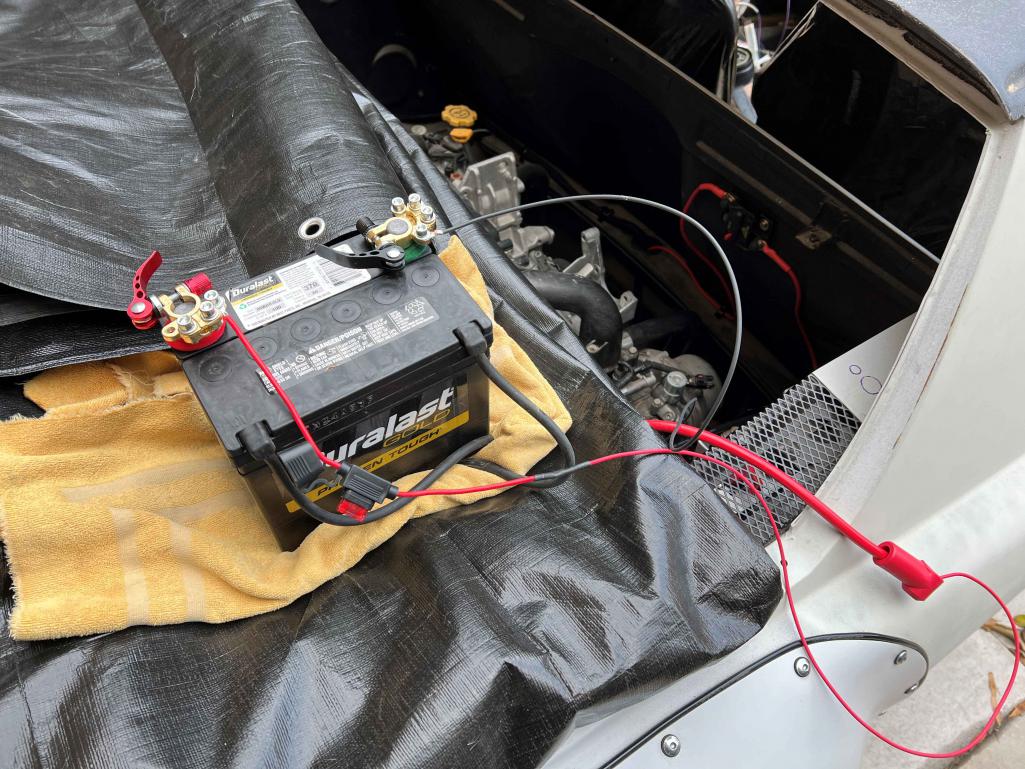 But, its enough so that I can use a small inline fuse for testing each circuit independently. I was also able to test the breaker feeding the fuse block, and my battery kill switch. 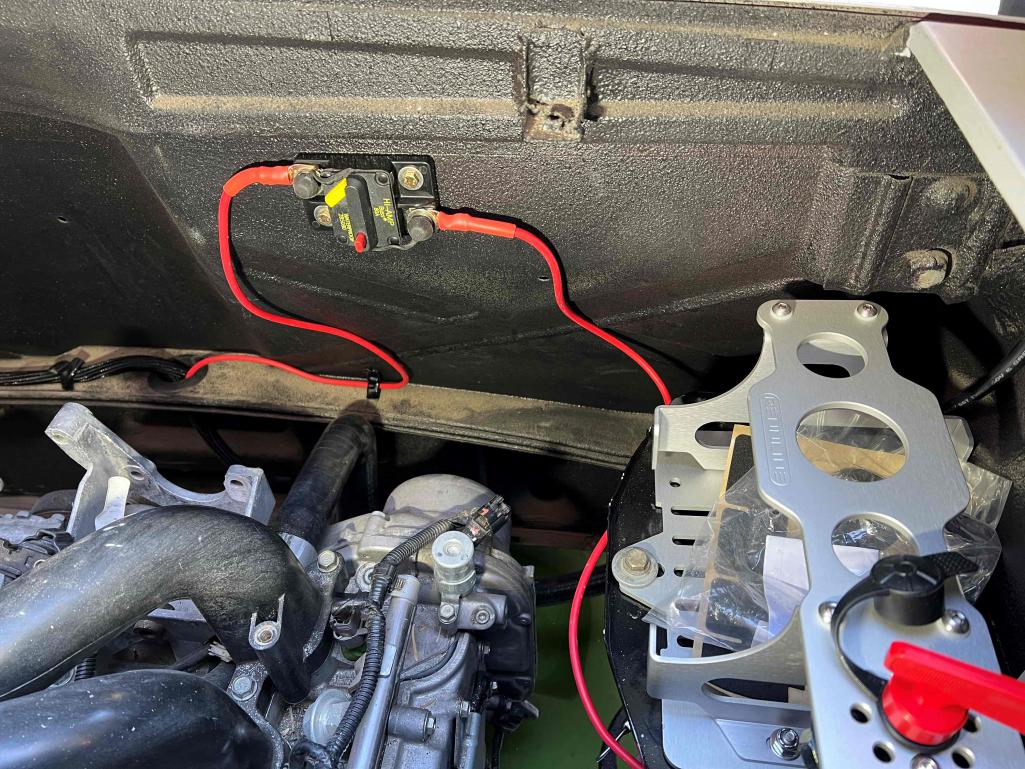 Now if I can just decipher the turn signal & wiper stalk connectors I'll be making some real progress! (IMG:style_emoticons/default/idea.gif) |
|
|
|
| technicalninja |
Jan 7 2024, 09:24 PM
Post
#323
|
|
Advanced Member Group: Members Posts: 2,531 Joined: 31-January 23 From: Granbury Texas Member No.: 27,135 Region Association: Southwest Region |
Very neat work!
First time I've seen printed heat shrink! Just bad assed! I'm not a subie guy but wow, you are kicking its ASS! I'm going to have to read your whole thread now. Really very nice! |
|
|
|
| slowrodent |
Jan 8 2024, 02:32 PM
Post
#324
|
|
Member Group: Members Posts: 235 Joined: 29-February 20 From: Tucson/Oro Valley Member No.: 23,981 Region Association: Southwest Region |
Always nice to see your updates Mike... I think your wiring methodology is spot-on..and your end result will be super clean. I'll try and adapt a few of your methods for sure..... Mine is a bit more chaotic. (IMG:style_emoticons/default/biggrin.gif)
|
|
|
|
| mgarrison |
Jan 16 2024, 02:03 PM
Post
#325
|
|
Member Group: Members Posts: 416 Joined: 14-February 20 From: Chandler, AZ Member No.: 23,922 Region Association: Southwest Region |
Finally made a spot for the 2x3 welding fixture table my wife got me for Christmas - looks like a decent little table!
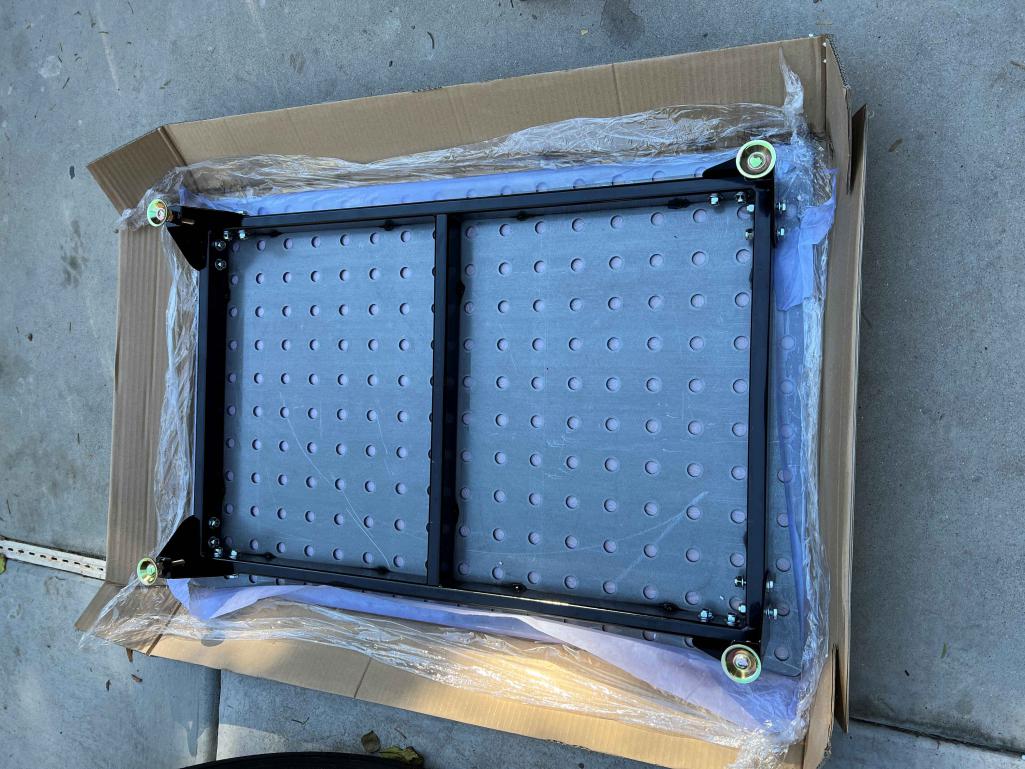 Snug as a bug in a rug! 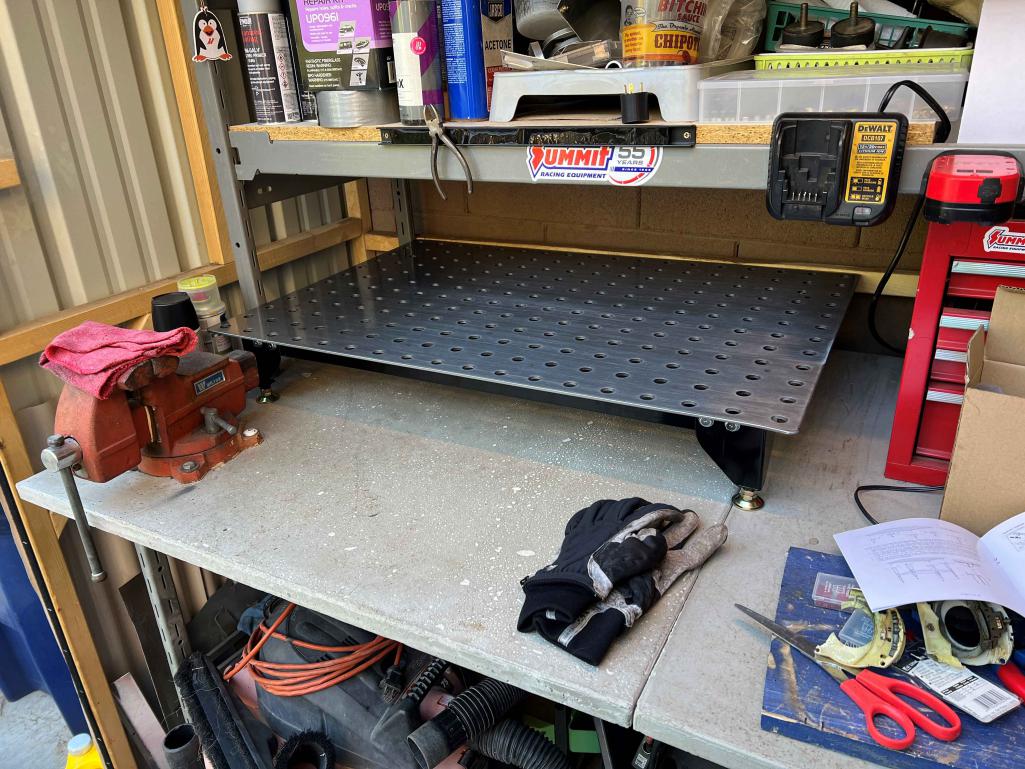 My hazard switch was not checking out with my multimeter. Turns out it must have popped open and lost it's contacts along the way! Ordered a new hazard switch from JBugs... 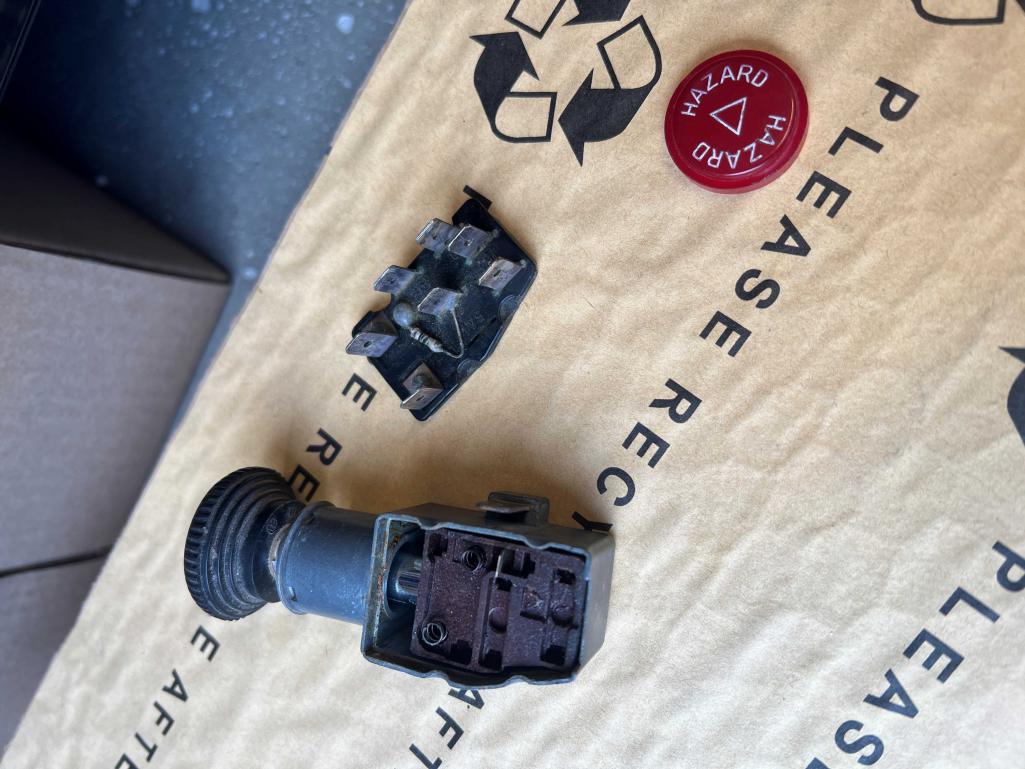 I did get my turn signals working, minus the hazard switch at the moment. 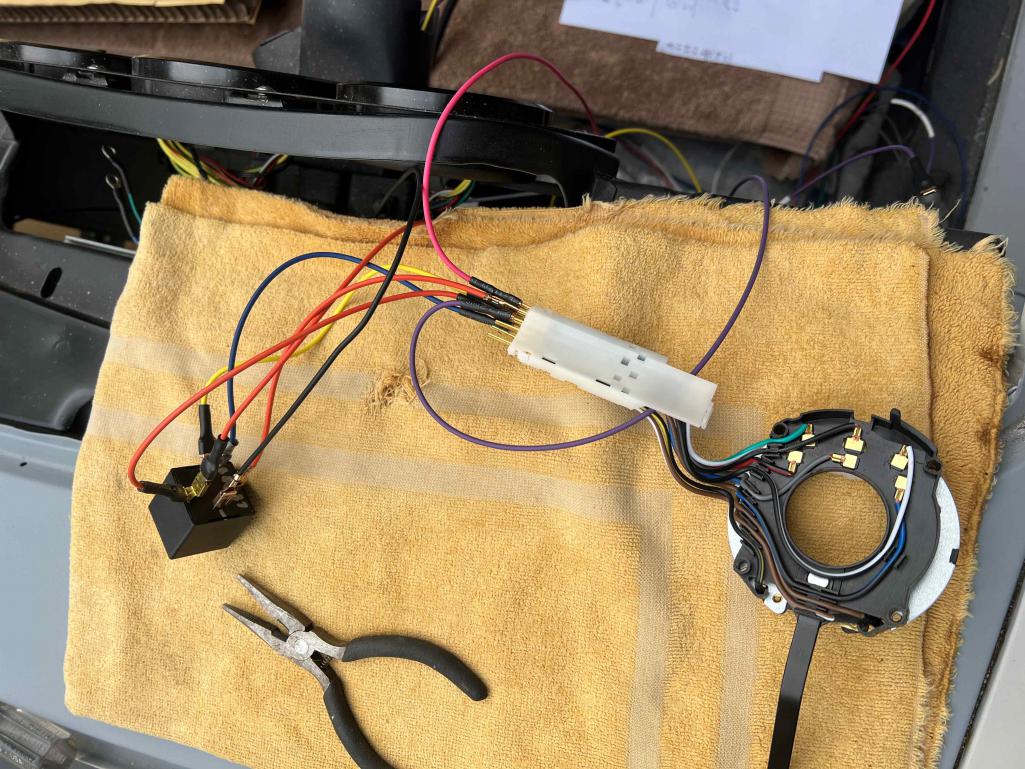 Once I've got it all working together (waiting on a relay to handle the momentary switch for the high/low beams), I'll feed it all through the column and dress the wires in properly. |
|
|
|
| mgarrison |
Jan 22 2024, 02:53 PM
Post
#326
|
|
Member Group: Members Posts: 416 Joined: 14-February 20 From: Chandler, AZ Member No.: 23,922 Region Association: Southwest Region |
Received my JBugs hazard switch and got it wired in. Still waiting on the high/low beam relay, but it's been raining so not able to work on the '14 anyway (IMG:style_emoticons/default/sad.gif)
Here's the JBugs VW hazard switch compared to the original: 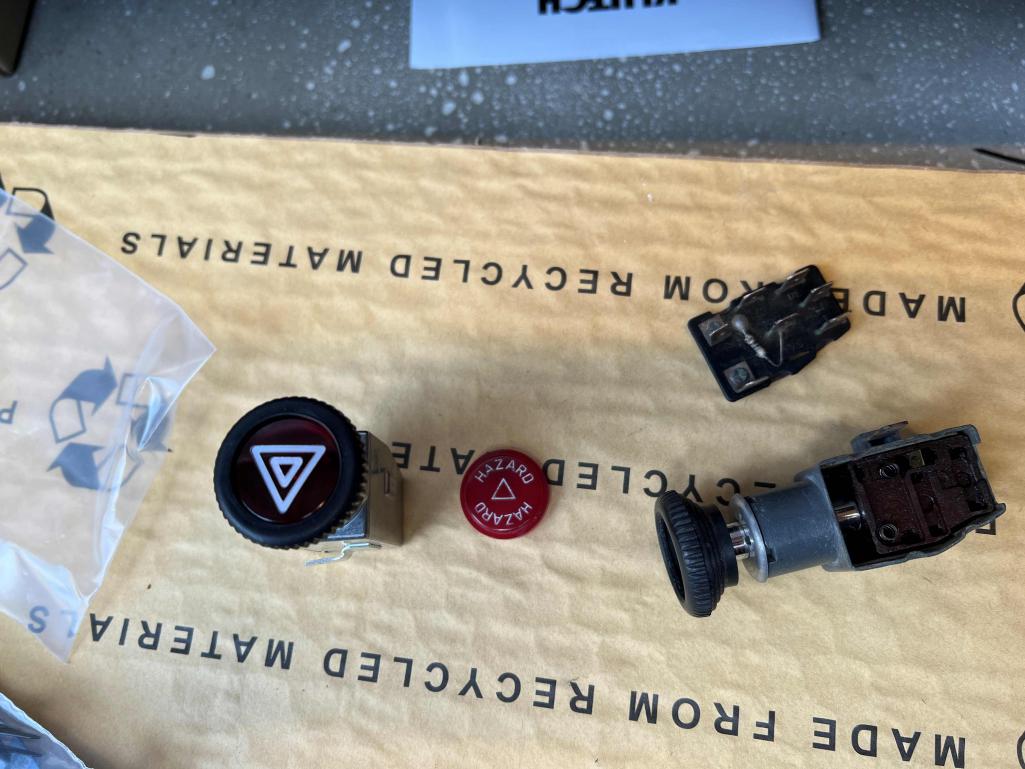 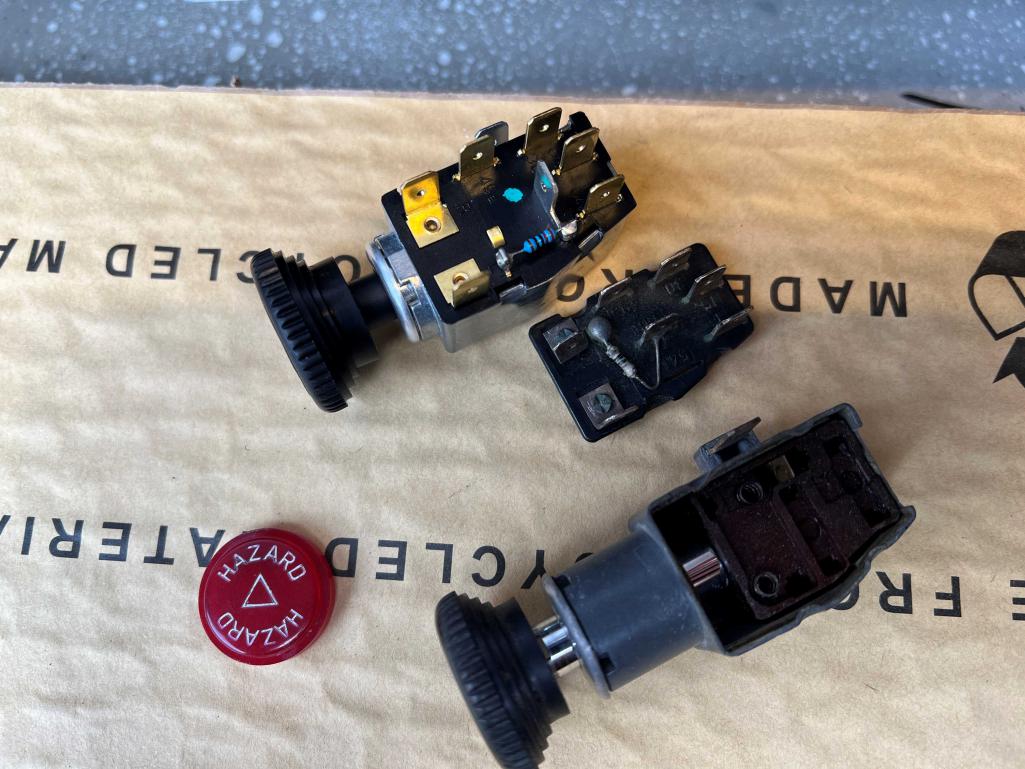 Seems rather simple if you wanted to swap the original switch cover/label onto the replacement switch. Here's the wiring diagram they provide - seems to match up correctly with the original:  |
|
|
|
| TorontoDave |
Feb 1 2024, 09:06 AM
Post
#327
|
|
Newbie Group: Members Posts: 5 Joined: 4-March 08 From: Toronto, Canada Member No.: 8,767 Region Association: Canada |
Did you put those 5-bolt hubs on the spindles from your original 4cyl struts, or did you change the struts to 911 ones? If you used the 4cyl struts exactly what hubs did you use and did you need to use different size bearings to mate up with the spindle? I didn't think 911 front hubs mated properly with the 4cyl 914 spindle. Thanks.
|
|
|
|
| mgarrison |
Jun 5 2024, 10:57 AM
Post
#328
|
|
Member Group: Members Posts: 416 Joined: 14-February 20 From: Chandler, AZ Member No.: 23,922 Region Association: Southwest Region |
QUOTE(TorontoDave @ Feb 1 2024, 08:06 AM)  Did you put those 5-bolt hubs on the spindles from your original 4cyl struts, or did you change the struts to 911 ones? If you used the 4cyl struts exactly what hubs did you use and did you need to use different size bearings to mate up with the spindle? I didn't think 911 front hubs mated properly with the 4cyl 914 spindle. Thanks. I put late 911 struts on it and 5 bolt hubs on the rear. It has Boxster calipers with Rich Johnson adapters. http://www.914world.com/bbs2/index.php?s=&...t&p=2983135 |
|
|
|
| mgarrison |
Jun 5 2024, 11:26 AM
Post
#329
|
|
Member Group: Members Posts: 416 Joined: 14-February 20 From: Chandler, AZ Member No.: 23,922 Region Association: Southwest Region |
It's been a few months since I've accomplished anything on the 914. Been trying to focus a bit more on my own health & fitness. I was getting a bit obsessed with working on the 914 every day, and it was costing me physically.
Anyway, I hope to get back to her soon and wrap up the rest of the electrical. Last October we bought this "Little Guy" for our daughter to compete on. He's eating up most all of my 914 $$$ (IMG:style_emoticons/default/blink.gif) 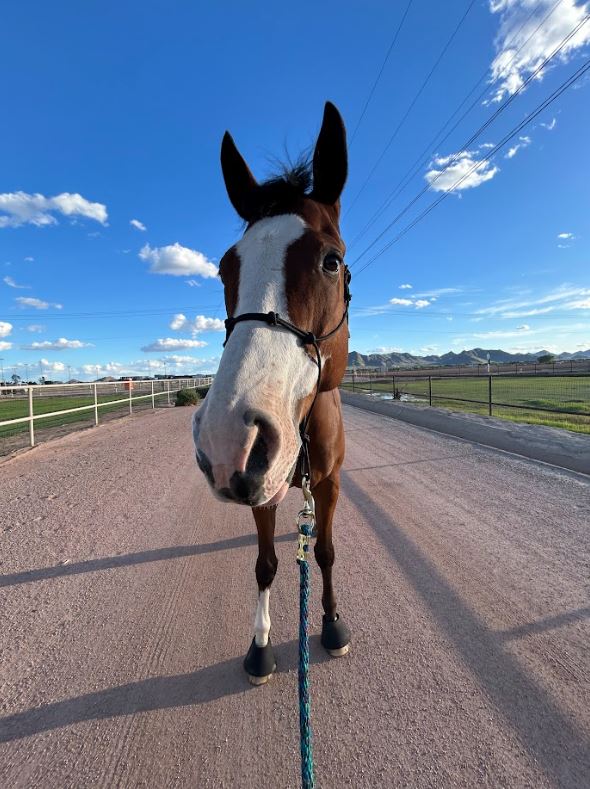 But, our daughter is happy and it is fulfilling caring for him/getting to know him! |
|
|
|
| Lof8 |
Jun 5 2024, 01:55 PM
Post
#330
|
|
Member Group: Members Posts: 51 Joined: 29-December 23 From: Bradenton, FL Member No.: 27,823 Region Association: South East States |
Wow! I just read this thread from start to finish. Beautiful work. I saved about 15 pictures for future reference on my project.
|
|
|
|
| slowrodent |
Jun 5 2024, 04:32 PM
Post
#331
|
|
Member Group: Members Posts: 235 Joined: 29-February 20 From: Tucson/Oro Valley Member No.: 23,981 Region Association: Southwest Region |
Never feel bad about taking a break Mike.... Gotta take care of your health and family stuff first... The car will be there when you get all else in order.....and you'll be refreshed.
PS... Still looks great. Kevin |
|
|
|
| mgarrison |
Jun 6 2024, 12:20 PM
Post
#332
|
|
Member Group: Members Posts: 416 Joined: 14-February 20 From: Chandler, AZ Member No.: 23,922 Region Association: Southwest Region |
QUOTE(Lof8 @ Jun 5 2024, 12:55 PM) Wow! I just read this thread from start to finish. Beautiful work. I saved about 15 pictures for future reference on my project. Thanks! (IMG:style_emoticons/default/pray.gif) I've just borrowed, pilfered, and stolen ideas I liked for much more talented builders here on 914World! This place and the folks here are top notch (IMG:style_emoticons/default/smilie_pokal.gif) |
|
|
|
| mgarrison |
Jun 6 2024, 12:27 PM
Post
#333
|
|
Member Group: Members Posts: 416 Joined: 14-February 20 From: Chandler, AZ Member No.: 23,922 Region Association: Southwest Region |
The rest of my 914 $$$ went to help our daughter buy a small pickup truck. I can't believe how expensive used trucks are! Even with 200-300K on them... (IMG:style_emoticons/default/wacko.gif)
This one fell into our lap; our daughter's Dressage Team Captain was headed off to college out of state and needed to sell her 2005 Tacoma. Only wanted about HALF what most folks were asking, and they bought it NEW in 2005! Her Dad had all the service records (IMG:style_emoticons/default/aktion035.gif) 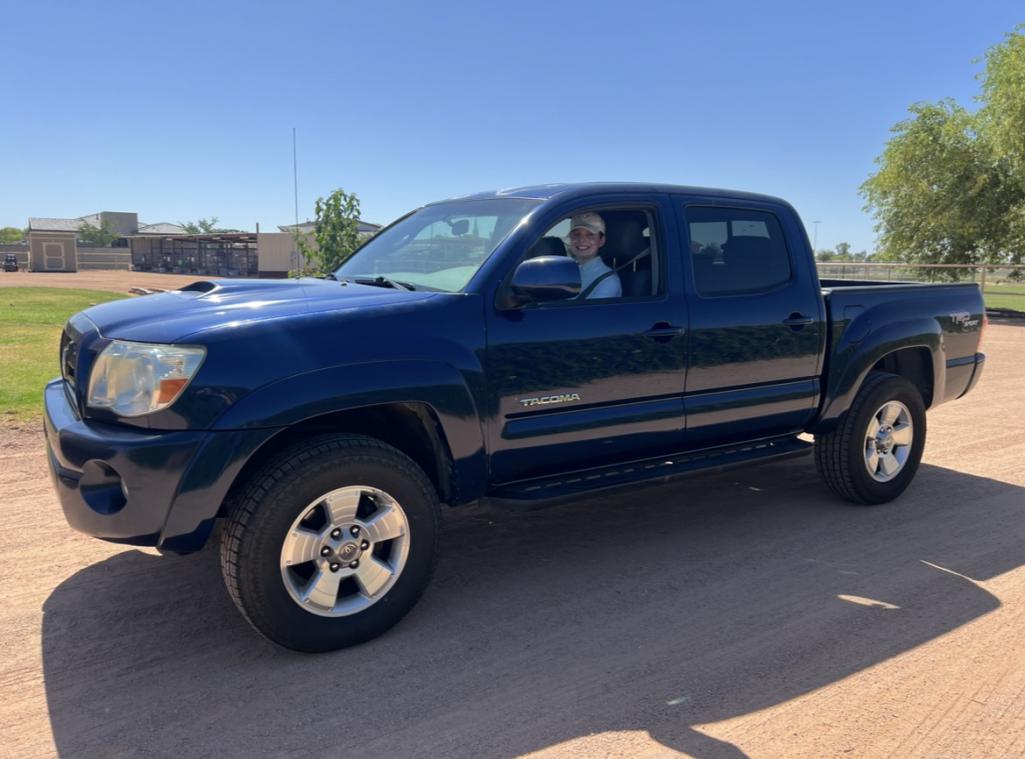 Hard to believe she's going to be driving solo (IMG:style_emoticons/default/blink.gif) |
|
|
|
| mgarrison |
Nov 19 2024, 04:01 PM
Post
#334
|
|
Member Group: Members Posts: 416 Joined: 14-February 20 From: Chandler, AZ Member No.: 23,922 Region Association: Southwest Region |
I finally got back to the 914 on Sunday. Spent a couple hours trying to wire up the wiper switch only to have it not work and ended up blowing the fuse trying to test where I had voltage - still not sure how/why on that one! (IMG:style_emoticons/default/confused24.gif)
Anyway, I pulled the switch out after taking a pic of how I had attempted to get it connected. 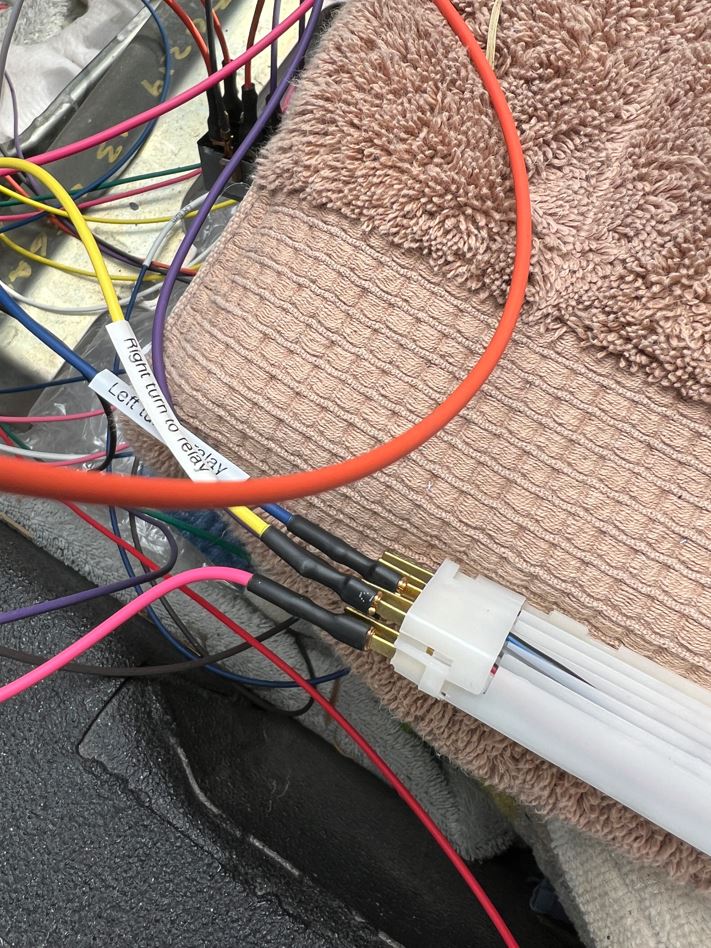 This looks SO EASY for a colorblind guy, doesn't it??? (IMG:style_emoticons/default/headbang.gif) 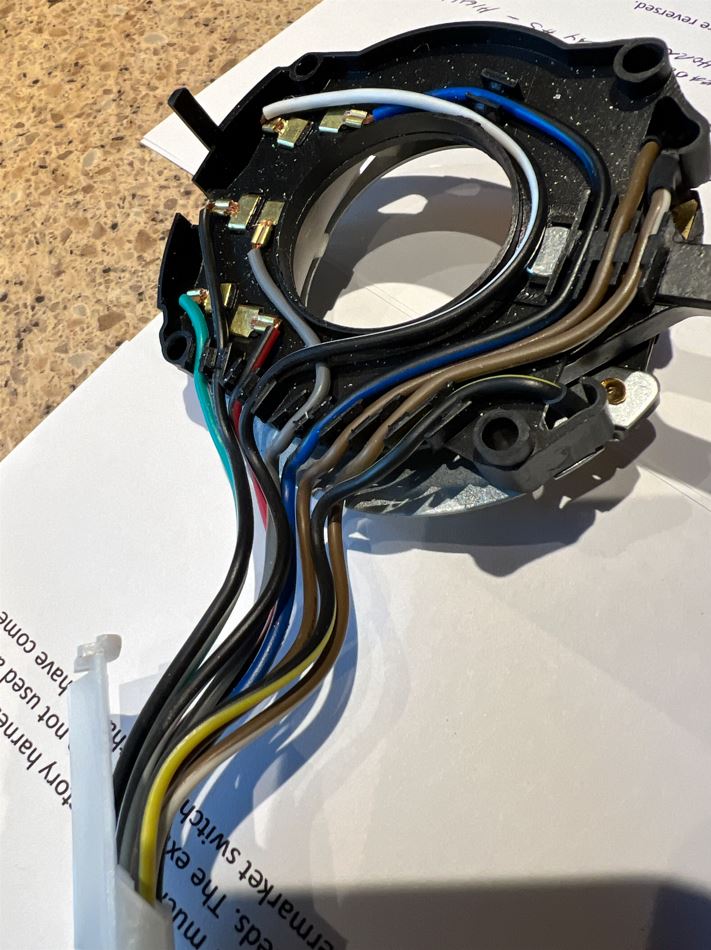 But wait! There's more...The aftermarket manufacturers don't use the original color wires, and JBugs has documented three different versions. Looks like I received the third version. 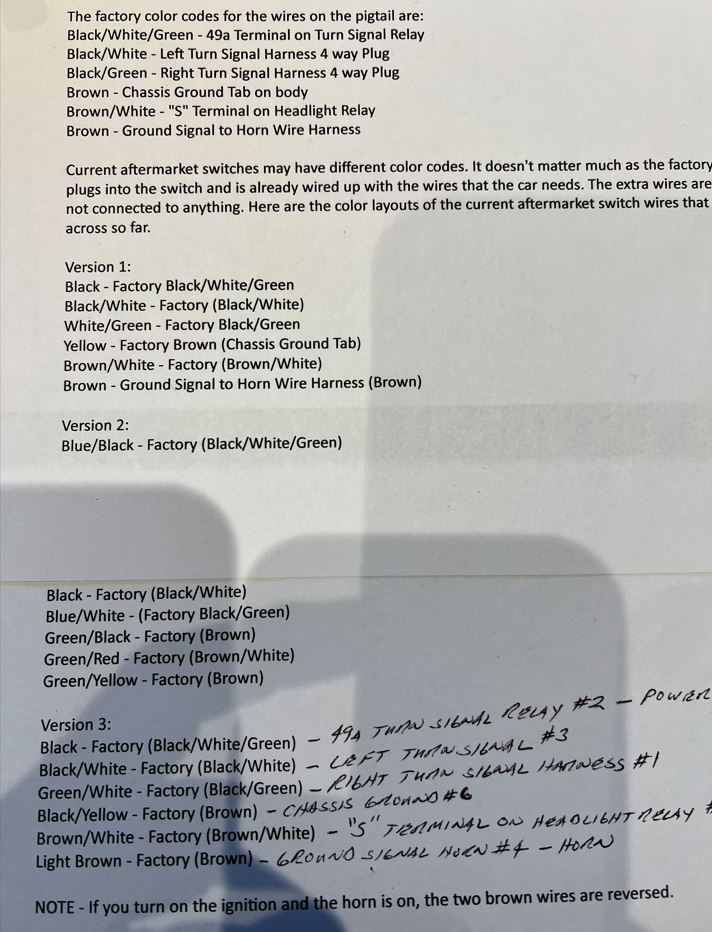 I traced/toned out each wire and labeled the connector with some numbers to assist my addled brain. (IMG:style_emoticons/default/wacko.gif)  Discovered there are 3 extra wires that don't get used - 7-9 on the other side of the connector. Hopefully now I have enough things figured out I can make this crazy 70s German Engineered thing work! |
|
|
|
| mgarrison |
Nov 19 2024, 04:04 PM
Post
#335
|
|
Member Group: Members Posts: 416 Joined: 14-February 20 From: Chandler, AZ Member No.: 23,922 Region Association: Southwest Region |
Still no $$$ to buy the things I'll need to finish up...Had to pay the vet, buy ulcer meds, and pay the farrier this week! (IMG:style_emoticons/default/headbang.gif)
But, it's impossible to resist this face...  |
|
|
|
| slowrodent |
Nov 20 2024, 08:42 AM
Post
#336
|
|
Member Group: Members Posts: 235 Joined: 29-February 20 From: Tucson/Oro Valley Member No.: 23,981 Region Association: Southwest Region |
Good to see the progress MIke... You're making worthwhile, long-term healthy tradeoffs.... Congrats... (IMG:style_emoticons/default/beer.gif)
|
|
|
|
| mgarrison |
Nov 20 2024, 03:58 PM
Post
#337
|
|
Member Group: Members Posts: 416 Joined: 14-February 20 From: Chandler, AZ Member No.: 23,922 Region Association: Southwest Region |
Thanks Kevin!
I ran out of daylight yesterday trying to get the wipers working, but after coming inside and looking at this drawing AGAIN it finally dawned on me! (IMG:style_emoticons/default/idea.gif) 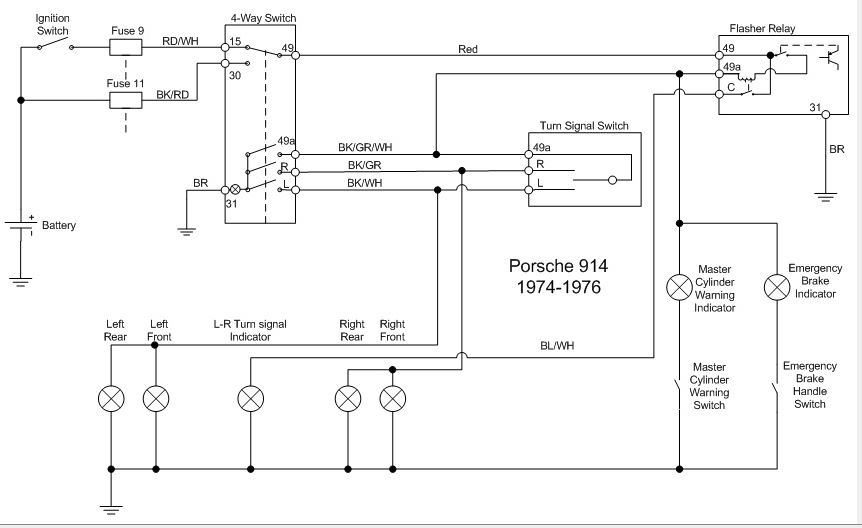 For testing I just had battery power going to terminal #30 on the hazard switch, as it would be wired normally. Hazards worked as expected. My addled brain missed the point that with power going to terminal #30 on the hazard switch the flasher relay only gets power when the hazard switch is ON - Doh! (IMG:style_emoticons/default/wacko.gif) Moved the feed wire from #30 to #15 on the hazard switch and bingo, the turn signals work. Dang...I wasted a lot of time & effort sorting that out. So, I just ordered a "Power", "on/off", "ignition" toggle switch to feed the "ignition on" switches such as the wipers, etc. I want to use a start button where the original key went in the steering column. Not sure where/what/how I want to do the "key" yet... (IMG:style_emoticons/default/confused24.gif) |
|
|
|
| mgarrison |
Nov 20 2024, 04:23 PM
Post
#338
|
|
Member Group: Members Posts: 416 Joined: 14-February 20 From: Chandler, AZ Member No.: 23,922 Region Association: Southwest Region |
This drawing really helped too. I added the blue arrows to help me track how the current was flowing from one connection to the other. When the switch was on vs. off.
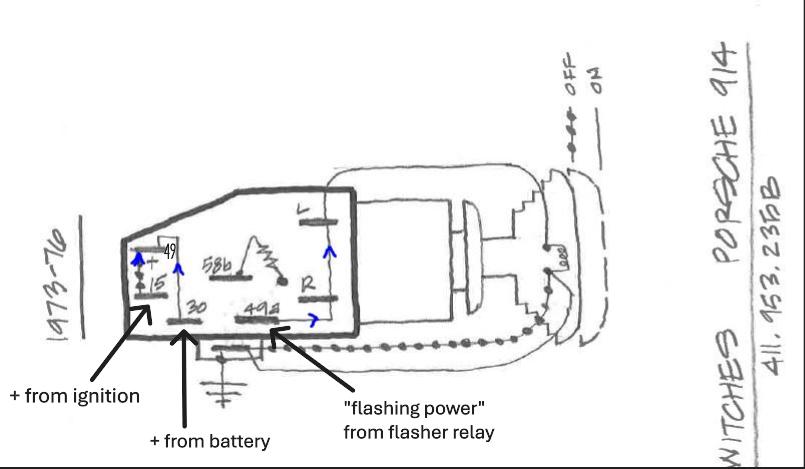 Battery power comes in #30 and flows to #49 when the hazard switch is ON. Ignition power comes in #15 and flows to #49 when the hazard switch is OFF. "Flashing power" comes in from the flasher relay and flows to #49a when the hazard switch is ON. When the hazard switch is off, power from #49 is used to power the flasher relay for the turn signals. At least that's what my brain believes at this point! (IMG:style_emoticons/default/wacko.gif) |
|
|
|
| sb914 |
Nov 20 2024, 05:04 PM
Post
#339
|
|
Surf Guru Group: Members Posts: 4,640 Joined: 25-November 12 From: Brookings,Oregon Member No.: 15,191 Region Association: Southern California |
Over 4 million views ! (IMG:style_emoticons/default/first.gif)
|
|
|
|
| mgarrison |
Nov 21 2024, 09:10 AM
Post
#340
|
|
Member Group: Members Posts: 416 Joined: 14-February 20 From: Chandler, AZ Member No.: 23,922 Region Association: Southwest Region |
QUOTE(sb914 @ Nov 20 2024, 04:04 PM) Dang...that's mind-bending! (IMG:style_emoticons/default/piratenanner.gif) |
|
|
|
|
1 User(s) are reading this topic (1 Guests and 0 Anonymous Users)
0 Members:

|
Lo-Fi Version | Time is now: 11th June 2026 - 06:37 PM |
Invision Power Board
v9.1.4 © 2026 IPS, Inc.