|
|

|
Porsche, and the Porsche crest are registered trademarks of Dr. Ing. h.c. F. Porsche AG.
This site is not affiliated with Porsche in any way. Its only purpose is to provide an online forum for car enthusiasts. All other trademarks are property of their respective owners. |
|
|
  |
| mgarrison |
 Mar 21 2021, 02:38 PM Mar 21 2021, 02:38 PM
Post
#81
|
|
Member   Group: Members Posts: 415 Joined: 14-February 20 From: Chandler, AZ Member No.: 23,922 Region Association: Southwest Region 
|
I've been working along slowly. Just keep swimming... (IMG:style_emoticons/default/idea.gif)
I removed the tabs for the back pad. I don't have a back pad or 914 seats, and being six foot three will need all the room I can get! 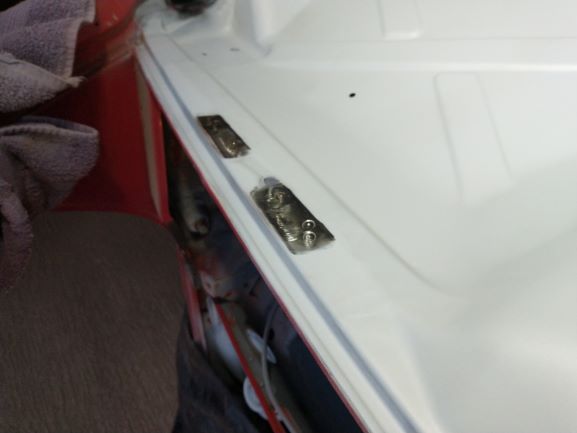 I see why there is not much paint or primer in the area under the head light buckets...HTH do you get in there??? 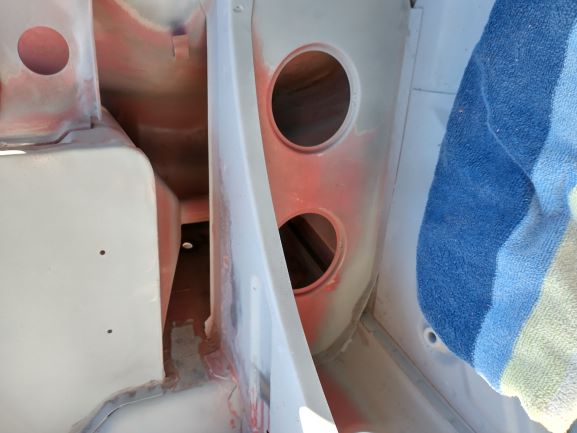 I ordered this extension from Amazon, but it only takes a 1/8" shank, so very limited options other than Dremel ends. 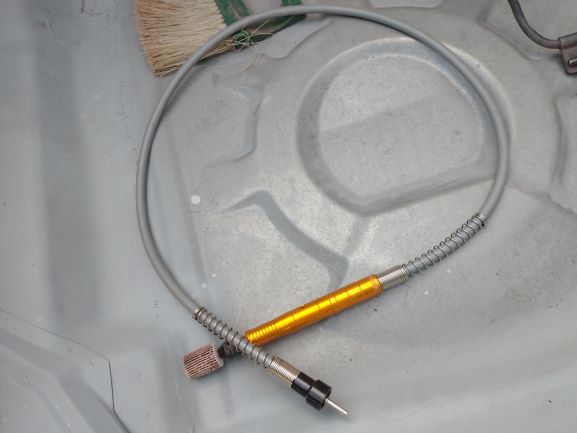 It kind of works, but not very well. I tried using it to get down in the corners of the fender well where it disappears behind the headlight bucket. 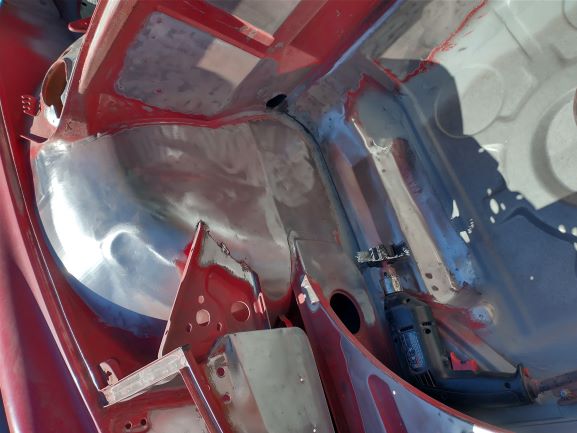 The area under the headlight buckets had a bit of surface rust, but not bad. The "seam sealer" they used in this area was very different from the rest. It is dark and had hardened up to a brittle, charcoal like substance! 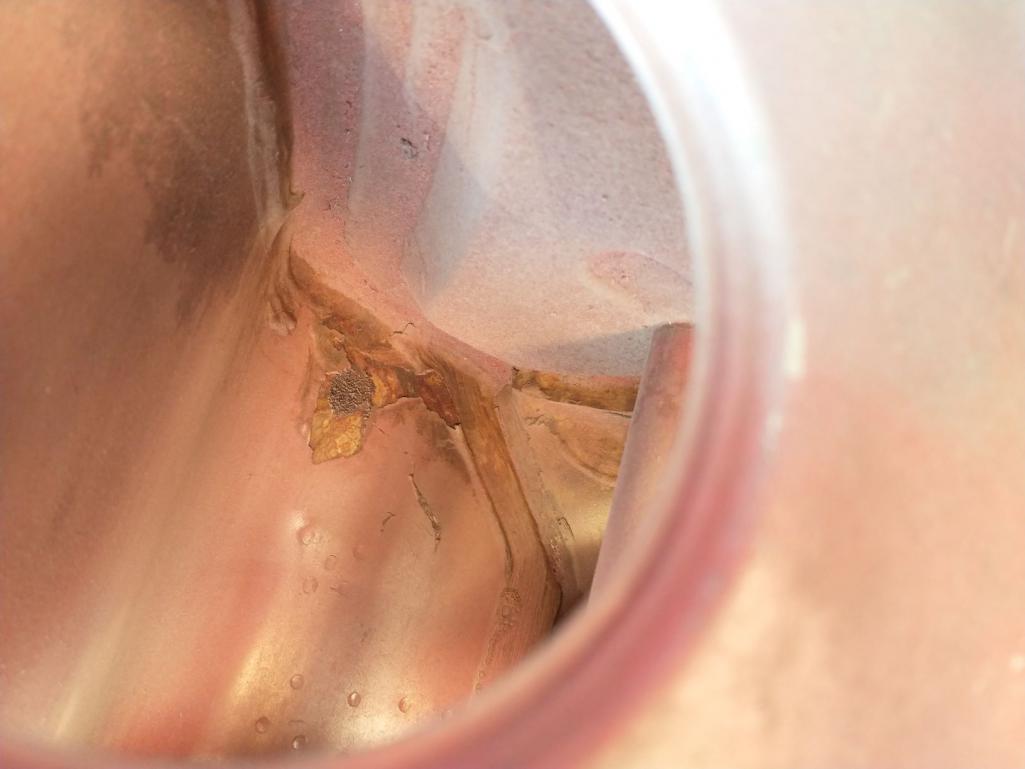 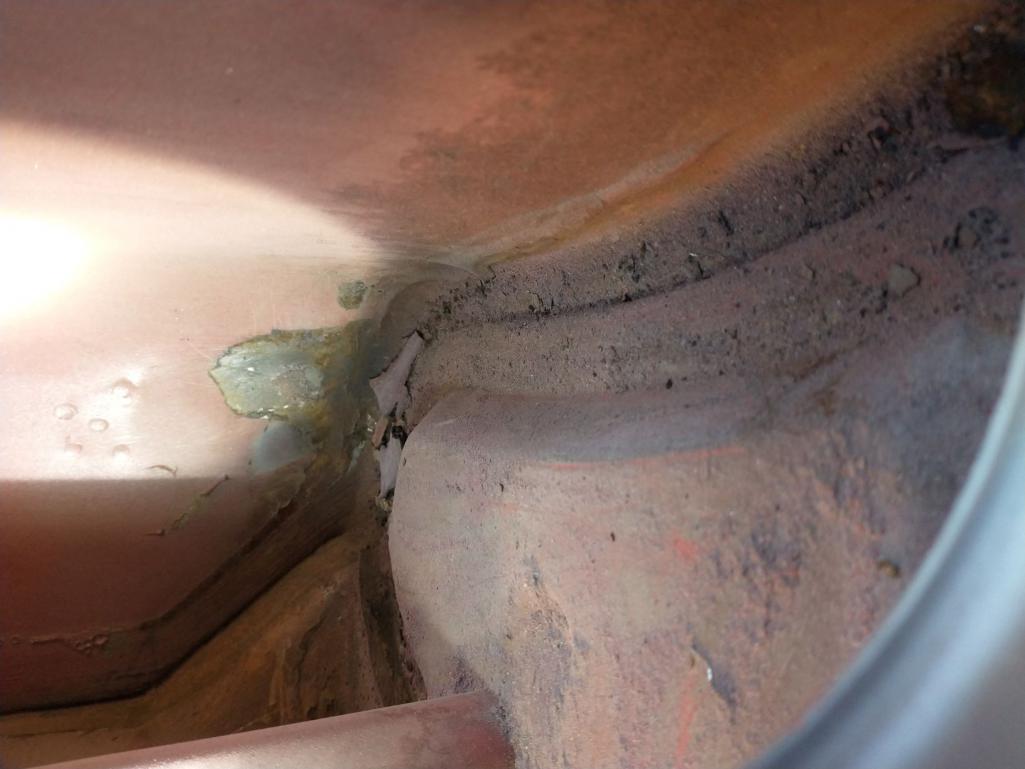 Quite a bit chipped off rather easily: 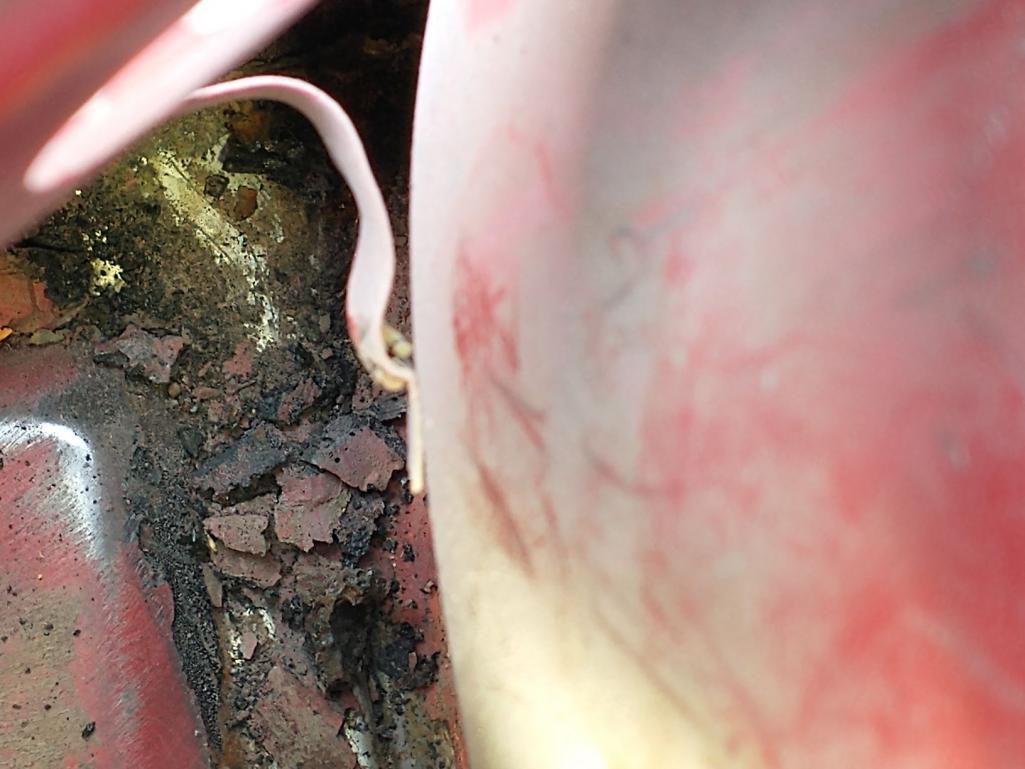 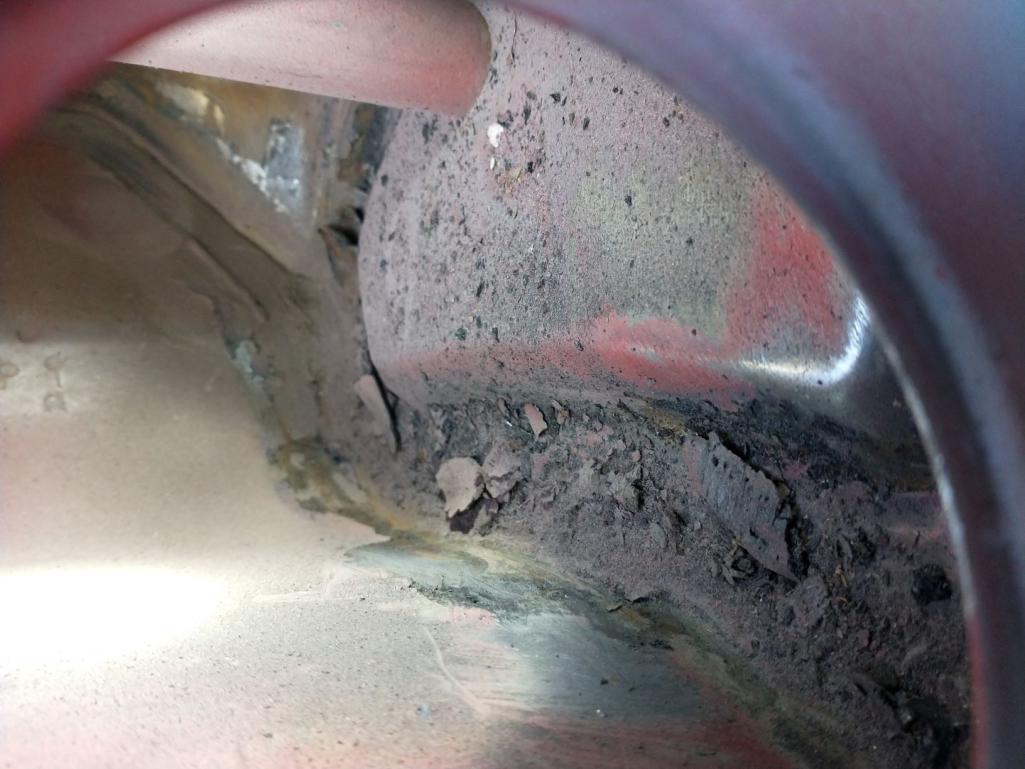 Here's a closeup of a big chunk, odd stuff: 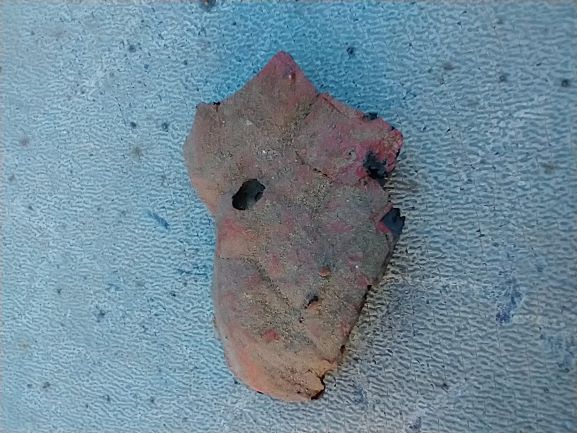 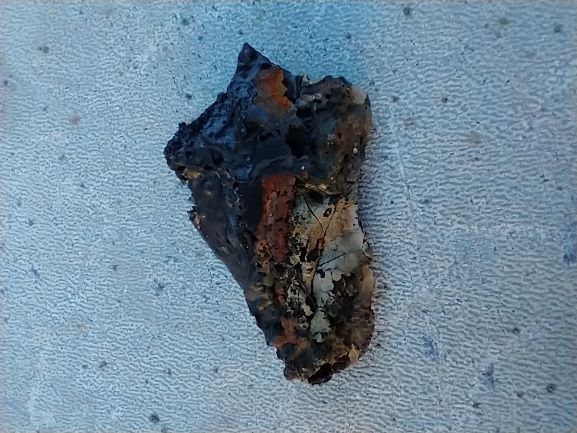 I moved over to the area under the gas tank. I needed to feel like I was making some progress/difference...needed to see some kind of change! 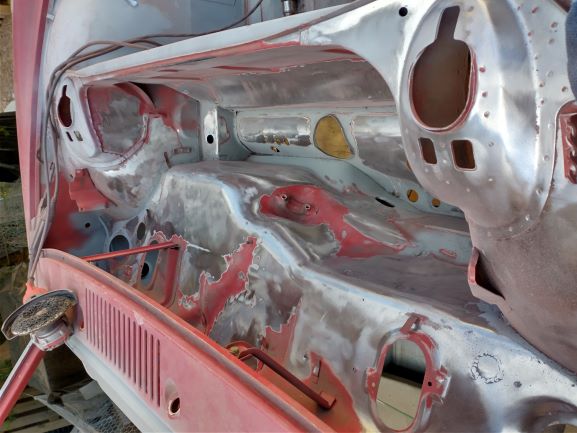 (IMG:style_emoticons/default/headbang.gif) (IMG:style_emoticons/default/headbang.gif) |
| mgarrison |
 Apr 7 2021, 10:30 AM Apr 7 2021, 10:30 AM
Post
#82
|
|
Member   Group: Members Posts: 415 Joined: 14-February 20 From: Chandler, AZ Member No.: 23,922 Region Association: Southwest Region 
|
I was really struggling trying to figure out how to get a wire/fiber brush down into all the nooks & crannies in the frunk area, and the area under the gas tank. I thought I had found a flexible extension for my drill, but then received an email that it was no longer available from the supplier! (IMG:style_emoticons/default/headbang.gif)
At that point I gave up and got a abrasive blaster from HF. I decided on the 110lb model since it was only $20 more than the 40lb model. After reading reviews, I stopped by Tractor Supply and got 100lbs of the Black Diamond fine blasting media (coal slag). It's $9.99/bag for 50lbs. The HF media is $24.99/bag for 50lbs! I have a 2HP Kobalt twin cylinder compressor that's plumbed in to another 32 gallon tank left over from my old compressor that died. So, 62 gallons of 150PSI air, theoretically... So far, so good. Works pretty well, and I have not run low on air pressure that I have noticed. I blast a section, then take a break - it's been in the mid to high 90s here already, so having a N95, safety glasses, hood, gloves, long sleeves makes it a bit too toasty to blast for very long! Creates a nice finish, but boy does it make a huge mess! 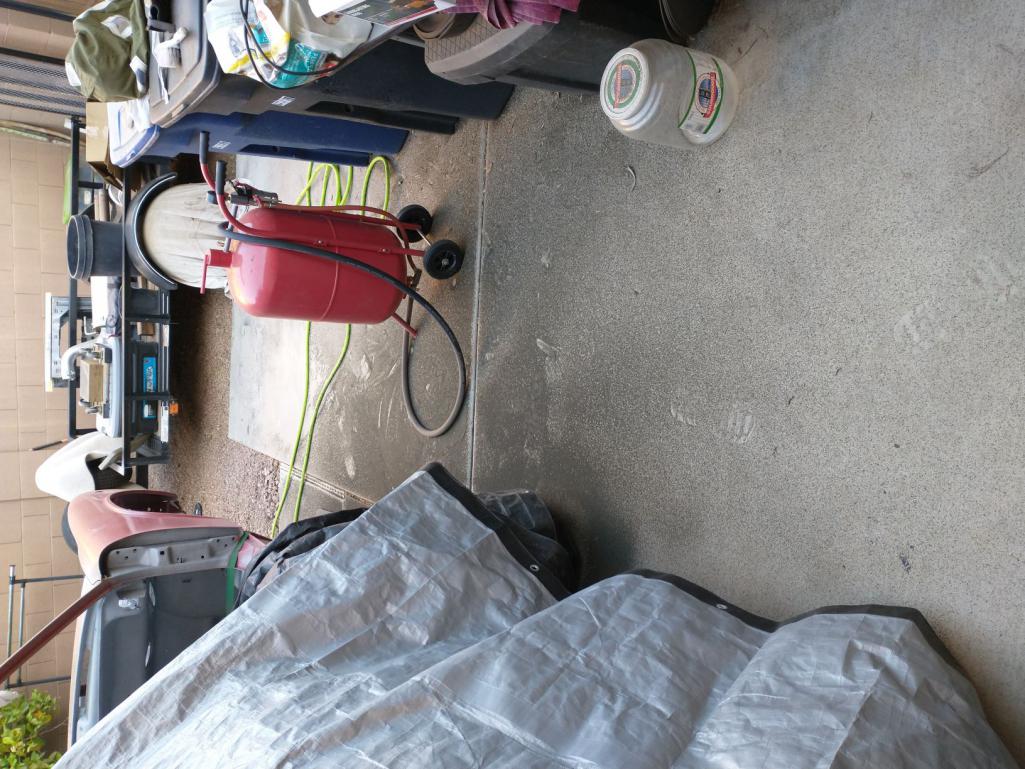 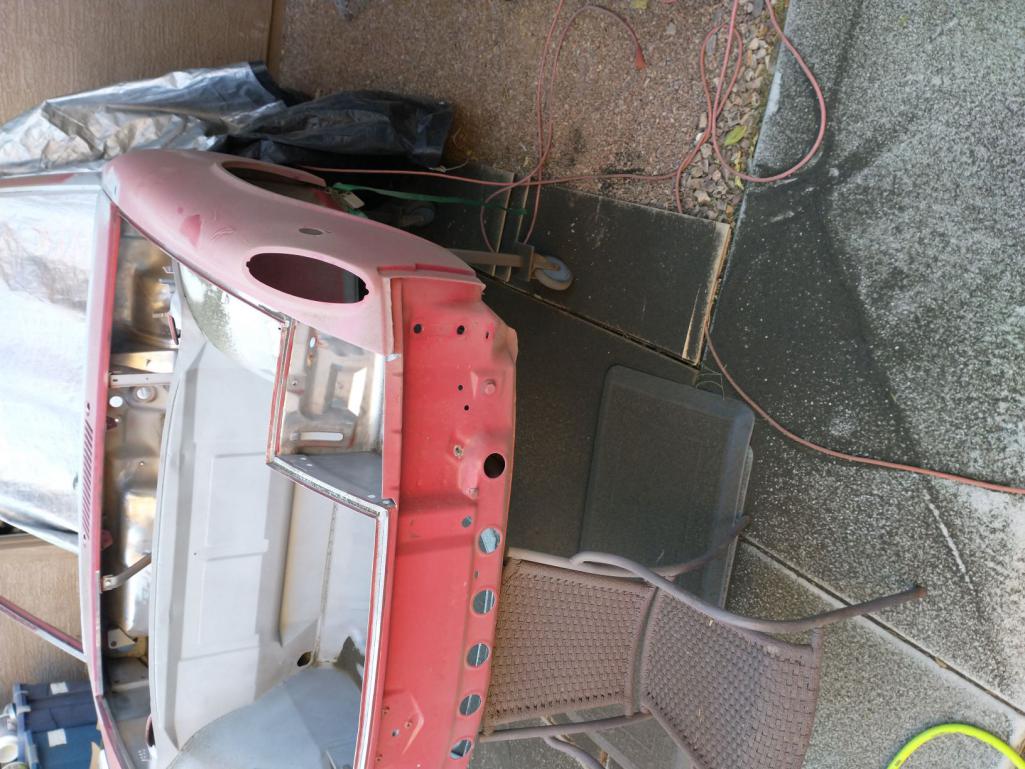 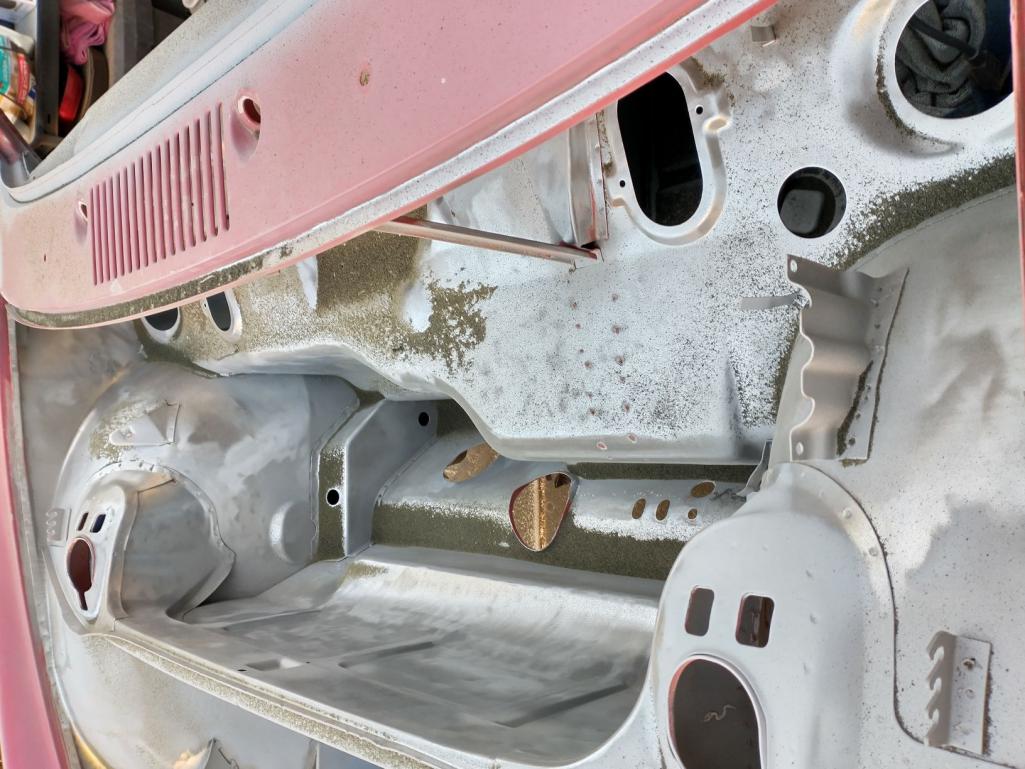 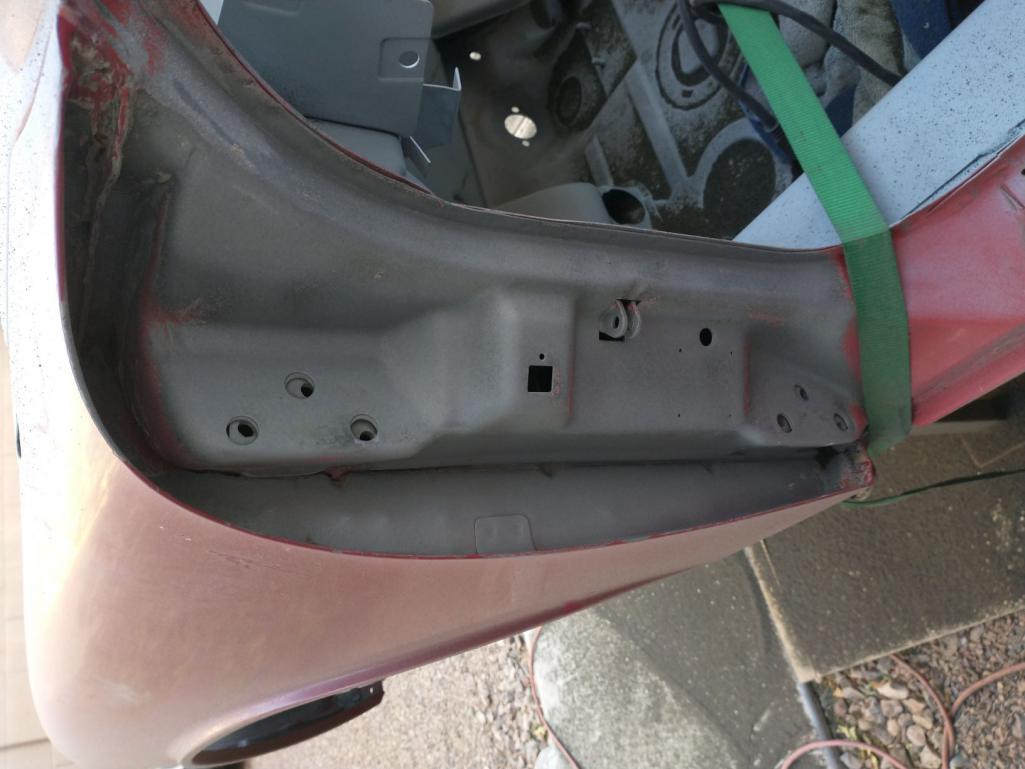 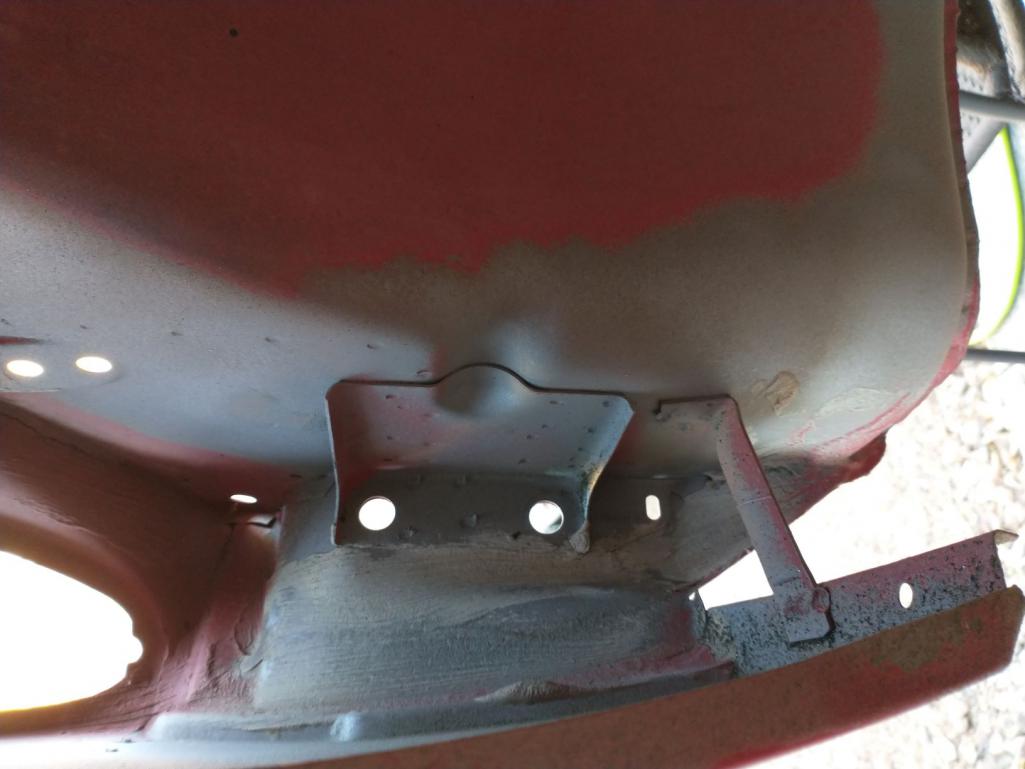 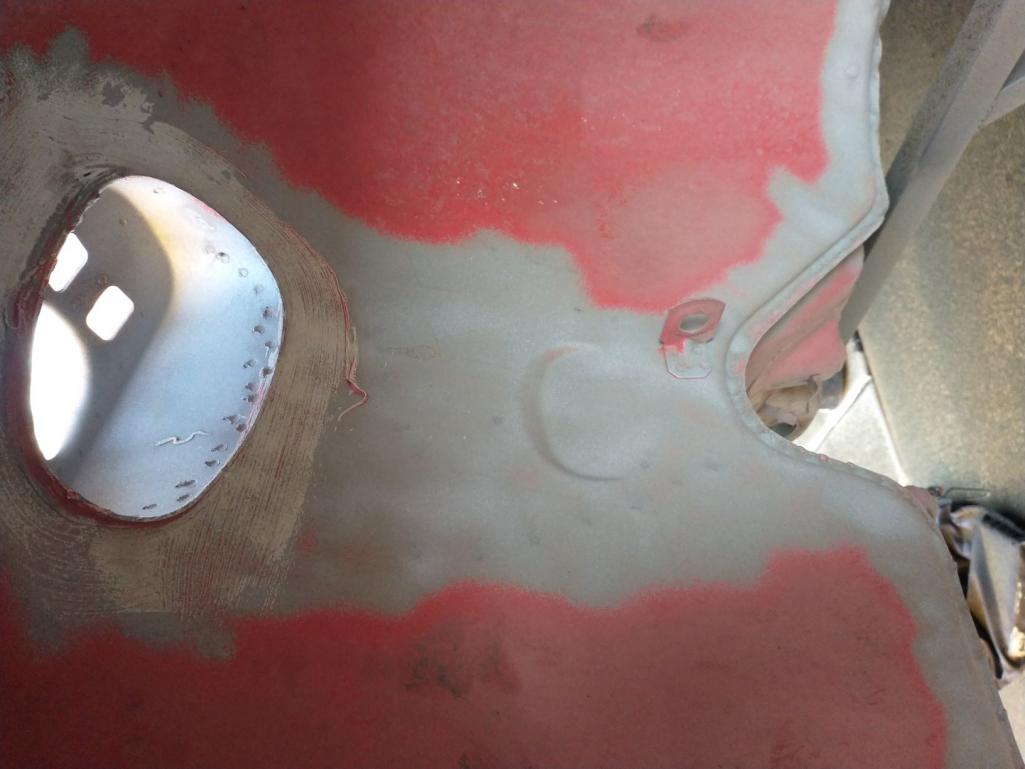 I have been cleaning the media up with my shop vac - one reviewer suggested sucking up all the used media in a clean shop vac, and then sifting it and reusing it. Have not tried doing that yet, but the shop vac is getting pretty heavy! (IMG:style_emoticons/default/idea.gif) |
| mgarrison |
 Apr 11 2021, 02:41 PM Apr 11 2021, 02:41 PM
Post
#83
|
|
Member   Group: Members Posts: 415 Joined: 14-February 20 From: Chandler, AZ Member No.: 23,922 Region Association: Southwest Region 
|
Been plugging along slowly. Finished up the frunk, tested sandblasting a bit along one rocker and both front fender wells. Cut and welded patches for the side marker light holes - Think I'm finally ready to order my flares and outer rockers! (IMG:style_emoticons/default/piratenanner.gif)
Once I get them mocked up and the fenders cut I plan on sandblasting the inside of the fenders - the larger cut out should make for easier access, I hope! Some pics of the marker light patches... 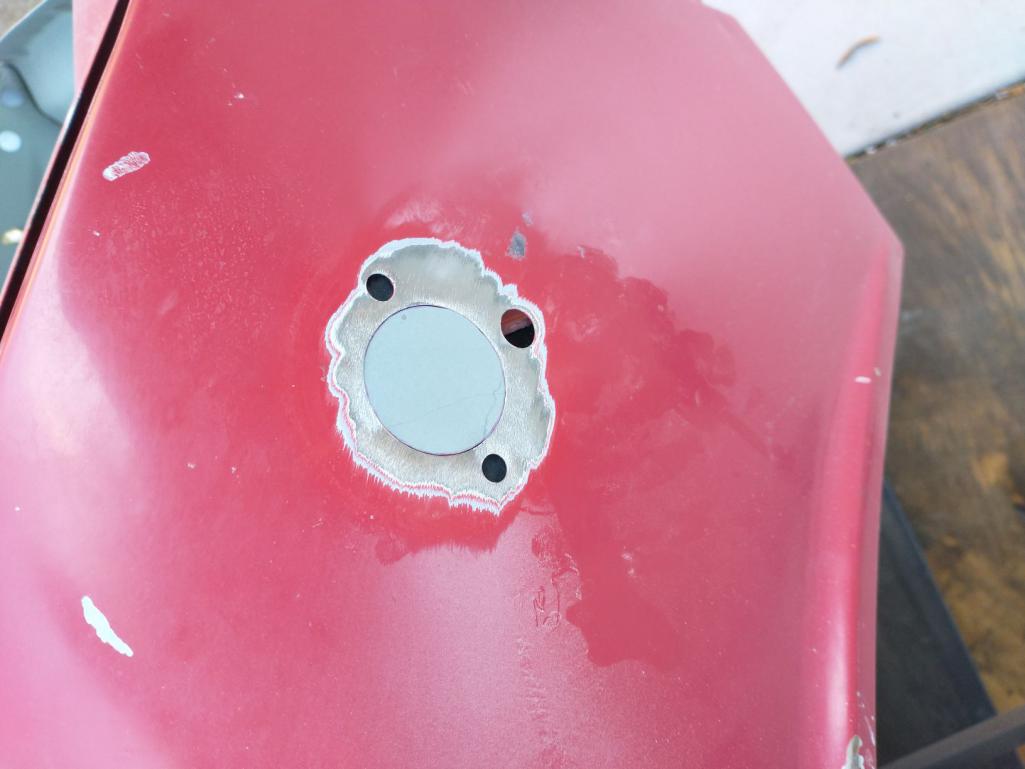 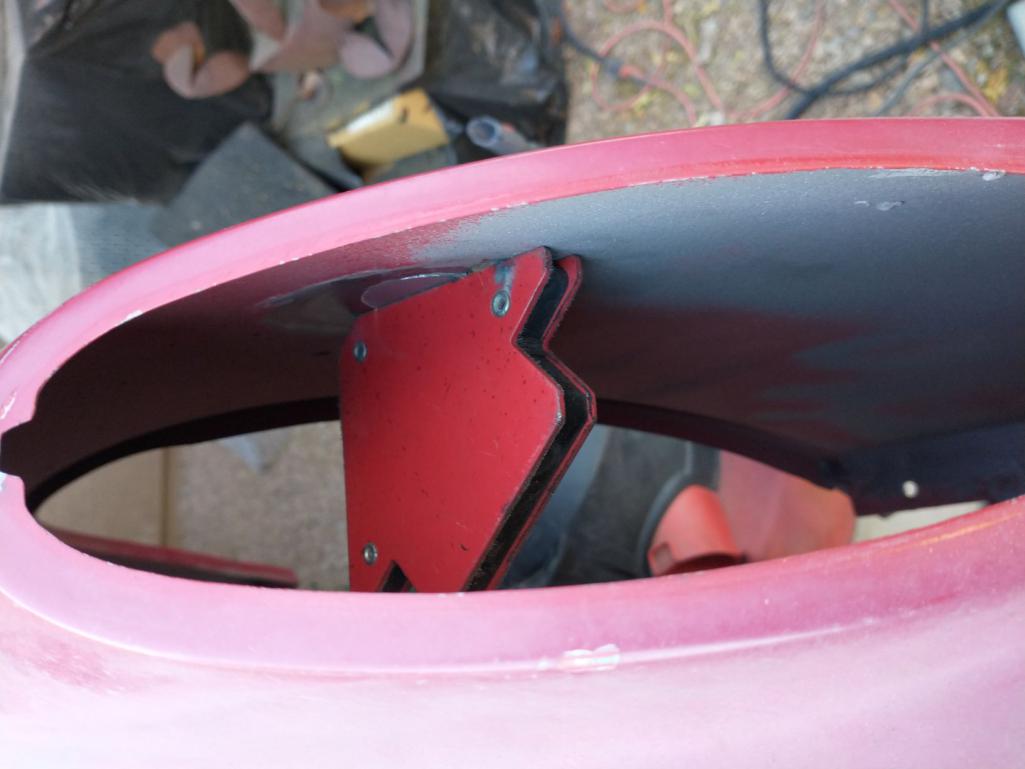 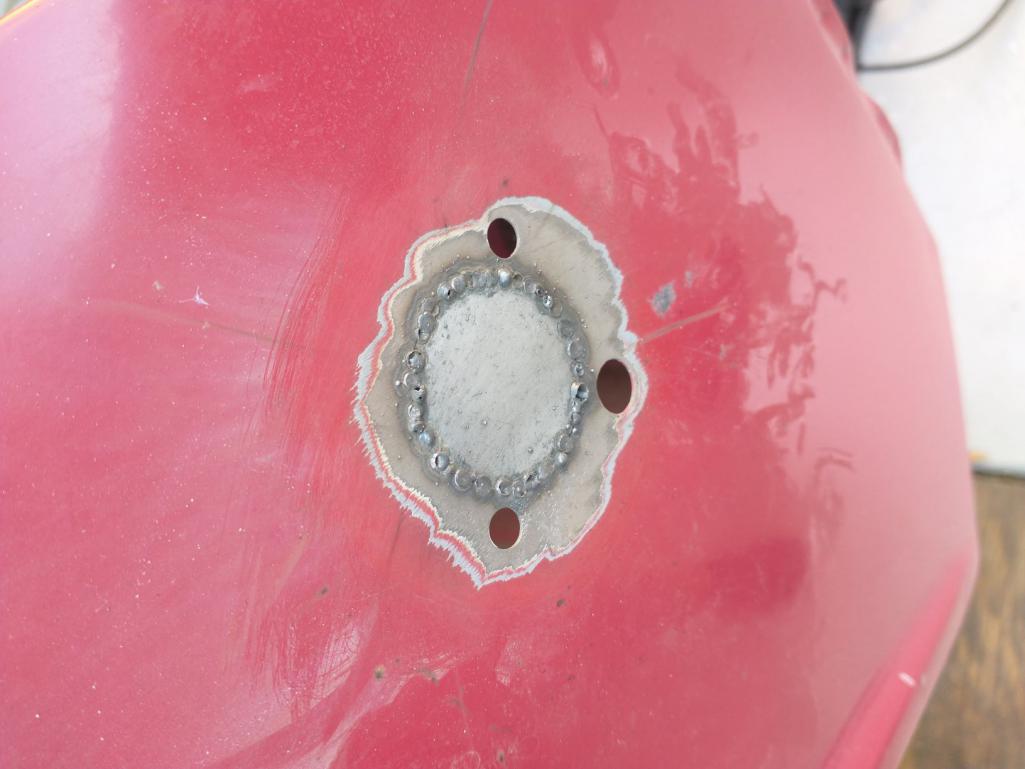 I do lose a couple of days a week helping our daughter at the barn. But it's worth it since I get to hang out and help with this guy! 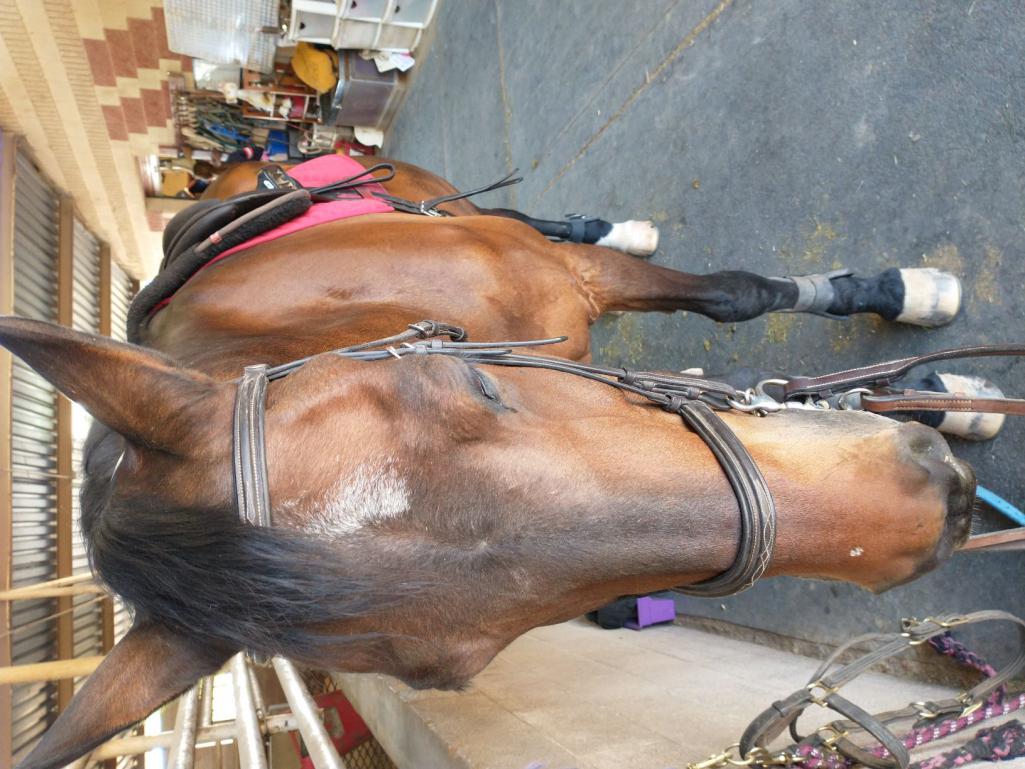 |
| mgarrison |
 Apr 16 2021, 09:30 PM Apr 16 2021, 09:30 PM
Post
#84
|
|
Member   Group: Members Posts: 415 Joined: 14-February 20 From: Chandler, AZ Member No.: 23,922 Region Association: Southwest Region 
|
I got the block off plates from Mad Dog Motorsports for the heater openings under the dash. No instructions, but it mostly made sense once I laid it all out.
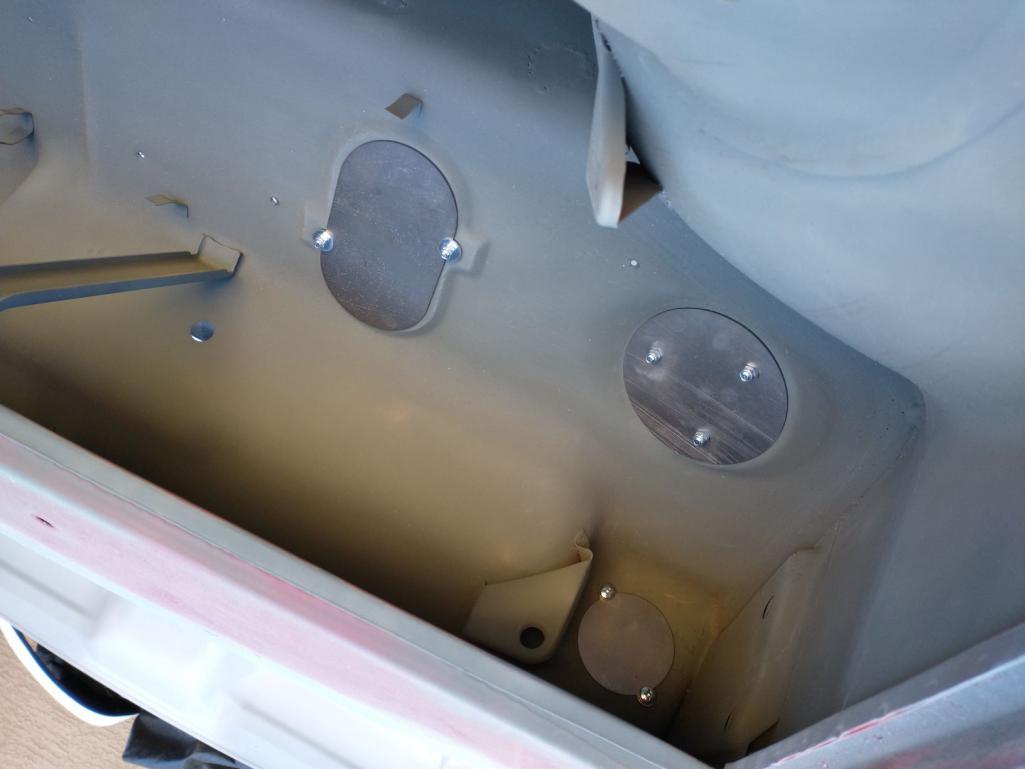 I finally was able to get my flares and rockers. A big shout out to Patrick Motorsports (who knew they were local!), and James Patrick for taking the time to go over his approach, and lessons learned on how to install the flares. I really appreciated his time and getting to see some really cool cars, and learning the local options for take-off parts, etc. I started with the rockers first. Got them trimmed, openings cut out, and holes drilled for mounting. 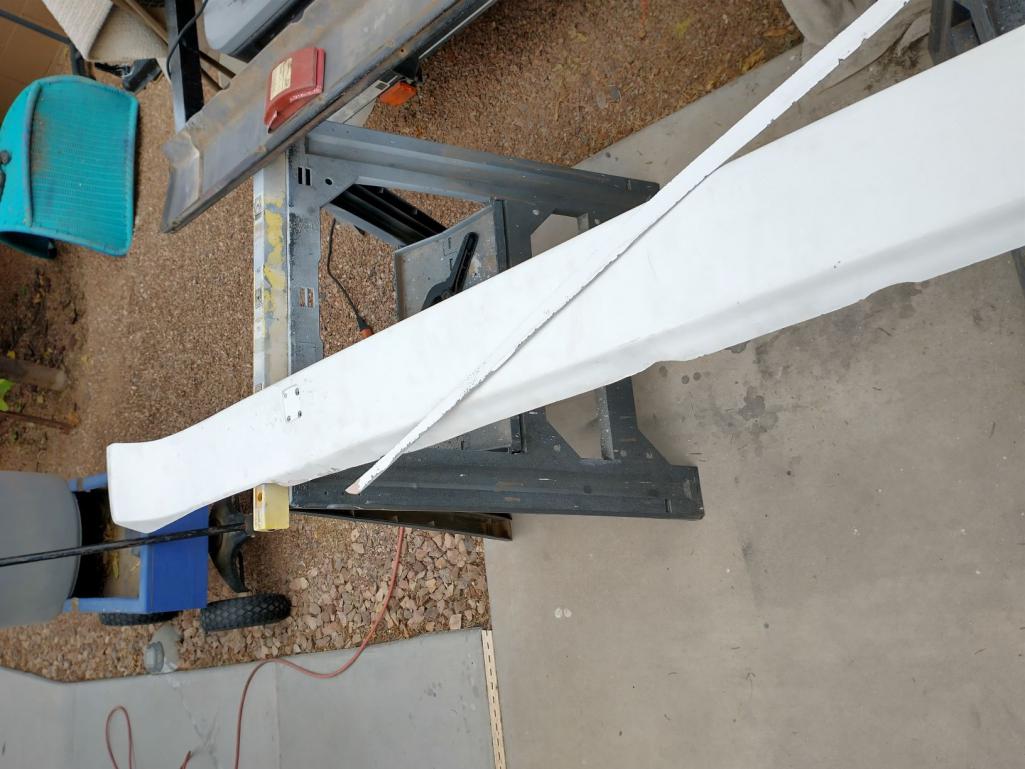 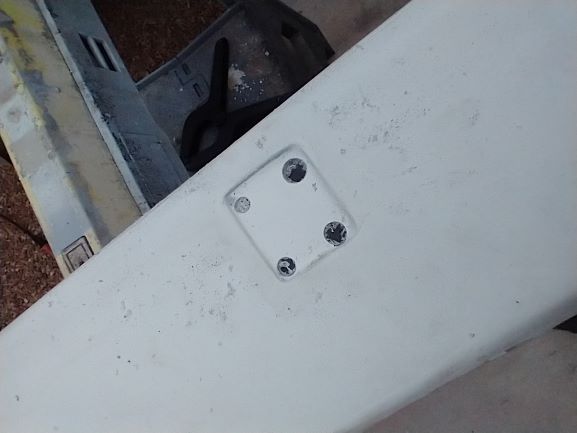 I did my best to get each side of the car all lined up between front, rear, and rocker. It's challenging to try and test fit the flares without an extra sets of hands. 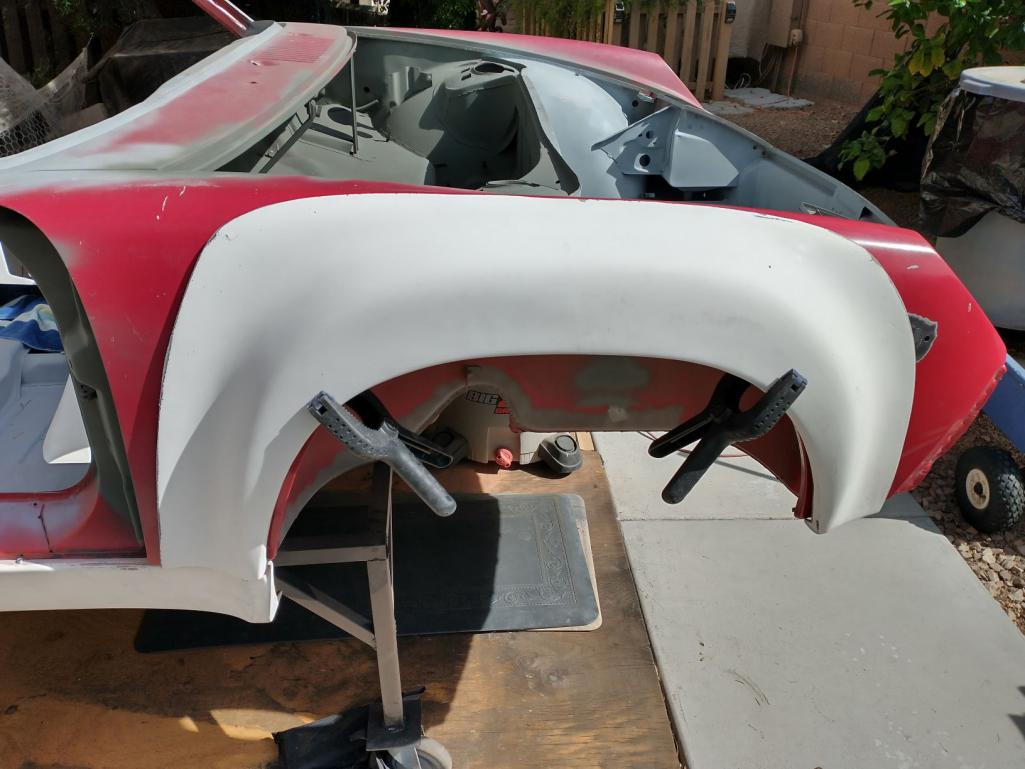 How does that song go? "The first cut is the deepest"... 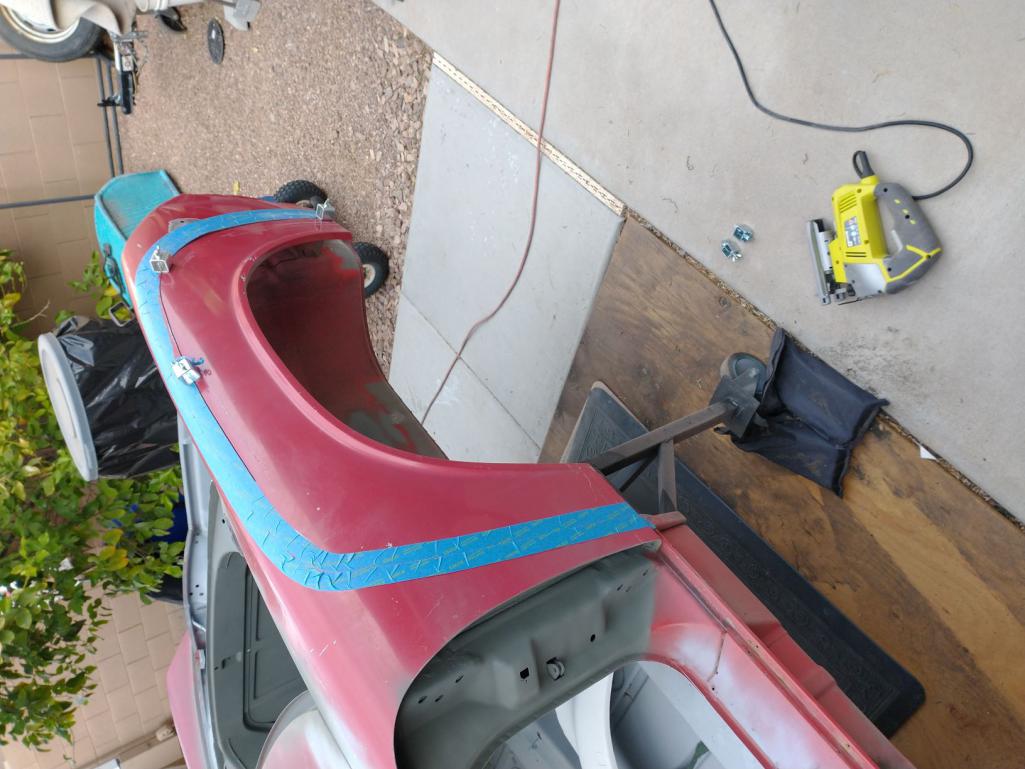 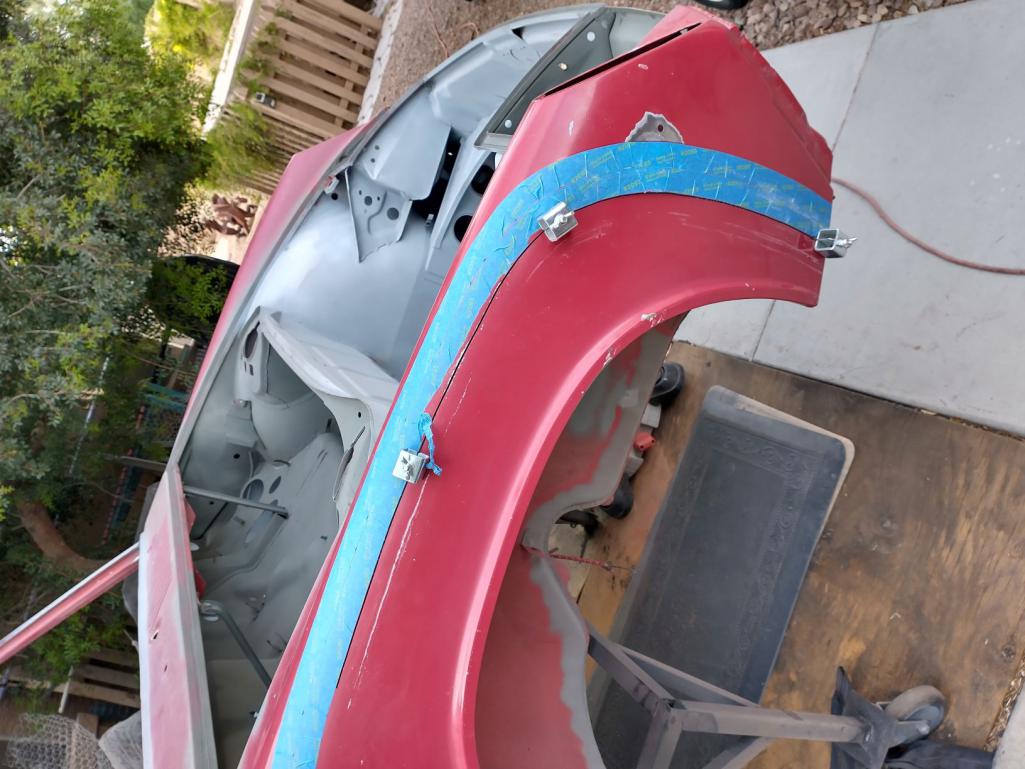 I used my butt-weld clamps to mostly keep things in place until the cut was finished. 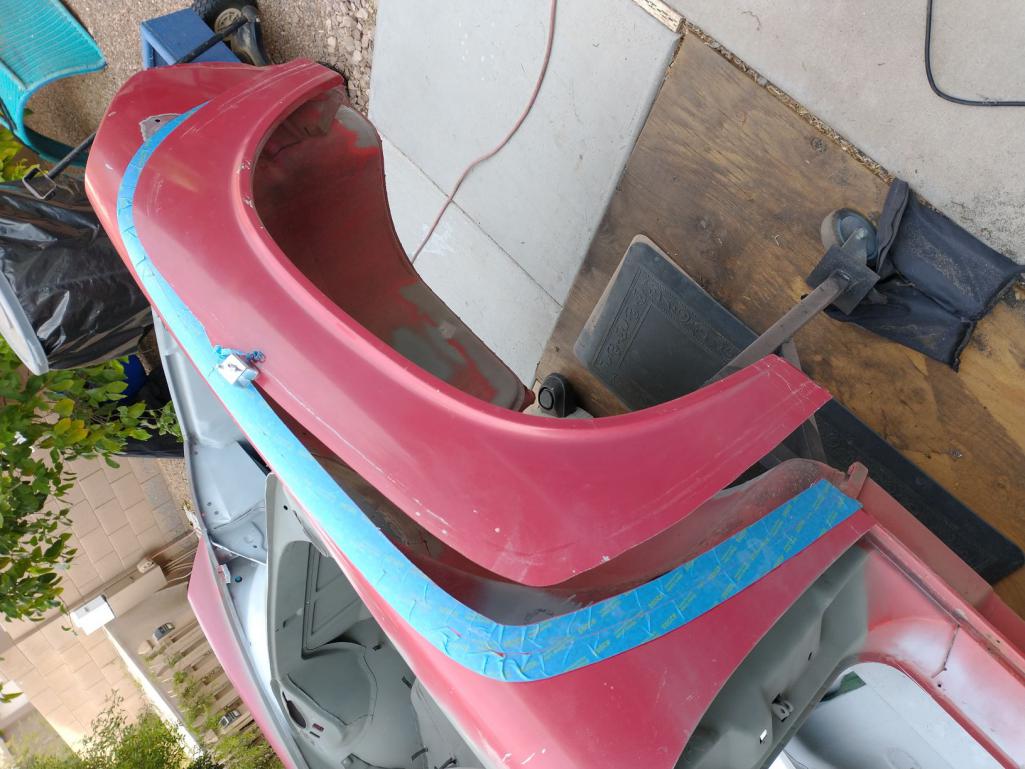 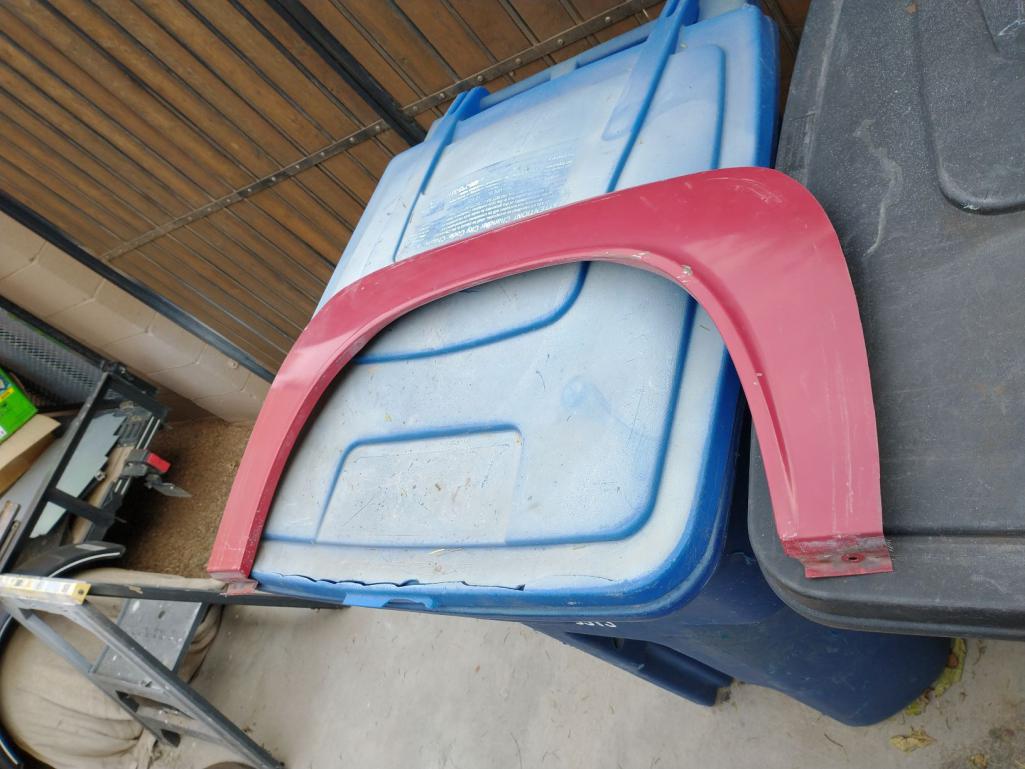 Definitely had the "what have I done!" moment! 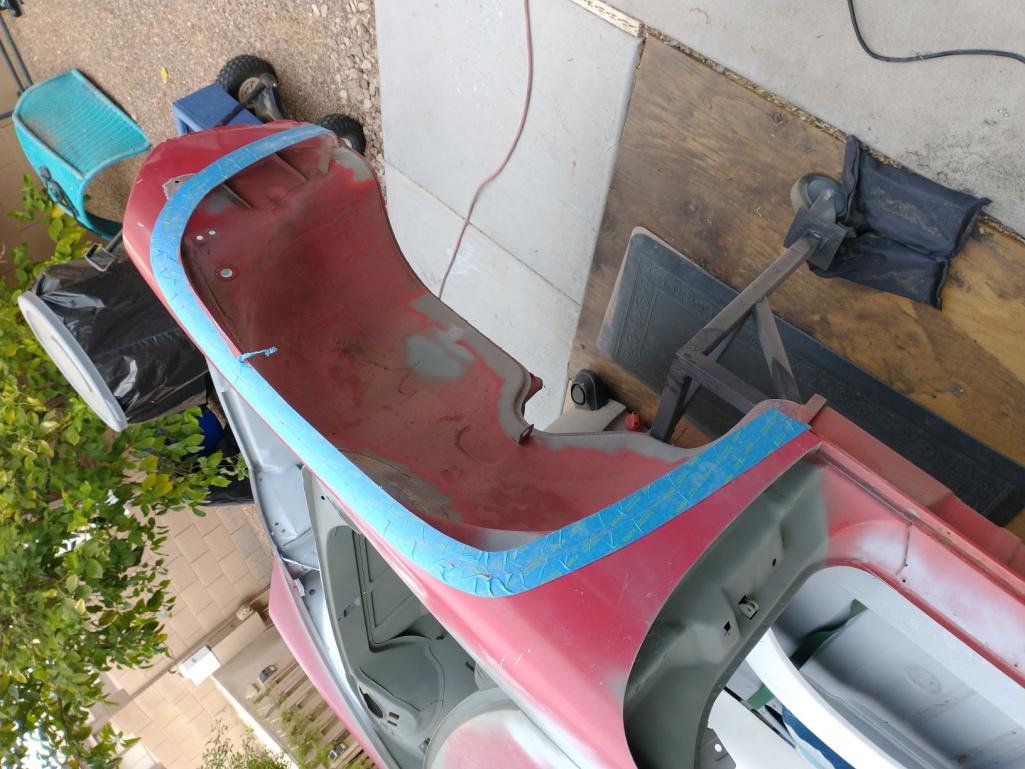 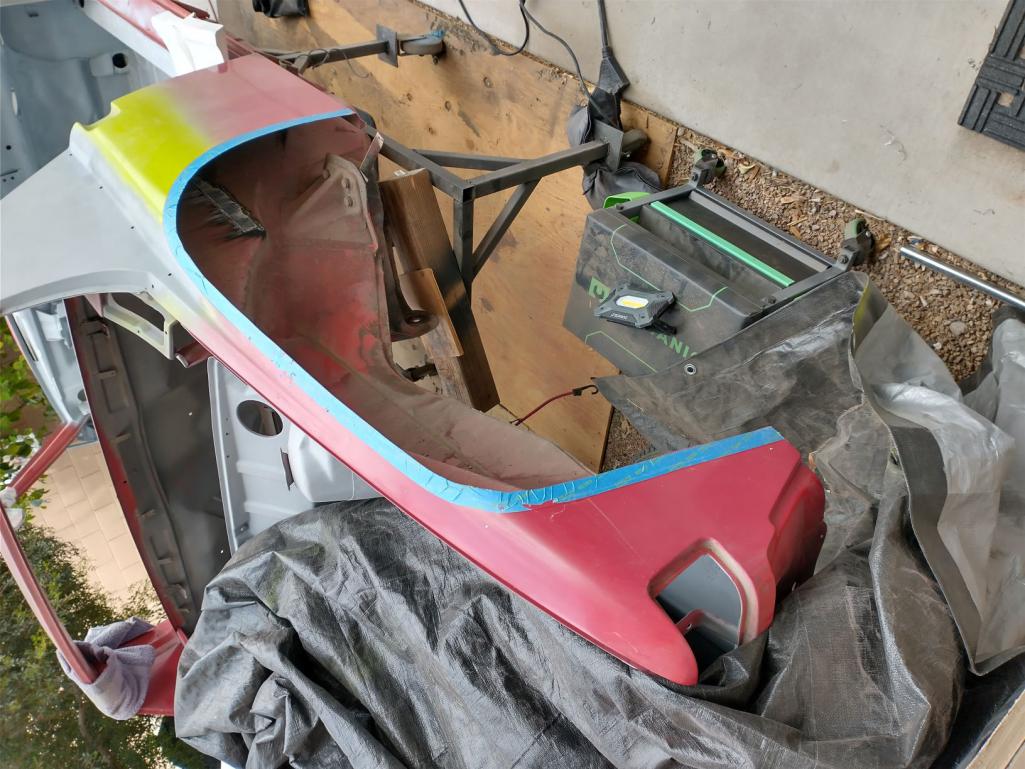 It sure takes a bit of sanding to try and get the flares to fit tight to the body. 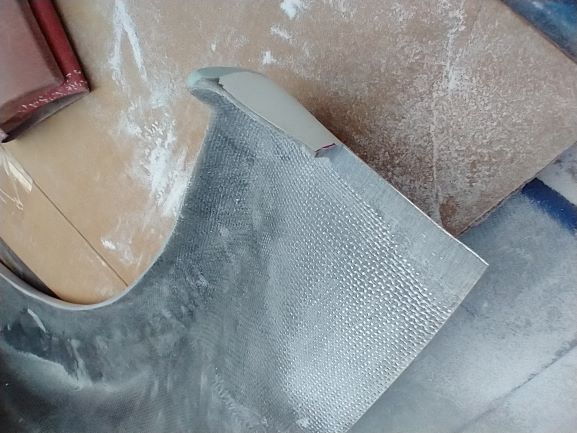 I just have things temporarily mounted. Still need to sand things a bit more in a few spots, and I need to find the right bolts and order some more rivnuts. 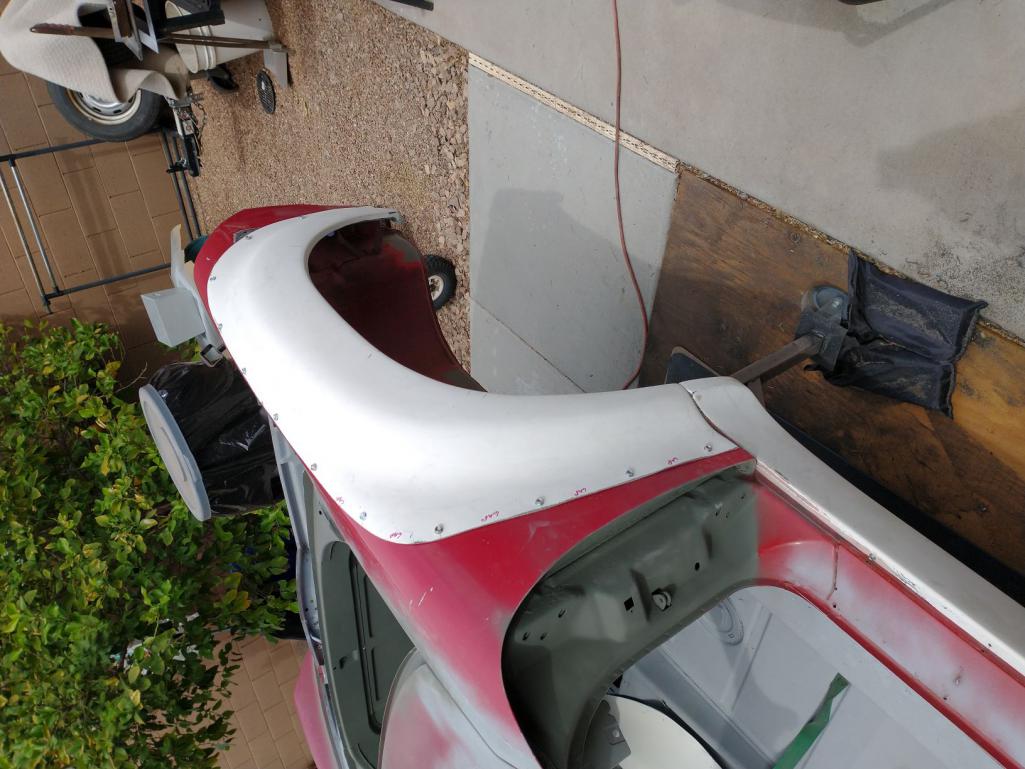 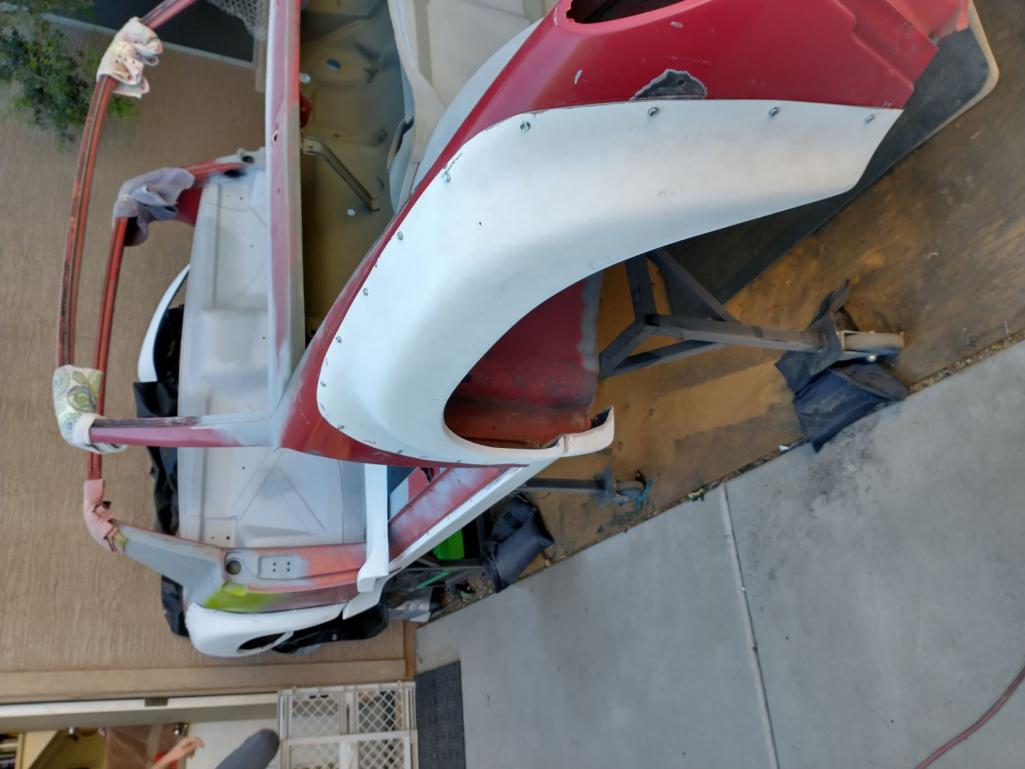 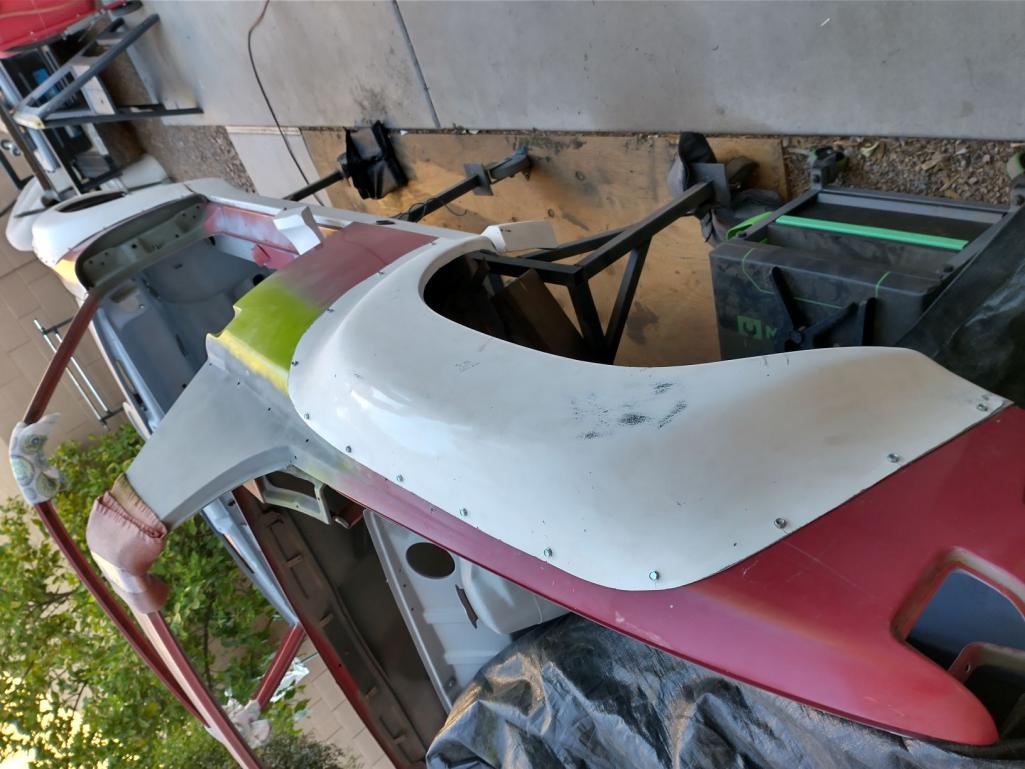 No clue why it keeps rotating the images until you click on them! (IMG:style_emoticons/default/screwy.gif) |
| mgarrison |
 Apr 20 2021, 10:11 AM Apr 20 2021, 10:11 AM
Post
#85
|
|
Member   Group: Members Posts: 415 Joined: 14-February 20 From: Chandler, AZ Member No.: 23,922 Region Association: Southwest Region 
|
Working on reusing/repurposing the fender braces on the rear fenders since the area they attach to gets cut out. This one is pretty easy since its close to where it needs to be, and can just be bent a little to line up with what's left of the steel fender. It already has the holes in it from drilling out the spots welds.
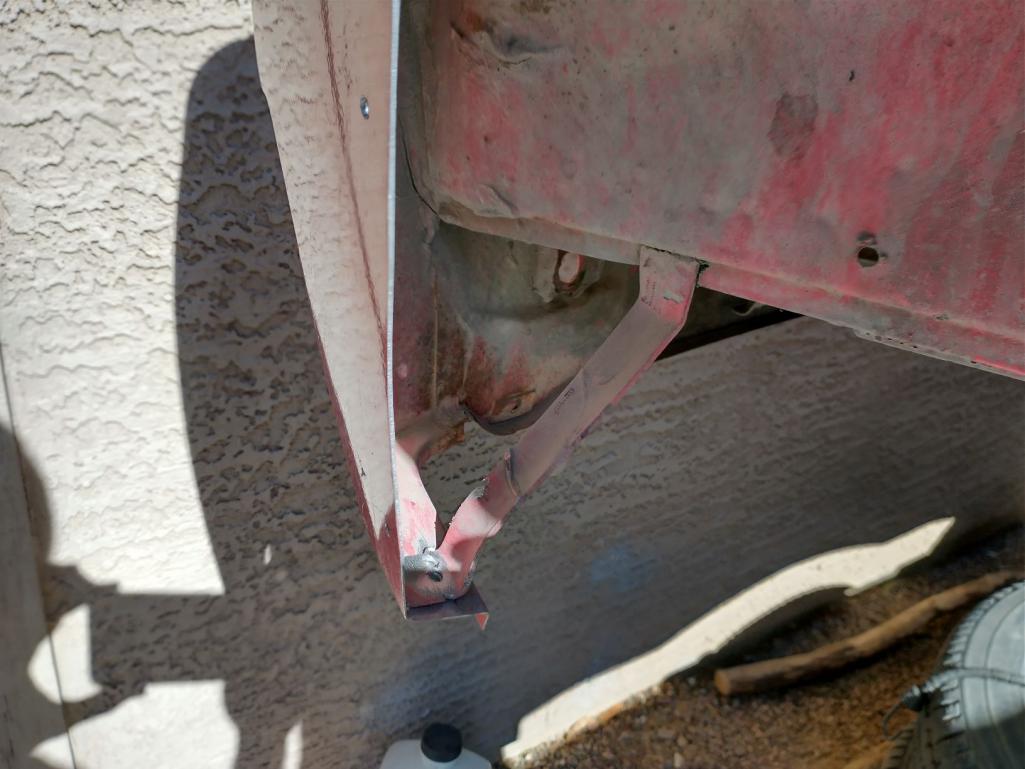 Still need to bend this one around after wire brushing where it needs to be welded back on. 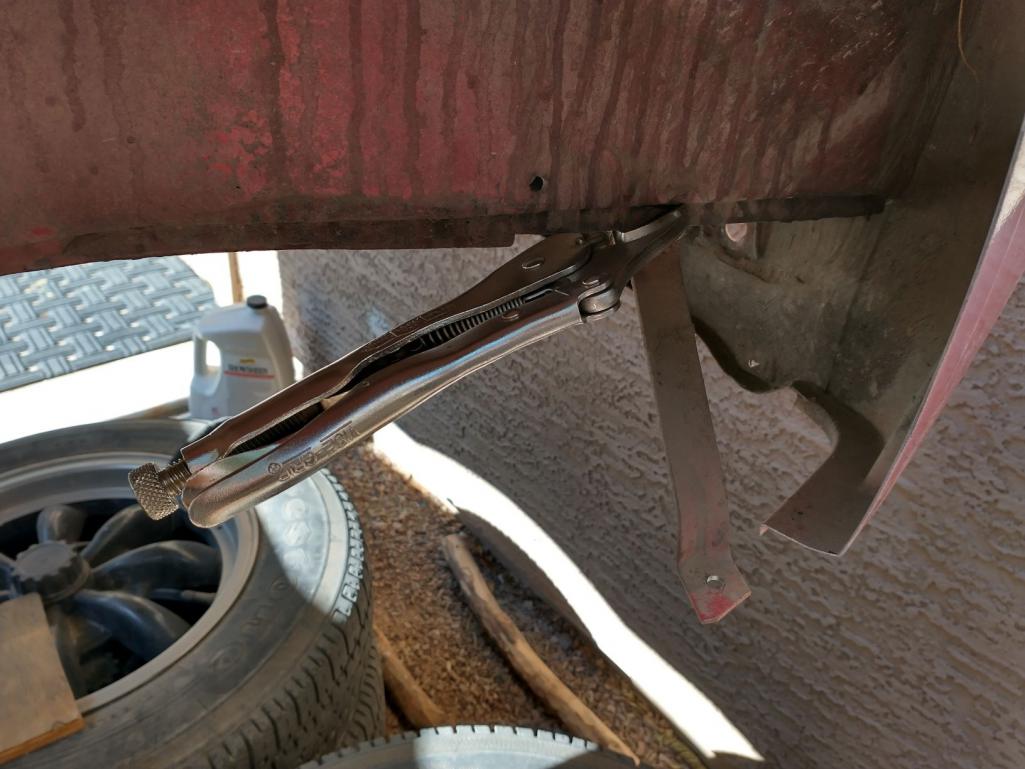 The front brace on the rear fenders needs to be removed, and then re-bent to be reused. Guess I could have just bent a new piece of steel, but figured why not reuse what was there originally since nothing is wrong with it. 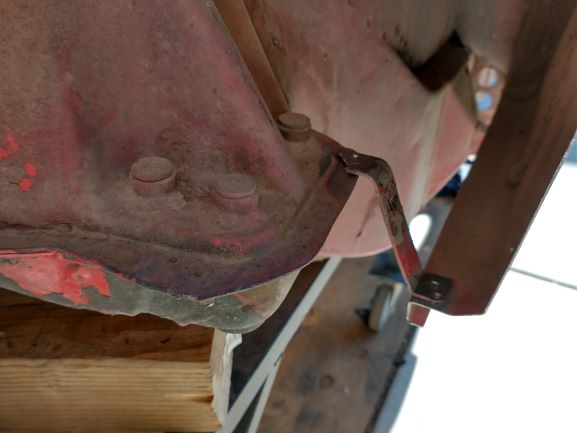 |
| 76-914 |
 Apr 20 2021, 07:29 PM Apr 20 2021, 07:29 PM
Post
#86
|
|
Repeat Offender & Resident Subaru Antagonist           Group: Members Posts: 13,863 Joined: 23-January 09 From: Temecula, CA Member No.: 9,964 Region Association: Southern California 
|
Using those butt-weld clamps as a 3rd hand was a good idea. Or as dad used to say, that's using your head for something other than a hat rack. (IMG:style_emoticons/default/beerchug.gif)
|
| mgarrison |
 Jun 1 2021, 10:26 AM Jun 1 2021, 10:26 AM
Post
#87
|
|
Member   Group: Members Posts: 415 Joined: 14-February 20 From: Chandler, AZ Member No.: 23,922 Region Association: Southwest Region 
|
Using those butt-weld clamps as a 3rd hand was a good idea. Or as dad used to say, that's using your head for something other than a hat rack. (IMG:style_emoticons/default/beerchug.gif) Yep! When I was squaring up the edges for the frunk pan replacement, those butt-weld clamps were real lifesavers - kept the saw blade from binding up constantly! (IMG:style_emoticons/default/sawzall-smiley.gif) |
| mgarrison |
 Jun 1 2021, 10:51 AM Jun 1 2021, 10:51 AM
Post
#88
|
|
Member   Group: Members Posts: 415 Joined: 14-February 20 From: Chandler, AZ Member No.: 23,922 Region Association: Southwest Region 
|
I've been making small/slow progress. I just keep trying to do something on the 914 most days - just keep swimming! (IMG:style_emoticons/default/smash.gif)
I saw a great idea in "9146C's" thread to lift the chassis up off the body dolly a few inches, so I copied his idea after a quick trip to Lowes for the parts. The front jacking "donuts" sit inside the rears (who noticed!), so I had to add some 1/8" plate to locate them in the proper spot. With a bit of assistance from my son, and some 4x4's laying on the QuickJack rails, we had success! 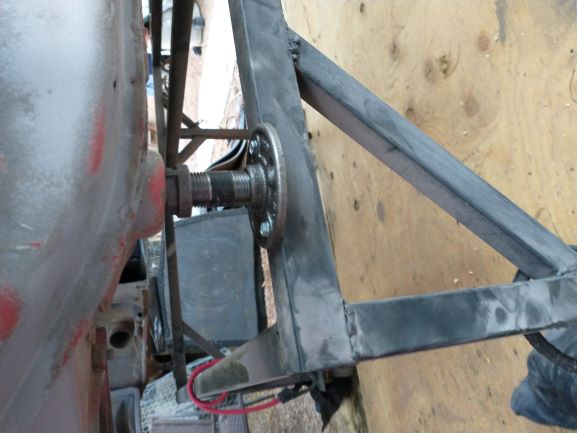 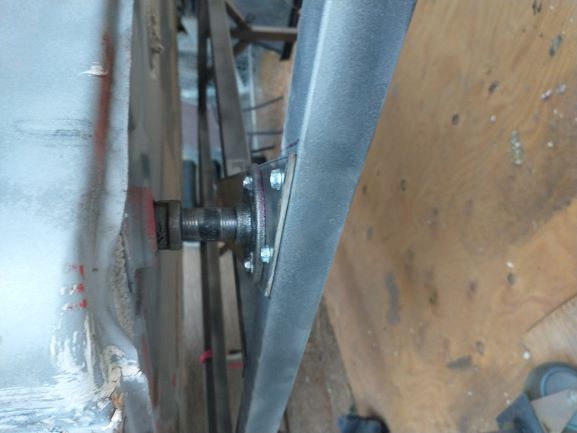 I was going to use "fender nuts" to give me a bit of wiggle room for flare alignment, but in the end it did not really help much - will be going back to my original rivnet/nutsert mounting idea. 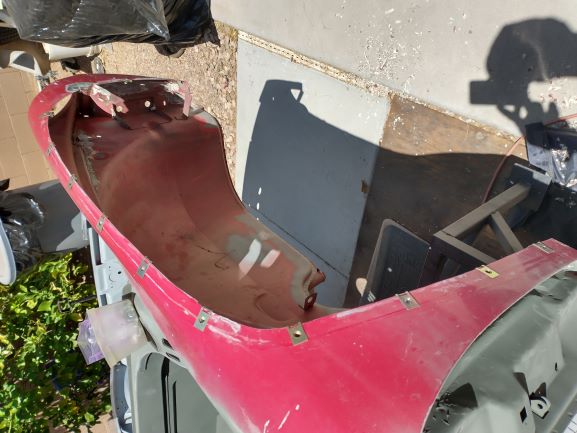 Received my VW fender beading and set about getting it trimmed to fit and clear the mounting bolts, etc. 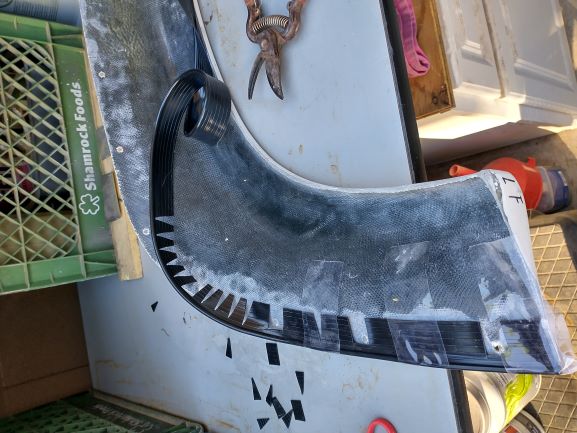 I believe once the flares are painted body color, and I figure out how to hold the beading in place on the back of the flares, this is going to look pretty decent. 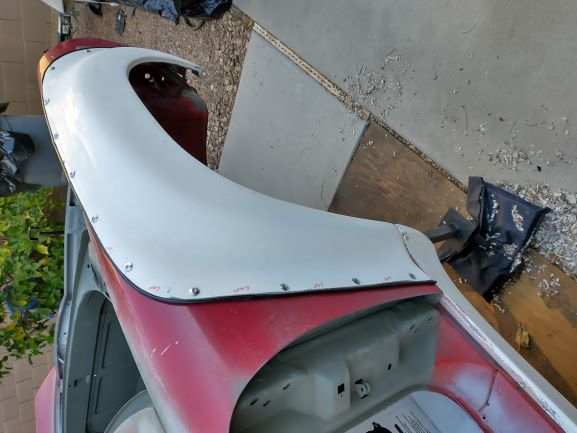 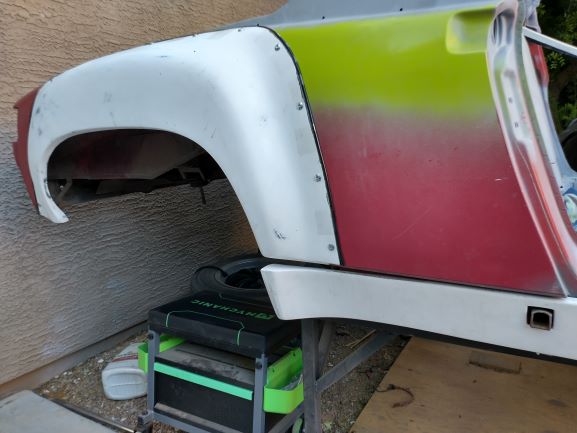 I cut out some metal strips to rivet to the bottom of the fiberglass rockers - this was how James Patrick @ PMS said they mount the bottom of the rockers. A bit annoying, to say the least that you have to create your own mounts for $300 fiberglass rockers! (IMG:style_emoticons/default/hissyfit.gif) I may end up going with the weld-on ends eventually since the original metal rockers I have are in good shape. They do line up reasonably well once you get the lower mounts attached. 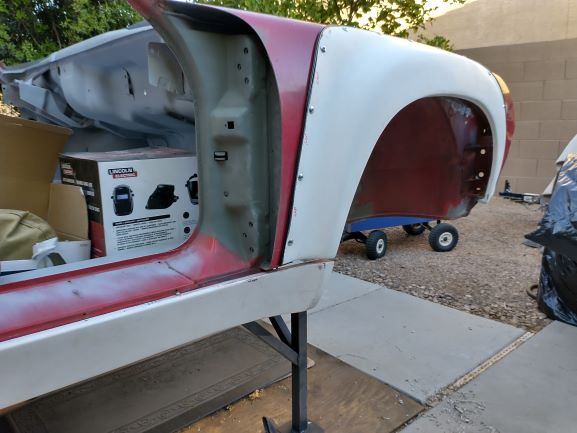 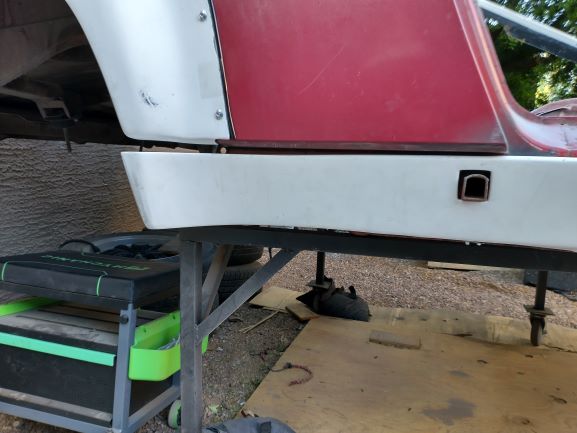 Next up was getting the fender wells and bottom media blasted and ready for the Raptor bed liner coating. Got sick of cleaning up media off the driveway really quick! I was able to reuse quite a bit of media by sifting it into a 5 gallon bucket, then sifting it again as it went into the blaster. I can't believe how much of that crap got into my shoes though - it was under my insoles! (IMG:style_emoticons/default/wacko.gif) 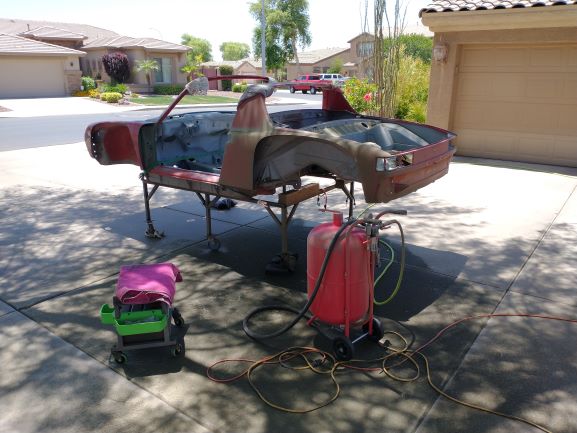 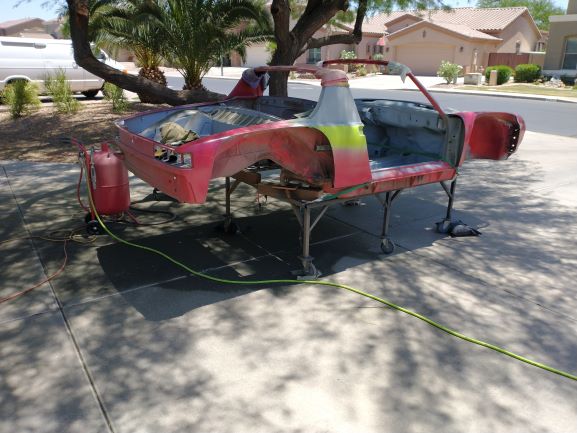 I sprayed and wiped down the fender wells and the bottom with degreaser just to be on the safe side. There was quite a bit of grease on the passengers side near the rear axle that I had to scrape off before blasting. Grease does not like to come off by blasting - too soft I guess! Grease also got up into the passengers side rear shock mount - that was way too much fun to clean out! Looking pretty decent at this point - still need to finish priming the bottom - ran out of juice just behind where the steering rack mounts... (IMG:style_emoticons/default/yellowsleep[1].gif) 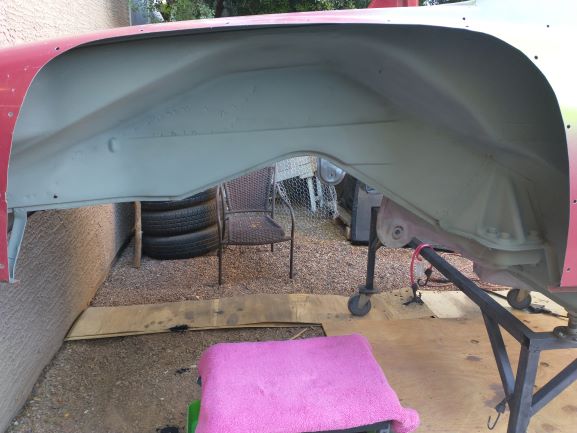 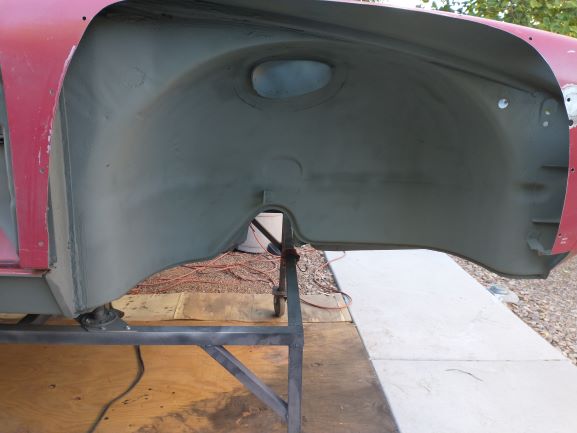 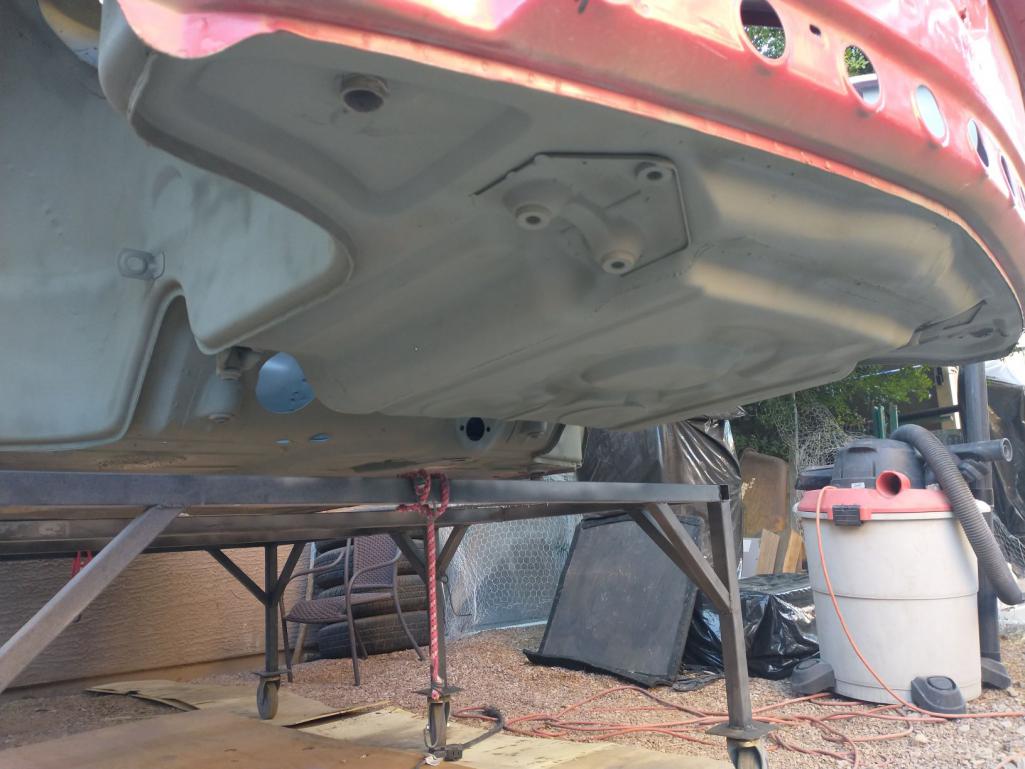 I had a bit of a distraction/another project for the Memorial Day weekend. But, I could not stop smiling about welding up "frog legs"! (IMG:style_emoticons/default/lol-2.gif) And I kept thinking of that line from the Six Million Dollar Man; We can rebuild him. We have the technology. (IMG:style_emoticons/default/av-943.gif) 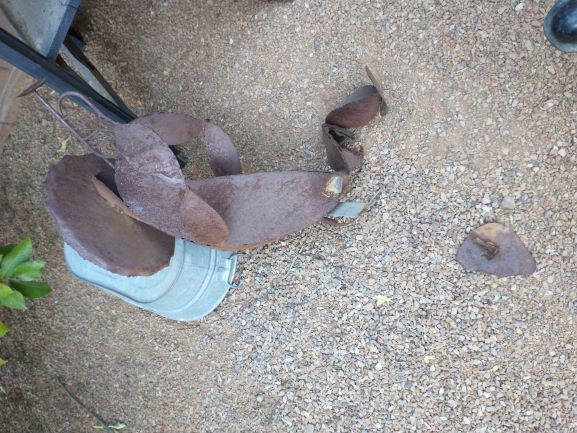 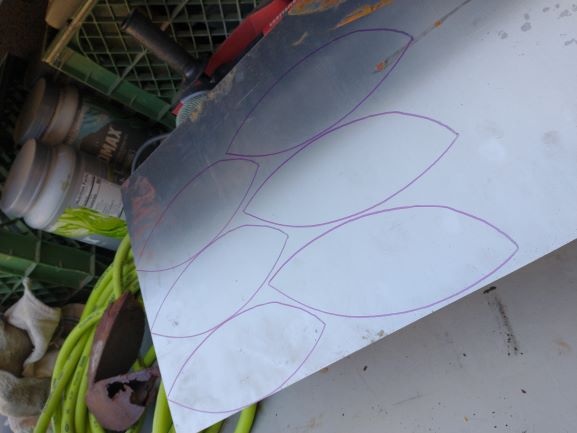 Who ordered the "half-leg" platter? 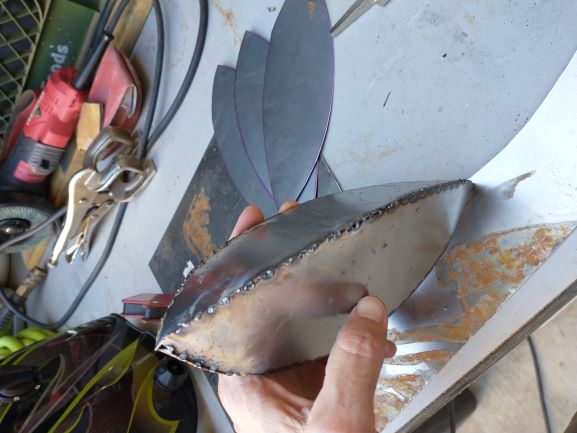 And the "whole-leg"? 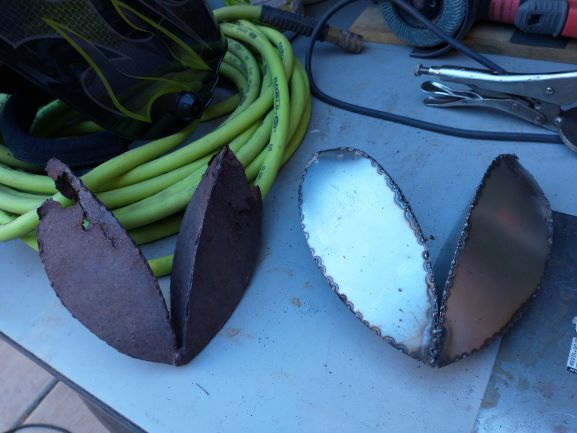 Whole Mariachi Frog again! (IMG:style_emoticons/default/piratenanner.gif) 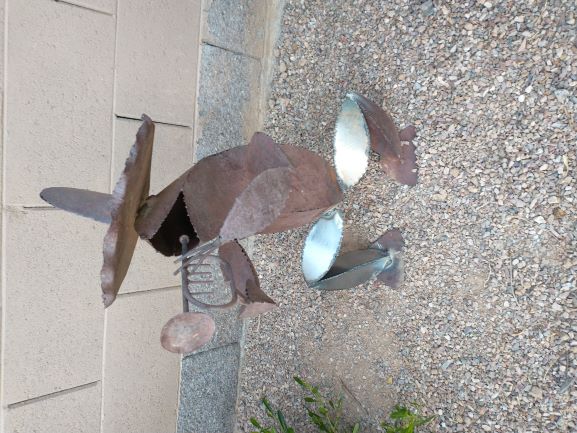 |
| 76-914 |
 Jun 2 2021, 09:04 AM Jun 2 2021, 09:04 AM
Post
#89
|
|
Repeat Offender & Resident Subaru Antagonist           Group: Members Posts: 13,863 Joined: 23-January 09 From: Temecula, CA Member No.: 9,964 Region Association: Southern California 
|
You will finish the project quicker when working on it everyday, whether it be 15 min's or 6 hours. Stay after it. (IMG:style_emoticons/default/beerchug.gif)
|
| mgarrison |
 Jun 10 2021, 04:43 PM Jun 10 2021, 04:43 PM
Post
#90
|
|
Member   Group: Members Posts: 415 Joined: 14-February 20 From: Chandler, AZ Member No.: 23,922 Region Association: Southwest Region 
|
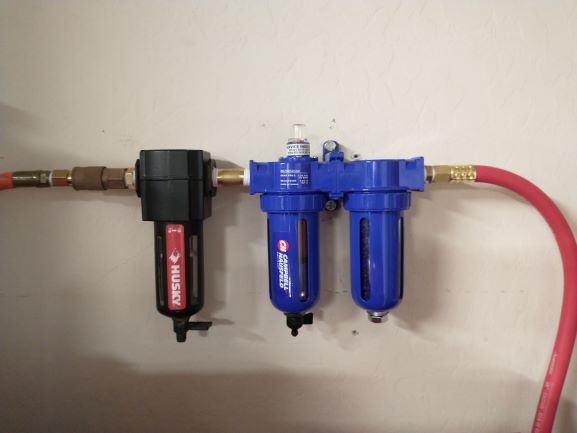
Finally got my filter/dryer delivered and installed. Getting the right adapters together was a PITA, of course! Hopefully, this keeps the compressed air clean enough for spraying the Raptor liner, and maybe paint one of these days! (IMG:style_emoticons/default/idea.gif)
 |
| mgarrison |
 Jun 15 2021, 09:32 AM Jun 15 2021, 09:32 AM
Post
#91
|
|
Member   Group: Members Posts: 415 Joined: 14-February 20 From: Chandler, AZ Member No.: 23,922 Region Association: Southwest Region 
|
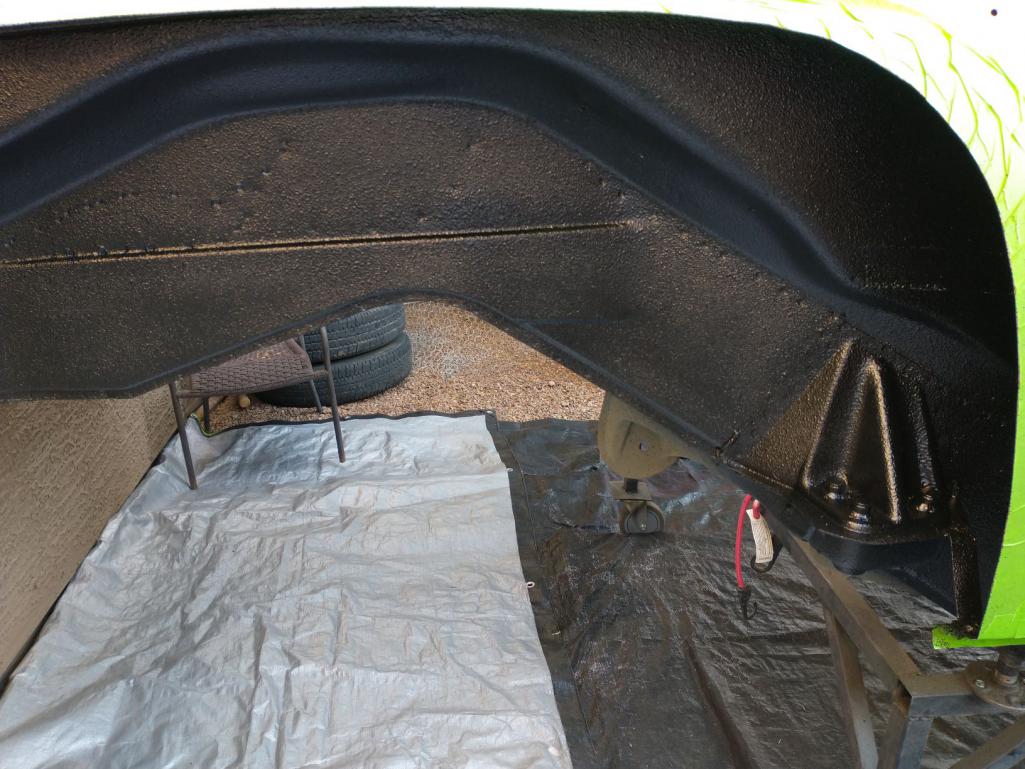
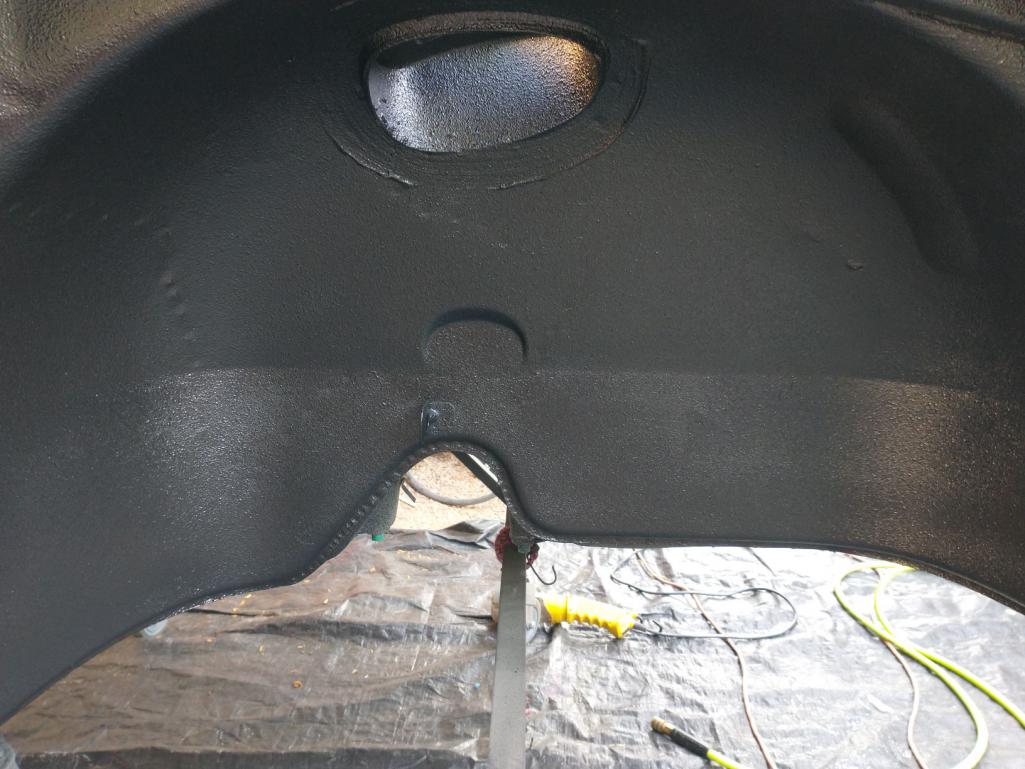
Started before 6am to try and spray at least one quart of Raptor liner on the fender wells before it got too hot. It was already about 85, and toasty with long sleeves, gloves, and respirator on! But, I got three fender wells, and the passenger rocker sprayed with Raptor. Super easy to spray, and the little bit left in the bottom of the jug was still liquid, so the heat did not affect the hardening time that I could tell. I think the flash time was super short though - was dry to the touch in no time! Came out rather well, I think! (IMG:style_emoticons/default/piratenanner.gif)
  |
| 76-914 |
 Jun 15 2021, 12:00 PM Jun 15 2021, 12:00 PM
Post
#92
|
|
Repeat Offender & Resident Subaru Antagonist           Group: Members Posts: 13,863 Joined: 23-January 09 From: Temecula, CA Member No.: 9,964 Region Association: Southern California 
|
Looks great. What size tip did you use? I don't think moisture will be a problem for you in AZ. Just bleed your compressor's tank before spraying and have a filter at your gun also. I'm in SoCal and don't have any moisture problems here. When I lived in TX it was a different game; entirely. (IMG:style_emoticons/default/beerchug.gif)
|
| mgarrison |
 Jun 15 2021, 12:57 PM Jun 15 2021, 12:57 PM
Post
#93
|
|
Member   Group: Members Posts: 415 Joined: 14-February 20 From: Chandler, AZ Member No.: 23,922 Region Association: Southwest Region 
|
I just used the Schutz gun that came with the Raptor kit I got. I am running a filter/dryer on the compressor, and I was running about 55PSI at the gun...
About as simple as it can get, I think. |
| mgarrison |
 Jun 17 2021, 10:16 AM Jun 17 2021, 10:16 AM
Post
#94
|
|
Member   Group: Members Posts: 415 Joined: 14-February 20 From: Chandler, AZ Member No.: 23,922 Region Association: Southwest Region 
|
I've been spraying one quart each morning before it gets too hot. I got the bottom covered this morning, and I still have one quart left. There are a few spots that need touch up, but not too many. It's definitely a challenge to spray with the tub on a body dolly, but totally possible. The Raptor is crazy easy to spray - I'm not sure you can really mess it up! Wearing long sleeves, gloves, respirator, etc. in 90+ degree heat is not so easy...But, it does flash off/dry really quickly!
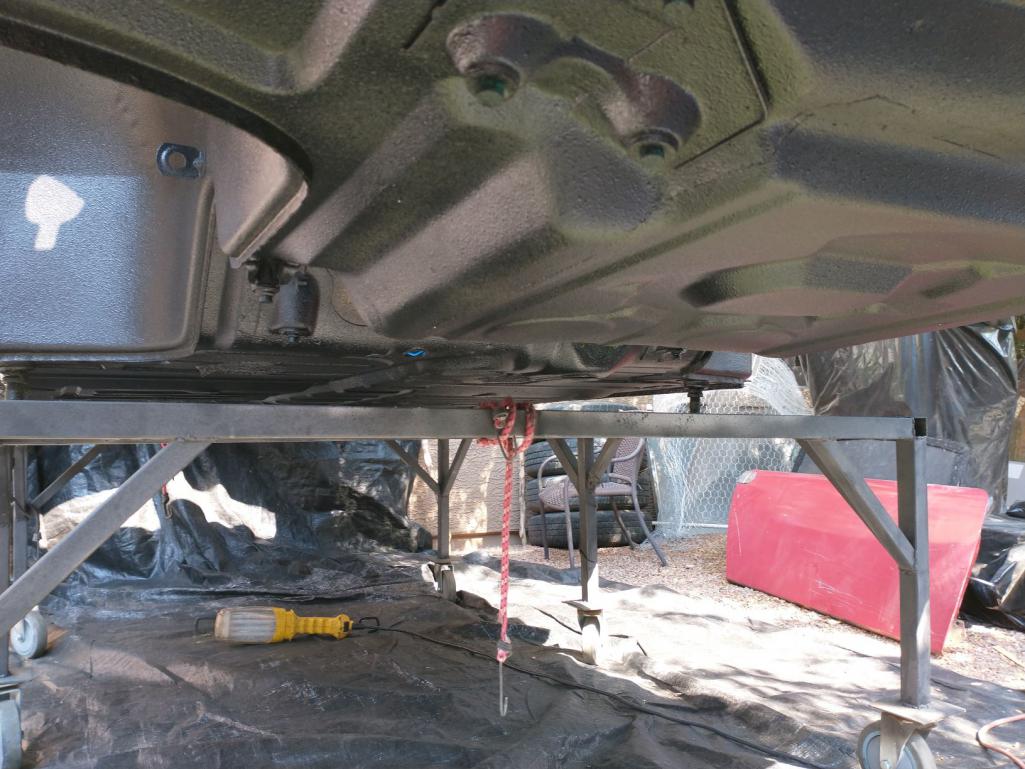 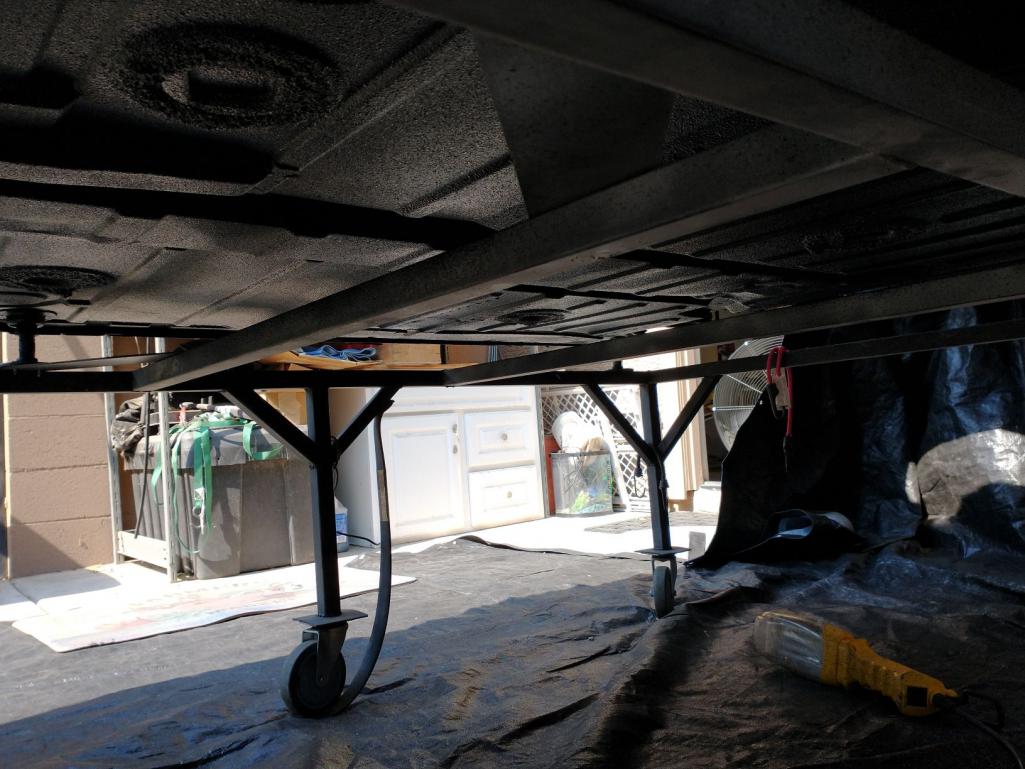 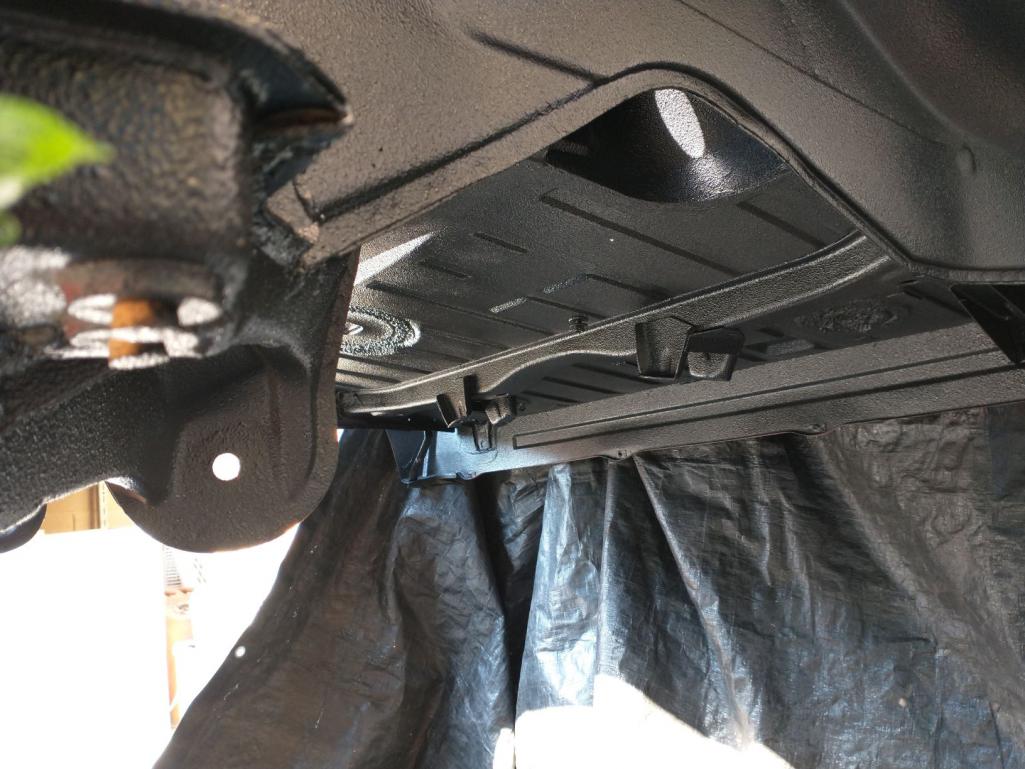 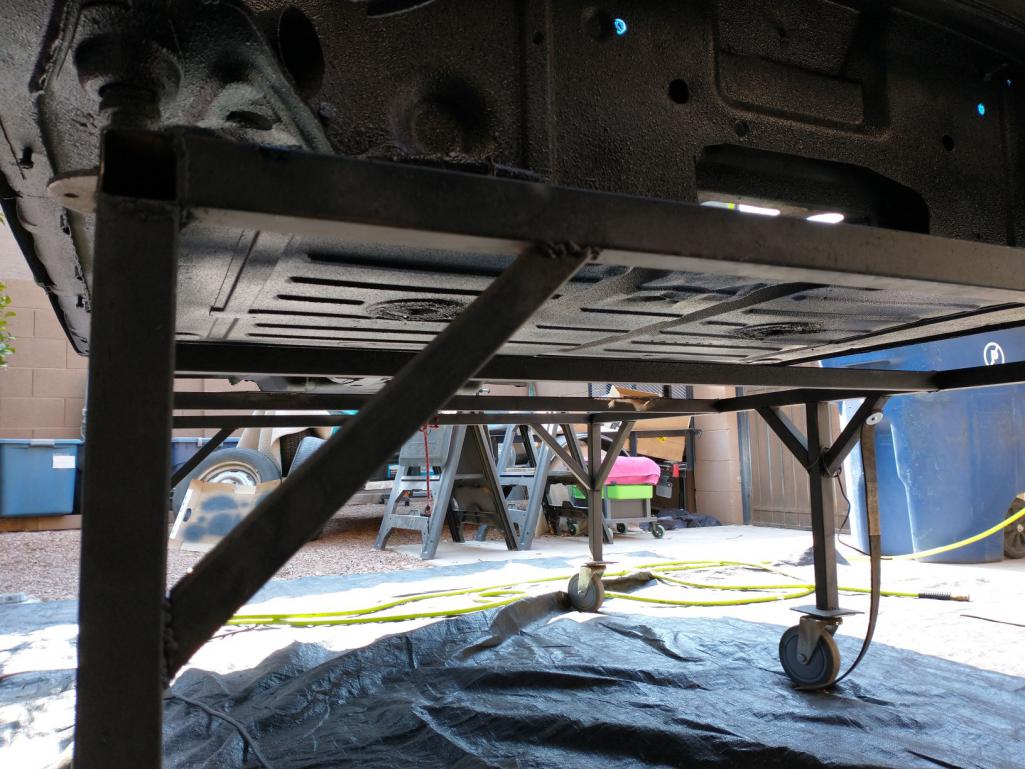 I really like how it came out! So much so, that I ordered a 2nd Raptor kit and plan to do the frunk, trunk, and inside. I may eventually scuff the Raptor and paint it body color in the frunk & trunk, but I really like the texture and durability it provides. It also seems cheaper/easier than lining areas with Dynamat. |
| Costa05 |
 Jun 17 2021, 10:31 AM Jun 17 2021, 10:31 AM
Post
#95
|
|
Member   Group: Members Posts: 320 Joined: 27-October 16 From: Phoenix, Arizona Member No.: 20,535 Region Association: Southwest Region 
|
I've been spraying one quart each morning before it gets too hot. I got the bottom covered this morning, and I still have one quart left. There are a few spots that need touch up, but not too many. It's definitely a challenge to spray with the tub on a body dolly, but totally possible. The Raptor is crazy easy to spray - I'm not sure you can really mess it up! Wearing long sleeves, gloves, respirator, etc. in 90+ degree heat is not so easy...But, it does flash off/dry really quickly!     I really like how it came out! So much so, that I ordered a 2nd Raptor kit and plan to do the frunk, trunk, and inside. I may eventually scuff the Raptor and paint it body color in the frunk & trunk, but I really like the texture and durability it provides. It also seems cheaper/easier than lining areas with Dynamat. Looking and making lots of progress. Congrats. |
| mgarrison |
 Jun 28 2021, 09:54 AM Jun 28 2021, 09:54 AM
Post
#96
|
|
Member   Group: Members Posts: 415 Joined: 14-February 20 From: Chandler, AZ Member No.: 23,922 Region Association: Southwest Region 
|
So, the Raptor coating did not hide my patches/repairs as much as I hoped for. Not sure if it's because of the sheen, or if I know where to look. Here's a couple examples where the patch/repair is a bit too easy to see:
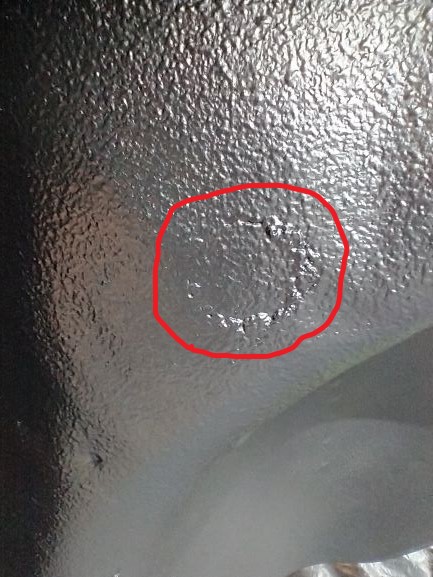 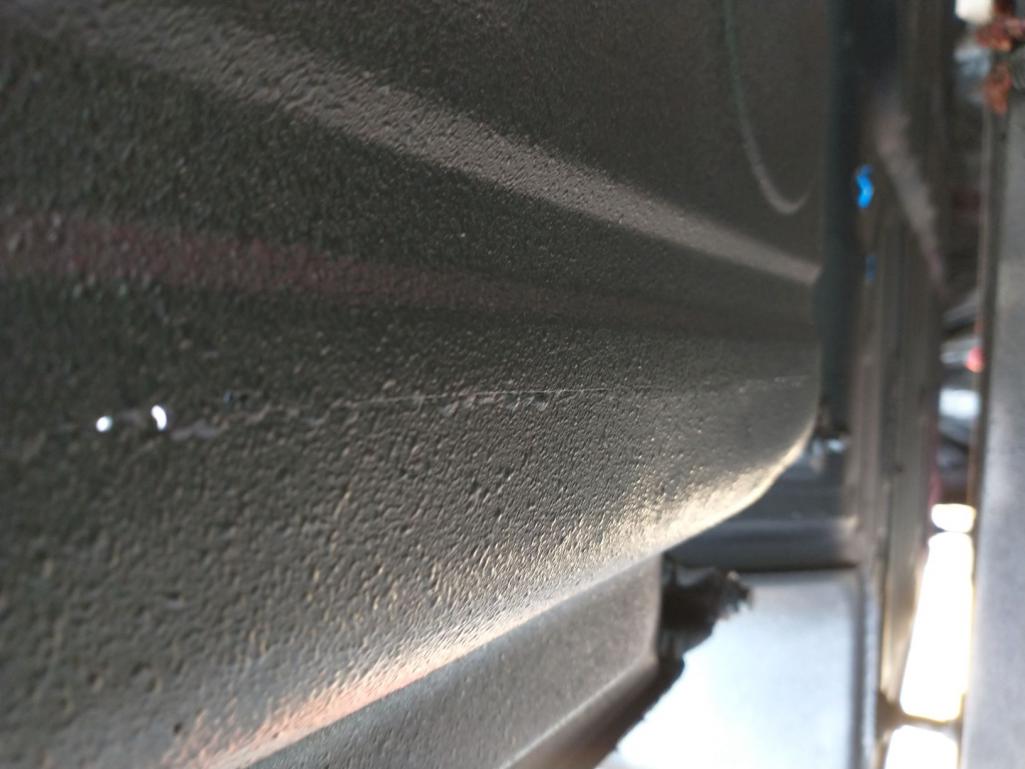 So, I ordered some body glaze and set about seeing if I could fill over and around my repairs so they are not quite so visible. I figured since I'm now working on the topside, I might as well make the effort to make things look better! (IMG:style_emoticons/default/idea.gif) Most of the work was where I replaced the frunk floor... 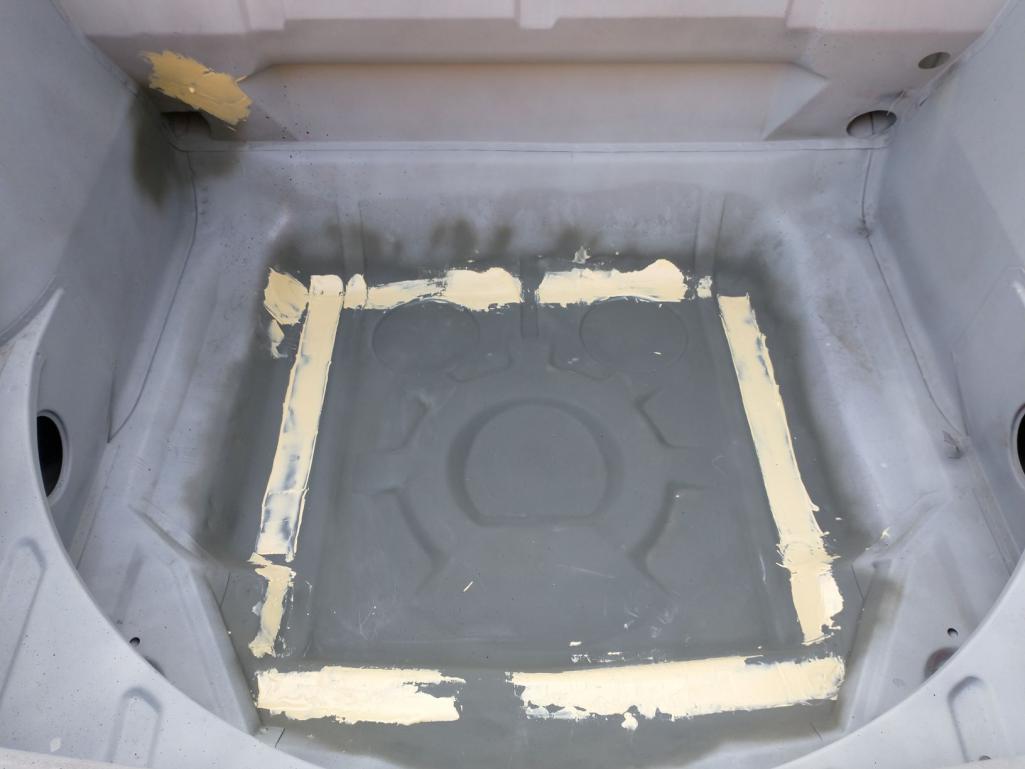 My fingers are a bit tender after all the hand sanding to blend things in/feather the glaze out. 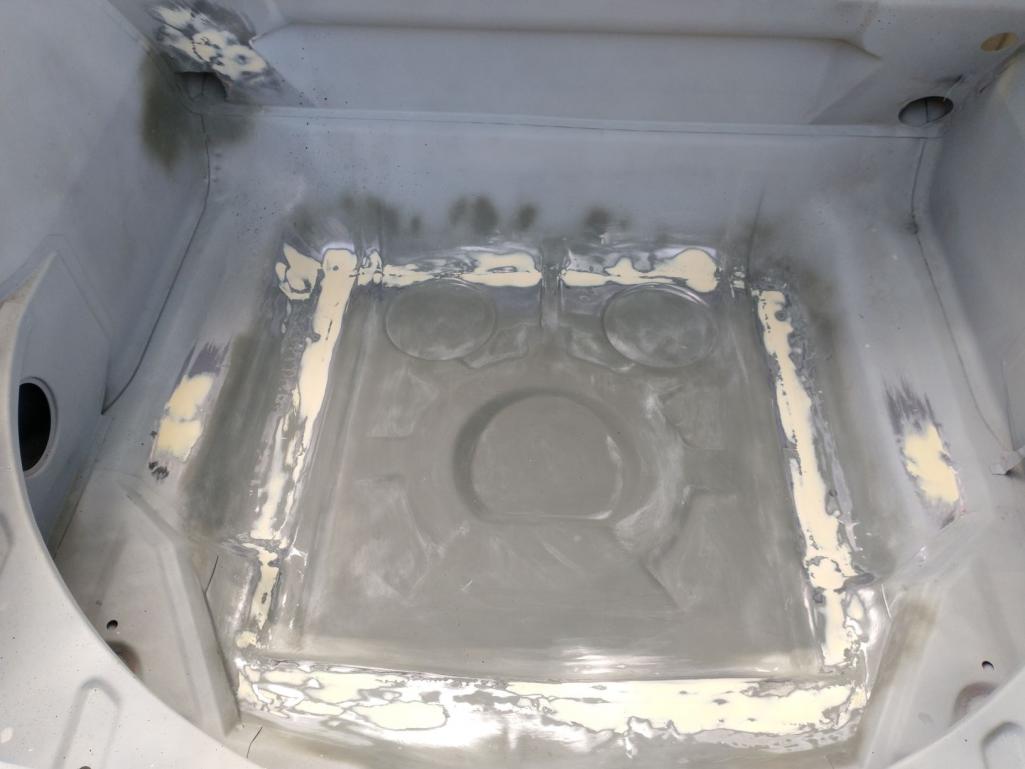 Here's a couple of spots where I did rectangle patches to replace small rusted out sections. I believe once I spray the Raptor liner over them you will be hard pressed to find them (I hope!). 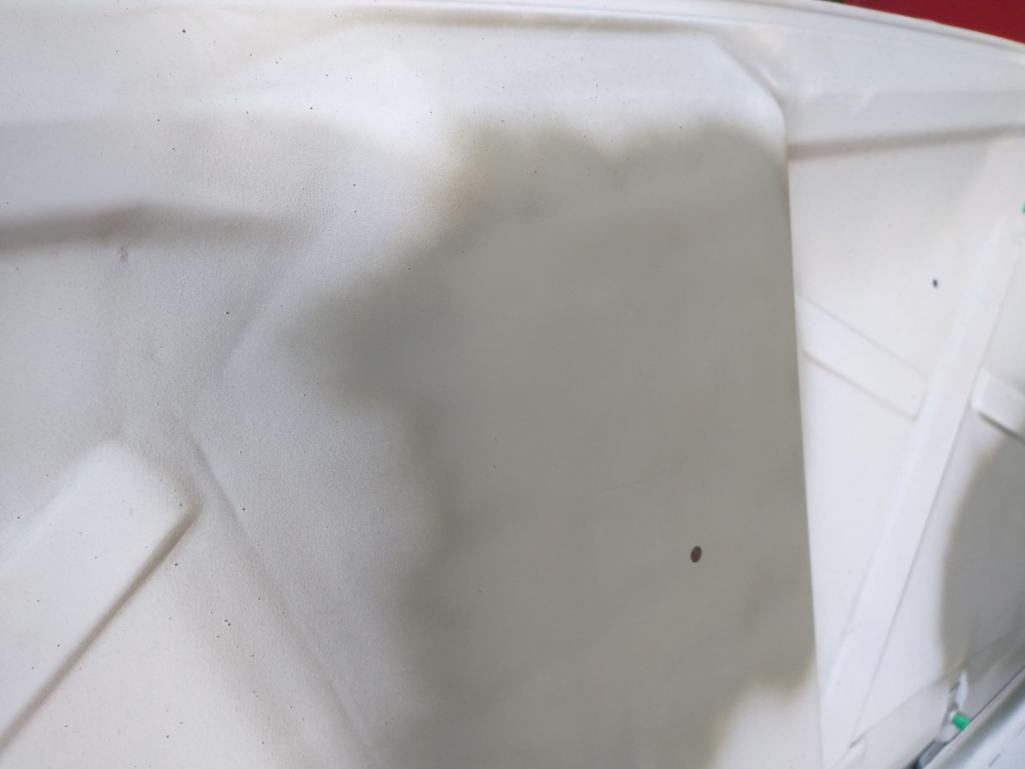 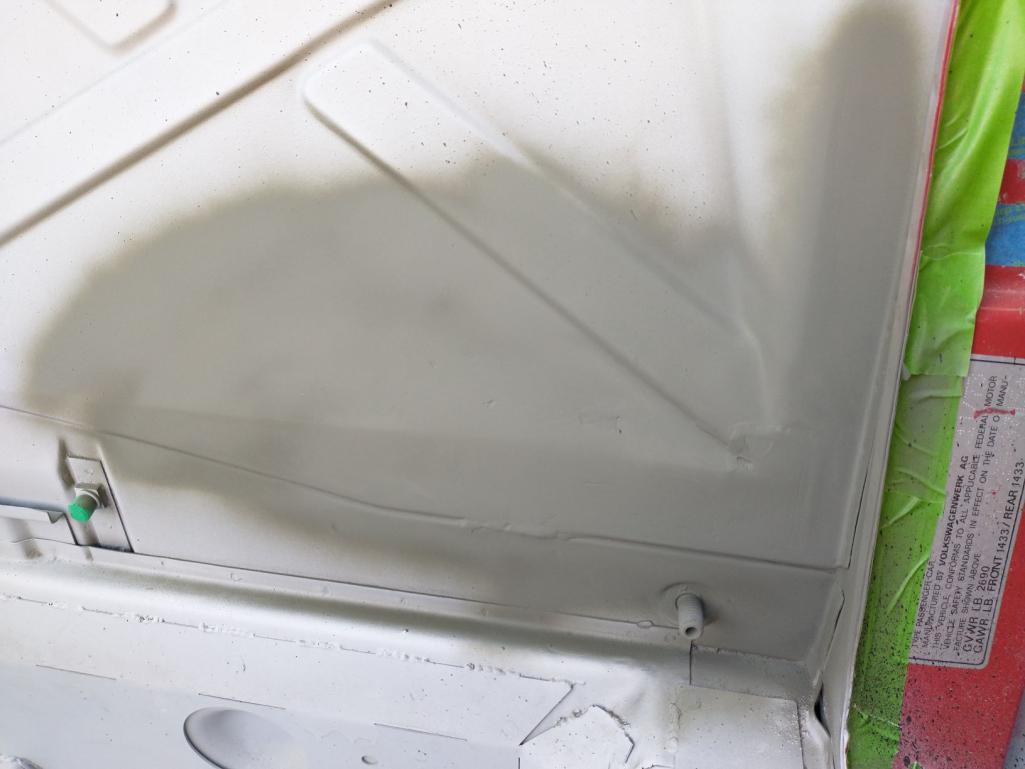 I did go back on that second one and do another layer to blend things in better. I know it will be behind the seat, but if I don't do it now, it will never get done! I went ahead and sprayed the VIN body color, and coated with clear. Does not look great, but decent enough for under the hood. 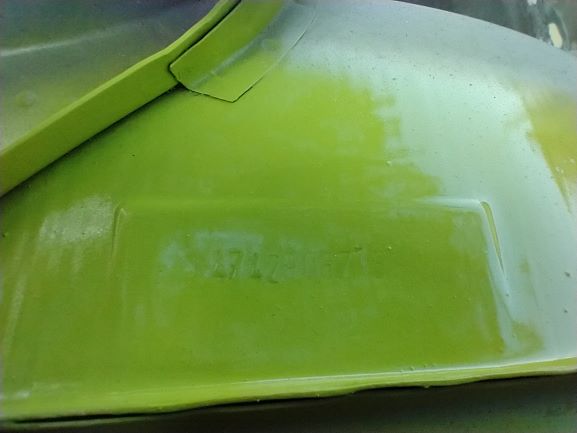 Now I just need to figure out how to mask off a clean rectangle over the VIN number so it does not get coated with Raptor and you can't read it anymore! (IMG:style_emoticons/default/blink.gif) I spent hours yesterday in 112 degree heat masking everything off so I could spray the Raptor in the frunk, trunk, and interior early this morning...Only to wake up to 25mph wind and rain on the way. Chance of rain every day this week. (IMG:style_emoticons/default/headbang.gif) Oh well, we really need the rain... |
| mgarrison |
 Jul 4 2021, 06:02 PM Jul 4 2021, 06:02 PM
Post
#97
|
|
Member   Group: Members Posts: 415 Joined: 14-February 20 From: Chandler, AZ Member No.: 23,922 Region Association: Southwest Region 
|
Finally had a morning with little wind, so I gave it a go spraying the Raptor. It tried to rain on me a couple of times, but was not enough to cause any issues, thankfully. I got the trunk and engine bay all sprayed.
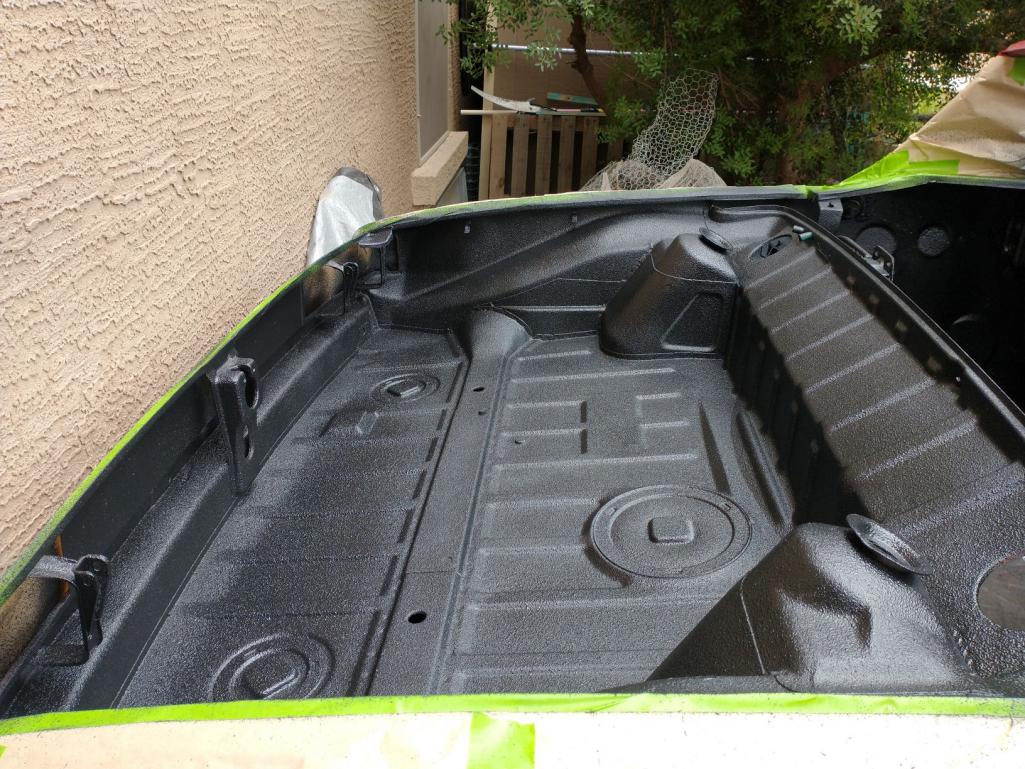 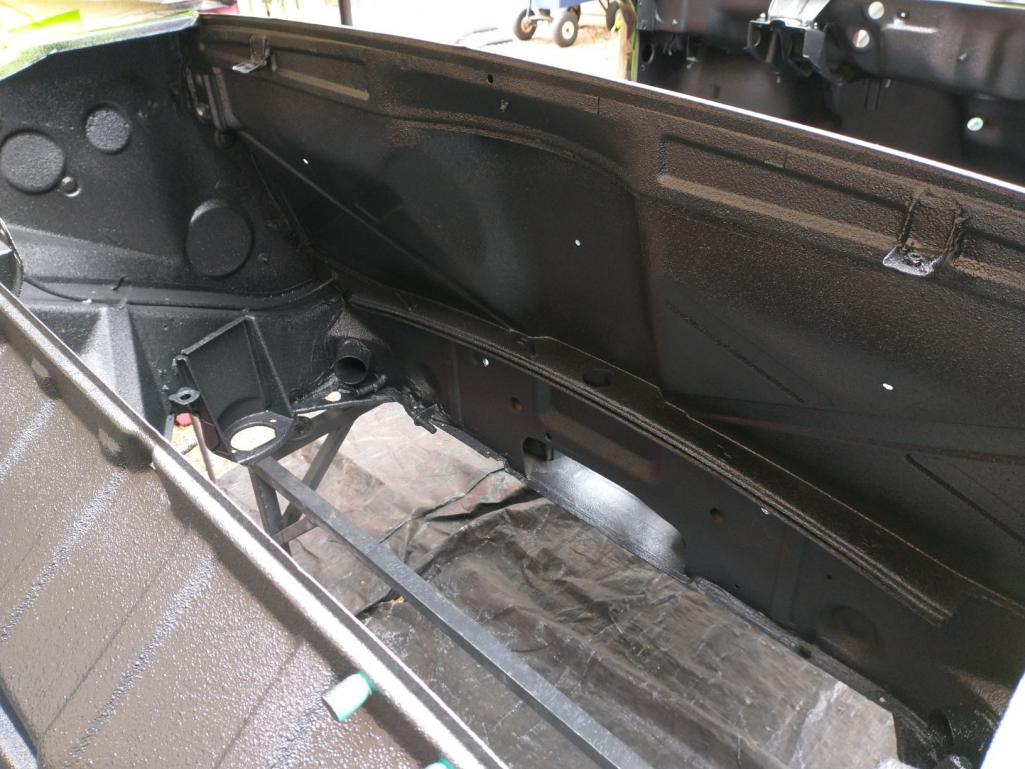 Cleaned the gun, and then mixed up another quart for the cabin. 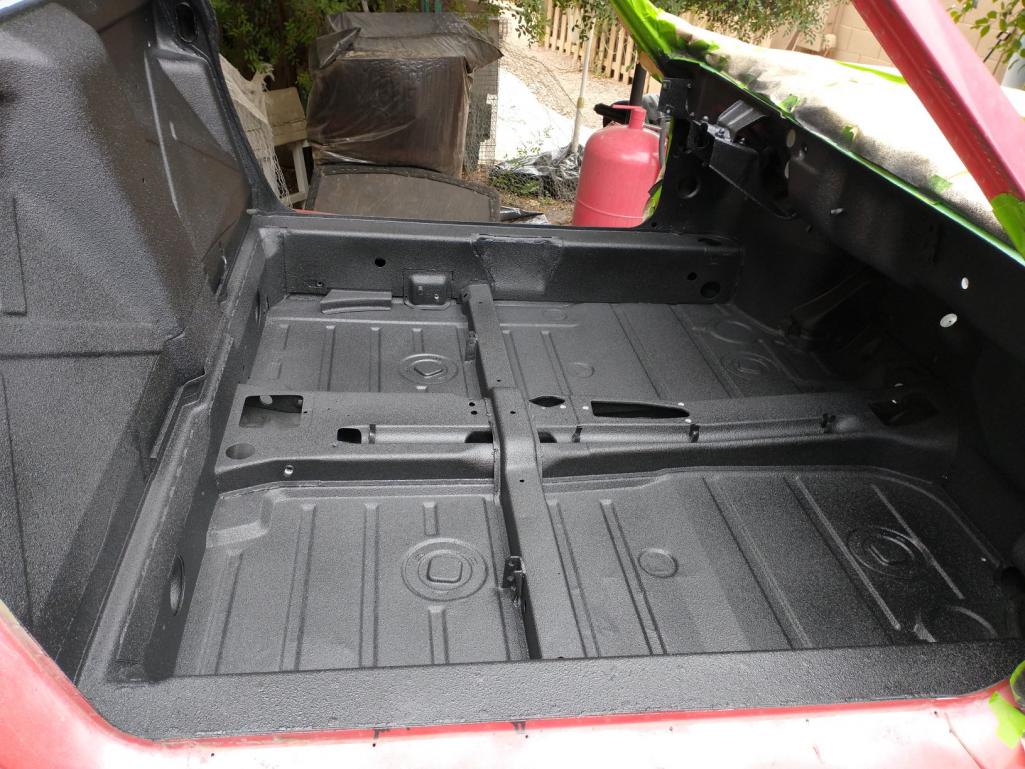 Cleaned the gun between each quart, and used my last quart on the gas tank area & frunk. Almost made it, but not quite (IMG:style_emoticons/default/mad.gif) 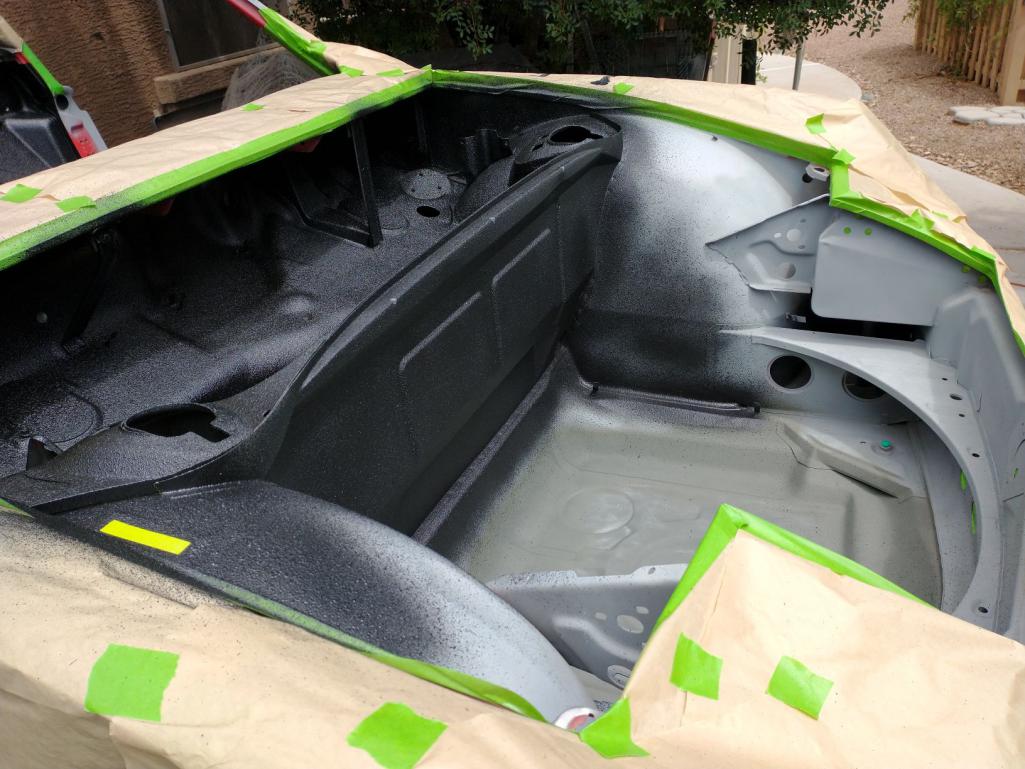 I ordered a couple more quarts to finish things up; need to touch up a couple spots in the gas tank area, finish the frunk, and still need to spray the rockers. I started filling all the divots, lines, scratches, etc. in the rockers. Lots of filling and sanding! 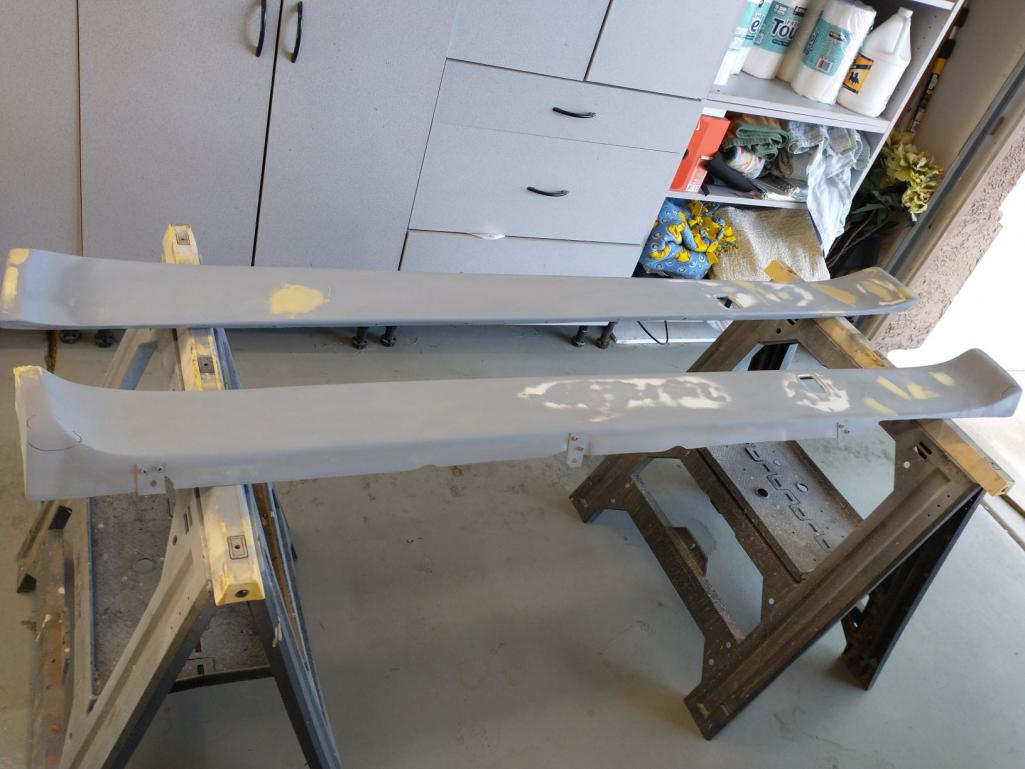 I will take what progress I can get! (IMG:style_emoticons/default/brain.gif) |
| Mayne |
 Jul 5 2021, 06:17 AM Jul 5 2021, 06:17 AM
Post
#98
|
|
Member   Group: Members Posts: 254 Joined: 28-February 17 From: NM Member No.: 20,880 Region Association: None |
Impressive work! Are you going to spray the areas with liner body color or leave them black?
|
| mgarrison |
 Jul 5 2021, 12:01 PM Jul 5 2021, 12:01 PM
Post
#99
|
|
Member   Group: Members Posts: 415 Joined: 14-February 20 From: Chandler, AZ Member No.: 23,922 Region Association: Southwest Region 
|
Most likely will leave them black. But, if after I get it painted I dont like the look, I can scuff the Raptor liner with a scotch bright pad and then paint body color. I don't have an engine or trans, and will be installing a Subaru driveline, so not really worried about staying original...
|
| Mowog4 |
 Jul 8 2021, 09:10 PM Jul 8 2021, 09:10 PM
Post
#100
|
|
Member   Group: Members Posts: 361 Joined: 2-November 15 From: Mesa AZ Member No.: 19,325 Region Association: None 
|
I am enjoying the build, I am in Mesa with a similar car, look forward to seeing it at the Pavilions.
|
  |
5 User(s) are reading this topic (4 Guests and 0 Anonymous Users)
1 Members: crwoods

|
Lo-Fi Version | Time is now: 18th February 2026 - 01:53 PM |
Invision Power Board
v9.1.4 © 2026 IPS, Inc.


