|
|
|
Porsche, and the Porsche crest are registered trademarks of Dr. Ing. h.c. F. Porsche AG.
This site is not affiliated with Porsche in any way. Its only purpose is to provide an online forum for car enthusiasts. All other trademarks are property of their respective owners. |
|
|

  |

| Morph914 |
 Nov 18 2021, 08:50 PM Nov 18 2021, 08:50 PM
Post
#121
|
|
Member  Group: Members Posts: 435 Joined: 22-August 16 From: St Augustine, FL Member No.: 20,326 Region Association: South East States |
Jim, you are more than welcome! This forum is the best! I was fortunate to follow several builds here to help me out in a big way. The least I could do was to give back by posting some of my work.
Good luck with your ‘70! Cheers, John |
   |

 
|
| pfreiburger |
Nov 18 2021, 10:52 PM
Post
#122
|
|
Member Group: Members Posts: 128 Joined: 6-October 20 From: Fond du Lac, WI Member No.: 24,738 Region Association: None |
Really nice work, everything on your car looks great. Your write up has been appreciated as well. Looking forward to seeing it on the road.
|
|
|
|
| tygaboy |
Nov 19 2021, 09:09 AM
Post
#123
|
|
914 Guru Group: Members Posts: 5,692 Joined: 6-October 15 From: Petaluma, CA Member No.: 19,241 Region Association: Northern California |
John - WOW! Your car looks wonderful! Great job and thanks for documenting.
|
|
|
|
| Morph914 |
Nov 19 2021, 01:13 PM
Post
#124
|
|
Member Group: Members Posts: 435 Joined: 22-August 16 From: St Augustine, FL Member No.: 20,326 Region Association: South East States |
Thank you! Do you have any ideas on how to remedy getting my trunk lid open. I must have put the lock plunger in the wrong orientation after disassembling and cleaning and now I can’t open the lid. (IMG:style_emoticons/default/headbang.gif)
By the way, love the new BMW. Because two projects (that I know of)were not enough… (IMG:style_emoticons/default/biggrin.gif) Cheers, John |
|
|
|
| Dion |
Nov 19 2021, 01:47 PM
Post
#125
|
|
RN Group: Members Posts: 2,918 Joined: 16-September 04 From: Audubon,PA Member No.: 2,766 Region Association: MidAtlantic Region |
Morph Maybe this link has useful info : http://www.914world.com/bbs2/index.php?showtopic=207951
|
|
|
|
| Morph914 |
Dec 12 2021, 08:48 PM
Post
#126
|
|
Member Group: Members Posts: 435 Joined: 22-August 16 From: St Augustine, FL Member No.: 20,326 Region Association: South East States |
Finally got the trunk lid open. I tried a golf club, a ratchet with several extensions added and taped to hold them together, and a brass rod with a bend on the end. What finally worked was the brass rod. After learning I could see through a couple of small holes at the top of the firewall I was able to get the brass rod back to the lock and release the latch.
This is the tool that finally worked. 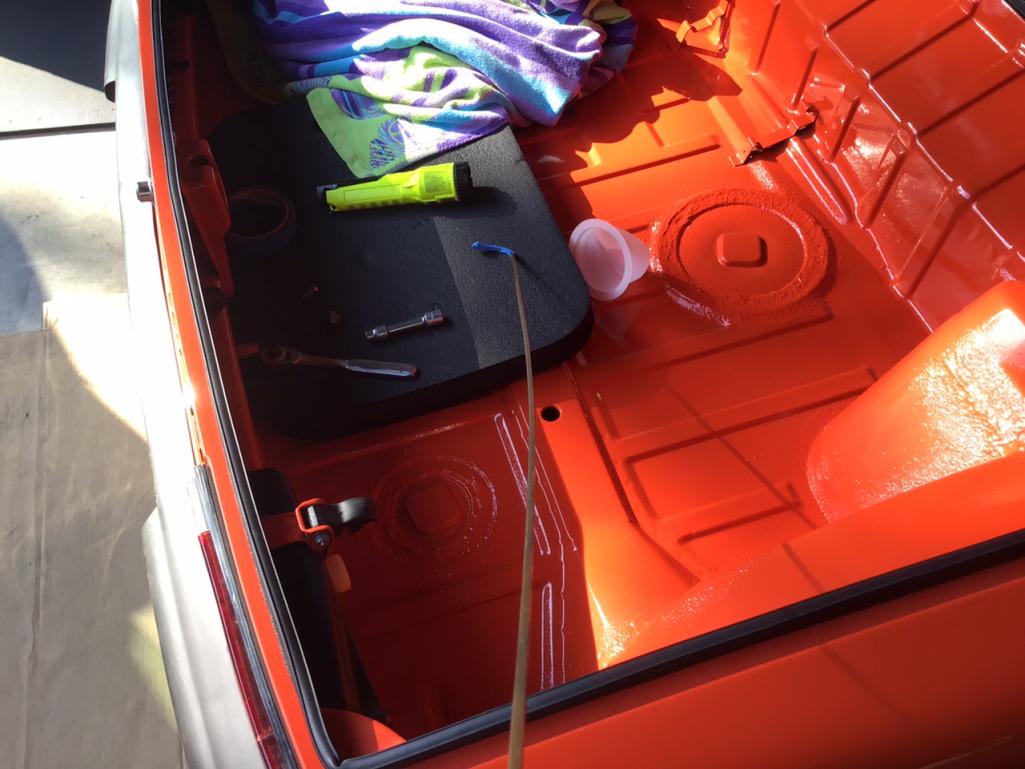 The 2 small holes at the top of the firewall made it much easier to see into the trunk. 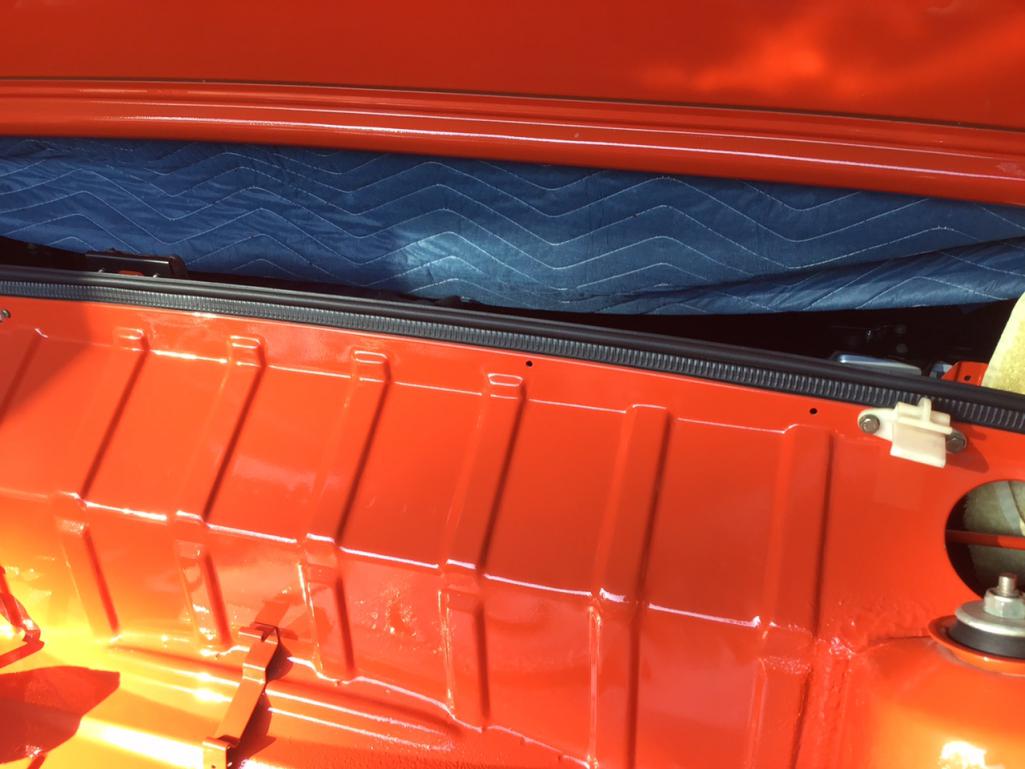 I had the release pin 180degrees out, so when I would push it in, it was doing nothing. 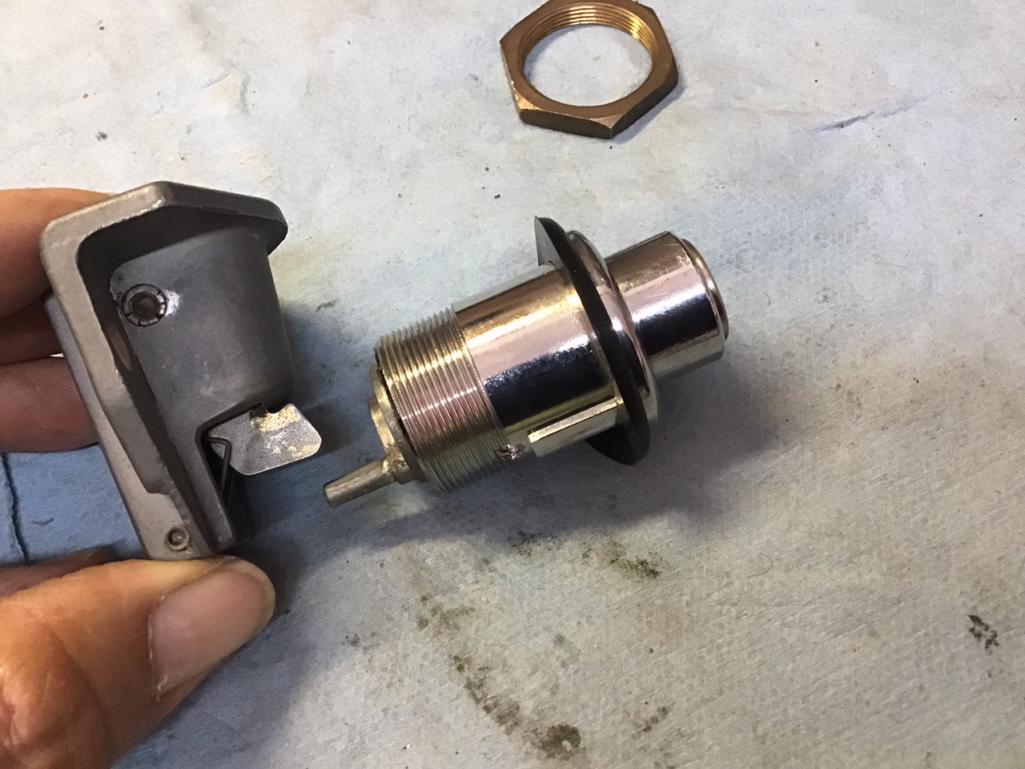 It was an easy fix after I took the lock out and flipped the release pin to the correct orientation. 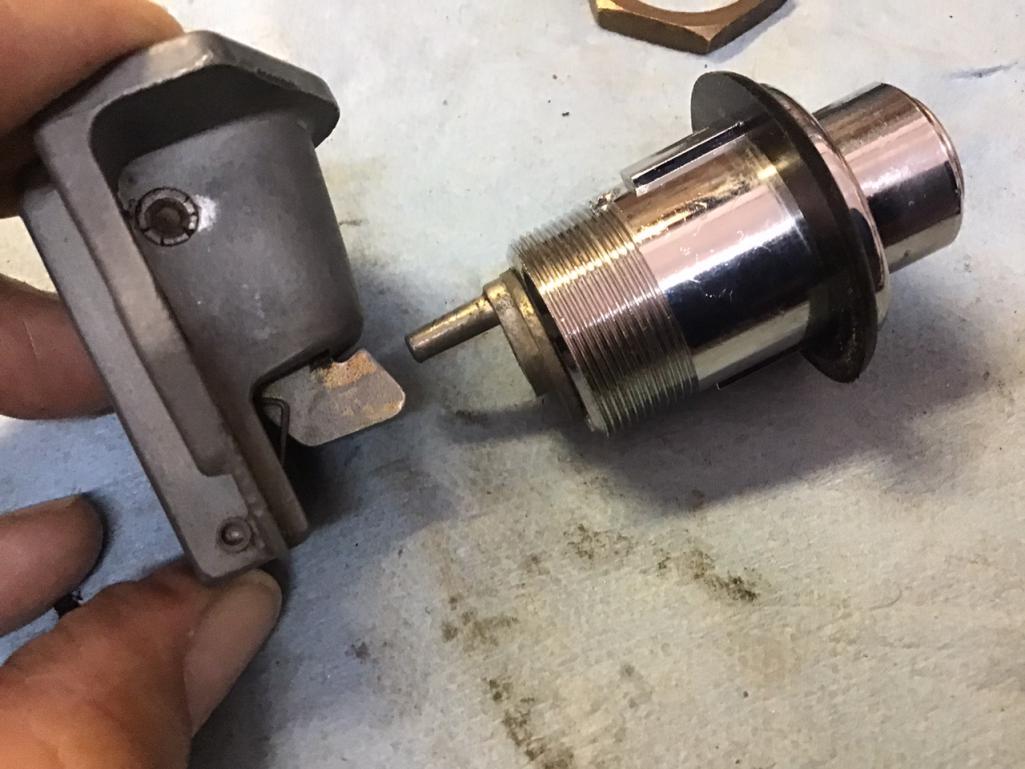 |
|
|
|
| DRPHIL914 |
Dec 14 2021, 04:57 PM
Post
#127
|
|
Dr. Phil Group: Members Posts: 5,867 Joined: 9-December 09 From: Bluffton, SC Member No.: 11,106 Region Association: South East States |
QUOTE(Morph914 @ May 5 2021, 12:28 AM)  Finally got the engine installed, what a pain. I should have purchased the engine plate that sits on the floor jack. I had the engine on my floor jack but was not able to get it stable enough to my liking, so I put it on a four wheel dolly, rolled in under with ease and then used a cherry picker to raise into place. This was my first engine install and I will do several things differently next time. Like leaving the fuel rails and hoses off, these took a beating and made things much more difficult than they needed to be. Hopefully I didn’t cut a fuel line or worse break an injector. It’s bout to get real (IMG:style_emoticons/default/aktion035.gif) Then I figured I would attach the axles to the trans and this where things went south. So the rubber bellows was not lined up correctly with the bolt holes so I proceeded to try and align them and all of a sudden one of the ball bearings drops out (IMG:style_emoticons/default/headbang.gif) then another. I tied to get them back in but it wasn’t going to happen. So I started removing the outer CV joint, but then while I was maneuvering it around to remove the bolts the axles pulls out and all the bearings fall out. So I have this huge mess, grease every where. Then I tried to get the CV joint out but the dowels had a good bite and we’re not letting go. Then I remembered, I had not torqued the stub axle bolt down, so I was able to easily tap it out and pull it and the attached CV joint out together. I think I spent most of the day dealing with this mess. Of course I had to clean everything up again, and I had no more grease or extra CV gaskets. (IMG:style_emoticons/default/headbang.gif) Some days are just going to get the better of you, this was one. oh boy! you are in good company, i also had this happen on getting my new motor back in the car in September, ended up taking the cv out just like you did and i took it completely apart and reassmebled it before reinstalling it. It was not as bad as i thought it would be. Car is looking great, hope to see you out and about in Jax/St. Augustine/daytona soon!! I need to come down for the next Caffeine and Octane show. Do you have a goal date in mind for road test? |
|
|
|
| Morph914 |
Dec 16 2021, 09:30 AM
Post
#128
|
|
Member Group: Members Posts: 435 Joined: 22-August 16 From: St Augustine, FL Member No.: 20,326 Region Association: South East States |
I’m hoping by the end of the year. I have had a hell of a time with the doors, and glass, and getting them adjusted properly. With all new seals, things don’t fit as they used to. I’m still not happy with them.
The next thing on my list is the windshield, I have not decided if I’m going to tackle this or not. I have everything to do it, including new trim, but a bit hesitant on this task. Cheers, and Merry Christmas! John |
|
|
|
| 9146C |
Dec 16 2021, 09:43 AM
Post
#129
|
|
Member Group: Members Posts: 228 Joined: 14-September 19 From: US Member No.: 23,460 Region Association: None |
The windshield replacement is not a particularly difficult task (having just replaced my original windshield recently...single-handed).
Assuming you've also purchased the new trim clips and spacers? Pick up a couple of these suction cups from Harbor Freight (or similar): https://www.harborfreight.com/4-23-in-dual-...5-lb-57501.html Keep in mind, there are likely fewer and fewer auto glass installers that are actually familiar with butyl tape windshield installations. You'll probably get someone doing this for the first time also. Plenty of videos available on YouTube showing how to do this. |
|
|
|
| DRPHIL914 |
Dec 16 2021, 10:00 AM
Post
#130
|
|
Dr. Phil Group: Members Posts: 5,867 Joined: 9-December 09 From: Bluffton, SC Member No.: 11,106 Region Association: South East States |
QUOTE(Morph914 @ Dec 16 2021, 10:30 AM) I’m hoping by the end of the year. I have had a hell of a time with the doors, and glass, and getting them adjusted properly. With all new seals, things don’t fit as they used to. I’m still not happy with them. The next thing on my list is the windshield, I have not decided if I’m going to tackle this or not. I have everything to do it, including new trim, but a bit hesitant on this task. Cheers, and Merry Christmas! John John, I called our local porsche dealer , they have a guy that does all of the windshield installation for the dealership all new and old. I ordered my new glass from Porsche, OEM, they went by and picked it up and brought it to my house and installed it., Glass was $500($50off PCA discount) and they charged me $100 for install, since i had the butyl already too. Check with the dealership they might do the same thing , or have a name of an independent that would install it for you. |
|
|
|
| Morph914 |
Dec 17 2021, 07:00 PM
Post
#131
|
|
Member Group: Members Posts: 435 Joined: 22-August 16 From: St Augustine, FL Member No.: 20,326 Region Association: South East States |
QUOTE(9146C @ Dec 16 2021, 10:43 AM) The windshield replacement is not a particularly difficult task (having just replaced my original windshield recently...single-handed). Assuming you've also purchased the new trim clips and spacers? Pick up a couple of these suction cups from Harbor Freight (or similar): https://www.harborfreight.com/4-23-in-dual-...5-lb-57501.html Keep in mind, there are likely fewer and fewer auto glass installers that are actually familiar with butyl tape windshield installations. You'll probably get someone doing this for the first time also. Plenty of videos available on YouTube showing how to do this. I do have all the necessary tidbits, but I do need to look into the suction cups. When I look at the top of the windshield it appears to me that the interior trim piece is too proud to let the windshield seat properly. I’ll have to watch the videos. Cheers, John 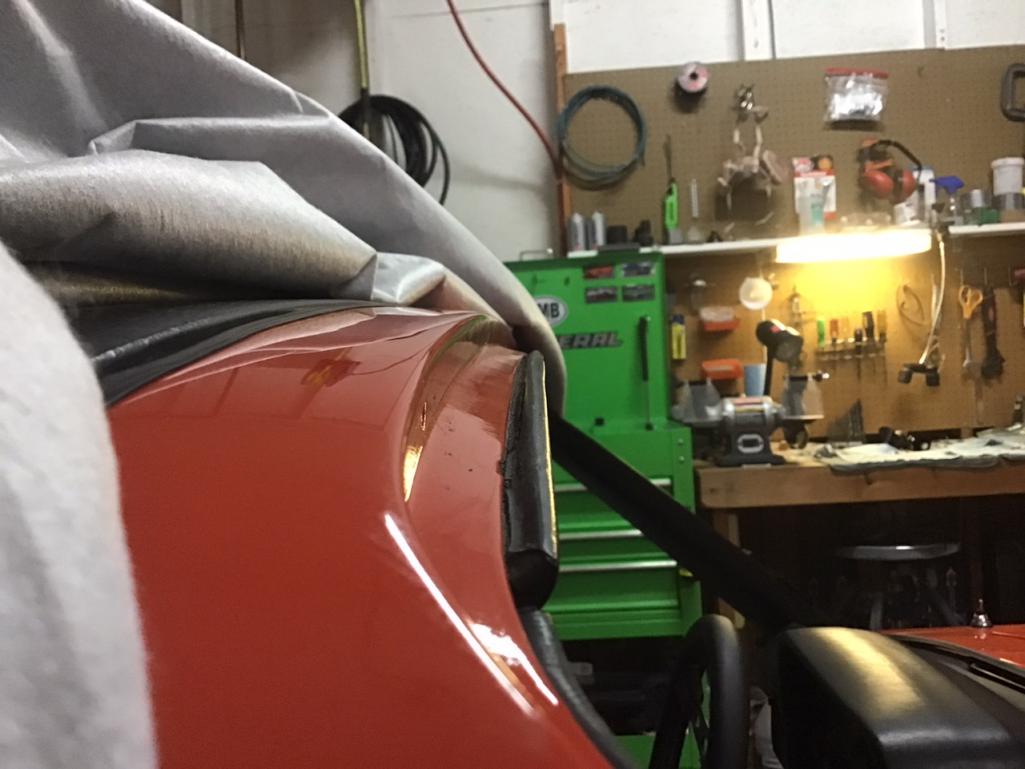 |
|
|
|
| Morph914 |
Dec 17 2021, 07:03 PM
Post
#132
|
|
Member Group: Members Posts: 435 Joined: 22-August 16 From: St Augustine, FL Member No.: 20,326 Region Association: South East States |
QUOTE(DRPHIL914 @ Dec 16 2021, 11:00 AM) QUOTE(Morph914 @ Dec 16 2021, 10:30 AM) I’m hoping by the end of the year. I have had a hell of a time with the doors, and glass, and getting them adjusted properly. With all new seals, things don’t fit as they used to. I’m still not happy with them. The next thing on my list is the windshield, I have not decided if I’m going to tackle this or not. I have everything to do it, including new trim, but a bit hesitant on this task. Cheers, and Merry Christmas! John John, I called our local porsche dealer , they have a guy that does all of the windshield installation for the dealership all new and old. I ordered my new glass from Porsche, OEM, they went by and picked it up and brought it to my house and installed it., Glass was $500($50off PCA discount) and they charged me $100 for install, since i had the butyl already too. Check with the dealership they might do the same thing , or have a name of an independent that would install it for you. Phil, not a bad idea. However I am reusing my windshield so not sure if they would be willing to install my old windshield. Might be worth a call. |
|
|
|
| Morph914 |
Jan 26 2022, 02:02 PM
Post
#133
|
|
Member Group: Members Posts: 435 Joined: 22-August 16 From: St Augustine, FL Member No.: 20,326 Region Association: South East States |
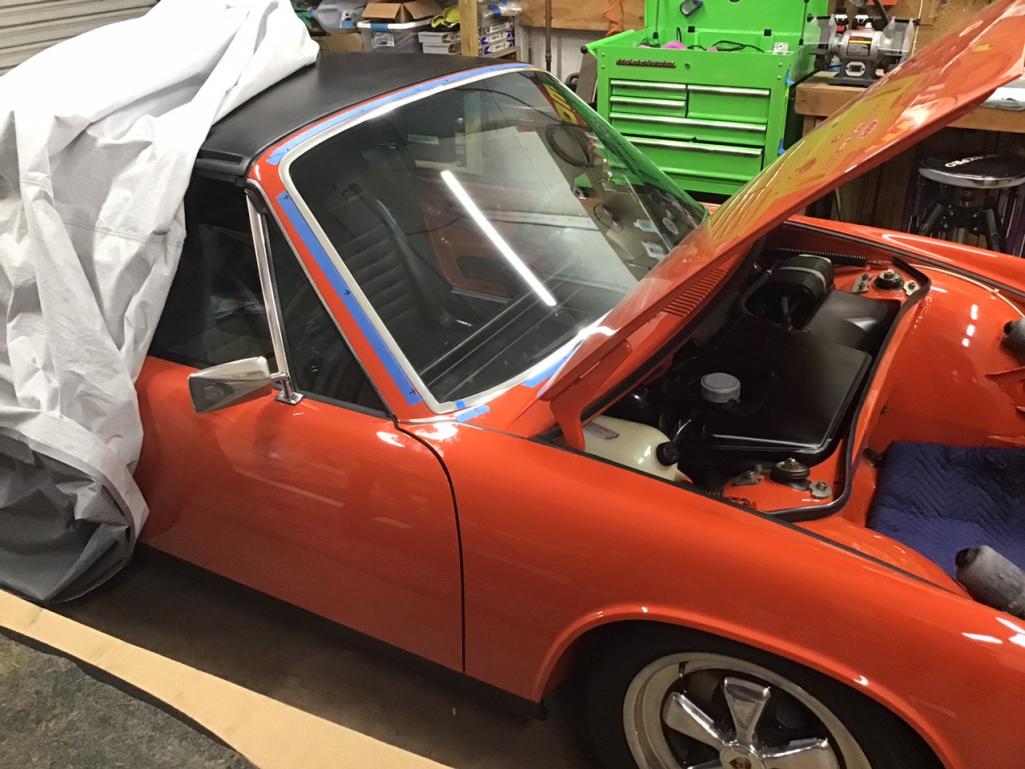
Well it’s starting to look like a car again. I decided to tackle the windshield install, the butyl tape and glass is fairly easy. The pain started when I tried to install the trim (IMG:style_emoticons/default/headbang.gif) it went well for the firs several clips, but when I got over to the passenger side near the top the glass was sitting up against the clip not allowing the trim to slide in and lock. And it was spaced evenly all the way around but there were three or four areas where the glass was up against the clip. Any way after much pain, suffering, walking away for a couple of days, a few modifications, I have the trim pretty much in, the lower corner on the driver side did not seat all the way in, but at this point I’m not willin to give it a tug to see if it’s locked in. If it’s not, a bit of driving will make it pop loose, then I will deal with it.
 I boogered up the corner piece of the trim while trying to get it in. (IMG:style_emoticons/default/headbang.gif) 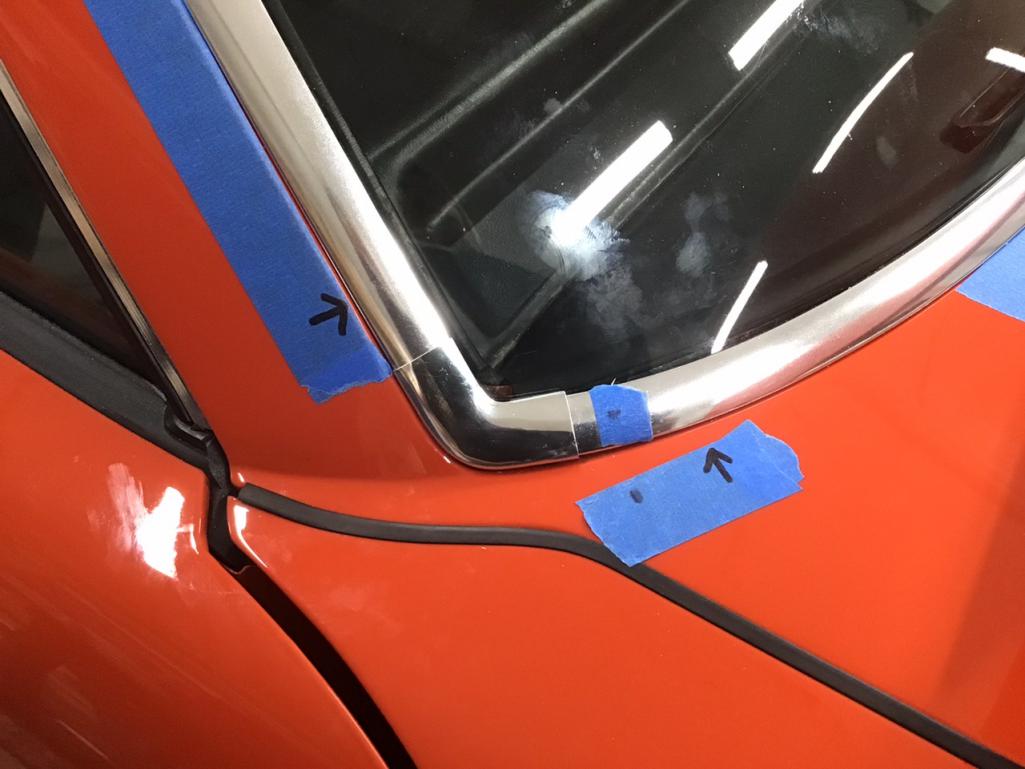 Drivers side at the bottom still not seating properly. 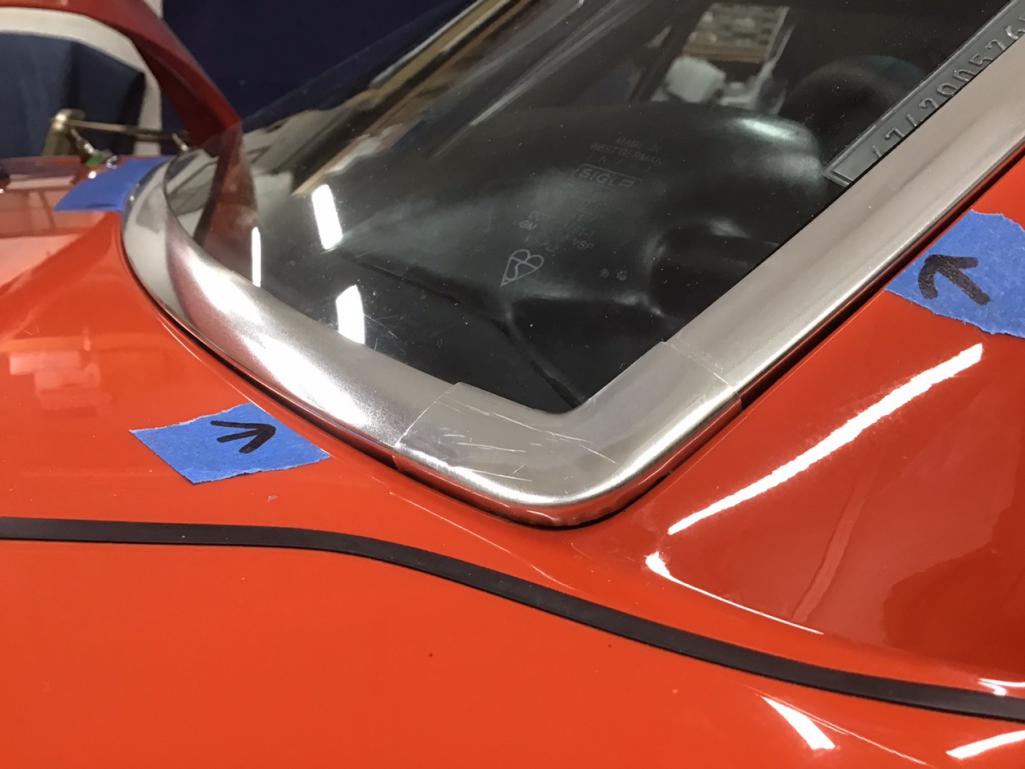 |
|
|
|
| Morph914 |
Jan 26 2022, 02:17 PM
Post
#134
|
|
Member Group: Members Posts: 435 Joined: 22-August 16 From: St Augustine, FL Member No.: 20,326 Region Association: South East States |
I know it’s bass ackwards, but I wanted to show how I installed the new clips.
I used a deep socket to set the clip.  Then used a punch to push in the pin and lock in place. 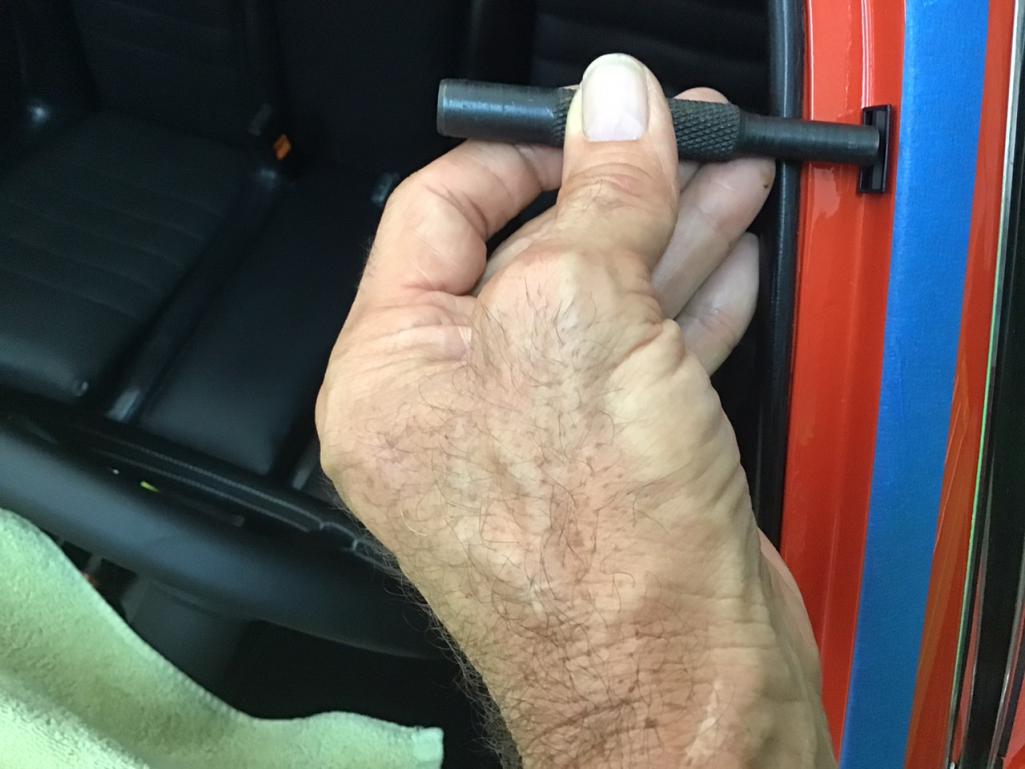 Also marked the location of all the clips so I knew where to apply the pressure when installing the trim. 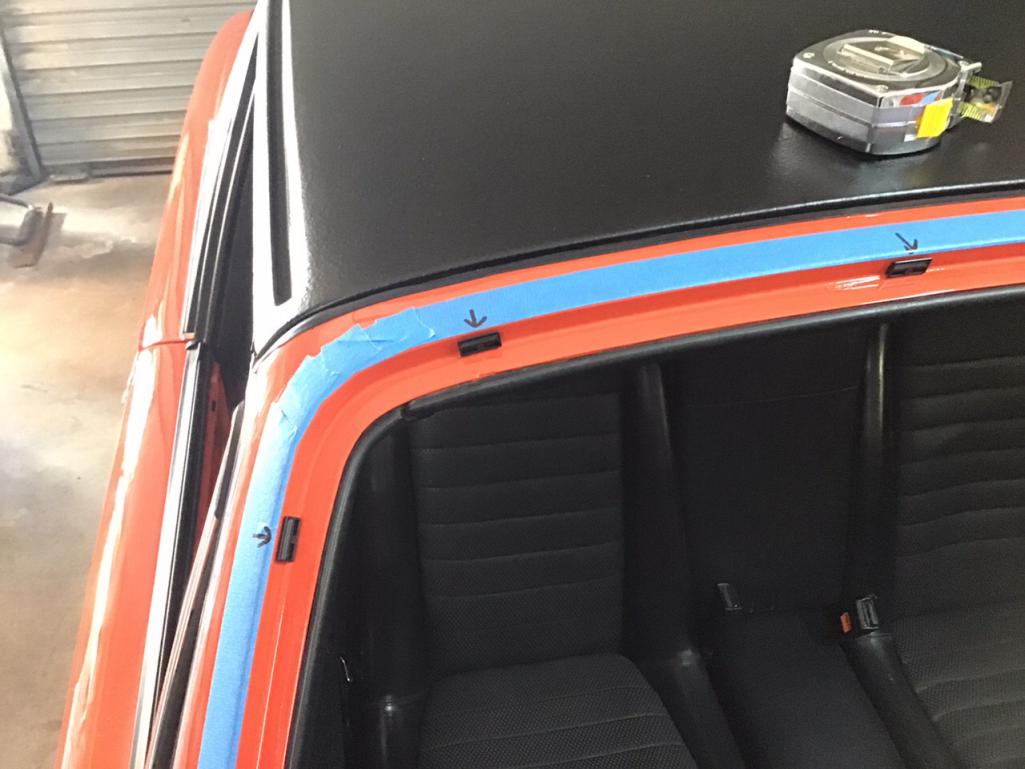 |
|
|
|
| Morph914 |
Jan 26 2022, 02:28 PM
Post
#135
|
|
Member Group: Members Posts: 435 Joined: 22-August 16 From: St Augustine, FL Member No.: 20,326 Region Association: South East States |
I’m trying to level out the front end and lower just a bit, but I’m having a bit of a problem pulling the end caps off the torsion bars. I pulled the adjusting bolt all the way out, jacked up the car to relieve any pressure, still not budging. I then took the wheel off and tried lifting the a arm up to see if that would work, again, no luck.
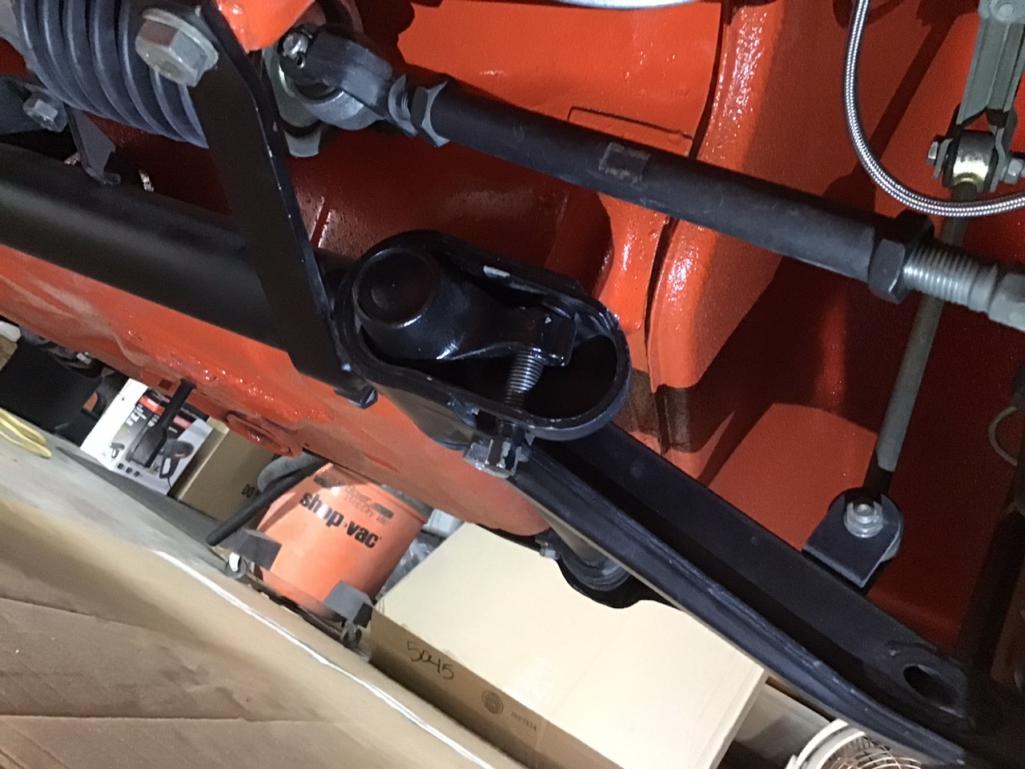 The cap seems to be wedged in at the top position 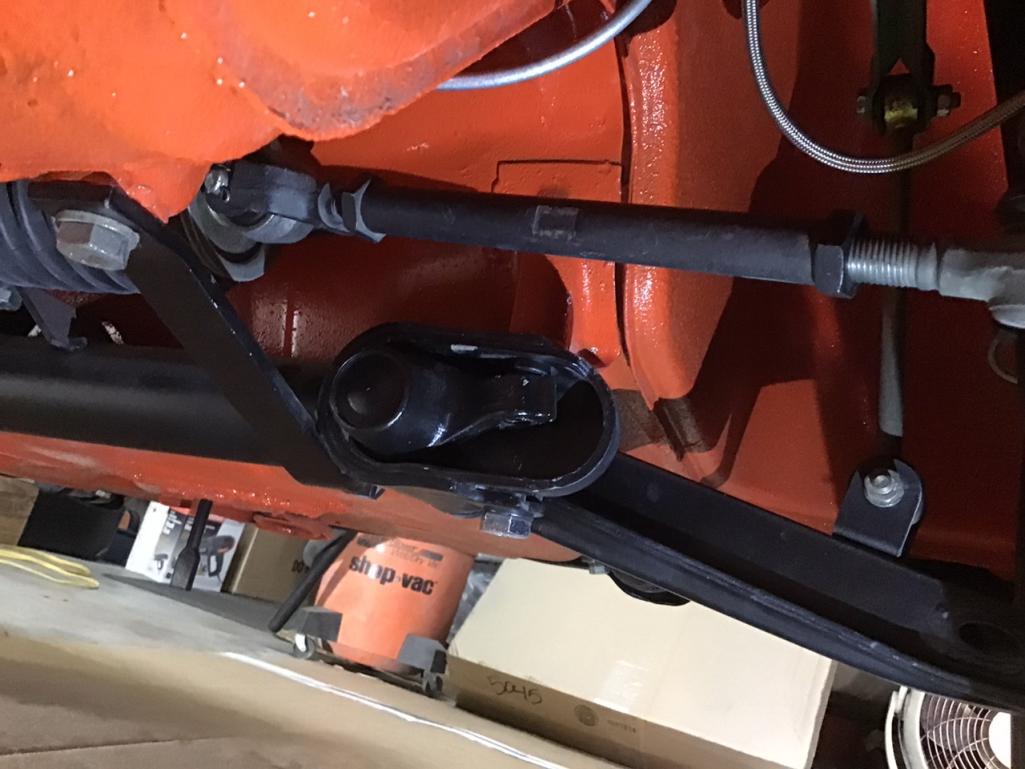 |
|
|
|
| Morph914 |
Jan 26 2022, 02:38 PM
Post
#136
|
|
Member Group: Members Posts: 435 Joined: 22-August 16 From: St Augustine, FL Member No.: 20,326 Region Association: South East States |
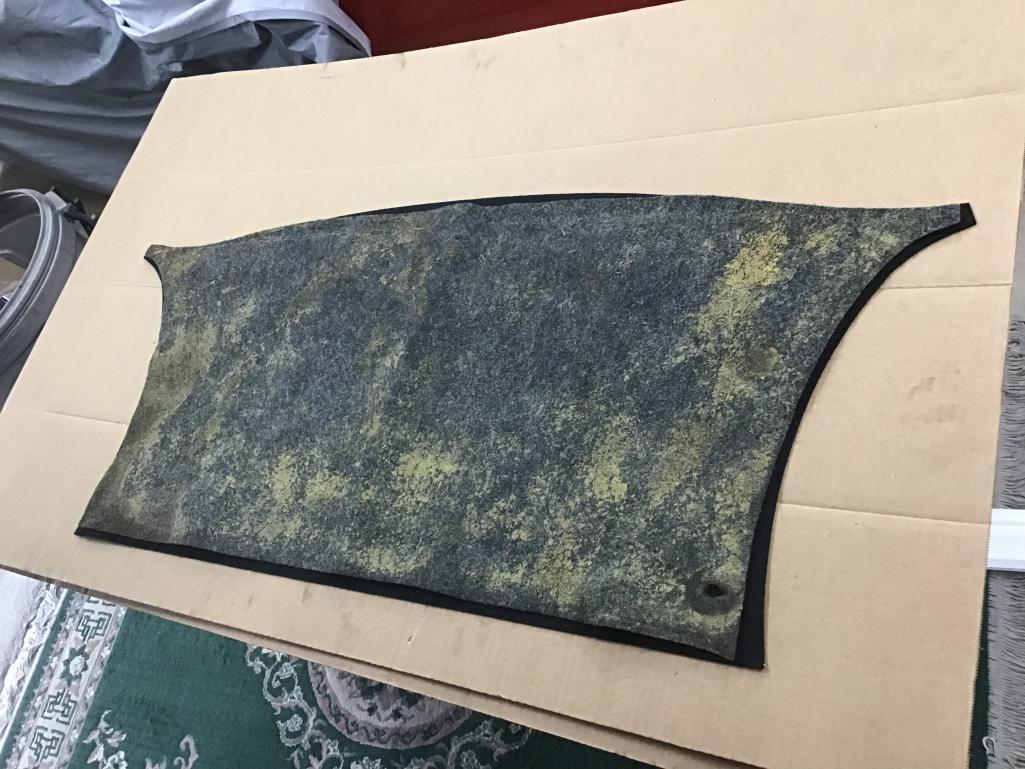
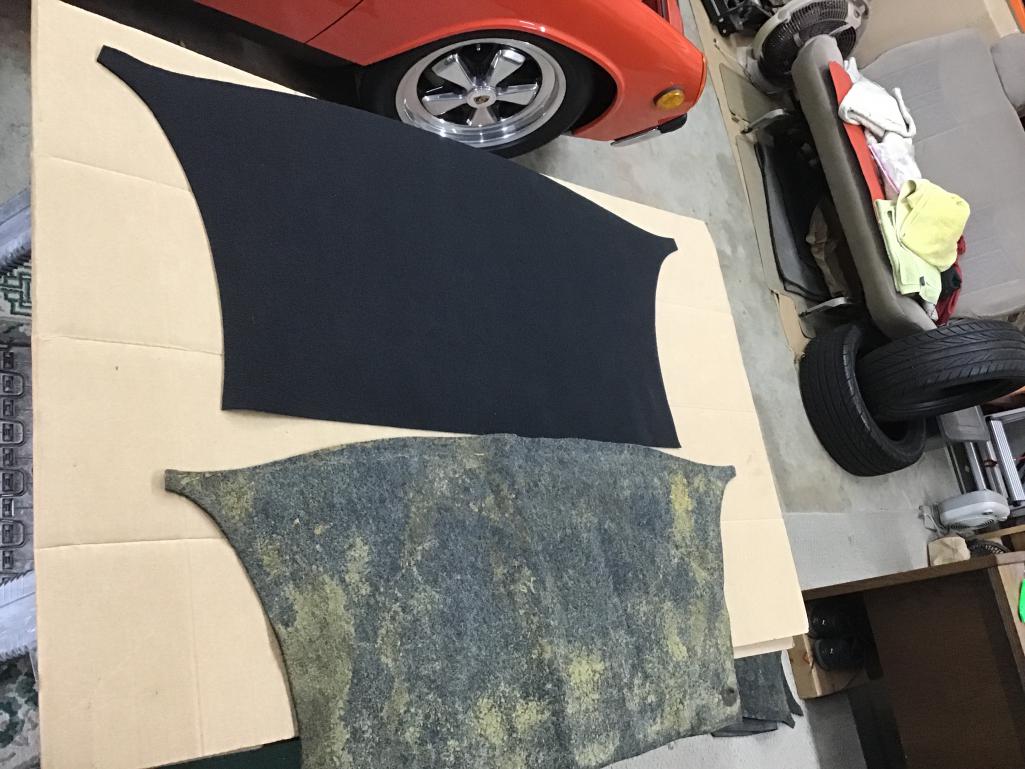
Getting ready to install the felt piece in the front trunk. This is a piece from 914 Rubber, it is bigger than the original. Has anyone had experience installing this piece? Should I trim to the original size or install as is. It is difficult to know due to the contours and uneven surfaces this covers.
  |
|
|
|
| AKFish |
Jan 29 2022, 09:40 PM
Post
#137
|
|
Newbie Group: Members Posts: 29 Joined: 10-December 18 From: Nampa, Idaho Member No.: 22,714 Region Association: Rocky Mountains |
[quote name='Morph914' date='Jan 24 2021, 06:16 PM' post='2885395']
Time to get the fan shroud cleaned up Fan shroud looks amazing, may I asked what you used to clean it? |
|
|
|
| Morph914 |
Feb 1 2022, 02:46 PM
Post
#138
|
|
Member Group: Members Posts: 435 Joined: 22-August 16 From: St Augustine, FL Member No.: 20,326 Region Association: South East States |
[quote name='AKFish' date='Jan 29 2022, 10:40 PM' post='2978327']
[quote name='Morph914' date='Jan 24 2021, 06:16 PM' post='2885395'] Time to get the fan shroud cleaned up Fan shroud looks amazing, may I asked what you used to clean it? [/quote] If I remember correctly, it was solvent and various types of brushes, wax and grease remover, then painted with a ceramic silver paint. |
|
|
|
| Morph914 |
Feb 1 2022, 03:07 PM
Post
#139
|
|
Member Group: Members Posts: 435 Joined: 22-August 16 From: St Augustine, FL Member No.: 20,326 Region Association: South East States |
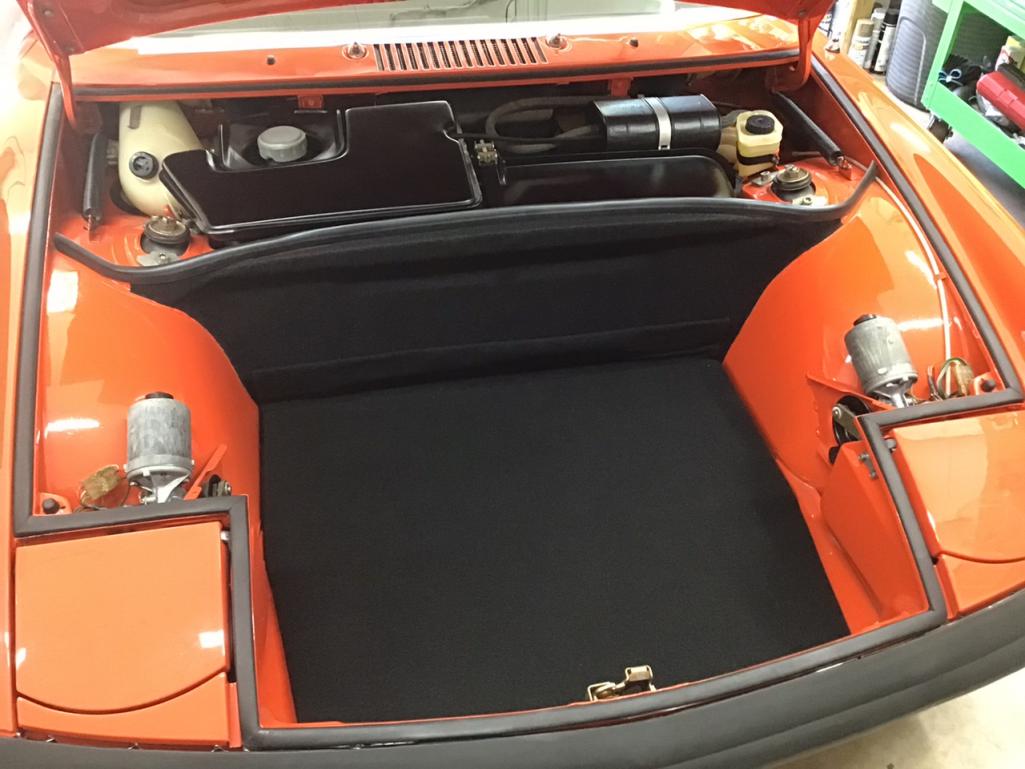
Got the felt glued on to the partition in the frunk. This was from 914 Rubber. I am mostly pleased with the results. It’s a bit tricky trying to get the felt to lay down on the top ridge. There are a couple of spots that didn’t get covered by the felt and you can see the orange paint on top, so I might try to paint these areas black.
 These are the two spots the felt didn’t cover.  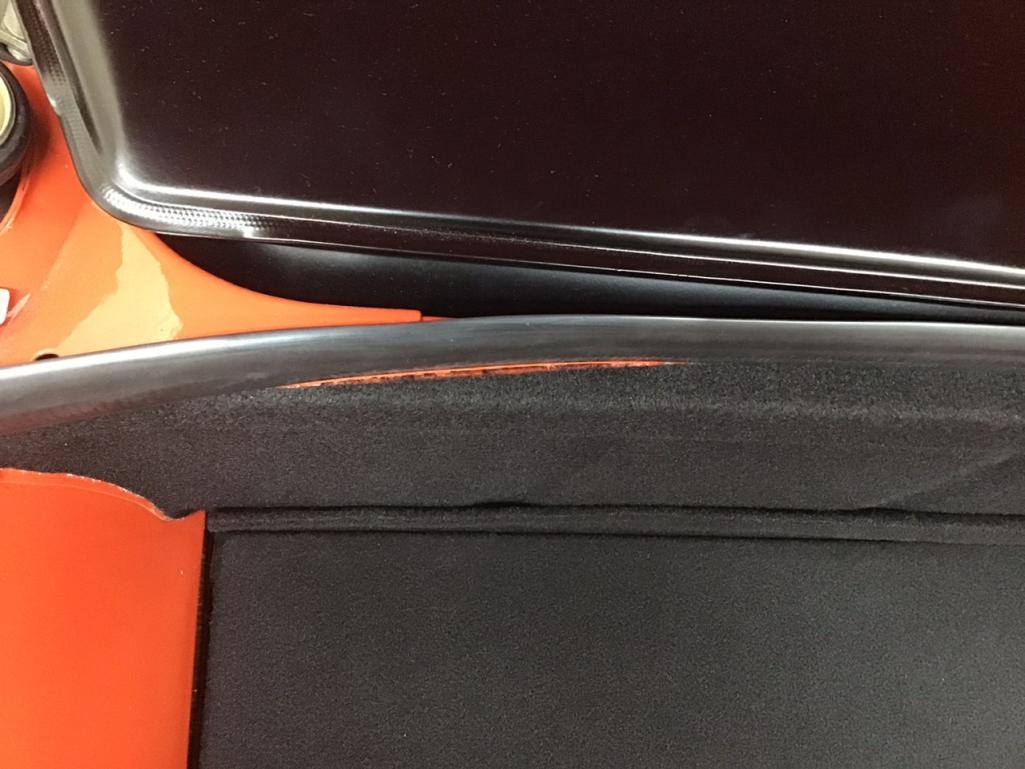 Attached thumbnail(s) 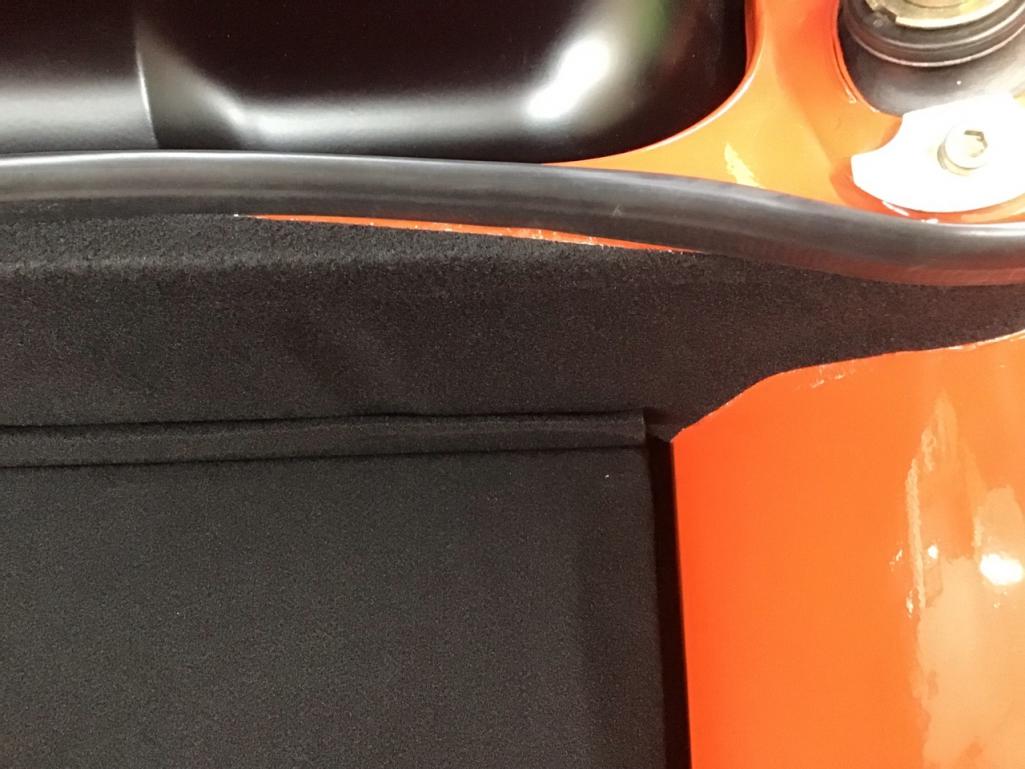
|
|
|
|
| Morph914 |
Feb 1 2022, 03:13 PM
Post
#140
|
|
Member Group: Members Posts: 435 Joined: 22-August 16 From: St Augustine, FL Member No.: 20,326 Region Association: South East States |
Added the door manufacturer/ VIN sticker to the door jam, I looked for info on the correct location without any luck, so I just took a leap and put it where I thought it should go. This is not a show car, so I’m not worried about it. 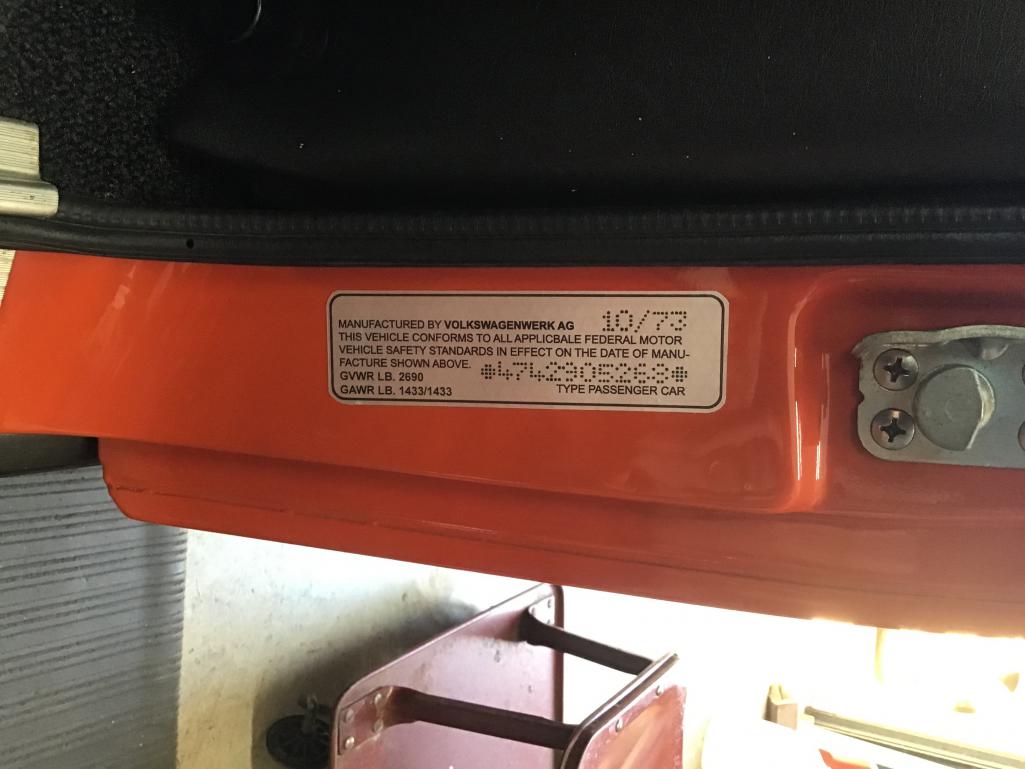 |
|
|
|
|
2 User(s) are reading this topic (2 Guests and 0 Anonymous Users)
0 Members:

|
Lo-Fi Version | Time is now: 9th November 2025 - 03:58 PM |
Invision Power Board
v9.1.4 © 2025 IPS, Inc.