|
|
|
Porsche, and the Porsche crest are registered trademarks of Dr. Ing. h.c. F. Porsche AG.
This site is not affiliated with Porsche in any way. Its only purpose is to provide an online forum for car enthusiasts. All other trademarks are property of their respective owners. |
|
|

  |

| raynekat |
 Dec 17 2020, 09:39 PM Dec 17 2020, 09:39 PM
Post
#61
|
|
Advanced Member  Group: Members Posts: 2,170 Joined: 30-December 14 From: Coeur d'Alene, Idaho Member No.: 18,263 Region Association: Pacific Northwest |
It's great that we have 914 Rubber.
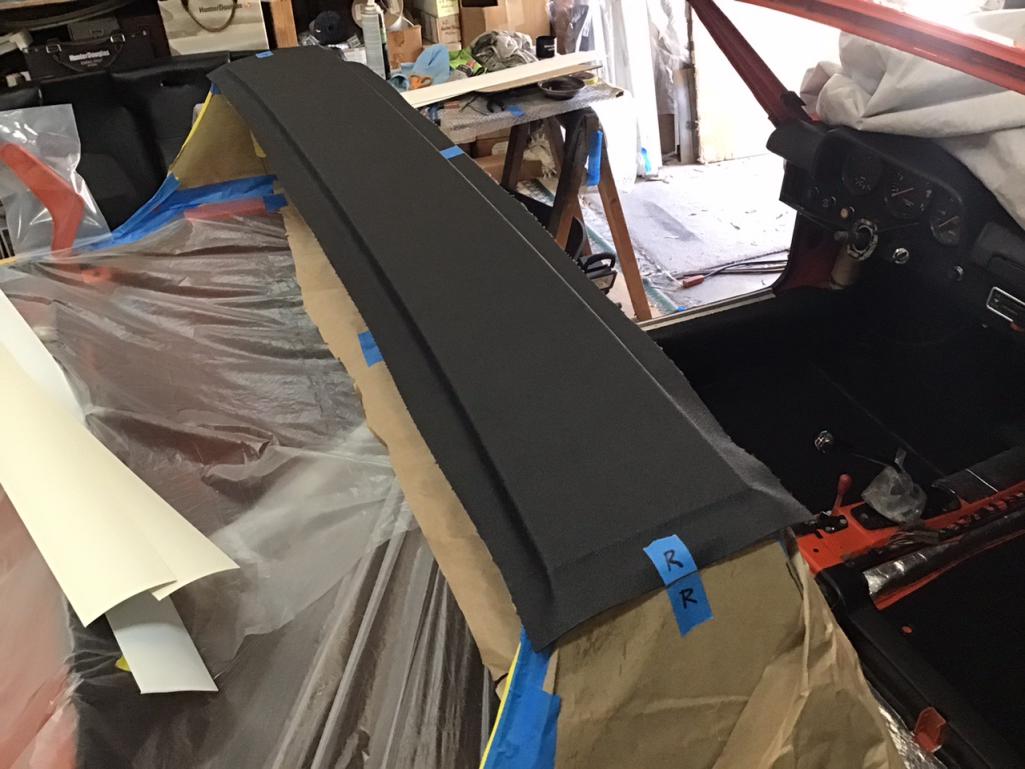
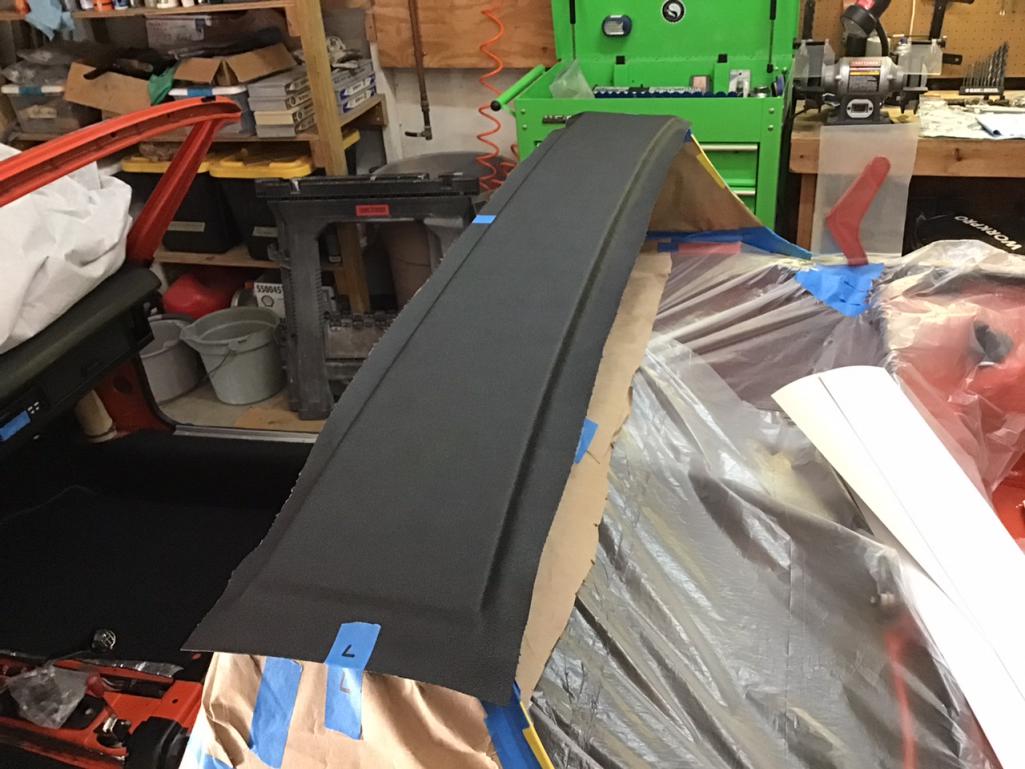
Unfortunately on many parts they get pumped out too fast without a lot of real world test fitting. Enter the dash top. Mine is the same way. I think I found out a way to get the ash tray to fit better. Don't ask me how after all this time. One other thing you may or may not have noticed..... Both ends of the dash top bow up a bit such that they don't meet the lower trim all that well. See yellow arrow in the following pic. 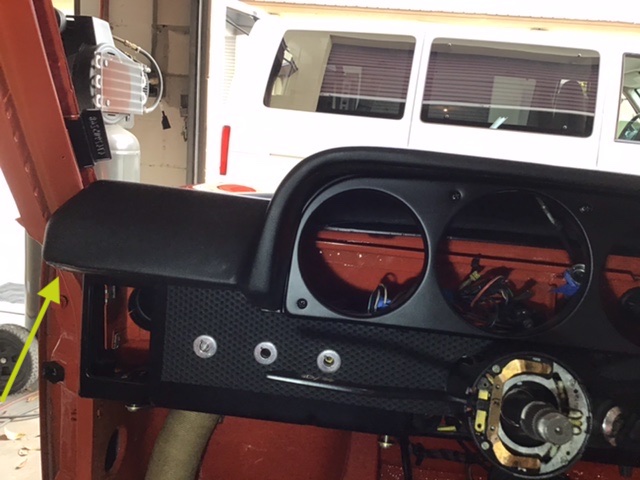 I have a big (1/4" gap) on both ends of the dash where the upper dash top meets the lower dash pieces. It bothers me enough....that I've thought about getting the lower dash pieces reupholstered such that they come up and meet the upper dash top better. Currently I have some kind of material in there that just fills up the gap. Aggravating for sure. Your car looks great. Keep up the stellar work. |
   |

 
|
| Morph914 |
Dec 18 2020, 11:24 AM
Post
#62
|
|
Member Group: Members Posts: 435 Joined: 22-August 16 From: St Augustine, FL Member No.: 20,326 Region Association: South East States |
QUOTE(raynekat @ Dec 17 2020, 10:39 PM)  It's great that we have 914 Rubber. Unfortunately on many parts they get pumped out too fast without a lot of real world test fitting. Enter the dash top. Mine is the same way. I think I found out a way to get the ash tray to fit better. Don't ask me how after all this time. One other thing you may or may not have noticed..... Both ends of the dash top bow up a bit such that they don't meet the lower trim all that well. See yellow arrow in the following pic. I have a big (1/4" gap) on both ends of the dash where the upper dash top meets the lower dash pieces. It bothers me enough....that I've thought about getting the lower dash pieces reupholstered such that they come up and meet the upper dash top better. Currently I have some kind of material in there that just fills up the gap. Aggravating for sure. Your car looks great. Keep up the stellar work. Thank you for the kind words. Regarding the dash top, I decided to remove the new one and go back to my original which was in pretty good condition. (IMG:style_emoticons/default/headbang.gif) |
|
|
|
| Morph914 |
Dec 23 2020, 07:22 PM
Post
#63
|
|
Member Group: Members Posts: 435 Joined: 22-August 16 From: St Augustine, FL Member No.: 20,326 Region Association: South East States |
Starting to get some tidbits ready for the engine. After cleaning the fuel injection harness I decided to replace the fuel injector rubber boots. For some reason I had two black and two grey boots for the injectors. Does this signify something, perhaps odd or even cylinders? The grey boots were still in good condition so just changing the crispy black ones.
Notice the handy dandy release tool I made with a large paper clip, just a few taps with a hammer on the edge to flatten out. 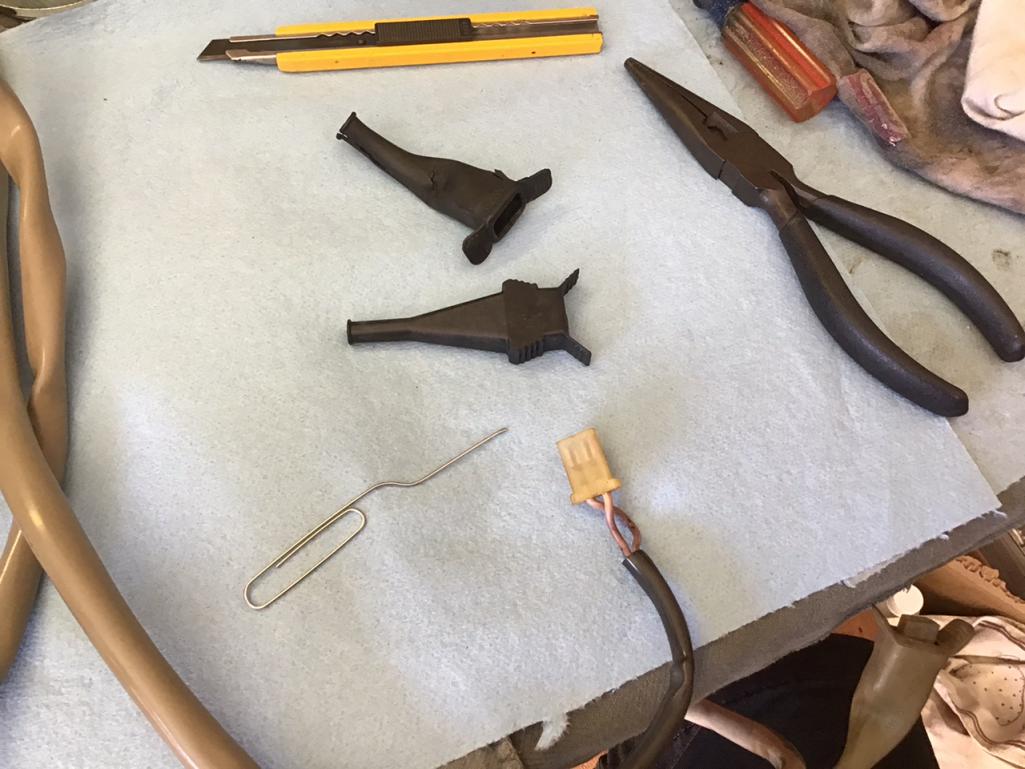 Im not sure if the wire orientation matters, but I marked one of the wires after taking it out so it would return to the same side. 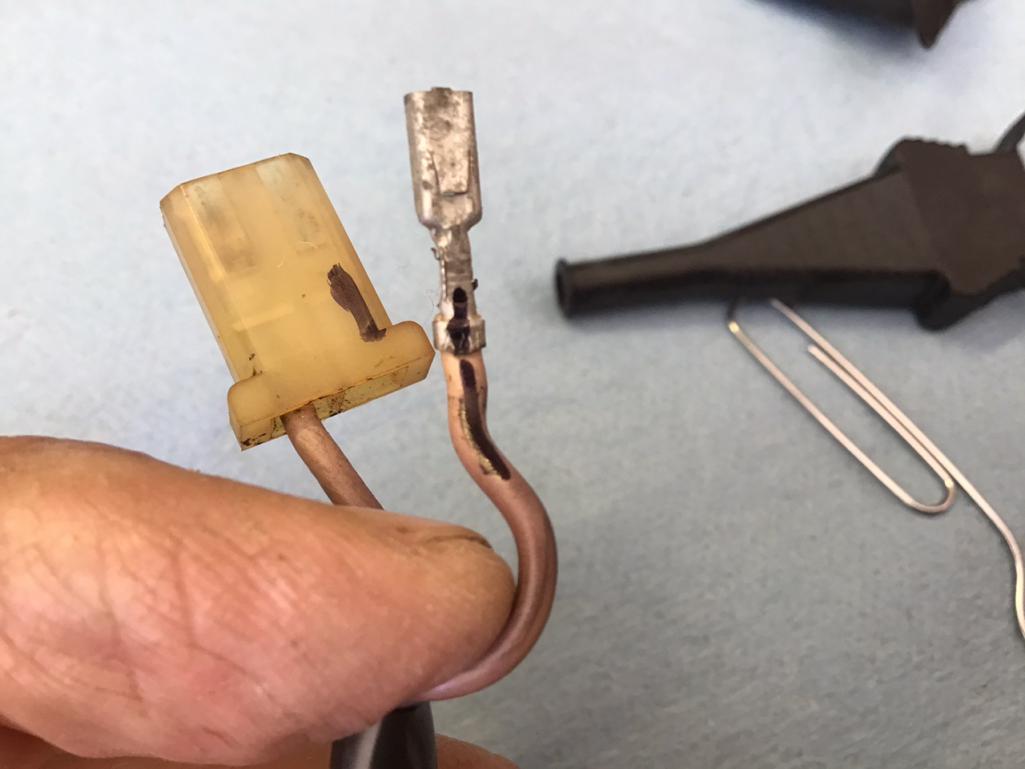 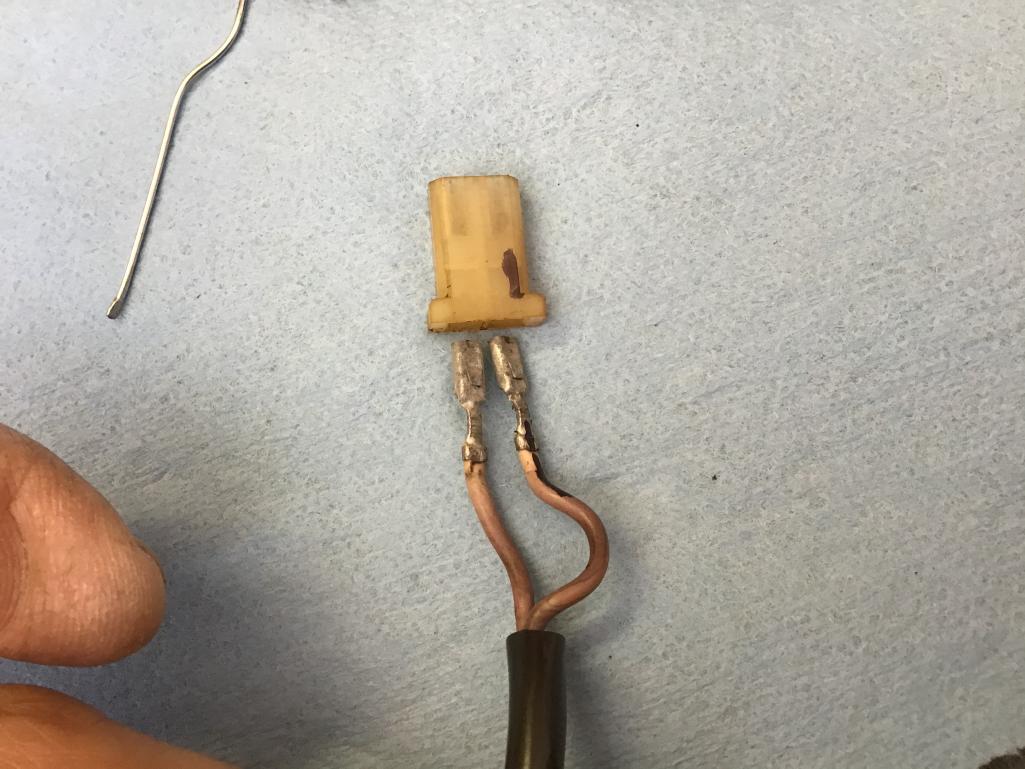 Getting the boots on were a bit of a pain, I used a bit of WD 40 to lube the boot. After you get the wires through make sure and push the tab back up on the connector or it will not lock into place. 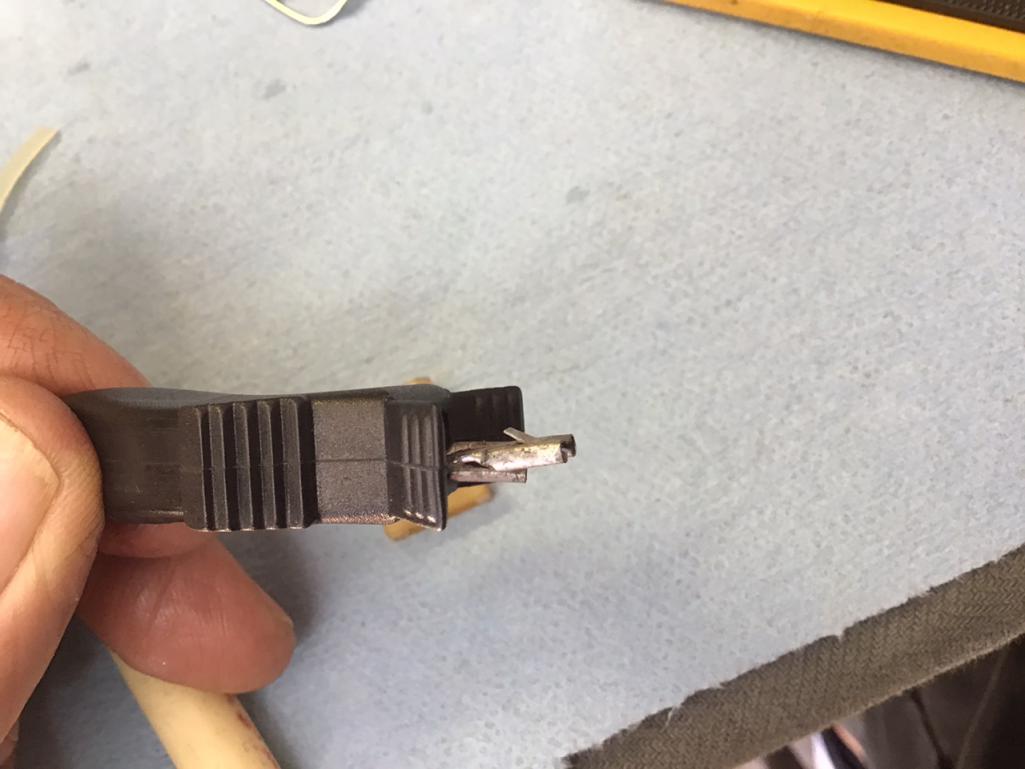 The plastic piece that fits into the injector is notched on two of the corners as if to fit into the injector in a specific manner but the injector has no such matching cut outs. Does anybody know if it matters which way these go in?  Attached thumbnail(s) 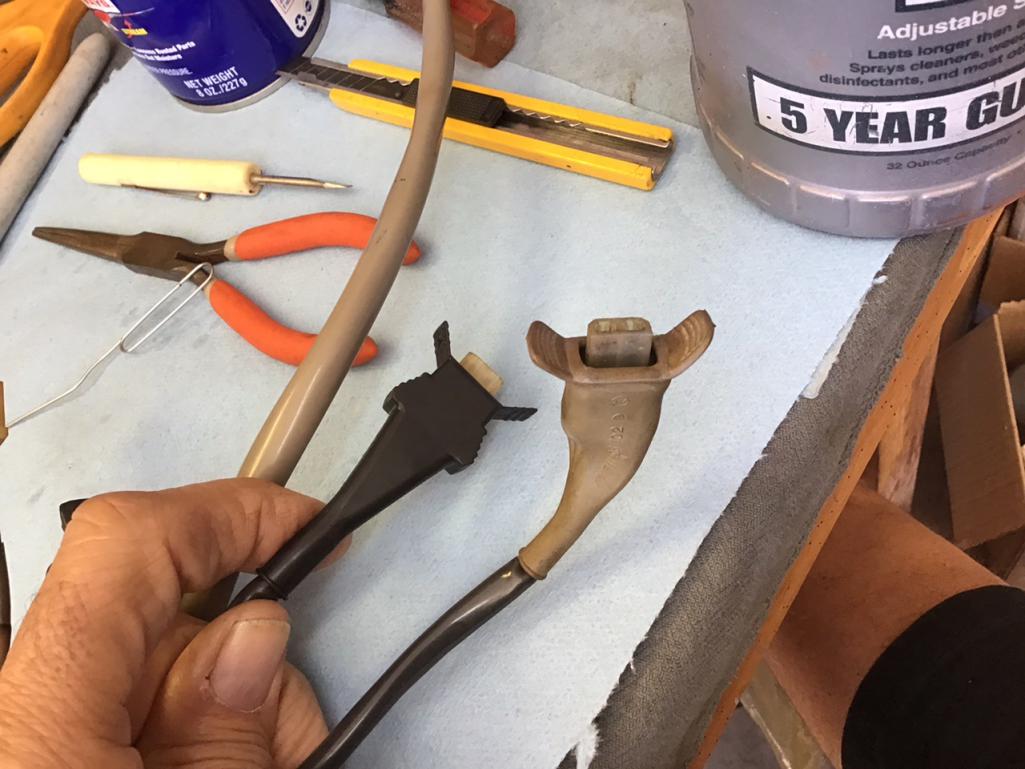
|
|
|
|
| Morph914 |
Jan 6 2021, 08:35 PM
Post
#64
|
|
Member Group: Members Posts: 435 Joined: 22-August 16 From: St Augustine, FL Member No.: 20,326 Region Association: South East States |
After replacing some of the seals on my side shift trans yesterday, I decided today to tackle the small shift rod seal. This little bugger gave me about a 2 hour plus fight. First I tried a seal puller with no luck, too big for this small seal. I tried a small screw driver, a pick, I drilled a small hole in the top of the seal (very carefully) inserted a screw and tried to pull it out, no go. I used my Dremel tool to carefully cut two notches 180 degrees apart, and then inserted a washer into the notches and slid a long punch through the washer and tried to twist it out, no go. Next, I got the torch out and put some heat to it, tried prying again with several different tools, no go. Finally, I put it in the vise with thin wood strips to protect the part, more heat more prying and it finally gave up.
I started by pressing the roll pin out with a small bolt on one side and a socket on the other. This worked perfectly. I was careful not to press the pin all the way out, as these can be a bugger to get back in. 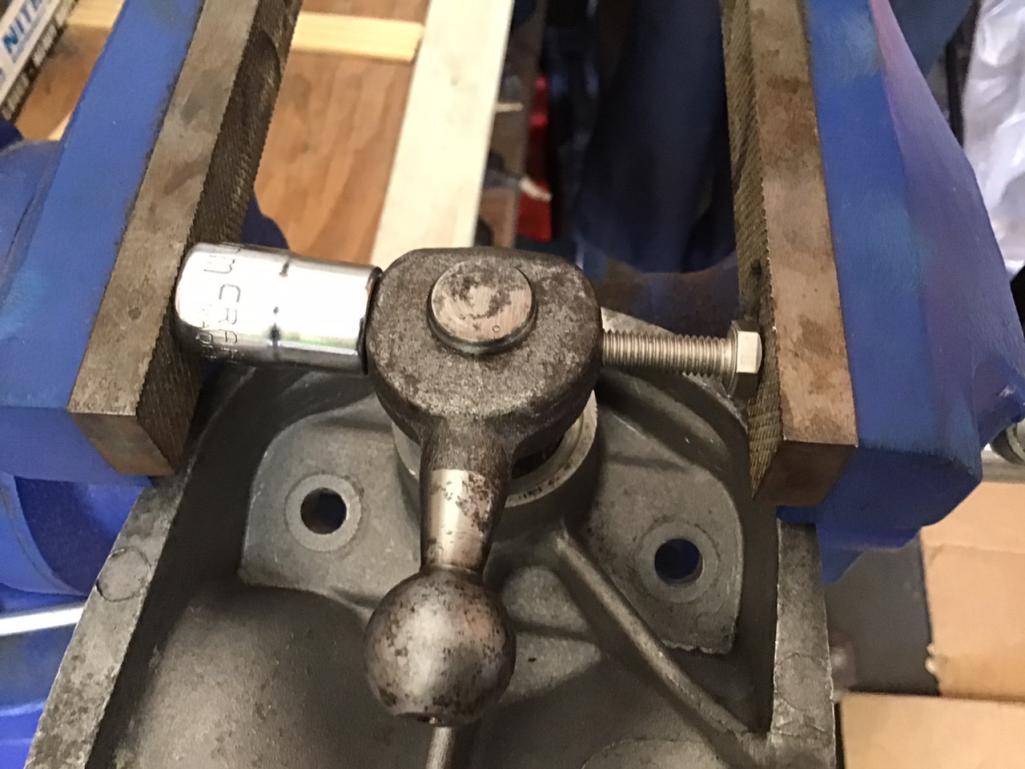 After removing the shift rod, the process of removing the old seal began. 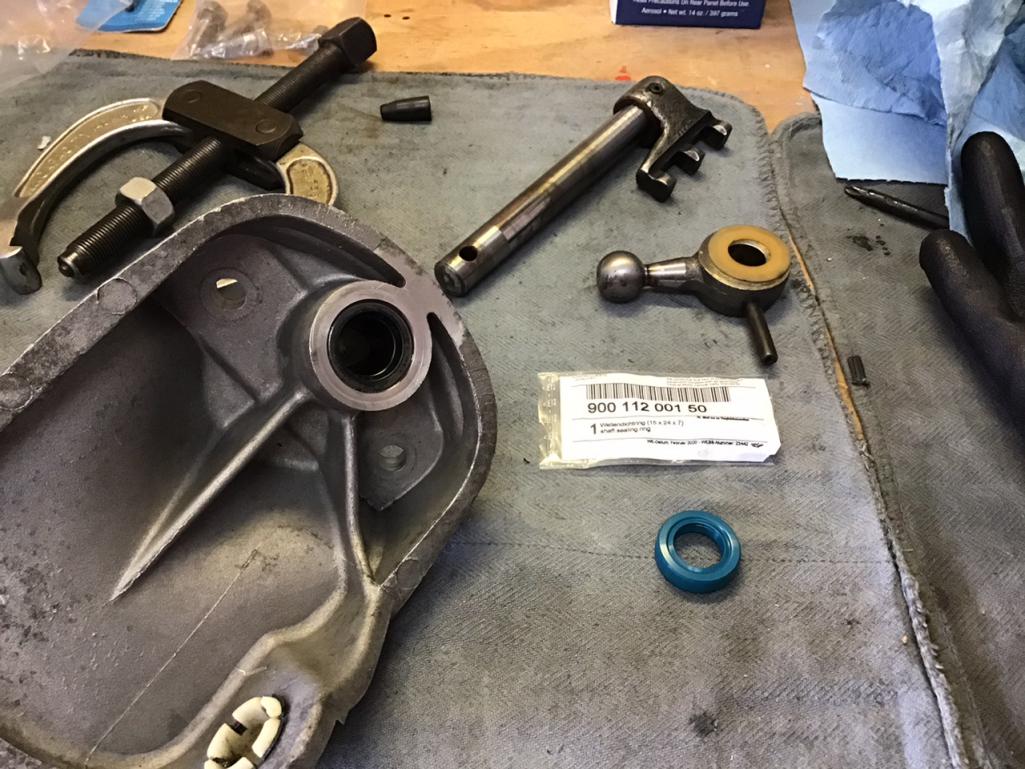 This is what was left after getting the seal out. Notice that the old one was not rubber coated on the side like the new one. Perhaps this is why it was so difficult to get out. 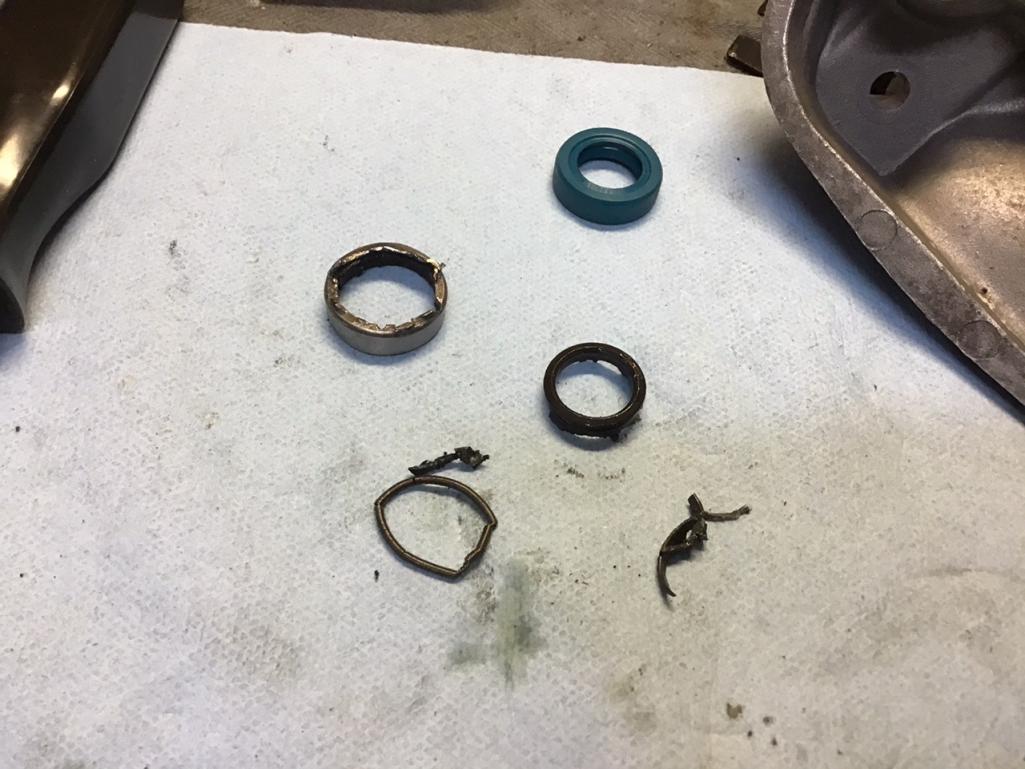 I will install the new seal tomorrow 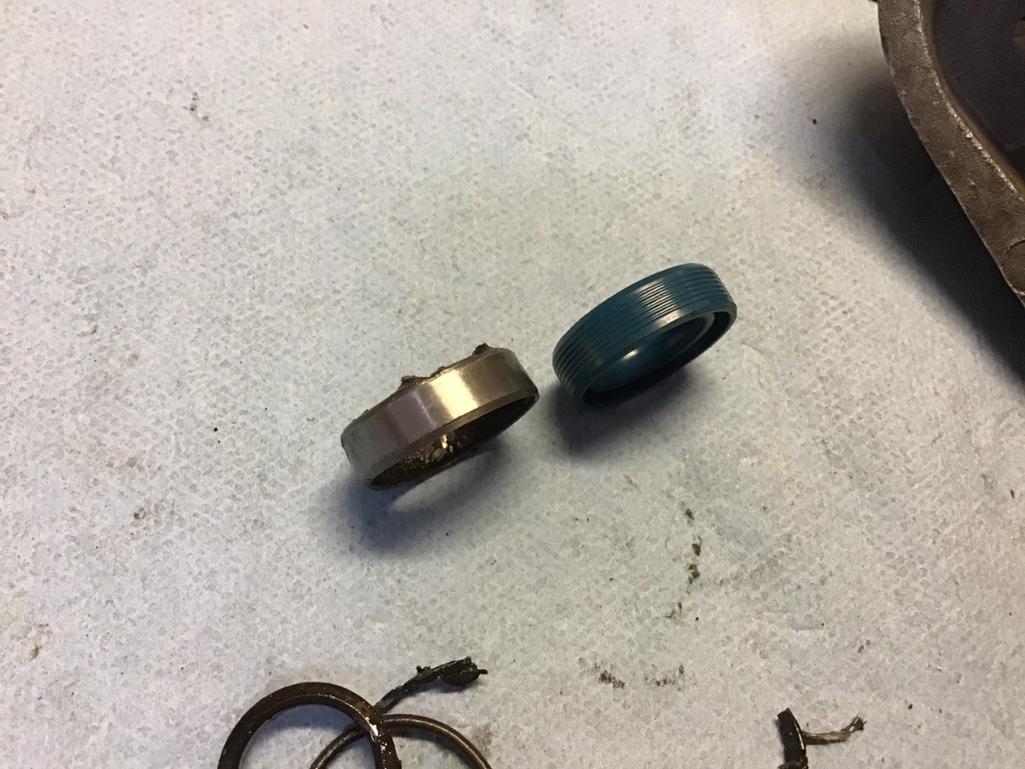 |
|
|
|
| Morph914 |
Jan 24 2021, 05:16 PM
Post
#65
|
|
Member Group: Members Posts: 435 Joined: 22-August 16 From: St Augustine, FL Member No.: 20,326 Region Association: South East States |
Time to get the fan shroud cleaned up
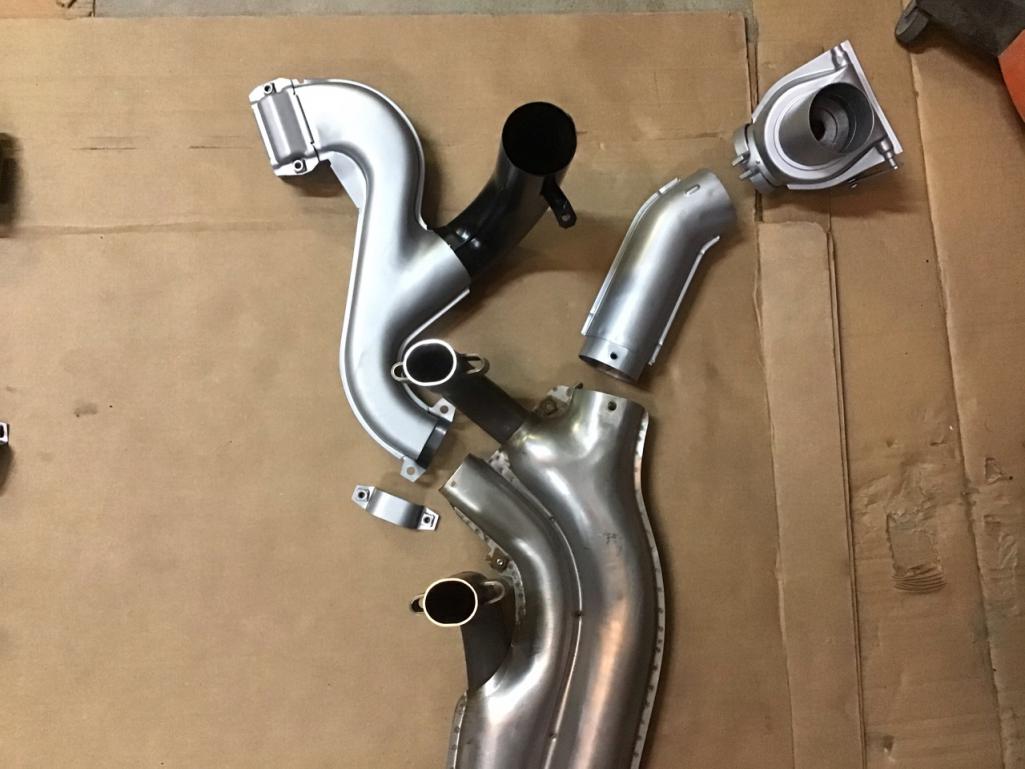
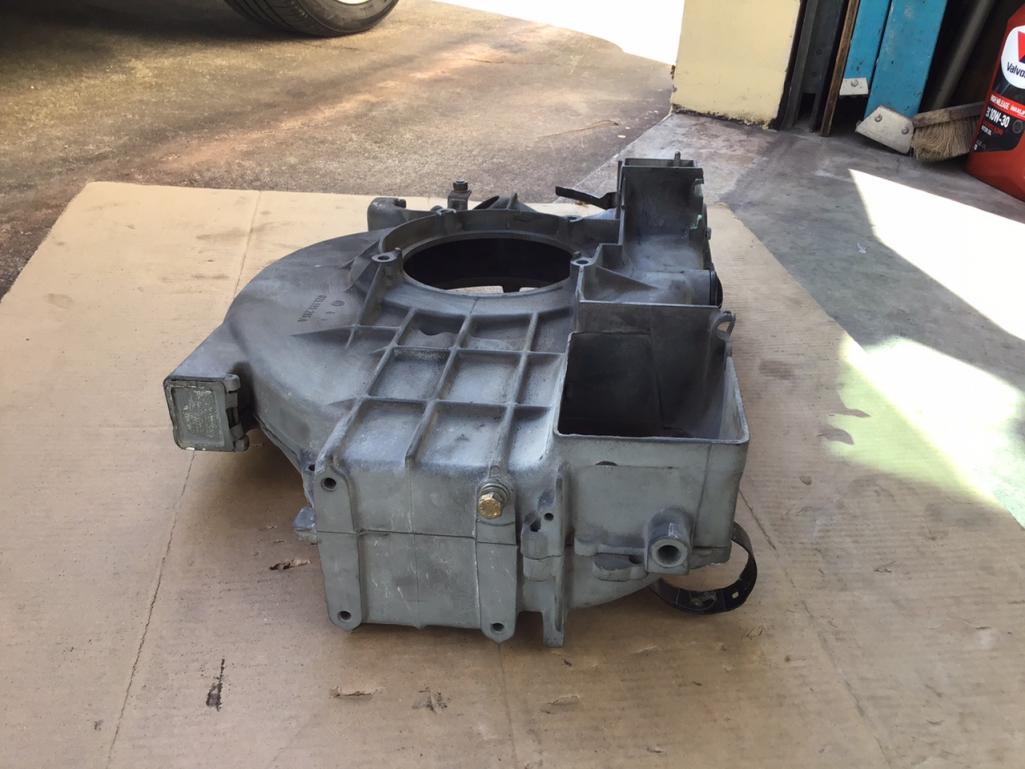 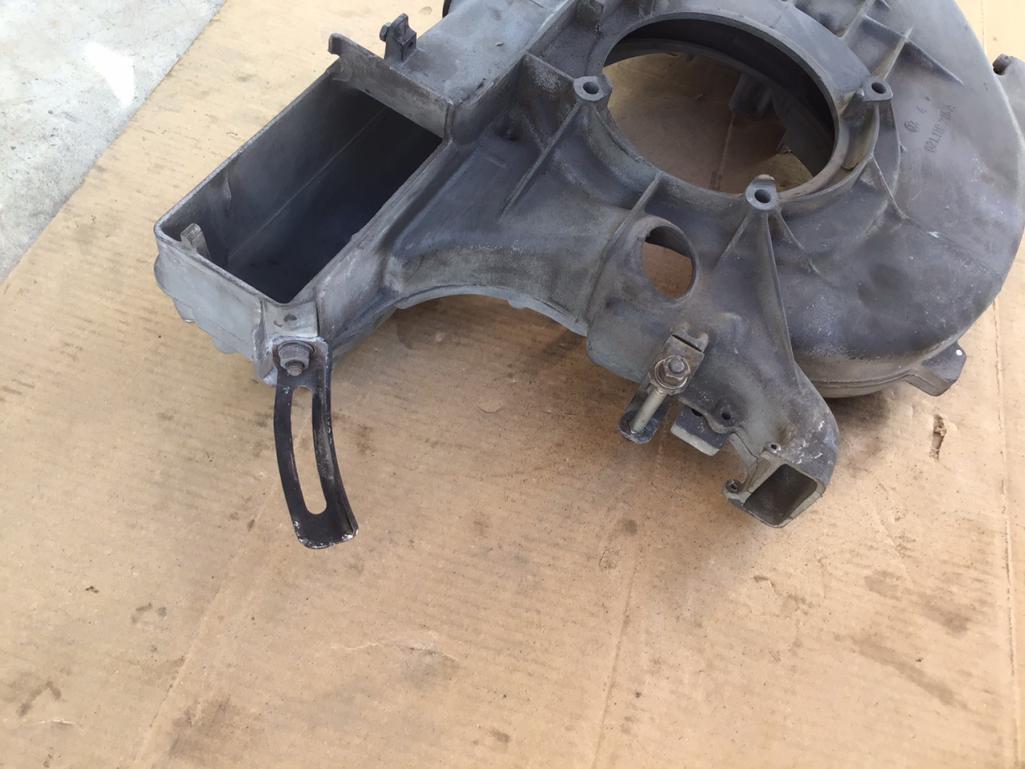  Decided to pull the trigger on the 123 Dizzy 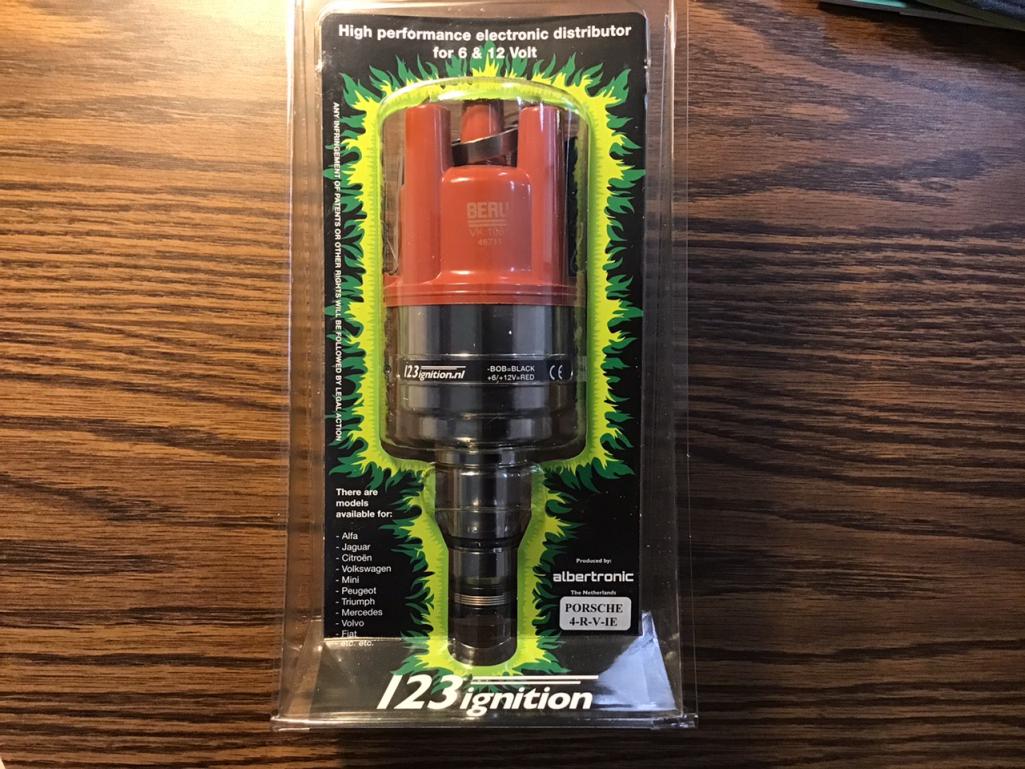 I’m trying to figure out if I have all my bits and pieces for this 2.0 L , I purchased this engine in pieces so I do not have the luxury of photos or bagging and tagging. 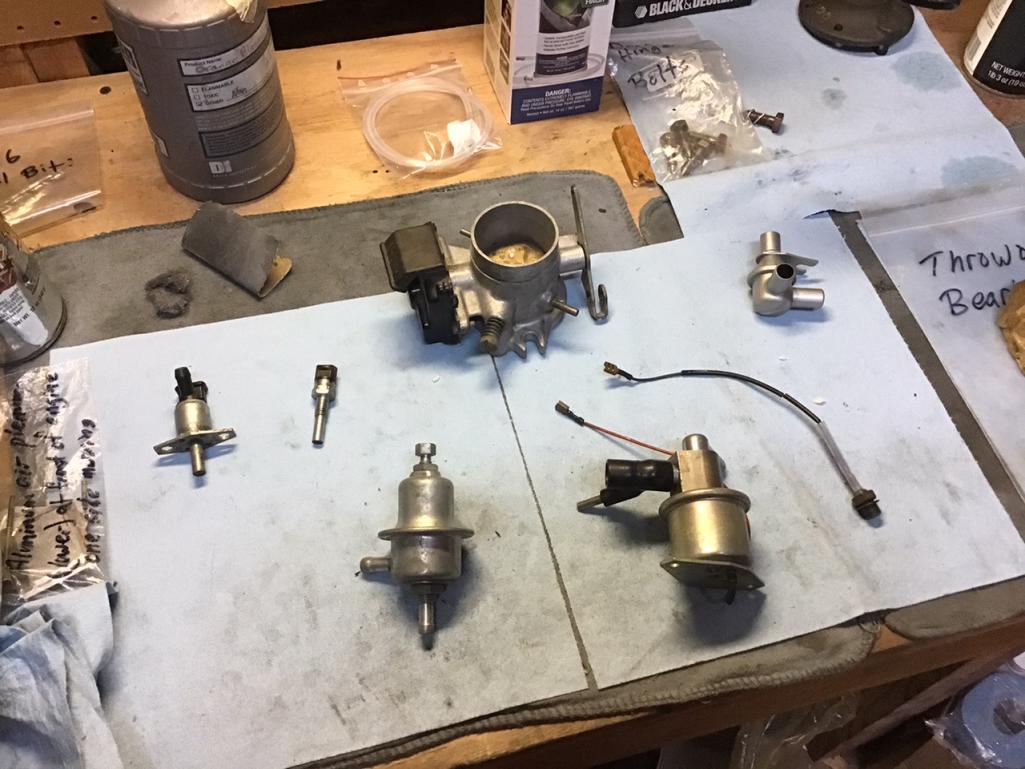 Connecting the new alternator wiring harness to the alternator. I love working with clean new parts! I will clean up the pulley and prep for paint.   Attached thumbnail(s) 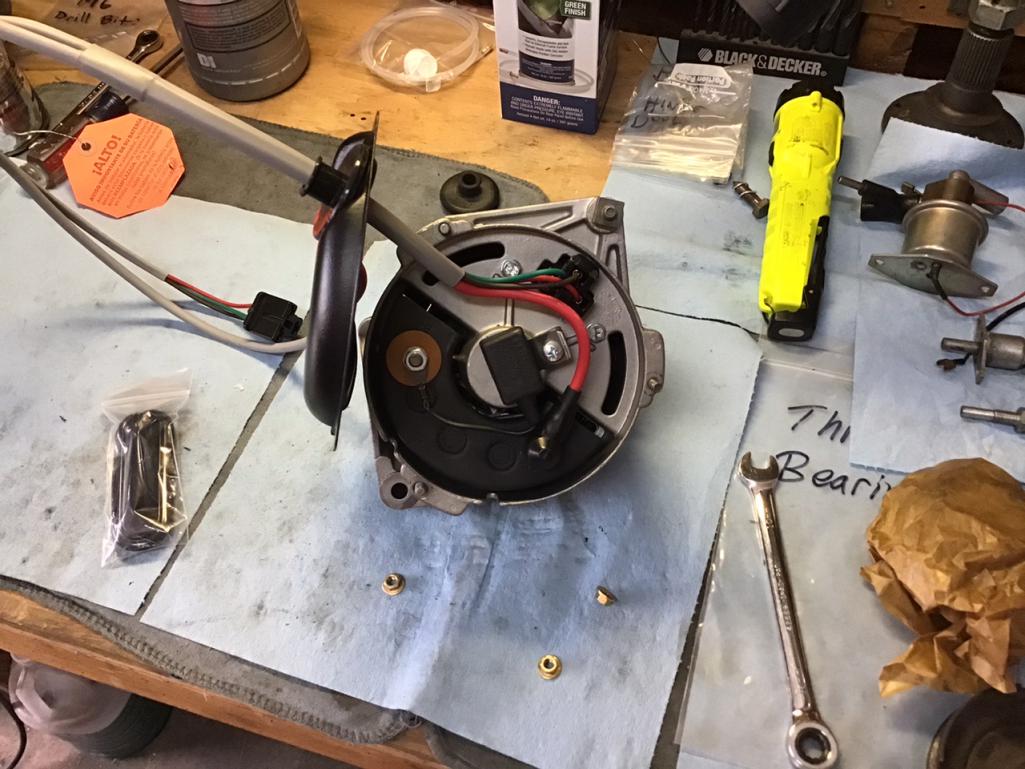 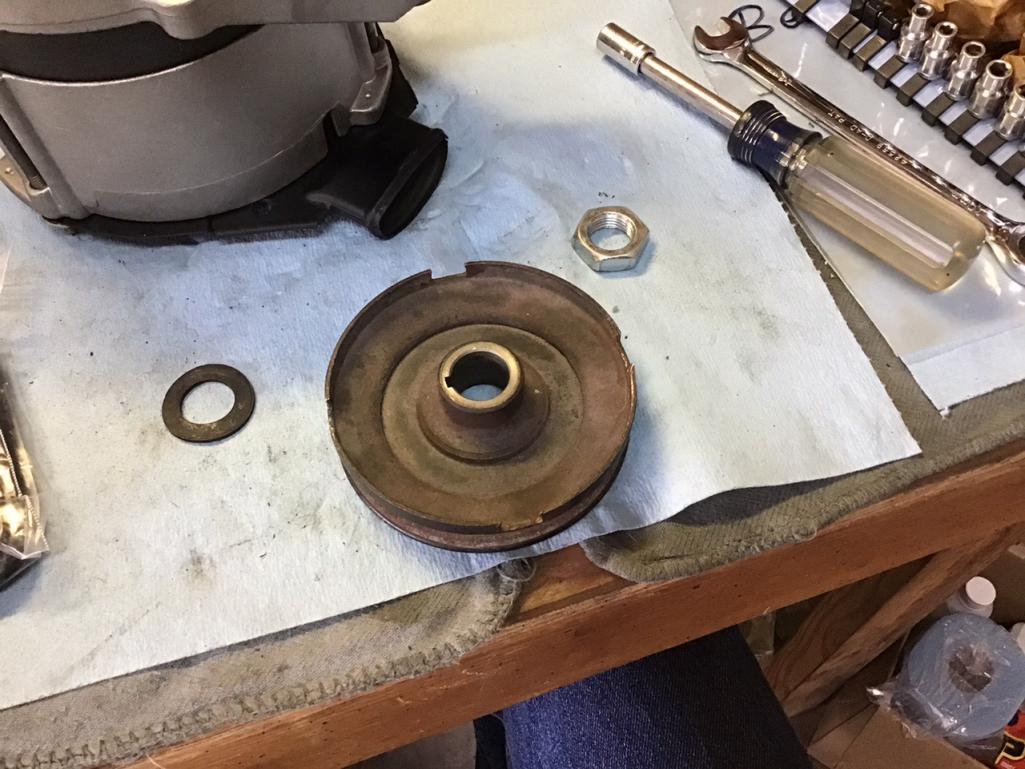
|
|
|
|
| Morph914 |
Jan 24 2021, 05:33 PM
Post
#66
|
|
Member Group: Members Posts: 435 Joined: 22-August 16 From: St Augustine, FL Member No.: 20,326 Region Association: South East States |
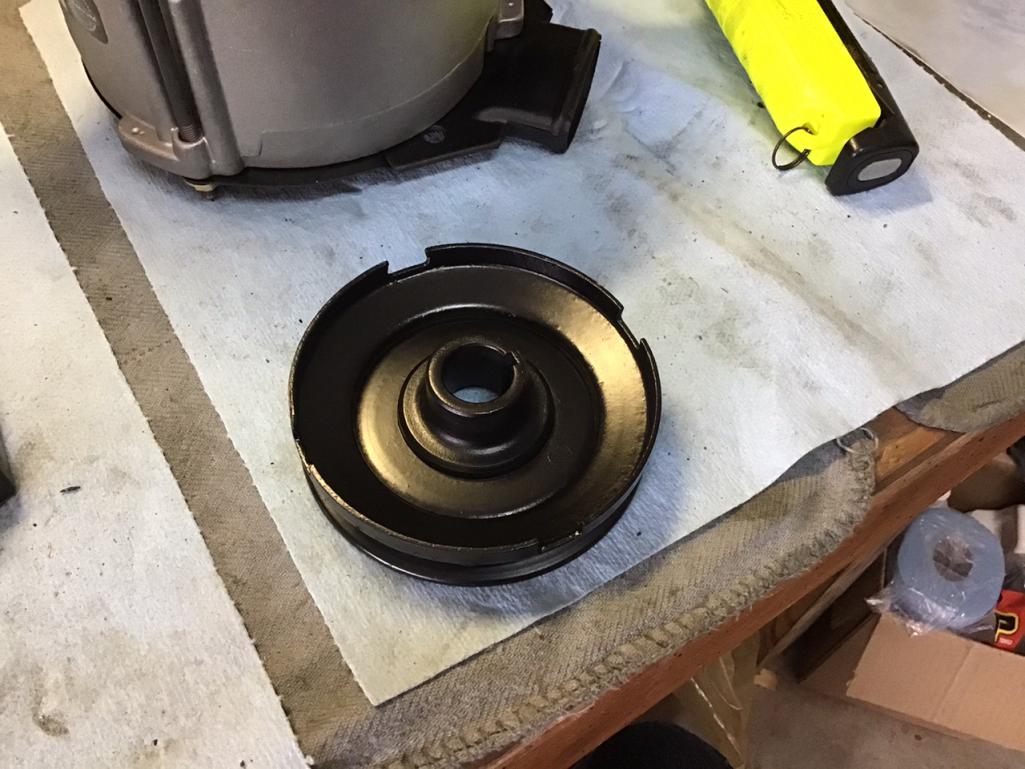
The pulley after fresh paint
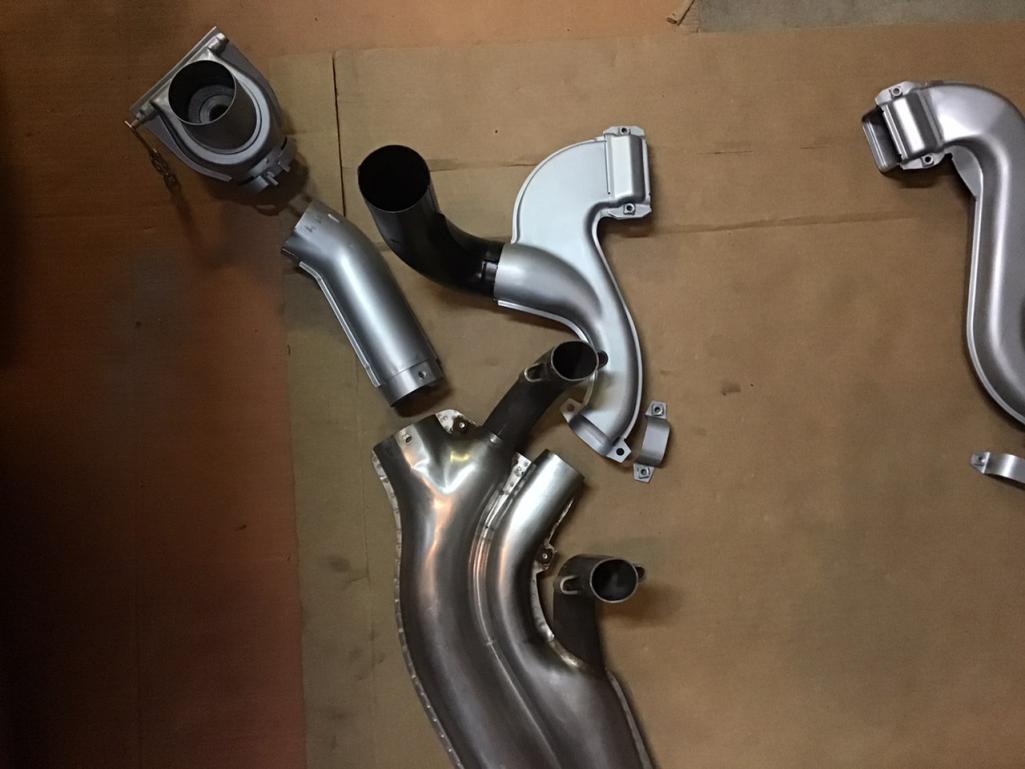
  I can’t remember where this plastic piece goes, I seems to fit well here. It did not show in the book so will have to wing it as I assemble. 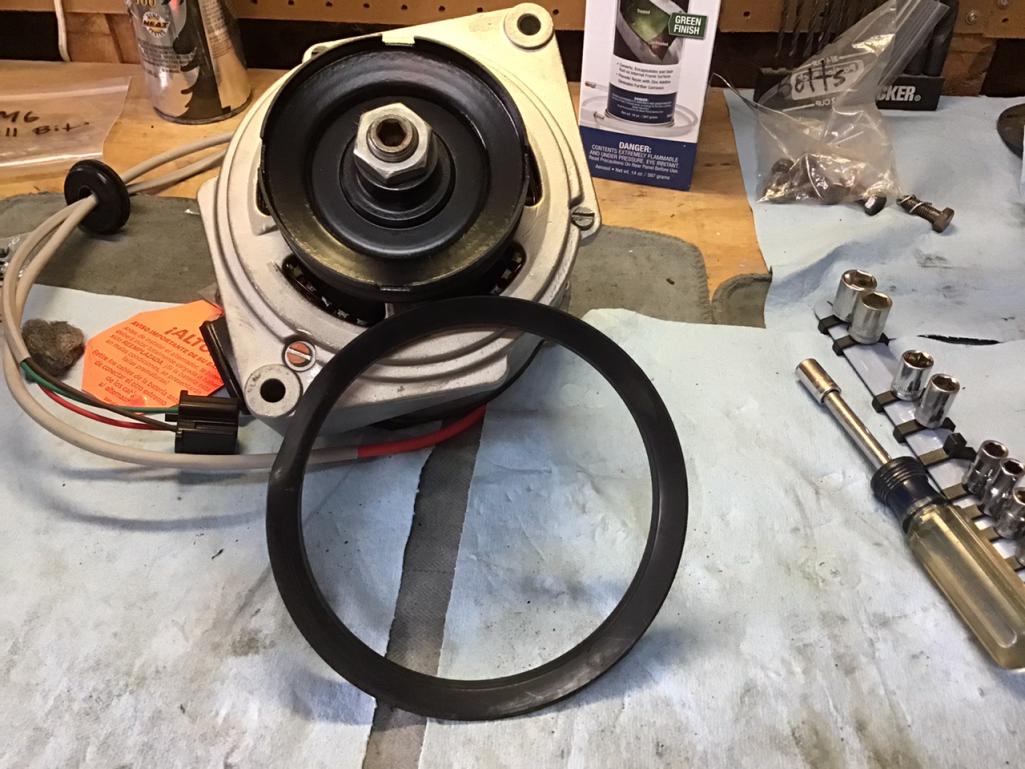 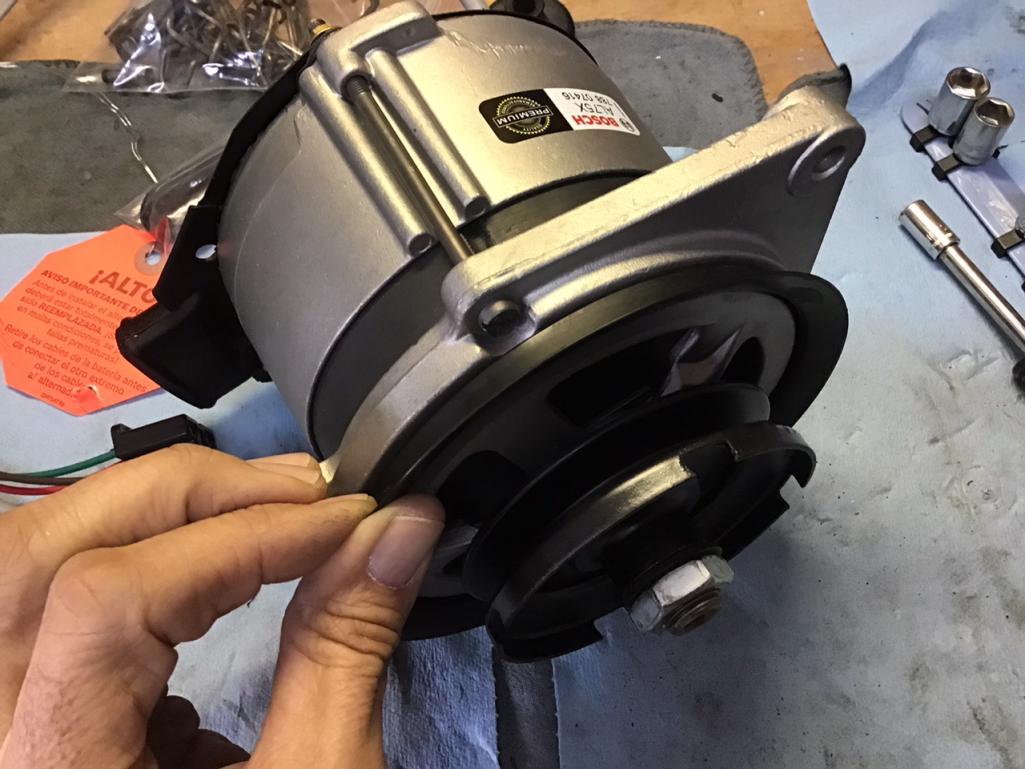 Now getting the air filter housing ready for paint, this should be the last big piece to clean and paint other than the targa top. (IMG:style_emoticons/default/aktion035.gif) 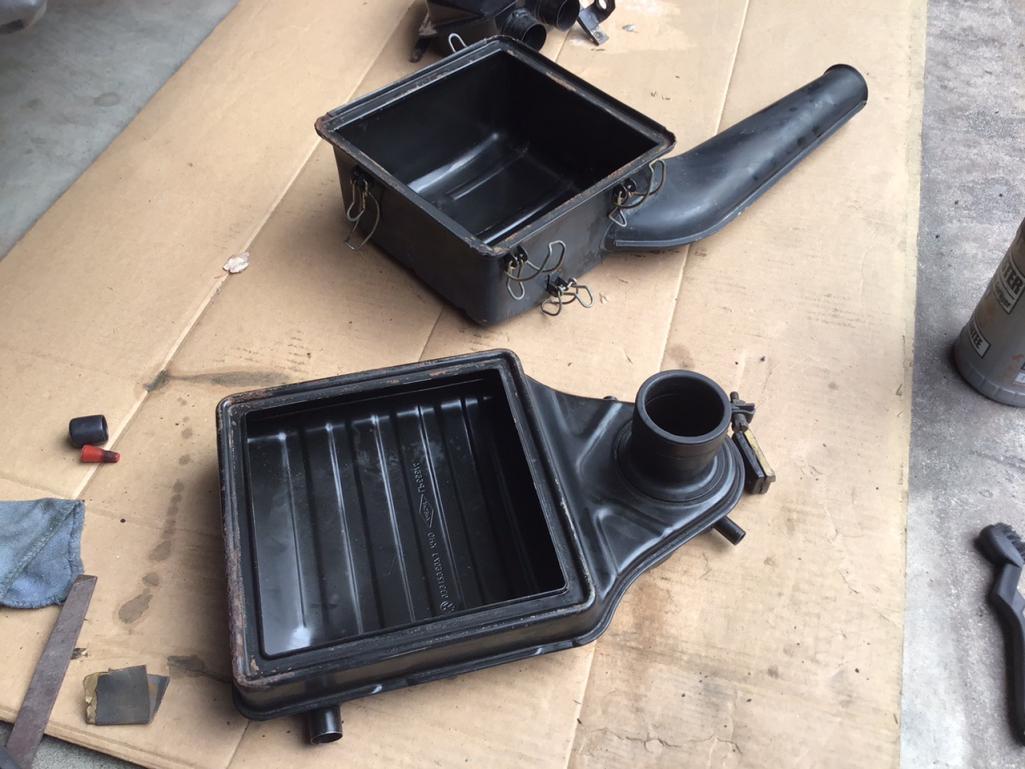 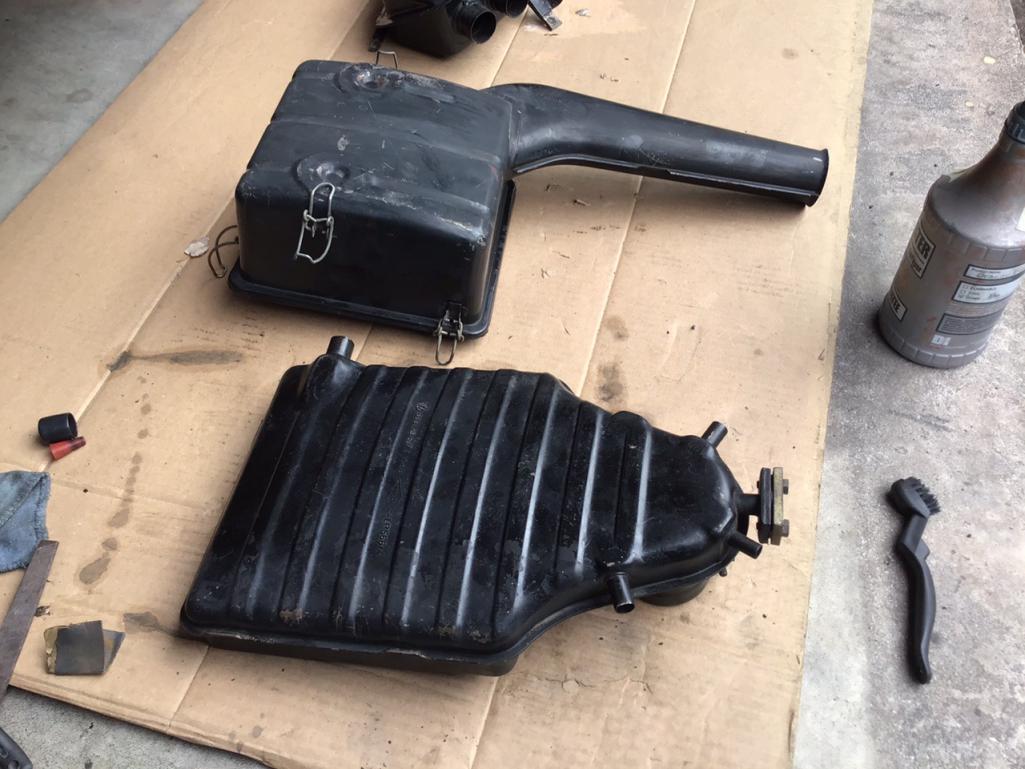 Attached thumbnail(s) 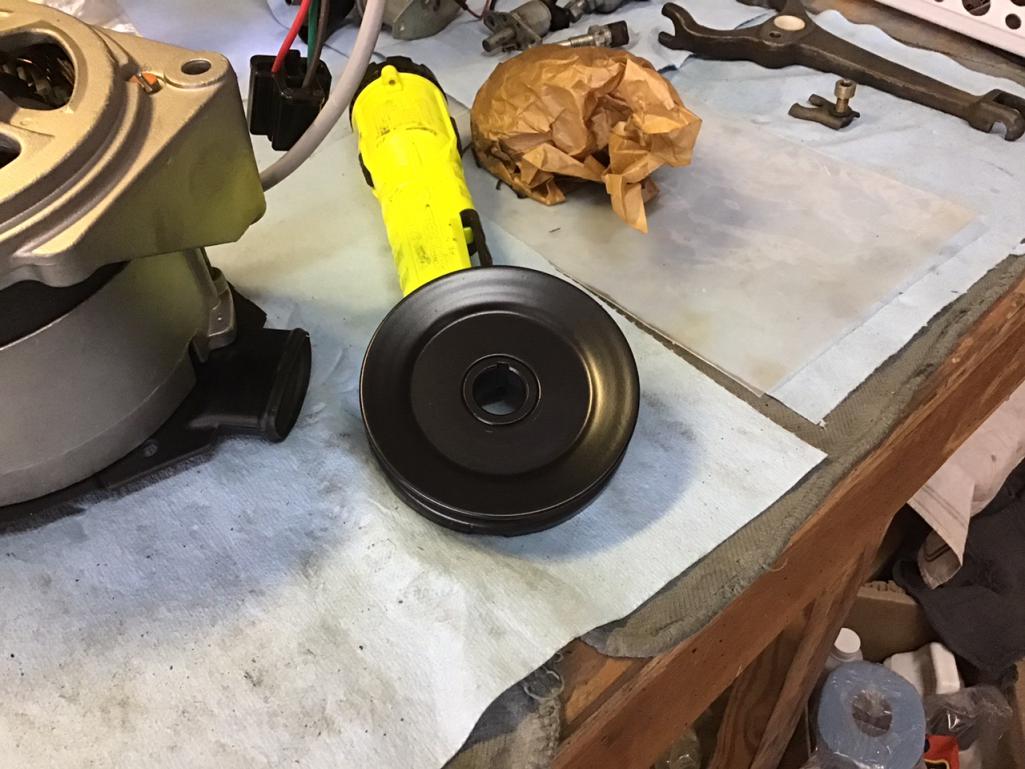
|
|
|
|
| krazykonrad |
Jan 25 2021, 11:31 AM
Post
#67
|
|
Senior Member Group: Members Posts: 1,156 Joined: 21-February 06 From: Canton, GA Member No.: 5,610 |
It looks like you're just a couple of steps ahead of me in the putting it back together process, so your thread is a huge help.
How did you put the new FI injector boots on without ripping or cutting them? Will the small end stretch enough to go over the connector? |
|
|
|
| Morph914 |
Jan 25 2021, 01:41 PM
Post
#68
|
|
Member Group: Members Posts: 435 Joined: 22-August 16 From: St Augustine, FL Member No.: 20,326 Region Association: South East States |
QUOTE(krazykonrad @ Jan 25 2021, 12:31 PM) It looks like you're just a couple of steps ahead of me in the putting it back together process, so your thread is a huge help. How did you put the new FI injector boots on without ripping or cutting them? Will the small end stretch enough to go over the connector? You have to remove the wires from the plug, use a paper clip with a flattened end to remove the wires. Slide the new boot on then reconnect the wires. Cheers, John |
|
|
|
| krazykonrad |
Jan 25 2021, 03:23 PM
Post
#69
|
|
Senior Member Group: Members Posts: 1,156 Joined: 21-February 06 From: Canton, GA Member No.: 5,610 |
Your photos make sense now. Thanks for the info. this seems like an easier project than I thought.
|
|
|
|
| Morph914 |
Feb 14 2021, 02:13 PM
Post
#70
|
|
Member Group: Members Posts: 435 Joined: 22-August 16 From: St Augustine, FL Member No.: 20,326 Region Association: South East States |
Trying to figure out if I have all my heater parts and pieces.
   Also got this vacuum line kit for the 2.0L at AA, I wish it had the red lines included. I may have to use bbrocks method for changing these to the red color. I think 914 Rubber may now be carrying the red lines... 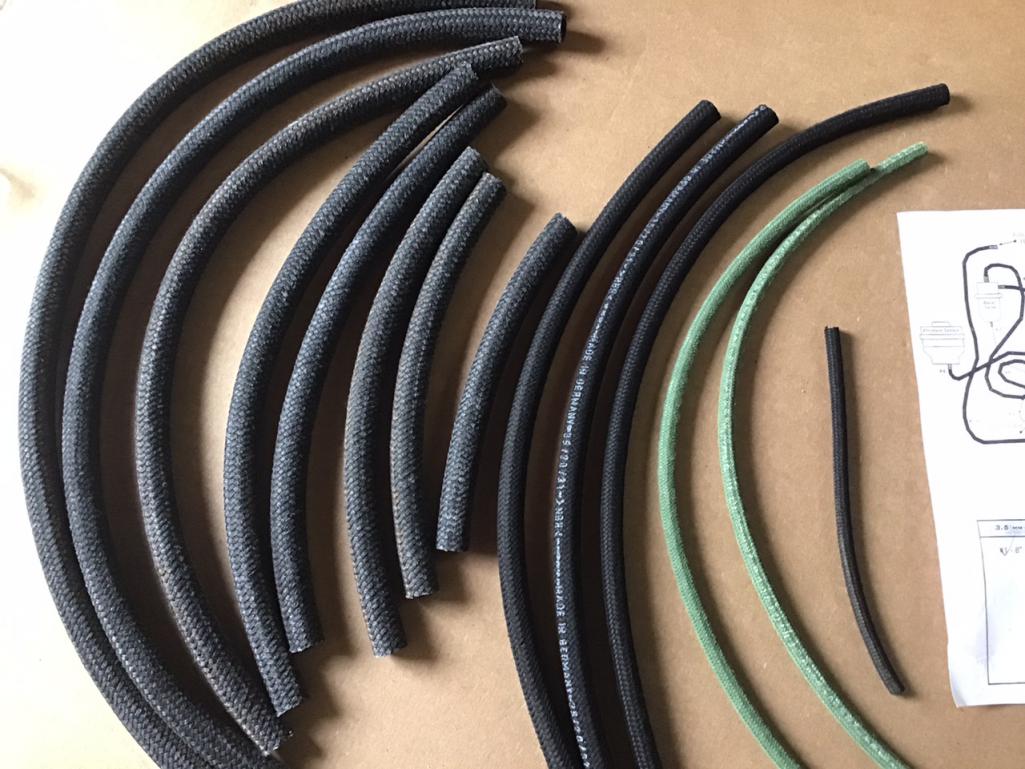 I wish this diagram was color coded so I know which lines need to be red. 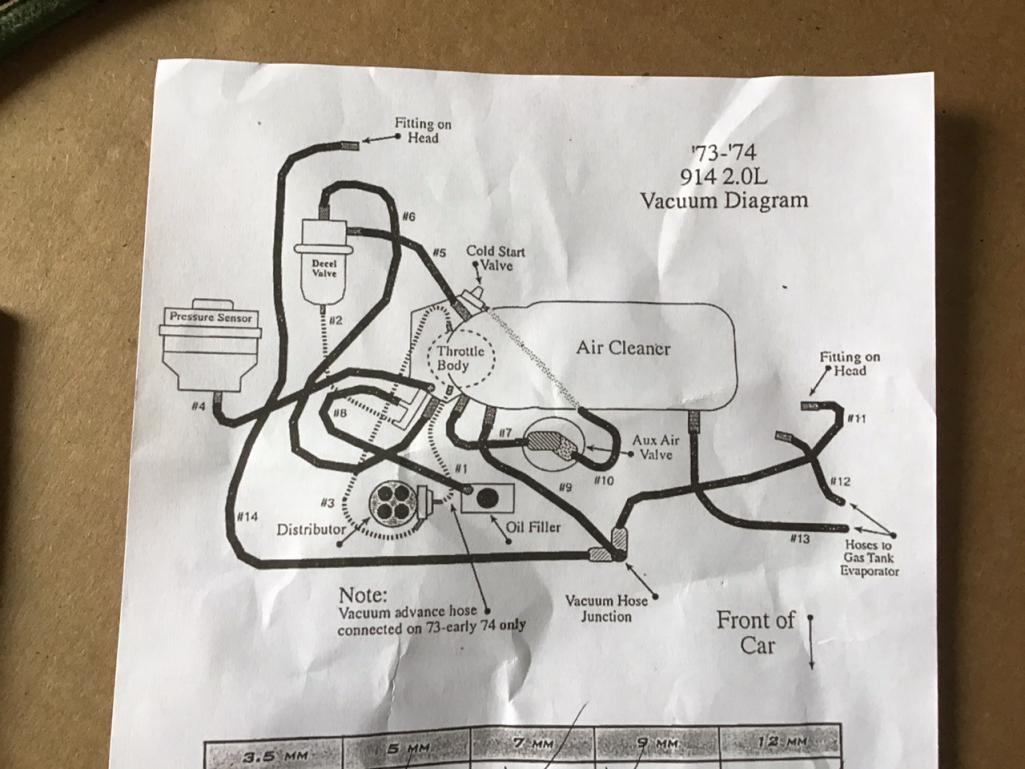 |
|
|
|
| Morph914 |
Feb 25 2021, 08:05 PM
Post
#71
|
|
Member Group: Members Posts: 435 Joined: 22-August 16 From: St Augustine, FL Member No.: 20,326 Region Association: South East States |
Time to clean and inspect the seat belt bits and pieces.
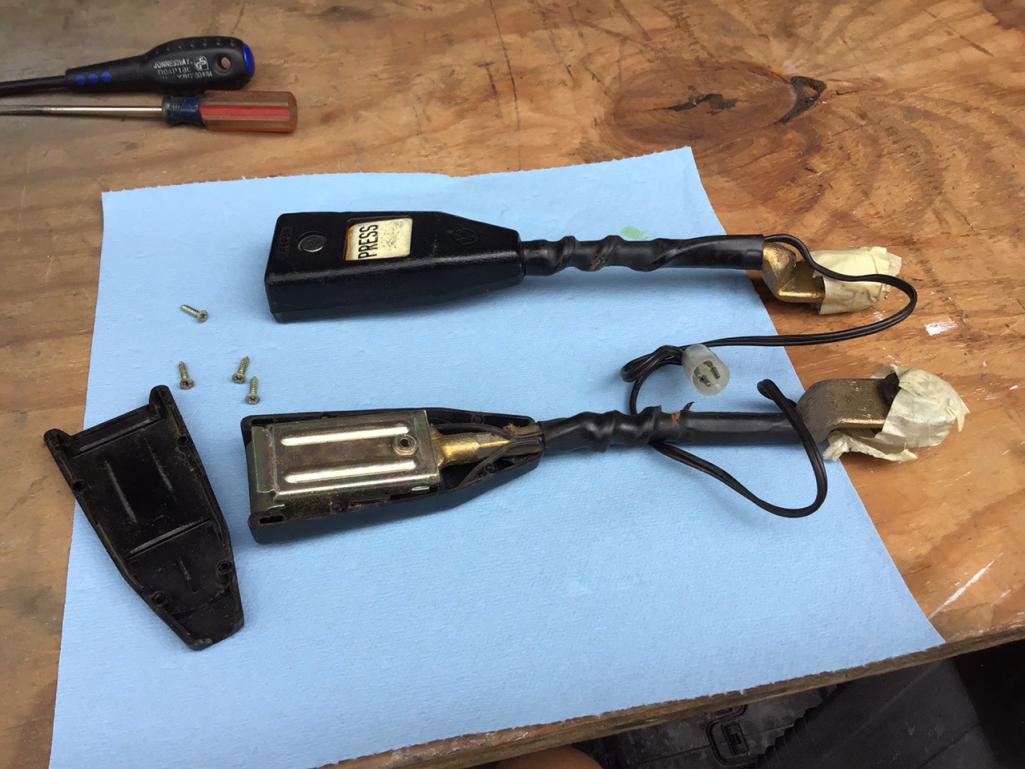 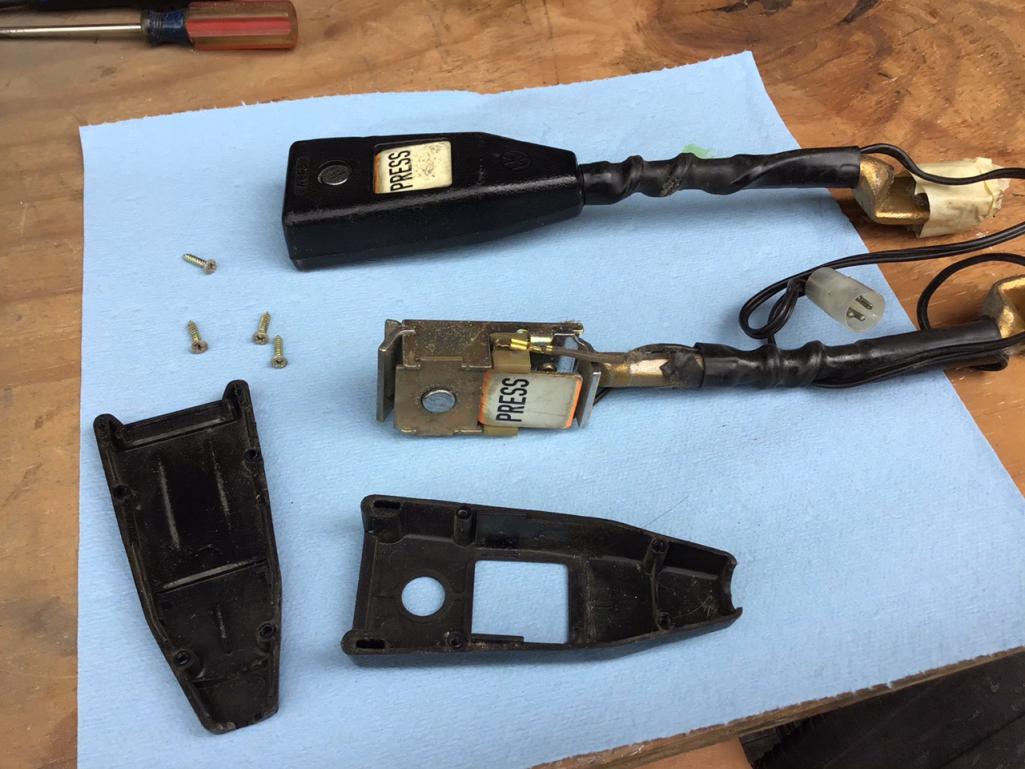 Off with the old PRESS sticker 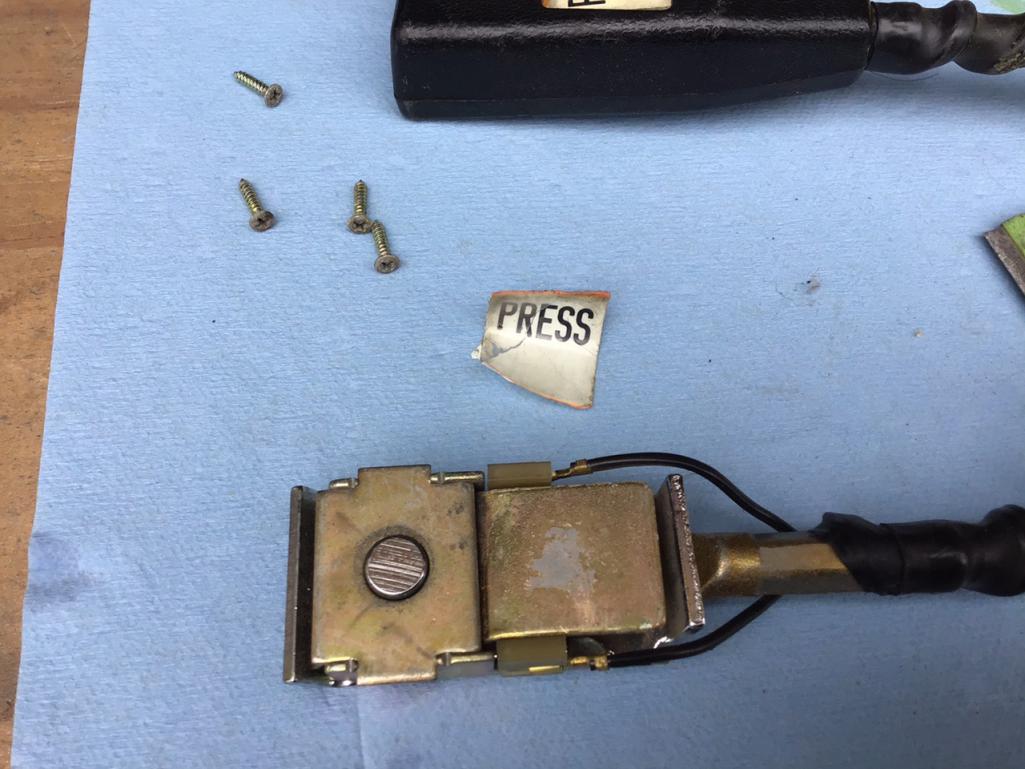 And on with the new sticker 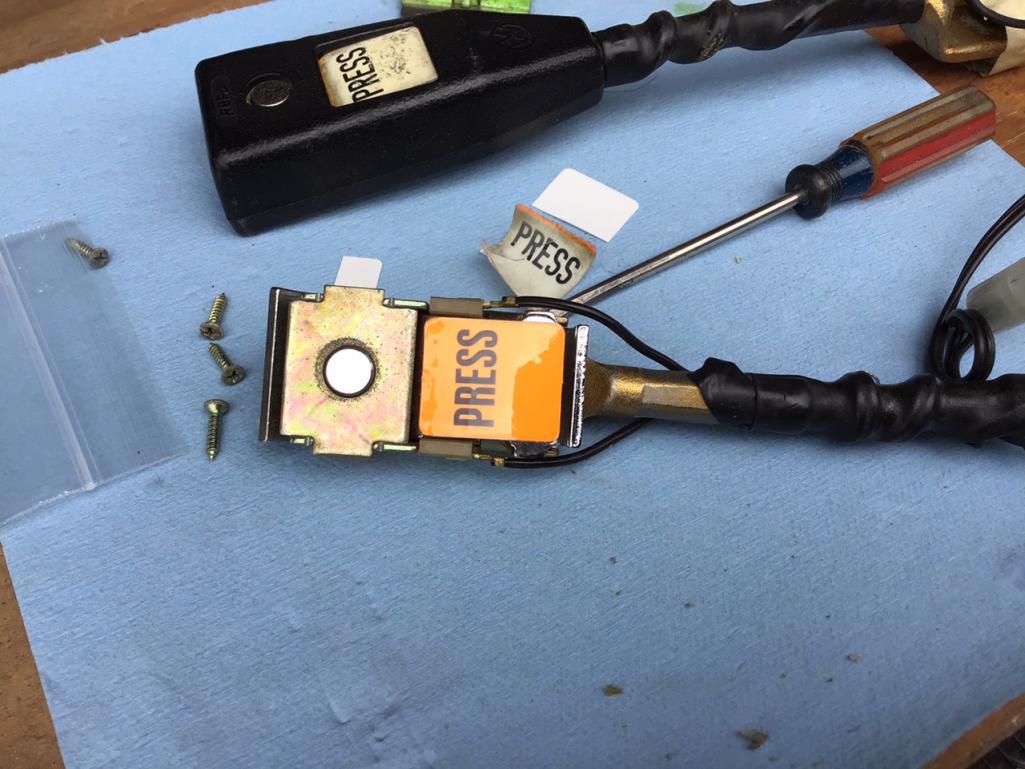 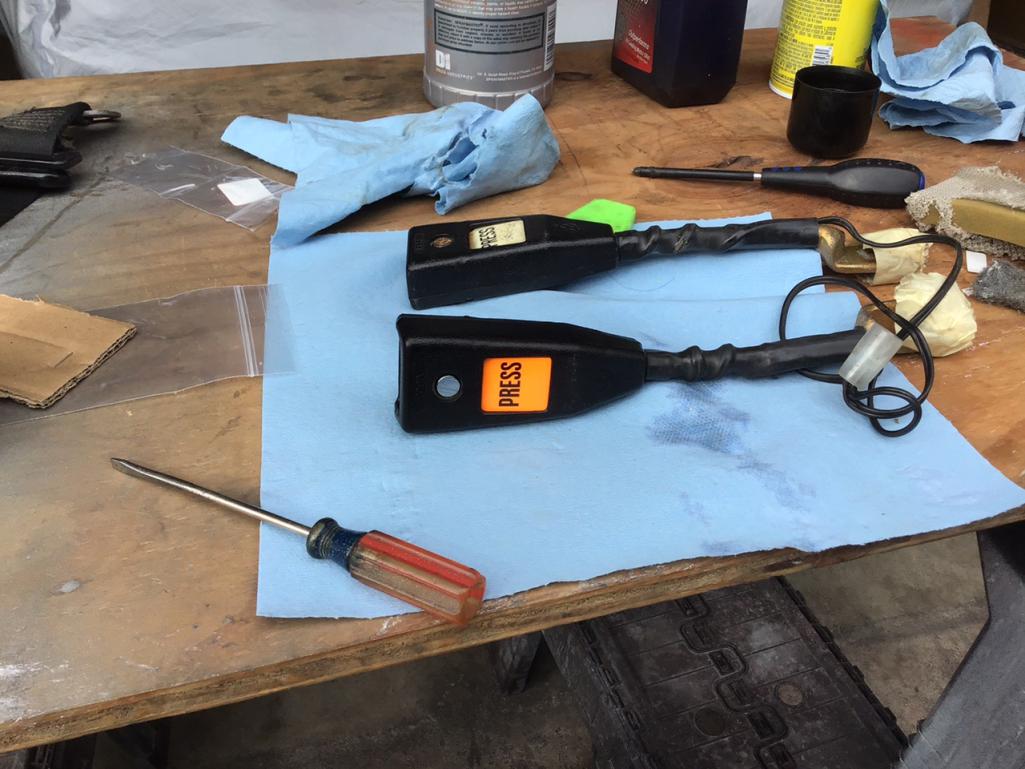 And now for the retractors 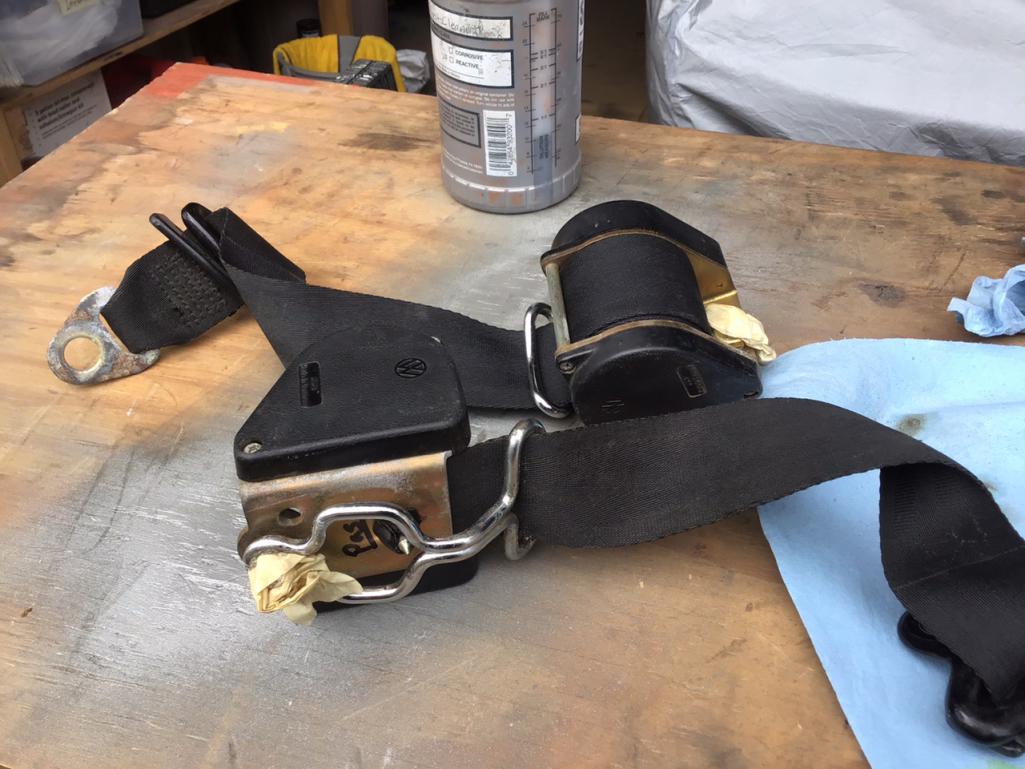 The belts seemed pretty dirty, so I decided to give them an overnight bath 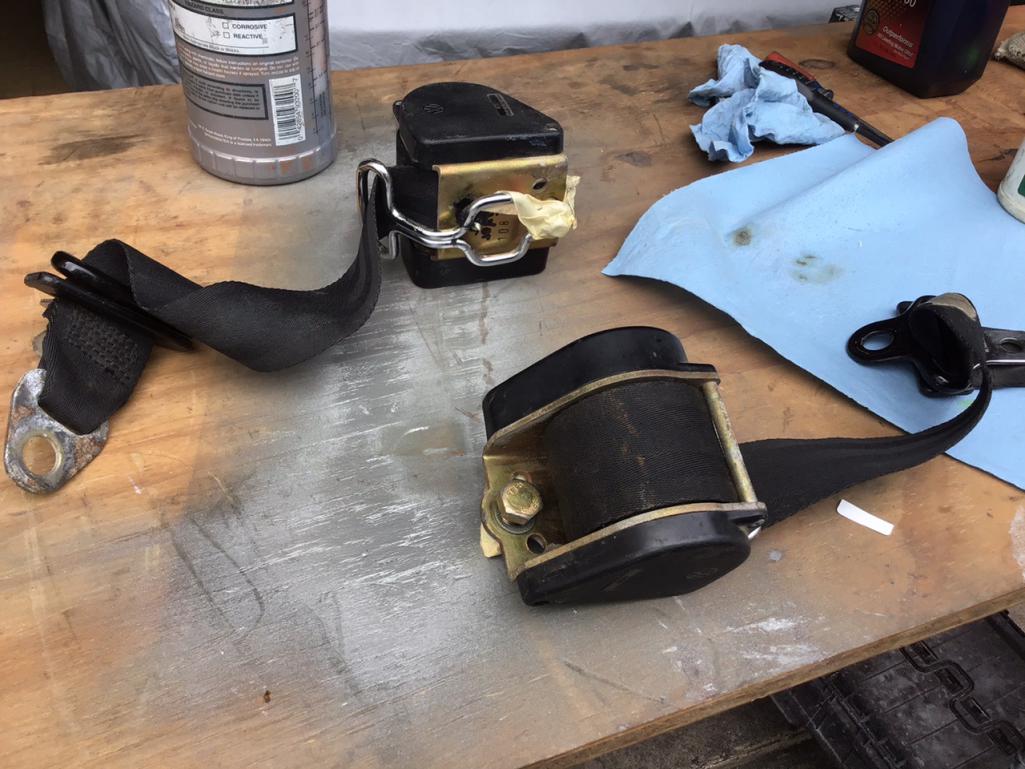 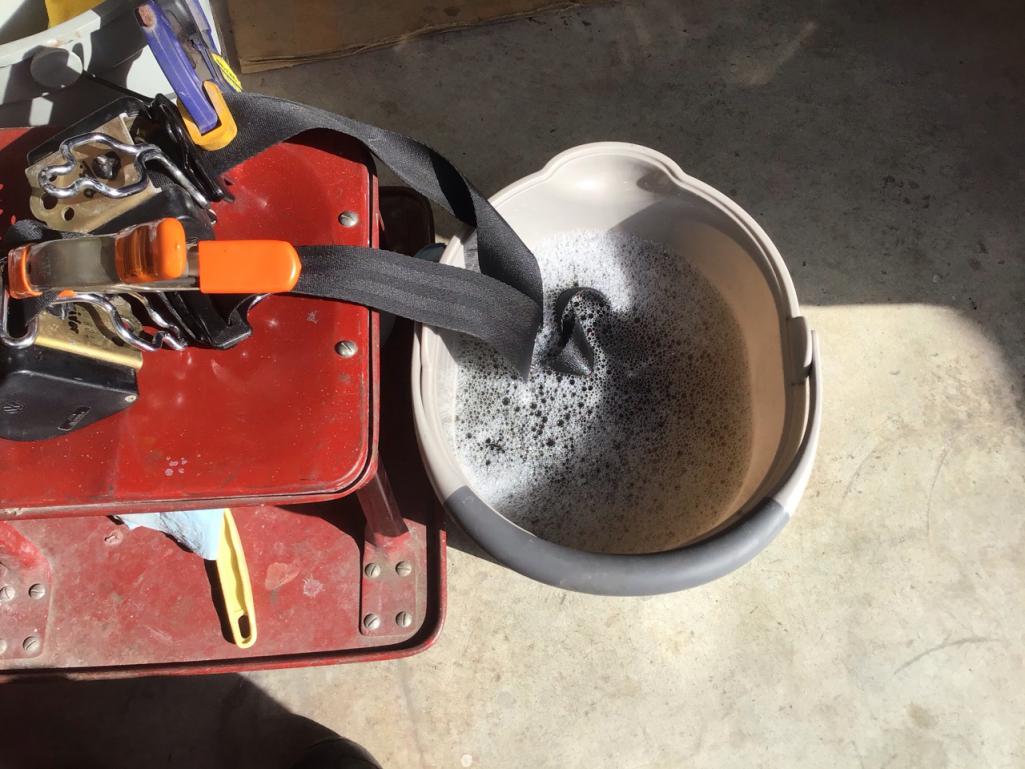 After soaking and manually agitating the water was black, so I dumped it out and soaked again in water only. The water was only slightly dirty, so I called it good. After this, I hung them up over night to dry. They seem to be working much better now. (IMG:style_emoticons/default/aktion035.gif) |
|
|
|
| Morph914 |
Mar 2 2021, 08:36 PM
Post
#72
|
|
Member Group: Members Posts: 435 Joined: 22-August 16 From: St Augustine, FL Member No.: 20,326 Region Association: South East States |
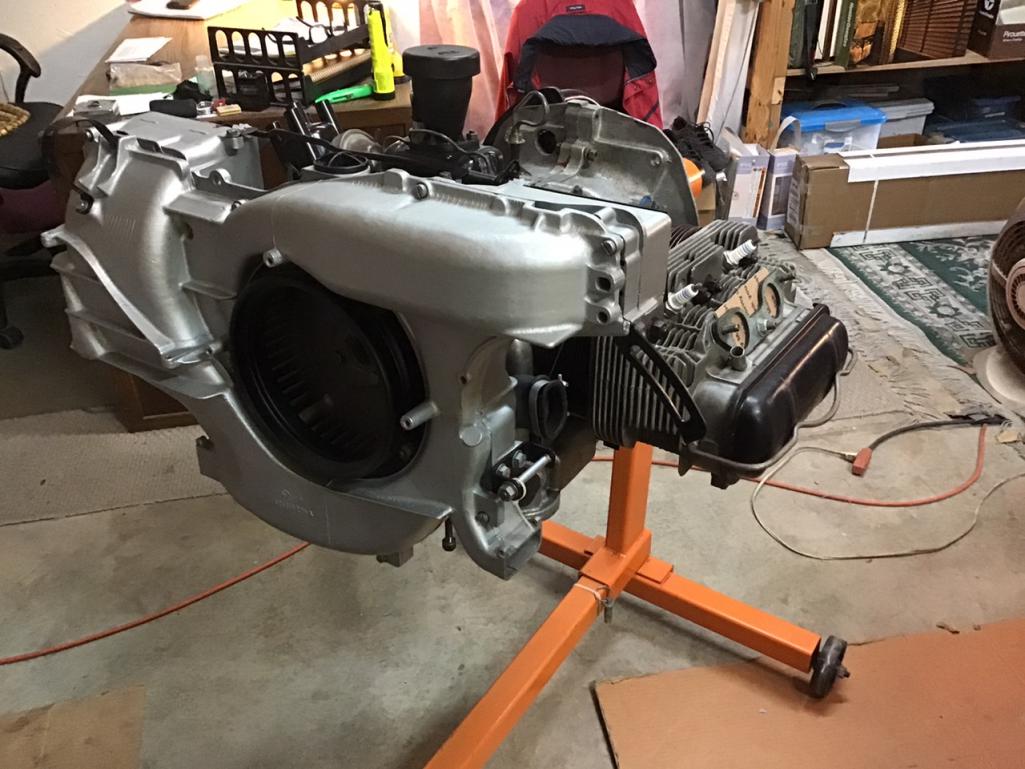
I was making fairly good progress today until my four arm engine attachment interfered with the right side tin going on.
I was able to get the alternator, some of the left side tin, the 123 distributor installed before the road block. I will need to get some kind of hoist to lift the engine off the stand so I can rotate the arm 180 degrees and then put it back on the stand. I’ll then continue with the assembly. 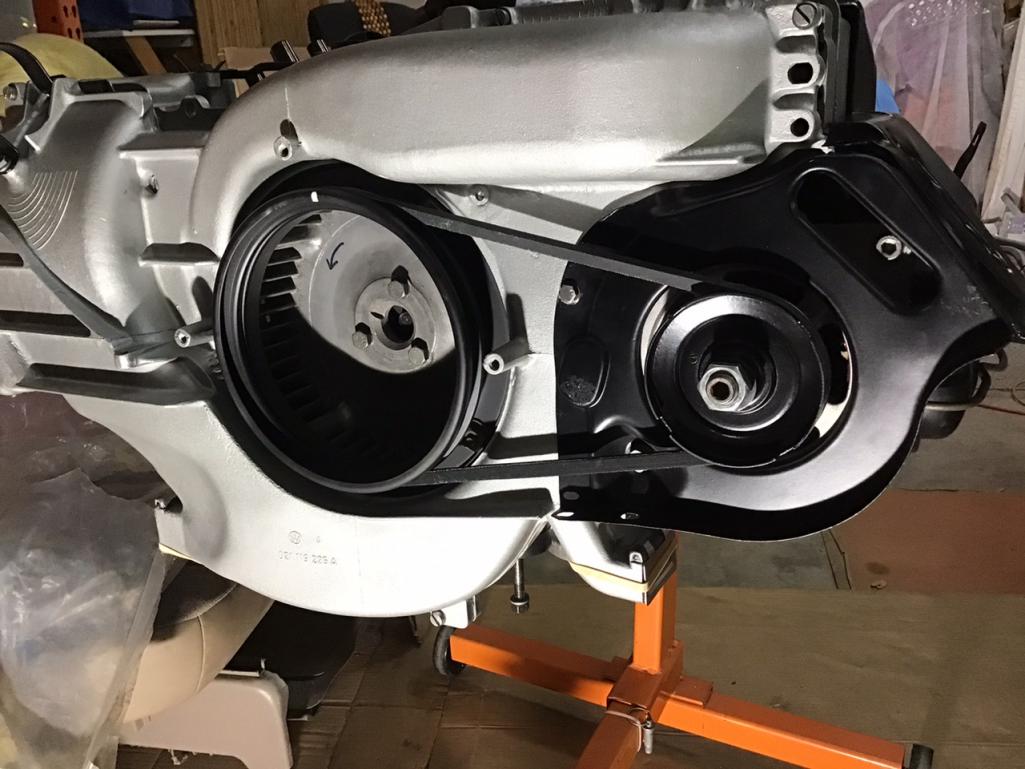 This is the part of the arm that interfered with the tin. 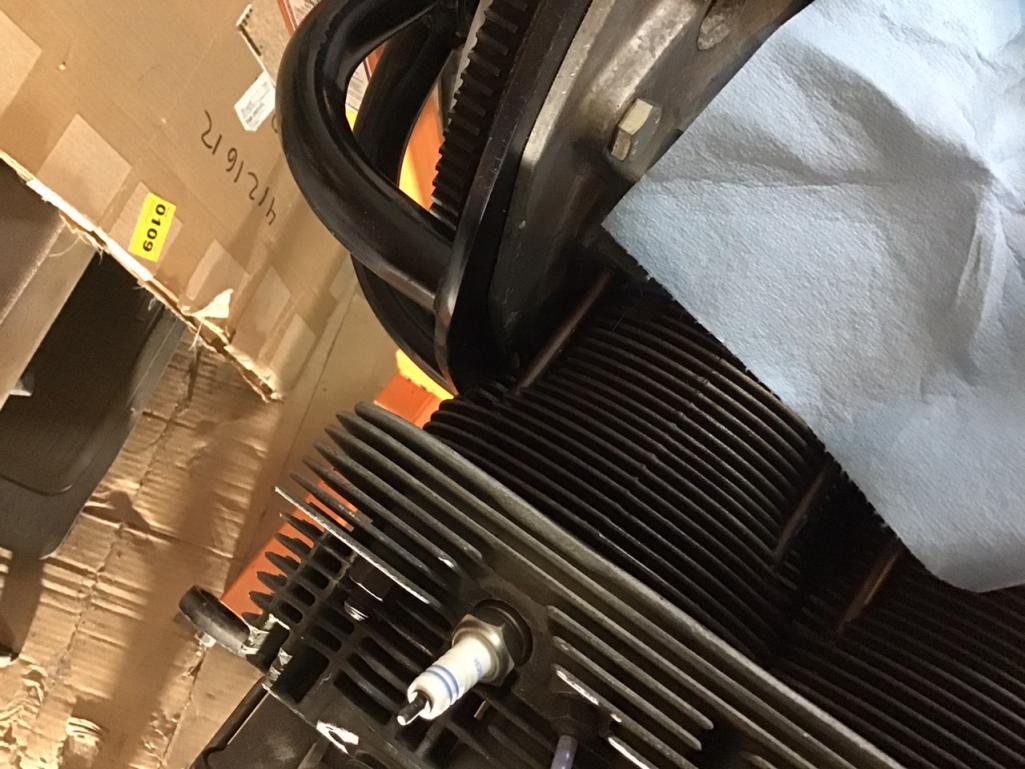 I tested the thermostat with a heat gun to make sure it works, and it was satisfying to see it work as designed. 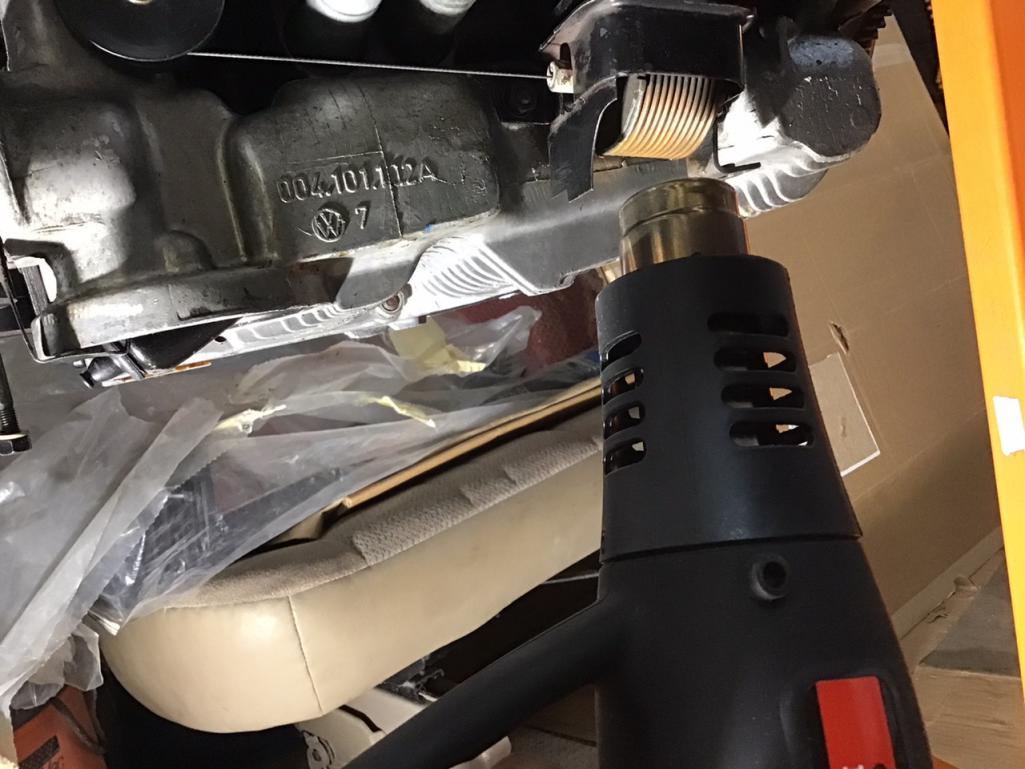 Is there any benefit to mounting the coil here versus on top of the tin? I have both mounts, so I can go either way. I kind of like this one better. 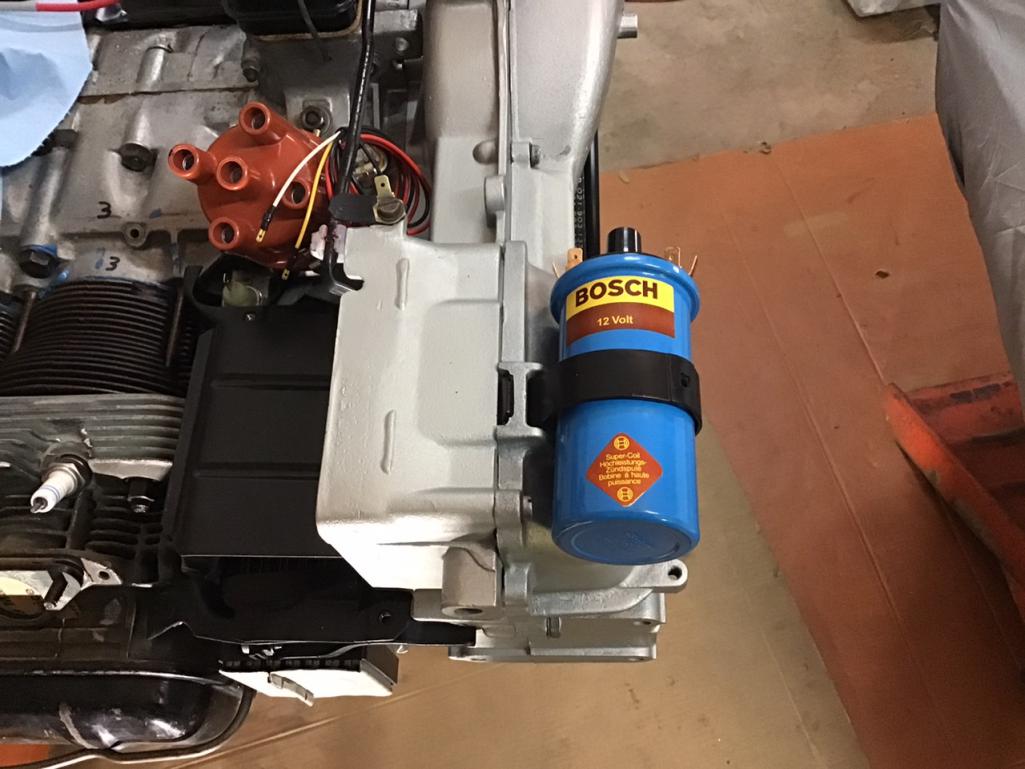 |
|
|
|
| barefoot |
Mar 3 2021, 07:11 AM
Post
#73
|
|
Senior Member Group: Members Posts: 1,433 Joined: 19-March 13 From: Charleston SC Member No.: 15,673 Region Association: South East States |
Is there any benefit to mounting the coil here versus on top of the tin? I have both mounts, so I can go either way. I kind of like this one better. [/quote] Yes, keep it on he fan shroud. All the ones mounted on the tin caused fatigue cracks as the tins are too weak to hold the coil over time. Porsche moved it there for a reason. (IMG:style_emoticons/default/smile.gif) |
|
|
|
| anderssj |
Mar 3 2021, 09:50 AM
Post
#74
|
|
Dog is my copilot... Group: Members Posts: 1,763 Joined: 28-January 03 From: VA Member No.: 207 Region Association: MidAtlantic Region |
QUOTE(Morph914 @ Mar 2 2021, 10:36 PM) Is there any benefit to mounting the coil here versus on top of the tin? I have both mounts, so I can go either way. I kind of like this one better. John, do you have a part number for the fan shroud coil mount? Thanks in advance! Steve A- |
 |
|
| Morph914 |
Mar 3 2021, 07:45 PM
Post
#75
|
|
Member Group: Members Posts: 435 Joined: 22-August 16 From: St Augustine, FL Member No.: 20,326 Region Association: South East States |
QUOTE(anderssj @ Mar 3 2021, 10:50 AM) QUOTE(Morph914 @ Mar 2 2021, 10:36 PM) Is there any benefit to mounting the coil here versus on top of the tin? I have both mounts, so I can go either way. I kind of like this one better. John, do you have a part number for the fan shroud coil mount? Thanks in advance! Steve A- I’ll check tomorrow and let you know. |
|
|
|
| Morph914 |
Mar 13 2021, 08:02 PM
Post
#76
|
|
Member Group: Members Posts: 435 Joined: 22-August 16 From: St Augustine, FL Member No.: 20,326 Region Association: South East States |
Started on the vinyl last week, the weather has been in the 70s with low humidity, so need to take advantage. I am trying to finish anything that needs to be painted or glued before the heat and humidity set in.
   I was super stoked on how the vinyl turned out and happy to have that behind me.  Today was rear window install day. First off I replaced the engine lid to glass seal.  Set the spacers at the bottom 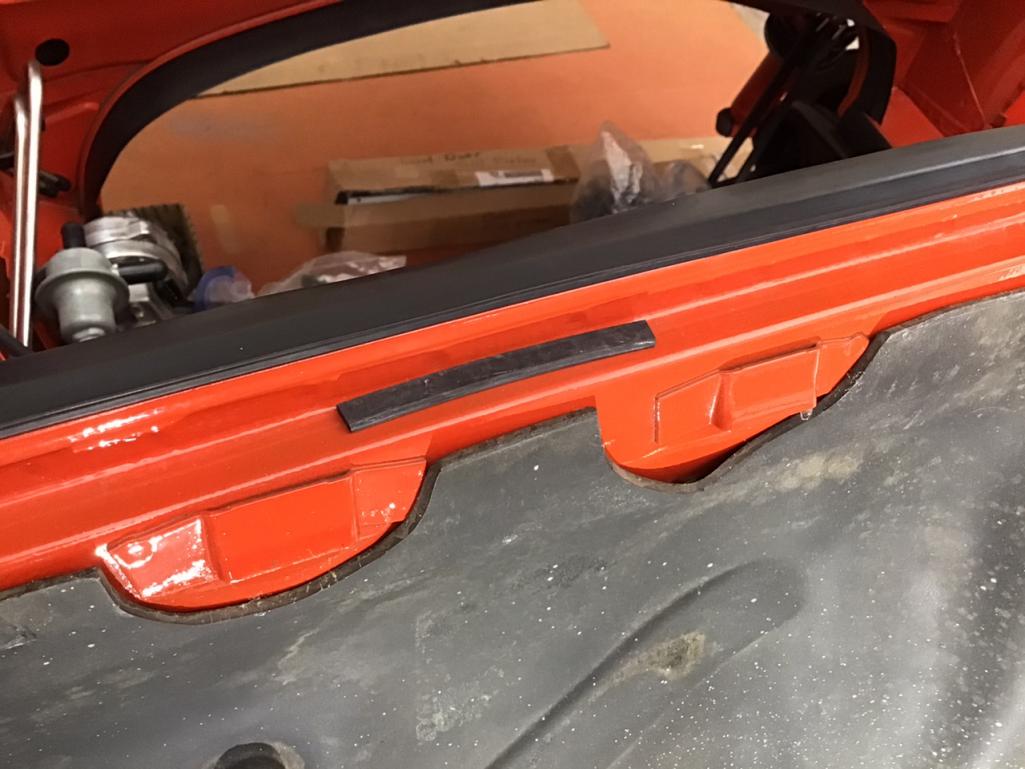 Install the butyl rope 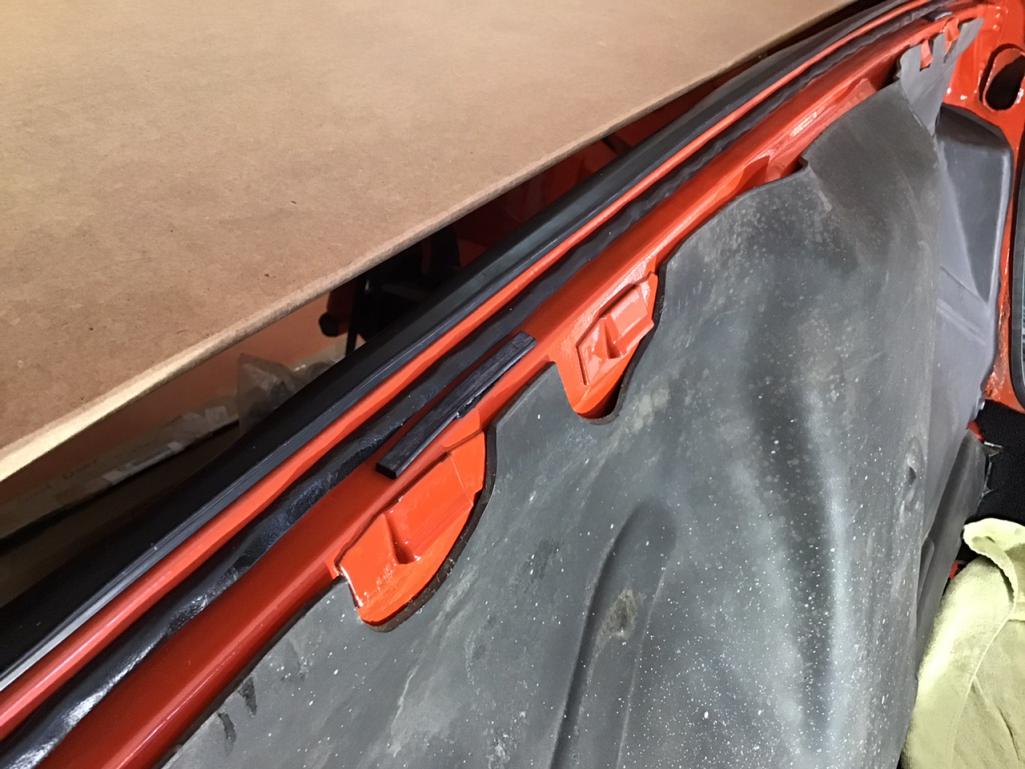 And then the glass. It went ok, but I’m not at all satisfied at this poor design of having nothing to keep the glass in place other than the butyl. I’m going to try and come up with something... 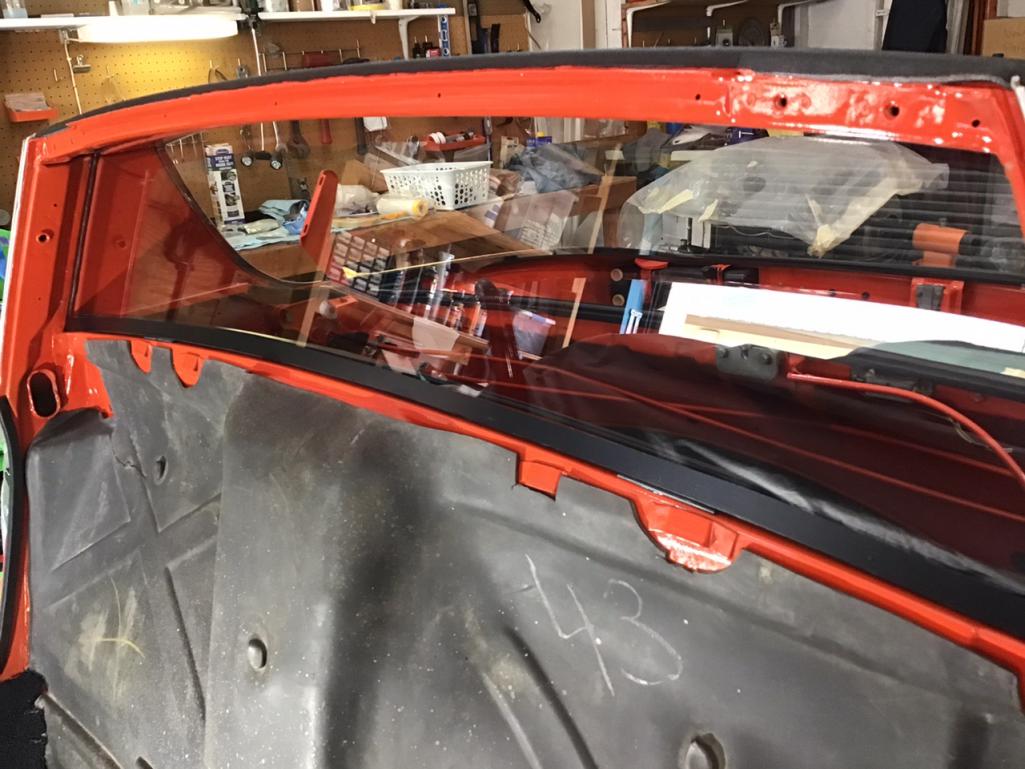 |
|
|
|
| Morph914 |
Mar 13 2021, 08:21 PM
Post
#77
|
|
Member Group: Members Posts: 435 Joined: 22-August 16 From: St Augustine, FL Member No.: 20,326 Region Association: South East States |
Also worked on installing the vinyl on the floor
 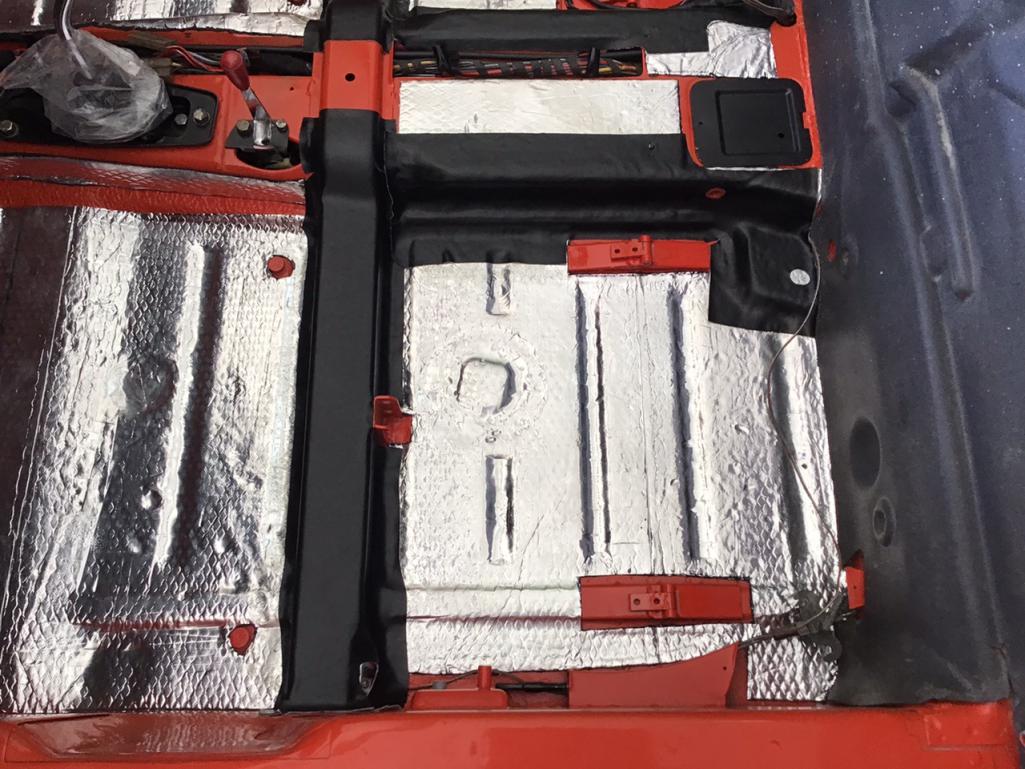 Then started fitting the carpet 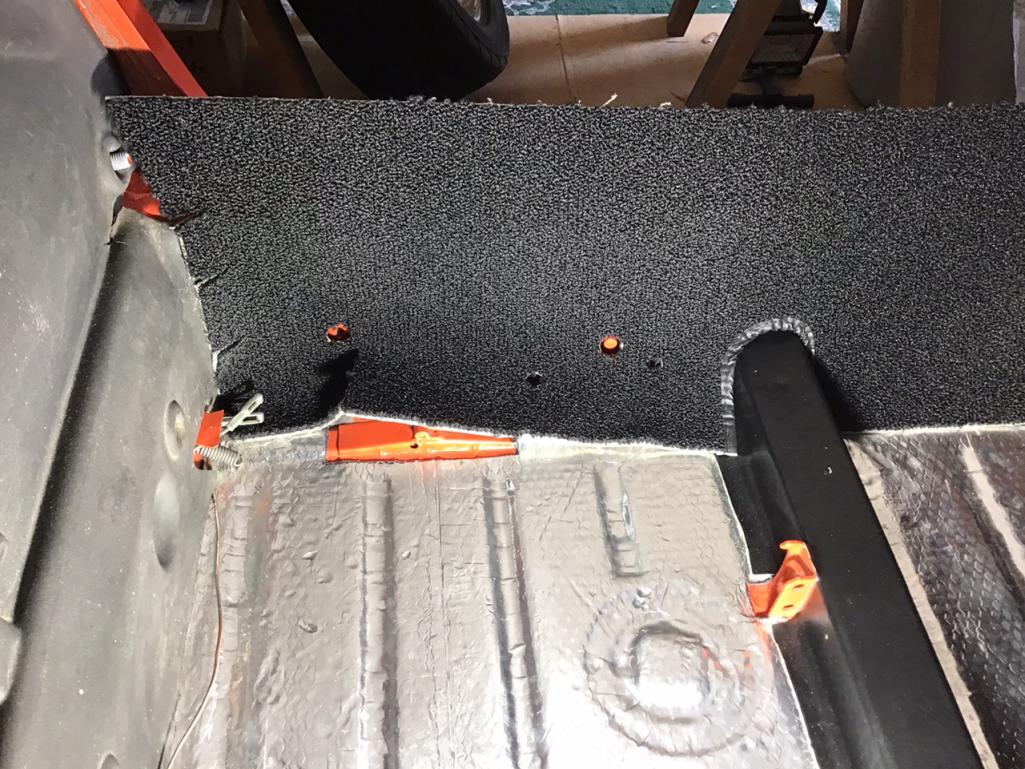 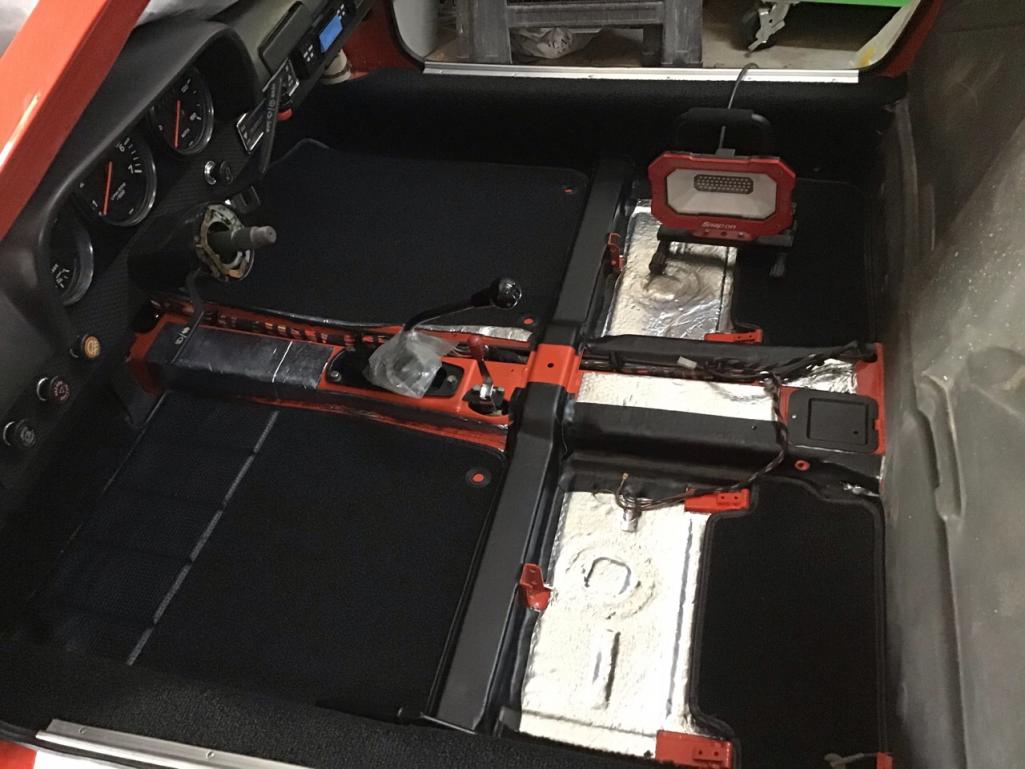 And finally the carpet strip and threshold plate. These were a bit of a challenge due to having to redrill all the holes since an inner long support kit had been installed. I’m going to leave the center consul and carpet pieces off in case I need access to the electrical after first start/test. 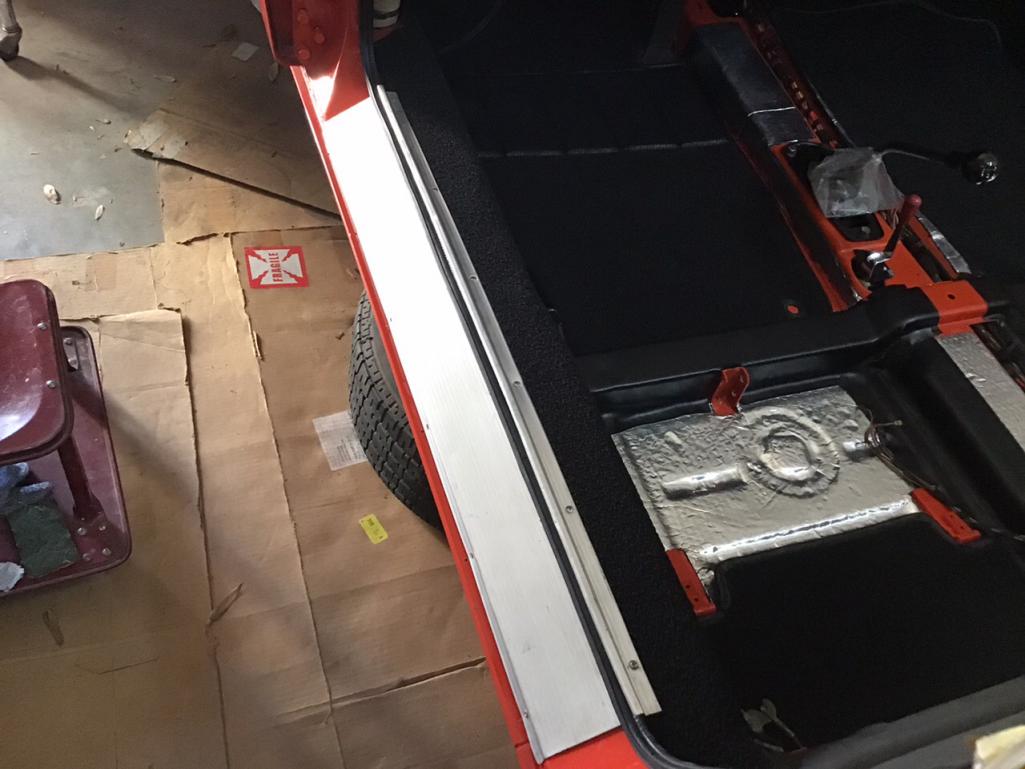 |
|
|
|
| bkrantz |
Mar 13 2021, 08:32 PM
Post
#78
|
|
914 Guru Group: Members Posts: 8,529 Joined: 3-August 19 From: SW Colorado Member No.: 23,343 Region Association: Rocky Mountains |
Looks great! We were in sync on targa vinyl, but you leaped ahead with carpet.
|
|
|
|
| DC_neun_vierzehn |
Mar 13 2021, 09:44 PM
Post
#79
|
|
Senior Member Group: Members Posts: 592 Joined: 16-November 20 From: Coastal Delaware Member No.: 24,893 Region Association: MidAtlantic Region |
QUOTE(Morph914 @ Feb 25 2021, 09:05 PM) Time to clean and inspect the seat belt bits and pieces. Off with the old PRESS sticker And on with the new sticker And now for the retractors The belts seemed pretty dirty, so I decided to give them an overnight bath After soaking and manually agitating the water was black, so I dumped it out and soaked again in water only. The water was only slightly dirty, so I called it good. After this, I hung them up over night to dry. They seem to be working much better now. (IMG:style_emoticons/default/aktion035.gif) Nice touch with the new stickers. Where did you get them? And I assume you have to take them apart to remove/replace them? |
|
|
|
| Morph914 |
Mar 14 2021, 08:16 AM
Post
#80
|
|
Member Group: Members Posts: 435 Joined: 22-August 16 From: St Augustine, FL Member No.: 20,326 Region Association: South East States |
QUOTE(DC_neun_vierzehn @ Mar 13 2021, 09:44 PM) QUOTE(Morph914 @ Feb 25 2021, 09:05 PM) Time to clean and inspect the seat belt bits and pieces. Off with the old PRESS sticker And on with the new sticker And now for the retractors The belts seemed pretty dirty, so I decided to give them an overnight bath After soaking and manually agitating the water was black, so I dumped it out and soaked again in water only. The water was only slightly dirty, so I called it good. After this, I hung them up over night to dry. They seem to be working much better now. (IMG:style_emoticons/default/aktion035.gif) Nice touch with the new stickers. Where did you get them? And I assume you have to take them apart to remove/replace them? Yes, you will have to take it apart to get the old sticker off, but this is very easy to do. As far as where I purchased, I don’t remember, they were sitting in a box for a couple of years. Either 914 Rubber, AA or Pelican I would guess has these. |
|
|
|
|
2 User(s) are reading this topic (2 Guests and 0 Anonymous Users)
0 Members:

|
Lo-Fi Version | Time is now: 9th November 2025 - 03:58 PM |
Invision Power Board
v9.1.4 © 2025 IPS, Inc.