|
|
|
Porsche, and the Porsche crest are registered trademarks of Dr. Ing. h.c. F. Porsche AG.
This site is not affiliated with Porsche in any way. Its only purpose is to provide an online forum for car enthusiasts. All other trademarks are property of their respective owners. |
|
|

  |

| 930cabman |
 Mar 14 2021, 09:12 AM Mar 14 2021, 09:12 AM
Post
#81
|
|
Advanced Member  Group: Members Posts: 4,323 Joined: 12-November 20 From: Buffalo Member No.: 24,877 Region Association: North East States |
This is great, thanks for posting and sharing all of your information. we are several months behind your project but will use the information gained from your posts
|
   |

 
|
| Morph914 |
Mar 15 2021, 11:58 AM
Post
#82
|
|
Member Group: Members Posts: 435 Joined: 22-August 16 From: St Augustine, FL Member No.: 20,326 Region Association: South East States |
QUOTE(930cabman @ Mar 14 2021, 09:12 AM)  This is great, thanks for posting and sharing all of your information. we are several months behind your project but will use the information gained from your posts You are welcome, l have also benefited from other posts in a big way, so just trying to pass it down. |
 |
|
| Morph914 |
Mar 18 2021, 07:04 PM
Post
#83
|
|
Member Group: Members Posts: 435 Joined: 22-August 16 From: St Augustine, FL Member No.: 20,326 Region Association: South East States |
I pulled the targa top out to check the condition. It will need a complete restore. Off with all the old bits and pieces.
 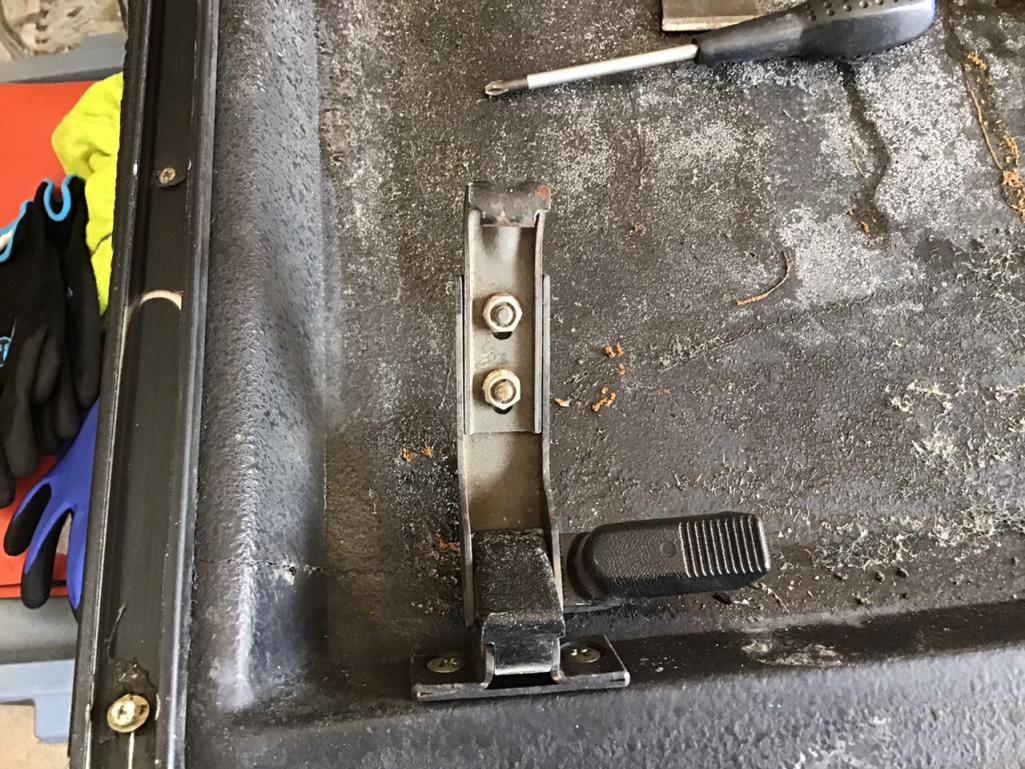 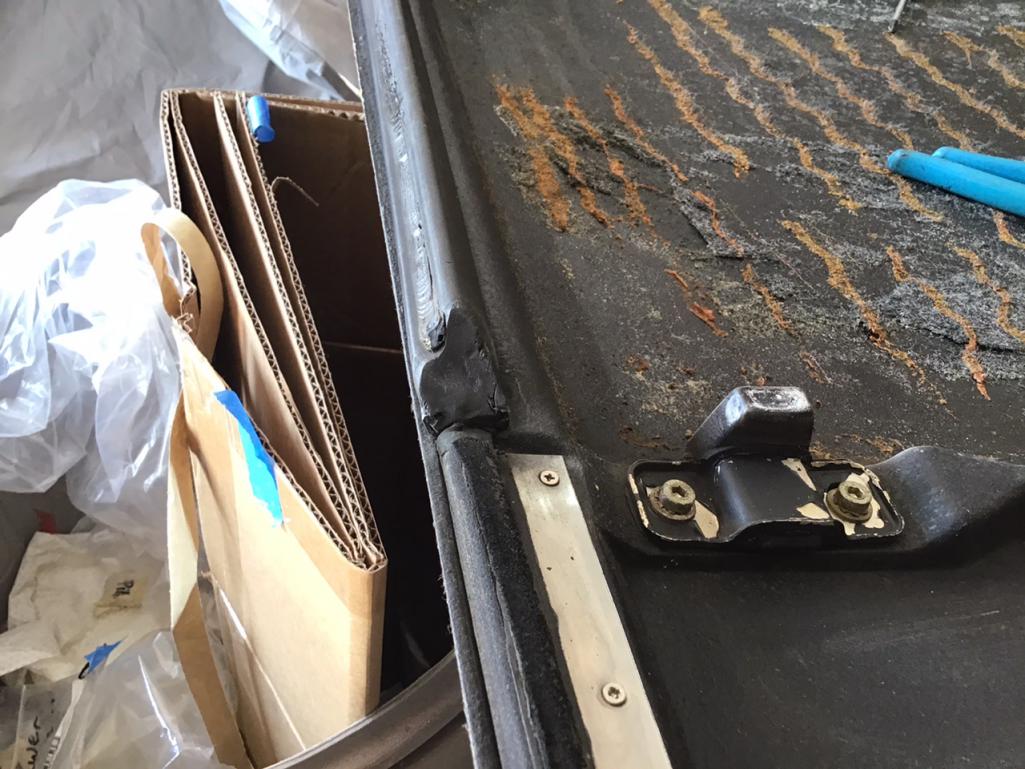 The short side metal pieces are not included in the new 914 Rubber seal with the fuzzy trim, so I had to dissect them off the original seal. This is not an easy task, but it was better than finding a piece of steel and and cutting, etc. 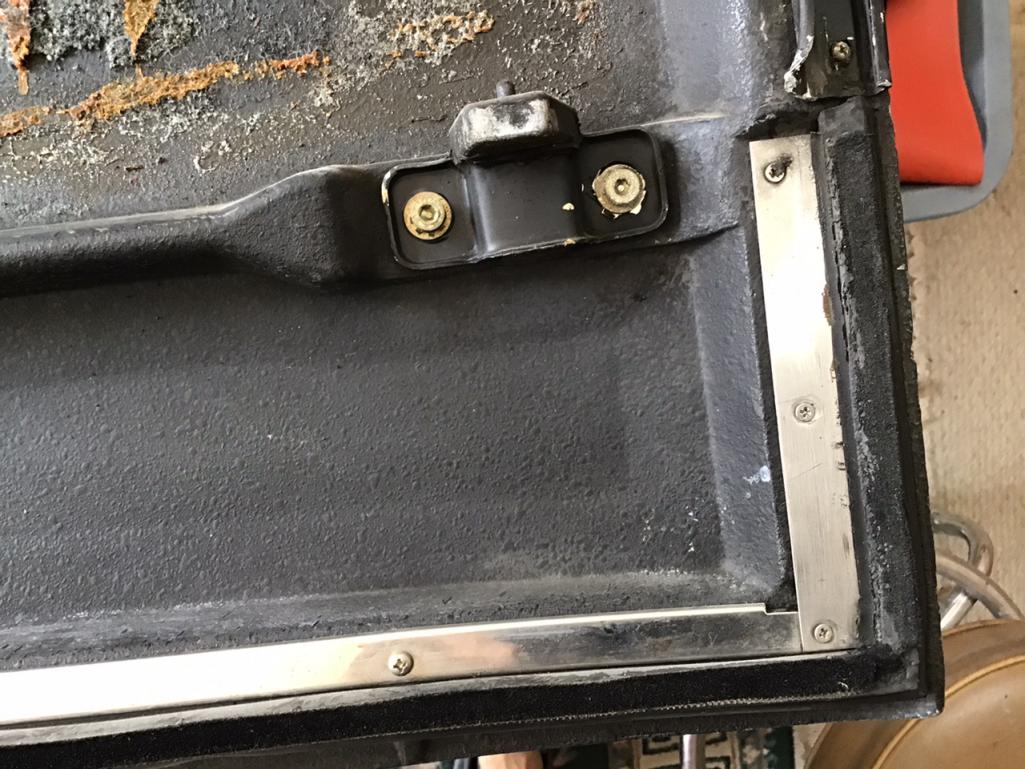 These are the harvested pieces, not great but they will do. 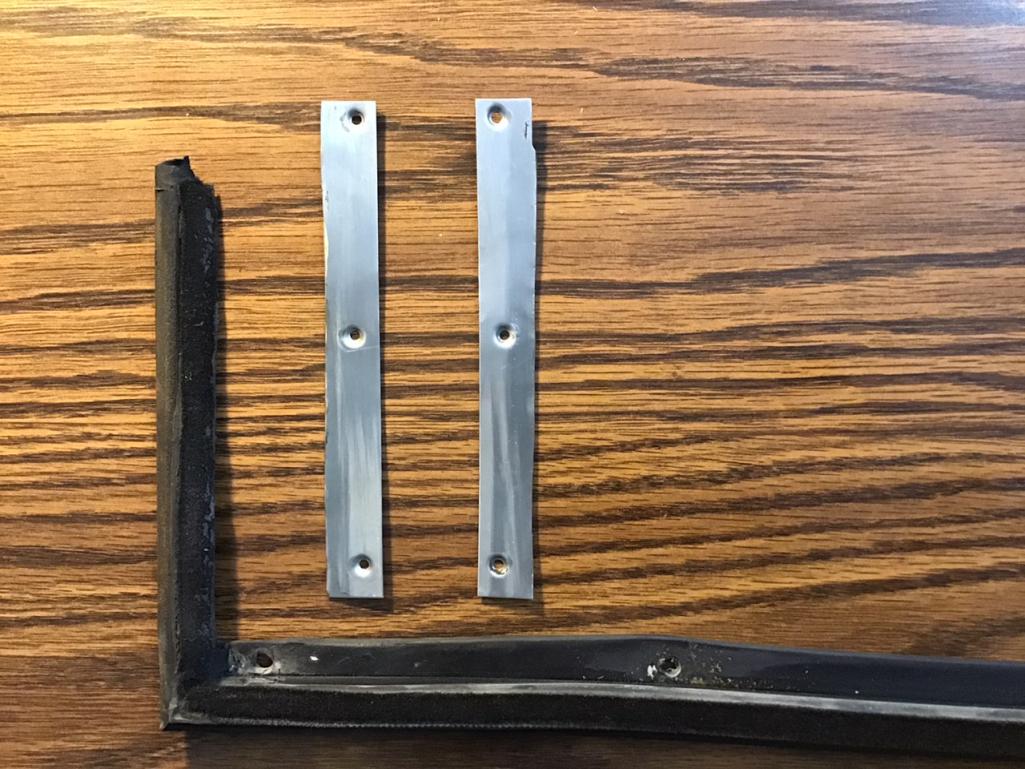 This will be its new home. 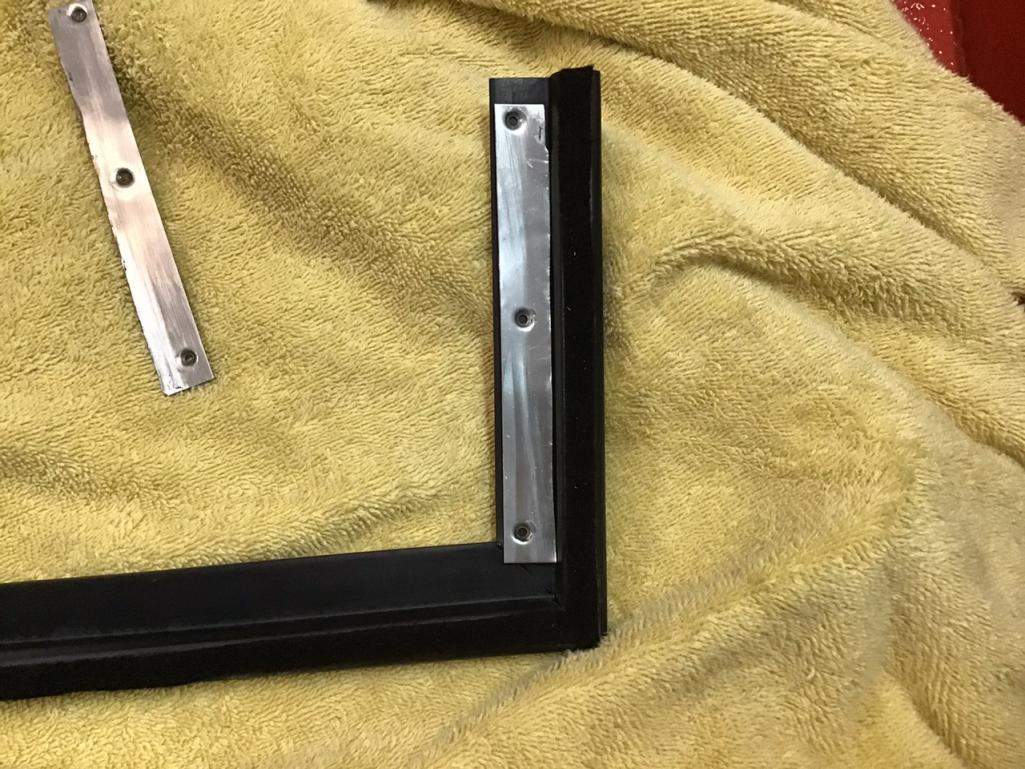 Attached thumbnail(s) 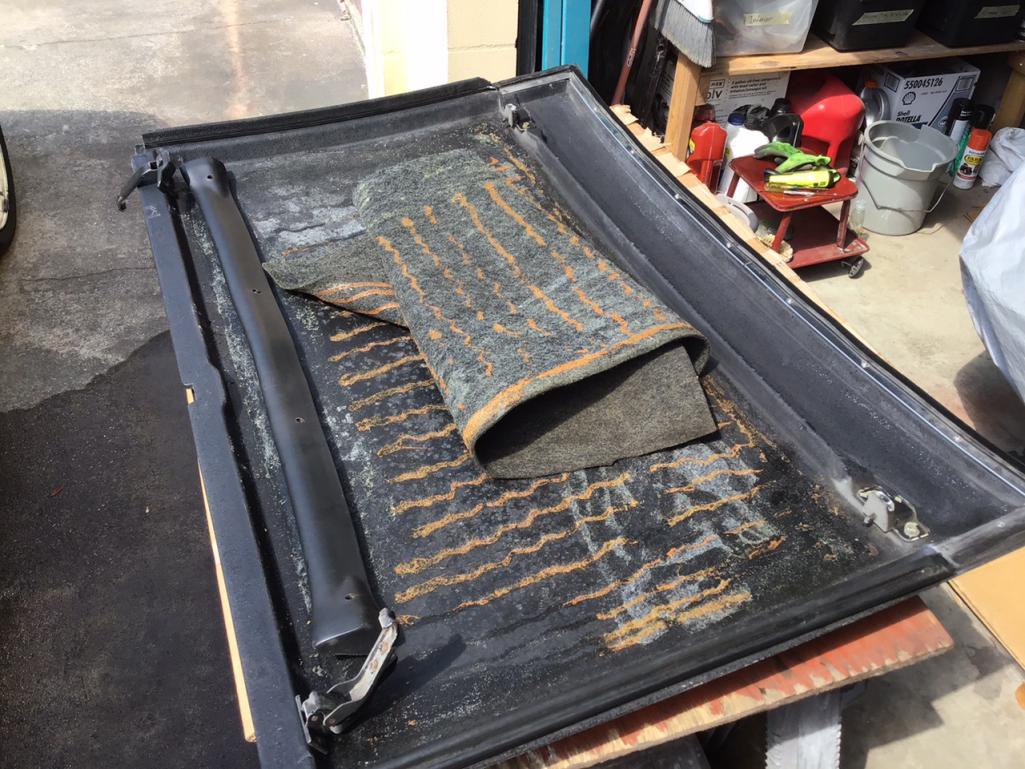
|
|
|
|
| Morph914 |
Mar 22 2021, 10:28 AM
Post
#84
|
|
Member Group: Members Posts: 435 Joined: 22-August 16 From: St Augustine, FL Member No.: 20,326 Region Association: South East States |
Time for some window seal replacements. The new seals are from 914 Rubber.
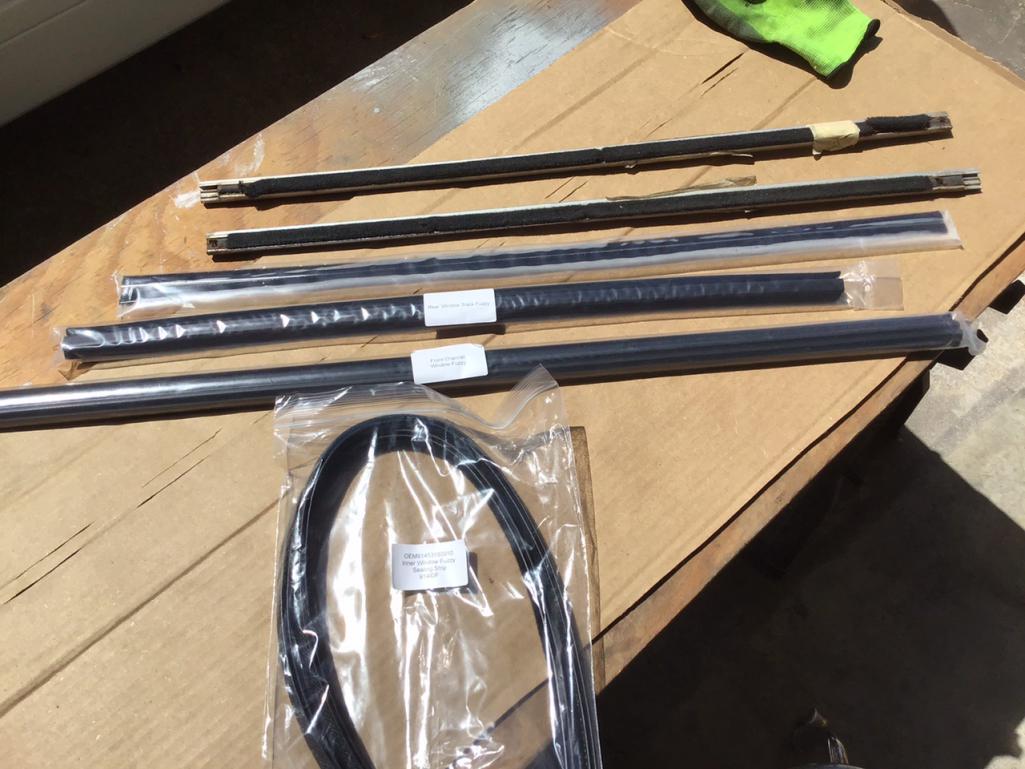 First off was replacing the top fuzzy seal 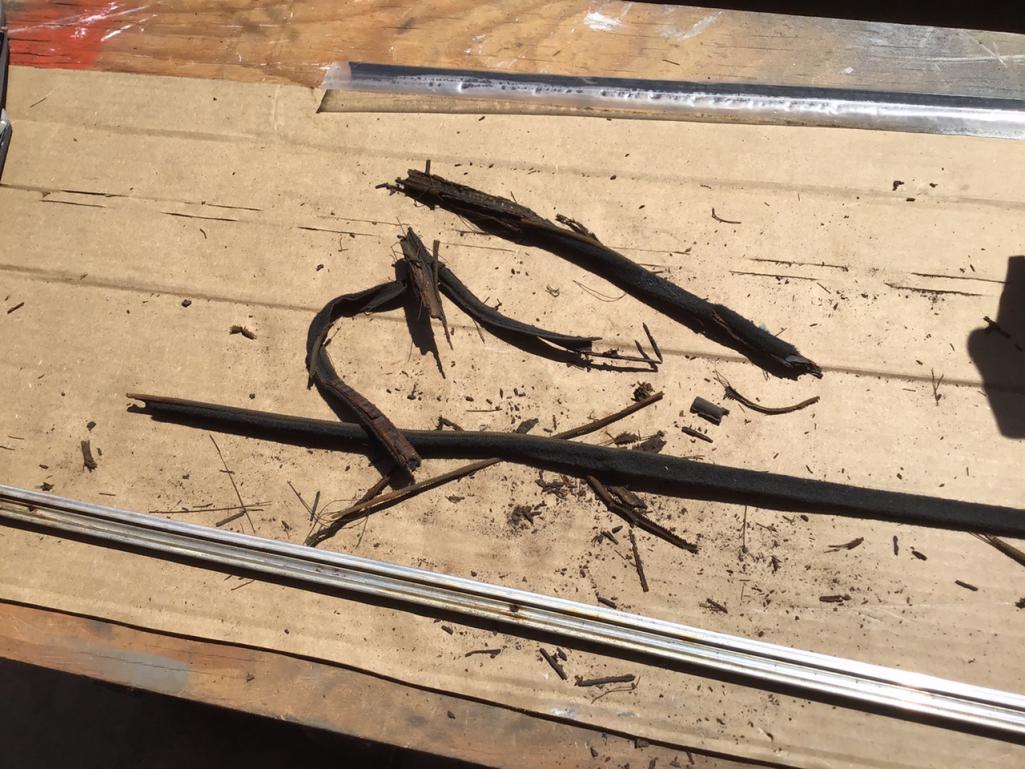 The first thing I notice is that the original seal or fuzzy strip is much more substantial than the new one. So much so that it won’t even stay in the track, perhaps I got the wrong seals? If not I will have to use some adhesive to keep these in place. 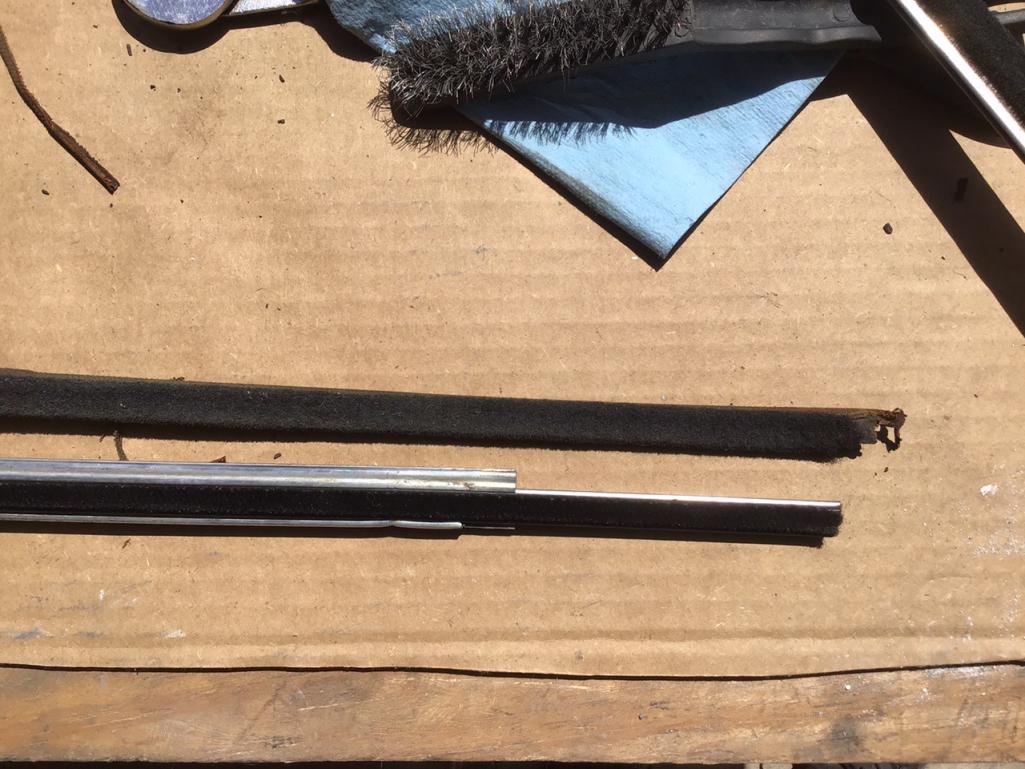 Next were the vertical seals 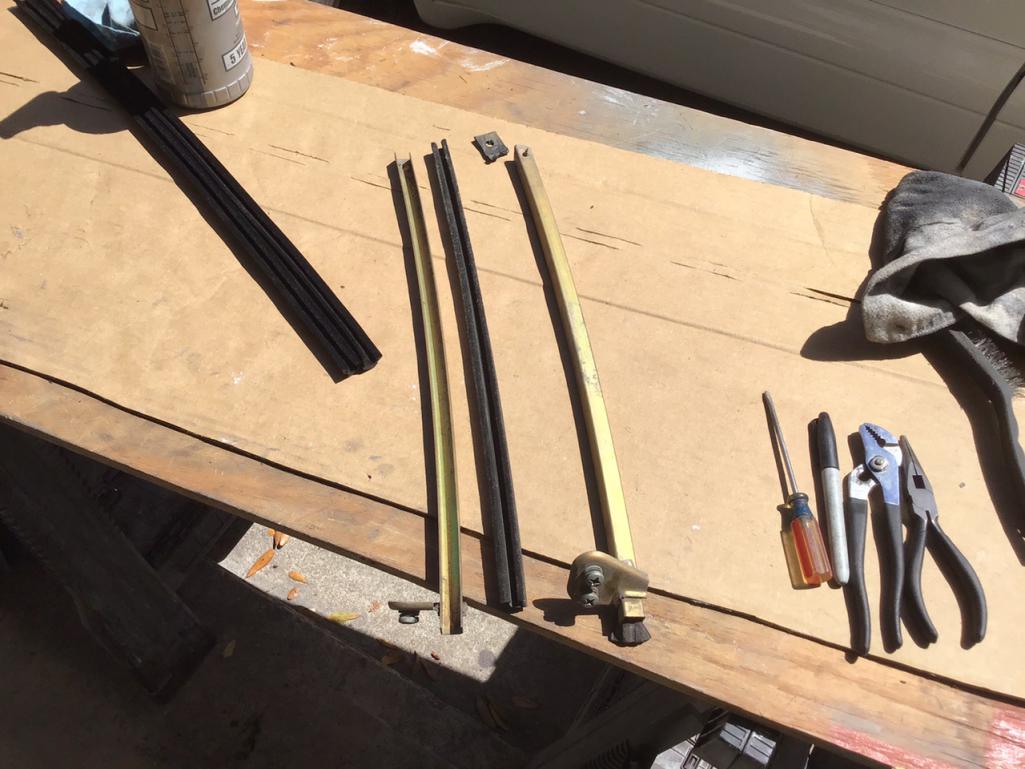 These seals fit nicely and are plenty long so I will trim later when I install them. 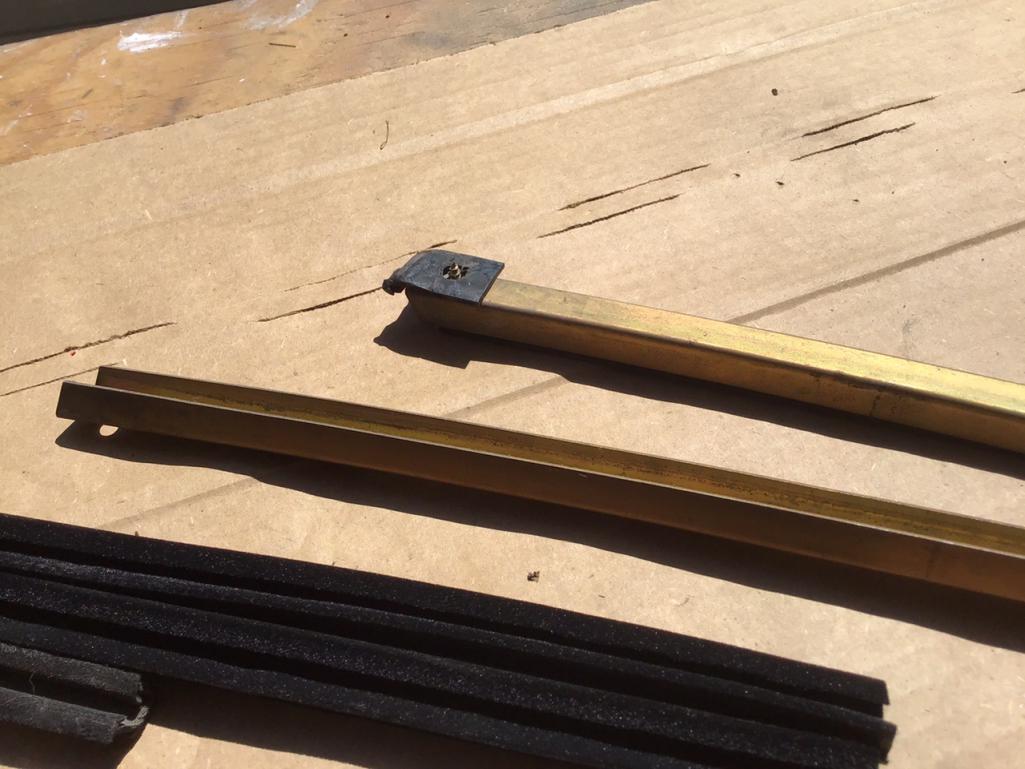 |
|
|
|
| Morph914 |
Apr 6 2021, 12:32 PM
Post
#85
|
|
Member Group: Members Posts: 435 Joined: 22-August 16 From: St Augustine, FL Member No.: 20,326 Region Association: South East States |
Today I’m continuing with the refresh on my targa top. I will be installing the 914 Rubber headliner. First I just laid the piece in to check the fit, it looks good but I wasn’t sure if it’s supposed to be trimmed on the sides to lay flat or not. I elected to leave it the way it came, because the chances of me getting a good clean straight cut would be slim.
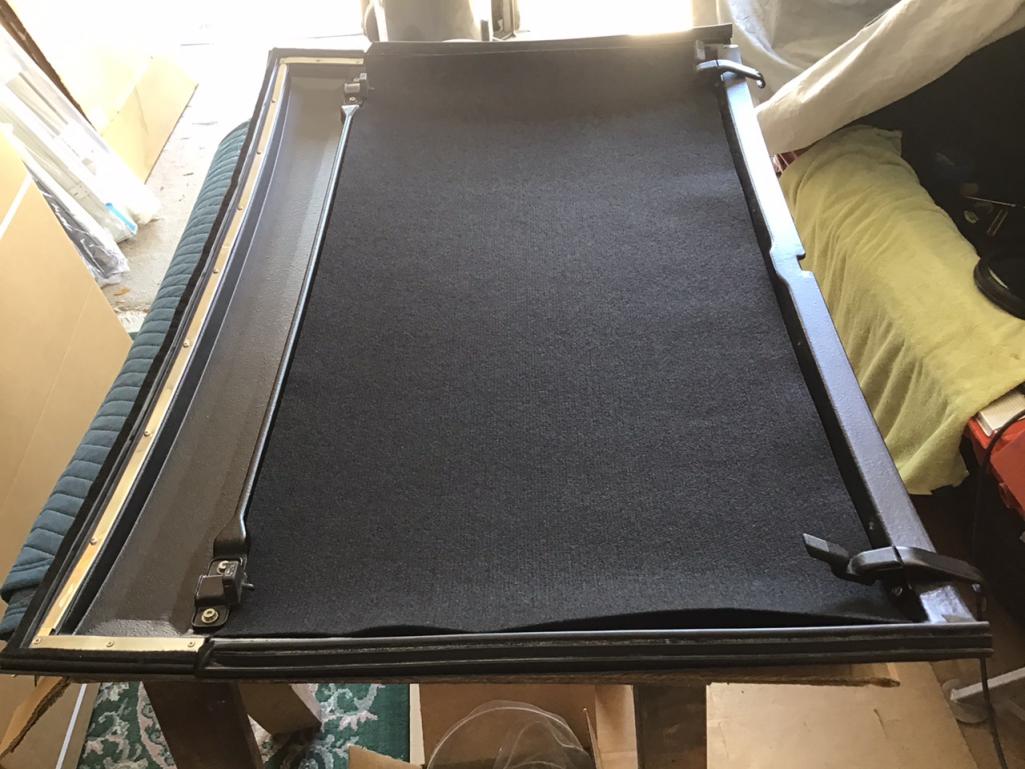 Next I masked everything off that I didn’t want adhesive on, and then applied the 3M adhesive to both surfaces in a criss cross pattern.  After waiting about 10 minutes, I had a buddy help me with getting it in straight, etc. Super stoked on how good this came out. It was a nice piece, and looks fantastic! 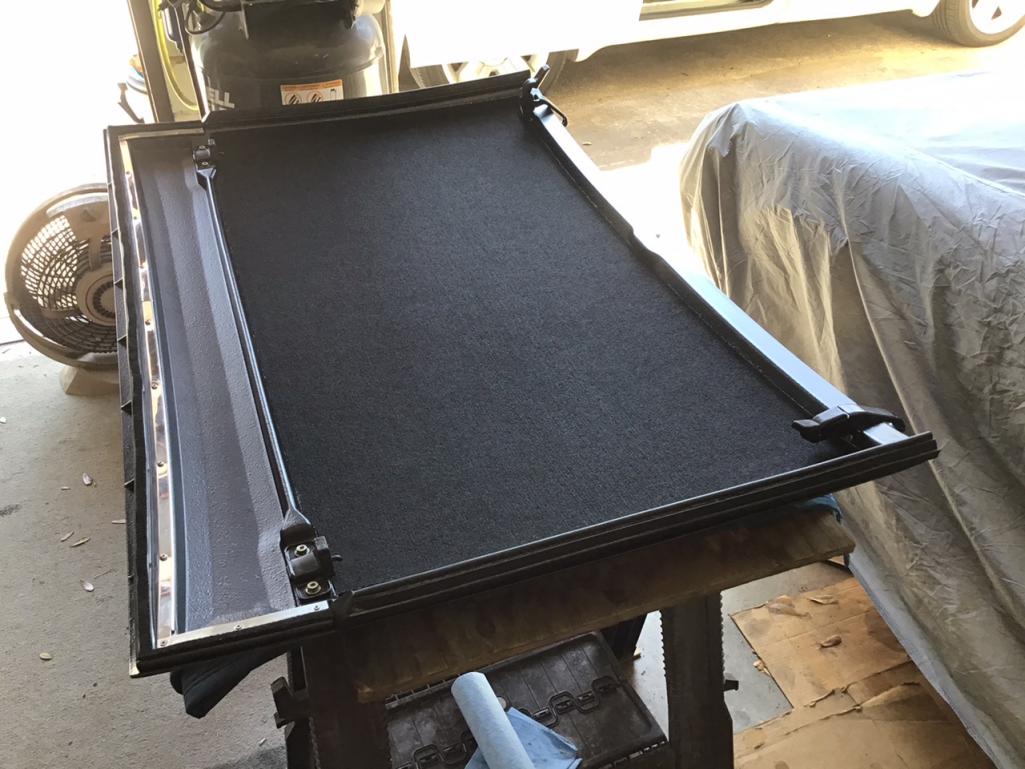 Here’s more after the front pad install.  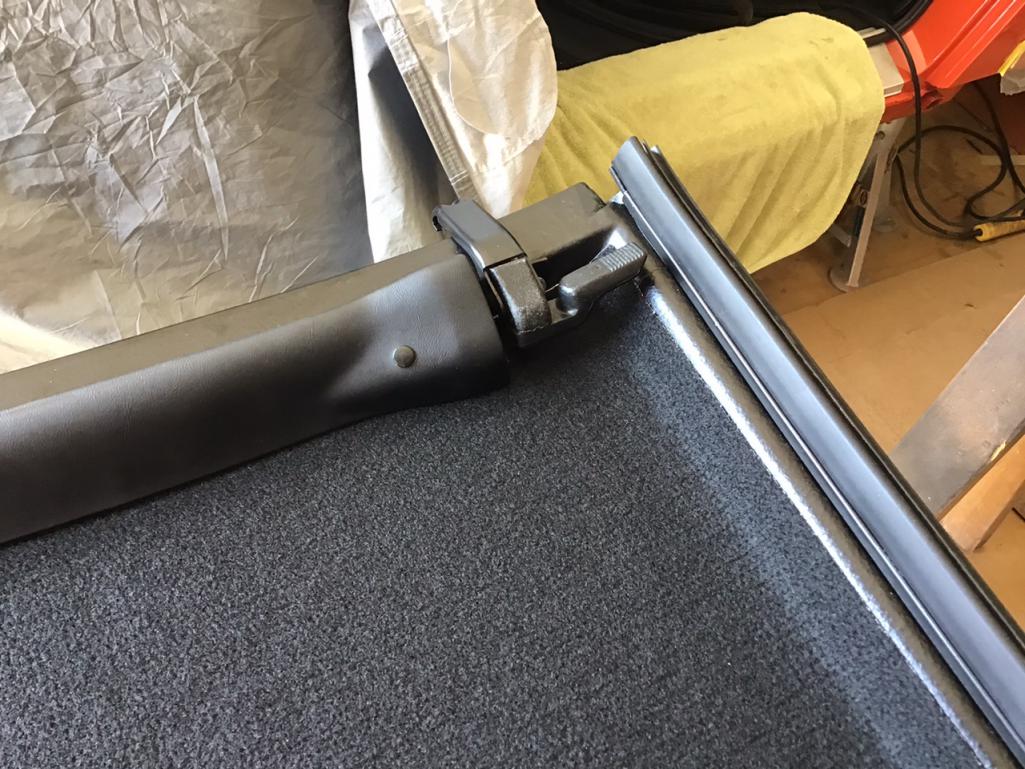 I left the side seals a bit long and will fit the top if and when I can get my main targa seal in. Then I will trim the seals as necessary. Happy to have this part refreshed! Attached thumbnail(s) 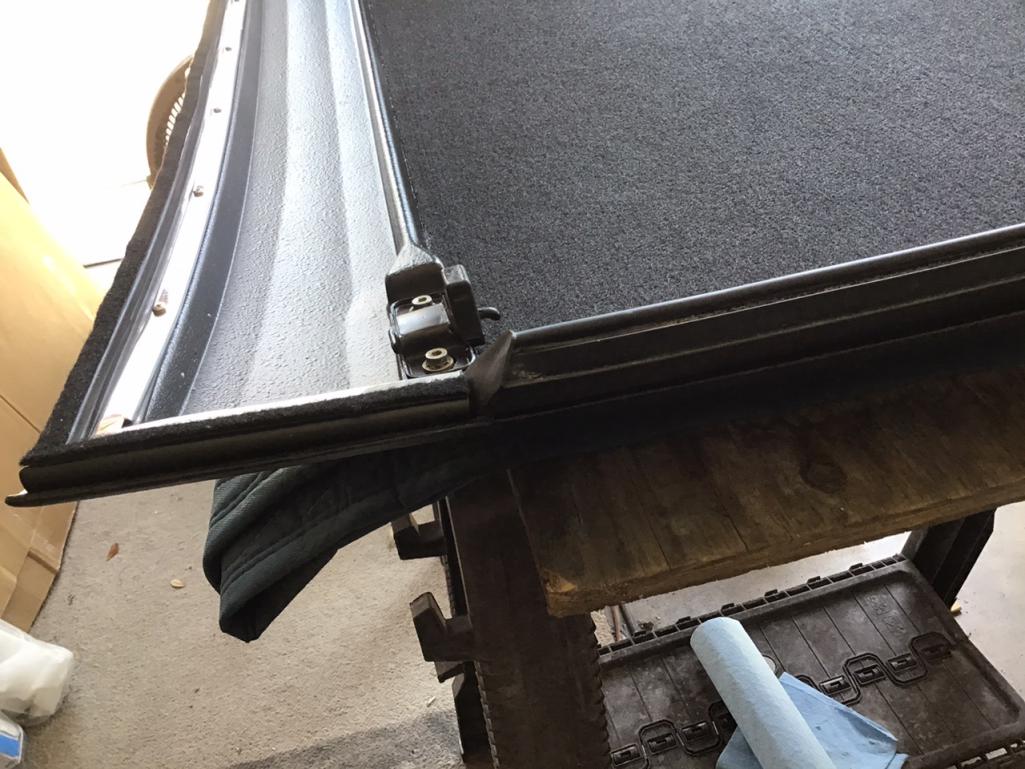
|
|
|
|
| 930cabman |
Apr 6 2021, 12:51 PM
Post
#86
|
|
Advanced Member Group: Members Posts: 4,323 Joined: 12-November 20 From: Buffalo Member No.: 24,877 Region Association: North East States |
+1, looks great, check another item from the list
|
|
|
|
| Morph914 |
Apr 17 2021, 08:34 PM
Post
#87
|
|
Member Group: Members Posts: 435 Joined: 22-August 16 From: St Augustine, FL Member No.: 20,326 Region Association: South East States |
Time to get the engine off the stand so I can marry the trans to it and start putting on all the bits and pieces.
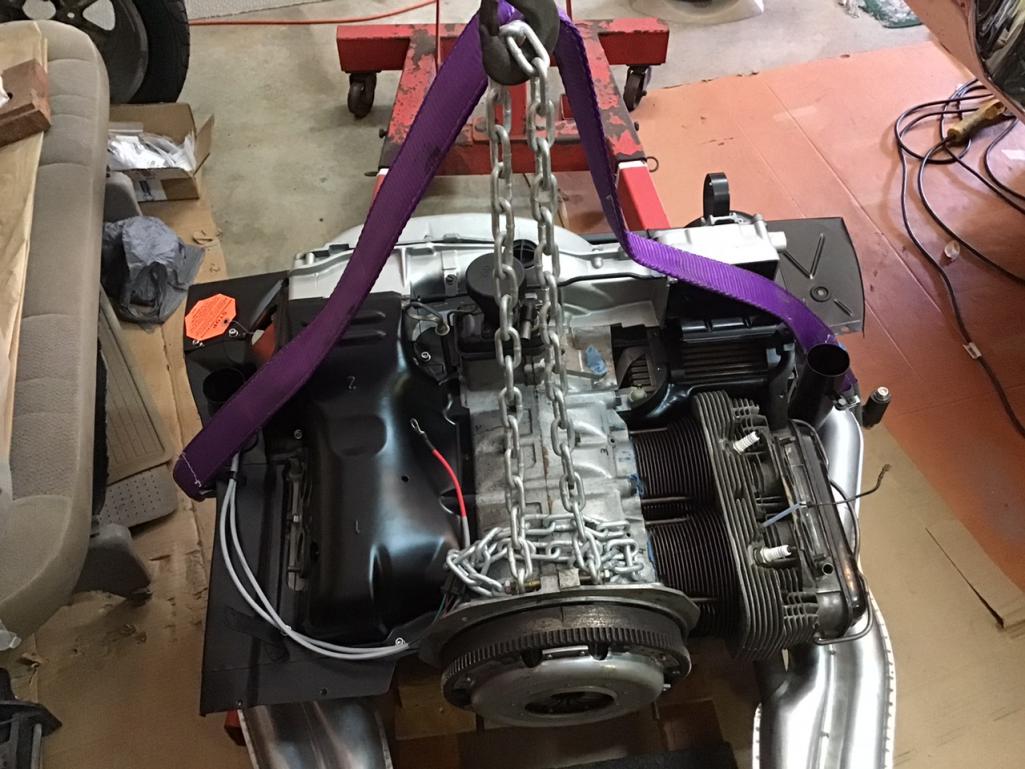 The trans meets its new mate. 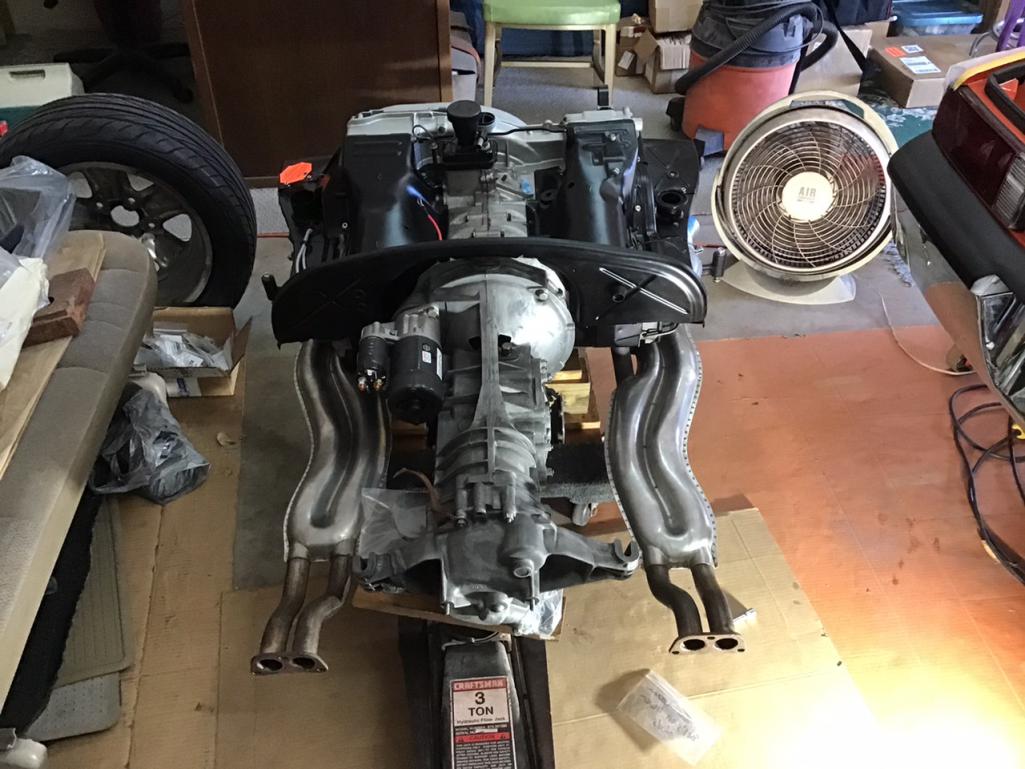 Intake runners, fuel injectors, fuel lines 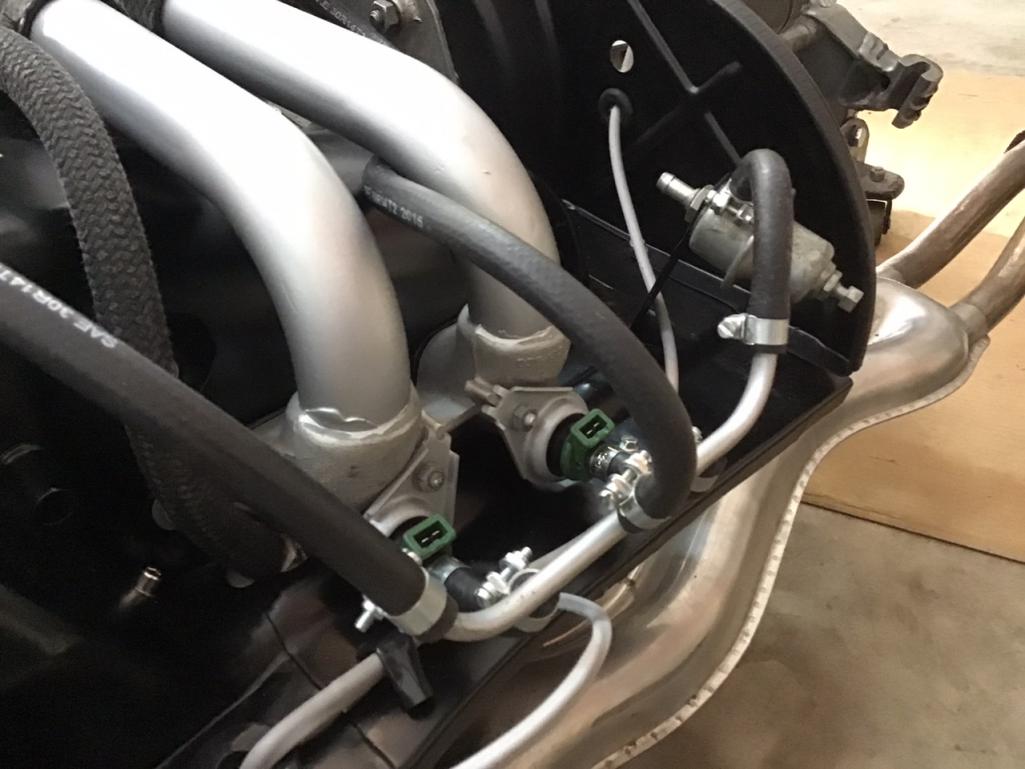 Got the 123 dizzy installed and wired to the coil 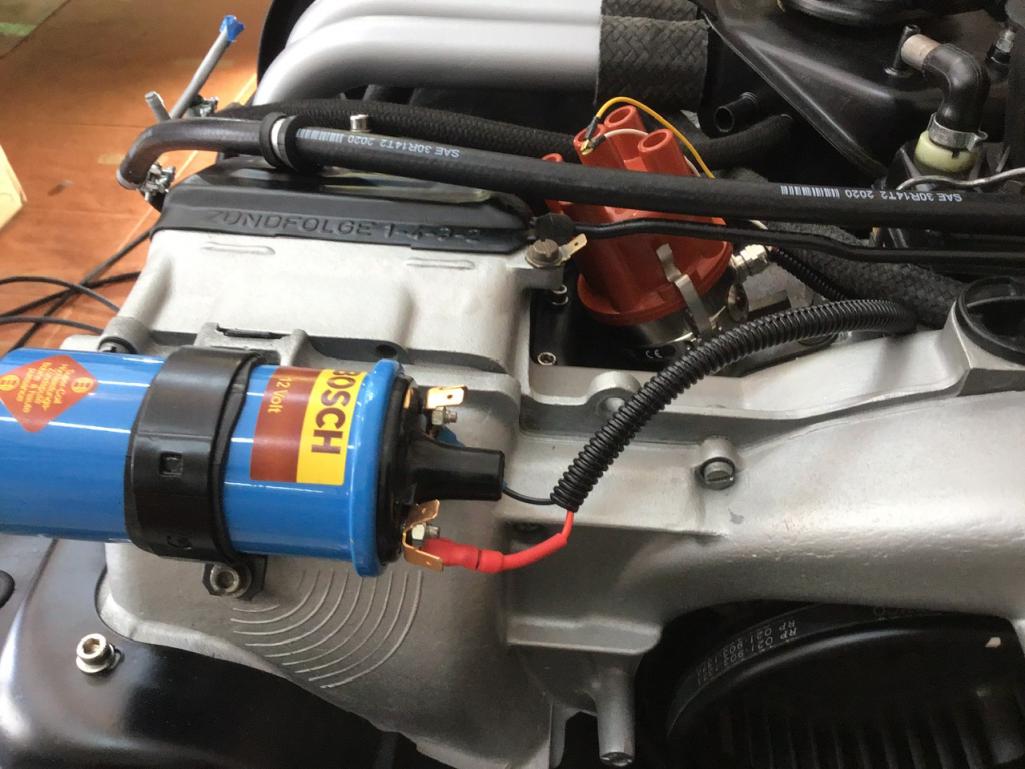 Unfortunately, I may have to relocate the coil back to the tin location due to my coil wire being too short. I prefer this location though so I might just make up a longer wire. Now trying to get my vacuum lines connected. I purchased the kit from AA but having a difficult time figuring this out. I have referred to many different diagrams and they all seem to differ a bit and then the ports on my air cleaner are a bit different. Like this big port on the back of the air cleaner, it has an ID of approx 3/4” and I believe this is where one of the lines from the charcoal canister connects, but I don’t have any hose in my kit that fits this. Is there a reducer for this stub? 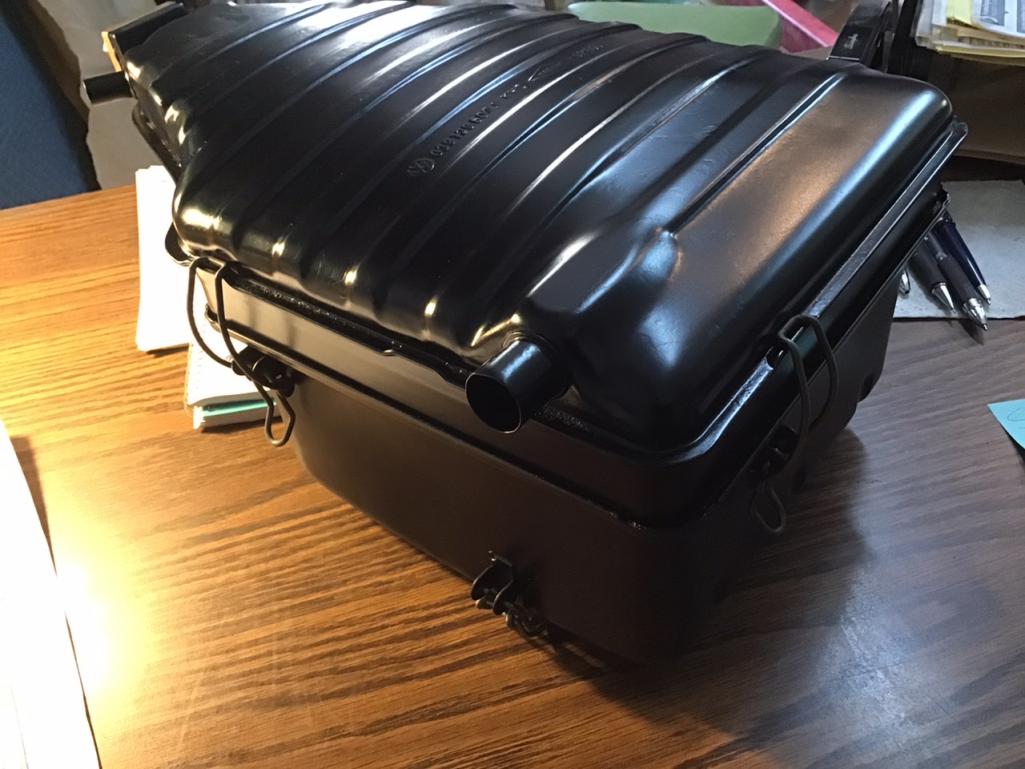 |
|
|
|
| bbrock |
Apr 17 2021, 08:48 PM
Post
#88
|
|
914 Guru Group: Members Posts: 5,269 Joined: 17-February 17 From: Montana Member No.: 20,845 Region Association: Rocky Mountains |
Looking good! You made the right call installing your HEs with the engine on the stand. I was too chicken and they were a bit of a pain to put on laying on my back with gravity working against me. Not terrible, but once I got them on, I knew they would have been just fine to install on the stand.
|
|
|
|
| Morph914 |
Apr 18 2021, 01:39 PM
Post
#89
|
|
Member Group: Members Posts: 435 Joined: 22-August 16 From: St Augustine, FL Member No.: 20,326 Region Association: South East States |
QUOTE(bbrock @ Apr 17 2021, 08:48 PM) Looking good! You made the right call installing your HEs with the engine on the stand. I was too chicken and they were a bit of a pain to put on laying on my back with gravity working against me. Not terrible, but once I got them on, I knew they would have been just fine to install on the stand. Funny you mentioned this, I was very apprehensive to install these on the stand because it’s a lot of leverage hanging out there to possibly do damage. But the the ease of installing on the stand won out. So after the install I go to rotate the engine 180 degrees so I could take it off the stand, and guess what the damn gone HE hit the stand after 90 degrees (IMG:style_emoticons/default/headbang.gif) , what a dumb ass am I. So off came the one that gave me the least amount of trouble, turned the engine another 90 degrees and then laid on my back and installed the HE for the second time. So all and all, if I had to do it again, I think I would go your route. The other issue was when I held my muffler up to check alignment, it was way off, so I had to loosen the HEs again to line up the muffler. Live and learn baby! |
|
|
|
| 930cabman |
Apr 18 2021, 01:50 PM
Post
#90
|
|
Advanced Member Group: Members Posts: 4,323 Joined: 12-November 20 From: Buffalo Member No.: 24,877 Region Association: North East States |
Looking good, keep the progress reports coming, inspiration for us following behind.
Thanks |
|
|
|
| bbrock |
Apr 18 2021, 02:17 PM
Post
#91
|
|
914 Guru Group: Members Posts: 5,269 Joined: 17-February 17 From: Montana Member No.: 20,845 Region Association: Rocky Mountains |
QUOTE(Morph914 @ Apr 18 2021, 12:39 PM) QUOTE(bbrock @ Apr 17 2021, 08:48 PM) Looking good! You made the right call installing your HEs with the engine on the stand. I was too chicken and they were a bit of a pain to put on laying on my back with gravity working against me. Not terrible, but once I got them on, I knew they would have been just fine to install on the stand. Funny you mentioned this, I was very apprehensive to install these on the stand because it’s a lot of leverage hanging out there to possibly do damage. But the the ease of installing on the stand won out. So after the install I go to rotate the engine 180 degrees so I could take it off the stand, and guess what the damn gone HE hit the stand after 90 degrees (IMG:style_emoticons/default/headbang.gif) , what a dumb ass am I. So off came the one that gave me the least amount of trouble, turned the engine another 90 degrees and then laid on my back and installed the HE for the second time. So all and all, if I had to do it again, I think I would go your route. The other issue was when I held my muffler up to check alignment, it was way off, so I had to loosen the HEs again to line up the muffler. Live and learn baby! Well that makes me feel better but sounds a lot like how my weekend has gone. Lost count of the number of times I've removed and replaced the same damn part because this need to be done first or why the hell is that gasket still on the bench? Only now it's all happening in the engine bay. Funny how time erases the memory of what a pit of horrors that is! It's an adventure! |
|
|
|
| 930cabman |
Apr 18 2021, 02:30 PM
Post
#92
|
|
Advanced Member Group: Members Posts: 4,323 Joined: 12-November 20 From: Buffalo Member No.: 24,877 Region Association: North East States |
If it was easy, our kids would do it.
Lucky is the man who has that luxury, even more so his grandson/daughter |
|
|
|
| Morph914 |
Apr 28 2021, 07:18 PM
Post
#93
|
|
Member Group: Members Posts: 435 Joined: 22-August 16 From: St Augustine, FL Member No.: 20,326 Region Association: South East States |
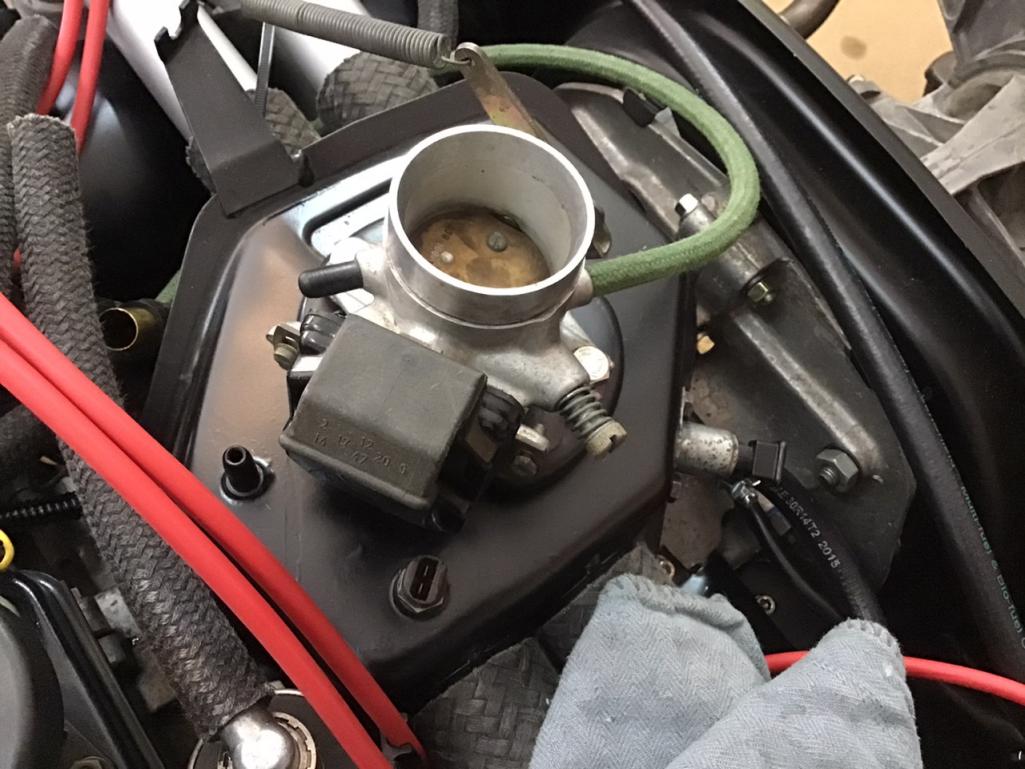
I’ve been working on the engine last couple of days. I do have a couple of questions though. First off, I connected the green vacuum hose from the throttle body to the new 123 Dizzy, I used this port because it had the same size as the one on the dizzy. The other advance/retard port that is capped off had a smaller port. I’m hoping this is right
 The next picture shows a splitter coming off the AAR valve, I am not using the cold start valve so not sure if I should plug this off or not. 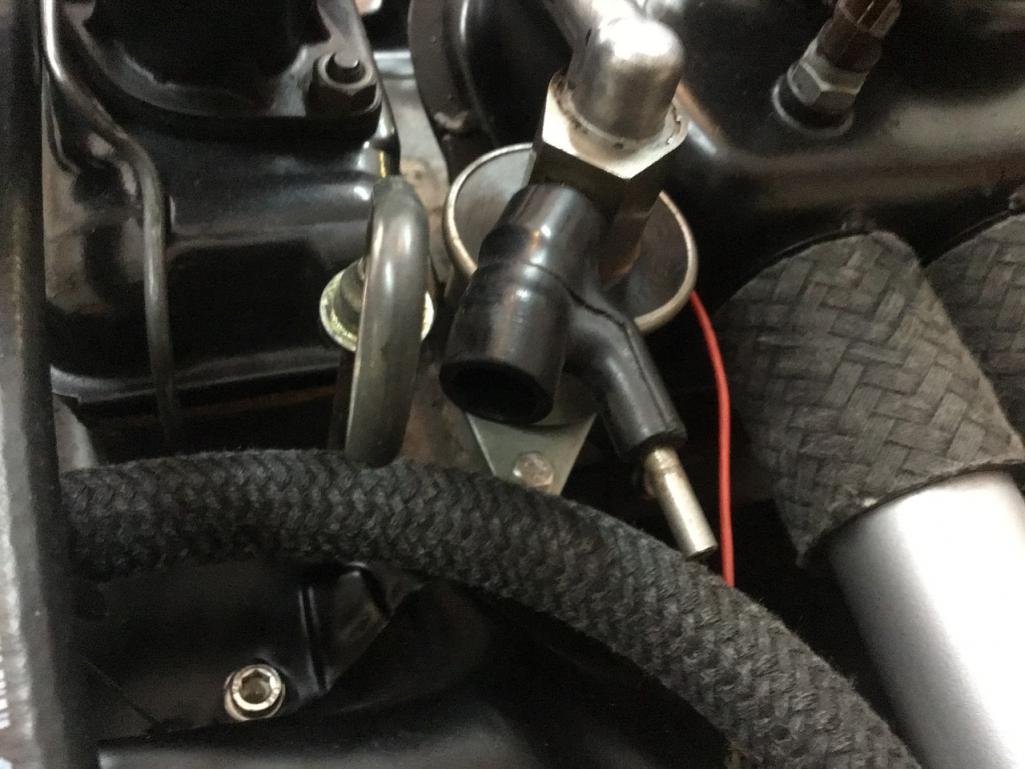 Just about ready to put the engine in, any words of wisdom are welcome at this point. Obviously I will remove the air cleaner before stabbing the engine. I was just fitting the last of the vacuum hoses, the more I can do outside of the car the better for me and my back. 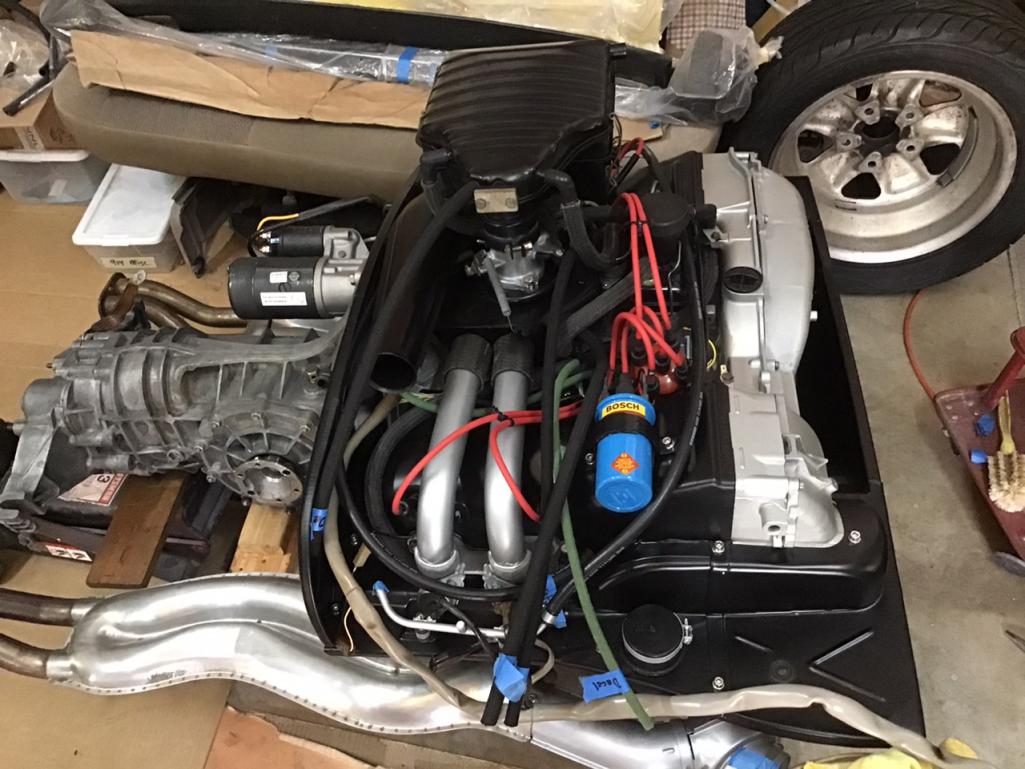 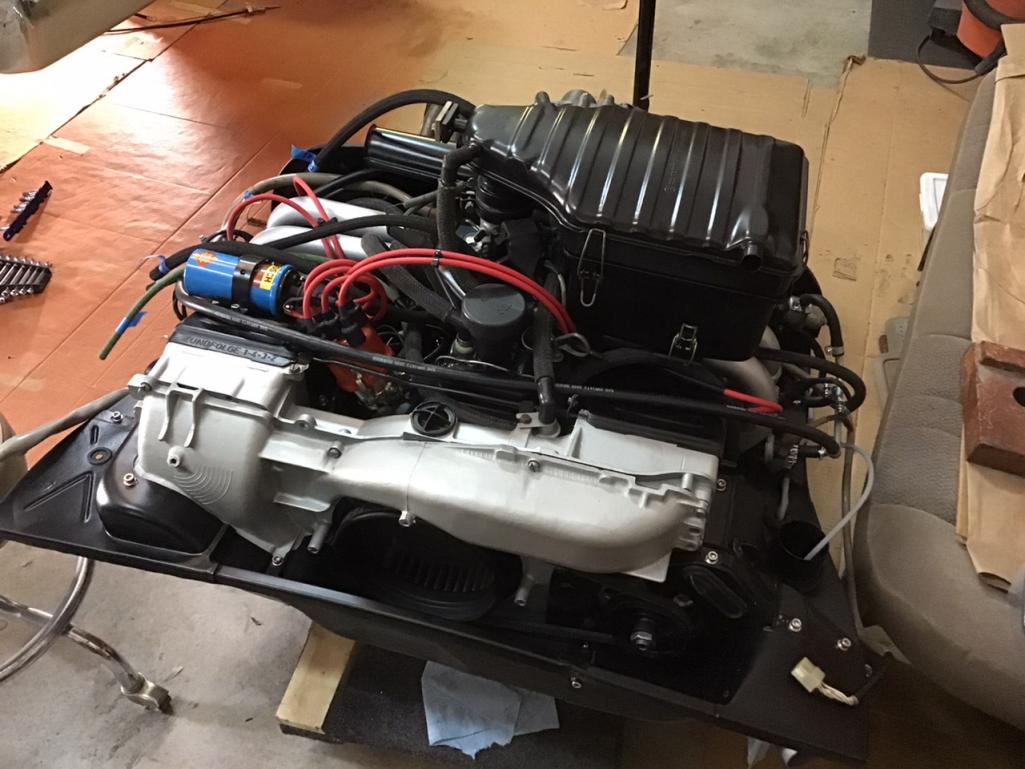 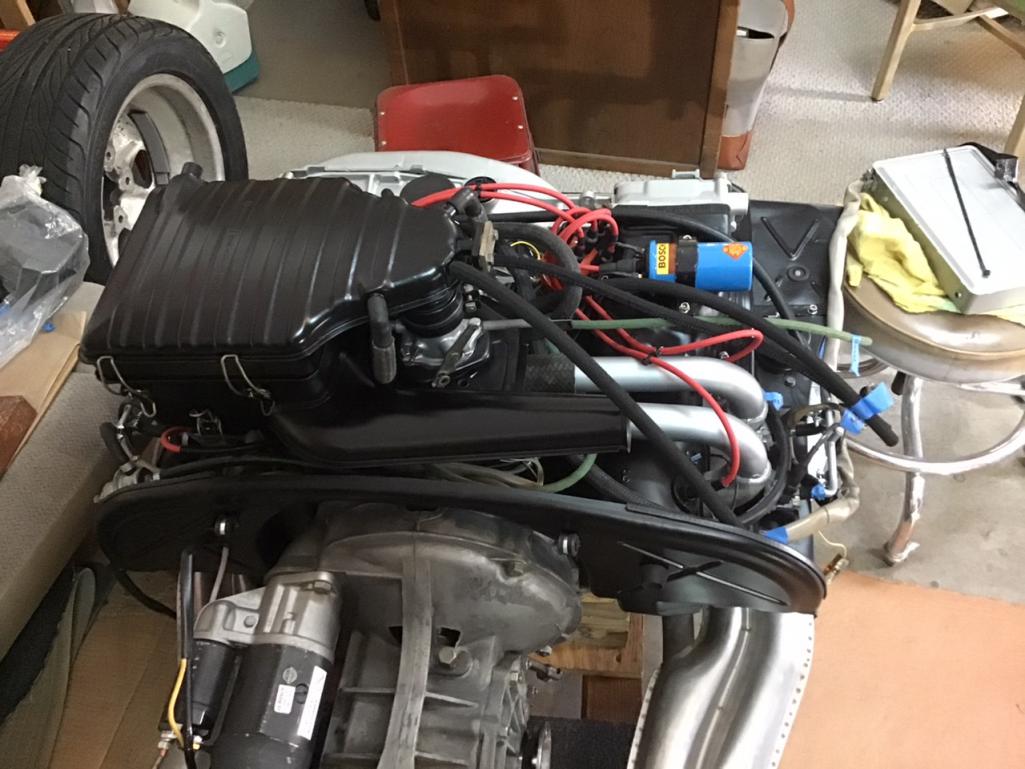 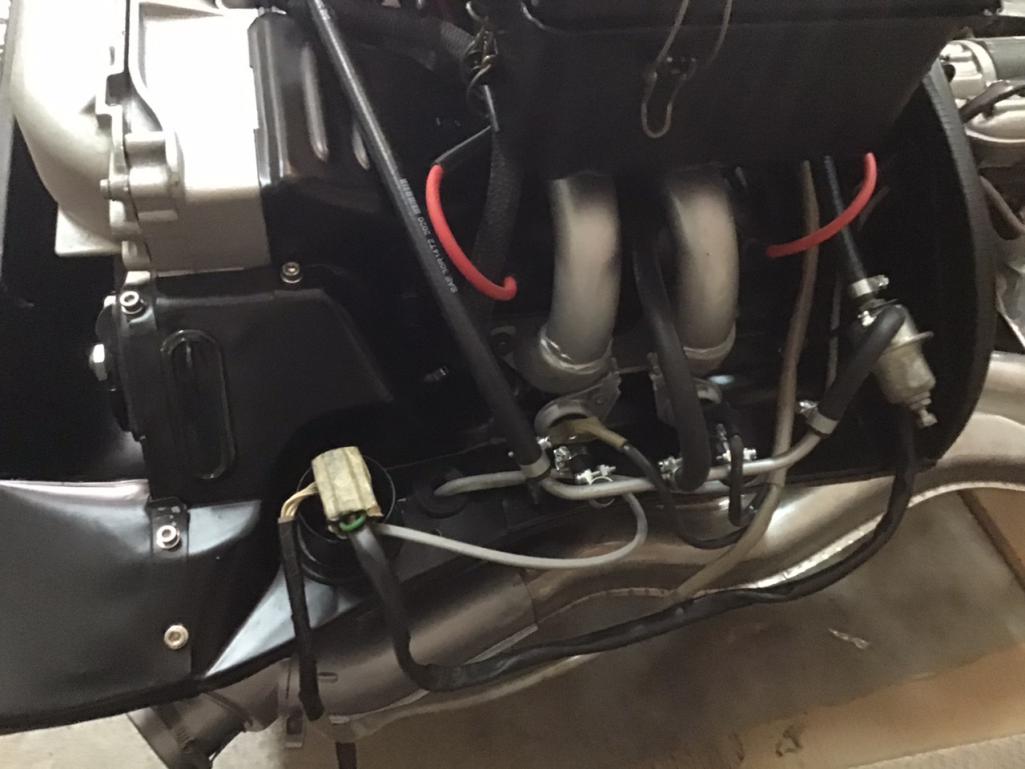  |
|
|
|
| bbrock |
Apr 28 2021, 09:25 PM
Post
#94
|
|
914 Guru Group: Members Posts: 5,269 Joined: 17-February 17 From: Montana Member No.: 20,845 Region Association: Rocky Mountains |
Looks like you have the green hose plugged into the ported vacuum side which is correct, at least the way it was originally hooked up. Some people claim the other side (manifold vacuum) is better but I tend to lean toward connecting the way it came from the factory because I don't know any better I guess.
|
|
|
|
| Dion |
Apr 29 2021, 04:46 AM
Post
#95
|
|
RN Group: Members Posts: 2,918 Joined: 16-September 04 From: Audubon,PA Member No.: 2,766 Region Association: MidAtlantic Region |
Car is looking fantastic! Great work. I appreciate your detailed pics.
Cheers, Dion |
|
|
|
| bbrock |
Apr 29 2021, 07:31 AM
Post
#96
|
|
914 Guru Group: Members Posts: 5,269 Joined: 17-February 17 From: Montana Member No.: 20,845 Region Association: Rocky Mountains |
BTW, where did you get the green vacuum hose?
|
|
|
|
| Morph914 |
Apr 29 2021, 10:21 AM
Post
#97
|
|
Member Group: Members Posts: 435 Joined: 22-August 16 From: St Augustine, FL Member No.: 20,326 Region Association: South East States |
QUOTE(bbrock @ Apr 29 2021, 07:31 AM) BTW, where did you get the green vacuum hose? It came with the Auto Atlanta vacuum line kit. Unfortunately no red hose though, and I was not up to the dying task that you were successful with. |
|
|
|
| Morph914 |
Apr 29 2021, 10:28 AM
Post
#98
|
|
Member Group: Members Posts: 435 Joined: 22-August 16 From: St Augustine, FL Member No.: 20,326 Region Association: South East States |
QUOTE(Dion @ Apr 29 2021, 04:46 AM) Car is looking fantastic! Great work. I appreciate your detailed pics. Cheers, Dion Thank you. I figure if I post pictures, you guys will help in pointing out my screw up’s (IMG:style_emoticons/default/biggrin.gif) Cheers, John |
|
|
|
| Root_Werks |
Apr 29 2021, 10:43 AM
Post
#99
|
|
Village Idiot Group: Members Posts: 8,841 Joined: 25-May 04 From: About 5NM from Canada Member No.: 2,105 Region Association: Pacific Northwest |
Looks clean and detailed, nice!
|
|
|
|
| 930cabman |
Apr 29 2021, 12:05 PM
Post
#100
|
|
Advanced Member Group: Members Posts: 4,323 Joined: 12-November 20 From: Buffalo Member No.: 24,877 Region Association: North East States |
Lookin good and thanks for posting your progress. Will you try to fire her up prior to installing into the car?
|
|
|
|
|
1 User(s) are reading this topic (1 Guests and 0 Anonymous Users)
0 Members:

|
Lo-Fi Version | Time is now: 9th November 2025 - 03:58 PM |
Invision Power Board
v9.1.4 © 2025 IPS, Inc.