|
|
|
Porsche, and the Porsche crest are registered trademarks of Dr. Ing. h.c. F. Porsche AG.
This site is not affiliated with Porsche in any way. Its only purpose is to provide an online forum for car enthusiasts. All other trademarks are property of their respective owners. |
|
|

  |

| 76-914 |
 Nov 9 2020, 06:04 PM Nov 9 2020, 06:04 PM
Post
#81
|
|
Repeat Offender & Resident Subaru Antagonist  Group: Members Posts: 13,920 Joined: 23-January 09 From: Temecula, CA Member No.: 9,964 Region Association: Southern California |
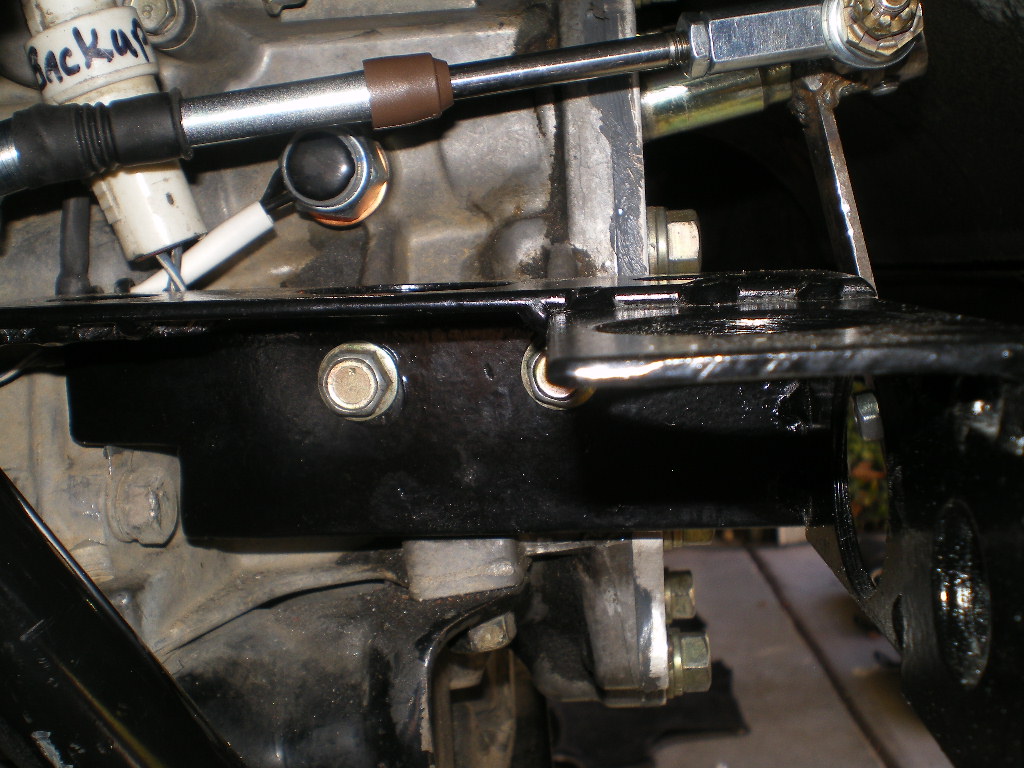
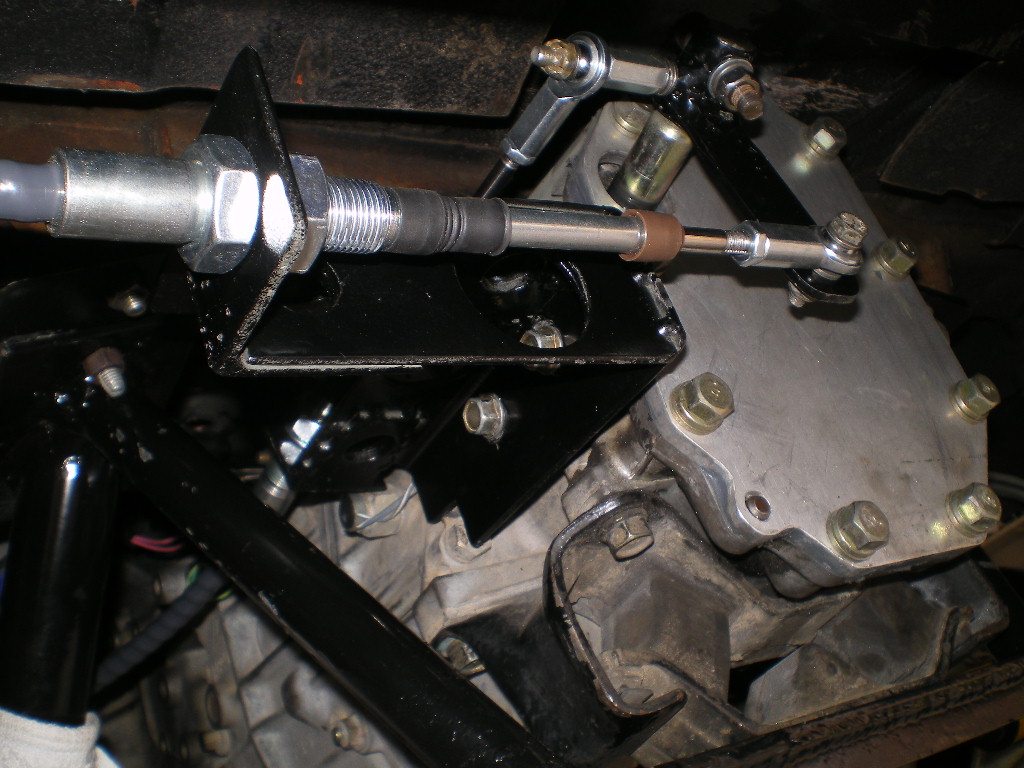
It's been a few weeks and only a few items remain. One of those items are the shifter cables which should arrive by the end of this week. I haven't even thought about how I will cover the shifter in this car. The other one was easy as I could hide everything between the console and middle cushion. But moving ahead I use some wire rope to visualize the route the cables will run because it is somewhat similar to the cables stiffness and will prevent me from making too small of a radius. I clamp the cables to the shifter on one end and to the transmission on the other. Nothing magic here but it does help to see where they will run.
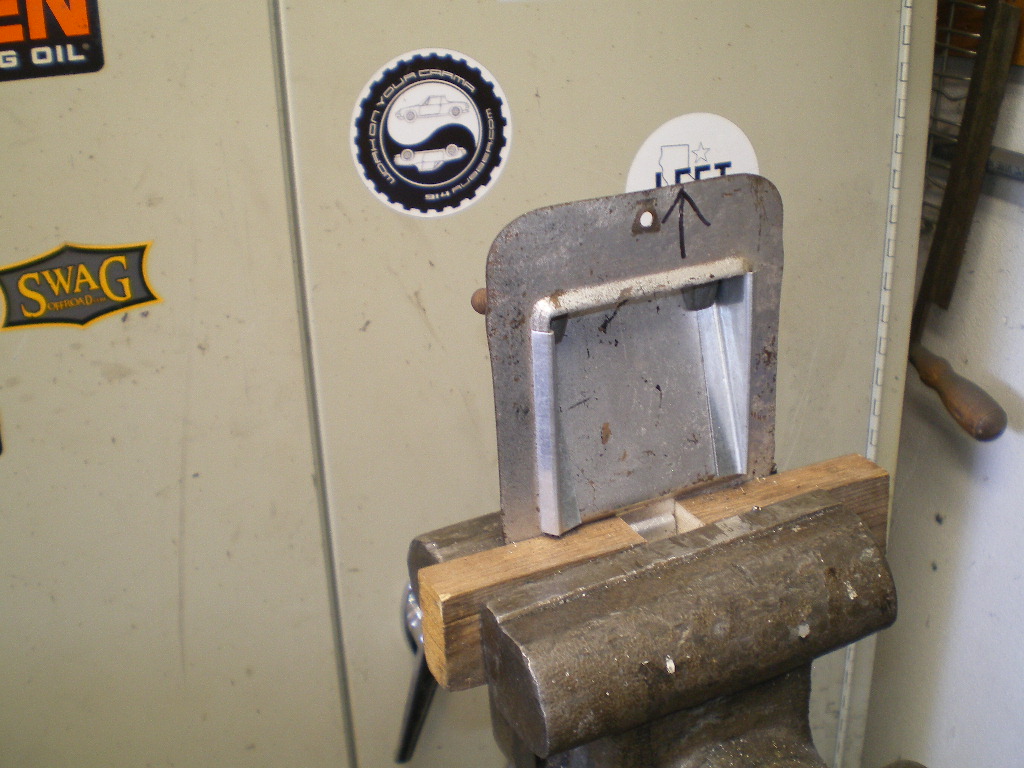
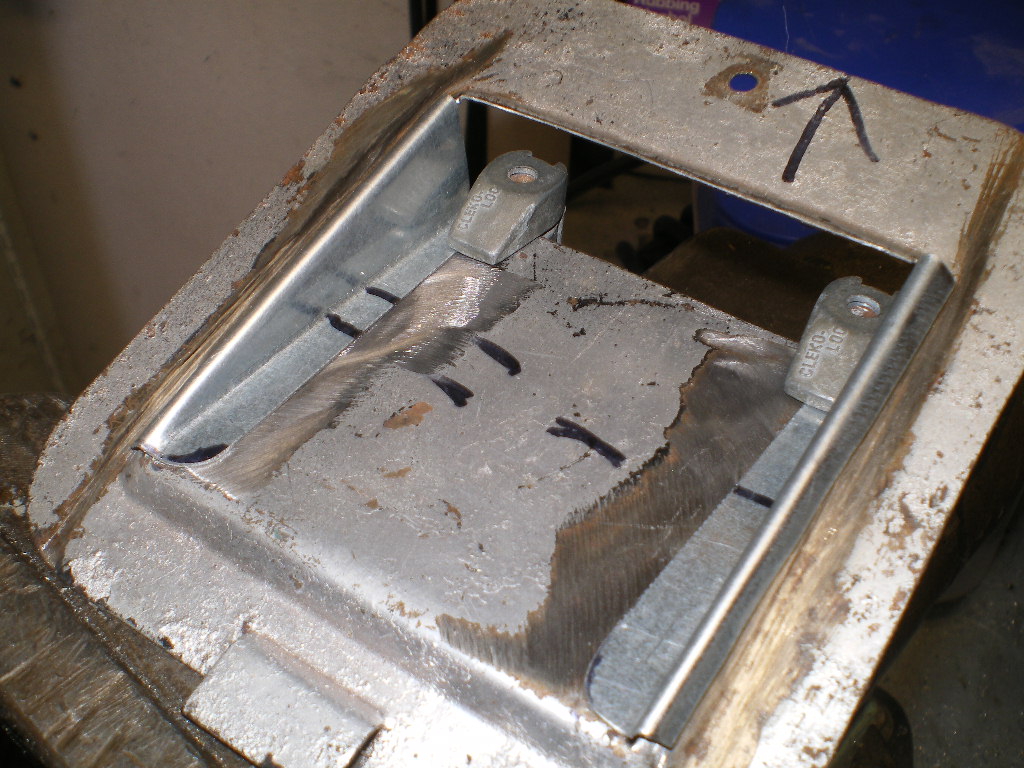
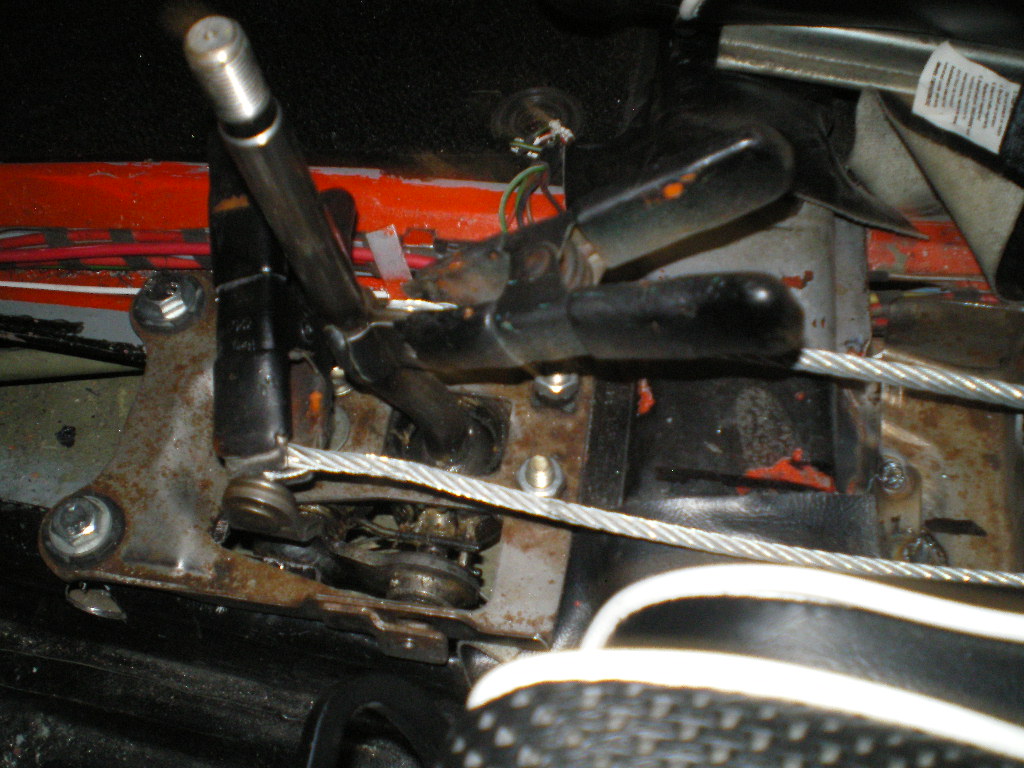 They will lay on top of the tunnel then drop thru the rear tunnel access cover and out the same hole in the firewall that the old shift rod passed through. 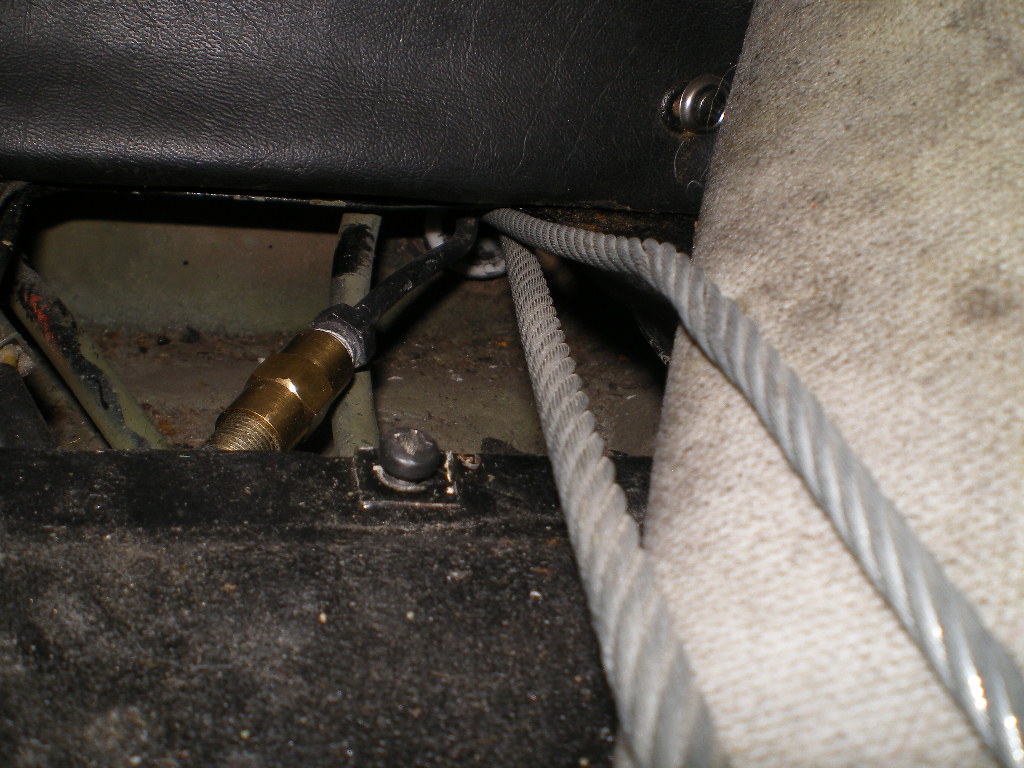 And from the engine compartment side. 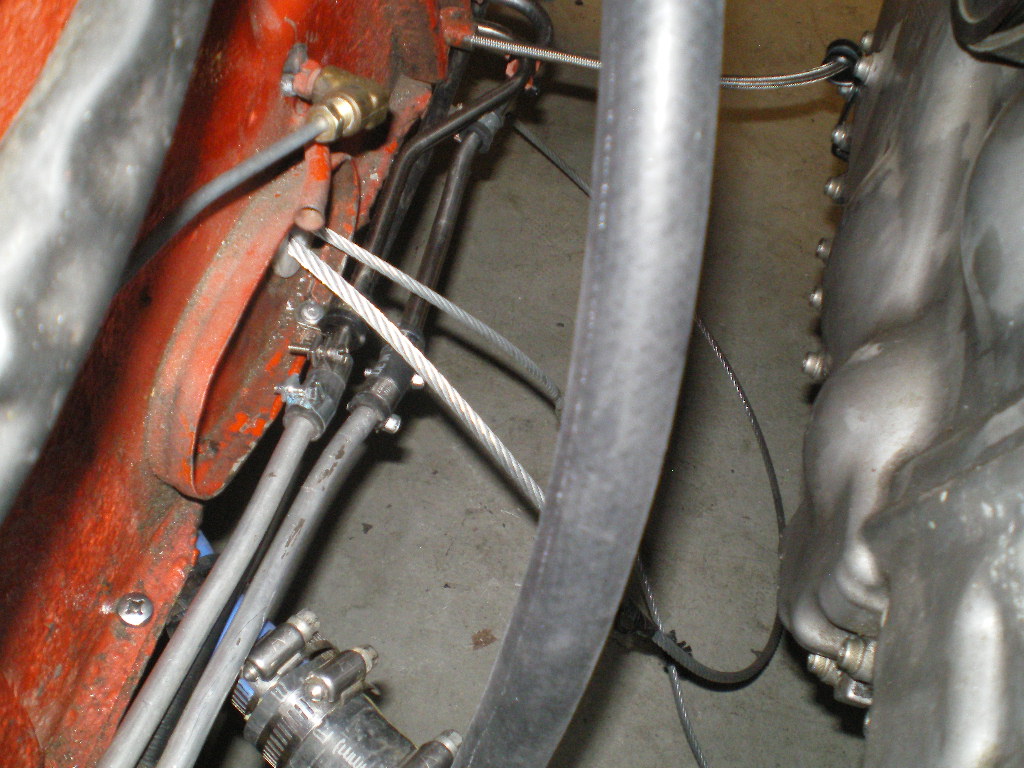 And finally to the transmission. 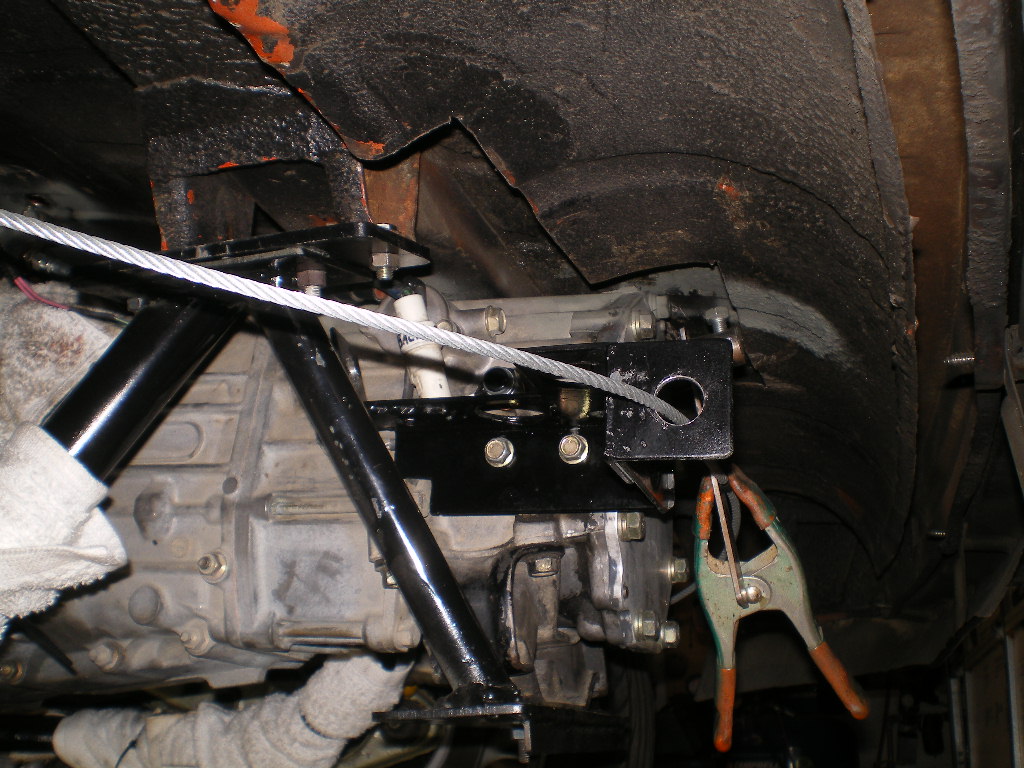 I cut the cover to allow the cables to enter the tunnel. 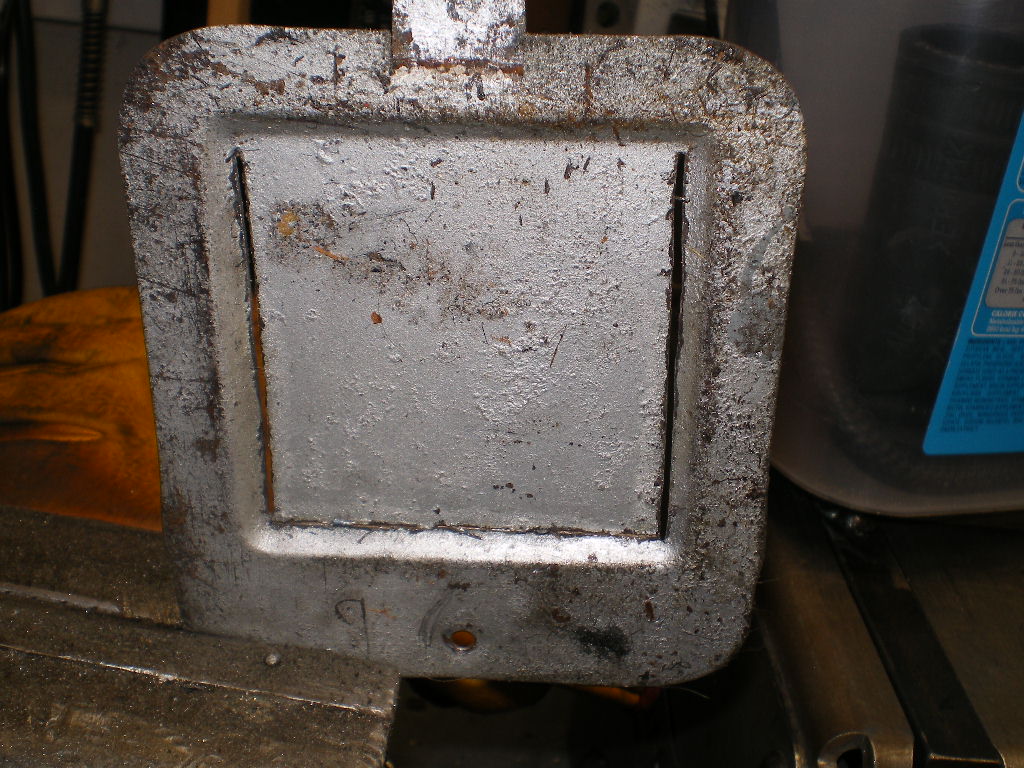 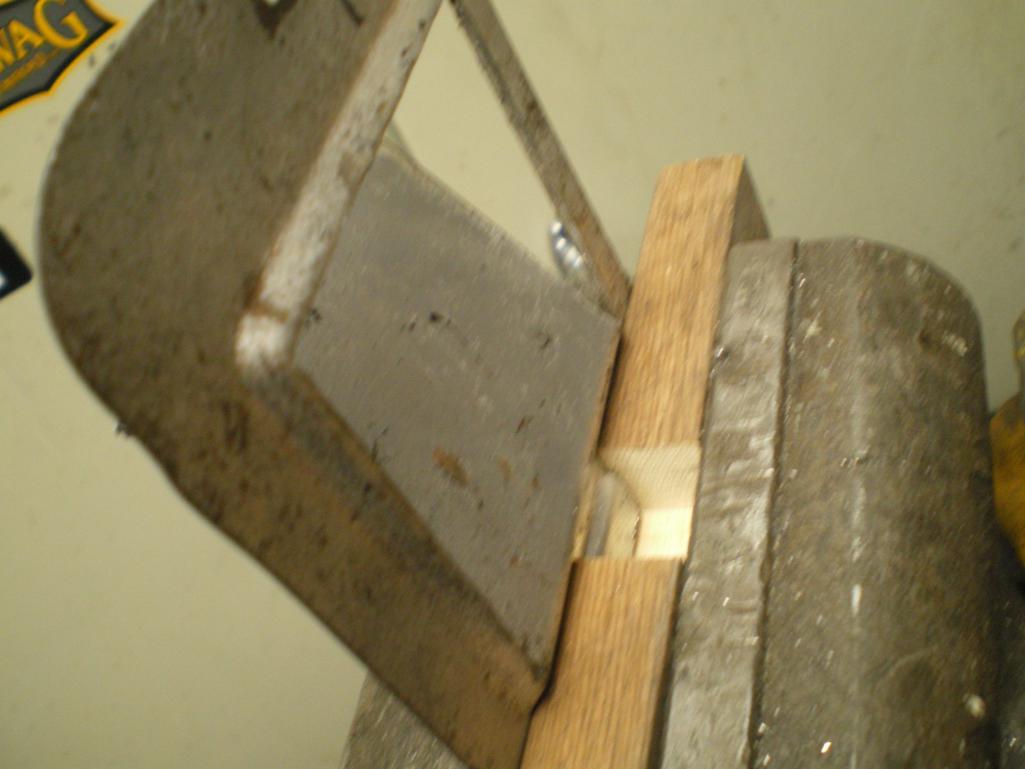 Then make a couple of small templates for the gussets. 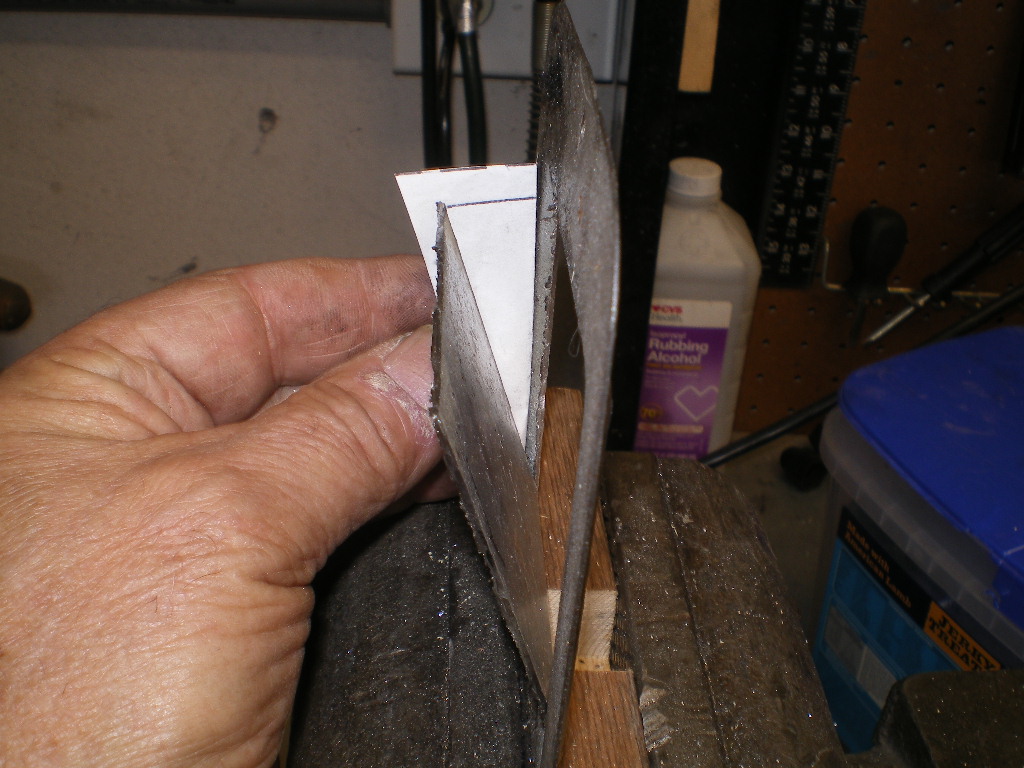 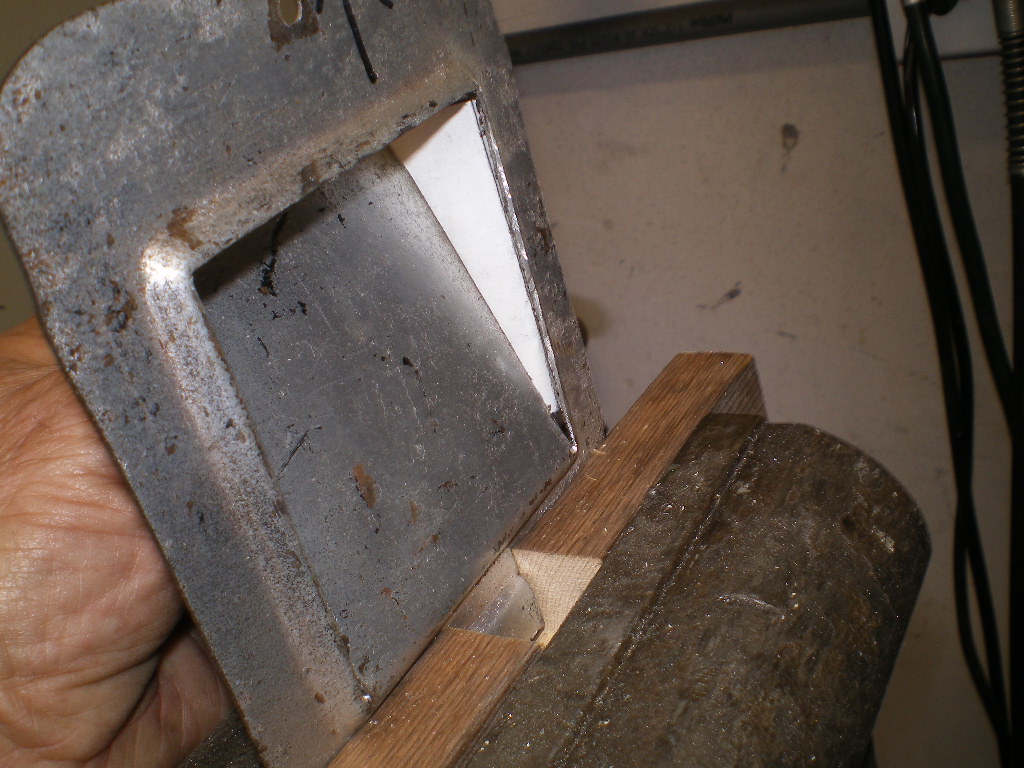 And form the gussets 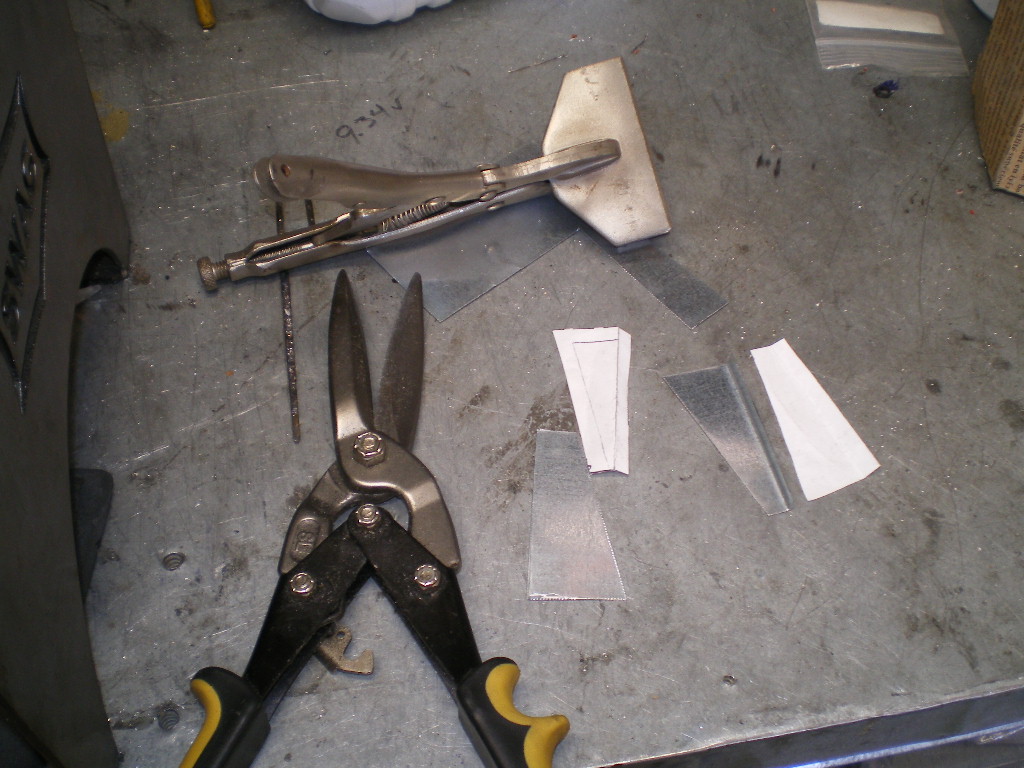 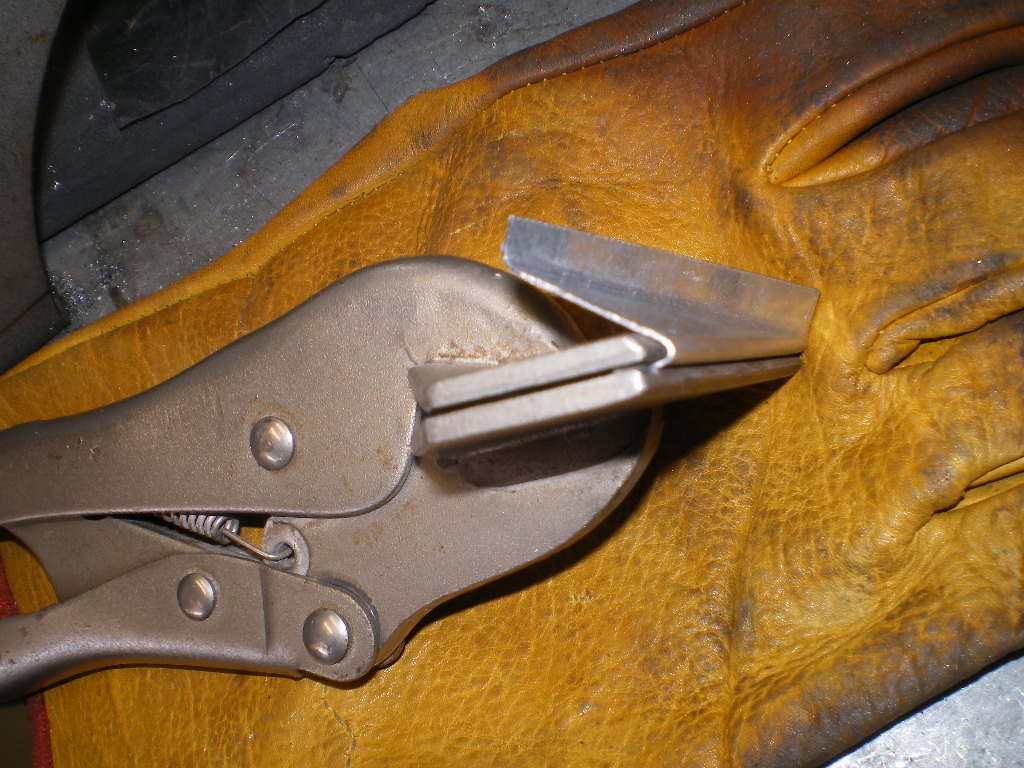 |
   |

 
|
| 76-914 |
Nov 9 2020, 06:09 PM
Post
#82
|
|
Repeat Offender & Resident Subaru Antagonist Group: Members Posts: 13,920 Joined: 23-January 09 From: Temecula, CA Member No.: 9,964 Region Association: Southern California |
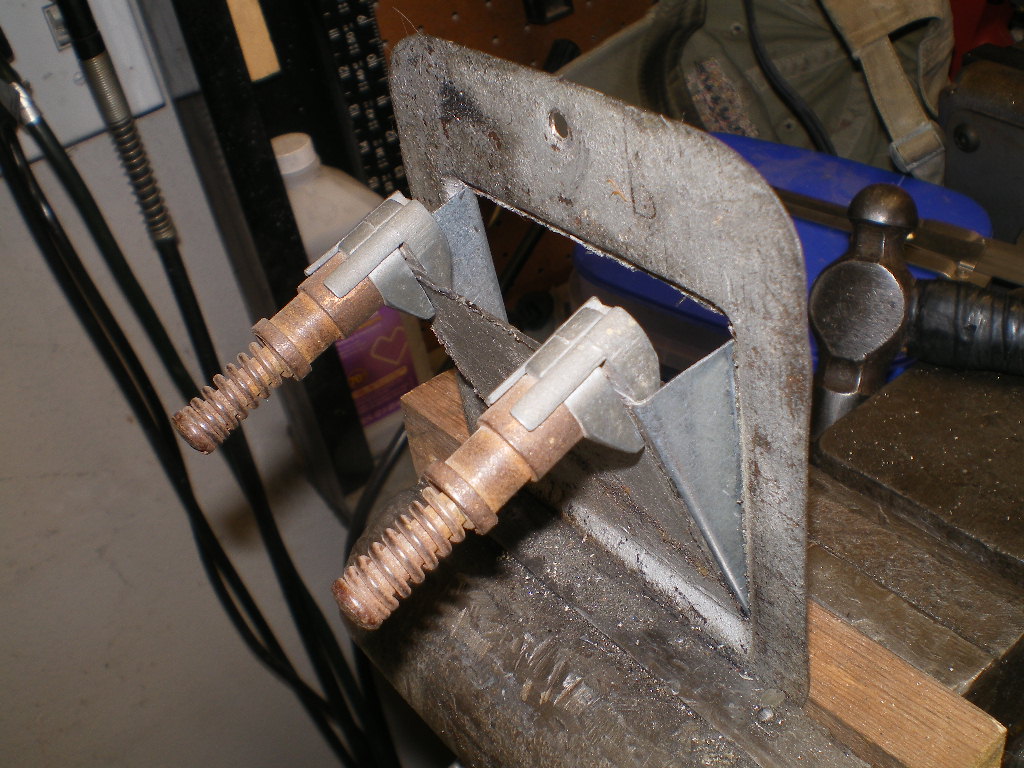
Then clamp together and weld. I use this term weld loosely as I blew a hole in the thin metal and had a couple more spots bulge out on the other side of the weld. I threw some primer on it for now and will hammer down those bulges later.
    |
|
|
|
| 76-914 |
Nov 9 2020, 06:25 PM
Post
#83
|
|
Repeat Offender & Resident Subaru Antagonist Group: Members Posts: 13,920 Joined: 23-January 09 From: Temecula, CA Member No.: 9,964 Region Association: Southern California |
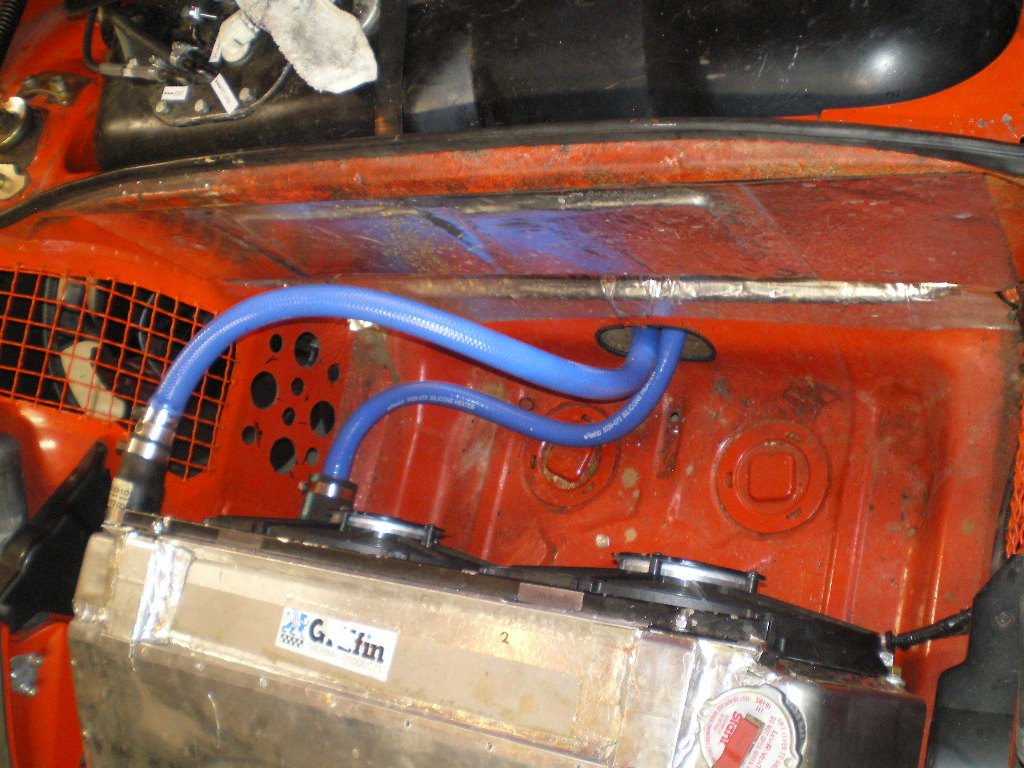
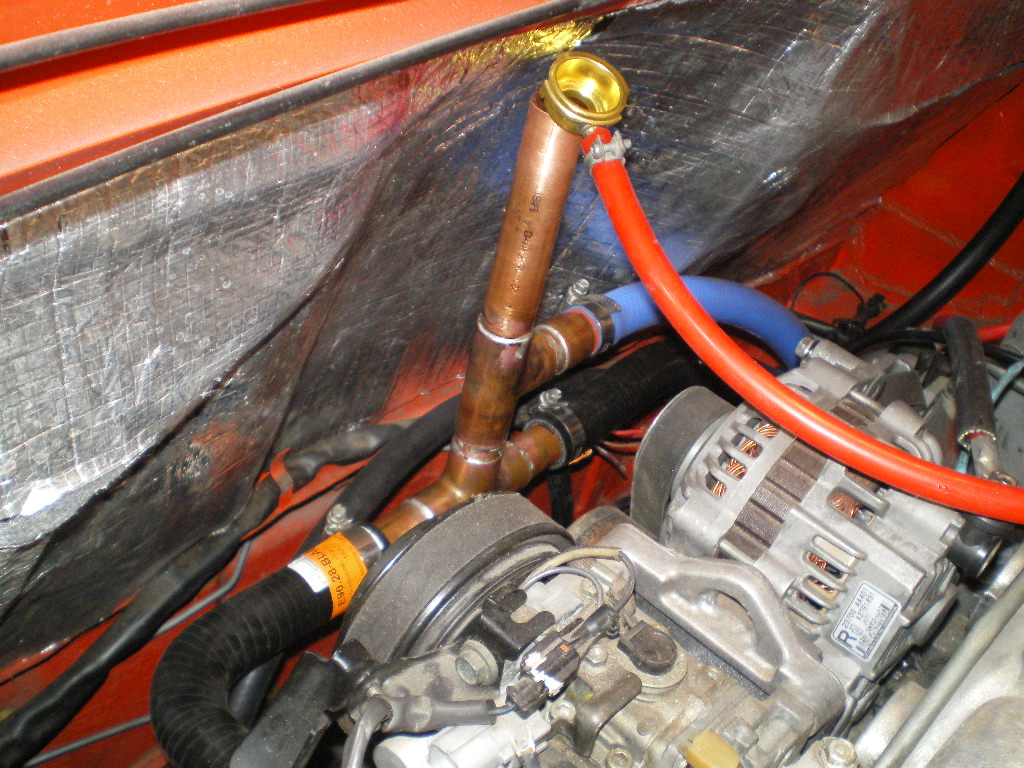
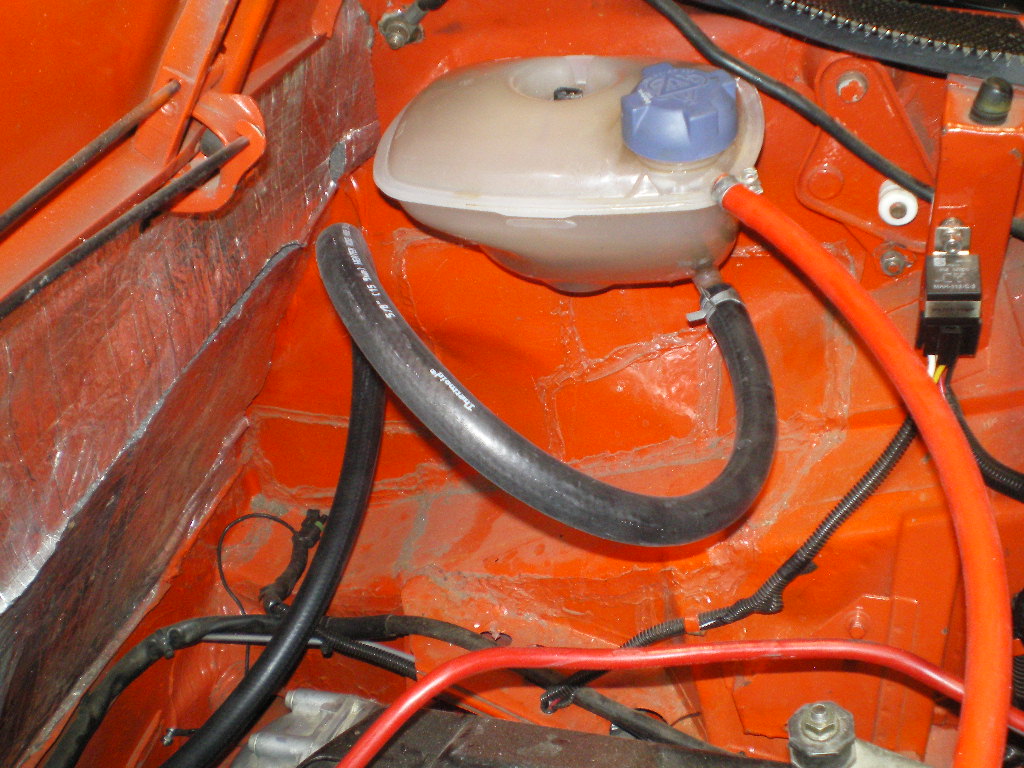
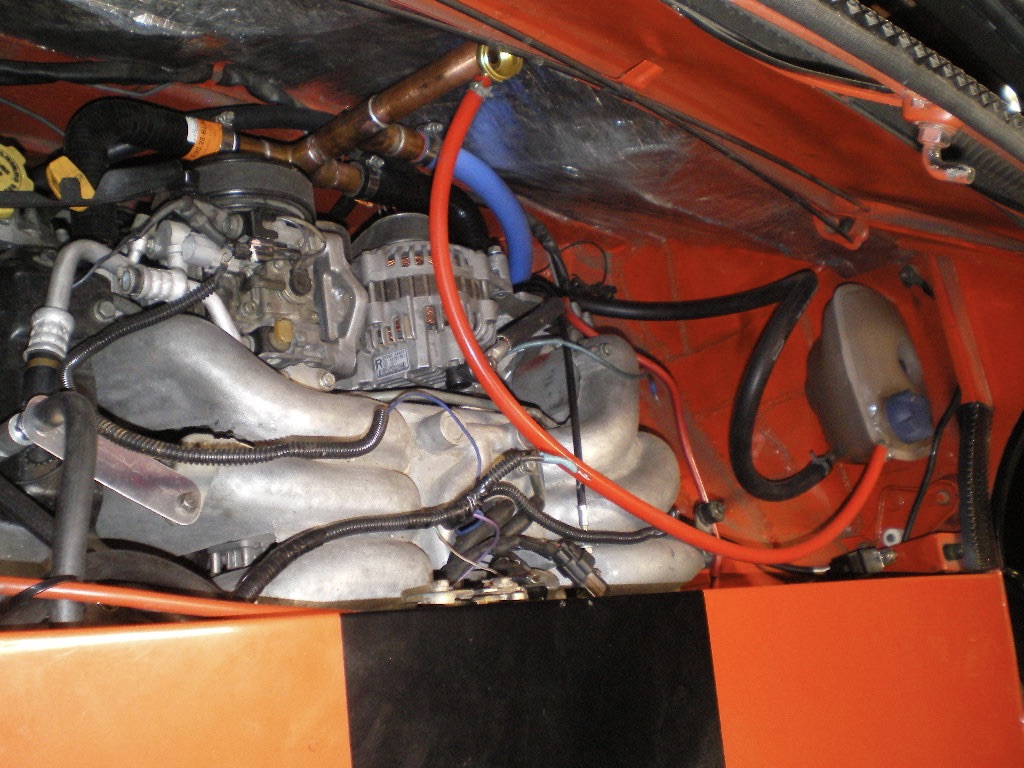
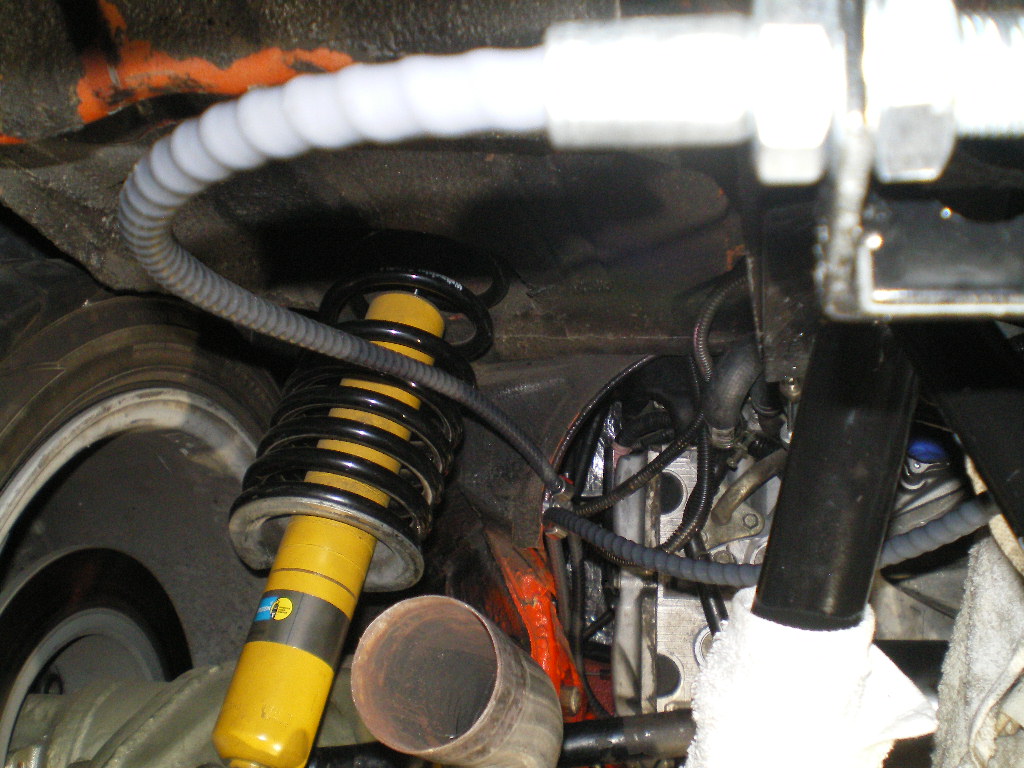
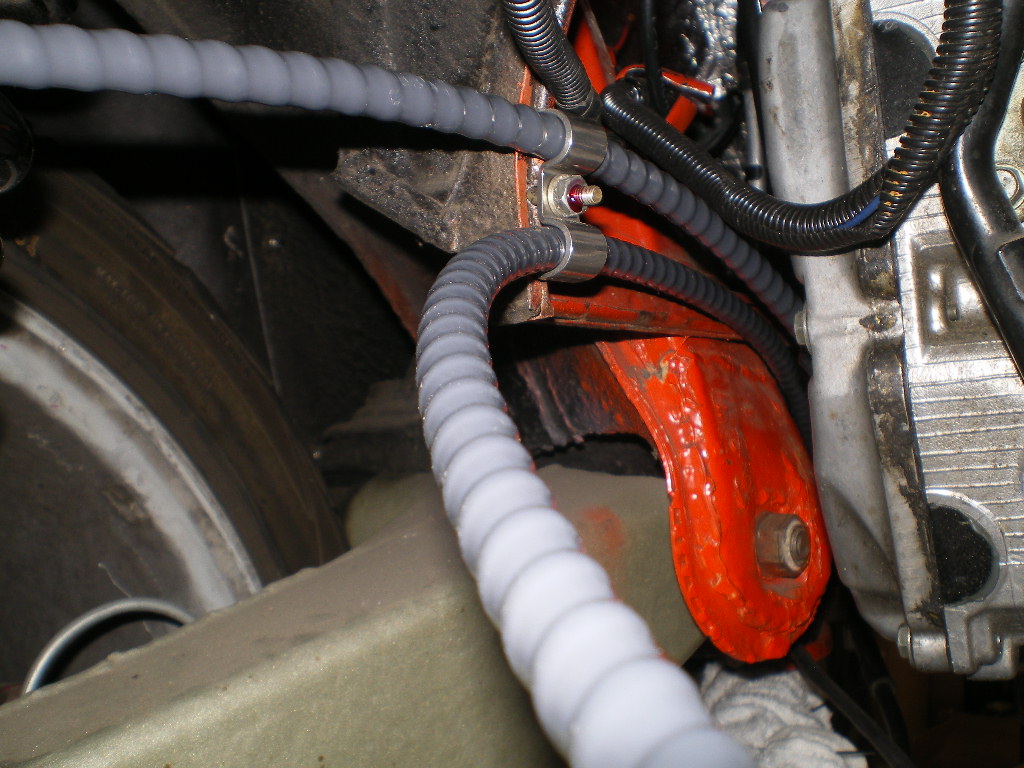
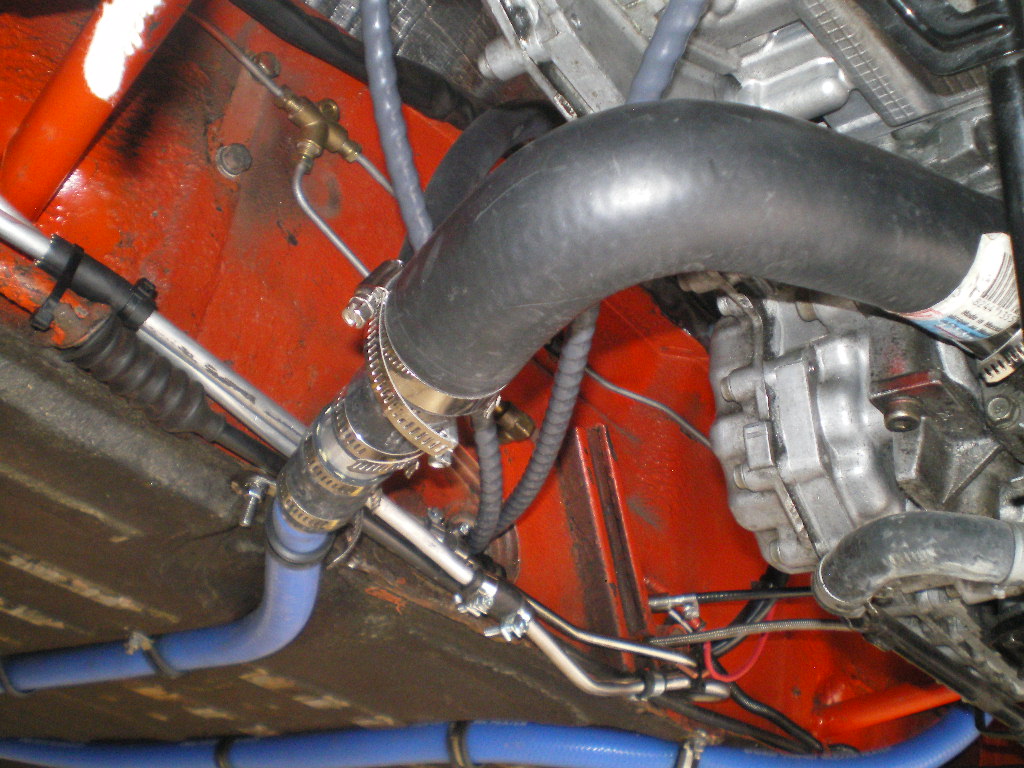
All of the plumbing is completed and tied in with the exception of the radiator filler neck. The one you see on the end of the red silicone hose is just too flimsy so I ordered another that is more substantial. It should be here in 2 weeks. I left all of the hoses a bit long for now. After I've got a few hours on the car I'll cut them to final length.
    The clutch is bled and the reservoir is topped off. 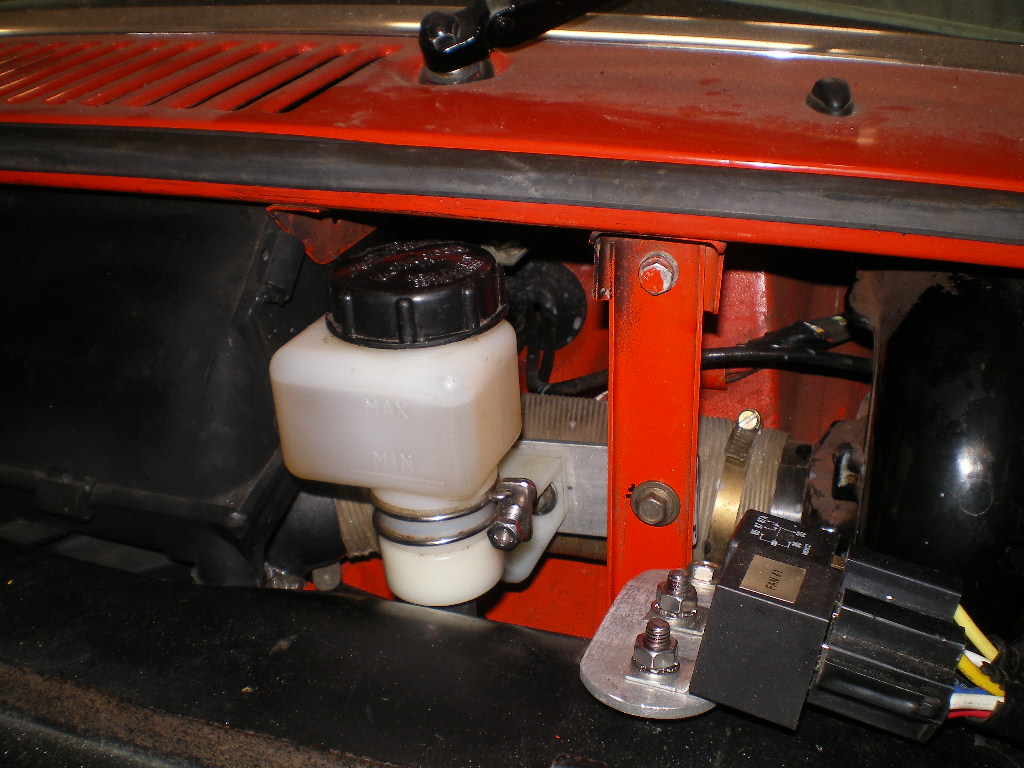 And the speedometer should be here in two weeks. 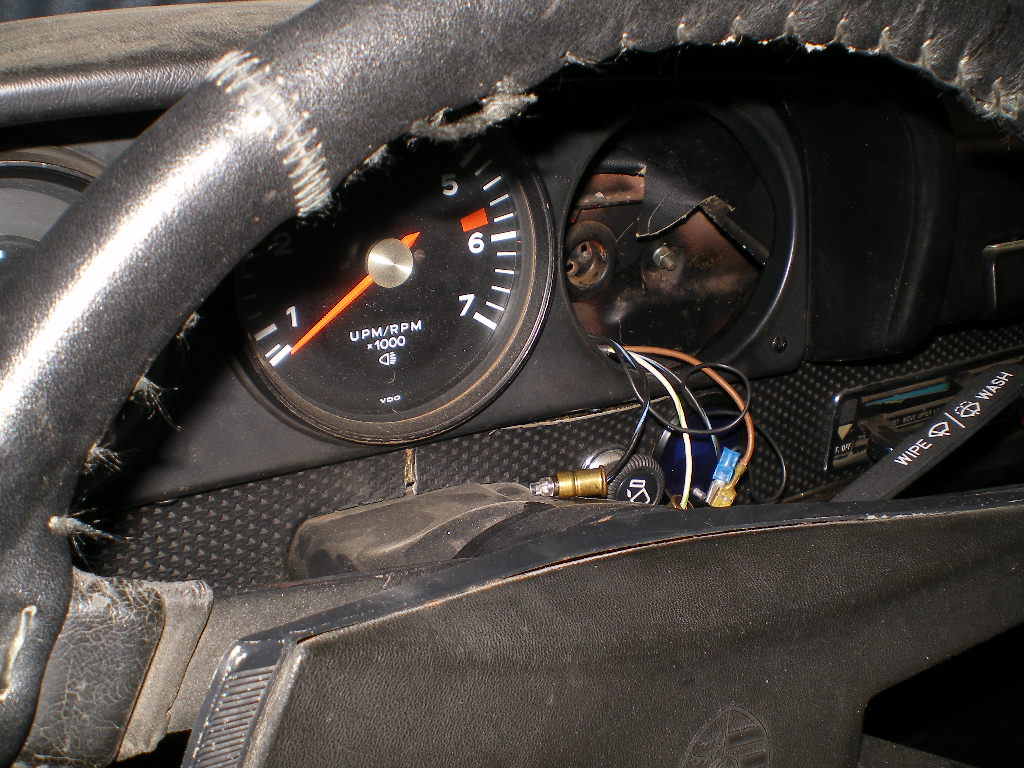 I can see the light at the end of the tunnel. God willing and the creeks don't rise this thing will be on the road by Christmas. To be continued.................. |
|
|
|
| FL000 |
Nov 9 2020, 06:56 PM
Post
#84
|
|
Member Group: Members Posts: 481 Joined: 31-January 12 From: Lancaster, CA Member No.: 14,076 Region Association: Southern California |
No idea how I have missed this thread until now. Nice job documenting it, I am sure it will help me as I embark on my trans swap soon. (IMG:style_emoticons/default/beerchug.gif)
|
|
|
|
| 914GTSTI |
Dec 1 2020, 10:11 PM
Post
#85
|
|
Member Group: Members Posts: 275 Joined: 16-September 07 From: Glendale AZ Member No.: 8,123 Region Association: None |
Thanks for all the great Ideas ! Your the MAN !
|
|
|
|
| Chris H. |
Dec 1 2020, 10:33 PM
Post
#86
|
|
Senior Member Group: Members Posts: 4,093 Joined: 2-January 03 From: Chicago 'burbs Member No.: 73 Region Association: Upper MidWest |
Looks great Kent! What size radiator hoses did you use? 3/4 and 7/8? I’m actually thinking about going back to smaller diameter myself.
|
|
|
|
| 76-914 |
Dec 2 2020, 04:50 AM
Post
#87
|
|
Repeat Offender & Resident Subaru Antagonist Group: Members Posts: 13,920 Joined: 23-January 09 From: Temecula, CA Member No.: 9,964 Region Association: Southern California |
QUOTE(Chris H. @ Dec 1 2020, 08:33 PM)  Looks great Kent! What size radiator hoses did you use? 3/4 and 7/8? I’m actually thinking about going back to smaller diameter myself. Yes, 7/8" & 3/4". LMK if you do. I'll send you some nice blue silicon hose that I have left over, Chris . I forget which but I think it is 3/4" that I have surplus stock. (IMG:style_emoticons/default/beerchug.gif) |
|
|
|
| Chris H. |
Dec 2 2020, 01:16 PM
Post
#88
|
|
Senior Member Group: Members Posts: 4,093 Joined: 2-January 03 From: Chicago 'burbs Member No.: 73 Region Association: Upper MidWest |
QUOTE(76-914 @ Dec 2 2020, 04:50 AM) QUOTE(Chris H. @ Dec 1 2020, 08:33 PM) Looks great Kent! What size radiator hoses did you use? 3/4 and 7/8? I’m actually thinking about going back to smaller diameter myself. Yes, 7/8" & 3/4". LMK if you do. I'll send you some nice blue silicon hose that I have left over, Chris . I forget which but I think it is 3/4" that I have surplus stock. (IMG:style_emoticons/default/beerchug.gif) Oh nice, will do Kent! |
|
|
|
| 76-914 |
Dec 11 2020, 11:56 AM
Post
#89
|
|
Repeat Offender & Resident Subaru Antagonist Group: Members Posts: 13,920 Joined: 23-January 09 From: Temecula, CA Member No.: 9,964 Region Association: Southern California |
I have some catching up to do here. I received my cables from CCI and they are top notch as usual. In case you're wondering they are 90" & 98" long. Here are a few pic's of them and of the installation.
         This lever was made using a scrap piece 1/2" steel pipe, 1/8" plate steel and an AN-3 bolt 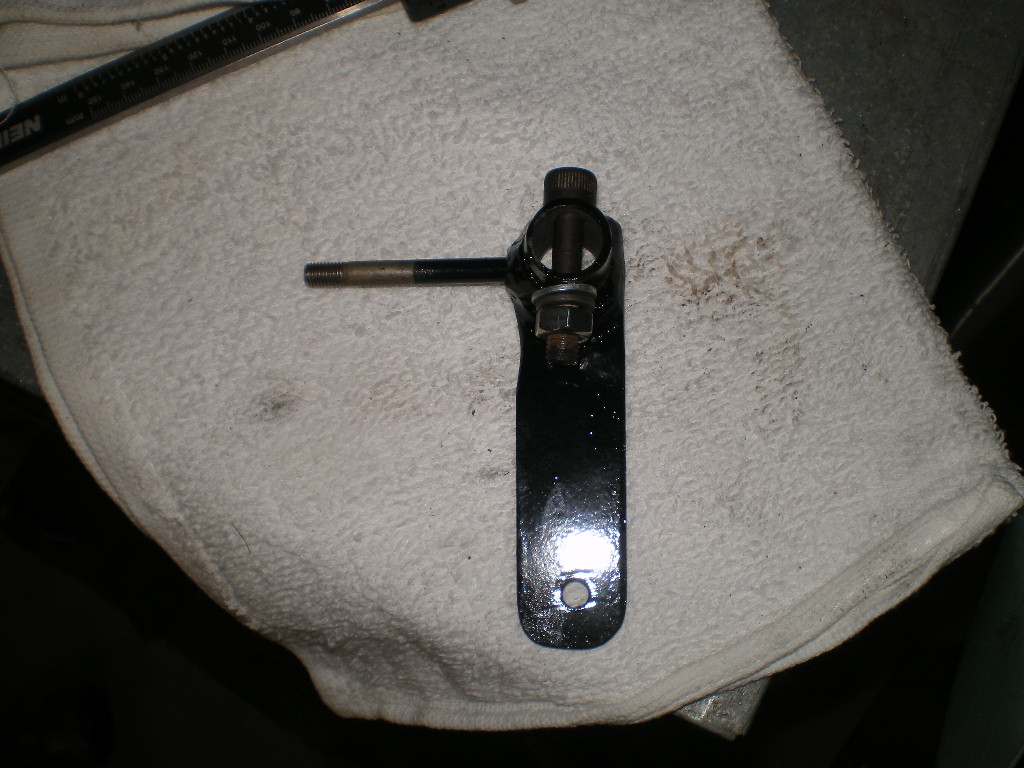 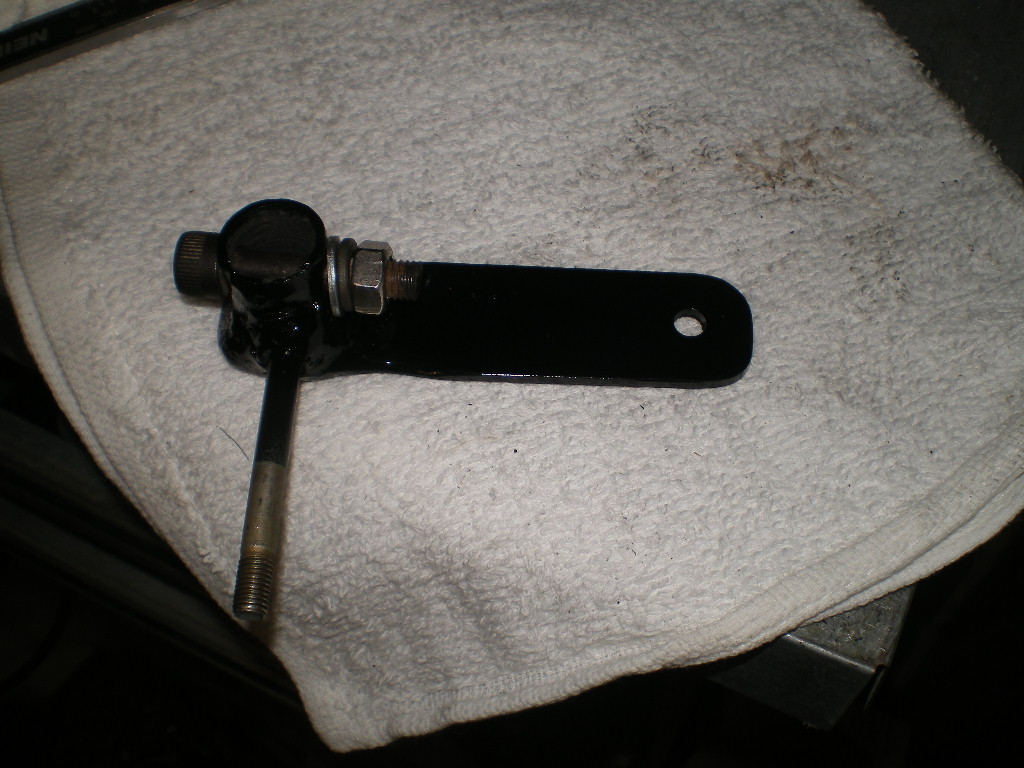 A few shots from inside the cabin. 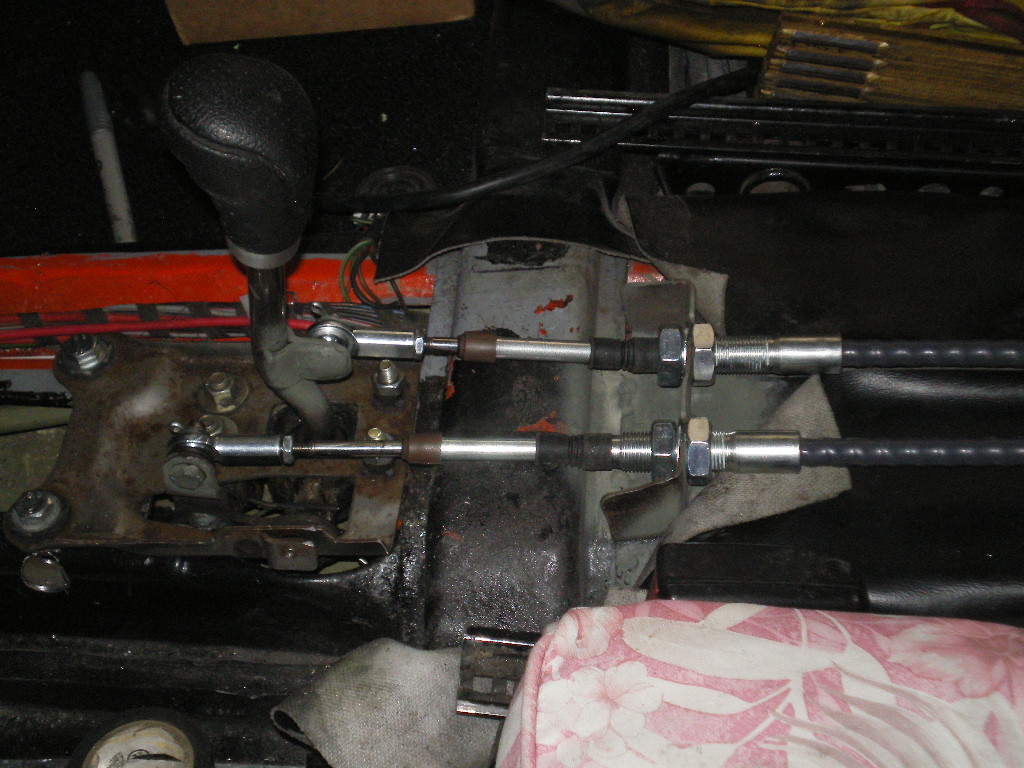 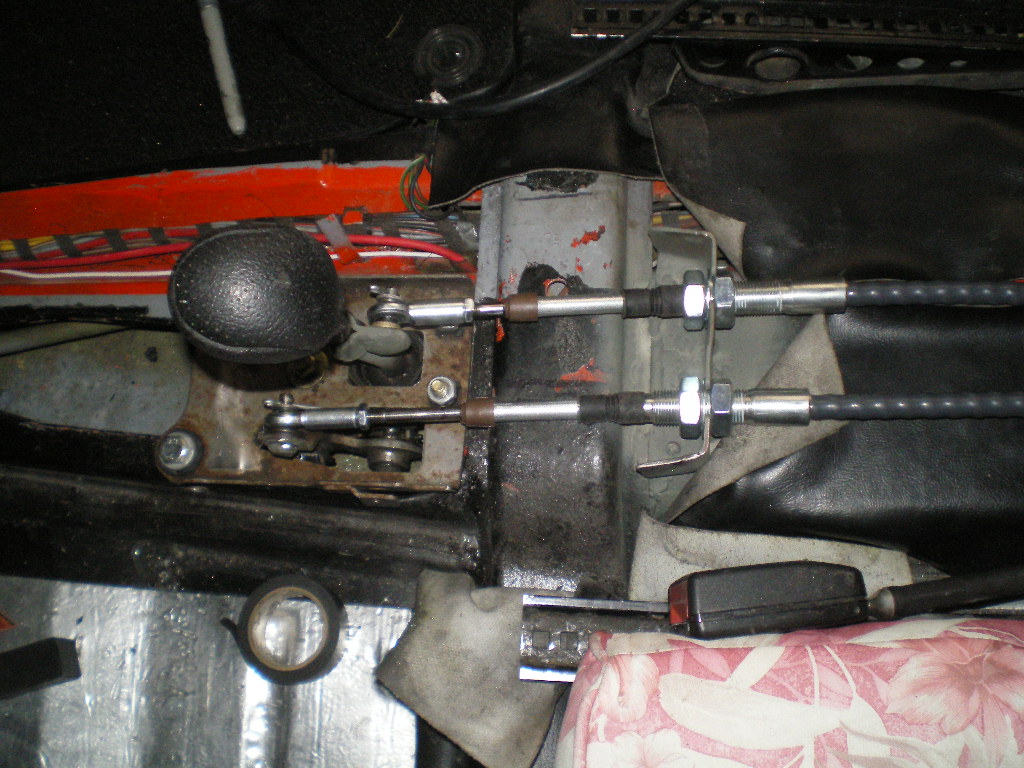 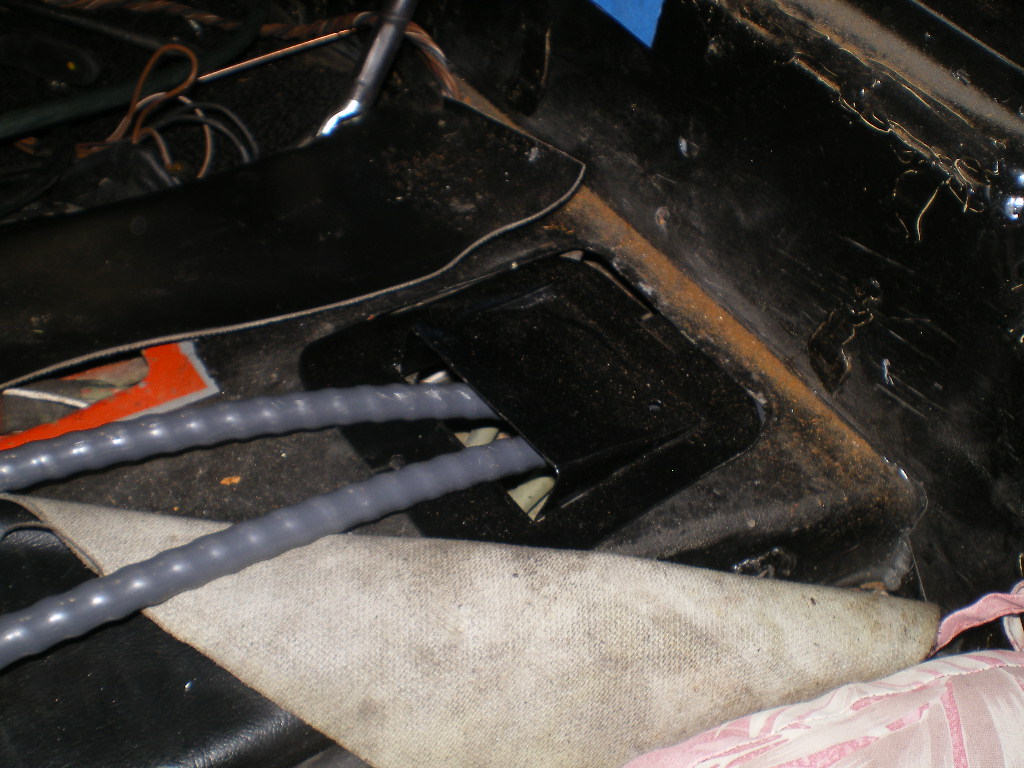 |
|
|
|
| rhodyguy |
Dec 11 2020, 12:08 PM
Post
#90
|
|
Chimp Sanctuary NW. Check it out. Group: Members Posts: 22,252 Joined: 2-March 03 From: Orion's Bell. The BELL! Member No.: 378 Region Association: Galt's Gulch |
Party ON!
|
|
|
|
| Mueller |
Dec 11 2020, 02:12 PM
Post
#91
|
|
914 Freak! Group: Members Posts: 17,155 Joined: 4-January 03 From: Antioch, CA Member No.: 87 Region Association: None |
Nice job, might have to borrow a few of your design ideas when I put my Subaru gearbox in.
|
|
|
|
| 76-914 |
Dec 25 2020, 05:09 PM
Post
#92
|
|
Repeat Offender & Resident Subaru Antagonist Group: Members Posts: 13,920 Joined: 23-January 09 From: Temecula, CA Member No.: 9,964 Region Association: Southern California |
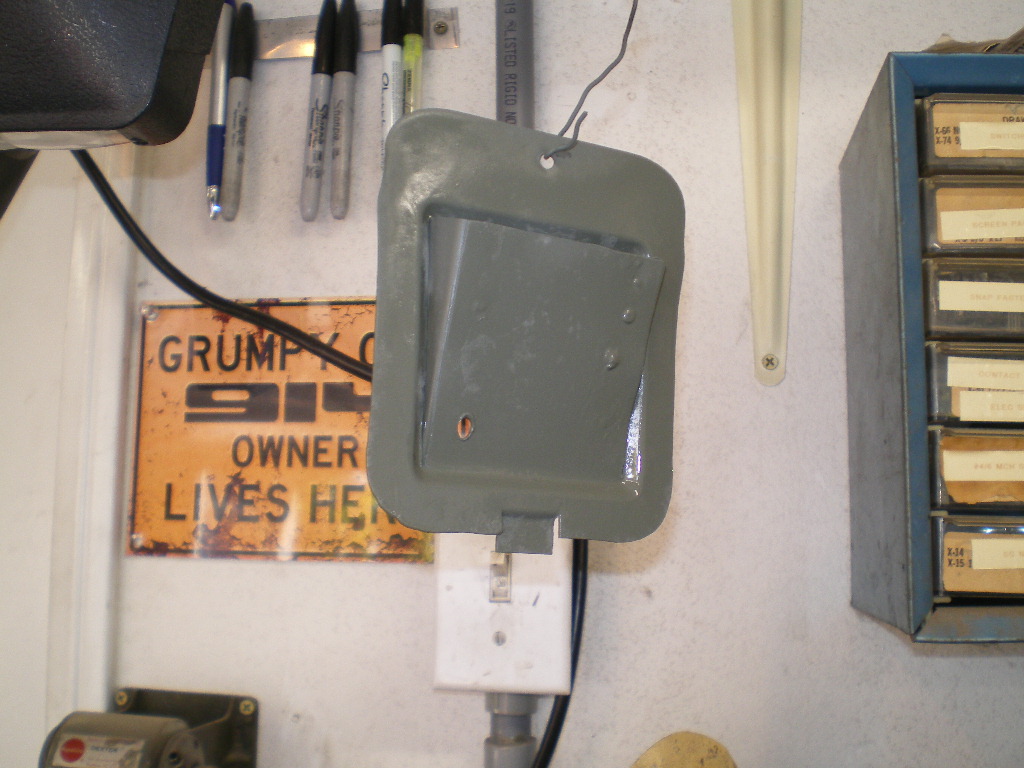
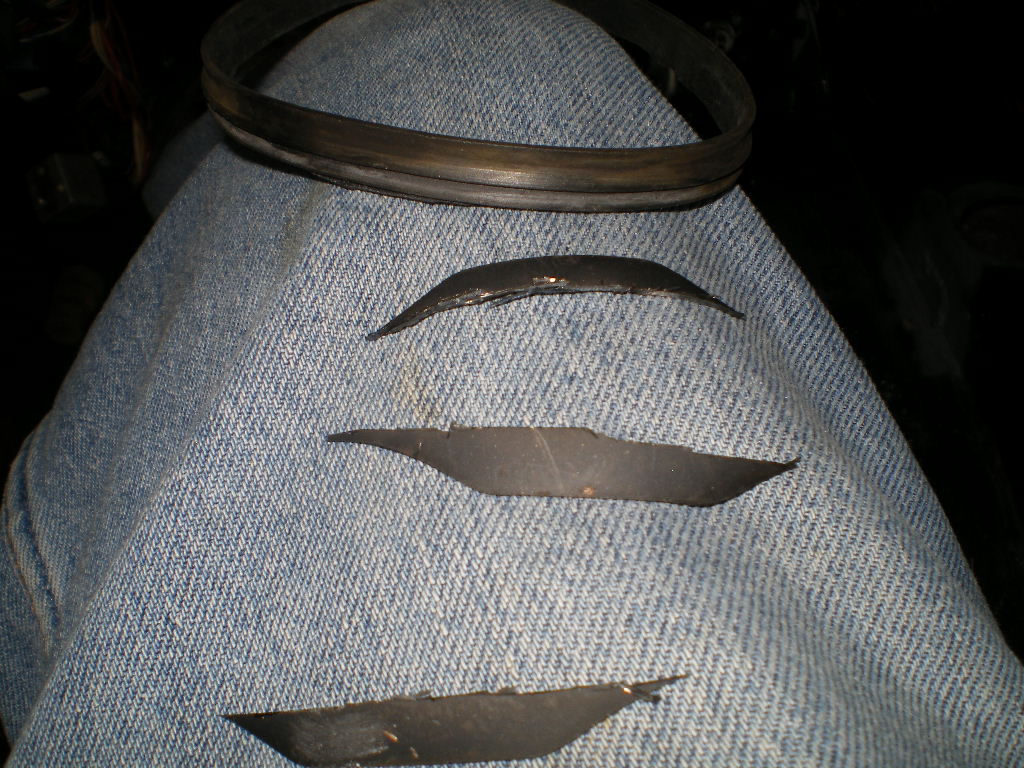
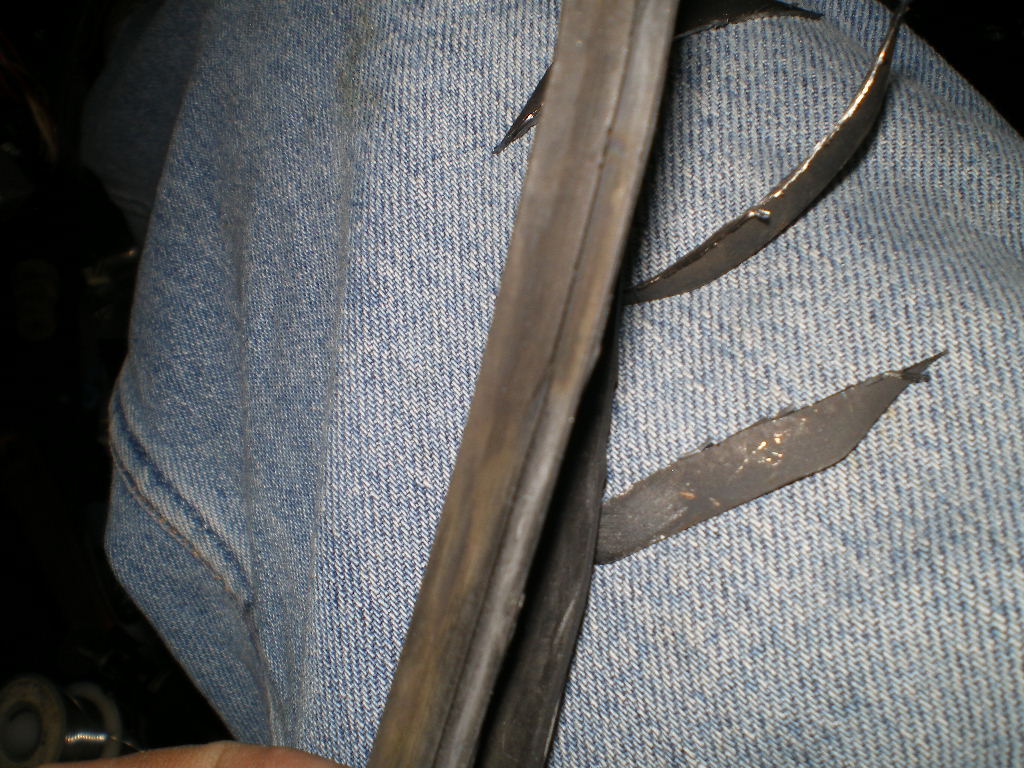
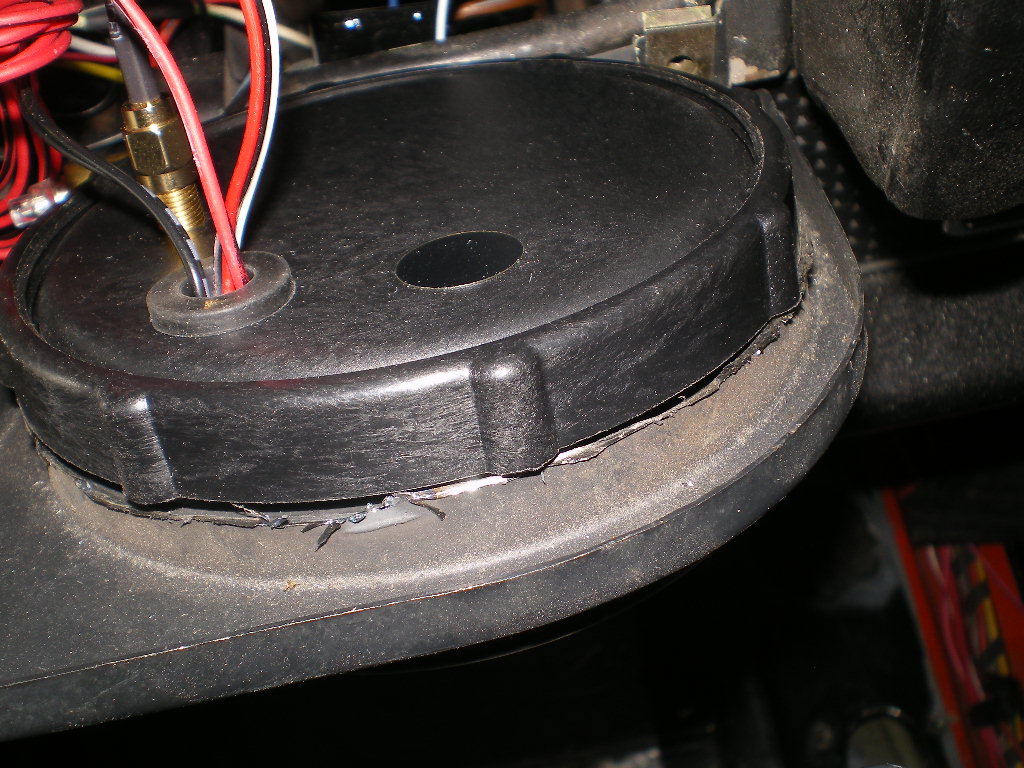
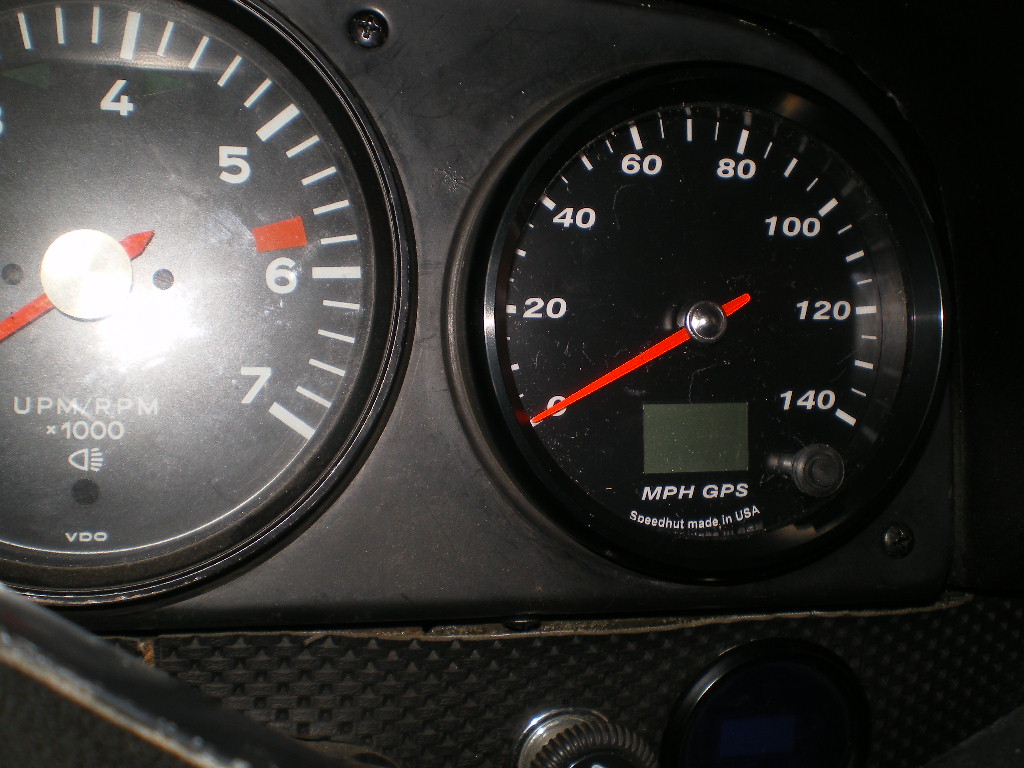
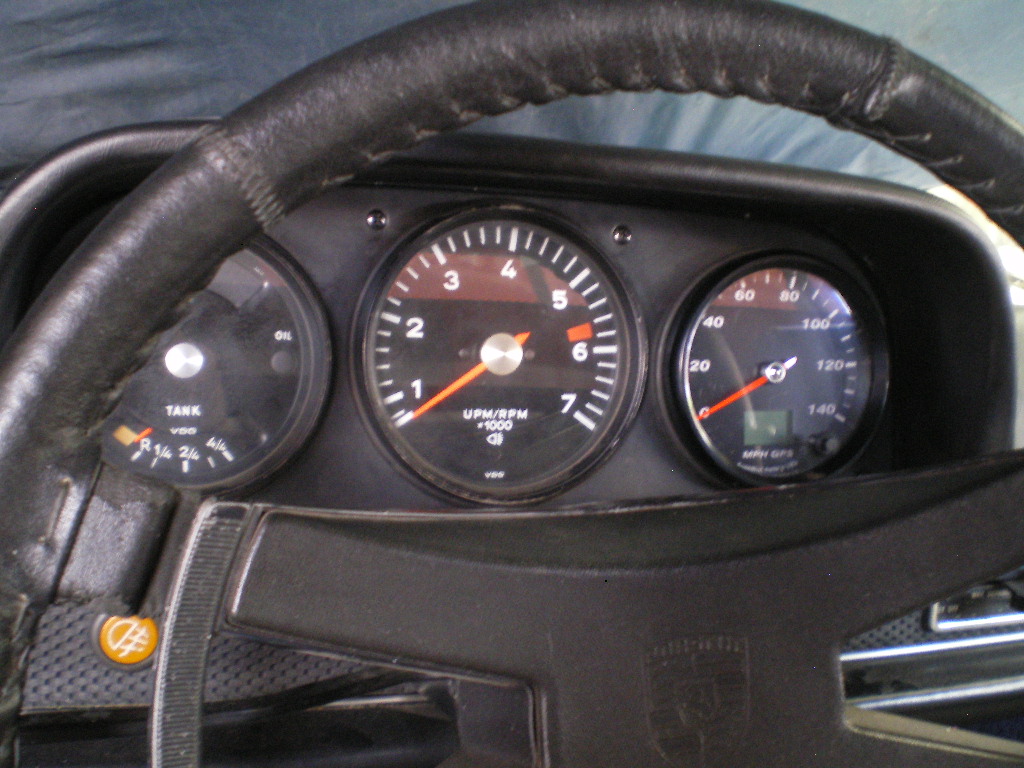
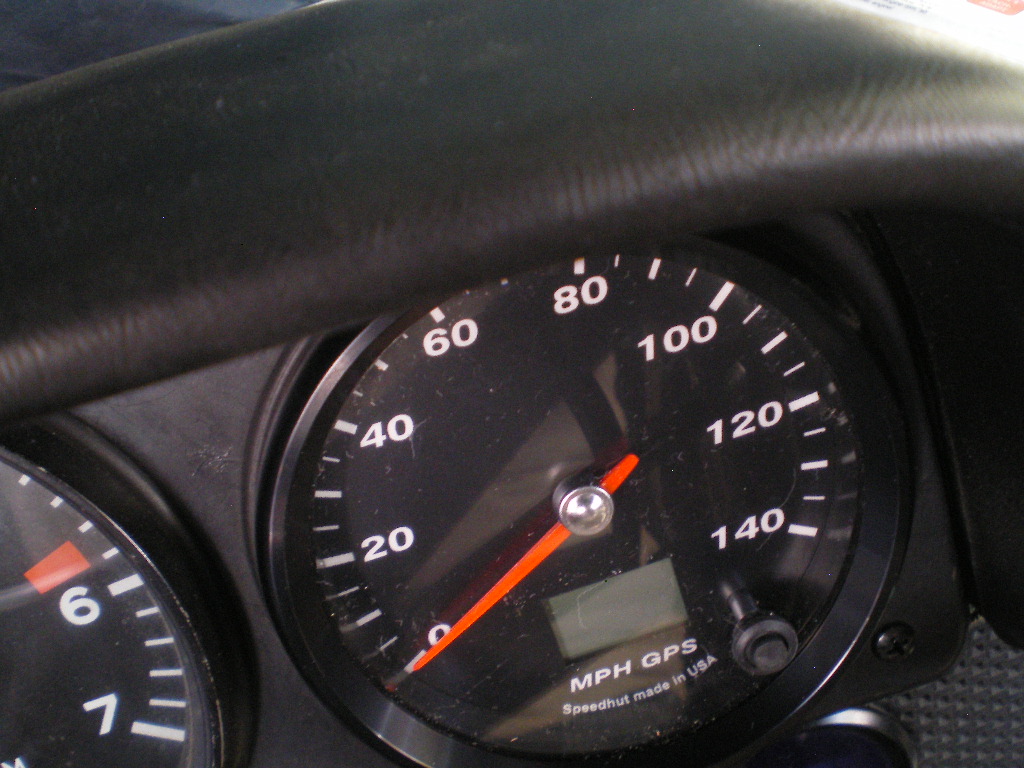
Thx Mike. Well, I went to way much trouble installing one of these Speed Hut Speedometers a few years back when I converted the black 914. I made another gauge panel to accept the gauge but there is an easier way. The problem is that the plastic mounting nut will not screw onto the body of the gauge because the threads on the body of the gauge are partially covered by the shoulder/flange of the OEM opening. So you will need to remove the 4 small metal pieces (with a Dremel) to shorten the shoulder that the gauge body sits in. There are 4 of these "tabs". You can see 3 of them sitting on my leg after cutting them off. The trimmed off piece of the rubber ring is also in the pic. Next you need to cut the rubber mounting ring to shorten it's depth so that it doesn't protrude past the shoulder where the small pieces were trimmed off. The rubber ring is easily trimmed with scissors. See pic's below .Thx to Stephan @914forme for the rubber ring. Merry Christmas ya'll. (IMG:style_emoticons/default/wreath.gif)
       |
|
|
|
| 76-914 |
Jan 12 2021, 10:40 AM
Post
#93
|
|
Repeat Offender & Resident Subaru Antagonist Group: Members Posts: 13,920 Joined: 23-January 09 From: Temecula, CA Member No.: 9,964 Region Association: Southern California |
If it ain't one thing it's two. I've been chasing this rough running engine and I've decided I need to just bite the bullet and throw another engine at it. The rear L cylinder seemed to be the culprit I'd pull the injector lead and it made no difference. Flipped injectors and no difference. Flipped coils and no difference. Any lead I pulled on the left bank was similar but more pronounced. Anything I pulled on the right bank would make a drastic difference. There is also a popping noise on the left exhaust. It would smooth out on acceleration and the engine had plenty of power. I had heard a chattering that I assumed was the AC compressor. Yesterday I pulled the belt and the chatter was still there. I think I have a left bank tensioner that died on me. I have a 120lb compression and today I'll do a leak down test just for shits n grins but I've already convinced myself it needs an engine. That they are plentiful and cheap is the good news. That I need to pull and install another is the bad news. I'd probably go in and replace the tensioners & rails which are available but this engine has about 200K on the clock and I think my $$$ would be better spent on another engine. (IMG:style_emoticons/default/headbang.gif)
|
|
|
|
| BillJ |
Jan 12 2021, 11:17 AM
Post
#94
|
|
Senior Member Group: Members Posts: 1,356 Joined: 4-March 13 From: charlotte, NC Member No.: 15,610 Region Association: None |
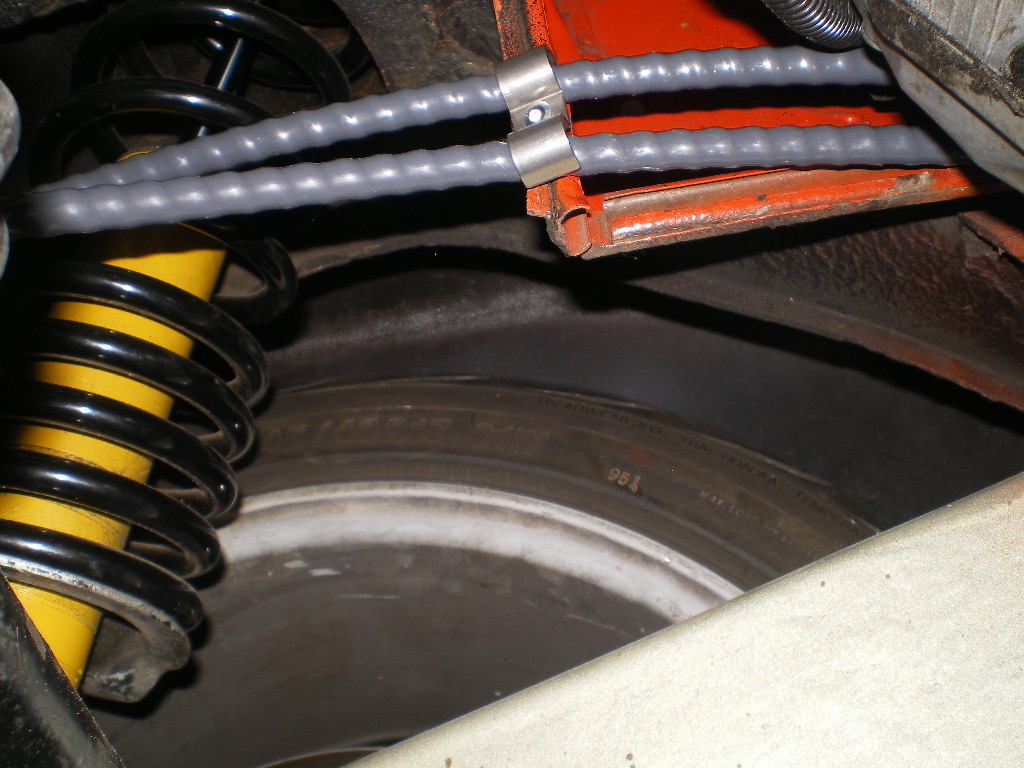
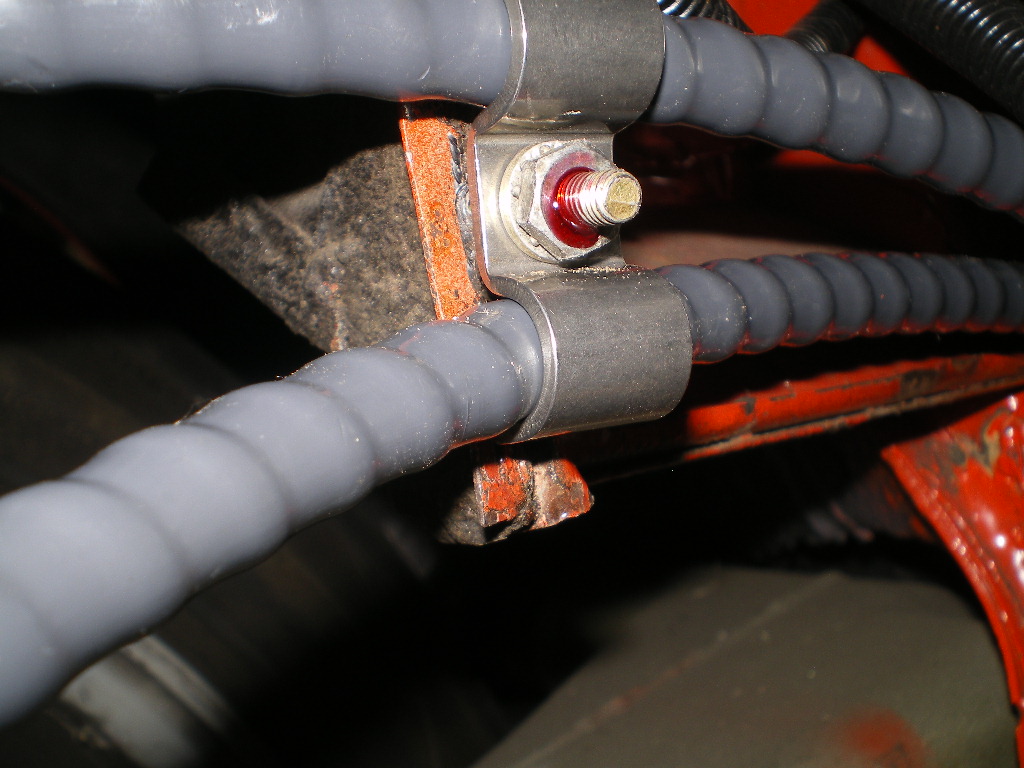
Very cool build and thanks for sharing it! Are you worried at all about the coolant lines running under the pans like that? I know some speed bumps that would love to eat the hoses for that one time you go over them too fast...
|
|
|
|
| 76-914 |
Jan 12 2021, 07:01 PM
Post
#95
|
|
Repeat Offender & Resident Subaru Antagonist Group: Members Posts: 13,920 Joined: 23-January 09 From: Temecula, CA Member No.: 9,964 Region Association: Southern California |
QUOTE(BillJ @ Jan 12 2021, 09:17 AM) Very cool build and thanks for sharing it! Are you worried at all about the coolant lines running under the pans like that? I know some speed bumps that would love to eat the hoses for that one time you go over them too fast... Not too much. But I keep a splice coupling and a few hose clamps with me when traveling. (IMG:style_emoticons/default/beerchug.gif) |
|
|
|
| rhodyguy |
Jan 12 2021, 07:06 PM
Post
#96
|
|
Chimp Sanctuary NW. Check it out. Group: Members Posts: 22,252 Joined: 2-March 03 From: Orion's Bell. The BELL! Member No.: 378 Region Association: Galt's Gulch |
How many turbos on the replacement 6? 2?
|
|
|
|
| Chris914n6 |
Jan 12 2021, 08:46 PM
Post
#97
|
|
Jackstands are my life. Group: Members Posts: 3,543 Joined: 14-March 03 From: Las Vegas, NV Member No.: 431 Region Association: Southwest Region |
I'd check the harness too to make sure that's good. The tensioner would affect the whole bank not just 1 cyl. Chatter could be a dead/flat lifter which might fix itself with use. At this point I'd assume it was a lifter.
|
|
|
|
| 76-914 |
Jan 13 2021, 10:21 AM
Post
#98
|
|
Repeat Offender & Resident Subaru Antagonist Group: Members Posts: 13,920 Joined: 23-January 09 From: Temecula, CA Member No.: 9,964 Region Association: Southern California |
QUOTE(Chris914n6 @ Jan 12 2021, 06:46 PM) I'd check the harness too to make sure that's good. The tensioner would affect the whole bank not just 1 cyl. Chatter could be a dead/flat lifter which might fix itself with use. At this point I'd assume it was a lifter. Chris thx for helping but the noise is from the front in the chain area and doesn't have that tat-tat-tat rhythm. Checked the harness first thing per the factory manual. Voltage is good from the ECM to the molex plugs at the coils. (IMG:style_emoticons/default/beerchug.gif) |
|
|
|
| 76-914 |
Feb 24 2021, 09:10 PM
Post
#99
|
|
Repeat Offender & Resident Subaru Antagonist Group: Members Posts: 13,920 Joined: 23-January 09 From: Temecula, CA Member No.: 9,964 Region Association: Southern California |
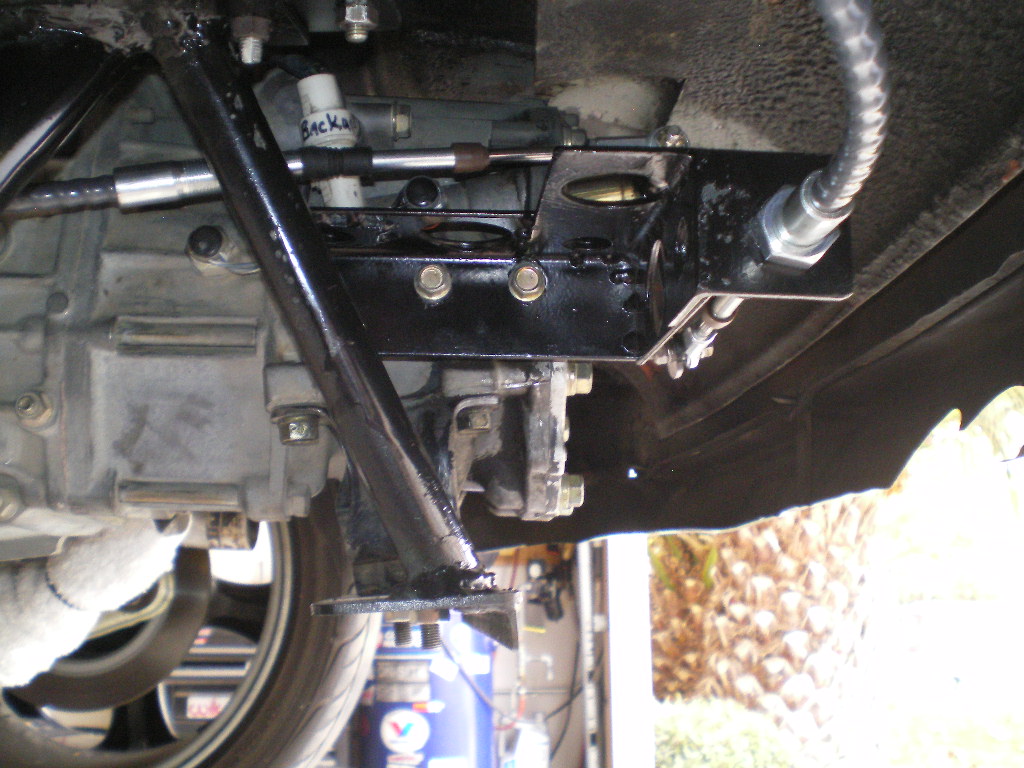
Well it's been 5 weeks and I wish I were further along but I can see the light at the end of the tunnel. I did shit can the engine as it needed a new tensioner which meant all new tensioners, guides and guess what chains weren't available. Given it had over 200K on the clock it was off to San Diego for an $850 JDM replacement motor. And since I'd pulled the drivetrain I bought one of Ian's (Cold Water Inc) cradles. I'd seen his newest design which allows for the removal of the transmission , should the need arise, while leaving the engine in the car. It had winked at me and the welds were a work of art so I took the plunge and scraped mine. So far I like his cradle more than mine in every respect except one. I'll get to that later.
First thing is to bolt it in place. Now is the time to discover any gotchas before mounting the drivetrain on the cradle only to find it won't bolt up to our car. And it did bolt right up.   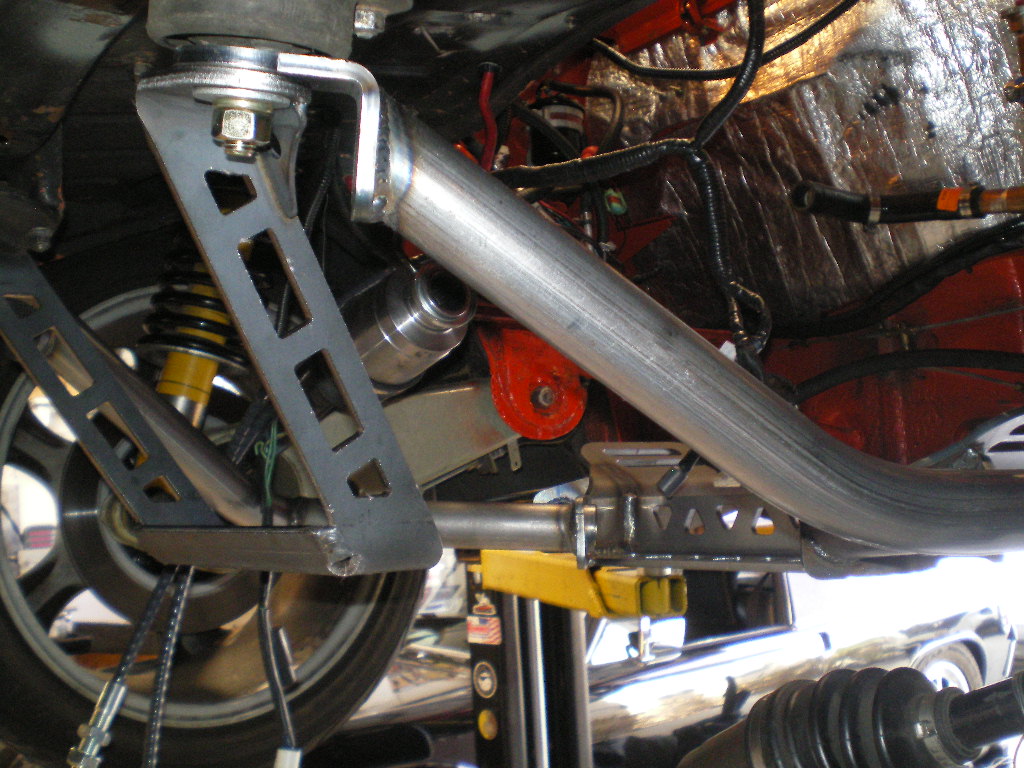 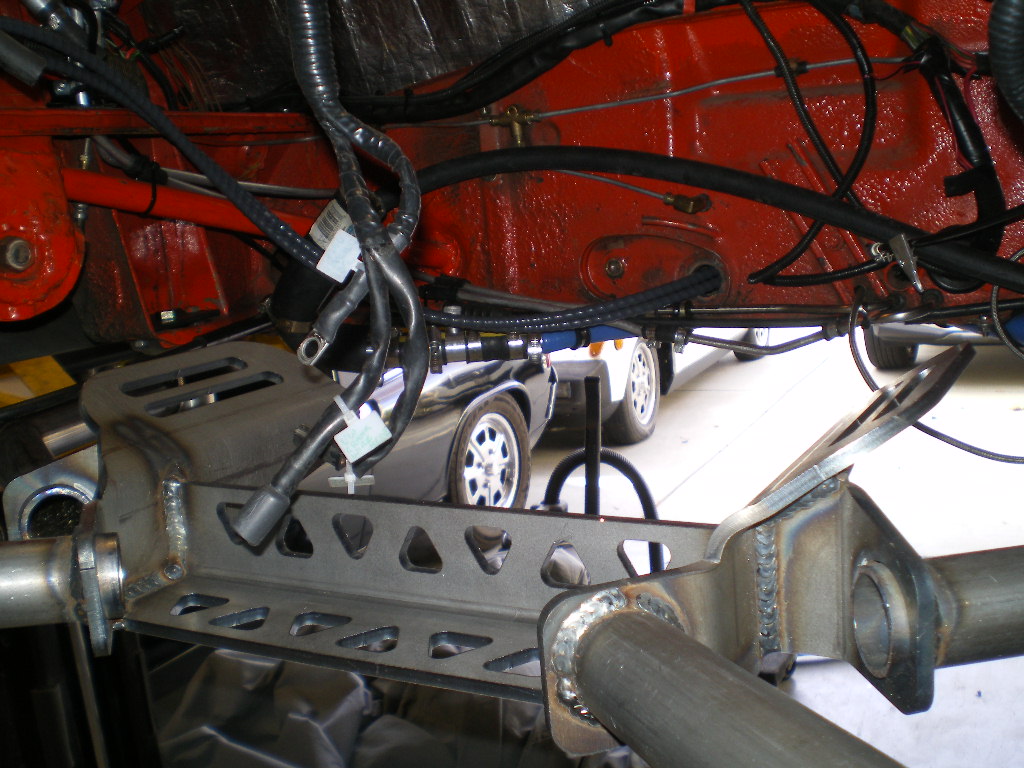 I should have left it as it was but I had to paint it. I regretted this later as I didn't let it cure and scraped it off in a few places. I'll touch it up later. 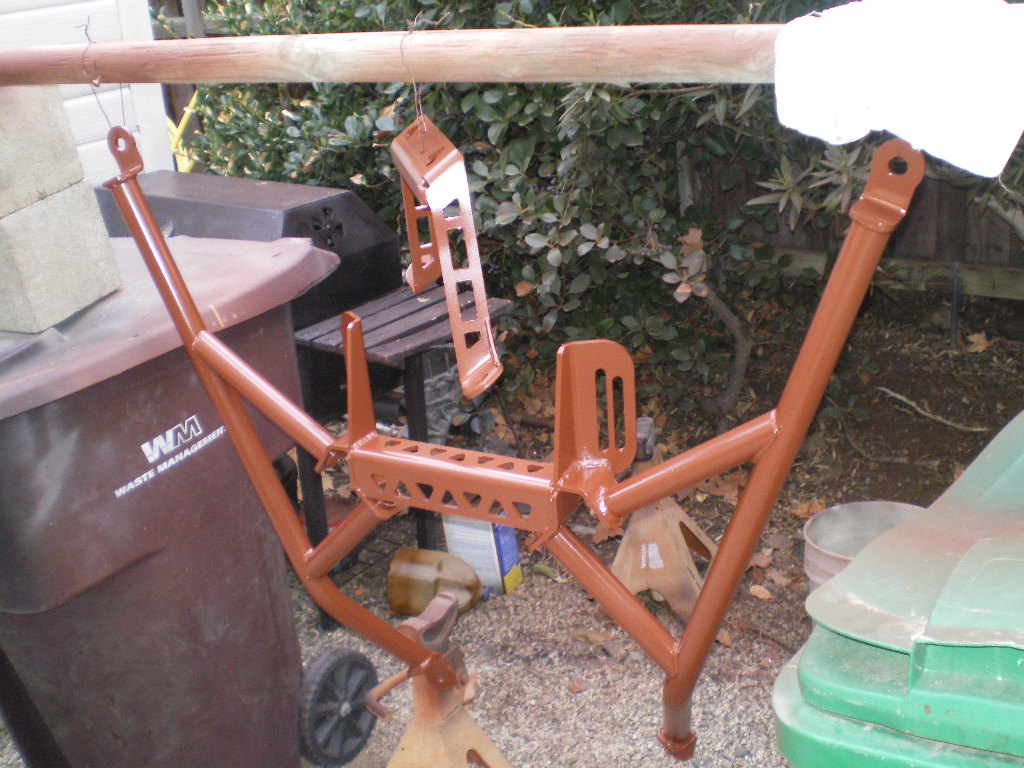 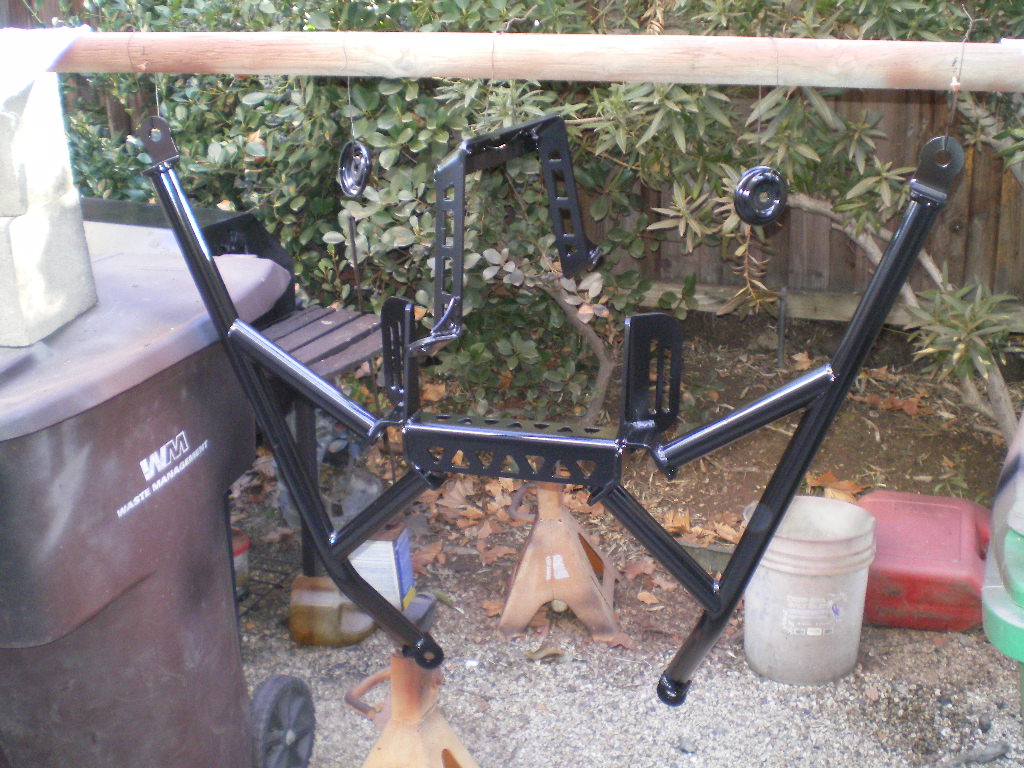 Ian's cradle doesn't have wheels or a place to mount any so I sat it on 3 furniture dollies and tied the 3 together with some 1x2's. I also placed a few 4x6's between the cradle and dollies to raise it a bit. Otherwise the car needs to sit too close to the ground during hook up. Then you just roll it in place and attach it to the car with the supplied hardware. The cradle has about 3" of front to back adjustment. I went with it midpoint. That gives me about 2" clearance where the harness' join which is a tight area otherwise. It also gives you a little more clearance around the starter connections. 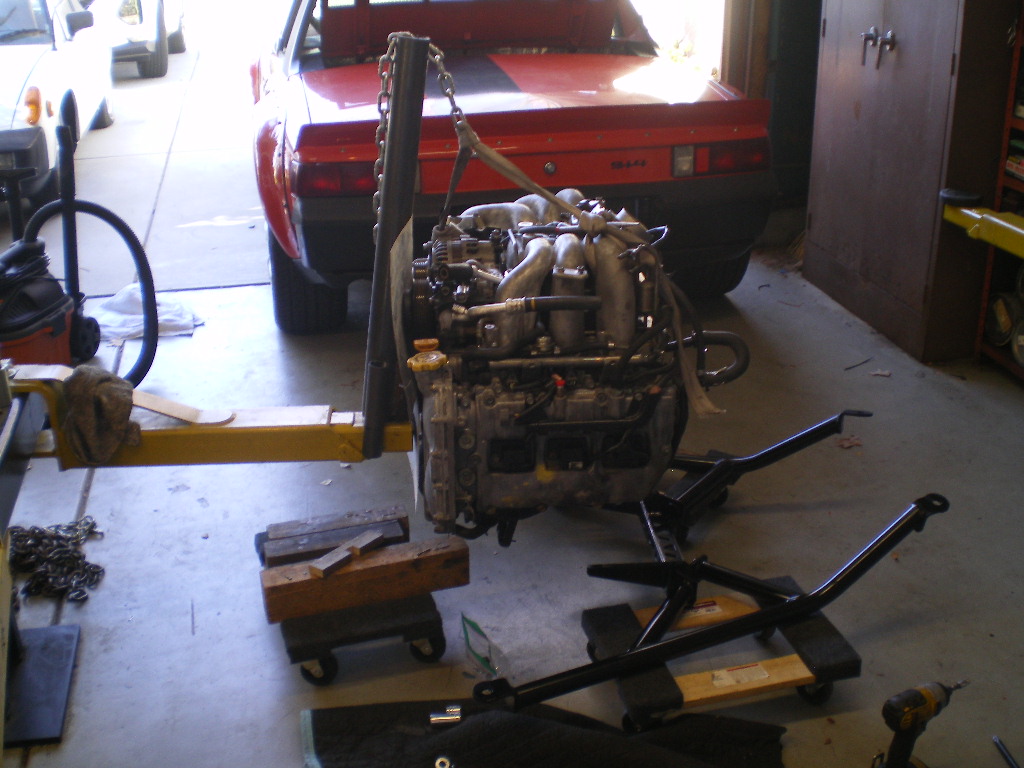 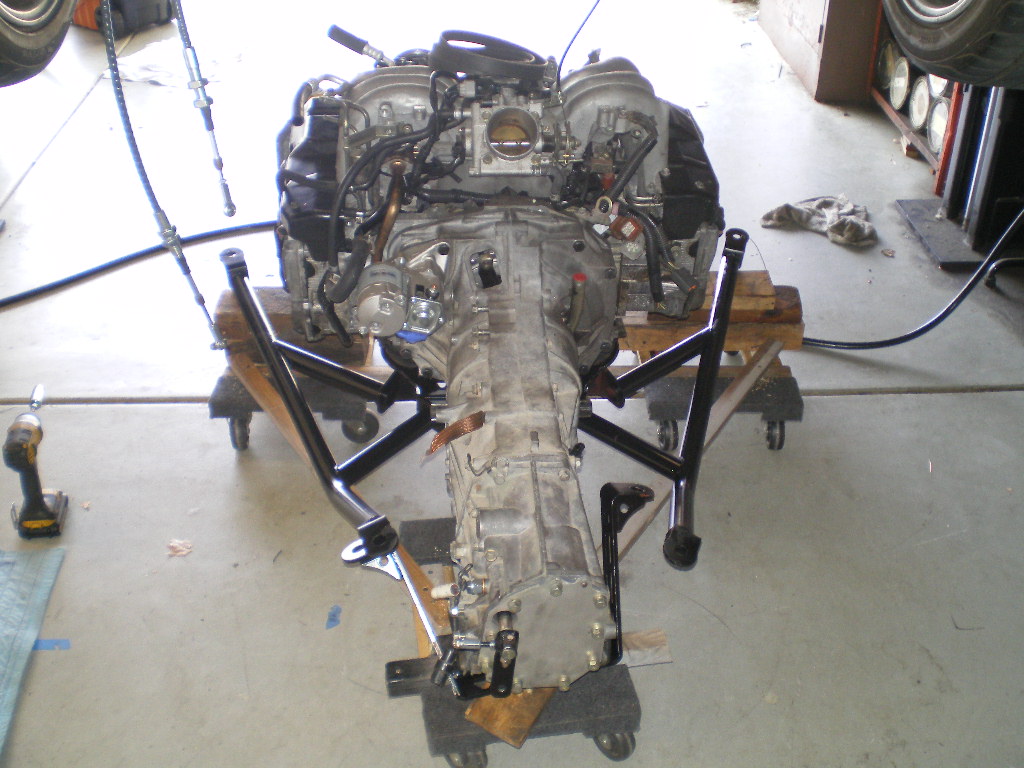 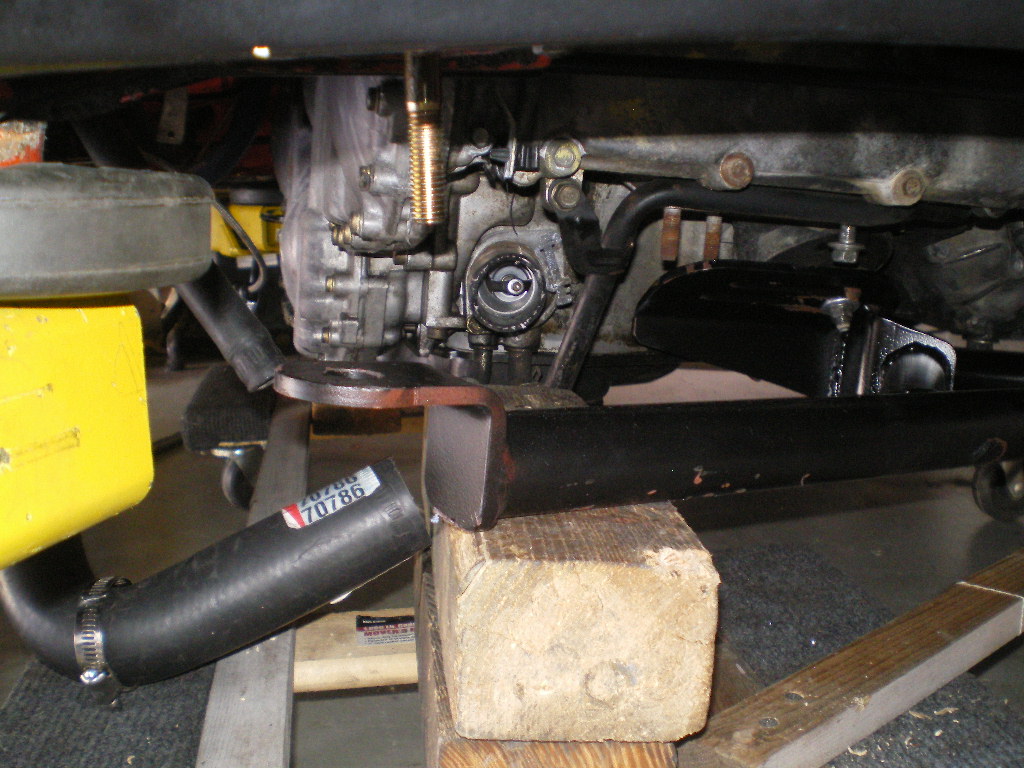 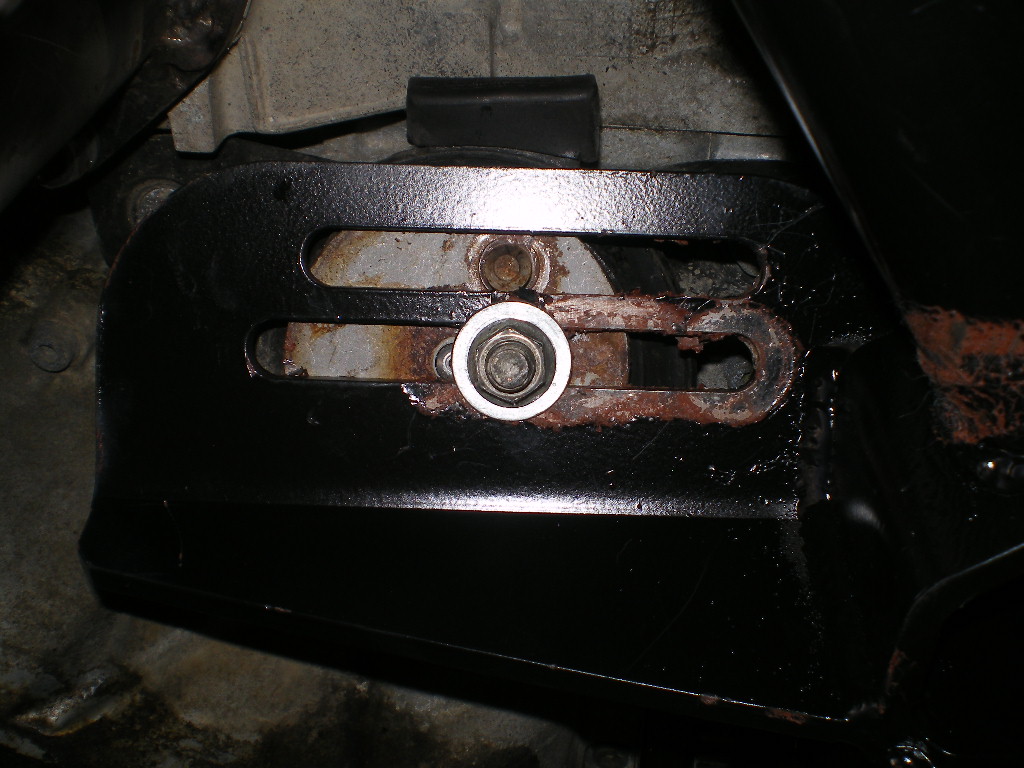 |
|
|
|
| 76-914 |
Feb 24 2021, 09:34 PM
Post
#100
|
|
Repeat Offender & Resident Subaru Antagonist Group: Members Posts: 13,920 Joined: 23-January 09 From: Temecula, CA Member No.: 9,964 Region Association: Southern California |
So the newest engine runs great, pulls strong and is loud as Hell which brings me to this chapter. Time for an exhaust system. I really like the exhaust system I have on the '73 so I duplicated that original order and went about installing it yesterday. You remember me saying there was one thing I didn't like about Ian's cradle? Well this is it. I can't use the same install method as he has a brace that interferes with how I installed the exhaust on the '73 using my cradle. Hopefully I'll be able to use the same combination of mufflers and keep the center out design but I had to order some additional fittings before I could go any further today. I'm using all 16ga SS so it will be good for many, many years. Her are some pif's of where I left off today.
Attached image(s) 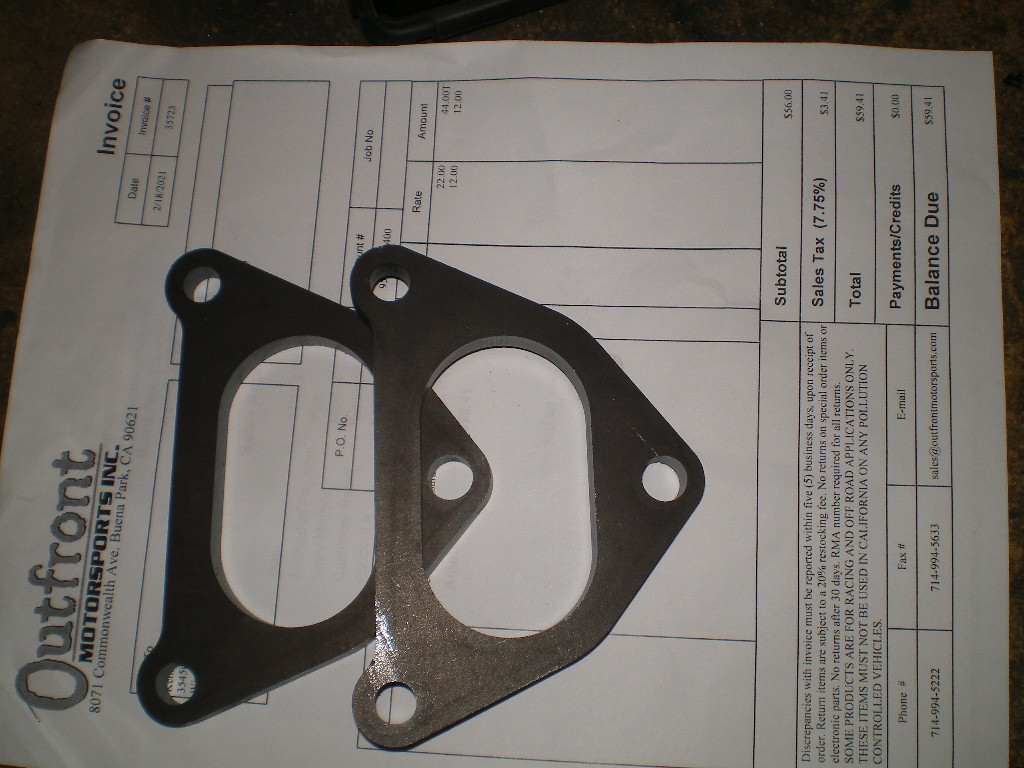 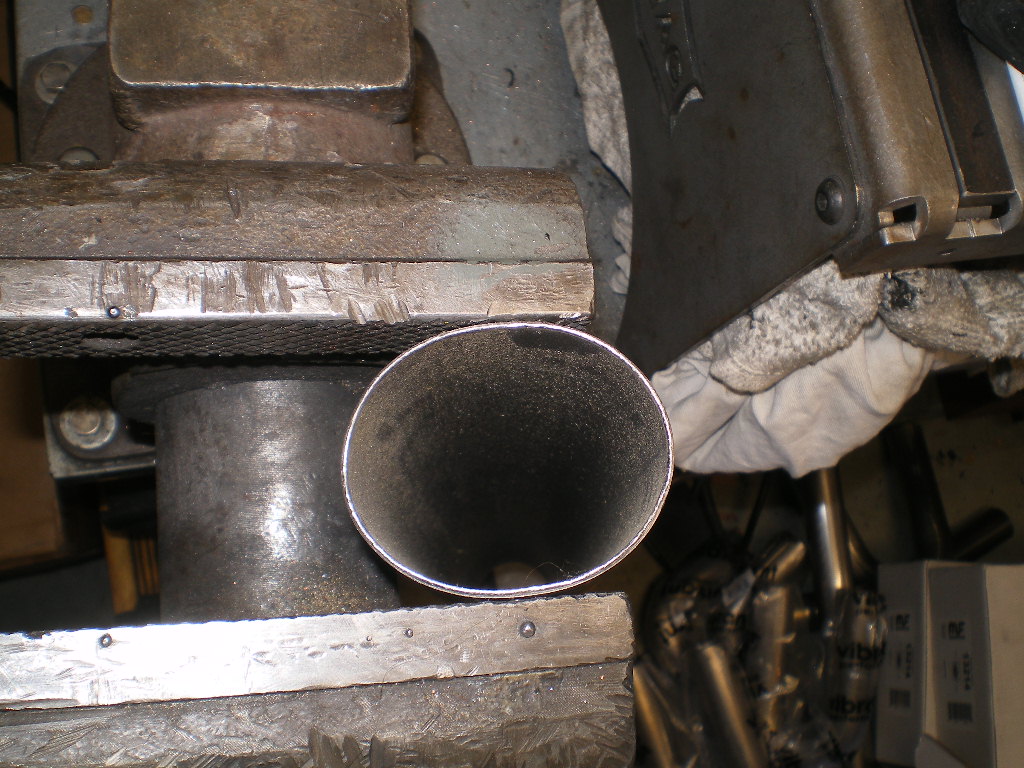 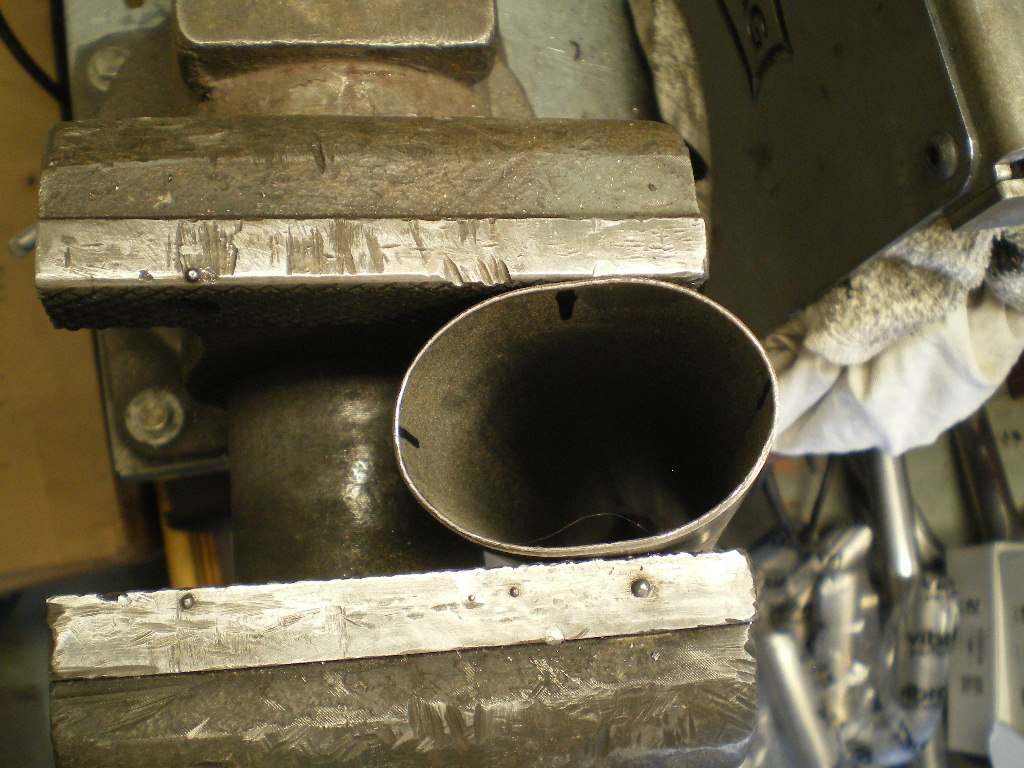 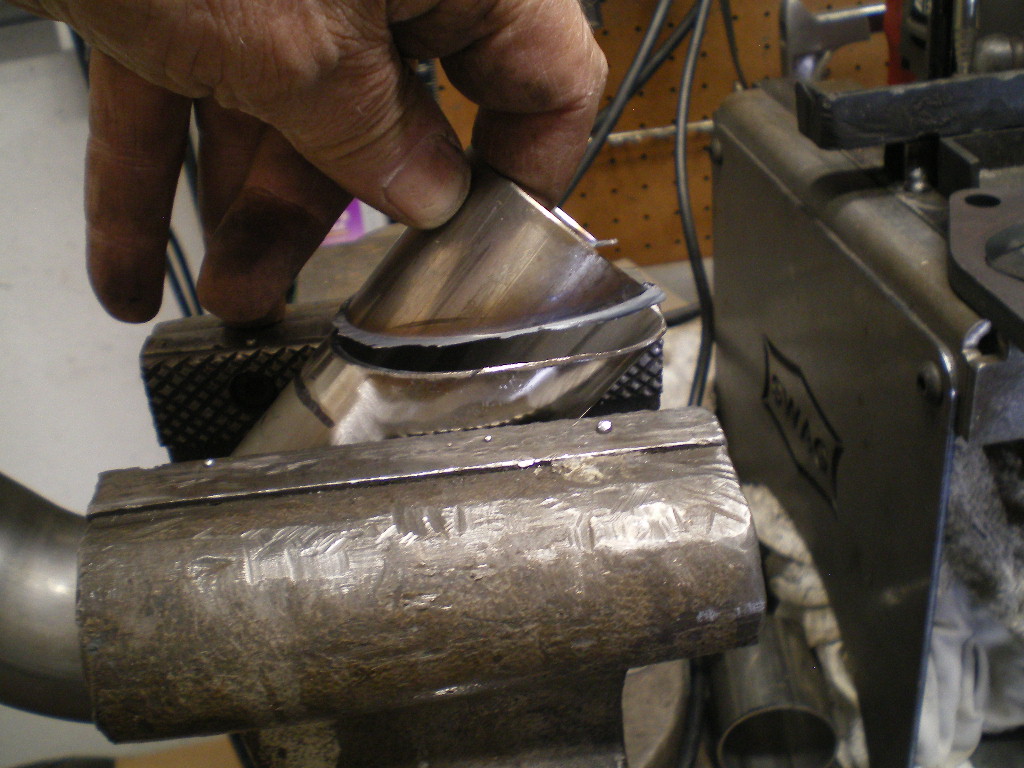 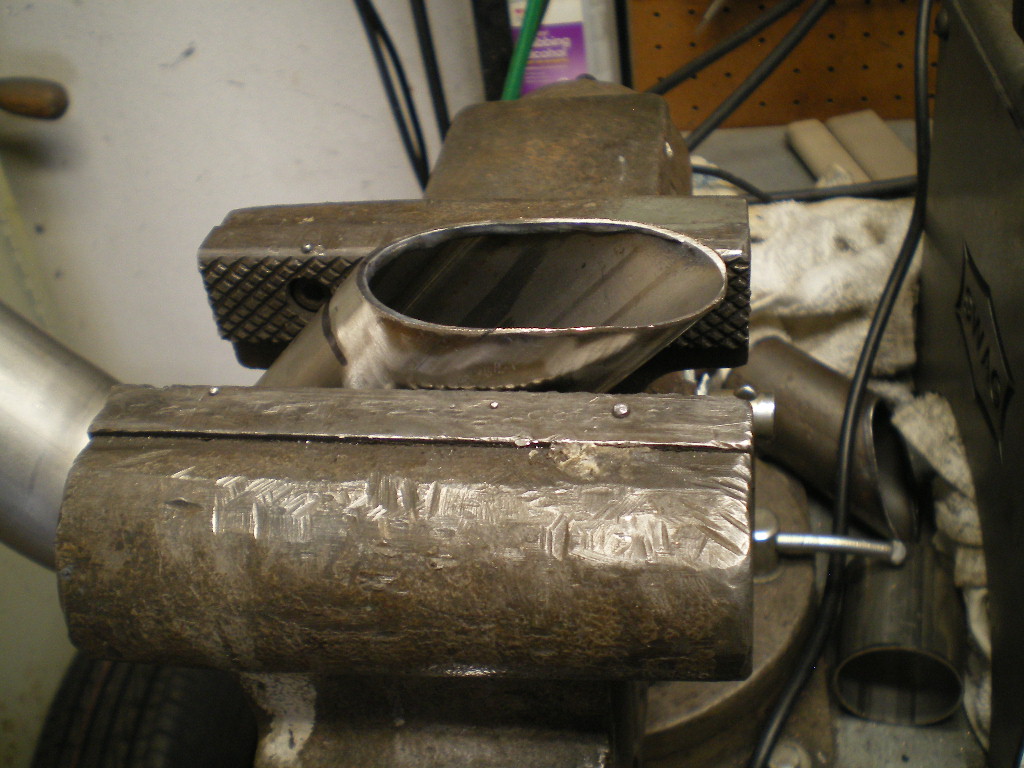 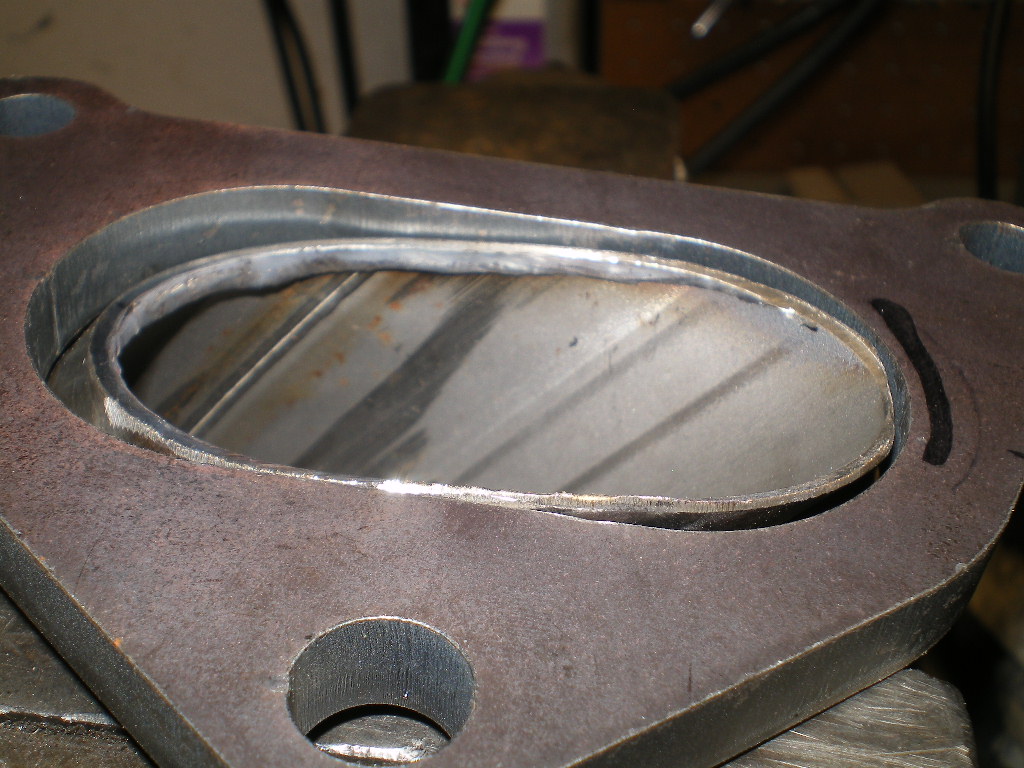 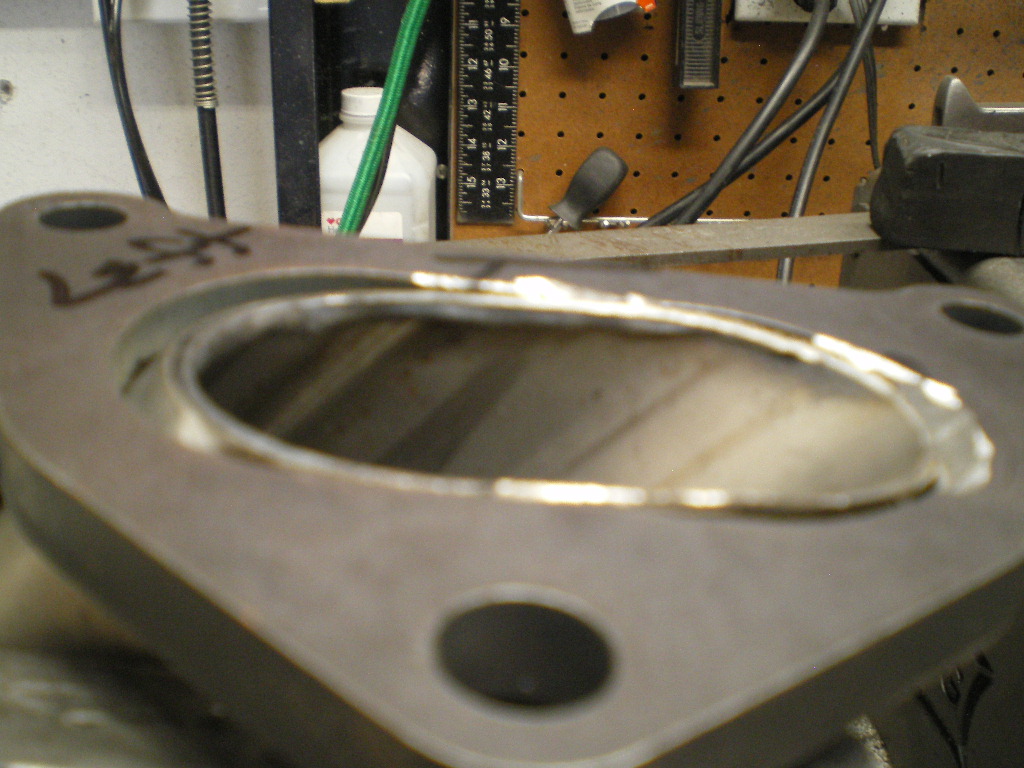 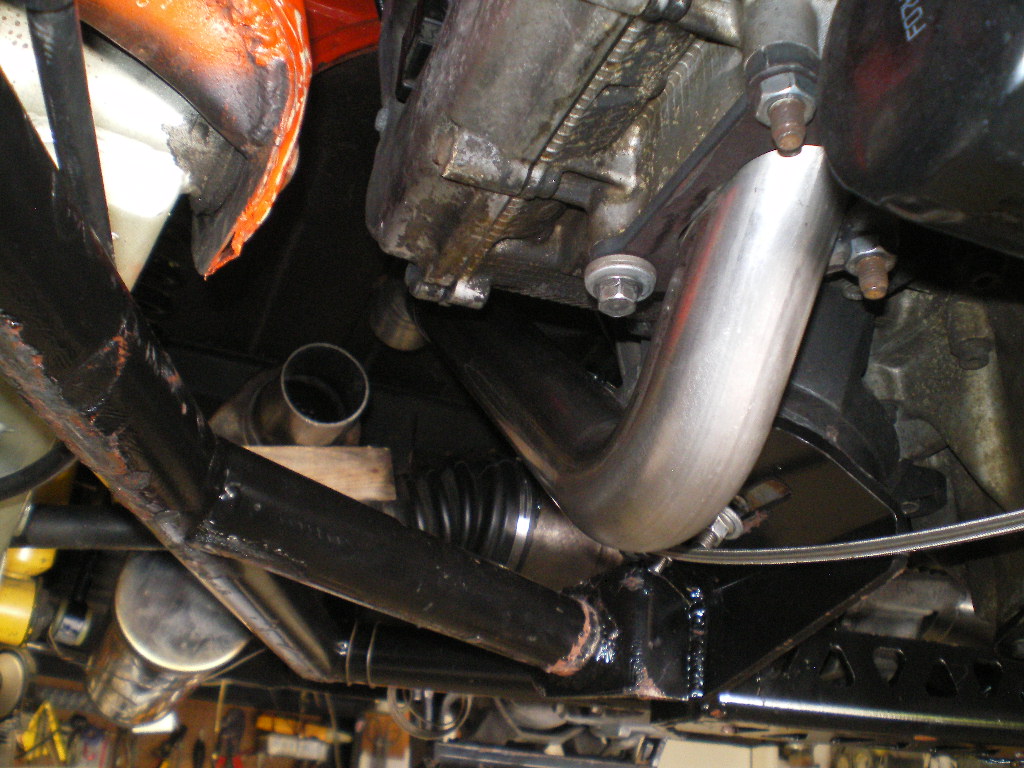 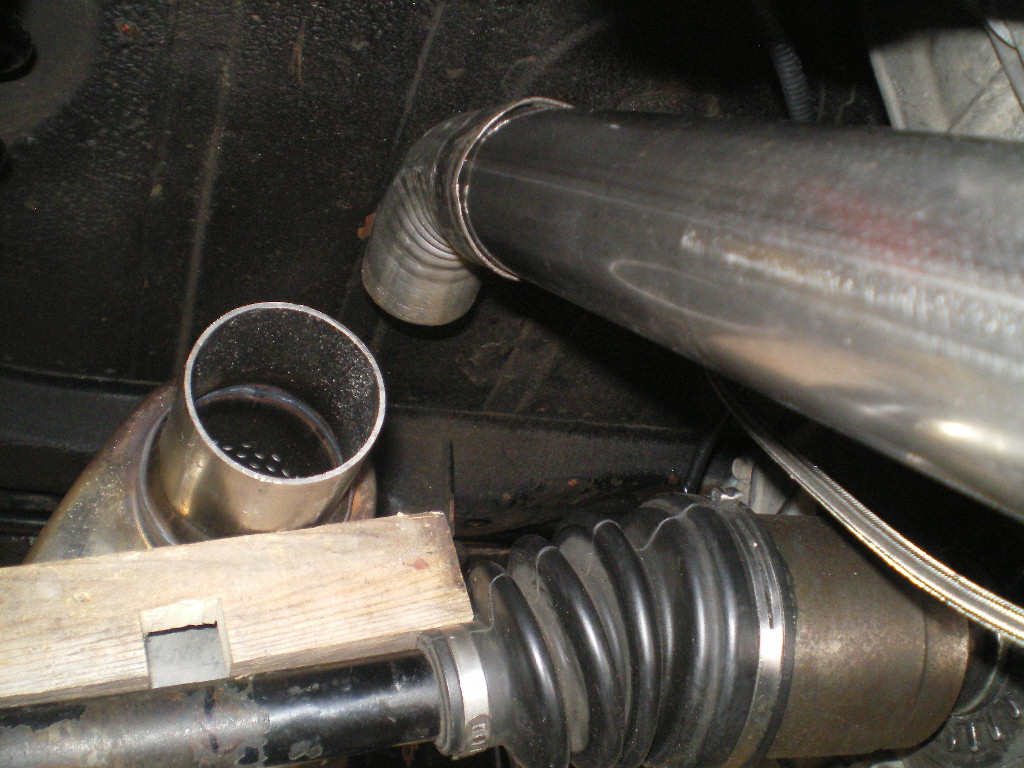 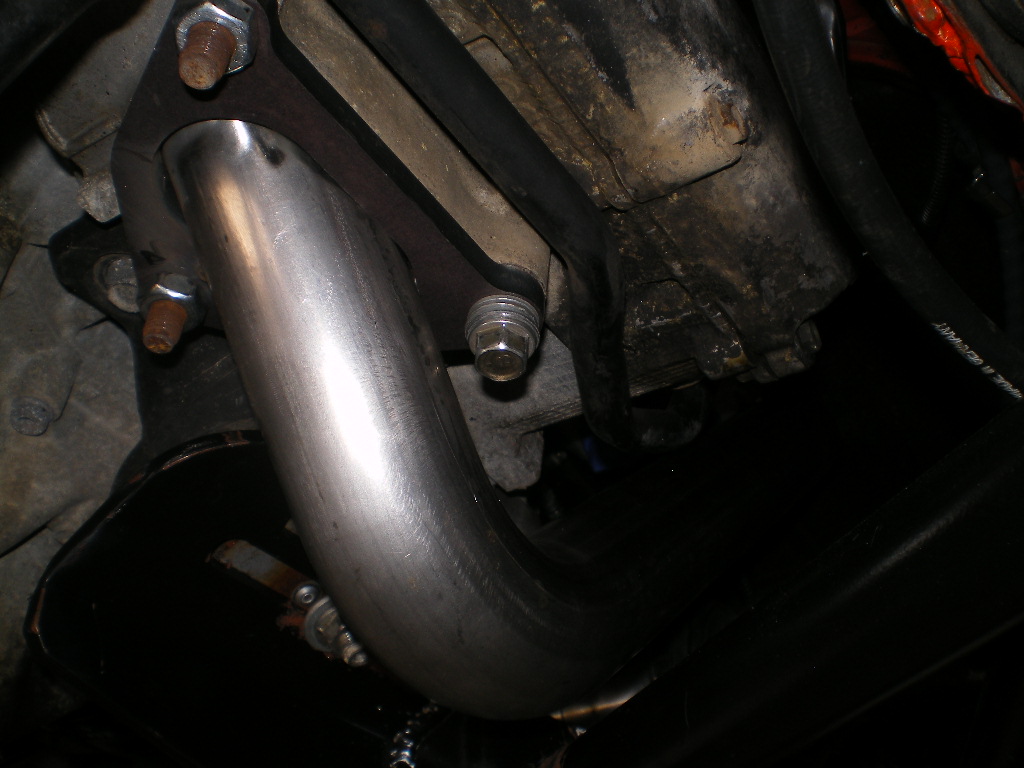 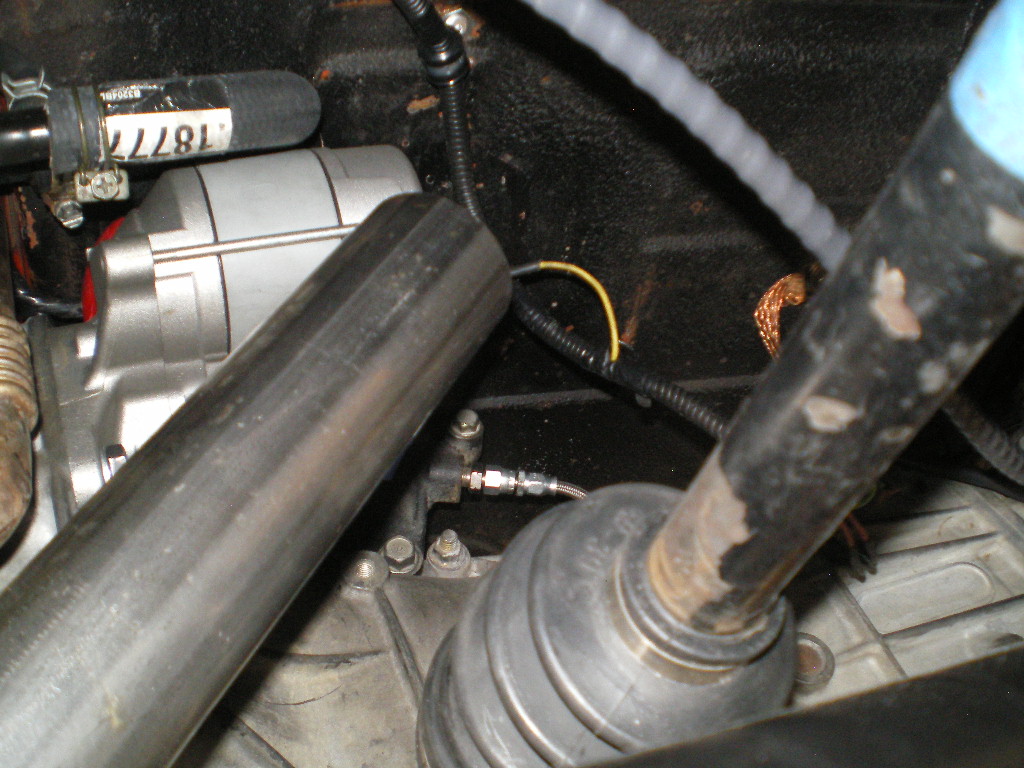 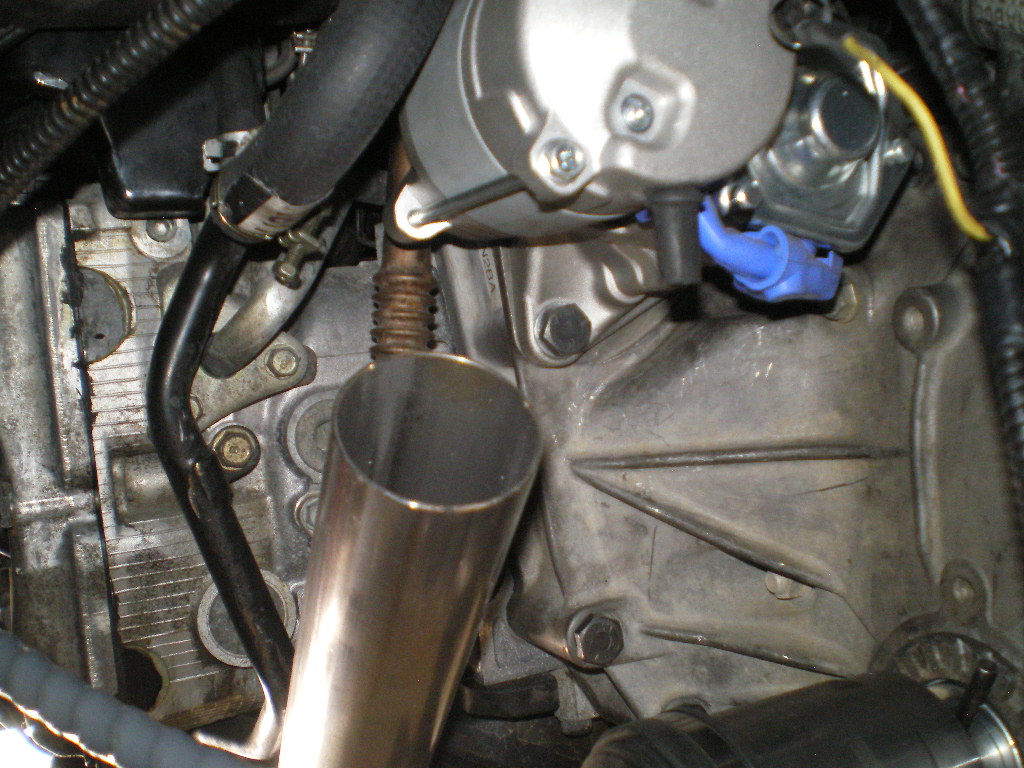
|
|
|
|
|
1 User(s) are reading this topic (1 Guests and 0 Anonymous Users)
0 Members:

|
Lo-Fi Version | Time is now: 24th July 2026 - 11:17 PM |
Invision Power Board
v9.1.4 © 2026 IPS, Inc.