|
|
|
Porsche, and the Porsche crest are registered trademarks of Dr. Ing. h.c. F. Porsche AG.
This site is not affiliated with Porsche in any way. Its only purpose is to provide an online forum for car enthusiasts. All other trademarks are property of their respective owners. |
|
|

  |

| mepstein |
 Mar 15 2024, 05:25 PM Mar 15 2024, 05:25 PM
Post
#321
|
|
914-6 GT in waiting  Group: Members Posts: 20,289 Joined: 19-September 09 From: Landenberg, PA/Wilmington, DE Member No.: 10,825 Region Association: MidAtlantic Region |
QUOTE(Tom1394racing @ Mar 15 2024, 04:34 PM)  QUOTE(mepstein @ Mar 15 2024, 12:08 PM) Looks super clean. Is this for the tangerine kit? Thanks Mark Those are the "dog-eared" attachments for the trailing arm pivot points stabilizers. Most factory GT cars used these. I am hoping the stabilizing rods will not interfere with my oil lines and T-stat that I am planning to locate underneath the engine sheet metal on the LHS of the engine compartment. I have the same kit and same as you, planning on hanging the thermostat in that location. Thanks for being the test pilot. (IMG:style_emoticons/default/beerchug.gif) |
   |

 
|
| Tom1394racing |
Mar 16 2024, 05:15 AM
Post
#322
|
|
Member Group: Members Posts: 493 Joined: 25-August 07 From: CT Member No.: 8,039 Region Association: North East States |
I am planning to use Ben McFarland‘s kit for the engine oil lines. The case suction line runs around the back of the engine and over the gearbox to the thermostat. Just like the Early 911. I’ll be using a Mocal thermostat . I know it’s a little tricky making some of the connections to the oil tank. My plan is to mount the engine first and then finalize the locations of the thermostat oil lines, CD boxes, coils, fuel lines, and throttle cable.
|
 |
|
| Tom1394racing |
Mar 25 2024, 06:04 PM
Post
#323
|
|
Member Group: Members Posts: 493 Joined: 25-August 07 From: CT Member No.: 8,039 Region Association: North East States |
Another update.
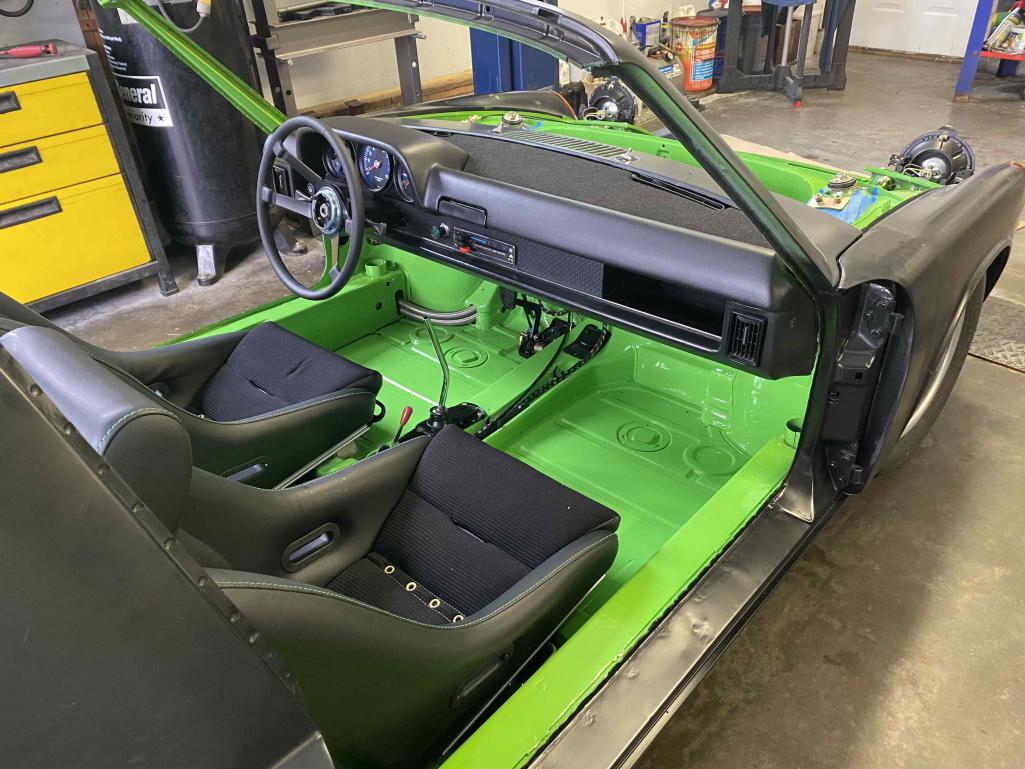
With the electricals mostly sorted out, I decided to remove the dash and install the dash top and dash facia off the car. Everything I've read and seen says it much easier to install these on the bench. The dash top is the original that was restored by Just Dashes, Very nice. Since I am going with the GT look without the glovebox door and radio, we removed the lock surround on the dash and I fabricated a radio delete plate. I also painted the dash cowl while the dash was out. 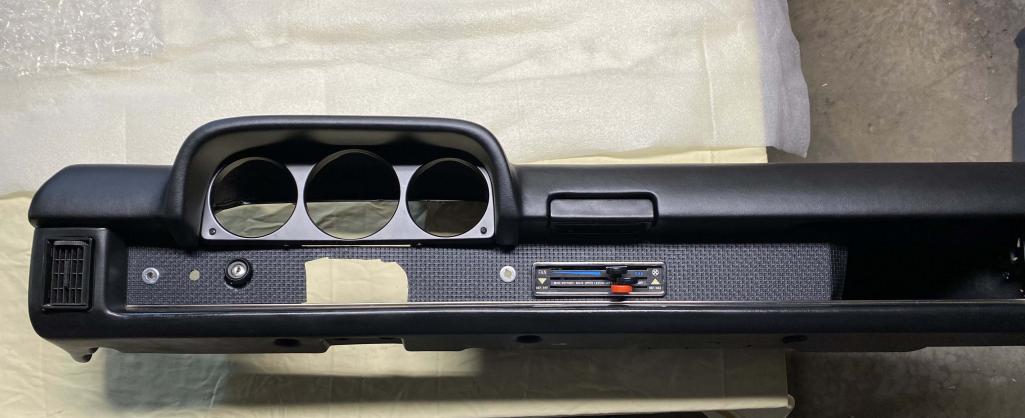 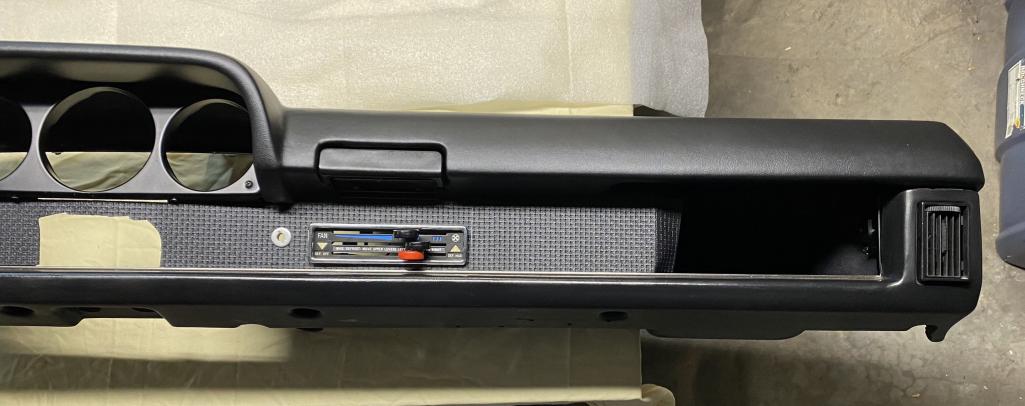 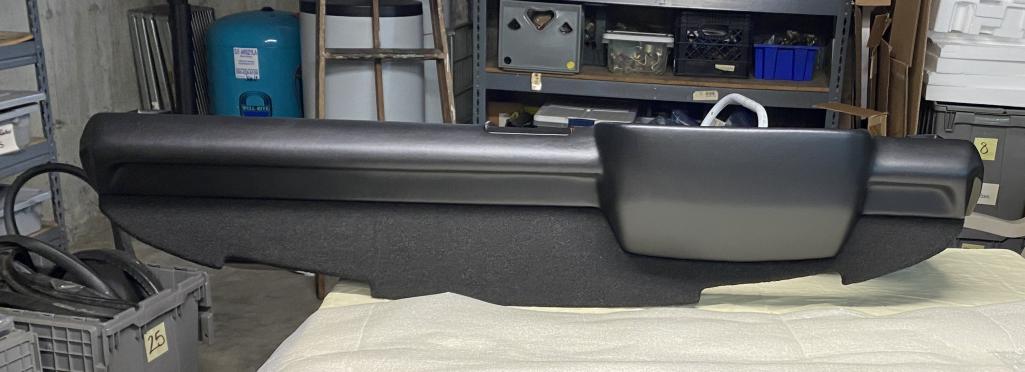 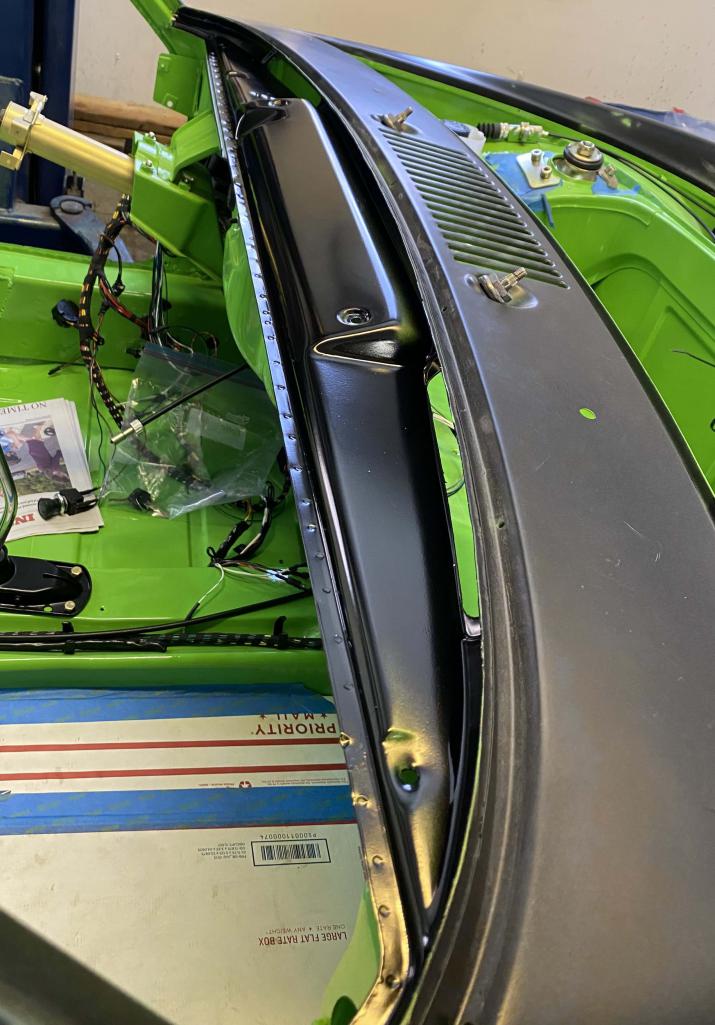 |
|
|
|
| Tom1394racing |
Mar 29 2024, 07:24 AM
Post
#324
|
|
Member Group: Members Posts: 493 Joined: 25-August 07 From: CT Member No.: 8,039 Region Association: North East States |
Had the chance to spend a few consecutive days in the garage this week working on the 914.
I reinstalled the dash, reconnected the gauges & switches and rechecked the electricals. All good. I then focused on the ventilation system. A lovely control panel from Dion arrived last week and found a home on my restored dash. I also installed the control boxes and cables following the great writeup from ElectroClassics EV. https://914electric.wordpress.com/2011/03/18/take-the-heat/ I had to belt sand some of the plastic surface on the bottom of the LHS control box to get it to fit without too much force. Now I am looking forward to the control box holding clips courtesy of John Hora The challenging task of installing the fan and fresh air plenum will wait until after the car has been painted to avoid any overspray through the cowl grills. 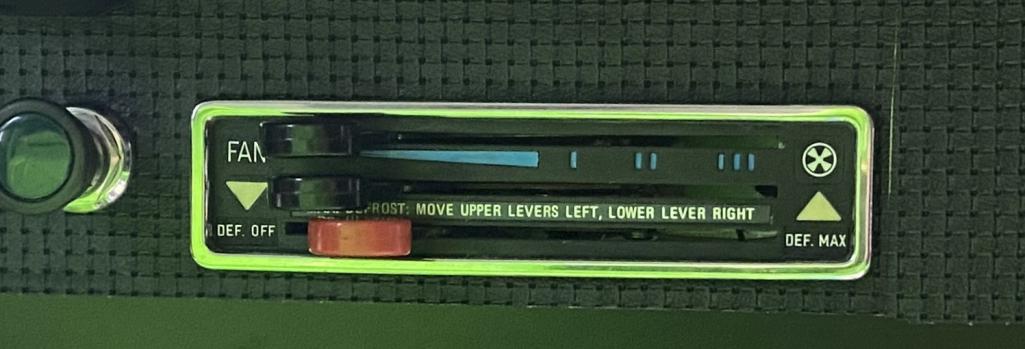 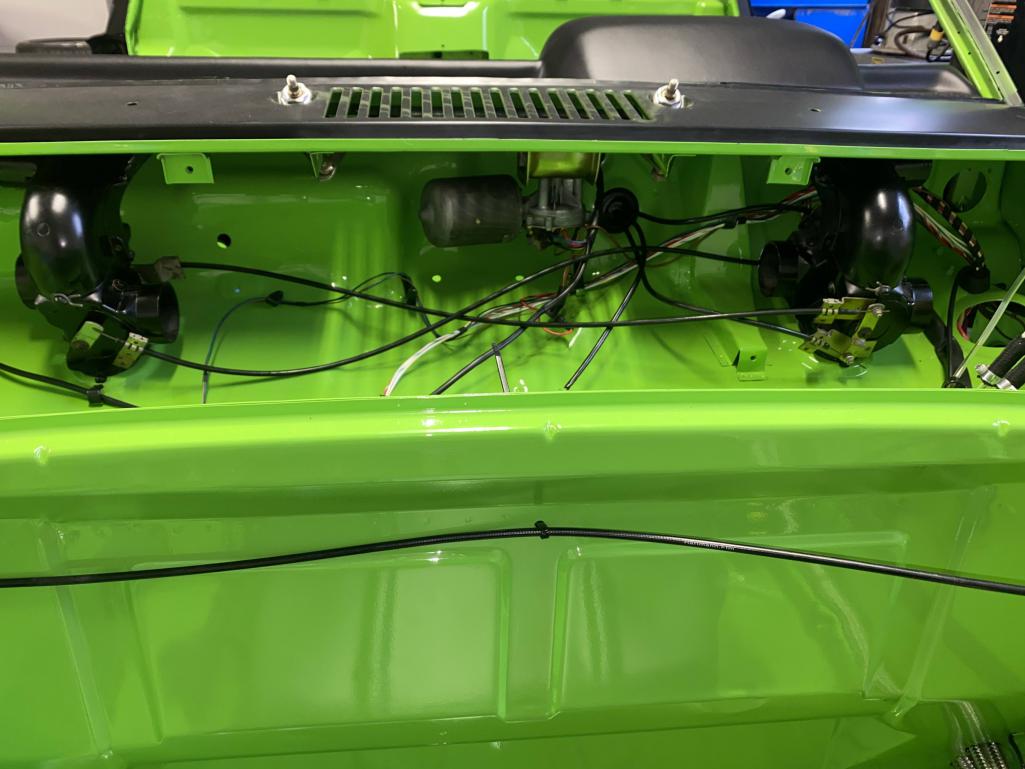 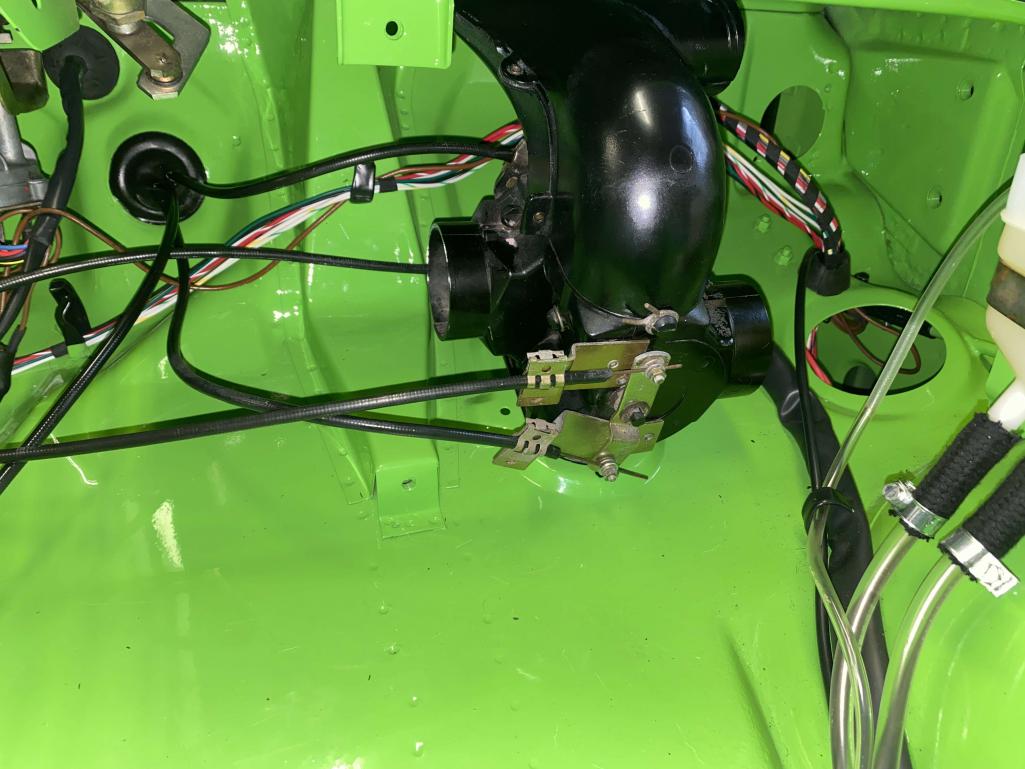 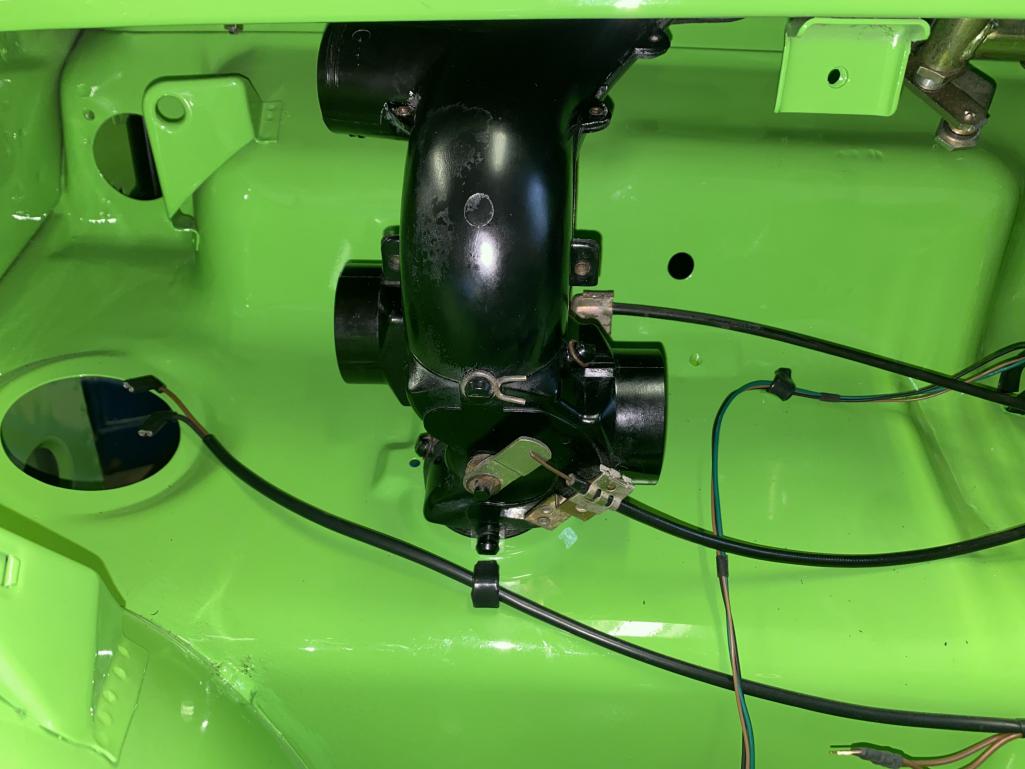 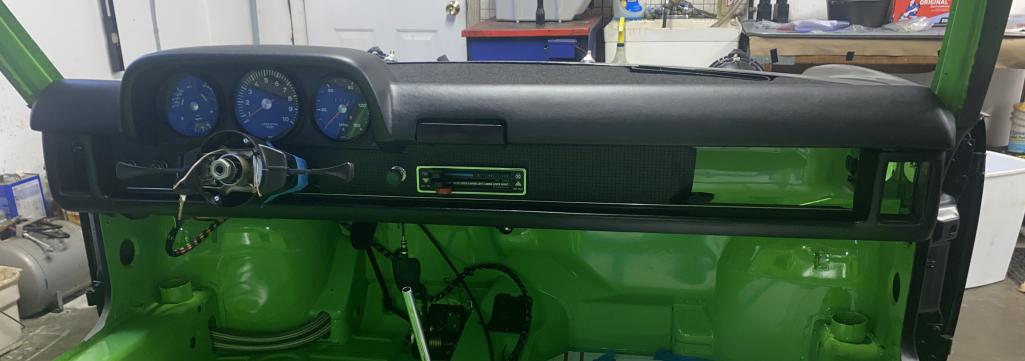 |
|
|
|
| East coaster |
Mar 29 2024, 08:18 AM
Post
#325
|
|
Senior Member Group: Members Posts: 1,901 Joined: 28-March 03 From: Millville, NJ Member No.: 487 Region Association: None |
Looks fantastic! Just curious why the wipers were installed before paint?
|
|
|
|
| Cairo94507 |
Mar 29 2024, 08:18 AM
Post
#326
|
|
Michael Group: Members Posts: 10,522 Joined: 1-November 08 From: Auburn, CA Member No.: 9,712 Region Association: Northern California |
That looks beautiful Tom; great work. (IMG:style_emoticons/default/beerchug.gif)
|
|
|
|
| Tom1394racing |
Mar 29 2024, 09:03 AM
Post
#327
|
|
Member Group: Members Posts: 493 Joined: 25-August 07 From: CT Member No.: 8,039 Region Association: North East States |
QUOTE(East coaster @ Mar 29 2024, 10:18 AM) Looks fantastic! Just curious why the wipers were installed before paint? I talked this over with the painter, Ken at Auto Associates, who has a tooling to cover the wiper shafts. |
|
|
|
| Dion |
Mar 30 2024, 10:15 AM
Post
#328
|
|
RN Group: Members Posts: 2,920 Joined: 16-September 04 From: Audubon,PA Member No.: 2,766 Region Association: MidAtlantic Region |
The Dash looks awesome!
Just beautiful work. (IMG:style_emoticons/default/beerchug.gif) |
|
|
|
| rick 918-S |
Mar 30 2024, 10:34 AM
Post
#329
|
|
Hey nice rack! -Celette Group: Members Posts: 21,143 Joined: 30-December 02 From: Now in Superior WI Member No.: 43 Region Association: Northstar Region |
One of the best colors (IMG:style_emoticons/default/drooley.gif)
|
|
|
|
| Tom1394racing |
Apr 4 2024, 12:05 PM
Post
#330
|
|
Member Group: Members Posts: 493 Joined: 25-August 07 From: CT Member No.: 8,039 Region Association: North East States |
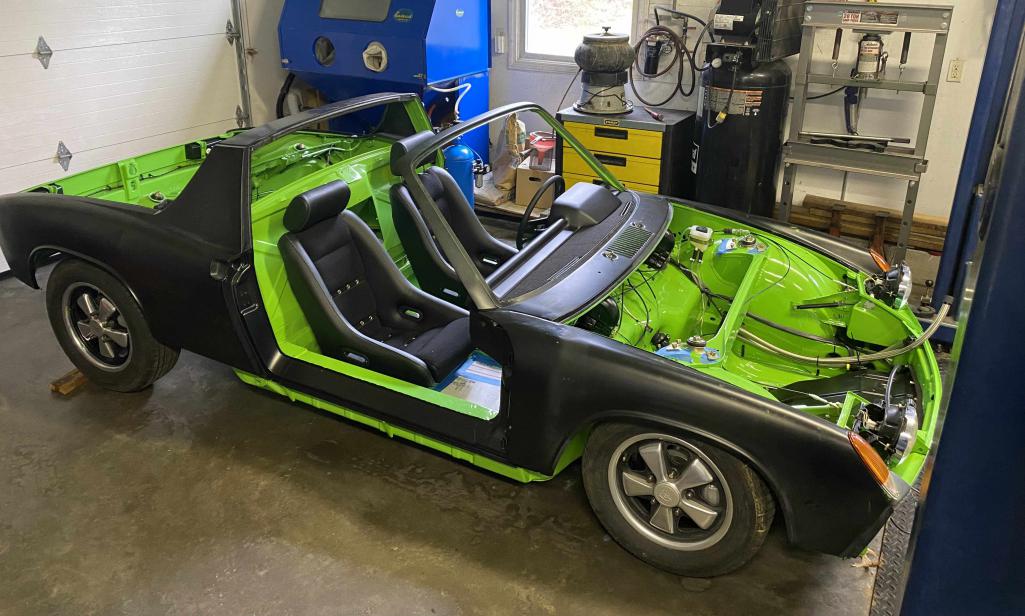
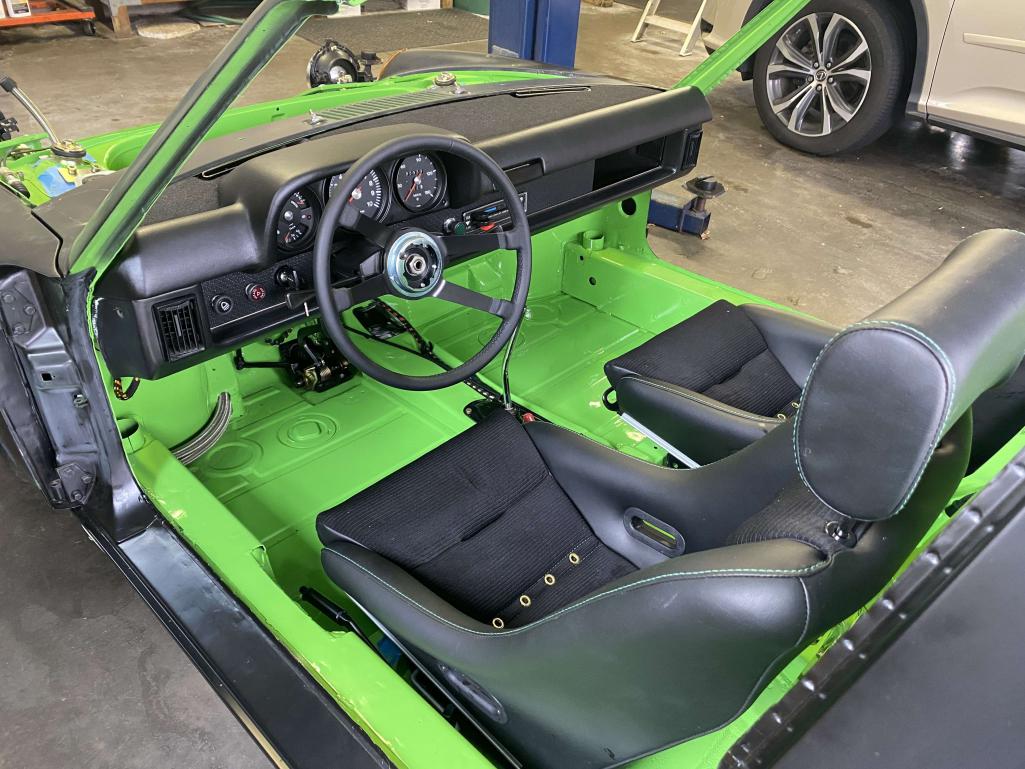
I finished installing the seats & dash and then put the car on roller wheels & tires for some photos. Starting to look and feel like a car again. Next up will be the engine build.
     |
|
|
|
| Cairo94507 |
Apr 4 2024, 02:14 PM
Post
#331
|
|
Michael Group: Members Posts: 10,522 Joined: 1-November 08 From: Auburn, CA Member No.: 9,712 Region Association: Northern California |
|
|
|
|
| TRS63 |
Apr 5 2024, 12:36 AM
Post
#332
|
|
Member Group: Members Posts: 326 Joined: 14-September 20 From: Germany - Stuttgart Member No.: 24,690 Region Association: Europe |
Wonderful seats!
Antoine |
|
|
|
| Tom1394racing |
Apr 12 2024, 06:57 AM
Post
#333
|
|
Member Group: Members Posts: 493 Joined: 25-August 07 From: CT Member No.: 8,039 Region Association: North East States |
A few odds and ends before starting the engine build.
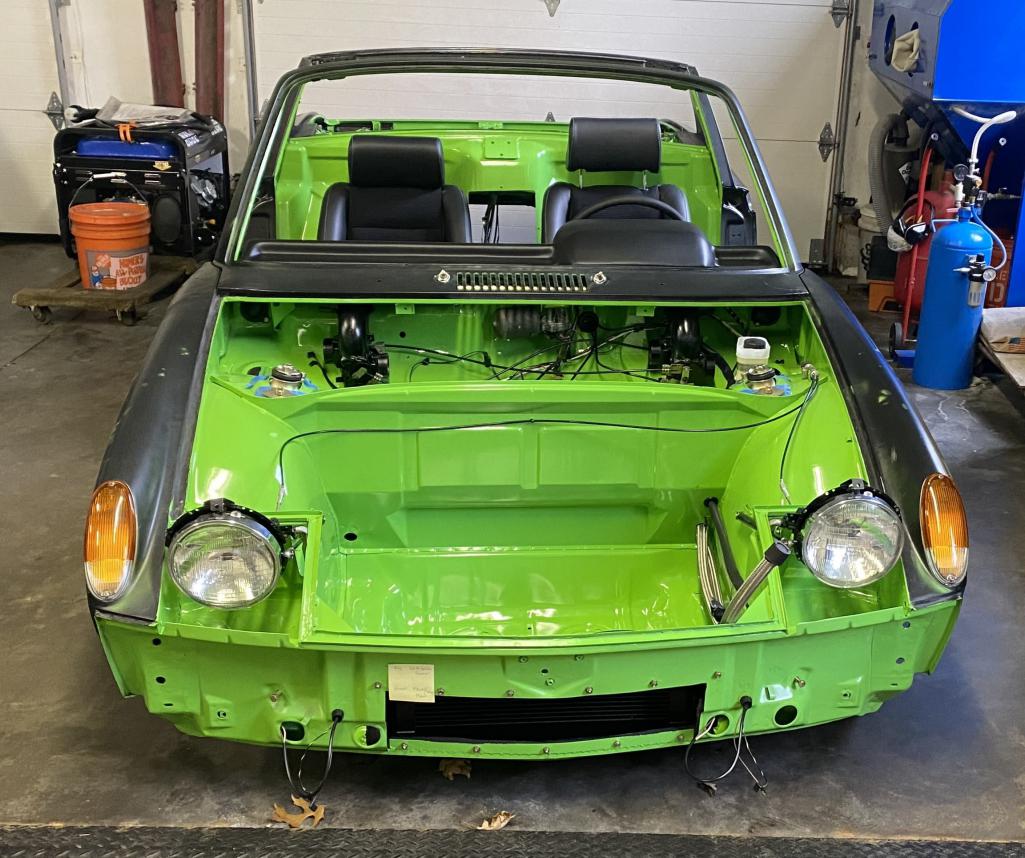
Made the AN connections to the front cooler. Also installed a pair of aftermarket horns (you can't see them through the grills...Right?). I also found a nice pair of Hella TN4's in my stash and installed them as well. 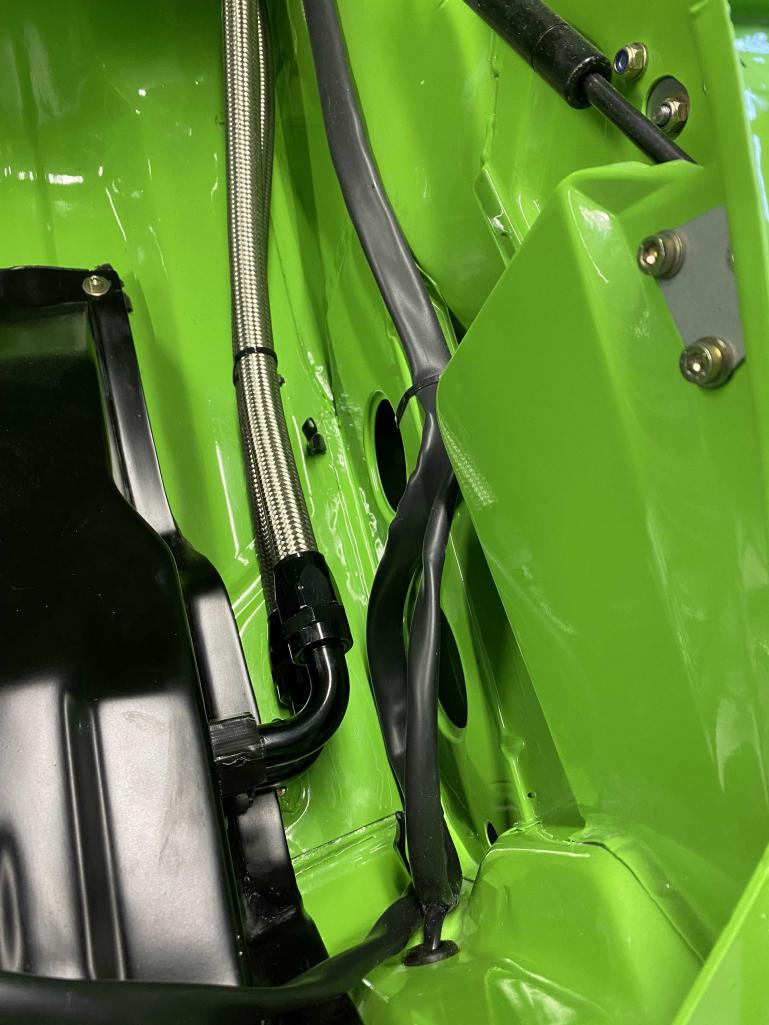 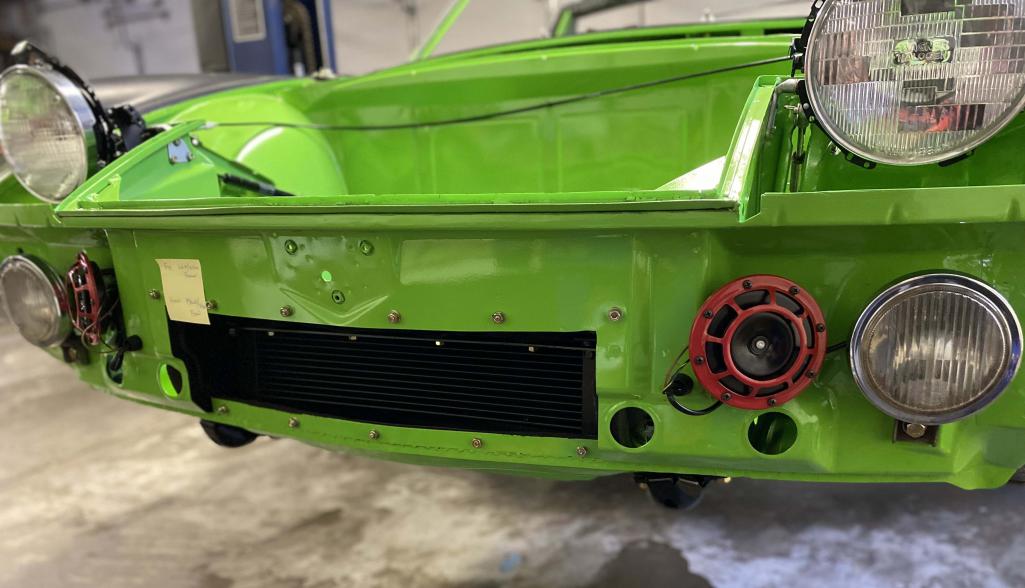 |
|
|
|
| Tom1394racing |
Apr 23 2024, 03:31 PM
Post
#334
|
|
Member Group: Members Posts: 493 Joined: 25-August 07 From: CT Member No.: 8,039 Region Association: North East States |
Started the engine build this week. As a reminder, the engine will be a 3.2 short stroke base on a 3.0 SC case and crank. I will be using new 98 mm Mahle Motorsport 10.2 CR P&C's along with a JB Racing twin plug distributor and DC-60 cams from John Dougherty. The case, rods, cam towers, chain boxes and valve covers all went to Ollies for refurbishment. The heads were rebuilt and twin plugged by Bob Hirst at Anchor Atlantic and the SC oil pump was blueprinted by Glen Yee Motorsports. The crankshaft was cleaned, crack checked, cross drilled and micro polished by Armando at CCR. At Armando's recommendation, the main bearings were coated by HM Elliot to bring the main bearing clearances into spec. Induction will be 46 MM PMO's.
The first order of business was to check the main bearing clearances. I used plastic gauge and found the clearances were all between 0.002-0.003" right on target. I then reinstalled the crank without the plastic gauge and check for smooth even crank rotation. All good here as well. 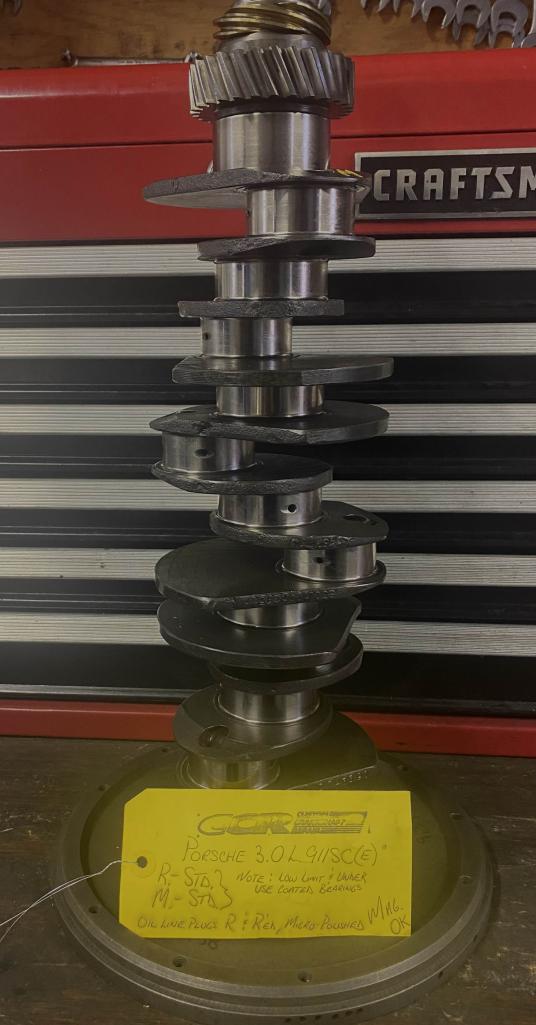 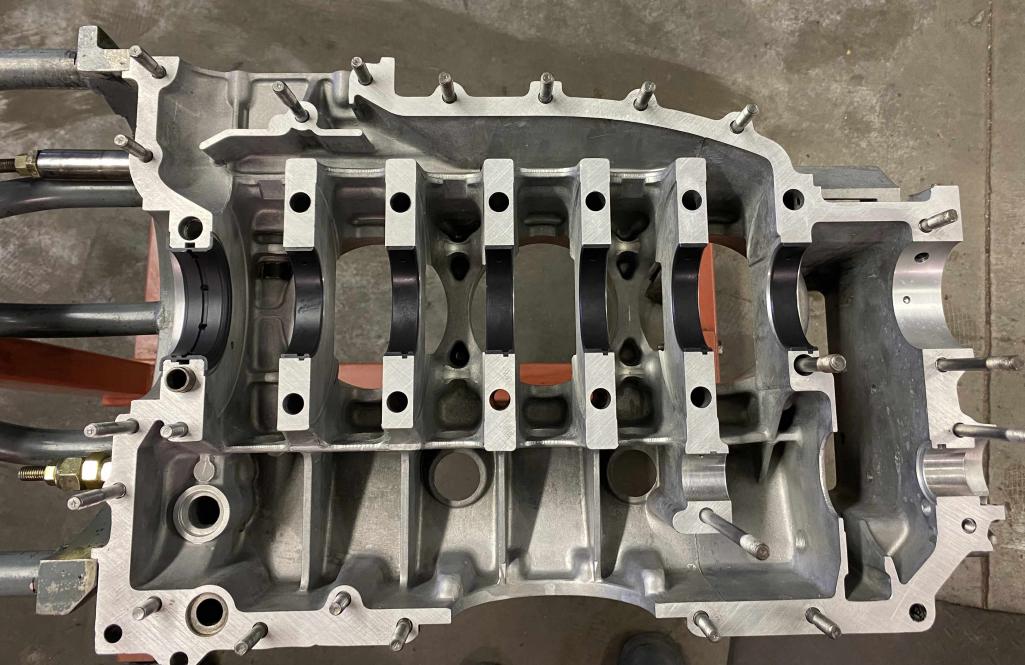 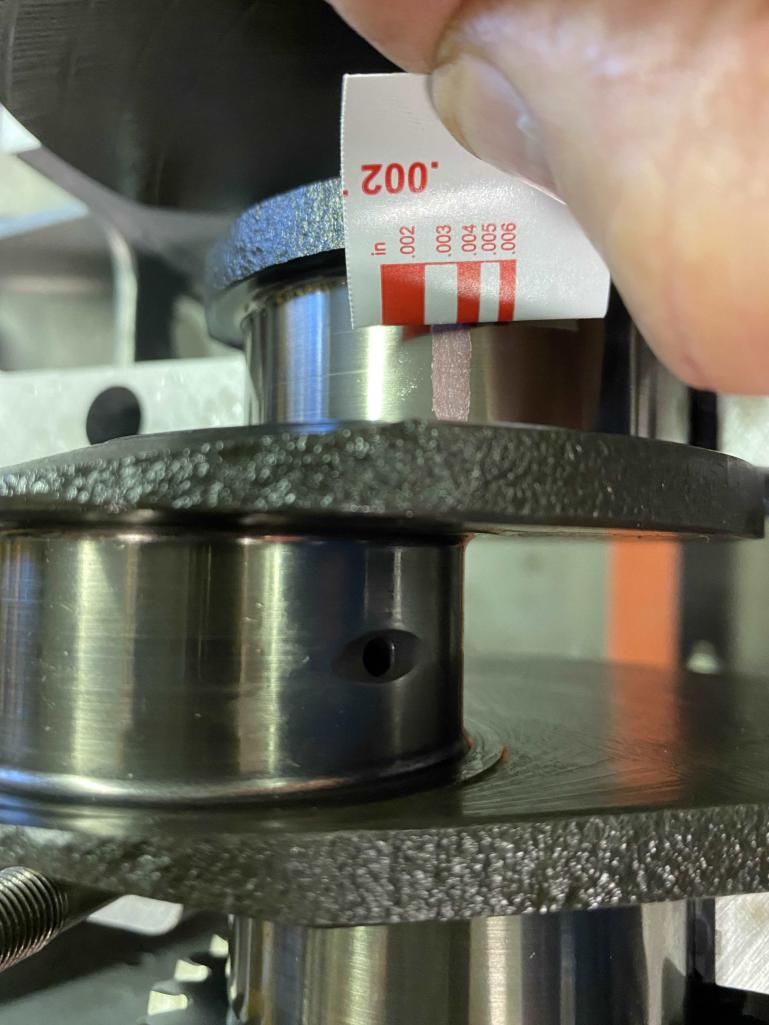 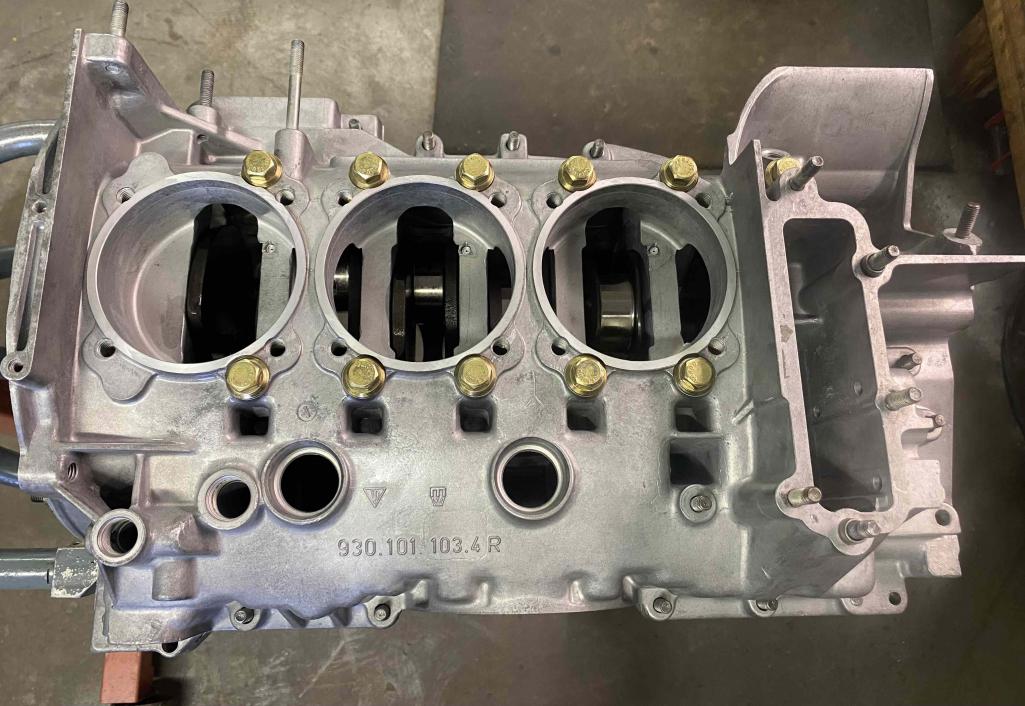 |
|
|
|
| Tom1394racing |
Apr 25 2024, 07:37 AM
Post
#335
|
|
Member Group: Members Posts: 493 Joined: 25-August 07 From: CT Member No.: 8,039 Region Association: North East States |
I moved on to check the rod bearing clearances. For these I used the dial bore gauge rather that the plastic gauge. I am using coated Clevite bearings from Auto Associates for the rod bearings. I installed the bearings in the rods, torqued them to spec using the old rod bolts and then measured the inner bearing diameters with my dial bore gauge zeroed on the average rod journal. Clearances measure between 0.002-0.003". Right where they should.
I then decided as a verification double check to weight each rod. I was not expecting any significant variation as they had been refurbished by Ollie's. To my surprise, one rod was heavy by about 10 grams. I removed the bearings and reweighed them and the results were the same. So goes the old saying, "Trust but Verify". Needless to say, the rods are on their way back to Ollie's who promised to expedite and rebalance them at no charge. 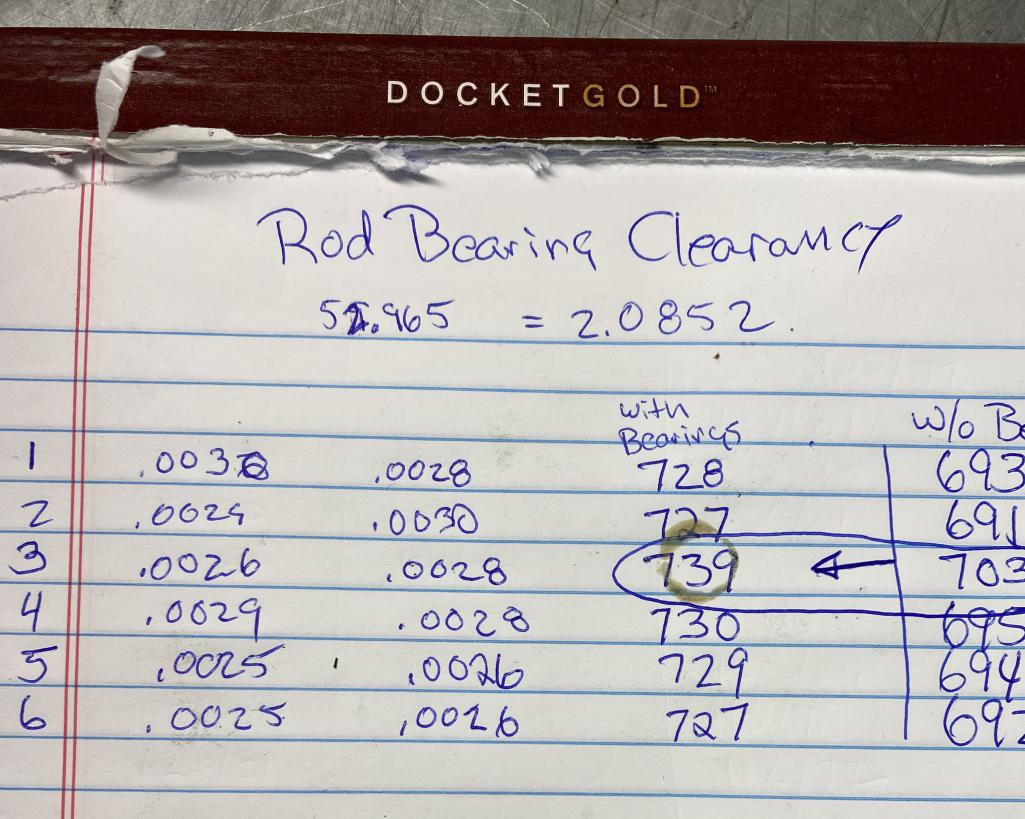 |
|
|
|
| live free & drive |
Apr 26 2024, 01:20 PM
Post
#336
|
|
Member Group: Members Posts: 208 Joined: 29-June 16 From: New Hampshire Member No.: 20,159 Region Association: None |
Odd question for you - about your crank from Armando - I see the tag, but does Armando etch or otherwise permanently mark either crank end with any markings?
I have a motor supposedly with one of Armando's cranks and would see if there is a way to verify. |
|
|
|
| Tom1394racing |
Apr 26 2024, 02:22 PM
Post
#337
|
|
Member Group: Members Posts: 493 Joined: 25-August 07 From: CT Member No.: 8,039 Region Association: North East States |
QUOTE(live free & drive @ Apr 26 2024, 03:20 PM) Odd question for you - about your crank from Armando - I see the tag, but does Armando etch or otherwise permanently mark either crank end with any markings? I have a motor supposedly with one of Armando's cranks and would see if there is a way to verify. Hi Jon I have had a few cranks done by Armando and I am not aware of any special markings. |
|
|
|
| Tom1394racing |
Apr 26 2024, 02:37 PM
Post
#338
|
|
Member Group: Members Posts: 493 Joined: 25-August 07 From: CT Member No.: 8,039 Region Association: North East States |
With the rods back off to Ollie's, I moved on to inspecting the pistons and cylinders, Installing the rings on the pistons and installing the pistons into the cylinders.
Everything checked out nicely on the P&C inspection as expected for a new Mahle set. Minimum variation in piston weights, good cylinder bore roundness and minimal taper Also good piston to cylinder clearances. I then installed the piston rings and very carefully installed the pistons in the cylinders. 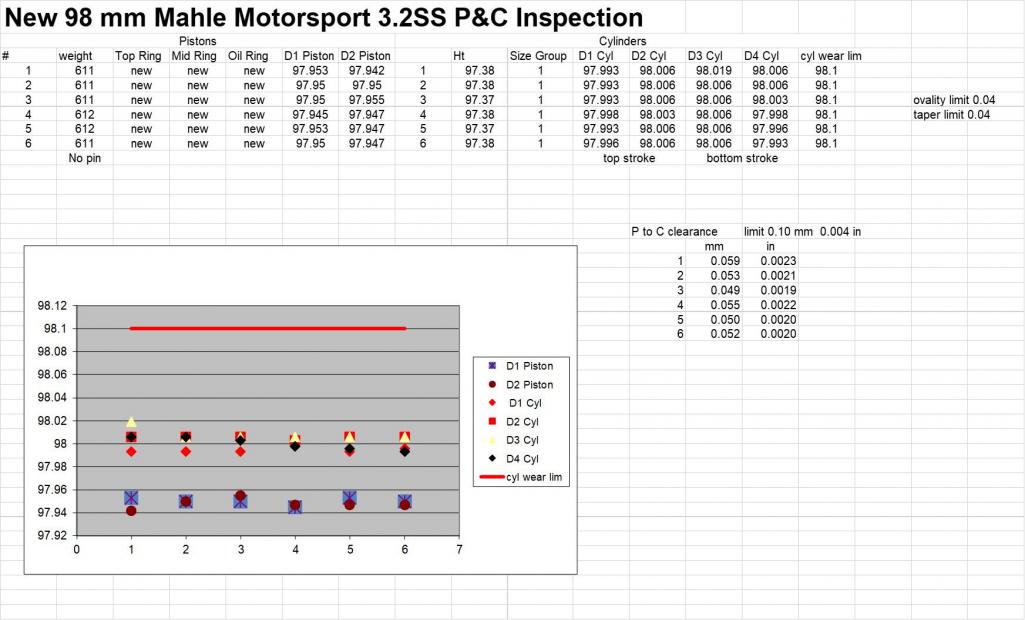 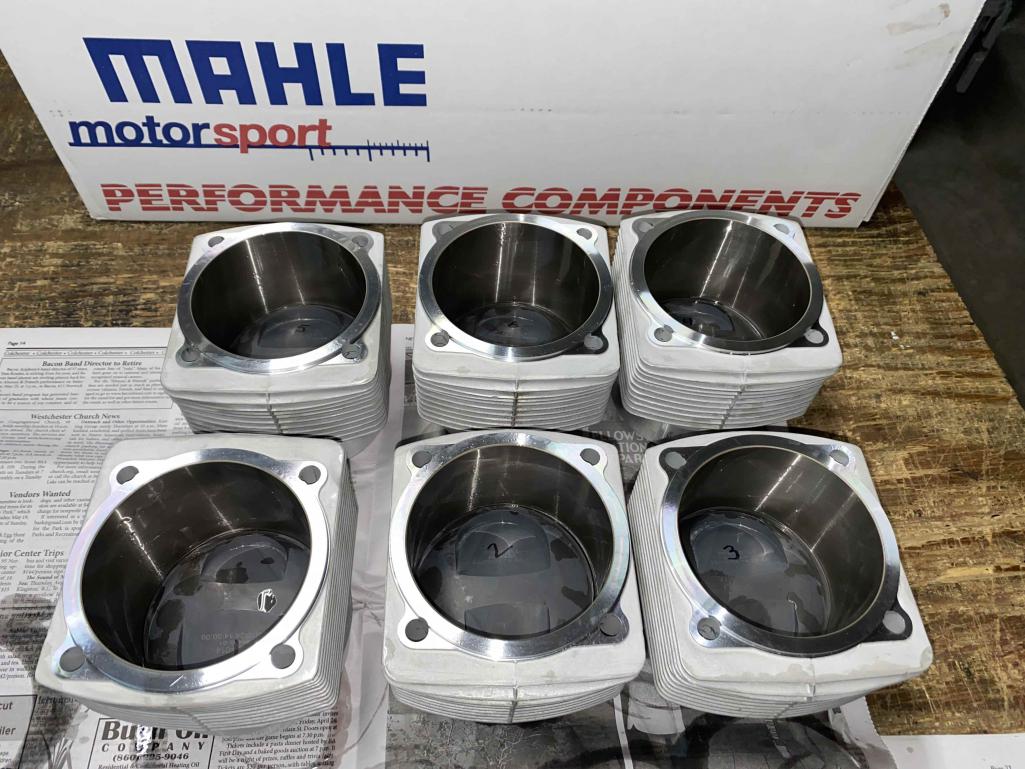 |
|
|
|
| Tom1394racing |
May 4 2024, 06:42 AM
Post
#339
|
|
Member Group: Members Posts: 493 Joined: 25-August 07 From: CT Member No.: 8,039 Region Association: North East States |
I continued on the engine build while waiting for my connecting rods to come back from Ollie's.
I checked the IMS backlash to make sure it was within acceptable limits. I got 0.05 mm movement on the dial gauge. 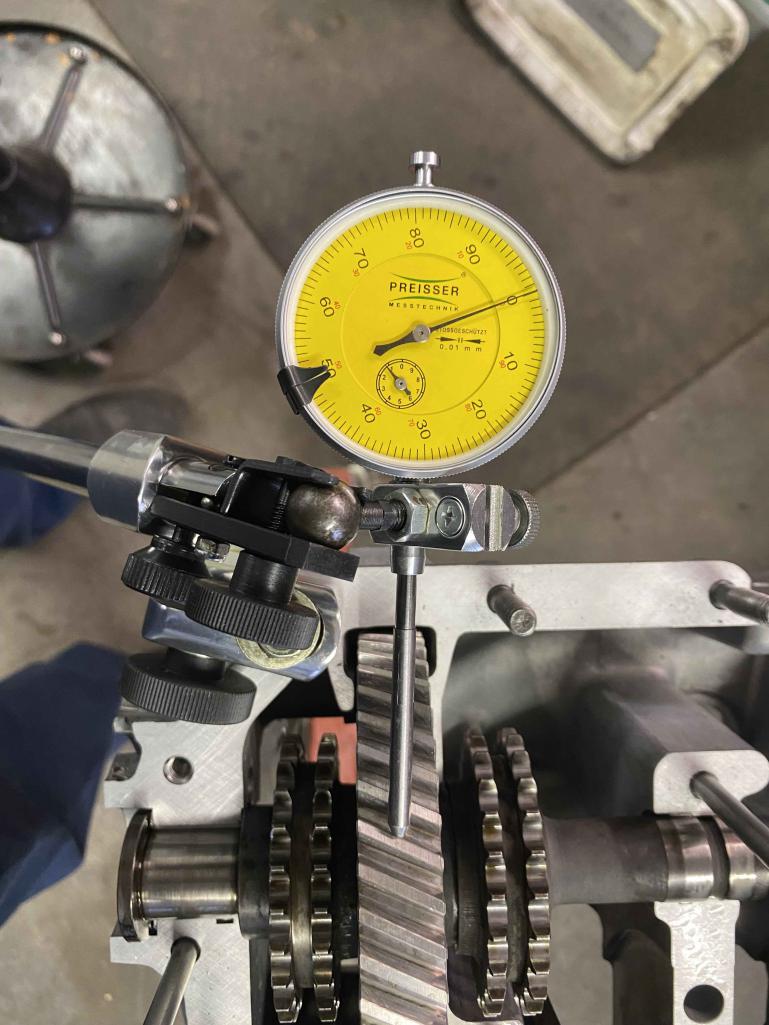 I then moved on to check the compression ratio using my CC burette volume checking setup. I checked each freshly rebuilt cylinder head to find the combustion chamber volume. All (6) measured between 89.5 and 90 cc's as expected for a 3.0 SC cylinder head. I then checked the piston dome volume using the same system and found piston #1 to be at 40 cc just as expected for this particular Mahle Motorsport piston. I only checked one piston assuming that the variation between brand new Mahle pistons will be insiginificant. Assuming I get 1 mm deck ht once I seal up the case and check, this will result in my target CR of 10.2:1. |
|
|
|
| Cairo94507 |
May 5 2024, 07:11 AM
Post
#340
|
|
Michael Group: Members Posts: 10,522 Joined: 1-November 08 From: Auburn, CA Member No.: 9,712 Region Association: Northern California |
Nice catch on the 1 rod. Even the experts miss the target once in a while. Your build is spectacular and I enjoy seeing the progress. (IMG:style_emoticons/default/beerchug.gif)
|
|
|
|
|
2 User(s) are reading this topic (2 Guests and 0 Anonymous Users)
0 Members:

|
Lo-Fi Version | Time is now: 14th December 2025 - 11:57 AM |
Invision Power Board
v9.1.4 © 2025 IPS, Inc.