|
|
|
Porsche, and the Porsche crest are registered trademarks of Dr. Ing. h.c. F. Porsche AG.
This site is not affiliated with Porsche in any way. Its only purpose is to provide an online forum for car enthusiasts. All other trademarks are property of their respective owners. |
|
|

  |

| rfinegan |
 Jul 17 2023, 07:30 AM Jul 17 2023, 07:30 AM
Post
#61
|
|
Senior Member  Group: Members Posts: 1,083 Joined: 8-February 13 From: NC Member No.: 15,499 Region Association: MidAtlantic Region |
Lapping the heads can only be a good thing, and you get a chance to look at the cylinder bores and pistons/rings too. AS well as resealing the case to cylinders while you are at it....top end work should go pretty EZ for people with good repair skills, even if they are new for type 4 work...Just need simple hand tools and a torque wrench and some hi temp Curel T(green) or a small dab aviation sealer ...What could go wrong....
-Cheers. and thanks for the support QUOTE(DRPHIL914 @ Jul 17 2023, 08:14 AM)  QUOTE(rfinegan @ Jul 10 2023, 08:57 AM) QUOTE(Cairo94507 @ Jul 9 2023, 07:49 PM) (IMG:style_emoticons/default/popcorn[1].gif) Can't wait for this to be fired-up. (IMG:style_emoticons/default/beerchug.gif) YEP, Getting optimistic again. With dreams of Octeenerfest, driving on the Dragon and LARGE dyno numbers! This is a dream right? @rfinegan watching and learning from your experiences, Hope to see you at Okteenerfest for sure!! at some point i need to reassemble my OEM motor that dropped the valve seat a couple years ago, and i am trying to decide if i can do that myself, i didnt crack the case i justhave to put the newly rebuilt original heads back on it and wonder if i need to lap the head if i keep the old cylinders and pistons in place, i assume i should. anyway we should get the 914s from SC and NC together and do a engine build how-to clinic! Good luck going forward 3x is a charm right?? |
   |

 
|
| DRPHIL914 |
Jul 17 2023, 07:57 AM
Post
#62
|
|
Dr. Phil Group: Members Posts: 5,830 Joined: 9-December 09 From: Bluffton, SC Member No.: 11,106 Region Association: South East States |
QUOTE(rfinegan @ Jul 17 2023, 09:30 AM) Lapping the heads can only be a good thing, and you get a chance to look at the cylinder bores and pistons/rings too. AS well as resealing the case to cylinders while you are at it....top end work should go pretty EZ for people with good repair skills, even if they are new for type 4 work...Just need simple hand tools and a torque wrench and some hi temp Curel 3 or a small dab aviation sealer ...What could go wrong.... -Cheers. and thanks for the support QUOTE(DRPHIL914 @ Jul 17 2023, 08:14 AM) QUOTE(rfinegan @ Jul 10 2023, 08:57 AM) QUOTE(Cairo94507 @ Jul 9 2023, 07:49 PM) (IMG:style_emoticons/default/popcorn[1].gif) Can't wait for this to be fired-up. (IMG:style_emoticons/default/beerchug.gif) YEP, Getting optimistic again. With dreams of Octeenerfest, driving on the Dragon and LARGE dyno numbers! This is a dream right? @rfinegan watching and learning from your experiences, Hope to see you at Okteenerfest for sure!! at some point i need to reassemble my OEM motor that dropped the valve seat a couple years ago, and i am trying to decide if i can do that myself, i didnt crack the case i justhave to put the newly rebuilt original heads back on it and wonder if i need to lap the head if i keep the old cylinders and pistons in place, i assume i should. anyway we should get the 914s from SC and NC together and do a engine build how-to clinic! Good luck going forward 3x is a charm right?? plenty! (IMG:style_emoticons/default/biggrin.gif) i have new rings, and was planning on doing just what you suggested, reseal the cylinder to case , do new rings, and reassemble. when i removed the heads due to the loose dropped #3 valve seat, i found it had been rebuilt not long before i got the car i think but whoever did that used gasket at the cylinder/head interface i will not be doing that. once lapped i will verify clearances, i am reinstalling the original 2.0 heads that were rebuilt with new seats, new valves new guides springs etc etc. . not sure when it will go back in , i like my 2.1 motor i am running now. |
 |
|
| rfinegan |
Jul 17 2023, 08:37 AM
Post
#63
|
|
Senior Member Group: Members Posts: 1,083 Joined: 8-February 13 From: NC Member No.: 15,499 Region Association: MidAtlantic Region |
I updated ALL my videos on You tube for Robert Finegan to public...so you can take a look with out all my descriptions and chat...
@robertfinegan4491 https://www.youtube.com/channel/UC6Ol_gbz9D5RPLqpYPD2qCg https://www.youtube.com/@robertfinegan4491 |
|
|
|
| rfinegan |
Jul 19 2023, 04:28 PM
Post
#64
|
|
Senior Member Group: Members Posts: 1,083 Joined: 8-February 13 From: NC Member No.: 15,499 Region Association: MidAtlantic Region |
Tonight I cleaned the carbon off the piston tops and got everything ready to install
Piston rings lubed and skirts and pins and started assemble . Problem: The new engine yoke did not have enough room to install piston pin # 3. #4 is installed first on the right side because the oil cooler is there and the pin is installed from the rear/center of the motor. When I got to # 3 the pin would not clear the engine yoke and I had to set it down and remove the yoke and install the pin/cylinder assembly. 10 extra minutes so not be deal . Starting to look pretty good....  |
|
|
|
| rfinegan |
Jul 19 2023, 04:29 PM
Post
#65
|
|
Senior Member Group: Members Posts: 1,083 Joined: 8-February 13 From: NC Member No.: 15,499 Region Association: MidAtlantic Region |
another
 |
|
|
|
| rfinegan |
Jul 19 2023, 04:29 PM
Post
#66
|
|
Senior Member Group: Members Posts: 1,083 Joined: 8-February 13 From: NC Member No.: 15,499 Region Association: MidAtlantic Region |
one more
 |
|
|
|
| BeatNavy |
Jul 19 2023, 05:14 PM
Post
#67
|
|
Certified Professional Scapegoat Group: Members Posts: 2,954 Joined: 26-February 14 From: Easton, MD Member No.: 17,042 Region Association: MidAtlantic Region |
Looking really good, Robert! (IMG:style_emoticons/default/thumb3d.gif)
|
|
|
|
| rfinegan |
Jul 20 2023, 08:33 AM
Post
#68
|
|
Senior Member Group: Members Posts: 1,083 Joined: 8-February 13 From: NC Member No.: 15,499 Region Association: MidAtlantic Region |
Thanks Rob, Thanks for positive feed back, it is greatly apreciated.
-Robert QUOTE(BeatNavy @ Jul 19 2023, 07:14 PM) |
|
|
|
| r_towle |
Jul 20 2023, 07:58 PM
Post
#69
|
|
Custom Member Group: Members Posts: 24,705 Joined: 9-January 03 From: Taxachusetts Member No.: 124 Region Association: North East States |
Thank you for doing such a great job documenting best practices.
Wonderful way to help the rest of us. |
|
|
|
| r_towle |
Jul 20 2023, 08:00 PM
Post
#70
|
|
Custom Member Group: Members Posts: 24,705 Joined: 9-January 03 From: Taxachusetts Member No.: 124 Region Association: North East States |
TLDR,
Did you use that paint on everything? Cool. I request a 1/2 year update on the paint please. |
|
|
|
| rfinegan |
Jul 21 2023, 05:35 AM
Post
#71
|
|
Senior Member Group: Members Posts: 1,083 Joined: 8-February 13 From: NC Member No.: 15,499 Region Association: MidAtlantic Region |
QUOTE(r_towle @ Jul 20 2023, 10:00 PM) TLDR, Did you use that paint on everything? I started with the heads or the benefits of the thermal dispersion transfer, then coated the cylinders for the same benefit. The last 1/3 of the sampler from Cerakote went on the case. I did the fins on the case bottom and the rest was for appearance. It should 2 tone nice with Satin Black tins. QUOTE Cool. I request a 1/2 year update on the paint please. If my track recorder stays intact, it should look EXACTLY link the pics I posted above... (IMG:style_emoticons/default/lol-2.gif) All kidding aside, Ill post some 6 month / 1 year pics as needed |
|
|
|
| Cairo94507 |
Jul 21 2023, 06:18 AM
Post
#72
|
|
Michael Group: Members Posts: 10,385 Joined: 1-November 08 From: Auburn, CA Member No.: 9,712 Region Association: Northern California |
|
|
|
|
| rfinegan |
Jul 21 2023, 07:10 AM
Post
#73
|
|
Senior Member Group: Members Posts: 1,083 Joined: 8-February 13 From: NC Member No.: 15,499 Region Association: MidAtlantic Region |
plan for the weekend...
1)Home made Jet Doctors for IDF 44 2)Torque heads and head tins 3)Paint Push rod tubes satin Black and install lifters 4)Valve train and valve lash/covers 5)Time permitting..stub pipe installation Continue R/D: pressurized engine priming tool/system ...lots more to come (IMG:style_emoticons/default/piratenanner.gif) (IMG:style_emoticons/default/piratenanner.gif) (IMG:style_emoticons/default/piratenanner.gif) |
|
|
|
| rfinegan |
Jul 23 2023, 07:30 AM
Post
#74
|
|
Senior Member Group: Members Posts: 1,083 Joined: 8-February 13 From: NC Member No.: 15,499 Region Association: MidAtlantic Region |
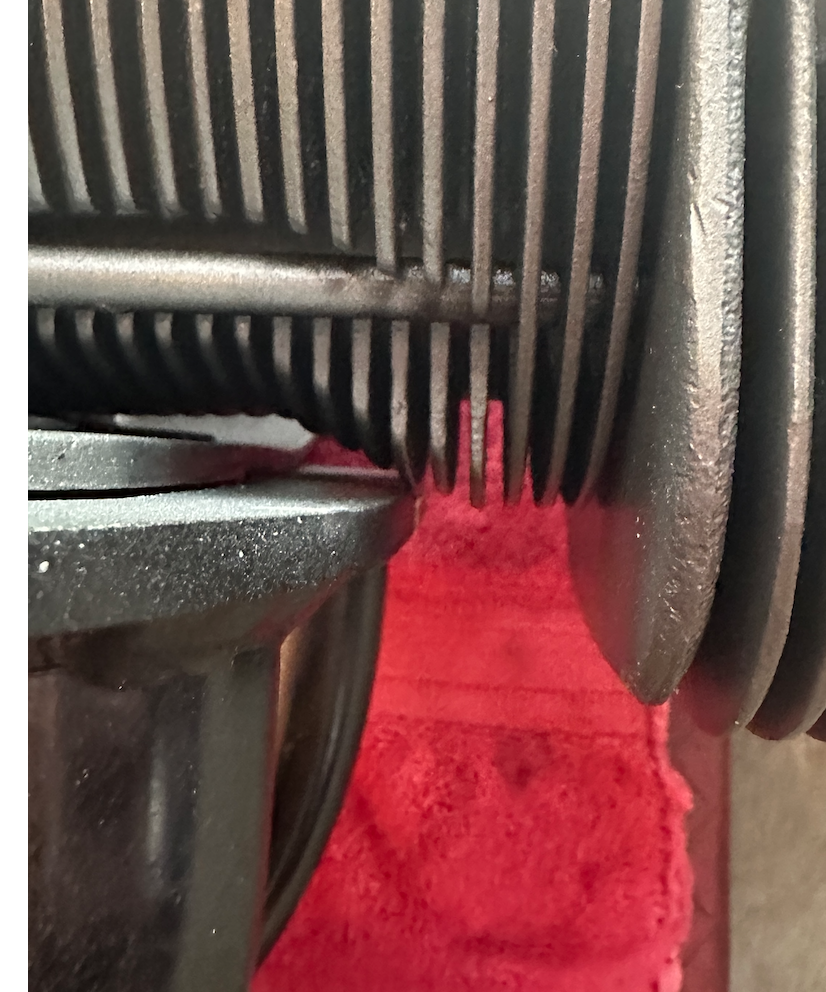
Darn, the engine yoke got me again. its touching the # 3 cylinder. I need to pull it off again and make a slight grinder modification to the mount so it now longer touches and I can torque the head.
However i did make good progress and I have another day to get back on track... I get a pic later to show how I did this. until then.. 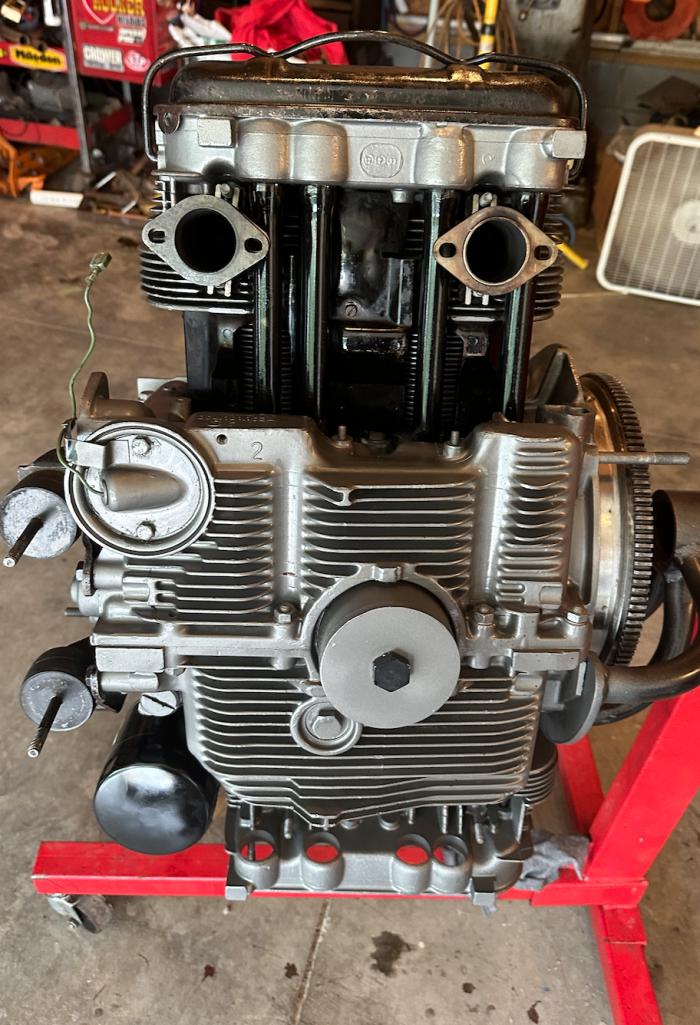 |
|
|
|
| rfinegan |
Jul 23 2023, 11:11 AM
Post
#75
|
|
Senior Member Group: Members Posts: 1,083 Joined: 8-February 13 From: NC Member No.: 15,499 Region Association: MidAtlantic Region |
DIY: Jet Doctor for idle jets or just by them from CB
I picked up some 3mm or 1/8 brass tubing from the hobby store and I did some calculations of how high to make them.. it turns you the main jet stack on my carbs are 1.950 from the bottom of the top plate..( I guess 2 inch would have been fine) but mine are he SAME height as the main stacks. IF its good enough for Weber it should work fine for the Doctor... MY old Italian Webers had short stacks even with the top plate..I need to change the too, I guess? 1) I cut 4 piece of tubing to the correct length (1.950 inch) 2) I flared the end of the base wit ha automatic center punch to gain a snug fit in the top of the carb vent hole 3) Add some 515 gasket sealer to the hole 4) Tap and set the brass tube it to top plate till flush on the bottom of the casting 5) Repeat for the there 3 vent holes All that is left is a few holes in the gasket and to drill 4 holes into you air cleaner base -Cheers 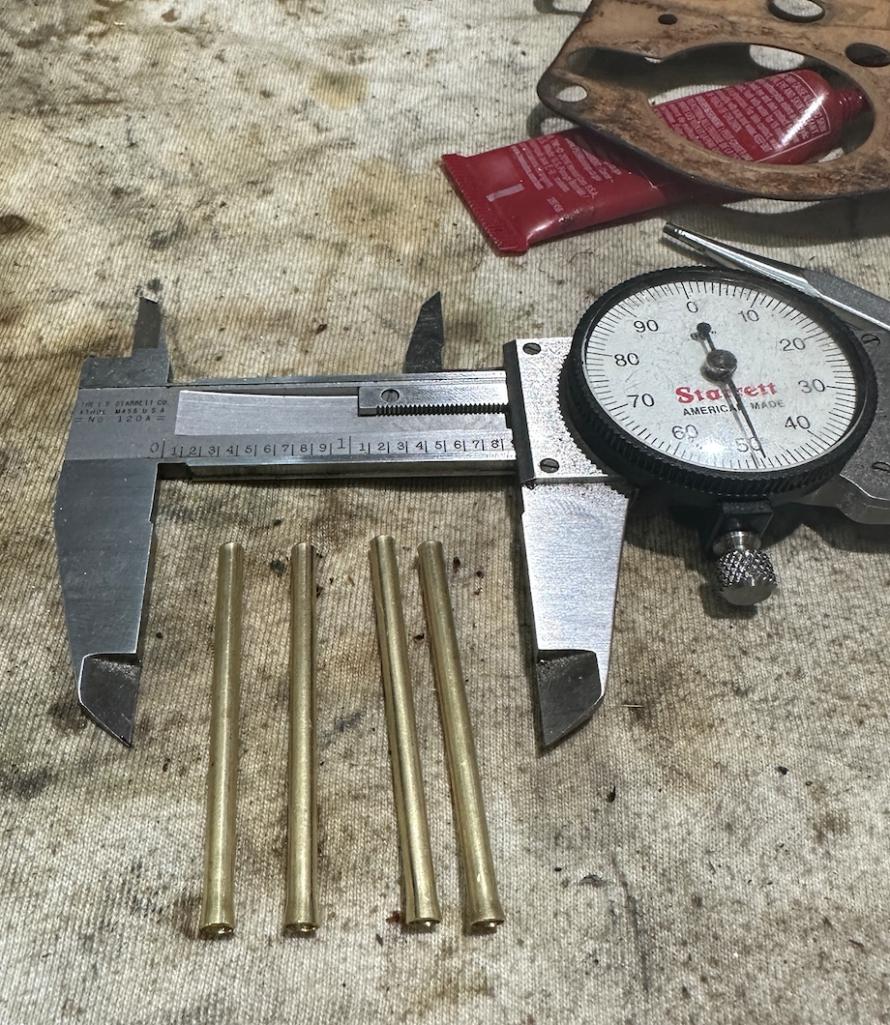 https://www.youtube.com/watch?v=boURpJiAvZk |
|
|
|
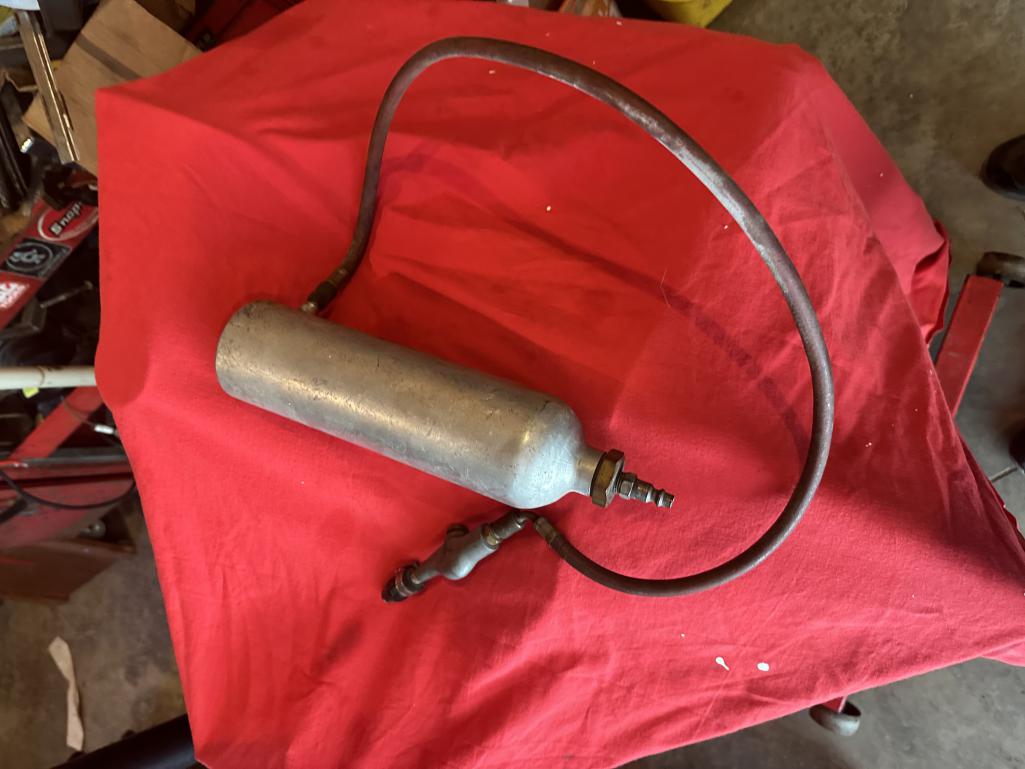
| rfinegan |
Jul 23 2023, 02:30 PM
Post
#76
|
|
Senior Member Group: Members Posts: 1,083 Joined: 8-February 13 From: NC Member No.: 15,499 Region Association: MidAtlantic Region |
oil primer in progress...
 |
|
|
|
| rfinegan |
Jul 23 2023, 02:34 PM
Post
#77
|
|
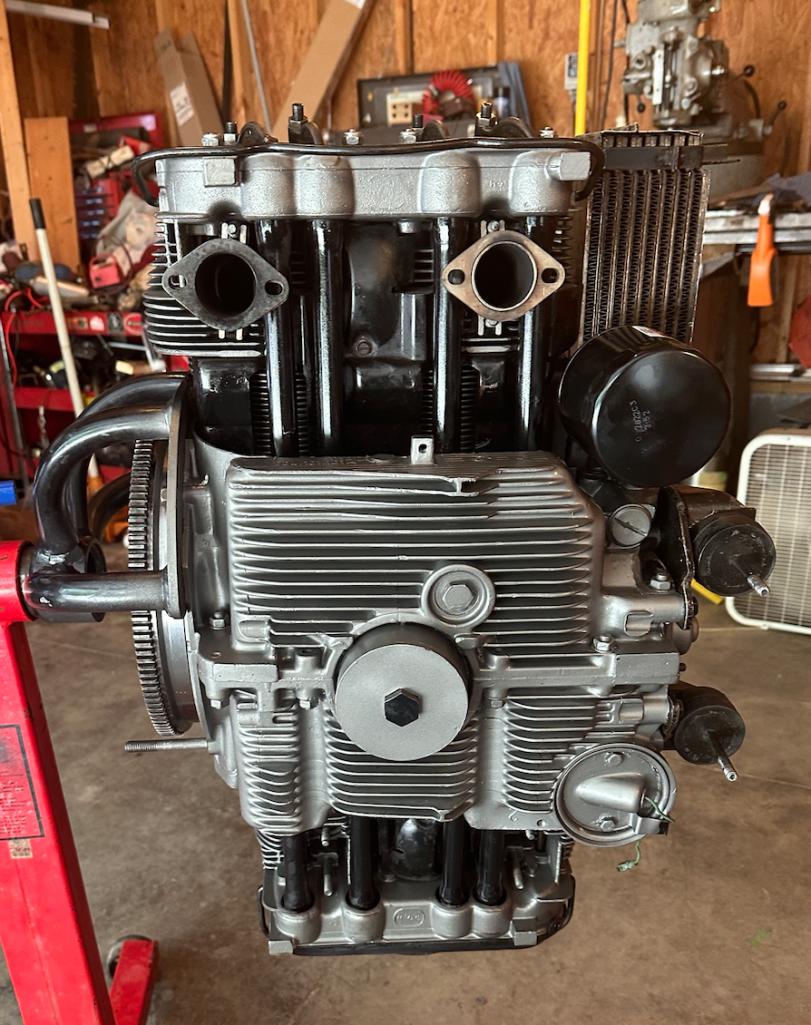
Senior Member Group: Members Posts: 1,083 Joined: 8-February 13 From: NC Member No.: 15,499 Region Association: MidAtlantic Region |
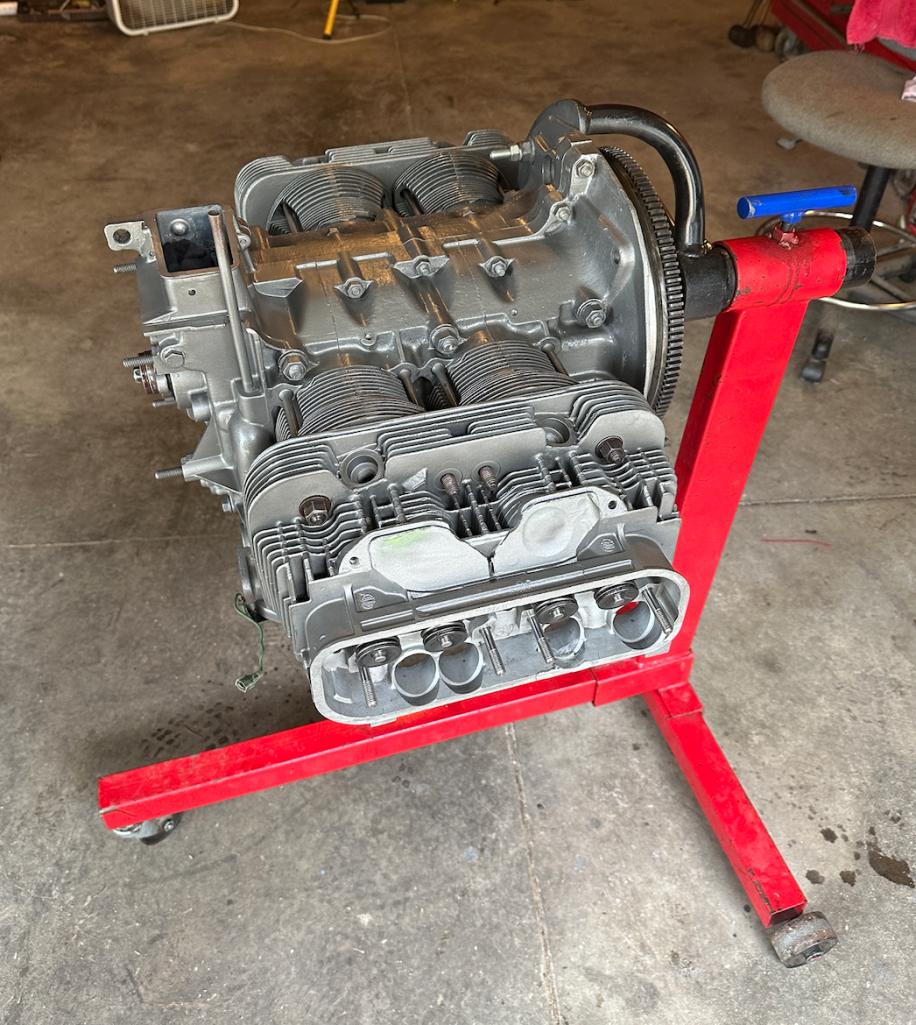
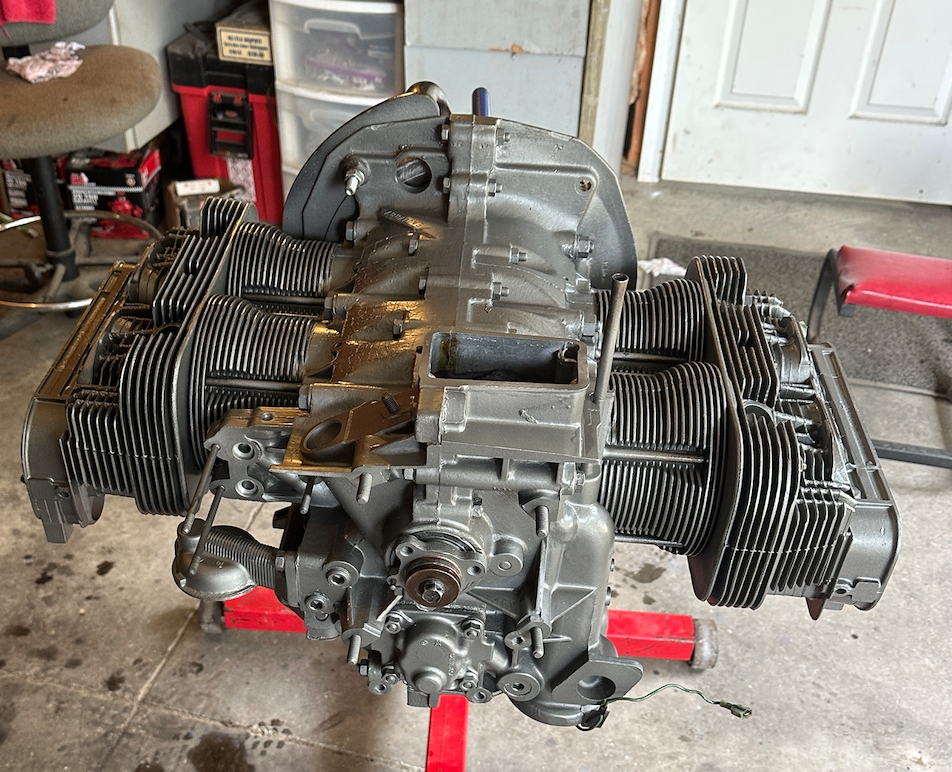
engine update..stubs and tins next...
 |
|
|
|
| rfinegan |
Jul 23 2023, 02:36 PM
Post
#78
|
|
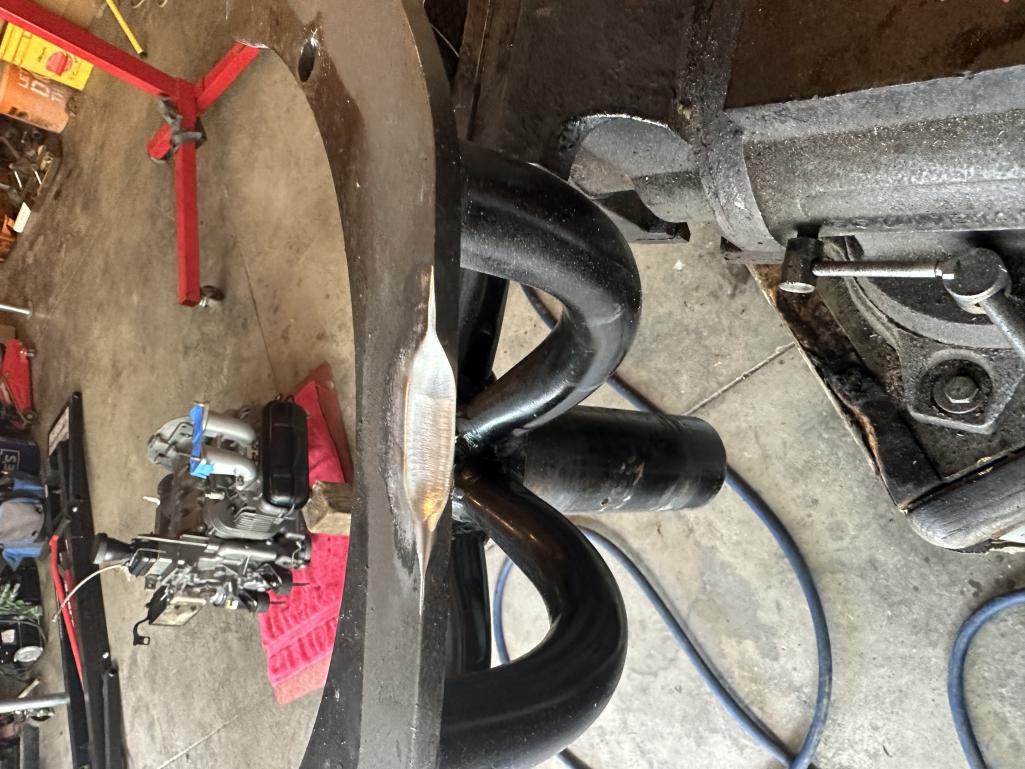
Senior Member Group: Members Posts: 1,083 Joined: 8-February 13 From: NC Member No.: 15,499 Region Association: MidAtlantic Region |
engine yoke mod...#3 cylinder
 |
|
|
|
| rfinegan |
Jul 23 2023, 03:25 PM
Post
#79
|
|
Senior Member Group: Members Posts: 1,083 Joined: 8-February 13 From: NC Member No.: 15,499 Region Association: MidAtlantic Region |
cylinders hitting the the yoke frame
 |
|
|
|
| rfinegan |
Jul 24 2023, 04:24 PM
Post
#80
|
|
Senior Member Group: Members Posts: 1,083 Joined: 8-February 13 From: NC Member No.: 15,499 Region Association: MidAtlantic Region |
Today I installer the blower housing, blower front tins alternator, belt left tin, intake...
Wanting for a Distributor drive spring before installing the right tin (tues) 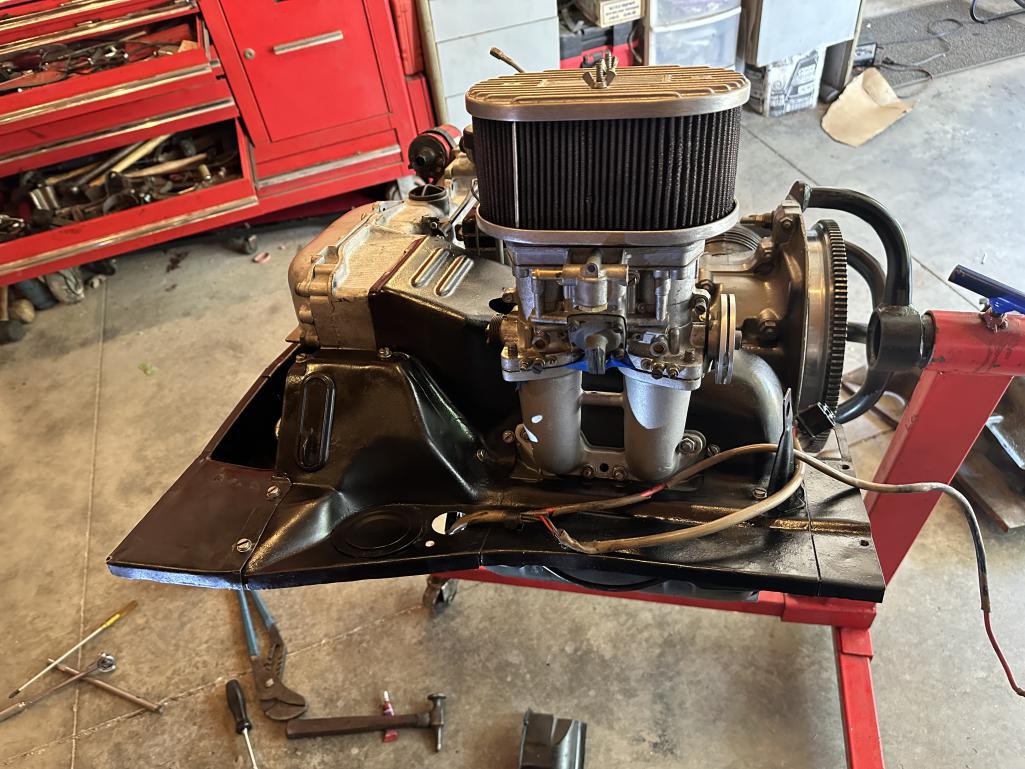 |
|
|
|
|
1 User(s) are reading this topic (1 Guests and 0 Anonymous Users)
0 Members:

|
Lo-Fi Version | Time is now: 14th July 2025 - 06:28 PM |
Invision Power Board
v9.1.4 © 2025 IPS, Inc.