|
|
|
Porsche, and the Porsche crest are registered trademarks of Dr. Ing. h.c. F. Porsche AG.
This site is not affiliated with Porsche in any way. Its only purpose is to provide an online forum for car enthusiasts. All other trademarks are property of their respective owners. |
|
|

  |

| Doug Leggins |
 Sep 13 2005, 10:47 PM Sep 13 2005, 10:47 PM
Post
#1
|
|
Senior Member  Group: Benefactors Posts: 1,358 Joined: 6-February 03 From: Nashville, Indiana Member No.: 261 Region Association: None |
I might be just too slow to get it done (IMG:http://www.914world.com/bbs2/html/emoticons/laugh.gif) , but I'm trying to get the 73 drivable for the FFC. (IMG:http://www.914world.com/bbs2/html/emoticons/driving.gif)
I've got a lot of work left to do, but if I can make good steady progress I've got a shot at driving it at the event. I don't think there is much of a chance of getting it 100% complete, so my goal is drivable. I haven't posted any updates in a while so I going to post some pics of stuff I have done. And then I'll try to post frequent progress updates. 914 & 2.0 badges and license plate holder were powder coated a few weeks back. I installed them a couple of weekends back. Attached image(s) 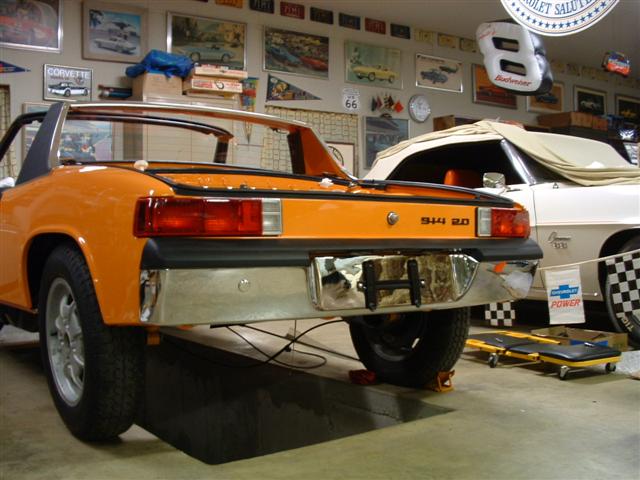
|
   |

 
|
| Doug Leggins |
Sep 13 2005, 10:52 PM
Post
#2
|
|
Senior Member Group: Benefactors Posts: 1,358 Joined: 6-February 03 From: Nashville, Indiana Member No.: 261 Region Association: None |
I've recently been working on assembling the doors. Both are mostly assembled. Next step will be to install them on the chassis.
Attached image(s) 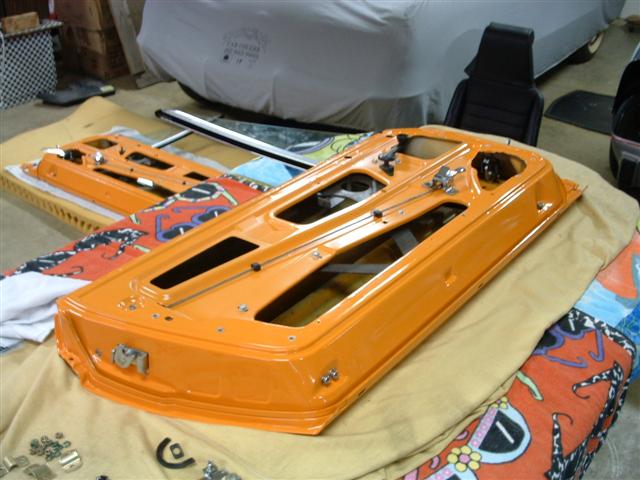
|
|
|
|
| Doug Leggins |
Sep 13 2005, 10:53 PM
Post
#3
|
|
Senior Member Group: Benefactors Posts: 1,358 Joined: 6-February 03 From: Nashville, Indiana Member No.: 261 Region Association: None |
asdf
Attached image(s) 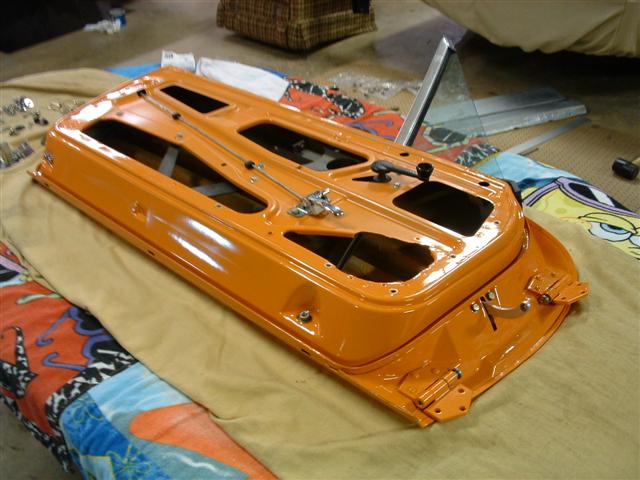
|
|
|
|
| Doug Leggins |
Sep 13 2005, 11:07 PM
Post
#4
|
|
Senior Member Group: Benefactors Posts: 1,358 Joined: 6-February 03 From: Nashville, Indiana Member No.: 261 Region Association: None |
Installing the inner fuzzy stip in the squeege gutter was every bit as difficult as everyone has said. I tried many things but nothing made it easy.
I used 2 clamps to create a fixture to hold the gutter in place while I pushed the felt strip in place. It was pretty much like trying to push a rope (IMG:http://www.914world.com/bbs2/html/emoticons/laugh.gif) One clamp held a stop block in place that I pushed against and the other clamp captured the gutter and prevented it from moving too much. I pushed the felt strip in about half way and then pulled ot out. Turned it around and then pushed it in about half way and pulled it out again. Did this a couple of times to reduce the amount of force that was required to push the strip in the gutter. I coated the gutter grooves with glycerine and started the pushing. I found it helped greatly to place a block of wood under the felt strip to reduce the tendency for it to bend. At about the half way point the push started to be only 1'8" at a time ...this took a while! Attached image(s) 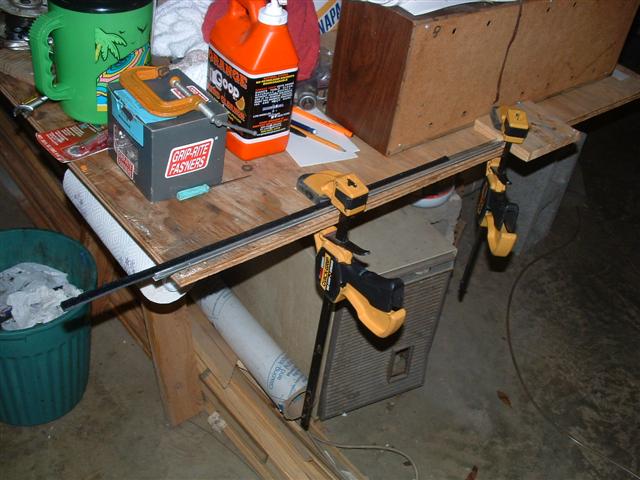
|
|
|
|
| Doug Leggins |
Sep 13 2005, 11:10 PM
Post
#5
|
|
Senior Member Group: Benefactors Posts: 1,358 Joined: 6-February 03 From: Nashville, Indiana Member No.: 261 Region Association: None |
piece of wood used to help push without bending
Attached image(s) 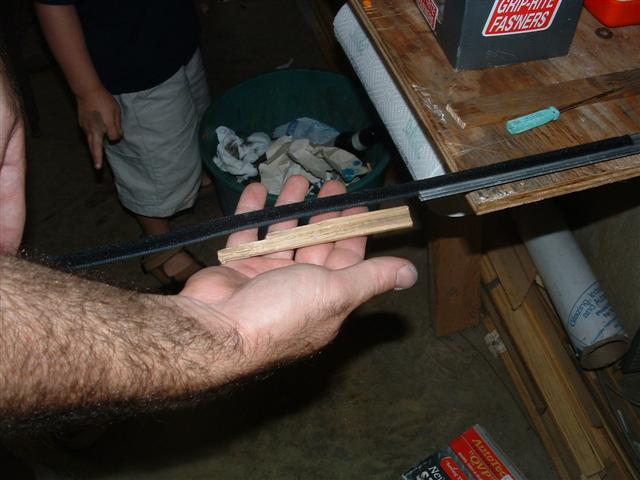
|
|
|
|
| Doug Leggins |
Sep 13 2005, 11:11 PM
Post
#6
|
|
Senior Member Group: Benefactors Posts: 1,358 Joined: 6-February 03 From: Nashville, Indiana Member No.: 261 Region Association: None |
A little at a time
Attached image(s) 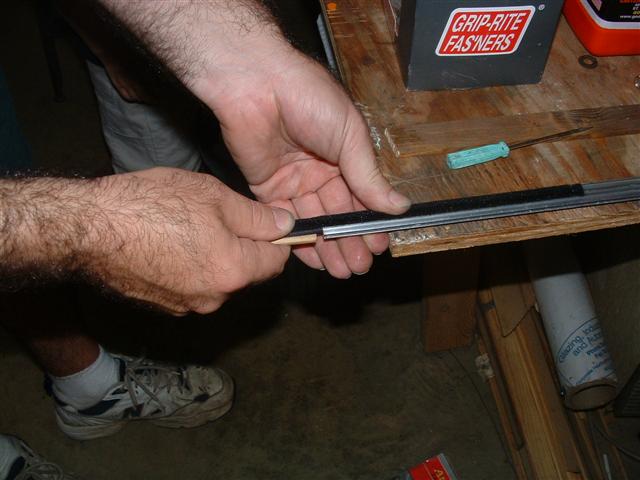
|
|
|
|
| Doug Leggins |
Sep 13 2005, 11:19 PM
Post
#7
|
|
Senior Member Group: Benefactors Posts: 1,358 Joined: 6-February 03 From: Nashville, Indiana Member No.: 261 Region Association: None |
Gathering parts for the doors took a while. Started with bare doors. Pulled out all of my used parts and sorted for the best. Layed out the new parts. There are a lot of seals used in and around the doors!
Cleaned up the used parts and started the re-assembly. Attached image(s) 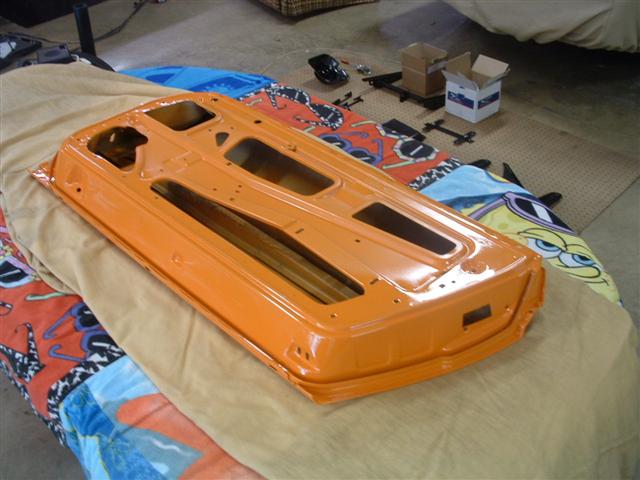
|
|
|
|
| Doug Leggins |
Sep 13 2005, 11:20 PM
Post
#8
|
|
Senior Member Group: Benefactors Posts: 1,358 Joined: 6-February 03 From: Nashville, Indiana Member No.: 261 Region Association: None |
Parts
Attached image(s) 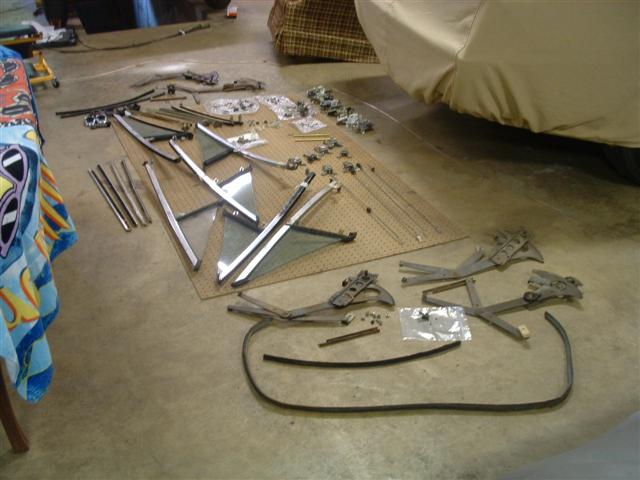
|
|
|
|
| Doug Leggins |
Sep 13 2005, 11:21 PM
Post
#9
|
|
Senior Member Group: Benefactors Posts: 1,358 Joined: 6-February 03 From: Nashville, Indiana Member No.: 261 Region Association: None |
more parts
Attached image(s) 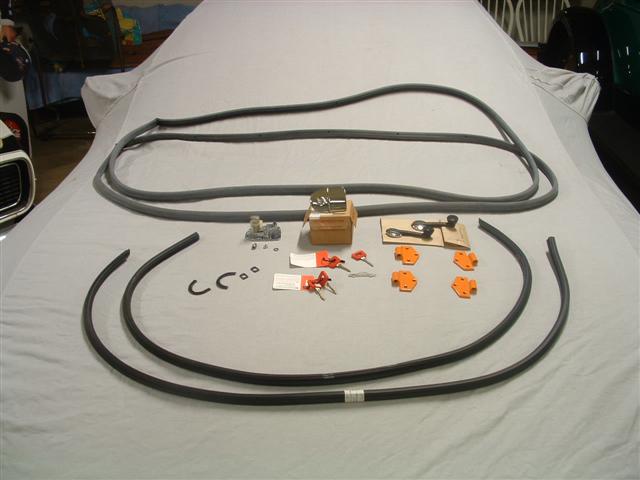
|
|
|
|
| Doug Leggins |
Sep 13 2005, 11:21 PM
Post
#10
|
|
Senior Member Group: Benefactors Posts: 1,358 Joined: 6-February 03 From: Nashville, Indiana Member No.: 261 Region Association: None |
A lot of seals and hardware
Attached image(s) 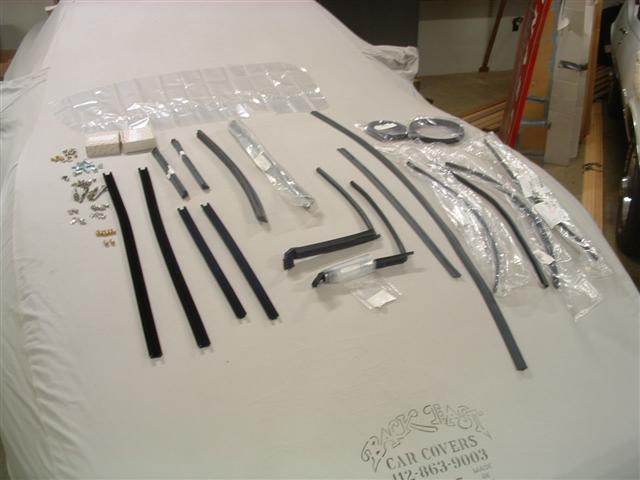
|
|
|
|
| Doug Leggins |
Sep 13 2005, 11:34 PM
Post
#11
|
|
Senior Member Group: Benefactors Posts: 1,358 Joined: 6-February 03 From: Nashville, Indiana Member No.: 261 Region Association: None |
Rebuilt the brake system a few weeks back. A lot of work here. Nearly done now! I need to adjust the rear brake venting clearance add brake fluid and bleed the brakes.
I rebuilt all 4 calipers. Kind of cool to see the insides of the calipers and learn how they work. But next time, if there is a next time (IMG:http://www.914world.com/bbs2/html/emoticons/laugh.gif) , it will be money well spent to get some of Eric's rebuilt calipers. Sand blasted, reassemmbled and partially painted Attached image(s) 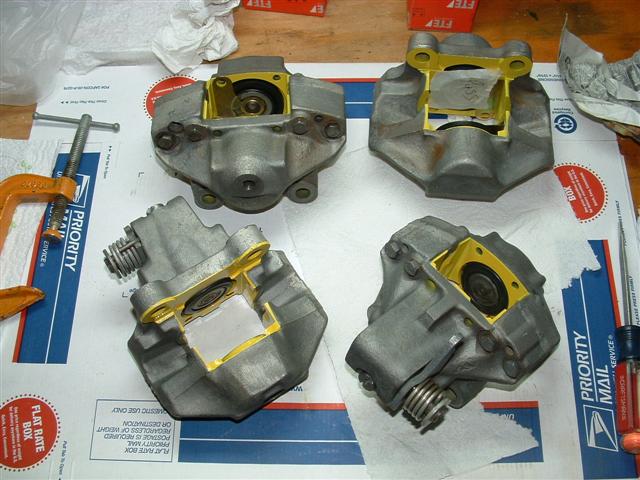
|
|
|
|
| Doug Leggins |
Sep 13 2005, 11:35 PM
Post
#12
|
|
Senior Member Group: Benefactors Posts: 1,358 Joined: 6-February 03 From: Nashville, Indiana Member No.: 261 Region Association: None |
hanging to dry
Attached image(s) 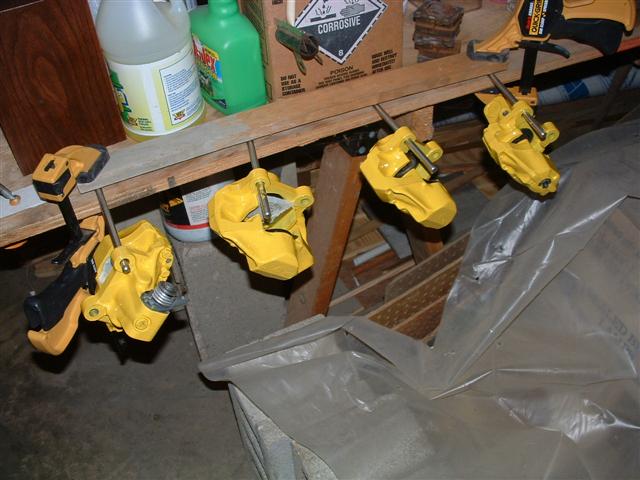
|
|
|
|
| Doug Leggins |
Sep 13 2005, 11:36 PM
Post
#13
|
|
Senior Member Group: Benefactors Posts: 1,358 Joined: 6-February 03 From: Nashville, Indiana Member No.: 261 Region Association: None |
master cylinder
Attached image(s) 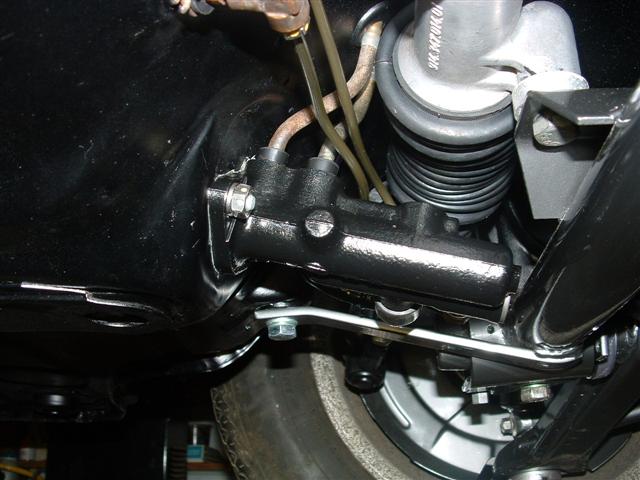
|
|
|
|
| Doug Leggins |
Sep 13 2005, 11:36 PM
Post
#14
|
|
Senior Member Group: Benefactors Posts: 1,358 Joined: 6-February 03 From: Nashville, Indiana Member No.: 261 Region Association: None |
asdf
Attached image(s) 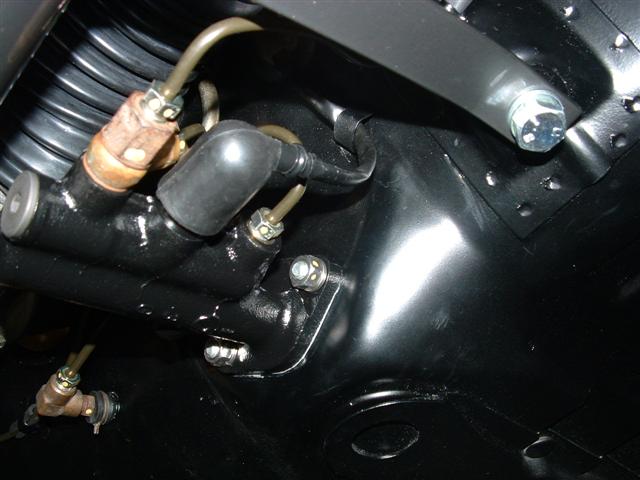
|
|
|
|
| Doug Leggins |
Sep 13 2005, 11:41 PM
Post
#15
|
|
Senior Member Group: Benefactors Posts: 1,358 Joined: 6-February 03 From: Nashville, Indiana Member No.: 261 Region Association: None |
front caliper installed
Attached image(s) 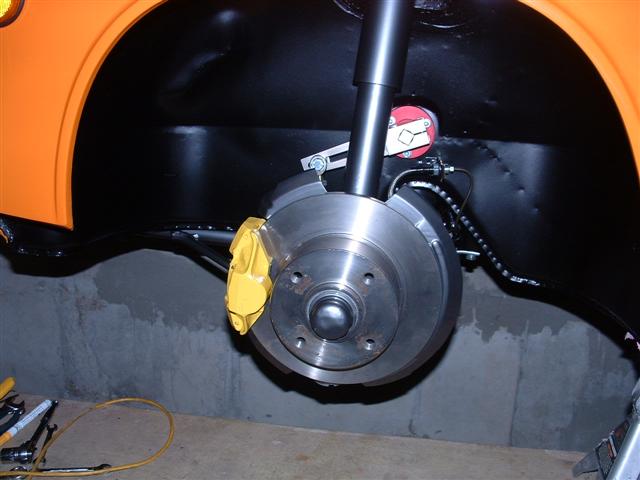
|
|
|
|
| Doug Leggins |
Sep 13 2005, 11:42 PM
Post
#16
|
|
Senior Member Group: Benefactors Posts: 1,358 Joined: 6-February 03 From: Nashville, Indiana Member No.: 261 Region Association: None |
front again
Attached image(s) 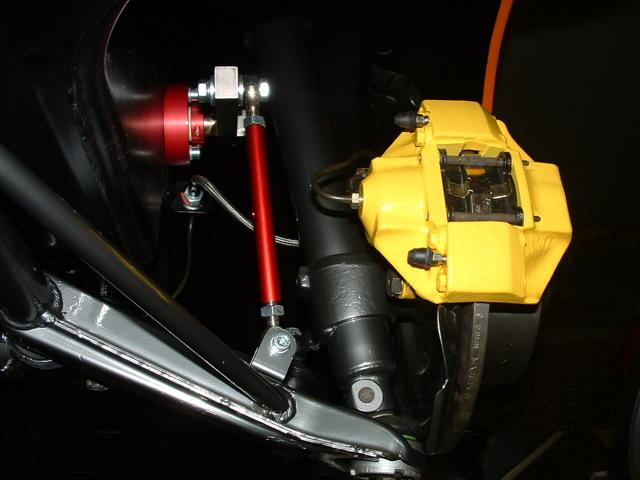
|
|
|
|
| Doug Leggins |
Sep 13 2005, 11:47 PM
Post
#17
|
|
Senior Member Group: Benefactors Posts: 1,358 Joined: 6-February 03 From: Nashville, Indiana Member No.: 261 Region Association: None |
rear brake T installed
Attached image(s) 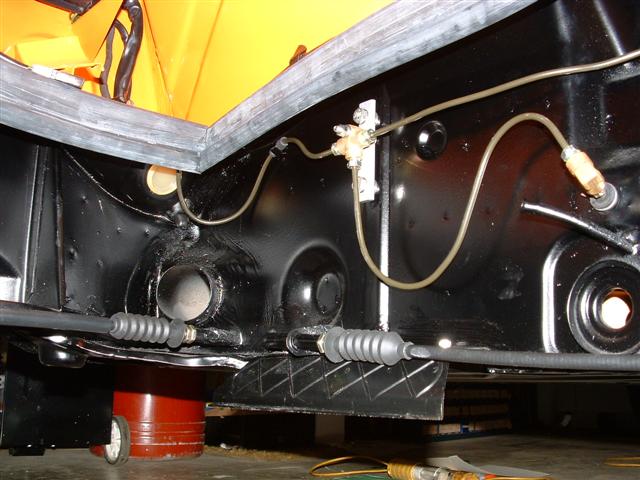
|
|
|
|
| Doug Leggins |
Sep 13 2005, 11:50 PM
Post
#18
|
|
Senior Member Group: Benefactors Posts: 1,358 Joined: 6-February 03 From: Nashville, Indiana Member No.: 261 Region Association: None |
rear caliper
Attached image(s) 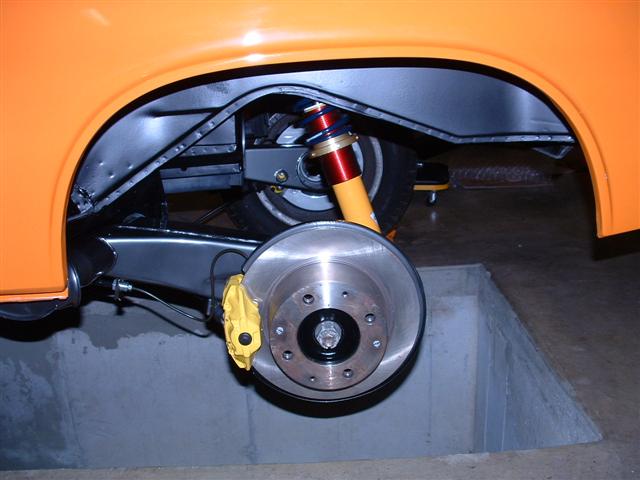
|
|
|
|
| Doug Leggins |
Sep 13 2005, 11:51 PM
Post
#19
|
|
Senior Member Group: Benefactors Posts: 1,358 Joined: 6-February 03 From: Nashville, Indiana Member No.: 261 Region Association: None |
asdf
Attached image(s) 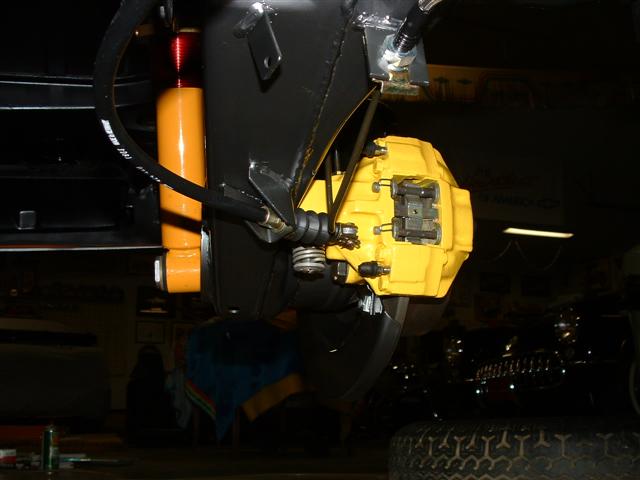
|
|
|
|
| Doug Leggins |
Sep 13 2005, 11:53 PM
Post
#20
|
|
Senior Member Group: Benefactors Posts: 1,358 Joined: 6-February 03 From: Nashville, Indiana Member No.: 261 Region Association: None |
This past weekend I installed the throttle cable and clutch cable.
Attached image(s) 
|
|
|
|
|
1 User(s) are reading this topic (1 Guests and 0 Anonymous Users)
0 Members:

|
Lo-Fi Version | Time is now: 9th June 2026 - 04:19 AM |
Invision Power Board
v9.1.4 © 2026 IPS, Inc.