|
|

|
Porsche, and the Porsche crest are registered trademarks of Dr. Ing. h.c. F. Porsche AG.
This site is not affiliated with Porsche in any way. Its only purpose is to provide an online forum for car enthusiasts. All other trademarks are property of their respective owners. |
|
|
  |
| Jeff Hail |
 Jan 20 2008, 08:45 PM Jan 20 2008, 08:45 PM
Post
#161
|
|
Senior Member    Group: Members Posts: 1,141 Joined: 3-May 07 From: LA/ CA Member No.: 7,712 |
A full day to play.
Installed both the new throttle and clutch cable conduits in the tunnel. The repros I made were pretty accurate. The angle of attack on the front flared ends was perfect. Welding inside the tunnel is difficult at the same time tense. After all the tacks you just hope you don't burn a hole thru the tubing and end up having to start over. I didn't get a chance to test fit the cables yet but I think I did not perforate any of the new tubes. At the front mouth of the clutch tube I welded a sleeve over the tube prior to install. Since the clutch tube has some decent presure on it during usage it needs to be more stout than the throttle cable tube. The sleeve let me get some heat into the remnant of the old bracket still in the tunnel without burning a hole in the tube itself. Threw some rattle can primer on for now. Still need to grind the welds on the outside of the tunnel to clean it up. Looks like some rain coming. Attached image(s) 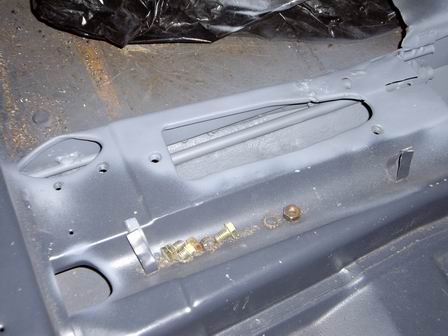 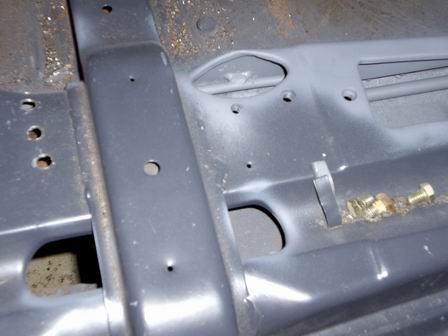 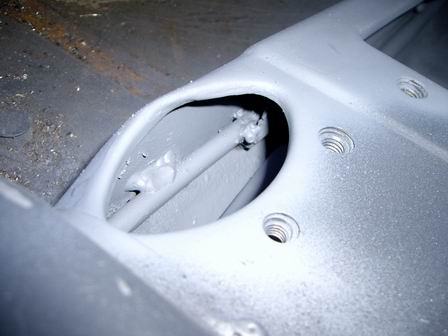 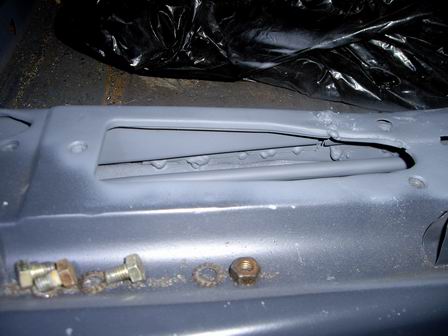 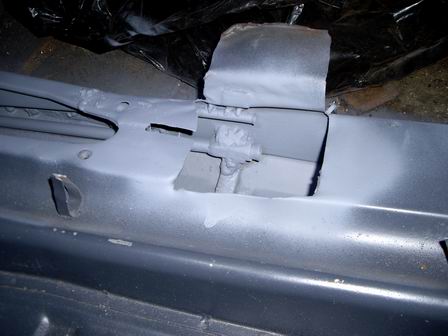
|
| Jeff Hail |
 Feb 2 2008, 08:26 PM Feb 2 2008, 08:26 PM
Post
#162
|
|
Senior Member    Group: Members Posts: 1,141 Joined: 3-May 07 From: LA/ CA Member No.: 7,712 |
Busy few weeks at work. Rain, rain and more rain coming tomorrow.
No time to play.............. Garage time Boxed the rear trailing arms today. Attached image(s) 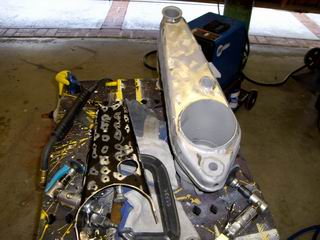 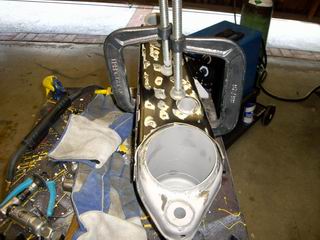 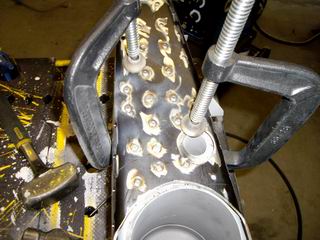 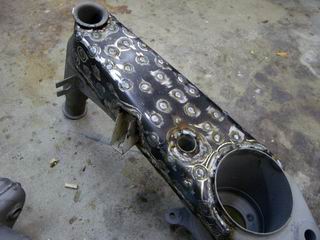 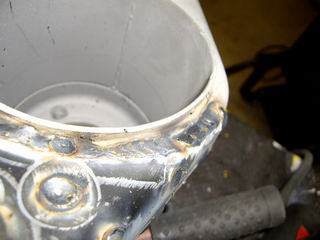
|
| Jeff Hail |
 Feb 2 2008, 08:29 PM Feb 2 2008, 08:29 PM
Post
#163
|
|
Senior Member    Group: Members Posts: 1,141 Joined: 3-May 07 From: LA/ CA Member No.: 7,712 |
They look really ugly will all those plug welds.
After grinding all the welds........one down...... I will grind the other one in the morning and send them off to the powdercoater Attached image(s) 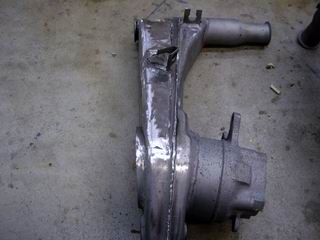 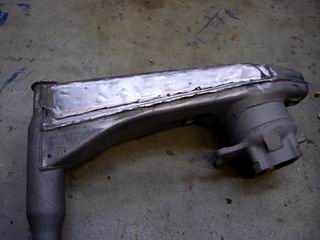 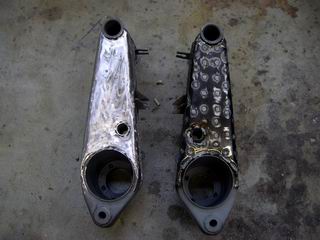
|
| Jeff Hail |
 Feb 3 2008, 07:21 PM Feb 3 2008, 07:21 PM
Post
#164
|
|
Senior Member    Group: Members Posts: 1,141 Joined: 3-May 07 From: LA/ CA Member No.: 7,712 |
Completed all the finish grinding today on the trailing arms.
Threw on some primer til they go to the powdercoater. Came out slick Attached image(s) 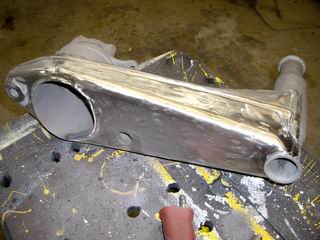 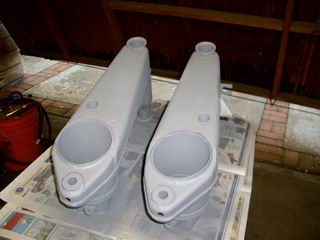
|
| Jeff Hail |
 Feb 10 2008, 09:48 PM Feb 10 2008, 09:48 PM
Post
#165
|
|
Senior Member    Group: Members Posts: 1,141 Joined: 3-May 07 From: LA/ CA Member No.: 7,712 |
Got a lot done this past week.
Stopped in to say hello to Peter at Rennspeed. http://www.rennspd.com/ Ended up leaving with a perfect set of GT Rocker moldings and an Oil presure/ temp gauge I have been hunting. The rocker moldings are perfect side to side length. This seems to be a problem with other suppliers. The flared ends also match the steel flares contour perfect. Never ever stop in to say hello when you have a wallet full of cash at any Porsche parts establishment. Sent the transaxle out to flip the R&P on the 915. I added a few modifications "since there in there". A hardened steel bearing carrier. All new syncro rings. G50 speedometer Hall sensor for inverted R&P. How much? Do not ask! And the week culminated with beautiful weather here in SoCal. One full day to work on the car and finish some things up. I hated to cut the quarter panel but no way to access the inner wheelhouse replacement. It will end up cleaner in the end. Managed to save the pillar in the process. Reminds me of Milchelko's "diggi'n into hell". Attached image(s) 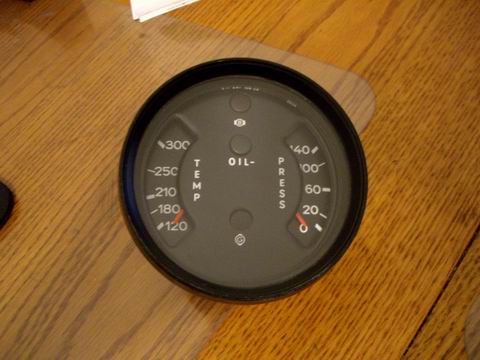 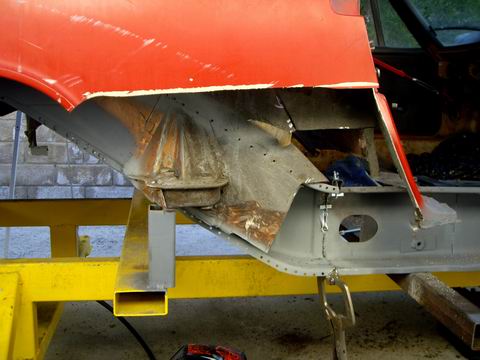 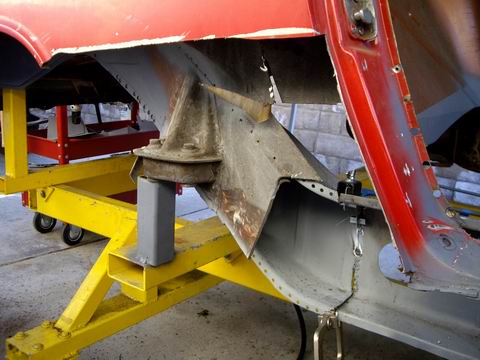 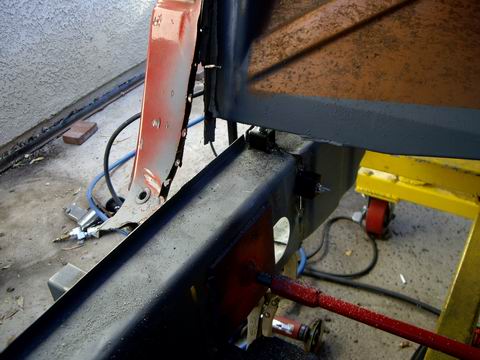
|
| Jeff Hail |
 Feb 10 2008, 09:54 PM Feb 10 2008, 09:54 PM
Post
#166
|
|
Senior Member    Group: Members Posts: 1,141 Joined: 3-May 07 From: LA/ CA Member No.: 7,712 |
No rust left here. All new steel.
Made another fixture to keep the longs in check. Threaded rod with plates on each end. Tack welded to the inner longs. Keeps the dimensions in check and the longs won't splay in process. Remember to take measurements before you begin cutting off stuff. Especially the suspension consoles Attached image(s) 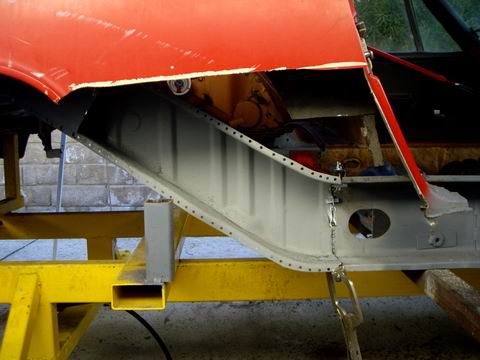 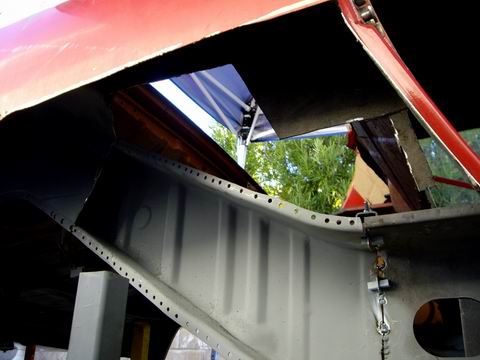 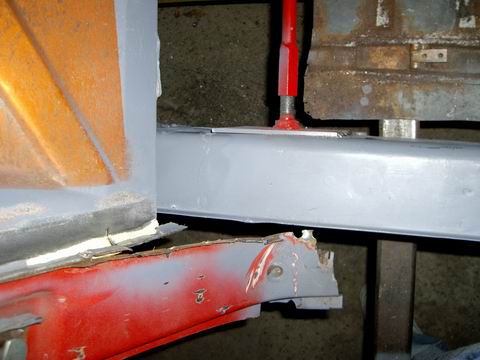 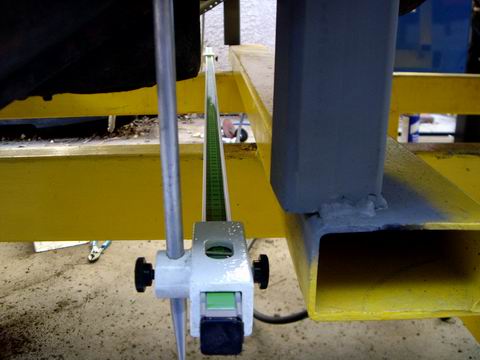
|
| Jeff Hail |
 Feb 10 2008, 10:00 PM Feb 10 2008, 10:00 PM
Post
#167
|
|
Senior Member    Group: Members Posts: 1,141 Joined: 3-May 07 From: LA/ CA Member No.: 7,712 |
More on measuring.
Do not proceed without measuring before you cut. This is vital to returning a chassis to dimensional tolerance. You do not have to high tech equipment. A tape measure will get by if on a budget. Pre- measure both sides before you cut any suspension consoles off. Attached image(s) 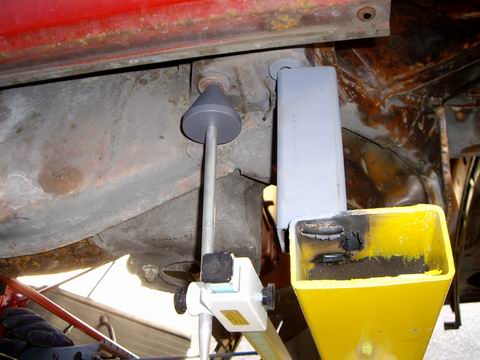 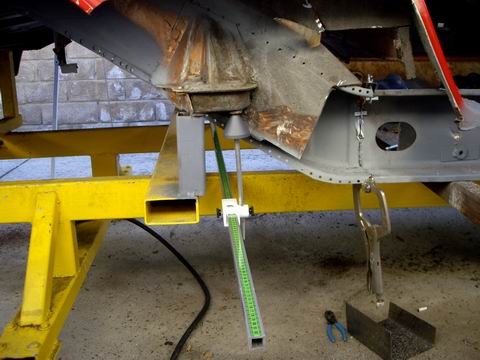 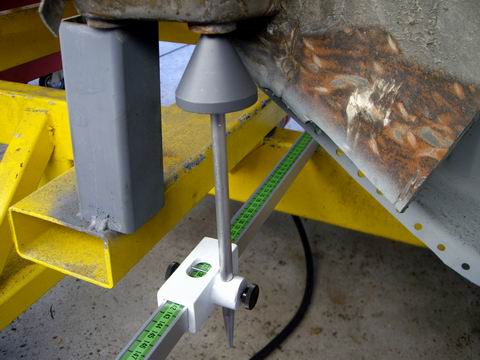 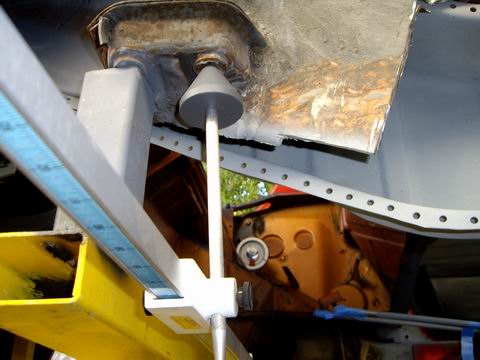
|
| Jeff Hail |
 Feb 10 2008, 10:05 PM Feb 10 2008, 10:05 PM
Post
#168
|
|
Senior Member    Group: Members Posts: 1,141 Joined: 3-May 07 From: LA/ CA Member No.: 7,712 |
Finished the long connection at the rear rail. Added a sleeve at the joint. This will strengthen the connection and eliminate the flex at this area that 914's at notorious for.
Notice I punched holes in the sleeve. Since this is a area known for corrosion I did the work from inside the long. No leaks from pin holes in any welds will happen here. Also less finish work required since it is all inside once the long is closed up. Work smart -not hard! Attached image(s) 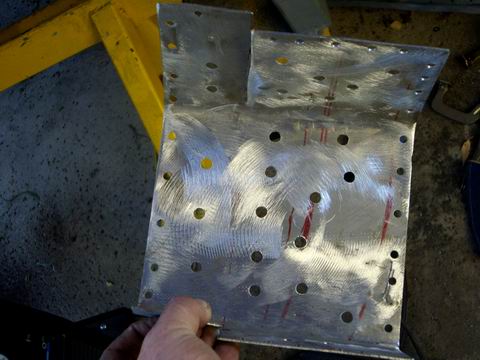 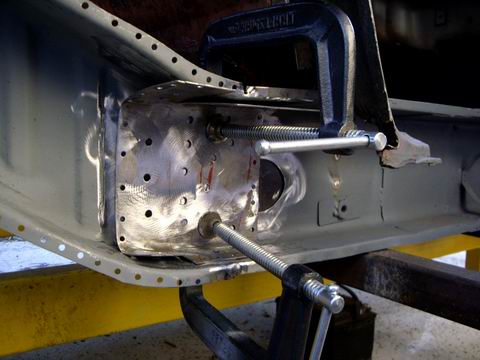 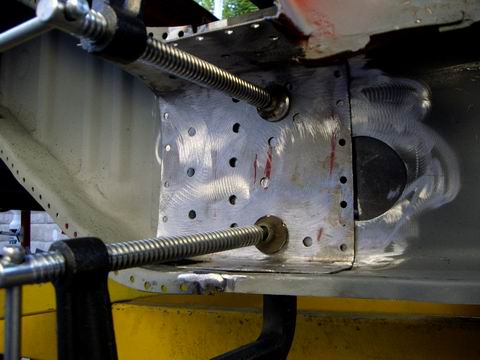 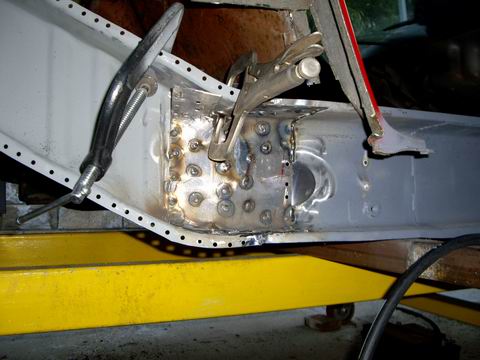
|
| Jeff Hail |
 Feb 10 2008, 10:15 PM Feb 10 2008, 10:15 PM
Post
#169
|
|
Senior Member    Group: Members Posts: 1,141 Joined: 3-May 07 From: LA/ CA Member No.: 7,712 |
Twice as strong as the factory design in this area. No welds from the outside except the outside butt joint equals no water leaks in this area.
I rough fit the new outer wheelhouse ( oops didn't take a pic) I little more trimming needed but should be installed next weekend. I am actually considering modifying a shelf where the rear diagonal long meets the inner long at the firewall. An angled addition of sheetmetal to make water run off and down away from the long. Easy to do and hardly noticeable. More on that later. Attached image(s) 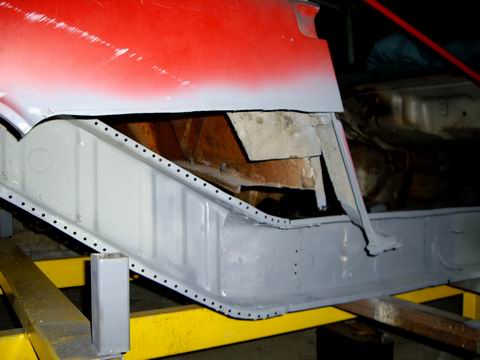
|
| Jeff Hail |
 Feb 10 2008, 10:31 PM Feb 10 2008, 10:31 PM
Post
#170
|
|
Senior Member    Group: Members Posts: 1,141 Joined: 3-May 07 From: LA/ CA Member No.: 7,712 |
Value in scribbled notes:
I am sure this will help someone one day! Measurements........... Seat hinge mounting Attached image(s) 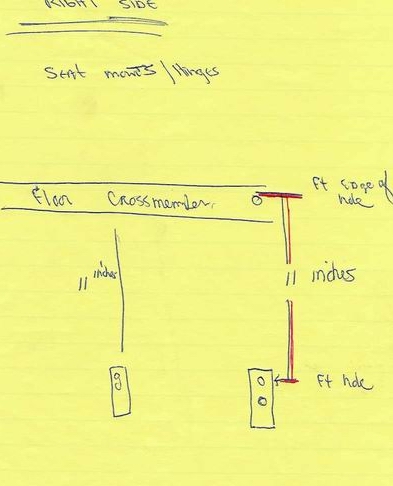
|
| Jeff Hail |
 Feb 10 2008, 10:33 PM Feb 10 2008, 10:33 PM
Post
#171
|
|
Senior Member    Group: Members Posts: 1,141 Joined: 3-May 07 From: LA/ CA Member No.: 7,712 |
More value in scribbled notes:
I am sure this will help someone one day! Measurements........... Outer suspension console specs............... Attached image(s) 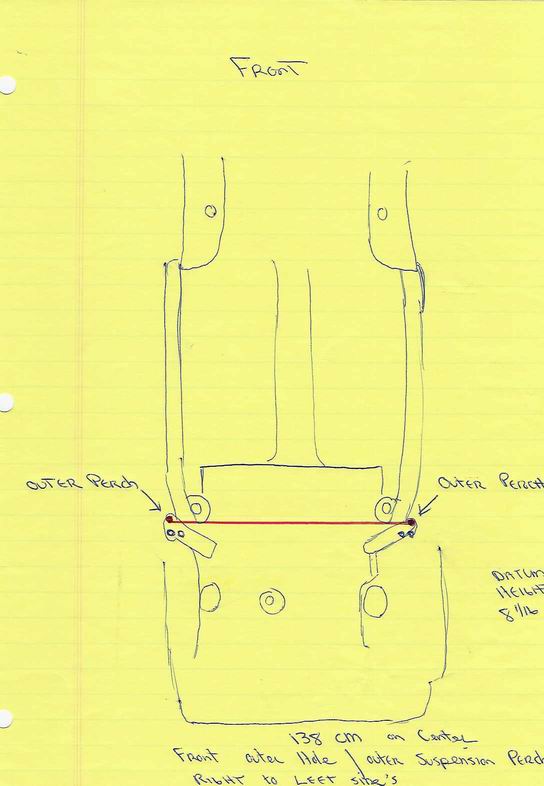
|
| Jeff Hail |
 Feb 10 2008, 10:35 PM Feb 10 2008, 10:35 PM
Post
#172
|
|
Senior Member    Group: Members Posts: 1,141 Joined: 3-May 07 From: LA/ CA Member No.: 7,712 |
More value in scribbled notes:
Measurements........... Inner suspension console specs............... Attached image(s) 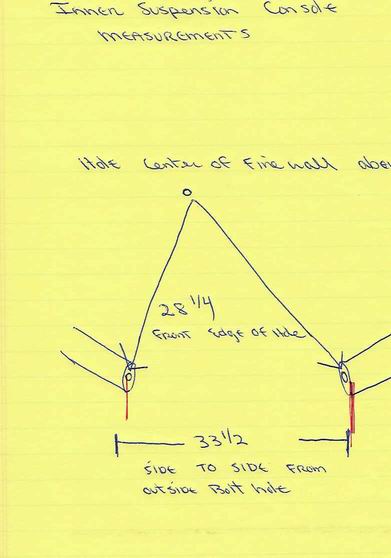
|
| Jeff Hail |
 Feb 10 2008, 10:39 PM Feb 10 2008, 10:39 PM
Post
#173
|
|
Senior Member    Group: Members Posts: 1,141 Joined: 3-May 07 From: LA/ CA Member No.: 7,712 |
More scribbled notes:
Measurements........... Jack post tube............... if you want your rocker moldings to fit correctly (tube centered in the rocker molding cutout hole) Attached image(s) 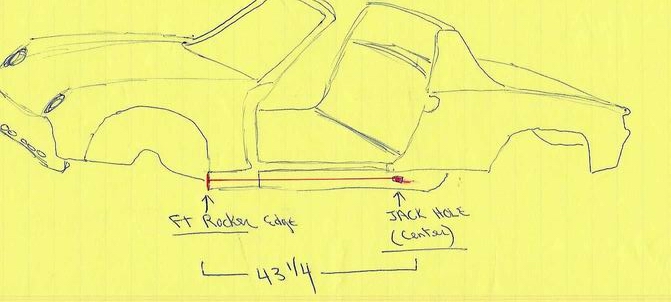
|
| type11969 |
 Feb 11 2008, 06:41 AM Feb 11 2008, 06:41 AM
Post
#174
|
|
Senior Member    Group: Members Posts: 1,231 Joined: 2-December 03 From: Collingswood, NJ Member No.: 1,410 Region Association: North East States |
Looks familiar . . . just much nicer!
-Chris |
| Eric_Shea |
 Feb 11 2008, 04:45 PM Feb 11 2008, 04:45 PM
Post
#175
|
|
PMB Performance                Group: Admin Posts: 19,304 Joined: 3-September 03 From: Salt Lake City, UT Member No.: 1,110 Region Association: Rocky Mountains  |
How long before my "Rock Crusher" is done... (IMG:style_emoticons/default/confused24.gif)
http://www.914world.com/bbs2/index.php?showtopic=80797 |
| Jeff Hail |
 Feb 11 2008, 08:44 PM Feb 11 2008, 08:44 PM
Post
#176
|
|
Senior Member    Group: Members Posts: 1,141 Joined: 3-May 07 From: LA/ CA Member No.: 7,712 |
Two weeks! Isn't that what all shops say?
|
| Twystd1 |
 Feb 12 2008, 12:08 AM Feb 12 2008, 12:08 AM
Post
#177
|
|
You don't want to know... really.....     Group: Members Posts: 2,515 Joined: 12-September 04 From: Newport Beach, California Member No.: 2,743 |
Eric, I have seen Jeff's work first hand.
Your rock crusher should be done in 9 days if I read it right. C |
| Jeff Hail |
 Feb 13 2008, 12:26 AM Feb 13 2008, 12:26 AM
Post
#178
|
|
Senior Member    Group: Members Posts: 1,141 Joined: 3-May 07 From: LA/ CA Member No.: 7,712 |
Might as well add this to the thread (IMG:style_emoticons/default/welder.gif) too:
The design make's everything a one man operation. The width of the upper bed is 32 inches wide which fits between the rear inner console ears that are the lowest part of the car. The height from the ground up was based on the maximum height of the common floor jack +2 inches (adding 2x2x 6 foot) cross bars that sat on jackstands and the bench rolled right underneath with a hair to spare? Of course easy access to gain access and roll around underneath on a creeper was taken into account. Attached image(s) 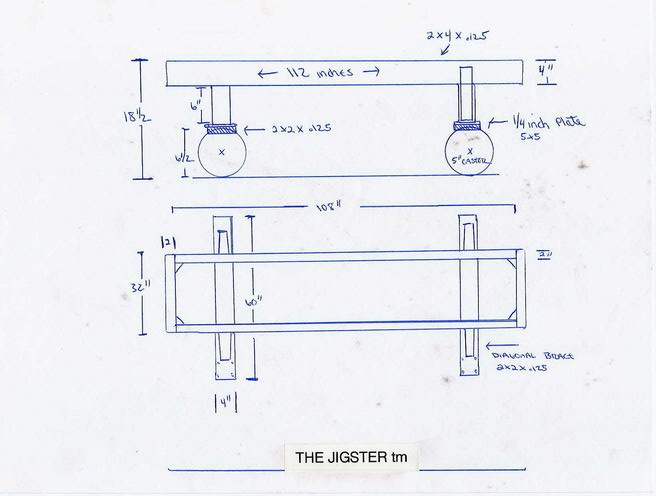
|
| Twystd1 |
 Feb 13 2008, 02:52 AM Feb 13 2008, 02:52 AM
Post
#179
|
|
You don't want to know... really.....     Group: Members Posts: 2,515 Joined: 12-September 04 From: Newport Beach, California Member No.: 2,743 |
This is my favorite thread on this site so far. I LOVE THIS STUFF.
Clayton |
| Zimms |
 Feb 14 2008, 04:57 AM Feb 14 2008, 04:57 AM
Post
#180
|
|
Senior Member    Group: Members Posts: 1,415 Joined: 11-February 06 From: Michigan Member No.: 5,565 Region Association: Upper MidWest 
|
(IMG:style_emoticons/default/agree.gif) Thanks for posting all of the sketches. I am going to be starting something similar this summer.
|
  |
1 User(s) are reading this topic (1 Guests and 0 Anonymous Users)
0 Members:

|
Lo-Fi Version | Time is now: 21st December 2025 - 10:10 AM |
Invision Power Board
v9.1.4 © 2025 IPS, Inc.


