|
|
|
Porsche, and the Porsche crest are registered trademarks of Dr. Ing. h.c. F. Porsche AG.
This site is not affiliated with Porsche in any way. Its only purpose is to provide an online forum for car enthusiasts. All other trademarks are property of their respective owners. |
|
|

  |

| 3d914 |
 Mar 1 2015, 05:39 PM Mar 1 2015, 05:39 PM
Post
#381
|
|
Senior Member  Group: Members Posts: 1,275 Joined: 24-September 03 From: Benson, AZ Member No.: 1,191 Region Association: Southwest Region |
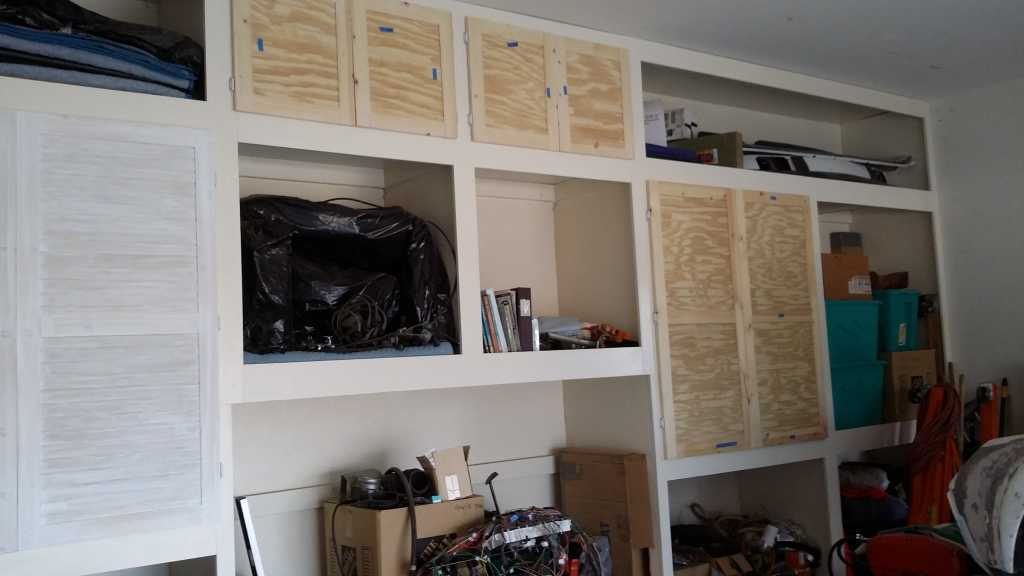
Been decent weather this weekend so spent some time on the cabinet doors. Not happy with a couple of the smaller doors - they have slight warp to them. Will likely take both apart and try to reassemble if pieces aren't too bad. Otherwise they'll get redone.
 |
   |

 
|
| 3d914 |
Mar 1 2015, 05:46 PM
Post
#382
|
|
Senior Member Group: Members Posts: 1,275 Joined: 24-September 03 From: Benson, AZ Member No.: 1,191 Region Association: Southwest Region |
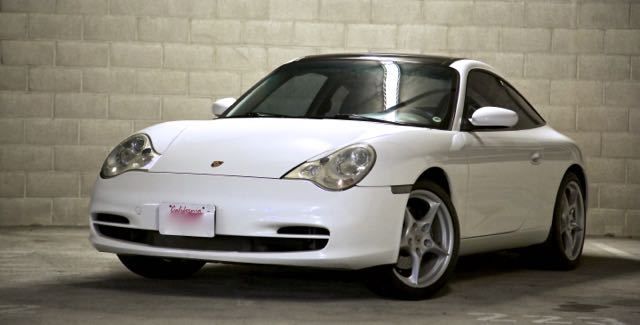
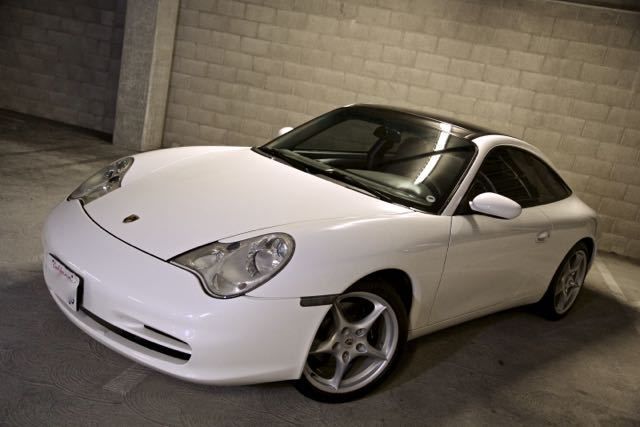
Just got some pics from my son of the 02 996 Targa he bought. Same color as his 914. Too cool.
  |
|
|
|
| 3d914 |
Mar 15 2015, 04:43 PM
Post
#383
|
|
Senior Member Group: Members Posts: 1,275 Joined: 24-September 03 From: Benson, AZ Member No.: 1,191 Region Association: Southwest Region |
Finally got all the rough and finish grinding done on the wheel well reinforcements. If I take this kind of job on again, the fenders are coming off completely. Makes everything else more work with them on. I'll get some pics up once I get them primed - hopefully this week if I have any daylight after work.
Next weekend the RSX gets a 160K mile service. Gonna tear it down past the heads to check valves, replace seals, gaskets, belts, etc. |
|
|
|
| 914GT |
Mar 15 2015, 06:47 PM
Post
#384
|
|
Senior Member Group: Members Posts: 1,101 Joined: 11-October 04 From: Tucson Member No.: 2,923 Region Association: Southwest Region |
I should head down I-10 and check the progress you are making.
Guy |
|
|
|
| 3d914 |
Mar 16 2015, 01:31 PM
Post
#385
|
|
Senior Member Group: Members Posts: 1,275 Joined: 24-September 03 From: Benson, AZ Member No.: 1,191 Region Association: Southwest Region |
QUOTE(914GT @ Mar 15 2015, 05:47 PM)  I should head down I-10 and check the progress you are making. Guy Guy, you're welcome any time. Give me shout when you're thinking about heading over: 480-two six six-7860 |
|
|
|
| 3d914 |
Mar 21 2015, 05:58 PM
Post
#386
|
|
Senior Member Group: Members Posts: 1,275 Joined: 24-September 03 From: Benson, AZ Member No.: 1,191 Region Association: Southwest Region |
Well the RSX got pushed off for a couple of weeks. My daughter will be in town next weekend and I'm not certain I'll have it all done by then for her to use. It looks like all the valve train on the K20A3 has to come off to remove the head. You'd think you could leave it all in tact. And I may have to pull the engine anyway to get the timing chain off. So this job could turn into a couple weekends.
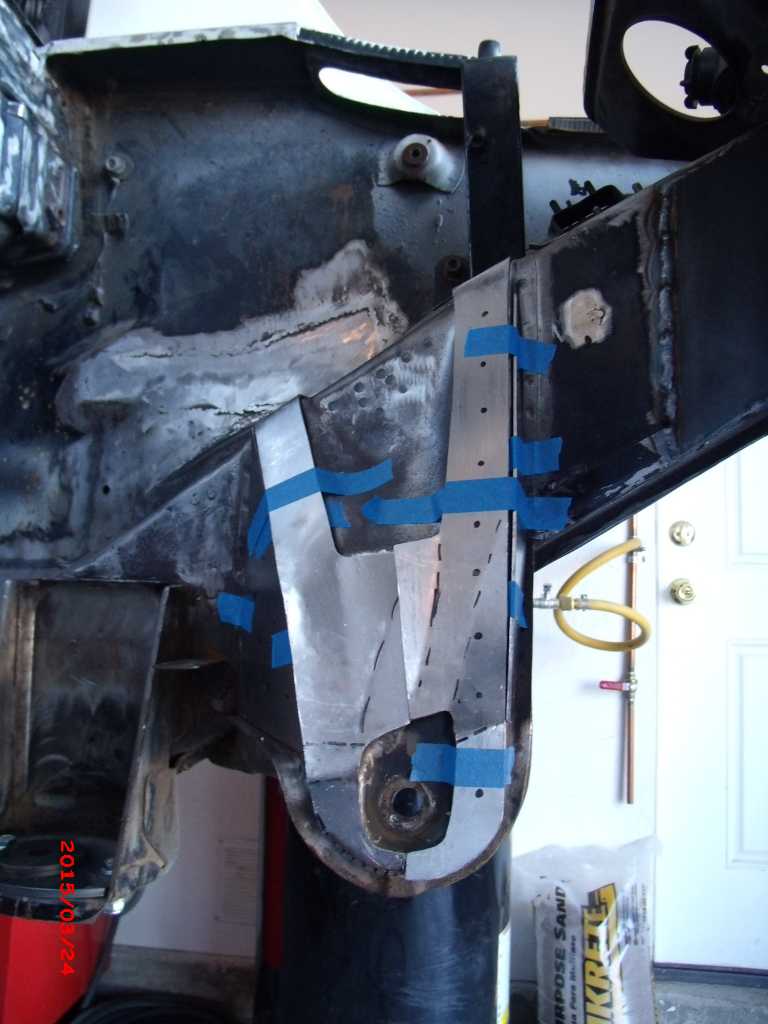
Anyway, got to spend time today on the reinforcement for the inner suspension. Decided to take a different approach and extend the reinforcement all the way up and over the top of the longitudinal. Pieces will get spot welds and edges welded all around. Made up the patterns, cut them out of 14ga steel, then spent a bunch of time getting the four pieces to fit. Lots of bends in varying directions. At least the patterns I cut for the left side match the right perfectly - so that's one less step.  |
|
|
|
| 3d914 |
Mar 24 2015, 08:10 PM
Post
#387
|
|
Senior Member Group: Members Posts: 1,275 Joined: 24-September 03 From: Benson, AZ Member No.: 1,191 Region Association: Southwest Region |
Got the right side cut out and fitted. Started drilling the holes for welding also. Hope to get to the welding part Wed/Thur of this week.
 |
|
|
|
| 3d914 |
Mar 27 2015, 07:14 PM
Post
#388
|
|
Senior Member Group: Members Posts: 1,275 Joined: 24-September 03 From: Benson, AZ Member No.: 1,191 Region Association: Southwest Region |
Had the day off so I got some time in on welding the inner suspension reinforcements. Sure enjoy melting metal.
Left side 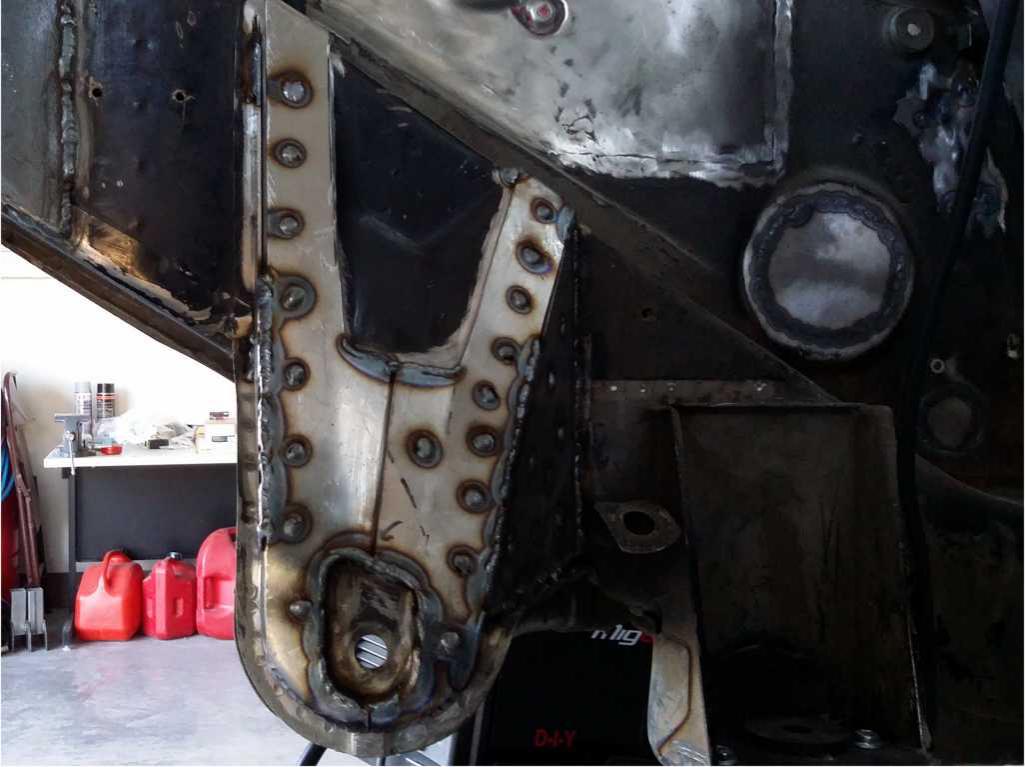 Right side 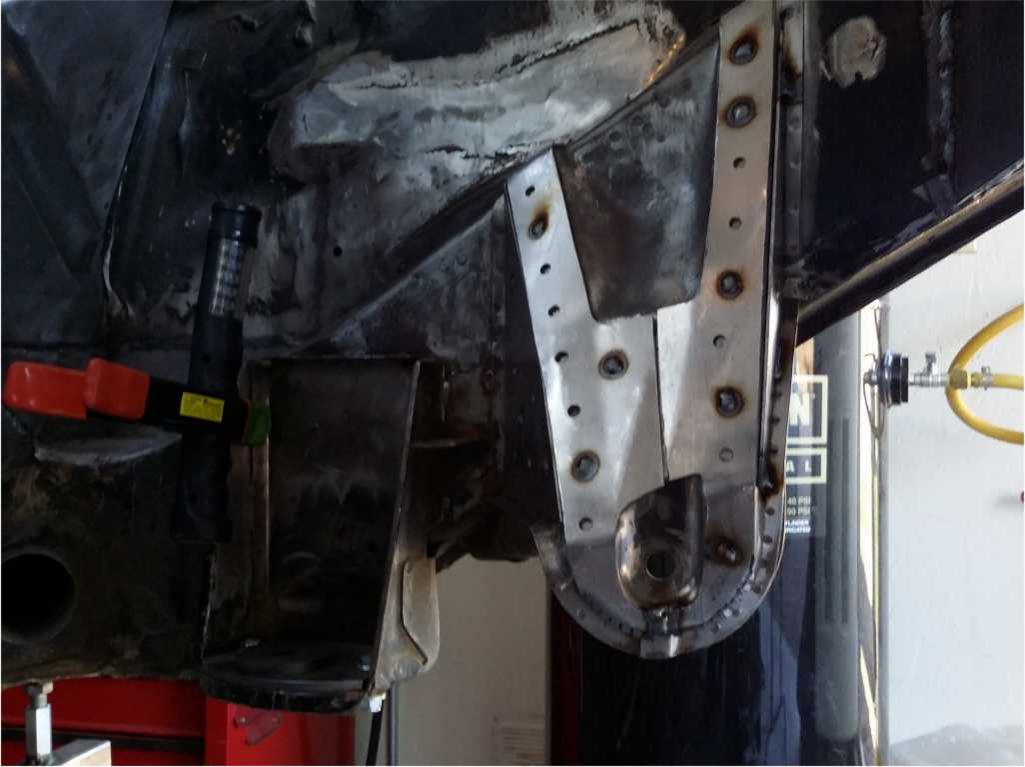 |
|
|
|
| 3d914 |
Mar 29 2015, 02:02 PM
Post
#389
|
|
Senior Member Group: Members Posts: 1,275 Joined: 24-September 03 From: Benson, AZ Member No.: 1,191 Region Association: Southwest Region |
Weldings done. Now I have the cleanup to do. Reasonably happy with the results. Got a little tight in a view places. Need to look around and see if anyone makes a smaller gun for a wire/gas welder. Of course that won't help in places where my big head and helmet get in the way!
Left side 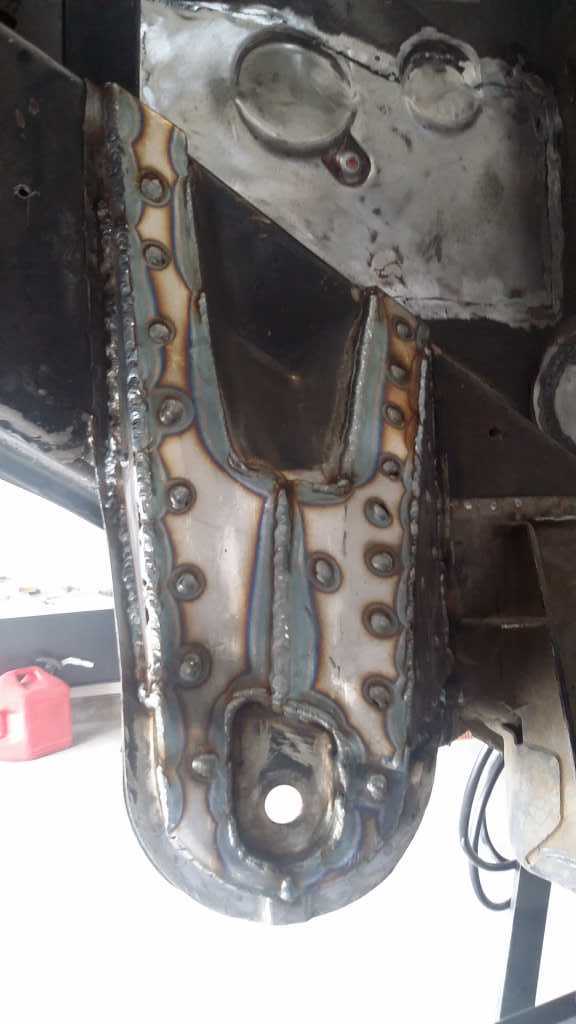 Right side 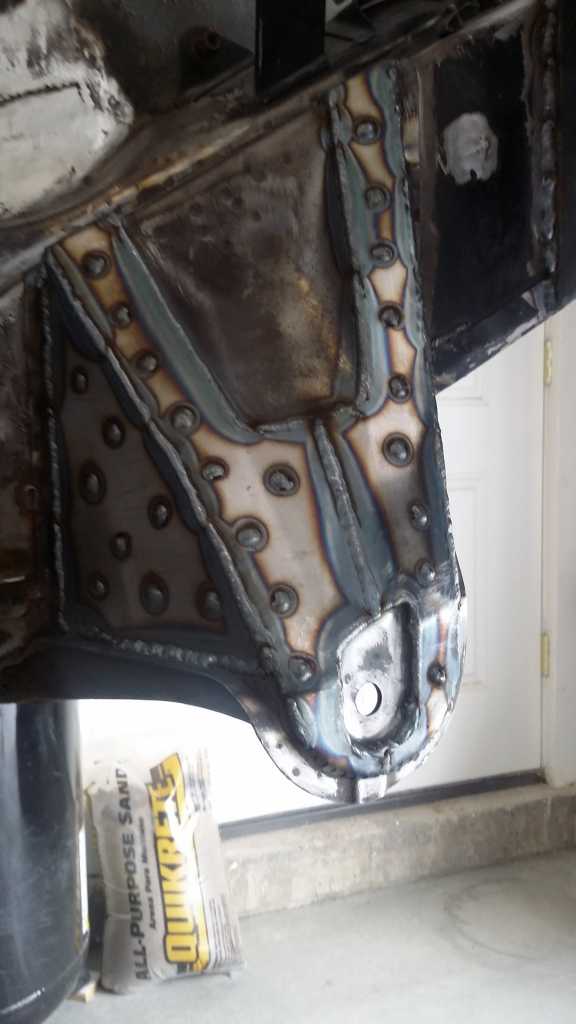 |
|
|
|
| 3d914 |
Mar 31 2015, 10:25 PM
Post
#390
|
|
Senior Member Group: Members Posts: 1,275 Joined: 24-September 03 From: Benson, AZ Member No.: 1,191 Region Association: Southwest Region |
Making more progress on the scope of metal work for the under body so I wanted to track what's getting done:
As I look at the rear driver's side floor panel, I'm seeing more rust under the metal dust than I remember. This may be one section I need to replace as a whole instead of just a few pieces. I'll do more cleanup first to get a better idea of its condition. |
|
|
|
| 3d914 |
Apr 12 2015, 05:05 PM
Post
#391
|
|
Senior Member Group: Members Posts: 1,275 Joined: 24-September 03 From: Benson, AZ Member No.: 1,191 Region Association: Southwest Region |
Spent part of this weekend deciding how I was going to handle the rust areas on the left floor. Got it cleaned up enough to tell that it was mostly surface rust as first suspected. There are a couple of thru holes though, so I got around to cutting those out today. Couldn't cut from the inside, so I drilled holes at the corners of my cutouts, and used those as a guide to cut from underneath. Cutting, shaping, and fitting wasn't too bad - since the parts are small and relatively easy shapes.
These floors are less than 16ga, so butt-weldings gonna be a challenge - especially where they're located. I'd like to just get them tacked in and finish them once the car's on the rotisserie. I have some reinforcement panels that go in the cockpit along the longitudinals and back cross-member first though - while its still on the dolly. I'll need to sort out if there's any interference with these patches before I decide how far to take the welding. Here's the back-left cutout. 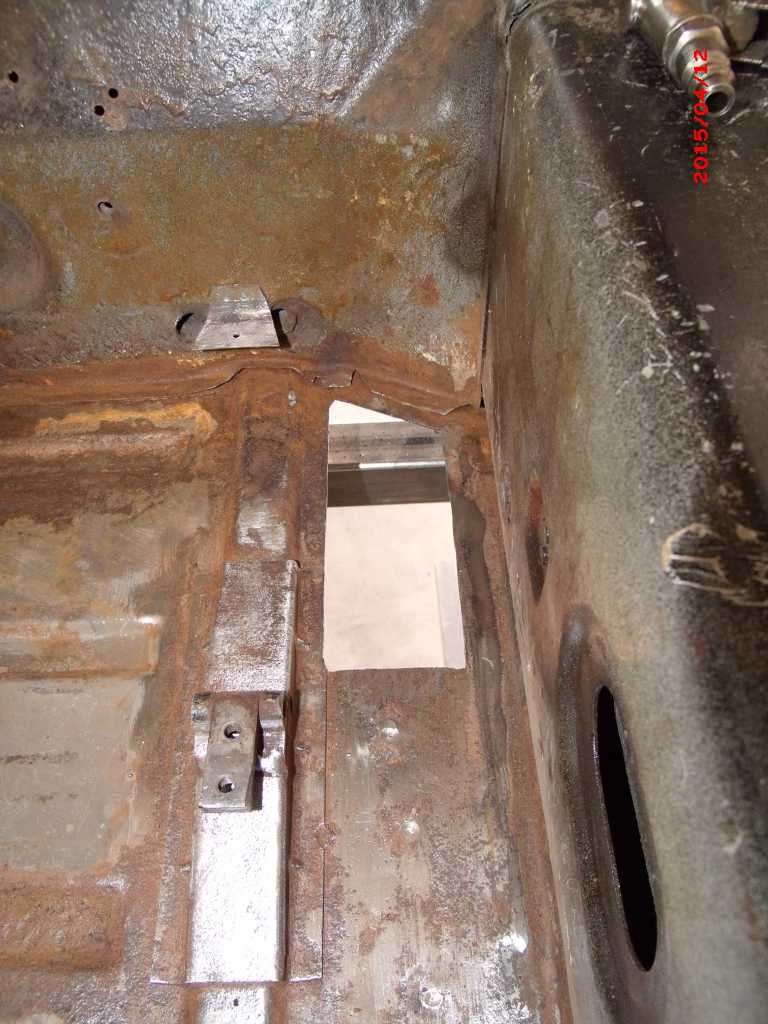 And the front-left cutout. 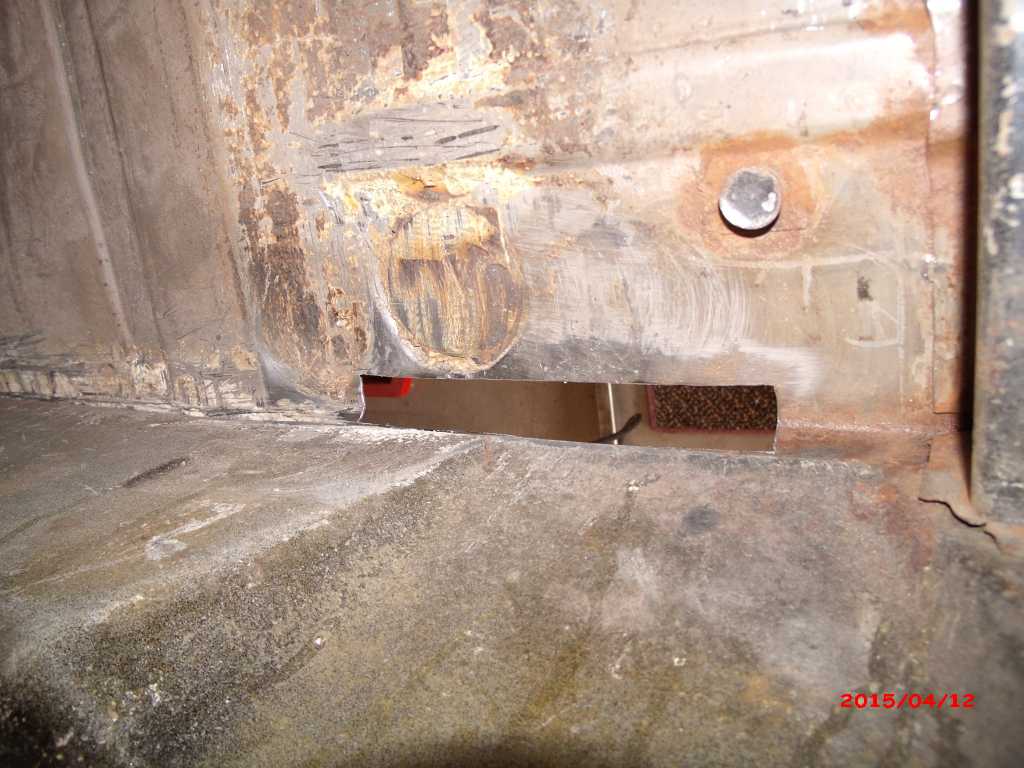 Got the pieces fit and ready to spot weld. 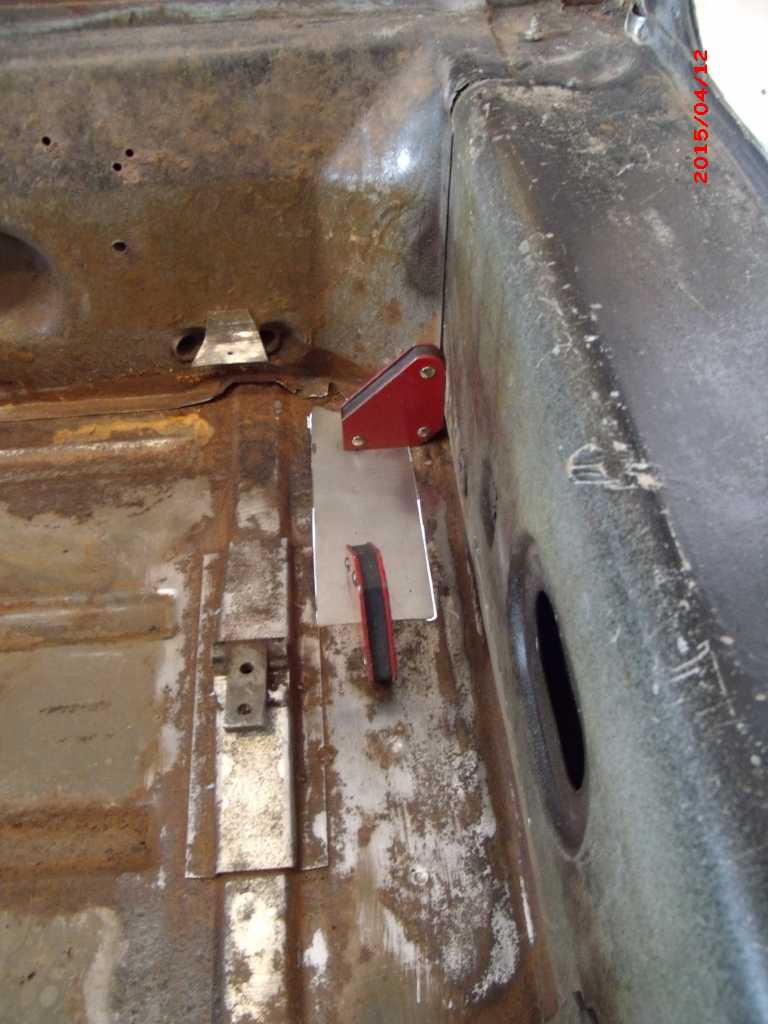 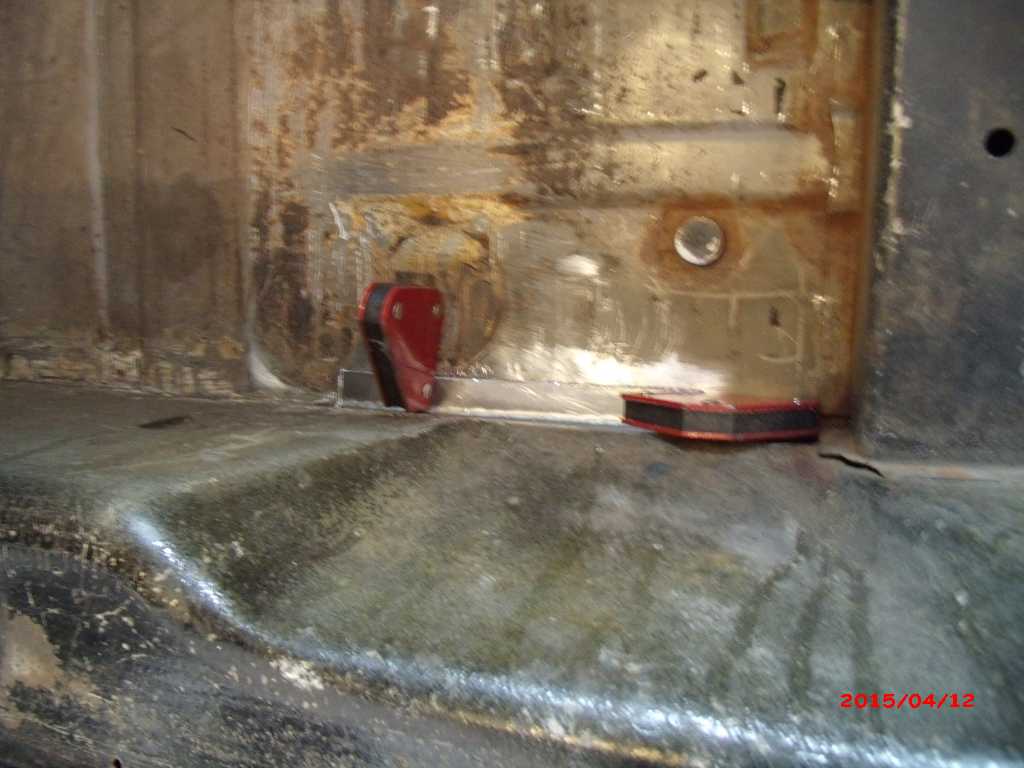 |
|
|
|
| 3d914 |
Apr 19 2015, 05:02 PM
Post
#392
|
|
Senior Member Group: Members Posts: 1,275 Joined: 24-September 03 From: Benson, AZ Member No.: 1,191 Region Association: Southwest Region |
Had some time this weekend to work on two 914's. My son wants to get his running and take over to CA. It's now in the garage on stands and getting prepped for some minor maintenance, gas tank replacement, and maybe fuel lines.
I dug out the Engman reinforcement kit I bought for the inner longitudinals in the cockpit. There are three pieces that cover three sides - left, back, & right. I wanted to check the fit for the left side and see whether it would block access to the patch I need to weld. . . Yep, it does. 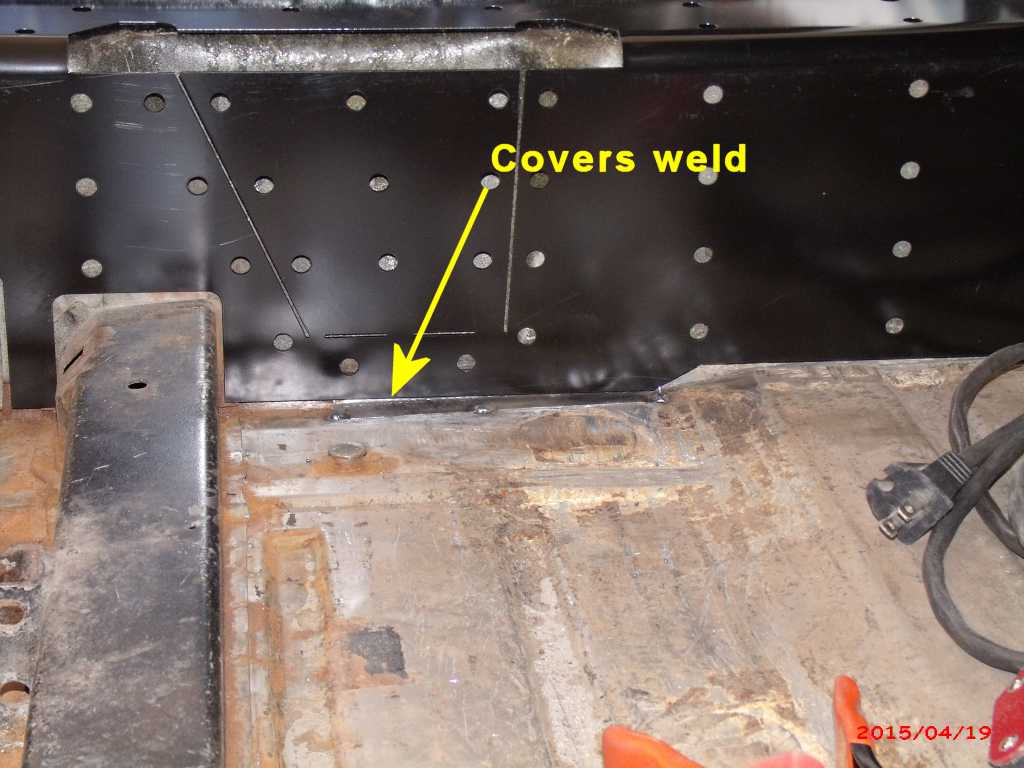 That means I'll have to do at least the side welding for the patch from the outside before I put the reinforcement piece in. I need to be able to get a copper backing plate behind the weld when working on the thin flooring material. Not what I was hoping for - but gotta be done that way. Here's shots of test fit for left, back & right sides. I'll get all the rust on the floors along these pieces cleaned and treated before starting to weld - since the corners won't be as easily accessible afterward. 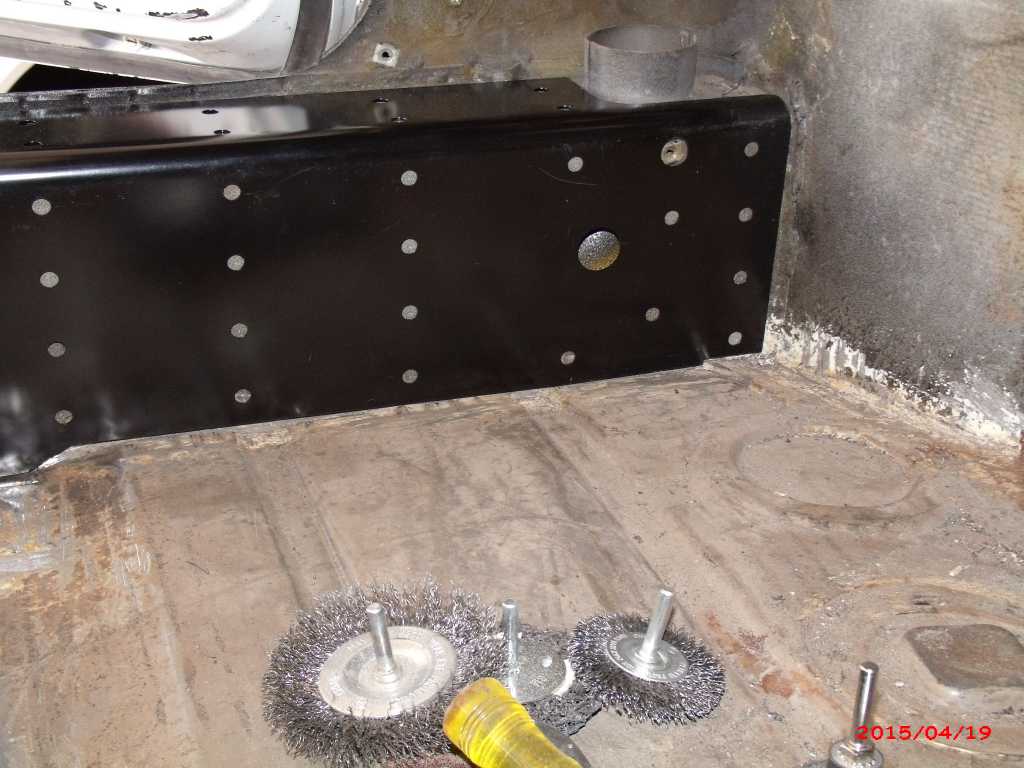 Note the angle on the back pieces. It measures roughly 22.5 degrees and fits good if you pre-bend the piece first. 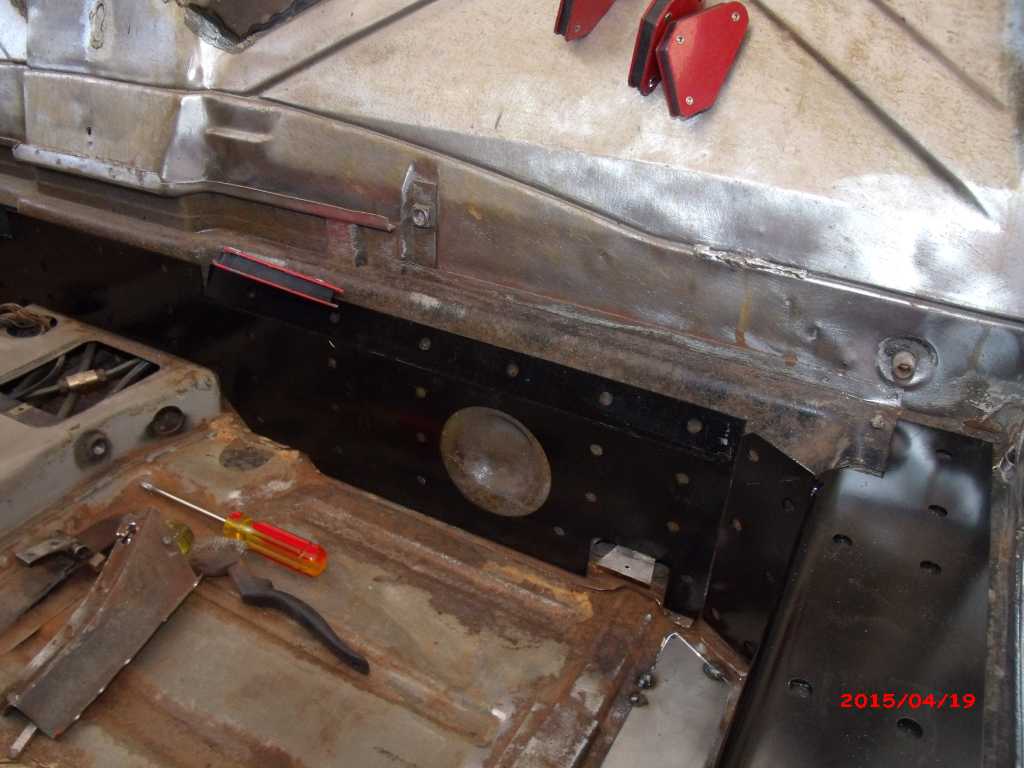 The right side still had some seam sealer which had to be cleaned away from bottoms and corners - otherwise the piece doesn't fit right. Instructions suggest an air chisel, but I had good luck with a hand wood chisel - feel like I have more control that way. Before seam sealer removal 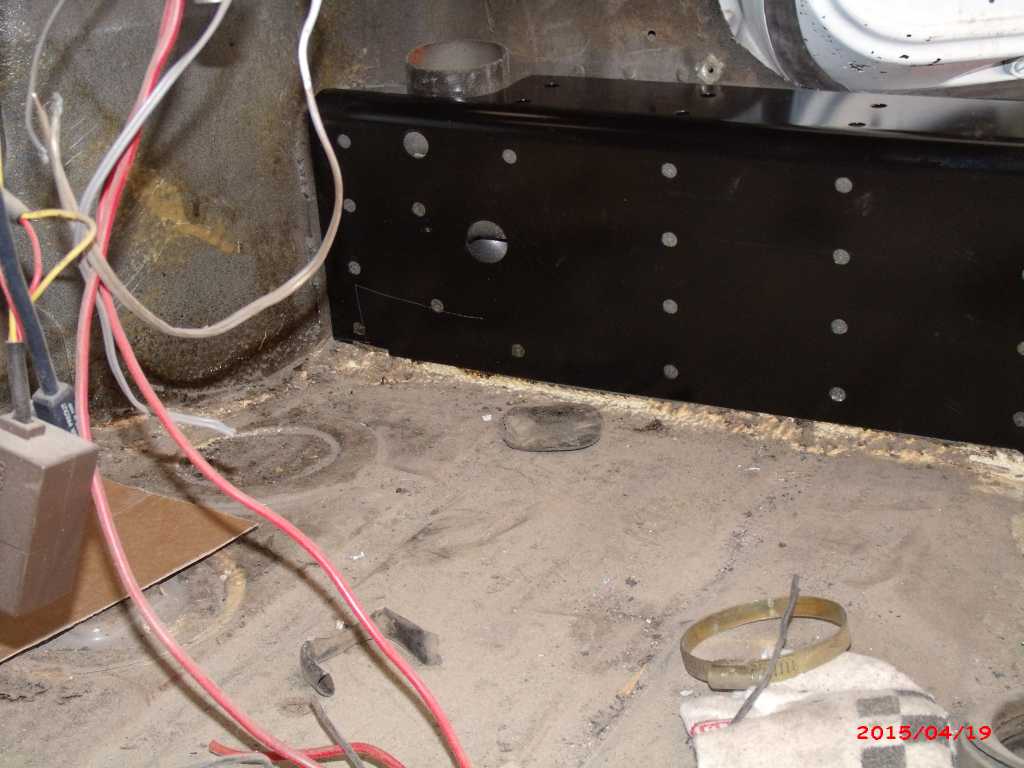 After 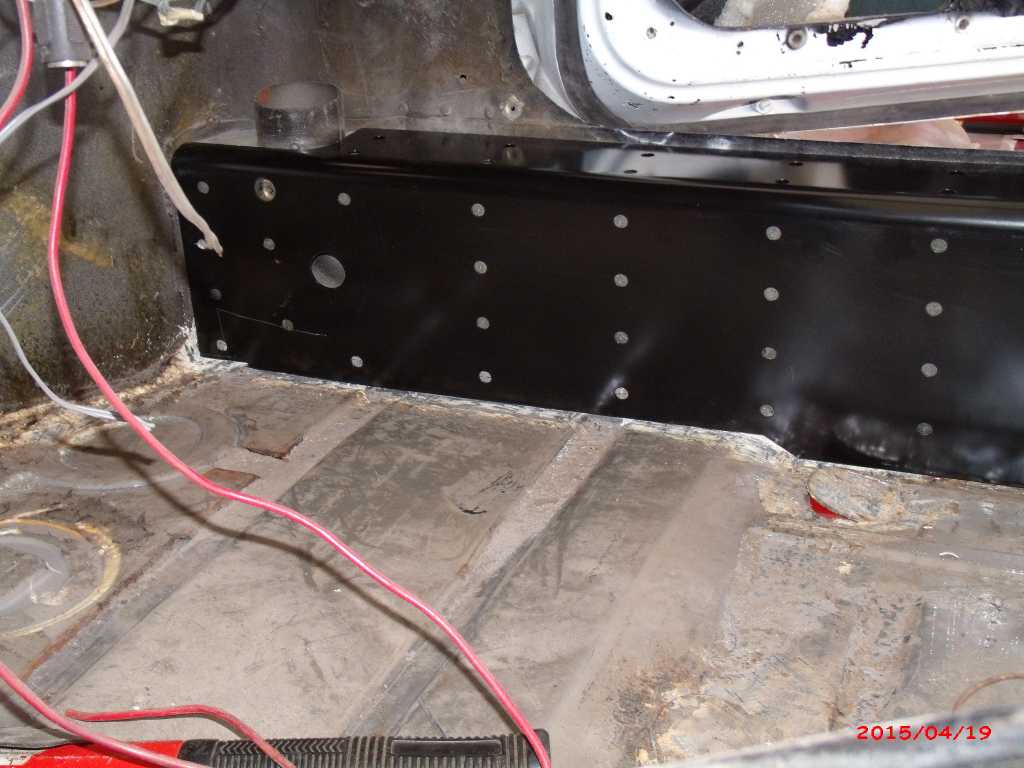 |
|
|
|
| 76-914 |
Apr 19 2015, 05:11 PM
Post
#393
|
|
Repeat Offender & Resident Subaru Antagonist Group: Members Posts: 13,896 Joined: 23-January 09 From: Temecula, CA Member No.: 9,964 Region Association: Southern California |
Don't forget to drill out for the 4 bolt holes that the seat back has. (IMG:style_emoticons/default/shades.gif)
|
|
|
|
| 3d914 |
May 8 2015, 07:11 PM
Post
#394
|
|
Senior Member Group: Members Posts: 1,275 Joined: 24-September 03 From: Benson, AZ Member No.: 1,191 Region Association: Southwest Region |
QUOTE(76-914 @ Apr 19 2015, 04:11 PM) Don't forget to drill out for the 4 bolt holes that the seat back has. (IMG:style_emoticons/default/shades.gif) You mean the back pad? My firewall is all custom. I wasn't going to use a stock pad - thought I'd come with something simpler. It would be prudent to leave access to the holes though - just in case I do something in fiberglass. (IMG:style_emoticons/default/idea.gif) |
|
|
|
| 3d914 |
May 8 2015, 07:18 PM
Post
#395
|
|
Senior Member Group: Members Posts: 1,275 Joined: 24-September 03 From: Benson, AZ Member No.: 1,191 Region Association: Southwest Region |
OK - one more thing to cross off the list of what's getting done. I wasn't happy with the material I used for the patches - it was too thin. So I cut them out and used some 16g instead. It was barely thicker than what's in the floor and welding went better:
Got both pieces (mostly) welded in - enough to get to the next step with the floor & inner longs. I'll do the finish work once the car's on the rotisserie. Now its on to rust treatment of the floor before I start more welding. 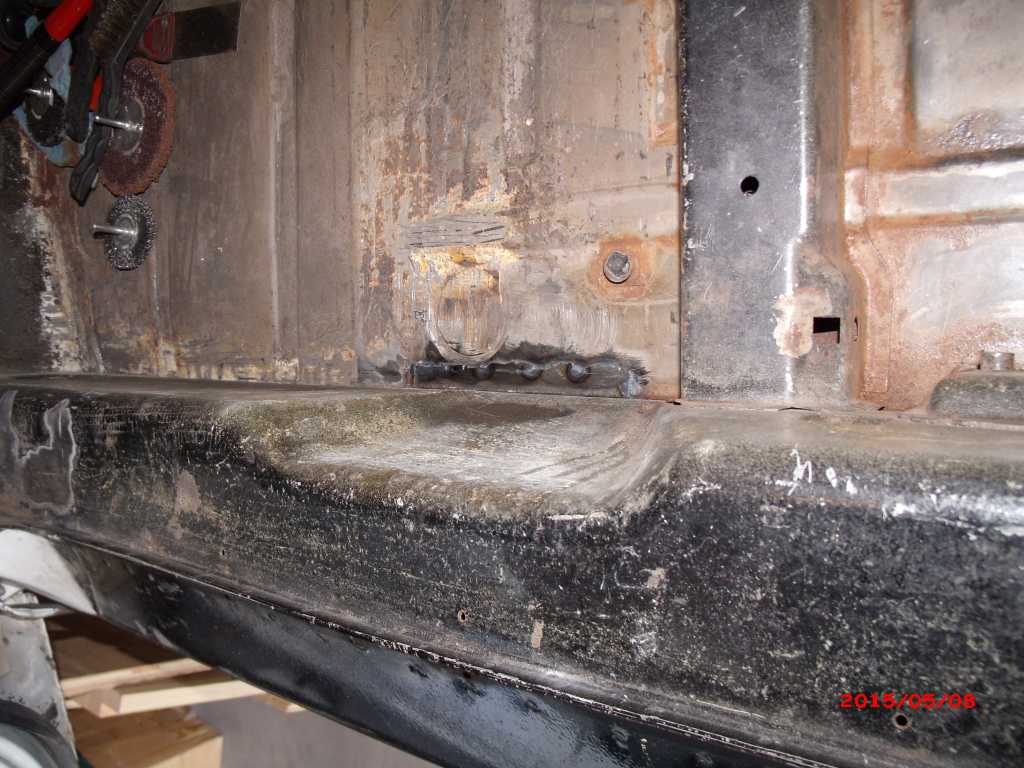 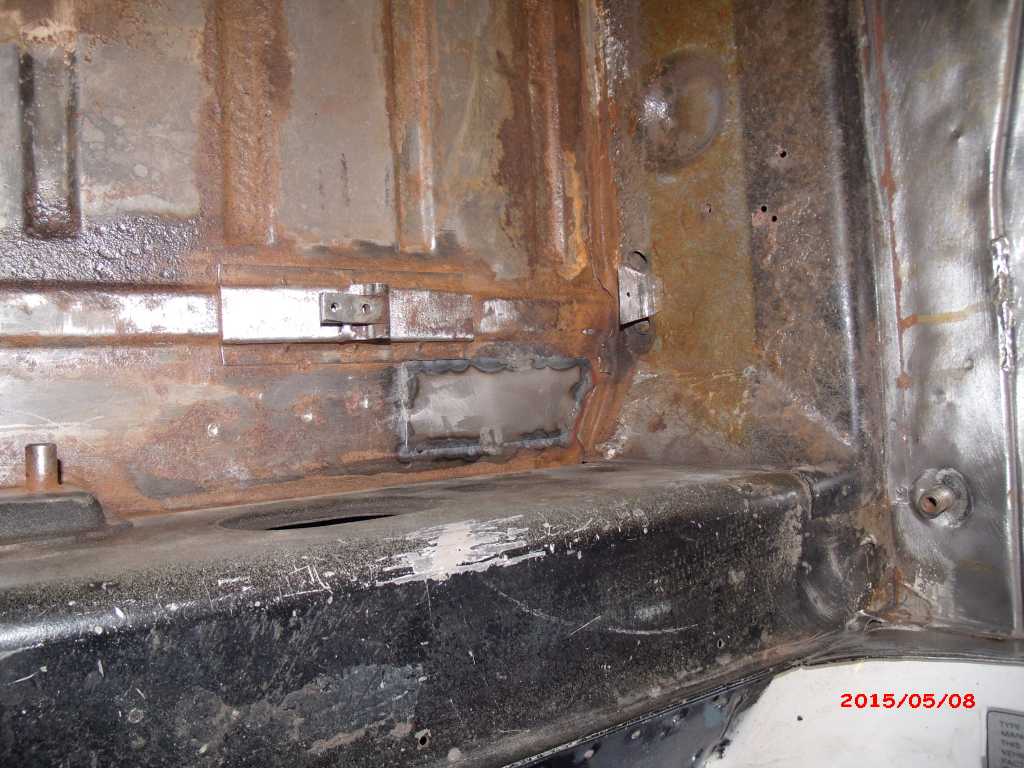 |
|
|
|
| 3d914 |
May 15 2015, 11:35 AM
Post
#396
|
|
Senior Member Group: Members Posts: 1,275 Joined: 24-September 03 From: Benson, AZ Member No.: 1,191 Region Association: Southwest Region |
Had some time during the week to make some metal plates to replace the dried out rubber ones that cover the four oval openings in the longs. I spot welded the rear ones in place and ground the welds down so they won't interfere with the reinforcement pieces. For the fronts, I'm going to widen the cutouts in the reinforcements so these plugs can be cemented or screwed in. This will allow me to use these in the future if I want to route coolant hoses from the front and thru the longs.
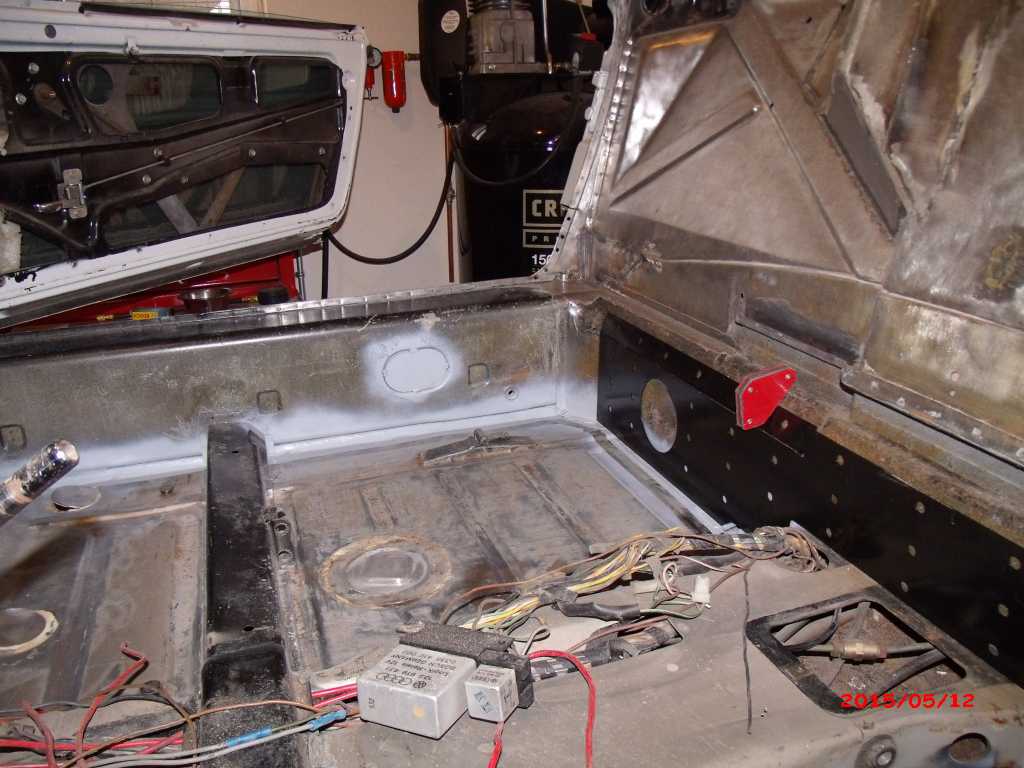 I also sprayed primer along the bottom edges where the longs meet the floor before I attach the reinforcements. It will difficult to get primer up in there once they're welded on. Now I just need to redrill some holes, add my cutouts, grind some edges, and clean the reinforcement pieces. I found some nice welding clamps at HF to hold pieces in place to start welding. I'll spread my welds out to tack each side down, then continue from there. 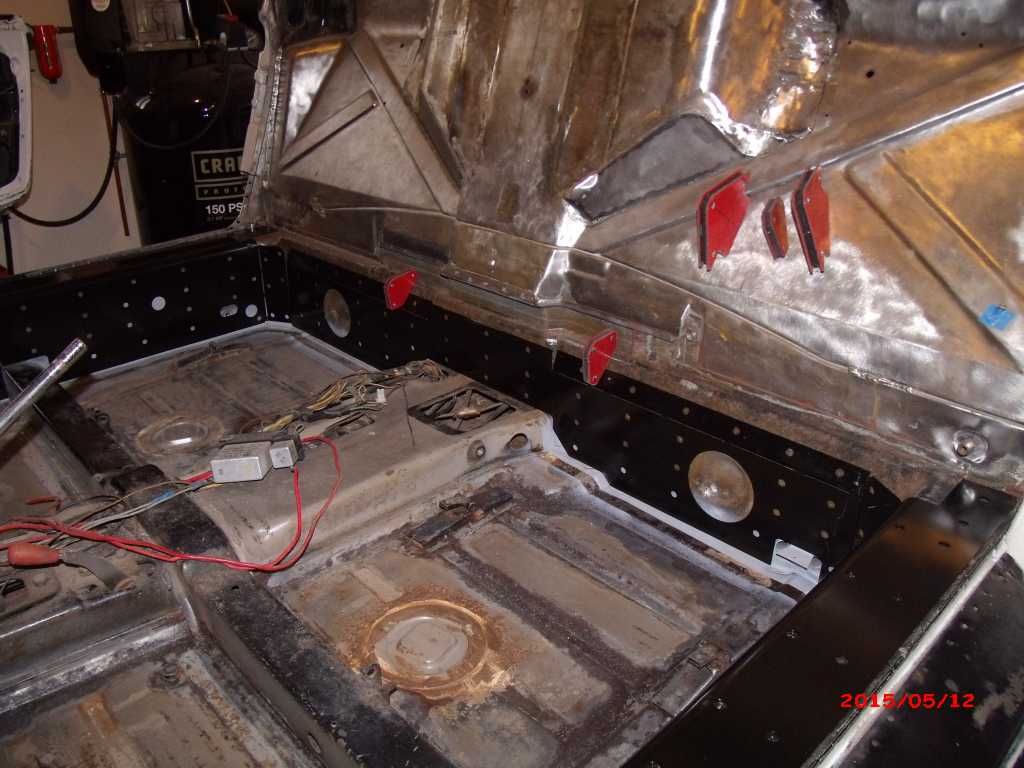 |
|
|
|
| andys |
May 15 2015, 12:06 PM
Post
#397
|
|
Advanced Member Group: Members Posts: 2,165 Joined: 21-May 03 From: Valencia, CA Member No.: 721 Region Association: None |
I used TEK screws to pull the plates flush against the chassis. They also helped the pull any concave sections, especially in the top of the longs, up against the plates. If you don't have door braces, then be sure to monitor the door gaps.
Good luck, Andys |
|
|
|
| Andyrew |
May 15 2015, 12:32 PM
Post
#398
|
|
Spooling.... Please wait Group: Members Posts: 13,380 Joined: 20-January 03 From: Riverbank, Ca Member No.: 172 Region Association: Northern California |
I used a hammer and just hammered just about every bit I needed to after a weld before moving to the next one. Tek screws would work I think, but welding and hammering is a lot of fun (IMG:style_emoticons/default/smile.gif)
|
|
|
|
| andys |
May 15 2015, 12:38 PM
Post
#399
|
|
Advanced Member Group: Members Posts: 2,165 Joined: 21-May 03 From: Valencia, CA Member No.: 721 Region Association: None |
To clarify; The TEK screws are temporary......I didn't mention that, but I figure you guys knew that.
Andys |
|
|
|
| 3d914 |
May 15 2015, 04:45 PM
Post
#400
|
|
Senior Member Group: Members Posts: 1,275 Joined: 24-September 03 From: Benson, AZ Member No.: 1,191 Region Association: Southwest Region |
QUOTE(andys @ May 15 2015, 11:38 AM) To clarify; The TEK screws are temporary......I didn't mention that, but I figure you guys knew that. Andys Yep, got it. I figure you used the type with the oversized head. Haven't bought any since the move here & not sure who carries them. If I needed a whole box I'd just get them off Amazon. FLAPS have them - or hardware store? |
|
|
|
|
1 User(s) are reading this topic (1 Guests and 0 Anonymous Users)
0 Members:

|
Lo-Fi Version | Time is now: 15th June 2026 - 12:23 AM |
Invision Power Board
v9.1.4 © 2026 IPS, Inc.