|
|
|
Porsche, and the Porsche crest are registered trademarks of Dr. Ing. h.c. F. Porsche AG.
This site is not affiliated with Porsche in any way. Its only purpose is to provide an online forum for car enthusiasts. All other trademarks are property of their respective owners. |
|
|

  |

| 3d914 |
 Nov 1 2015, 11:04 AM Nov 1 2015, 11:04 AM
Post
#441
|
|
Senior Member  Group: Members Posts: 1,275 Joined: 24-September 03 From: Benson, AZ Member No.: 1,191 Region Association: Southwest Region |
QUOTE(Chris H. @ Sep 20 2015, 04:38 PM)  Chris, thanks for the link and the cudos. This floor panel may get cut in the future so I was hoping to just find some pieces to patch. Haven't had any luck so I'm going to cut out the bad areas, shape replacements and weld in. |
   |

 
|
| 3d914 |
Nov 22 2015, 04:00 PM
Post
#442
|
|
Senior Member Group: Members Posts: 1,275 Joined: 24-September 03 From: Benson, AZ Member No.: 1,191 Region Association: Southwest Region |
OK, just so ya know I did get something done on the 914-SHO last weekend. Since I couldn't find a replacement section for the damage in the front trunk floor, I decided to cut it out, patch it and reshape it. Got err done!
Here's the damaged section 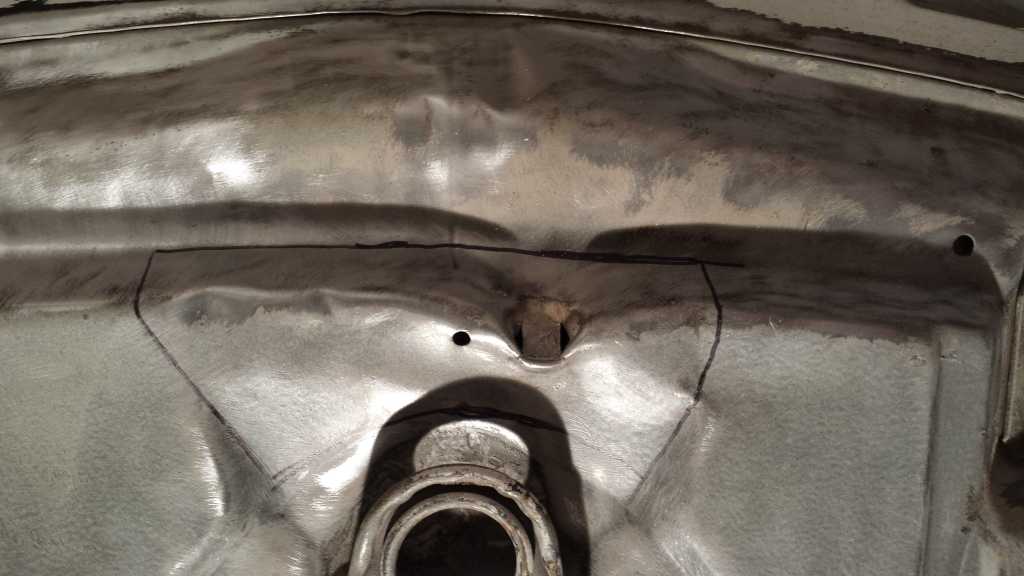 Repaired and ready to weld in 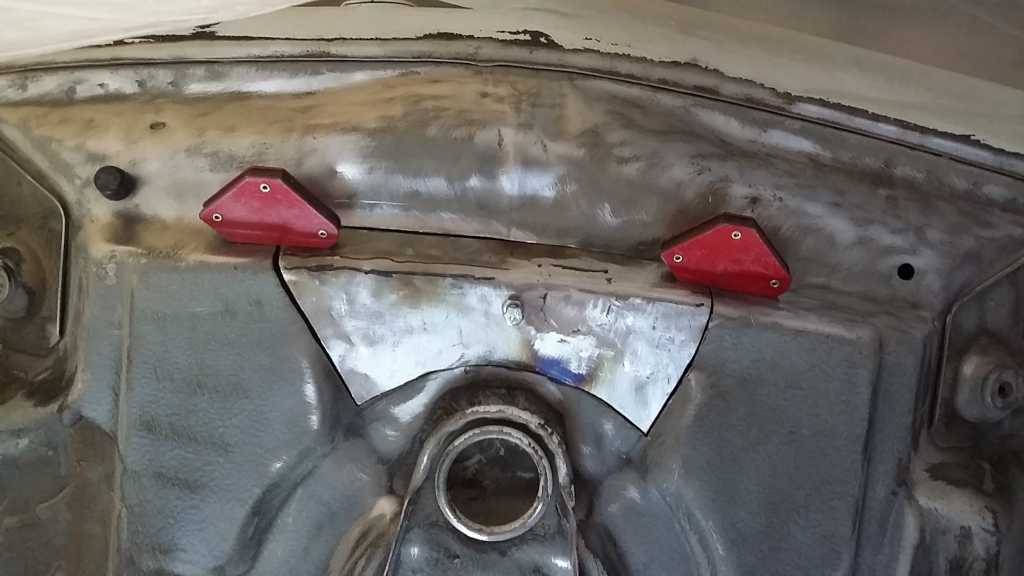 I was also able to get the left jack-donut plate welded in since there wasn't any repair work for the body on that side. 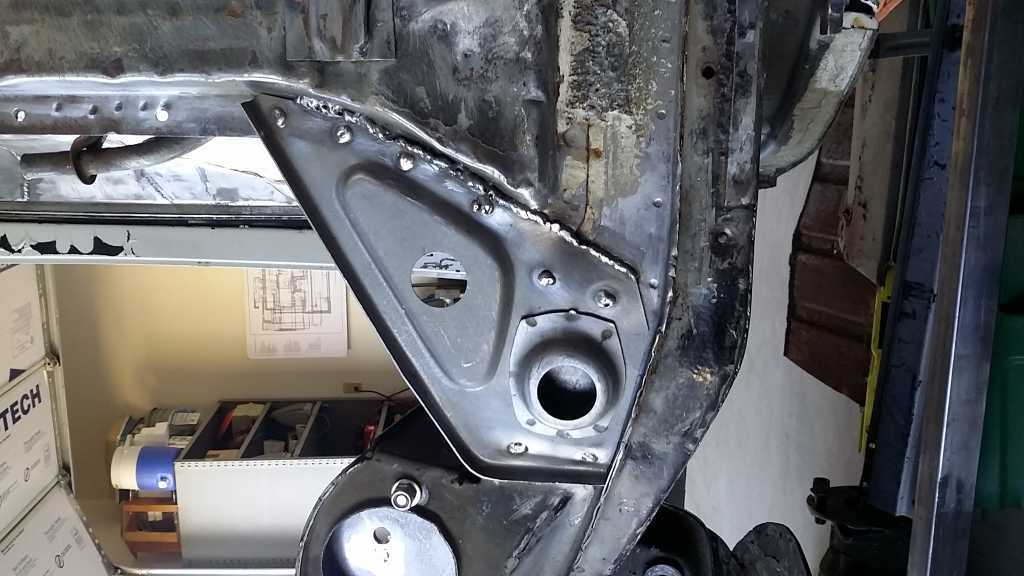 |
|
|
|
| 3d914 |
Nov 27 2015, 06:48 PM
Post
#443
|
|
Senior Member Group: Members Posts: 1,275 Joined: 24-September 03 From: Benson, AZ Member No.: 1,191 Region Association: Southwest Region |
Had some time today to rough-in the replacement piece up front. Also spent time pounding out the dents in the trunk floor. Just need to finish grinding welds, do a little reshaping, and prep for primer. Still trying to decide whether to take the car to someone to soda blast the remaining paint off, or try to do it myself.
  |
|
|
|
| 3d914 |
Nov 29 2015, 08:00 PM
Post
#444
|
|
Senior Member Group: Members Posts: 1,275 Joined: 24-September 03 From: Benson, AZ Member No.: 1,191 Region Association: Southwest Region |
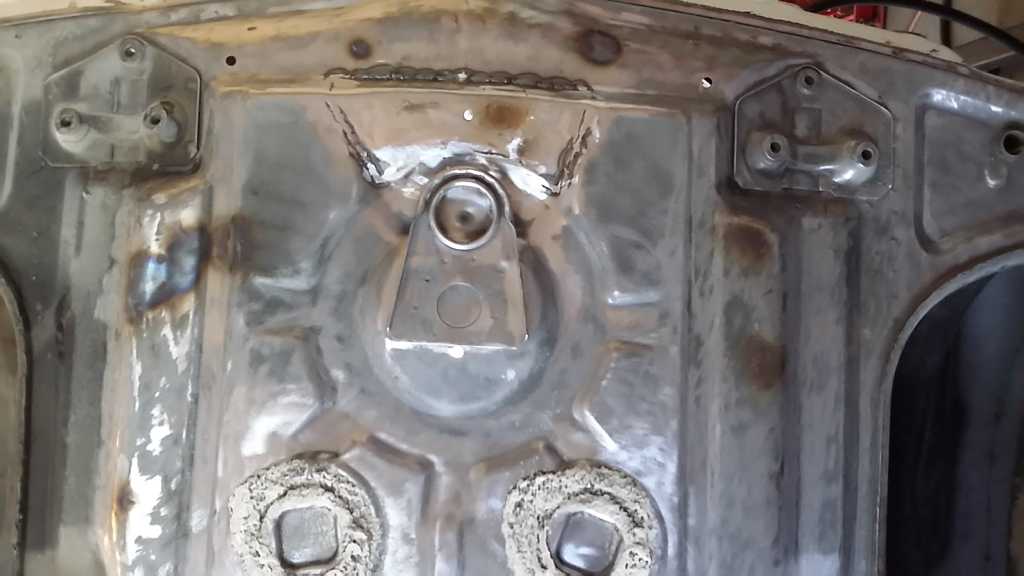
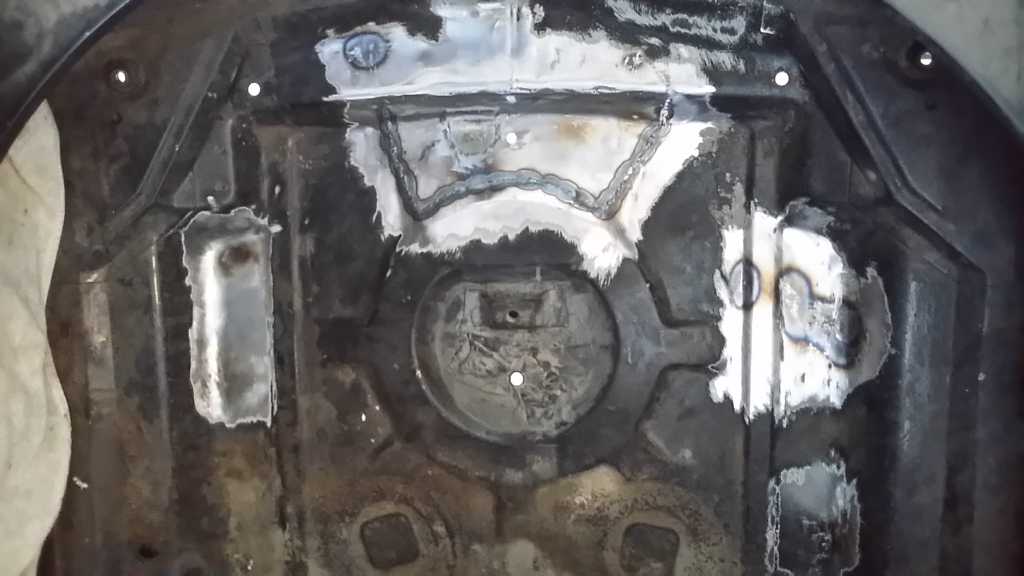
Finished cleaning up the welds on the repaired area inside & under the trunk. Also pounded out half a dozen dents in the trunk floor. SOoo, unless I find something else, the majority of metal repair work is done. Now I'll go around with some metal filler to clean up all the pinholes from welding, etc.
All that should be left are my modifications for the rear trunk and lid, but that's quite a bit itself. Underside view of repair. Discolored areas are from heating metal to fix deep dents. 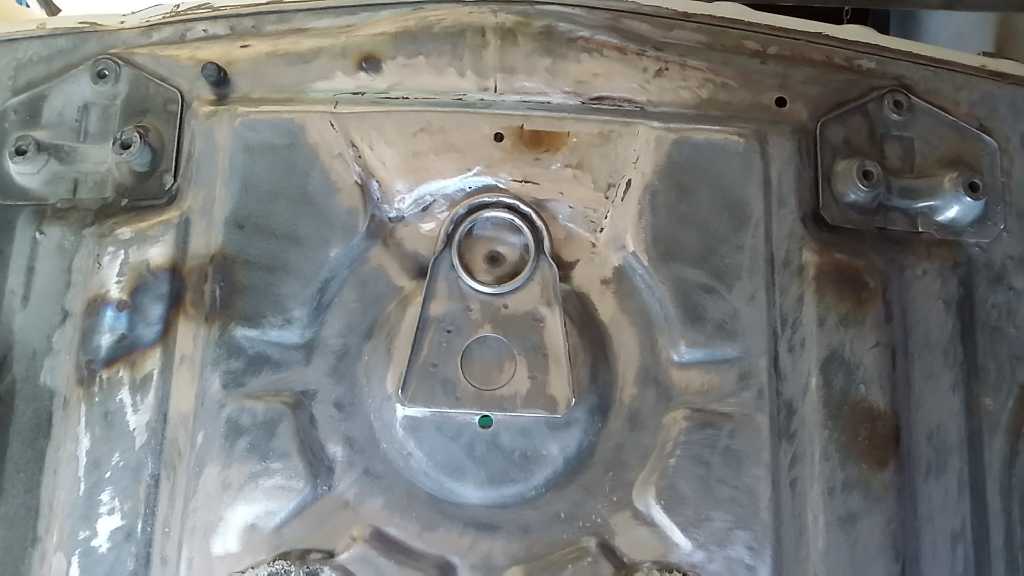 Inside the trunk needs a lot of paint removal. Still have to decide how I want to tackle that - especially with winter approaching. 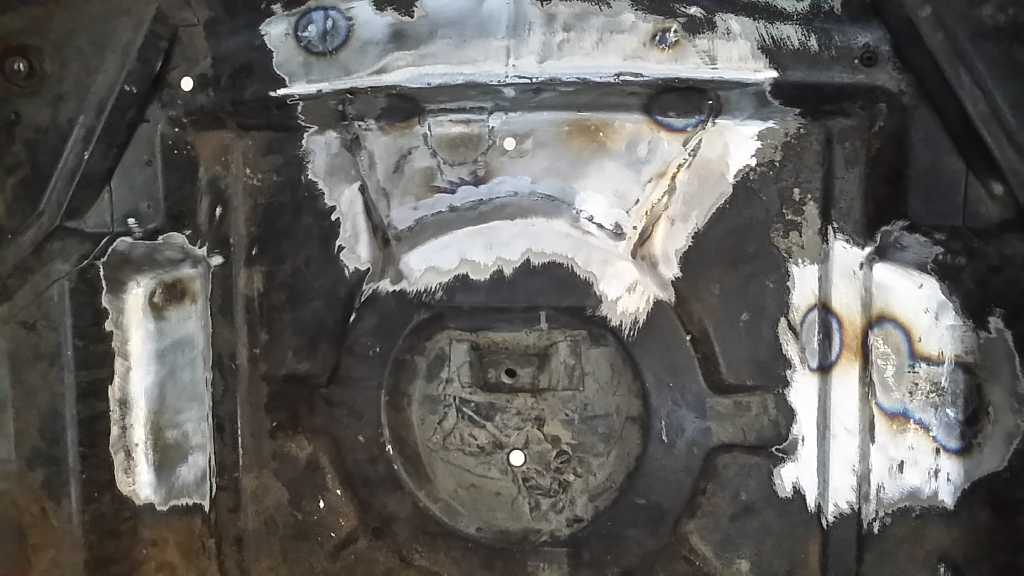 |
|
|
|
| Cairo94507 |
Nov 30 2015, 08:32 AM
Post
#445
|
|
Michael Group: Members Posts: 10,677 Joined: 1-November 08 From: Auburn, CA Member No.: 9,712 Region Association: Northern California |
Nice progress. I vote media blaster for paint removal.
|
|
|
|
| 3d914 |
Dec 6 2015, 11:49 AM
Post
#446
|
|
Senior Member Group: Members Posts: 1,275 Joined: 24-September 03 From: Benson, AZ Member No.: 1,191 Region Association: Southwest Region |
QUOTE(Cairo94507 @ Nov 30 2015, 07:32 AM) Nice progress. I vote media blaster for paint removal. Thanks Michael. I agree that's the best choice. Just a little over-whelmed that every task really requires two other tasks, so they start adding up fast. SO in order to do the media blasting, aside from getting the equipment, I also have to buy and build a platform to roll the body and dolly out into my gravel driveway. Not too difficult, just additional cost & time. OK, rant over. |
|
|
|
| 3d914 |
Dec 17 2015, 01:33 PM
Post
#447
|
|
Senior Member Group: Members Posts: 1,275 Joined: 24-September 03 From: Benson, AZ Member No.: 1,191 Region Association: Southwest Region |
Haven't been doing much on the 914-SHO. Been finishing my work bench so I can get the garage cleaned up. Ongoing projects have a habit of spreading all over the garage. Been pretty good at preventing that - but it's been kinda crazy lately. Feels good to have things somewhat under control. Yeh- I know its just an illusion - but it helps.
Now I just need some warm weather so I can lay down some primer and under-coating. Hope I don't have to wait for Spring. Plan is to get the body to paint in late spring. |
|
|
|
| 3d914 |
Dec 20 2015, 08:54 PM
Post
#448
|
|
Senior Member Group: Members Posts: 1,275 Joined: 24-September 03 From: Benson, AZ Member No.: 1,191 Region Association: Southwest Region |
Got my work-bench finished and everything moved over to it. Here's a pic before I put the bench top on. I used a solid-core door, cut to size. I'll add retracting wheels and other finishing touches later.
 For the 914, I was able to get a few hours in after replacing the timing belt on a neighbors truck. Got the right section ahead of the rear jack post finished and spot welded. Will get the rest of the welding done one evening this week. 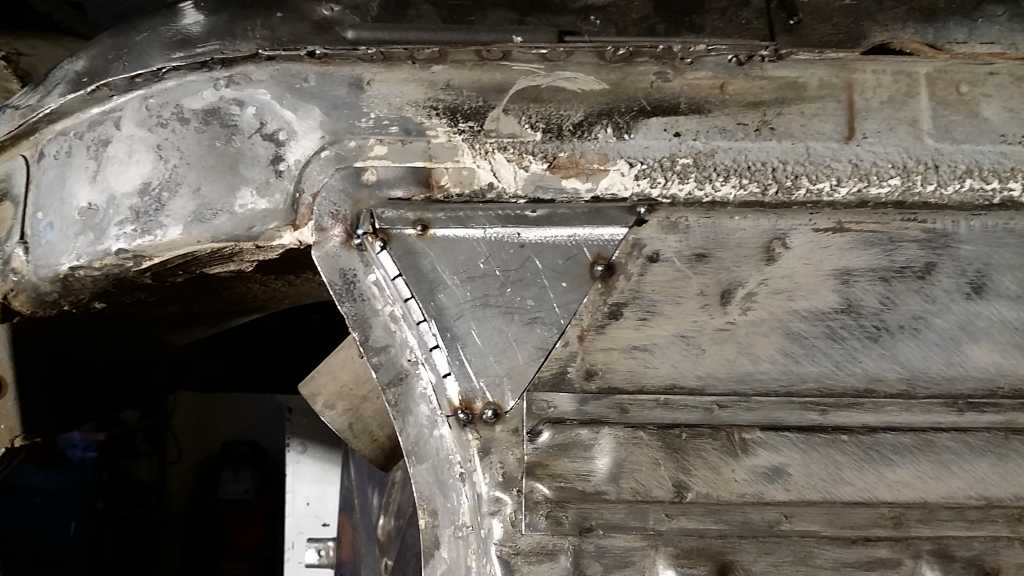 |
|
|
|
| 3d914 |
Dec 22 2015, 04:39 PM
Post
#449
|
|
Senior Member Group: Members Posts: 1,275 Joined: 24-September 03 From: Benson, AZ Member No.: 1,191 Region Association: Southwest Region |
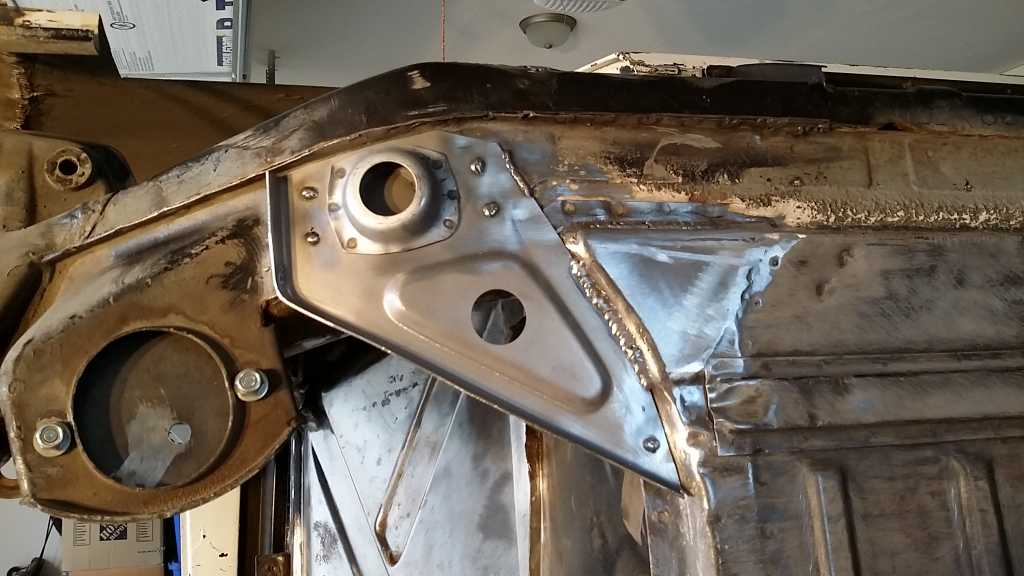
Had some time today to finish up the welding, grinding, and mounted the right jack post as well. Now if it would just warm up I can get the primer, seam-sealer & undercoating on the underside. Guess I'll have to work on the cockpit until then.
 |
|
|
|
| 3d914 |
Jan 2 2016, 12:10 PM
Post
#450
|
|
Senior Member Group: Members Posts: 1,275 Joined: 24-September 03 From: Benson, AZ Member No.: 1,191 Region Association: Southwest Region |
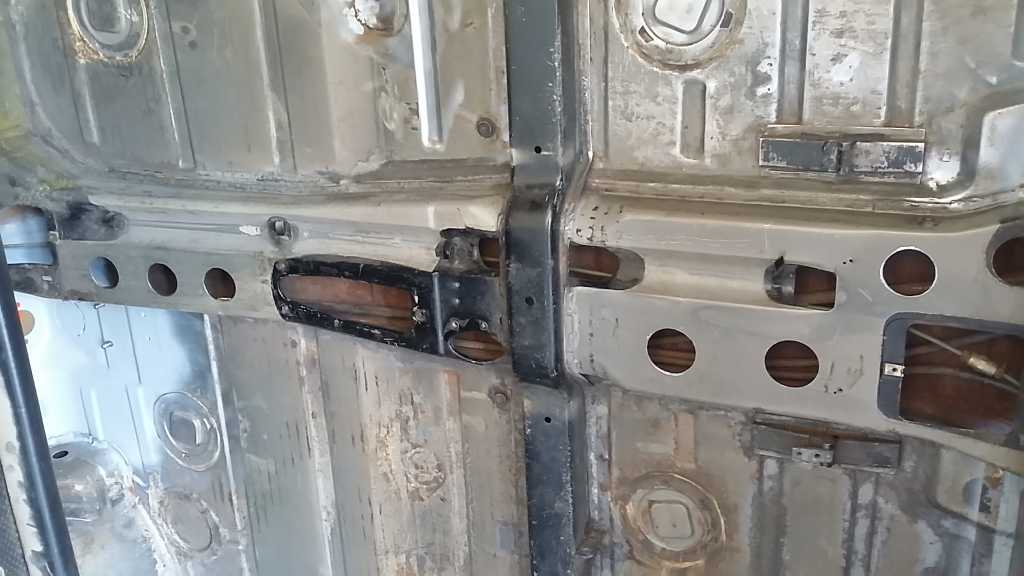
Well, the last thing I worked on for 2015 was getting the rest of the holes drilled in the center console. Aside from the good access for rust-proofing, it will also aid in routing the new fuel lines and tying down the break lines.
 |
|
|
|
| 3d914 |
Jan 29 2016, 09:49 PM
Post
#451
|
|
Senior Member Group: Members Posts: 1,275 Joined: 24-September 03 From: Benson, AZ Member No.: 1,191 Region Association: Southwest Region |
Had a decently warm day today so was able to get the wiring & under-dash relay panel pulled, along with the gauges, steering column, lower dash, etc.
All that's left is the dash top and the dash facia. I'd like to get this painted body color and just leave it metal, but I'll have to see how things will fit. 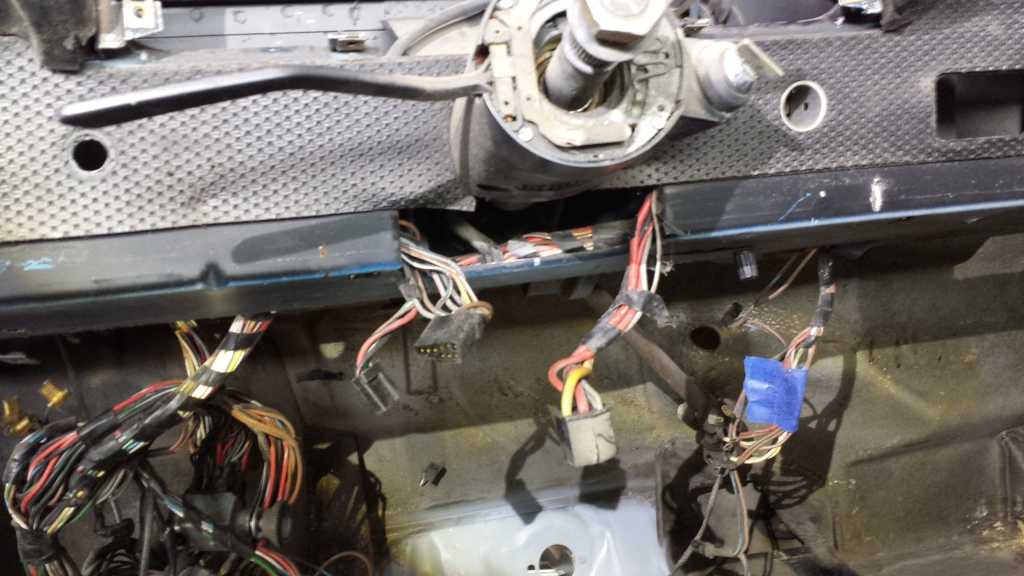 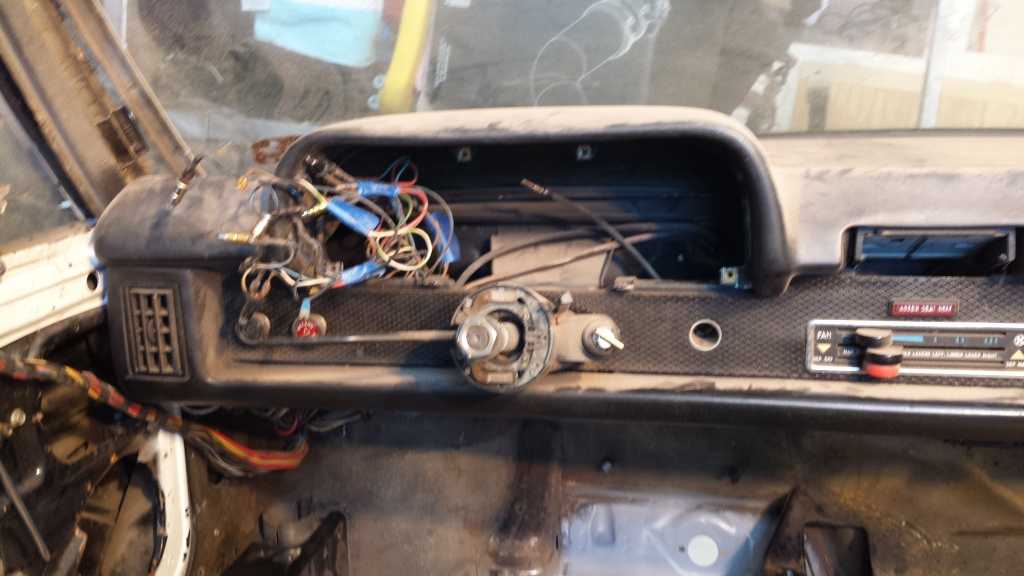  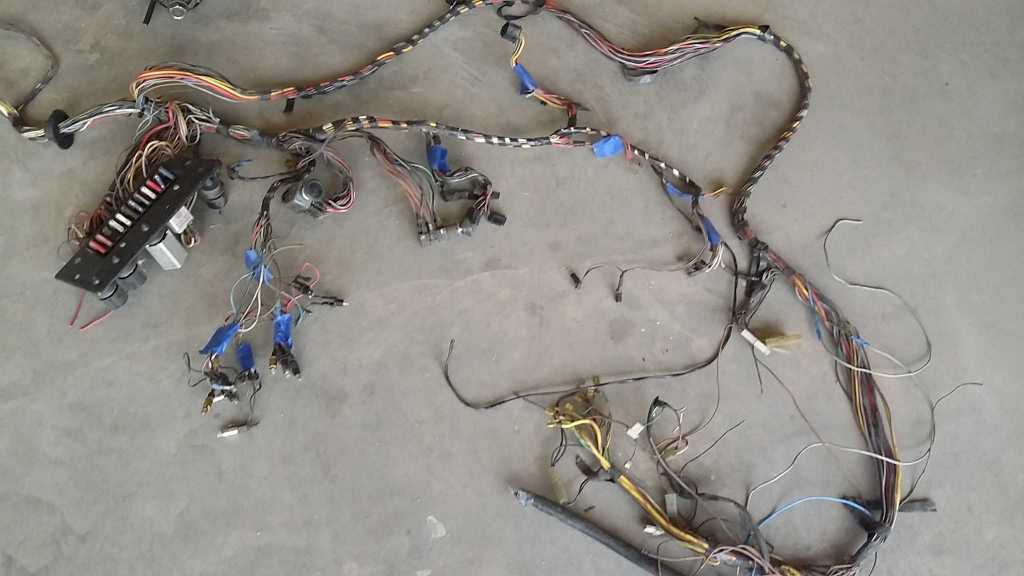 |
|
|
|
| 3d914 |
Jan 31 2016, 04:20 PM
Post
#452
|
|
Senior Member Group: Members Posts: 1,275 Joined: 24-September 03 From: Benson, AZ Member No.: 1,191 Region Association: Southwest Region |
Was able to get the upper dash off today. Just required locating the 9x10mm nuts holding it on. The two visible from the gauge area are the hardest & require a open-ended wrench. The rest can be done with a small 10mm socket wrench. I could get to everything form the doorways and didn't need to get upside-down!
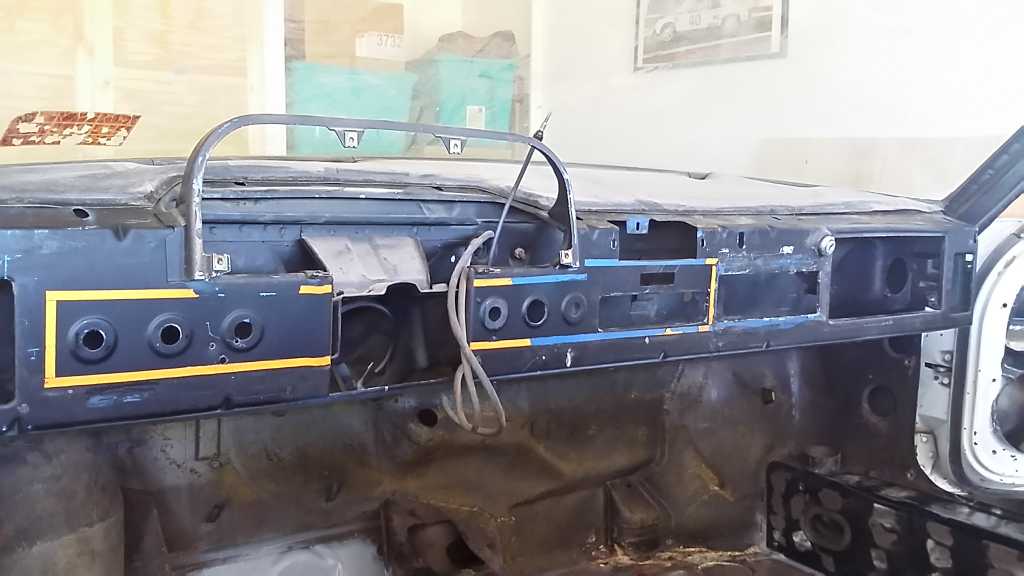 Now it's down to the inner dash. Aside from the two screws on each end, there are four 10mm nuts in the front trunk and one under the dash in the center. However, I'm not sure there is enough clearance to get it out with the windshield still in. Gonna have to search or post about that. 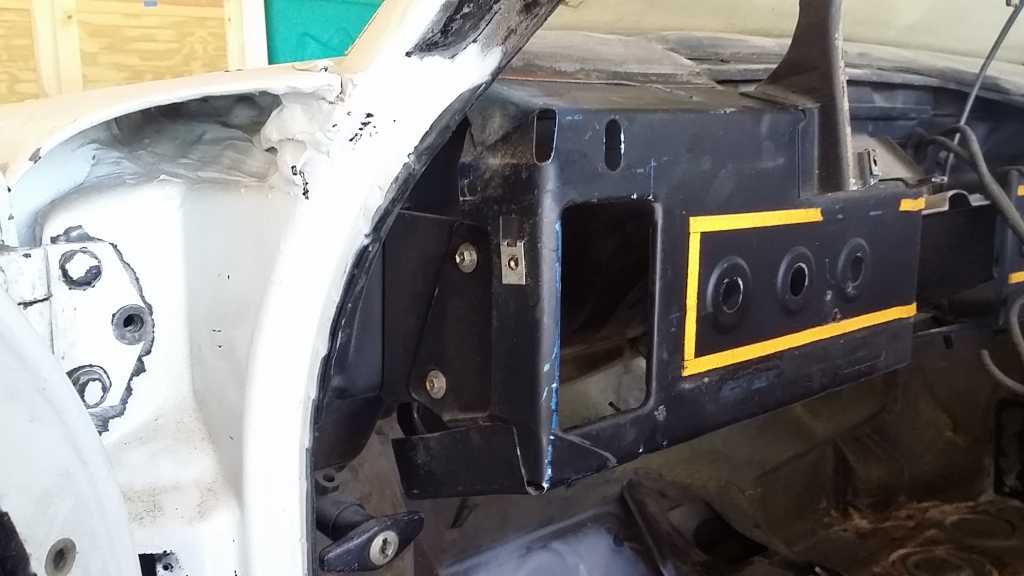 The dash face has a thin metal cover (off in this pic) that the plastic material is attached to. The material is going and I don't intend to replace it. The metal cover may be needed to make things fit properly. You can see the raised areas where switches go. With the thin metal cover this all looks smooth & flush. |
|
|
|
| Chris914n6 |
Jan 31 2016, 05:09 PM
Post
#453
|
|
Jackstands are my life. Group: Members Posts: 3,537 Joined: 14-March 03 From: Las Vegas, NV Member No.: 431 Region Association: Southwest Region |
Dash will come out no problem. The dry rubber seal between it and the windshield will be destroyed.
|
|
|
|
| 3d914 |
Jan 31 2016, 10:40 PM
Post
#454
|
|
Senior Member Group: Members Posts: 1,275 Joined: 24-September 03 From: Benson, AZ Member No.: 1,191 Region Association: Southwest Region |
QUOTE(Chris914n6 @ Jan 31 2016, 04:09 PM) Dash will come out no problem. The dry rubber seal between it and the windshield will be destroyed. Gotcha, thanks. |
|
|
|
| rick 918-S |
Jan 31 2016, 10:50 PM
Post
#455
|
|
Hey nice rack! -Celette Group: Members Posts: 21,288 Joined: 30-December 02 From: Now in Superior WI Member No.: 43 Region Association: Northstar Region |
Been watching this one for years. Nice progress.
|
|
|
|
| 3d914 |
Feb 3 2016, 08:11 PM
Post
#456
|
|
Senior Member Group: Members Posts: 1,275 Joined: 24-September 03 From: Benson, AZ Member No.: 1,191 Region Association: Southwest Region |
QUOTE(rick 918-S @ Jan 31 2016, 09:50 PM) Been watching this one for years. Nice progress. Thanks, Rick. |
|
|
|
| 3d914 |
Mar 8 2016, 07:05 PM
Post
#457
|
|
Senior Member Group: Members Posts: 1,275 Joined: 24-September 03 From: Benson, AZ Member No.: 1,191 Region Association: Southwest Region |
Got some time on the project this last weekend, but mostly mocking up pieces for closing off the trunk firewall that was cutout for the SHO intake and TB.
Did get to spend some time with our A-10 crew chief building a shelf unit she wanted for her bedroom. Nice having someone with an interest in this kind of work. 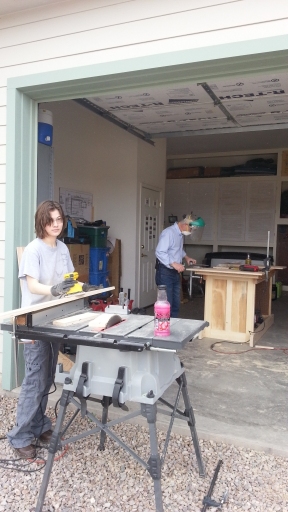 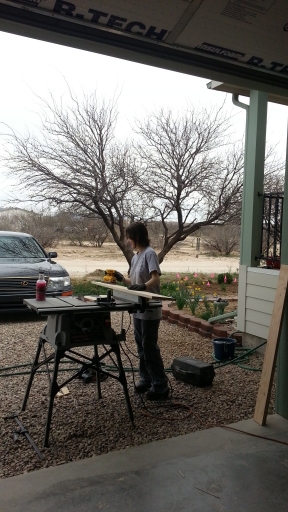 |
|
|
|
| 3d914 |
Mar 12 2016, 05:15 PM
Post
#458
|
|
Senior Member Group: Members Posts: 1,275 Joined: 24-September 03 From: Benson, AZ Member No.: 1,191 Region Association: Southwest Region |
Doing mostly maintenance stuff on other cars this weekend. Should get some time Sunday to cut metal for the 914-SHO project.
Got some time to finish mobilizing my work bench. Now I can get it out, use it, and put it away with ease. The wheels are mounted to some scrap pieces and hinged to the base of the bench. When in storage, the wheels are down so I can roll it around. When in use, they are swung out so the bench sits on its wide base - that way it doesn't move when I'm pounding on things. 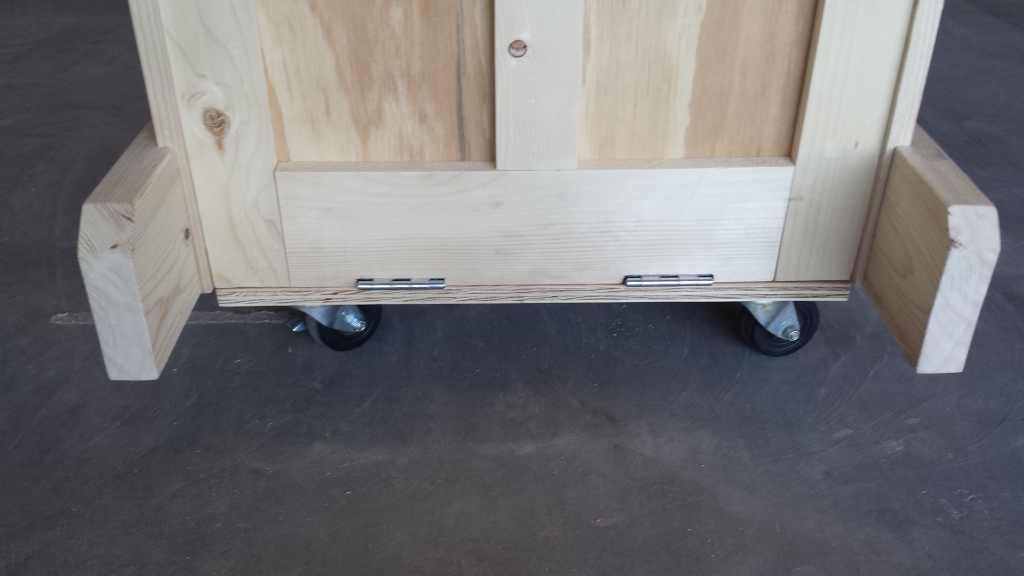  |
|
|
|
| 3d914 |
Mar 20 2016, 07:58 PM
Post
#459
|
|
Senior Member Group: Members Posts: 1,275 Joined: 24-September 03 From: Benson, AZ Member No.: 1,191 Region Association: Southwest Region |
Took some time this weekend to try and close off the rear firewall to the trunk. Since I'm trying to reuse some of the original panels - its been slow piecing things together.
Also getting to use the new work-bench. This is the first metal-work/welding that I've done on a flat surface. Everything else has been welding in-place, on the car. First I had to add a piece to close off the ribs. 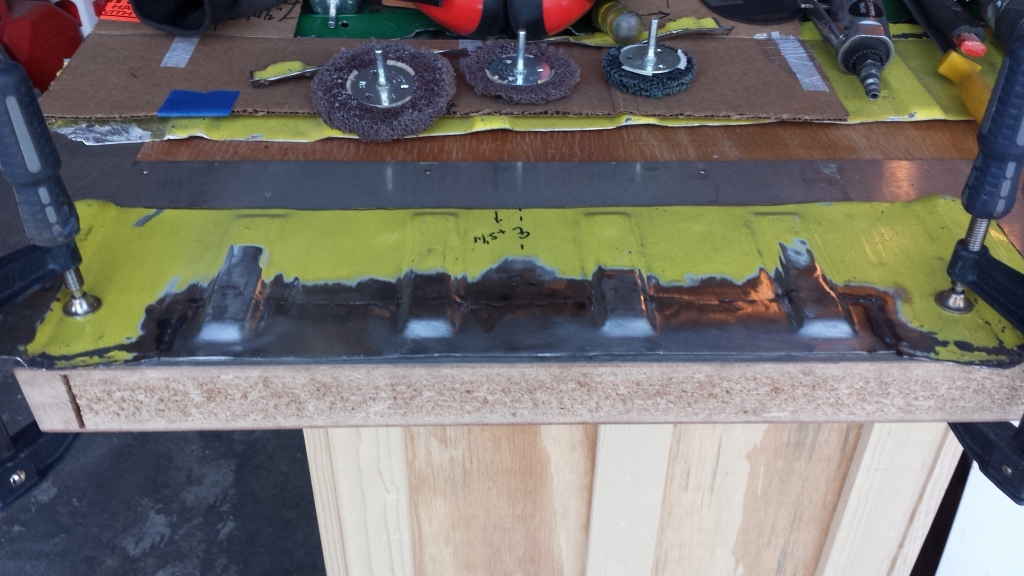 Then had to extend the lower section so I can cut-off the excess. 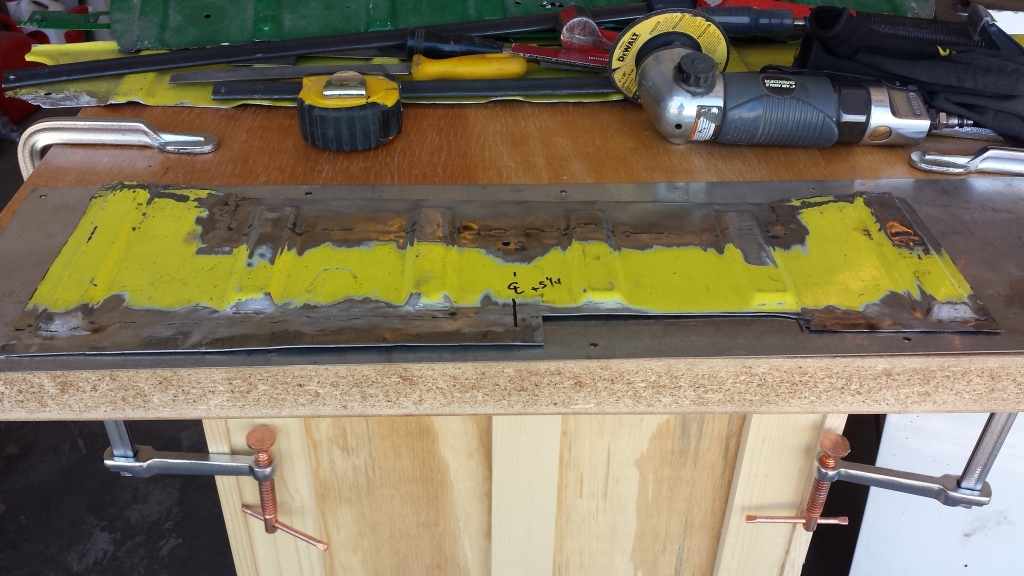 This is where it will go. The gap just off right-center is how much the whole piece is lowered, marked, then trimmed. 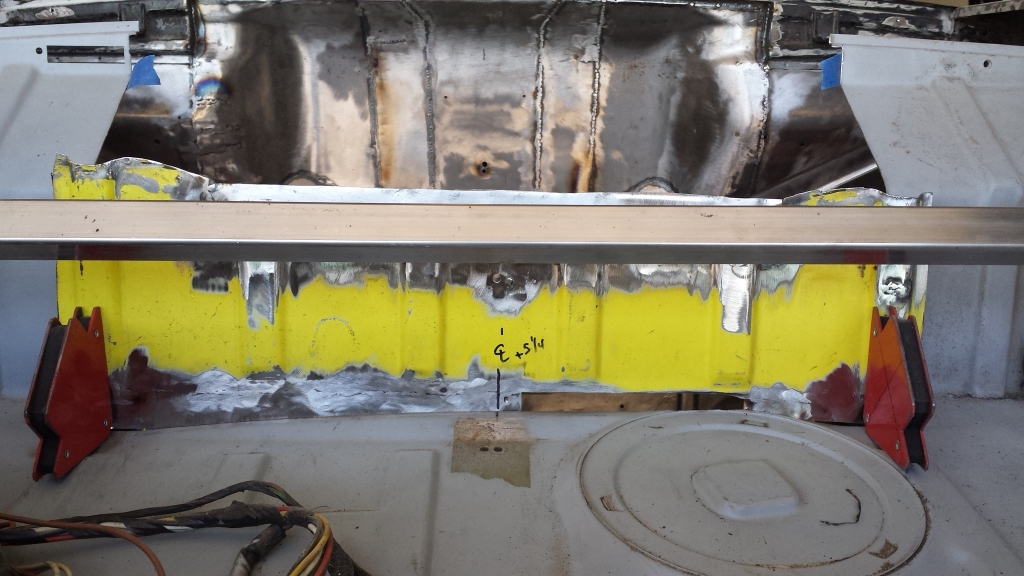 |
|
|
|
| bryanc |
Apr 25 2016, 10:54 PM
Post
#460
|
|
Member Group: Members Posts: 322 Joined: 9-August 04 From: San Antonio, Tx Member No.: 2,495 Region Association: Southwest Region |
Gerard, some technical reference if you need:
1989 Shogun https://www.youtube.com/watch?v= 3XR9SoQU16c |
|
|
|
|
2 User(s) are reading this topic (2 Guests and 0 Anonymous Users)
0 Members:

|
Lo-Fi Version | Time is now: 22nd June 2026 - 09:16 AM |
Invision Power Board
v9.1.4 © 2026 IPS, Inc.