|
|
|
Porsche, and the Porsche crest are registered trademarks of Dr. Ing. h.c. F. Porsche AG.
This site is not affiliated with Porsche in any way. Its only purpose is to provide an online forum for car enthusiasts. All other trademarks are property of their respective owners. |
|
|

  |

| tygaboy |
 Nov 13 2016, 07:36 PM Nov 13 2016, 07:36 PM
Post
#501
|
|
914 Guru  Group: Members Posts: 5,824 Joined: 6-October 15 From: Petaluma, CA Member No.: 19,241 Region Association: Northern California |
DUDE! Looks like your careful planning and patience is paying off. Fit is looking really nice. (IMG:style_emoticons/default/smilie_pokal.gif)
|
   |

 
|
| 3d914 |
Nov 21 2016, 05:34 PM
Post
#502
|
|
Senior Member Group: Members Posts: 1,275 Joined: 24-September 03 From: Benson, AZ Member No.: 1,191 Region Association: Southwest Region |
Got a little more done on the right panel this weekend. Weekend went kind of crappy, so didn't get all I wanted done. Decided to take Monday off to make up for it. Glad I did.
Welding on the panel went well. Just combined multiple spot welds at alternating positions and used compressed air to keep things from getting too hot. I'll save the grinding with a 80 grit flap disk for during the weekday evenings. 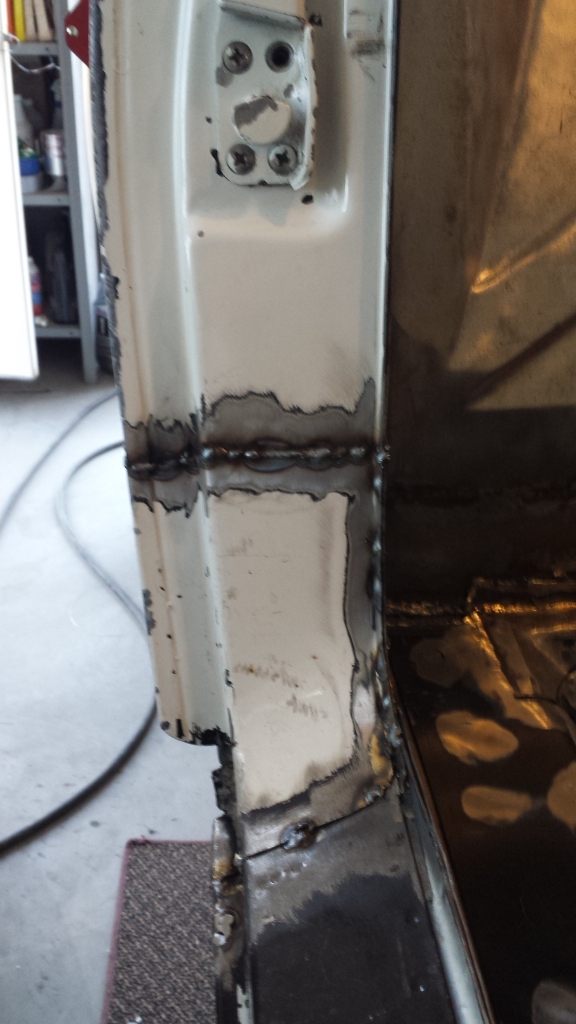 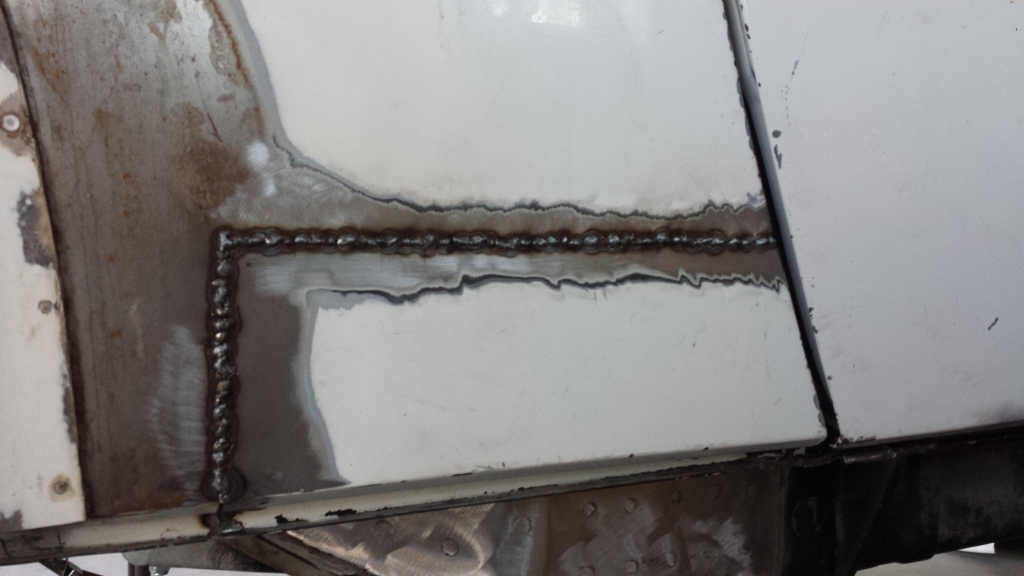 Picked up my cut mounting brackets for the trunk hinges. Started working on the flanges already and will finish the others once I get the circular flange tool in this week. 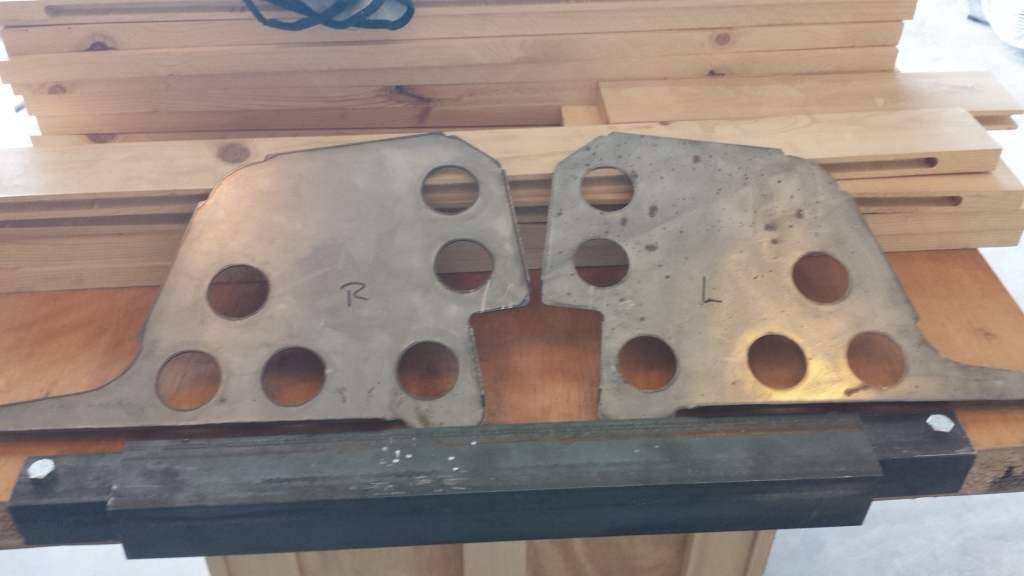 Also had time to start cutting the air box out of the 1/8 inch ABS sheets I found online. I was concerned about the amount of heat this may take in the back of the trunk above where the muffler sits, but I'll be retaining the stock heat shield and will also have this mounted a couple inches up off the trunk floor. We'll see how it goes. I may need to rebuild later from slightly heavier material. 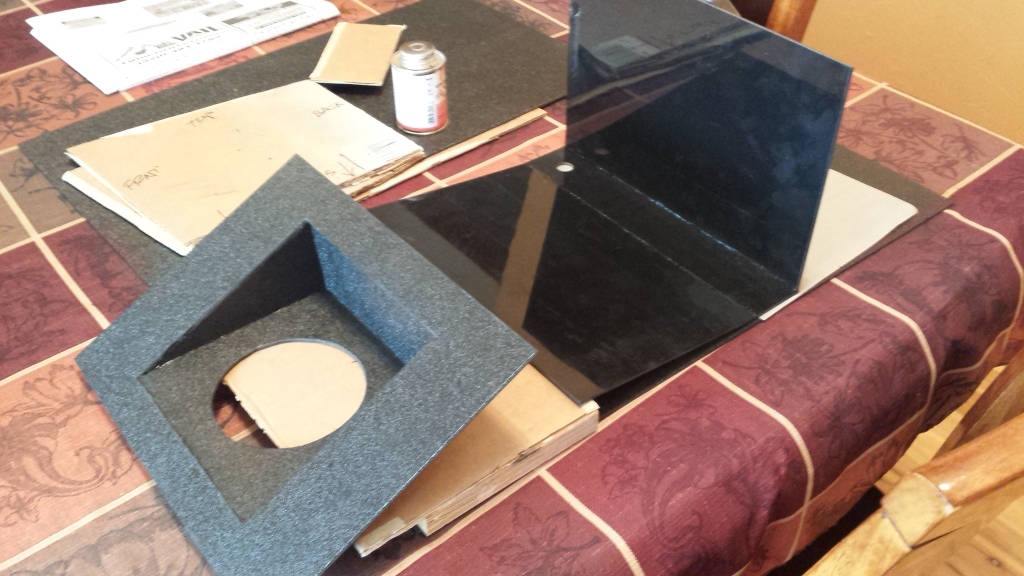 |
|
|
|
| 3d914 |
Nov 24 2016, 01:36 PM
Post
#503
|
|
Senior Member Group: Members Posts: 1,275 Joined: 24-September 03 From: Benson, AZ Member No.: 1,191 Region Association: Southwest Region |
Had to move part of the work indoors because the garage is getting too cold to work with this plastic. The glue I'm using also requires warmer temps. Next time though I think I'll try a plastic welder over the glue, or find glue in a better dispenser so it can be applied cleaner.
Now I just need to add the rubber seal that goes along the top edge & mates with the underside of the trunk lid. 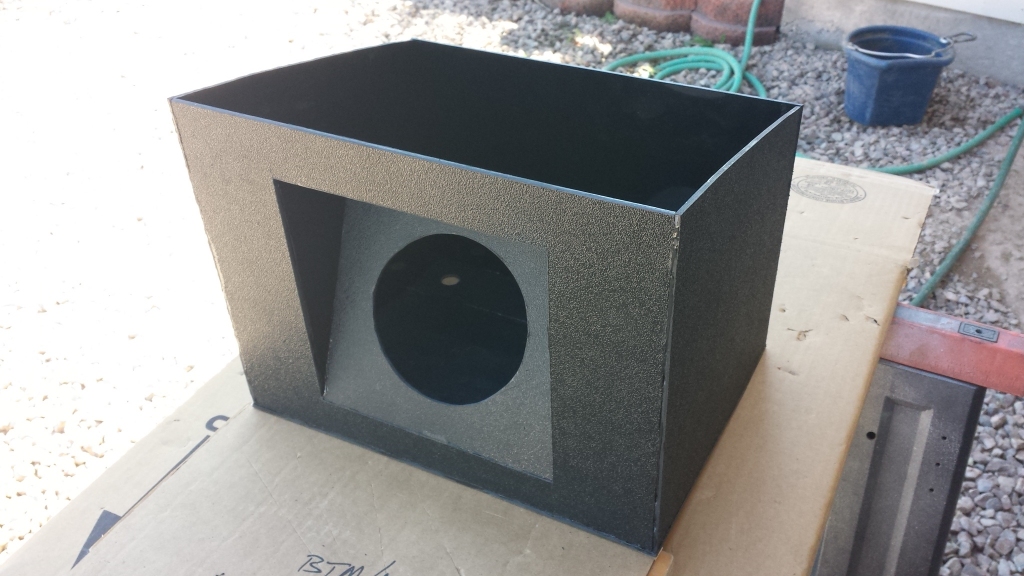 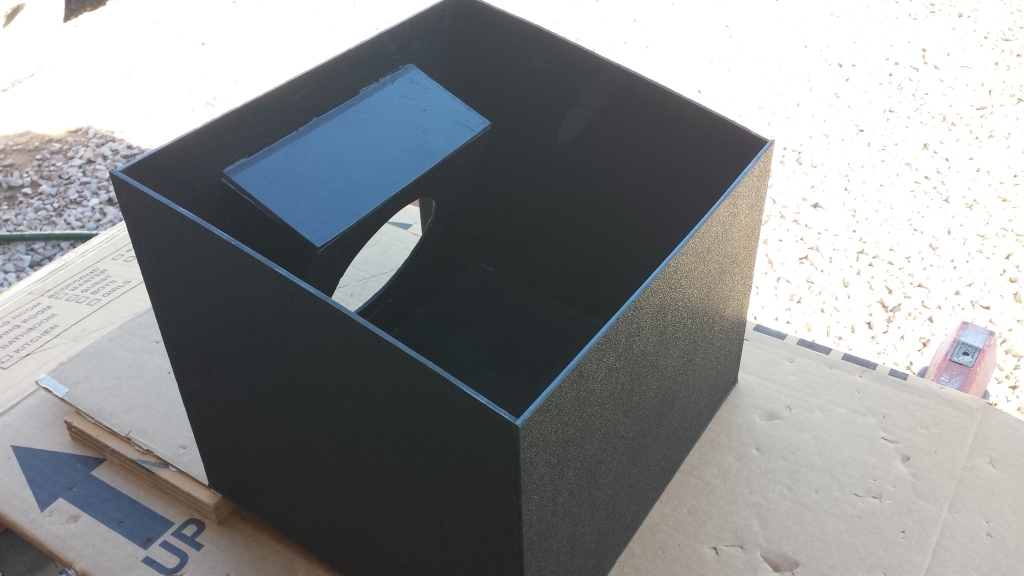 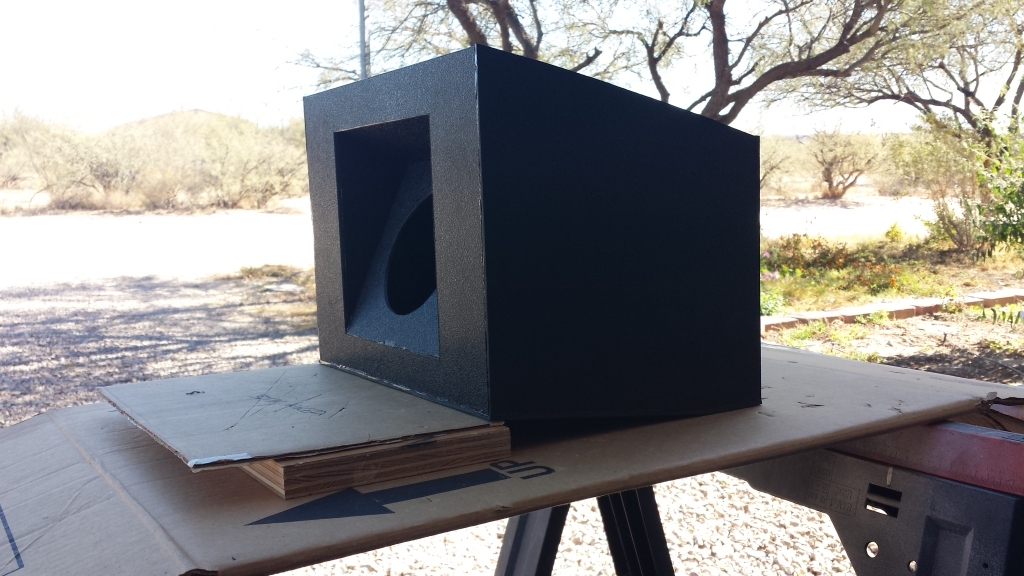 |
|
|
|
| 3d914 |
Nov 27 2016, 10:27 PM
Post
#504
|
|
Senior Member Group: Members Posts: 1,275 Joined: 24-September 03 From: Benson, AZ Member No.: 1,191 Region Association: Southwest Region |
Didn't work on the 914 over Thanksgiving weekend. Promised my wife I'd get the flagstone laid out for the patio and work on setting her step stones. I did get the flagstone laid out and numbered - and fortunately I won't have to do much chipping/cutting for fit. Now I'll have to pull it up to put the aggregate down to set the stones in.
Had just enough daylight left today to get six of her 18 step stones set in mortor. 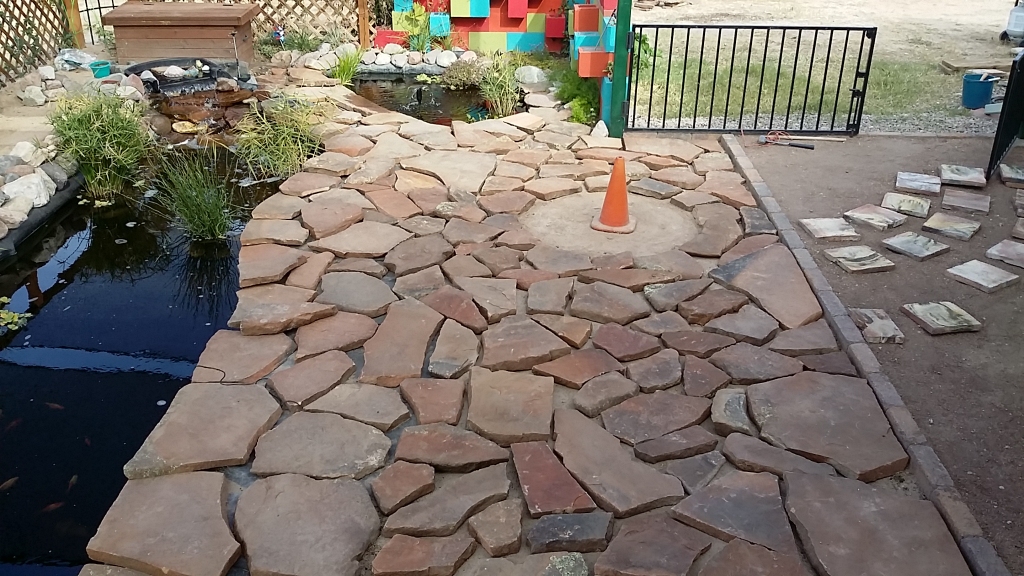 |
|
|
|
| 3d914 |
Dec 2 2016, 04:16 PM
Post
#505
|
|
Senior Member Group: Members Posts: 1,275 Joined: 24-September 03 From: Benson, AZ Member No.: 1,191 Region Association: Southwest Region |
Since I'm up here posting end-of-month for challenge, figured I'd post update pics for the trunk hinge mounting brackets. Picked up a 1.5" flange die and used it to get the angled flange I was after.
Also have some work to do on my daughters car that threw a rod. That may wait till next weekend when she has some time off. Ohh, the fun never ends! 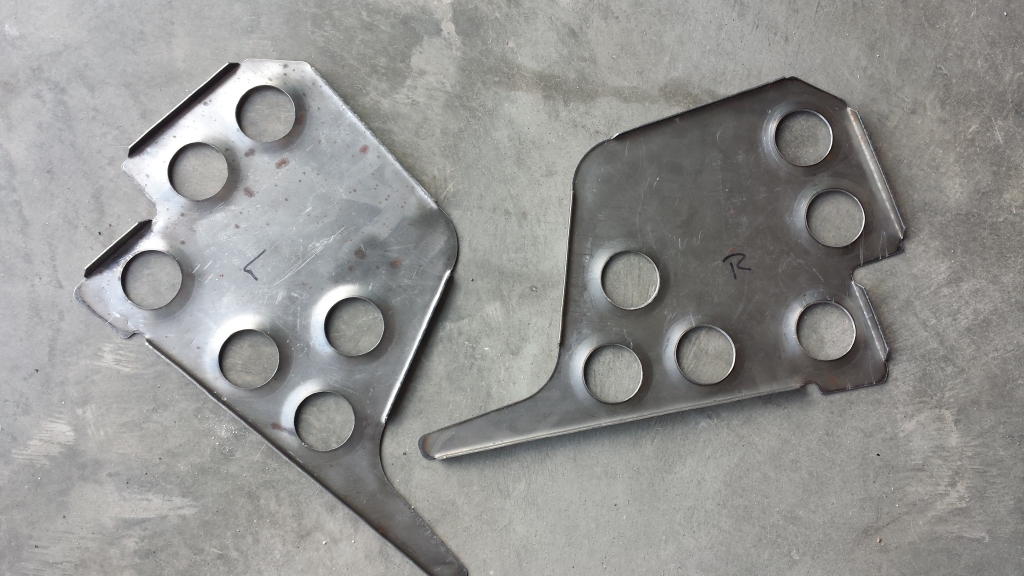 |
|
|
|
| 3d914 |
Dec 4 2016, 10:39 AM
Post
#506
|
|
Senior Member Group: Members Posts: 1,275 Joined: 24-September 03 From: Benson, AZ Member No.: 1,191 Region Association: Southwest Region |
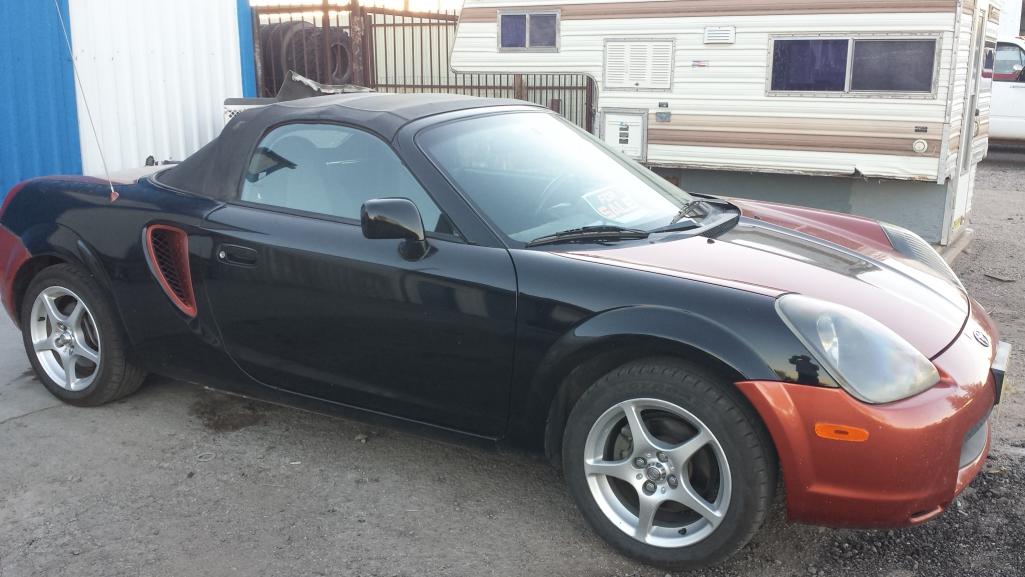
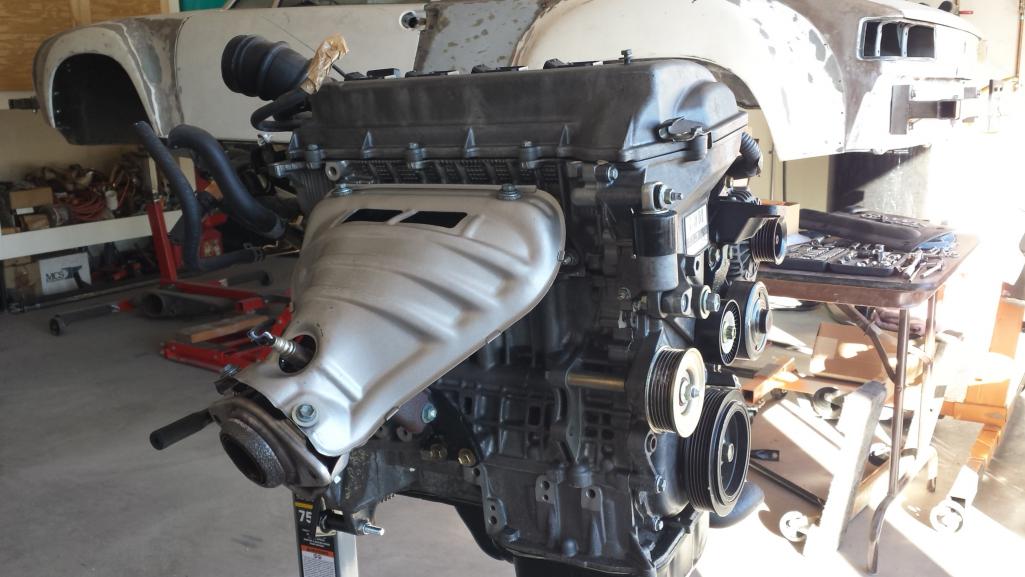
Spent part of Friday getting my daughters car ready for a transplant. Here's the car & the new (used) motor.
  |
|
|
|
| Andyrew |
Dec 4 2016, 04:29 PM
Post
#507
|
|
Spooling.... Please wait Group: Members Posts: 13,380 Joined: 20-January 03 From: Riverbank, Ca Member No.: 172 Region Association: Northern California |
Good car!
|
|
|
|
| 3d914 |
Dec 4 2016, 08:18 PM
Post
#508
|
|
Senior Member Group: Members Posts: 1,275 Joined: 24-September 03 From: Benson, AZ Member No.: 1,191 Region Association: Southwest Region |
QUOTE(Andyrew @ Dec 4 2016, 03:29 PM)  Good car! Andy, the MR2? What's your experience with them? This is our first. |
|
|
|
| 3d914 |
Dec 16 2016, 07:48 PM
Post
#509
|
|
Senior Member Group: Members Posts: 1,275 Joined: 24-September 03 From: Benson, AZ Member No.: 1,191 Region Association: Southwest Region |
Well it looks like I won't be getting the 914 painted as soon as I had hoped. With the motor to swap on my daughters MR2 and a bearing replacement to do on my son's 996, I spent my painting money on a single-post lift. I've done enough repair work under cars on my back - figured it was time to upgrade.
This is the Eagle single-post lift rated at 6000lbs. So I'll likely be busy getting this together over the weekend.  My wife and I already spent the most of the day unloading the beast. Here's all the packing material: a metal support frame, encased in a wooden crate. And my make-shift ramp I build from some of the crate material - so we could roll pieces off the trailer. 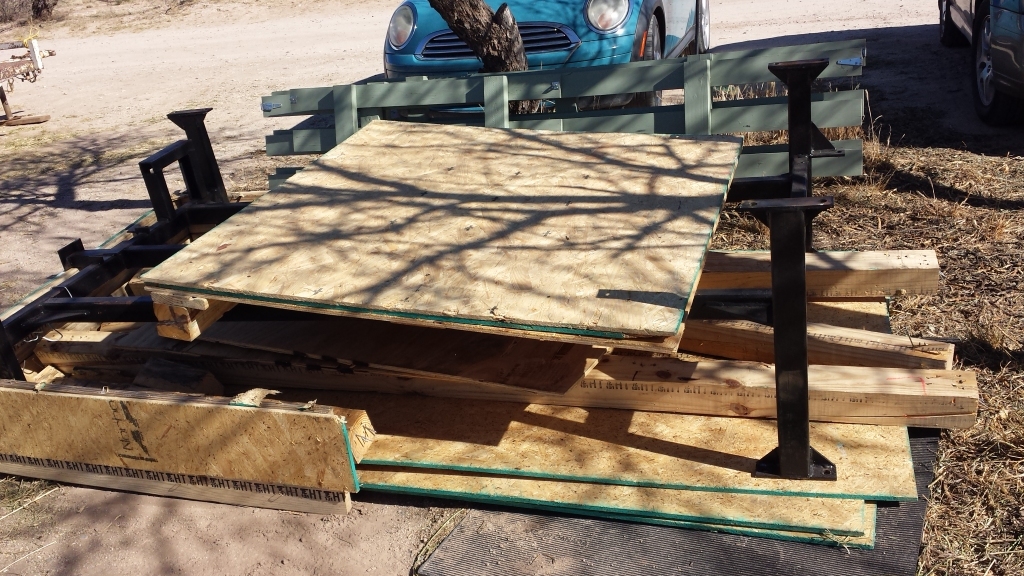 |
|
|
|
| Cairo94507 |
Dec 17 2016, 08:15 AM
Post
#510
|
|
Michael Group: Members Posts: 10,625 Joined: 1-November 08 From: Auburn, CA Member No.: 9,712 Region Association: Northern California |
Cool lift. Enjoy that. (IMG:style_emoticons/default/beer.gif)
|
 |
|
| 76-914 |
Dec 17 2016, 08:46 AM
Post
#511
|
|
Repeat Offender & Resident Subaru Antagonist Group: Members Posts: 13,882 Joined: 23-January 09 From: Temecula, CA Member No.: 9,964 Region Association: Southern California |
You will never regret that investment. I've had mine for about 1 yr and wonder why I'd waited so long. (IMG:style_emoticons/default/beerchug.gif)
|
|
|
|
| 3d914 |
Dec 18 2016, 06:16 PM
Post
#512
|
|
Senior Member Group: Members Posts: 1,275 Joined: 24-September 03 From: Benson, AZ Member No.: 1,191 Region Association: Southwest Region |
Thanks guys. As of around 2:30 this afternoon, I now have a working lift in my garage. What a relief. First car to go on will be the daughters MR2 - so we can get the motor pulled next weekend.
The fun continues . . . 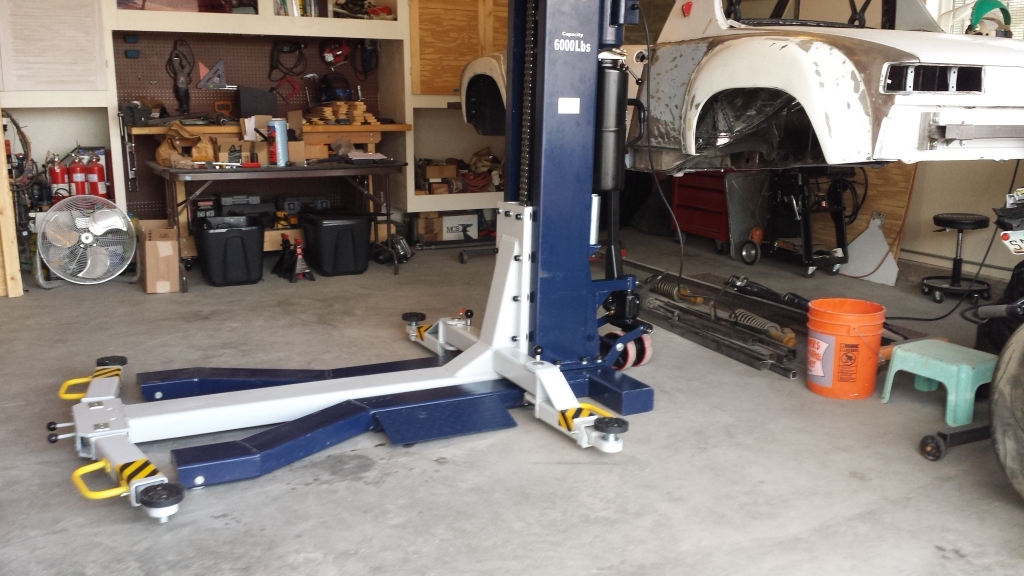 |
|
|
|
| 3d914 |
Feb 13 2017, 10:14 PM
Post
#513
|
|
Senior Member Group: Members Posts: 1,275 Joined: 24-September 03 From: Benson, AZ Member No.: 1,191 Region Association: Southwest Region |
OK, first of the year is over, got caught up on all vehicle maintenance, now I can get back on the teener.
Spent this last weekend on the soda blasting. I've decided the larger outer panels will get paint removed with flapper discs. But the trunks, engine bay, etc, will get soda blasted. It's ideal for all those irregular shapes, little corners, etc. Before I could do any blasting I had to build a ramp that I could roll the rotisserie out on. Gravel just doesn't cut it. Had lots of scrap left from the car lift crate so it's not going to waste. 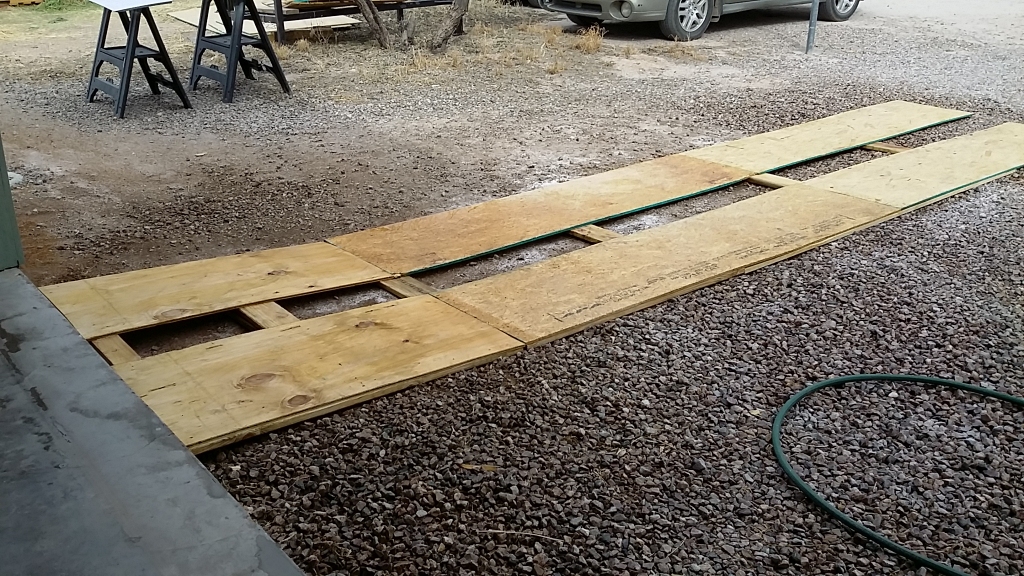 The blasting progressed a little slow until I got things dialed in properly. Had Friday afternoon to work on that. Love the look of the clean metal. Using a tarp under the car and plastic sheets surrounding the work area I was able to reuse almost 75% of the material. 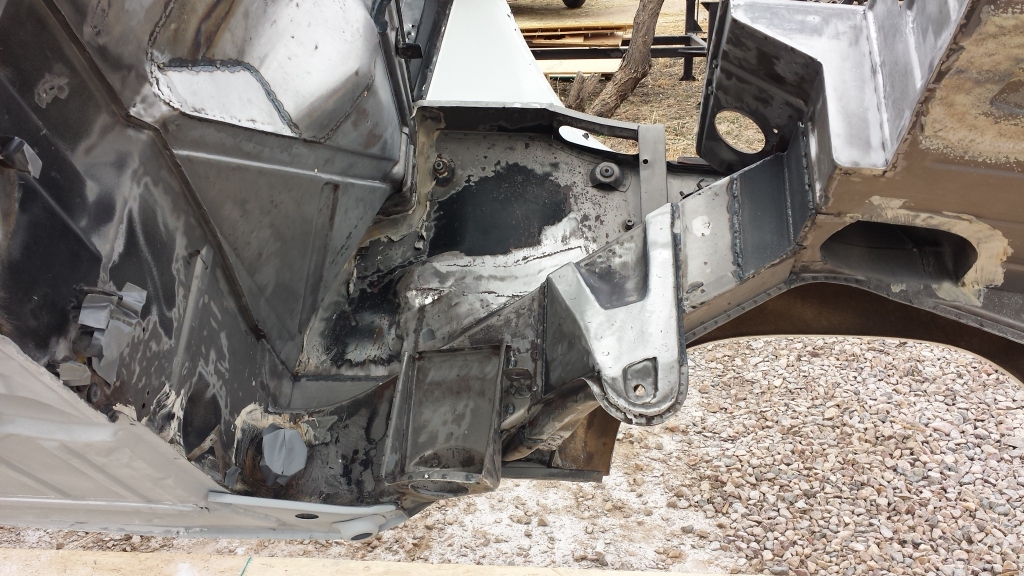 Then was able to spend most of Saturday working on the engine bay and under the trunk. Cleanup after soda blasting is a big job, but it's well worth the time saved. Sunday started to get humid and rained in the afternoon, so didn't get much done then. 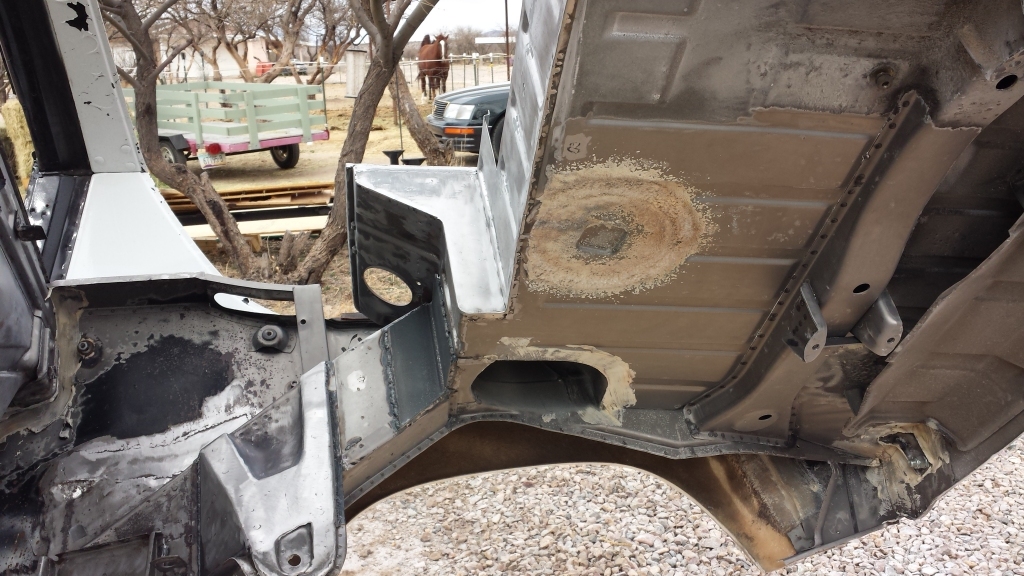 Decided to remove the muffler heat shield. I wanted to drill the welds from inside the trunk but was unable to locate them accurately. Decided to do them from the shield side. I've got nuts I'll weld to little stop plates that will go behind the drilled mounting brackets. They get flood welded then a single hole drilled for a hex bolt. 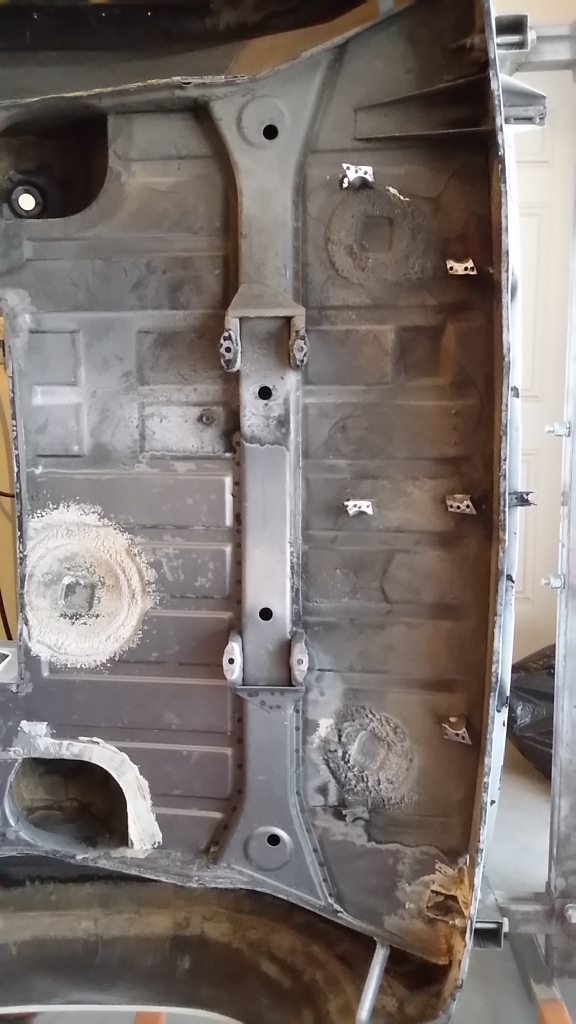 |
|
|
|
| Cairo94507 |
Feb 14 2017, 08:10 AM
Post
#514
|
|
Michael Group: Members Posts: 10,625 Joined: 1-November 08 From: Auburn, CA Member No.: 9,712 Region Association: Northern California |
Very nice to see clean metal.
|
|
|
|
| 3d914 |
Feb 15 2017, 09:56 PM
Post
#515
|
|
Senior Member Group: Members Posts: 1,275 Joined: 24-September 03 From: Benson, AZ Member No.: 1,191 Region Association: Southwest Region |
QUOTE(Cairo94507 @ Feb 14 2017, 07:10 AM) Very nice to see clean metal. I agree. Almost tempted to leave it that way. |
|
|
|
| 3d914 |
Feb 19 2017, 05:50 PM
Post
#516
|
|
Senior Member Group: Members Posts: 1,275 Joined: 24-September 03 From: Benson, AZ Member No.: 1,191 Region Association: Southwest Region |
Nothing worth photos today. Just paint removal on the muffler heat shield and cutting metal backing pieces to reinforce the mounting points for the heat shield. Was cloudy and humid all weekend so had to put soda blasting off till next weekend.
|
|
|
|
| john77 |
Feb 19 2017, 06:04 PM
Post
#517
|
|
Senior Member Group: Members Posts: 621 Joined: 21-February 14 From: Los Angeles Member No.: 17,027 Region Association: Southern California |
Nice work with the soda blasting. I need to do my front trunk and after stripping the engine bay on another car with aircraft paint remover/flap disk/wire wheel on a drill/will this never end/please make it stop I was thinking blasting might be the way to go. What set up do you use?
|
|
|
|
| 3d914 |
Feb 22 2017, 09:05 PM
Post
#518
|
|
Senior Member Group: Members Posts: 1,275 Joined: 24-September 03 From: Benson, AZ Member No.: 1,191 Region Association: Southwest Region |
QUOTE(john77 @ Feb 19 2017, 05:04 PM) Nice work with the soda blasting. I need to do my front trunk and after stripping the engine bay on another car with aircraft paint remover/flap disk/wire wheel on a drill/will this never end/please make it stop I was thinking blasting might be the way to go. What set up do you use? John, Harbor Freight 40 lb media blaster with Soda conversion kit. THe XL soda media I was using required that I remove the nozzle built into the soda kit fittings that replace the std fittings that come with the blaster. Look at the instructions for the soda kit and you'll see an exploded view showing the nozzle. It may work well for fine media, but didn't with what I was using. If you want to use other non-soda media, be sure to get a fine grade, not course. I tried coarse walnut shells but couldn't get it tp work with the limited nozzles provided with the blaster. Good luck. |
|
|
|
| 3d914 |
Feb 26 2017, 04:59 PM
Post
#519
|
|
Senior Member Group: Members Posts: 1,275 Joined: 24-September 03 From: Benson, AZ Member No.: 1,191 Region Association: Southwest Region |
Had another 3-day weekend so spent Friday & Saturday blasting. This is tedious work - especially in the engine bay. Put my sanding booth together hoping that would make it easier to move around and still collect the media so I could reuse it. Worked OK, but not great.
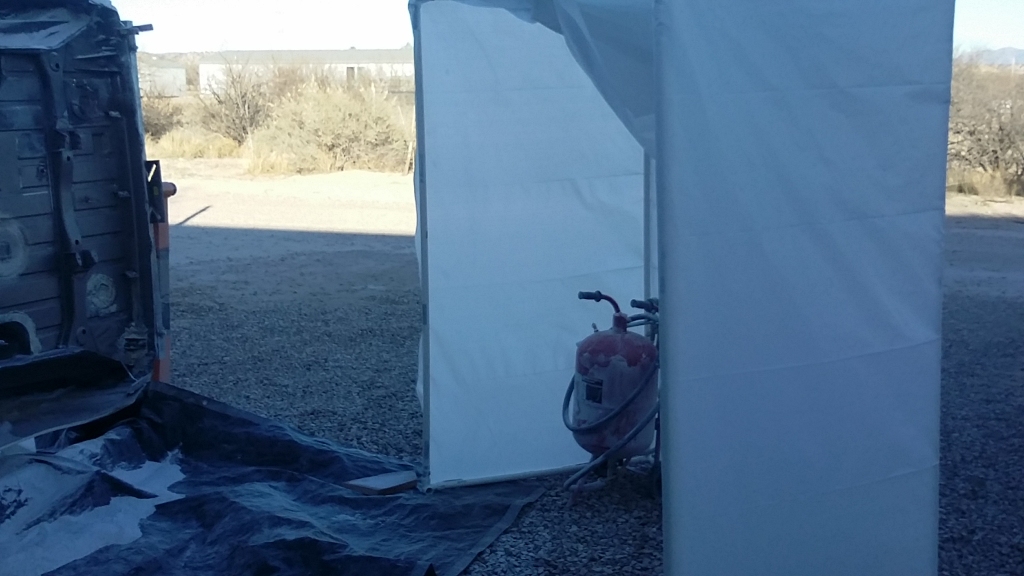 I kept the opposite side covered in plastic also to help contain the media. That and the booth weren't air tight but I was still able to collect about 50% of the media. I've only been able to get one reuse out of it because it starts to break down into finer particles and just blows away when collecting it. 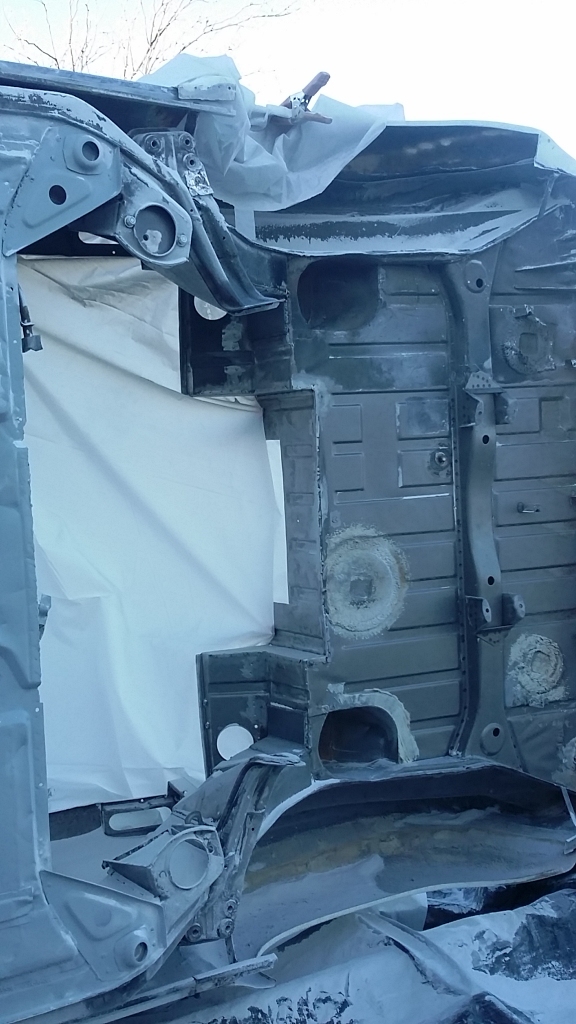 The other factor is keeping dust off the hoods plastic lens. It collects soda dust after 5-10 min and makes it hard to see. I keep missing little patches that will have to be cleaned up later. Gettin a little frustrated, but still making progress. Probably have a couple more days just to finish off the engine bay and rear section of the trunk - then I can primer. 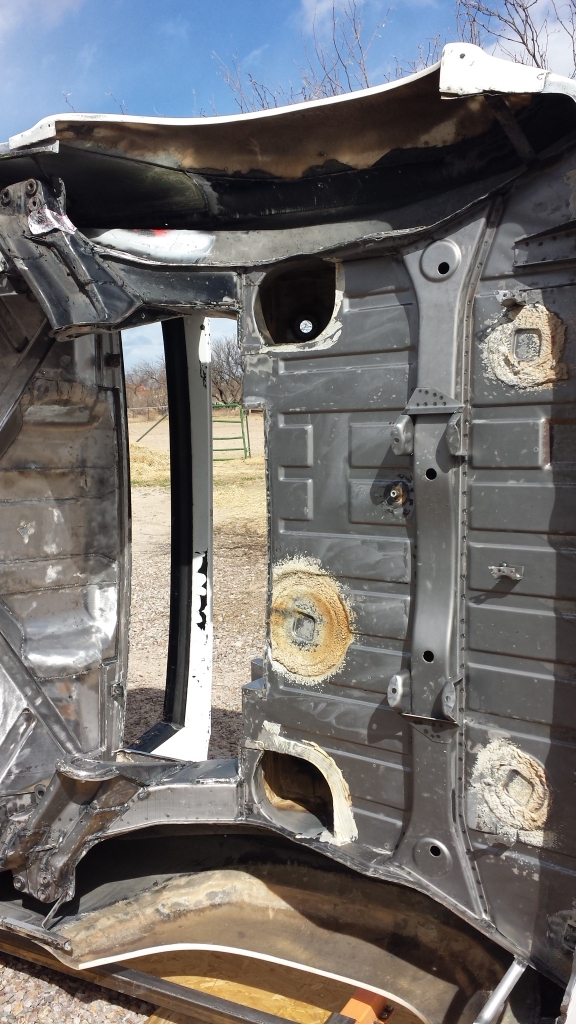 |
|
|
|
| 914forme |
Feb 26 2017, 05:08 PM
Post
#520
|
|
Times a wastin', get wrenchin'! Group: Members Posts: 3,899 Joined: 24-July 04 From: Dayton, Ohio Member No.: 2,388 Region Association: None |
That is looking really nice, can't wait to see it in paint.
|
|
|
|
|
2 User(s) are reading this topic (2 Guests and 0 Anonymous Users)
0 Members:

|
Lo-Fi Version | Time is now: 7th May 2026 - 05:50 PM |
Invision Power Board
v9.1.4 © 2026 IPS, Inc.