|
|
|
Porsche, and the Porsche crest are registered trademarks of Dr. Ing. h.c. F. Porsche AG.
This site is not affiliated with Porsche in any way. Its only purpose is to provide an online forum for car enthusiasts. All other trademarks are property of their respective owners. |
|
|

  |

| computers4kids |
 Jun 21 2008, 05:51 PM Jun 21 2008, 05:51 PM
Post
#61
|
|
Love these little cars!  Group: Members Posts: 2,443 Joined: 11-June 05 From: Port Townsend, WA Member No.: 4,253 Region Association: None |
QUOTE(JRust @ Jun 21 2008, 01:32 PM)  Just pull the drivtrain & time it out of the car! You got the skills & you can figure out the timing marks for next time. A bit of work but heck your used to pulling motors (IMG:style_emoticons/default/happy11.gif) I can't believe I didn't think about making a mark on the flywheel BEFORE I put the engine in. Hopefully I won't have to pull the motor for a while. Jamie...you should hear this thing...unbelievable! |
   |

 
|
| computers4kids |
Jun 21 2008, 06:09 PM
Post
#62
|
|
Love these little cars! Group: Members Posts: 2,443 Joined: 11-June 05 From: Port Townsend, WA Member No.: 4,253 Region Association: None |
QUOTE(LvSteveH @ Jun 21 2008, 02:41 PM) If you use a piston stop you can establish perfect TDC and mark it under the car. I've marked the balancer (on the bottom) and the flywheel via the hole in the bottom of the trans and either works fine. A timing light with an advance dial makes it easier. Thanks...I'm pretty sure I follow your line of thinking. Along that line of thinking, I wonder if this would also work. Connect my cylinder leakage kit up to #1 and find either side of TDC on the compression stroke. Turn engine one way leakage out of carb (watch meter) intake opens. Turn the other direction...leakage out exhaust (watch meter( exhaust valve opens. Make a mark for both sides of TDC as you mentioned. Divide in half=TDC. Another option: I could probably watch the valves open and close (#1), mark both sides of TDC and divide in half. What do you think...am I on the right track? |
|
|
|
| Dr. Roger |
Jun 21 2008, 10:13 PM
Post
#63
|
|
A bat out of hell. Group: Members Posts: 3,944 Joined: 31-January 05 From: Hercules, California Member No.: 3,533 Region Association: Northern California |
<What do you think...am I on the right track?>
All of our V8 engines are setup differently, and most have been internally modded so one engine is different from all others. That includes timing. there's another way. If your engine is pinging you should retard your timing immediately. If your engine isn't pinging under full throttle, you can add some advance. I do it in very small steps until I hear a little, then retard back one or two degrees. Now I get no ping under full throttle and maximum power for the given engine setup. Once you've completed that step you can look at your mechanical ignition advance curve and see where the ping was in conjunction with the vacuum advance and adjust accordingly to optimize power across most driving situations. Daily driver or lead foot.... =) Clear as mud, right? |
|
|
|
| Dr. Roger |
Jun 21 2008, 10:18 PM
Post
#64
|
|
A bat out of hell. Group: Members Posts: 3,944 Joined: 31-January 05 From: Hercules, California Member No.: 3,533 Region Association: Northern California |
|
|
|
|
| computers4kids |
Jun 22 2008, 12:14 AM
Post
#65
|
|
Love these little cars! Group: Members Posts: 2,443 Joined: 11-June 05 From: Port Townsend, WA Member No.: 4,253 Region Association: None |
QUOTE(Dr. Roger @ Jun 21 2008, 09:18 PM) Great read...sounds like I have a lot to bone-up on to get the motor tuned to its powerband. For starters, I need to find and make a mark for TDC that I can see and I do have a variable timing light so I'll be able to see soon enough what is going on. |
|
|
|
| computers4kids |
Jun 22 2008, 02:39 PM
Post
#66
|
|
Love these little cars! Group: Members Posts: 2,443 Joined: 11-June 05 From: Port Townsend, WA Member No.: 4,253 Region Association: None |
The car can now be timed from the driver's wheel well.
How: Using the driver's side heater cable tube which is no longer used in the conversion I bent it up and toward the engine balancer. I then took a white screw ancor and ground the end down so it would fit in the end of the heater tube with the pointed end right next to and in front of the balancer. I then found TDC and placed some white paint at the end of my new timing pointer representing when the engine is at TDC on the compression stroke. Now, using my adjustable timing, I can dial in a curve and point on the underside of the driver's fender well and time the engine. Actually works pretty good. Went ahead and adjusted initial timing without vaccumm advance to 9 degrees at 850 rpm. The engine actually is running and starting pretty good. This weekend, I also stripped the side rockers and the front valance, did any body work necessary and primed them...went ahead and fitted the front spoiler to make sure all fit correctly...I had updated from 75 bumpers. Here's a quetion: When the motor gets to about 185 the two fans automatically come on. Instead of having both of them come on at 185, what about having just one come on at 185 and place a second sender in the radiator that activates the other fan to only come on say at 200 (or whatever)???? Seems like having both come on at once is overkill. Attached thumbnail(s) 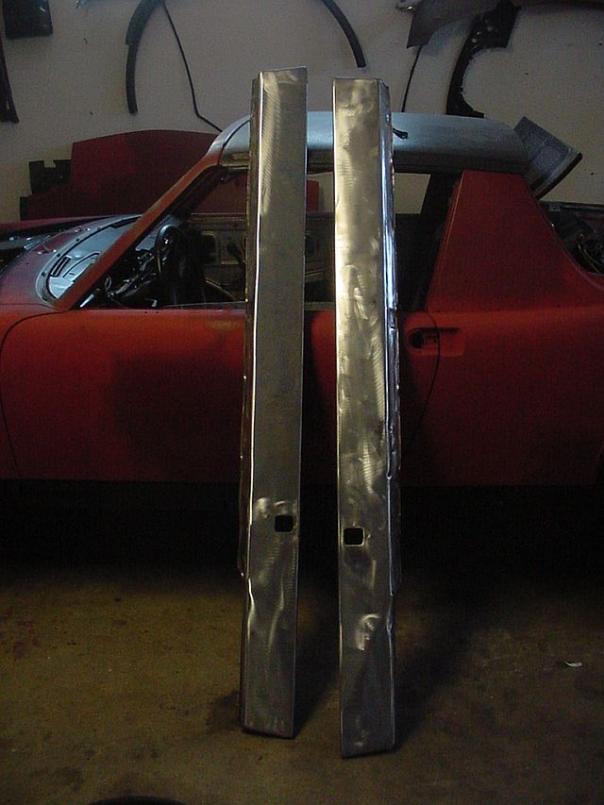 Attached image(s) 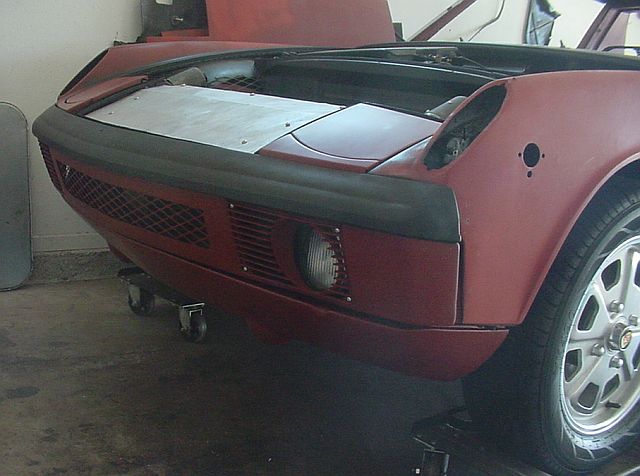 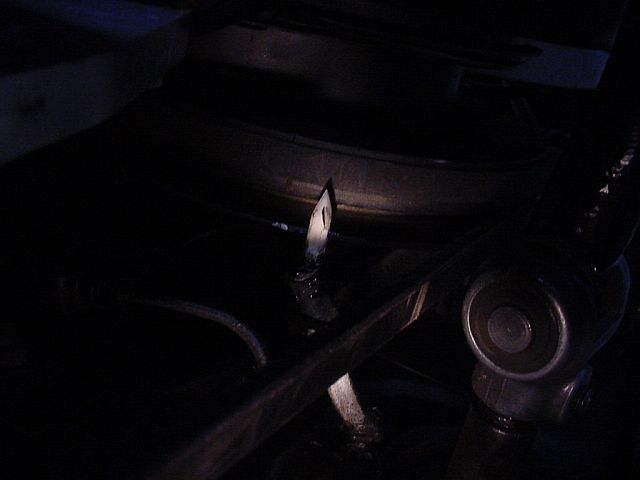
|
|
|
|
| computers4kids |
Jun 29 2008, 11:38 PM
Post
#67
|
|
Love these little cars! Group: Members Posts: 2,443 Joined: 11-June 05 From: Port Townsend, WA Member No.: 4,253 Region Association: None |
More progress...
Today, I painted the interior "marathon blue" along with the inside of the doors. I went with single stage on the inside. The outside will be going the same color but base coat, clear coat. Now I can start putting the interior back in now...acutally looks like its coming together. Took off the headers because the paint that came on them was not so great and big hunks flaked off when I first started the motor. I thought some paint stripper would take the rest off quickly...I was WRONG. After several coats of stripper only some of it came off. More work than expected. (IMG:style_emoticons/default/mad.gif) As soon as I get my gauges back from being re-calibrated...in goes the Ghetty dash. Attached image(s)  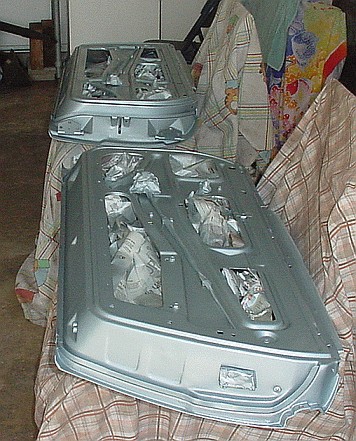
|
|
|
|
| computers4kids |
Jul 2 2008, 11:21 PM
Post
#68
|
|
Love these little cars! Group: Members Posts: 2,443 Joined: 11-June 05 From: Port Townsend, WA Member No.: 4,253 Region Association: None |
I've begun installing the interior of the car. And as usual, the targa rear pad was a pita--getting the two 10mm latch bolts and the little screws for hold the bracket plates back on was a joy.
Installed... rear window, backpad, carpet, seats, seat belts and various interior pieces. I also got started on the Ghetty dash. Gauges should be here right after the holiday (July 4th). Lots still to do...all that little stuff sure eats-up time. The hardest part for this project is finding all the correct bolts and screws. When I bought this car the interior had already been torn out and many parts missing. I'm finally to a point now that I actually know what parts need to be acquired. Attached image(s) 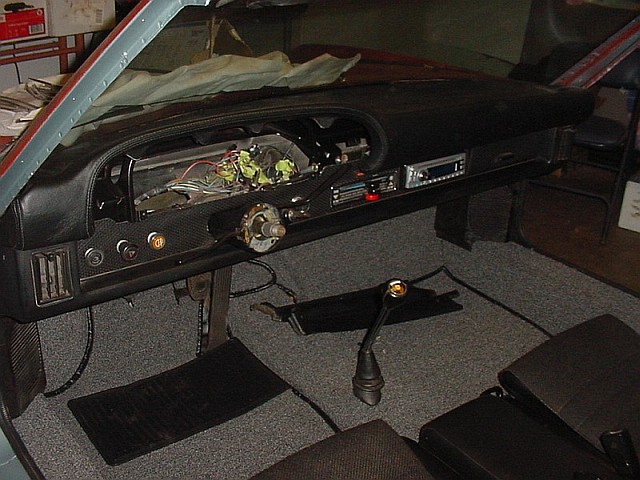 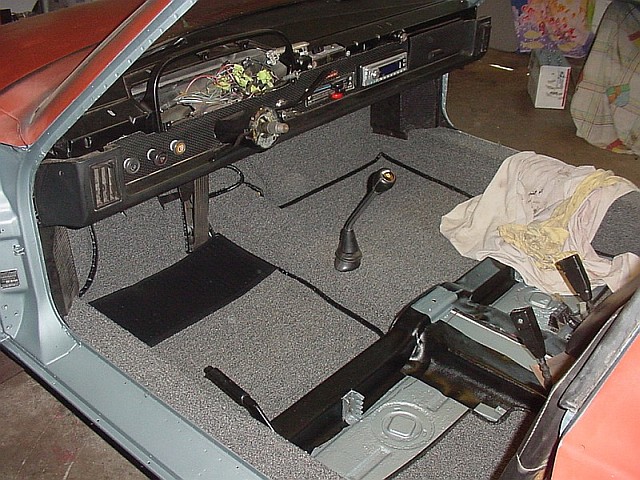 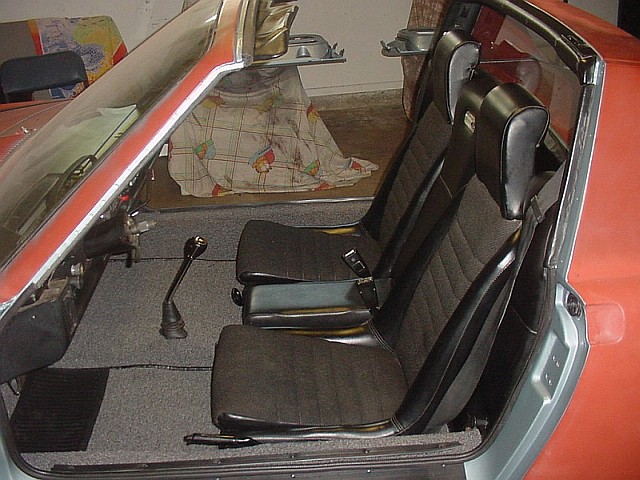
|
|
|
|
| JRust |
Jul 3 2008, 01:16 AM
Post
#69
|
|
914 Guru Group: Members Posts: 6,317 Joined: 10-January 03 From: Albany Oregon Member No.: 129 Region Association: Pacific Northwest |
Looking good Mark! I got your air cleaner out yesterday UPS. Not sure if it will make it tommorow or not. With the 4th we will see when it makes it.
Still hoping things will change & you will make the trip for WCR (IMG:style_emoticons/default/biggrin.gif) |
|
|
|
| computers4kids |
Jul 4 2008, 12:16 AM
Post
#70
|
|
Love these little cars! Group: Members Posts: 2,443 Joined: 11-June 05 From: Port Townsend, WA Member No.: 4,253 Region Association: None |
Doors went back on today...alignment was a piece of cake thanks to the club tip of drilling a small hole in the hinge through the body before pulling the doors.
Interior is just about done. The dash is the big one left and then add a windshield seal. Looks like I may have to make my own rear valance...really wanted the wide early one found on 70 and 71 cars...of course I'll have to do some alteration to the oem hole and add another. Attached image(s) 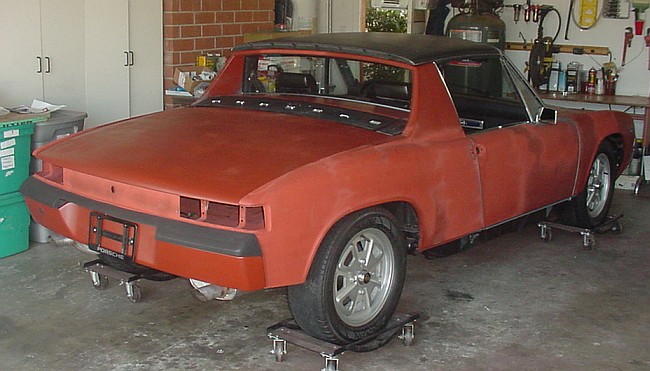
|
|
|
|
| Dr. Roger |
Jul 4 2008, 12:31 AM
Post
#71
|
|
A bat out of hell. Group: Members Posts: 3,944 Joined: 31-January 05 From: Hercules, California Member No.: 3,533 Region Association: Northern California |
Momentum is building. the end is in sight. (IMG:style_emoticons/default/piratenanner.gif)
Some guys double up on the throttle return springs. Just a heads up. Roger |
|
|
|
| computers4kids |
Jul 4 2008, 01:24 AM
Post
#72
|
|
Love these little cars! Group: Members Posts: 2,443 Joined: 11-June 05 From: Port Townsend, WA Member No.: 4,253 Region Association: None |
QUOTE(Dr. Roger @ Jul 3 2008, 11:31 PM) Hey Roger...Yeah, I'm starting to see the finish line...I want to take it for a (IMG:style_emoticons/default/driving.gif) . Other than running it in the garage, I don't even know how the trans is going to do or ? I want to make sure she's ship worthy before I paint the outside. |
|
|
|
| JRust |
Jul 4 2008, 01:49 AM
Post
#73
|
|
914 Guru Group: Members Posts: 6,317 Joined: 10-January 03 From: Albany Oregon Member No.: 129 Region Association: Pacific Northwest |
I've got a rear valance that would work. It is on my 74 2.0 car. I'll add the picture I have. You can have it free if you come & take it off (IMG:style_emoticons/default/biggrin.gif) It is some aftermarket valance but is in great shape. Not the best picture of it but I can take more if you want.
Huh (IMG:style_emoticons/default/idea.gif) Come to WCR & get a free Valance. I do really need that to finish my car (IMG:style_emoticons/default/idea.gif) I guess I will have to go after all (IMG:style_emoticons/default/happy11.gif) Attached image(s) 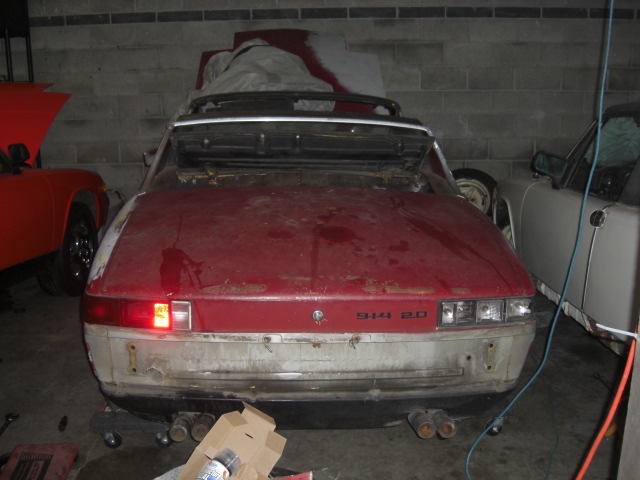
|
|
|
|
| computers4kids |
Jul 4 2008, 12:30 PM
Post
#74
|
|
Love these little cars! Group: Members Posts: 2,443 Joined: 11-June 05 From: Port Townsend, WA Member No.: 4,253 Region Association: None |
QUOTE(JRust @ Jul 4 2008, 12:49 AM) I've got a rear valance that would work. It is on my 74 2.0 car. I'll add the picture I have. You can have it free if you come & take it off (IMG:style_emoticons/default/biggrin.gif) It is some aftermarket valance but is in great shape. Not the best picture of it but I can take more if you want. Huh (IMG:style_emoticons/default/idea.gif) Come to WCR & get a free Valance. I do really need that to finish my car (IMG:style_emoticons/default/idea.gif) I guess I will have to go after all (IMG:style_emoticons/default/happy11.gif) OK (IMG:style_emoticons/default/driving.gif) |
|
|
|
| type47fan |
Jul 5 2008, 12:30 AM
Post
#75
|
|
It Looks Better In Person. . . Group: Members Posts: 860 Joined: 17-September 03 From: Carlsbad, CA Member No.: 1,170 Region Association: Southern California |
Lookin' good, Mark.
I modified a '72 valance years ago for an ANSA exhaust and am now using it for my V8 conversion. You're almost there! Attached image(s) 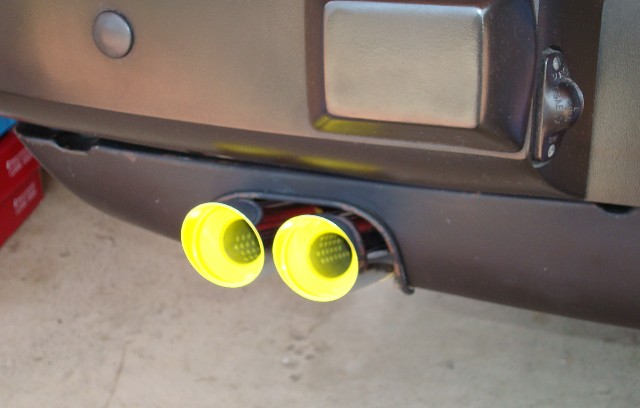 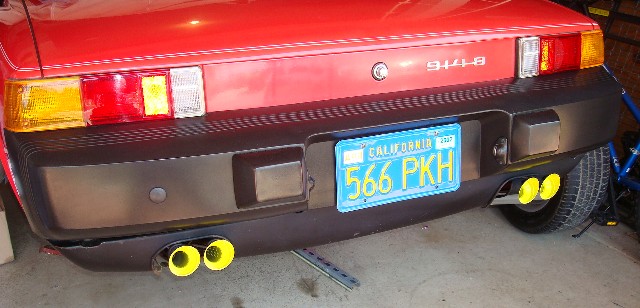
|
|
|
|
| computers4kids |
Jul 7 2008, 06:18 PM
Post
#76
|
|
Love these little cars! Group: Members Posts: 2,443 Joined: 11-June 05 From: Port Townsend, WA Member No.: 4,253 Region Association: None |
Let's see...
Installed the rest of interior like the door panels, rear view mirror and restored all the latches, liner, rubbers and chrome on the targa lid. Double springs for the carb per suggestion and started to add some BLING to the engine compartment. Still can't decide what valve covers to put on it that will compliment the new air cleaner. I'm also toying with the idea of making my lid into a double grill...still not sure. The lid already is quite a bit more flimsy without the center support...can't imagine what it would be like if I altered the other side. (IMG:style_emoticons/default/idea.gif) Will be able to pickup the deep rear valance from my friend Jamie, do a lttle customizing to the exhaust pipes and on it will go. Even went to the DMV and took the car off a non-op and made it all legal. (IMG:style_emoticons/default/piratenanner.gif) Didn't get too much done over the 4th...and then packing for a week to the "soggy side of nowhere." (IMG:style_emoticons/default/driving.gif) I'm bummed, I'm so close to start driving this thing...a couple more weeks, I could have taken the beast with me. Oh Well, next year. Attached thumbnail(s) 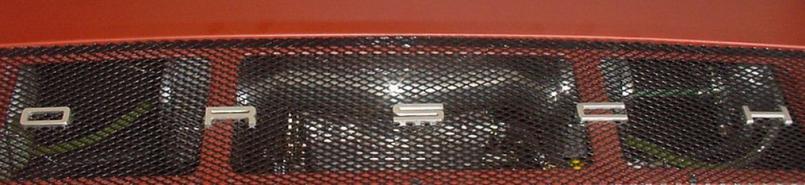 Attached image(s) 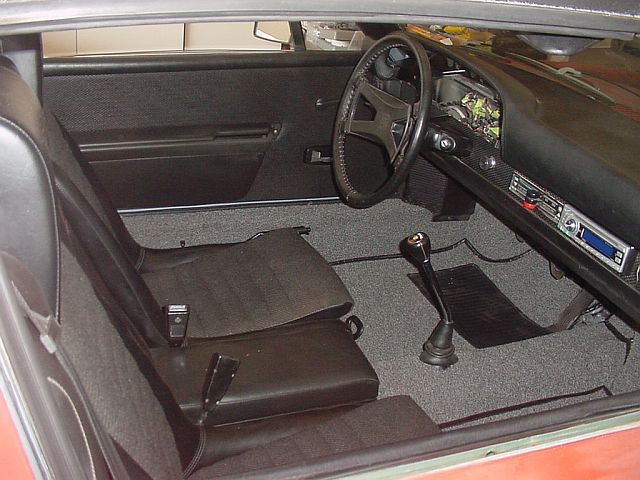 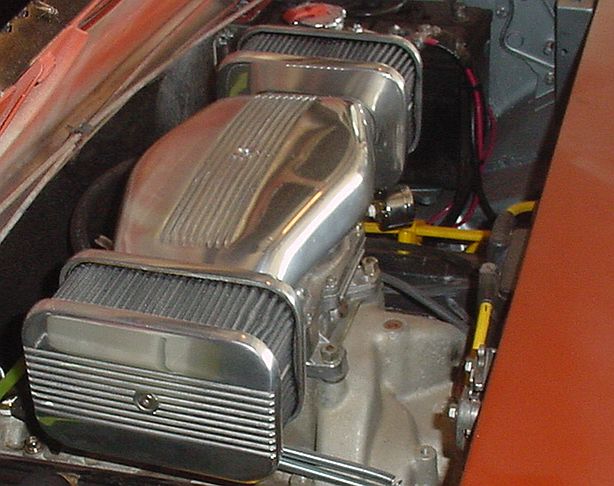
|
|
|
|
| computers4kids |
Jul 18 2008, 09:34 PM
Post
#77
|
|
Love these little cars! Group: Members Posts: 2,443 Joined: 11-June 05 From: Port Townsend, WA Member No.: 4,253 Region Association: None |
Well, took a couple of weeks off and travled up to Port Townsend WA and the WCR in Seattle...great times and good people. Was able to get some great ideas from all the neat cars. After riding in Jamie's Buick 914, I've decided I have too bump up the front brakes immediately! Dang...these little cars haul ass with some more horsepower.
Thanks to Jamie, I brought home the valance on his 74 roller. The holes for the dual exhaust lined up pretty good. I know have to decide whether to close up the hole for just one tip or change the tips to fill the hole. Perhaps dual tips, or one larger oblong tip...not sure at the moment. Installed the Ghetty dash...tomorrow the gauges go in and if all goes well, I'm taking it around the block for it's maiden voyage. It's licensed and insured now..... Attached image(s) 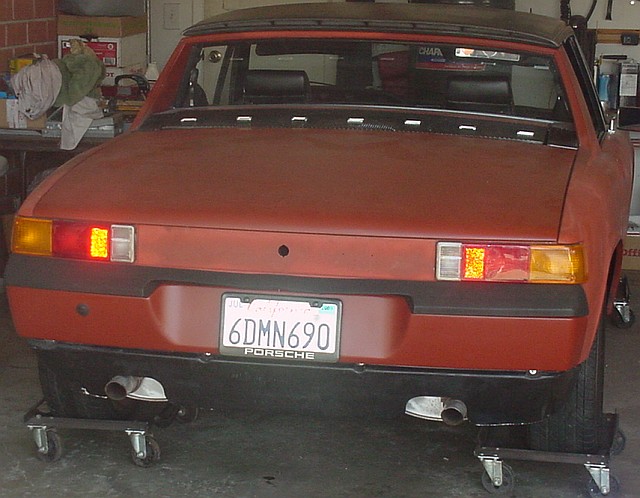
|
|
|
|
| JRust |
Jul 19 2008, 02:17 PM
Post
#78
|
|
914 Guru Group: Members Posts: 6,317 Joined: 10-January 03 From: Albany Oregon Member No.: 129 Region Association: Pacific Northwest |
I kind of like the flatter & wider ovaled pipe. I think it would look pretty cool to fill the holes. Dual pies would probably look cool too. Maybe you could give it that dual tip aftermarket look of the anza? Then maybe people would think it was still a VW motor? Then they would go HOLY $hit that is a fast VW (IMG:style_emoticons/default/drooley.gif)
|
|
|
|
| computers4kids |
Jul 20 2008, 09:40 PM
Post
#79
|
|
Love these little cars! Group: Members Posts: 2,443 Joined: 11-June 05 From: Port Townsend, WA Member No.: 4,253 Region Association: None |
Installing the ghetty dash took much longer than I had expected. I took the time to lengthen the wires that needed to be using the correct colored wire from an old harness that I had been saving just for this. Added the rest of the wiring, like senders for the oil pressure, water temperature, voltmeter, clock and all the lights in the new gauges. I did not cut any of the wires of the 75 project car's dash so the whole dash is reversible if someone was so inclined.
It turned out looking pretty sharp! I have to give special thanks to Morphenspectra (james) for doing an outstanding job covering the dash in leather and of course, BigMark Deisgn for customizing a few of my gauges (added volt and water temp gauges and changed my v-8 tach to a non-silver bullet). I also took his advice and I wired a "fans on" lamp at the bottom of the tach to let me know when the fans come on. And finally, I DROVE MY CAR TWO FEET TODAY (IMG:style_emoticons/default/av-943.gif) (IMG:style_emoticons/default/av-943.gif) I couldn't get the transmission into reverse to get out of the garage and it was late and I didn't want to start adjusting the linkage. If my memory serves me correctly, I should be able to adjust the shifter my moving it...I'll have to look up which way. Attached thumbnail(s) 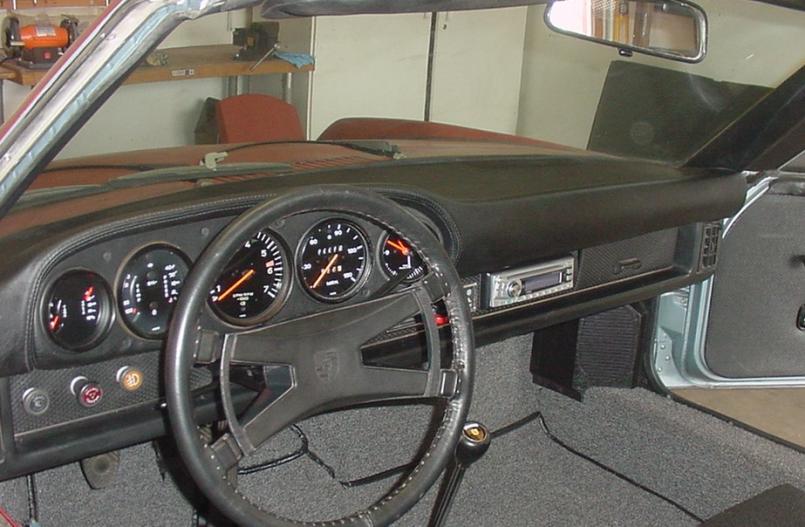
|
|
|
|
| JRust |
Jul 20 2008, 09:59 PM
Post
#80
|
|
914 Guru Group: Members Posts: 6,317 Joined: 10-January 03 From: Albany Oregon Member No.: 129 Region Association: Pacific Northwest |
Yes just pull the cover & loosen the one bolt. If it isn't quite getting reverse you'll want to hold the shifter itself in place. Then slide the linkage itself back 1/4-1/2 inch. Start at a 1/4 & see if it's enough. Sounds like you maiden voyage will come tommorow!!!!! (IMG:style_emoticons/default/biggrin.gif) (IMG:style_emoticons/default/driving.gif)
Can't wait to hear about it. Make sure you set up your camera so you can see you face. Be a sweet angle for your first drive (IMG:style_emoticons/default/happy11.gif) The smile you get is one to remember (IMG:style_emoticons/default/aktion035.gif) |
|
|
|
|
2 User(s) are reading this topic (2 Guests and 0 Anonymous Users)
0 Members:

|
Lo-Fi Version | Time is now: 23rd December 2025 - 05:25 PM |
Invision Power Board
v9.1.4 © 2025 IPS, Inc.