|
|
|
Porsche, and the Porsche crest are registered trademarks of Dr. Ing. h.c. F. Porsche AG.
This site is not affiliated with Porsche in any way. Its only purpose is to provide an online forum for car enthusiasts. All other trademarks are property of their respective owners. |
|
|

  |

| Ferg |
 Mar 14 2016, 10:02 AM Mar 14 2016, 10:02 AM
Post
#1161
|
|
914 Guru  Group: Members Posts: 5,948 Joined: 8-January 03 From: Boulder CO Member No.: 116 Region Association: None |
|
   |

 
|
| plymouth37 |
Apr 24 2016, 10:37 AM
Post
#1162
|
|
Senior Member Group: Members Posts: 1,825 Joined: 24-May 05 From: Snoqualmie, WA Member No.: 4,138 Region Association: Pacific Northwest |
Here is the panel mounted in the car:
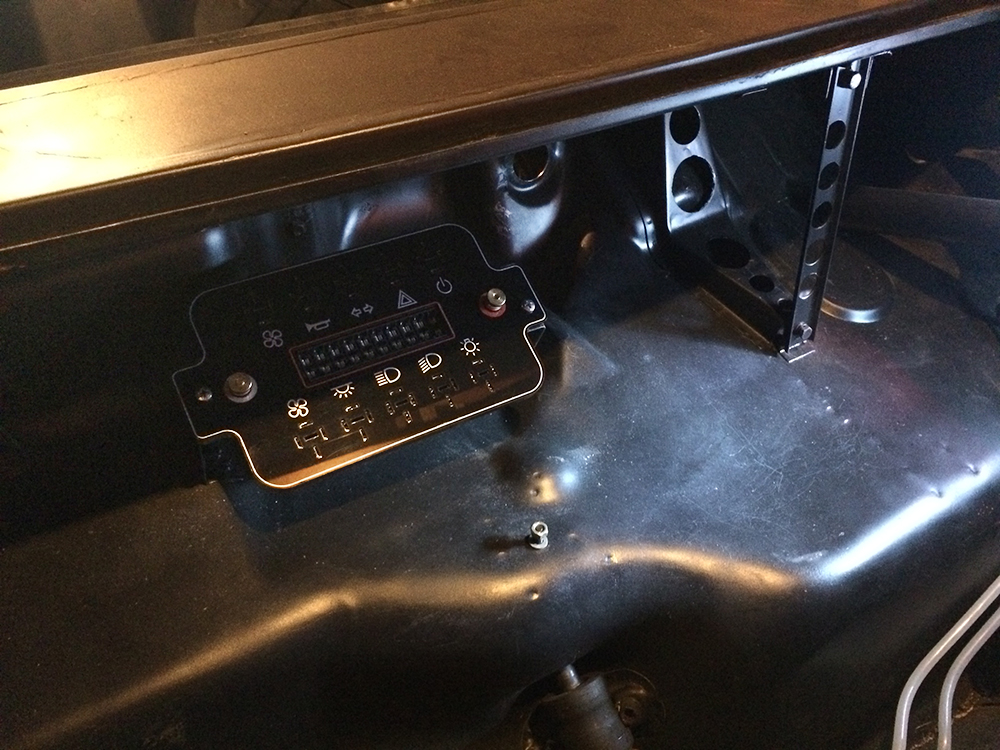 And with the gas tank in place: 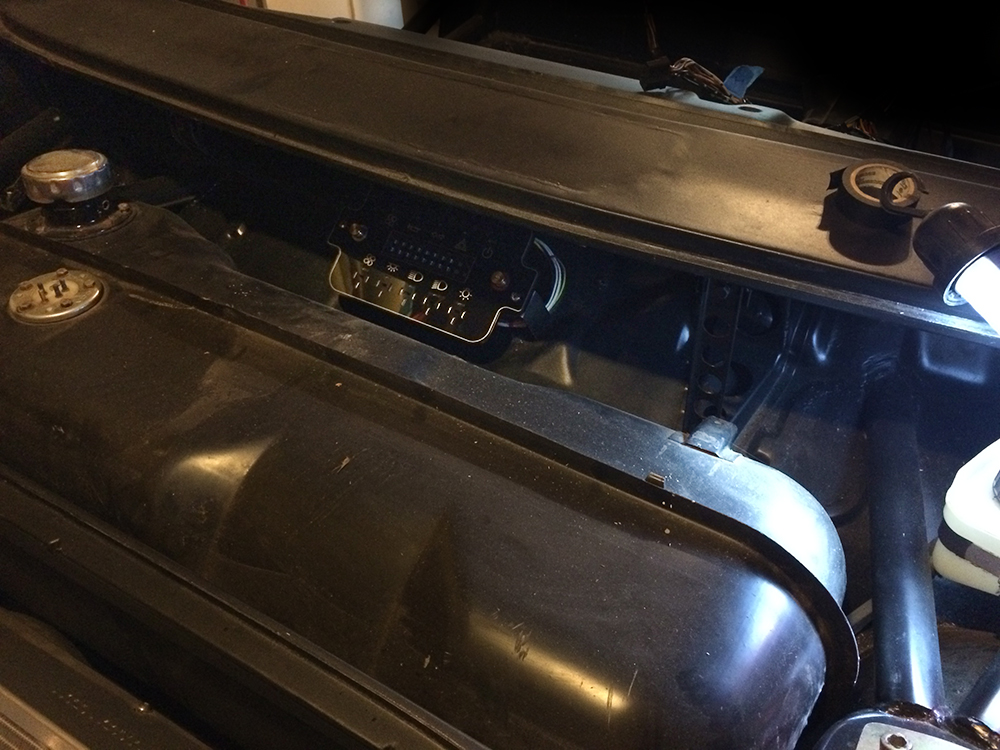 Now to plug it in! I bought a 22 pin Delphi Weatherpack bulkhead connector to run through to the interior. With only one plug swapping out brains will be easy if I decide to change or upgrade anything. 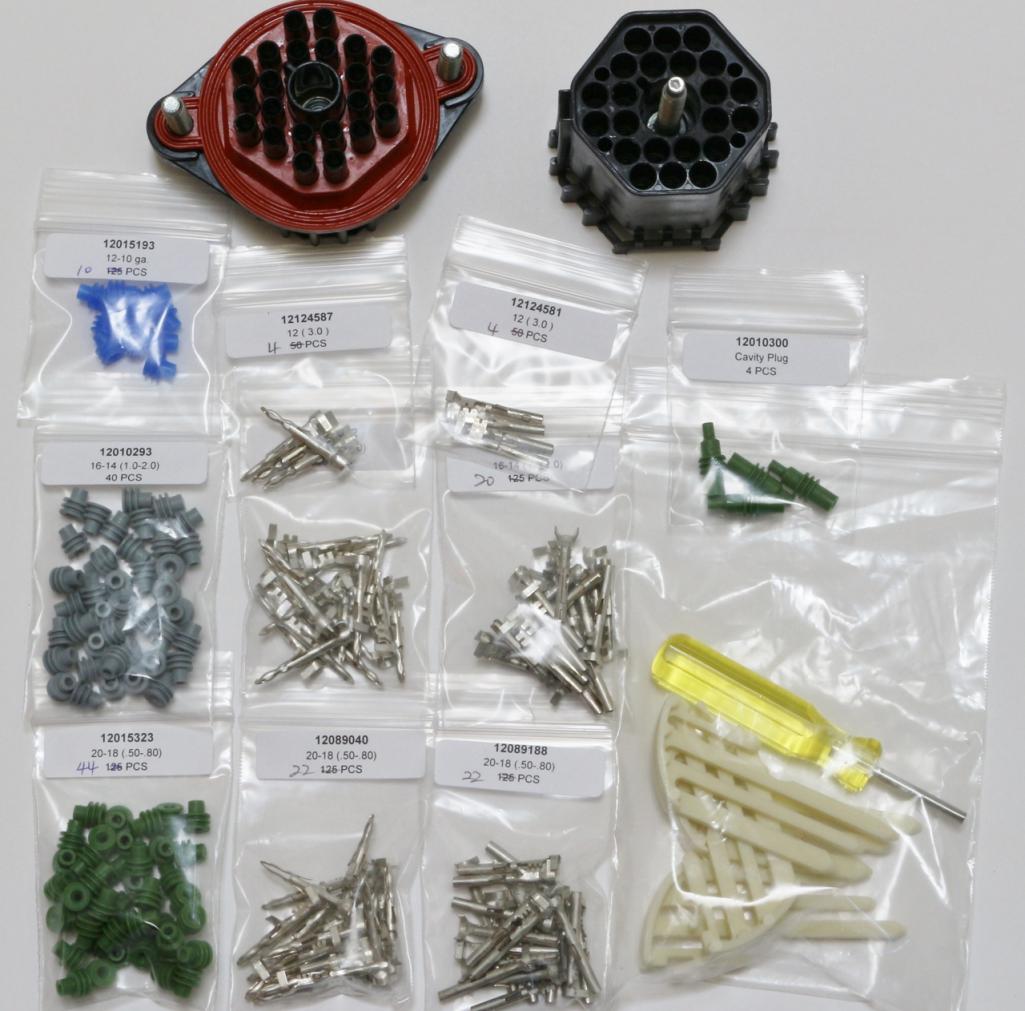 And all wired up, ready to go in the car! 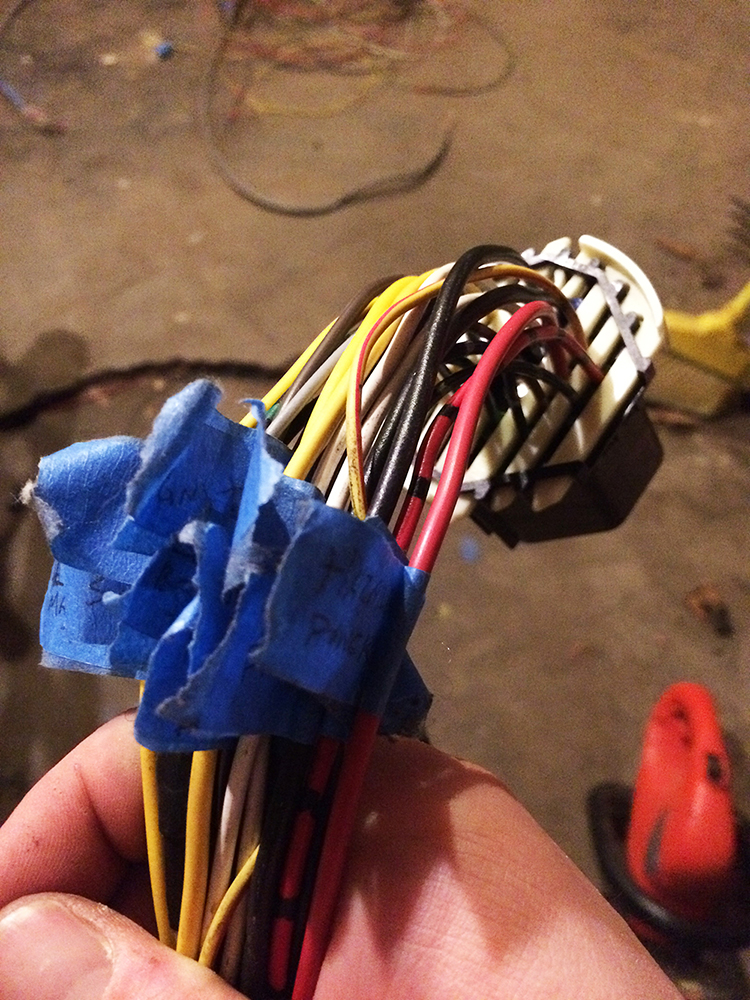 Well this portion of the harness is finished, time to move to the interior!  |
|
|
|
| plymouth37 |
Apr 24 2016, 10:51 AM
Post
#1163
|
|
Senior Member Group: Members Posts: 1,825 Joined: 24-May 05 From: Snoqualmie, WA Member No.: 4,138 Region Association: Pacific Northwest |
So here is the other side of the bulkhead connector:
 And here is my updated diagram on how the relay board needs to be spliced unto the existing harness: 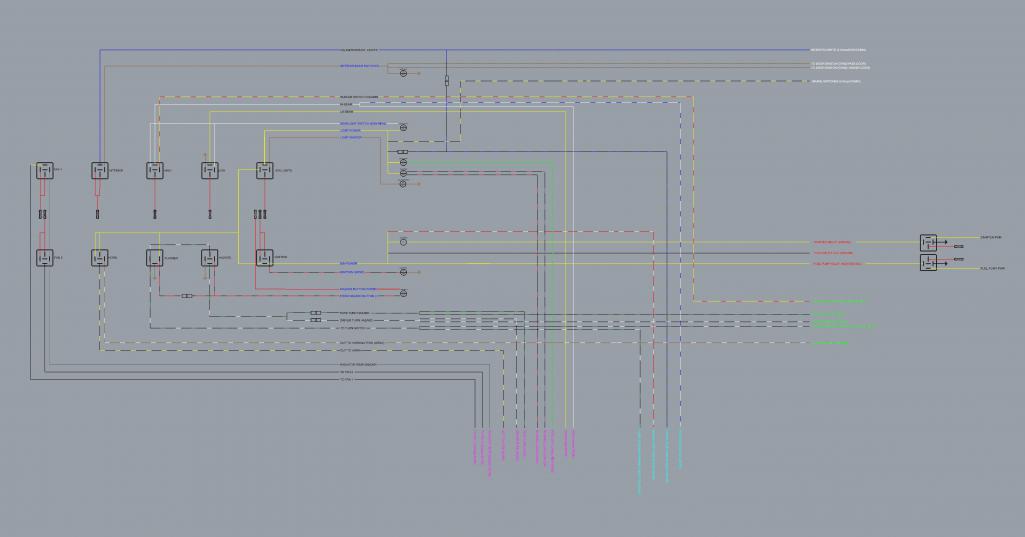 |
|
|
|
| wingnut86 |
Apr 24 2016, 10:52 AM
Post
#1164
|
|
...boola la boo boola boo... Group: Members Posts: 1,054 Joined: 22-April 10 From: South Carolina Member No.: 11,645 Region Association: South East States |
I had a fellow avionics technician I worked with back in 1985 in Shreveport, LA. He had his 72' bug wired with a single through-hole hubbel style plug, courtesy of a B52 parts scrap bin. I helped him pull his motor once, we had it out from ignition disconnect in under 12 minutes or similar - I was shocked with how well it worked. I had a 66' Ghia that I was rigging for similar when I got a cash offer I couldn't refuse.
You'll appreciate the ease with which you can do service, especially on a cold floor in mid-winter;-) |
|
|
|
| plymouth37 |
May 5 2016, 06:58 PM
Post
#1165
|
|
Senior Member Group: Members Posts: 1,825 Joined: 24-May 05 From: Snoqualmie, WA Member No.: 4,138 Region Association: Pacific Northwest |
I just had to share the state of affairs, what a rats nest!
I think I have the 914 wiring harness (or at least my interpretation of it) just about memorized. 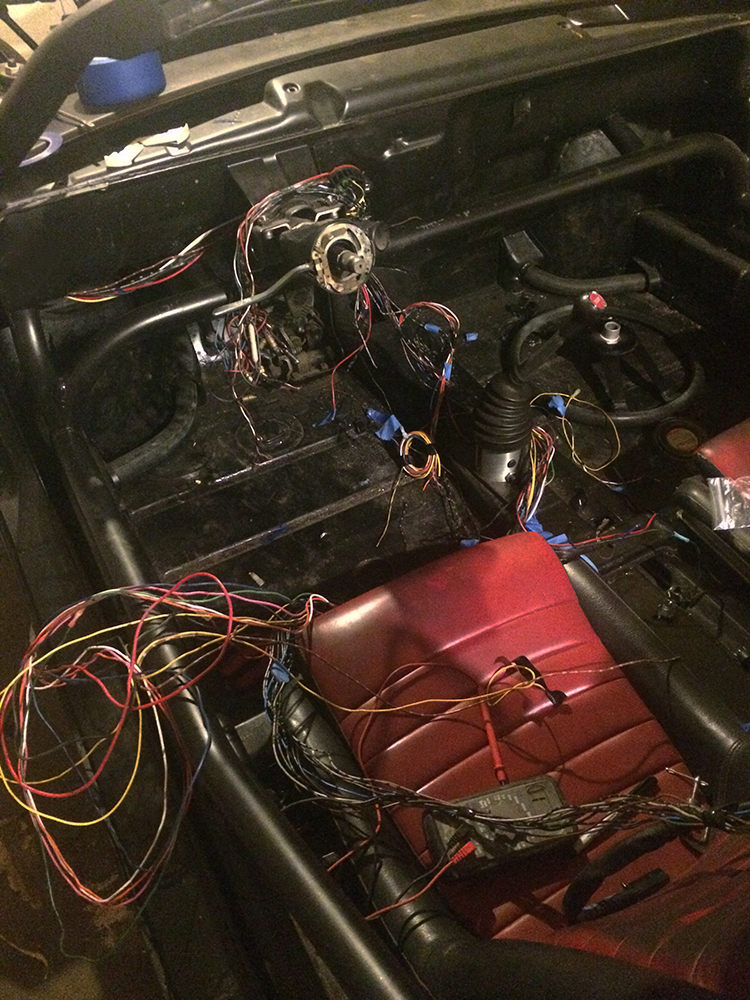 |
|
|
|
| 2mAn |
Jun 27 2016, 10:44 AM
Post
#1166
|
|
trying to see how long I can go without a 914 Group: Members Posts: 487 Joined: 14-November 13 From: Westchester (Los Angeles) Member No.: 16,644 Region Association: Southern California |
QUOTE(plymouth37 @ Jan 30 2016, 08:42 PM)  I like to geek out on wiring too and didn't want to miss out on the fun of wiring this! quoted for the insanity! QUOTE(Ferg @ Mar 14 2016, 09:02 AM) exactly how I feel. Dane, I've shared this thread with other forums and believe it or not theres a TON of people waiting to see this car finished. Wiring is always where I stall out, glad to see you geek out at this point. just dont take too long! |
|
|
|
| not_hans_stuck |
Jul 5 2016, 01:44 PM
Post
#1167
|
|
Newbie Group: Members Posts: 1 Joined: 5-July 16 From: houston Member No.: 20,167 Region Association: None |
How have I never seen this thread?
This is a fantastic build. So, listen up, I set the standard over on Pelican for how you're supposed to start and finish your thread. (Go look them up - same username) With a build this awesome and a thread this long, you simply have to finish it. Thanks for sharing your life with us. Hal |
|
|
|
| Mike Bellis |
Jul 5 2016, 05:36 PM
Post
#1168
|
|
Resident Electrician Group: Members Posts: 8,347 Joined: 22-June 09 From: Midlothian TX Member No.: 10,496 Region Association: None |
QUOTE(not_hans_stuck @ Jul 5 2016, 12:44 PM) How have I never seen this thread? This is a fantastic build. So, listen up, I set the standard over on Pelican for how you're supposed to start and finish your thread. (Go look them up - same username) With a build this awesome and a thread this long, you simply have to finish it. Thanks for sharing your life with us. Hal Who are you? What standard and where is the link? We are too lazy to search pelican... |
|
|
|
| restore2seater |
Jul 5 2016, 07:39 PM
Post
#1169
|
|
Future 914 copilot. Group: Members Posts: 313 Joined: 30-October 04 From: Dunlap,IL Member No.: 3,037 Region Association: None |
QUOTE(Mike Bellis @ Jul 5 2016, 06:36 PM) QUOTE(not_hans_stuck @ Jul 5 2016, 12:44 PM) How have I never seen this thread? This is a fantastic build. So, listen up, I set the standard over on Pelican for how you're supposed to start and finish your thread. (Go look them up - same username) With a build this awesome and a thread this long, you simply have to finish it. Thanks for sharing your life with us. Hal Who are you? What standard and where is the link? We are too lazy to search pelican... Possibly these 2 threads. RSR LS Conversion DIY IROC RSR Conversion |
|
|
|
| plymouth37 |
Jul 8 2016, 11:53 PM
Post
#1170
|
|
Senior Member Group: Members Posts: 1,825 Joined: 24-May 05 From: Snoqualmie, WA Member No.: 4,138 Region Association: Pacific Northwest |
Thanks for the kind words guys, progress has been slow, wiring takes forever but I will keep plugging away at this thing!
Well the rat's nest has been cleared and sorted, I wired the existing car harness into the interior half of the bulkhead connector. 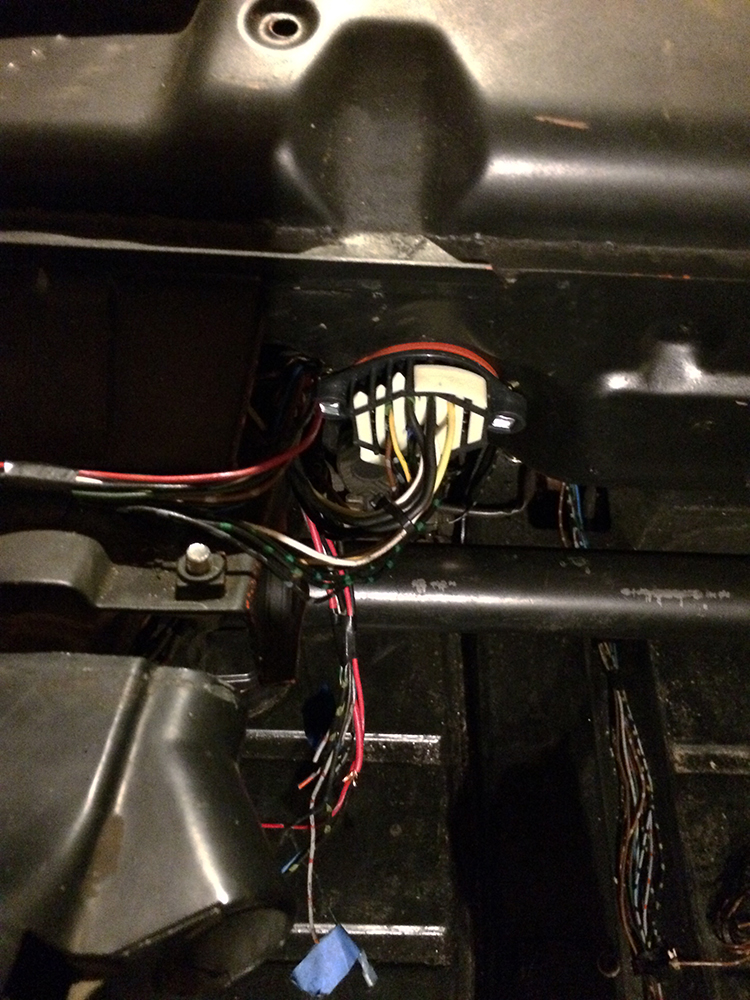 Then I routed what remains of the stock harness through the rest of the car. 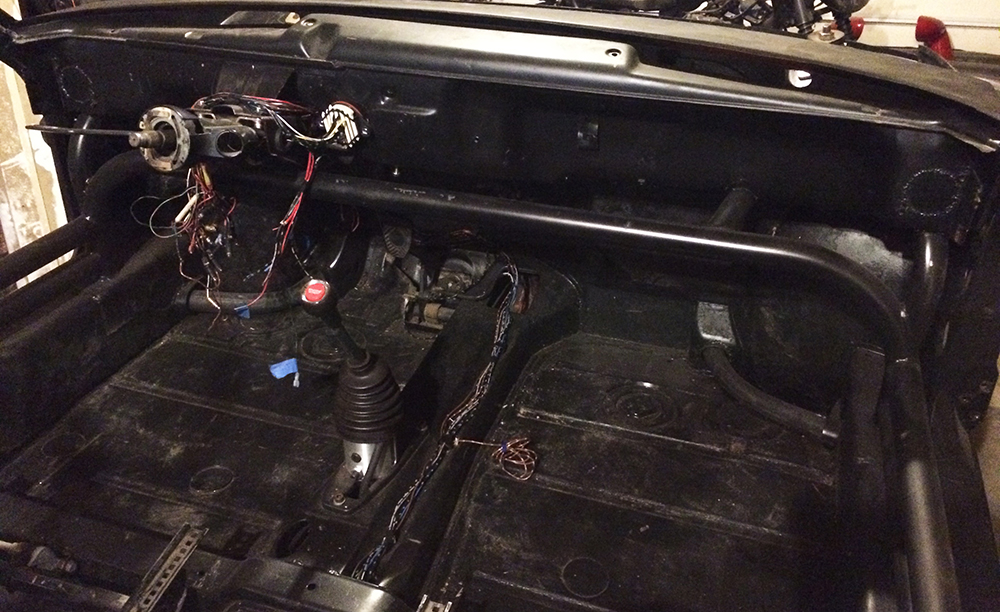 i am not wiring up the cabin yet, i want to focus on getting the engine running first. 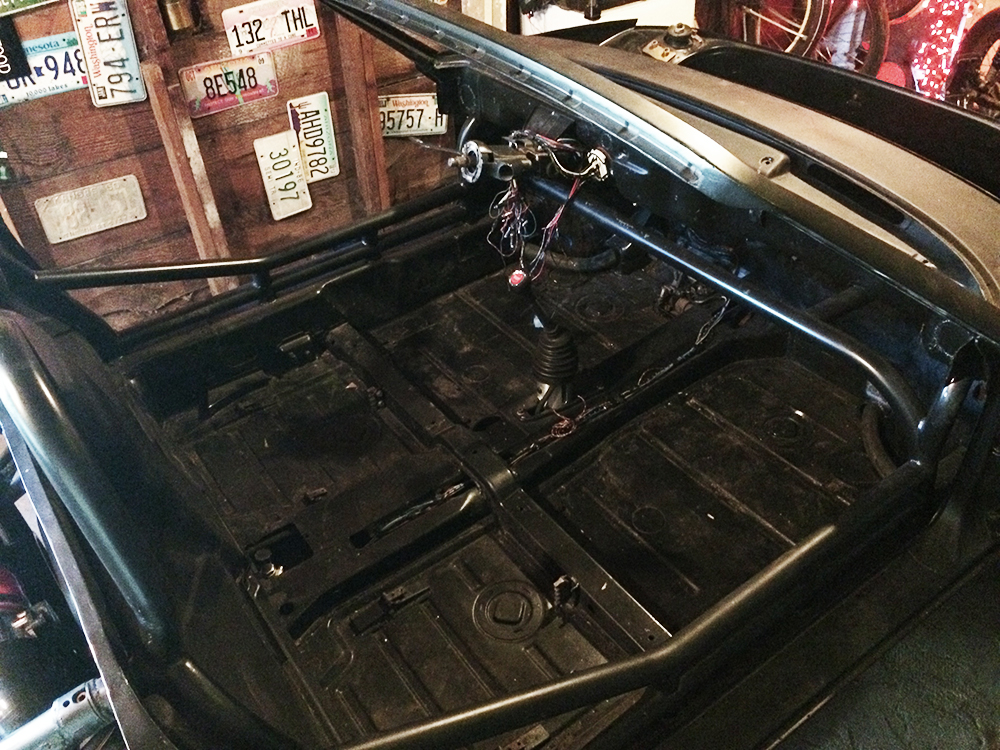 The harness has been run into the engine bay, ready to connect my next project, the WRX computer and engine harness. 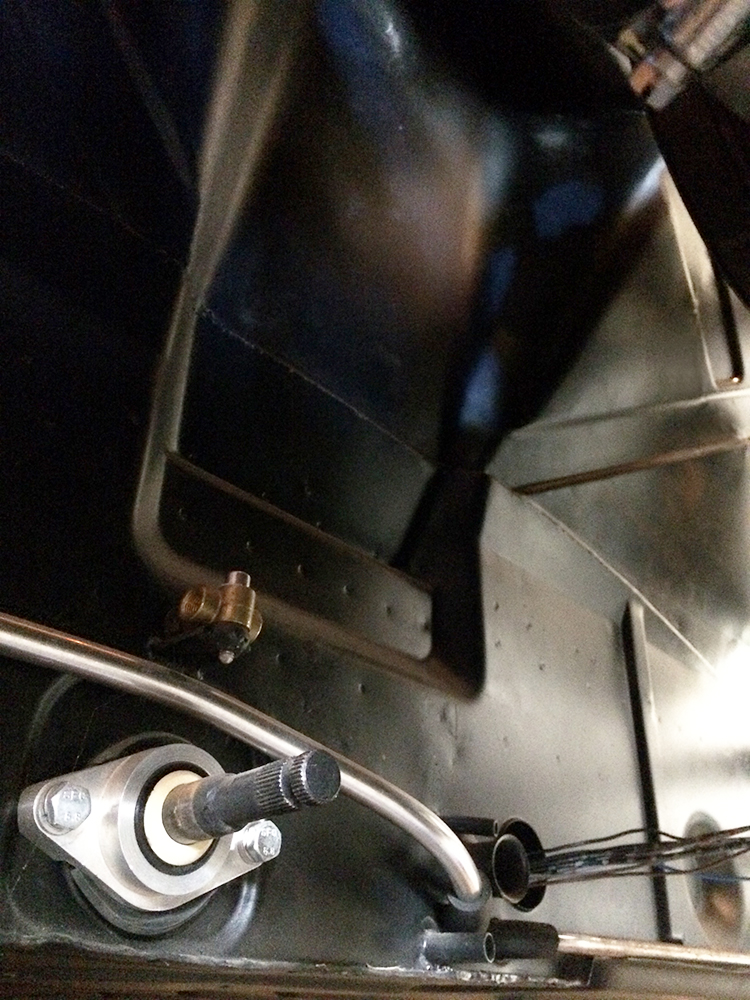 |
|
|
|
| plymouth37 |
Jul 9 2016, 12:32 AM
Post
#1171
|
|
Senior Member Group: Members Posts: 1,825 Joined: 24-May 05 From: Snoqualmie, WA Member No.: 4,138 Region Association: Pacific Northwest |
Here is the WRX wiring harness, as you can see it is about 10 feet longer than it needs to be. I will trim and shorten it in the future but I know it works as it is so I will leave it until I have a running engine to test it with.
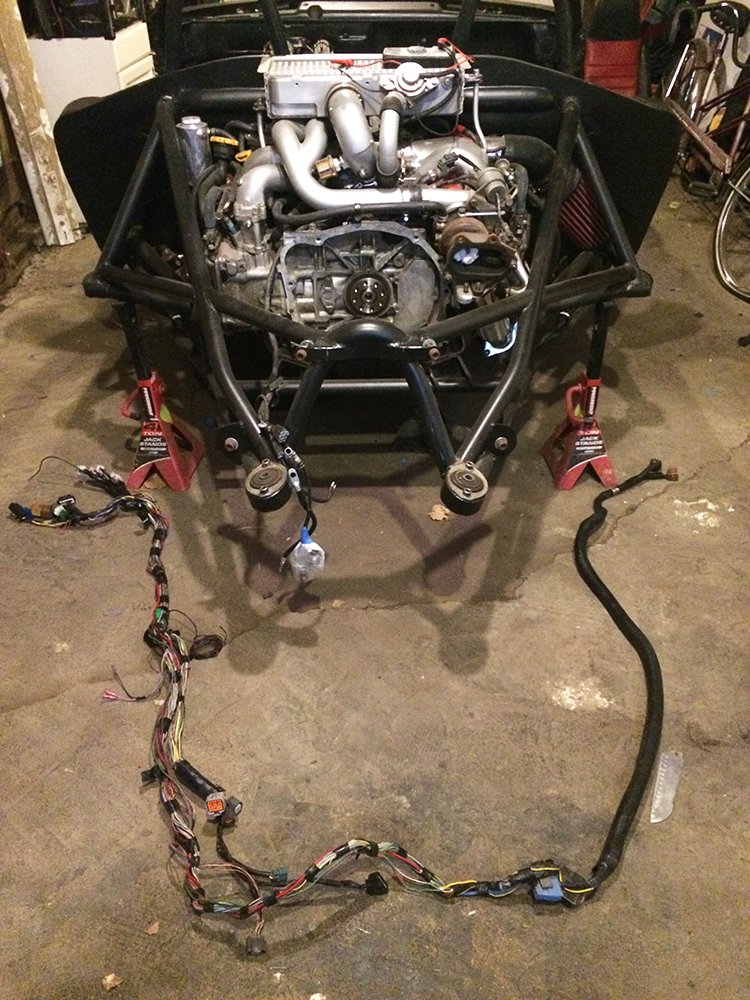 I am thinking I will mount the computer and the excess wiring harness in a compartment I build around the back of the firewall bulge. 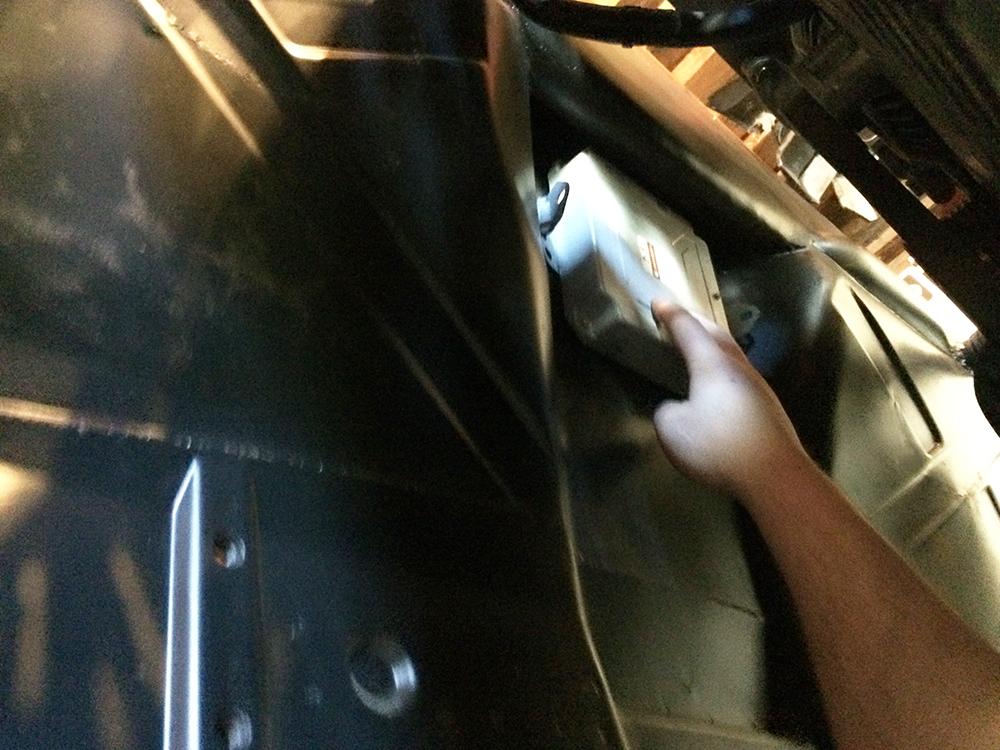 I organized the harness in a way that should fit in the space provided, 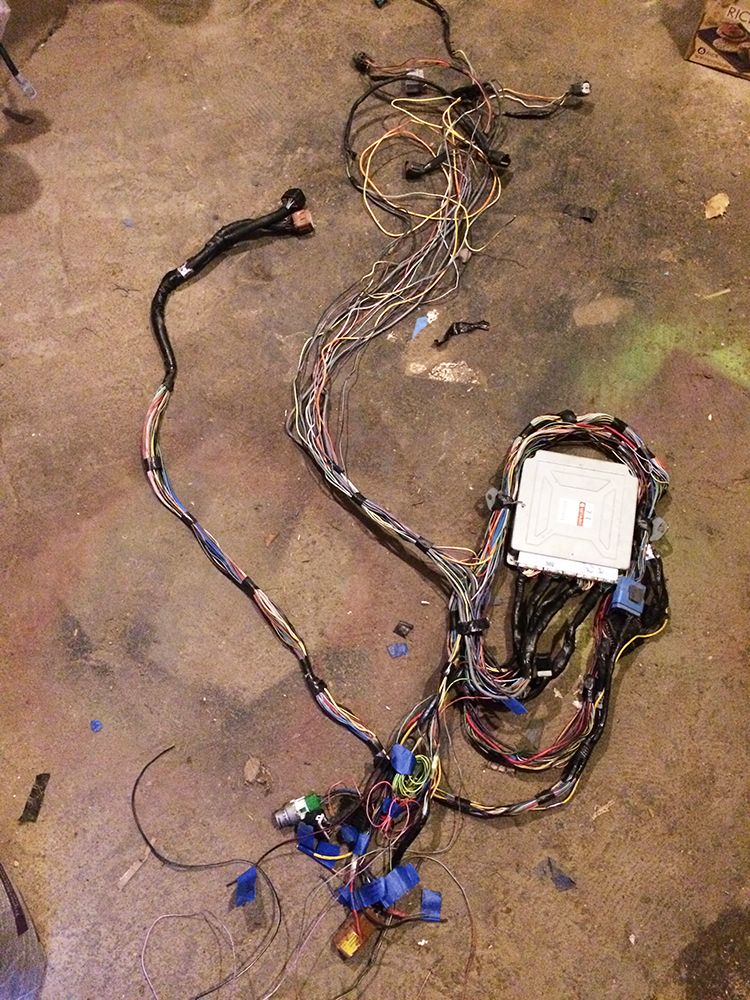 I had to make 3 big loops around the ECU to take up the slack.  |
|
|
|
| 914forme |
Jul 9 2016, 06:47 PM
Post
#1172
|
|
Times a wastin', get wrenchin'! Group: Members Posts: 3,896 Joined: 24-July 04 From: Dayton, Ohio Member No.: 2,388 Region Association: None |
QUOTE(plymouth37 @ Jul 9 2016, 01:53 AM) Dana great work as usual, I was walking around Goodguys Columbus Nationals today and thought about how I would rather look at your build than most of the cars i saw today. Now one question. What the hell is this still doing in this build? 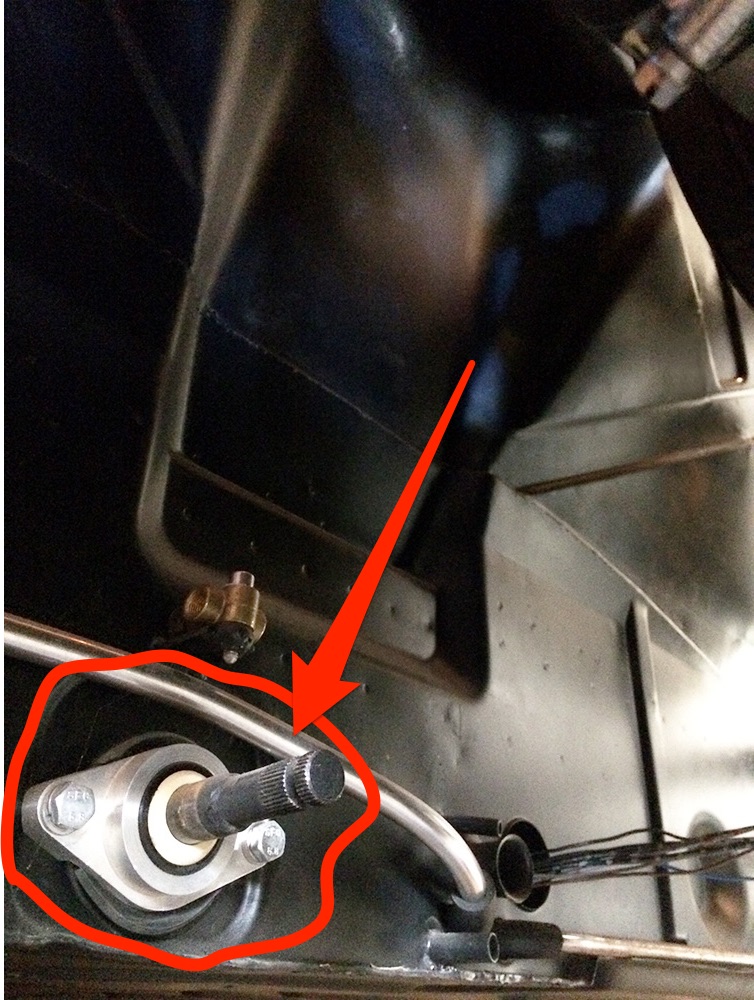 Don't get me wrong, I love Chris' products. And they have there place. This car needs a Subaru MT5 in its back end, and a cable shifter. We have a bunch of these in various conversion cars, and I would love to see your build skills being put to use on an MT5. |
|
|
|
| mepstein |
Jul 9 2016, 07:48 PM
Post
#1173
|
|
914-6 GT in waiting Group: Members Posts: 20,289 Joined: 19-September 09 From: Landenberg, PA/Wilmington, DE Member No.: 10,825 Region Association: MidAtlantic Region |
QUOTE(914forme @ Jul 9 2016, 08:47 PM) QUOTE(plymouth37 @ Jul 9 2016, 01:53 AM) Dana great work as usual, I was walking around Goodguys Columbus Nationals today and thought about how I would rather look at your build than most of the cars i saw today. Now one question. What the hell is this still doing in this build? Don't get me wrong, I love Chris' products. And they have there place. This car needs a Subaru MT5 in its back end, and a cable shifter. We have a bunch of these in various conversion cars, and I would love to see your build skills being put to use on an MT5. (IMG:style_emoticons/default/agree.gif) maybe not to get it on a he road if you already have the 901 parts but in time, I think the suby trans is the logical upgrade. |
 |
|
| plymouth37 |
Jul 9 2016, 10:01 PM
Post
#1174
|
|
Senior Member Group: Members Posts: 1,825 Joined: 24-May 05 From: Snoqualmie, WA Member No.: 4,138 Region Association: Pacific Northwest |
Unfortunately now is not the time to change huge things like a tranny, in the future definitely. It will be drivable in the relatively near future and the detour of changing drivetrains at this point would kill this project. Lucky the rear half of the car is replaceable, so nothing is permanent. Once I have play money upgrades will be implemented on the entire car, I just need it to move under its own power first.
|
|
|
|
| Cairo94507 |
Jul 10 2016, 06:37 AM
Post
#1175
|
|
Michael Group: Members Posts: 10,522 Joined: 1-November 08 From: Auburn, CA Member No.: 9,712 Region Association: Northern California |
Hi Dana - So glad to see you making progress on your car. One of my absolute favorite builds. Good luck.
|
|
|
|
| 914forme |
Jul 10 2016, 12:14 PM
Post
#1176
|
|
Times a wastin', get wrenchin'! Group: Members Posts: 3,896 Joined: 24-July 04 From: Dayton, Ohio Member No.: 2,388 Region Association: None |
QUOTE(plymouth37 @ Jul 10 2016, 12:01 AM) Unfortunately now is not the time to change huge things like a tranny, in the future definitely. It will be drivable in the relatively near future and the detour of changing drivetrains at this point would kill this project. Lucky the rear half of the car is replaceable, so nothing is permanent. Once I have play money upgrades will be implemented on the entire car, I just need it to move under its own power first. Sounds like a great answer to me, carry on love the build |
|
|
|
| rgalla9146 |
Jul 10 2016, 04:47 PM
Post
#1177
|
|
Advanced Member Group: Members Posts: 4,896 Joined: 23-November 05 From: Paramus NJ Member No.: 5,176 Region Association: None |
QUOTE(scotty b @ Jun 9 2008, 09:15 PM) Get a stump boy (IMG:style_emoticons/default/laugh.gif) Stump, ball peen hammer, oxy acetylene torch and a cigar is all any good body man needs (IMG:style_emoticons/default/slap.gif) The cigar comes first. |
|
|
|
| plymouth37 |
Nov 19 2016, 07:26 PM
Post
#1178
|
|
Senior Member Group: Members Posts: 1,825 Joined: 24-May 05 From: Snoqualmie, WA Member No.: 4,138 Region Association: Pacific Northwest |
Sorry for not posting in a while, rest assured, progress continues!
I got the ECU and engine harness wired into the car and engine. 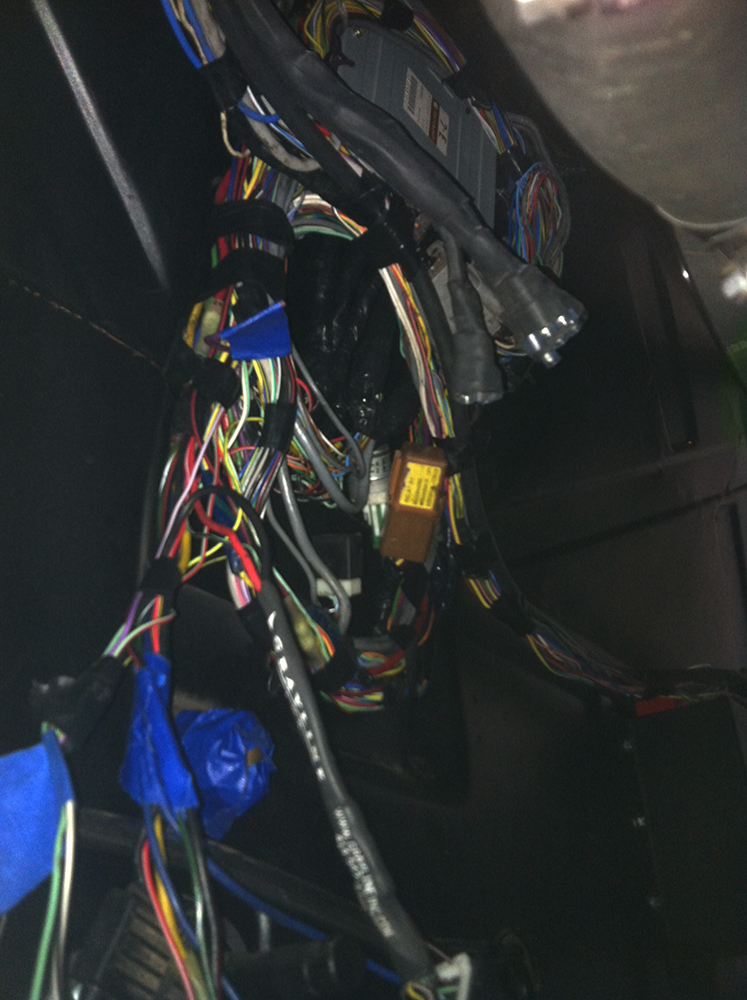 In addition to attaching the engine to the ECU I also attached the car harness to the ECU as well as a custom rear wiring harness. 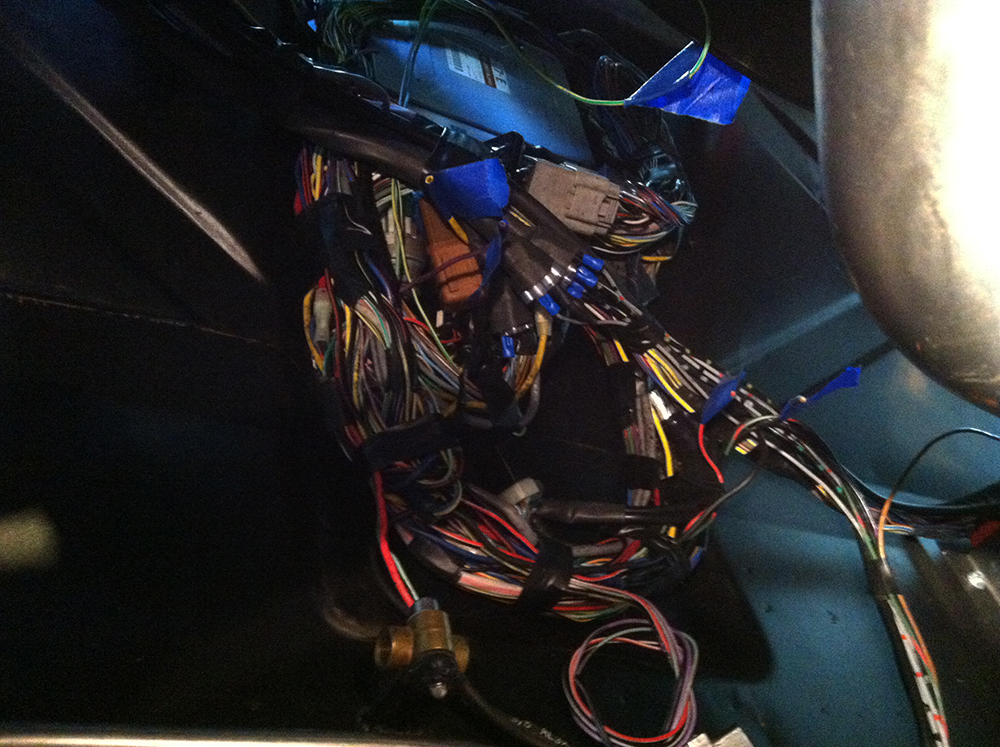 Here is the rear wiring harness I built, it attaches to the intake sensors, starter, reverse switch, speed sensor, and rear lights. 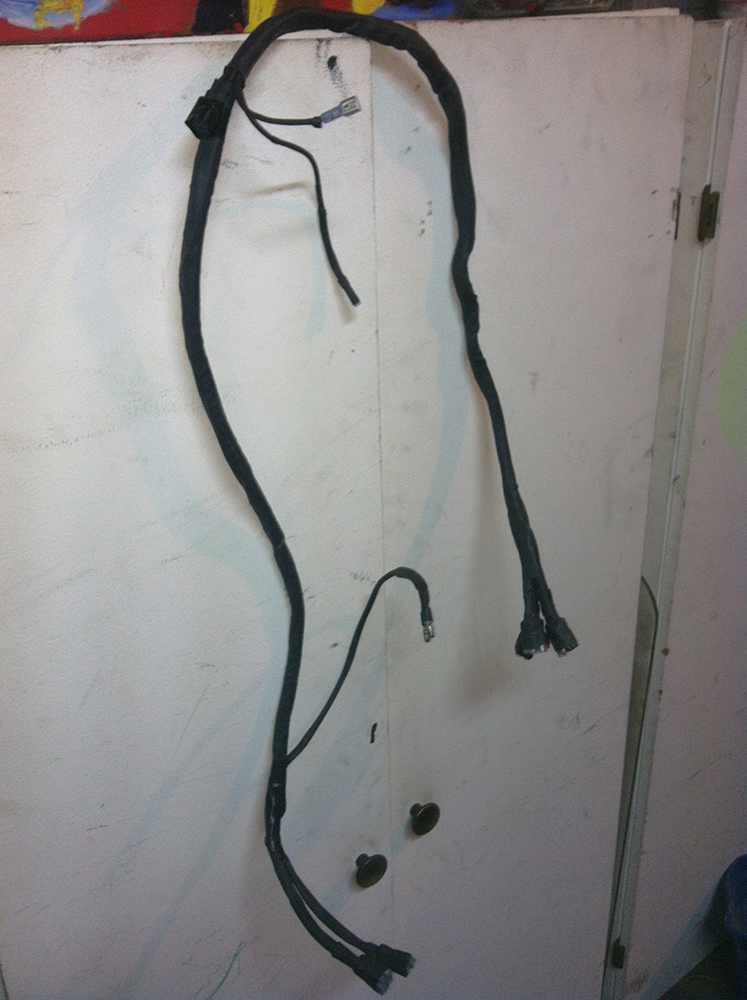 This is hard to represent properly but here is the state of affairs, I now know the wrx wiring harness by memory, but engine wiring is just about done! 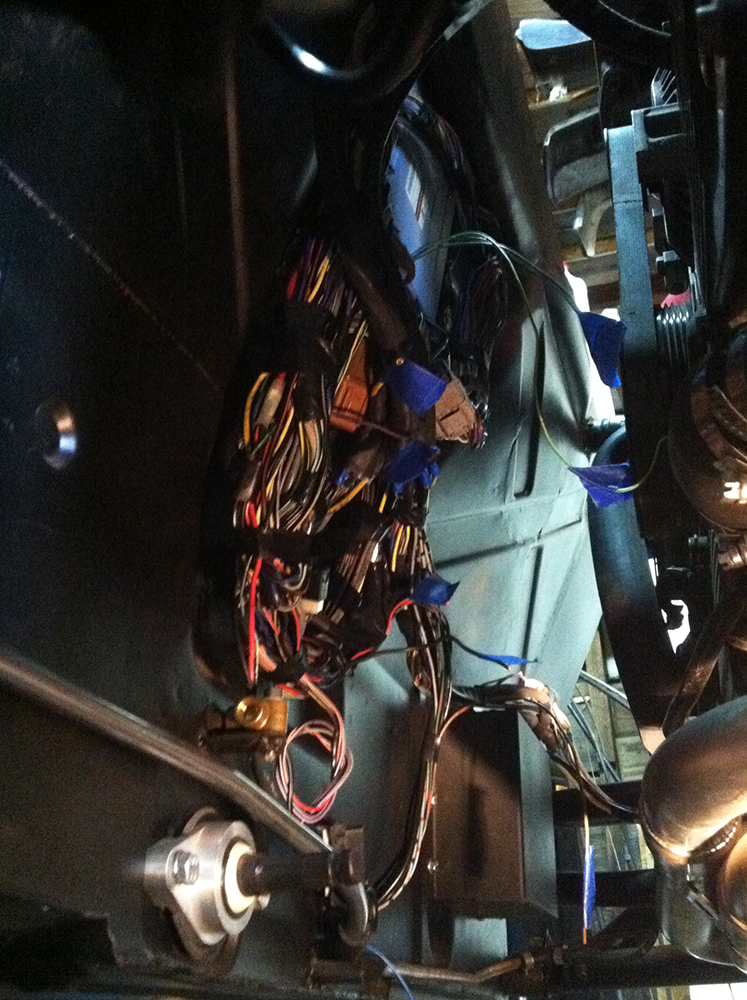 Here you can see the rear harness, plugged into the intake sensors and waiting for a tranny to wire up. Also refurbished the adapter plate and installed it, clutch is on its way! 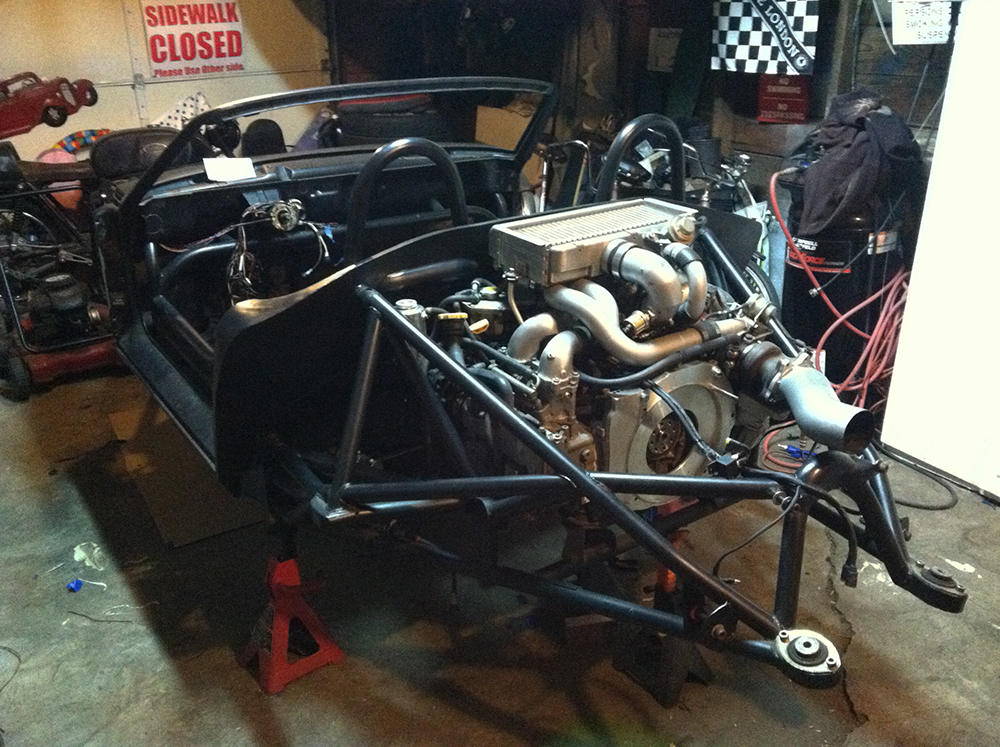 |
|
|
|
| plymouth37 |
Nov 20 2016, 01:39 AM
Post
#1179
|
|
Senior Member Group: Members Posts: 1,825 Joined: 24-May 05 From: Snoqualmie, WA Member No.: 4,138 Region Association: Pacific Northwest |
I needed to start wiring up the battery cables, but wasn't close enough to starting the engine to buy a battery so I decided to make a battery mockup. I started by modeling an Odyssey 680 based on images
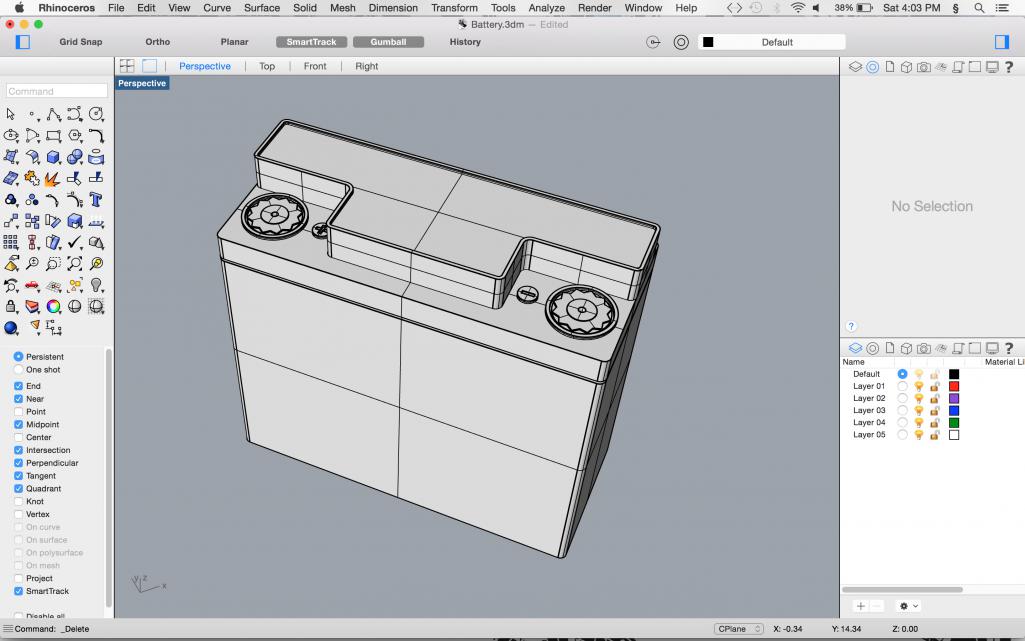 Then I 3D printed it. 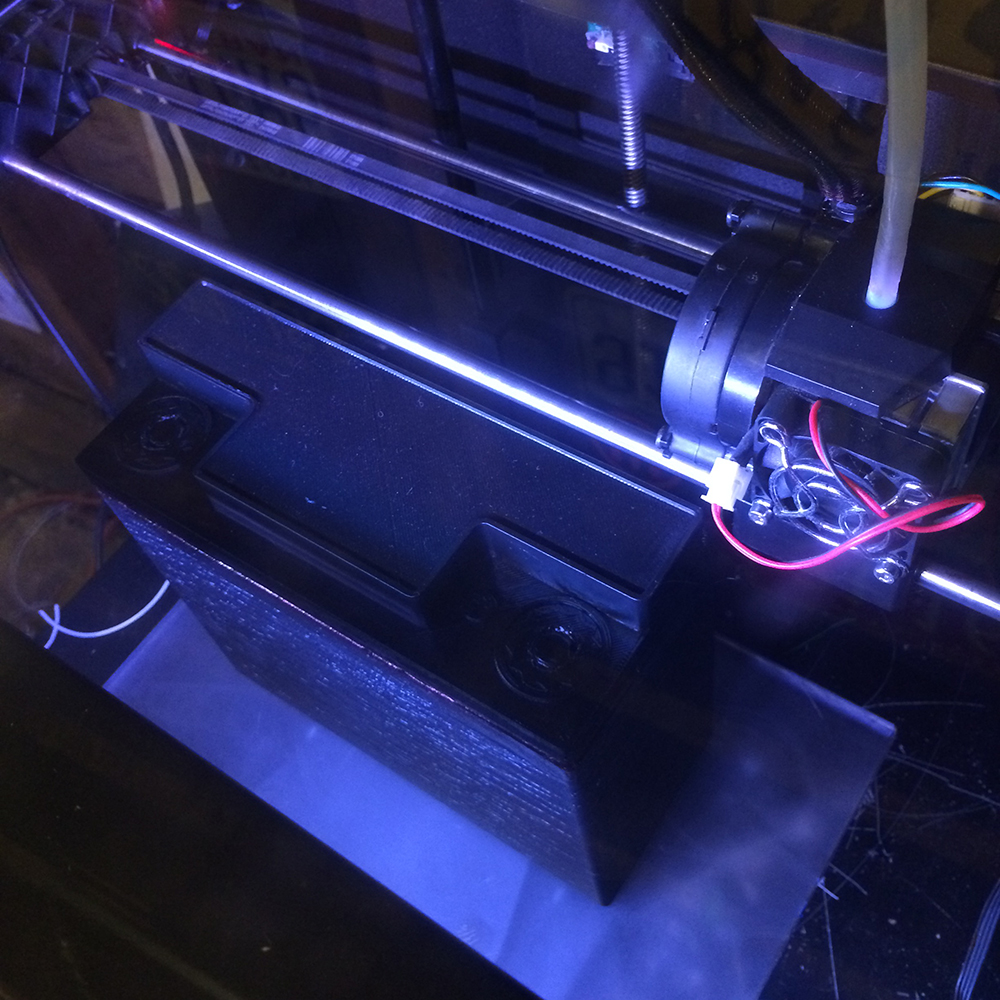 I painted the print and installed the proper threads into it. 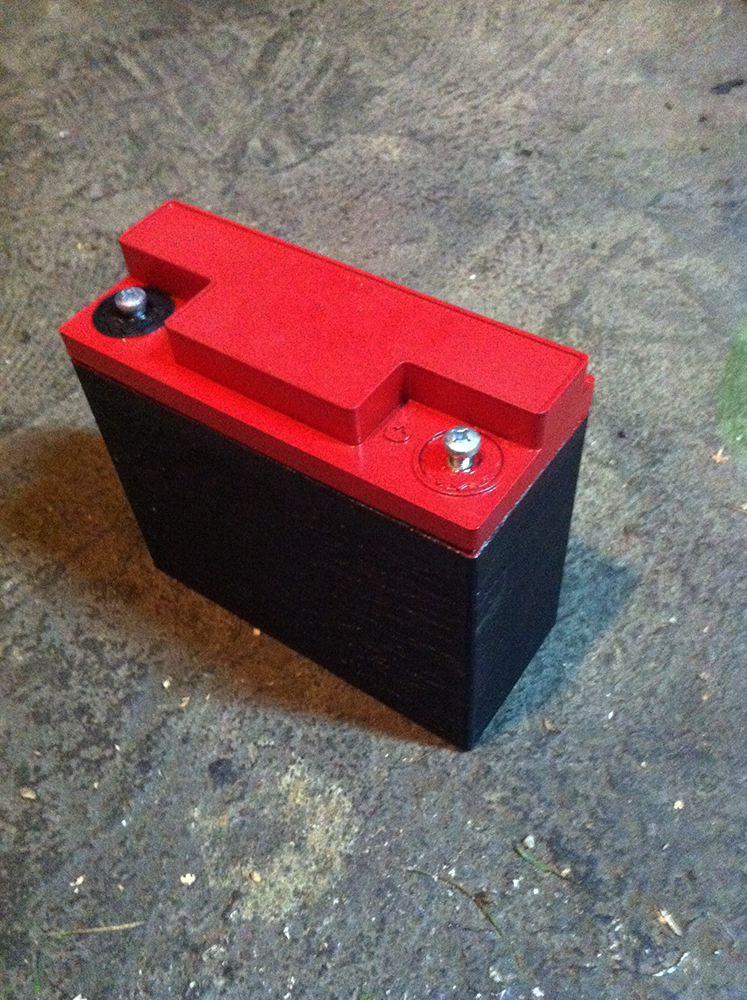 Here is the Battery Mount. 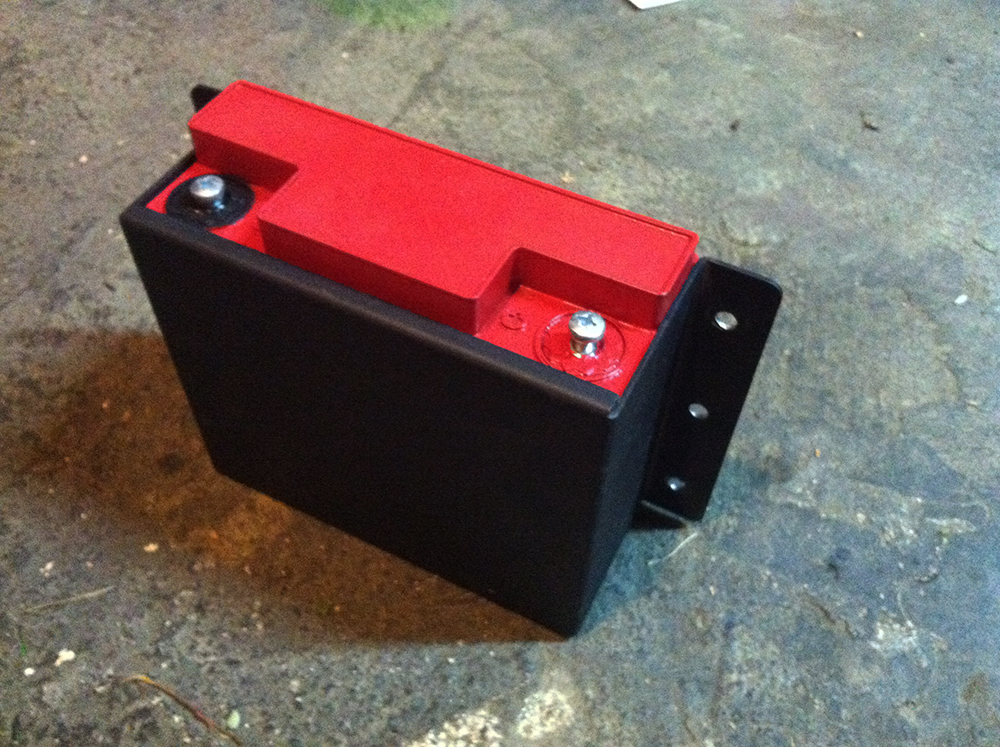 Finally I installed it in a clear spot on the firewall, low, opposite the driver, hidden by the air cleaner. I then ran the harness for the passenger side of the engine and battery cables to the chassis, starter, and wiring harness. Attached image(s) 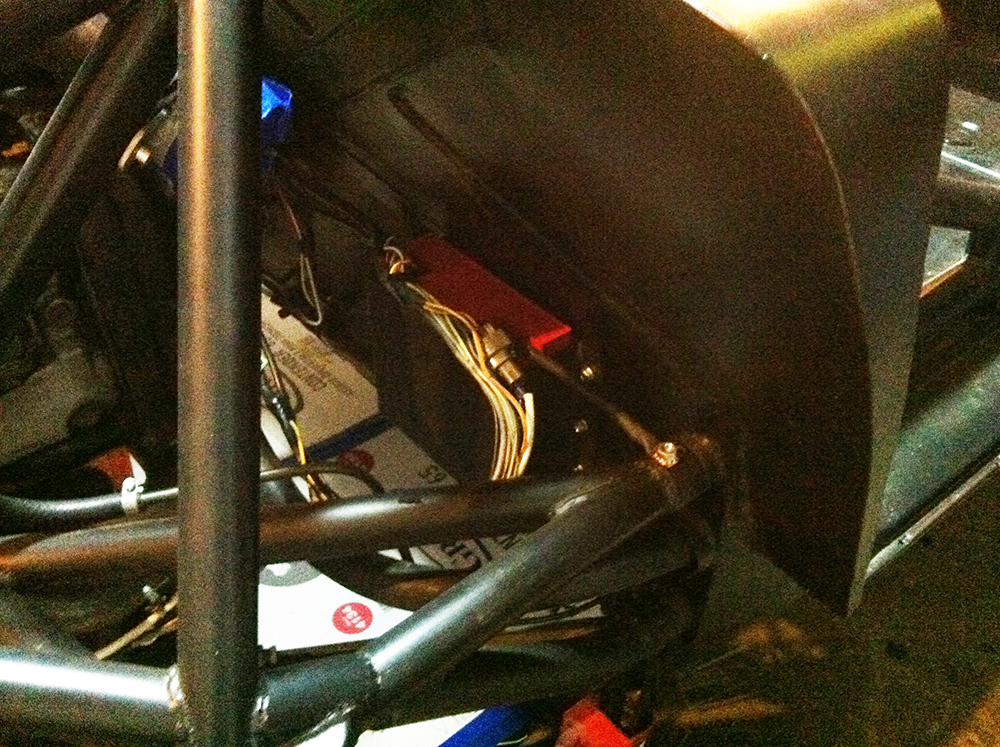
|
|
|
|
| plymouth37 |
Nov 24 2016, 01:13 PM
Post
#1180
|
|
Senior Member Group: Members Posts: 1,825 Joined: 24-May 05 From: Snoqualmie, WA Member No.: 4,138 Region Association: Pacific Northwest |
Happy Thanksgiving everybody!
I finally got all of the parts of my new clutch setup. New kennedy kevlar disk, new stage 2 pressor plate, and a resurfaced flywheel. I will install them and hopefully the tranny this weekend!  I found a great local machinist, look at this beautiful work!  |
|
|
|
|
2 User(s) are reading this topic (2 Guests and 0 Anonymous Users)
0 Members:

|
Lo-Fi Version | Time is now: 14th December 2025 - 11:38 AM |
Invision Power Board
v9.1.4 © 2025 IPS, Inc.