|
|
|
Porsche, and the Porsche crest are registered trademarks of Dr. Ing. h.c. F. Porsche AG.
This site is not affiliated with Porsche in any way. Its only purpose is to provide an online forum for car enthusiasts. All other trademarks are property of their respective owners. |
|
|

  |

| plymouth37 |
 Apr 23 2020, 04:03 PM Apr 23 2020, 04:03 PM
Post
#1481
|
|
Senior Member  Group: Members Posts: 1,825 Joined: 24-May 05 From: Snoqualmie, WA Member No.: 4,138 Region Association: Pacific Northwest |
Test tilt time!
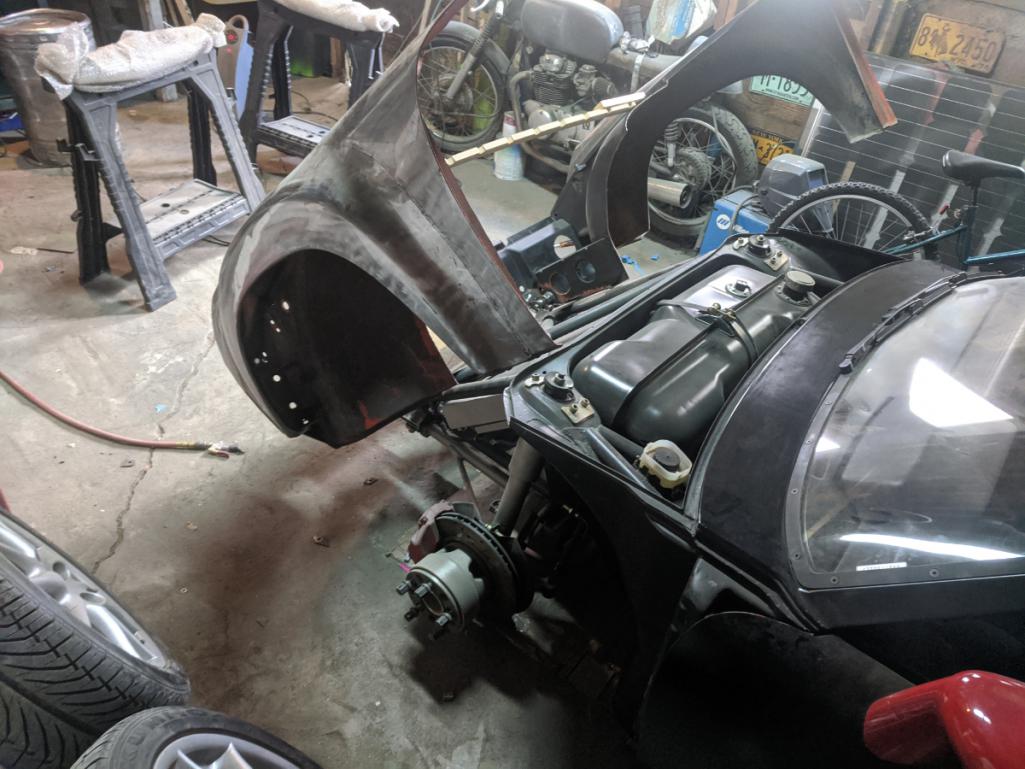 Heck yeah! Hood prep is next! 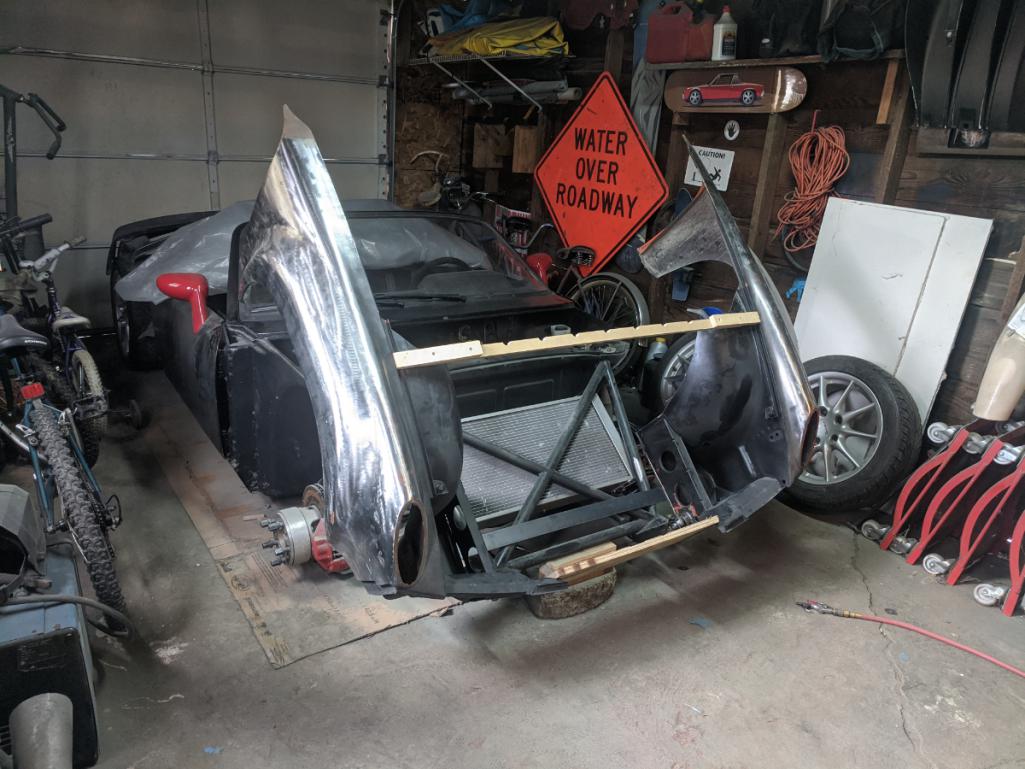 |
   |

 
|
| 76-914 |
Apr 23 2020, 04:09 PM
Post
#1482
|
|
Repeat Offender & Resident Subaru Antagonist Group: Members Posts: 13,883 Joined: 23-January 09 From: Temecula, CA Member No.: 9,964 Region Association: Southern California |
Very nice indeed. Maybe this will be the year! (IMG:style_emoticons/default/beerchug.gif)
|
|
|
|
| Root_Werks |
Apr 23 2020, 04:21 PM
Post
#1483
|
|
Village Idiot Group: Members Posts: 8,977 Joined: 25-May 04 From: About 5NM from Canada Member No.: 2,105 Region Association: Pacific Northwest |
Gotta love it when something actually works as planned! Well done!
|
|
|
|
| plymouth37 |
Apr 23 2020, 04:32 PM
Post
#1484
|
|
Senior Member Group: Members Posts: 1,825 Joined: 24-May 05 From: Snoqualmie, WA Member No.: 4,138 Region Association: Pacific Northwest |
QUOTE(76-914 @ Apr 23 2020, 04:09 PM)  I've been saying that for 10 years... |
|
|
|
| KELTY360 |
Apr 23 2020, 05:43 PM
Post
#1485
|
|
914 Neferati Group: Members Posts: 5,189 Joined: 31-December 05 From: Pt. Townsend, WA Member No.: 5,344 Region Association: Pacific Northwest |
QUOTE(plymouth37 @ Apr 23 2020, 02:32 PM) QUOTE(76-914 @ Apr 23 2020, 04:09 PM) I've been saying that for 10 years... Yeah, we know. (IMG:style_emoticons/default/shades.gif) I still get chills remembering logging into your thread and seeing you’d cut the car in half! |
|
|
|
| plymouth37 |
Apr 27 2020, 10:17 AM
Post
#1486
|
|
Senior Member Group: Members Posts: 1,825 Joined: 24-May 05 From: Snoqualmie, WA Member No.: 4,138 Region Association: Pacific Northwest |
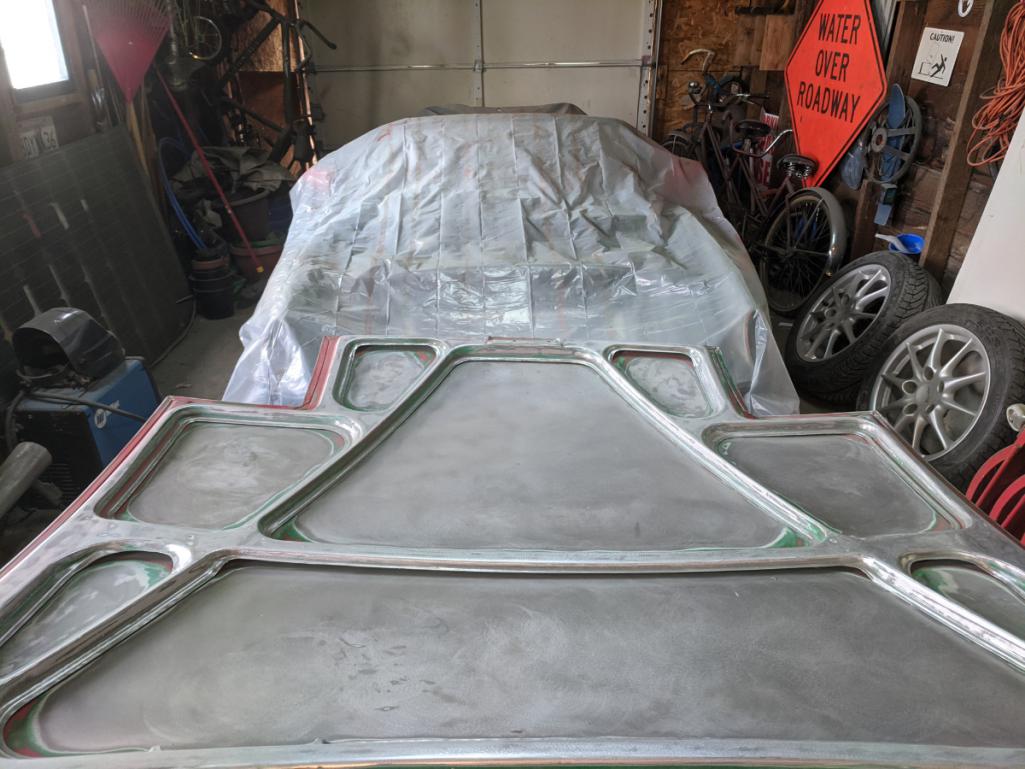
Now onto the hood, I got this lid in a trade and it has always felt a little heavy to me, lets see what is lurking under this paint!
 Merry Christmas, your present is Bondo!  A lot of it! 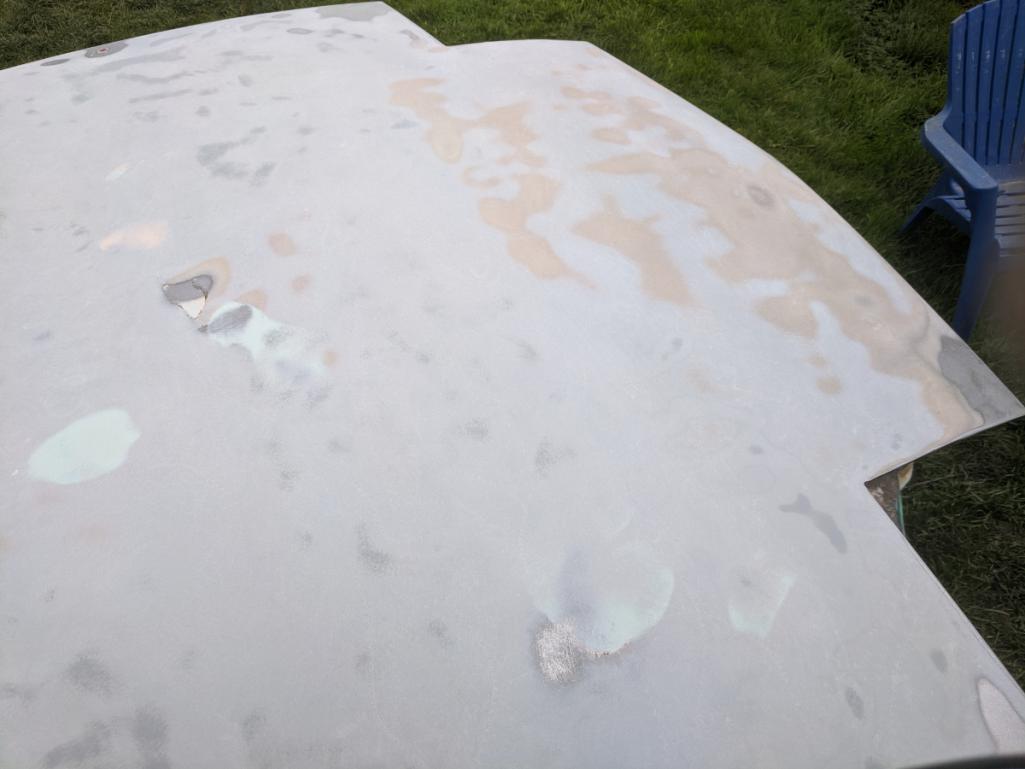 After stripping away pounds of Bondo it looks like this lid is actually pretty clean, it just suffered from the two most common injuries that happen to these lids. The dent where you put your hand to close it, someone closed the lid on a strangely shaped, too big object, oh and there are a few rock dings. I can totally work with this, an afternoon with a hammer and dolly will get this straight, I think the last person just added Bondo until the high points were hidden, yikes! 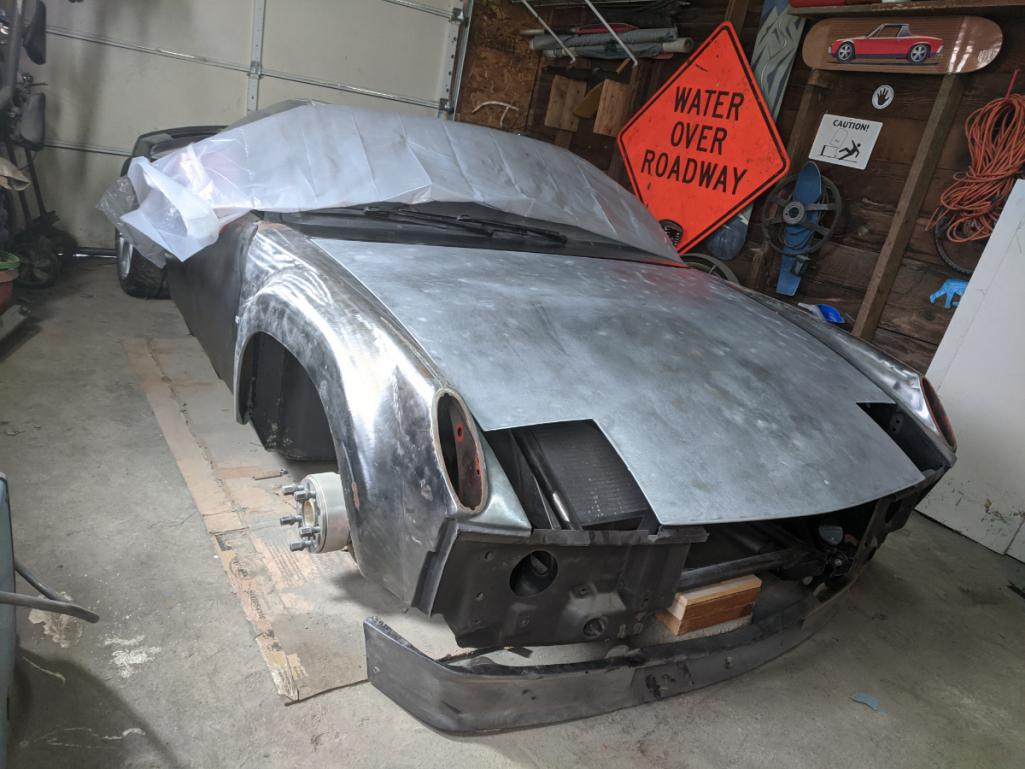 |
|
|
|
| Cairo94507 |
Apr 27 2020, 10:22 AM
Post
#1487
|
|
Michael Group: Members Posts: 10,631 Joined: 1-November 08 From: Auburn, CA Member No.: 9,712 Region Association: Northern California |
Really taking shape now. Can wait to see it all buttoned up and running. (IMG:style_emoticons/default/beerchug.gif)
|
|
|
|
| plymouth37 |
Apr 27 2020, 10:22 AM
Post
#1488
|
|
Senior Member Group: Members Posts: 1,825 Joined: 24-May 05 From: Snoqualmie, WA Member No.: 4,138 Region Association: Pacific Northwest |
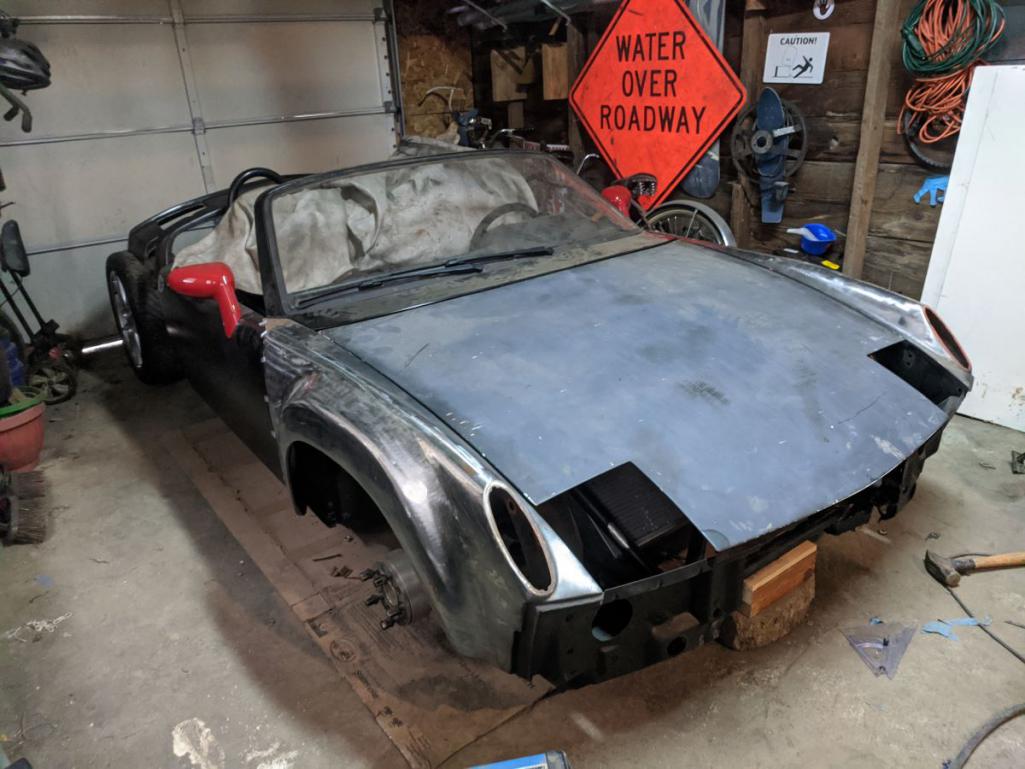
Cleaned up the back.
 ohh shiny! (IMG:style_emoticons/default/drooley.gif) Oh the 220V to the garage is done too, trench is almost undetectable already! 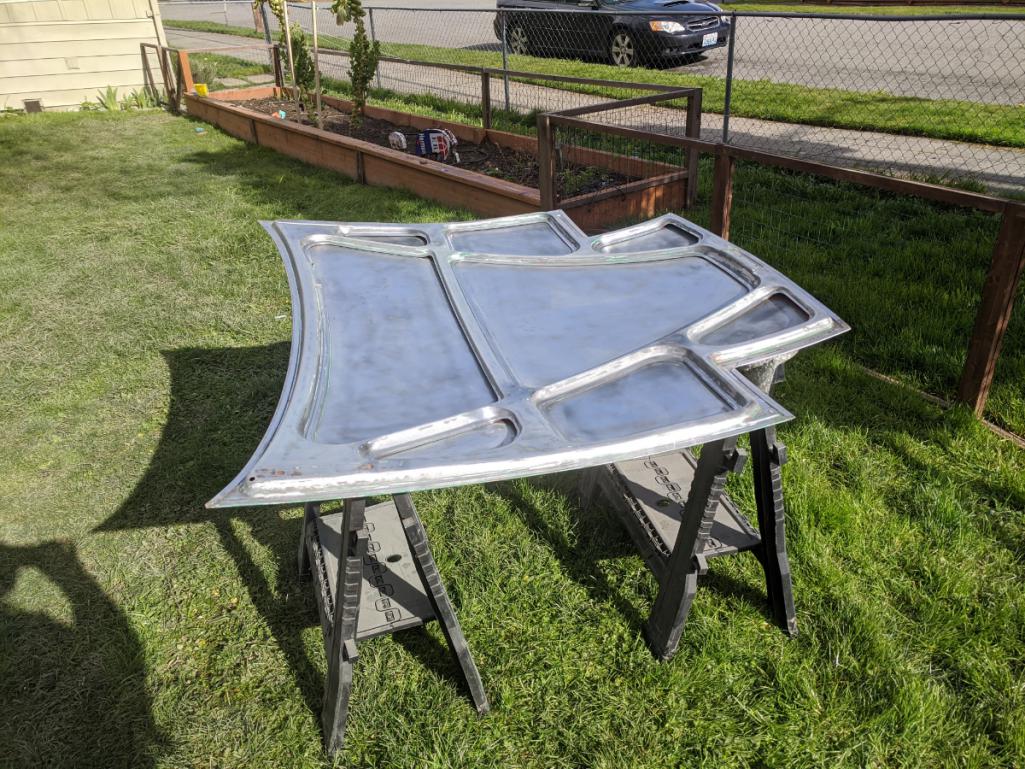 Then shot the whole thing in primer again, looks about the same as before but about 10 pounds lighter! 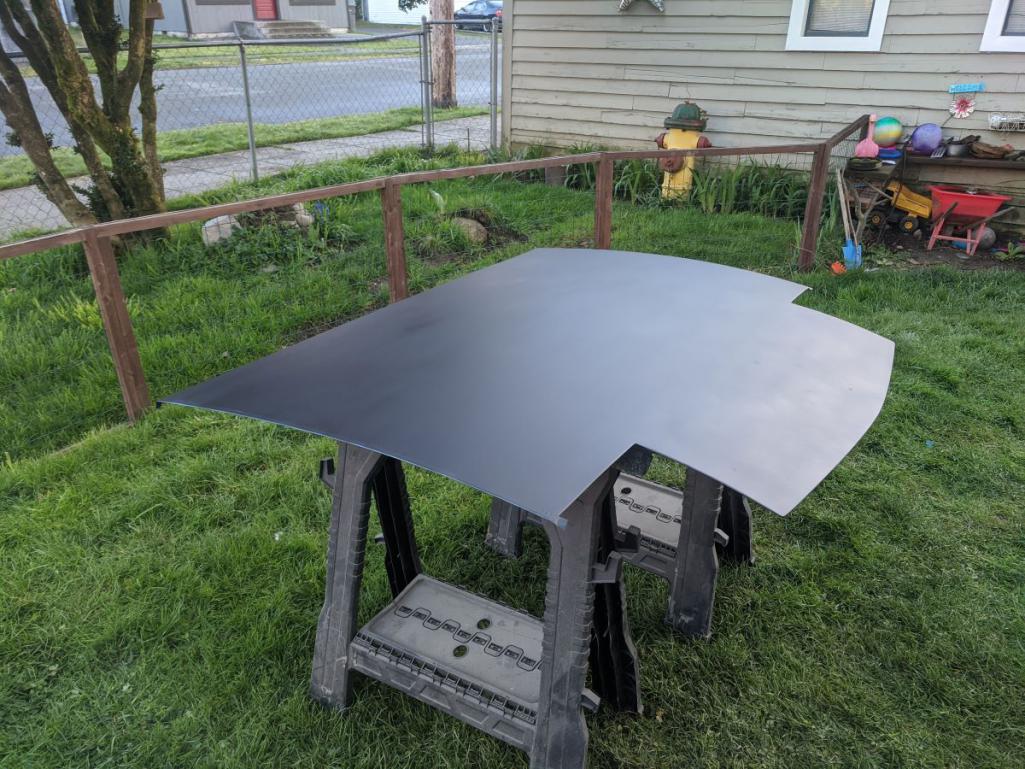 |
|
|
|
| dan10101 |
Apr 27 2020, 10:35 AM
Post
#1489
|
|
TORQUE-o-holic Group: Members Posts: 1,140 Joined: 29-April 03 From: Eagle Point, Or Member No.: 626 Region Association: Pacific Northwest |
Nicely done. (IMG:style_emoticons/default/first.gif)
|
|
|
|
| Mueller |
Apr 27 2020, 11:38 AM
Post
#1490
|
|
914 Freak! Group: Members Posts: 17,155 Joined: 4-January 03 From: Antioch, CA Member No.: 87 Region Association: None |
That tilting front end section is next level stuff, great job.
|
|
|
|
| 914werke |
Apr 27 2020, 11:39 AM
Post
#1491
|
|
"I got blisters on me fingers" Group: Members Posts: 11,658 Joined: 22-March 03 From: USofA Member No.: 453 Region Association: Pacific Northwest |
I thought you might strip the steel skin & replace it with Alum or FG.
|
|
|
|
| plymouth37 |
Apr 27 2020, 12:06 PM
Post
#1492
|
|
Senior Member Group: Members Posts: 1,825 Joined: 24-May 05 From: Snoqualmie, WA Member No.: 4,138 Region Association: Pacific Northwest |
QUOTE(914werke @ Apr 27 2020, 11:39 AM) I thought you might strip the steel skin & replace it with Alum or FG. I am welding the lid to the fenders to make it a single piece, might take a mold off it when it's done. (IMG:style_emoticons/default/idea.gif) |
|
|
|
| Root_Werks |
Apr 27 2020, 12:39 PM
Post
#1493
|
|
Village Idiot Group: Members Posts: 8,977 Joined: 25-May 04 From: About 5NM from Canada Member No.: 2,105 Region Association: Pacific Northwest |
QUOTE(plymouth37 @ Apr 27 2020, 11:06 AM) QUOTE(914werke @ Apr 27 2020, 11:39 AM) I thought you might strip the steel skin & replace it with Alum or FG. I am welding the lid to the fenders to make it a single piece, might take a mold off it when it's done. (IMG:style_emoticons/default/idea.gif) You'd think you could lose some of the factory bracing since the hood won't have to support itself anymore. A little less weight. Very cool! |
|
|
|
| plymouth37 |
Apr 28 2020, 08:34 AM
Post
#1494
|
|
Senior Member Group: Members Posts: 1,825 Joined: 24-May 05 From: Snoqualmie, WA Member No.: 4,138 Region Association: Pacific Northwest |
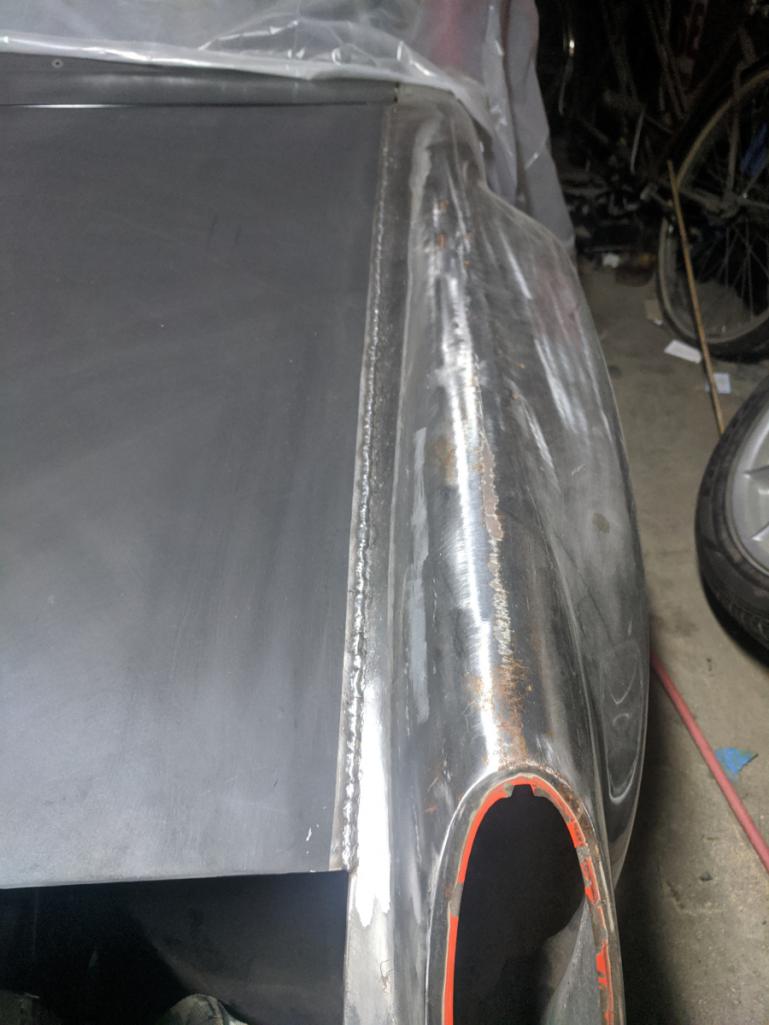
I am going to need to do 2 welds on each side of the hood to attach it to fill the panel gap. I cut a 1/4" wide strip of 1/8' steel and tacked it on.
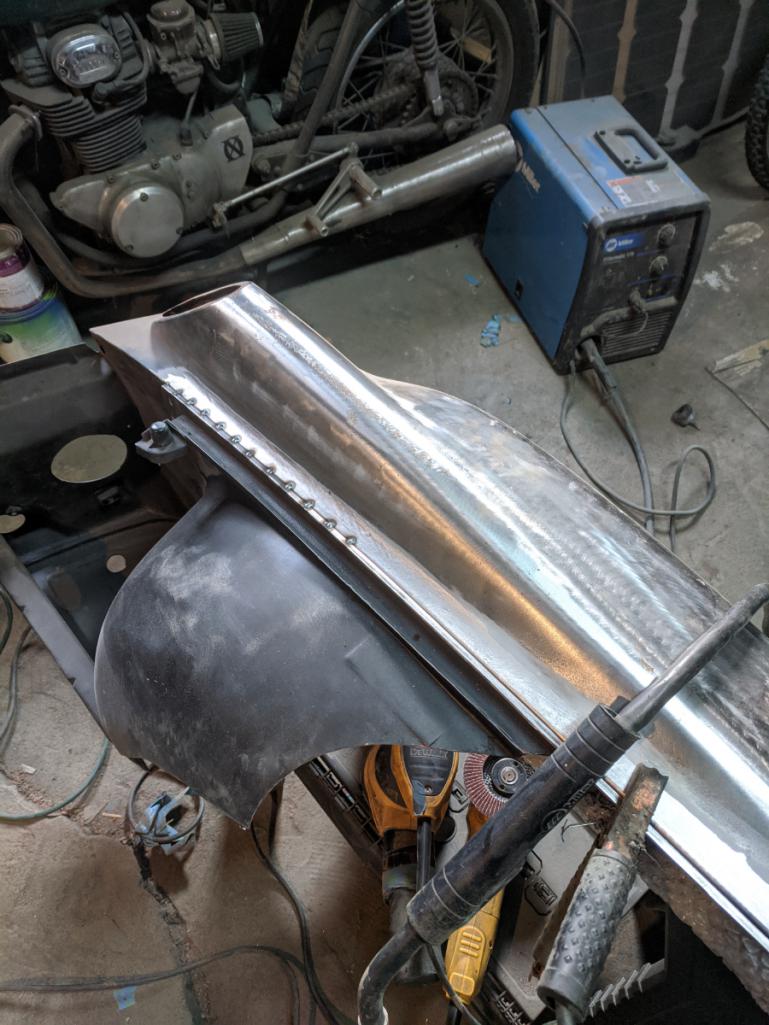 Between the fold in the fender and the 1/8" material I could sink some good heat into the tacks, but went slow and tacked every inch or so, then every 1/2" then slowly filled in the gaps.  3 feet of weld down, 9 more to go! 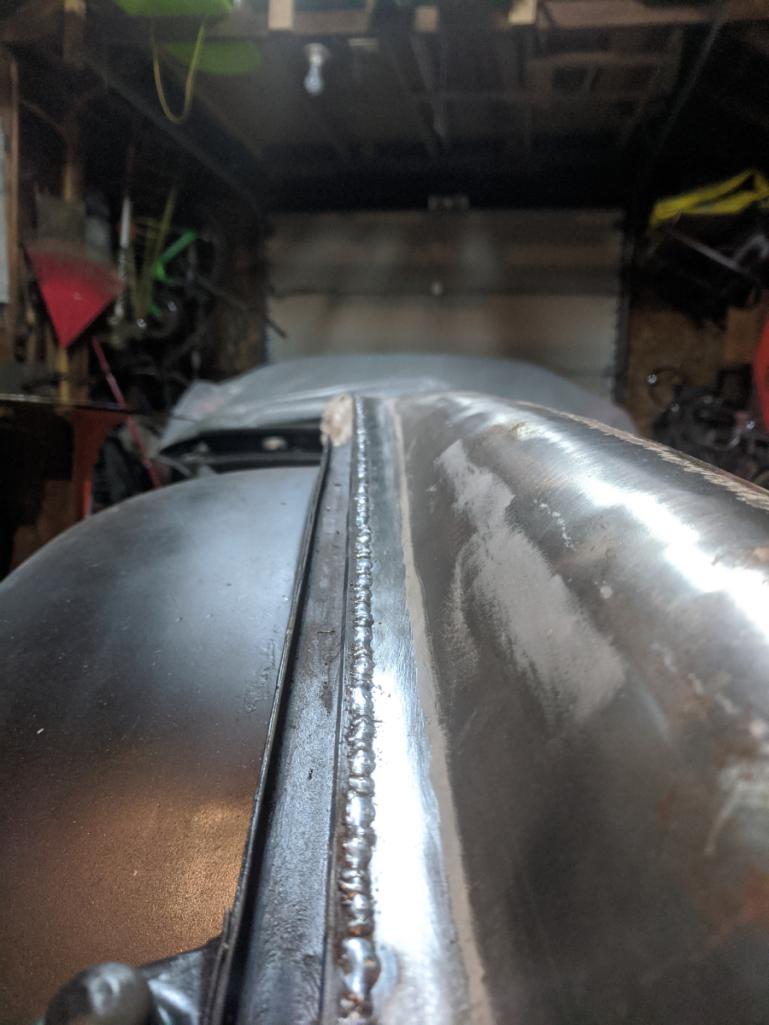 |
|
|
|
| sixnotfour |
Apr 28 2020, 12:04 PM
Post
#1495
|
|
914 Wizard Group: Members Posts: 11,244 Joined: 12-September 04 Member No.: 2,744 Region Association: NineFourteenerVille |
He had fiberglass F&R Hoods, My son and I drove over to WY. and traded, Bovy got the rear I have the head-lite delete front, Dana got steel F&R.. Late night Winter night trade...luckily the roads where open..
Wish I find the pic. of Chris standing next to the ANKLBTR.2011. (IMG:style_emoticons/default/beerchug.gif) |
|
|
|
| Asheikh |
May 4 2020, 05:23 AM
Post
#1496
|
|
Newbie Group: Members Posts: 48 Joined: 7-August 15 From: Pakistan Member No.: 19,037 Region Association: Pakistan |
QUOTE(plymouth37 @ Apr 23 2020, 01:47 PM) QUOTE(Asheikh @ Apr 16 2020, 11:02 AM) do u still have your break active spoiler....? can you please share more information on it I may make another one, that was a relay logic board (would use an arduino now) powering a couple linear actuators attached to a cut portion of the original trunk lid. didn't have it for long, can't even find a pic! I found the video for it. I downloaded it 13 years ago (IMG:style_emoticons/default/aktion035.gif) |
|
|
|
| plymouth37 |
May 4 2020, 11:07 AM
Post
#1497
|
|
Senior Member Group: Members Posts: 1,825 Joined: 24-May 05 From: Snoqualmie, WA Member No.: 4,138 Region Association: Pacific Northwest |
I got both filler strips welded on
 Ground the weld down 75% of the way or so, filler strips are also still wide. You can see I also masked the edges of the hood when I primered it so I have a clean edge to weld to, forethought? What's that? 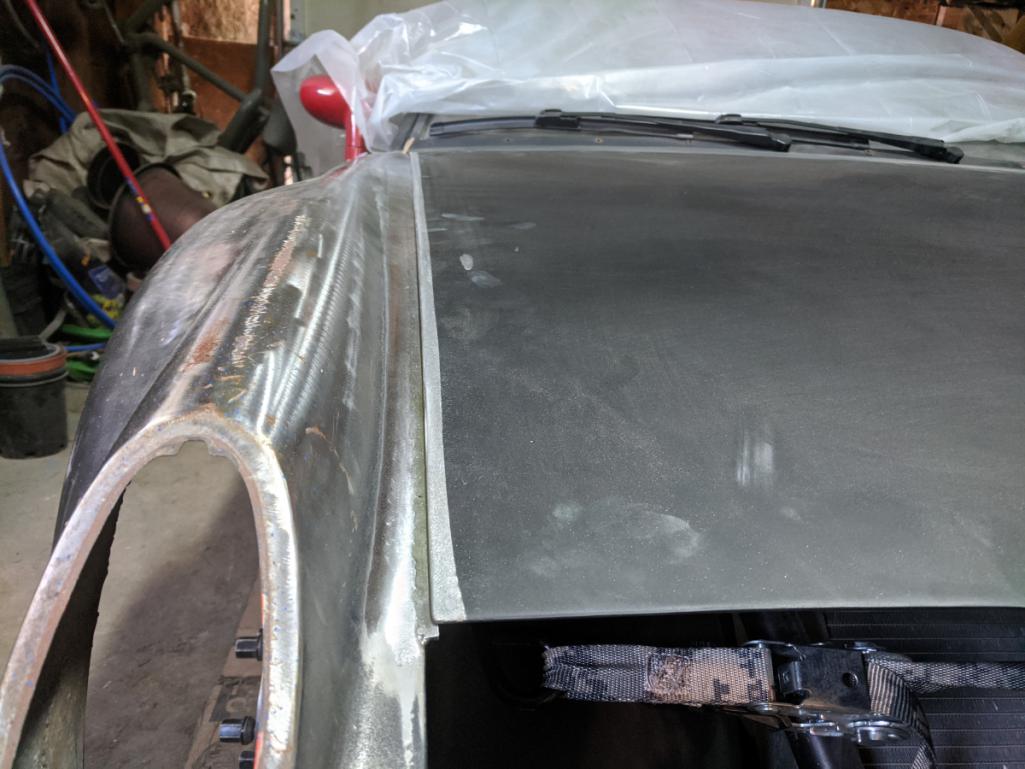 I mounted the fenders, laid the lid on them, now I will mark and cut the hood opening, then weld it in. 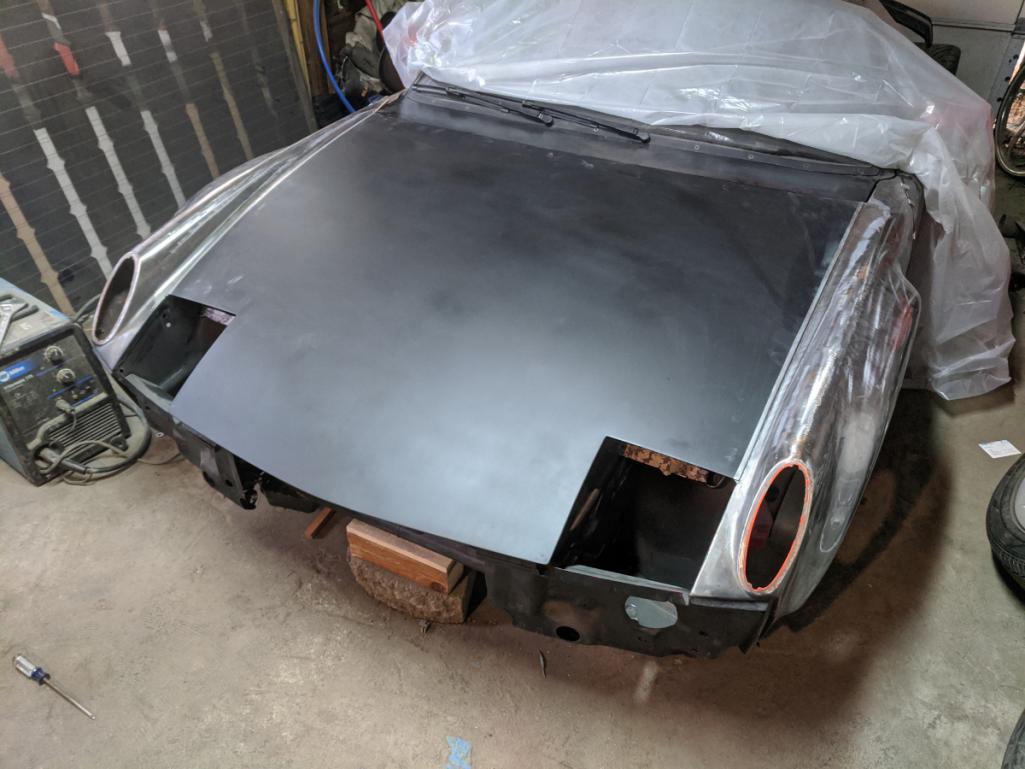 |
|
|
|
| plymouth37 |
May 4 2020, 11:20 AM
Post
#1498
|
|
Senior Member Group: Members Posts: 1,825 Joined: 24-May 05 From: Snoqualmie, WA Member No.: 4,138 Region Association: Pacific Northwest |
QUOTE(Asheikh @ May 4 2020, 05:23 AM) QUOTE(plymouth37 @ Apr 23 2020, 01:47 PM) QUOTE(Asheikh @ Apr 16 2020, 11:02 AM) do u still have your break active spoiler....? can you please share more information on it I may make another one, that was a relay logic board (would use an arduino now) powering a couple linear actuators attached to a cut portion of the original trunk lid. didn't have it for long, can't even find a pic! I found the video for it. I downloaded it 13 years ago (IMG:style_emoticons/default/aktion035.gif) (IMG:style_emoticons/default/aktion035.gif) haha, forgot how cool that was! Damn I look young! |
|
|
|
| plymouth37 |
May 18 2020, 04:06 PM
Post
#1499
|
|
Senior Member Group: Members Posts: 1,825 Joined: 24-May 05 From: Snoqualmie, WA Member No.: 4,138 Region Association: Pacific Northwest |
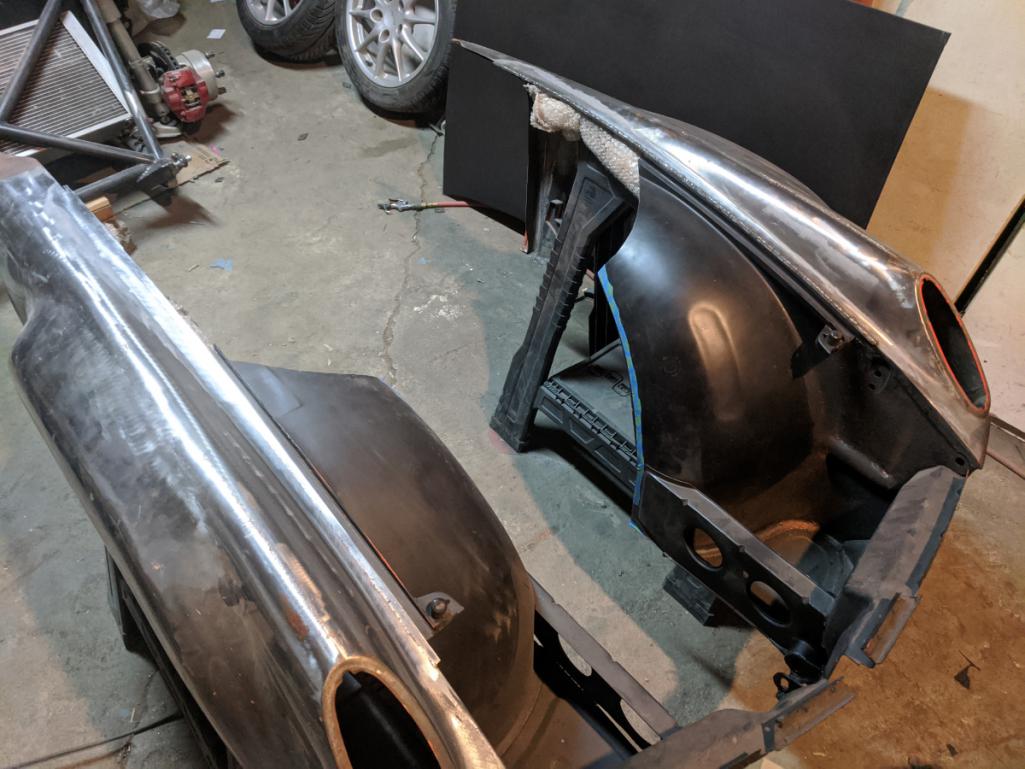
I got the fenders aligned and mounted.
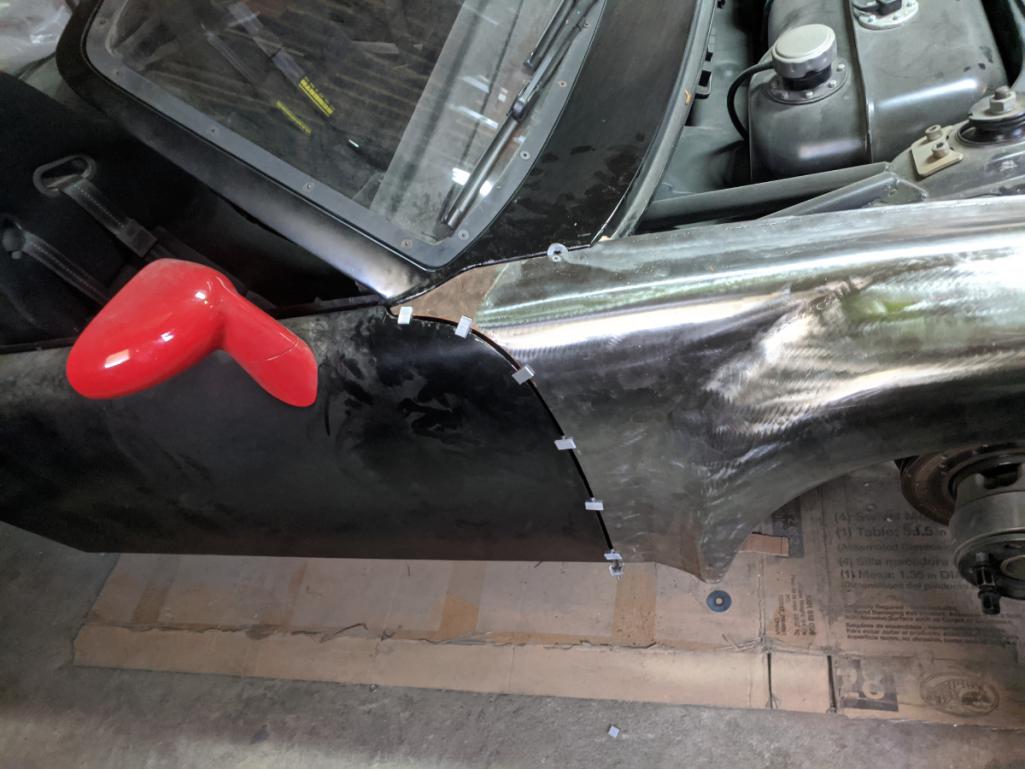 Cut down my oversized fenders to fit the lid, (sheetmetal screw included for added accuracy). 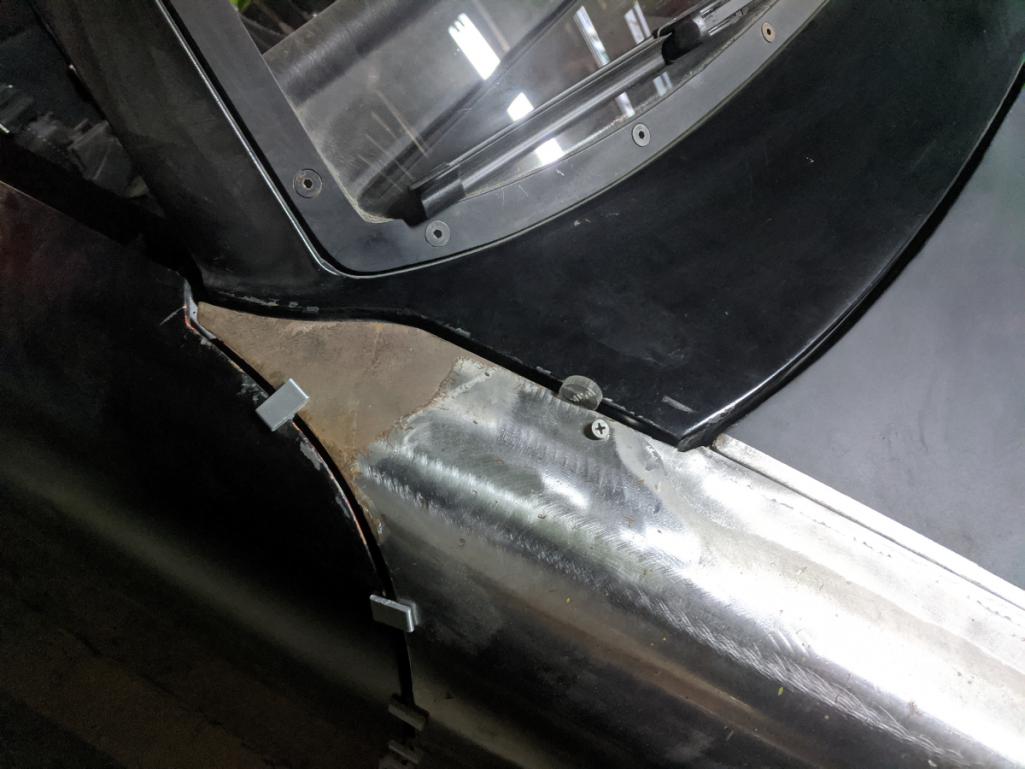 Here we go! 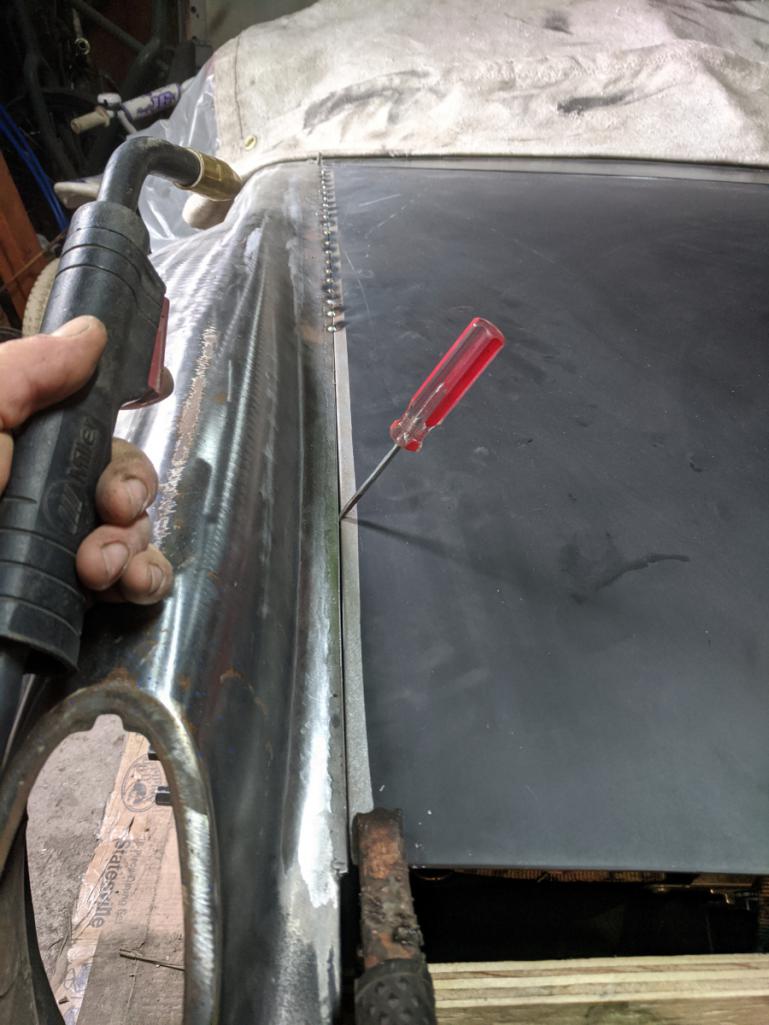 Hood is tacked on, gaps still look good, time to fully weld the lid on and move on to rebuilding the front inner sheet metal. 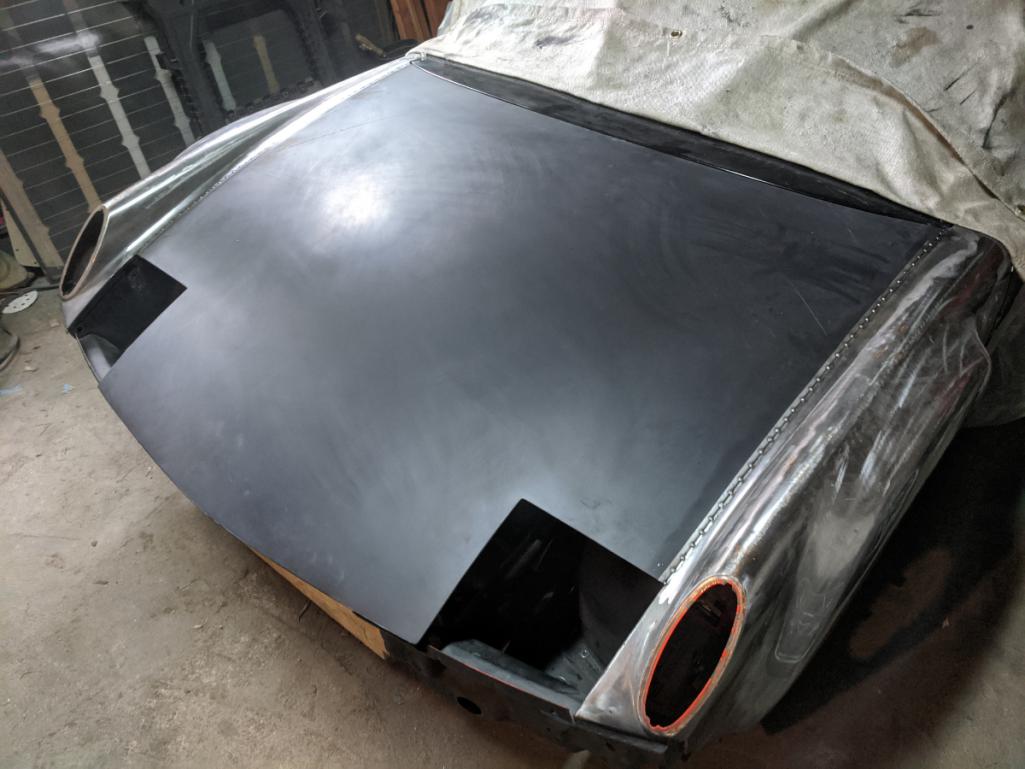 |
|
|
|
| plymouth37 |
Jun 3 2020, 03:08 PM
Post
#1500
|
|
Senior Member Group: Members Posts: 1,825 Joined: 24-May 05 From: Snoqualmie, WA Member No.: 4,138 Region Association: Pacific Northwest |
Finished welding the lid on, also welded in a filler panel for the old radiator opening.
 I am going to re-cut the front opening once I get the bumper figured out but I really think the hole can be much smaller than it was before. We were just copying the design for the V8 cars at the time but I think that is way oversized now that I have lived with the car for a while. 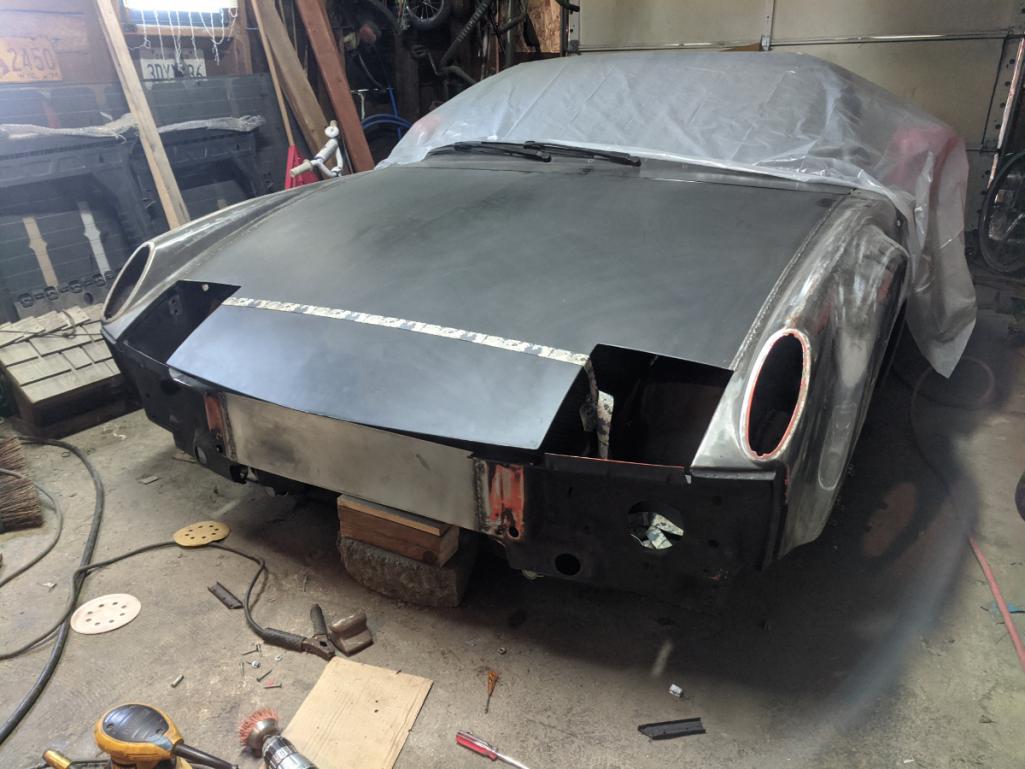 Then I finished the welds, should be able to finish this seam with a light skim coat of filler. (found another dent in the hood too (IMG:style_emoticons/default/biggrin.gif) ) 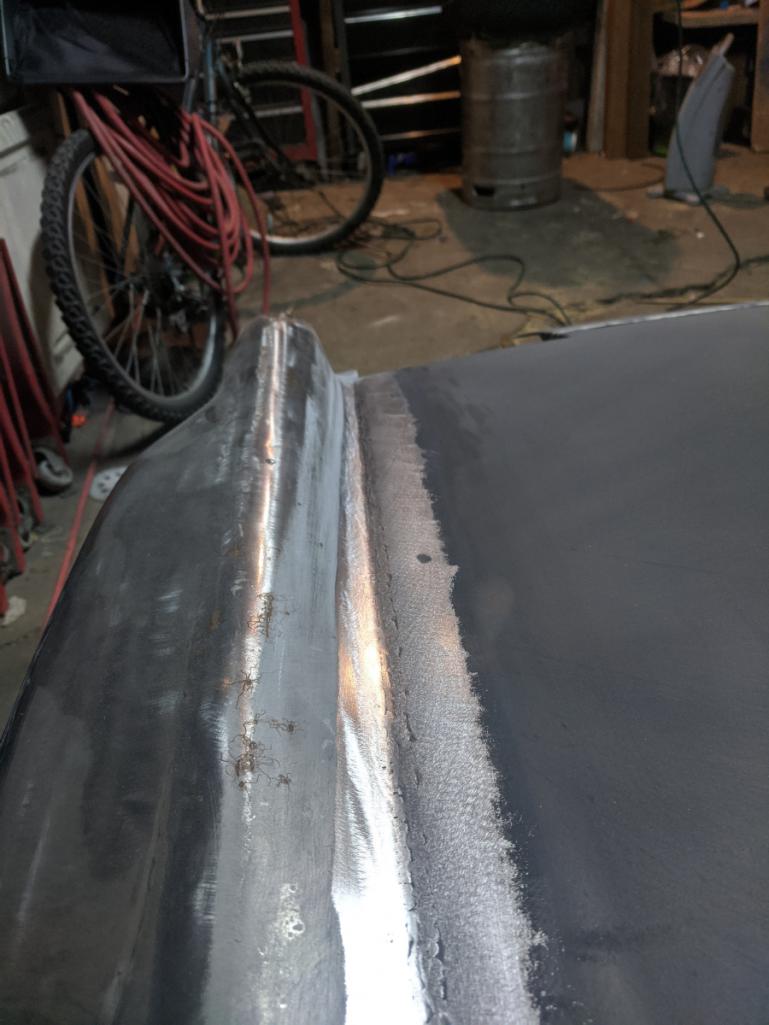 Next I am going to rebuild the structure that attaches the front hood structure to the nose of the car and make some headlight filler pieces. 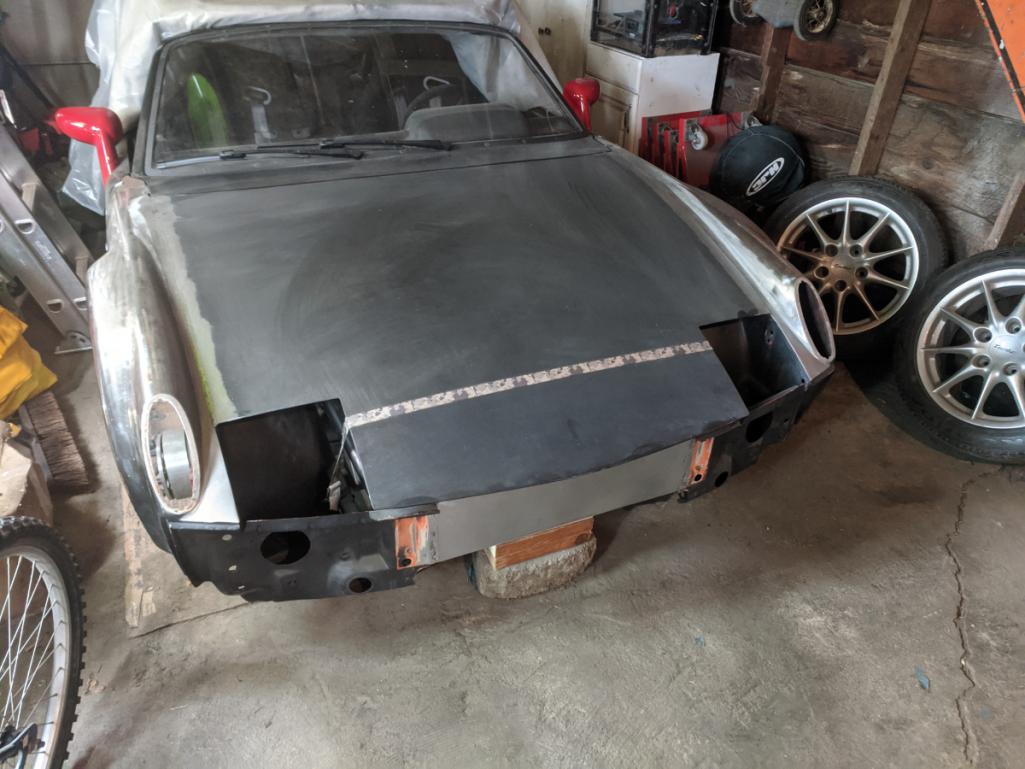 |
|
|
|
|
5 User(s) are reading this topic (5 Guests and 0 Anonymous Users)
0 Members:

|
Lo-Fi Version | Time is now: 14th May 2026 - 04:13 AM |
Invision Power Board
v9.1.4 © 2026 IPS, Inc.