|
|
|
Porsche, and the Porsche crest are registered trademarks of Dr. Ing. h.c. F. Porsche AG.
This site is not affiliated with Porsche in any way. Its only purpose is to provide an online forum for car enthusiasts. All other trademarks are property of their respective owners. |
|
|

  |

| RiqueMar |
 Jul 18 2020, 01:55 PM Jul 18 2020, 01:55 PM
Post
#881
|
|
Enrique Allen Mar  Group: Members Posts: 2,264 Joined: 28-August 08 From: San Diego, CA Member No.: 9,478 Region Association: Southern California |
Less updates, but a bunch on progress! Simultaneously having the side and rear valences worked on as my Father and I work on revising the oil system. Most of the updates in this post relate to the side-valences, as they need a bunch of work.
Let me start off by saying, the side valences need a lot of work. Starting this project, I was fortunate that we had the side-skirts on as we welded on the flares. Note to anyone reading; Even having the side-skirts on when we welded the flares, they need ALOT of work. They are NOT 'plug and play'. As with the front valence, expect a lot of sanding, building up, and possibly adding glass. In my case, we had to glass in ABS to add about 1/2" on the top lip for anything to line up flush with the doors and fenders. Once added onto the car, that's when the shaping and build-up comes in. Forecasting the work to be done, the guys 'back-filled' the rockers with fiberglass so that we are not constantly attaching / disconnecting the pieces. After the first phase was complete and everything lines up, it was time to add more filler so that the 'curves' of the fenders match with the fenders (last photo) and blend in a radius to match the car-body. 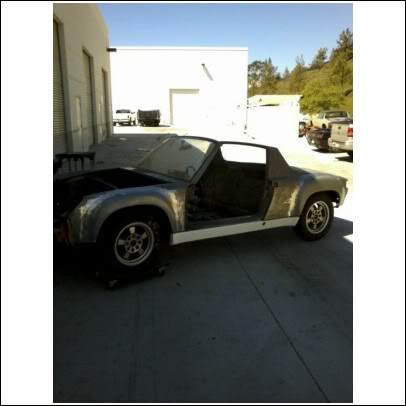 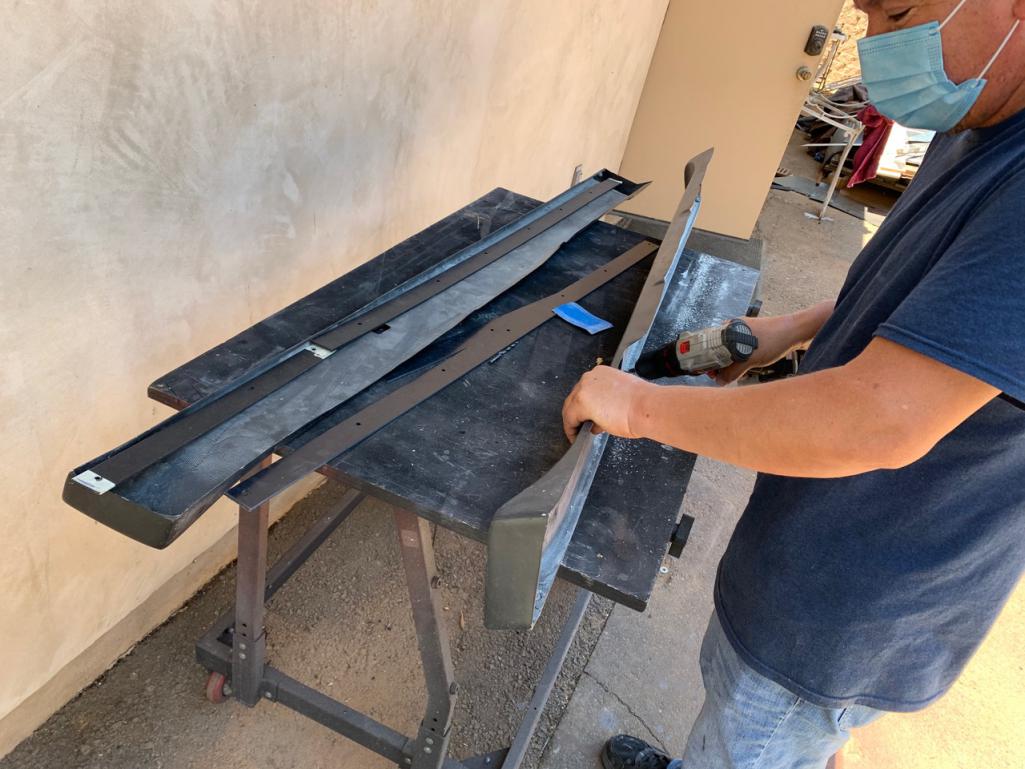 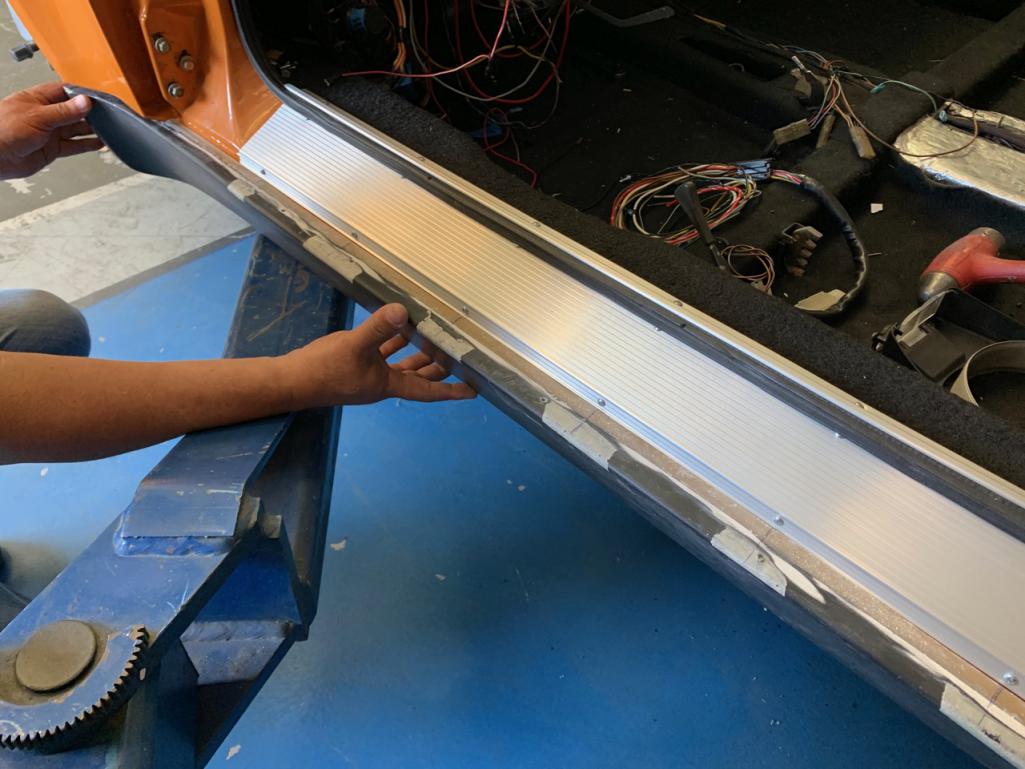 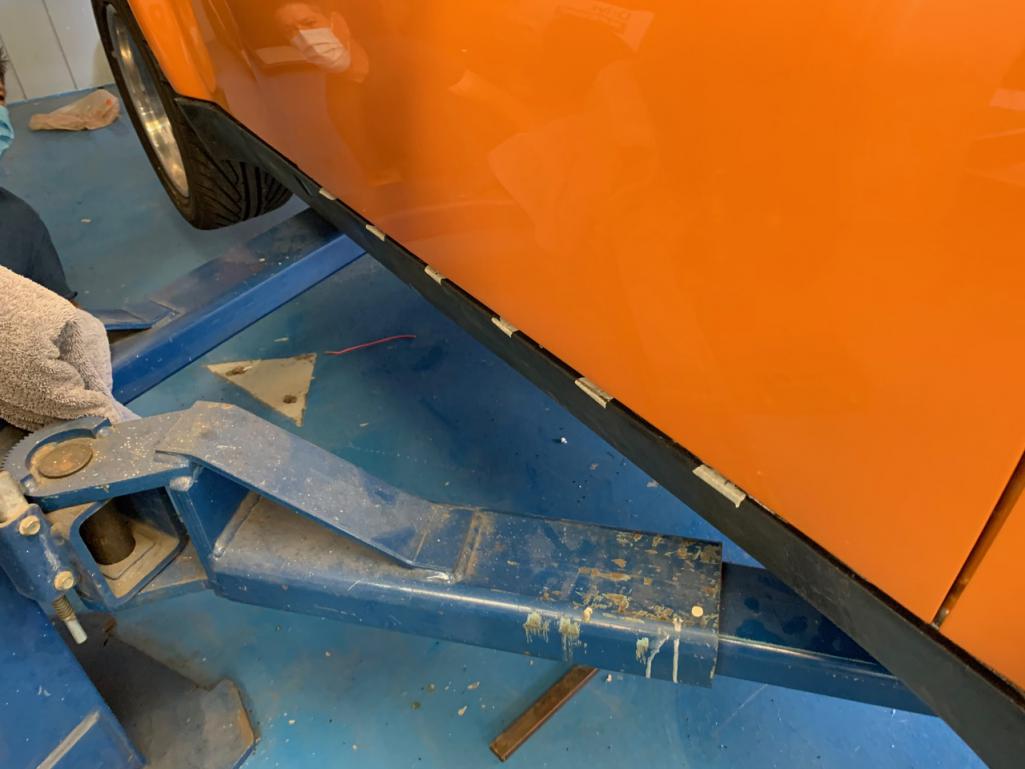 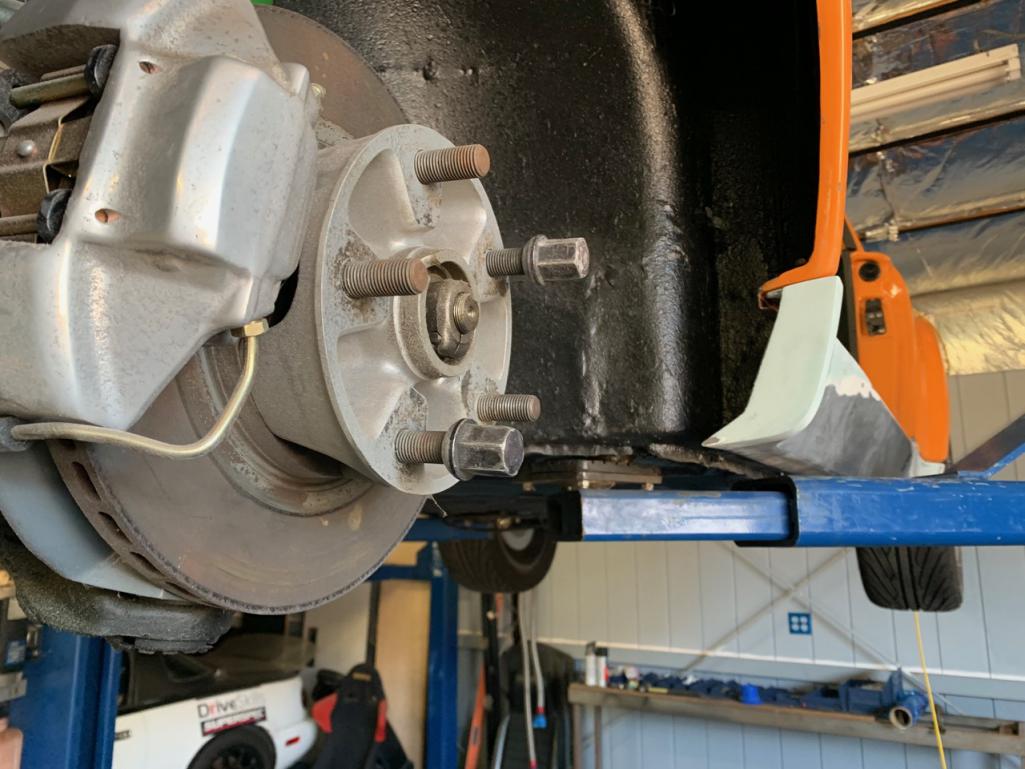 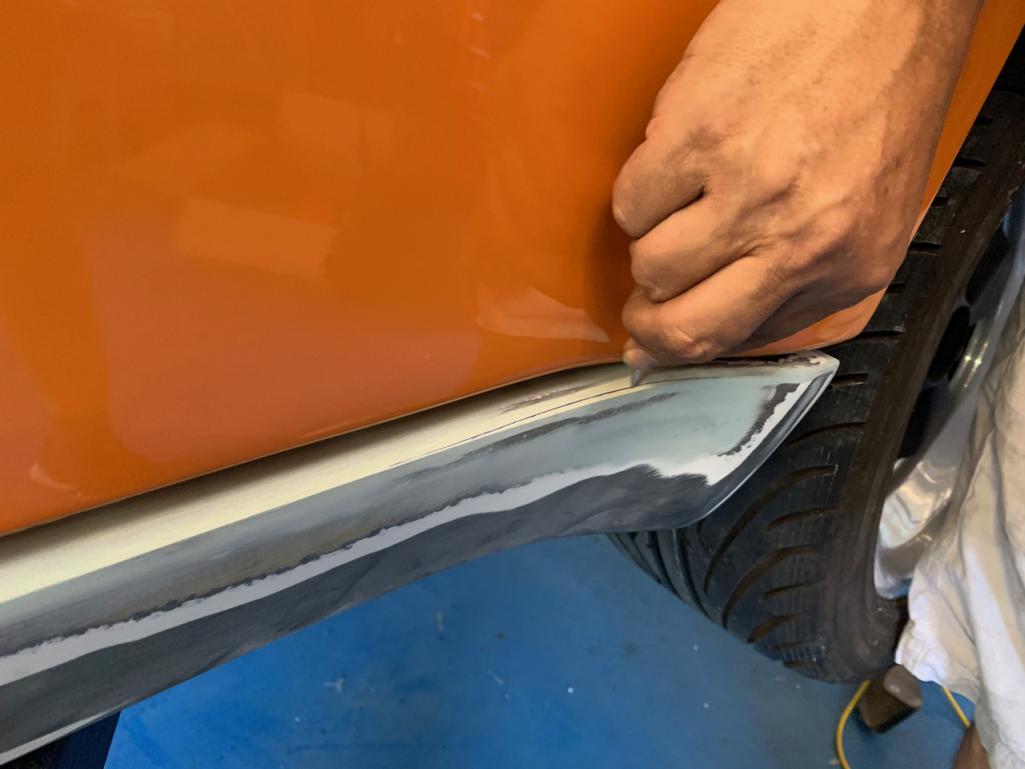 |
   |

 
|
| RiqueMar |
Jul 18 2020, 02:10 PM
Post
#882
|
|
Enrique Allen Mar Group: Members Posts: 2,264 Joined: 28-August 08 From: San Diego, CA Member No.: 9,478 Region Association: Southern California |
As the guys work on the body-work, my Dad and I were concentrating on equipment in the front trunk (Amplifier, Oil Cooler, Fuel Pump and Lines, etc.). First order of business on this front, we decided to add a bulk-head fitting for the lines entering the wheel-well as the old-setup. We increased the size of the cutout to about 3-1/2 inches, then fabricated a 'block off' plate with AN connectors. Installing it today but once done, the lines will run along the passenger side of the car, and come to a 90º fitting where they will enter the cab. From there, it will have a straight fitting to the oil-bypass thermostat where it will connect to the GT cooler.
I'm nixing the original equipment, so look out for this in the classifieds section. While I don't like it for my car, its very good for racing purposes as you can mount the fuel pump, oil breather and fuel filter to the aluminum shrowd. Uses a stock 964 oil cooler that has adaptors for AN fittings. 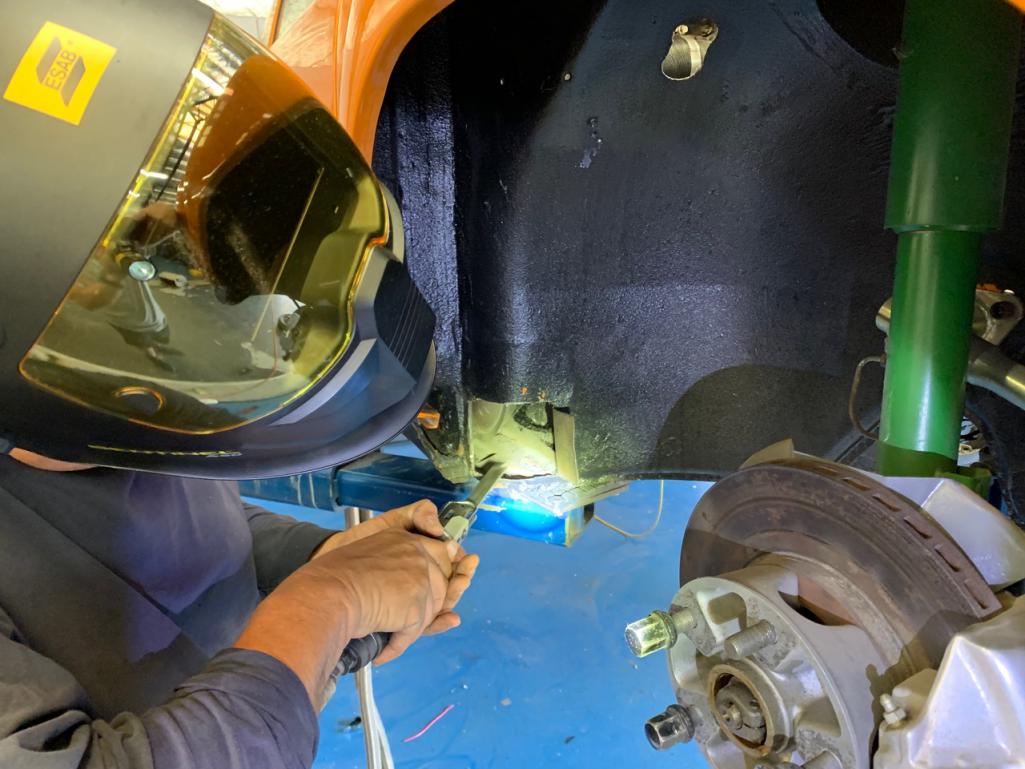 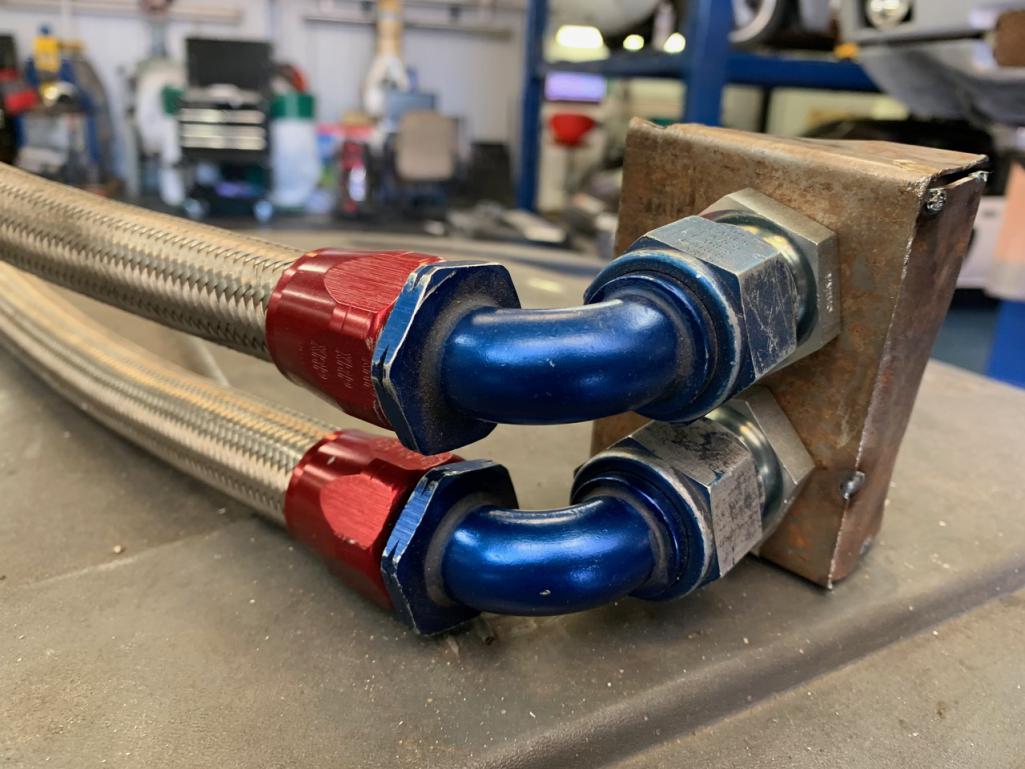 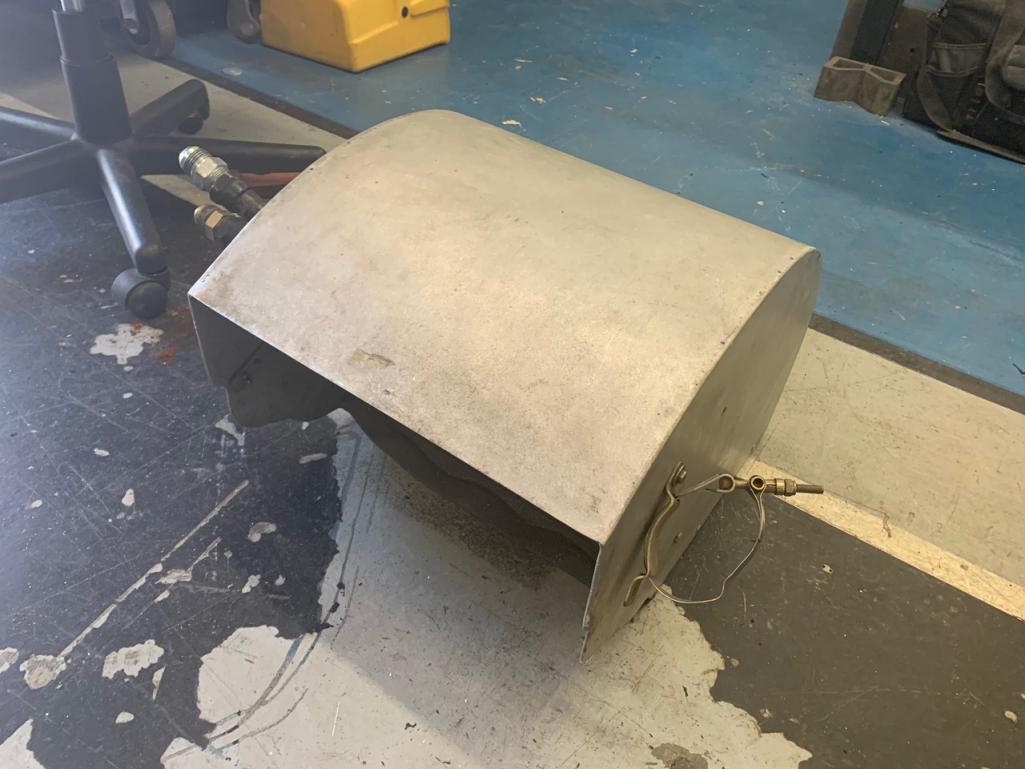  |
|
|
|
| RiqueMar |
Jul 20 2020, 11:12 AM
Post
#883
|
|
Enrique Allen Mar Group: Members Posts: 2,264 Joined: 28-August 08 From: San Diego, CA Member No.: 9,478 Region Association: Southern California |
Another day and gratefully, more progress!
Again, with the help of my Father we were able to get the bracket for the oil line bulk-heads situated. Unfortunately, we had to make another bracket, but hey.... par for the course. This new bracket is inset within the fender well, as we needed that extra space for the proper 90º-AN fitting to make the turn. Only downside to this is we had to cut the fender-well a little more than anticipated, add a small patch above the fitting (see the photos) and slightly 'ding' the interior heater tube about 1/2". As we completed the bracket and bulkhead, the guys progressed on the side-skirts, which I'm happy to say are done and looking very good! So good, in fact, that rather than go with my original plan to 'texture' the pieces, I'm just going to paint satin-black to match the non-chrome trim. Now, we focus back on the front valence, as I finish up on the oil system; Cooler, shrowd, and front trunk placement. Moving away from the original 964 cooler has caused me to move things around in the front trunk. Now, the fuel pump, filter and amplifier will sit on the front firewall, and the spare tire will go in its 'stock' location in the rear-trunk. While this seems trivial, it's important to me because I want to be able to take 'road trips', and still accommodate a few duffle bags and equipment.First order here was making a bracket to mount the Amplifier on the front firewall, so as my Dad finished the welding on the bulkhead mount, I designed the plate and cut on our laser machine. Goal here is to have a system where the only wires and connections you see come out from behind the Amp and bracket. 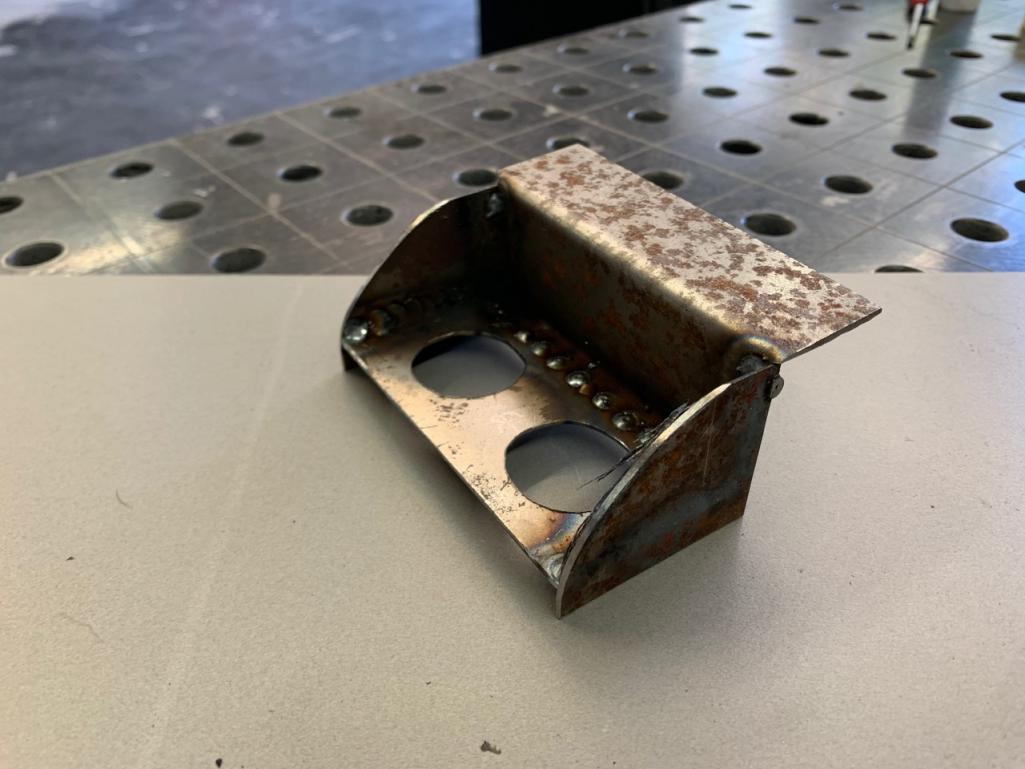 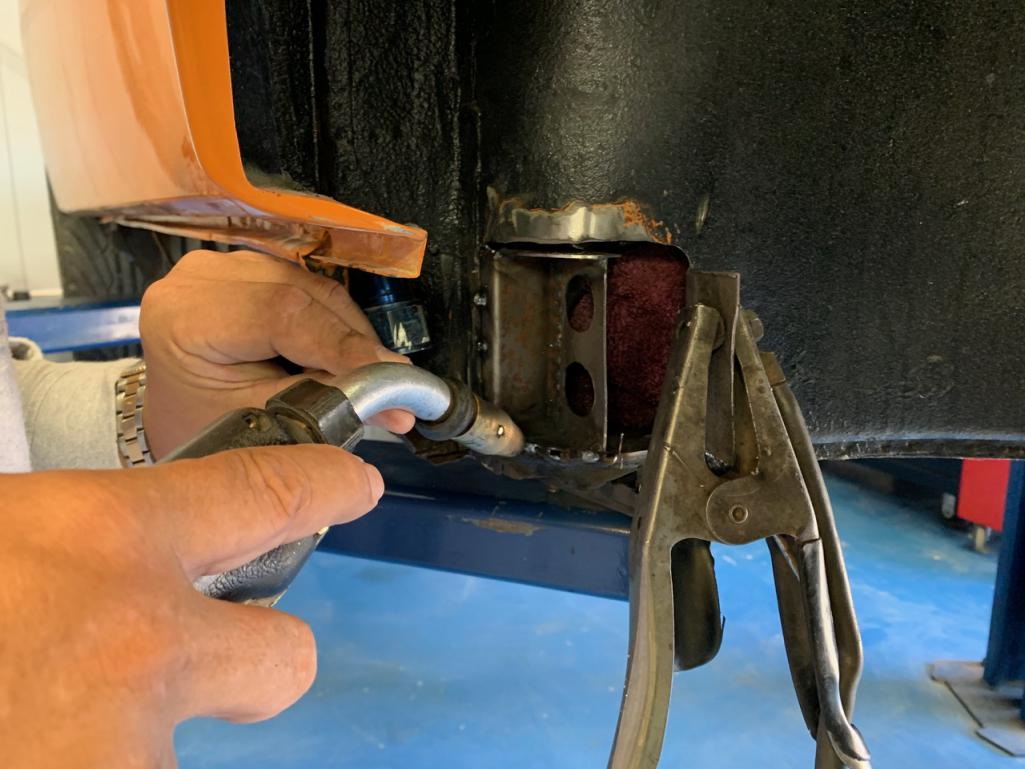 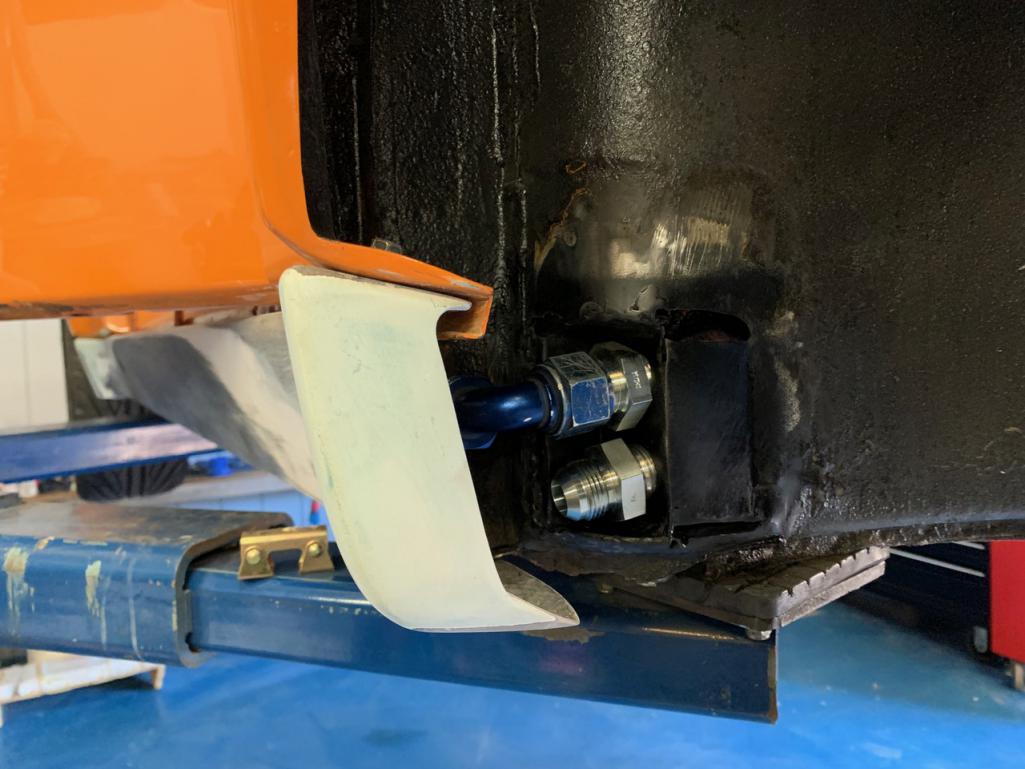 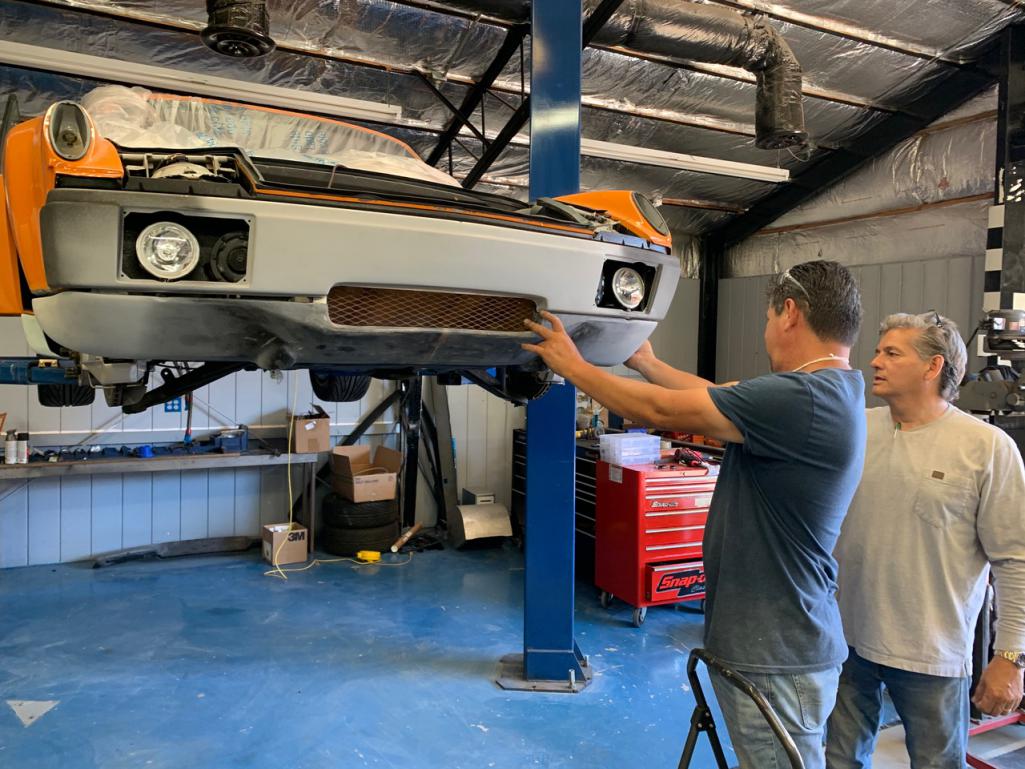  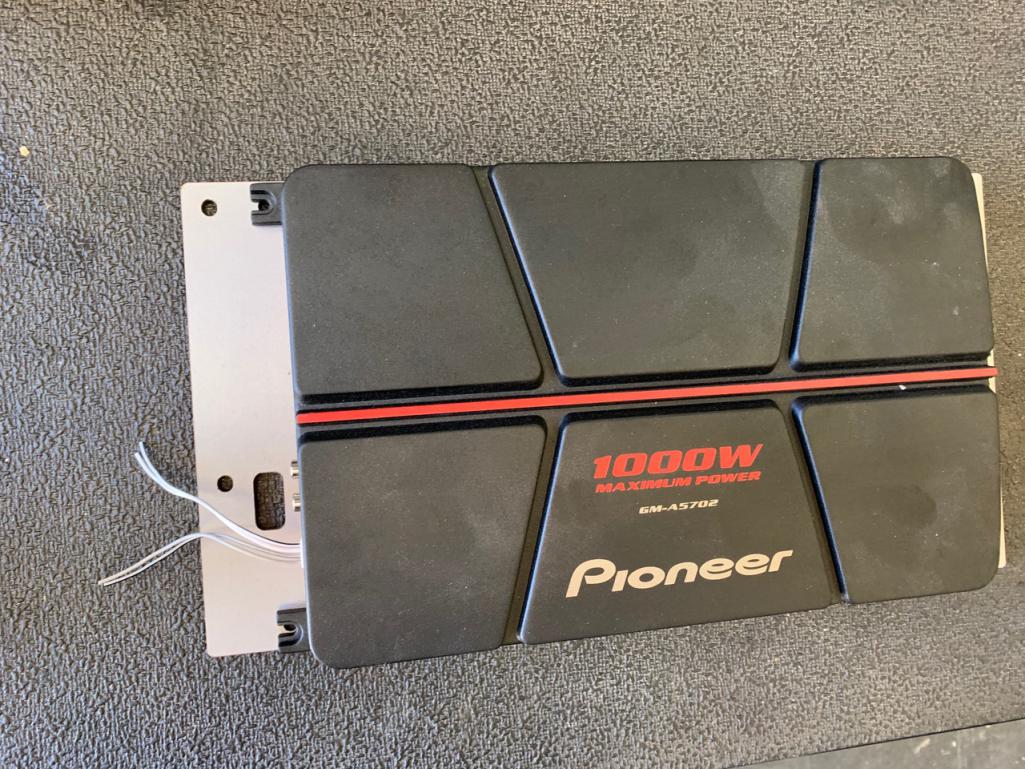 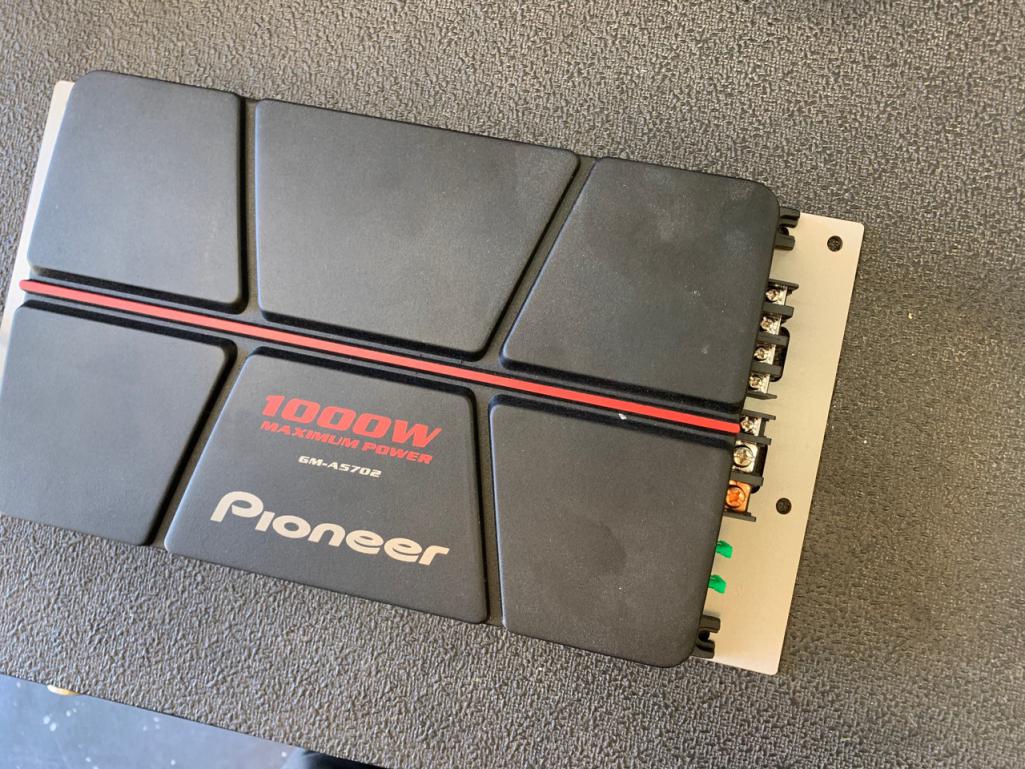 |
|
|
|
| RiqueMar |
Jul 20 2020, 08:54 PM
Post
#884
|
|
Enrique Allen Mar Group: Members Posts: 2,264 Joined: 28-August 08 From: San Diego, CA Member No.: 9,478 Region Association: Southern California |
In my last post, I made mention of the current focus on locating items in the front trunk, and 'nixing' the original 964 oil cooler for a more 'vintage' looking option. Thanks to my Dad and the folks on my GT Cooler thread (Link found here), I was able to source info from some owners and come to the conclusion of what I want to do on my car. Shoutout to everyone on the oil-cooler thread, with special thanks to @SirAndy @mepstein @Retroracer @Steve @eric9144 ConeDodger for putting up with my dumb-questions
As I mention on the thread, it's important to me to have a fan setup as my 3.6 has no onboard forced air and I live in Southern California and am often subject to heavy traffic. Eventually, I settled on a multi-fan solution, with a cooler and thermo switch from PMS. Attached image(s)  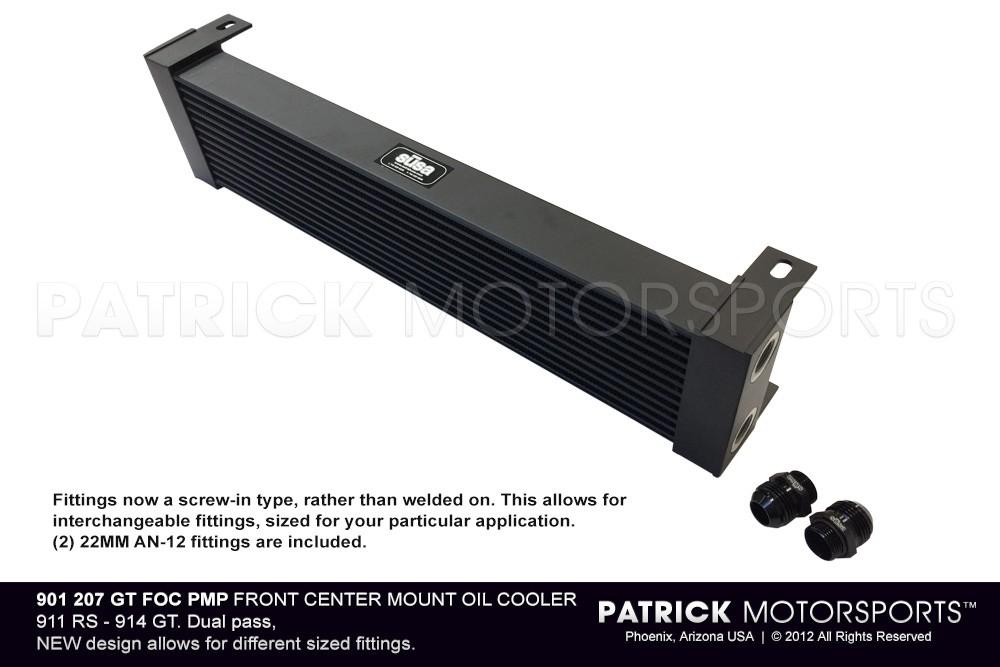
|
|
|
|
| RiqueMar |
Aug 4 2020, 07:55 PM
Post
#885
|
|
Enrique Allen Mar Group: Members Posts: 2,264 Joined: 28-August 08 From: San Diego, CA Member No.: 9,478 Region Association: Southern California |
Significant progress made on the project!
I've been meaning to update for a few weeks. Excited to report Side-skirts and Front valence are done, just awaiting paint. The bodywork on these pieces is phenomenal, and I couldn't be happier. Everything lines up very nicely, and we were even able to add a front 'lip' to the valence to match the lip on the lower-part of the front bumper. Recommendation here: Make sure, when fitting your valence and bumper, to do so with the bumper top ON. It's so easy to create a poor alignment / fitment if all the equipment isn't attached. 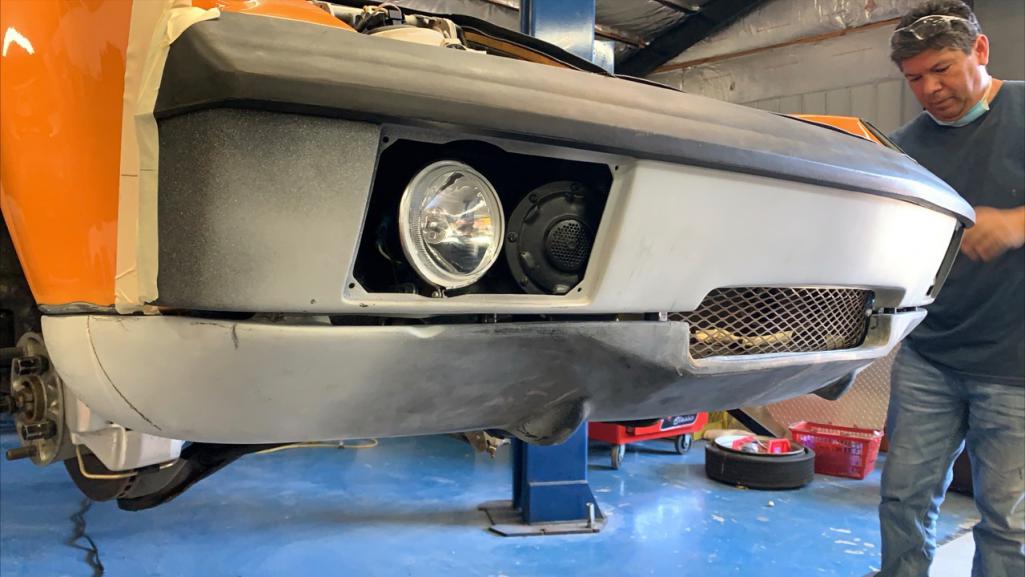 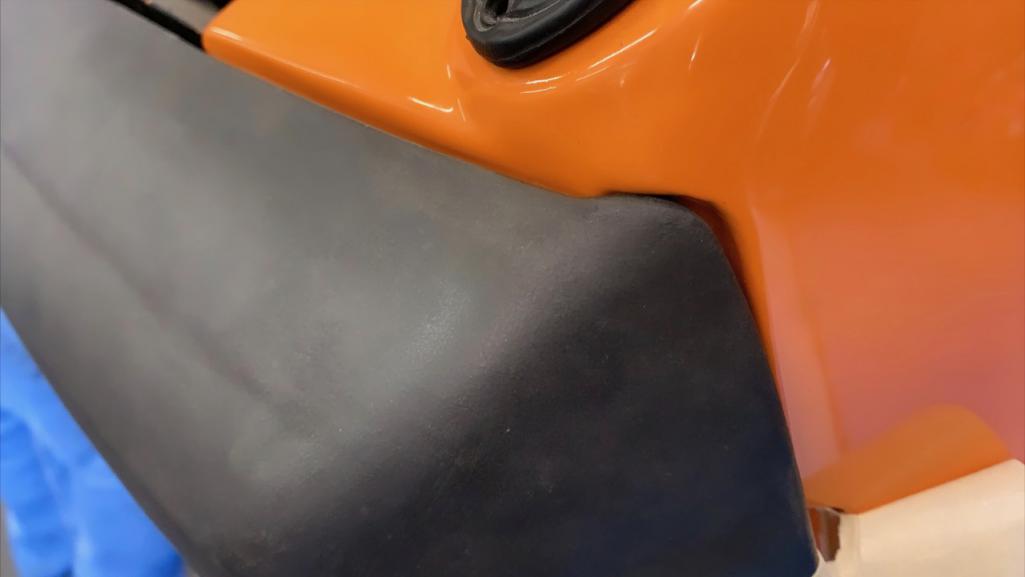 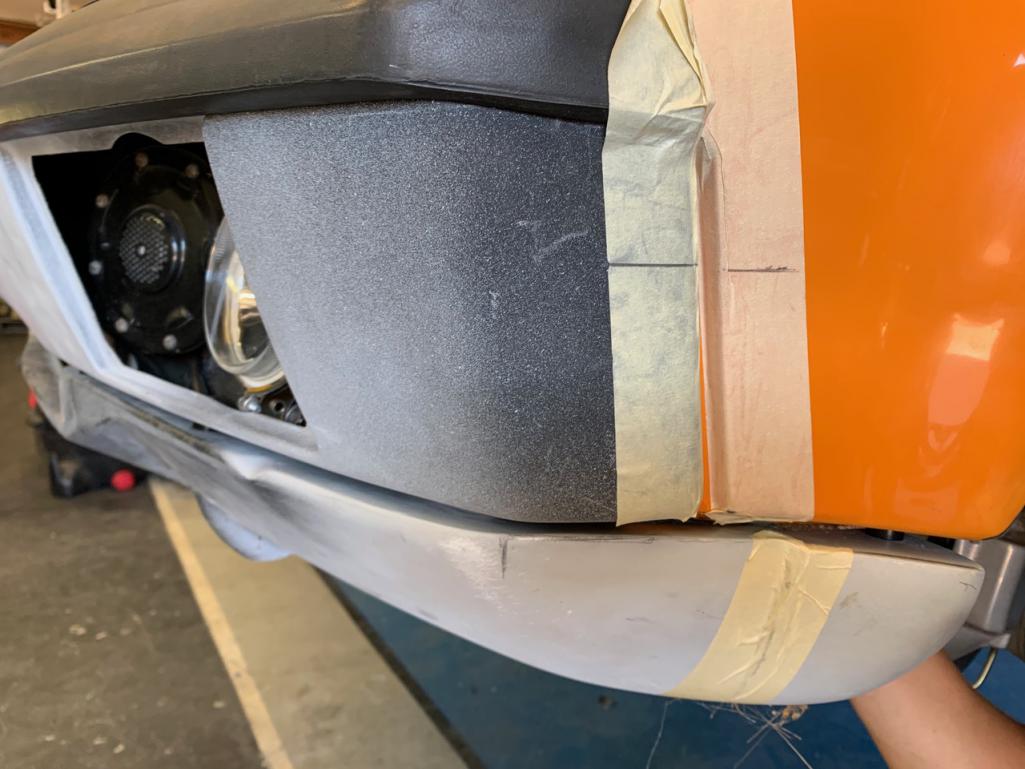 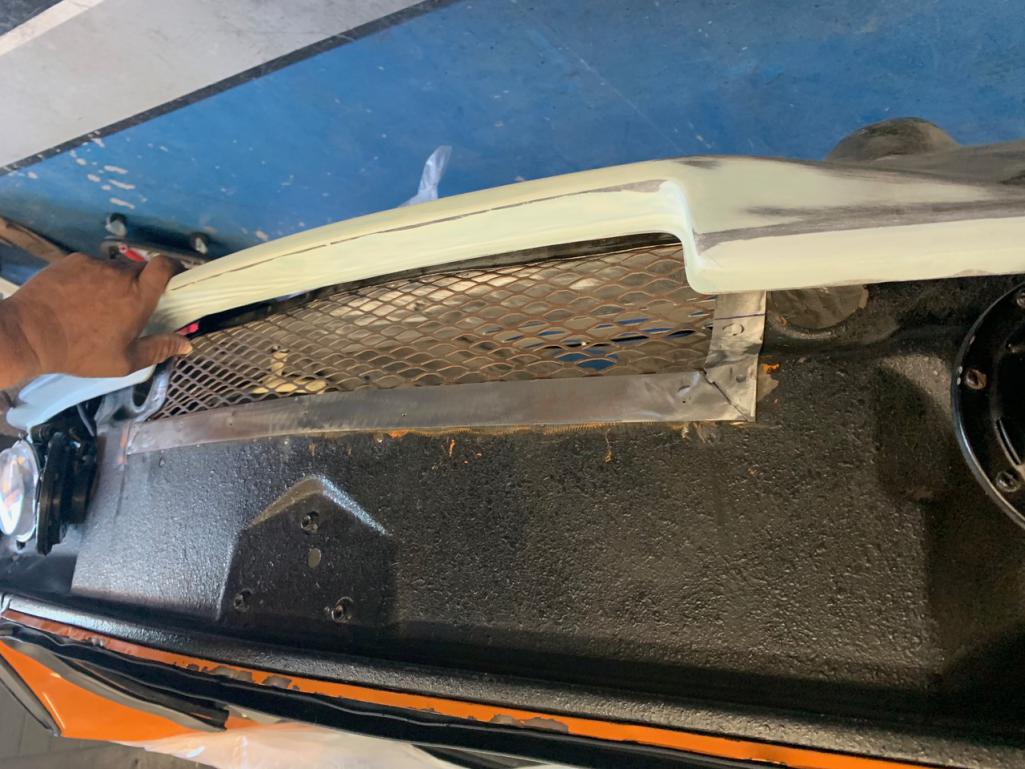 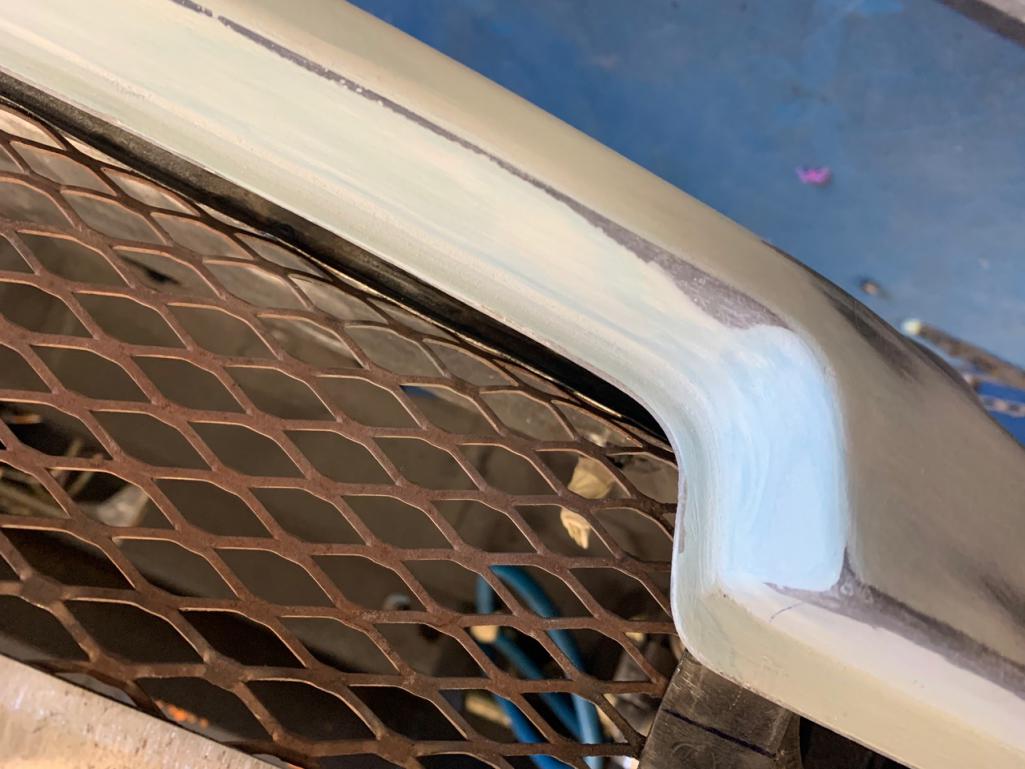 |
|
|
|
| RiqueMar |
Aug 4 2020, 07:56 PM
Post
#886
|
|
Enrique Allen Mar Group: Members Posts: 2,264 Joined: 28-August 08 From: San Diego, CA Member No.: 9,478 Region Association: Southern California |
As work continues, my main focus has been fitting the GT cooler. I'm not trying to 're-create' or 'replicate' a GT car in any form, I just want my design to be clean. I ended up purchasing a louvered sheet metal piece from Patrick Motorsports (PMS) for $68.00 and welding it in to the (already previously cut for an AC) floor. In a 'while I'm here approach' I re-welded the previously cut floor, and both sections will get seam-sealer once done.
Note to anyone reading this with the same plans: The sheet metal from PMS comes in very long, so you could conceivably just cut out the bottom of the front trunk and stitch weld, but I wanted to keep some fo the factory form (folds in the floor).For my car, I first 'stitched' the bottom, then switched to the top and 'stitched' the spaced in-between. 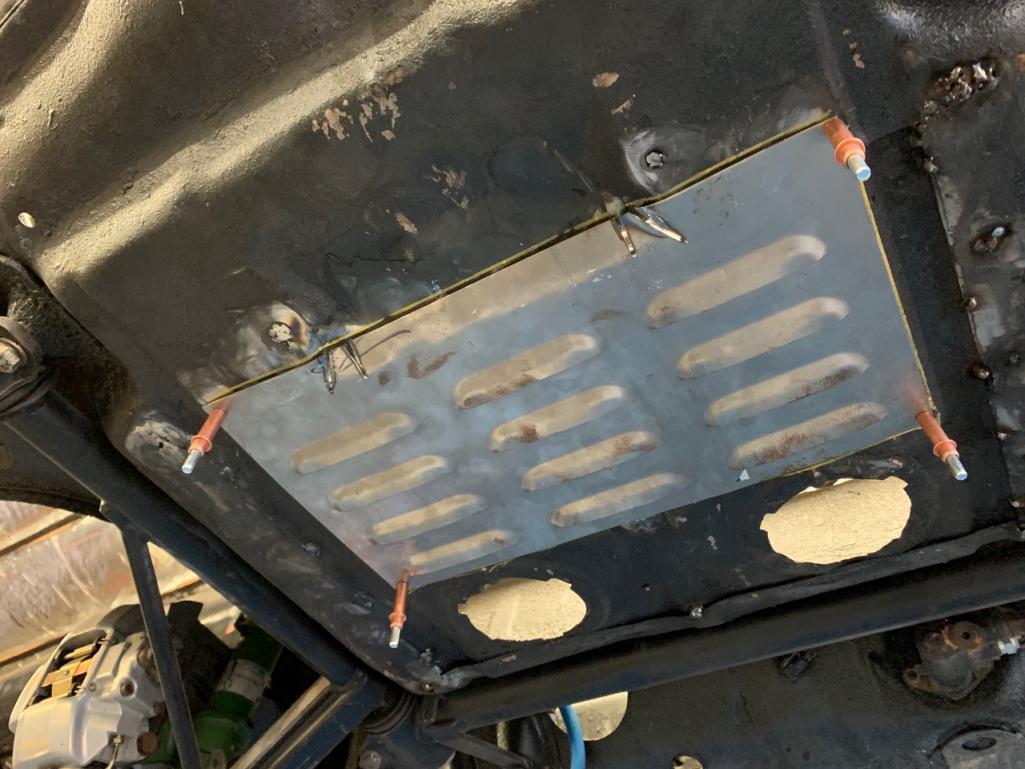 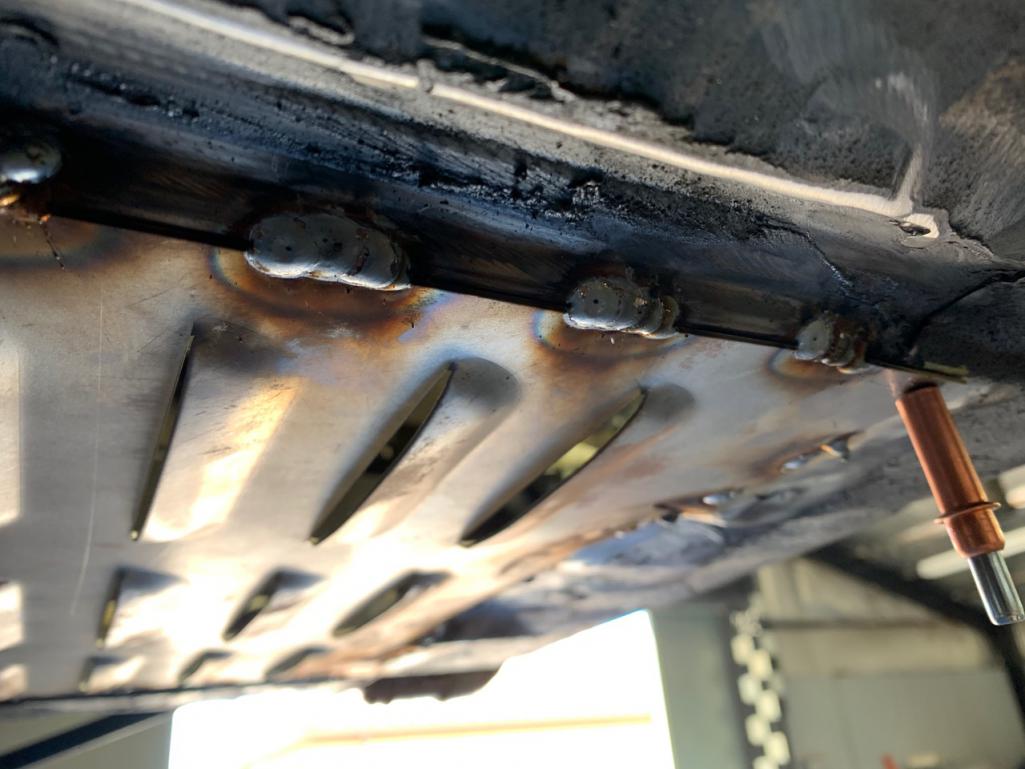 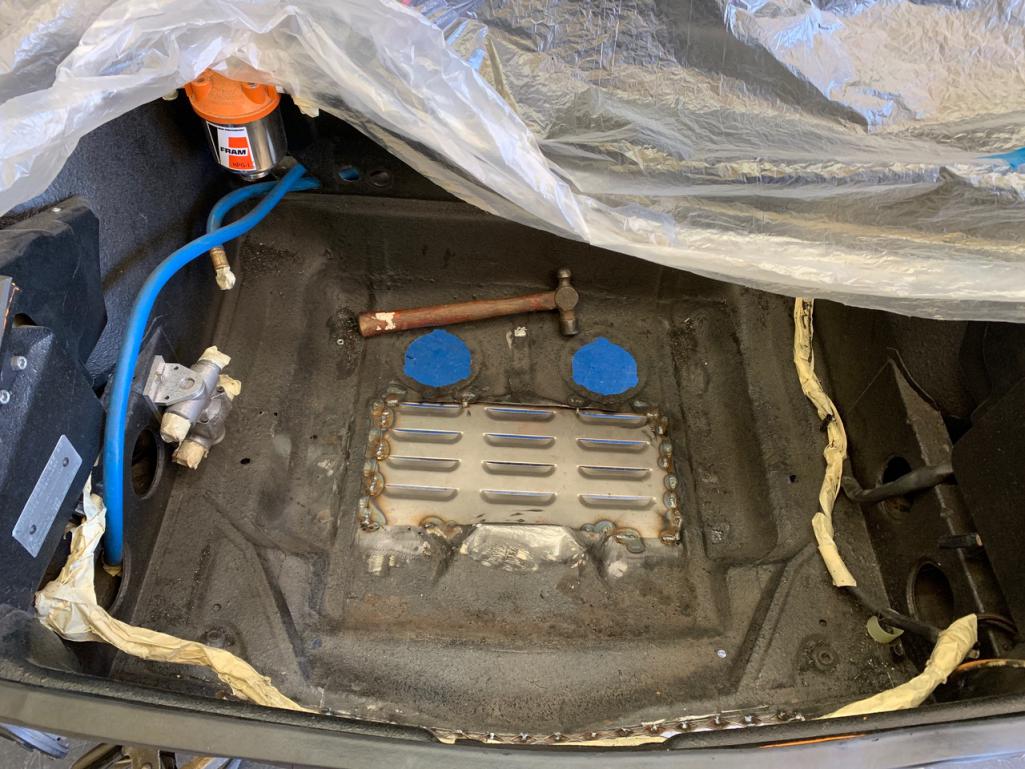 |
|
|
|
| RiqueMar |
Aug 4 2020, 08:01 PM
Post
#887
|
|
Enrique Allen Mar Group: Members Posts: 2,264 Joined: 28-August 08 From: San Diego, CA Member No.: 9,478 Region Association: Southern California |
Regarding the GT cooler, I've attached some photos showing my approach. After receiving the unit from PMS, my original plan of using the plastic 'zip locks' to secure the Seal fans to the cooler went out the window, so I designed a bracket and used our laser-cutter to produce the piece in 1/4" ABS. Still unsure if I'll stick with ABS or go with water-jet.
With the Oil-cooler fans and floor complete, the tricky part was now how to 'mount' the cooler on a sort of shelf. To do this, I cut a piece of sheet metal about 1/2" larger than the cooler, and doubled up on the last 2-inches where the cooler studs would sit, photos attached. From there, I just stitched the front to the point of the body just below the front-bumper air-inlet, and marked where I want my M8 studs. Note: I used a 35mm M8 stud to be able to accommodate a rubber grommet / spacer to give the oil cooler a bit of cushion. I was hesitant if it would be rigid enough, but luckily I was over-thinking it; Once everything is welded together, it's super strong, and I'm very happy with the way it all turned out, functional and easy to disassemble if anything ever needs replaced. Once all the mockup was done, cue the grinding!  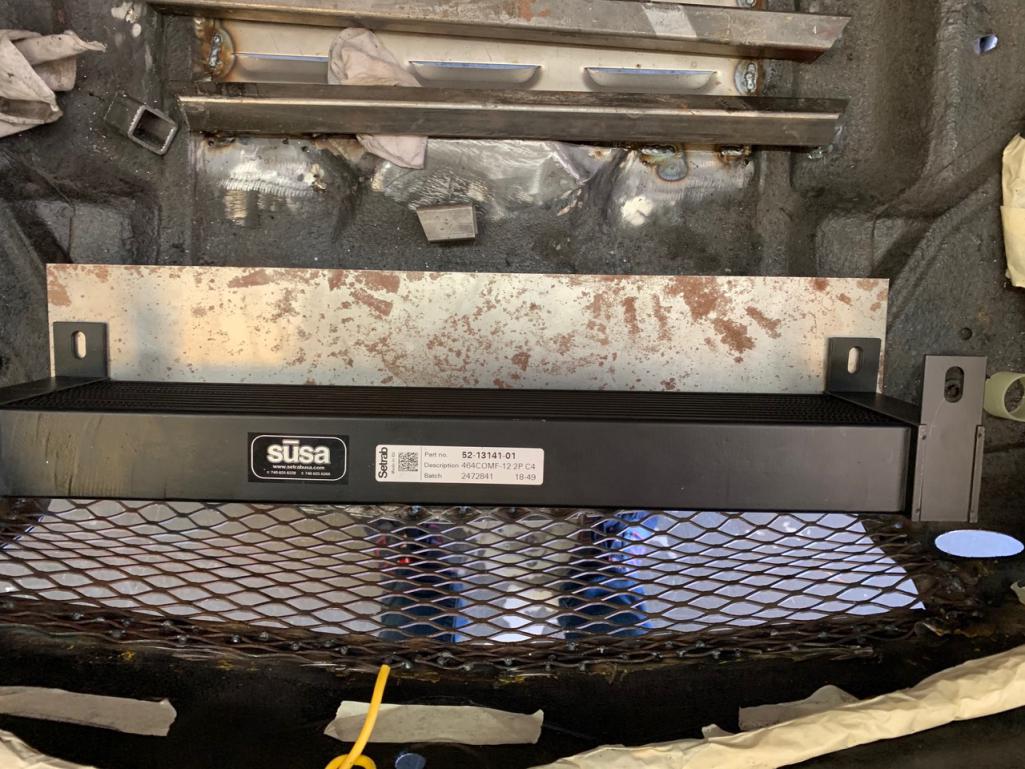 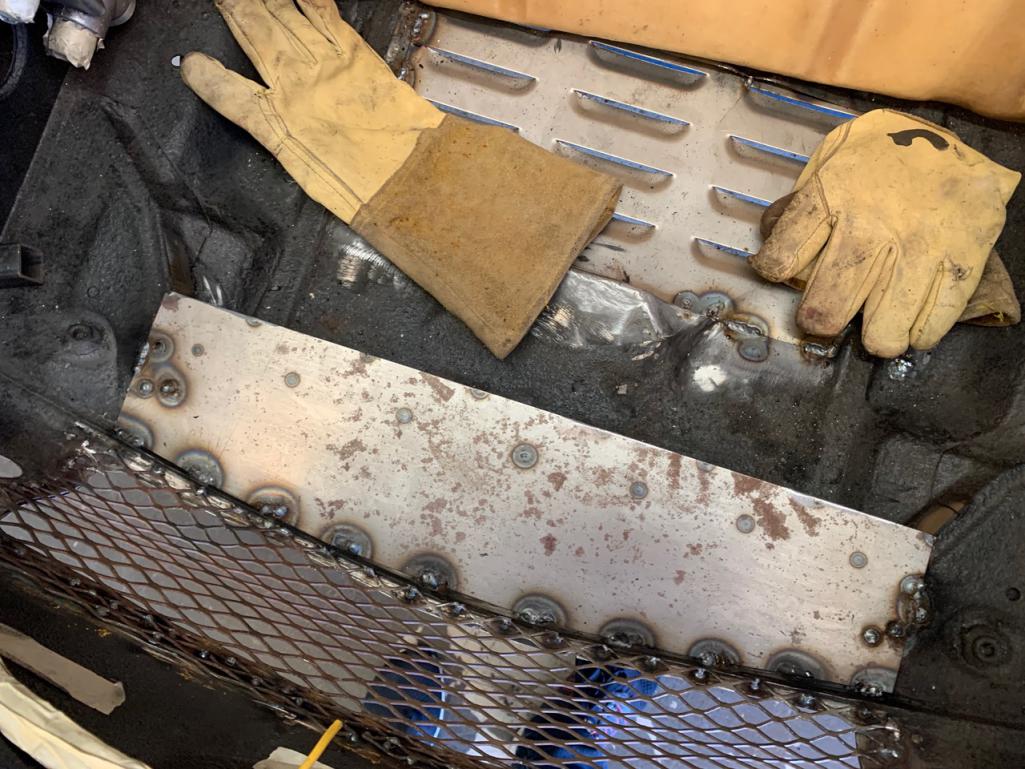 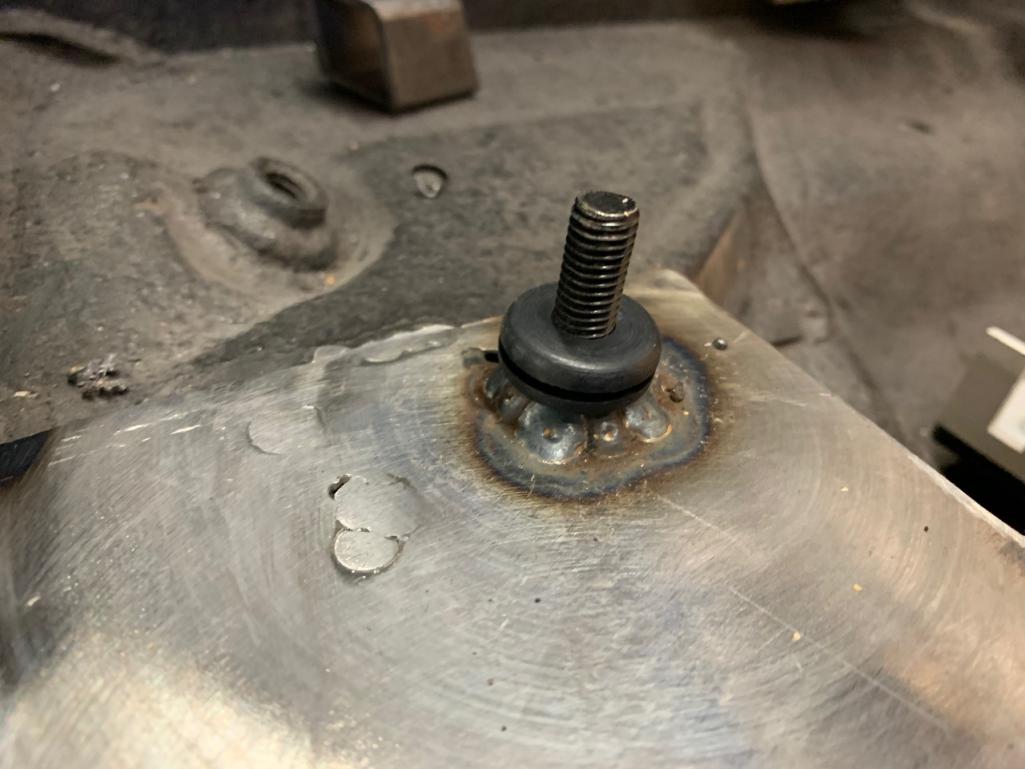 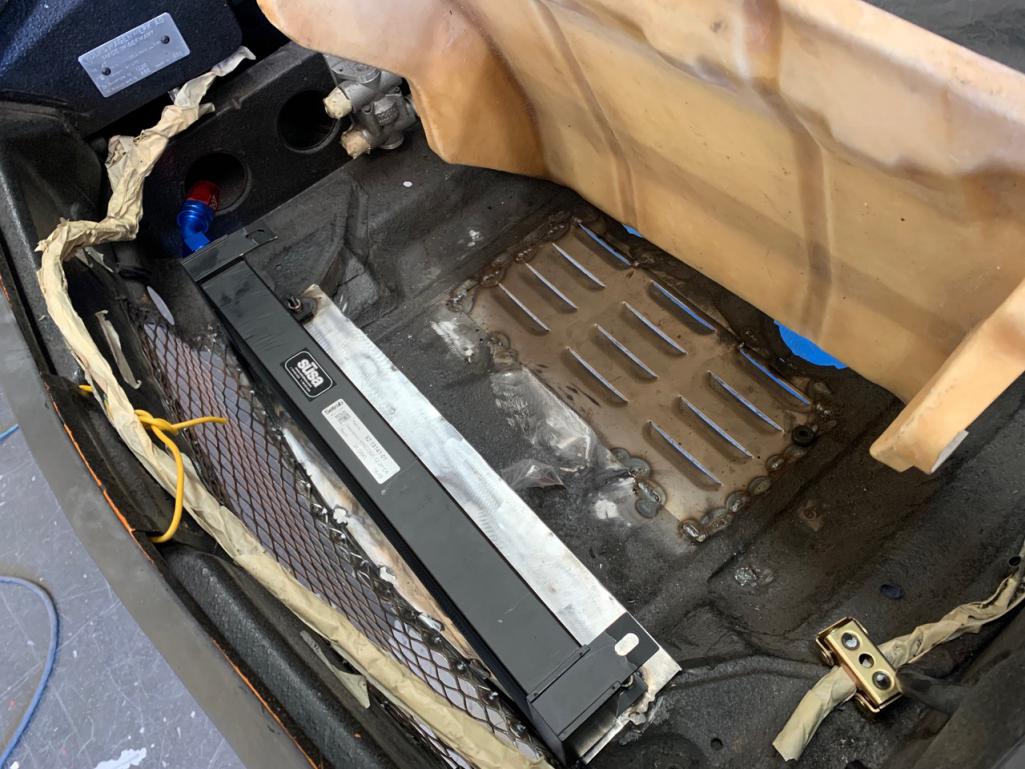 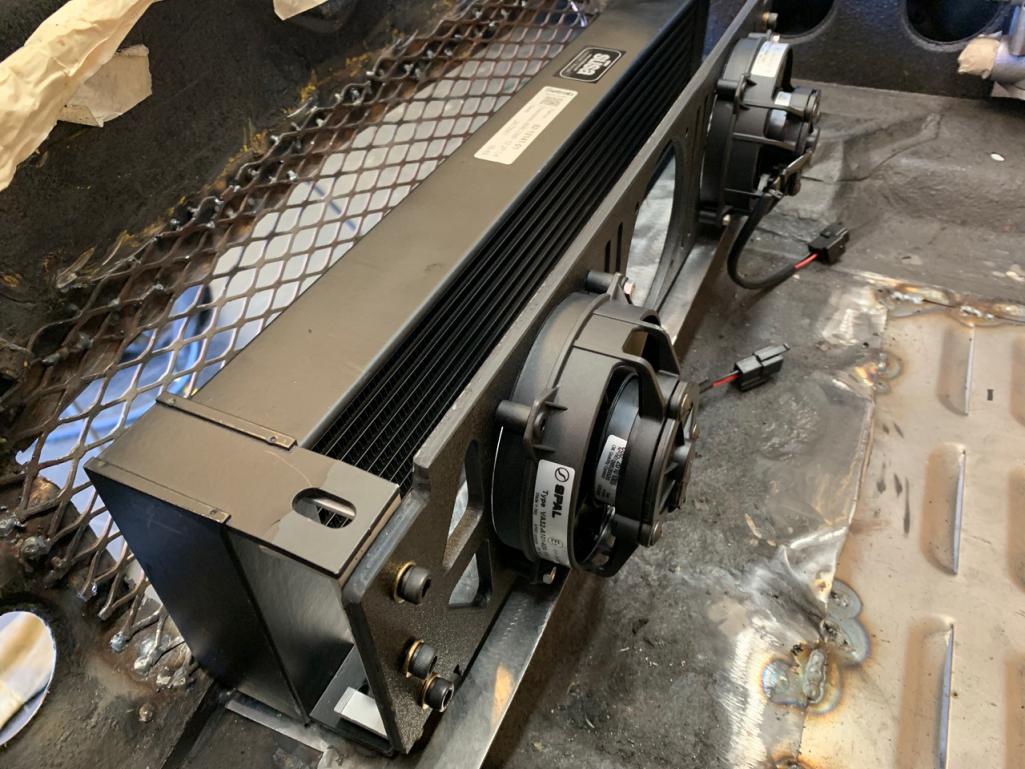 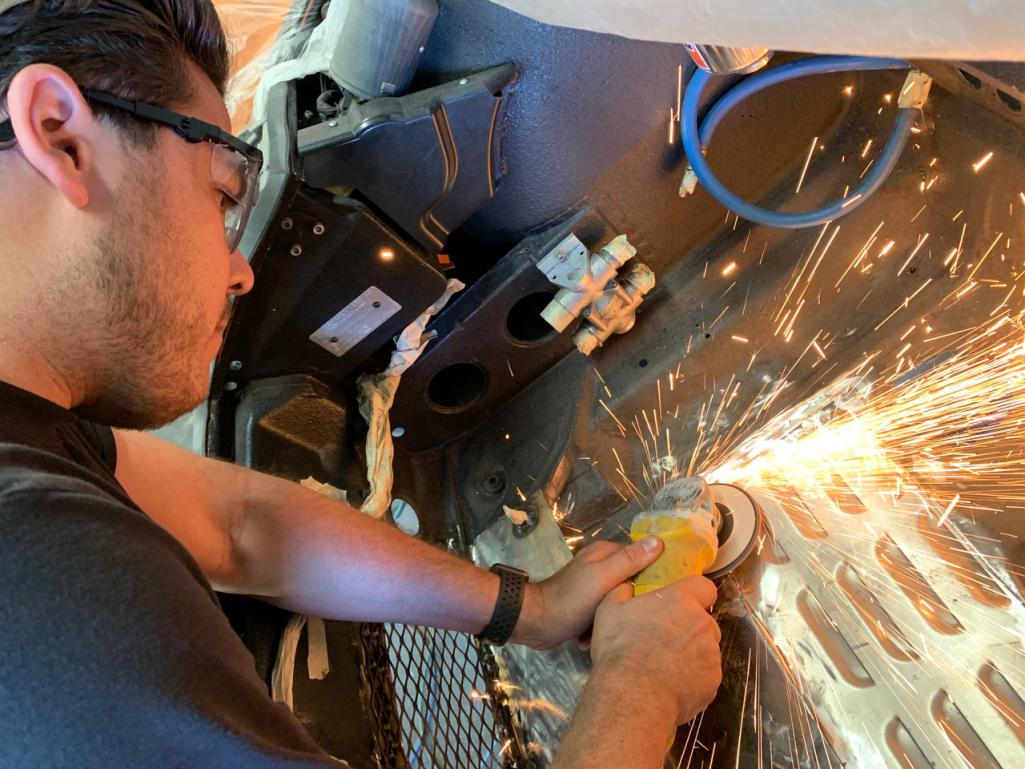 |
|
|
|
| eric9144 |
Aug 11 2020, 01:22 PM
Post
#888
|
|
Advanced Member Group: Members Posts: 2,796 Joined: 30-March 11 From: San Diego, CA Member No.: 12,876 Region Association: Southern California |
For the fans, are you going thermostat activated or manual switch or ?
Mine is wired to an under dash on/off switch. I find I'm only really using the fans when things get up over 210 or so which I've only hit either pushing really hard in canyons or when stuck in traffic situations that have you not really moving. |
|
|
|
| Cairo94507 |
Aug 11 2020, 02:13 PM
Post
#889
|
|
Michael Group: Members Posts: 10,671 Joined: 1-November 08 From: Auburn, CA Member No.: 9,712 Region Association: Northern California |
Enrique - Your car is coming along with nicely. Love the front valance and rocker covers. I don't think you will have any problems with heat with that set-up. (IMG:style_emoticons/default/beerchug.gif)
|
|
|
|
| 76-914 |
Aug 11 2020, 02:52 PM
Post
#890
|
|
Repeat Offender & Resident Subaru Antagonist Group: Members Posts: 13,896 Joined: 23-January 09 From: Temecula, CA Member No.: 9,964 Region Association: Southern California |
Looks great. I'll bet your happy the fiberglassing is done. It was a pleasure meeting your parents. You come from good stock Rick. (IMG:style_emoticons/default/beerchug.gif)
|
|
|
|
| ValcoOscar |
Aug 11 2020, 02:53 PM
Post
#891
|
|
Garage Life Group: Members Posts: 2,625 Joined: 19-November 13 From: SoCal Member No.: 16,669 Region Association: Southern California |
QUOTE(Cairo94507 @ Aug 11 2020, 01:13 PM)  Enrique - Your car is coming along with nicely. Love the front valance and rocker covers. I don't think you will have any problems with heat with that set-up. (IMG:style_emoticons/default/beerchug.gif) (IMG:style_emoticons/default/agree.gif) Great job Enrique. (IMG:style_emoticons/default/beerchug.gif) Hope to see your car in person very soon. You're moving along quite nicely (IMG:style_emoticons/default/aktion035.gif) (IMG:style_emoticons/default/driving.gif) Oscar |
|
|
|
| RiqueMar |
Aug 12 2020, 12:37 PM
Post
#892
|
|
Enrique Allen Mar Group: Members Posts: 2,264 Joined: 28-August 08 From: San Diego, CA Member No.: 9,478 Region Association: Southern California |
QUOTE(eric9144 @ Aug 11 2020, 12:22 PM) For the fans, are you going thermostat activated or manual switch or ? Mine is wired to an under dash on/off switch. I find I'm only really using the fans when things get up over 210 or so which I've only hit either pushing really hard in canyons or when stuck in traffic situations that have you not really moving. @Eric9144 - Purchased an in-line thermal switch (Setrab unit, set to 190º), and plan on running this on the thermostat just below the passenger-side headlight bucket. Patrick Motorsports sells them, however you can find them nearly any-where (Link Here). I'm paranoid about being stuck in traffic. Learning from the previous setup in the black-car, I really like the way the motor worked with the stock setup that included a thermal switch (on a secondary oil-filter). I can remember being in LA traffic several times with the 3.6, bumper-to-bumper for 3-4 hours and seeing no difference in oil-temps. Though the stock C2 unit had one big fan and one big cooler (22-rows), I'm hoping these three smaller units, wider double-pass cooler and more airflow / better system will do the trick. .... Also, it's been fun to play fabricator. (IMG:style_emoticons/default/sawzall-smiley.gif) (IMG:style_emoticons/default/welder.gif) (IMG:style_emoticons/default/smash.gif) (IMG:style_emoticons/default/sawzall-smiley.gif) (IMG:style_emoticons/default/welder.gif) (IMG:style_emoticons/default/smash.gif) |
|
|
|
| RiqueMar |
Aug 12 2020, 12:39 PM
Post
#893
|
|
Enrique Allen Mar Group: Members Posts: 2,264 Joined: 28-August 08 From: San Diego, CA Member No.: 9,478 Region Association: Southern California |
QUOTE(Cairo94507 @ Aug 11 2020, 01:13 PM) Enrique - Your car is coming along with nicely. Love the front valance and rocker covers. I don't think you will have any problems with heat with that set-up. (IMG:style_emoticons/default/beerchug.gif) QUOTE(76-914 @ Aug 11 2020, 01:52 PM) Looks great. I'll bet your happy the fiberglassing is done. It was a pleasure meeting your parents. You come from good stock Rick. (IMG:style_emoticons/default/beerchug.gif) QUOTE(ValcoOscar @ Aug 11 2020, 01:53 PM) (IMG:style_emoticons/default/agree.gif) Great job Enrique. (IMG:style_emoticons/default/beerchug.gif) Hope to see your car in person very soon. You're moving along quite nicely (IMG:style_emoticons/default/aktion035.gif) (IMG:style_emoticons/default/driving.gif) Oscar @Cairo94507 @76-914 @ValcoOscar - Thank you, Thank you, and Thank you Gentleman. Hope to be out there soon with my fellow Californians (IMG:style_emoticons/default/driving.gif) (IMG:style_emoticons/default/driving.gif) (IMG:style_emoticons/default/driving.gif) (IMG:style_emoticons/default/driving.gif) |
|
|
|
| RiqueMar |
Aug 12 2020, 12:57 PM
Post
#894
|
|
Enrique Allen Mar Group: Members Posts: 2,264 Joined: 28-August 08 From: San Diego, CA Member No.: 9,478 Region Association: Southern California |
Non-914 update and station break! (IMG:style_emoticons/default/icon_bump.gif)
Took a bit of time, and the garage 2-post lift, to help a close friend last week with his project; Installing a large (read VERY large) front mount intercooler, advanced air-intake, and other mods on his Abarth. As this fits the 'very cool' category, I thought I'de share a few progress and 'end' photos on this thread. Enjoy! 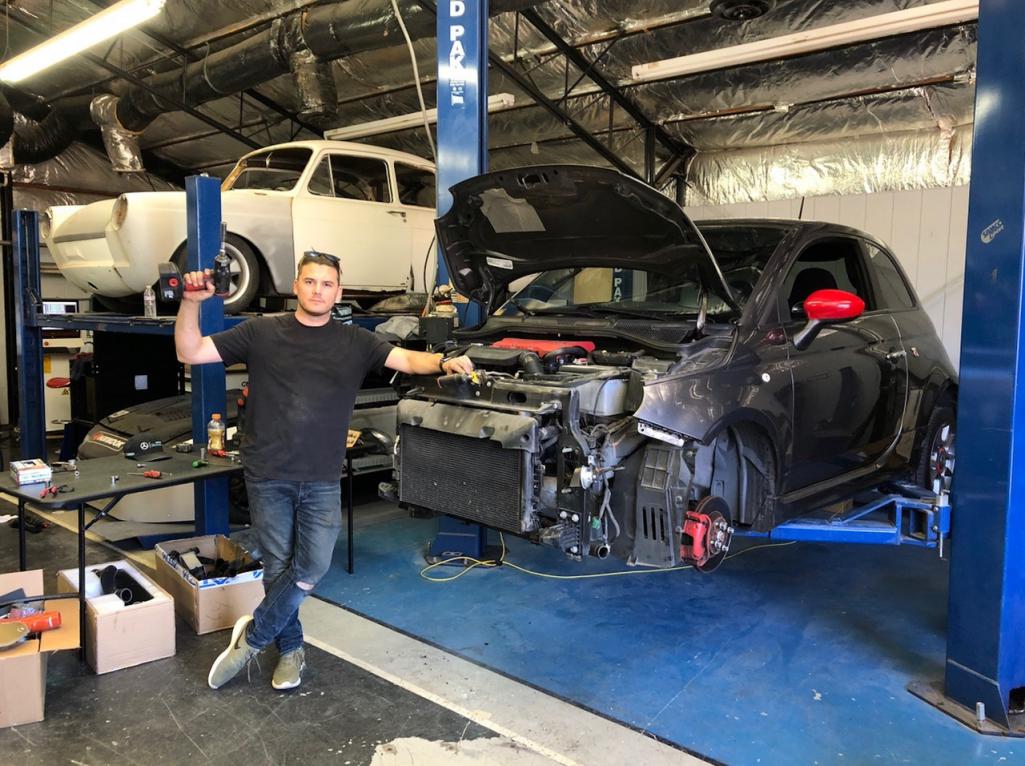 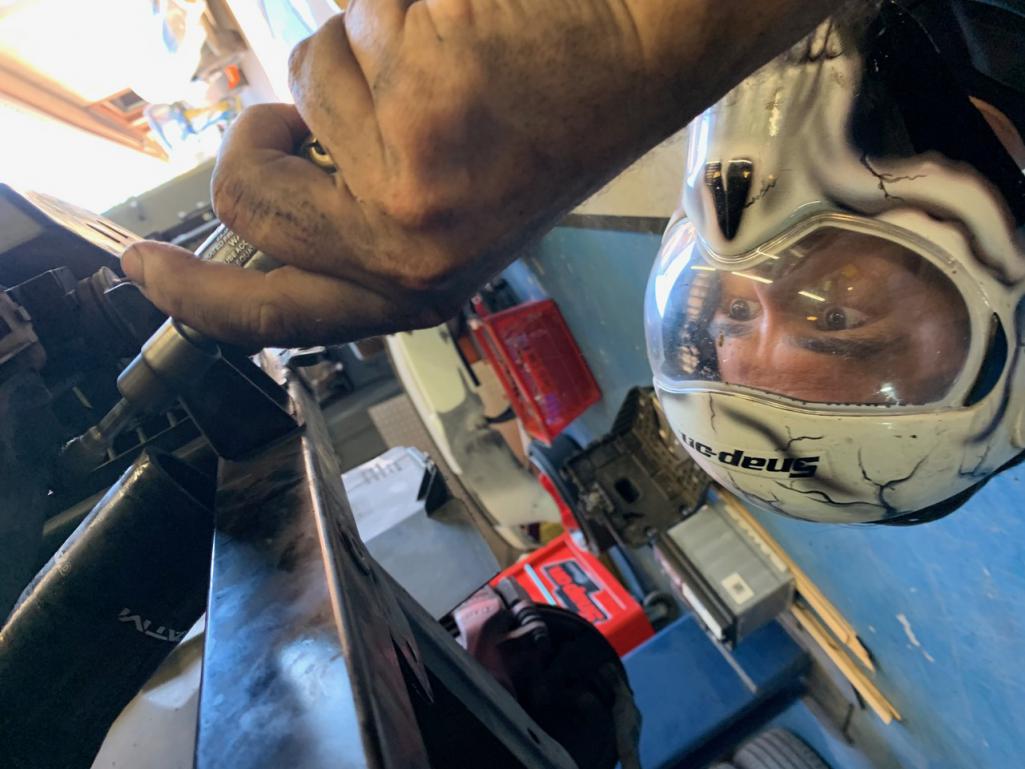 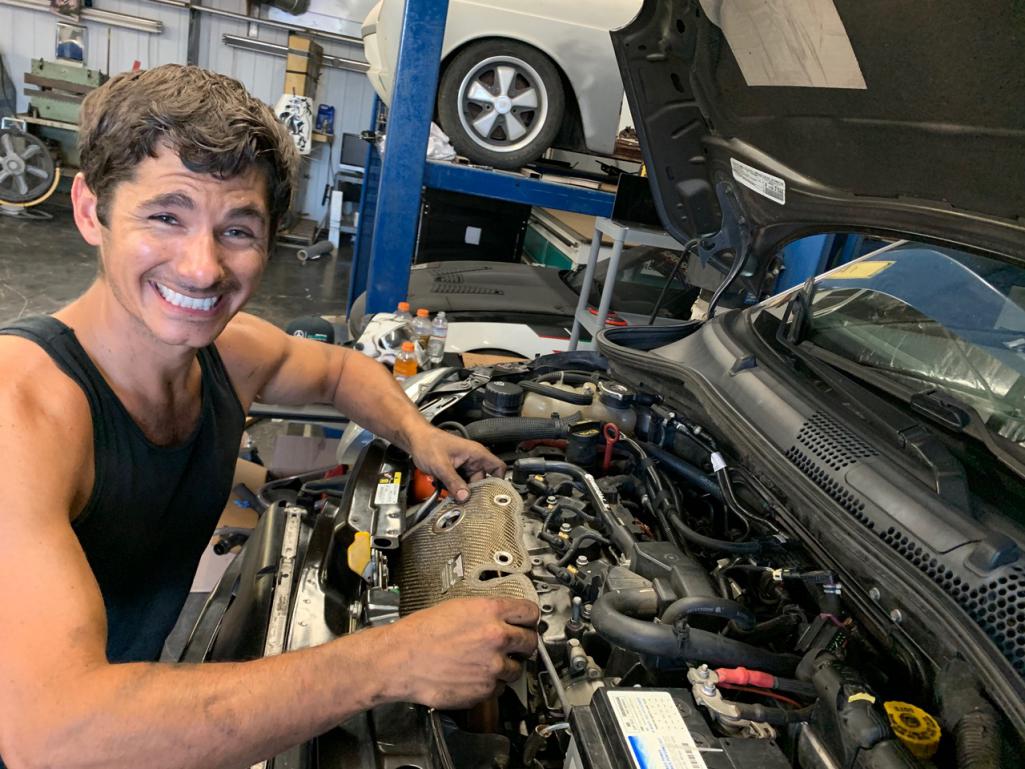 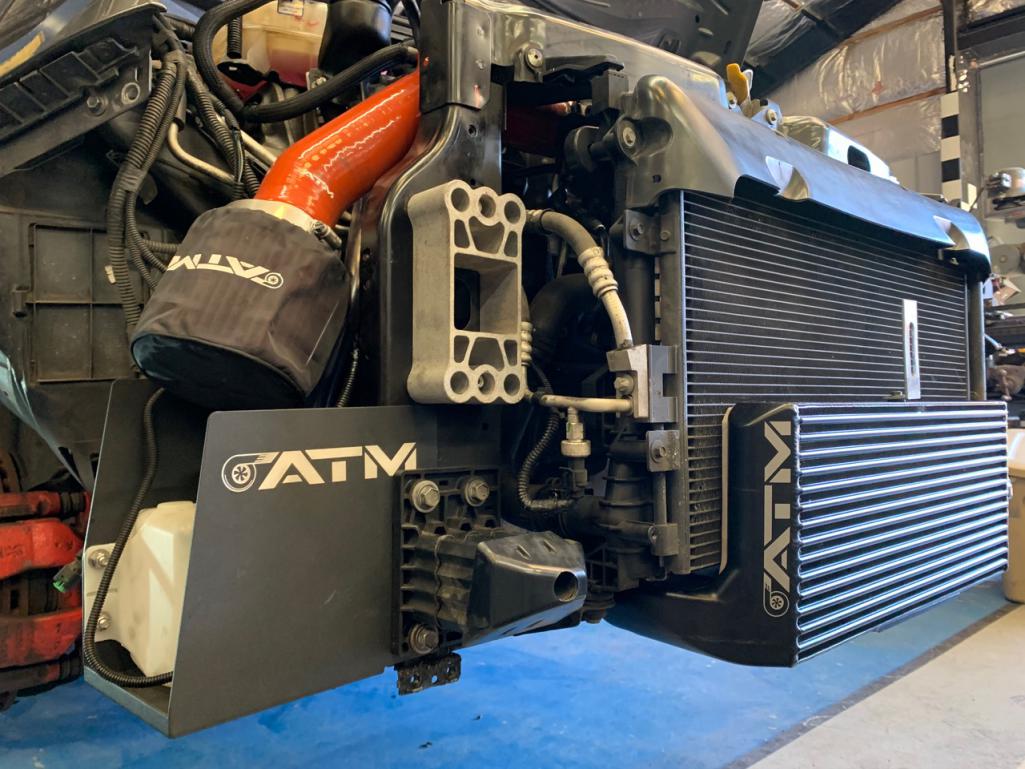 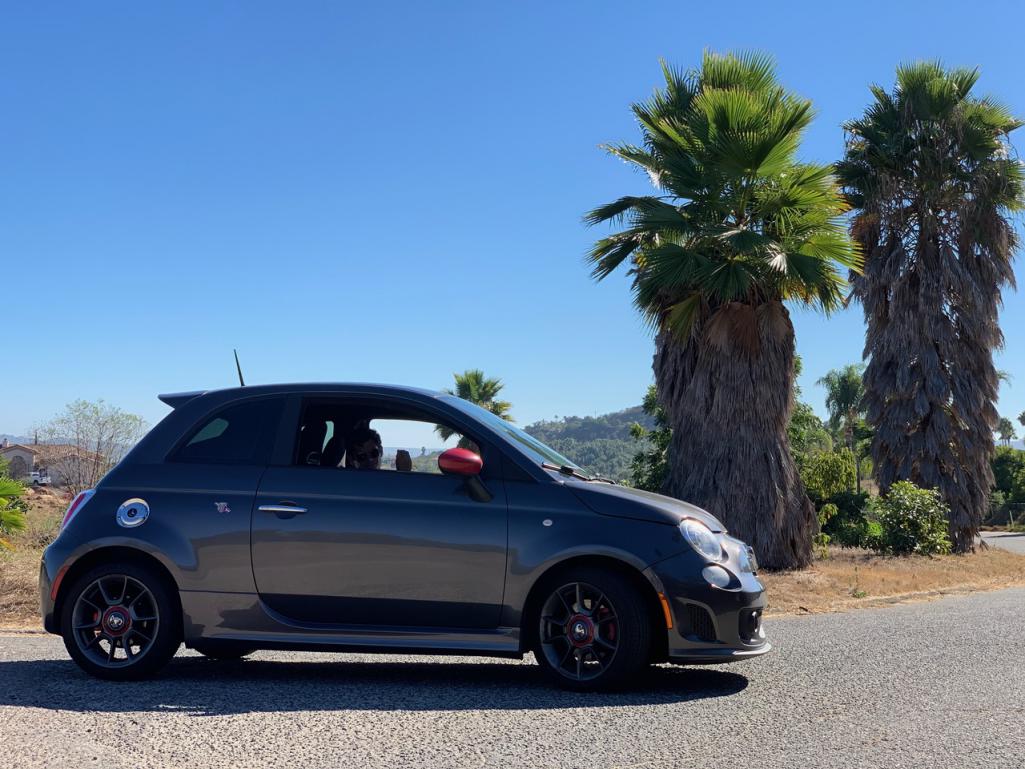 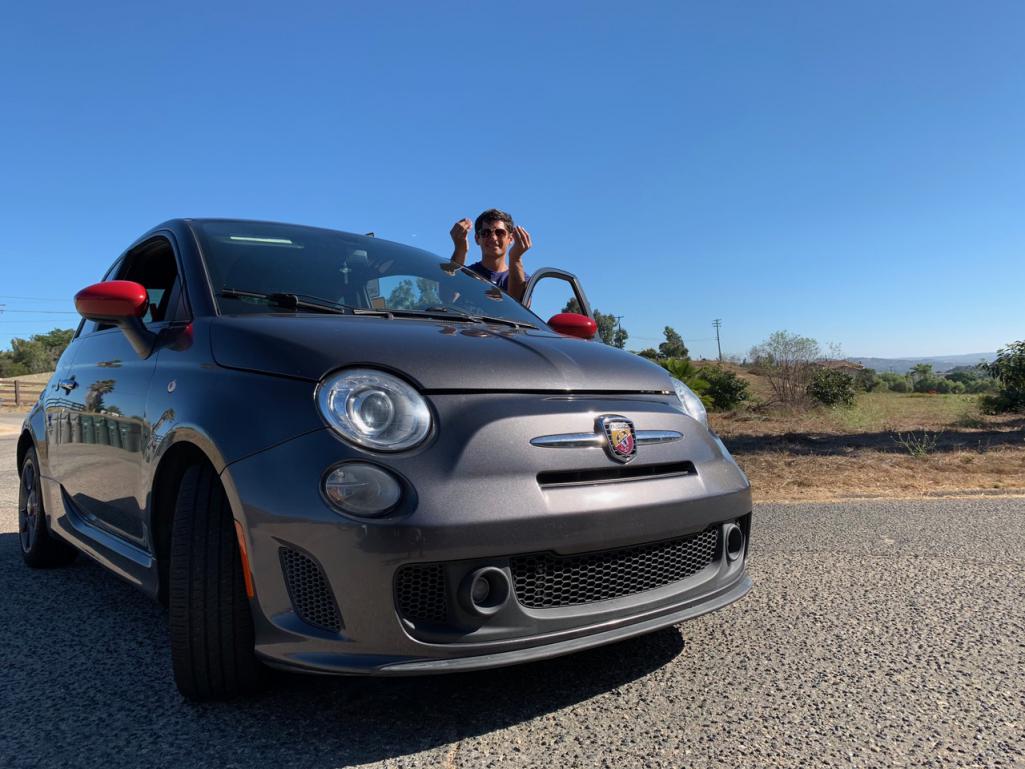 |
|
|
|
| RiqueMar |
Aug 12 2020, 05:15 PM
Post
#895
|
|
Enrique Allen Mar Group: Members Posts: 2,264 Joined: 28-August 08 From: San Diego, CA Member No.: 9,478 Region Association: Southern California |
Back to our regular programming, project 3.6 progress!
As my friend and I where wrenching away on the Abarth, it was time for our (incredibly talented) fiberglass modeler to adjust, fit and place the GT oil cooler shroud. I think I've mentioned earlier in this thread that it isn't exactly a high grade piece. From the photos, one can see how much 'filler' is needed in some places, as well as the inside to keep everything from flexing. Taking into account the amount the piece 'grew' we decided to match the radius of the front of the cooler to the front-clip of the car. While here I decided to address something that nags me, considering I'm not using the stock cooler beneath the shroud, the original mounting bolt-holes. We decided to fill these from the top and grind down the inside, relying now on the two 'tabs' seen on the top of the Setrab cooler for mounting, as well as 2-4 more points on the trunk floor. While dealing with the filler, we added some of the compound to the 'spaces' between the existing trunk and the new louvered sheet metal. Next, these will get covered with seam sealer before painted with rubberized undercoating to match the undercarriage and rest of the front-trunk. 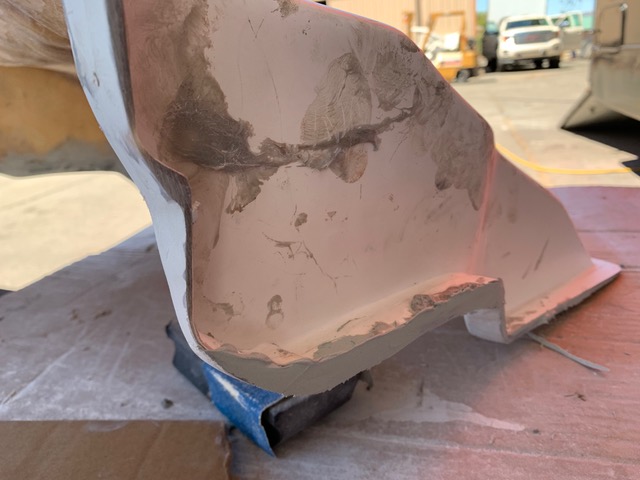 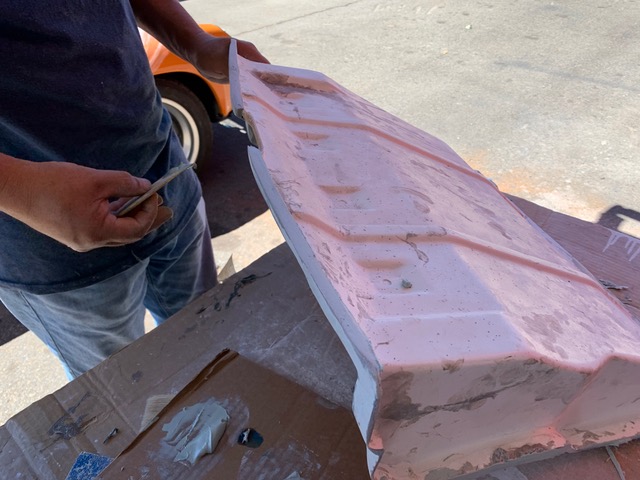 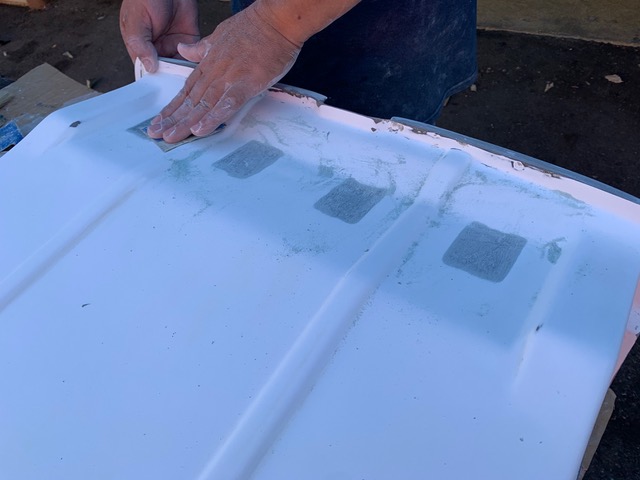 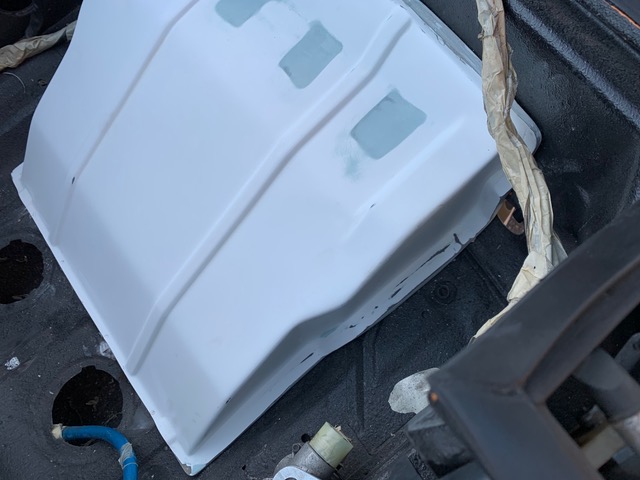 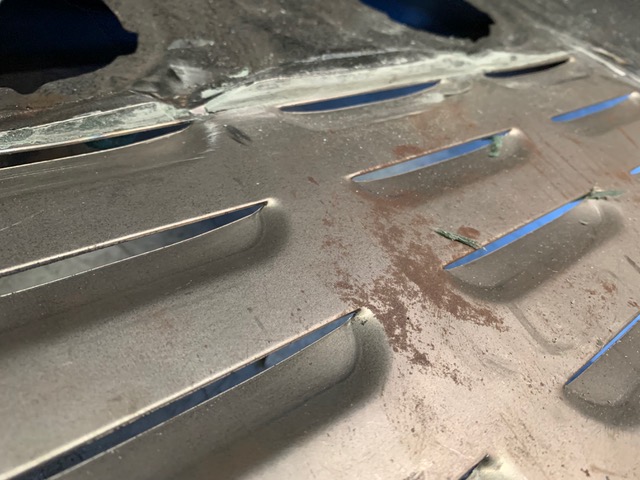 |
|
|
|
| RiqueMar |
Aug 12 2020, 11:52 PM
Post
#896
|
|
Enrique Allen Mar Group: Members Posts: 2,264 Joined: 28-August 08 From: San Diego, CA Member No.: 9,478 Region Association: Southern California |
Oil-cooler well on its way to completion. The beginning of this week was all about finishing up fabrication, starting off with the new additions to the front trunk and passenger-side bulkhead mount for the AN12 oil-lines.
Primered both the interior of the front trunk, as well as the undercarriage and air-inlet in the front before adding sealer and rubberized undercoating, so that everything matches and looks tidy. NOTE: To the reader considering doing this fabrication on a project car; Do as much as you can before painting. My car has gone through numerous iterations, and it is sometimes nerve-racking working around finished bodywork and paint. As for the finishing, I chose to go 'thick' with the seam sealer and went with Wurth brushable. My car is 'anything but' stock, I like the look of this underneath the coating. It has nothing to do with 'it's what the factory used', nor am I trying to replicate that. I first applied it using a bondo applicator squeege to make sure to get inside the seams, then passed over the masked area with the brush. Love it, the way it looks, to me is pure 70's inspired racing. 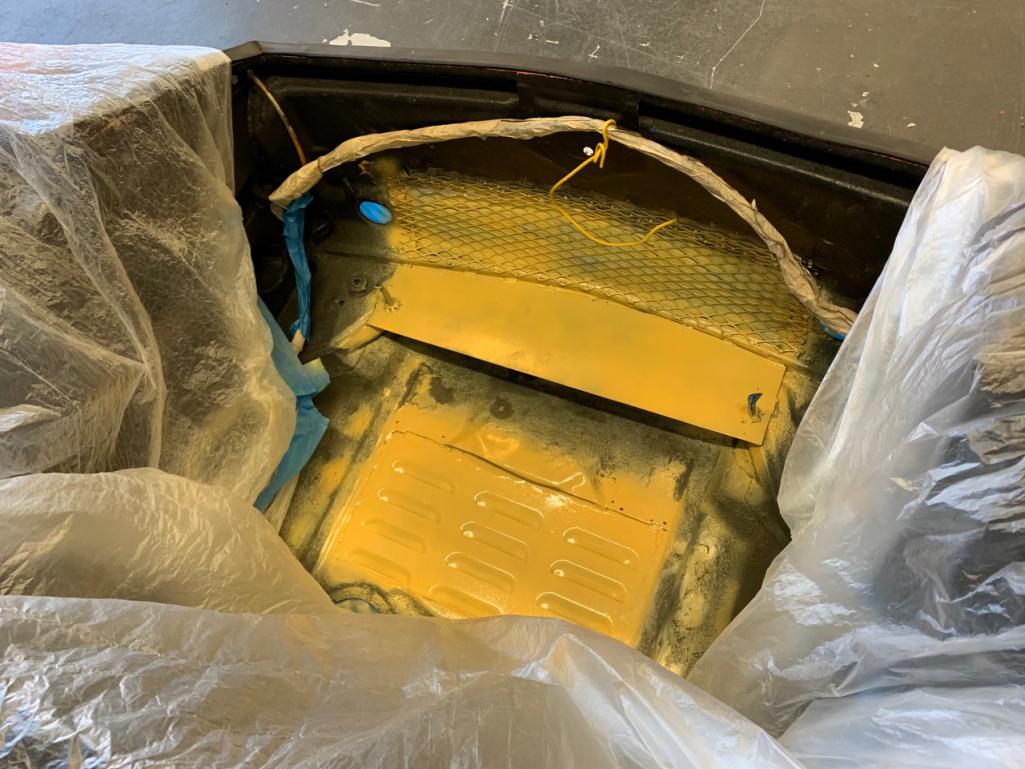  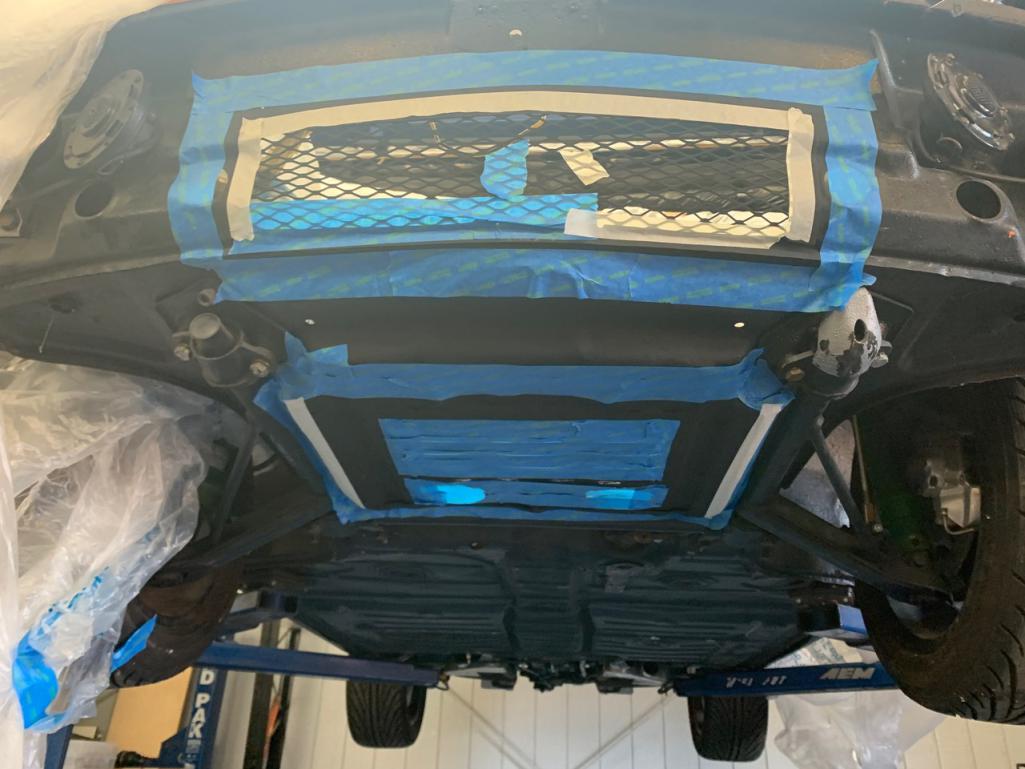 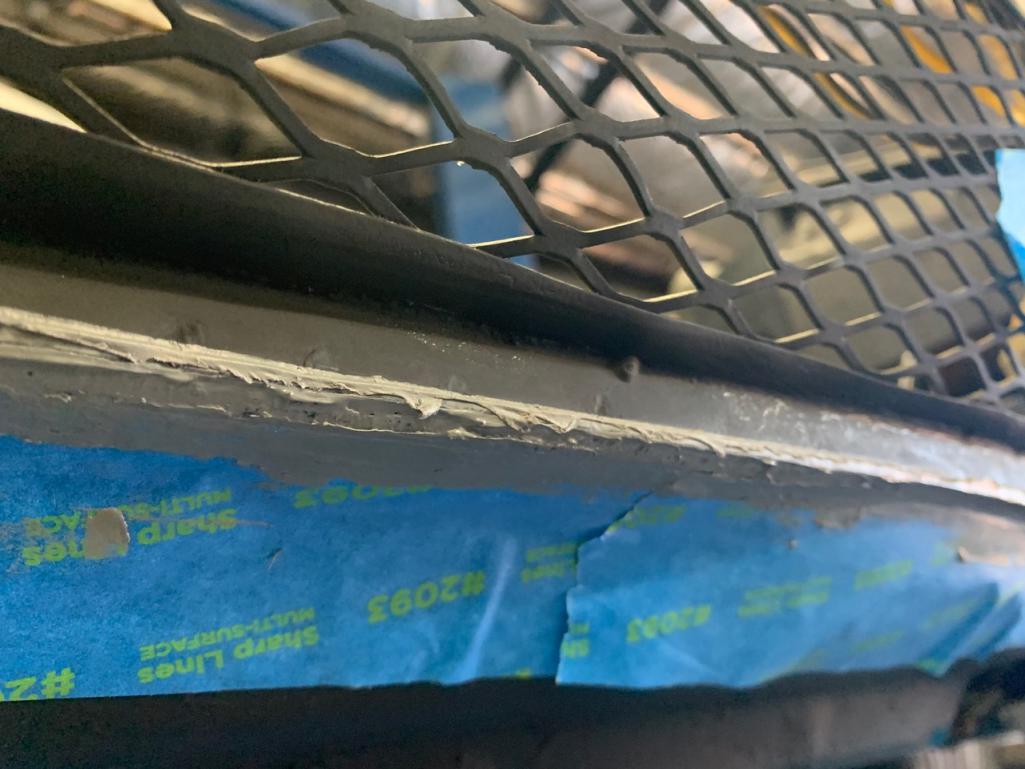 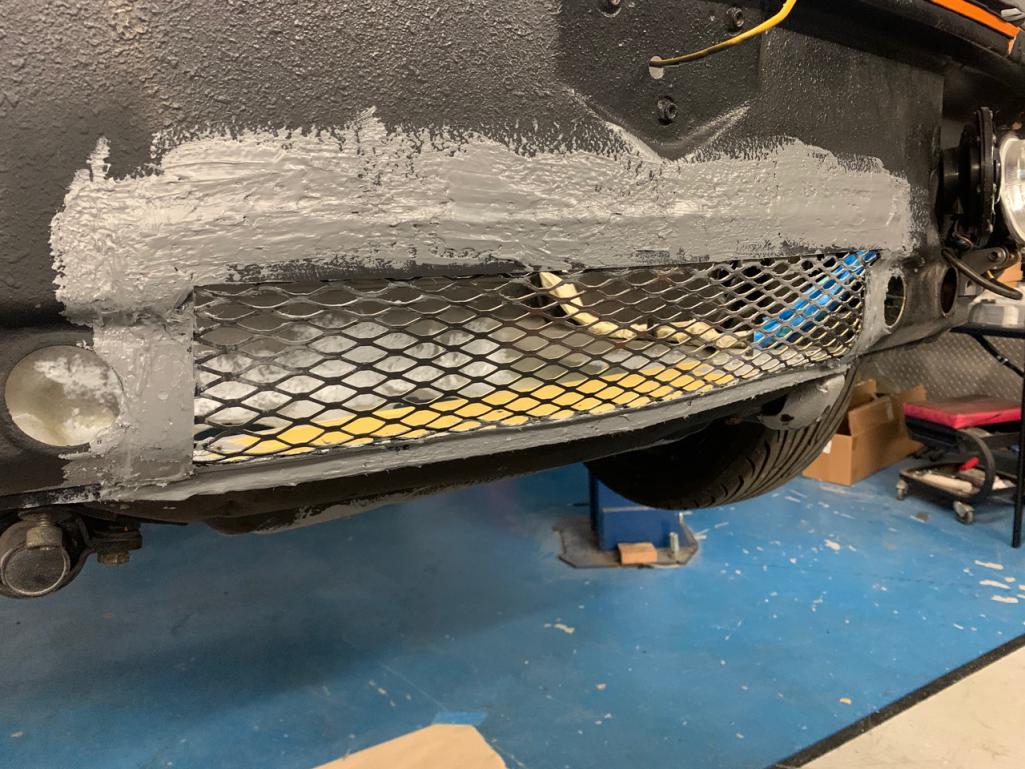 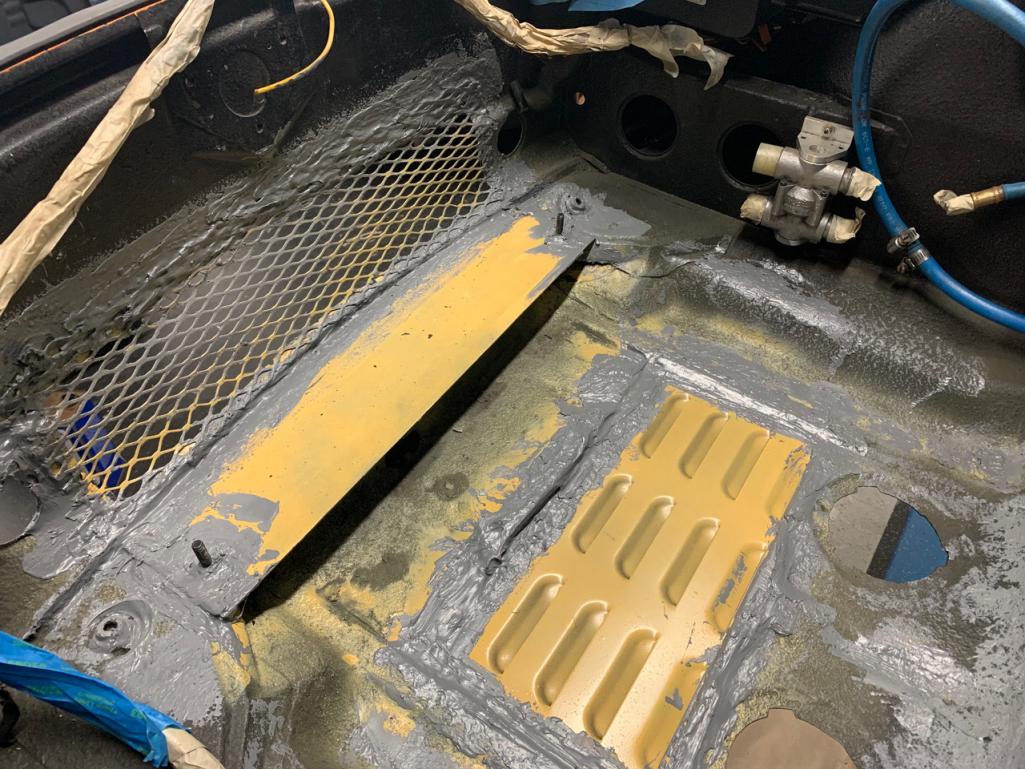 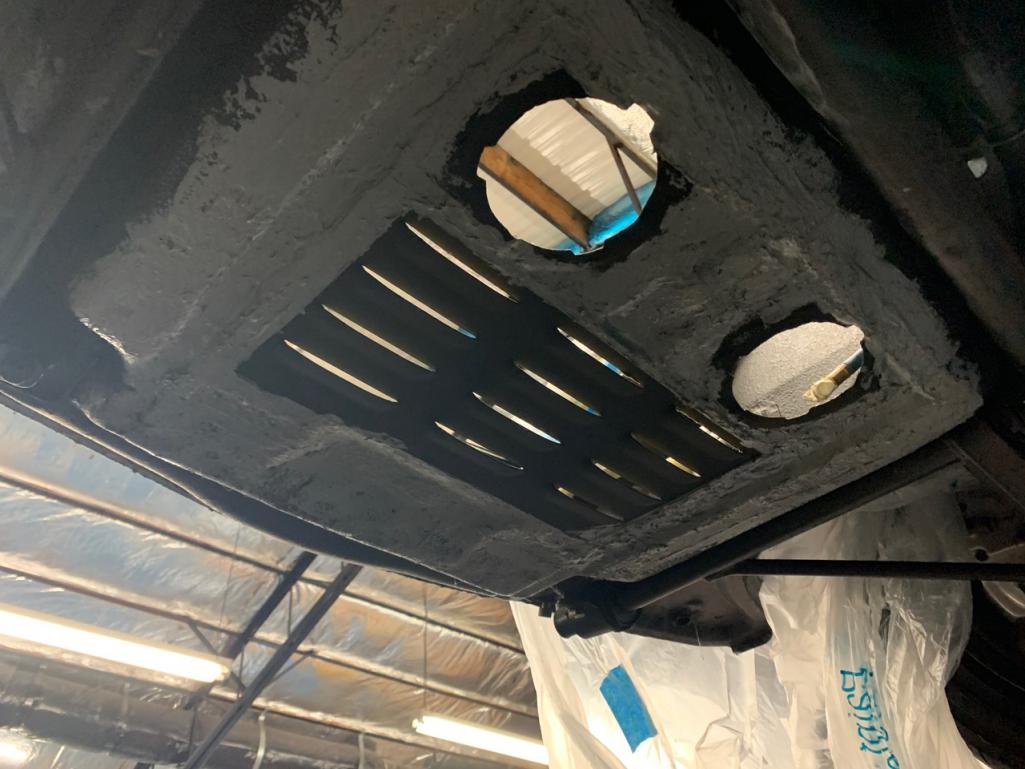 |
|
|
|
| RiqueMar |
Aug 13 2020, 12:05 PM
Post
#897
|
|
Enrique Allen Mar Group: Members Posts: 2,264 Joined: 28-August 08 From: San Diego, CA Member No.: 9,478 Region Association: Southern California |
Monday, Tuesday and Wednesday this week were all about the oil-lines running on the passenger side. After reinforcing the area around the new bulkhead inlet, I also covered this with seam-sealer and applied rubberized undercoating. As I was re-running the oil-lines, I decided that the gussets that support the passenger entry 'step' still looked a bit big and needed to be ground-down a bit more, and then touched up this area with more undercoating, as well as the inside of the long there the bulkhead connections will be.
After running the lines BACK along the passenger side, I had to cut each to a shorter size (they were originally a 'home run' from the tank/engine to the thermostat) and fit the 90º AN12 fittings. For those following along, this is bear of a job. I hate putting new fittings on SS braided lines, but here we are. Also note, I've included a diagram for reference for those, like me, that were/are unsure which direction the oil flows within the system. 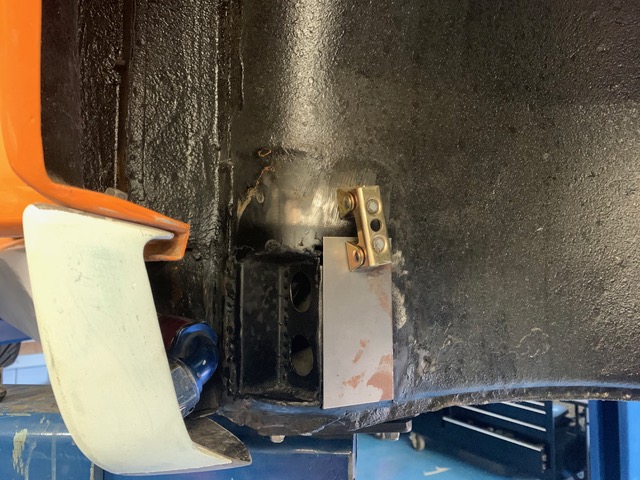 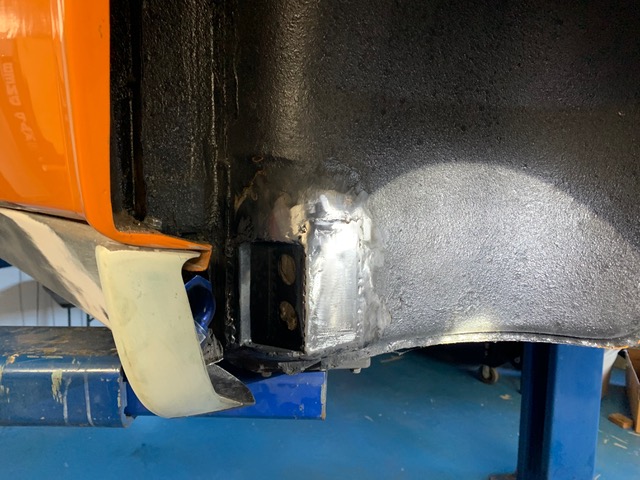 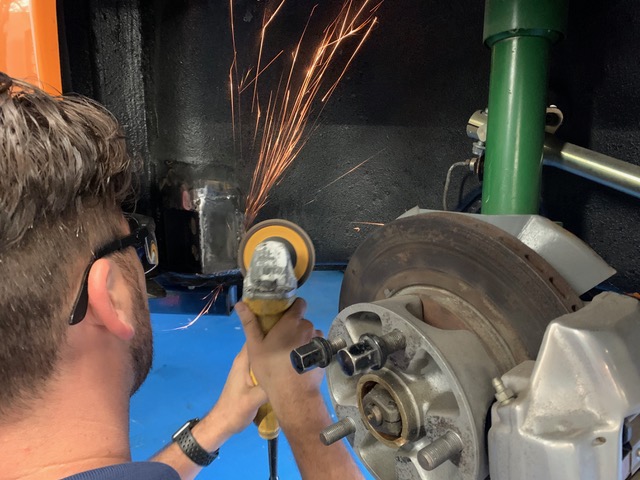 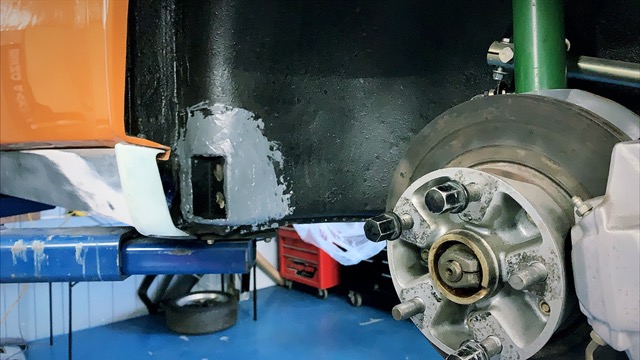 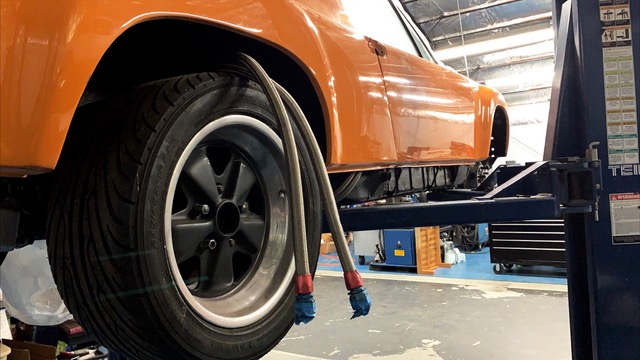 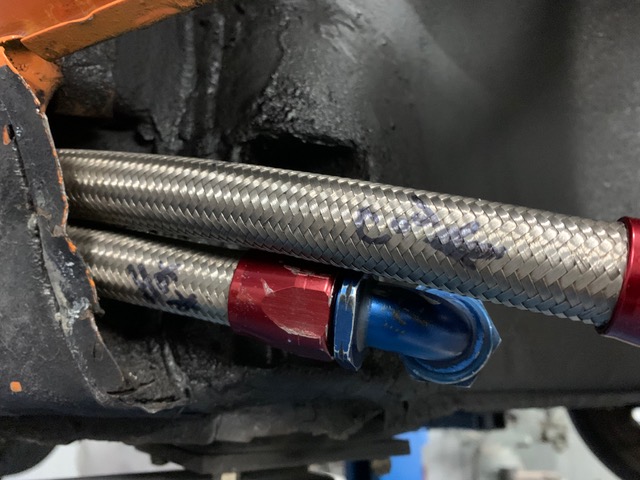 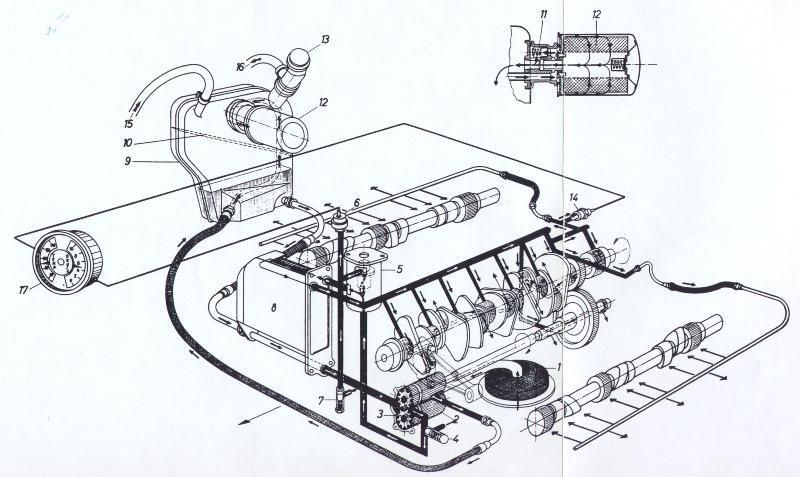 |
|
|
|
| Luke M |
Aug 13 2020, 01:01 PM
Post
#898
|
|
Senior Member Group: Members Posts: 1,541 Joined: 8-February 05 From: WNY Member No.: 3,574 Region Association: North East States |
Your GT project is coming along great. I have a question for you.
Looks like you made your own fan holding bracket out of abs. How about knocking a few out of aluminum ? I could use two of them for my projects. Or anyone here have the means to do this? Attached image(s) 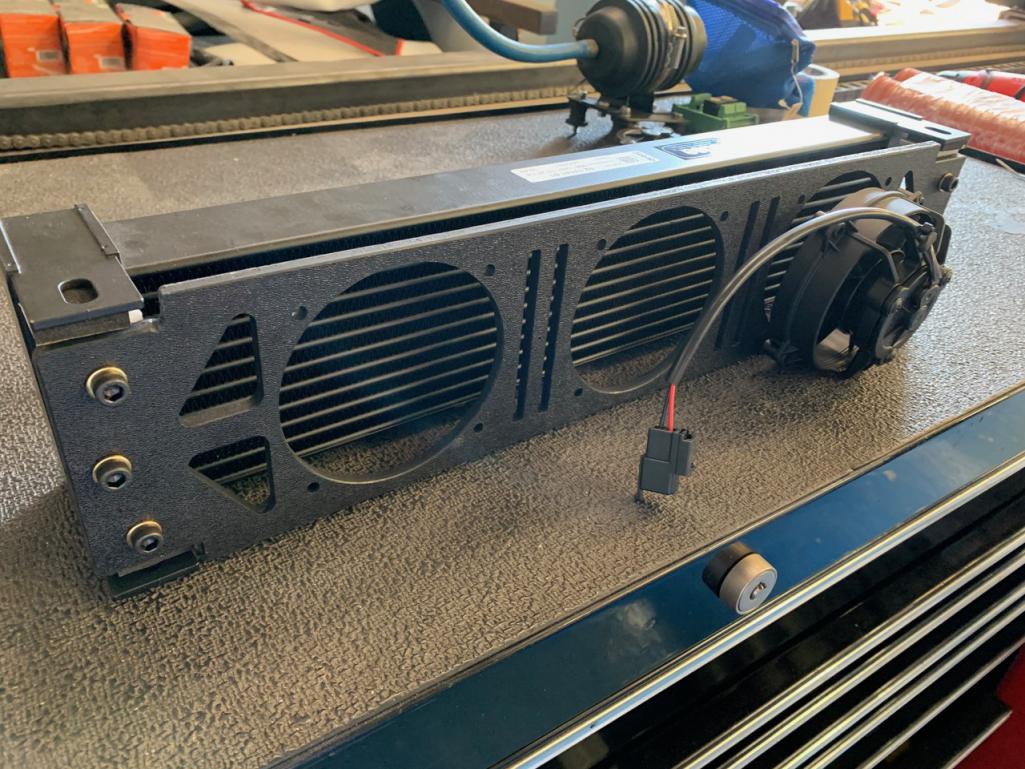
|
|
|
|
| RiqueMar |
Aug 13 2020, 01:29 PM
Post
#899
|
|
Enrique Allen Mar Group: Members Posts: 2,264 Joined: 28-August 08 From: San Diego, CA Member No.: 9,478 Region Association: Southern California |
QUOTE(Luke M @ Aug 13 2020, 12:01 PM) Your GT project is coming along great. I have a question for you. Looks like you made your own fan holding bracket out of abs. How about knocking a few out of aluminum ? I could use two of them for my projects. Or anyone here have the means to do this? Hey Luke, you read my mind. This and a few other products will be available soon. I'll also have the ability to produce custom laser-cut items. (IMG:style_emoticons/default/beer.gif) |
|
|
|
| Luke M |
Aug 13 2020, 02:17 PM
Post
#900
|
|
Senior Member Group: Members Posts: 1,541 Joined: 8-February 05 From: WNY Member No.: 3,574 Region Association: North East States |
(IMG:style_emoticons/default/aktion035.gif) Pm me when you get going on them. I'd be in for two of them.
I'll be running the same oil cooler that you have with the gt shroud. |
|
|
|
|
1 User(s) are reading this topic (1 Guests and 0 Anonymous Users)
0 Members:

|
Lo-Fi Version | Time is now: 16th June 2026 - 06:29 AM |
Invision Power Board
v9.1.4 © 2026 IPS, Inc.