|
|
|
Porsche, and the Porsche crest are registered trademarks of Dr. Ing. h.c. F. Porsche AG.
This site is not affiliated with Porsche in any way. Its only purpose is to provide an online forum for car enthusiasts. All other trademarks are property of their respective owners. |
|
|

  |

| jc914 |
 Nov 23 2008, 06:33 PM Nov 23 2008, 06:33 PM
Post
#3
|
|
Member  Group: Members Posts: 289 Joined: 15-September 08 From: Miami, Florida Member No.: 9,548 Region Association: South East States |
GREAT JOB Keep us all posted. Nice work on the Flares very very nice (IMG:style_emoticons/default/smilie_pokal.gif) (IMG:style_emoticons/default/clap56.gif) (IMG:style_emoticons/default/welcome.png) (IMG:style_emoticons/default/beerchug.gif)
|
   |

 
|
| wallys914 |
Nov 23 2008, 06:34 PM
Post
#4
|
|
In life you don't get what you want, you get what you negoia Group: Members Posts: 190 Joined: 10-October 08 From: Garden Grove, Member No.: 9,631 Region Association: Southern California |
I got the rockers off to find the driver side in great condition with the passenger side in total havoc.....Seeee.... And has any one else had a rats nest in there rockers too?
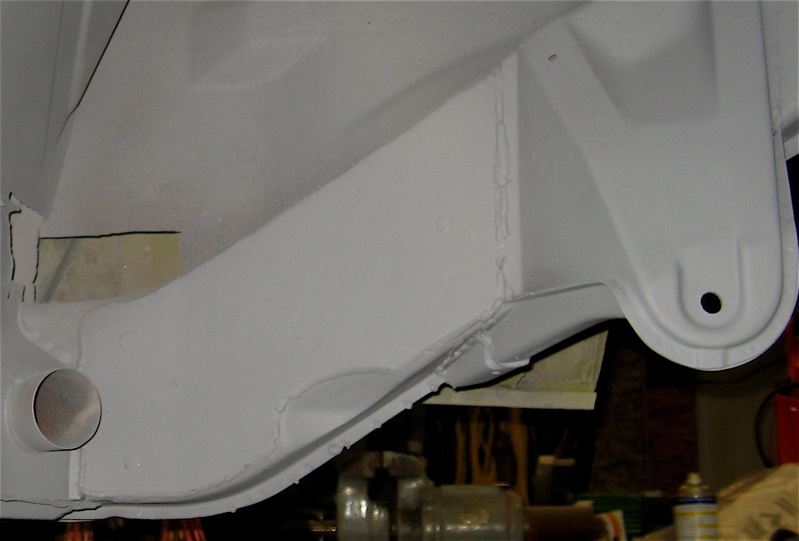
(IMG:http://i328.photobucket.com/albums/l326/walloch/PorscheRestoration075.jpg) (IMG:http://i328.photobucket.com/albums/l326/walloch/PorscheRestoration074.jpg) (IMG:http://i328.photobucket.com/albums/l326/walloch/PorscheRestoration008-2.jpg) I got the rest of my kit on the way as well as the engine......Heres the tank (1000$'s grrrr) (IMG:http://i328.photobucket.com/albums/l326/walloch/PorscheRestoration006-2.jpg) :pics: I pulled some dents out with my new stud welder..... (IMG:http://i328.photobucket.com/albums/l326/walloch/PorscheRestoration034-3.jpg) (IMG:http://i328.photobucket.com/albums/l326/walloch/PorscheRestoration002-2.jpg) So then I noticed some rust in the rear trunk through all the sprayed bedliner that didnt set so i spent the day cutting the piece out...Sorry guys the wife wasnt home.... (IMG:http://i328.photobucket.com/albums/l326/walloch/PorscheRestoration003-3.jpg) (IMG:http://i328.photobucket.com/albums/l326/walloch/PorscheRestoration007-3.jpg) I also in the spare time i had when air compressor was filling had a chance to wire wheel the front trunk and remove some kind of sprayed on bedliner, who knew the original paint was in great condition.....See.... Before (IMG:http://i328.photobucket.com/albums/l326/walloch/PorscheRestoration029-2.jpg) After (IMG:http://i328.photobucket.com/albums/l326/walloch/PorscheRestoration006-3.jpg) (IMG:style_emoticons/default/popcorn[1].gif) I got all of my parts and cleant the back truck out, its amazing what a lil stripper and some elbow grease will do....got the hood on to...doesnt fit rigth though Parts were.... MotorMount Acc Linkage Eng Tin Behr Oil Cooler acc cable rubber seald and roll bar rubber It was like christmas in August (IMG:style_emoticons/default/smile.gif) so back to work i go.... :bfh: (IMG:http://i328.photobucket.com/albums/l326/walloch/PorscheRestoration014-3.jpg) (IMG:http://i328.photobucket.com/albums/l326/walloch/PorscheRestoration018-3.jpg) (IMG:http://i328.photobucket.com/albums/l326/walloch/PorscheRestoration012-4.jpg) (IMG:http://i328.photobucket.com/albums/l326/walloch/PorscheRestoration001-3.jpg) (IMG:http://i328.photobucket.com/albums/l326/walloch/PorscheRestoration004-4.jpg) (IMG:http://i328.photobucket.com/albums/l326/walloch/PorscheRestoration006-4.jpg) |
|
|
|
| computers4kids |
Nov 23 2008, 06:43 PM
Post
#8
|
|
Love these little cars! Group: Members Posts: 2,443 Joined: 11-June 05 From: Port Townsend, WA Member No.: 4,253 Region Association: None |
Great job on the flares...you're an amazing welder. Had I tried to do that...well, lets just leave that to your imagination. You'll be glad you stripped the car...even though you probaby thought you had opened a can of worms mid stream.
Looking forward to more pics! |
|
|
|
| wallys914 |
Nov 23 2008, 06:57 PM
Post
#12
|
|
In life you don't get what you want, you get what you negoia Group: Members Posts: 190 Joined: 10-October 08 From: Garden Grove, Member No.: 9,631 Region Association: Southern California |
I like the stock tensioners with the 25 upgrade i think I will leave that!!!
(IMG:http://i328.photobucket.com/albums/l326/walloch/PorscheRestoration002-9.jpg) (IMG:http://i328.photobucket.com/albums/l326/walloch/PorscheRestoration004-11.jpg) NoT (IMG:style_emoticons/default/poke.gif) Got the heads off today....Yuck (IMG:style_emoticons/default/sawzall-smiley.gif) After I had to heat up the Cam Nut and clamp some vise grips on the sprocket and deadblowed it... (IMG:http://i328.photobucket.com/albums/l326/walloch/PorscheRestoration019-9.jpg) Um I learned you can just man handle it or shit just breaks....Randomly....After Andy Man Handled the Cam nut.....Notice the Right Rocker (IMG:http://i328.photobucket.com/albums/l326/walloch/PorscheRestoration018-7.jpg) Pistons are ehhh, one has marks where it looks like the piston has been rubbing the cylinder.... :doh: (IMG:http://i328.photobucket.com/albums/l326/walloch/PorscheRestoration020-9.jpg) Got all the other crap off just need to remove the Flywheel and split the case, I unbolted all the bolts and nuts I could find...but no Splitty after some Tap-Tap-Tap-a-roo Engine Un-Build Complete.... I also Sanded and painted the Shroud today..... :aah: Bearings and Crank looks good, didnt see any signs of Carnage, but just the usual wear and tear, Maybe arebuild wont be so much..... (IMG:http://i328.photobucket.com/albums/l326/walloch/PorscheRestoration003-12.jpg) (IMG:http://i328.photobucket.com/albums/l326/walloch/PorscheRestoration004-12.jpg) (IMG:http://i328.photobucket.com/albums/l326/walloch/PorscheRestoration005-13.jpg) (IMG:http://i328.photobucket.com/albums/l326/walloch/PorscheRestoration008-13.jpg) Shroud and such.... (IMG:http://i328.photobucket.com/albums/l326/walloch/PorscheRestoration010-9.jpg) (IMG:http://i328.photobucket.com/albums/l326/walloch/PorscheRestoration009-11.jpg) This is where i stand today as of 2 hours ago.....More to come over the Next days, weeks, Months..... Thank you all for your posts.... |
|
|
|
| veltror |
Nov 24 2008, 10:22 AM
Post
#13
|
|
Senior Member Group: Members Posts: 928 Joined: 27-April 08 From: Potters Bar Herts UK Member No.: 8,978 Region Association: None |
Brillinat work!! Wish mine was like yours but mine is significantly worse...
|
|
|
|
| JimmyG |
Nov 24 2008, 11:23 AM
Post
#14
|
|
Member Group: Members Posts: 146 Joined: 10-September 04 From: Birmingham, AL Member No.: 2,730 Region Association: South East States |
OK... Who is the better welder?
She looks like she knows her way arould the MIG. |
|
|
|
| 6freak |
Nov 24 2008, 01:22 PM
Post
#15
|
|
MR.C Group: Members Posts: 4,740 Joined: 19-March 08 From: Tacoma WA Member No.: 8,829 Region Association: Pacific Northwest |
QUOTE(wallys914 @ Nov 23 2008, 04:57 PM)  I like the stock tensioners with the 25 upgrade i think I will leave that!!! (IMG:http://i328.photobucket.com/albums/l326/walloch/PorscheRestoration002-9.jpg) (IMG:http://i328.photobucket.com/albums/l326/walloch/PorscheRestoration004-11.jpg) NoT (IMG:style_emoticons/default/poke.gif) Got the heads off today....Yuck (IMG:style_emoticons/default/sawzall-smiley.gif) After I had to heat up the Cam Nut and clamp some vise grips on the sprocket and deadblowed it... (IMG:http://i328.photobucket.com/albums/l326/walloch/PorscheRestoration019-9.jpg) Um I learned you can just man handle it or shit just breaks....Randomly....After Andy Man Handled the Cam nut.....Notice the Right Rocker (IMG:http://i328.photobucket.com/albums/l326/walloch/PorscheRestoration018-7.jpg) Pistons are ehhh, one has marks where it looks like the piston has been rubbing the cylinder.... :doh: (IMG:http://i328.photobucket.com/albums/l326/walloch/PorscheRestoration020-9.jpg) Got all the other crap off just need to remove the Flywheel and split the case, I unbolted all the bolts and nuts I could find...but no Splitty after some Tap-Tap-Tap-a-roo Engine Un-Build Complete.... I also Sanded and painted the Shroud today..... :aah: Bearings and Crank looks good, didnt see any signs of Carnage, but just the usual wear and tear, Maybe arebuild wont be so much..... (IMG:http://i328.photobucket.com/albums/l326/walloch/PorscheRestoration003-12.jpg) (IMG:http://i328.photobucket.com/albums/l326/walloch/PorscheRestoration004-12.jpg) (IMG:http://i328.photobucket.com/albums/l326/walloch/PorscheRestoration005-13.jpg) (IMG:http://i328.photobucket.com/albums/l326/walloch/PorscheRestoration008-13.jpg) Shroud and such.... (IMG:http://i328.photobucket.com/albums/l326/walloch/PorscheRestoration010-9.jpg) (IMG:http://i328.photobucket.com/albums/l326/walloch/PorscheRestoration009-11.jpg) This is where i stand today as of 2 hours ago.....More to come over the Next days, weeks, Months..... Thank you all for your posts.... do the hydraulic tentioners when your that deep into it...... thats more work then i would ever want to tackle ..nice job keep up the good work ..and you better let the wife drive it after she work so hard on it with you |
|
|
|
| wallys914 |
Nov 24 2008, 11:26 PM
Post
#16
|
|
In life you don't get what you want, you get what you negoia Group: Members Posts: 190 Joined: 10-October 08 From: Garden Grove, Member No.: 9,631 Region Association: Southern California |
I think I may have some issues..... (IMG:style_emoticons/default/confused24.gif)
(IMG:http://i328.photobucket.com/albums/l326/walloch/PorscheRestoration011-11.jpg) (IMG:http://i328.photobucket.com/albums/l326/walloch/PorscheRestoration012-12.jpg) (IMG:http://i328.photobucket.com/albums/l326/walloch/PorscheRestoration013-13.jpg) (IMG:http://i328.photobucket.com/albums/l326/walloch/PorscheRestoration014-10.jpg) (IMG:http://i328.photobucket.com/albums/l326/walloch/PorscheRestoration015-10.jpg) |
|
|
|
| wallys914 |
Nov 29 2008, 11:05 PM
Post
#17
|
|
In life you don't get what you want, you get what you negoia Group: Members Posts: 190 Joined: 10-October 08 From: Garden Grove, Member No.: 9,631 Region Association: Southern California |
So i was playing with the hood this evening, and i could not get the hood lined up for the life of me, and I found this.....Damnit i knew it was hit some where just couldnt tell (Or maybe I did and i didnt want to think about it) Any one had these issues and is there an easy resolution.....HELP!!!!.....
Inside the Trunk (IMG:http://i328.photobucket.com/albums/l326/walloch/Eric048.jpg) Then this....(Small People helped me take these pictures....) (IMG:http://i328.photobucket.com/albums/l326/walloch/Eric053.jpg) But the Hoods aligned as far back as it can go (IMG:http://i328.photobucket.com/albums/l326/walloch/Eric056.jpg) But... (IMG:http://i328.photobucket.com/albums/l326/walloch/Eric058.jpg) (IMG:http://i328.photobucket.com/albums/l326/walloch/Eric060.jpg) (IMG:http://i328.photobucket.com/albums/l326/walloch/Eric061.jpg) So in the end im stuck with 2 bad things, 1) Hood latch that is catching the front lip and 2) Hood that's hitting the front Lip.... HELP Also is there an easy way to cut out the Original Motor Mounts....I dont want to run them and I want to make sure that the area is well supported (E.G.- New Plating).....Your Thoughts anyone.... (IMG:http://i328.photobucket.com/albums/l326/walloch/Eric042.jpg) |
|
|
|
| Wilhelm |
Nov 30 2008, 02:50 AM
Post
#18
|
|
Member Group: Members Posts: 408 Joined: 7-September 07 From: Hooterville, OR Member No.: 8,088 Region Association: None |
Getting the motor mounts off not so hard. Find the spot welds and drill them. Then get a flat thin chisel or heavy duty scraper behind it and it will tap right off. On my car http://www.914world.com/bbs2/index.php?showtopic=87896 I made carboard template of the long under the motor mount area than transfered it to a plate of 1/8" steel. Multiple bung welds and the perimeter welded as well.
 Gonna hang my engine off this and doubt it will rip off, unlike the original mount whose lack of strength was pretty scary. |
|
|
|
| wallys914 |
Dec 3 2008, 05:40 PM
Post
#19
|
|
In life you don't get what you want, you get what you negoia Group: Members Posts: 190 Joined: 10-October 08 From: Garden Grove, Member No.: 9,631 Region Association: Southern California |
I wanted to know if the barrels above can be cleaned up, and re-honed? I was just wondering cause i have a great deal from a friend for an incomplete set that looks good and are matching numbers for the pistons. He has 4 barrrels and 5 pistons, i was going to use some of mine mine but i wanted to make sure i can reuse it all...or the majority.
Anybody give me some hints? sorry you have to scroll up.......! LOL |
|
|
|
| rfuerst911sc |
Dec 3 2008, 06:15 PM
Post
#20
|
|
Advanced Member Group: Members Posts: 2,158 Joined: 4-May 06 From: Dahlonega , Georgia Member No.: 5,980 Region Association: South East States |
QUOTE(wallys914 @ Dec 3 2008, 03:40 PM) I wanted to know if the barrels above can be cleaned up, and re-honed? I was just wondering cause i have a great deal from a friend for an incomplete set that looks good and are matching numbers for the pistons. He has 4 barrrels and 5 pistons, i was going to use some of mine mine but i wanted to make sure i can reuse it all...or the majority. Anybody give me some hints? sorry you have to scroll up.......! LOL I'm no expert but there are a few things to know before this can be answered. First is to figure out if they are Nikasil or Alusil cylinders. It is my understanding that if they are Alusil they might be scrap. Like anything else there is a acceptable tolerance for wear limits. You need to find out what those are for your cylinders and then see if they are within spec or not. I'm sure someone like EBS Racing can help you out. They refurbish / resell cylinders and I believe can re-apply the Nikasil coating but it won't be cheap. |
|
|
|
|
1 User(s) are reading this topic (1 Guests and 0 Anonymous Users)
0 Members:

|
Lo-Fi Version | Time is now: 17th May 2024 - 03:50 PM |
Invision Power Board
v9.1.4 © 2024 IPS, Inc.