|
|
|
Porsche, and the Porsche crest are registered trademarks of Dr. Ing. h.c. F. Porsche AG.
This site is not affiliated with Porsche in any way. Its only purpose is to provide an online forum for car enthusiasts. All other trademarks are property of their respective owners. |
|
|

  |

| Zaney |
 May 31 2010, 12:25 AM May 31 2010, 12:25 AM
Post
#61
|
|
Deuchland en der Haus  Group: Members Posts: 461 Joined: 1-March 04 From: Engine 11 Redmond, WA Member No.: 1,738 Region Association: Pacific Northwest |
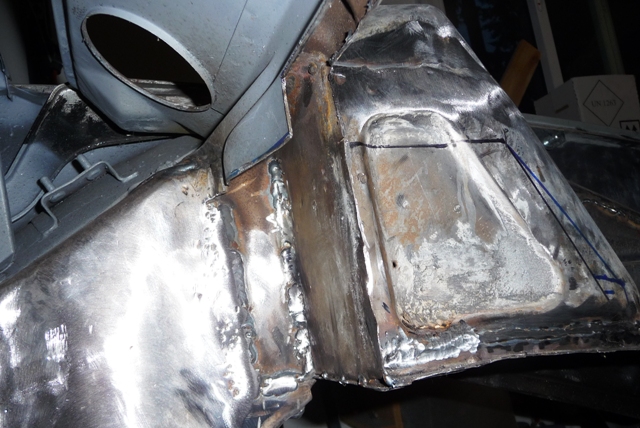
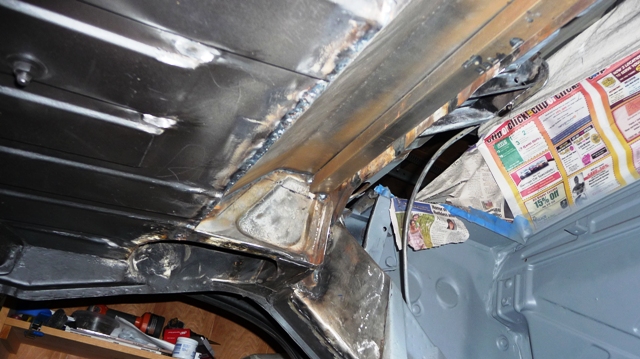
Thought I would listen to Geoff's advice and tighten up the welds in the trunk and the rear firewall before I cut into it.
Took about 3 hours of patiently seam welding and air quenching but it turned out alright. I ground off some of the high spots and the area between the strut towers for the new 'boxed out' firewall. Then, measured and remeasured the trunk and... (IMG:style_emoticons/default/sawzall-smiley.gif) Here are some pics to survey the surgery (IMG:style_emoticons/default/biggrin.gif) 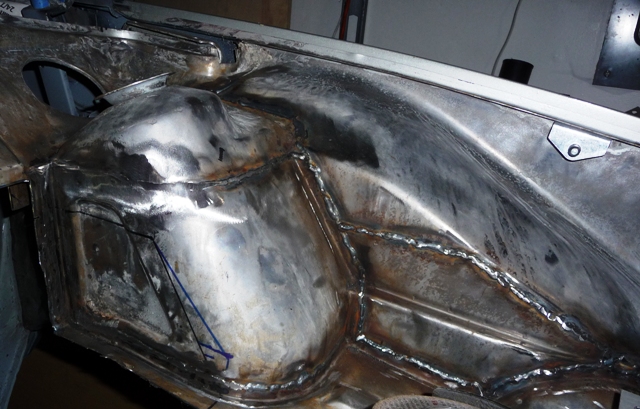 Seam welded trunk 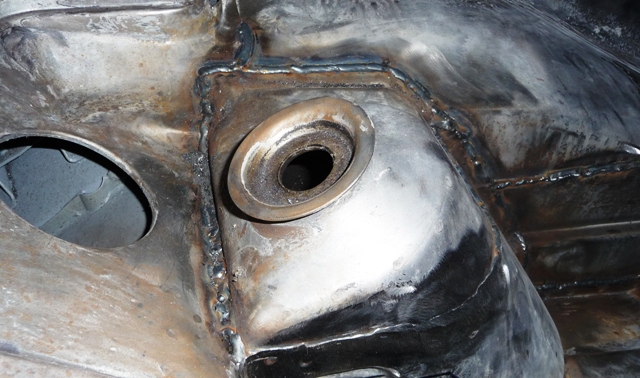 Got the firewall strut tower joint welded up |
   |

 
|
| Zaney |
May 31 2010, 12:29 AM
Post
#62
|
|
Deuchland en der Haus Group: Members Posts: 461 Joined: 1-March 04 From: Engine 11 Redmond, WA Member No.: 1,738 Region Association: Pacific Northwest |
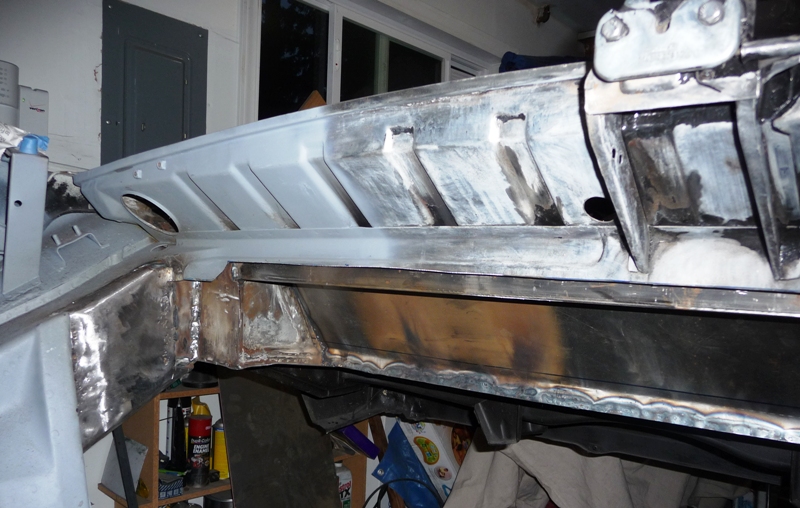
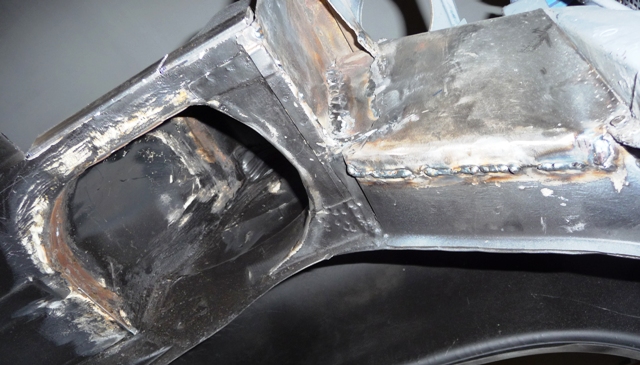 tied all the gusset plates together into the 'long' 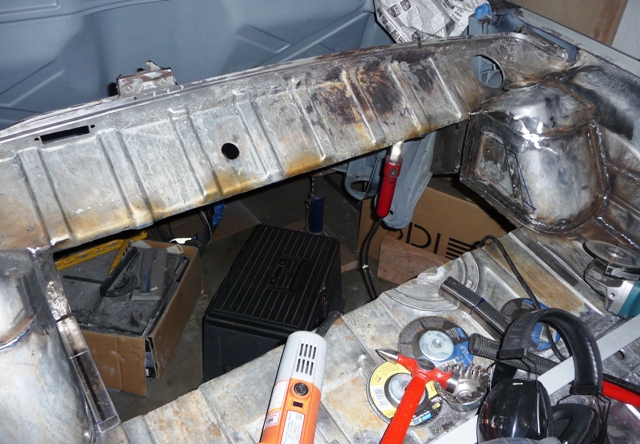 Cut out the 'Big Hole' No turning back now.... Do you think an Eaton M90 and piping will fit in there? (End of dream sequence (IMG:style_emoticons/default/happy11.gif) ) |
|
|
|
| Zaney |
May 31 2010, 12:33 AM
Post
#63
|
|
Deuchland en der Haus Group: Members Posts: 461 Joined: 1-March 04 From: Engine 11 Redmond, WA Member No.: 1,738 Region Association: Pacific Northwest |
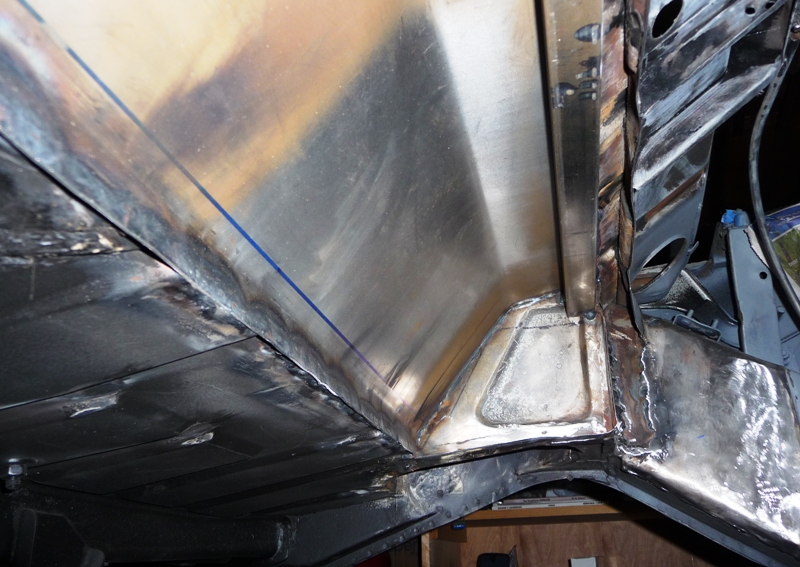
Followed the advice of many who have come before me and got to the inner seam weld between the firewall portions,
 Now it is time to Fab up the 'box' and make it fit nicely in the Big Hole. (IMG:style_emoticons/default/confused24.gif) Time to (IMG:style_emoticons/default/beer.gif) Cheers Nate |
|
|
|
| charliew |
Jun 5 2010, 10:51 PM
Post
#64
|
|
Advanced Member Group: Members Posts: 2,363 Joined: 31-July 07 From: Crawford, TX. Member No.: 7,958 |
Don't slow down now. Try to get someone to cut up a donor for the pieces you need, that way the rib pattern will line up. You actually may have cut a little too far back to use the donor parts though.
|
|
|
|
| Zaney |
Jun 5 2010, 10:57 PM
Post
#65
|
|
Deuchland en der Haus Group: Members Posts: 461 Joined: 1-March 04 From: Engine 11 Redmond, WA Member No.: 1,738 Region Association: Pacific Northwest |
Got a bit of time thanks to Grandma visiting and watching Sydney for the day! Thank you Sue!!!
So, measured some 18 gauge sheet metal and buzzed it down to size! Took a spare 2'x4' and the table saw to rip out my form to bend the metal on. Then, found my cinder blocks and made my own DIY sheet metal brake. It got me close enough without a real one. (IMG:style_emoticons/default/huh.gif) Followed Steve's (Porscharu) lead and braced the strut towers with a piece of 1 inch steel tubing. (IMG:style_emoticons/default/welder.gif) Then, used the bench grinder to make the final tweeks on the firewall cover. Here are some pics: (IMG:style_emoticons/default/smilie_pokal.gif) 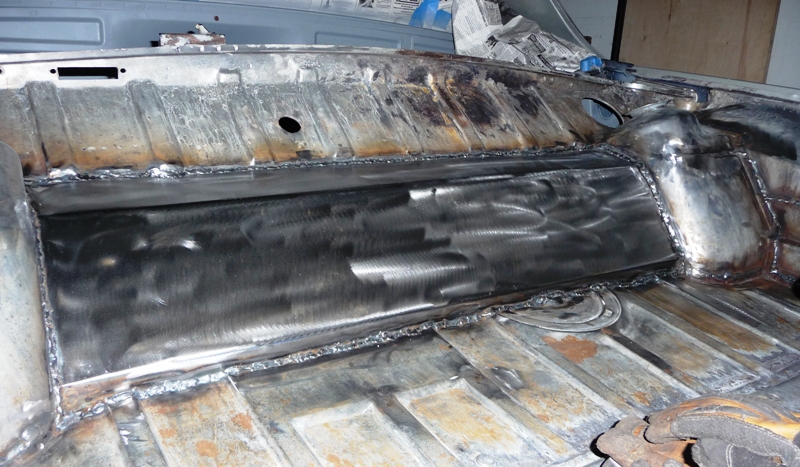 |
|
|
|
| Zaney |
Jun 5 2010, 10:59 PM
Post
#66
|
|
Deuchland en der Haus Group: Members Posts: 461 Joined: 1-March 04 From: Engine 11 Redmond, WA Member No.: 1,738 Region Association: Pacific Northwest |
|
|
|
|
| Zaney |
Jun 5 2010, 11:01 PM
Post
#67
|
|
Deuchland en der Haus Group: Members Posts: 461 Joined: 1-March 04 From: Engine 11 Redmond, WA Member No.: 1,738 Region Association: Pacific Northwest |
  |
|
|
|
| Zaney |
Jun 5 2010, 11:06 PM
Post
#68
|
|
Deuchland en der Haus Group: Members Posts: 461 Joined: 1-March 04 From: Engine 11 Redmond, WA Member No.: 1,738 Region Association: Pacific Northwest |
Next, I am going to take apart the tranny and attempt to do the DIY coupling magic and save $350. Need to find out the thickness of the block off plate then, go buy a piece of aluminum to make one.
After the trans is ready then mate the power plant together and fit it for final placement in the engine bay! The momentum is building! I will probably hold off on the 5-lug conversion due to funds. Instead, get this baby on the road!!! Tada! 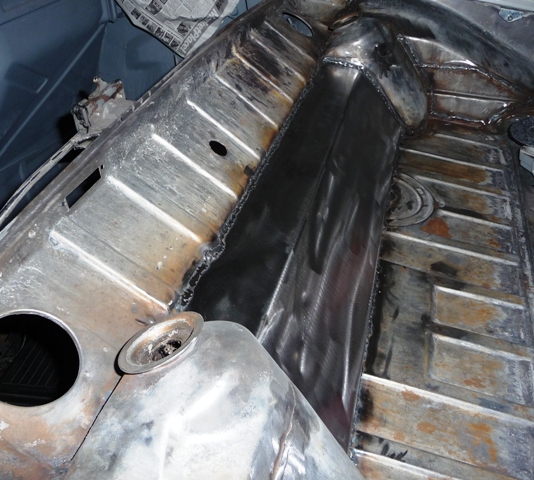 |
|
|
|
| Zaney |
Jun 13 2010, 02:34 PM
Post
#69
|
|
Deuchland en der Haus Group: Members Posts: 461 Joined: 1-March 04 From: Engine 11 Redmond, WA Member No.: 1,738 Region Association: Pacific Northwest |
Keep the momentum going...
Painted the rear trunk and seam sealed the welds. Painted the intake manifold with 500 degree chevy red-orange paint. Used the DIY Bremar Coupling Thread and made my own plate to save myself $350. Here are the pics (IMG:style_emoticons/default/welder.gif) 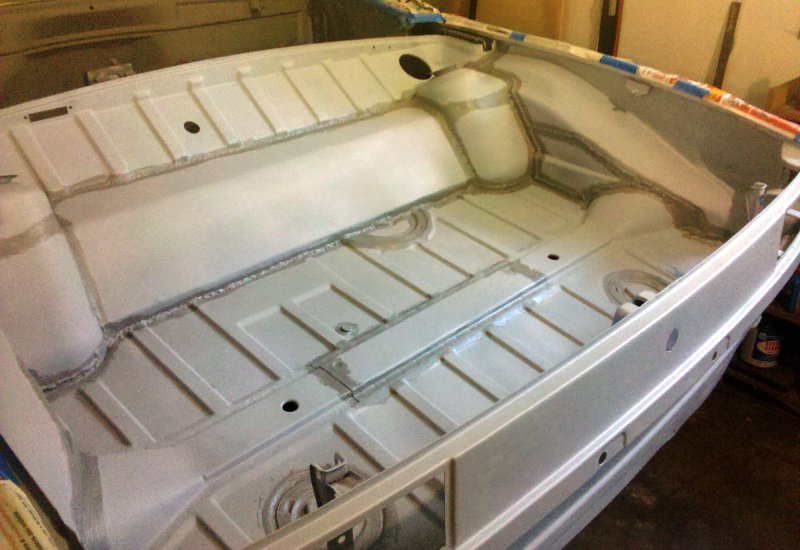   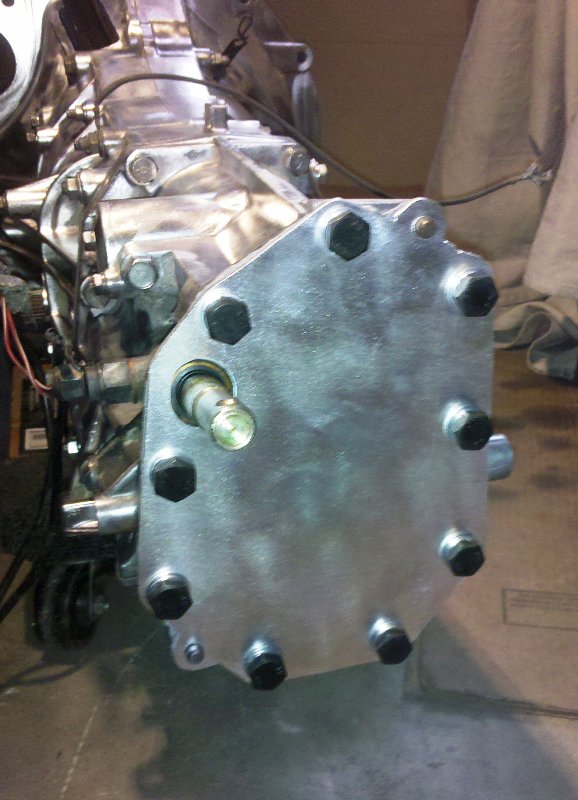 |
|
|
|
| nsr-jamie |
Jul 4 2010, 05:53 AM
Post
#70
|
|
914 guy in Japan Group: Members Posts: 1,182 Joined: 7-November 07 From: Nagoya, Japan Member No.: 8,305 Region Association: None |
I love this thread! Keep up the excellent work!
|
|
|
|
| Zaney |
Jul 20 2010, 01:57 PM
Post
#71
|
|
Deuchland en der Haus Group: Members Posts: 461 Joined: 1-March 04 From: Engine 11 Redmond, WA Member No.: 1,738 Region Association: Pacific Northwest |
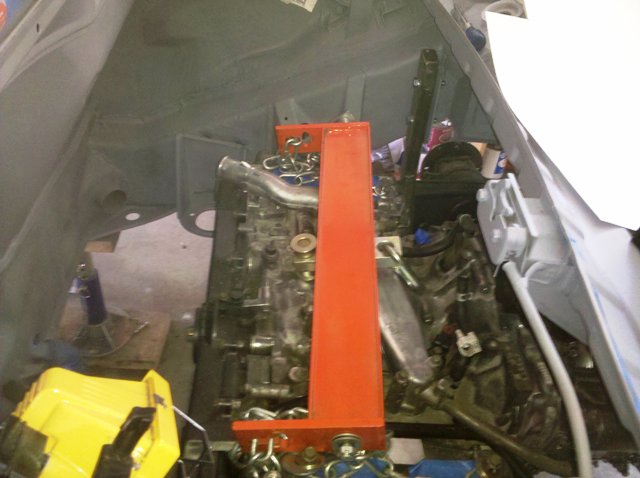
Alrighty then!
More progress on the Suby Transmission mount and the final placement of the mounting tabs for the engine cradle. I copied the engine cradle/yoke design from Geoff (Strawman) 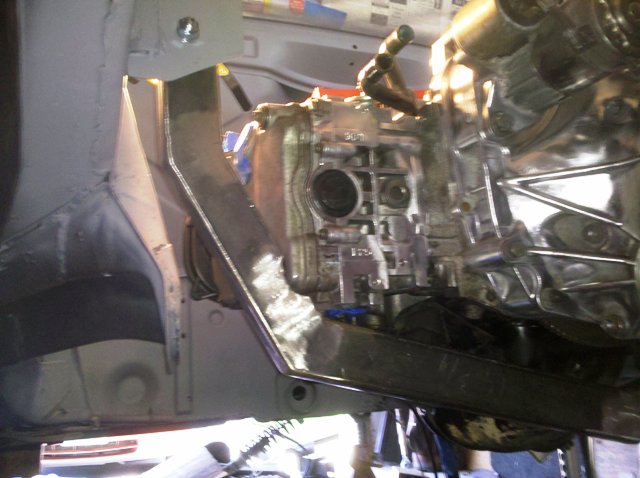 Another pic with the trans mount 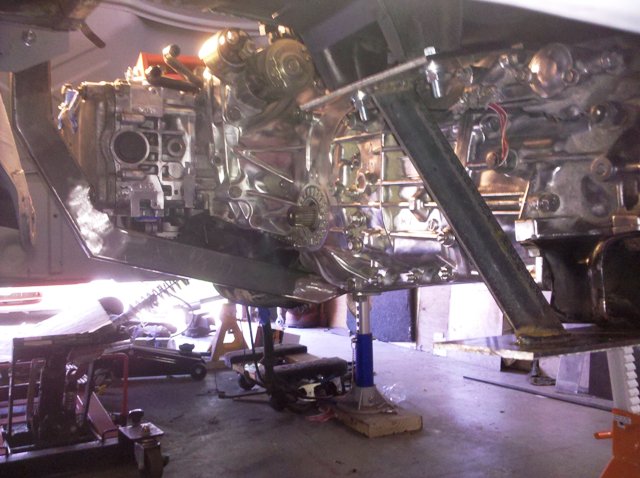 The little notch is my mismeasurement of the cylinder clearance on that side. Should not hurt the stabilty of the cradle. |
|
|
|
| Zaney |
Jul 20 2010, 02:04 PM
Post
#72
|
|
Deuchland en der Haus Group: Members Posts: 461 Joined: 1-March 04 From: Engine 11 Redmond, WA Member No.: 1,738 Region Association: Pacific Northwest |
Here is my attempt at the Suby Transmission mount in the 914.
I utilized the stock subaru transmission mount and made a simple plate-based mount to hang from the 914 stock trans mount position. I will use better fasteners for the final installation. (IMG:style_emoticons/default/driving.gif)  Here is the clearance under the rear trunk. Since this picture was taken I ground down the old muffler hanger tabs. So, there is about 1/2 to 3/4 inch clearance. 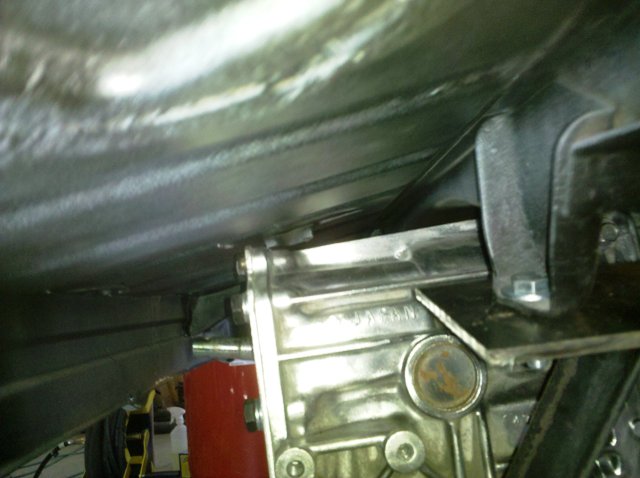 |
|
|
|
| Zaney |
Jul 20 2010, 02:09 PM
Post
#73
|
|
Deuchland en der Haus Group: Members Posts: 461 Joined: 1-March 04 From: Engine 11 Redmond, WA Member No.: 1,738 Region Association: Pacific Northwest |
Here is the alignment of the axle for the Suby Trans and the teener trailing arm.
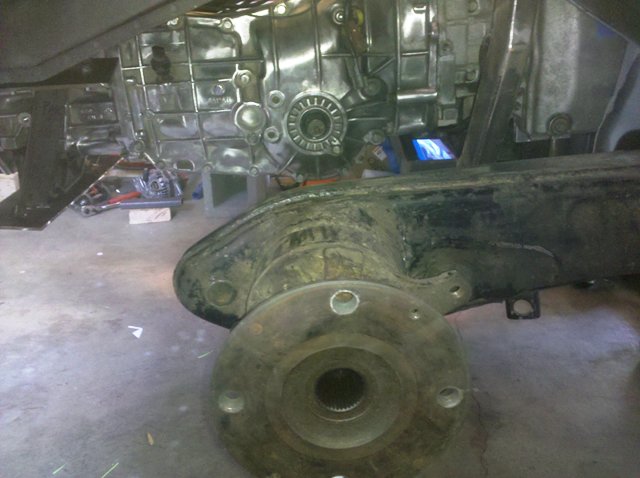 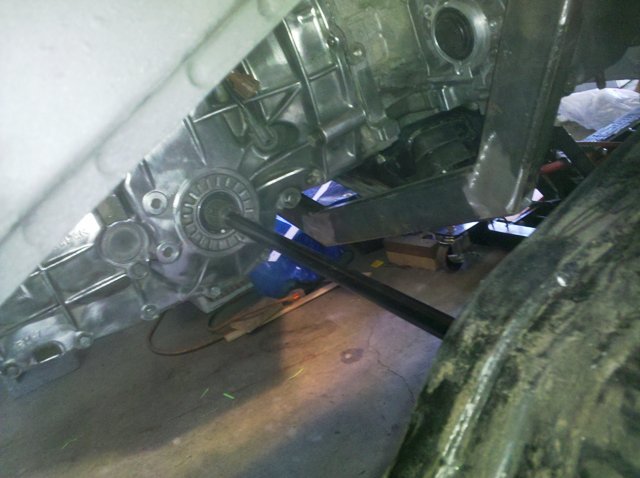 Here is the room from the trunk clearance modification for the starter and the slave clutch cylinder. (IMG:style_emoticons/default/sawzall-smiley.gif) 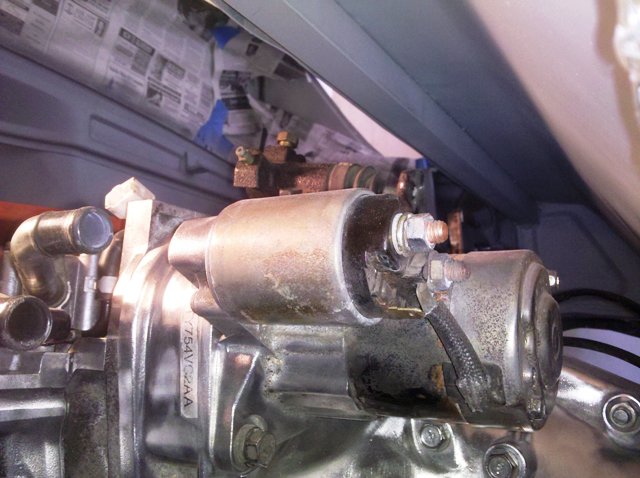 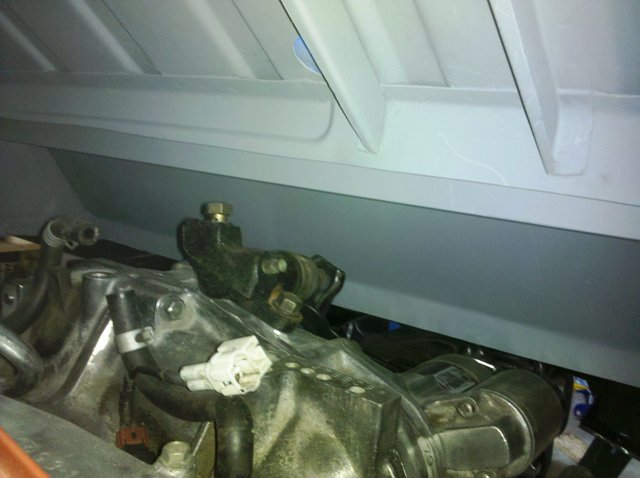 |
|
|
|
| Zaney |
Jul 20 2010, 02:13 PM
Post
#74
|
|
Deuchland en der Haus Group: Members Posts: 461 Joined: 1-March 04 From: Engine 11 Redmond, WA Member No.: 1,738 Region Association: Pacific Northwest |
There is plenty of room in the engine bay with this current setup.
 Now, it is time to measure the placement for the front radiator system and hopefully utilize a heater core from the water heater piping from the Suby engine. 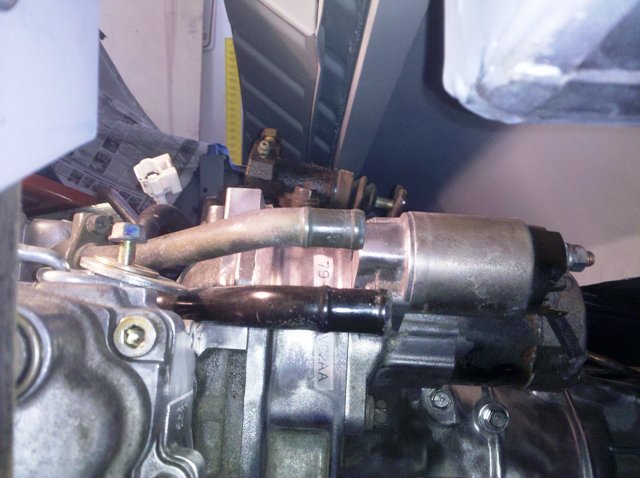 Keep it movin'! (IMG:style_emoticons/default/driving.gif) |
|
|
|
| KELTY360 |
Jul 20 2010, 02:54 PM
Post
#75
|
|
914 Neferati Group: Members Posts: 5,189 Joined: 31-December 05 From: Pt. Townsend, WA Member No.: 5,344 Region Association: Pacific Northwest |
Nice looking work. I like the way you took a little space from the rear trunk but retained it's utility. When you say 'front radiator system', does that mean front of the engine bay or front of the car? Sorry if I missed that detail in your build thread.
|
|
|
|
| KELTY360 |
Jul 20 2010, 02:58 PM
Post
#76
|
|
914 Neferati Group: Members Posts: 5,189 Joined: 31-December 05 From: Pt. Townsend, WA Member No.: 5,344 Region Association: Pacific Northwest |
Nice looking work. I like the way you took a little space from the rear trunk but retained it's utility. When you say 'front radiator system', does that mean front of the engine bay or front of the car? Sorry if I missed that detail in your build thread.
|
|
|
|
| Zaney |
Jul 20 2010, 04:40 PM
Post
#77
|
|
Deuchland en der Haus Group: Members Posts: 461 Joined: 1-March 04 From: Engine 11 Redmond, WA Member No.: 1,738 Region Association: Pacific Northwest |
QUOTE(KELTY360 @ Jul 20 2010, 01:58 PM)  Nice looking work. I like the way you took a little space from the rear trunk but retained it's utility. When you say 'front radiator system', does that mean front of the engine bay or front of the car? Sorry if I missed that detail in your build thread. I am going for the "front of the car" radiator system. I picked up a new 90's VW Golf radiator at the Cascade Kombis Car Show/Swap Meet along with some decent used Bay Window Bus axles/CVs. So, next is to build a radiator mount and shroud. Buy some gates radiator hose and pipe it into the engine bay. Clean up the Bus axles, bus CV's, 914 CV's and then find a Suby radiator reservior at a pick n pull. Fun stuff! (IMG:style_emoticons/default/sawzall-smiley.gif) (IMG:style_emoticons/default/welder.gif) |
|
|
|
| charliew |
Jul 20 2010, 11:18 PM
Post
#78
|
|
Advanced Member Group: Members Posts: 2,363 Joined: 31-July 07 From: Crawford, TX. Member No.: 7,958 |
Why not just take off from the front radiator to make the heater connections? That will be much cleaner than running the hoses from the suby lines that are facing rearward behind the motor unless you are going to put the heater core in the enginebay.
|
|
|
|
| Porcharu |
Aug 25 2010, 10:59 PM
Post
#79
|
|
Senior Member Group: Members Posts: 1,314 Joined: 27-January 05 From: Campbell, CA Member No.: 3,518 Region Association: Northern California |
Good to see MY idea for the trunk is working out well for the Subi Swappers (it's actually Ricks ie Aliens idea.) At this rate I might be the last person to have a running all Suby 914. It will happen - I just don't know when. The joys of a new house and son (IMG:style_emoticons/default/biggrin.gif)
Steve |
|
|
|
| Zaney |
Aug 26 2010, 12:02 AM
Post
#80
|
|
Deuchland en der Haus Group: Members Posts: 461 Joined: 1-March 04 From: Engine 11 Redmond, WA Member No.: 1,738 Region Association: Pacific Northwest |
I am actually in the redesigning phase of my transmission mount. I received some sage advice from some members about my first version of the trans mount being the lowest point of the car. Thus, being the first thing to get ripped off in the unfortunate event (ie. bad speedbump.)
So, I am going to go with a hard mount point to the trans case and use the stock 914 tranny mounting points with 911 sport mounts. I am also collecting the necessary hardware to do the rear 5-lug swap with 944CVs, in SirAndy's classic thread. Pics to come... (IMG:style_emoticons/default/beer.gif) Nate |
|
|
|
|
1 User(s) are reading this topic (1 Guests and 0 Anonymous Users)
0 Members:

|
Lo-Fi Version | Time is now: 25th June 2026 - 01:09 AM |
Invision Power Board
v9.1.4 © 2026 IPS, Inc.