I spent the morning grinding off layers of poorly welded, and poorly mage reinforcements on the inner of the longerons. Both sides has at least two different welders (one could weld the other, not so much. On the battery side, I removed 3 layers of patches that seems hacked on below the sheetmetal that the motor rubber seal is crimped to. Below that I found 2 more layers, several vertical indentions in the inner sheetmetal just in front of the suspension console. They looks 'factory'.
So are the longerones the same construction , right and left?
Where does the multilayer construction begin?
I can do some inspections via using a hole saw, which I need to do to clean the inside of the Longs, as they have lots of sand/grindings, and assorted debris inside.
Thanks for any help.
Double wall sheetmetal is from the seatbelt mounts up through the rear suspension consoles.
I
Click to view attachment
Click to view attachment
I
Click to view attachment
Click to view attachment
Thanks for the quick reply!! [i]
I encountered so many layers of 'reinforcements', on the 3rd layer down, I couldnt tell where any plug welds were located. The top layer seemed 'flat' up to where the console metal is spot welded on, so I stopped.
Any idea why there is a dimple in the lower/inner corner of the longs about 6 inches forward of the console?[color=#000099]
Who ever welded on all the grinding dust I just made really boogered up those corner dimples.
If the dimples have no use for clearance, I will square off the lower edge when I repair that area.
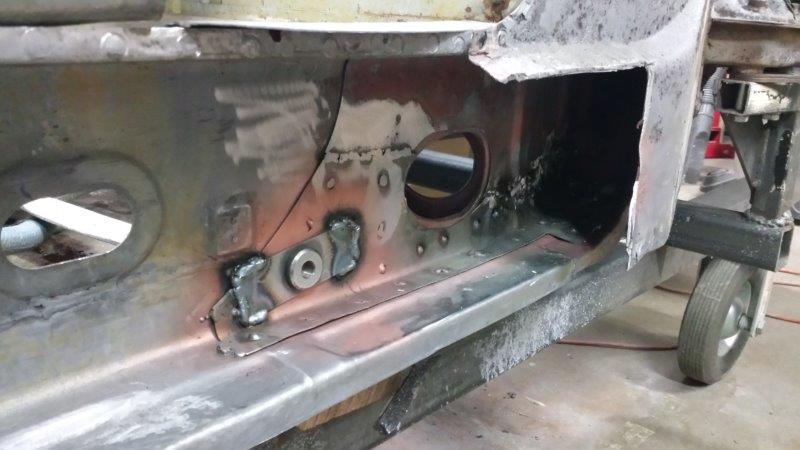
Look through the restoration and rebuild threads and you can probably find better examples, but here is a pic of one of mine that I repaired.
The front edge of the double wall sweeps forward from just behind the rear most mount for the heater tube clip to in front of the seat belt bolt mount. The vertical beading begins just behind the hole for the metal heater tube to exit. Everything in front of that bead is just spot welded flat to the outer wall.
Good luck!
IIRC, multi-layer begins aft of the jack point. If you buy the pieces, the outboard half comes from RD with the extra layer already welded in. If you buy the inboard layer, it is only a single layer, but slightly thicker to account for it (I think). Some folks weld on an outer layer anyway for historical accuracy- in the stock config, the outer layer hides the corrugation of the inner layer.
Here's my some of my notes (EDIT: not from my build, but someone else's build that helped me) on long construction, probably explains it better than I can...
5) Palindrome 914 Build Thread
Complete long replacement, lots of bracing info including hardware sources. Cost-no-object frames and jigs. Good unibody cutaway photos, discussion of where longs are double-walled/single-walled.
http://www.914world.com/bbs2/index.php?showtopic=113507
Post 146: excellent photos of double layer portions of longs
Post 107: discussion of original layers of inner long, good pics
Complete construction of outer LAYER of inner long. This was original but the RD parts are thicker such that they do not need two layers. However, some scheme is necessary to join the straight piece to the wheelhouse piece, because those layers in the original facilitated this. The modern thick pieces should not be merely butt welded, they should be sleeved.
Post 154: Excellent cross-section diagram of long layers.
Post 156: Pictures of long fully constructed per original, fantastic reference.
QUOTE(Ecke Liebhaber @ Jan 10 2018, 12:14 PM) 
Any idea why there is a dimple in the lower/inner corner of the longs about 6 inches forward of the console?[color=#000099]
Who ever welded on all the grinding dust I just made really boogered up those corner dimples.
If the dimples have no use for clearance, I will square off the lower edge when I repair that area.
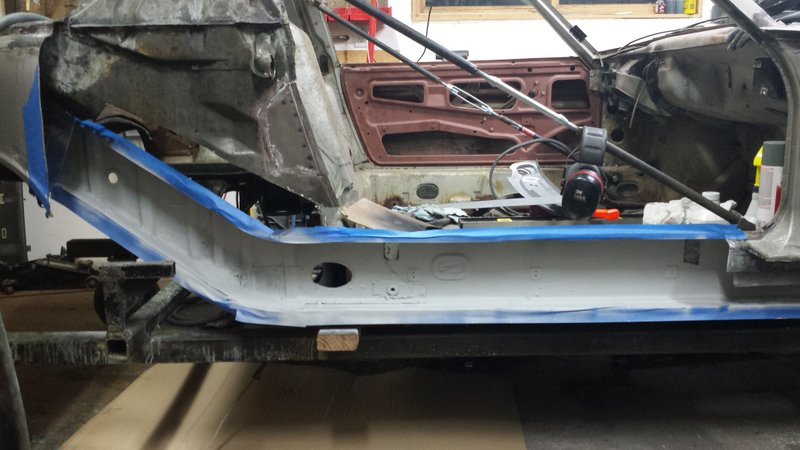
That dimple is needed for clearance for the 4 cylinder outer engine mount. I thought I had a shot of mine cleaned up and in primer, but you can see the hump that fits in the dimple here.
And here's another shot of the front of the double wall from the other side of my car.
Thanks for he reply BrentB. Those pictures really show the extra layer.
Now I can make a plan as to where I need to inspect inside the Longs via my hole saw hole (s).
Thanks
Now I can make a plan as to where I need to inspect inside the Longs via my hole saw hole (s).
Thanks
Love the longeron avaition reference.. Did a front fuselage section in a Mooney last winter after a gear up landing..
That dimple is needed for clearance for the 4 cylinder outer engine mount. I thought I had a shot of mine cleaned up and in primer, but you can see the hump that fits in the dimple here.
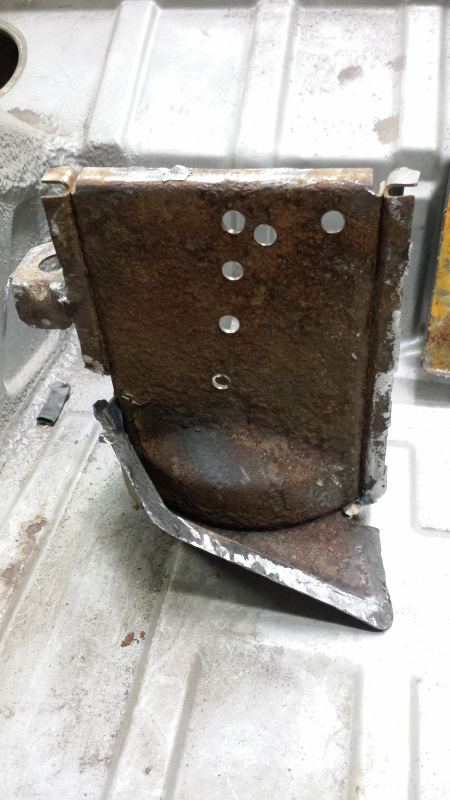
I went out and looked at another 914 I have which is unmolested. I noticed a square plate that sure seemed factory installed on both sides..the square plate was under at least one layer of 'reinforcements'.
What I found remains of the 4 cylinder motor mounts, where the flat portion was welded to the longs, may they rest in peace, well pieces and grinding dust.
Here is a link to my project, building a road legal, 3.0 GT clone from an ex racecar;
http://www.914world.com/bbs2/index.php?showtopic=322283
This is a "lo-fi" version of our main content. To view the full version with more information, formatting and images, please click here.