Looks like you need one of these.
http://www.restoration-design.com/store/product/PP301T
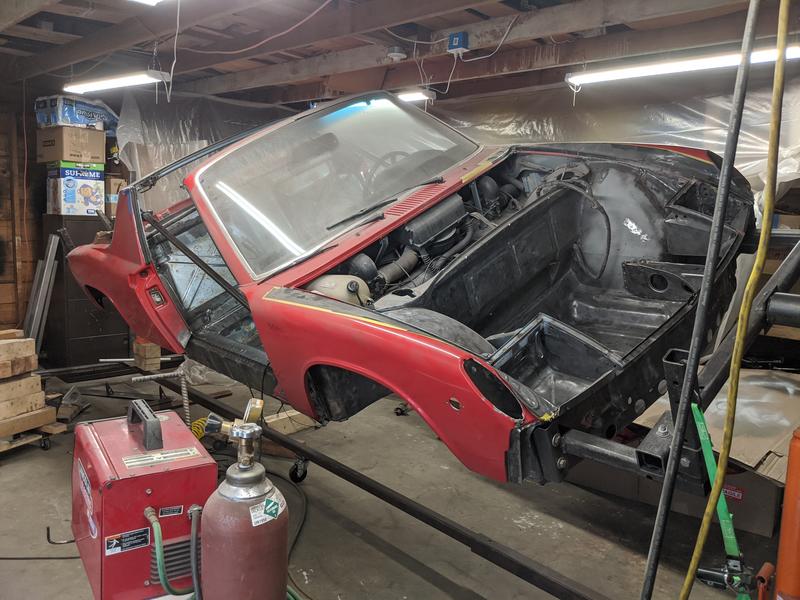
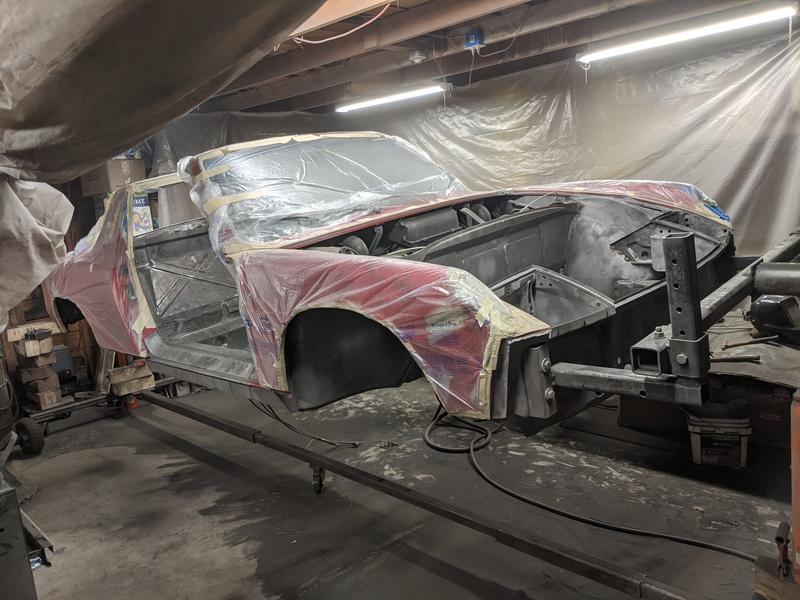
Full Version: 1974 914 Rust Repair Project
QUOTE(Luke M @ Apr 4 2020, 12:50 PM) 
914werke has one he's sending me (only $35 + shipping!).
QUOTE(FourBlades @ Apr 4 2020, 01:45 PM)
You are doing a great job!

When you finish it will be all done right and ready for 40 more years on the road.
John


QUOTE(FourBlades @ Apr 4 2020, 12:45 PM)
When you finish it will be all done right and ready for 40 more years on the road.
John
That's the idea, although I bought this about 2006ish and it had been off the road for quite awhile before that (I think the seller mentioned 8 years).
I'm thinking of using ospho, then rustoleum primer on the inside of the longs. Apparently ospho doesn't play well with some epoxy primers and I don't want to take any chances.
QUOTE(sreyemj @ Apr 4 2020, 04:21 PM)
Apparently ospho doesn't play well with some epoxy primers and I don't want to take any chances.
Curious where you read that. PPG actually recommends using an acid rust converter to promote adhesion of their epoxy. Lots of us have used Ospho/phosporic acid as metal prep for epoxy without any issues. After all this work, you don't want to skimp on your one chance to lay down solid protection. There are things you can spray in the longs after they are together, but none will be as good as a good coat or 2 of epoxy. Also, remember that most primers will allow water through to the metal. Epoxy won't.
QUOTE(bbrock @ Apr 4 2020, 08:24 PM)
QUOTE(sreyemj @ Apr 4 2020, 04:21 PM)
Apparently ospho doesn't play well with some epoxy primers and I don't want to take any chances.
Curious where you read that. PPG actually recommends using an acid rust converter to promote adhesion of their epoxy. Lots of us have used Ospho/phosporic acid as metal prep for epoxy without any issues. After all this work, you don't want to skimp on your one chance to lay down solid protection. There are things you can spray in the longs after they are together, but none will be as good as a good coat or 2 of epoxy. Also, remember that most primers will allow water through to the metal. Epoxy won't.
The ospho bottle says recommended for use under oil-based primer and to do a trail before using with epoxy or other systems. Based on that, I googled around and found some people who had trouble (but you can find people who have failures with almost any paint/primer product).
Did you do anything to the ospho'ed surface before using the epoxy primer (rinsing, sanding, etc)? I can wire wheel it down to bare metal, but there is still going to be a small amount of rust in the pitted metal unless I convert it with ospho before primer. If you wire wheel after ospho you just take off the converted material and potentially expose more unconverted rust.
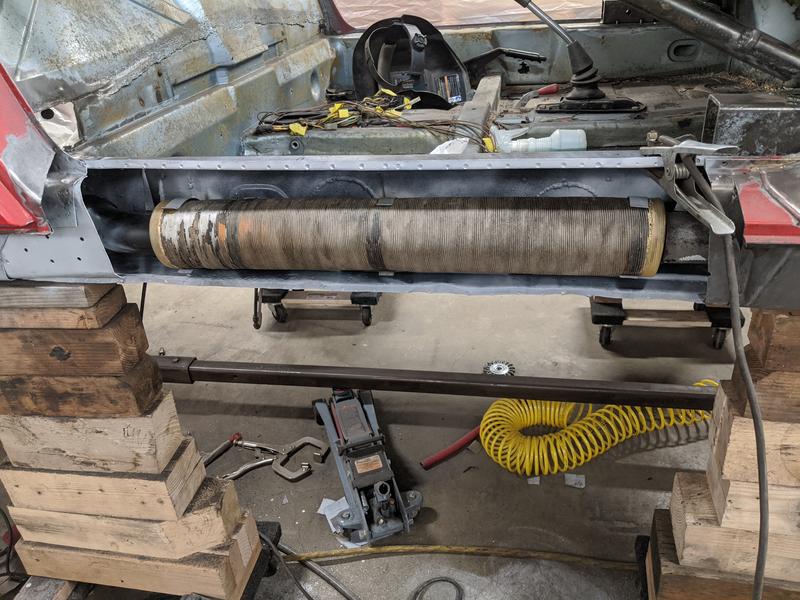
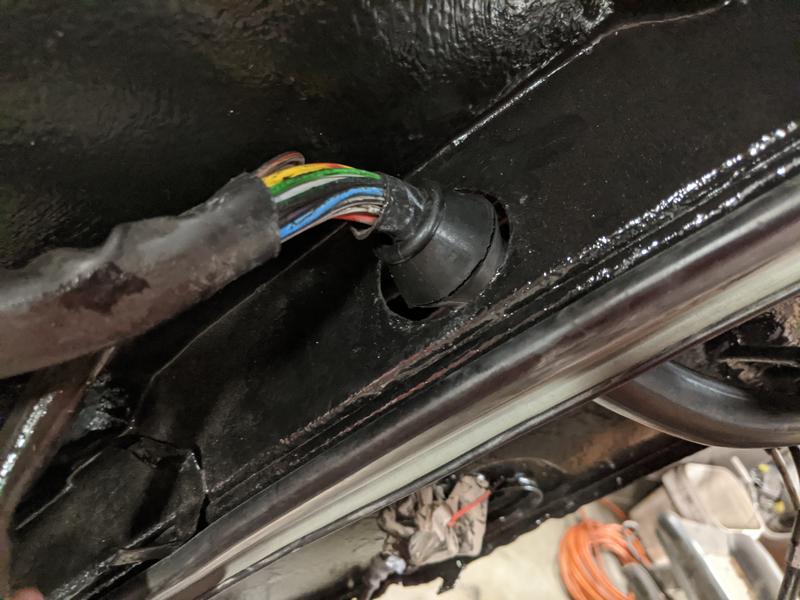
I wonder if all those big round holes were made by the clever PO to do surgery on the original heater hose and then install the cheap replacement.
QUOTE(sreyemj @ Apr 4 2020, 07:36 PM)
Did you do anything to the ospho'ed surface before using the epoxy primer (rinsing, sanding, etc)? I can wire wheel it down to bare metal, but there is still going to be a small amount of rust in the pitted metal unless I convert it with ospho before primer. If you wire wheel after ospho you just take off the converted material and potentially expose more unconverted rust.
Yeah. I let the Ospho sit for several hours or overnight. Then rinse with water to neutralize the acid. That will create a white phosphorous coating that will protect the metal somewhat and you can leave it until ready to paint. The go over it with a red Scotch Brite pad to remove the loose powdery stuff. I learned this from a few people on here who restore cars professionally. I've never had any problems with epoxy or any DTM paint sticking to it.
I also do like you are planning and clean as much of he rust out as possible before treating with the Ospho. The Ospho soaks down into the pits rust to convert the rust and doesn't just encapsulate it. It's really good stuff.
QUOTE(bbrock @ Apr 4 2020, 11:12 PM)
QUOTE(sreyemj @ Apr 4 2020, 07:36 PM)
Did you do anything to the ospho'ed surface before using the epoxy primer (rinsing, sanding, etc)? I can wire wheel it down to bare metal, but there is still going to be a small amount of rust in the pitted metal unless I convert it with ospho before primer. If you wire wheel after ospho you just take off the converted material and potentially expose more unconverted rust.
Yeah. I let the Ospho sit for several hours or overnight. Then rinse with water to neutralize the acid. That will create a white phosphorous coating that will protect the metal somewhat and you can leave it until ready to paint. The go over it with a red Scotch Brite pad to remove the loose powdery stuff. I learned this from a few people on here who restore cars professionally. I've never had any problems with epoxy or any DTM paint sticking to it.
I also do like you are planning and clean as much of he rust out as possible before treating with the Ospho. The Ospho soaks down into the pits rust to convert the rust and doesn't just encapsulate it. It's really good stuff.
I'll try that. The ospho bottle just says dry for 24hr and then paint, but I will definitely rinse first.
QUOTE(bkrantz @ Apr 4 2020, 10:13 PM)
I wonder if all those big round holes were made by the clever PO to do surgery on the original heater hose and then install the cheap replacement.
I'm sure they were, looks like they used a hole saw.
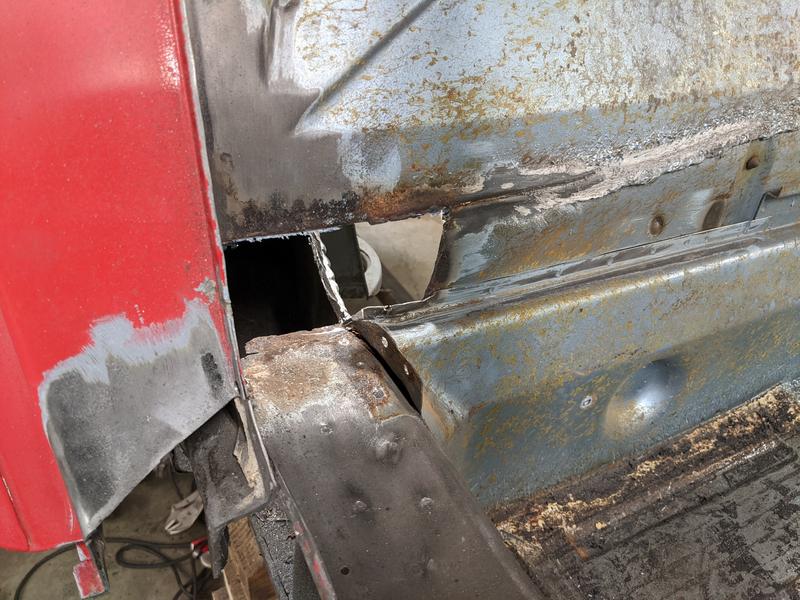
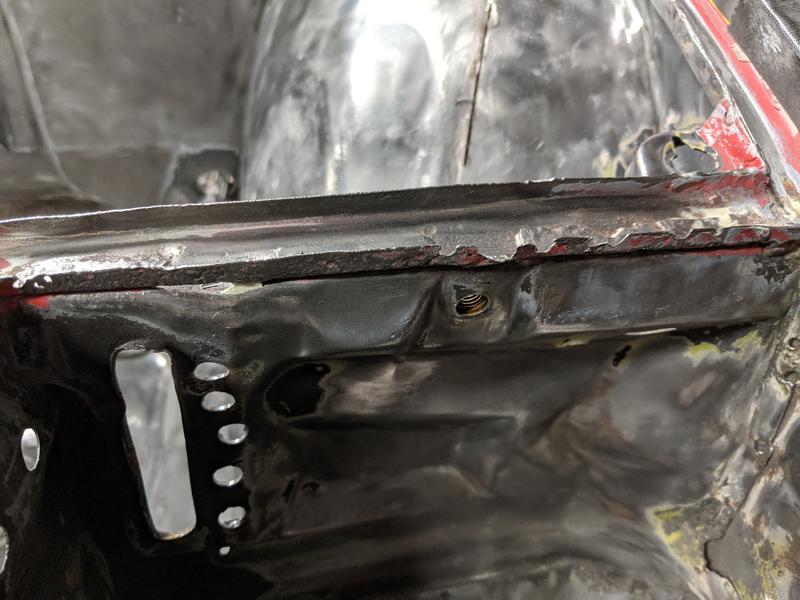
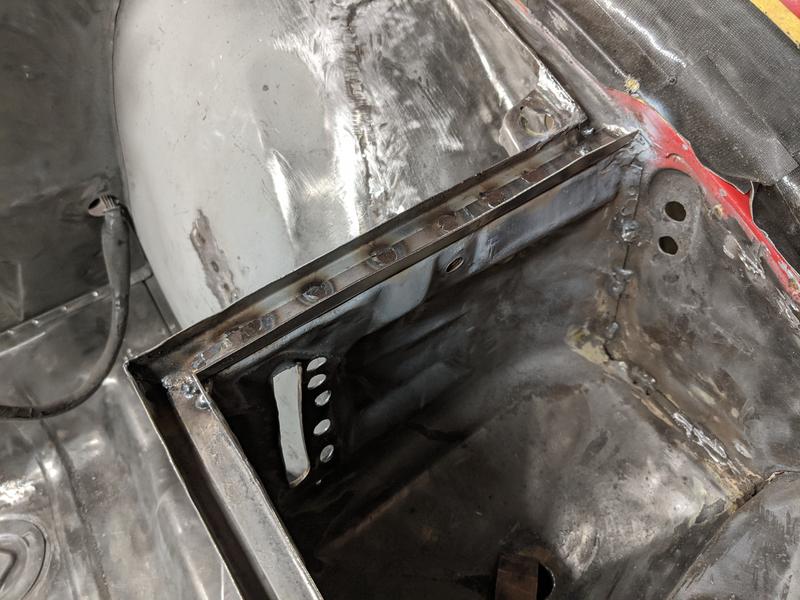
Done with most of the cutting. I had to back off my passenger door brace slightly as the gap had widened by about 1/16in after removing all this metal. There are areas of the removed metal that are made of two laminated pieces of steel (including the top of the long in the engine compartment. It would be nice to reproduce the factory configuration, but I will probably use 16ga steel for the structural parts of the long repair.
From inside the passenger area:
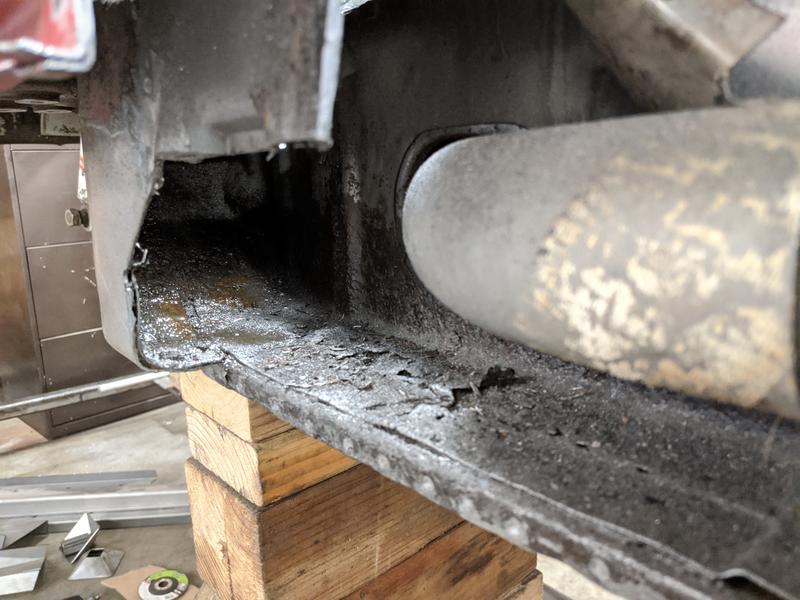
Inside the long, dark from the ospho:
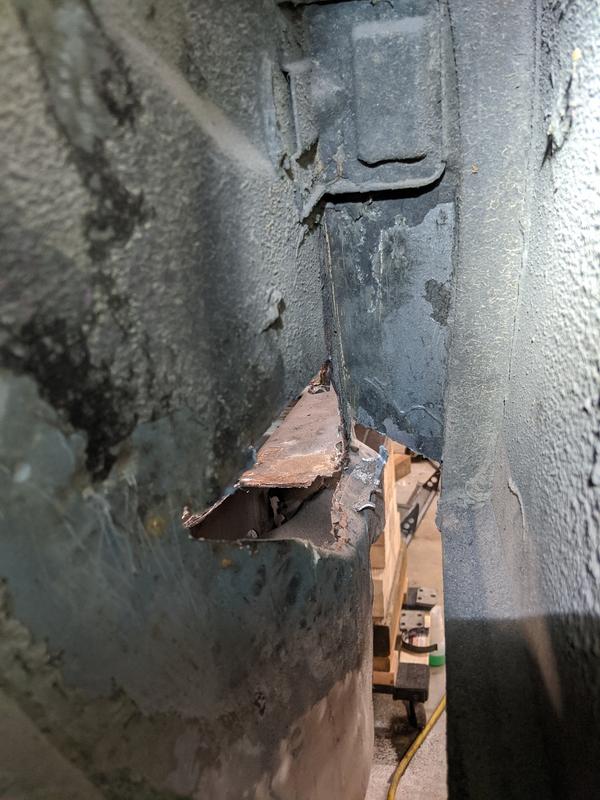
From inside the rear fender:
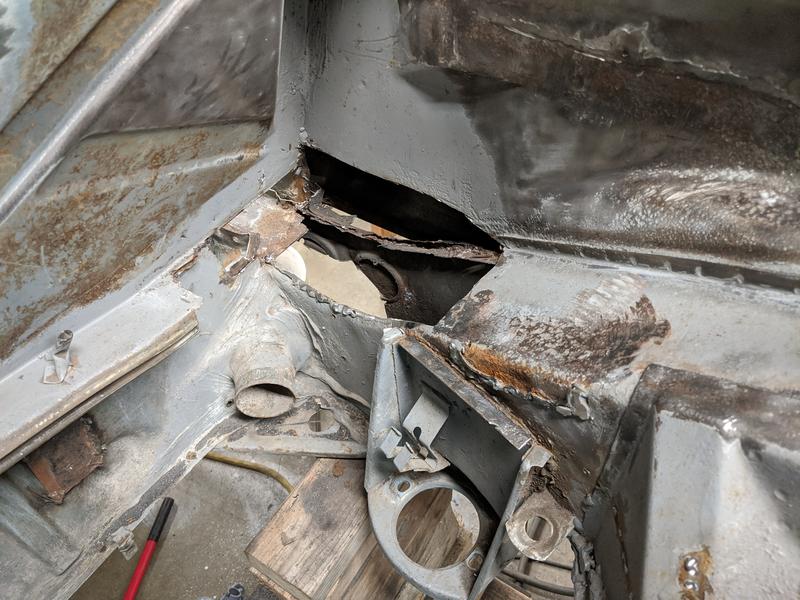
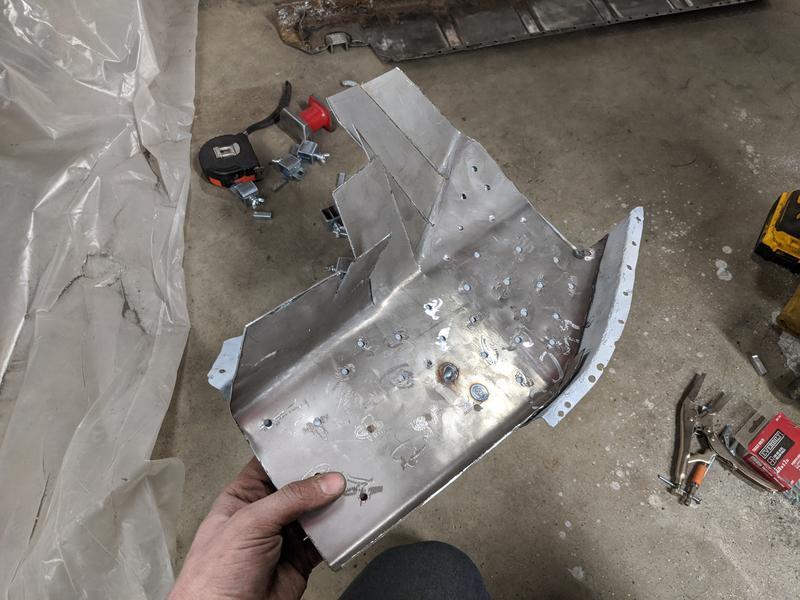
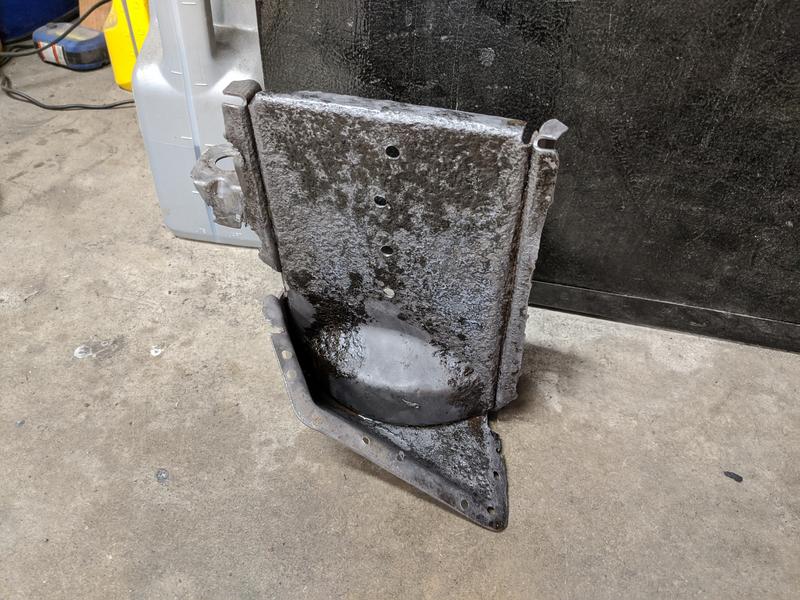
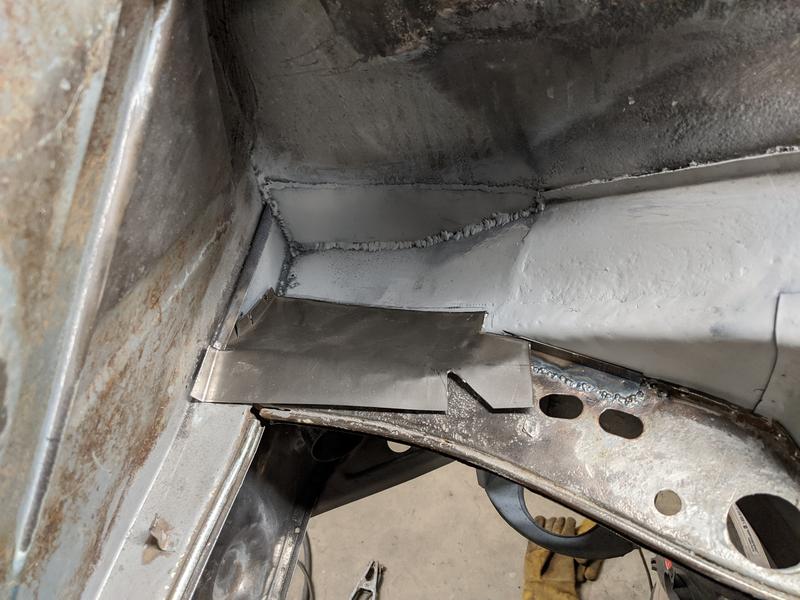
The rear suspension console has some welded repairs. This will be replaced after the long repair so I removed the engine shelf on the passenger side:
From inside the passenger area:
Inside the long, dark from the ospho:
From inside the rear fender:
The rear suspension console has some welded repairs. This will be replaced after the long repair so I removed the engine shelf on the passenger side:
QUOTE(sreyemj @ Apr 4 2020, 10:19 PM)
I'll try that. The ospho bottle just says dry for 24hr and then paint, but I will definitely rinse first.
Yeah, I think they might have changed the directions and to be honest, I've done that on some suspension parts that I could easily repaint if things didn't work. I had no problem that way either. All of the competing brands of phosphoric acid I've used all said to rinse and lightly scuff off the residue like I described and all the guys who have been using Ospho for a long time say to do the same. So I'm not sure if the directions for Ospho were always just apply, wait, and paint or if they later decided that neutralizing the acid wasn't necessary. At any rate, I like the surface left behind after neutralizing and scuffing off the residue better. If you just leave it on, it can sometimes leave a slightly sticky coating and that seems like where you might get adhesion problems.
Great work on the car BTW!

QUOTE(sreyemj @ Apr 5 2020, 01:36 AM)
The rear suspension console has some welded repairs. This will be replaced after the long repair so I removed the engine shelf on the passenger side:
 Scary stuff. I found braze in my suspension console.
Rant for previous abusers of these vehicles:
People -- this is the part that holds the wheel on the car for crying out loud. Were you really willing to trust your lives to that rusted metal and pooly welded (or brazed in my case) backyard fix?

OK - Done now.
QUOTE(Superhawk996 @ Apr 5 2020, 08:07 AM)
Scary stuff. I found braze in my suspension console.Oh my!


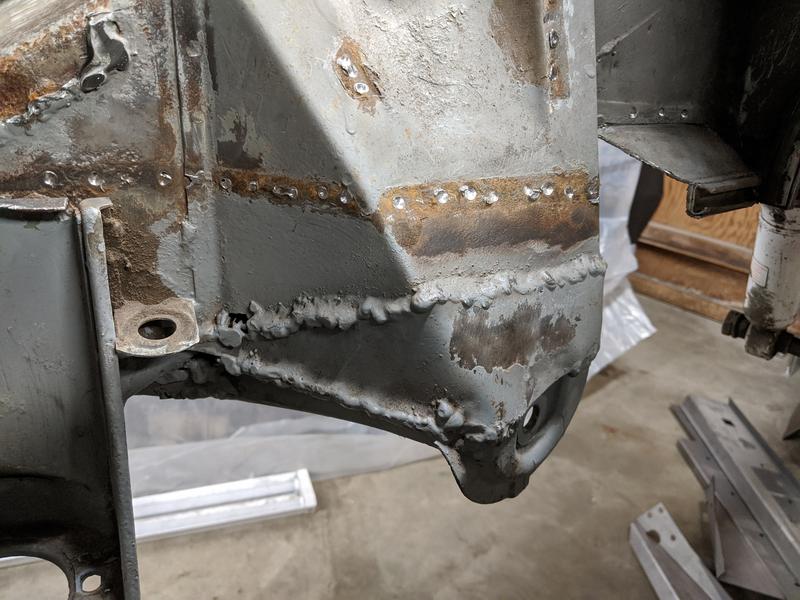
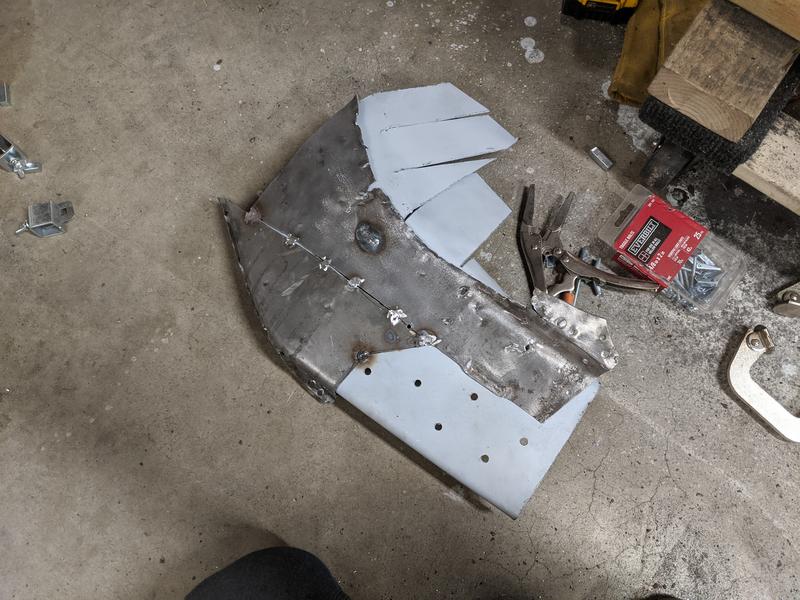
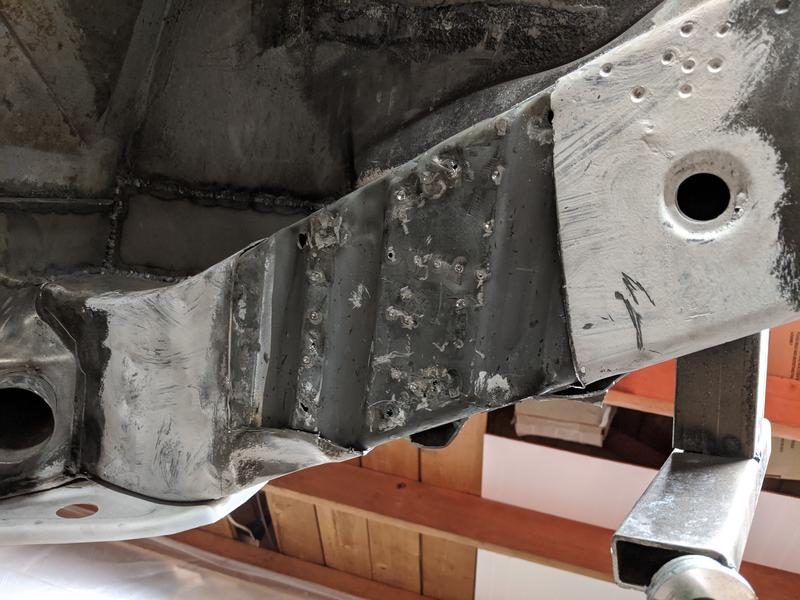
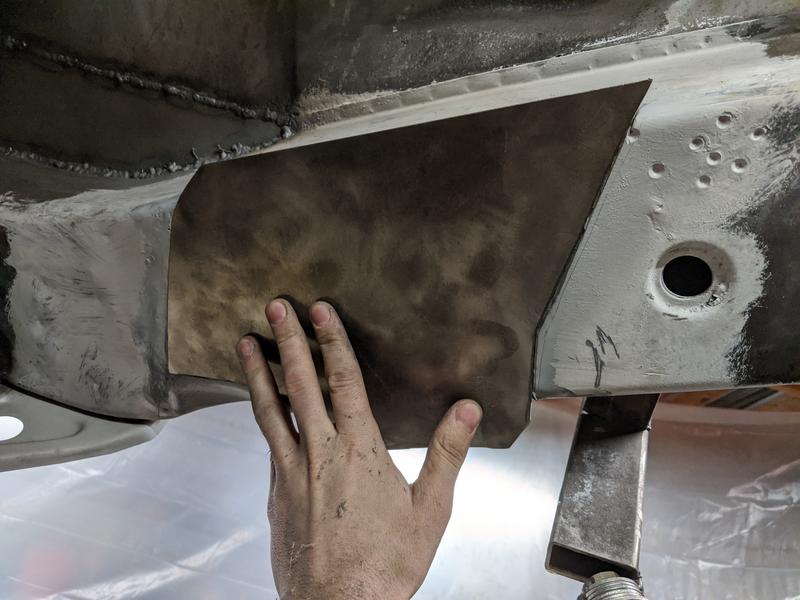
I took a few steps forward and one back. I did weld a patch on the top of the long, but the inner layer of the long was more badly rusted than I had hoped. I used a wire wheel and blasted the edges, but there was still enough rust to contaminate the welds and I wasn't really happy with it. To correct this, I opened the long some more, and removed most of that inner lamination. I'll fabricate a piece and rosette weld it to the inside of the inner long.
Looks pretty good from the outside:
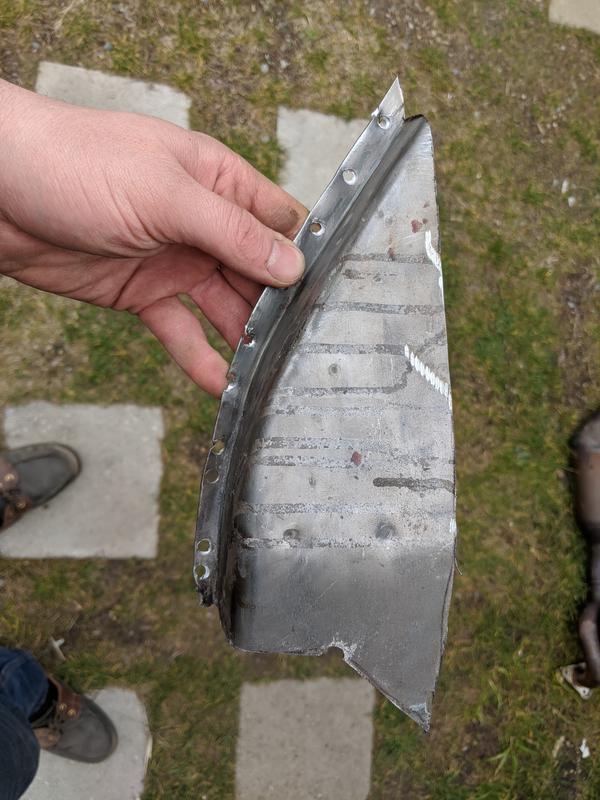
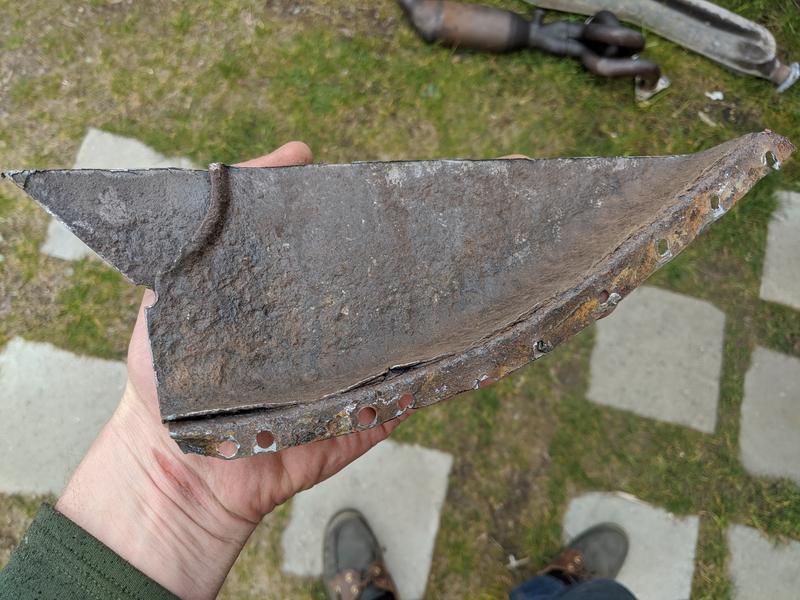
Inside layer is badly rusted:
Inside of the long with the worst rust cut out:
Starting to fabricate the piece to reinforce the inner long:
Looks pretty good from the outside:
Inside layer is badly rusted:
Inside of the long with the worst rust cut out:
Starting to fabricate the piece to reinforce the inner long:
Yup,
Most people don't believe that these cars literally rust from the inside out.
By the time you can see a pin hole on the front, the back is virtually gone.
Most people don't believe that these cars literally rust from the inside out.
By the time you can see a pin hole on the front, the back is virtually gone.
QUOTE(Superhawk996 @ Apr 8 2020, 01:46 PM)
Yup,
Most people don't believe that these cars literally rust from the inside out.
By the time you can see a pin hole on the front, the back is virtually gone.
New inner lamination, butts up to and will be welded to clean metal:

Welded in:

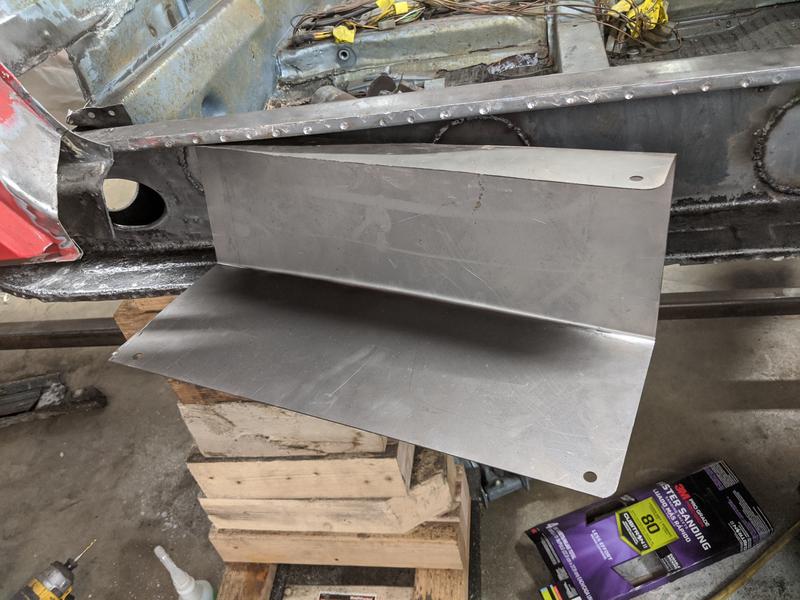
Fabricating the piece for the outer long. Not sure why people say the outer long is the main source of strength?

Keep going. The hours are endless but you're making great progress.

I'm hoping to drive this from Washington to Texas (moving to start residency) in about a month, so I had to speed things up and take fewer pictures. I had Tim's ACVW freshen up the 1.7L that was in the car, reasonable cost and it's no longer leaking copious oil. Door gaps have remained spot on. I'm tasting victory in the next few weeks.
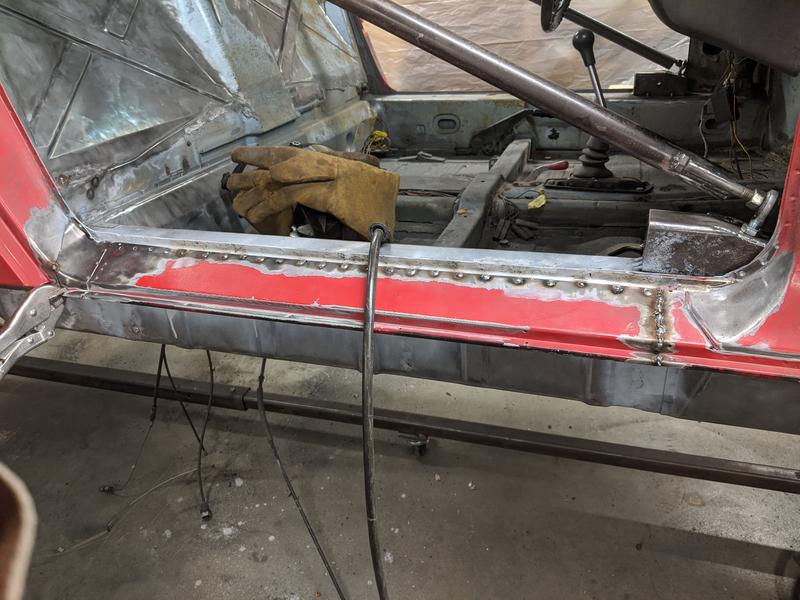
Installed the heater tube from 914werke.com:
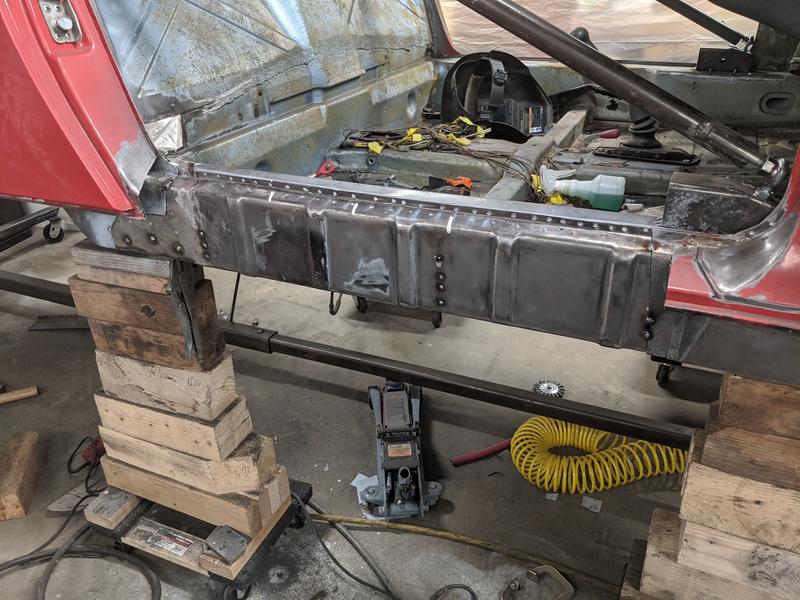
Starting to weld the outer long:
Installed the heater tube from 914werke.com:
Starting to weld the outer long:
Really great progress. Having a little bit of PTSD because I just finished the repairs on this section on my '71. You reinforced that area a bit more than me, but I will be running a stiffening kit. Look nice.
Stay motivated, I'll be following!
Stay motivated, I'll be following!
QUOTE(jaredmcginness @ Apr 14 2020, 08:26 AM)
Really great progress. Having a little bit of PTSD because I just finished the repairs on this section on my '71. You reinforced that area a bit more than me, but I will be running a stiffening kit. Look nice.
Stay motivated, I'll be following!
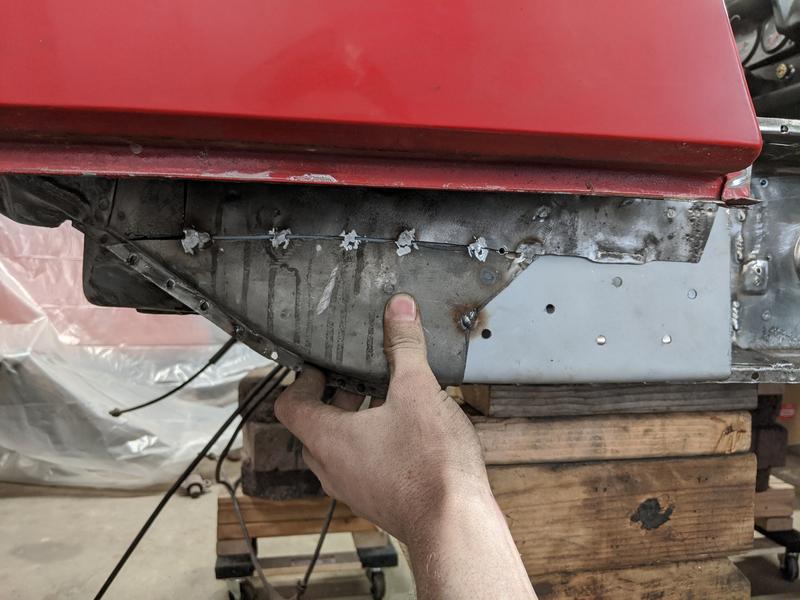
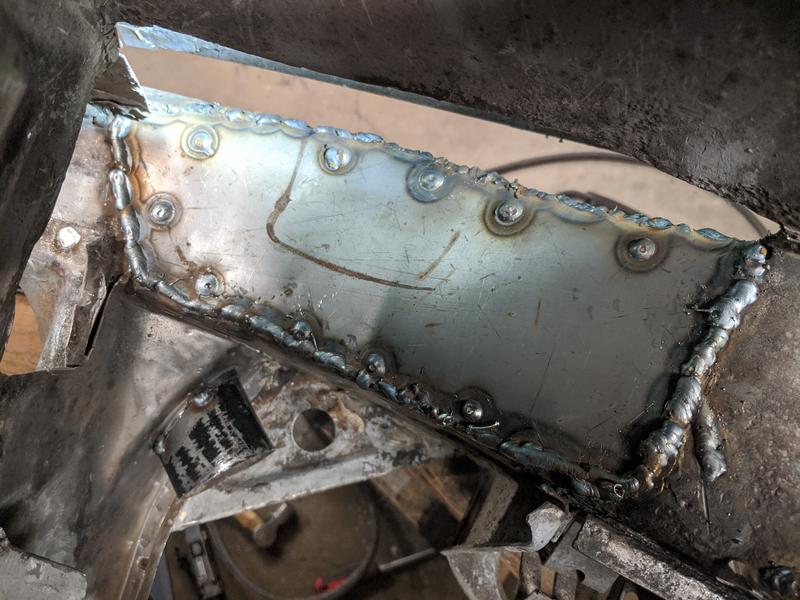
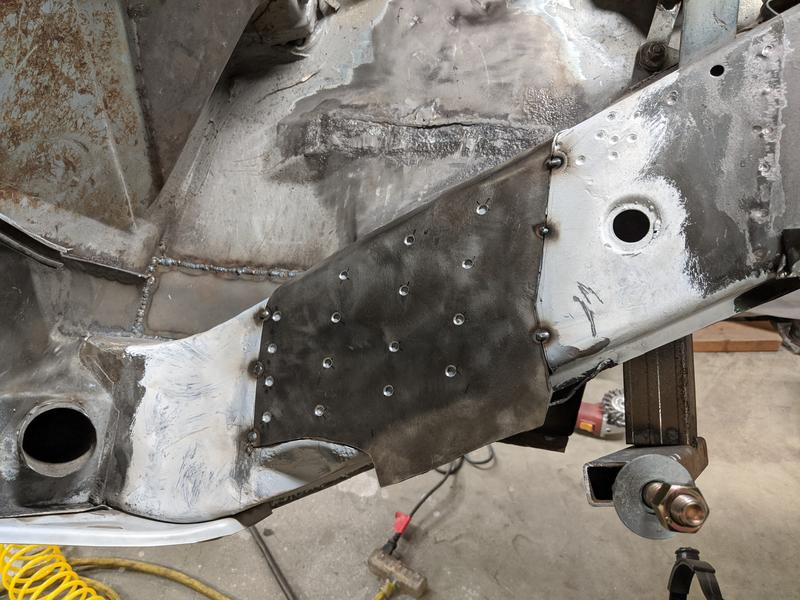
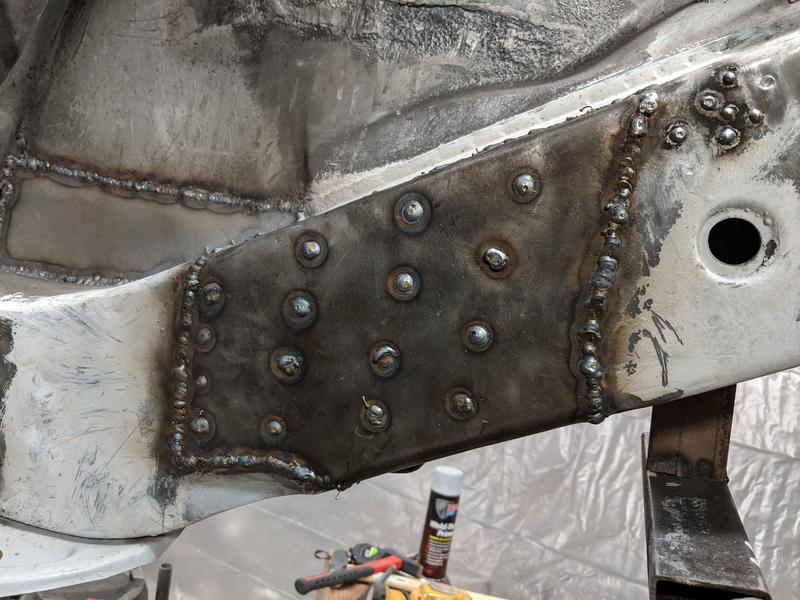
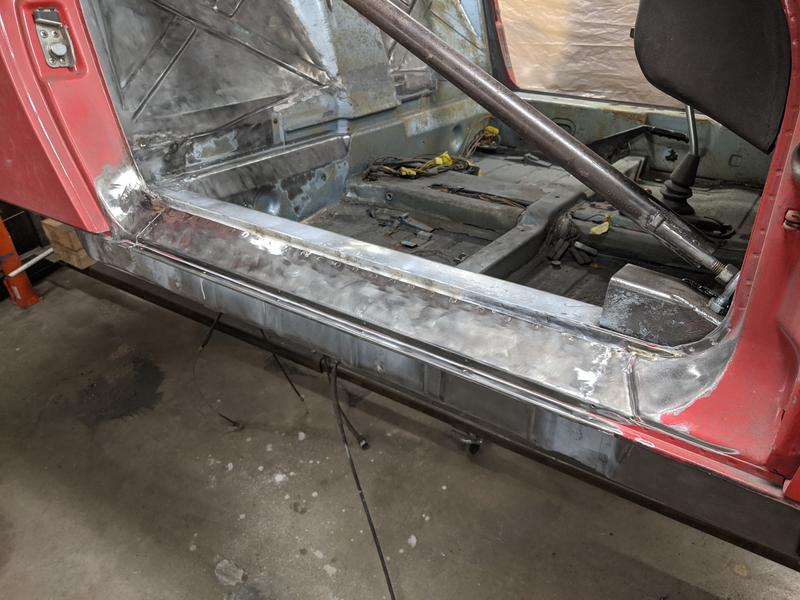
After closing up the outer long, I put the final patch over the hell hole area. I used my inner layer (the new metal) to make tabs along the edge and then plug welded the new piece to the tabs. After that, I was able to hammer down the edges and weld the seams. The welds look scrappy because I was only doing short sections (and cooling with compressed air), but I'm really happy with how it welded up. On the rotisserie afterward, the car is MUCH stiffer.
More great work! 
John
John
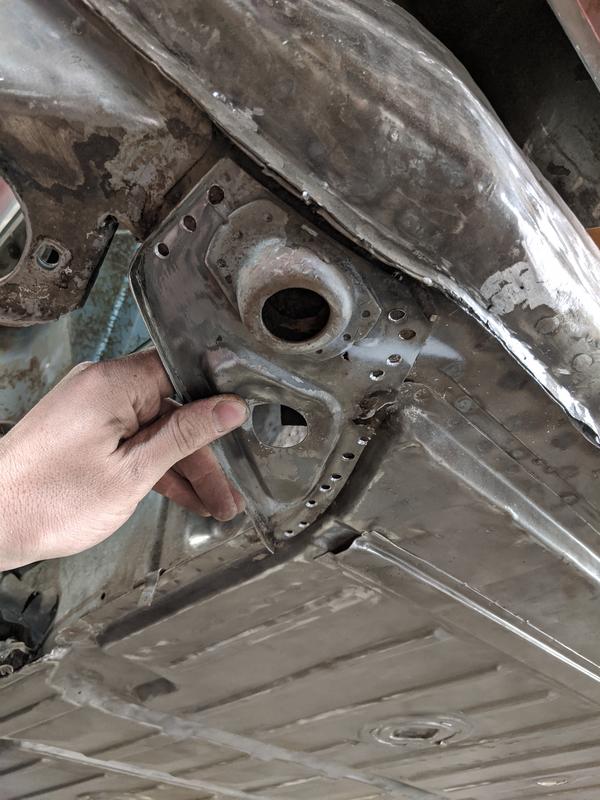
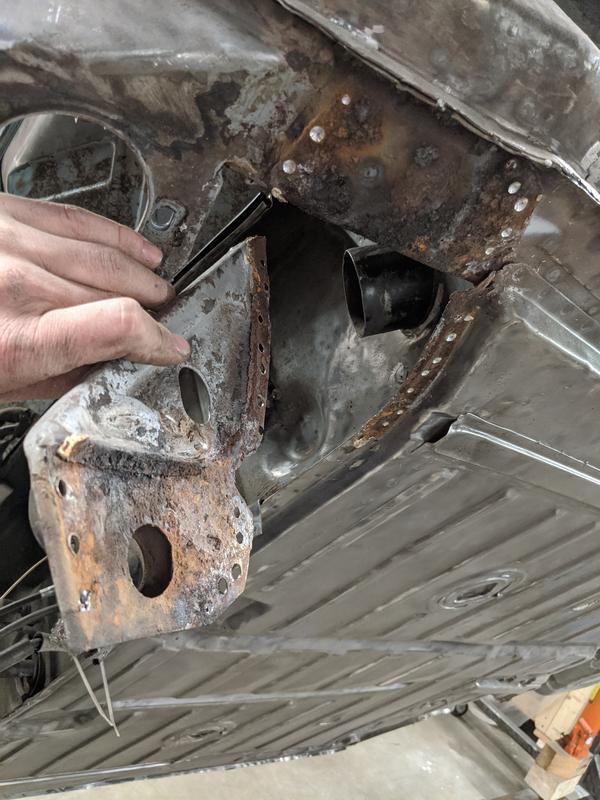
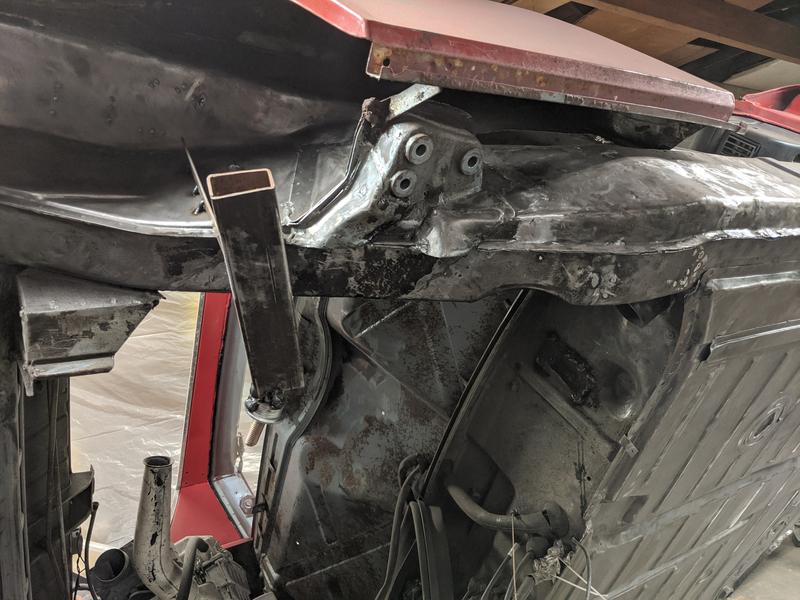
More grinding away, literally. Removed the passenger jack mount, it will be replaced. I think the mount for the engine bar might be compromised too, at least there is rust behind it. I'm going to remove it and see how bad the rust is. Having a hard time finding a replacement piece, anyone know of a source?
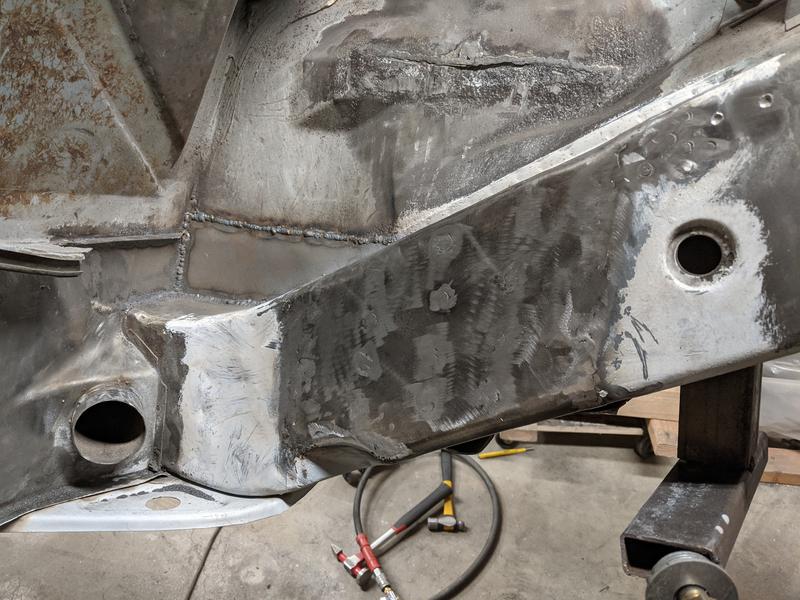
Welds ground down over hell hole:
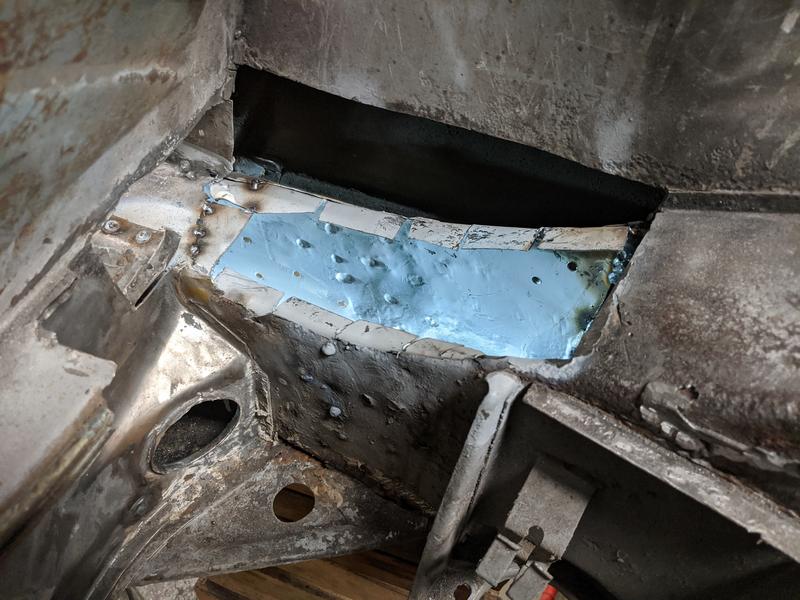
Patching the firewall:

"Rust free" from the outside:
NOT rust free:
Welds ground down over hell hole:
Patching the firewall:
"Rust free" from the outside:
NOT rust free:
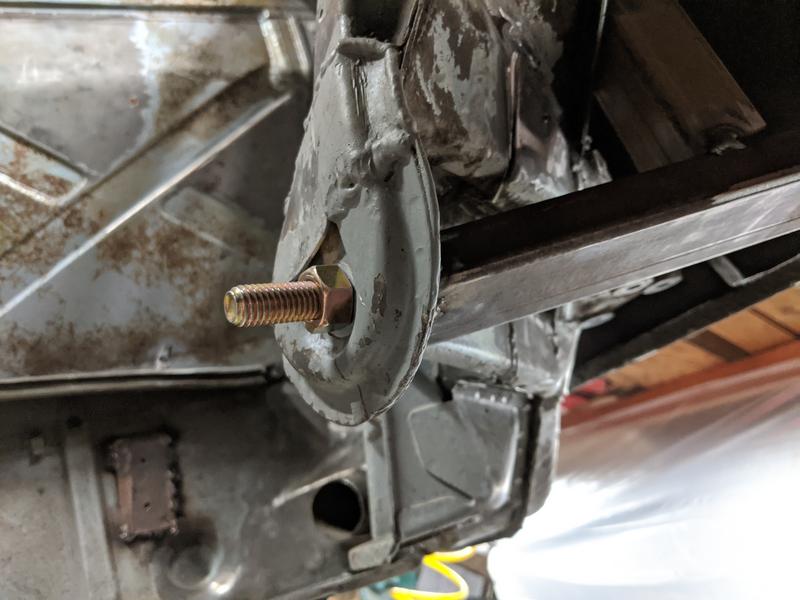
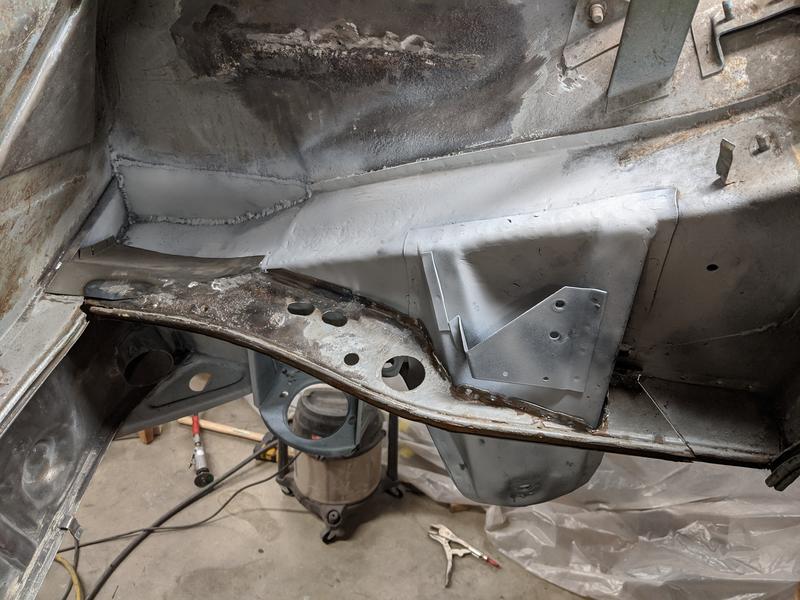
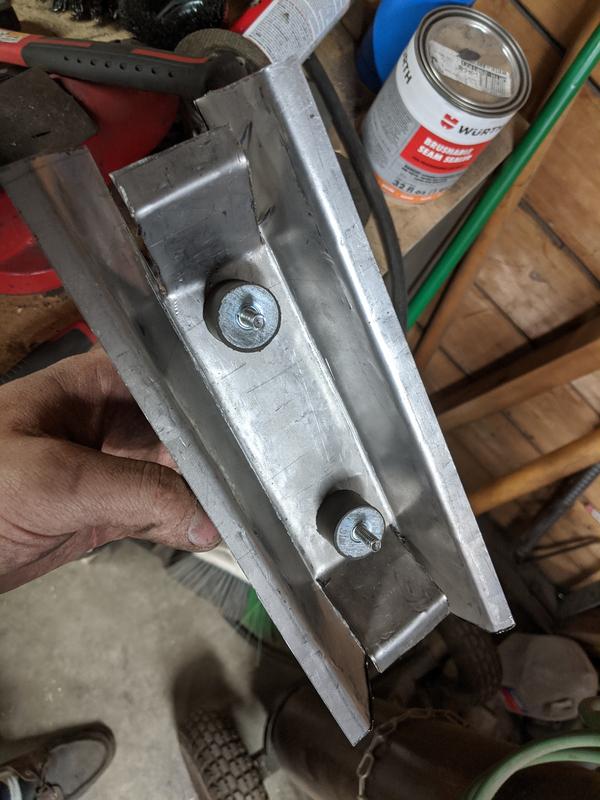
Getting ready to replace the suspension console. I used a 9/16th bolt and welded a quick bracket to locate the hole. Not sure this is the most reliable way to do it, but it seemed like a good idea at the time.
Bracket:
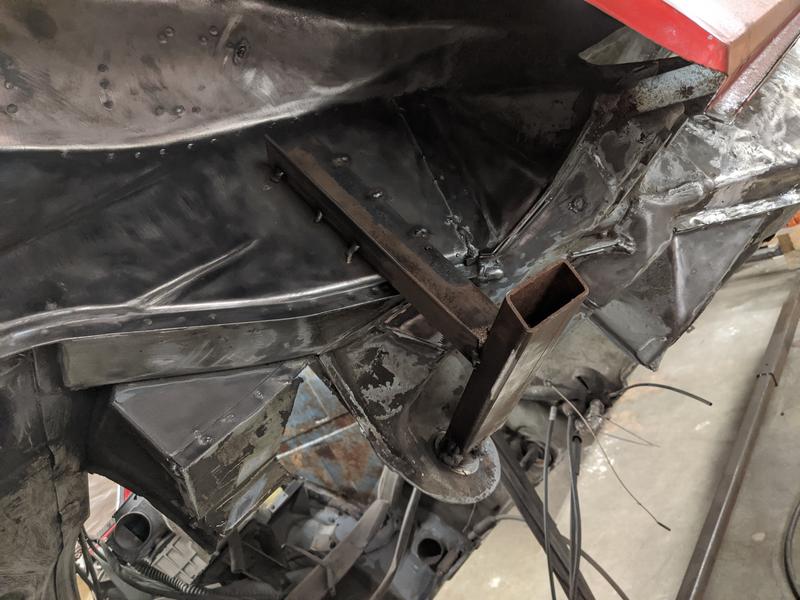
Had to see, but there's a bit washer welded to other side that is keeping it flat:
Cutting into the suspension console, gross!

Bracket:
Had to see, but there's a bit washer welded to other side that is keeping it flat:
Cutting into the suspension console, gross!
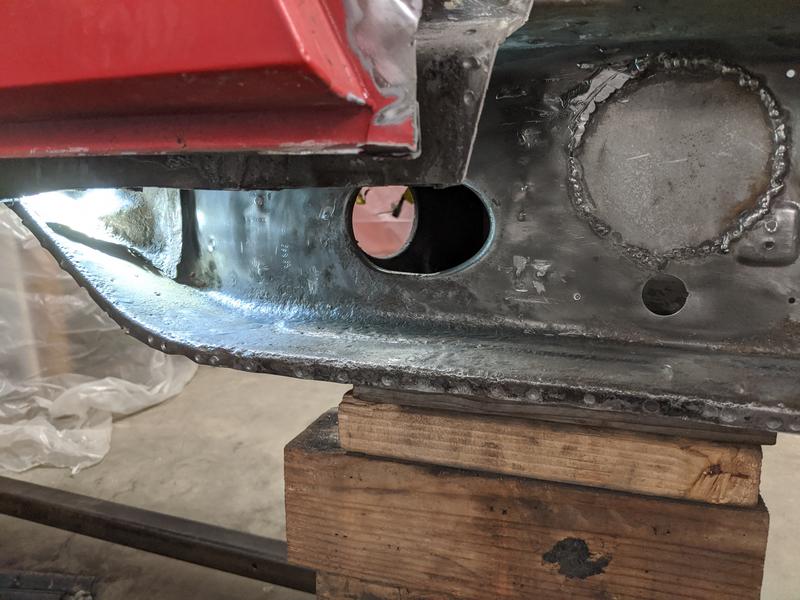
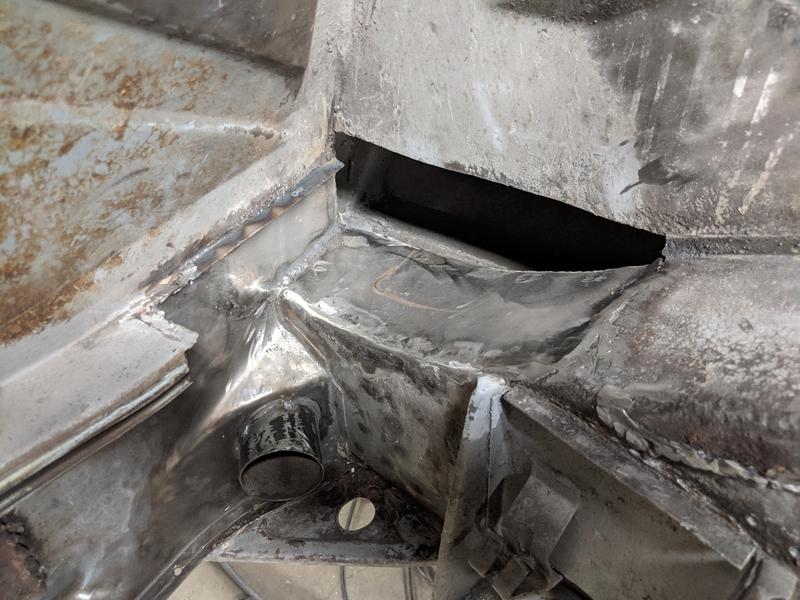
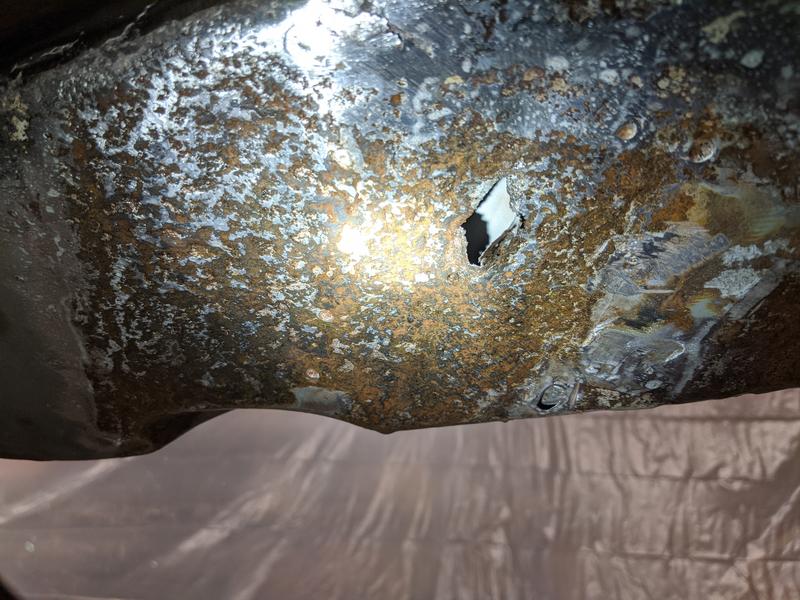
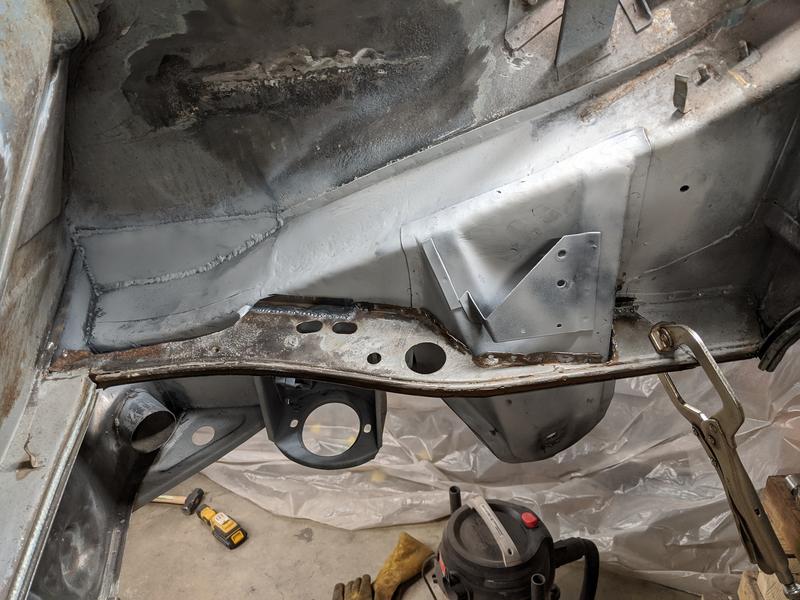
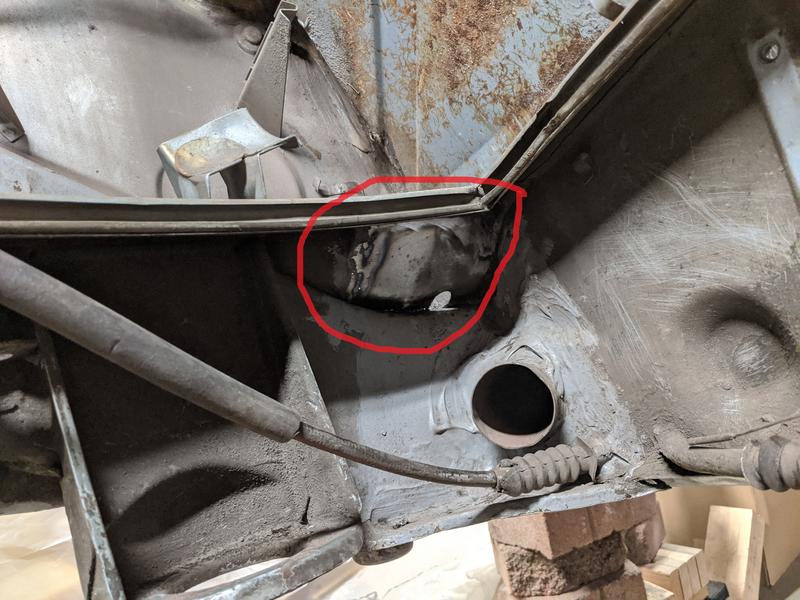
The inside longitudinal behind the engine bar mount and suspension console had been "bathed" in battery acid. This resulted in some severe pitting, but everything inside the long (based on several holes I poked through it) is rust free. I've already seen the inside of the long and fixed what needed fixing. I think for this area I will treat the rust/paint and add a 20ga sheet to the outside.
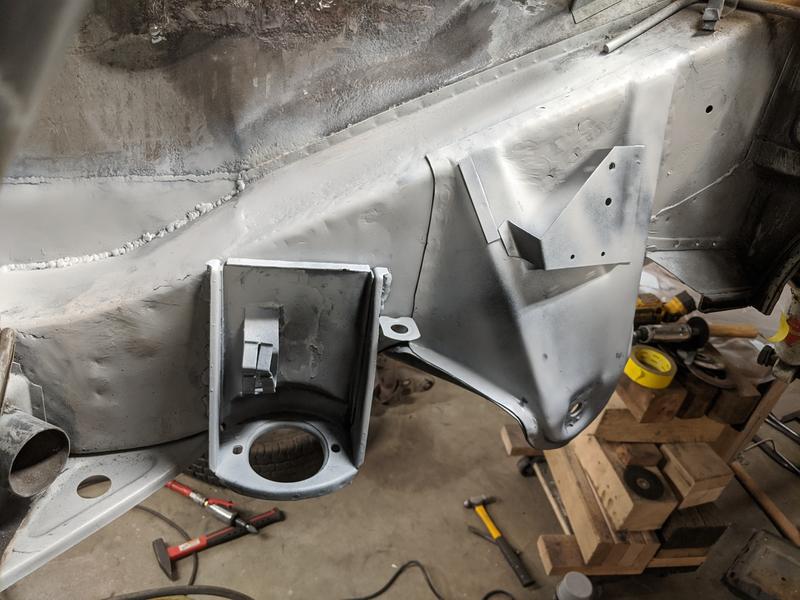
Suspension console (and engine bar mount) cut off:
Found the soft spot on the inside of the long behind the engine bar mount and punched a screwdriver through it. The metal was thin in this spot, but the area behind is rust free:
Engine bar mount, pitted, but solid:
Suspension console (and engine bar mount) cut off:
Found the soft spot on the inside of the long behind the engine bar mount and punched a screwdriver through it. The metal was thin in this spot, but the area behind is rust free:
Engine bar mount, pitted, but solid:
Thanks for the updates, making great progress!
(Blocks of wood supporting the car make me nervous still)
(Blocks of wood supporting the car make me nervous still)
QUOTE(Tdskip @ Apr 19 2020, 08:04 AM)
Thanks for the updates, making great progress!
(Blocks of wood supporting the car make me nervous still)
It's on a rotisserie, the blocks were to keep it flat.
I decided to cut out the piece of the long behind the motor bar mount after all. There were two spot where the metal was very thin (see picture above) and I wanted to be sure it was sound. It turns out that there was no rust behind the outer skin so an overlay piece probably would have been fine, but having lots of solid metal made it very easy to weld the patch in and eliminate the soft spots for good.
Area behind the outer skin, no rust at all:
Patch being fit:
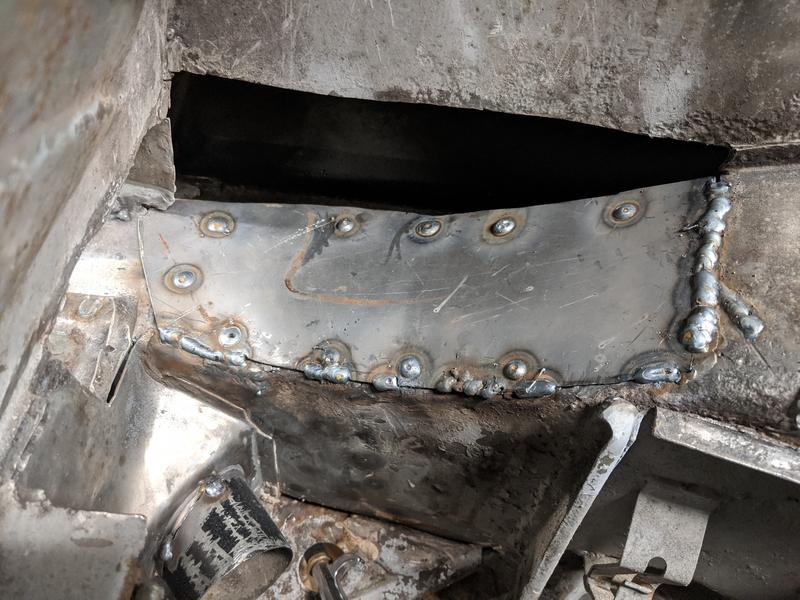
These holes are a bit small, I opened them up for better welding:
Ready to grind off the welds:
Area behind the outer skin, no rust at all:
Patch being fit:
These holes are a bit small, I opened them up for better welding:
Ready to grind off the welds:
This progress is seriously awesome.
I like that idea for locating the suspension console. That is about the only part I didn't hit on my rebuild. This post makes it seem not as scary...
If I missed it, are you using a cutout console from another car, or a replacement piece?
I like that idea for locating the suspension console. That is about the only part I didn't hit on my rebuild. This post makes it seem not as scary...
If I missed it, are you using a cutout console from another car, or a replacement piece?
QUOTE(jaredmcginness @ Apr 21 2020, 07:00 AM)
This progress is seriously awesome.
I like that idea for locating the suspension console. That is about the only part I didn't hit on my rebuild. This post makes it seem not as scary...
If I missed it, are you using a cutout console from another car, or a replacement piece?
Replacement part.
Getting closer, welded the engine bar mount and suspension console on today. The suspension console took forever to position because it didn't fit well when positioned as the previous one had been (1/4 inch gap on the bottom rear). I used the locator bracket but measured as well. I mounted the swing arm after to see how it fit and everything seems to be aligned. Definitely not my favorite part of this project, will be a relief after the car is running and aligned.
Welds ground down:
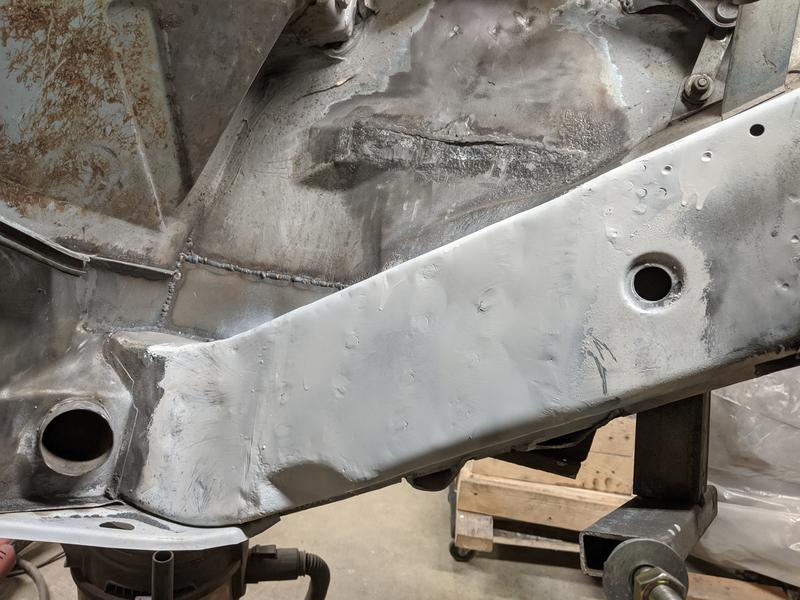
Weld through primer:
Test fit:
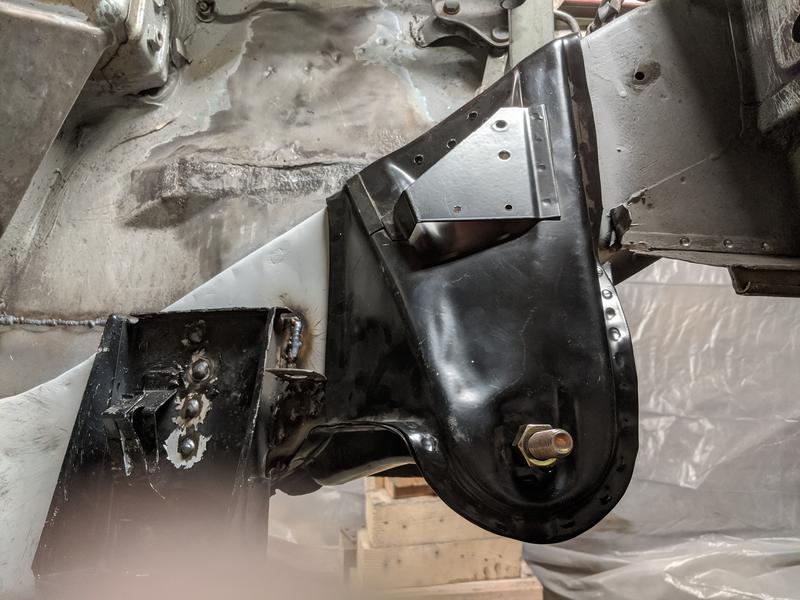
Mostly done:
Welds ground down:
Weld through primer:
Test fit:
Mostly done:
Finished some minor weld grinding and started rebuilding the engine shelf. I'm going to add a drain hole and weld it in tomorrow.
Reattached the passenger door sill and repaired the driver's side engine shelf (drain plug had clogged).
I've been cleaning off the bottom of the car to get it ready for epoxy primer. Unfortunately, cleaning out the inside of the driver's wheel well exposed some rust and a fiberglass repair of the trunk seal channel. I was going to leave this when I painted the body so as to not disturb the paint, but it will just have to be a bit ugly until then.
Rust, freaking rust:
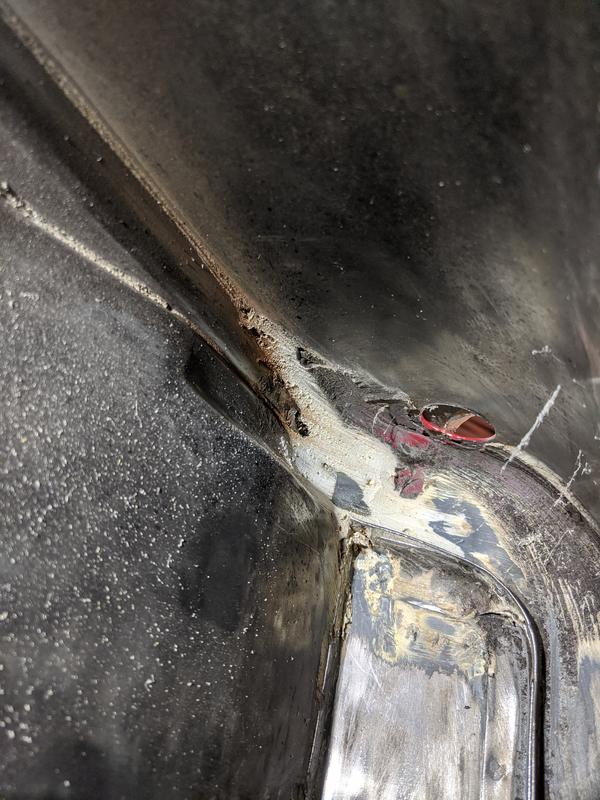
There's the rust:

Cut it out:
Cleaned up:
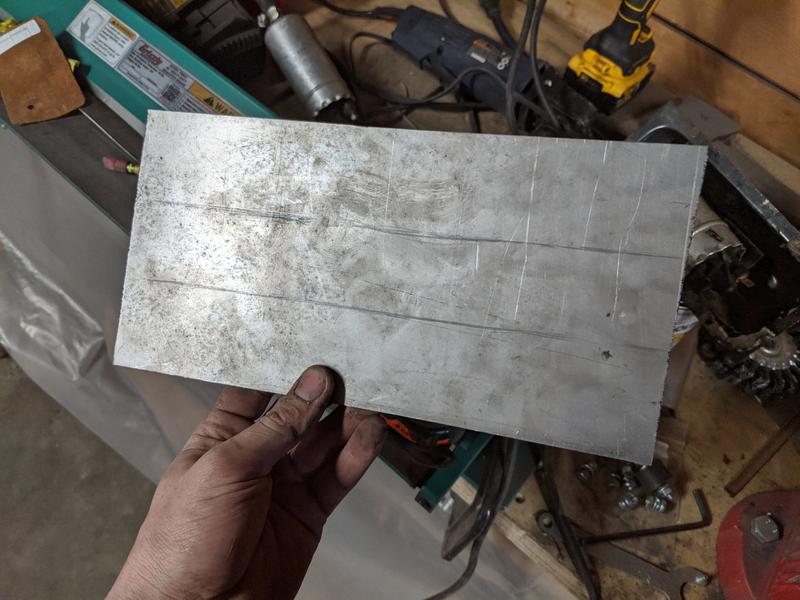
Make stuff that looks like the stuff you cut out:

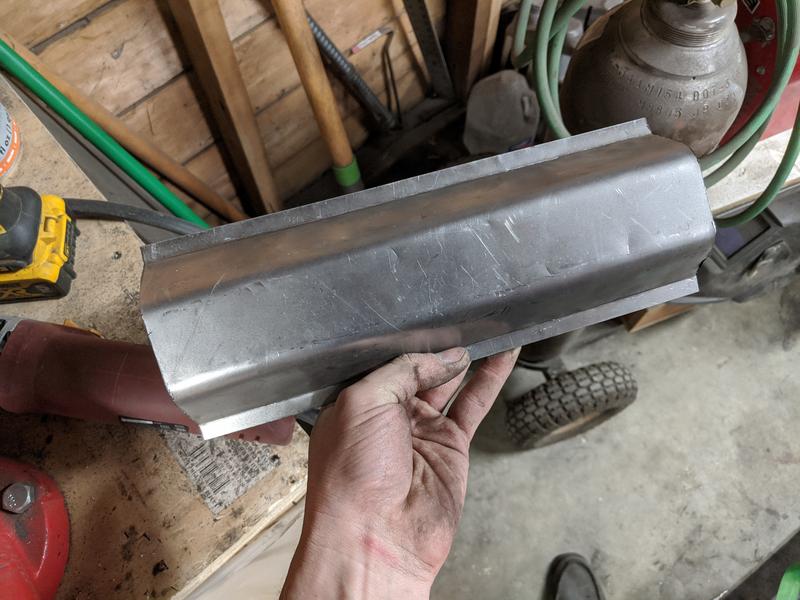
That looks similar:
Time to spend way too much time welding it in:
Solid, but ugly now until paint:
Rust, freaking rust:
There's the rust:
Cut it out:
Cleaned up:
Make stuff that looks like the stuff you cut out:
That looks similar:
Time to spend way too much time welding it in:
Solid, but ugly now until paint:
WOW, master-level Skilz, very impressive!
I've been cleaning off the bottom of the car to get it ready for epoxy primer. Unfortunately, cleaning out the inside of the driver's wheel well exposed some rust and a fiberglass repair of the trunk seal channel. I was going to leave this when I painted the body so as to not disturb the paint, but it will just have to be a bit ugly until then.
Rust, freaking rust:
There's the rust:
Cut it out:
Cleaned up:
Make stuff that looks like the stuff you cut out:
That looks similar:
Time to spend way too much time welding it in:
QUOTE(sreyemj @ Apr 28 2020, 08:37 PM)
I've been cleaning off the bottom of the car to get it ready for epoxy primer. Unfortunately, cleaning out the inside of the driver's wheel well exposed some rust and a fiberglass repair of the trunk seal channel. I was going to leave this when I painted the body so as to not disturb the paint, but it will just have to be a bit ugly until then.
Rust, freaking rust:
There's the rust:
Cut it out:
Cleaned up:
Make stuff that looks like the stuff you cut out:
That looks similar:
Time to spend way too much time welding it in:
Nice piece, that looks bad ass.
Great work, love watching new metal take shape.
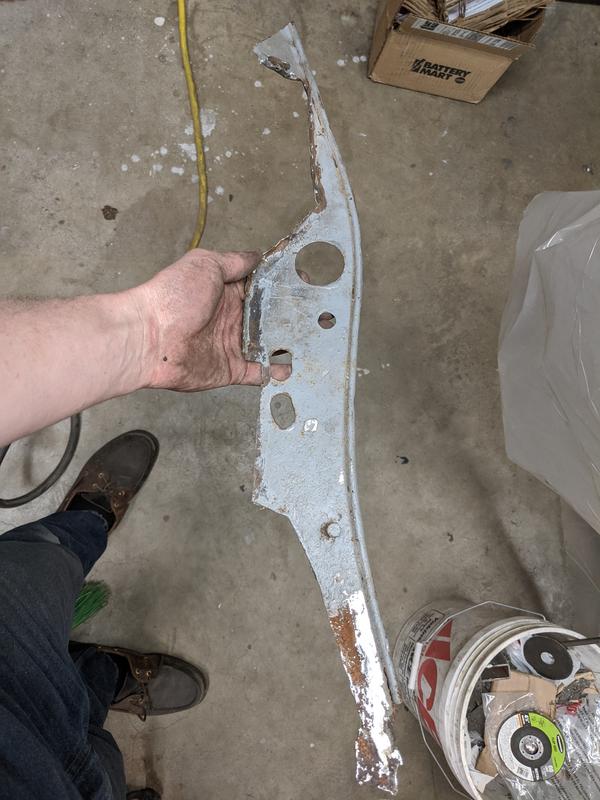
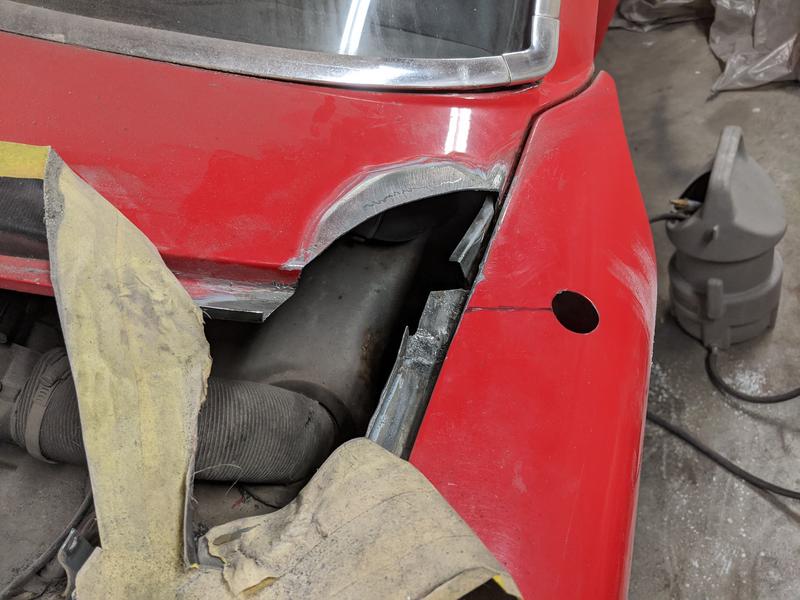
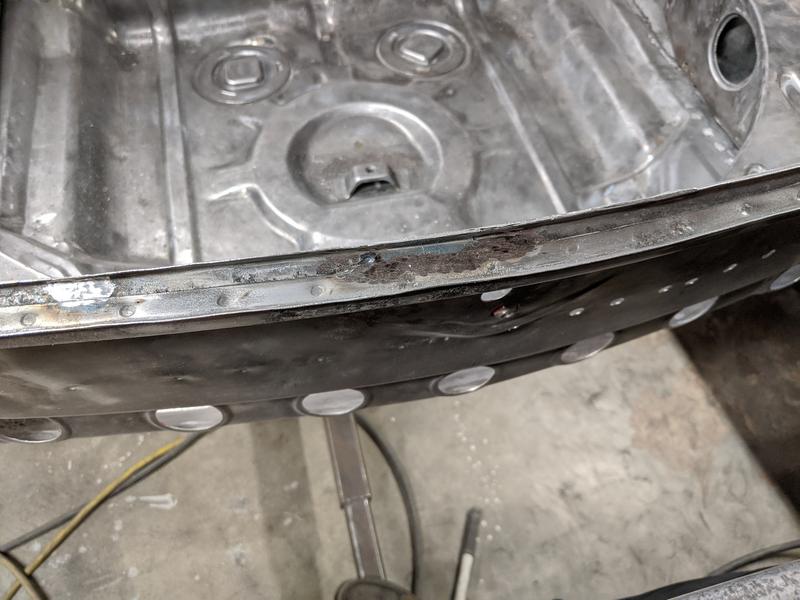
Spending way too much time cleaning up random bits and pieces of the project. The frunk seal channel was rusted away in a few places so I added some new metal.
New metal:

Ground down:
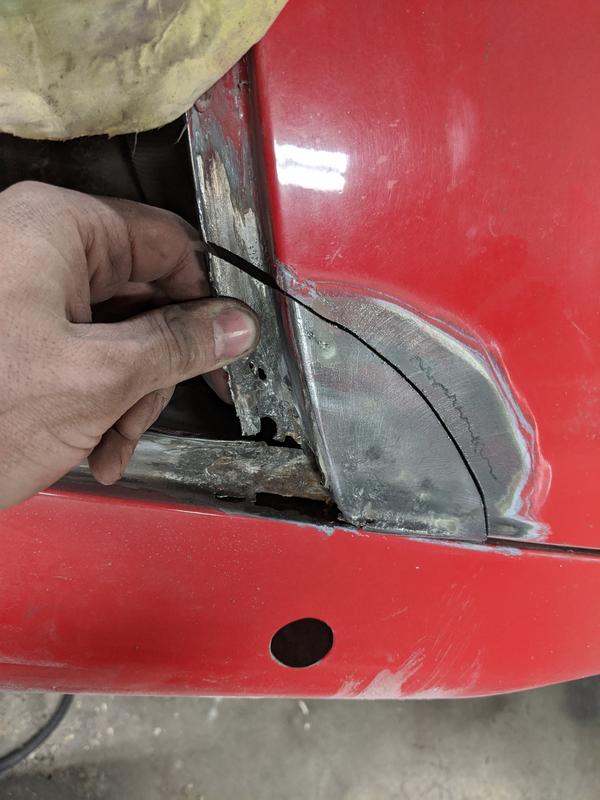
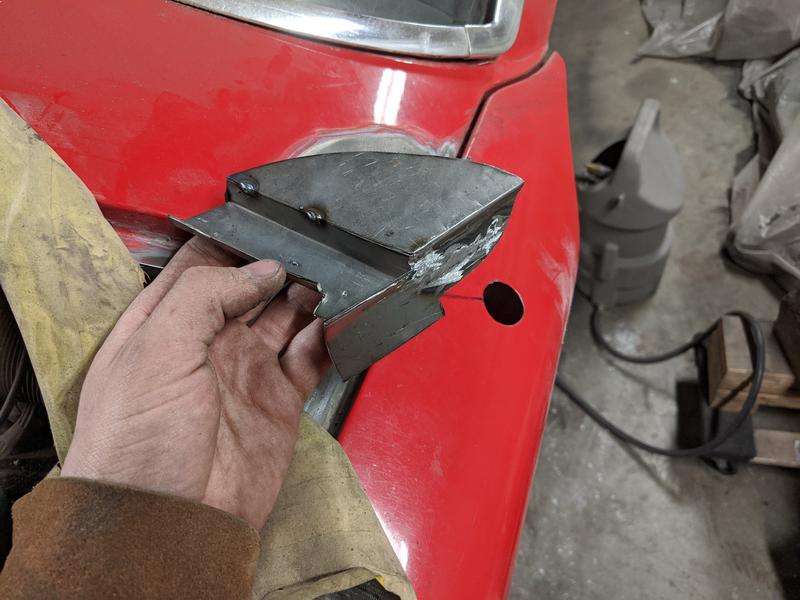
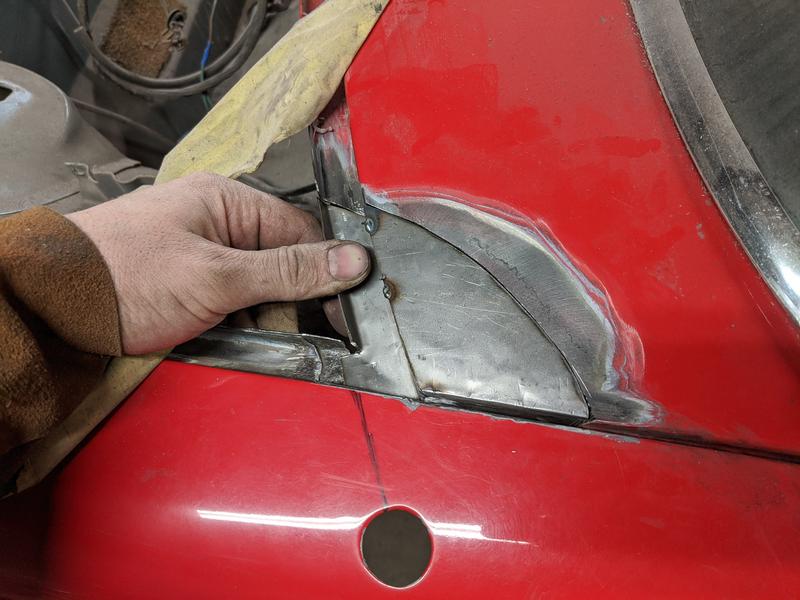
Over the headlight area, this is the side with the fender splice:
New metal:
Ground down:
Over the headlight area, this is the side with the fender splice:
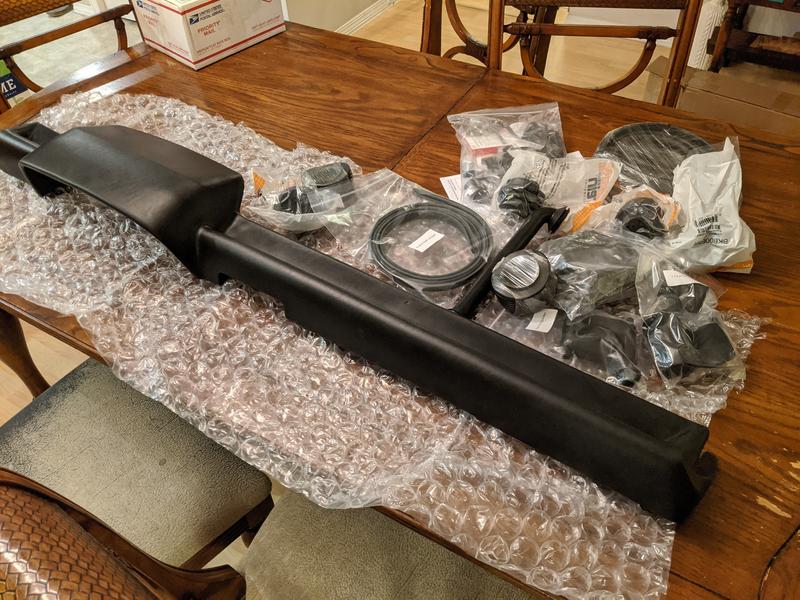
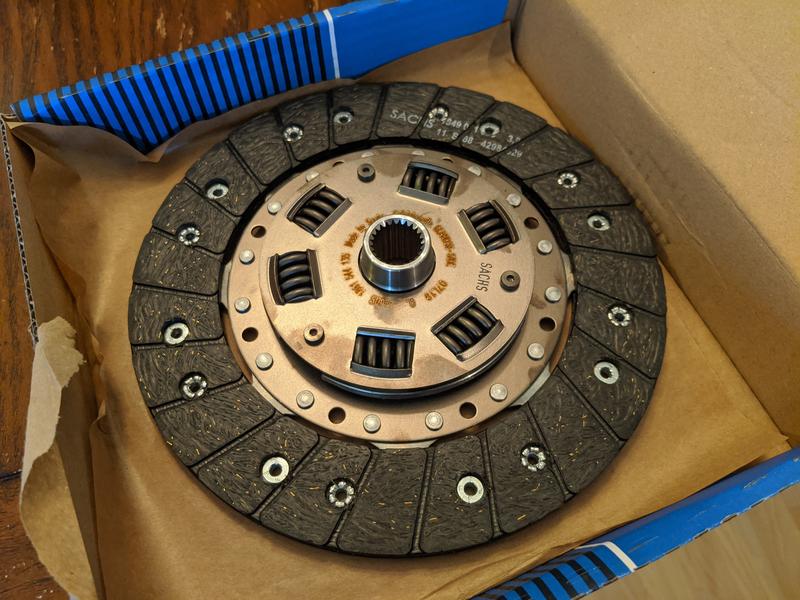
Some new stuff from 914rubber, and a replacement clutch disk (engine was missing the rear seal and soaked the clutch disk with oil).
Tried making a front firewall mount to relocate the fuel filter to the front. I had mount from a 1976 car that I sort of copied.
Mount from a later car:
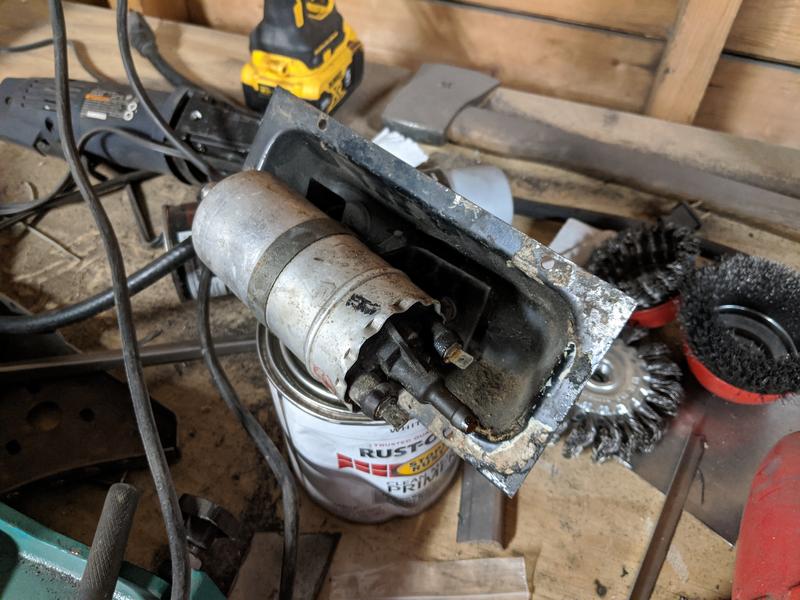
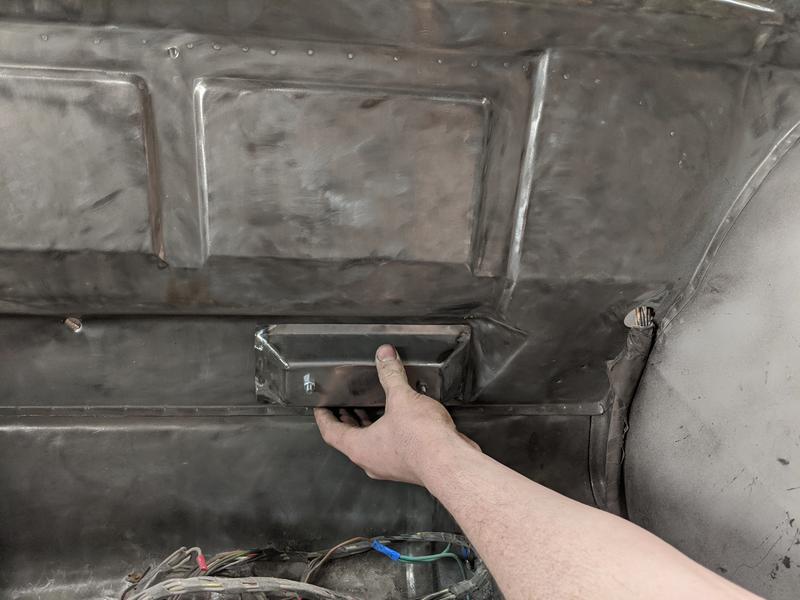
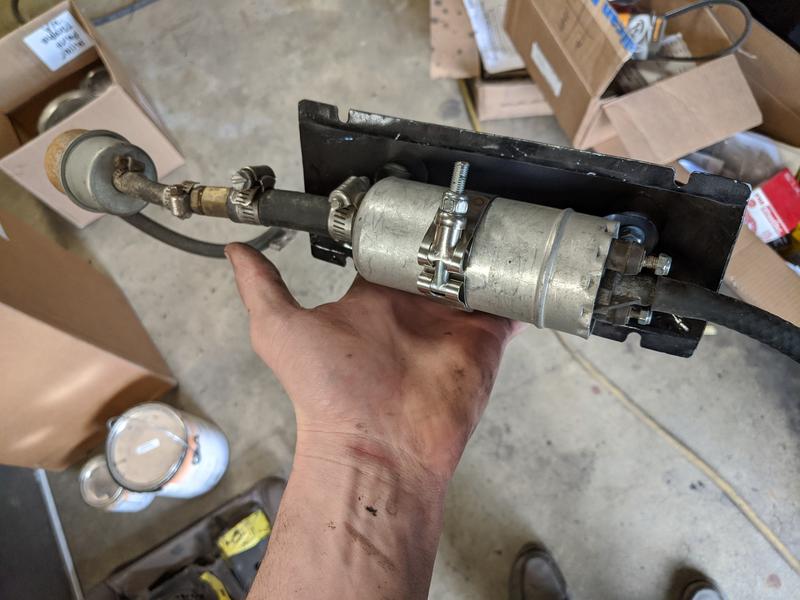
Mount from a later car:
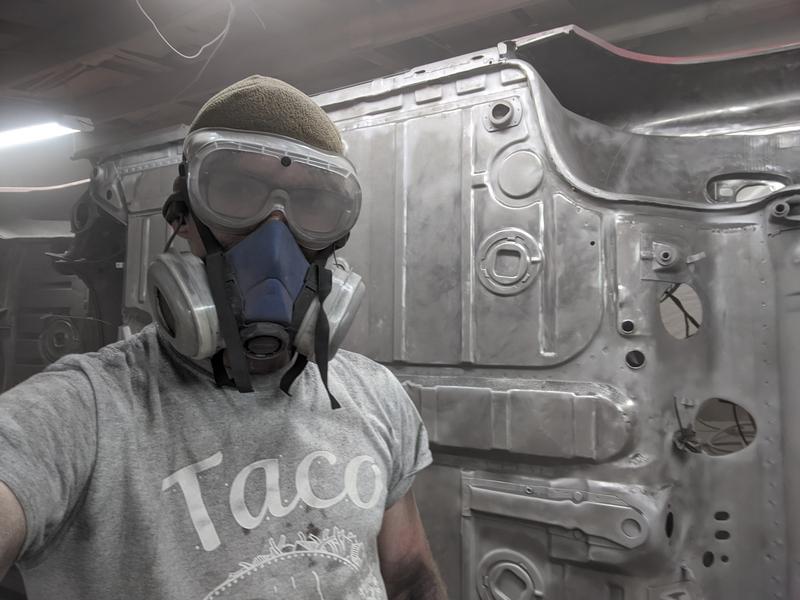
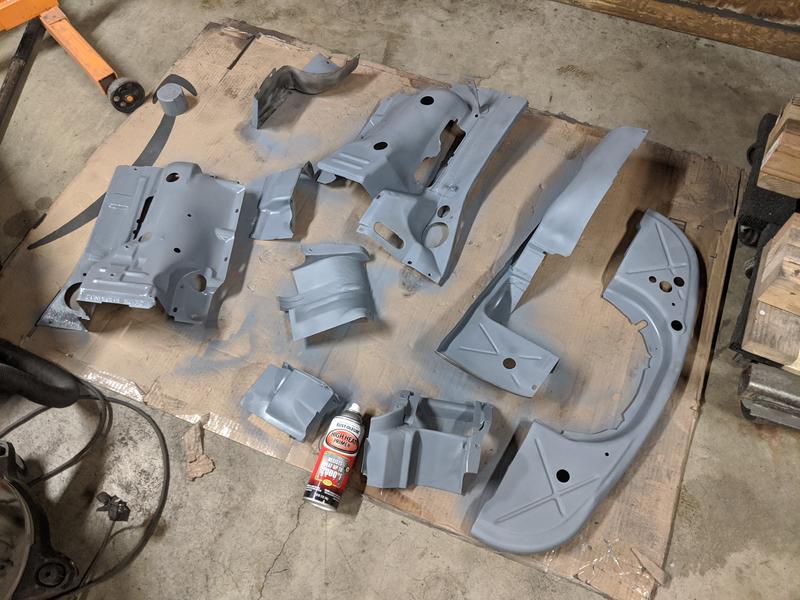
Been awhile since I posted an update. I stripped everything down as much as I could with wire wheels and abrasive blasted everything else down to bare metal.
Very dusty:
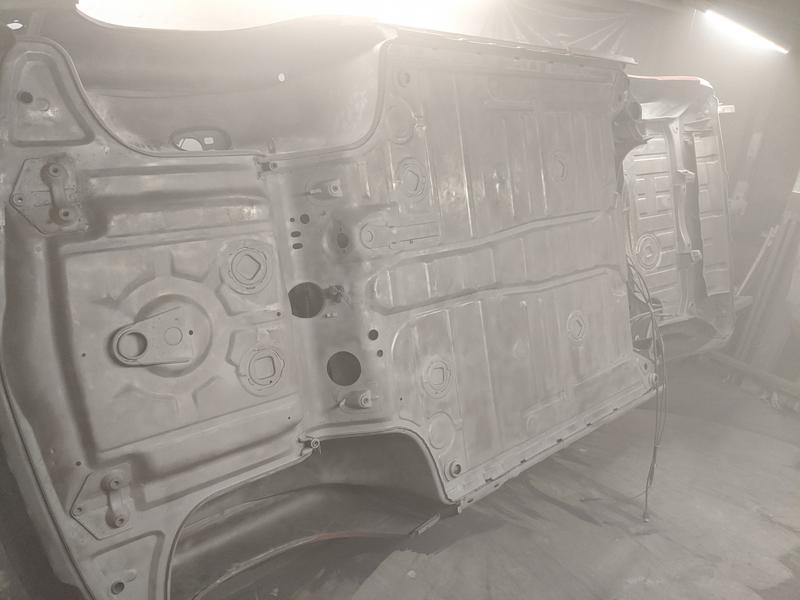
Not the most fun, next time I'll hire this part out:
Very dusty:
Not the most fun, next time I'll hire this part out:
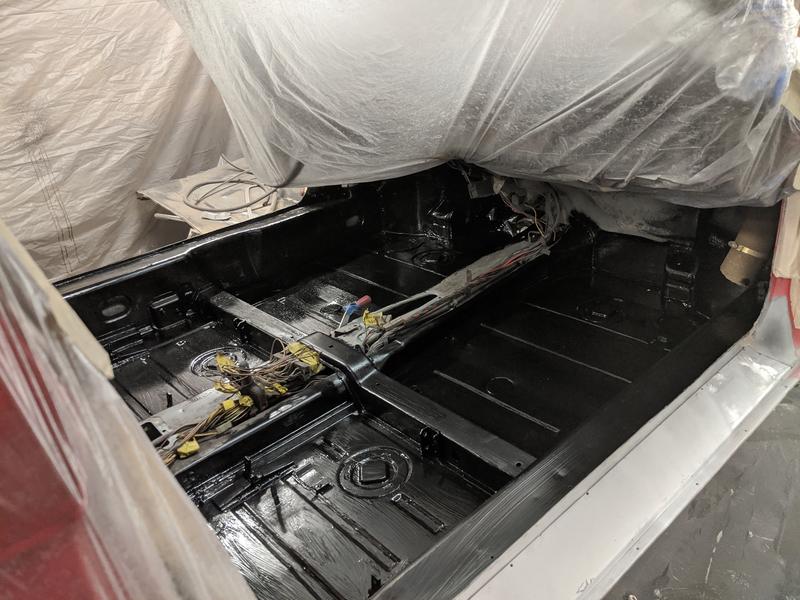
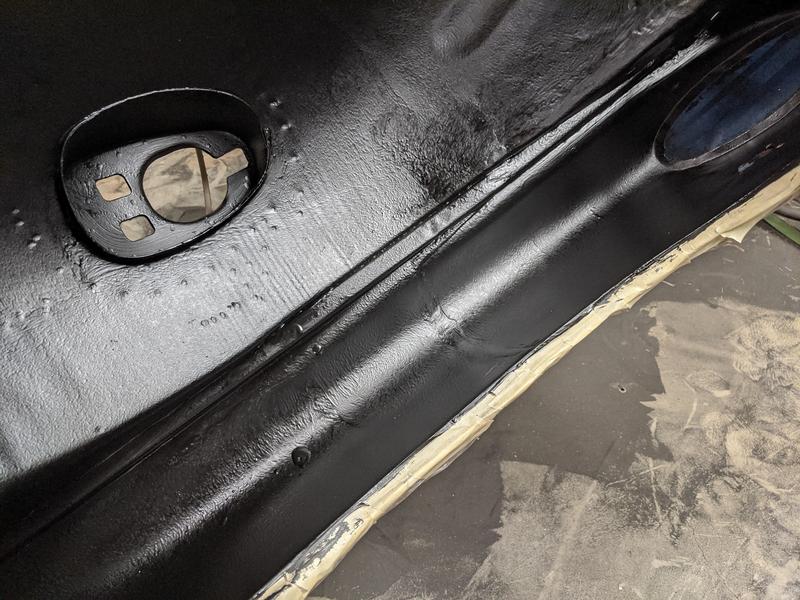
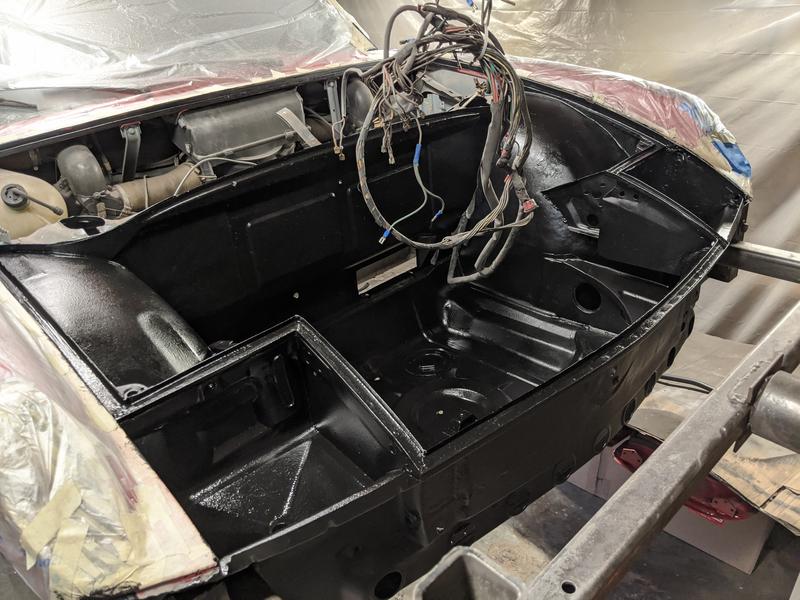
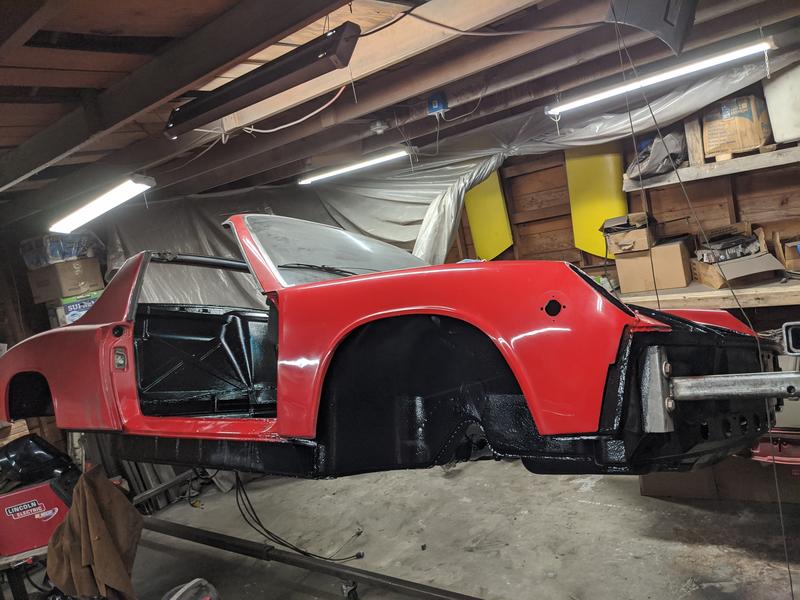
Putting on the epoxy primer. I was going to spray it on, but my shop isn't the best space and I wasn't sure I could get inside the fenders with a spray gun so I used a brush and roller.
Taped off, probably not needed since I'm not spraying:
Interior done:
Part done:
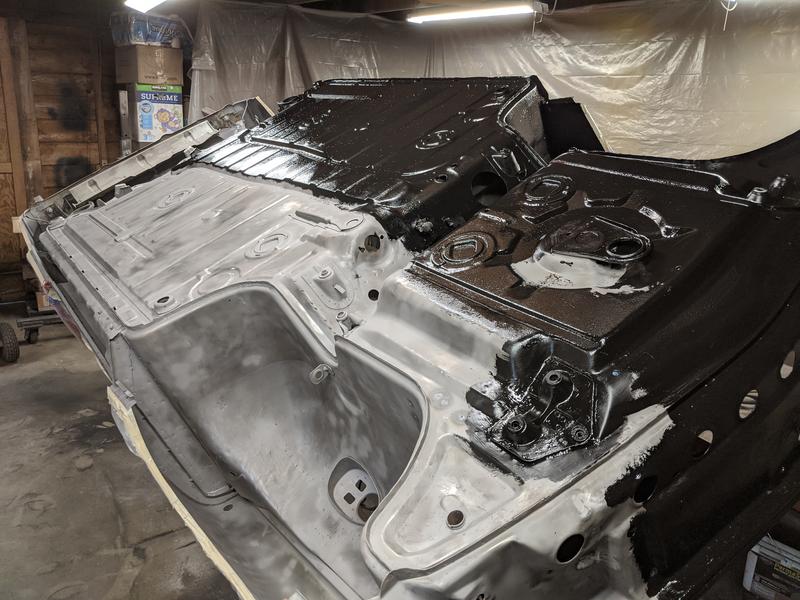
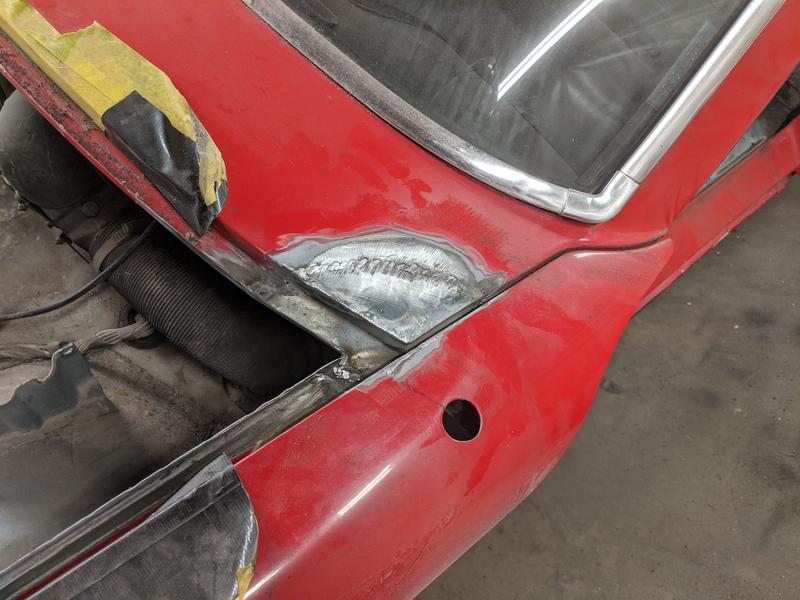
The area where the driver's fender was spliced, actually turned out to be fairly well concealed:
Taped off, probably not needed since I'm not spraying:
Interior done:
Part done:
The area where the driver's fender was spliced, actually turned out to be fairly well concealed:
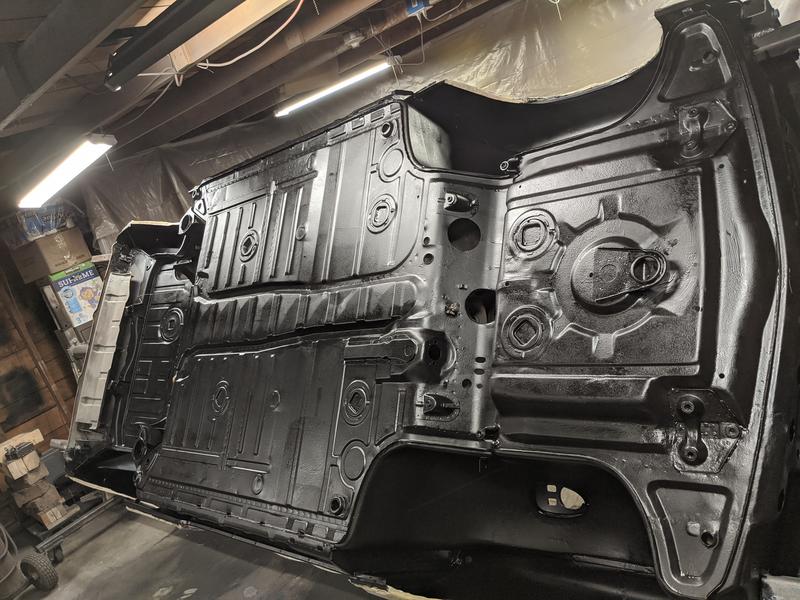
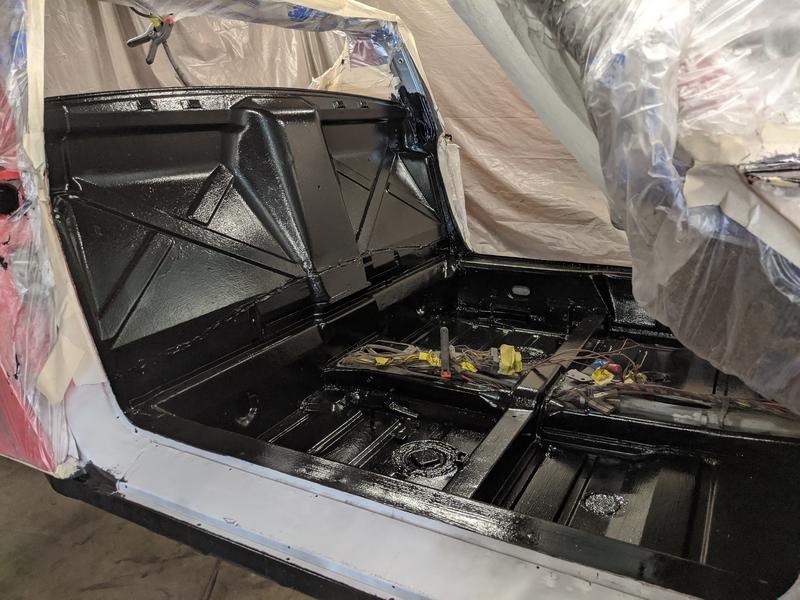
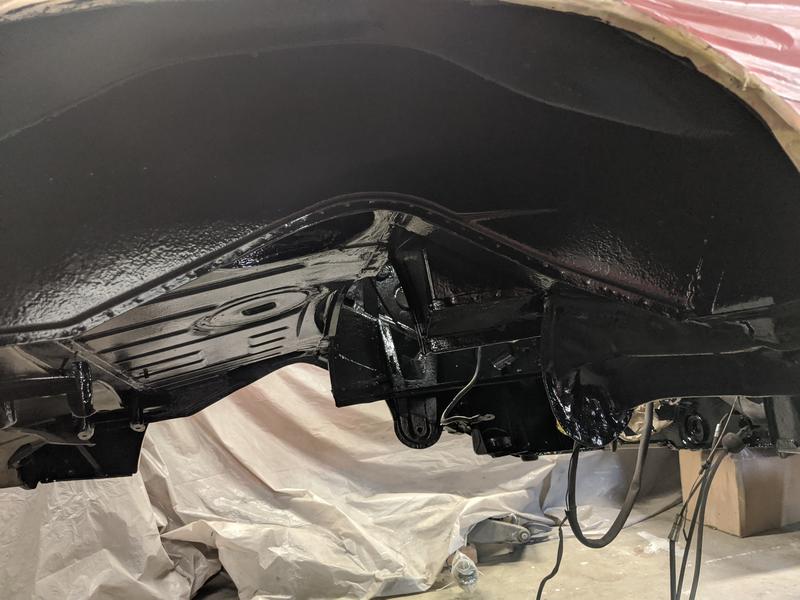
More pictures after epoxy primer
Front trunk:
Engine compartment:
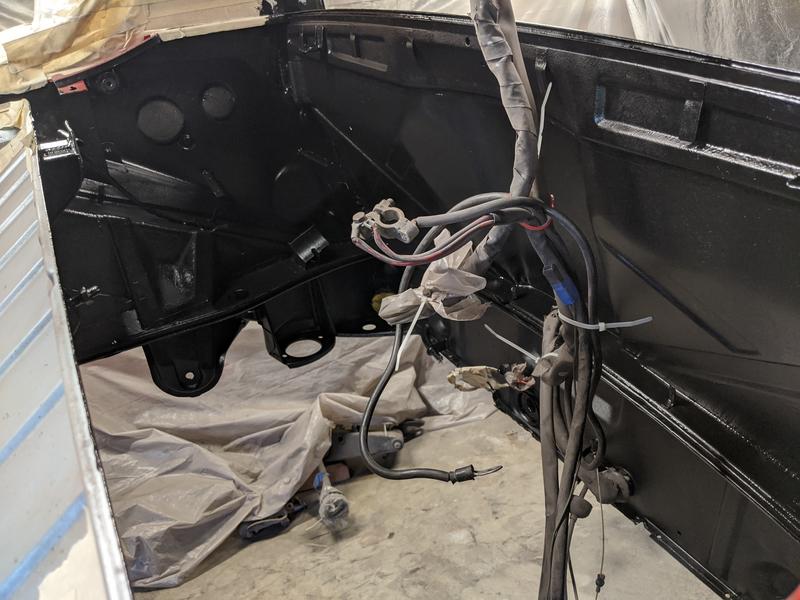
Hell hole area:
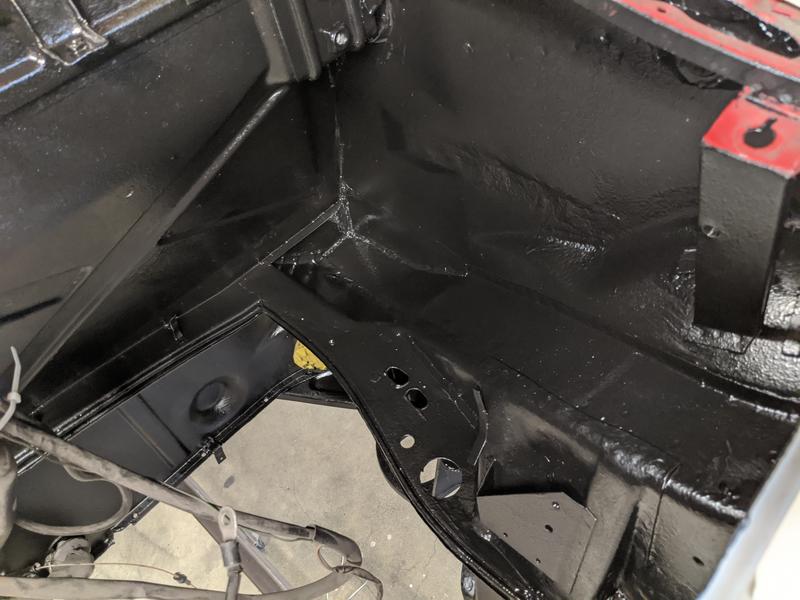
Wurth seam sealer is next:

Front trunk:
Engine compartment:
Hell hole area:
Wurth seam sealer is next:
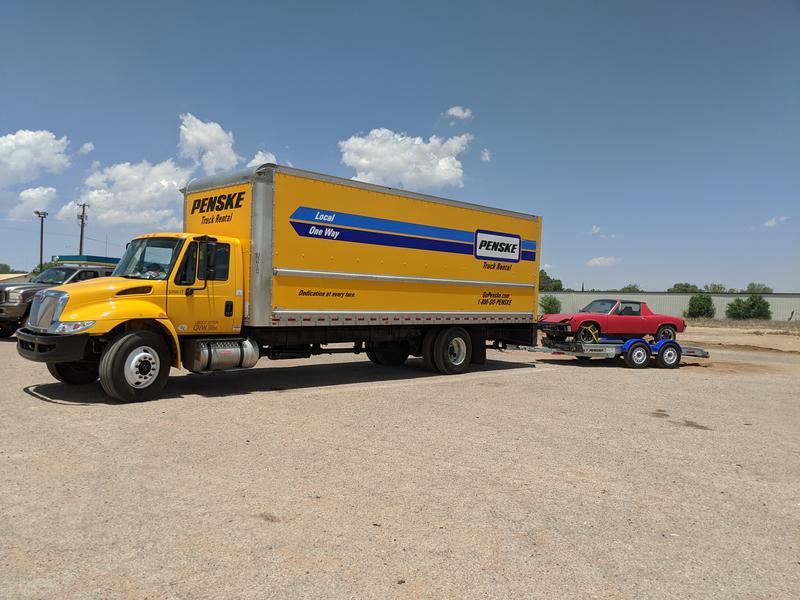
This car is moving from Washington to Texas in 2 days, doesn't leave me much time to get it trailer ready!
Quickly abrasive blasted and painted the engine tin with high temp paint:
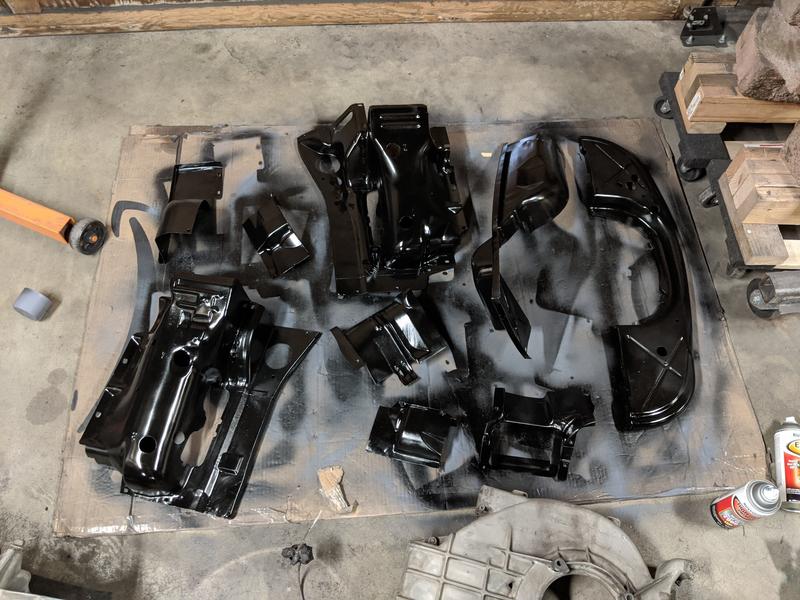
Quickly abrasive blasted and painted the engine tin with high temp paint:
I put a new rubber snorkel from 914rubber on, doesn't fit at the top though (hole in engine shelf is too big). I have an idea on how to fix it, but it's odd that the website says that it fits all years?
Paint ended up being more shiny vs the primer than I would have liked (I actually exchanged the gloss for semi-gloss, still looks pretty shiny though). Doesn't matter much as the paint is not going to be exposed except in the front trunk.
Looks good!
Car made it safely to San Antonio. Only passed one other 914 on the 2000 mile trip (on a trailer as well!). Will be awhile before I get time to finish it, panels are on but not aligned and it has a lot of small details to finish.
Congrats on the move!
Great work you are doing.
Making lots of progress.
John
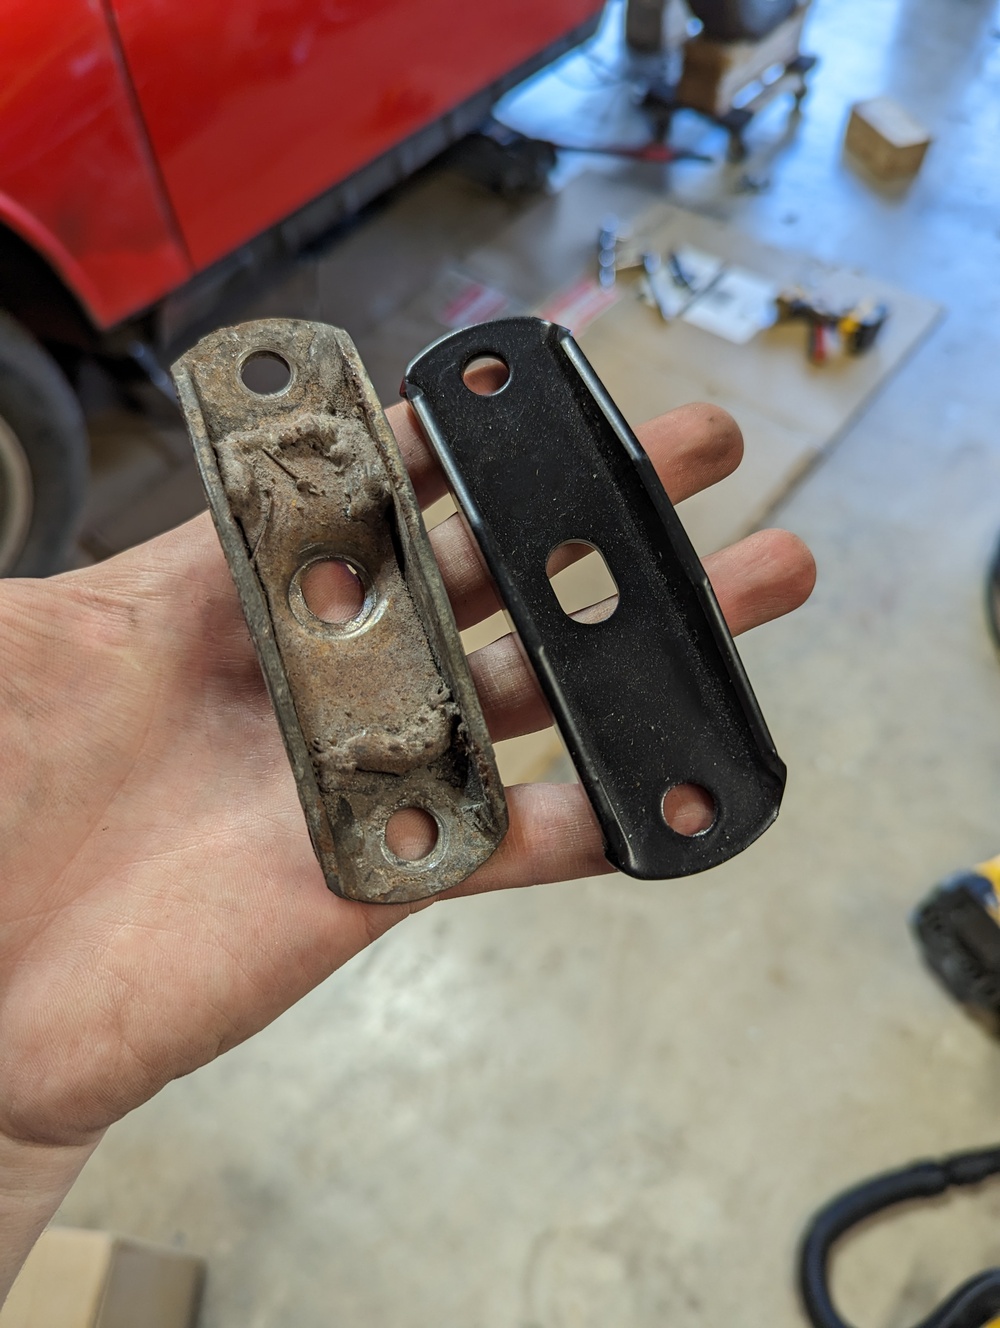
Quick update on this project. Long story short, I started residency in Texas andso have been too busy to make much progress on the car. It's been a bit frustrating, and I have done some small projects but it still has a lot of odds and ends before it will be drivable.
New engine bar brackets from bdstone914, old ones were trash:
New MSDS header with spintech muffler (muffler needs to be welded on). Also a Tangerine shift linkage in there somewhere:
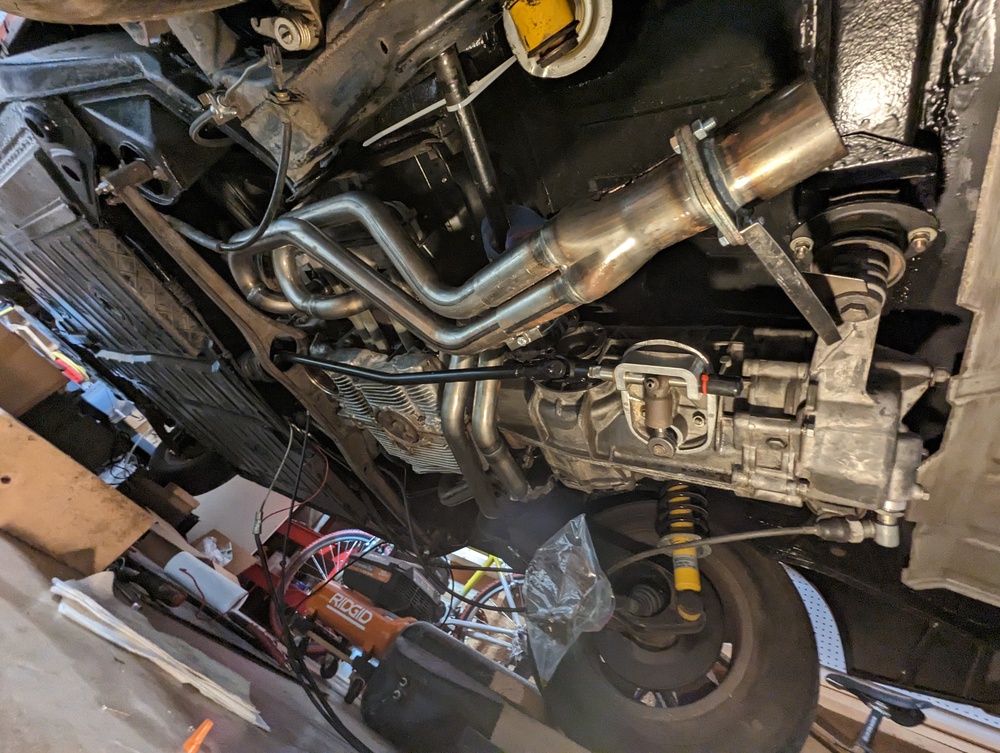
This engine has a couple delightfully random exhaust bolt heli-coils, including one that happened to be the same thread as an old E39 BMW head bolt...
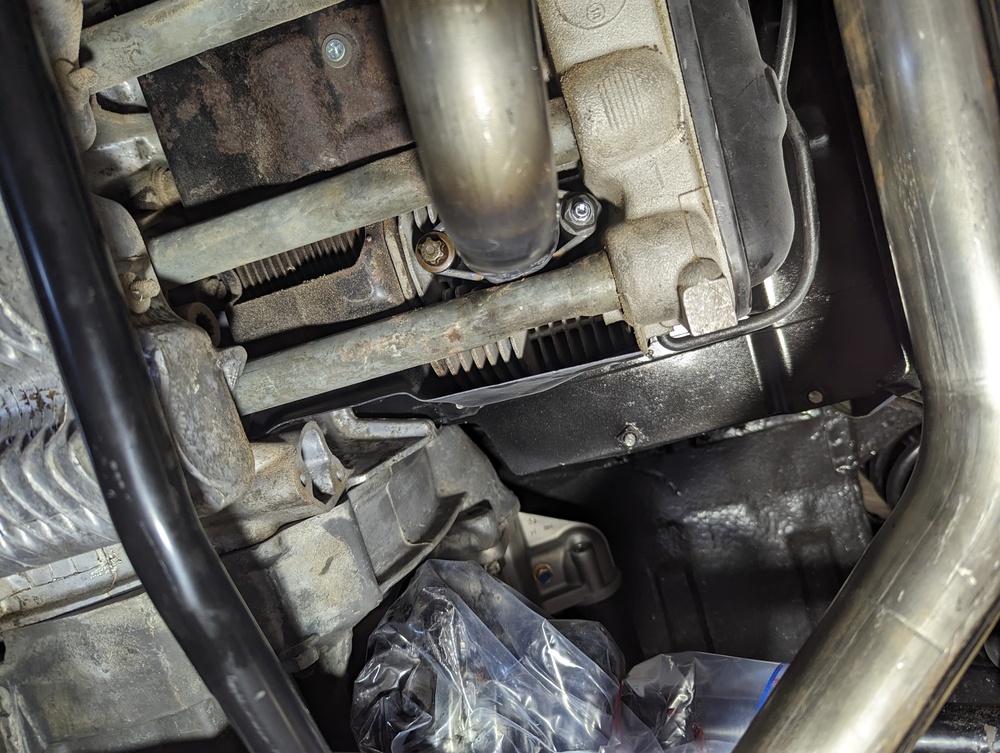
New engine bar brackets from bdstone914, old ones were trash:
New MSDS header with spintech muffler (muffler needs to be welded on). Also a Tangerine shift linkage in there somewhere:
This engine has a couple delightfully random exhaust bolt heli-coils, including one that happened to be the same thread as an old E39 BMW head bolt...
This is a "lo-fi" version of our main content. To view the full version with more information, formatting and images, please click here.