jpnovak
Sep 22 2009, 10:09 PM
I wanted to introduce myself as a new member to the World. I am new to the 914 but not new to air-cooled. I have two 1971 911s; a T - soft-window targa and an ST-replica track car. I am sure I have seen many of you on Pelican. With the 911 I have done it all, rust repair, paint, engines, transmissions and chassis setup. I felt it was time for something new.
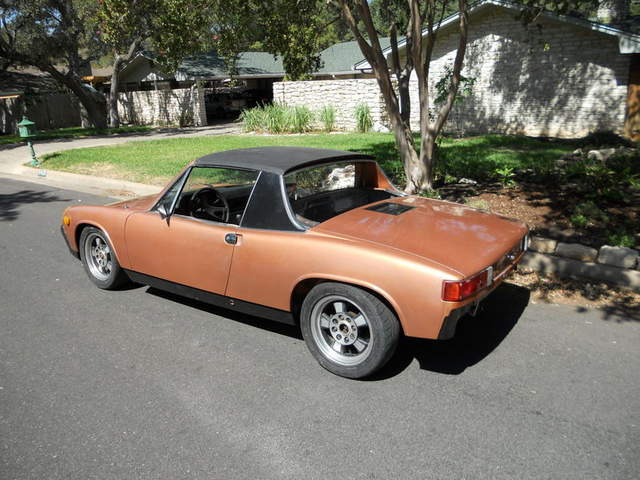
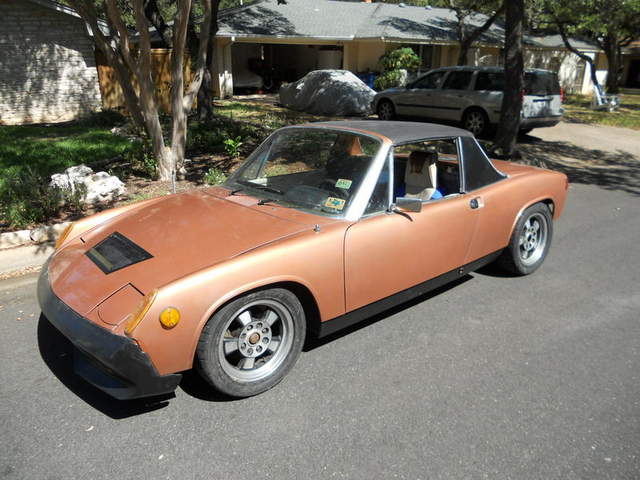
Introducing my new project. "Dirty Penny"
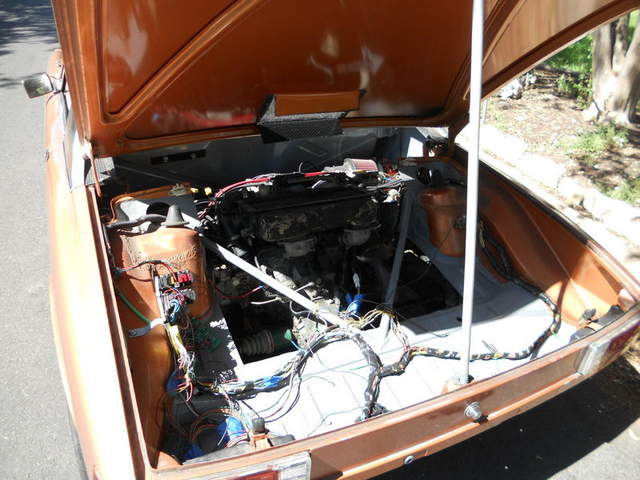
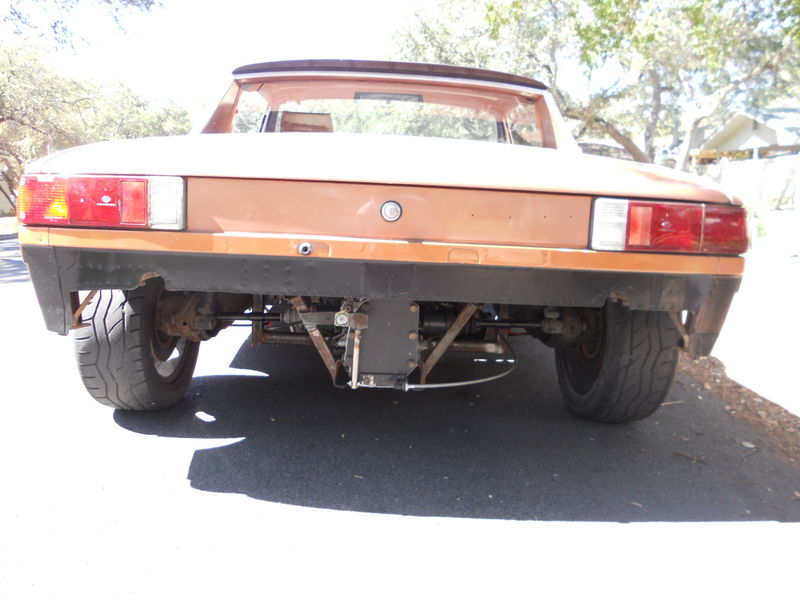
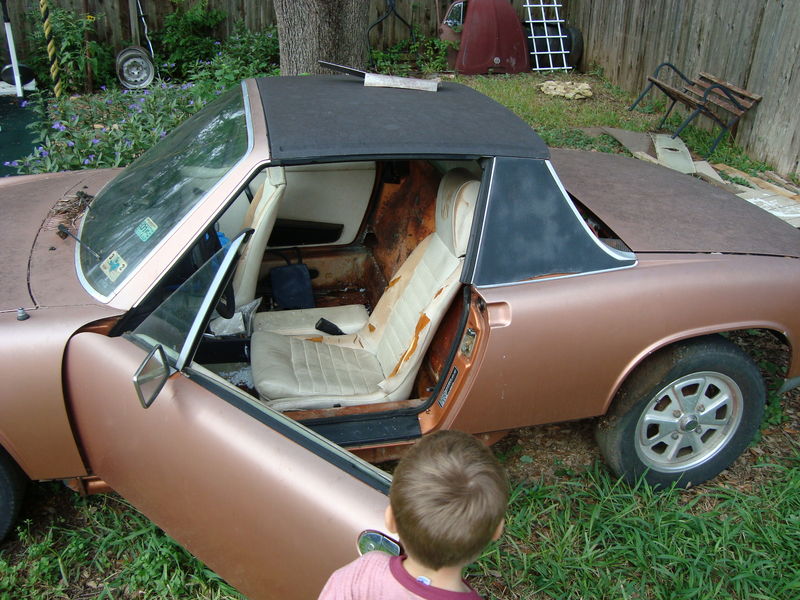
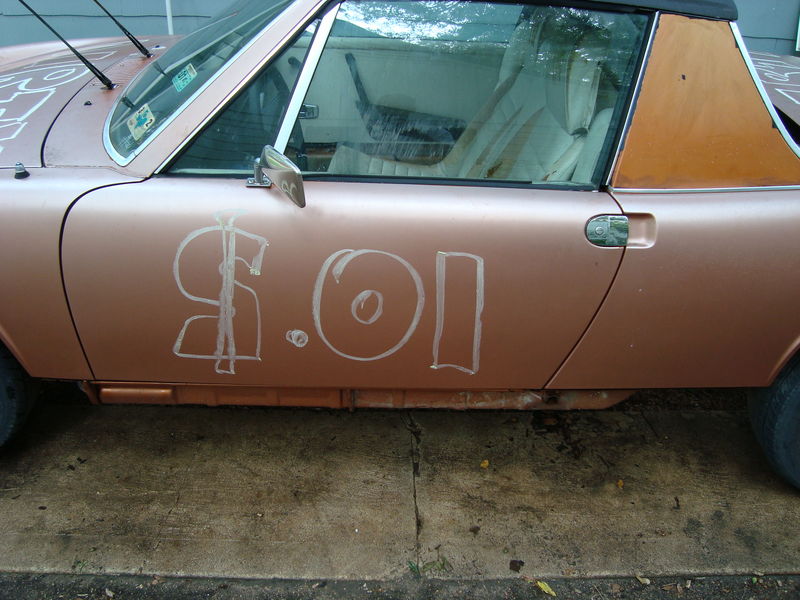
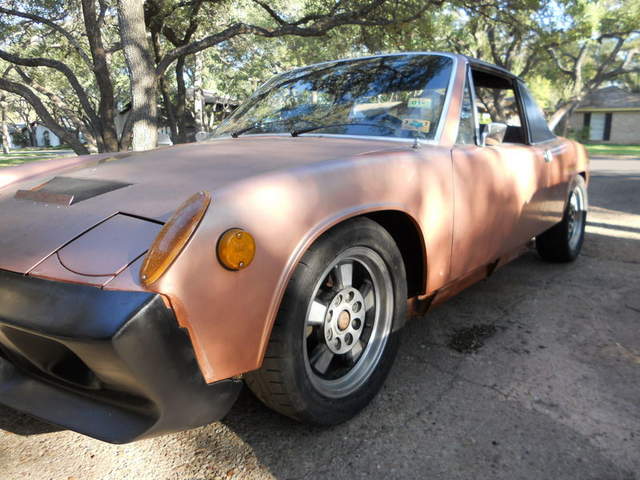
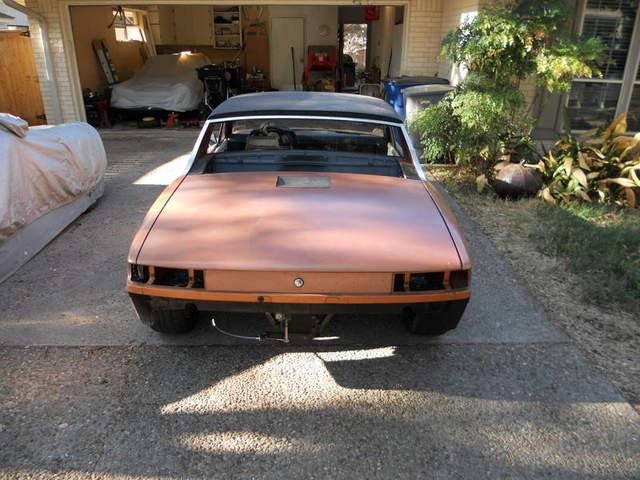
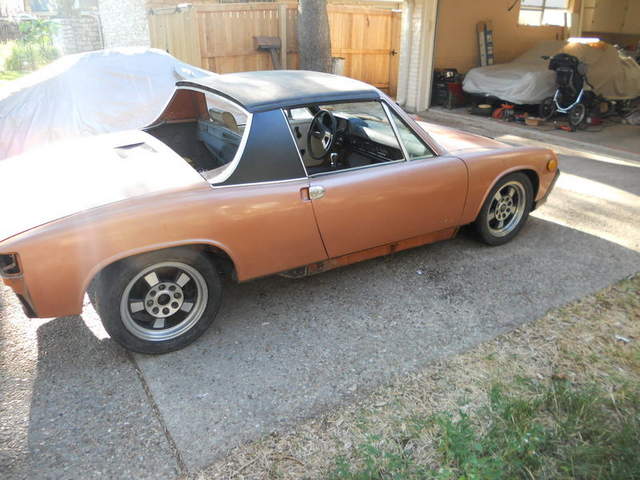
Penny is a 1975 Porsche 914. She has been sitting unattended for a while. I found her at a friends house under the old oak tree. Penny is wearing copper metallic paint and had a white interior. Penny arrived without a heart. I am going to give her new life.
Penny will be built as a Grassroots Motorsports $2010 Challenge car. For those not familiar that means you have $2010 to build a car where it competes in a concours, drag race and autocross. The prize? Notoriety in GRM and ridicule from those who already think you are nuts and cheap. My wife doesn't affectionately call me Fred Sanford for nothing.

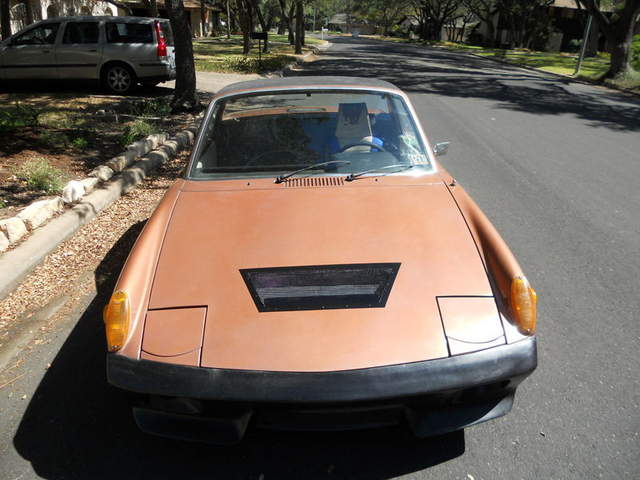
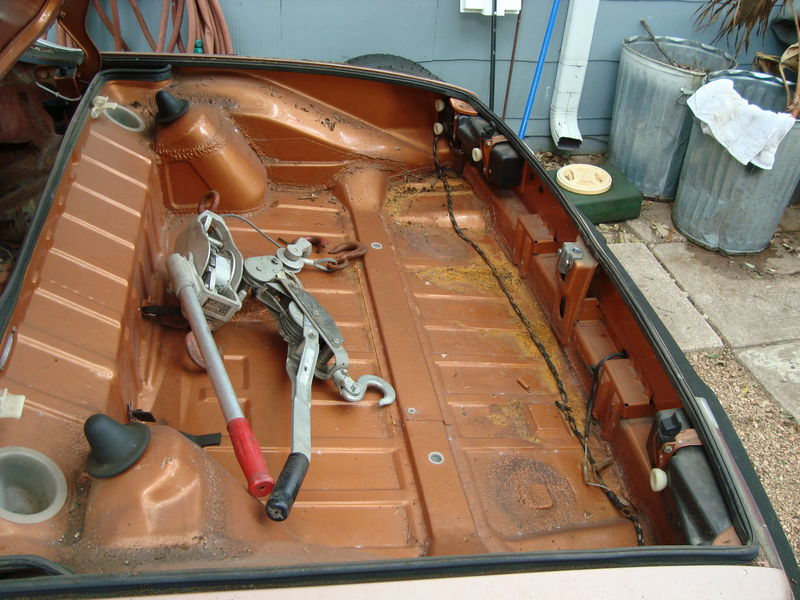
Here are a few pictures of Penny being unearthed from her previous home. The TX sun has not been kind to the paint, nor the interior. However, the dry climate has left her remarkably rust free. There is rust in the Hell Hole that has been previously cut out yet never welded back in. Rot is almost non-existent.
How much money I have left to spend on the project.
The plan is simple to do well at the Challenge. Get a car that handles well. Strip the weight out of it. give it some extra HP. Let's see... A 914 handles well. they are already pretty light. but the Type IV doesn't lend itself to high HP without major $$$.
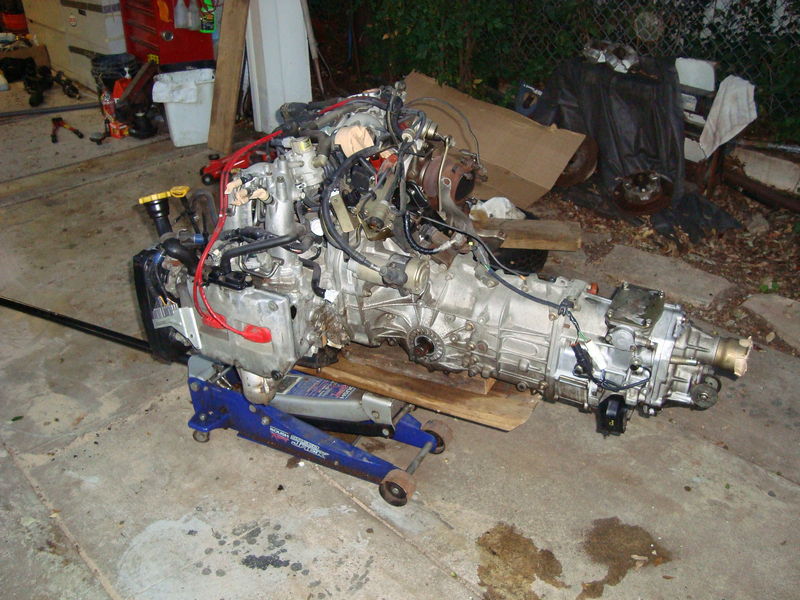
A bit of late night ebay browsing and I came across a JDM Subaru EJ20G drivetrain. Yes, that's what I need. ITs still a flat-4 - yet has to be water cooled and makes 140+ HP/L in stock trim. I like it. The vendor was in Dallas which means reduced shipping costs. Yep, that's the rule. you must account for ALL purchases.
The new heart and soul... Oh yeah it will have soul!
to be honest, work has been crazy and I have 13 months to build the car. Progress won't be fast. I am excited to make this go forward. The challenge of swapping the entire drivetrain begins with connections. The engine mounts are easy. Trying to get the shift linkage, clutch linkage and throttle cable done on the cheap is not so easy. I know there is a wealth of information on this site. Thanks to all those who have traveled this road before me.
Until the next update...
Now I have to figure out how to post images on this site rather than link external.
jtf914
Sep 22 2009, 10:14 PM
Hey Jamie,
Been a while since I last saw you in DC. Always loved your work on the ST and soft window targa. Good Luck and

-Justin
jpnovak
Sep 22 2009, 10:19 PM
Hey Justin, It has been a while. For some reason, I thought you sold your -6. btw, thanks for the welcome. This will be a bit of a diversion from the other projects. Nah, who am I kidding. They are all the same. Find something interesting and make it my own.
Of course, my wife doesn't think I am going to keep it. When the mechanicals are all done I have to at least take it to the track. And then I need to maximize the suspension... And then...
Ahh the slippery slope.
TravisNeff
Sep 22 2009, 11:09 PM
This should be a great thread!
![popcorn[1].gif](http://www.914world.com/bbs2/style_emoticons/default/popcorn[1].gif)
Todd Enlund
Sep 23 2009, 01:21 AM
jpnovak
Oct 27 2009, 07:02 AM
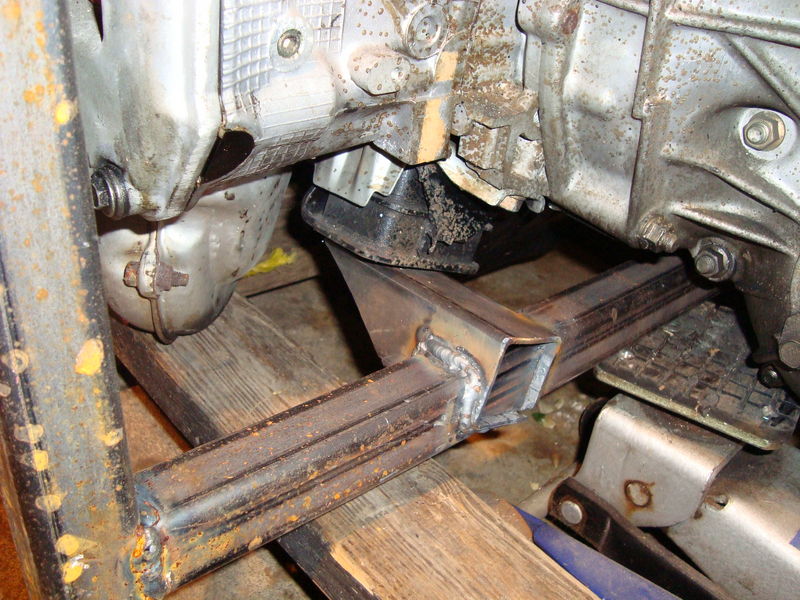
I mocked up the engine mount in CAD. The package all fits together within the measured dimensions of the engine bay. Here is the model engine mount. There are two vertical struts that will bolt to the rear shock tower cross member. Two engine mounts connect to the flat four. The Suby engine has engine mounts on the backside next to the bell housing connection. These are angled at 22 deg per side. Two forward extending struts will connect to the stock engine mount locations. This effectively ties the rear of the car together. Triangulated bracing is not shown for simplicity. The design also clears the up and down pipe on the turbo.

Enough with the design. Let's start cutting metal. I started by supporting the car on jack stands. Then I cut out all the mounting channels for the air seal. This car will never need these again.
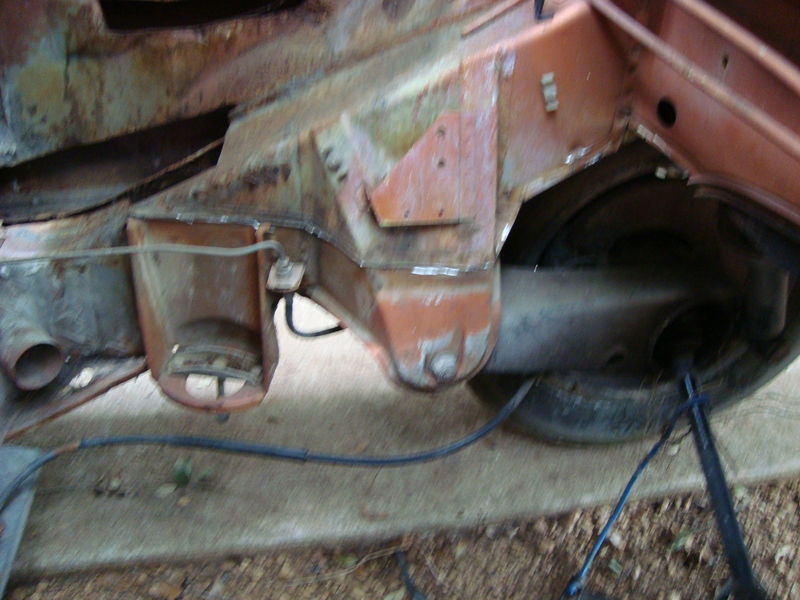
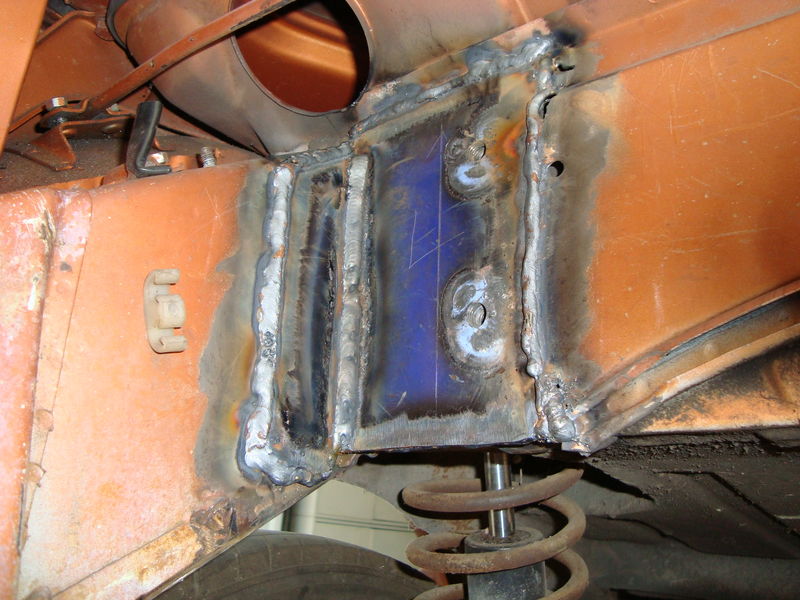
The next step is to cut an opening in the rear tray/cross member for a little chassis reinforcement. It is well known that high g-loads can cause separation of the shock towers from the longitudinals. The problem lies in the fact that the rear shock towers are not actually welded to the ends of the longitudinals. One side of the cross member mounts to the shocktower and the front side of the cross member mounts to the longitudinal. cutting an opening followed by some welding can easily solve the problem.
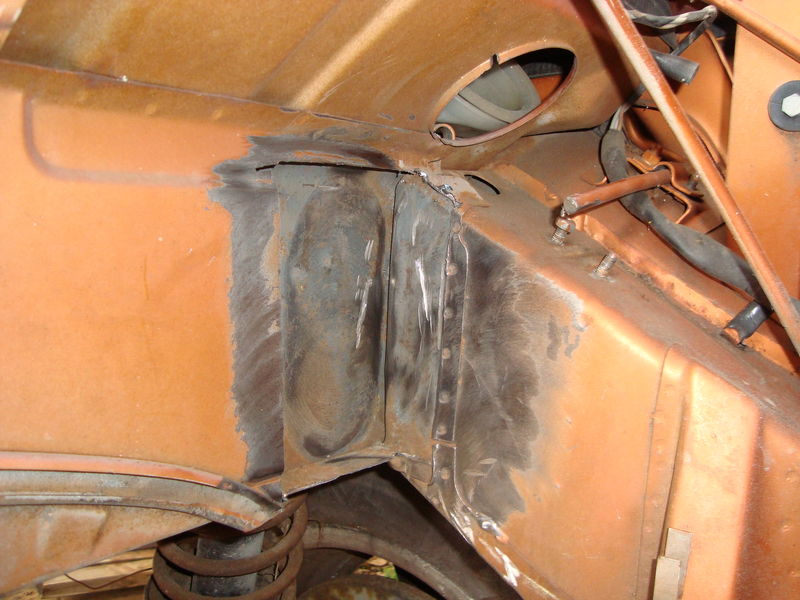
Once the access hole is opened, I simply seam welded the two sections.
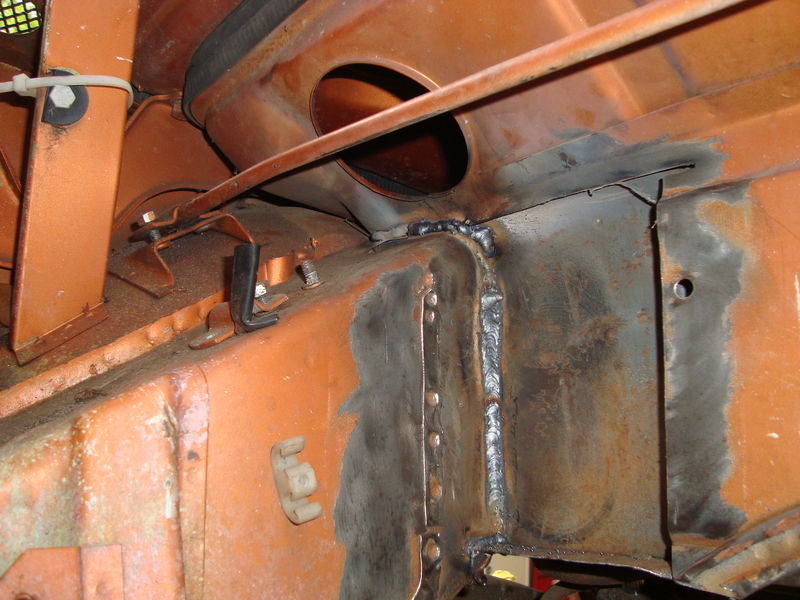
I also welded up the top section to further connect the shock tower to the longitudinal.
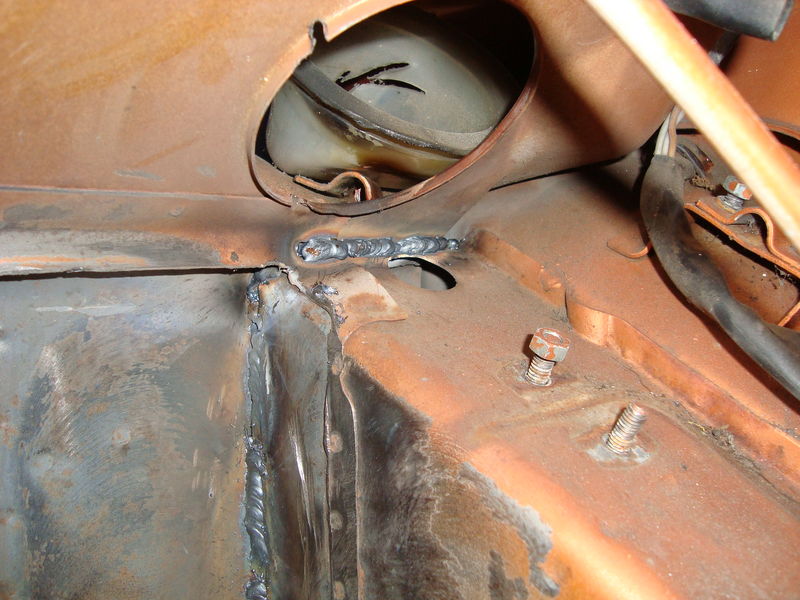
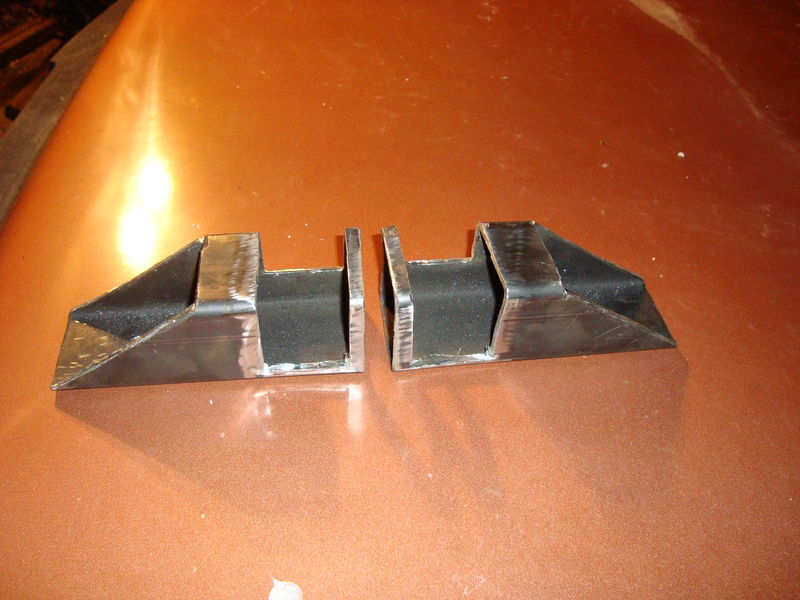
Next, I fabricate the reinforcement sections for the corners. These will serve as the mounting points for the engine yoke/cradle. These are simply cut from scrap 3/16" flat stock. good thing scrap steel can be had for free if you know where to look.
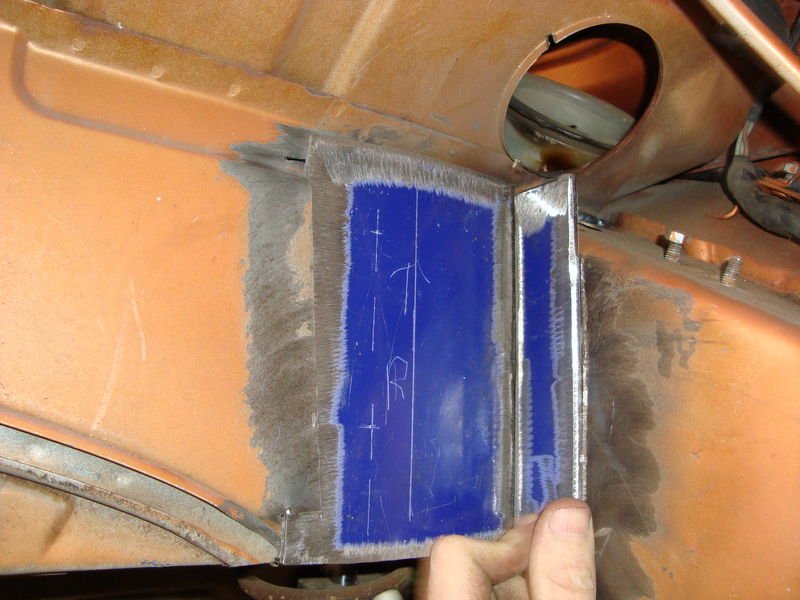
Here are the two corner sections installed. I also drilled and tapped holes and then welded nuts on the backsides. These blind nuts will serve as the upper mounting holes for the engine yoke. Two bolts on each side of the vertical struts pictured above.
jpnovak
Oct 27 2009, 07:03 AM
Next I had to start work on the engine yoke. Up until this point I have not spent any money. I did make a shopping trip to my local metal supplier. They are actually cheaper than Metalmart.com and I can easily get items cut to length. Sales tax on $24 in steel is cheaper than shipping any day.
The main loop is fabricated from 1.5" square tubing. The two engine mount sections are mitered from 2" square tubing. The forward locating struts are made from 1" square tubing. I thought that this was the best application of cost and strength.
First I welded up the main hoop. This is the U shape with two vertical struts and one horizontal cross member. This will support most of the weight of the motor. Next I miter cut the engine mounts. These are angled to the proper 22 degree and have relief cuts to access the engine mounting bolts.
The mitered cuts were then installed on the main hoop.
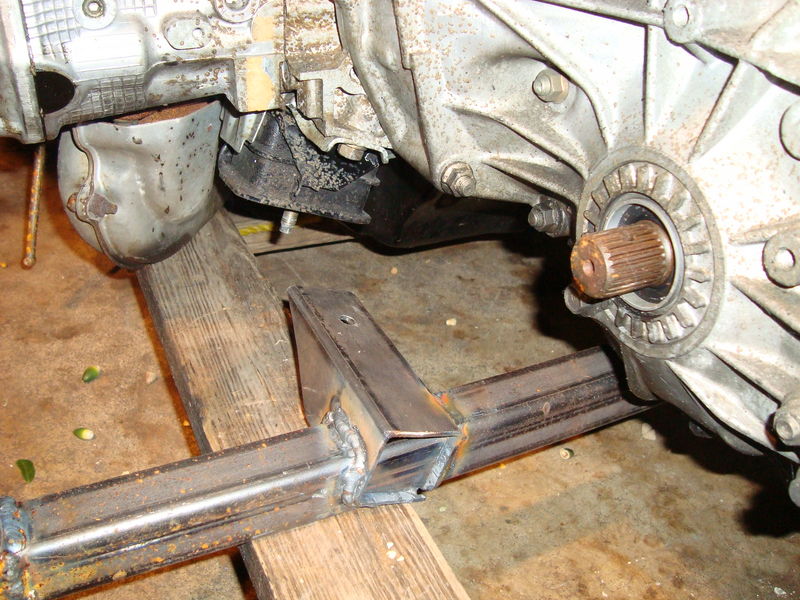
As you can see it fits up nicely.
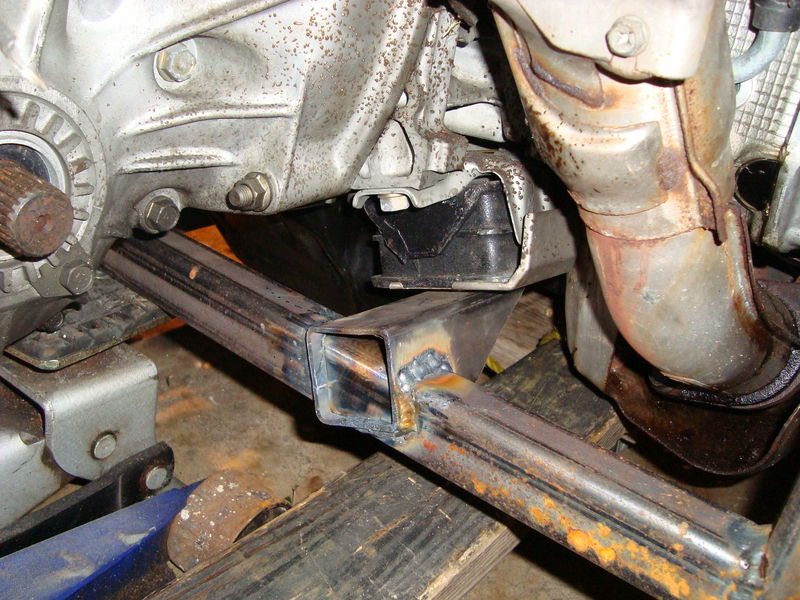
The next step is to raise the engine in the car and make cutouts for the turbo in the rear trunk. I will need to remove about a 2" segment of the floor to clear the turbo downpipe. The renegade kit mounts the motor more forward to avoid cutting the car. I did not want to do this since it puts a strained angle on the CV axles. My drivetrain is setup with perfect alignment of the axles and the hubs.
Once the engine is raised I can get a final height on my engine yoke and drill the pass through holes. After that I will fab tranny mounts in the car to support the backside of the drivetrain. This might make me cut the whole trunk out and tube the rear of the car. Nah! too much money in replacement steel for that.
Ahh its good to be back working on a project. Maybe I can get the motor installed and fired before the end of the year.
Until next time...
ConeDodger
Oct 27 2009, 10:22 AM
Hey! I lived on the same block as a "Dirty Penny". She went to Catholic school but we all knew her...

So, I am thinking this one has a lot of 2010 Challenge potential... How can we help? Are donations allowed as $0 or do you have to valuate them and enter it in the accounting" Perhaps a little 914World Sponsorship...
strawman
Oct 27 2009, 10:35 AM
Kewl, another Suby swap! My swap is chronicled at:
http://www.914world.com/bbs2/index.php?act...f=2&t=83031See post #83 for my Suby trans mount solution. That would work well for your trans, too, since your trans also has the removable rear/top plate. I am doing my swap on the cheap, too, using as much surplus and used components that I am able to scrounge.
For me, the project build is more than half the fun. In the past 15 years, I've built a bunch of VWs (Bugs, Vans, Fastback, dune buggy, etc.), a couple of IH Scouts, a Samurai-based rockcrawler, RX7 and MR2 autocrossers, a 125cc shifter kart, RD400-based cafe racer, etc. I swapped a '94 Suby Legacy engine into a Westy Syncro Vanagon, and have owned a couple of Subies, so I know these engines well.
Best of luck. I'll keep an eye on your build... keep the pics coming!
Geoff
jpnovak
Oct 27 2009, 01:35 PM
Rob, I am not sure of your connotation. I truly believe that the car looks like a discarded coin, not something that may not be the prettiest to look at but has something special under the skirt. java script:emoticon(':shades2:',%20'smid_45')
I would love to have free parts. However, I have to account for all parts. This means assigning "fair market value" to all additions on the car. Of course, this could be up for interpretation as to the true market value and corresponding condition of said parts.
Geoff, Sounds like a great project list. I have checked out your build. The tranny mount seems like a good one. I was planning to triangulate down to the lower isolation mount . This would give a slightly better angle of attack on the tubing. I also thought that I might make the rear diff cover be the mount. Then I could have a visual reference to a 908/917 in the rear. Would be easy if planned properly.
I have a solution such that I do not have to buy the Bremar parts. I will keep everyone posted. I think they make a great part but I need to have that budget on my build. Good thing for cutting and welding tools. java script:emoticon(':welder:',%20'smid_59')
IronHillRestorations
Oct 27 2009, 07:47 PM
That is one of my favorite color combinations. Metallic copper and white interior looks awesome!
grouperalley
Oct 28 2009, 09:22 PM
great car for $2010. You've read the rules, so you know liberal inteptations of trading parting out are allowed. Ive got a 76 parts car a set of riverias, some other stuff that might help when you get to the details, and surely some shop space. So if as your plans develop you might want to come to Orlando, 50 miles south of gainesville ( the site of most $2010) and borrow misc parts you might need. Good luck
camaroz1985
Feb 2 2010, 02:22 PM
Looking good. How's the progress coming?
My progress has stalled for the winter again (I need a heated garage). Hopefully there will be at least 2 914s at the $2010 challenge.
jpnovak
Feb 2 2010, 03:47 PM
The motor and tranny mounts are done. I am currently fitting the cooling system. Once I have water I will wire it up and fab an exhaust.
Progress has been really slow the past 2 months due to other commitments.
jpnovak
Jul 5 2011, 11:47 AM
I thought I would bump this thread since I finally moved on to get some progress completed.
The car and project goals are still alive. Just delayed a year or so. Life, family and work got in the way. Now I am committed to getting Penny to the Challenge! Hey, I have an extra dollar to spend this year.
I will update some pictures later tonight but thought I would give a brief description of my progress (and lack of).
1. The cooling system is in. I bought some EPDM heavy wall hose from McMaster Carr. This 1.25" ID/2"OD hose runs under the car through the floor stamping recess that outlines the center tunnel. Like others before me I snake the hose between the front suspension cross member and steering rack. In the rear I machined adapters that step from 1.25" up to 1.5" using scrap aluminum. This mates to the factory Suby inlet/outlet. Looks clean and is leak free.
Interesting note: Red hose is $0.40/ft cheaper than black hose. Guess what color my radiator hose is. Besides, red is faster right?!
2. Shifting system. I used Evinrude boat control cables I found on eBay for $5. These mate to welded adapters on the shift-select rod.
In the car I installed a manual shifter from a Nissan Versa. I know its not the same as most other builds but there are a few notable differences. First the shift cables exit the front and then loop down through the tunnel. Worked perfectly with my long boat cables. SEcond the shift position is fantastic. The shifter knob is located to the right about 6", back about 3" and middle of the wheel for height. My hand naturally drops of the steering wheel and onto the knob. The throw is about 3" front-to-back and about 2" side-to-side.
Oh, I was the one with he DIY Bremar kit. Shifting works great now.
3. Fuel system. I pulled the tank and cleaned it out. Then I made my own rust etch and ended up with a nice, internally clean tank. I used a Ford Crown Vic fuel pump. Also used on the 98 F150 and a bunch of other Ford cars. Fuel pressure spec is up to 50psi and plenty of delivery volume. Best of all it was $30 delivered.
The stock fuel lines were cleaned and connected to the subaru fuel inlet/outlet using a bridge fuel hose. my 75 had the poly lines through the tunnel. The OD is the same as the ID of the stock Subaru hose. A simple clamp made the connection. Simple, cost nothing and is leak free.
4. Wiring and electrical. This is where I have had the most trouble. I bought a JDM 98 Forester turbo drivetrain. Great except that the wiring diagrams are one-year only and really do not exist. Thankfully all of the GC-X (X = 1-8) series EJ20 motors have similar pin-outs even if the wiring colors are vastly different. It litterally took me 2.5 months to trim the factory subaru harness down to the engine controls. I have traced every wire coming out of the ECU and verified the colors were correct. This was difficult considering that 80% were different colors compared to the wiring diagrams I was using. I found that the UK version of the 1998 WRX had the best match for a wiring diagram.
Once I had the ECU wired in the car I started to make connections to the 914 wiring. Where do I start?
ON a car that sat for 12 years it was an exercise in frustration the first time I connected the battery. Nothing worked. First I cleaned the ignition switch. Then the main relay. Then the light switch. Then all of the grounds. Finally, the lights, starter, fuel pump and most of the gauges work.
Someone please answer this question. Why did the factory switch wire colors from Black/Red to green in the middle of the wiring harness under the dash for the fuel pump 12V supply? I spent hours tracking that down and only found it by splitting the harness and pulling out the wire to find the change in color. This change was not noted in ANY 914 wiring diagram I could find.
Yesterday I was very excited to finally reach the point of starting the motor. I bought some oil late yesterday afternoon and filled the sump. Next I primed the fuel system and turned the key. Spins and spins yet, no spark/no injector pulse. HMM. Time to start tracking signals starting with the crank sensor.
Hopefully, I will get this car started soon. Then it is off to more important things like building axles, figuring out the clutch and rebuilding the brake system. First, it must run.
SirAndy
Jul 5 2011, 12:09 PM
camaroz1985
Jul 5 2011, 12:39 PM
Congrats on getting this far. Life got in the way of my GRM project before I even got the engine in. The remnants are still for sale

jpnovak
Jul 6 2011, 12:48 PM
yes, life has a way of getting in the way. My wife (who I love dearly) said - get the car running and make the Challenge or get rid of it. the line was drawn in the said and I decided to finish the car.
I now have a copy of the 98 factory manual. It has all the output signals I need to troubleshoot the ECU and see what ails it. I have verified all power and ground connections. Now I need to start tracking down signals starting with the crank sensor. Hopefully it will be something simple.
If I can't get the ECU working I will probably Megasquirt it. - I will have to make concessions on the seats and other items but a running car is worth it.
jpnovak
Jul 7 2011, 09:18 AM
Still no start on the ECU. I used the O-scope last night and tracked a nice input signal off the cam and crank sensors. However, no output signals to the injectors or coil.
today I took apart the ECU case and checked the board. I found a few bad solder joints on the main chip and so I reflowed the two main chips and all of the power transistors/driver circuits. Hiopefully, this will solve the problem.
If there is still no output I will abandon the factory ECU and install a MS system. I bought a used one on CL and it is already accounted for in my budget as a backup.
jpnovak
Jul 8 2011, 07:41 AM
I am GO for MS.
The factory ECU is dead. I don't know if it got zapped or just lost its firmware from sitting unpowered for so long. Usually the ROM data is good for at least a few years. There is no telling how long the motor has been sitting. I do no think I can reflash it.
At this point it would be easier for me to wire in the MS unit.
jpnovak
Jul 24 2011, 04:00 PM
Penny is alive!! Despite the triple digit heat I was in the garage this morning.
The car runs despite lack of TPS, MAP and coolant signals. WooHoo!
Now I will finalize the wiring and finalize the injection system.
Next step is to fabricate axles and put a clutch connection.
clow
Jul 24 2011, 04:45 PM
QUOTE(jpnovak @ Jul 24 2011, 02:00 PM)

Penny is alive!! Despite the triple digit heat I was in the garage this morning.
The car runs despite lack of TPS, MAP and coolant signals. WooHoo!
Now I will finalize the wiring and finalize the injection system.
Next step is to fabricate axles and put a clutch connection.
This is a very neat concept. Nice to hear the car is running, congrats! Do you mind me asking what you have into it so far?
jpnovak
Jul 24 2011, 08:33 PM
Currently, I am almost to ~$1900. Of course, almost $1450 is in the drivetrain. I bought the roller for $300. The difference is for steel tubing to build the engine cradle and fix rust. I will post a full detailed list once I am done.
I am going to have to swap my interior budget (seats and "carpet") to convert to hydraulic clutch. Just the parts will be close to $75 for a used MC/hose and banjo fittings. Thank goodness fabrication is free.
The only thing i will not count in the build budget is for a few safety items. Mostly this is new brake hoses and caliper rebuild kits. I will not take a car out without going through the braking system with a fine tooth comb. I might even replace the MC. First I will just pull it apart and check for pitting/wear on the bore/piston. Yes, this is within the rules. I will also replace the stock belts with a harness.
jpnovak
Sep 8 2011, 10:10 PM
FYI, I just moved a work trip and am now clear for the tow from TX to FL for the event. I have less than 4 weeks to complete the car. There will not be much time for updates but I will try to mark off the list.
I will follow up with a complete build post once this is all over.
Tonight I finalized my hydraulic clutch setup. I just have to make final connections to the pedal cluster and connect a supply line off the brake reservoir. Rock and Roll!
Brakes are completely rebuilt with new rubber lines.
I have to connect a throttle cable and put rubber on the car and I should be able to drive it within the next week. I am getting really close now.
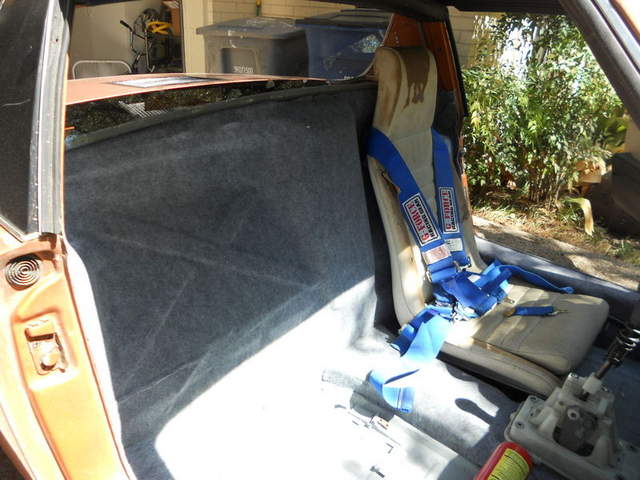
After the car is running I need to sort the suspension (align and corner balance) then install a seat and my "special" interior. Really, there is nothing special about it. Just some lightweight carpet to hide bare panels.
SirAndy
Sep 9 2011, 12:47 AM
rick 918-S
Sep 9 2011, 05:04 AM
jpnovak
Sep 12 2011, 08:28 AM
22 days left! That's it to complete a long list of stuff.
Weekend progress.
1. Hydraulic clutch is completely plumbed. fluid flows with no leaks
2. Hydraulic clutch is connected to pedal cluster - pedal actuates MC
3. Hydraulic clutch does not work - needs to bleed!
4. Brakes are full of fluid - No leaks after the rebuild. (well there was two lines I forgot to tighten on the passenger side front.
5. rocker panels are painted.
6. Front bumper screen is epoxied into place to protect the radiator. John, thanks for the aluminum screen from the satellite. It works perfectly.
7. Front bumper is blocked and painted. Unfortunately I will need to repaint. I did not know it was so hot yesterday afternoon. The paint was drying as I was brushing. Usually Rustoleum flows really well to level itself. However, it does not flow when its 104. I did not realize it was so hot until late last night.
Next up
1. Must get tires mounted
2. get throttle cable connected -
3. Waiting for final plugs for radiator. Still "in transit"
4. Connect, fill and leak check cooling system.
5. Determine seat/harness arrangement -
6. Install Harness
7. Weld final struts on motor mount to prevent fore/aft swing and rock of engine under power
8. weld cable mounts for shifter on tranny mount
9. Paint tranny and engine mounts
10. remake shifter to cable stop mount (I don't like the current one - holes are too big; too much slop)
11. Make connection to alternator
12. Find alternator belt that fits.
13. Carpet interior
jpnovak
Sep 20 2011, 07:31 AM
Crossing things off the list...
14 days and counting.
1. Must get tires mounted
2. get throttle cable connected -
3. Waiting for final plugs for radiator. Still "in transit"
4. Connect, fill and leak check cooling system.
5. Determine seat/harness arrangement -
6. Install Harness
7. Weld final struts on motor mount to prevent fore/aft swing and rock of engine under power
8. weld cable mounts for shifter on tranny mount
9. Paint tranny and engine mounts
10. remake shifter to cable stop mount (I don't like the current one - holes are too big; too much slop)
11. Make connection to alternator
12. Find alternator belt that fits.
13. Carpet interior
the clutch is still not working. I am having problems getting it to bleed properly. Tonight I will pull out the vacuum bleeder and get to work.
My cable shifter is awesome! It shifts with a simple, authoritative snick that my friend compared to a motorcycle. The positioning of the shifter is in perfect relationship to the steering wheel. I can't wait to get seats in place and test drive. Maybe tomorrow night.
jpnovak
Sep 21 2011, 04:00 PM
The competition has just been announced. Compare and Contrast!
Lots of interesting cars. It will be fun to check out what is unique about each one. From previous event coverage the small hondas and such have big turbos and turn quick 1/4 mile times. Same can be said for the big V8 cars.
I might have the only mid-engine turbo car there. Of course, people relocate drive trains and there are many creative builds. I can't wait to see what happens.
Condor Speed Shop Carlos Mendez 1975 BMW 2002
Gary Wyatt 1987 Chevrolet Corvette
Hendricks Motorsports James Hendricks 1983 Jaguar XJS
Mickler Motorsports Philip Mickler 1980 Ford Fiesta
Nelson Family 1
SDAC Patrick Culkin 1988 Dodge Arries
Roadcat Racing Doug Qualls 1985 Mazda RX-7
Shane Samuels Go Fast or Die Trying 1975 Datsun 280z
Nanoman's Garage James Novak 1975 Porsche 914
Evil Ducky David Melton 3000 Mach 1.5
O-Town 350s Joseph Thompson 1974 Datsun 280Z
OMGWTFBBQ Edwin Rodriguez 1991 Eagle Talon
Git R Dun Mattew Wojtkowiak 1994 Pontiac Firebird
El Diablo Speedshop Marc Griswold 1986 BMW 325e
Milton Robert Branch 1988 Toyota Supra
Erroneous 1 Sammy Shams 1985 Nissan 300zx
Backyard Bessie Kevin Sweeney 1998 Saturn SC2
3 Guys from Canada Jonathan McCreery 1997 Honda Civic CX
Hello Kitty Spinout Lasota 1975 Triumph TR7
Black and sTan Adam Baskin 1992 Mazda Miata
Roadstein Racing Jason Stanford 1994 Mazda Miata
Busted Knuckle Racing Brian McGarvey 1988 VW Scirocco
Sparkly Unicorn Farts Scott Evans 1991 Honda Civic Nelson Family 2
BURP Trip Ferrer 1992 Honda Civic
Hong Norrth Les Burchett 1986 Honda CRX
Hong Norrth Les Burchett 1985 Dodge Omni GLHT
Project: Parts Bin Bryce Nash 1972 Honda N600
Whim Racing Greg Voth 1977 Triumph Spitfire
Uranus Mike Guido 1986 Mitsubishi Uranus
wreck racing Team Gimp John Hooper 1987 Dodge Charger
Erroneous 2 Thomas Jaeger 1989 BMW 325is
CH Racing Tim Spellman 1987 Pontiac Firebird
The Killer Team
Time Racing Chris Simmons 1984 Chevrolet Corvette
Andrew Neuman 1990 Honda Civic Si
Dorsey Brothers Stan Dorsey
Westside Brian Dimont 1992 Eagle Talon
Karl Lafollette
Karl Lafollette
FOAB Ben Berusch 2001 Mazda Miata
rick 918-S
Sep 21 2011, 05:30 PM
Cool! Be sure to post pics of your competition!

jpnovak
Sep 25 2011, 06:21 PM
9 days and Counting...
It appears that this project kept going despite my life's best attempt at keeping me from completing it. 9 days from now I will load up and two to FL for the GRM $2011 Challenge.
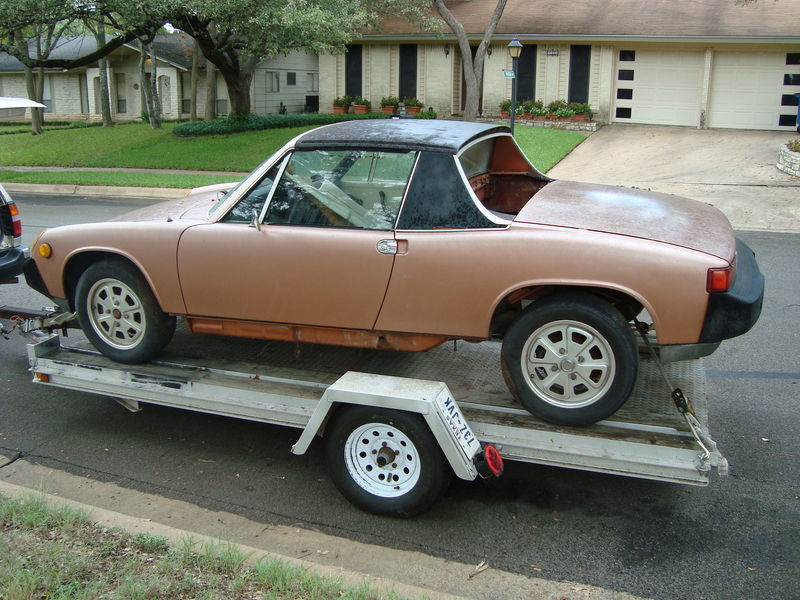
The car drove on its own for the first time in 10+ years. Runs a little rough but all systems are working. I just have to start sorting the car in the next week, get it cleaned up and ready for action.
A few pictures of the car back on four wheels.

Here is a short list of the project.
1975 914
1998 Subaru EJ20G 2.0T engine
Subaru 5sp manual transmission
hydraulic clutch conversion
stripped to the minimum
GT style front bumper
Let's just say that its light enough and has enough torque that it can start in 4th gear. yeah, I just found that out since my shifter is backwards in the LR plane. I have to reverse cable connection.
this week I will cut and buff the paint, layout the graphics, install the rockers.
I need to install a cooling system overflow tank. Right now I have no way to control the heat expansion.
Also, I have to roll the rear fenders. The 205/50 tires rub.
Also, I need to install a harness and seat. The seat is just sitting on the floor for now. It made my test drive quite fun.
I will post updates at the event. I will update with a full build after the event.
rick 918-S
Sep 25 2011, 06:43 PM
I'm excited for you. Good luck! Be sure to nut and bolt that thing before you try to shake it down for the first time. I would hate to see you get a DNF for a silly missed bolt or a hose or a wire rubbing through some place.
jpnovak
Sep 25 2011, 06:58 PM
Agreed. A nut and bolt effort is on the list. Everything from motor mounts to CV axles to simple things like light and seat mounting bolts.
I wish I had more time to sort the car.
Either way, I will have a blast and have loved building this car.
once I finish the event I have to determine if I keep it for a DE car or move on to something else. I can say that my wife would like to see one of the cars go...
rick 918-S
Sep 25 2011, 07:45 PM
If I was in Texas


I would be over to help you. I'll be watching
and cheering you on!
jpnovak
Sep 26 2011, 07:35 AM
Ahh Texas where at the end of September it was 105 yesterday.
Hard to keep motivation up when working in the garage sweating all over the car.
jpnovak
Sep 27 2011, 07:32 AM
Despite another heat wave and hectic work schedule I managed to get the paint buffed. 15 minutes a panel spread over many hours can really accomplish a lot.
I am really starting to love the copper metallic color.
Also, I fixed the shifter by reversing the travel. Works much better now. I can even select all 6 gears. Yes that includes reverse.
Bad news, my home made rear differential cover plate leaks at the bottom. I guess I need to pull it and reseal.
Brett W
Sep 27 2011, 07:33 PM
What did you do about the axles? Did you have the splines re-cut to allow the use of the Suby inner joint? Looks like you could have a potential winner on your hands. If you keep the car for next year you can sort it out and make it better.
jpnovak
Sep 27 2011, 08:18 PM
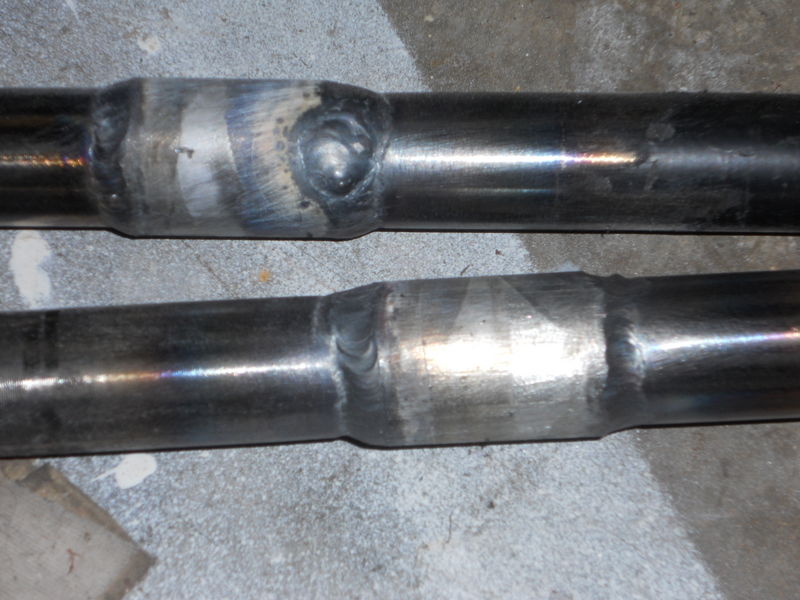
The Subaru and 914 axles are the same diameter (+/- 0.5mm). I cut and welded the center of the axles and then welded a sleeve over the weld joint. The result is a hybrid subaru inner / 914 outer.
I suspect these should be strong enough for the event. Custom axles or the custom flanges might be a better option. However traction on the tires will be my weak point during the event.
jigged
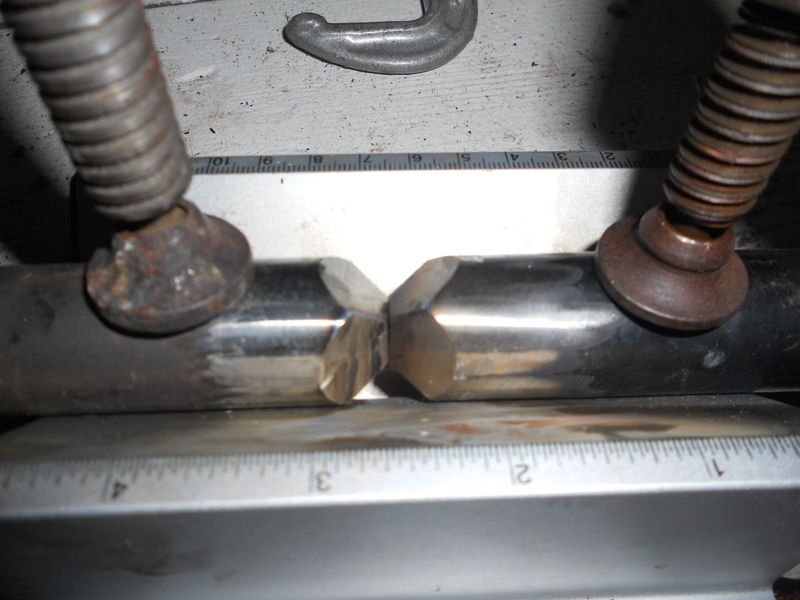
welded and finished
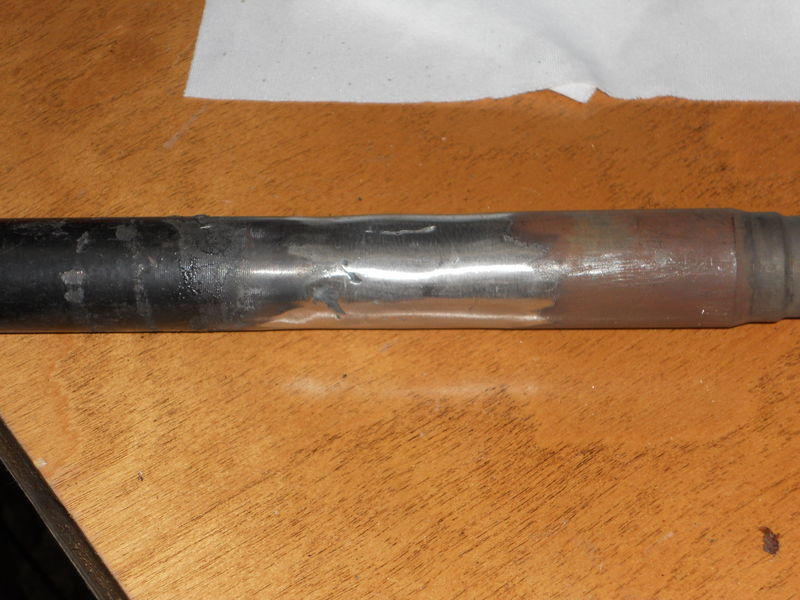
sleeved and welded
Brett W
Sep 28 2011, 06:41 AM
You might paint a white line the length of your axle shafts to make sure they don't twist. It would give you a pretty quick safety inspection through the weekend. Good luck.
jpnovak
Sep 28 2011, 07:00 AM
Great suggestion.
I was going to have them heat treated but could not find a vendor locally that could turn them around fast enough. I would love to have them rehardened.
if they survive the weekend I will harden them after the event.
Eric_Shea
Sep 28 2011, 08:23 AM

of the buffed out, decaled car!
jpnovak
Sep 28 2011, 11:30 AM
I have been working late for the day job and then later for the car job. I will see if I can get pictures before dark tonight.
I have still not completed the graphics layout. I put the stripes on in tape last night but did not like the way they looked. Not sure what to do next.
jpnovak
Sep 29 2011, 11:00 AM
Manged to get the tail lights installed and working last night. Also finished wiring up the tach. Did not have a chance to test it since there is still no muffler installed.
I am getting ready for a tune session on Saturday morning.
I think I have almost decided to forgo the graphics. I am sold on the simplicity of it all.
jpnovak
Sep 29 2011, 09:54 PM
All buffed up and somewhere to go...

Yes, that is my garage door in the reflection. Its up and you are basically looking at the ceiling.
I would say that I brought the paint back into the land of the living. The black rectangle is the vent opening for the intercooler. Now some might say that it is placed in a position to take advantage of air flow separation coming off the rear roofline. Some might be correct.
jpnovak
Sep 29 2011, 09:56 PM
Tonight felt like there was nothing accomplished. However I did manage to paint the front trunk and rear decklid ducts and install the rockers.
I worked on the tach but I still do not get the signal output I need.
jpnovak
Oct 1 2011, 01:59 PM
bfrymire
Oct 1 2011, 05:08 PM
QUOTE(jpnovak @ Oct 1 2011, 12:59 PM)
Hum. Is it me, or does it seem to be riding a little high in the back?
-- brett
rick 918-S
Oct 1 2011, 05:23 PM
Looks good. Neaten up that wiring. No DNF's for wire fires or connections coming unplugged.
jpnovak
Oct 1 2011, 06:26 PM
I am getting ready to put the car on scales and setup the suspension. As far as I can tell, the rear is not adjustable unless I cut the spring or reweld the position of the spring perch. Please enlighten me if there is another way.
There is not enough room in the build budget to setup suspension properly. That will be the next step after the challenge is over.
Rick, the ECU has been in/out quite a bit as I try to build a circuit to make the tach work with the output signal. I have been probing pins trying to find the right signal on the oscilloscope. It still doe snot work.
the wiring will be cleaned up before the event. I have to retape a few sections of the harness after closing up the ECU.
I am also fighting isssues with the cam signal dropping out. This causes the ECU to loose its place and it drops out all signals. Can you say misfire? Its bad at 4K rpm and I have to get this fixed.
shuie
Oct 1 2011, 09:15 PM
Cool man. Thanks for sharing! Good to see you here
This is a "lo-fi" version of our main content. To view the full version with more information, formatting and images, please
click here.