|
|
|
Porsche, and the Porsche crest are registered trademarks of Dr. Ing. h.c. F. Porsche AG.
This site is not affiliated with Porsche in any way. Its only purpose is to provide an online forum for car enthusiasts. All other trademarks are property of their respective owners. |
|
|

  |

| 76-914 |
 Jan 7 2013, 09:39 AM Jan 7 2013, 09:39 AM
Post
#1
|
|
Repeat Offender & Resident Subaru Antagonist  Group: Members Posts: 13,502 Joined: 23-January 09 From: Temecula, CA Member No.: 9,964 Region Association: Southern California |
This is what I know about installing the Engman stiffner kit.... ZERO. OK, I lied. I know one thing; when done wrong you end up with body shrinkage. That and I've read that the car should be supported on all 4 jack points when the work is done. That's all I know so I ask Scotty (or someone with experience in doing this correctly), are any of those going on soon? I'm looking for some tips & pic's of install. Specifically shrinkage. And before Dave chimes in, I'm talking about the shrinkage that occurs as a result of welding not cold water. (IMG:style_emoticons/default/dry.gif) Is it avoidable if I don't get the piece too hot to the touch? Is there a sequence (as in torquing a head) that the spot welds are done? What are the preferred methods of bracing and where, e.g. body and/or door bracing. Best to do on while jigged or rolling? TIA,.
|
   |

 
|
| Chris H. |
Jan 7 2013, 09:48 AM
Post
#2
|
|
Senior Member Group: Members Posts: 4,030 Joined: 2-January 03 From: Chicago 'burbs Member No.: 73 Region Association: Upper MidWest |
(IMG:style_emoticons/default/agree.gif)
And it would be great to know if waiting between weld sequences is helpful. Does it help if you do a section, wait a day or two, do another...? (IMG:style_emoticons/default/welder.gif) |
|
|
|
| mrbubblehead |
Jan 7 2013, 12:27 PM
Post
#3
|
|
Twodollardoug Group: Members Posts: 1,155 Joined: 17-December 10 From: calimesa ca. Member No.: 12,492 Region Association: Southern California |
i did mine with all 4 wheels on the ground. i used tek screws to hold the kit in place. i took my time welding. i did 3 or 4 welds on say the drivers side. the welds were far apart. then three or four on passenger side far apart. then the rear. take your time and move slowly.
|
|
|
|
| Elliot Cannon |
Jan 7 2013, 12:44 PM
Post
#4
|
|
914 Guru Group: Retired Members Posts: 8,487 Joined: 29-December 06 From: Paso Robles Ca. (Central coast) Member No.: 7,407 Region Association: None |
I did mine with the car on the ground. I removed both doors and used 1 inch square tubing to make a support that bolted to the top door hinge and the striker plate to prevent the door spacing from changing. It might help to have compressed air handy to cool the welds as you go along. I also drilled all the holes to 5/8ths inch to make a better-stronger weld (see below). After reviewing my pics, I see that I actually had the car on my lift which means it was sitting on the donuts.
Attached image(s) 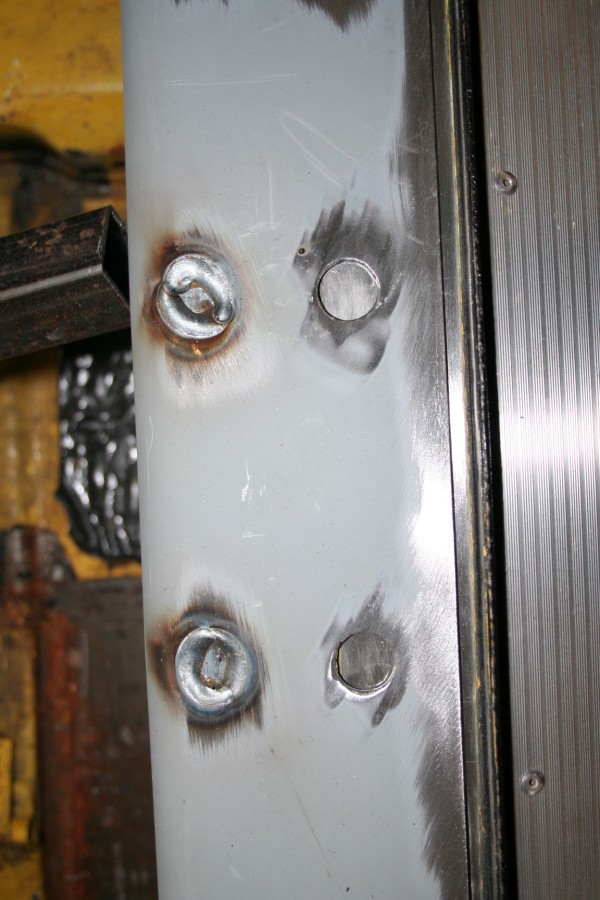 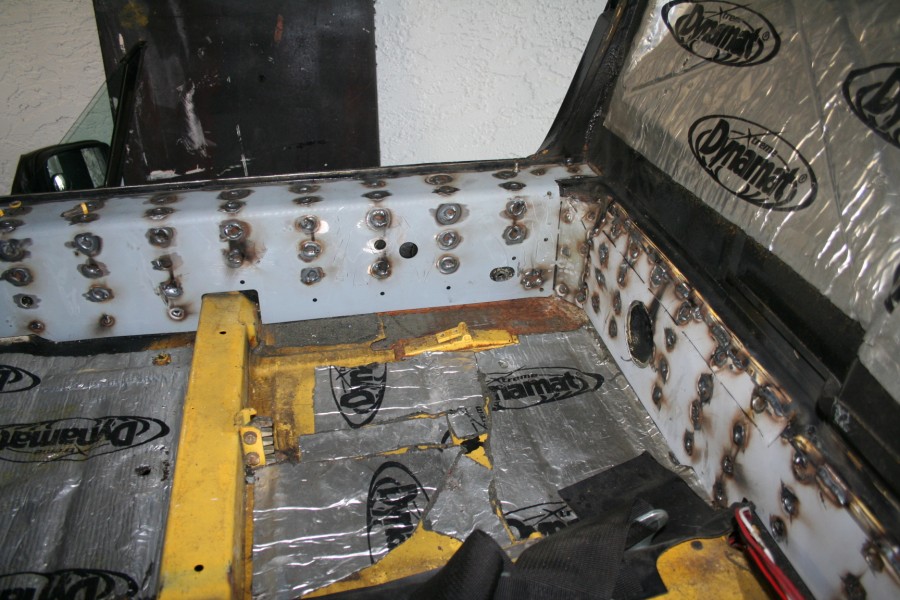
|
|
|
|
| scotty b |
Jan 7 2013, 01:30 PM
Post
#5
|
|
rust free you say ? Group: Members Posts: 16,375 Joined: 7-January 05 From: richmond, Va. Member No.: 3,419 Region Association: None |
I'll be doing 2 in the not to distant future ( hopefully by the end of the month
) and can do a write up at that time, but basically I recommend bracing the floor of the car not the suspension. By bracing the suspension you are putting all of the weight on the front and rear and nothing in the center, so if there is any warping, you have ensured that the roof will close in. By using jackstands and some 4x4 running the length of the longs, you are stabilizing the center of the car. Yes there is a chance of the car " opening " up from the suspensions weight hanging, but IMHO this is far less likely to be an issue as the other way around. Either leave the doors on while you weld the vertical walls, or brace the jambs as I and others have shown when doing hell hole repairs probably the biggest thing is to TAKE YOUR TIME, and space the welds out. Do not start in one spot and work your way around. Instead do 2-3 welds in the center of one panel. Move to the other side of the car and do 2-3 welds, then move to the back panel and do 2-3 weld. GO back to the first and do 2-3 at the opposite end. This keeps the heat in any given area to a minimum. Use .023 wire. This requires less heat and will give you every bit as solid of a weld as a heavier wire will. Preferably leave the doors on and the brace in such a way that you can shut the doors periodically to check the gpas. This way you will see any chnage before it is too late. I also like to start in the center of the panel so I can make any adjustments in the fit as I work |
|
|
|
| Trekkor |
Jan 7 2013, 01:35 PM
Post
#6
|
|
I do things... Group: Members Posts: 7,809 Joined: 2-December 03 From: Napa, Ca Member No.: 1,413 Region Association: Northern California |
http://www.914world.com/bbs2/index.php?showtopic=14508
Had all four wheels on the ground. No shrinkage or bracing. KT |
|
|
|
| 76-914 |
Jan 7 2013, 05:11 PM
Post
#7
|
|
Repeat Offender & Resident Subaru Antagonist Group: Members Posts: 13,502 Joined: 23-January 09 From: Temecula, CA Member No.: 9,964 Region Association: Southern California |
[quote name='scotty b' date='Jan 7 2013, 11:30 AM' post='1798206']
"I'll be doing 2 in the not to distant future ( hopefully by the end of the month and can do a write up at that time " That would be stellar Scotty. I went thru 6 pages of your topics and found where this was touched upon but didn't find any details: I have prep work to keep me busy until you post up. "Either leave the doors on while you weld the vertical walls, or brace the jambs as I and others have shown when doing hell hole repairs" Bracing has got to be the correct answer. (IMG:style_emoticons/default/lol-2.gif) probably the biggest thing is to TAKE YOUR TIME, and space the welds out. Do not start in one spot and work your way around. Instead do 2-3 welds in the center of one panel. Move to the other side of the car and do 2-3 welds, then move to the back panel and do 2-3 weld. GO back to the first and do 2-3 at the opposite end. This keeps the heat in any given area to a minimum. So a little like torque sequencing a head, no? Use .023 wire. This requires less heat and will give you every bit as solid of a weld as a heavier wire will. Check Preferably leave the doors on and the brace in such a way that you can shut the doors periodically to check the gaps. This way you will see any change before it is too late. This in itself is worth waiting for your writeup. Trying to think what that brace would look like. (IMG:style_emoticons/default/idea.gif) I also like to start in the center of the panel so I can make any adjustments in the fit as I work OK, this part needs splaining to me. By adjustments in the fit do you mean how well the 2 pieces mate or whats happening in the shrinkage dep't? [quote name='Trekkor' date='Jan 7 2013, 11:35 AM' post='1798207'] http://www.914world.com/bbs2/index.php?showtopic=14508 Had all four wheels on the ground. No shrinkage or bracing. Now you see; yet another successful approach though contradicting common sense. I see your in CA also Trekk. Could it be our chassis are beefier because we have less rust? KT Another thing that I would like to see addressed is what to do if you begin to notice small warp-age occurring. When and how to correct, if you will. Or am I totally overboard on this and have no worries if I follow ScottyB's tutelage. |
|
|
|
| balljoint |
Jan 7 2013, 05:35 PM
Post
#8
|
|
914 Wizard Group: Members Posts: 10,000 Joined: 6-April 04 Member No.: 1,897 Region Association: None |
I will also be doing this on my car this winter. I will do a detailed thread on it as well.
|
|
|
|
| scotty b |
Jan 7 2013, 05:56 PM
Post
#9
|
|
rust free you say ? Group: Members Posts: 16,375 Joined: 7-January 05 From: richmond, Va. Member No.: 3,419 Region Association: None |
QUOTE(balljoint @ Jan 7 2013, 03:35 PM)  I will also be doing this on my car this winter. I will do a detailed thread on it as well. oh lord........ |
|
|
|
| Elliot Cannon |
Jan 7 2013, 07:06 PM
Post
#10
|
|
914 Guru Group: Retired Members Posts: 8,487 Joined: 29-December 06 From: Paso Robles Ca. (Central coast) Member No.: 7,407 Region Association: None |
[quote name='76-914' date='Jan 7 2013, 03:11 PM' post='1798330']
[quote name='scotty b' date='Jan 7 2013, 11:30 AM' post='1798206'] "I'll be doing 2 in the not to distant future ( hopefully by the end of the month and can do a write up at that time " That would be stellar Scotty. I went thru 6 pages of your topics and found where this was touched upon but didn't find any details: I have prep work to keep me busy until you post up. "Either leave the doors on while you weld the vertical walls, or brace the jambs as I and others have shown when doing hell hole repairs" Bracing has got to be the correct answer. (IMG:style_emoticons/default/lol-2.gif) probably the biggest thing is to TAKE YOUR TIME, and space the welds out. Do not start in one spot and work your way around. Instead do 2-3 welds in the center of one panel. Move to the other side of the car and do 2-3 welds, then move to the back panel and do 2-3 weld. GO back to the first and do 2-3 at the opposite end. This keeps the heat in any given area to a minimum. So a little like torque sequencing a head, no? Use .023 wire. This requires less heat and will give you every bit as solid of a weld as a heavier wire will. Check Preferably leave the doors on and the brace in such a way that you can shut the doors periodically to check the gaps. This way you will see any change before it is too late. This in itself is worth waiting for your writeup. Trying to think what that brace would look like. (IMG:style_emoticons/default/idea.gif) I also like to start in the center of the panel so I can make any adjustments in the fit as I work OK, this part needs splaining to me. By adjustments in the fit do you mean how well the 2 pieces mate or whats happening in the shrinkage dep't? [quote name='Trekkor' date='Jan 7 2013, 11:35 AM' post='1798207'] http://www.914world.com/bbs2/index.php?showtopic=14508 Had all four wheels on the ground. No shrinkage or bracing. Now you see; yet another successful approach though contradicting common sense. I see your in CA also Trekk. Could it be our chassis are beefier because we have less rust? KT Another thing that I would like to see addressed is what to do if you begin to notice small warp-age occurring. When and how to correct, if you will. Or am I totally overboard on this and have no worries if I follow ScottyB's tutelage. [/quote] By adjustments to the fit, I think he means fitting the stiffener kit tight to the frame so it can be welded properly. I had to wedge a piece of steel tubing against the opposite long. to get the stiffener kit steel to lay flush against the long. A few times I had to resort to a BFH. (IMG:style_emoticons/default/smash.gif) It took me awhile to learn that fit-up is one of the most important parts of getting a decent weld. And I'm a slow learner. (IMG:style_emoticons/default/biggrin.gif) I'm pretty sure Scotty might know what he's doing. Following his advice and ignoring mine, might also be good advice. |
|
|
|
| scotty b |
Jan 7 2013, 08:46 PM
Post
#11
|
|
rust free you say ? Group: Members Posts: 16,375 Joined: 7-January 05 From: richmond, Va. Member No.: 3,419 Region Association: None |
(IMG:style_emoticons/default/agree.gif) You'll need to get the pieces tight against the long to get a good fit and weld. And like Elliot siad, keep a BFH and some lengths of 2x4 nearby (IMG:style_emoticons/default/welder.gif)
|
|
|
|
| Cairo94507 |
Jan 7 2013, 10:11 PM
Post
#12
|
|
Michael Group: Members Posts: 9,759 Joined: 1-November 08 From: Auburn, CA Member No.: 9,712 Region Association: Northern California |
I would be tickled if my car were to be the one Scotty did the install on and photographed for all to see. (IMG:style_emoticons/default/smile.gif) Just not sure at what point the Engman kit goes on. My chassis should be getting blasted by the end of the month. And....oh yeah..... I still need to find the kit for my car!
|
|
|
|
| jimkelly |
Jan 8 2013, 06:02 AM
Post
#13
|
|
Delaware USA Group: Members Posts: 4,969 Joined: 5-August 04 From: Delaware, USA Member No.: 2,460 Region Association: MidAtlantic Region |
here is the kit that is currently available.
pm maddog - he'll reply. http://www.914world.com/bbs2/index.php?showtopic=104453 jim (IMG:http://www.914world.com/bbs2/uploads/post-710-1267807498.jpg) |
|
|
|
| PRS914-6 |
Jan 8 2013, 09:04 PM
Post
#14
|
|
Excellence Magazine Project 914 3.6 Group: Retired Members Posts: 1,278 Joined: 20-May 06 From: Central California Member No.: 6,031 Region Association: None |
See my comments in THIS THREAD
As stated there, the kit fits a little "too good" and some hole enlarging and grinding is necessary to get the kit to fit without gaps. "Close enough" is not good enough, it needs to fit perfect and sealer, bumps, slag, paint, etc need to be removed so that when everything is gently clamped up it fits tight with no gaps and without force. If it has to be forced, keep at it..... Large C clamps work great and wedging a 2x4 across helps hold things in place. My doors fit the same after welding the kit in. Good luck! 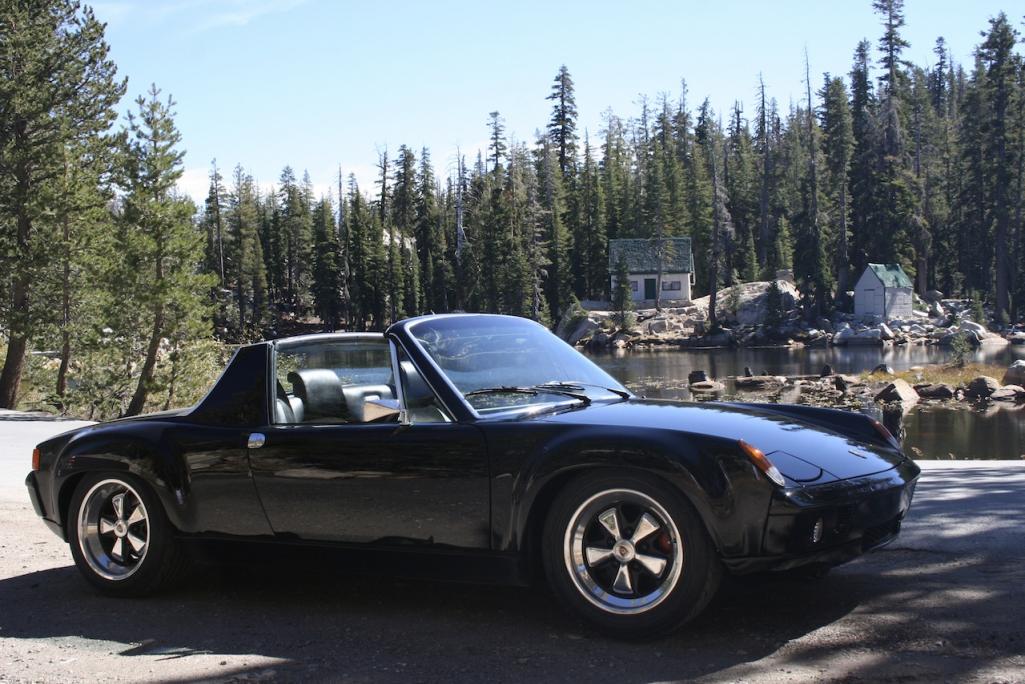 |
|
|
|
| 76-914 |
Jan 8 2013, 10:24 PM
Post
#15
|
|
Repeat Offender & Resident Subaru Antagonist Group: Members Posts: 13,502 Joined: 23-January 09 From: Temecula, CA Member No.: 9,964 Region Association: Southern California |
All GREAT info guys. I missed that build PRS and did a search using Engman stiffner kit. Key word searches are a stumbling block for me. I received my kit today, pulled the drive train Saturday (90 hr engine is going to it's new owner this Saturday), my wife and her sister are going on vacation for 15 days. (IMG:style_emoticons/default/cheer.gif) (IMG:style_emoticons/default/cheer.gif) I feel a Porsche porn attack coming. Garage to myself, no interruptions when working, I won't shave on Saturday, farting will be at will, and the Porsche will be my mistress. Back to reality.....I can see the prep that needs to happen so I need to get busy stripping and cleaning. (IMG:style_emoticons/default/welder.gif) (IMG:style_emoticons/default/smash.gif) (IMG:style_emoticons/default/sawzall-smiley.gif)
|
|
|
|
| silver74insocal |
Jan 8 2013, 10:35 PM
Post
#16
|
|
Senior Member Group: Members Posts: 736 Joined: 26-November 09 From: rancho cucamonga Member No.: 11,073 Region Association: Southern California |
(IMG:style_emoticons/default/cheer.gif) hopefully i will be seeing the debauchery in person this weekend...
|
|
|
|
| hotlanta914 |
Jan 9 2013, 10:49 AM
Post
#17
|
|
Newbie Group: Members Posts: 21 Joined: 15-July 06 From: Atlanta, GA Member No.: 6,438 |
jack stands on donuts, alternated welding areas, tack welded first then went back to fill the holes, grinded and seam sealed with Wurth
Attached thumbnail(s) 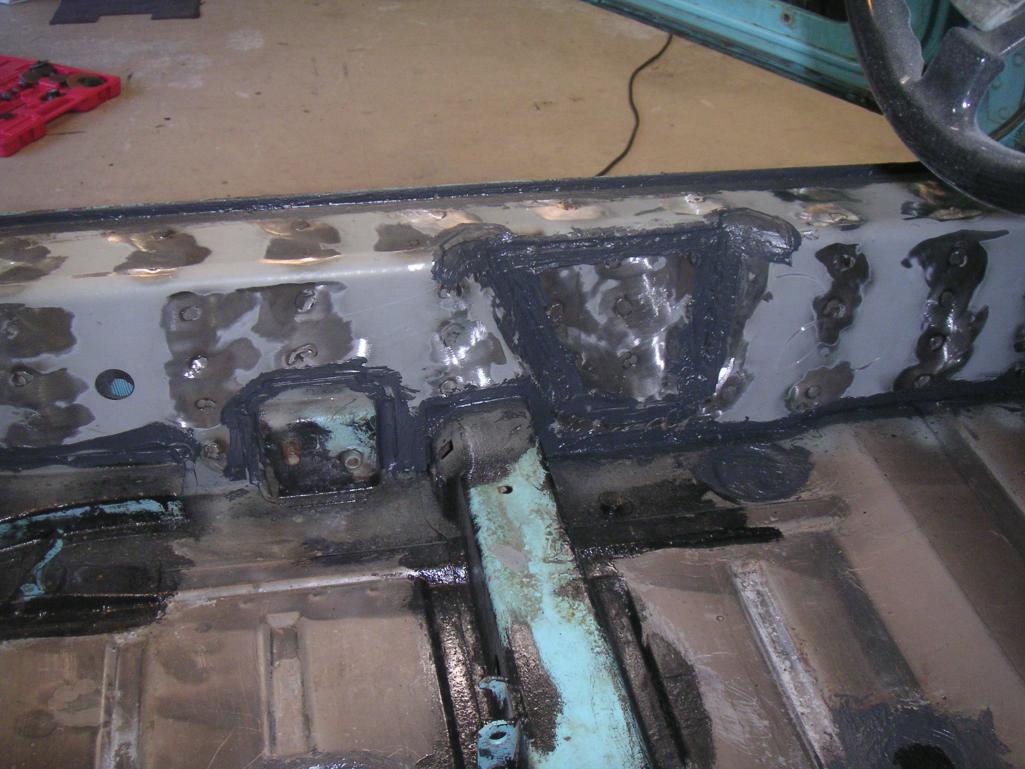
|
|
|
|
| speed metal army |
Feb 15 2013, 10:26 PM
Post
#18
|
|
Waiting for the rain to stop... Group: Members Posts: 1,068 Joined: 4-September 10 From: PNW Member No.: 12,137 Region Association: Canada |
Nice!Its crazy.I had the distinct feeling I was ruining my car while welding all this stuff in.It seems so.....Permanent!lol!
Despite my paranoia,it really stiffened up the chassis,zero flex,better handling. Worth it! (IMG:style_emoticons/default/smile.gif) Edit!:And zero issues.See below for correct procedure!;) |
|
|
|
| JoeSharp |
Feb 15 2013, 11:22 PM
Post
#19
|
|
In Irvine, Ca. May 15-18 Group: Members Posts: 3,947 Joined: 9-July 03 From: DeLand, Florida Member No.: 898 Region Association: South East States |
Kent: I did this to Carerror and the thread is in NARP. I shimed the car up level and did 3 spots at a time and moved to another spot checking the longs all the time. Do not seam weld anything. Just keep moving your location across the car. Like catycorner. Weld some here then weld some there. I have the door brace if you need it.
|
|
|
|
| rfuerst911sc |
Feb 16 2013, 06:15 AM
Post
#20
|
|
Advanced Member Group: Members Posts: 2,158 Joined: 4-May 06 From: Dahlonega , Georgia Member No.: 5,980 Region Association: South East States |
Did the Engman kit on my 75 GT clone it was fairly easy. As Scotty and others have suggested you need to screw/clamp the pieces as tight to the metal as you can. I used .023 wire with gas when I did mine. Car was on jackstands ( imagine that ) with the doors on. I started in the middle of each piece and worked my way out. A BFH helps " massage " the metal when needed. A few welds on drivers side then go to passenger side then on to the back panel. Stop every once in a while for an adult beverage and enjoy the work you are doing. Take your time and open/close the doors every once in a while to make sure things have not moved. My doors open/close just fine and the gaps are even/straight. In my opinion it's more of a pain in the ass to grind the welds after you are done vs. the actual welding. Also one thing I did is my existing panels had been primed and painted. I placed the Engman panels in place and used a pencil to mark each hole onto the paint. I then ground each small circle to bare metal to make sure I was welding on metal rather than paint. This is a great chassis improvement for not too much money or effort. Now get welding (IMG:style_emoticons/default/welder.gif)
|
|
|
|
|
1 User(s) are reading this topic (1 Guests and 0 Anonymous Users)
0 Members:

|
Lo-Fi Version | Time is now: 17th May 2024 - 04:12 PM |
Invision Power Board
v9.1.4 © 2024 IPS, Inc.