Drivers side... yes.
When I said "notice" I meant heat. Some say they can heat up the interior. Car hasn't gotten much over 180 anywhoo so... hard to say.
Full Version: PMB Performance - Mike Krieger Build
Gotcha....
Why not run them like a 911?
Mine (1984) are all under, then up inside the fender to the cooler.
Makes placing the jacks hard, but can be done.
Why not run them like a 911?
Mine (1984) are all under, then up inside the fender to the cooler.
Makes placing the jacks hard, but can be done.
QUOTE(Eric_Shea @ Jan 29 2014, 04:38 PM) 
914ltd kit.
Regarding the lines; not there yet with this build (where I think you're asking about) but once it goes off to the body shop, we'll hit the J-Tube with acetylene and use a large drift to do this:
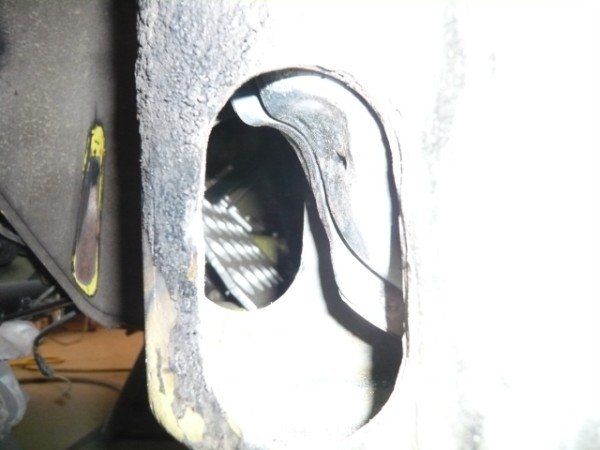
It's a factory mod we gleaned from looking at a GT with heat.
Eric- does this weaken the area? Do you weld in something to compensate?
How do you keep the water out?
No. No. and... Clay 
Looks like we have a little time to make up here. The decision has changed a bit. Now the mission is to get the 3.6 in and get the car running. Phase II will be to paint and clean up the trunks and do some final welding work. For now, the race is on to get the 3.6 in and sort through the wiring harness (which on this car can be a challenge). We're hoping to have the engine in place this week.
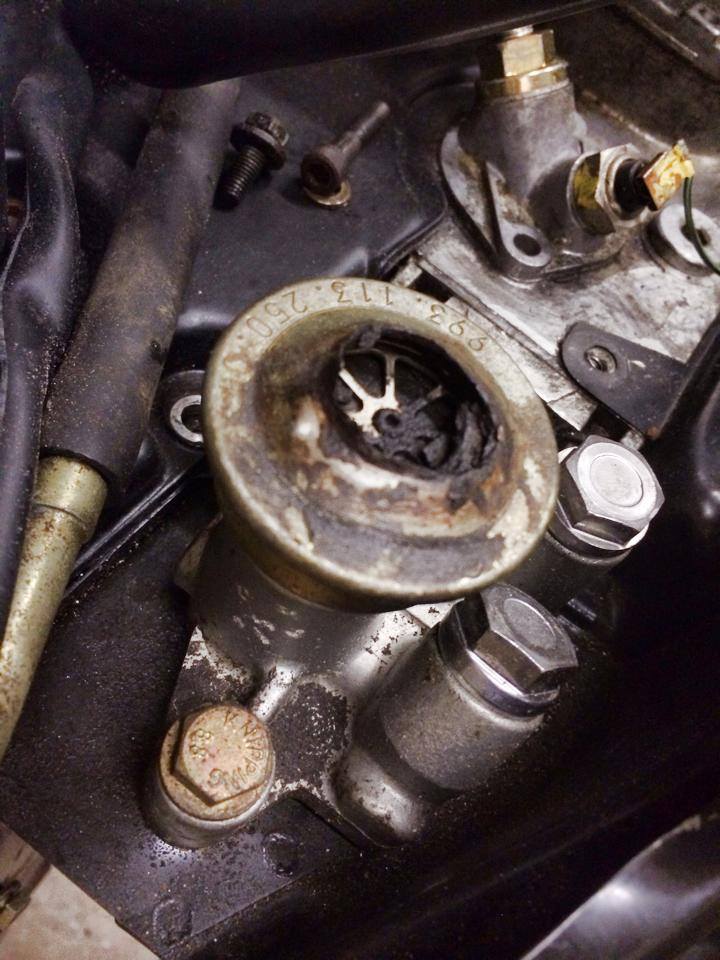
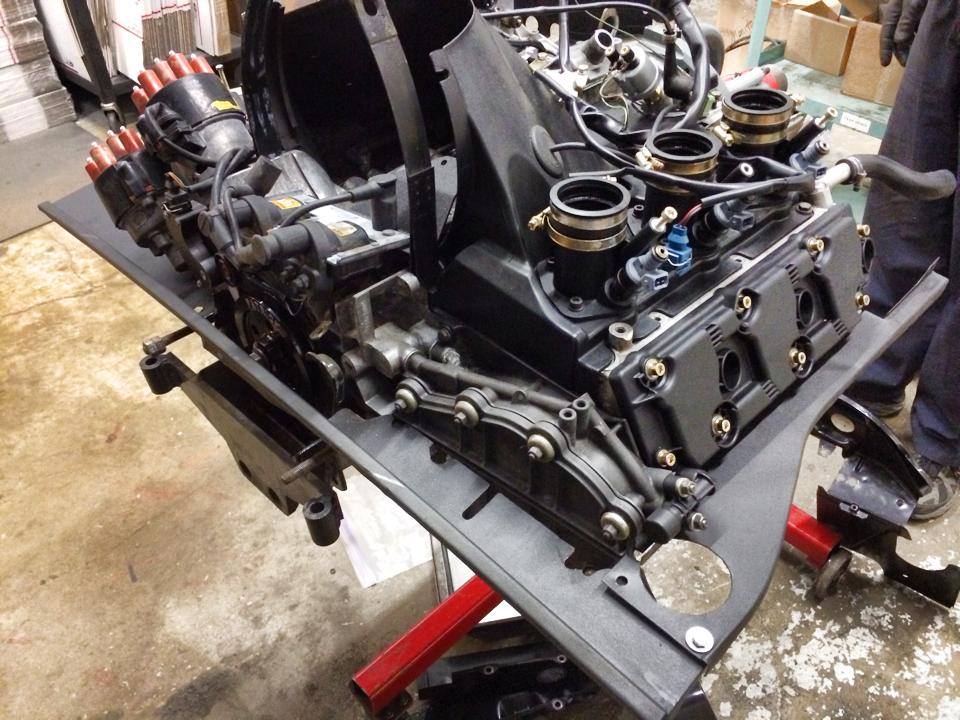
The induction was taken off and the engine basically stripped to a long block. We ran a compression test and repaired a number of valve cover threads. These covers were torqued way beyond spec to (assuming) stop a leak.
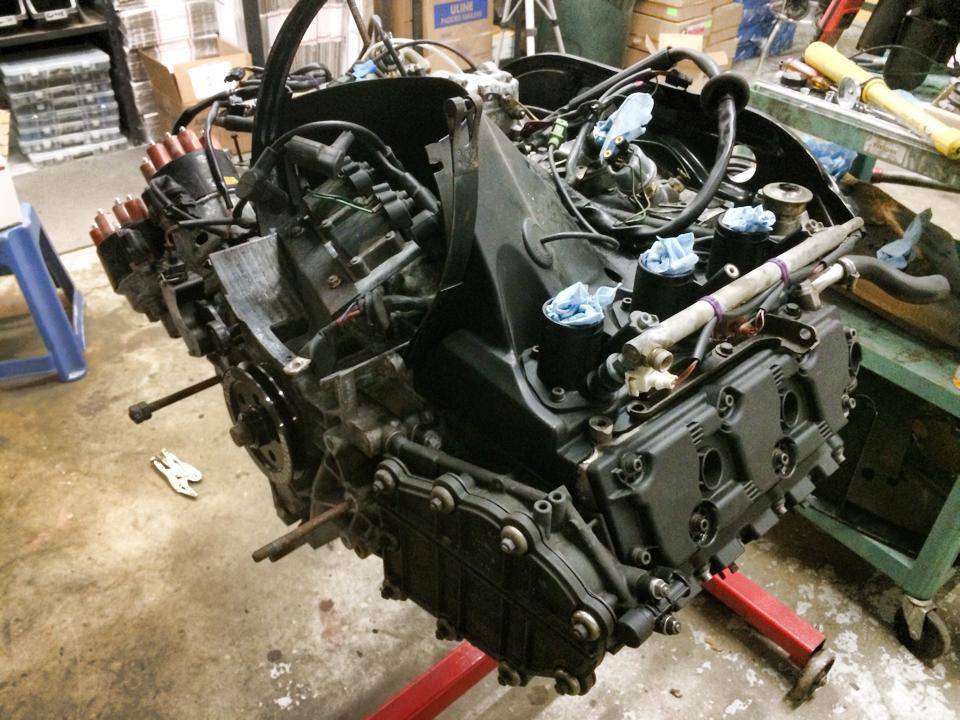
Fuel rails and various bits were replated and cleaned up. The entire engine was detailed giving us a good look at any areas needing attention:
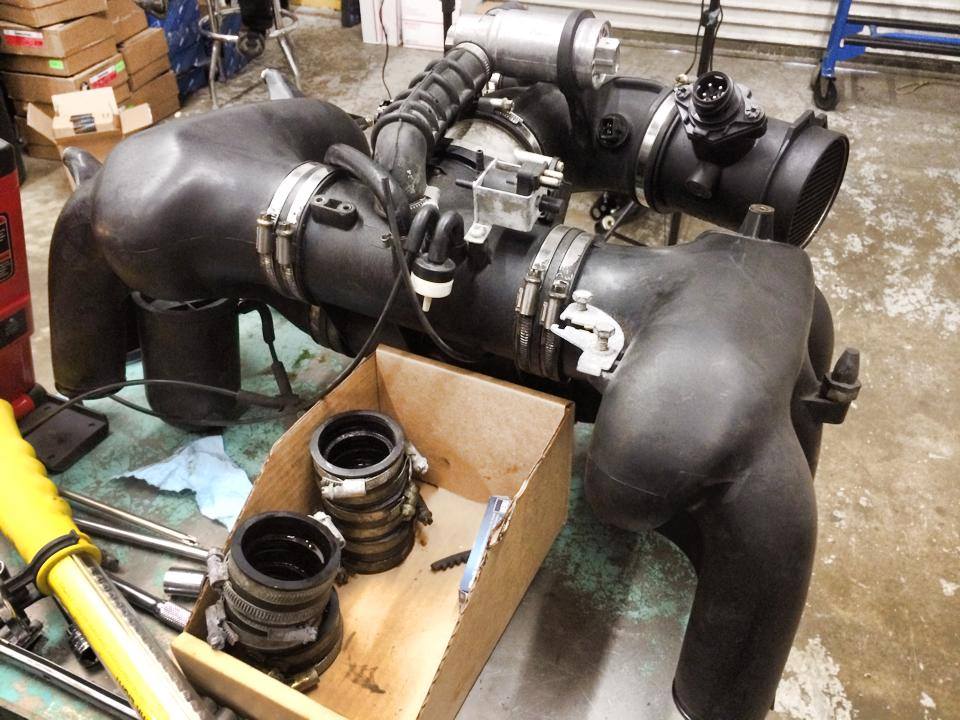
The dual intake tubes had to be cut apart and trimmed so the intake manifold could be turned down to fit in the 914 engine compartment.
Little problem here:
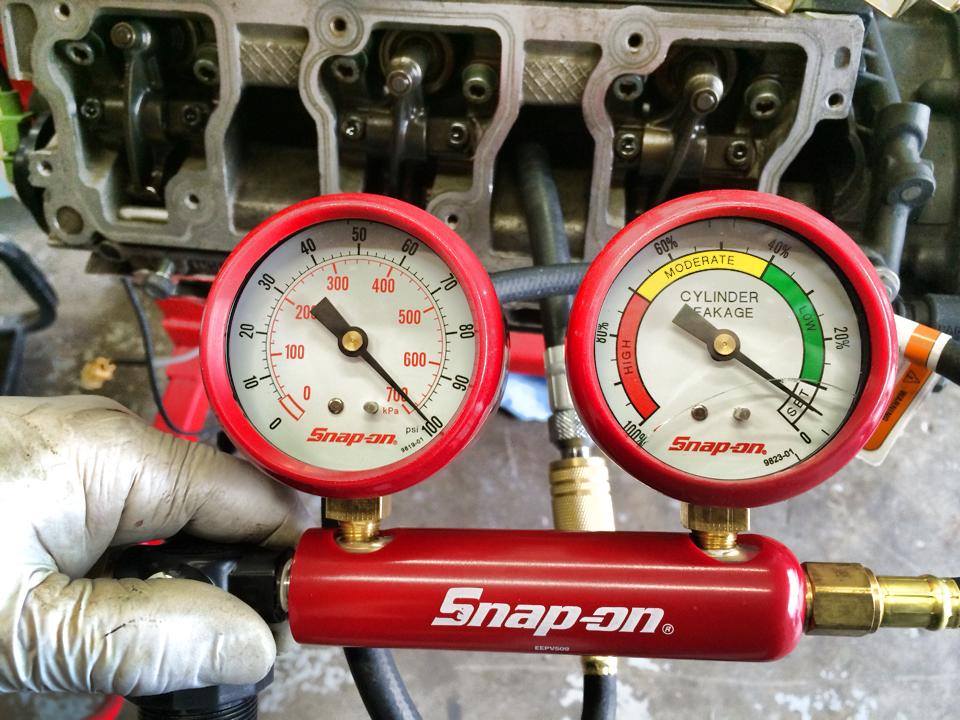
Leakdown was spot on across the board. We had one exhaust valve that gave us an issue but when we tapped on it, it settled in. Just a little carbon buildup.
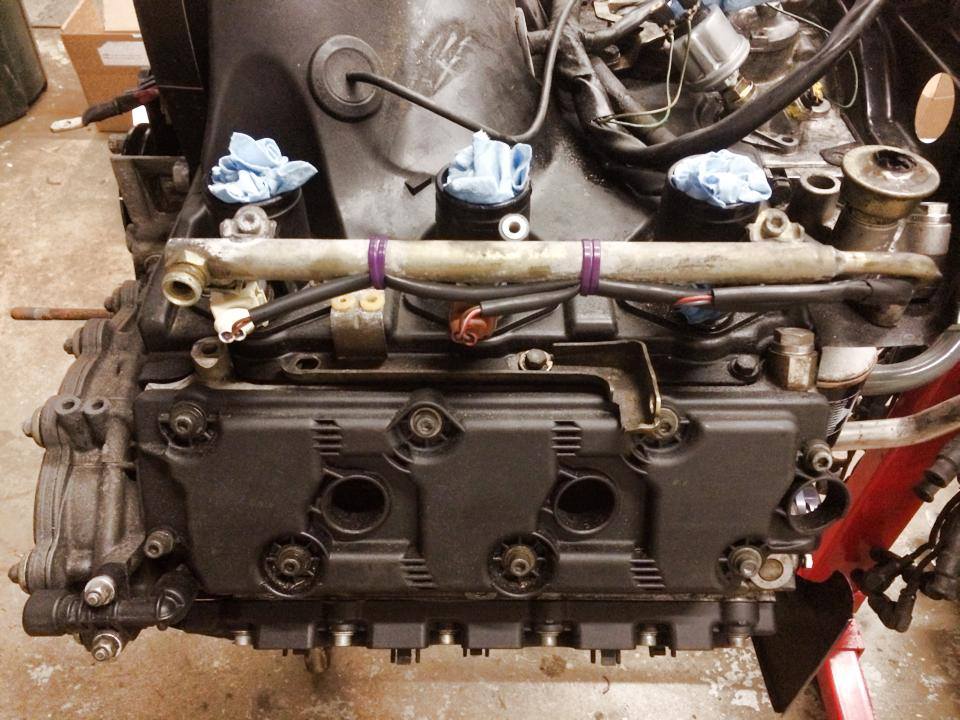
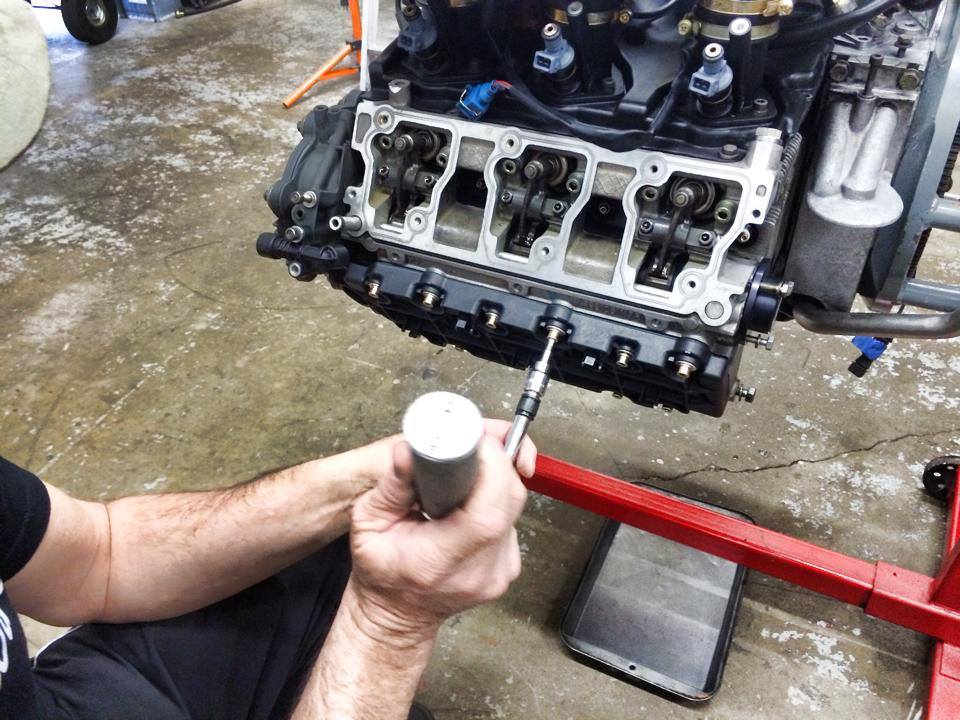
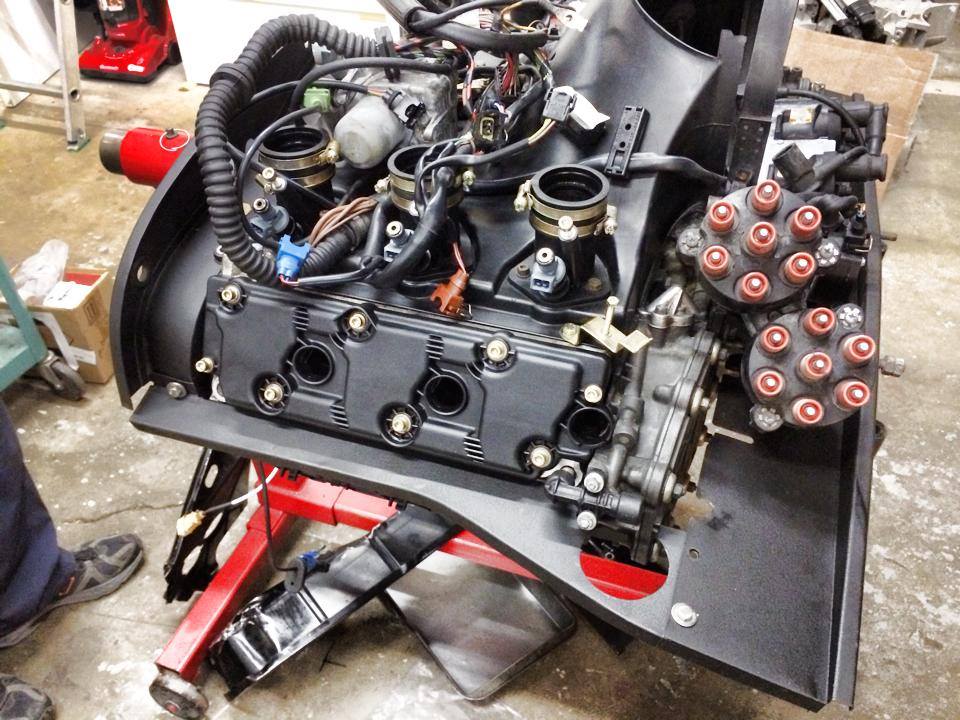
Everything all cleaned up and repaired. Valve covers going back on:
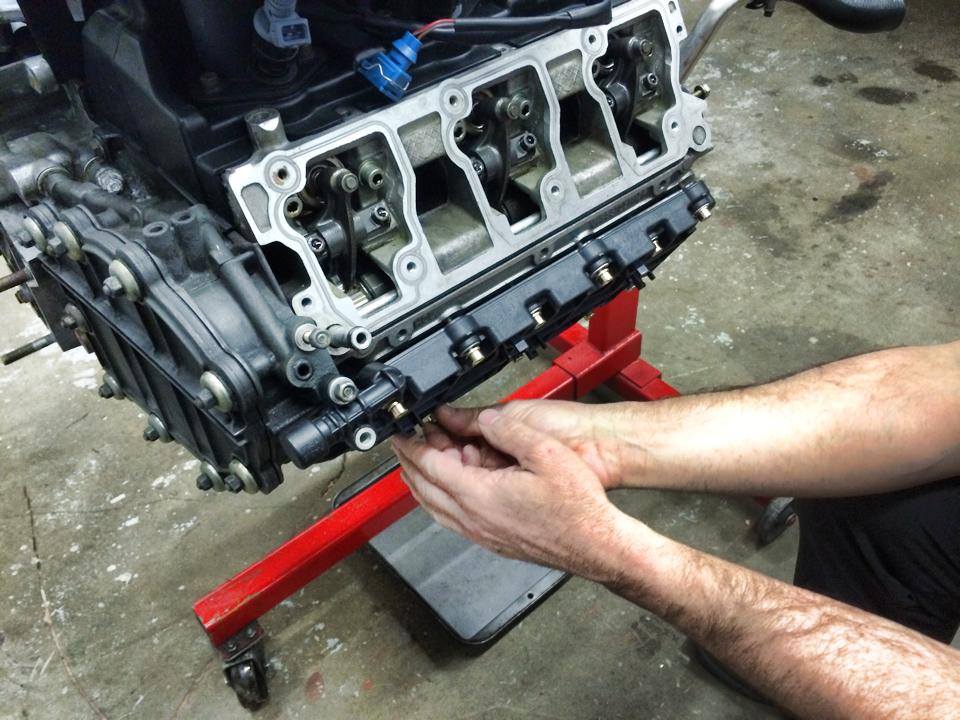
We opted for new lower valve covers as the previous mechanic put some sort of RTV all over these and it would have been hours to get them clean. Hours that would equate to the cost of a new pair of correct covers.
Getting there...
Steve Weiner worked his magic on the twin plug dizzy. It basically needed everything:
The next challenge was getting the sheet metal to fit up. Lots of custom work on the left rear corner:
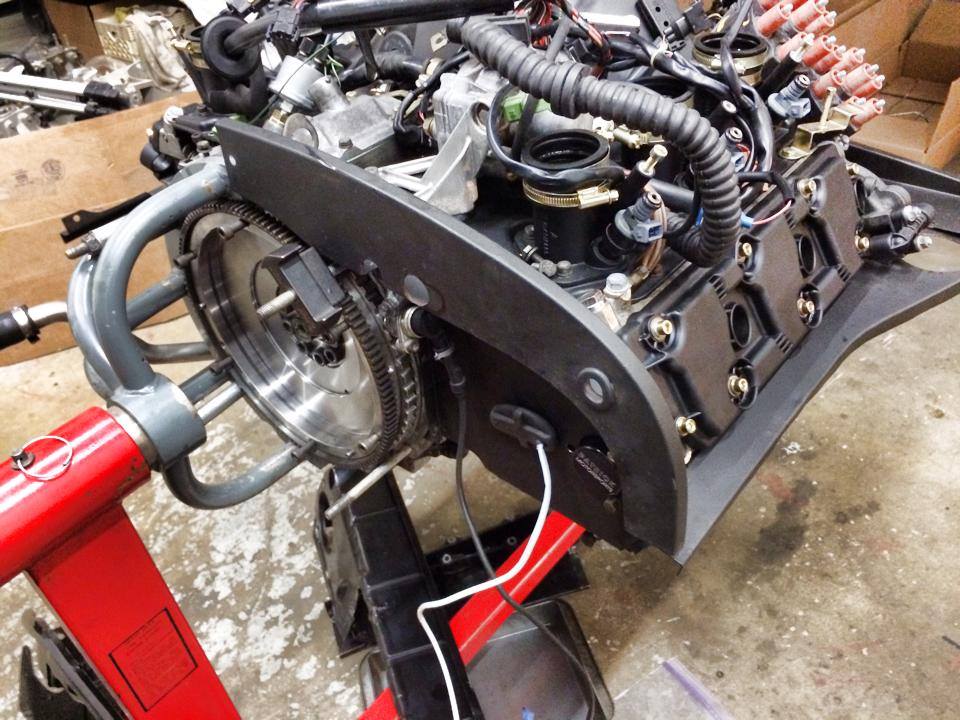
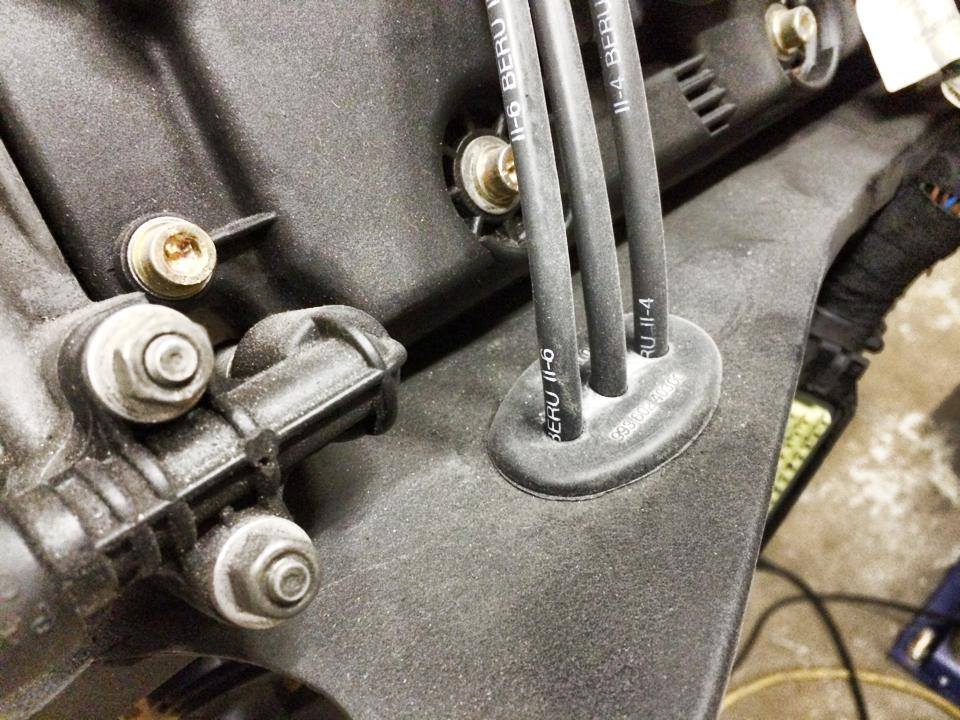
The 914 tin needed to be modified for the lower plug wires:
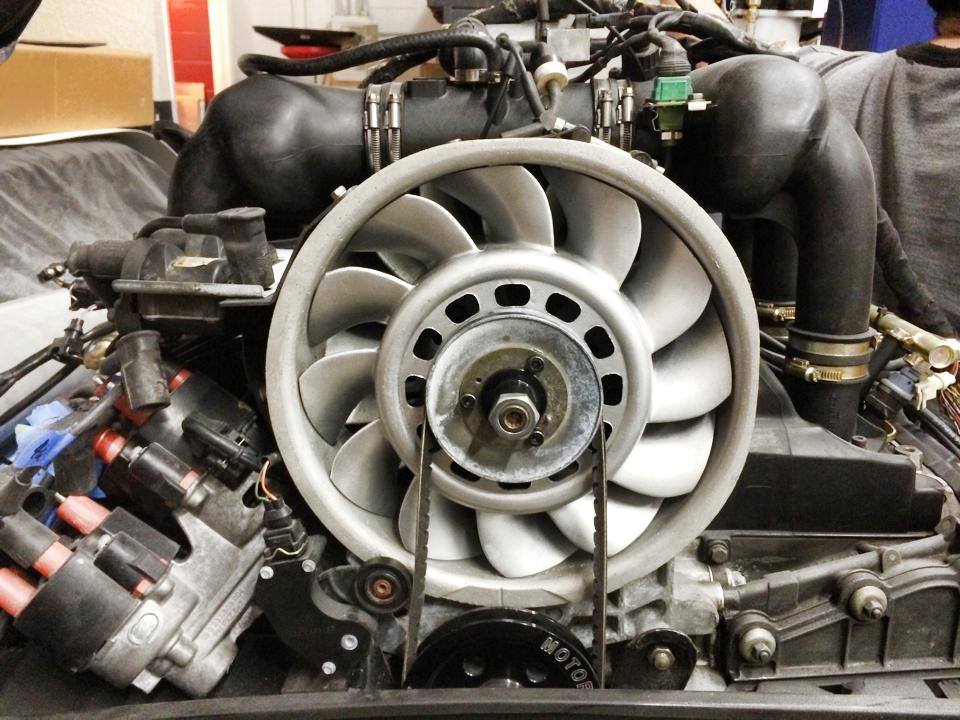
Almost there. This one needed a new fan as corrosion literally split and almost took off a blade:
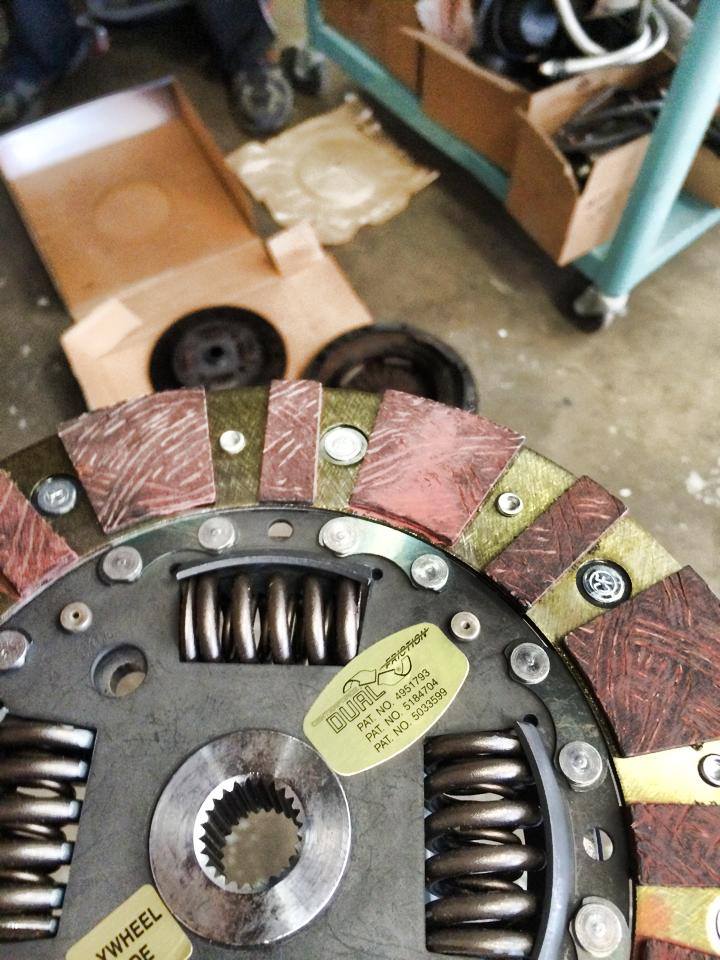
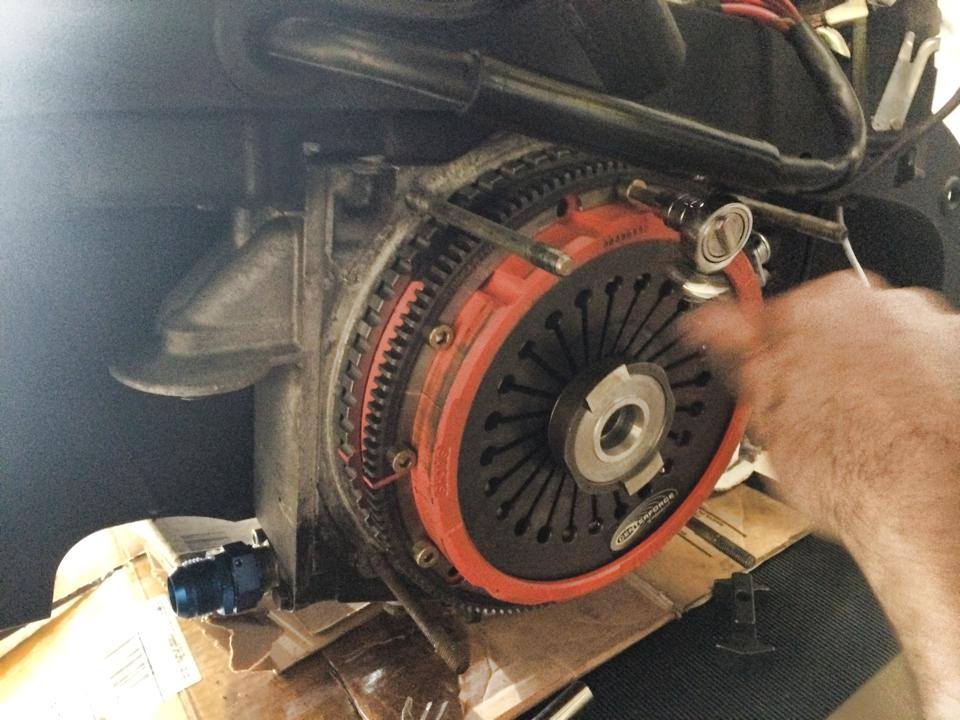
A new Centerforce clutch is now hiding under a new pressure plate and to bearing:
Some other goodies arrived last week as well! Time to wrap up the wiring for these puppies:
Looks like we have a little time to make up here. The decision has changed a bit. Now the mission is to get the 3.6 in and get the car running. Phase II will be to paint and clean up the trunks and do some final welding work. For now, the race is on to get the 3.6 in and sort through the wiring harness (which on this car can be a challenge). We're hoping to have the engine in place this week.
The induction was taken off and the engine basically stripped to a long block. We ran a compression test and repaired a number of valve cover threads. These covers were torqued way beyond spec to (assuming) stop a leak.
Fuel rails and various bits were replated and cleaned up. The entire engine was detailed giving us a good look at any areas needing attention:
The dual intake tubes had to be cut apart and trimmed so the intake manifold could be turned down to fit in the 914 engine compartment.
Little problem here:
Leakdown was spot on across the board. We had one exhaust valve that gave us an issue but when we tapped on it, it settled in. Just a little carbon buildup.
Everything all cleaned up and repaired. Valve covers going back on:
We opted for new lower valve covers as the previous mechanic put some sort of RTV all over these and it would have been hours to get them clean. Hours that would equate to the cost of a new pair of correct covers.
Getting there...
Steve Weiner worked his magic on the twin plug dizzy. It basically needed everything:
The next challenge was getting the sheet metal to fit up. Lots of custom work on the left rear corner:
The 914 tin needed to be modified for the lower plug wires:
Almost there. This one needed a new fan as corrosion literally split and almost took off a blade:
A new Centerforce clutch is now hiding under a new pressure plate and to bearing:
Some other goodies arrived last week as well! Time to wrap up the wiring for these puppies:
Speaking of wiring...
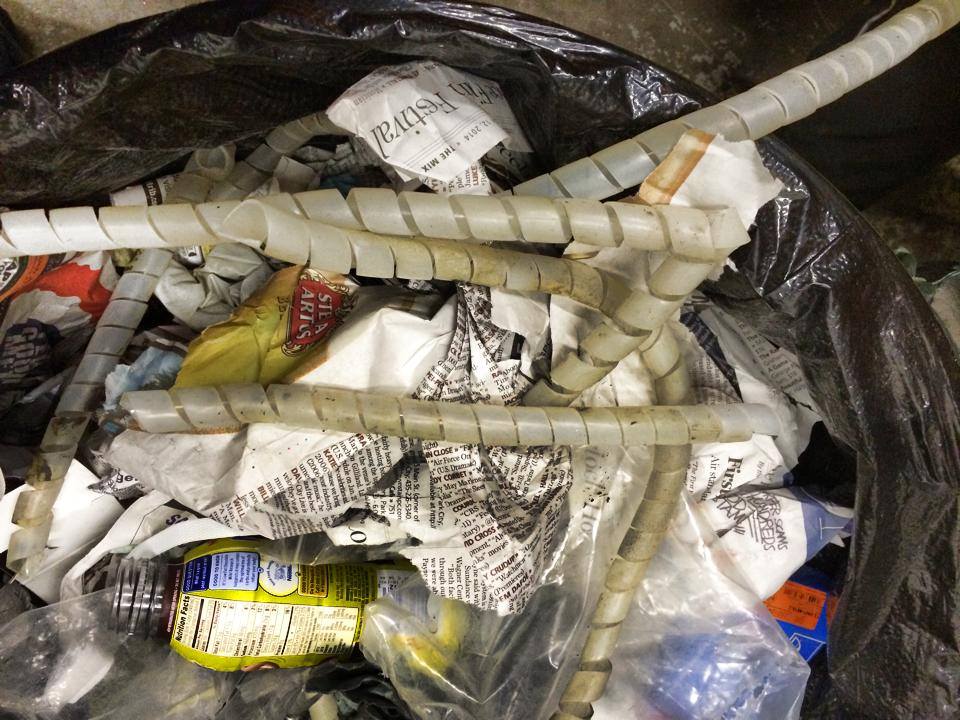
This is one of my pet peeves. This car had the Home Depot corrugated plastic sheathing all over the harness, front to rear. It also had a wrap on the loom as it went through the center tunnel. That usually means they have something to cover-up... no?
Here's one of my favorites... a bread tie! Not just "a" bread tie, a bunch-o-bread-ties. One was even punched through the carpet on the passengers side to hold one of these up. Ironically, it was a hot lead to the fuel pump that went back to the 14 pin so it could attach to a wire in the loom that went back up to the fuse panel. Following this? They ran a fuel pump up front and ran the wire to the back to hook it up to a wire that went to the front again.
The final phase is in the works. The tunnel and the engine compartment will be buttoned up this week. Yuk!
I love throwing this stuff in the trash!
The 3.6 harness will be run inside the factory harness and everything will be re-wrapped in the cloth tape. Stay tuned.
I like your table top. Was considering working one of my SC case for that same thing.
Keep up the great work / update.
Keep up the great work / update.
Yeah... that's one of those 2.4 7R cases that everybody's after! 
I wanna see those Cibies mounted! Are they going on the hood, 911 rally style?
Indeed they will. See post #26 where we already ran the wires to bring the juice to them.
You seriously need more shop space! And several more Eric's.
Just when you think Eric has left the building and is only talking with the 911 crowd....he appears with not one, but two 914 projects....
Nice to see.
Nice to see.
QUOTE
You seriously need more shop space! And several more Eric's.
True, true.
QUOTE
Just when you think Eric has left the building and is only talking with the 911 crowd....he appears with not one, but two 914 projects....
Nice to see.
Nice to see.
We have one of those going on right now too!

What piaa lights are those?
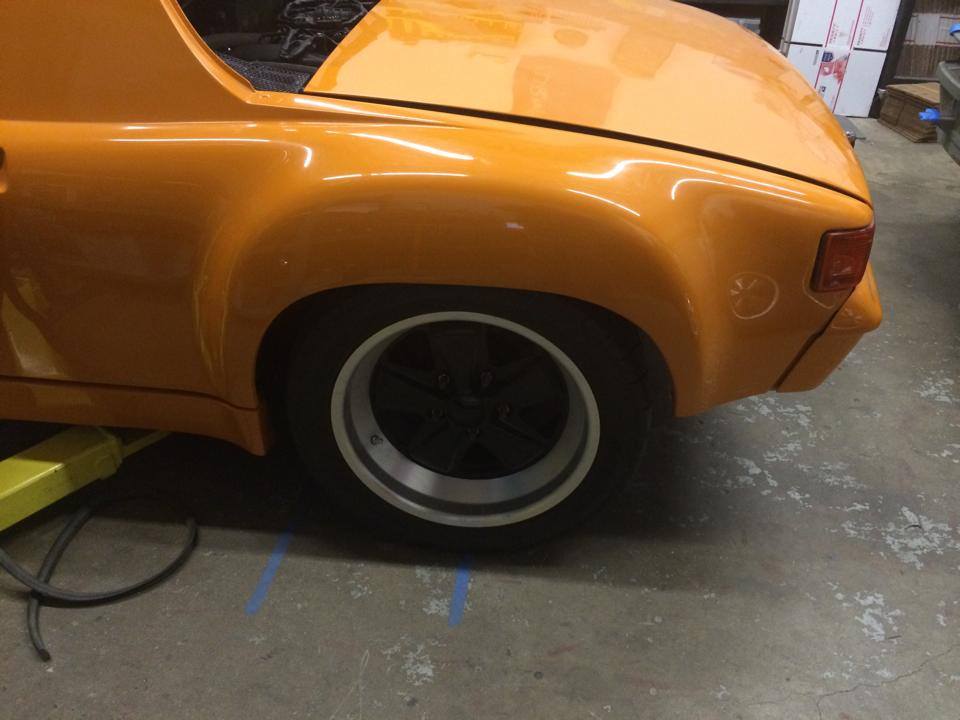
So much has been done but so little to show! I guess the engine and tranny in place make for a good start. Hood lights and pin retainers on. Roughed in the ride height. Massive rubber fits!!
It looks like we'll still need to adjust the lights a bit but, they are on and wired. The lights themselves are extremely impressive. The wiring inside them was not. Very short with with inexpensive bullet plugs that would pop out at will. We went through and fixed all of that...
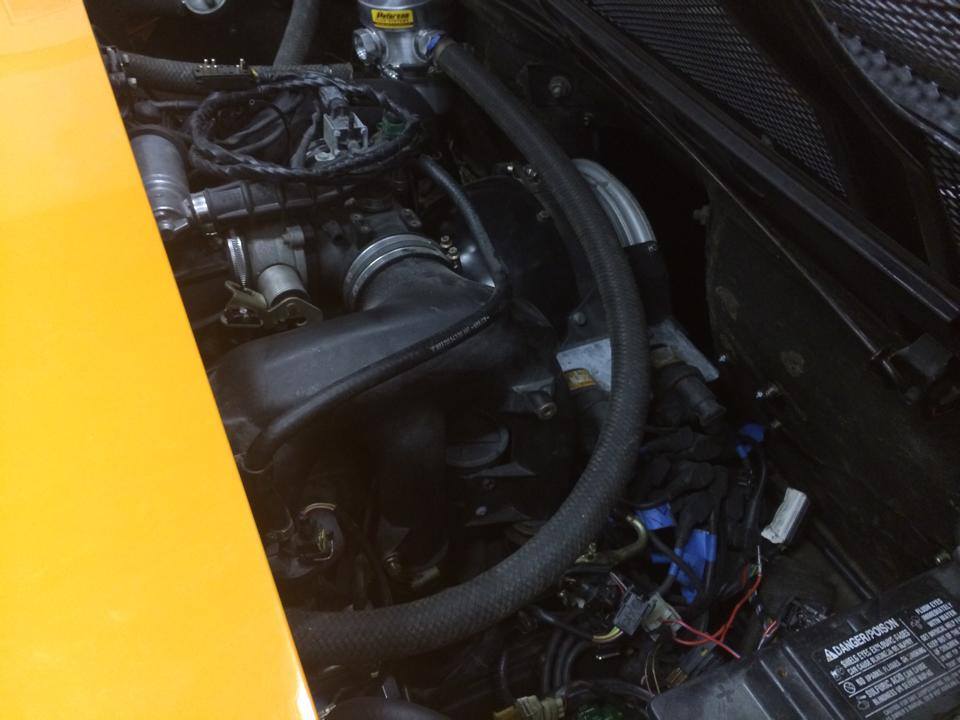
The engine and tranny are in (as mentioned) and only a bit of harness work to be performed. This is a test fit which allowed us to cinch up the oil hard and soft lines and resolve the intake and other various fitment issues. You can see the purchased 14-pin engine harness connector laying on the top. Only 5 of the pins in this "purchased" harness were correct. Reverse lights were missing and the low oil indicator was going to the hand lever for the heater blower switch! We had to go in and add the reverse wires and change (quite) a few things around. In the end... just purchase a few 14-pin ends and do it yourself.
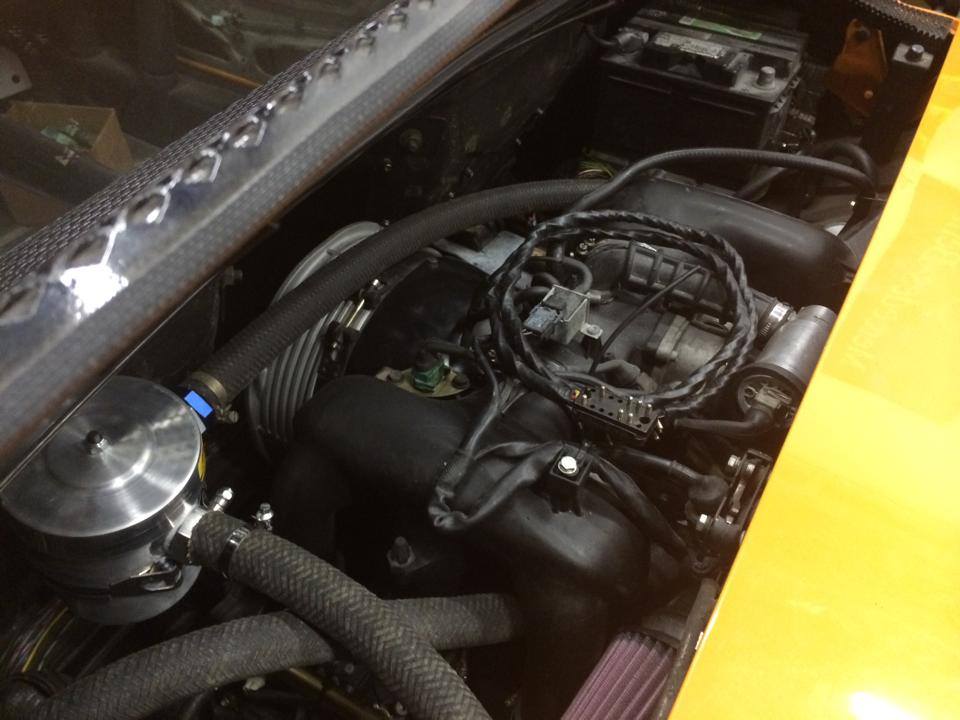
All of the fuel lines and hoses have been run. Just a little tidying up to do there and it should be good to go.
The engine will come back out one more time as we have the front tin being finalized and, we want to get back in the engine compartment to clean up and re-tape the main harness.
I'd have to say, wiring on this car ate up the most hours but, I'm crazy about that stuff. Nothing worse than chasing a short in an unknown harness with crimp on connectors. With the engine and DME install, this will be the last bit of harness to clean up. Everything will be wrapped in a factory cloth tape.
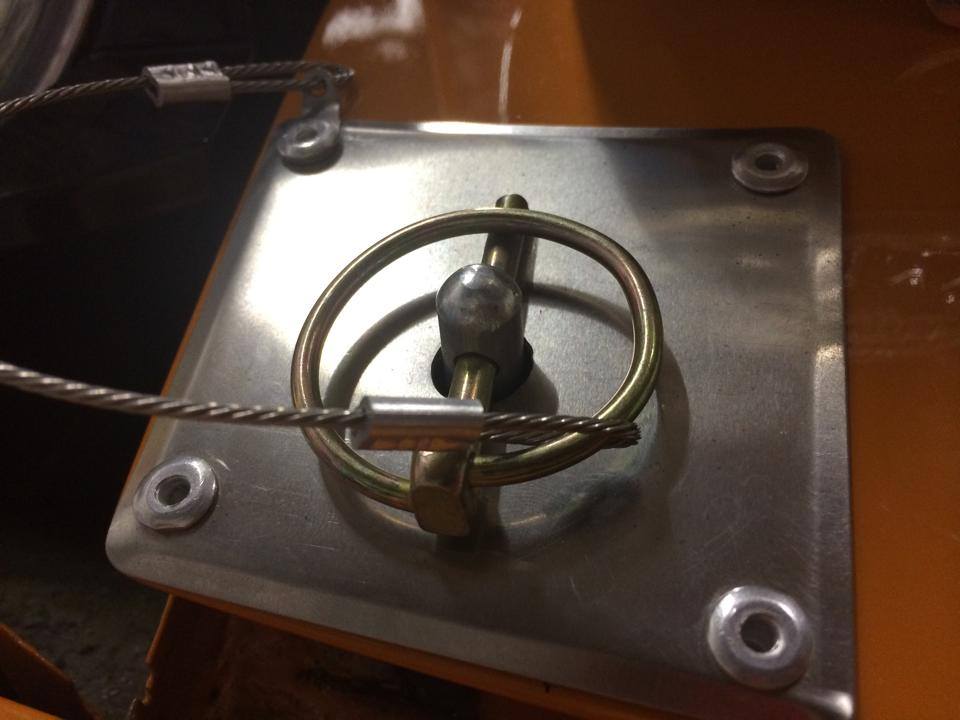
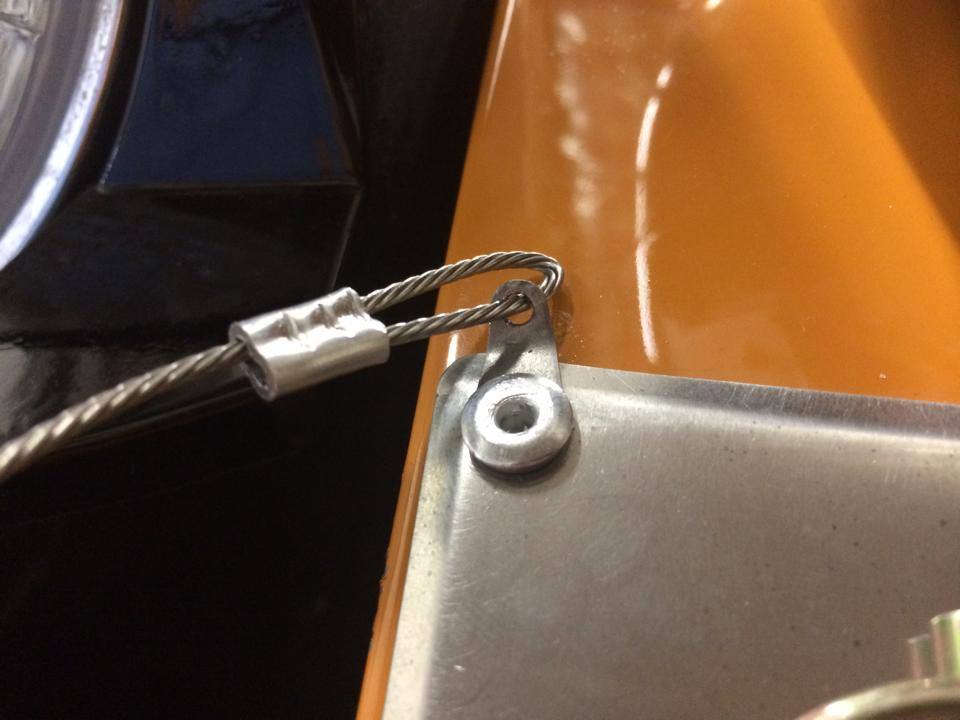
We installed a nice system for the hood pins (and yes, buttheads... we installed a set on my car as well)
We also set a preliminary ride height with the motor and trans in. Hard to believe but, it looks as though the massive rubber will fit!
It looks like we'll still need to adjust the lights a bit but, they are on and wired. The lights themselves are extremely impressive. The wiring inside them was not. Very short with with inexpensive bullet plugs that would pop out at will. We went through and fixed all of that...
The engine and tranny are in (as mentioned) and only a bit of harness work to be performed. This is a test fit which allowed us to cinch up the oil hard and soft lines and resolve the intake and other various fitment issues. You can see the purchased 14-pin engine harness connector laying on the top. Only 5 of the pins in this "purchased" harness were correct. Reverse lights were missing and the low oil indicator was going to the hand lever for the heater blower switch!
We had to go in and add the reverse wires and change (quite) a few things around. In the end... just purchase a few 14-pin ends and do it yourself.All of the fuel lines and hoses have been run. Just a little tidying up to do there and it should be good to go.
The engine will come back out one more time as we have the front tin being finalized and, we want to get back in the engine compartment to clean up and re-tape the main harness.
I'd have to say, wiring on this car ate up the most hours but, I'm crazy about that stuff. Nothing worse than chasing a short in an unknown harness with crimp on connectors. With the engine and DME install, this will be the last bit of harness to clean up. Everything will be wrapped in a factory cloth tape.
We installed a nice system for the hood pins (and yes, buttheads... we installed a set on my car as well)
We also set a preliminary ride height with the motor and trans in. Hard to believe but, it looks as though the massive rubber will fit!
(the taildragger project is coming along swimmingly as well... fresh coat of Glasurit on the topside is all buffed out now and assembly begins)
"Back to your regularly scheduled program!"
"Back to your regularly scheduled program!"
Wouldn't it make more sense to install the tab like this, so the cable doesn't scratch the paint?
Sorta thought the same thing.
Tough room here......
Please convince him to ditch that ugly ass front bumper. 
Pretty please ...
PS: Yes, mine is coming off too, just in case you were wondering.
Pretty please ...
PS: Yes, mine is coming off too, just in case you were wondering.
I love posting on 914world.
QUOTE(Eric_Shea @ Apr 30 2014, 11:41 AM)
I love posting on 914world.
Hey, if you don't want "feedback" lock the thread ...
Nice, keep them coming.
QUOTE(Eric_Shea @ Apr 30 2014, 04:57 AM)
The wiring inside them was not. Very short with with inexpensive bullet plugs that would pop out at will. We went through and fixed all of that...
You can see the purchased 14-pin engine harness connector laying on the top. Only 5 of the pins in this "purchased" harness were correct. Reverse lights were missing and the low oil indicator was going to the hand lever for the heater blower switch!
We had to go in and add the reverse wires and change (quite) a few things around. In the end... just purchase a few 14-pin ends and do it yourself.Very impressive. I have bullet connections in the British cars. Work fine if they are the right ones and done properly. Not a favorite though.
My big question is: why stay with the 14 pin plug at all. Seems like so many of the circuits don't belong together in the first place, but were convenient when the relay board was being used. I was thinking about some of the weatherproof multipin connectors you can find at Jegs etc.. Maybe one for lighting another for starting and running the engine, etc.
QUOTE
Hey, if you don't want "feedback" lock the thread ...
Good idea.
I think Mike is softening on the bumpers. He mentioned he'll entertain changing them after his first track "altercation".
Eric,
Would you mind posting a pic with the headlights down? I'm torn between adding the hood lights or not.
My 3 year+ build is finally nearing completion, and I can't decide what to do about the hood lights.
Thanks.
Mike
Click to view attachment
Would you mind posting a pic with the headlights down? I'm torn between adding the hood lights or not.
My 3 year+ build is finally nearing completion, and I can't decide what to do about the hood lights.
Thanks.
Mike
Click to view attachment
QUOTE(SirAndy @ Apr 30 2014, 09:54 AM)
Please convince him to ditch that ugly ass front bumper.
Pretty please ...
PS: Yes, mine is coming off too, just in case you were wondering.

Liked the look when i was 19, but think mine will be coming off soon as well in favor of fiberglass GT bumpers
Eric, do you have any more of the large (20 and 22mm) braided hose pictured in post 65? If so, I may need to get some from you when I order all my suspension stuff in the near future.
Oh, yeah, nice work! I agree on rotating the cable retainer for the hood pins around to save the paint. That 911 looks fantastic!
Oh, yeah, nice work! I agree on rotating the cable retainer for the hood pins around to save the paint. That 911 looks fantastic!
Its nice Eric! 
Rear bumper = okay
front bumper = yikes!!!
front bumper = yikes!!!
Mike- Your car is looking beautiful. I look forward to seeing more photos soon.
Michael
Michael
QUOTE(Eric_Shea @ Dec 7 2013, 01:01 PM)
Hey Gang,
We've been working on this one for a while now and I thought you'd like to follow along. It has a lot of "914" issues to sort through and can be a good piece to show how and why to fix things properly, especially with the value of these cars climbing and the money invested in a car of this quality.
Mike came to us last year after finding us here for a PPI. In this case it was a "Post Purchase Inspection". The car was sold as a rust free (yes, enter your comments here) 3.2 six conversion. It turns out it was anything but. Regardless, Mike was in for the long haul and, he was determined to do things properly. He expressed interest in making the car a wide-body and fixing what needed to be fixed at the time.
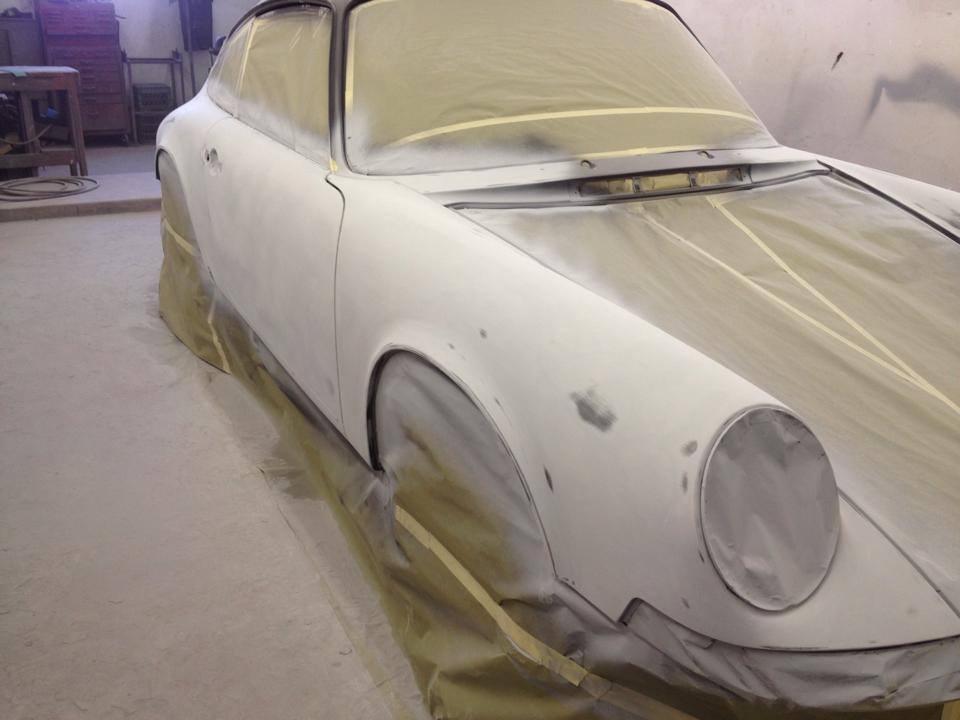
Off the tub went to be stripped and prepped for flares and paint work. Here you can see the "after" shot with the flares on and glass panels being fitted:
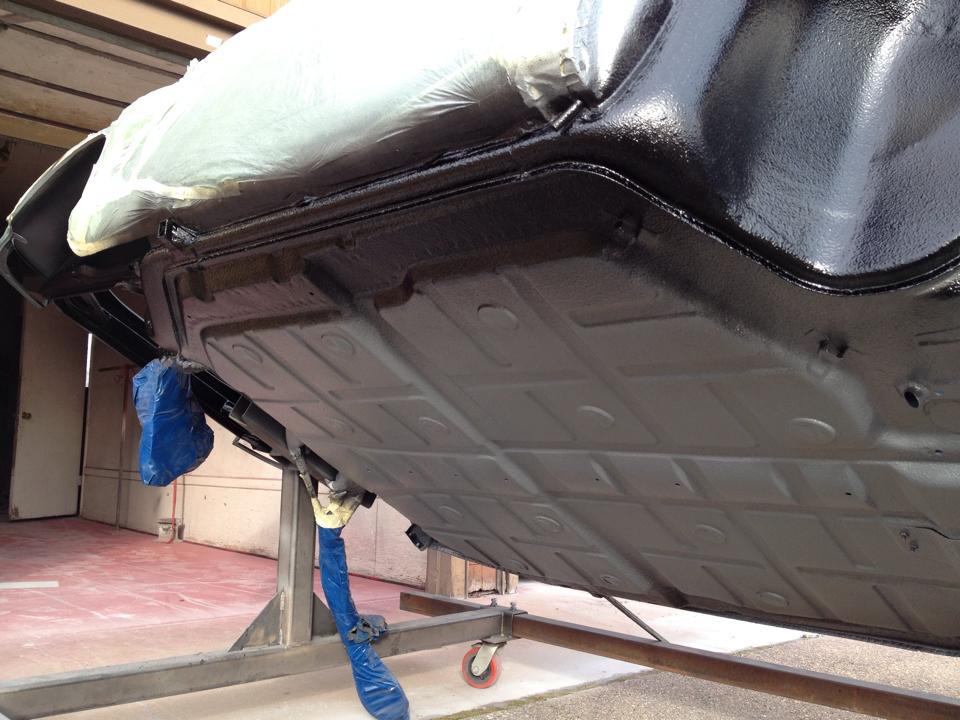
There was a lot of metal work needed as indeed... the rust was free on this one. Before flares could go on, a new quarter panel was needed and various stiffening kits (factory and 914LTD) added to ensure minimal twist with an impending 3.6 install. The car was then painted "Signal Orange" and given back to Mike for some detail installments.
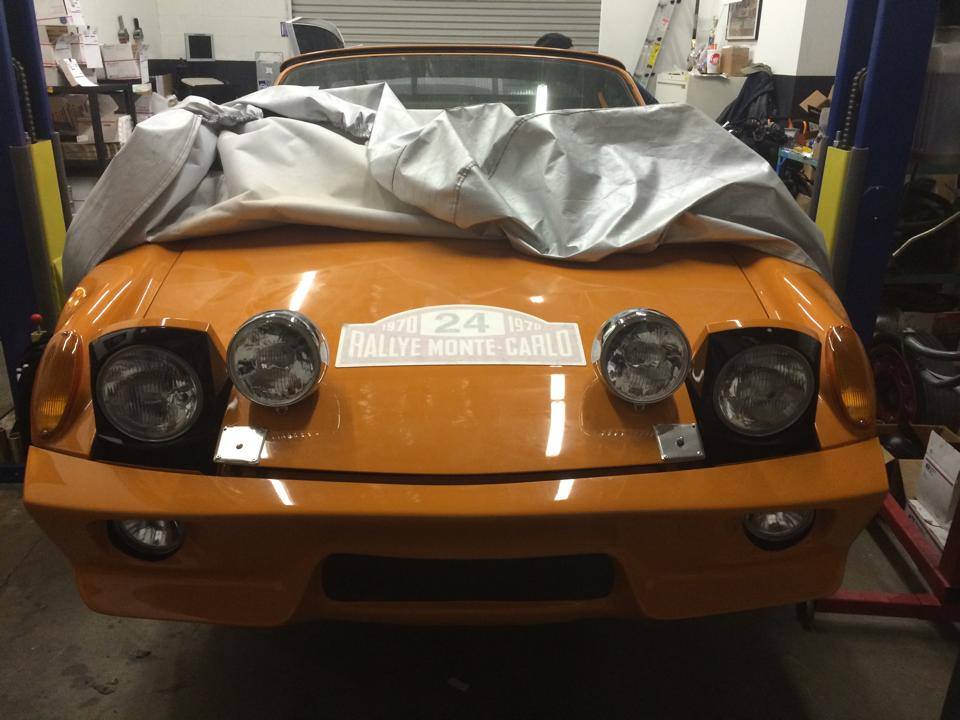
Fast forward to present day. We picked the car up from Mike and began ticking off items on his wish list. Install driving lights, front turn signal buckets, hood lights, hood pins, sway bar, get turn signals working, various trim pieces etc.
Here's how it it sat when we got'er in the shop:
Then the "inevitable" happened. It began to act like any other DAPO 914. She began to show some of her true colors. I actually think the car was talking to us and letting us know about the problems before she burned to the ground in a heap of smoke and flames.
Let's start with wiring because we basically had to re-wire the car. What started as a simple request to "get the rear light buckets working" brought us to a few swapped wires on the install post paint and then... funny smells and blown fuses. When we looked at the fuse block we saw this:
Yes, the blown fuse was also a 16a!! Needless to say, this was one of the first things we did...
We also found some previous melted wires that could have been catastrophic:
This caused us to start at the front and completely go over all of the wiring. Fix and replace with proper factory colored wires from a donor harness and wrap everything back up with the early cloth tape loom.
The factory driving light harness was cut and crimp on ends were all that existed in the apron. We went into the harness and soldiered in new leads and used factory sheathing to bring them through the grommets in the front apron. Mike wanted these PIAA lights so we then soldiered the PIAA ends on the factory wires and inserted them back into the connectors for a clean, clip-on installation:
Next we did the same thing while repairing the horn leads. Removed the crappy blue crimp on connectors and went full factory with the protective sheath. We also ran a second lead over for dual tone horns.
Here's a shot of Mike's new harness:
Is someone making replacement harnesses?
The 916/rally split personality is due to the length of time the project has taken. Eric has done a great job and has taken years off of the build time, but I am afraid that my vision for the project has changed over time and the leftovers from prior versions remain. Once I get it running and can enjoy it for the summer I intend to go full rally and put on period correct front bumpers, wheels and tires and raise it a little. For now, it will look like a crossbreed.
We're just jealous, it's a bitchin car!!!!!!!!!!
QUOTE(Larmo63 @ May 7 2014, 02:17 PM)
We're just jealous, it's a bitchen car!!!!!!!!!!
If you mean a really great car, the correct spelling is bichen.
 I had to point that out to my English teacher in 1962.
We spell it "bitchin" in California, make that southern California.....
QUOTE(mharmon @ Apr 30 2014, 04:42 PM)
Eric,
Would you mind posting a pic with the headlights down? I'm torn between adding the hood lights or not.
My 3 year+ build is finally nearing completion, and I can't decide what to do about the hood lights.
Thanks.
Mike
Click to view attachment
I am in the same boat, I love the look with the head lamps up, but when retracted not so sure. I was only able to find a few shots of 914 GTs with the hood lamps and the head lamps in the closed position.
Bitchen.
I have a question on the front bumper. Was it reshaped in the area right in the middle of the car/hood, or was that the way it came? I used to always get on my soap box about how the top of the 916 bumper should be the exact same dimension all the way across the nose of the car (see purple dots in pic). However, anymore it seems like on 99% of the cars that have theses bumpers, they all are narrowed in the center. Was just curious if this was how they were installed or how they were now being molded.
Awsome build.
your late to the party, brought up a long time ago..
Eric,
What flywheel bolts did you use on the patrick 3.6 flywheel and
centerforce clutch..?
thanks,
harry
What flywheel bolts did you use on the patrick 3.6 flywheel and
centerforce clutch..?
thanks,
harry
QUOTE(Scott S @ May 8 2014, 01:40 PM)
I have a question on the front bumper. Was it reshaped in the area right in the middle of the car/hood, or was that the way it came? I used to always get on my soap box about how the top of the 916 bumper should be the exact same dimension all the way across the nose of the car (see purple dots in pic). However, anymore it seems like on 99% of the cars that have theses bumpers, they all are narrowed in the center. Was just curious if this was how they were installed or how they were now being molded.
Only the real 916 bumpers have the same width across the top.
I have never seen a reproduction that got it right, they all narrow in the middle.
Harry, I believe Mike had the bolts when we received the engine. Perhaps he can shed some more light on the subject.
She came to life Wednesday. What's amazing about these more modern DME motronic beasts is... Two cranks and she was breathing fire. Once the hydraulic lifter came back to life the motor quieted down and ran like a champ.
Wednesday afternoon it was back out getting the chain housing covers resealed. No more drip, drip, drip. We had it ready to go back in by end of day Friday. With the lift and the new engine tranny table, extraction is a 1 hour job.
All done. Back to Mike and off to run at Miller Motorsports Park tomorrow.
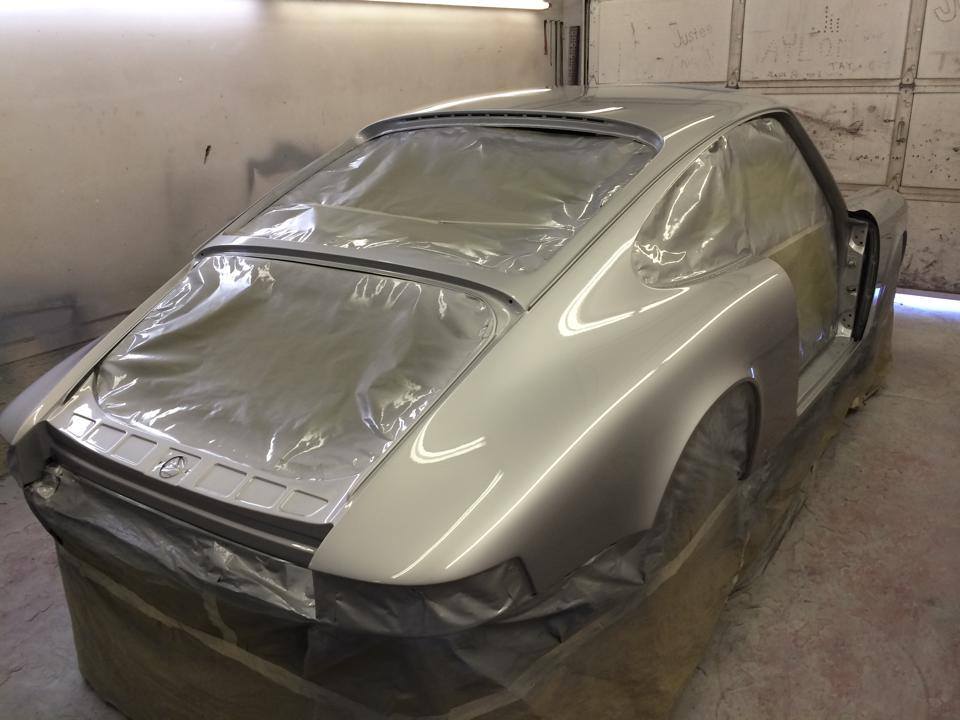
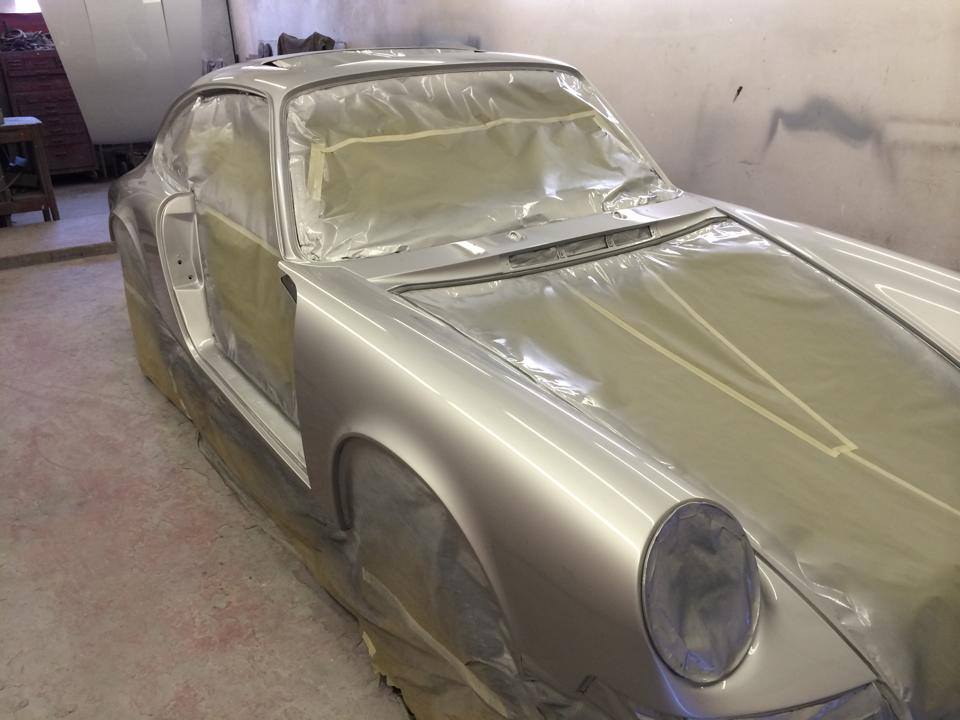
Still looking to sort out a window solution for the full Lexan panes.
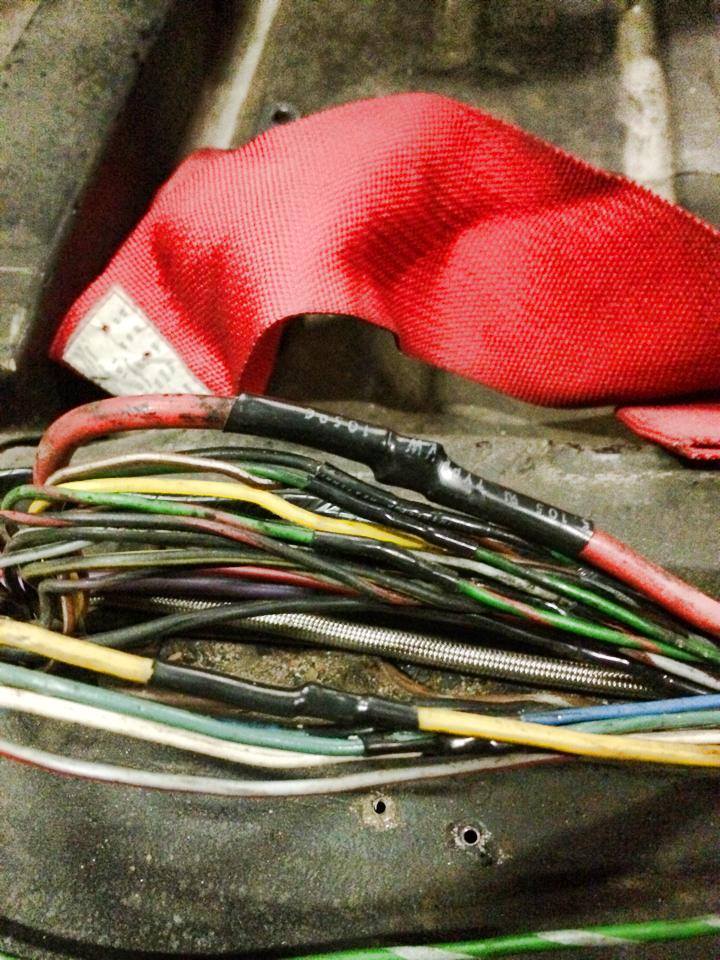
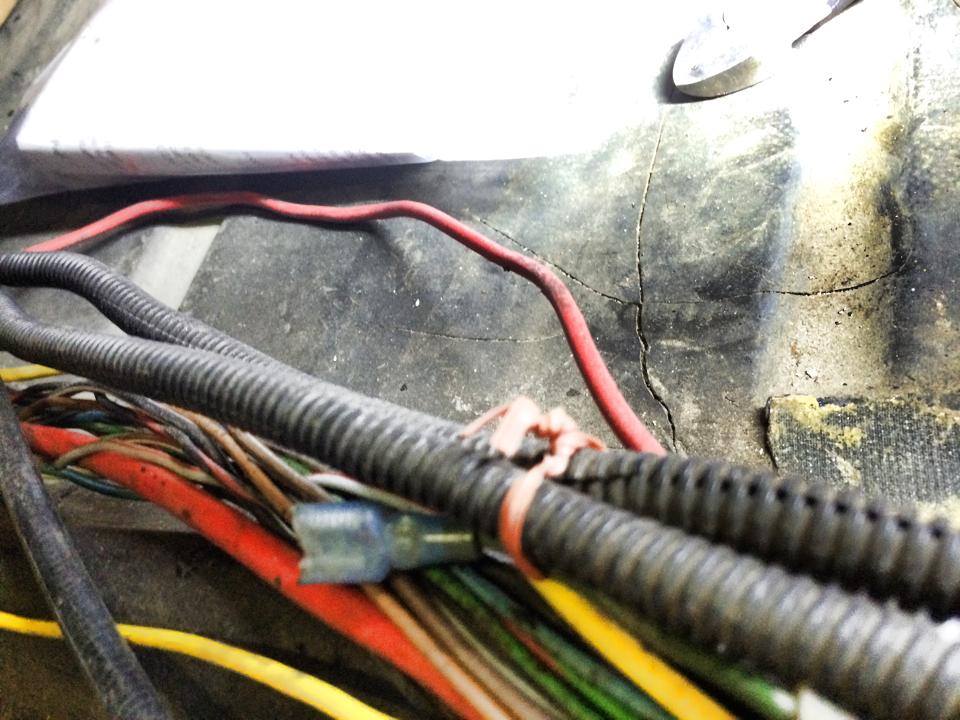
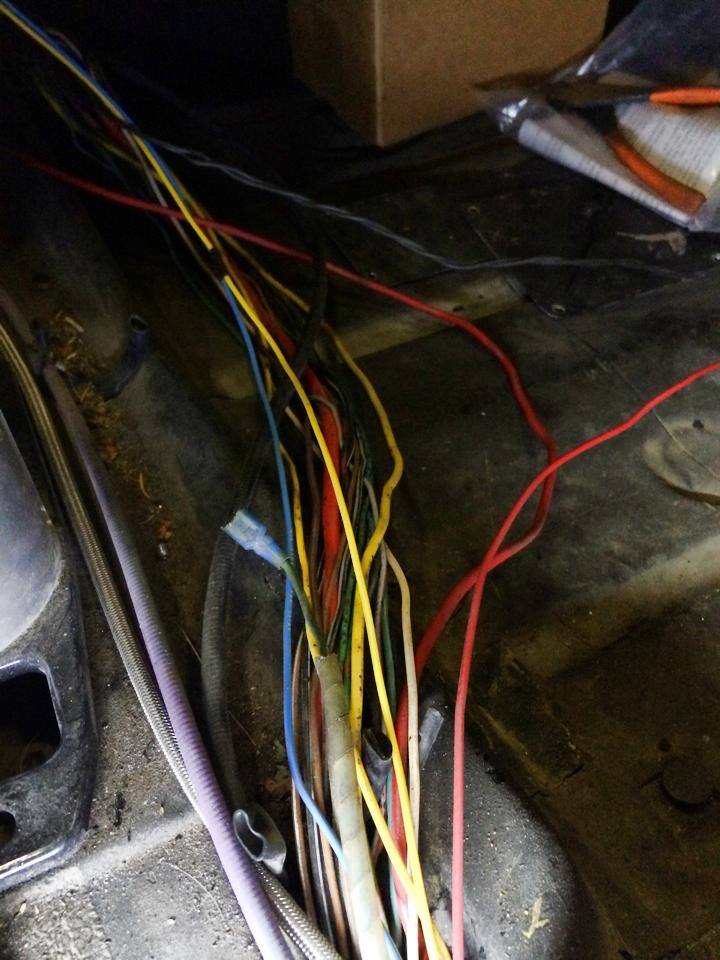
The car ended up eating another turn signal switch and that was the last straw. The dash harness was the last stronghold of "interesting" wiring. We bit the bullet and went all in. From left to right across the dash. All switches, all gauges... everything was sorted and put back to factory condition. A few melted wires in the big rats nest appear to be the culprits.
We took a few pictures before we gave her back. Enjoy.
Click to view attachment
Click to view attachment
Click to view attachment
Click to view attachment
Still looking to sort out a window solution for the full Lexan panes.
The car ended up eating another turn signal switch and that was the last straw. The dash harness was the last stronghold of "interesting" wiring. We bit the bullet and went all in. From left to right across the dash. All switches, all gauges... everything was sorted and put back to factory condition. A few melted wires in the big rats nest appear to be the culprits.
We took a few pictures before we gave her back. Enjoy.
Click to view attachment
Click to view attachment
Click to view attachment
Click to view attachment
Porsche 914 porn!!! Great looking cars, guys!!!
Bravo!!!!!!
Bravo!!!!!!
This is a "lo-fi" version of our main content. To view the full version with more information, formatting and images, please click here.