nditiz1
Aug 11 2021, 08:31 PM
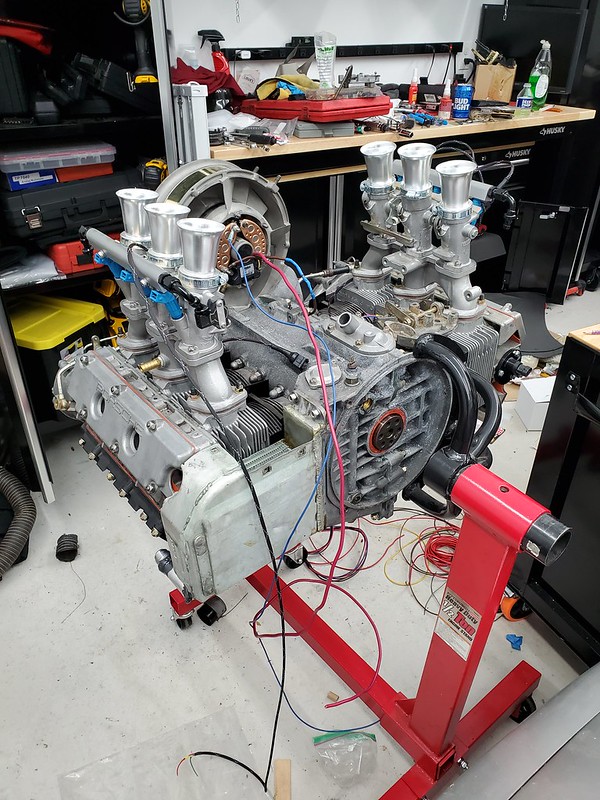
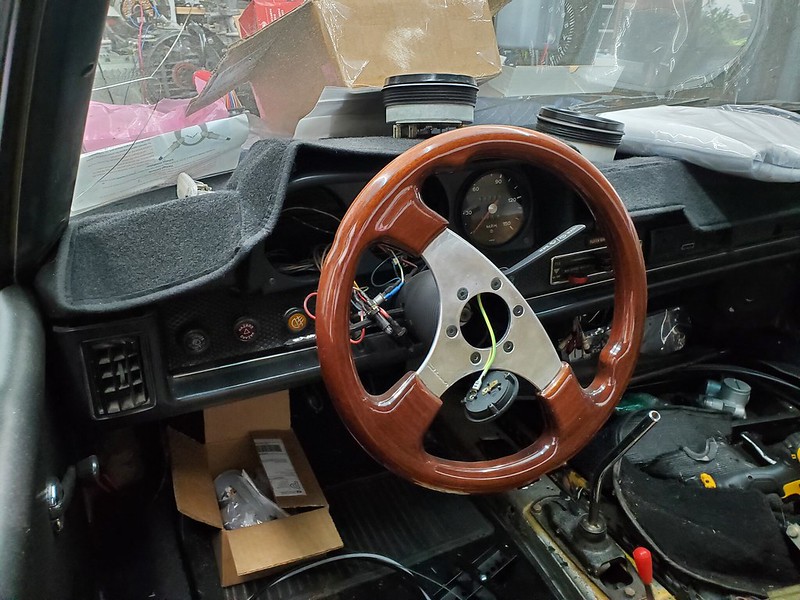
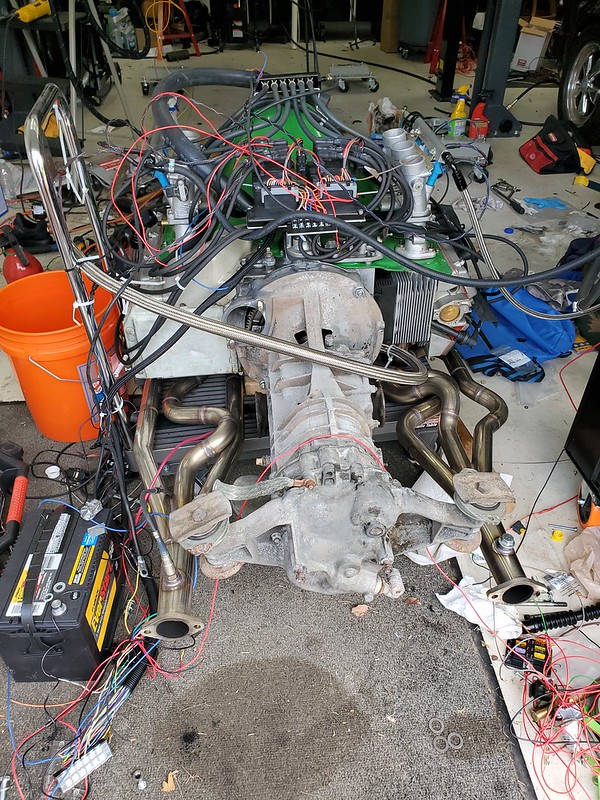
Hey all - not sure if you all were aware that I have been in the middle of a conversion build since last year. Well the time finally came, or should I say a fire under my butt, to get me to push for a completion. By completion I mean a running/driving 6. Quick back story. Bought the car from a member 74 2.0. Already had glass flares, 5 lug, and an overheating engine. Dropped that out as I had a 2.7 waiting to be finished. Collected parts for the engine. Collected parts for the conversion. Sat back and waited for it to build itself, it didn't. Finally bought my tix for Okteenerfest so now I'm forced to get it done in time. I recently posted up an extensive to do list.
She won't be a show winner, but she may just get me there.
Here is the current state of affairs.
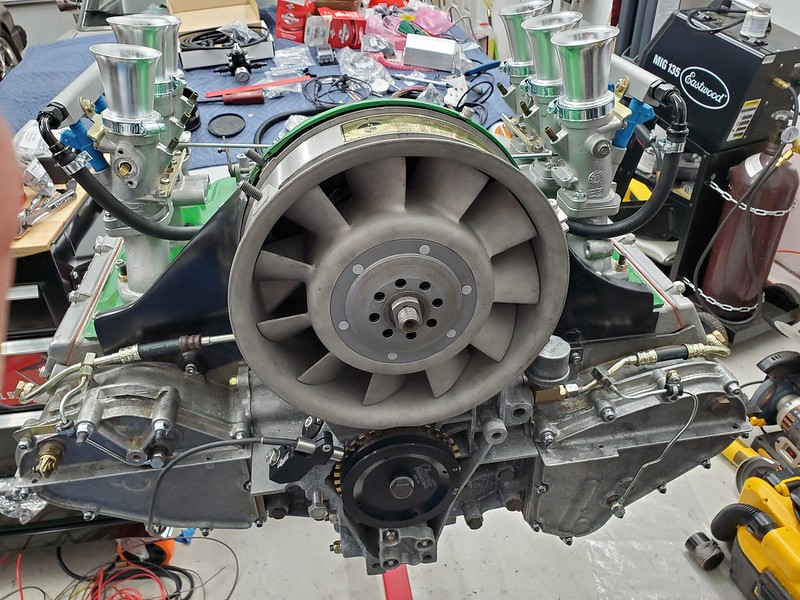
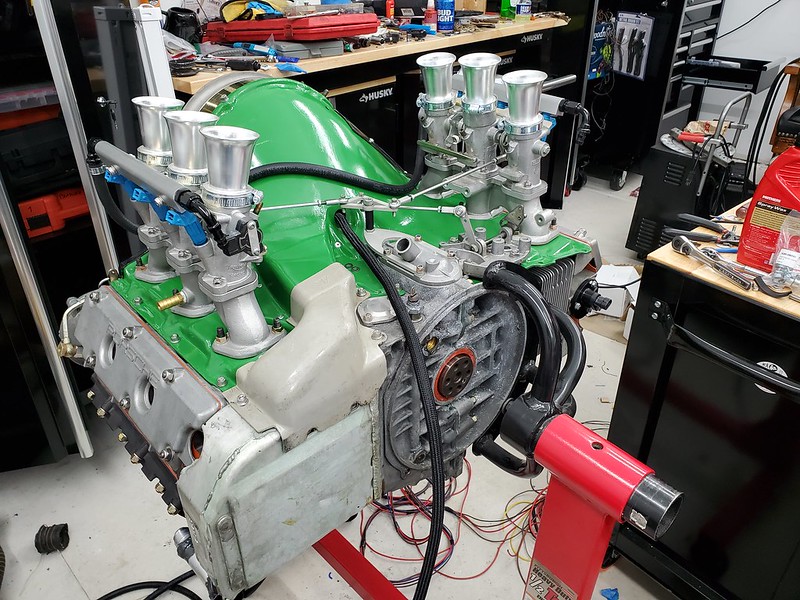
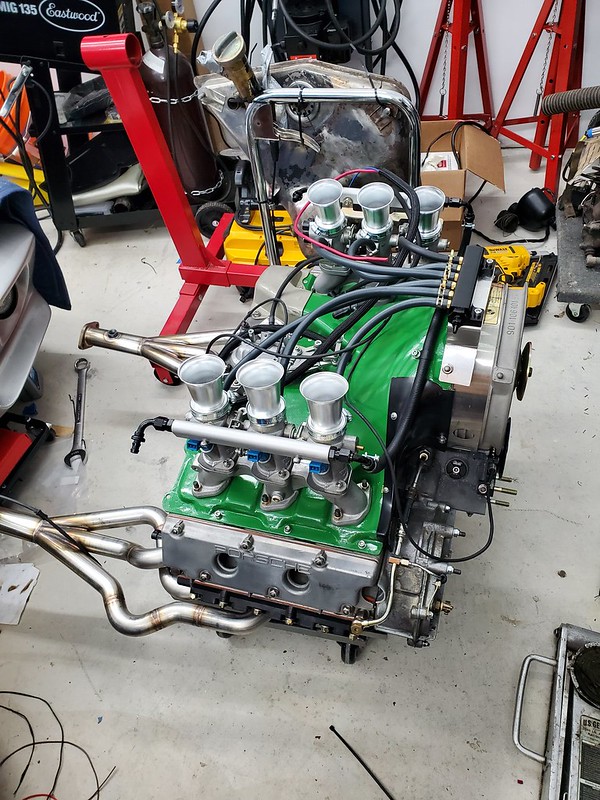
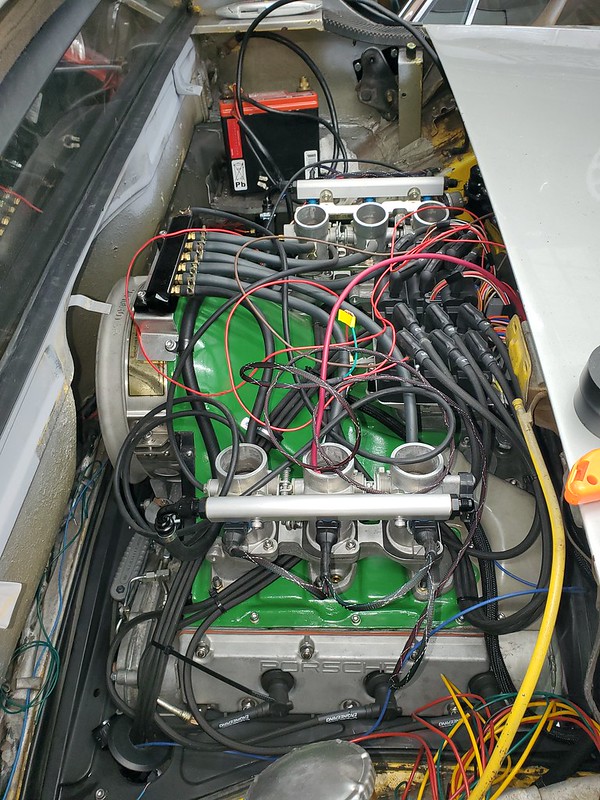
2.7 - ITB twin plug EFI
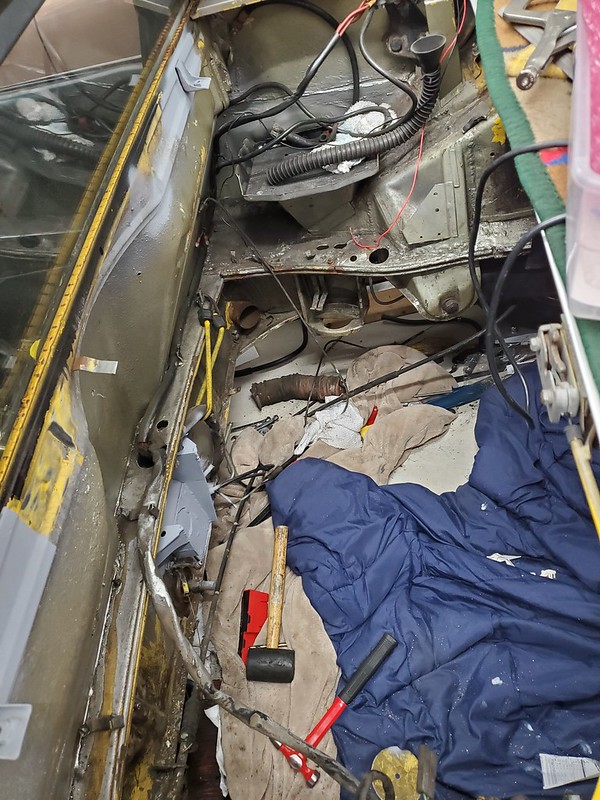
Yup! definitely grabbed the wrong hole saw 3" (should have been 2.5") smh

Have to address this rust I cut out before I can mount the tank.
Dion
Aug 11 2021, 08:44 PM
Nice powerplant! Good luck with the project.
mgp4591
Aug 11 2021, 08:44 PM
Sounds like a good opportunity to use some fuel line tubing for edge protection and visual bling. Some may use other material for bling but it's bling enough for me and my build as well!
saigon71
Aug 12 2021, 05:37 AM
That engine even looks fast!
I hope you are able to finish it in time Nick.

Cairo94507
Aug 12 2021, 06:28 AM
nditiz1
Aug 12 2021, 07:29 AM
Thanks Bob.
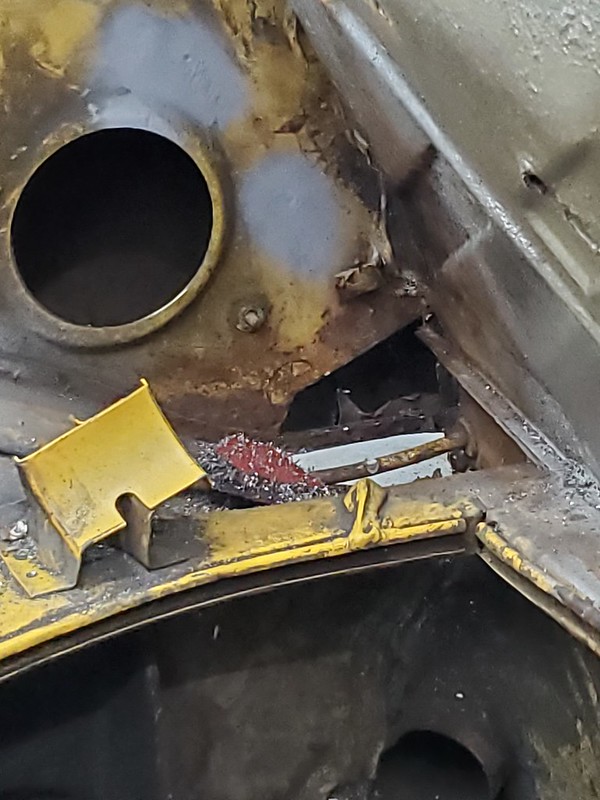
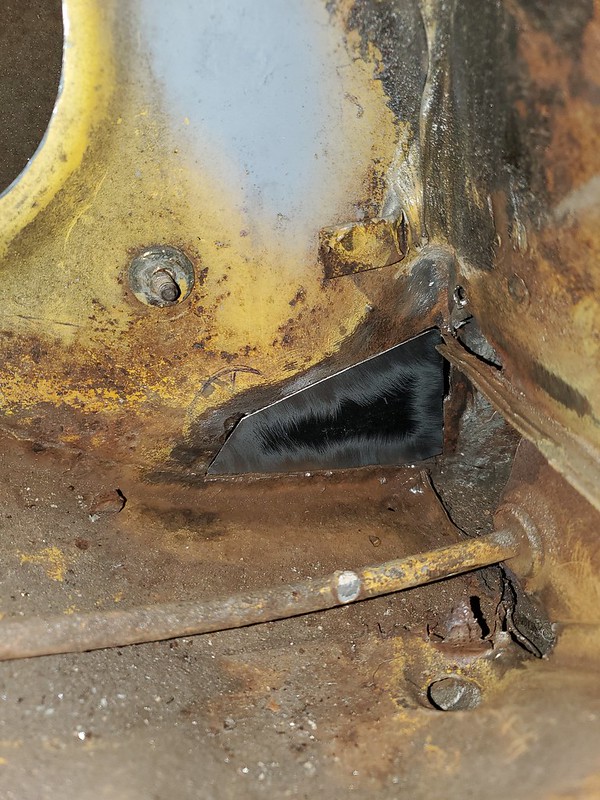
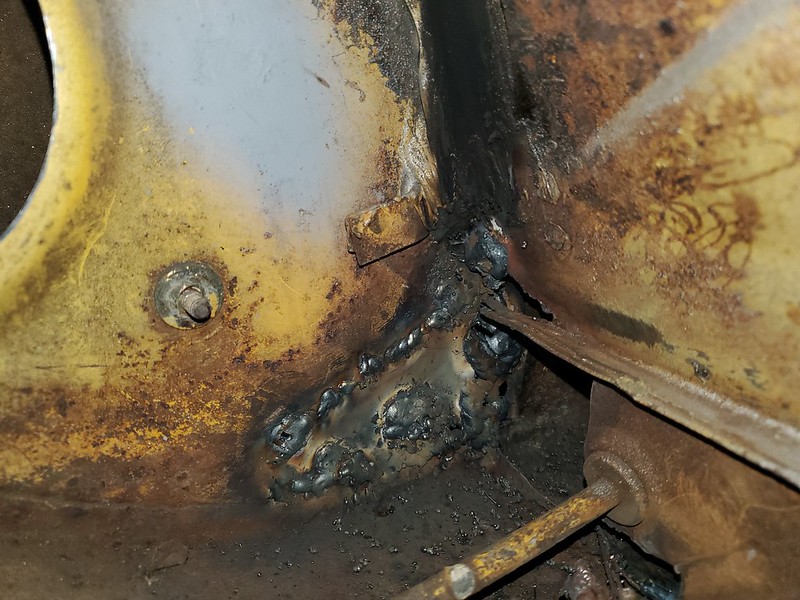
Some morning welding. It ain't pretty, but it will do. It started out so nice. I am at most just below average welder lol. If the metal is thick, I'm good. Maybe because of the MIG. What settings are you all running? It's an Eastwood 135 MIG. That's why the invented grinders right? 1 more patch panel and the welding should be done for now.
Burn through and difficult location.
Justinp71
Aug 12 2021, 09:58 AM
Nice! Whose throttle bodies are those? I just got the RHD's but have not started that project yet.
nditiz1
Aug 12 2021, 10:43 AM
They are the old triumph triple speed ITB's.
They are/were sold through X-Factory (Al Kosmal), but I think he has now moved to the RHD.
TRS63
Aug 12 2021, 11:21 AM
What a nice engine

Antoine
BK911
Aug 12 2021, 12:15 PM
Wow, pretty ambitious!
Lots of looooong nights ahead, but looks like she will be worth it.
nditiz1
Aug 14 2021, 05:53 AM
Trying to catch OptimusGlen

, getting the engine closer to a startup. Today will hopefully be a productive day in getting the last bit of welding done and the tank installed.
Optimusglen
Aug 14 2021, 06:16 AM
QUOTE(nditiz1 @ Aug 14 2021, 06:53 AM)

Trying to catch OptimusGlen
, getting the engine closer to a startup. Today will hopefully be a productive day in getting the last bit of welding done and the tank installed.
Haha, good luck! Make sure you connect and torque the lower hose on the tank before you install it.
Do you want a couple caps for the heater tubes too?
Spoke
Aug 14 2021, 06:37 AM
Nick, the engine looks great. Good luck with the conversion.
Shivers
Aug 14 2021, 06:47 AM
I hope you make your goal. The engine looks great
nditiz1
Aug 14 2021, 07:12 AM
Thanks for the encouragement all.
 @OptimusGlen
 - yes please.
He is sending me some block off plates for my tin, some cabin caps like he just posted and the half pulley (95mm) for my fan.
mb911
Aug 14 2021, 08:35 AM
Love to see everyone finishing up these projects. Most of us started around the same time including Brent, Glen, Dion and now Nick. Very cool
porschetub
Aug 14 2021, 06:17 PM
QUOTE(mb911 @ Aug 15 2021, 02:35 AM)
Love to see everyone finishing up these projects. Most of us started around the same time including Brent, Glen, Dion and now Nick. Very cool

great to see these conversions going on ,best of luck for that "first start" for you guys....trust me its an epic day
.
nditiz1
Aug 15 2021, 04:44 AM
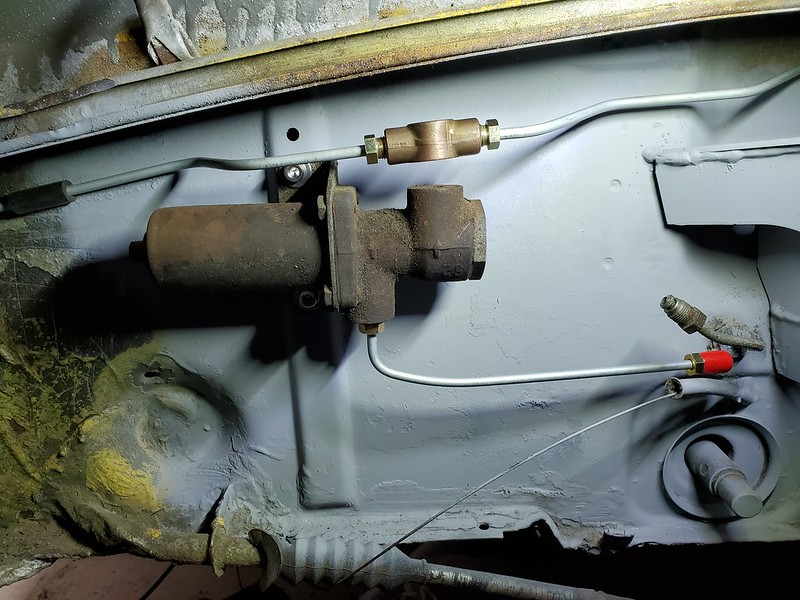
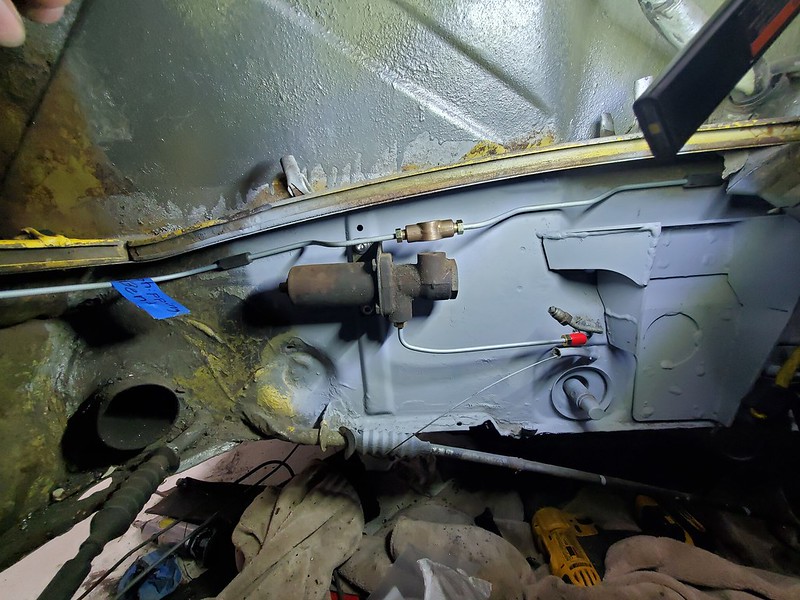
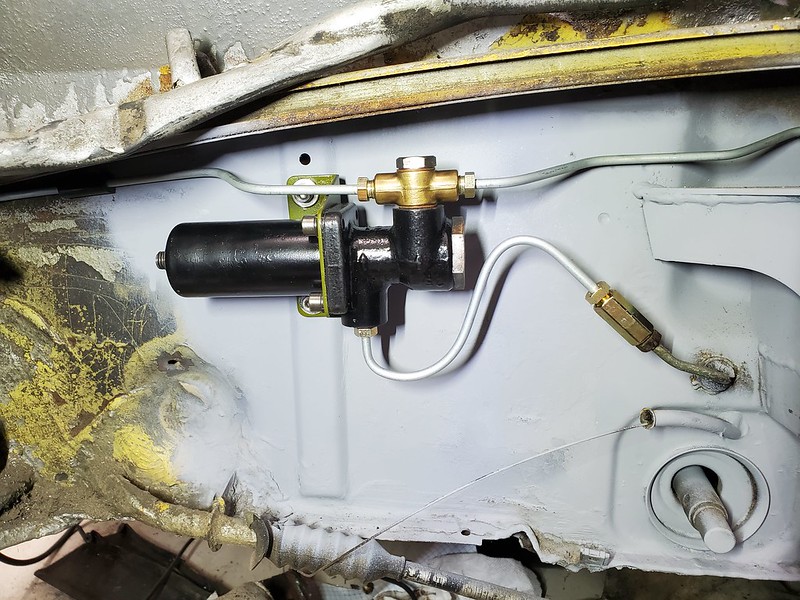
Got the "brake thingy" loosely mounted. If anyone was wondering I did have my regulator mounted closer to the 6 mount. PMB hooked me up with early lines, the T fitting, a cap for the rear port, but alas no banjo bolt and washers. I put up the Bat signal in the parts section if anyone has those they can ship out. Also, I am either looking for the 90 fitting and or the small coupler behind the FW so I can splice these 2 lines together. I'm surprised PMB has not come up with a simple pre-bent conversion line that mounts to the coupler behind the FW and this older mounting location.
I mounted it with Riv Nuts, man they are great. Next onto the return fuel line thingy.
nditiz1
Aug 19 2021, 10:55 PM
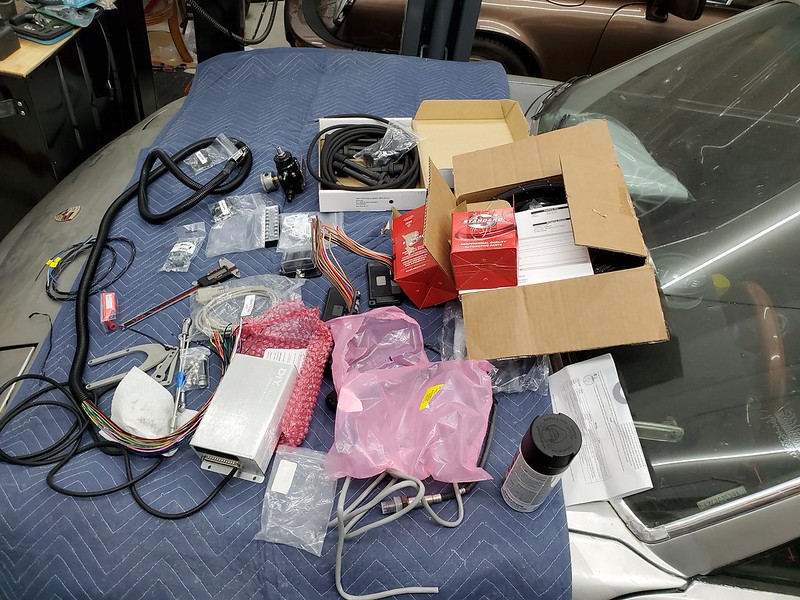
Updates:
I haven't really shown any picture progress as I have been working on figuring out the wiring for this EFI. I have the wiring pretty much done and am getting the final touches done for the engine for the test run.
Replace RMS - I don't like the look of the new boogered up one.
Install flywheel
Install clutch/PP
Run fuel line to FPR and then to Jerry can
Run fuel line to fuel pump and mount it somewhere
Run oil lines to 911 oil tank dangling from bar
Hook in all wires (MS2, Alt, Starter, Fuel Pump)
Make a switch to simulate ignition
Make a push button starter
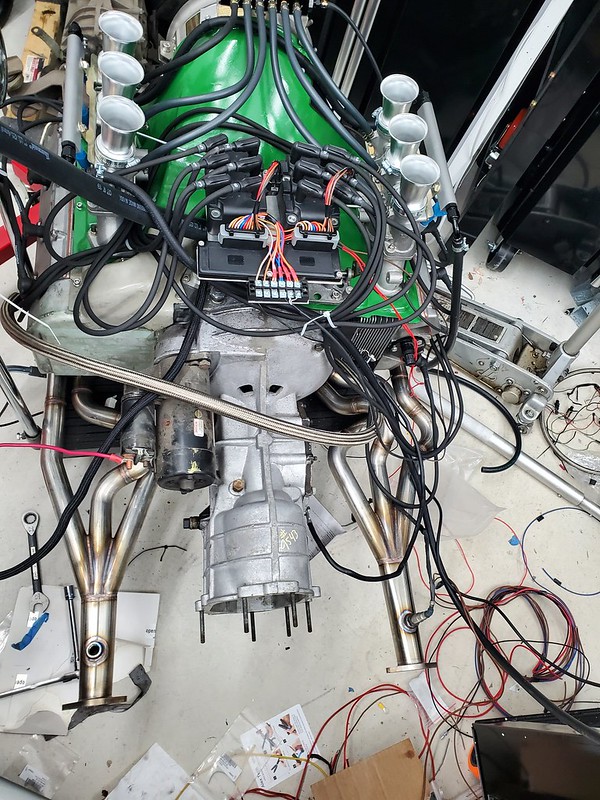
Mate 901 tranny half to engine
Install starter
Install belt
Go! hopefully
jaredmcginness
Aug 20 2021, 05:55 AM
Totally bad ass Nick. Eternally jealous of that motor. Twin plug + ITB just sounds cool.
Give me a holler if you need an extra set of hands installing it or anything.
nditiz1
Aug 23 2021, 05:51 PM
Falling inline with
@OptimusGlen I might be having this engines first attempt at a startup tomorrow. I was planning to use a spare 911 oil tank, but I don't have a 30mm to AN12 fitting to accomplish that. So the 914-6 will need to be rigged up instead. Currently hooked to a spare 901 tranny.
Optimusglen
Aug 23 2021, 06:38 PM
Woooo!
Hope it goes well!
Are you on Instagram? I'll be doing some updates and videos as the day progresses.
@glen_in_the_garage
nditiz1
Aug 25 2021, 11:04 PM
Glen I just followed you sweet vid of you driving, i can't wait to hit that milestone.
Update time:
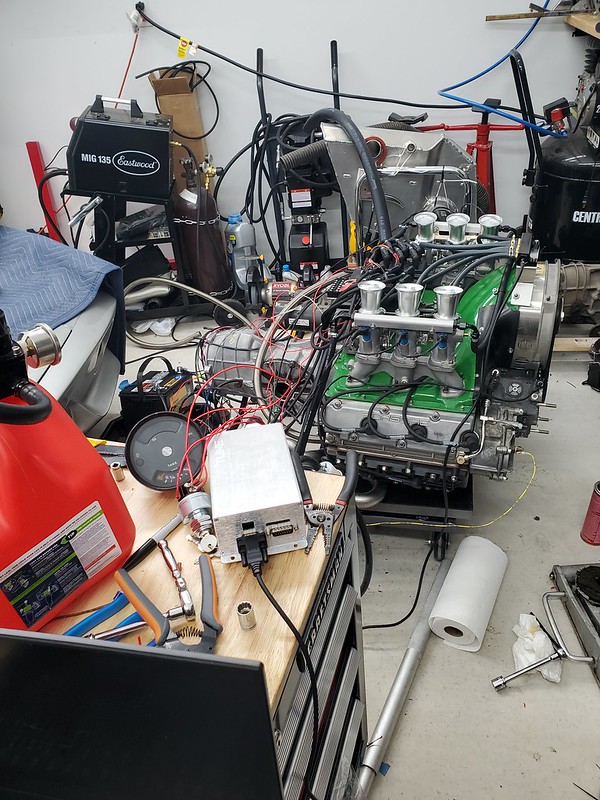
I was able to turn the engine over via the starter tonight. I have never heard the engine turn over without me cranking on it so this was huge! I dumped some oil out the front after forgetting to plug the T-stat hole with a T-stat sensor

I had to perform some checks regarding sensors and black magic of the EFI. Hopefully the chicken offering and beer will allow the arts to start this monster tomorrow.
Currently had to hook up the 6 oil tank as my 911 one needed a 30mm to AN12 which I could not wait for. I sent some final questions to Al. If everything checks out I'll add some fuel and ready the fire extinguishers mid day tomorrow.
I'll be glad to get my garage back in order and clean up this mobile test stand.
Oh one last great thing. The engine was able to build enough pressure to turn off the idiot light
Tdskip
Aug 26 2021, 06:05 AM
Congratulations on the engine coming up healthy, big moment. Thanks for the updates.
nditiz1
Aug 26 2021, 10:41 AM
Chasing some wiring issues as the injectors are not passing the test. Also it appears my fuse block is defective as it is providing power to all posts even when the fuses are removed, while less I would expect no power. I also developed a small leak out of the back of the cam tower where a clewett camshaft position sensor was installed. I don't need it anymore with this setup so I am thinking of removing and putting whatever cover goes in that spot.
Optimusglen
Aug 26 2021, 01:29 PM
Cool updates! Keep it up!
nditiz1
Aug 27 2021, 09:42 AM
Was hoping to throw some fuel in for a first start, but am currently waiting for tech support to figure out why the injector is not firing. I have uploaded the tune, data logs, and wiring diagram in hopes that something can be found.
I'll start focusing my efforts on getting the car ready for the engine:
Task list
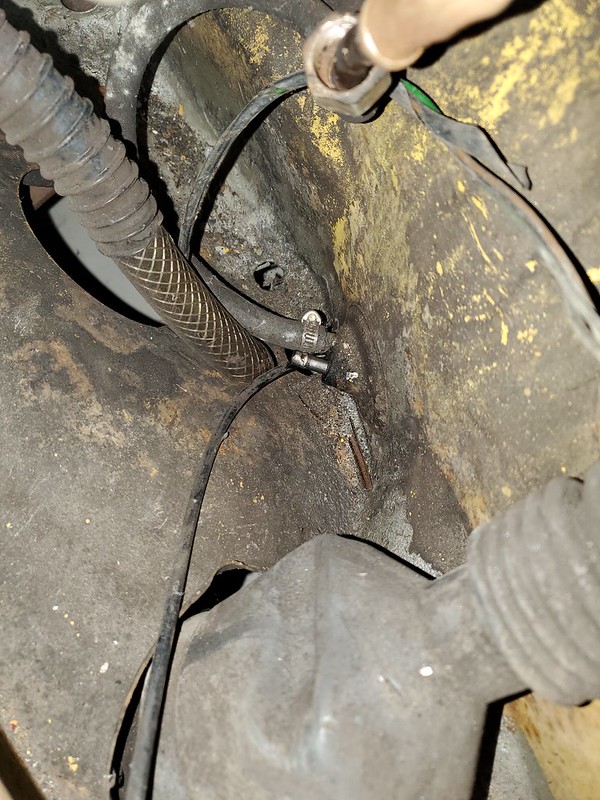
Install Tangerine return fuel line (PO only did 1 as it was carb'd)
-watch Ian's vid again
-remove fuel tank
-feed line through
-While in there replace wiper motor and hopefully get that working or it's RAIN-X
Install newly purchased brake regulator that has the Unicorn Banjo bolt...smdh
Bleed brakes
Grind away ugly welds and weld in piece of of firewall - this should complete the welding...for now anyway
Cut last hole for oil tank
Install shift bushing
Install new clutch cable
Install new Patrick Motorsports throttle cable
Reinstall most of the interior
nditiz1
Aug 27 2021, 03:19 PM
Got a little bit done while waiting on troubleshooting steps
Not pretty with that S bend but at least this part is fixed. 73 and up cars are really not geared for 6 conversion. My main harness, it is totally in the way of the mount.
nditiz1
Aug 29 2021, 11:12 PM
With the engine awaiting a Microsquirt brain, swapping out the non working MS2, I decided to get some other items completed.
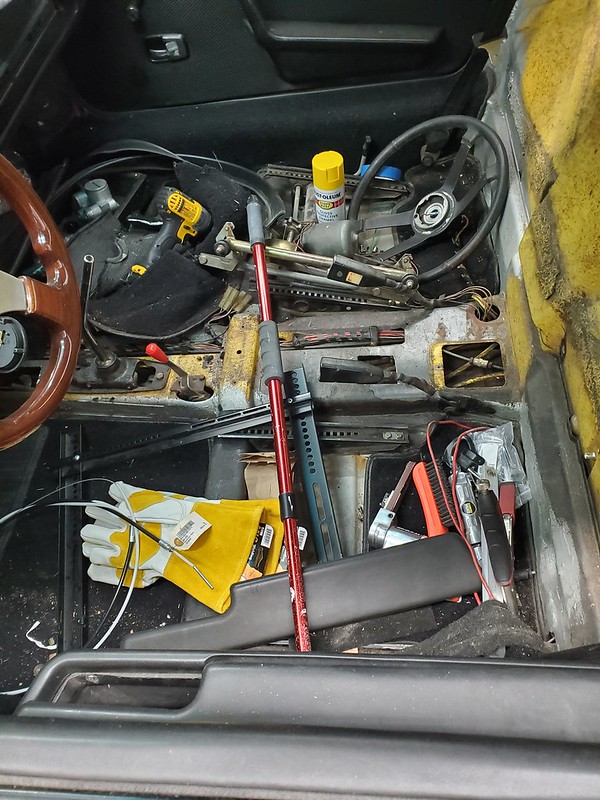
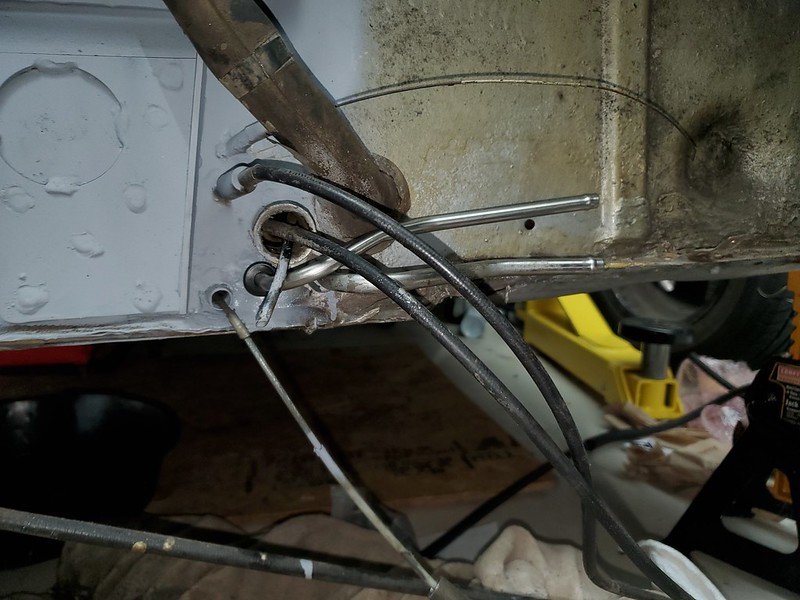
First was the removal of the Tank to gain access to the wiper motor. It also allowed me to follow
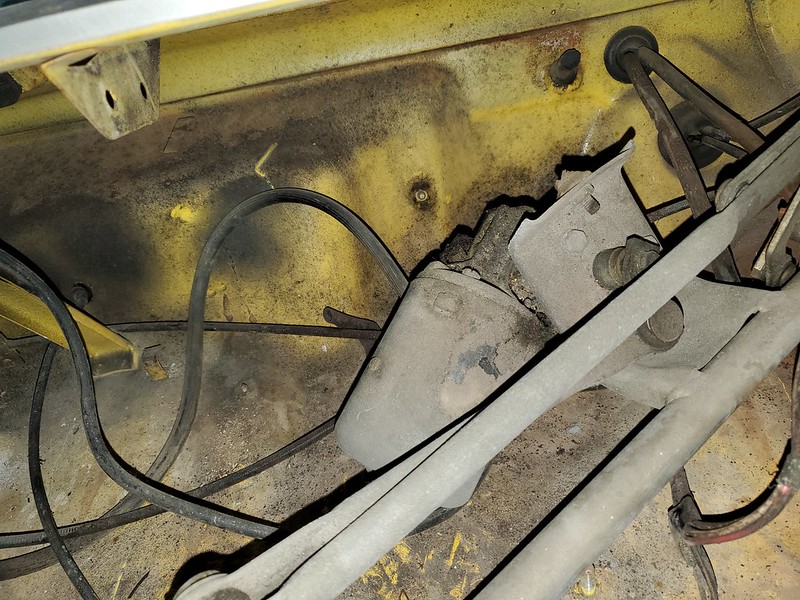
@iankarr 's video (thanks!) on the Tangerine Racing Fuel line install. The supply line is already present. So I just needed to install the return, which I didn't realize was a smaller line. Got that in without too much trouble. The wiper motor came out with a little struggle and I realized why. There is a vibration stud attached to it. It is broke and now I am wondering if it is needed or it can wait until I redo the dash some years later.
Broken vibration mount
nditiz1
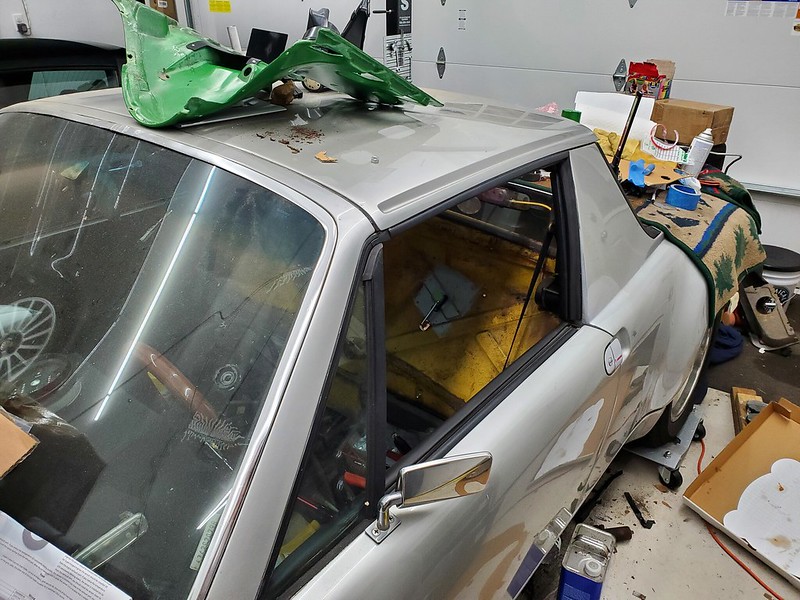
Aug 31 2021, 11:21 PM
Today and yesterday were spending days. After getting the tank out I decided to replace some of the things I wasn't going to address for awhile. Rubber grommets for the wiper motor, washer nozzles, fresh air box hoses, fresh air box gasket,...
Anyway another big purchase I wasn't planning on making were rear brake calipers. When I had the chance to drive the car a little last year the brakes seemed fine. The car stopped when I pressed the pedal. Since I had to open the system to relocate the brake regulator I needed to bleed them again. Unfortunately the lower bleeder on my red (ew) caliper passenger side broke

So it was a call to PMB. At last years Aircooled vintage swap meet I was the lucky winner of a set of brake calipers done by PMB. This will come in hand especially after braking the bleeder. I thought it would be a quick fix, but PMB is currently swamped with a 3 week turn around. That would put me right at Okteenerfest. I sent out the Bat Signal and Perry has a set of NOS ones. Not cheap, but at least they will arrive before PMB can restore these ones.
Going back to my S-bend to the regulator I could not get it to stop leaking at the coupler. I am thinking the coupler is too long and the bolts cannot secure the flare against the inside enough. I just removed it and will use some of the old line to create a longer piece that is connected just inside the firewall. Hopefully that will do the trick.
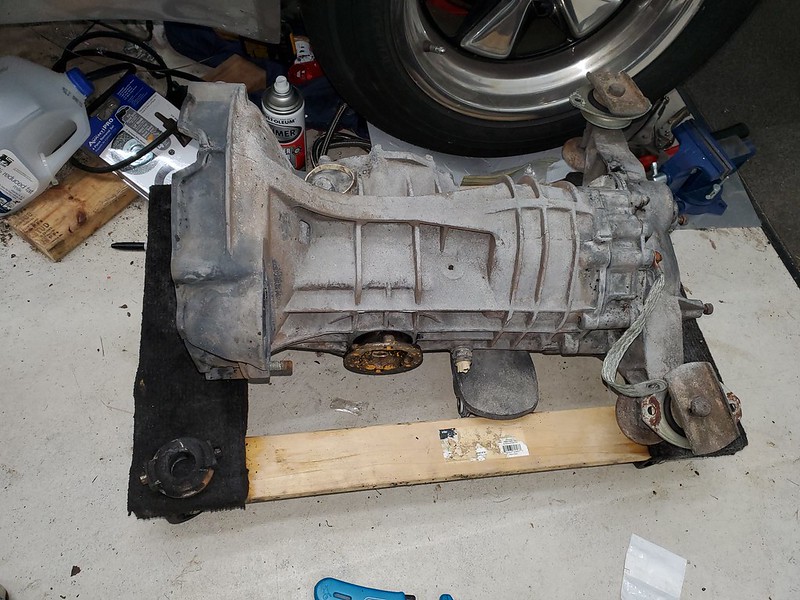
I spent a lot of the day cleaning the trans. I used brake clean, oven cleaner, simple green and a power washer. It needs a minor cleanup in the bell housing and then I can change the oil and put the fork, bearing, and bushings back on.
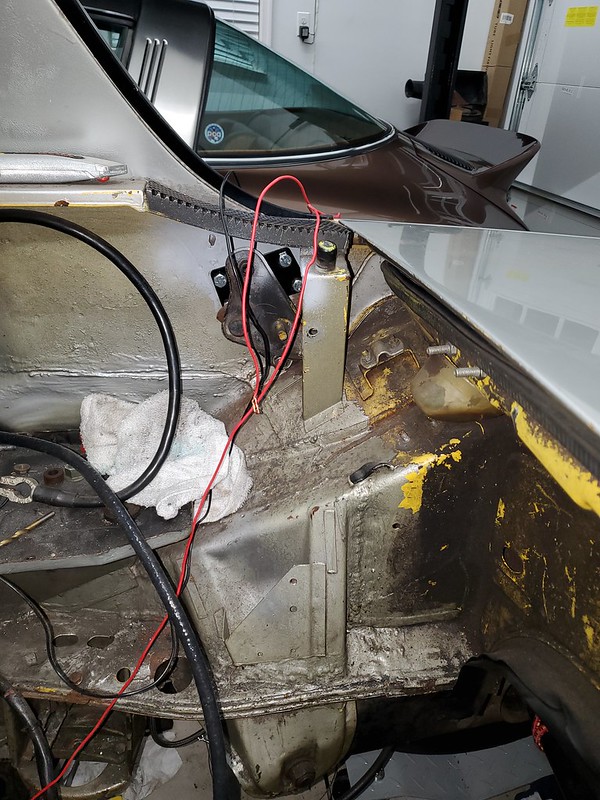
I was able to fix a trunk plague since I purchased the car. It suffered from rust fairly badly on the passenger side and as a result the hinge pivot broke free from its welds. I cleaned up the remaining spot welds and used 1 of the 2 JWest hinges that came with the car. Install was not too bad. If I have enough time I will install craigs (camp914) shock kit as the torsion bars are no longer on.
I got the working wiper motor hooked up and briefly gave it a go. Everything seemed to function. I will know more once the 914Rubber parts are delivered Thursday.
Removed the old throttle cable and installed Patrick MS's 914-6 one.
So things are progressing towards the goal of making the fest. The lingering engine no start is a huge concern. Al sent a new Microsquirt brain to me today. Hopefully that is what the issue is and I can get a first start this weekend. If I can get the engine tuned outside the car by the 9th and installed by the 16th it will give me 1 week to drive around and test before the big drive. Fingers crossed.
Justinp71
Sep 1 2021, 12:06 PM
I'll keep my fingers crossed for you! I'm curious if it is the brain, I was hoping they were reliable. Where did you decide to mount the brain? I will need to start my efi install maybe this winter...
nditiz1
Sep 1 2021, 11:32 PM
Mine are crossed as well. For both(MS2/Microsquirt) I was going to put them behind the passenger seat.
Wiper motor - 1 Me - 0
Fresh air box - 1 Me - 1 - after recuperating I got back at it and got it in.
I have given up on the wiper for now. It will be RainX if I can finish in time. I had washed everything in oil, tested the motor, tested the arms moving. Kept everything loose and once I got it all buttoned up I realized why I had to keep it loose. The pass. side shaft wanted to twist the threads where as the driver just wanted to move inside like it is supposed to. In order to properly oil and restore this unit, one needs to take the clip off and remove the center pivot from the threaded shaft thereby exposing whatever rust has gotten inside to bind it up. On the bench it looks great, but if you tighten the large nuts it binds, that's because this underlying issue. So while I could remove and refresh for the 3rd time I was not going to have time to diagnose why it always wanted to be on. If the car was on the wipers wanted to also be on. The wiring was correct so something must be shorted together or its something in the wiper stalk. Anyway too much time wasted on this so maybe later
Managed to get the clutch arm rebushed and greased. New bearing is on. Just need to drain the tranny and add new oil and it is ready to be put back on the engine.
The airbox now has a non over sprayed grill and a new seal from 914Rubber. I needed to unbolt the wiper assembly to get it to fit. What a pain it was to get the two 10mm back in. I had some left over Skeet from my 911 back date project so I halved it and put that on both sides going to the blend valves. The hose I took off no longer had flex. They were statues that crumbled when flexed.
iankarr
Sep 2 2021, 12:43 AM
Go for it pal! Nothing like a deadline to move things along. Glad the fuel line install video helped. Did you also use the tips and tricks in the airbox one? That first start will put a permagrin on your face. I’m still smiling from mine. Keep it up. We’re all pulling for ya!
nditiz1
Sep 2 2021, 06:14 PM
I think I did see that tips and tricks vid, need to go rewatch it.
Tonight's agenda
Microsquirt arrived!!! Time to get wiring.
Bend up a brake line
Remove driver caliper
Fill tyranny back up - done!
nditiz1
Sep 3 2021, 02:34 PM
Ok the euro brake line from Napa is in place. It's a little too long, but that just means it has extra cool waves in it. PMB should make this conversion line.
Microsquirt is hooked in! I had it hooked up late last night (12AM) fired it off and had no RPM signal. I had the injectors now working but lost engine speed. What a trade off. The MS2 is being shipped back to DIY to test and diagnose. I spent most of the day working with Al back and forth on things to check and try. Eventually he found the wire that needed to be in place and my latest start test was successful. So now I have injectors firing, registering RPMs, temp, MAP, everything!!! I fixed the oil leaking from the rear cam tower - PO marred the surround getting the old cap out for the CPS from clewett. I'm not using that so stock cap went back in and sealed. Unfortunately 2 new leaks developed. 1 at the front which looks like the intermediate shaft cover, but I didn't see any from it only below it where the case meets. 2nd one is from below the cam tower. I had noticed a crack which looked to already have had some type of fix. I even added more JB weld to it hoping to reinforce. I'm surprised Ollie's did not mention/fix this, but maybe the PO did it when installing the Cam cases. In any case this might be one I just have to live with. Hopefully it won't leak more when the engine was gone through a heat cycle.
Tomorrow will be the day I finally get to throw some fuel and fire this baby up. Less than 3 weeks to go. 1 week to tune it, 1 week to get it in and button up all the loose ends. Less than a week to take it on a long trip to ensure no breakage. We are cutting it close.
Optimusglen
Sep 3 2021, 11:57 PM
Man I still have a leak under my intermediate shaft cover. Dropped my motor to R&R it and its still there. It's not terrible but kinda bumms me out on a fresh new engine.
Nice to see the progress!
nditiz1
Sep 4 2021, 04:05 PM
So I added the tensioner lines to that list. I put new washers and o-rings. I was able to tighten the banjo bolt so hopefully that will stop it. For the center case below the IMS cover I'm just going to let it go. Then I will never have to change the oil it will just keep recycling
BIG NEWS! She's a runner!!! Got some fuel logistics knocked out this morning. Had her running for about a minute before needing to go run some errands. If I can get a chance tonight I will try to run it a bit longer and at least sync each ITB. It sounds so good without the muffler, maybe I'll just run straight pipes.
@MB911 how much will your muffler cut down on your headers as far as sound? I think I went for the quiet, but now I want it mean LOL
Definitely forgot to hook the Alt back up before this vid. She was running off the batt...
First start19 days and counting
Dion
Sep 4 2021, 04:53 PM
Congrats! Like to see it coming together.
mb911
Sep 4 2021, 05:28 PM
I don't recall what system you bought but I think ultimately you will want it on there.
Optimusglen
Sep 4 2021, 05:33 PM
Congrats!
nditiz1
Sep 8 2021, 10:52 AM
Getting down to crunch time with so much still to do.
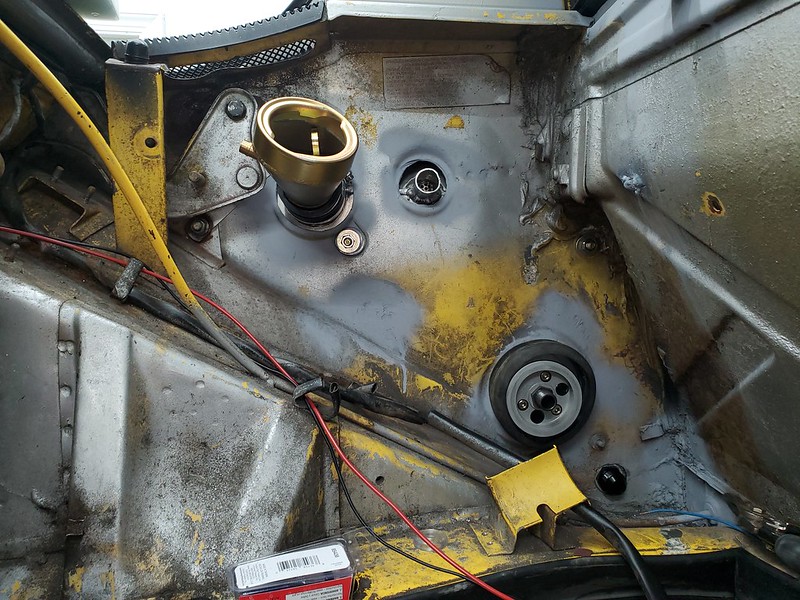
I have been putting off welding the last little piece, I think I need to get that in by tomorrow so I can put in the seals and start to move the engine into its resting place. I have been working on tuning the engine with Al and odds and ends. The front end is pretty much squared away with the tank back in and new fuel lines running up to it. My driver turn signal has some grounding issue or an issue with the holder that is making a bad connection. It works but only on the low circuit not the brighter one.
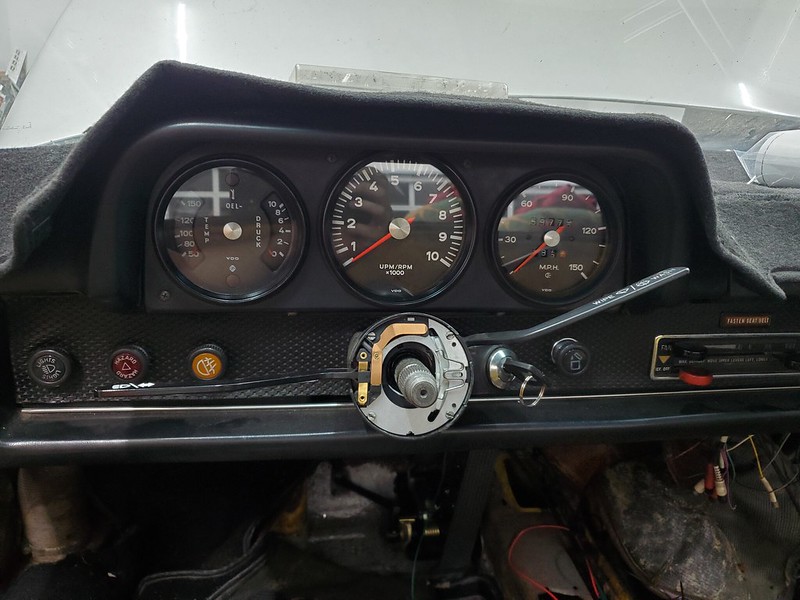
I have the new GT gauges almost fully in. The speedo was not touched, but the 10k tach is in and all wired up. It should work with the EDIS as I used one from a 74 and it had no problems with the signal. I needed to run a wire for the oil temp. I ended up using the console gauge temp wire for oil pressure. They final wiring will be done once the engine is in. I got the last hole cut for the oil tank and will begin to move it over in a day or 2.
Bucket list of things that are still lingering with 2 weeks and 2 days to go:
Install engine tin
Install oil tank
Install clutch
Install transmission
Hook up accelerator and clutch cable
Cut last plate to be welded in
weld in last plate
Install rear calipers
Bleed brakes
Run wires for ECU in trunk
Install engine mount
Install engine seal
Install engine
Run oil lines
Install fuel filter/fuel pump/fuel lines in engine bay
Install seats and backpad

DaveO90s4
Sep 9 2021, 05:41 AM
Hi Nick - looking good. You're probably too busy to answer but if not too busy, can you please tell me what fuel injectors you are using on your triumph itb's? Also, I'm chasing an aluminium fuel rail to replace one of my plastic ones - you don't have one left over by any chance?
Thanks
Dave
Australia
nditiz1
Sep 11 2021, 11:27 PM
Hey Dave, I'll have to check with Al from X-Factory, not sure which ones were put in.
Update time - I'm 2 days behind schedule. I have not started to move the engine into the bay as I'm still trying to tune the non load. Hopefully another day I should have it. I start to here a tapping coming from the 1/2/3 side as the engine warms. Might need to double check the valves. If all good then, maybe it will go away...or hopefully its not harmful.
The last bit of welding is done (for now - this car is a shit box). This might become just a track car, even though I don't race. That's ok it has enough bling to cover up all the eye sores. Like this:
GT Gauges
Major things that need to be done this week
-Trans to engine - don't forget clutch
-Install oil tank
-Run oil lines
-Hook up all wiring
-Install fuel pump
-Hook up cables (speedo, clutch, throttle)
If I can have the engine running in the car by Thursday I'm in pretty decent shape. Big IF
DRPHIL914
Sep 13 2021, 10:04 AM
QUOTE(nditiz1 @ Sep 12 2021, 01:27 AM)
Hey Dave, I'll have to check with Al from X-Factory, not sure which ones were put in.
Update time - I'm 2 days behind schedule. I have not started to move the engine into the bay as I'm still trying to tune the non load. Hopefully another day I should have it. I start to here a tapping coming from the 1/2/3 side as the engine warms. Might need to double check the valves. If all good then, maybe it will go away...or hopefully its not harmful.
The last bit of welding is done (for now - this car is a shit box). This might become just a track car, even though I don't race. That's ok it has enough bling to cover up all the eye sores. Like this:
GT Gauges
Major things that need to be done this week
-Trans to engine - don't forget clutch
-Install oil tank
-Run oil lines
-Hook up all wiring
-Install fuel pump
-Hook up cables (speedo, clutch, throttle)
If I can have the engine running in the car by Thursday I'm in pretty decent shape. Big IF
![popcorn[1].gif](http://www.914world.com/bbs2/style_emoticons/default/popcorn[1].gif)
Go Go Go!!!! cheering you on while trying to get mine going too.
lots to do to get it going before this weekend and get some seat time in to break it in before we leave.
clean those grounds well and get them all hooked up properly - last time i had the motor out and put it back in after paint i didnt have proper ground at the fuel pump, so it took a while to figure that out

hope to see you there.
Retroracer
Sep 13 2021, 11:43 AM
GT Gauges looking good!! Getting close......
- Tony
IronHillRestorations
Sep 13 2021, 01:15 PM
Make sure you put the lower oil line on the tank before you put the tank in the fender
nditiz1
Sep 13 2021, 03:10 PM
Thanks Perry. I put the fitting on, but did not think to attach the hose.
nditiz1
Sep 14 2021, 12:56 PM
Oil tank in!
Trans mated!
Let's get this bitch installed!
Run oil lines - partially done
Run wires for ECU - partially done
Engine tin - partially done
Engine seal installed
Backpad installed
Engine mount installed
Install engine
Connect drive shafts
Connect shift linkage
Tune.....
The engine is leaking a bit of oil while running. I think it is the camshaft seal. It was either not installed correctly or it is something else. A 20 minute run probably drops about a tablespoon. That is a project for winter, trying to get this down the road.
nditiz1
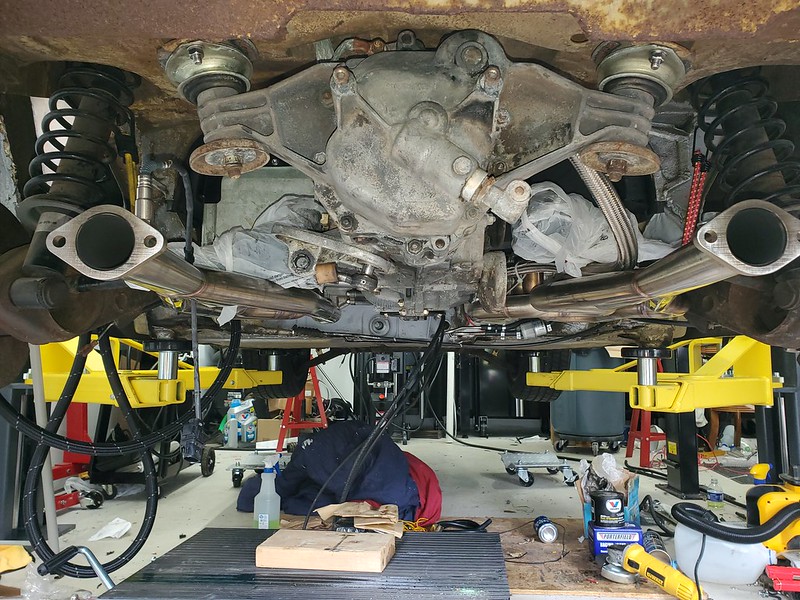
Sep 16 2021, 02:45 PM
And then there was a 6. Engine is bolted in. I made my goal of having it in a week before the fest. Still plenty to do.
Hook up fuel lines
Hook up all wires
Mount main ECU
Connect throttle
Connect drive shafts
Connect clutch cable
Connect speedo cable
Fix E brake - nope not this one, in gear it is
Install shifter linkage
Install muffler
Install seat, maybe 2
Drive and tune
Luke M
Sep 16 2021, 04:39 PM
QUOTE(nditiz1 @ Sep 16 2021, 01:45 PM)
And then there was a 6. Engine is bolted in. I made my goal of having it in a week before the fest. Still plenty to do.
Hook up fuel lines
Hook up all wires
Mount main ECU
Connect throttle
Connect drive shafts
Connect clutch cable
Connect speedo cable
Fix E brake - nope not this one, in gear it is
Install shifter linkage
Install muffler
Install seat, maybe 2
Drive and tune
Take a look at your trans mounting hardware. It's not correct. That big cup washer goes on top of the trans ear.
This is a "lo-fi" version of our main content. To view the full version with more information, formatting and images, please
click here.