Full Version: Rebuilding my race car
Cool. Thanks. I am placing a order right. Don't tell the wife. I spent
the last two weeks selling over 150 books to make room for the
kids books. Just one little book should not make a difference right:)
| QUOTE (racerx7 @ Jan 31 2006, 01:31 AM) |
| WSU Formula SAE Drivetrain Lead/ Suspension Team http://www.mme.wsu.edu/~sae/  :worship: :worship: Please for this arm chair want to be designer, could you recommend books, softwarefor me to look and read about. I have always wanted to go to school just so I could enter that contest. Maybe in my next life time. |
this software has been recommended by a few people in the know

Mitchell suspension software programs
| QUOTE (Mueller @ Jan 31 2006, 11:58 AM) |
| this software has been recommended by a few people in the know Mitchell suspension software programs |
Very nice. thanks for the link.
| QUOTE (racerx7 @ Jan 31 2006, 01:10 PM) | ||
Very nice. thanks for the link. |
no problem....I wonder if he'd offer a group purchase discount or a networked version for multiple people

I'd like a copy, but I have a hard time justifing the price for something I'd only use a few times a year if even that much......
Great looking fab work!
The microstub setup BrettW was talking about can be found at http://www.kartek.com This setup is commonly used in off road buggy racing.
I've attached a picture as well.
John
The microstub setup BrettW was talking about can be found at http://www.kartek.com This setup is commonly used in off road buggy racing.
I've attached a picture as well.
John
I'm borrowing a book that the guy that invented the mitchell software wrote. I've heard about his program as well, but haven't ever used it since you can do everything on solid works, just have to set it up first. And since we're college students we've been kind of running on the minimalist approach.
If you don't want to learn how to use a whole program and you want to do more of a plug and chug kinda deal his program is probably much better.
If you don't want to learn how to use a whole program and you want to do more of a plug and chug kinda deal his program is probably much better.
Hi Again
I'we been sick for over month but now i'am getting better (i hope).
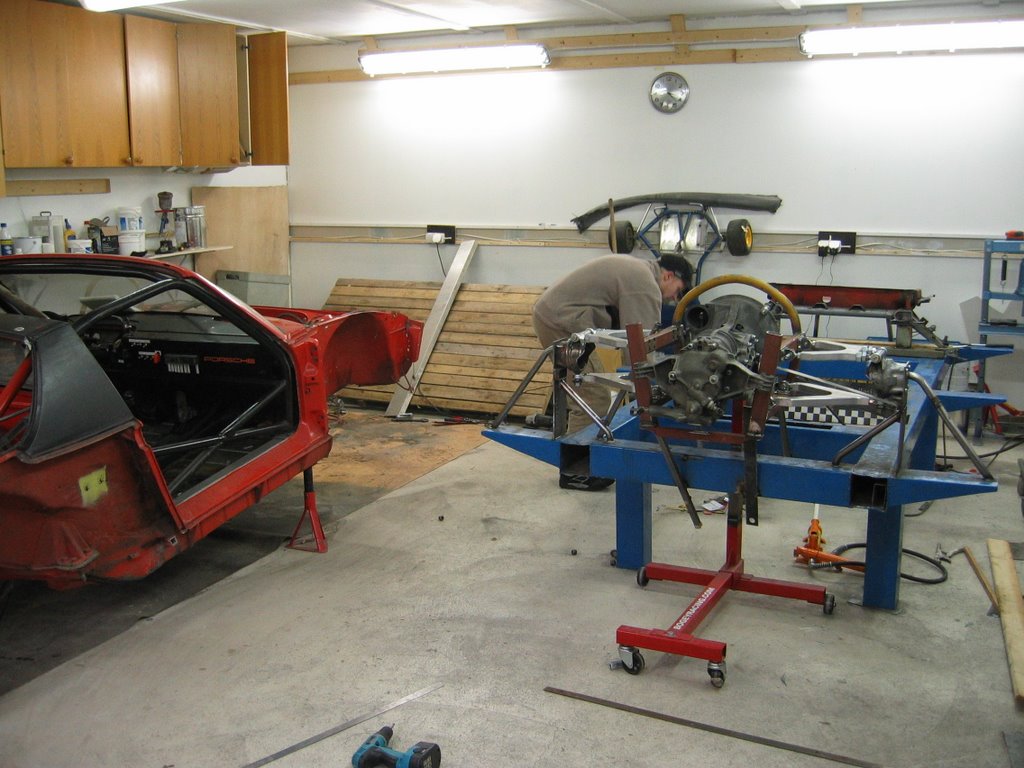
I don't know if i should call this progress but here is what we did last weekend.
I was thinking that i just make a frame out of the 30*50mm square tube which i
use to tie the front and rear attachment points together. Then i raise the whole setup
1" and weld roll gage tubes to it. How does it sound? Do you think there is something else
i should do to make the front better? When i have the frame part ready i will put it on a table and then measure that all are square with rear axle.
Here is the rear
i'am trying to get the suspension ready so i can lift the car over it. This should happen in a next 3 weeks.
Then i should have the car ready for Callicott Motorsports quarter panels (thanks Dan) as they arrive.
After those are on a car, i'll paint the car using a Jeroen's design with main sponsors colours.
Then of course i still need to rebuildt the engine and gearbox.
Oh, and finish a new trailer (thanks lurker Pekka)
Mika
I'we been sick for over month but now i'am getting better (i hope).
I don't know if i should call this progress but here is what we did last weekend.
I was thinking that i just make a frame out of the 30*50mm square tube which i
use to tie the front and rear attachment points together. Then i raise the whole setup
1" and weld roll gage tubes to it. How does it sound? Do you think there is something else
i should do to make the front better? When i have the frame part ready i will put it on a table and then measure that all are square with rear axle.
Here is the rear
i'am trying to get the suspension ready so i can lift the car over it. This should happen in a next 3 weeks.
Then i should have the car ready for Callicott Motorsports quarter panels (thanks Dan) as they arrive.
After those are on a car, i'll paint the car using a Jeroen's design with main sponsors colours.
Then of course i still need to rebuildt the engine and gearbox.
Oh, and finish a new trailer (thanks lurker Pekka)
Mika
Did Harris have anything to do with this?!?! 
Harris?
way to go Mika! I like your plans!
but since you're at it... why not make a double a-arm front suspension as well?

but since you're at it... why not make a double a-arm front suspension as well?
Nice work! I have one question. Why did you attach the lower control arm (outer hiem joint flat?) It looks like it would bind in full travel and stress the joint. I'm no chassis builder, just an observation.
I have one question. Why did you attach the lower control arm (outer hiem joint flat?) It looks like it would bind in full travel and stress the joint. I'm no chassis builder, just an observation.
Jeroen, don´t even start !!! 
Mika already has a lot to do before summer. If he starts to design a new front suspension too, we don´t see him next summer at the track.
But, maybe during next winter.....
Mika already has a lot to do before summer. If he starts to design a new front suspension too, we don´t see him next summer at the track.
But, maybe during next winter.....
| QUOTE |
| Why did you attach the lower control arm (outer hiem joint flat?) It looks like it would bind in full travel and stress the joint. |
I am not Mika, but.... Yes, it looks like it will bind in full travel, but it wount. I asked the same and Mika showed to me it really works.
Hi guys
Luckily our rules doesn't allow to change front to double A-arm.
And as Timo allready told it does work. We will add small shape to final aluminium parts so that there is even more travel. I just need total of 10cm. travel. And one more thing, that joint is taking all the braking and acc forces and it is much stronger that way.
Mika
| QUOTE (slugmika @ Feb 21 2006, 10:11 AM) |
| And one more thing, that joint is taking all the braking and acc forces and it is much stronger that way. Mika |
Oh, I get it.
Thanks
BTW Rick, i love your car 
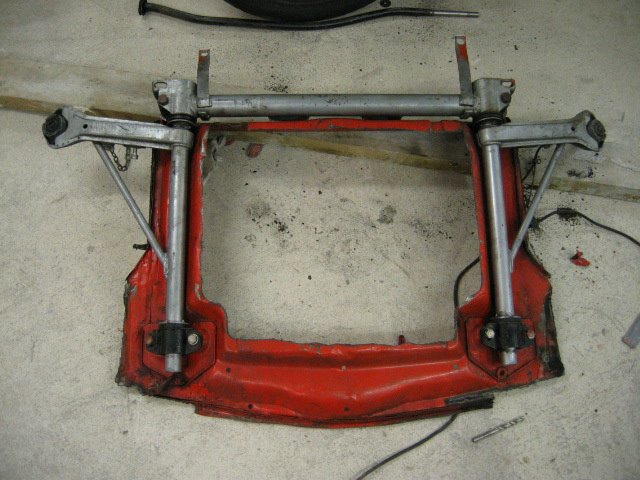
Some progress.
Front axle frame allmost ready.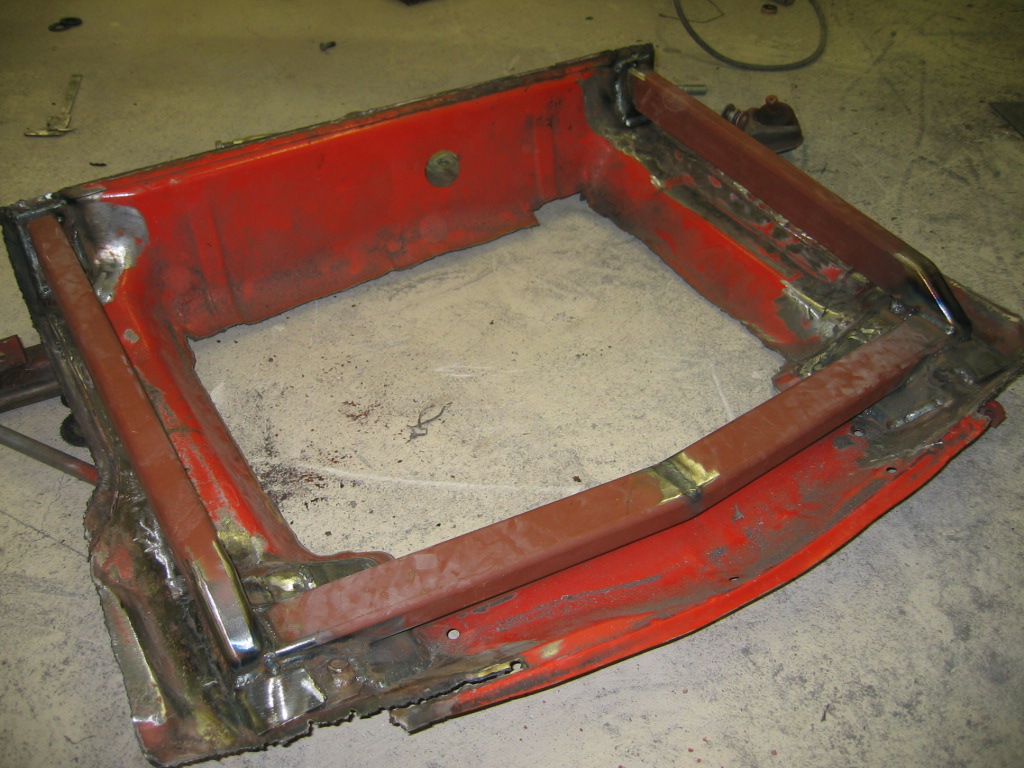
detail shot
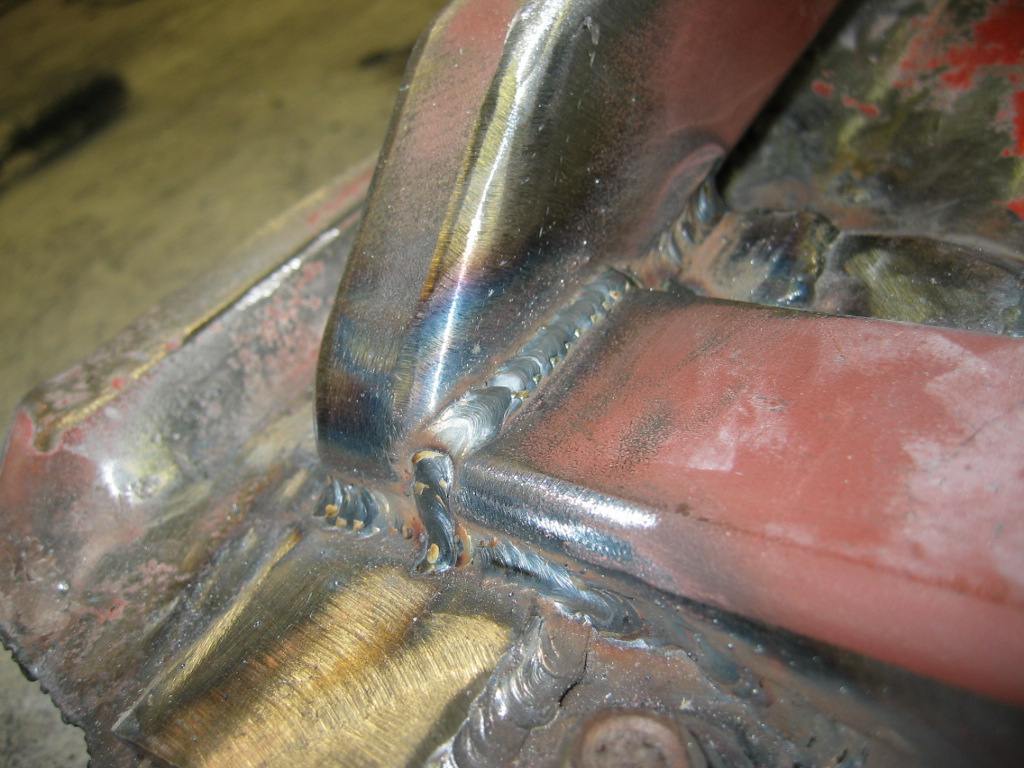
Friday i will have change to finish the frame. Then i can lift the front to table and start measuring.
Mika
Front axle frame allmost ready.
detail shot
Friday i will have change to finish the frame. Then i can lift the front to table and start measuring.
Mika
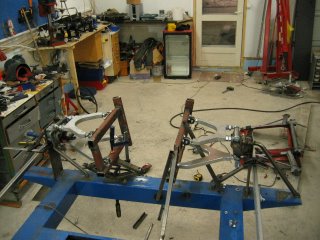
Some progres.
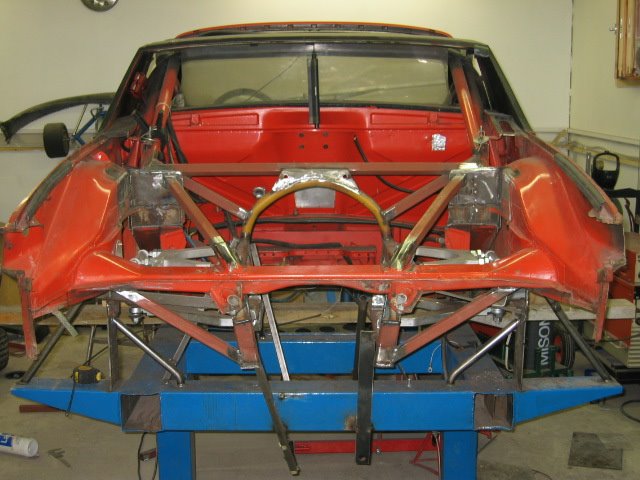
We got the front axle placed in a table and corrected some misalligments. Now the front and rear are in right place and body is about to be welded. We are going to raise the front about 2" and match the rear to that. Here's some pictures. Thanks BadJuha, Topi and Henkka.
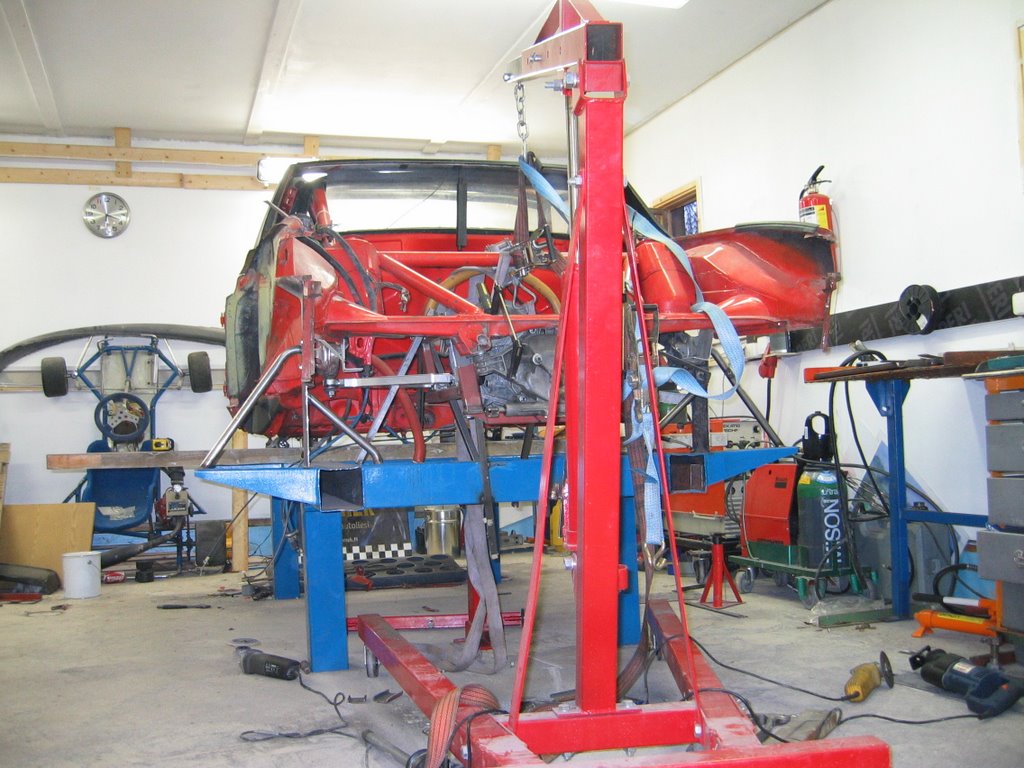
We got the front axle placed in a table and corrected some misalligments. Now the front and rear are in right place and body is about to be welded. We are going to raise the front about 2" and match the rear to that. Here's some pictures. Thanks BadJuha, Topi and Henkka.
you guys are nutz!
and i respect that 
and i respect that
Thanks Aaron, i don't know if i'am nutz or just plain stupid 
We also raised the gearbox and engine 28mm. Now there is more room for headers etc. under the car.
We also raised the gearbox and engine 28mm. Now there is more room for headers etc. under the car.
cool!
got any pics of the front?
got any pics of the front?
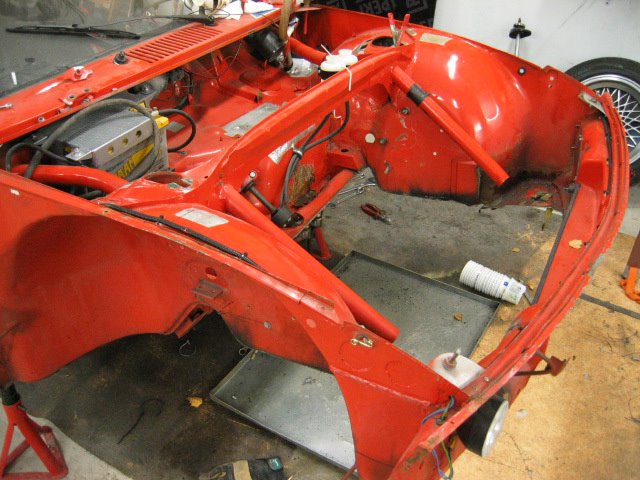
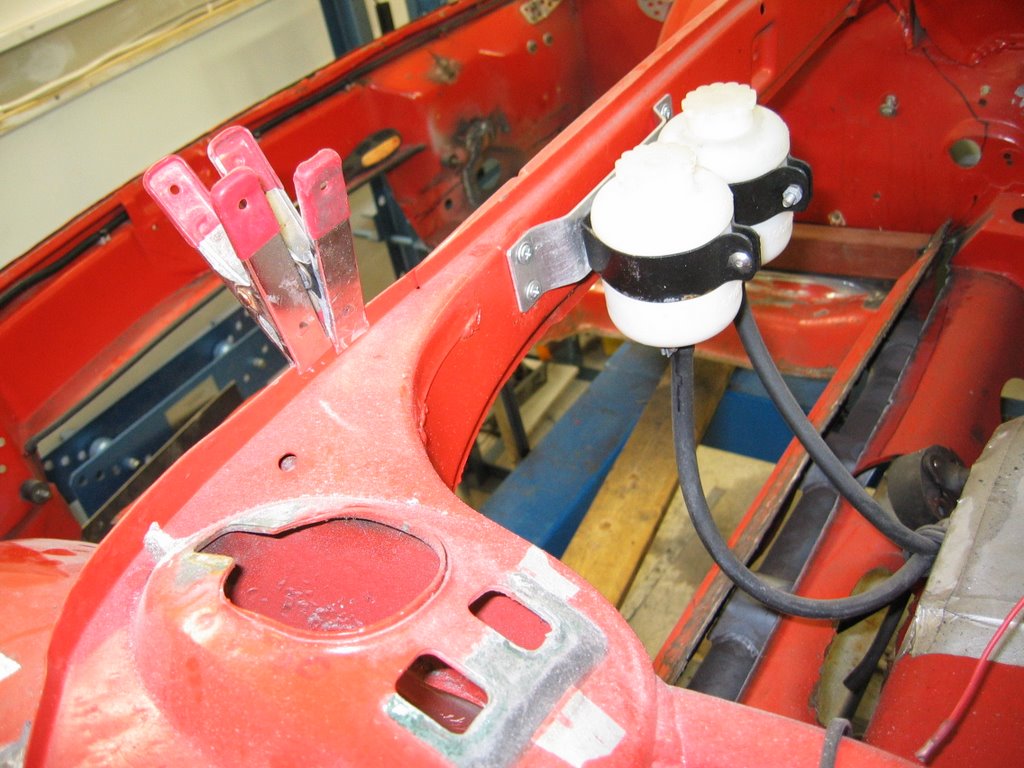
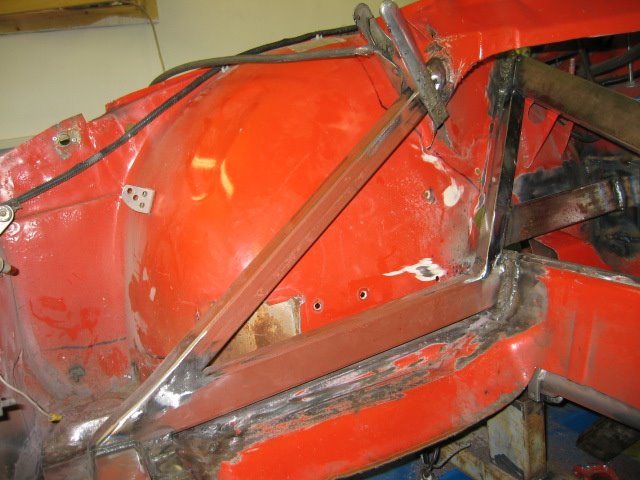
Here is front pictures. Still need to adjust the front with fenders and hood on before welding because it got bended a little while lifting.
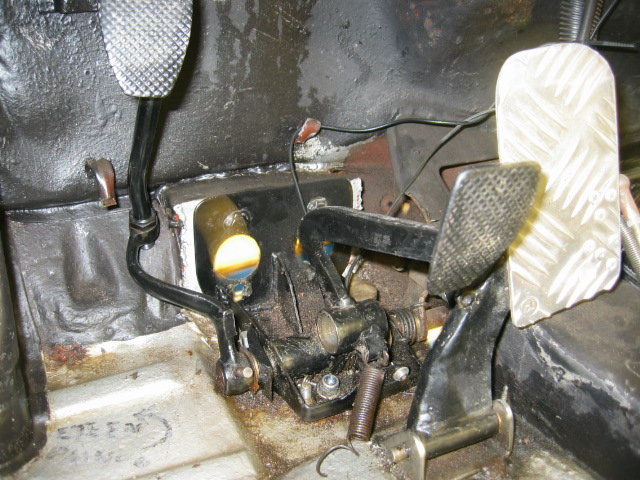
I also need to make room for r&p and re route the steering shaft. New pedal box is also under work (if someone needs RSR copy, i have one extra).
Its hard to see from this photo but front was over 30mm angled.
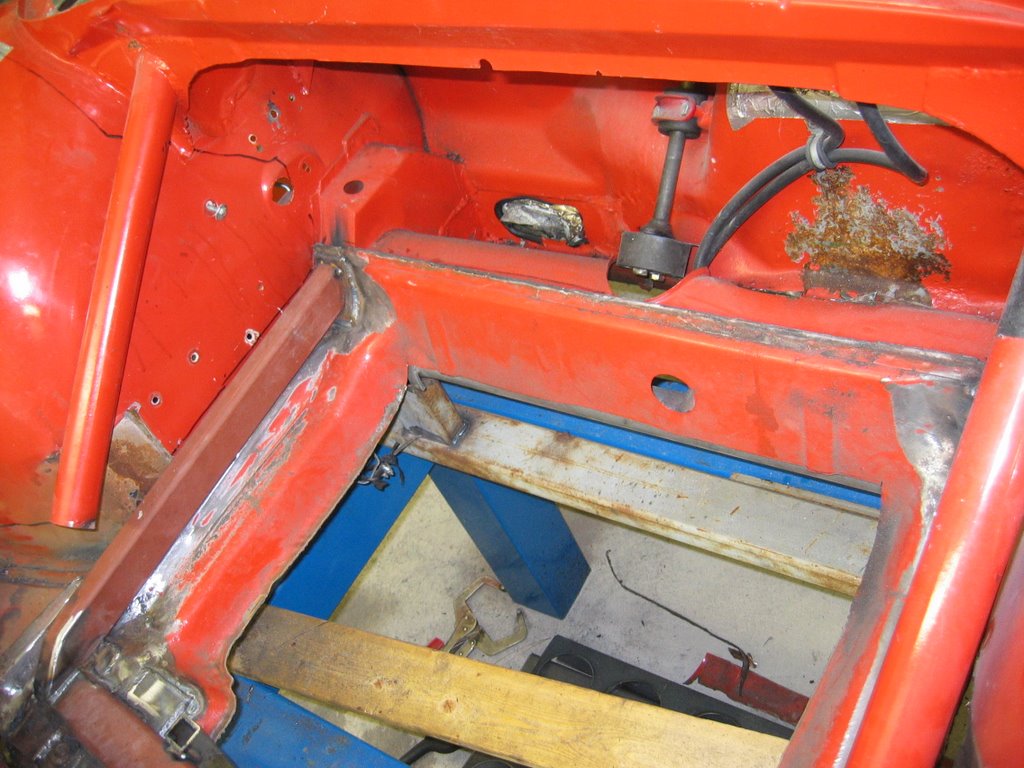
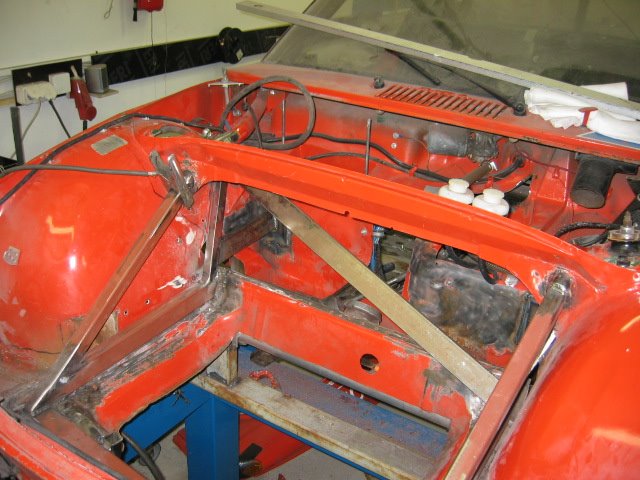
This one shows the angle problem better even though the gap in this one shows mainly the height modification.
Mika
I also need to make room for r&p and re route the steering shaft. New pedal box is also under work (if someone needs RSR copy, i have one extra).
Its hard to see from this photo but front was over 30mm angled.
This one shows the angle problem better even though the gap in this one shows mainly the height modification.
Mika
Mika,
Hard to tell from the pics but are you running the upper and lower arms parallel at each end?
If not, how are you determining where you are putting your static roll center?
Does it stay above ground through roll front and rear?
How much camber gain are you designing for front and rear? (deg/in or deg/mm is fine as I can convert easily to /in)
I am building a tube chassis car right now and have been beating the crap out of my brain reading Milliken and any other suspension book I can get my hands on to figure out where I want to put roll centers, how much camber gain I want to see on 2" of bump, etc. and was interested in knowing what you are setting yours up at.
Thanks,
Tim
wow! looks pretty complex to get it all to close up again
got any info on the RSR pedal box?
got any info on the RSR pedal box?
Hi guys
Tim, yes upper and lower are parallel. Now it's easy to adjust roll center just by changing the upper arms angle.
I don't remember how much is the camber gain but i'll check that later from my drawings. Front is stock but just raised 2" so camber gain is as per original.
I don't know if you should follow my way because this is my first multilink suspension. I'am sure we need to test this a lot but that happens after 50cm of snow has melted
I'am sick at home so i'll have time to check the camber gain later today.
I'll take some pictures for you Jeroen, later
Mika
You've been sick a lot lately. Take care of youself, man!
Yes i'we been sick over 4 months now and fever over 2 moths. Finally yesterday i got a call from my doctor and she had "good" news, i have lung fever. That's good news only because finally we have disease named and medicine which should take care of that
Pedal box pictures are in my blog now.
Progress is slow but i will be there when season opens
Just need my new Koni's so i can make the brackets and make needed modifications to tub
Mika
Pedal box pictures are in my blog now.
Progress is slow but i will be there when season opens
Just need my new Koni's so i can make the brackets and make needed modifications to tub
Mika
Koni's just arriwed so i started to make brackets for them.
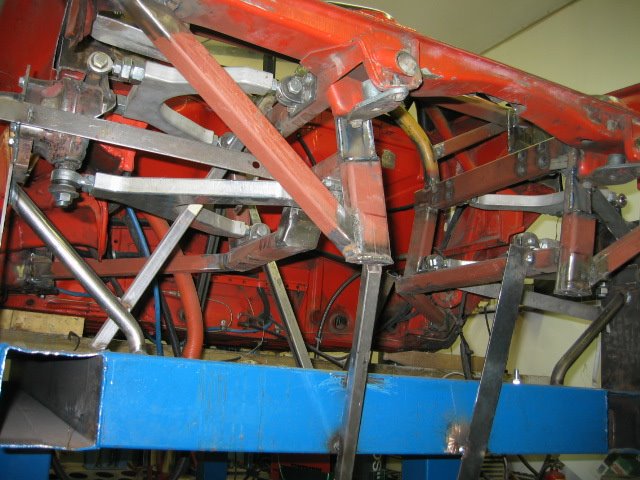
Here is couple of pictures about progress. I <!-- emo&:sawzall: --><!-- endemo --> off the shock towers so i will have
more room to make the brackets.
Suspension is also welded to chassis but it's still attached to table so i can make the new supports for transmission.
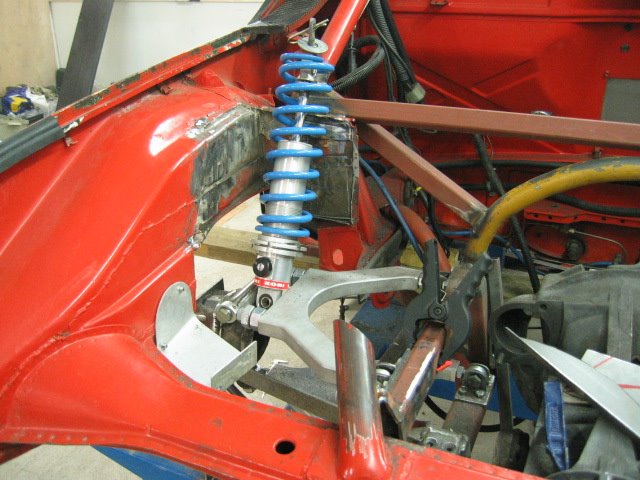
Here is couple of pictures about progress. I <!-- emo&:sawzall: -->
<!-- endemo --> off the shock towers so i will havemore room to make the brackets.
Suspension is also welded to chassis but it's still attached to table so i can make the new supports for transmission.
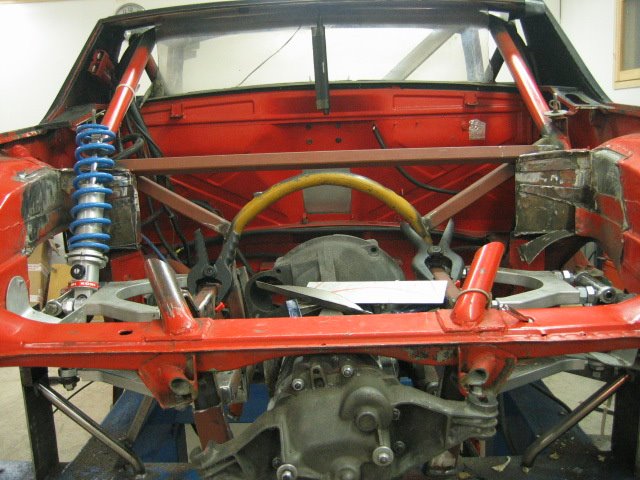
Rear is allmost ready. Only thing to do is the shock mounts.
Front frame is also quite ready.
When fenders arrive, i can make new bumper mounts and oil cooler surround.
I started to make the new pedal box

Thats all for today
Mika
Front frame is also quite ready.
When fenders arrive, i can make new bumper mounts and oil cooler surround.
I started to make the new pedal box
Thats all for today
Mika
mika! you are insane!!! looks totally awesome!!!! cant wait to see this bad boy complete!!!
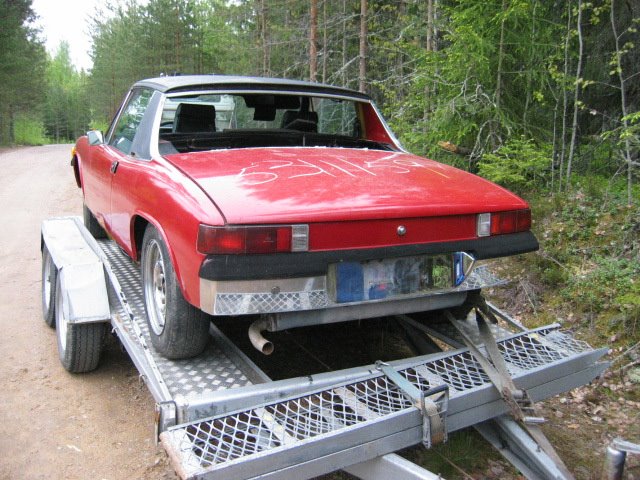
BTW - was this an original finland car?
BTW - was this an original finland car?
Hi Aaron
Car is imported from Florida to Switzerland and from there to Finland. This car was really rusty. One of the reasons to do this extensive suspension fix was that my car was wrecked and tub was 50mm bendt in front. I think i will need to find better tub to start my full on race car Well, maybe i'll do a Porsche B32 replica first  That would be something else for Finnish Roadsport Class.
BTW Aaron, your car looks amazing with the new paint, not that it was ugly before.
Mika
Car is imported from Florida to Switzerland and from there to Finland. This car was really rusty. One of the reasons to do this extensive suspension fix was that my car was wrecked and tub was 50mm bendt in front. I think i will need to find better tub to start my full on race car
Well, maybe i'll do a Porsche B32 replica first That would be something else for Finnish Roadsport Class.BTW Aaron, your car looks amazing with the new paint, not that it was ugly before.
Mika
I am enjoying your project very much. I wish the SCCA would allow us to change these things for production.
I only have one comment, if it is okay, It appears you have just placed the shocks on the rear suspension for the photo purpose, but if they are mounted in that manner, the unsprung mass will increase. If they are mounted with the shock body mounted to the chassis and the shock shaft to the suspension.
Keep up the awesome work, I am looking forward to future pics.
Erik Madsen
Thanks for comment Erik.
What would you do? We were thinking about the inline arrangement with pushrod's but thought that we should leave something to do for next winter .
I was going to attach the shock body to suspension and shaft side to chassis, but i can still make it other way if it's wiser.
Btw, do you know how much should i use bumpstop with these Koni's? I figure that it's enough if i just put so much that the shock doesn't bottom?
Mika
What would you do? We were thinking about the inline arrangement with pushrod's but thought that we should leave something to do for next winter
.I was going to attach the shock body to suspension and shaft side to chassis, but i can still make it other way if it's wiser.
Btw, do you know how much should i use bumpstop with these Koni's? I figure that it's enough if i just put so much that the shock doesn't bottom?
Mika
Mika,
With pushrods it over complicates things, unless your packaging will dictate you must have them. As far as Iam concerned pushrods will only be a benefit for two reasons.
- suspension package is in the airstream, and yours really isn't.
-Suspesion package needs to be adjustable with regards to spring/damper progression.
My suggestion on your set up is to mount the shocks with the damper shaft attached to the lower a-arm, not the upper. This will also keep the mass lower in the car. As for the rubber bump stops, they really need to be installed, and I woudl suggest determining the final placement of the upper shock mount after you (maybe you already have) determine what the travel will be and where ride height will be. Then have the bumpers come into play in the last 10% of the travel. This would be my suggestion not knowing exactly what you have.
Erik
Erik
Now i understand what you mean. I need to attach the shocks to hub part. Those balljoints are not strong enough to attach shocks to arms. Arms are also designed so that they can't take the powers from shocks.
I'am trying to attach those as low as possible.
Thanks alot for your comments, i really appriciate it.
Mika
Finally i got the quarters and front fenders, BIIG THANKS DAN!
Next weekend we are going to prep the tub for paint and paint it.
But before paint i still need to weld few spots.
Here is couple pictures of Callicott Motorsports REALLY nice fg parts.
Mika
ps. Dan, i didn't find the "motorsport" font of your logo but i will keep searching. This is the closest one that i had.
Nice!
Those fronts look a lot better than the ones I got from Rennspeed
Oh and check your mailbox for the font/logo
Those fronts look a lot better than the ones I got from Rennspeed
Oh and check your mailbox for the font/logo
quality of the parts is suberb 
Jeroen, i can't open or save the logo eps
Jeroen, i can't open or save the logo eps
It was nice sunny day and +10c so i painted quarters outside.
First coat of blue is on (front is still unpainted)
Next light skim of bondo and final paint.
Engine bay is ready for engine.
Ok, there is some brackets still to be welded and couple of places where the tub is welded to table needs to be painted again.
Jeroen, i got the font and now Callicott Msport logo is ready, thanks.
its got the blues 
Troubles! Need to make new a-arms. Someone (me) did a slight 80mm mistake when measuring track width (from bearing house to bearing house).
Oh well, the new ones will be made of tube. Front is ready and even the steering shafts are moved to trunks side.
No problem in front with 225-50-16 tires.
Mika
Oh well, the new ones will be made of tube. Front is ready and even the steering shafts are moved to trunks side.
No problem in front with 225-50-16 tires.
Mika
good color choice
hi again
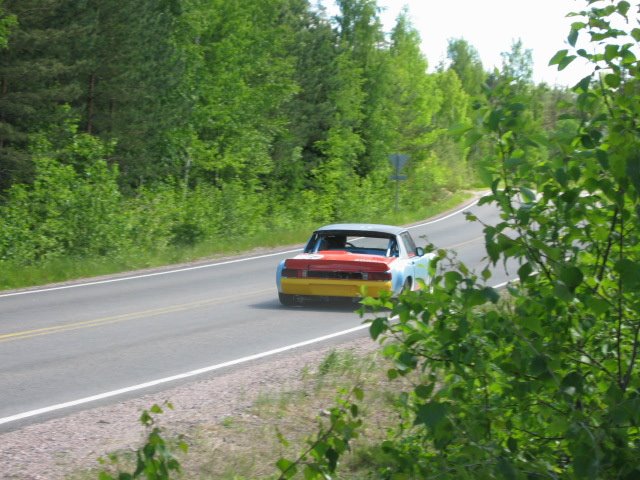
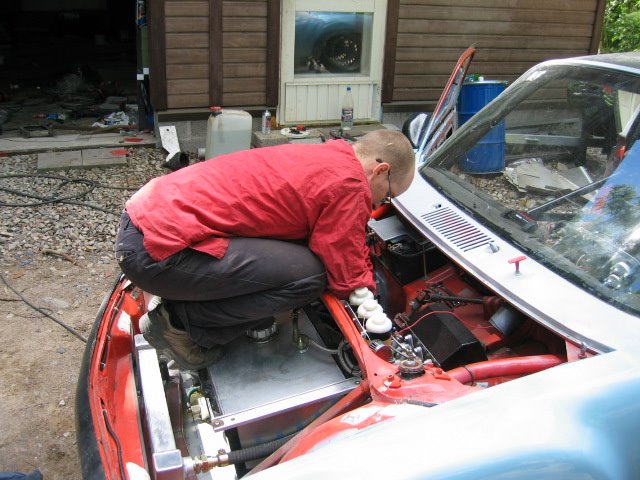
still 1week to first race. engine is finally ready and after trying 8 times it now fits.
car is on its wheels and yesterday we started to rebuilt oil-lines and system.
hopefully we'll test drive the car in weekend.
still 1week to first race. engine is finally ready and after trying 8 times it now fits.
car is on its wheels and yesterday we started to rebuilt oil-lines and system.
hopefully we'll test drive the car in weekend.
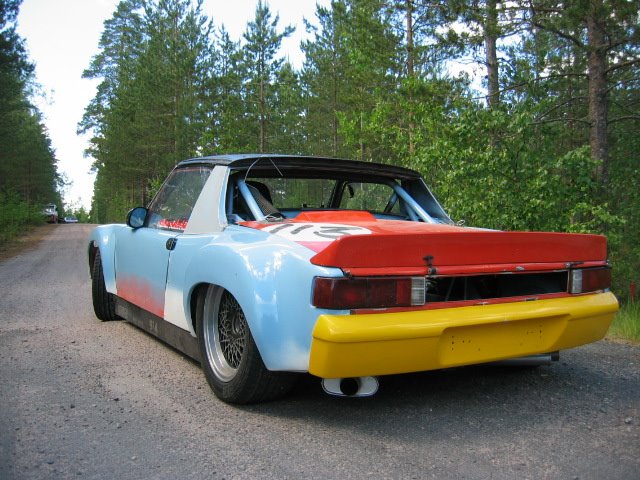
Not much interest here I think well call this thread dead, but before that here is some pictures.
Because of lot of things i did not complete my car before first race. Now we have one open class race in next weekend and we are going to give the shakedown in there. We haven't been able to drive in a track at all so it might be stupid to even go Next official race is in 8th of next month but we are going to get a new baby in 6th so i won't be able to go there. There is lot of things that needs to be finished but we'll have the new look ready before Historic Grand Race (thanks again Dan and Jeroen).
Thanks
Mika
ps. i just parked my future (suby) project to barn.
I think well call this thread dead, but before that here is some pictures.Because of lot of things i did not complete my car before first race. Now we have one open class race in next weekend and we are going to give the shakedown in there. We haven't been able to drive in a track at all so it might be stupid to even go
Next official race is in 8th of next month but we are going to get a new baby in 6th so i won't be able to go there. There is lot of things that needs to be finished but we'll have the new look ready before Historic Grand Race (thanks again Dan and Jeroen).Thanks
Mika
ps. i just parked my future (suby) project to barn.
OMG!!! the thing is L O W !!!!
hows the new suspension feel?
hows the new suspension feel?
That rear suspension is a work of art! Looks great. What kinda springs or shocks ar you going to put back there?
eric
eric
way to go Mika!
what did you end up using for the front suspension?
you mentioned changes to the a-arms...
details / pics ?
and keep us posted when the new baby is born!
Hi guys
New suspension feels different. Steering response is much much "tighter". Now i can say that it feels like go-cart. Aaron, the front is actually still 2cm too high, rear is in its riding height.
Rear springs are 82kg/cm at the moment. We started to test it with 45kg/cm which is about 250lbs/inch. These springs are the 5th that we tested and these are quite close to final. Shocks are Koni's aluminium ones with double adj.
Front is the one that i used last year. Just raised it 7cm to correct the steering geometry to original porsche specs. 22mm torsion bars and 25mm cromoly sway bar. Front shocks are Spax's from England.
I'll add some pictures later
Mika
Here is better picture of the rear
QUOTE(slugmika @ Jun 15 2006, 11:17 PM) 
Here is better picture of the rear
Wow, that is amazing

You sure did a great job
This is a "lo-fi" version of our main content. To view the full version with more information, formatting and images, please click here.