
Full Version: Palindrome 914 Build Thread
Get a Face Mask. Goggles always fogged up so I ended up not using them. A face mask has full protection and does not fog up or get hot. Grinding wheel slag just bounces off. You're really doing a great job. Can't wait to see the new metal going on.
Ha, the last picture is a familiar one.. You're in deep too I see! Nice work!!
The eye thing sounds familiar too, been there 3 times, everytime drilled out and hurts like hell for 2 days.. I never go without goggles again...
The eye thing sounds familiar too, been there 3 times, everytime drilled out and hurts like hell for 2 days.. I never go without goggles again...
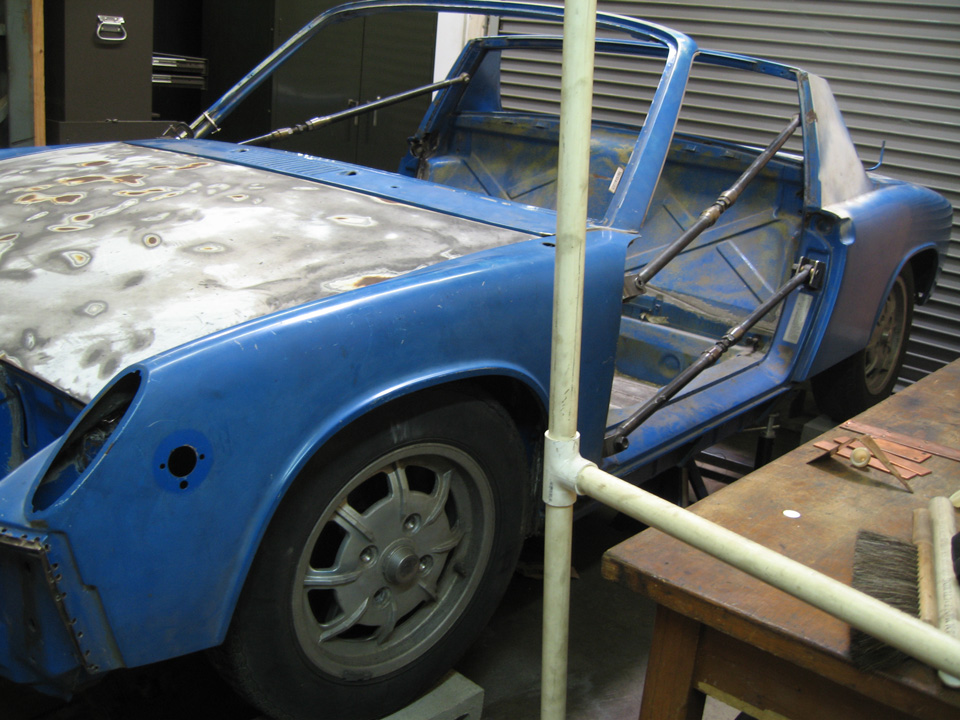
I haven't updated in awhile, but I have been busy. 
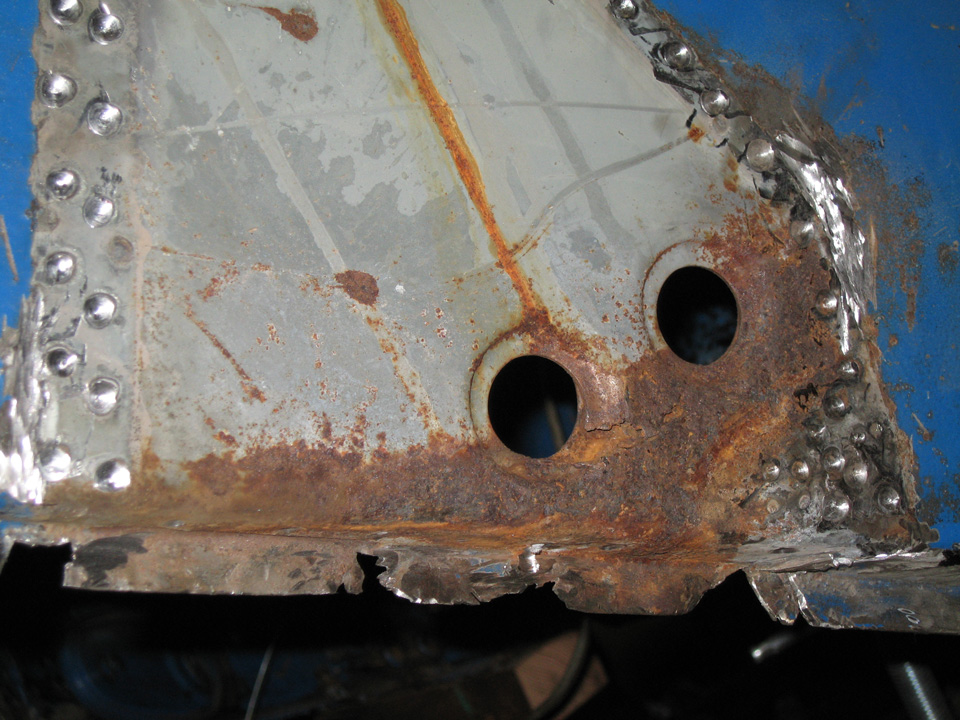
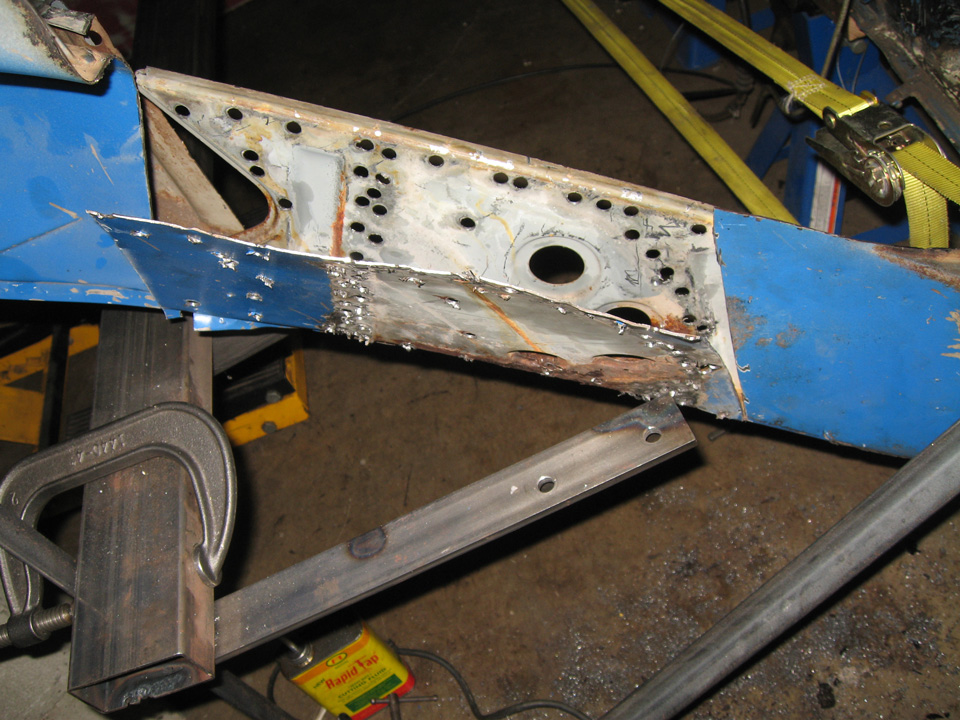
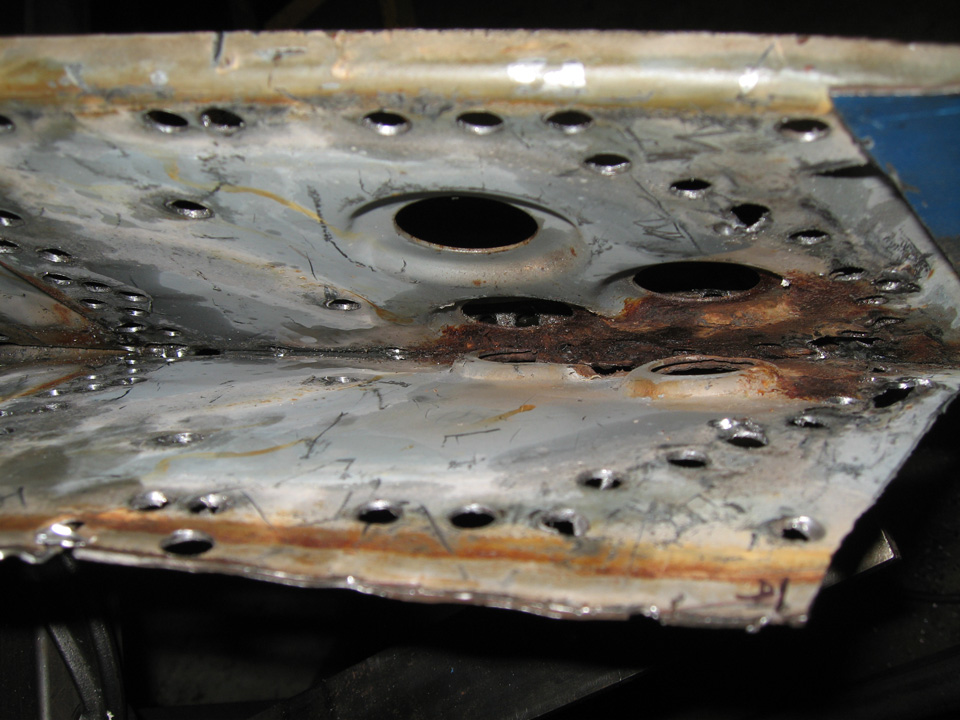
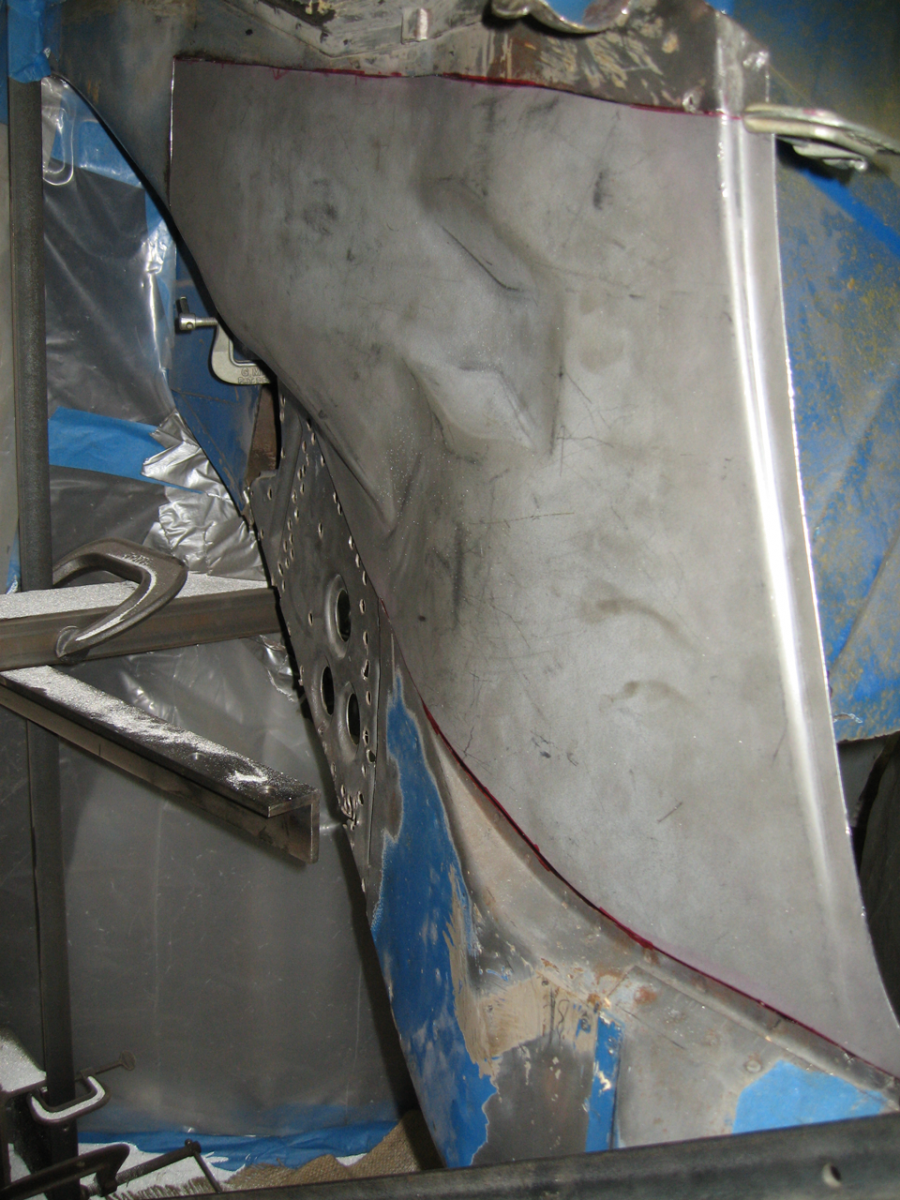
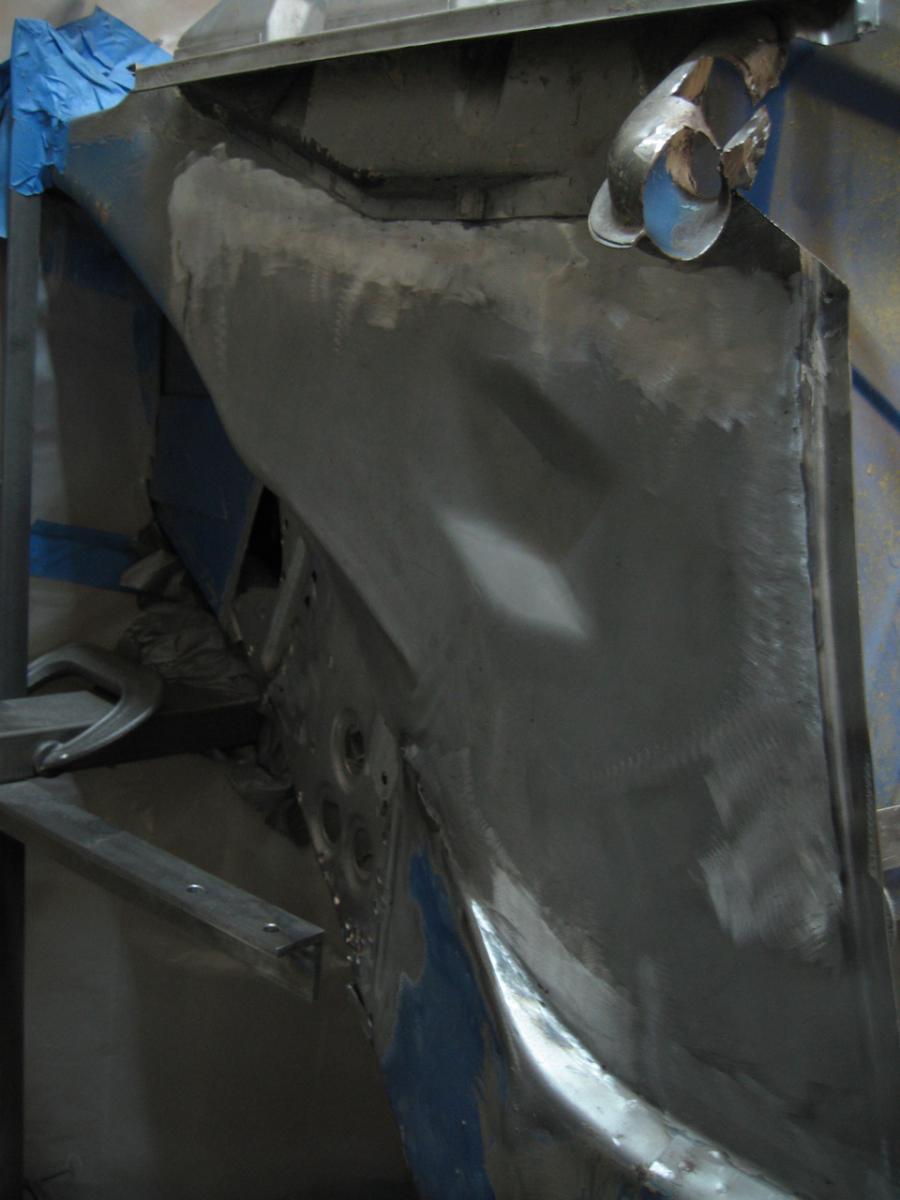
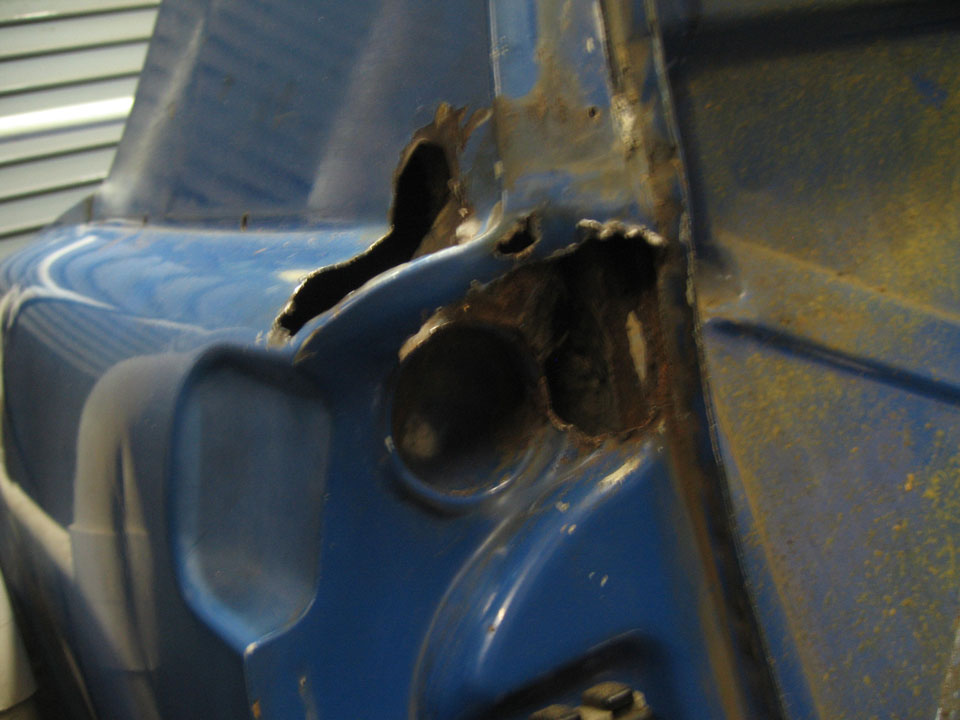
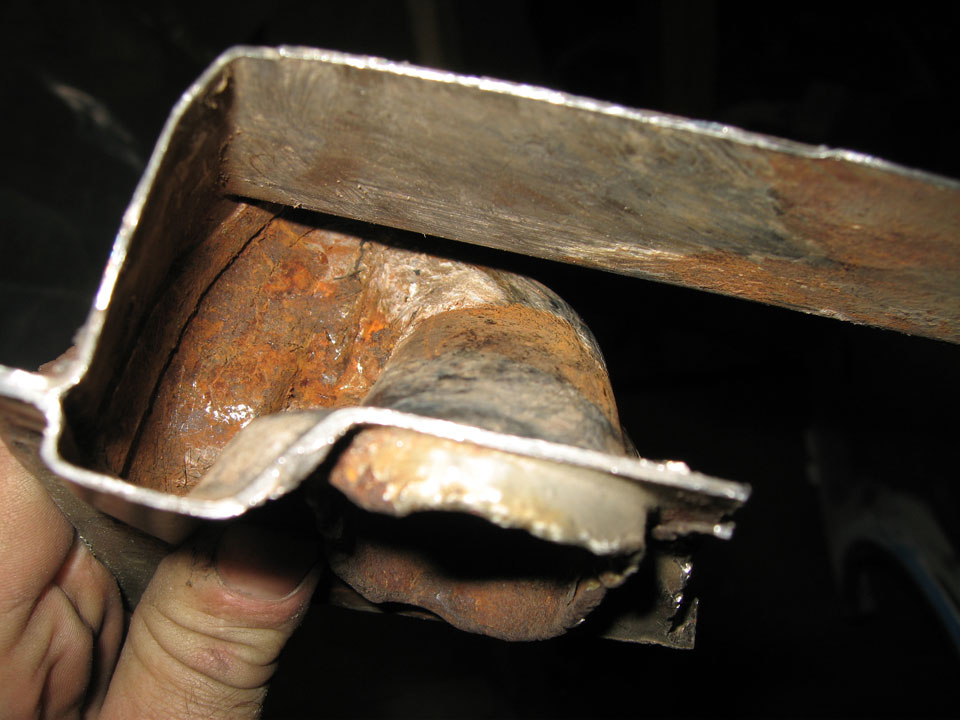
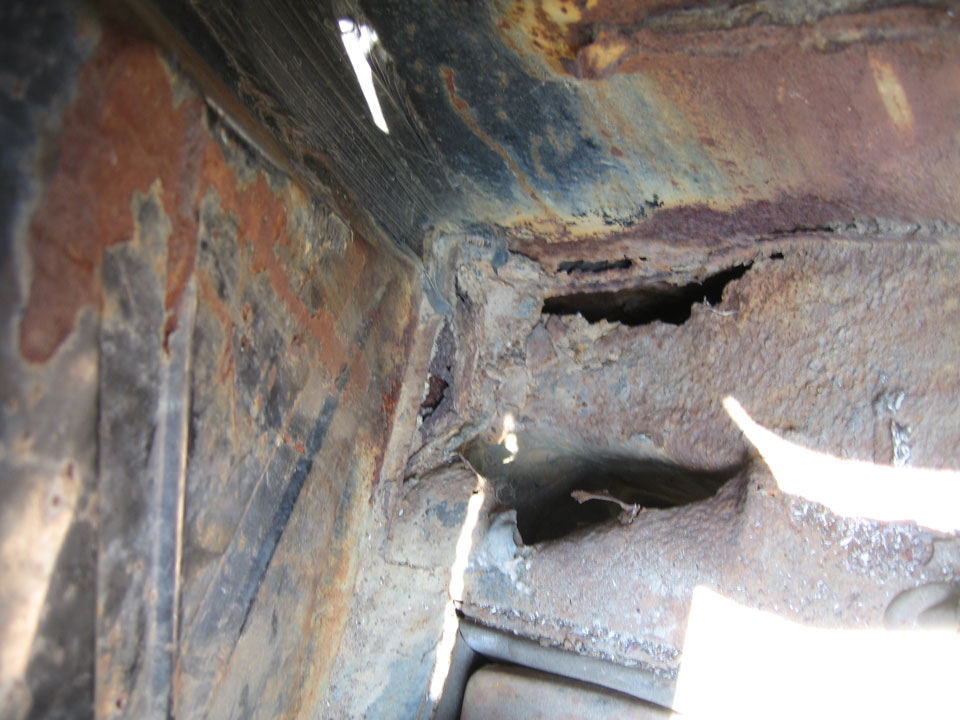
I thought I had gone to the core of it, that no more rust lay hiding, but those 2 little holes kept taunting me.
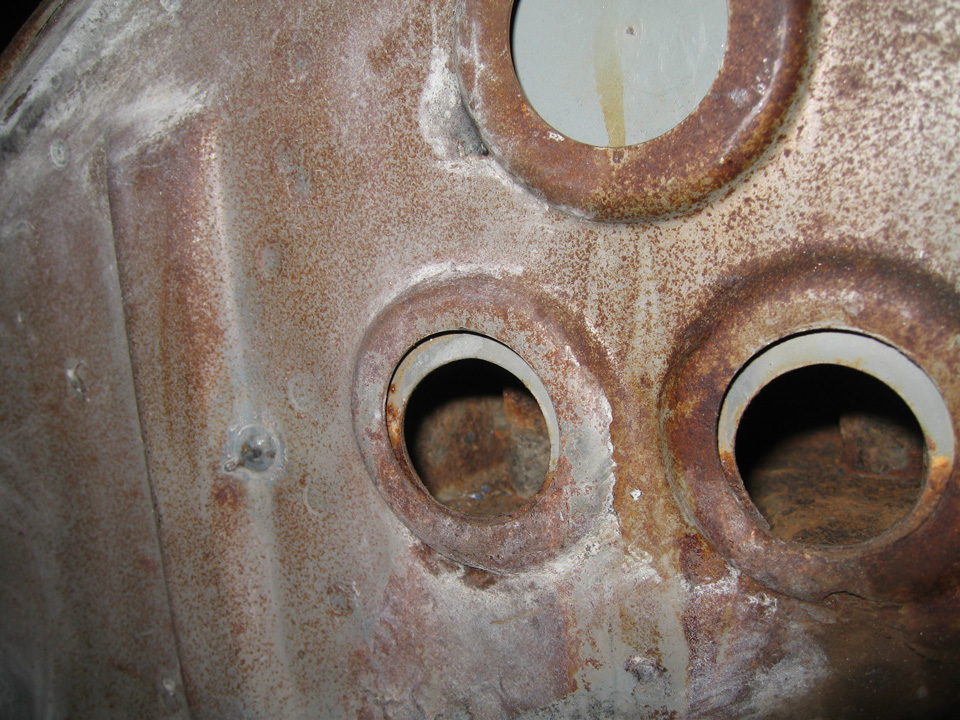
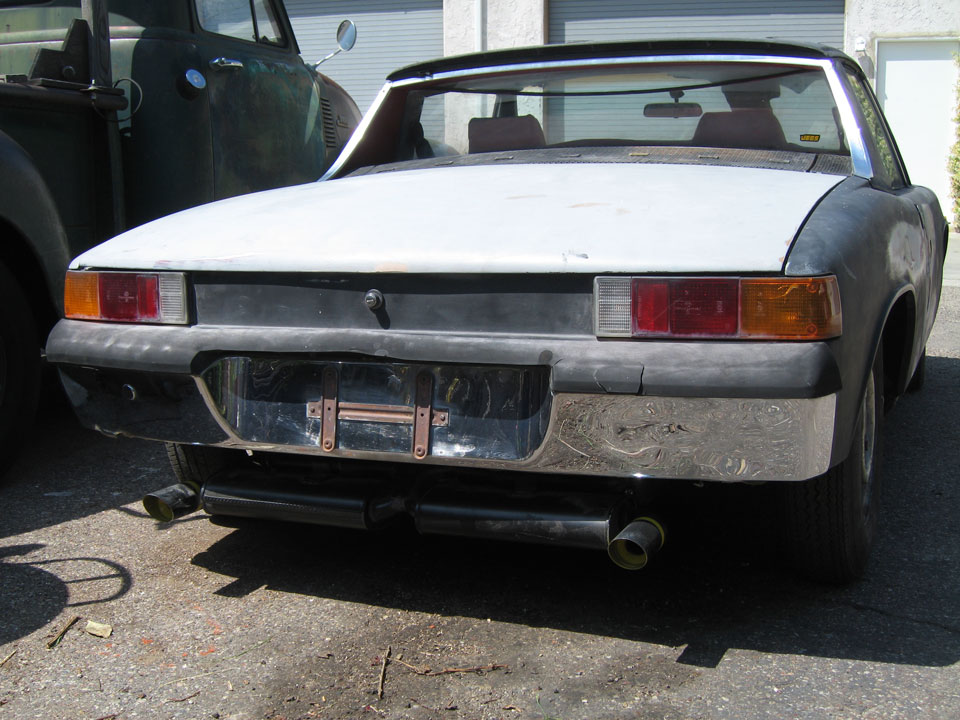
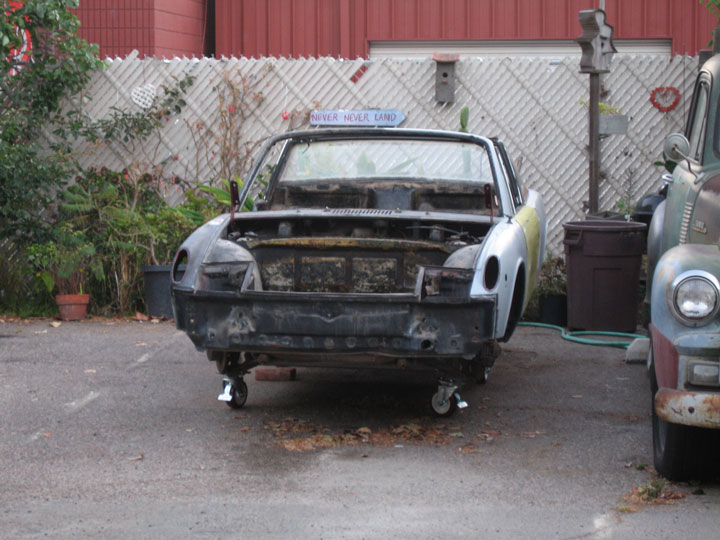
Outside it looks solid of course
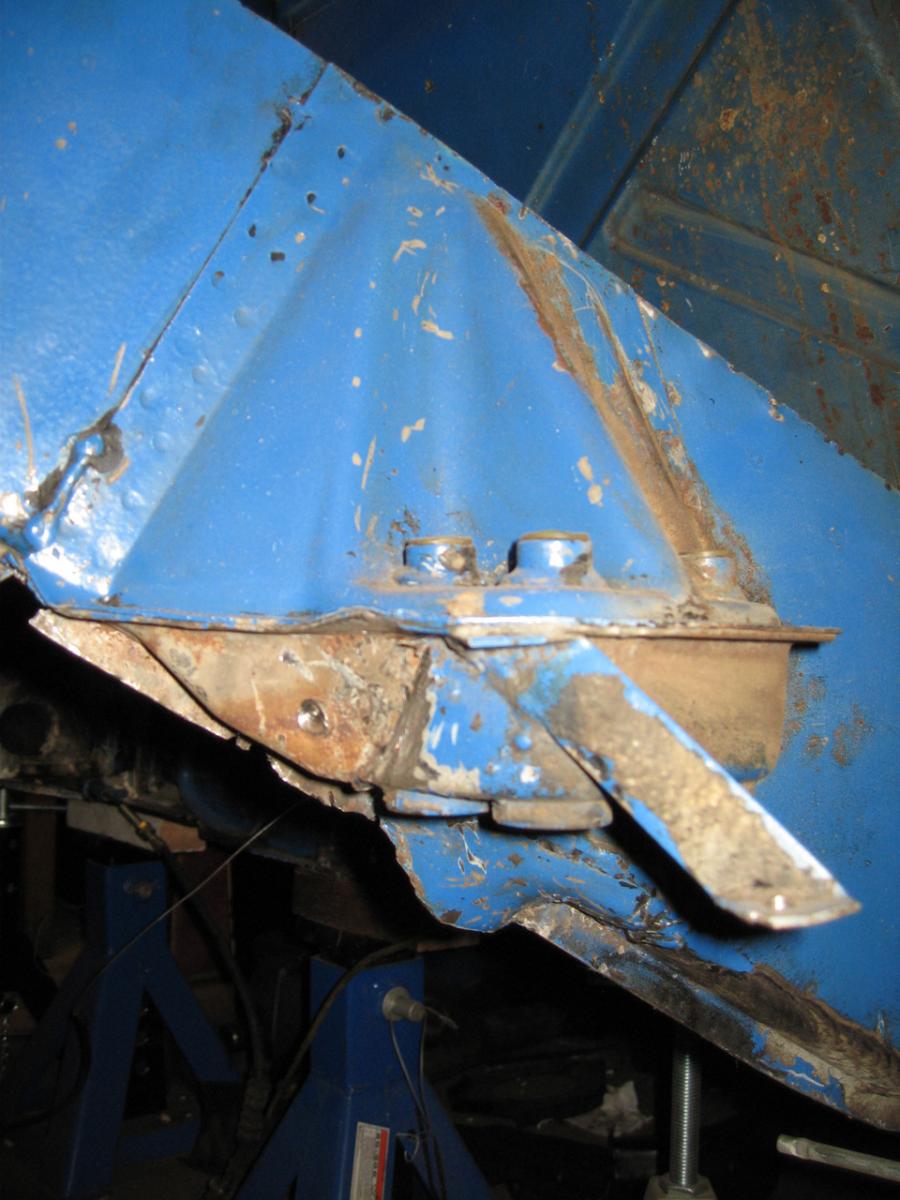
I'm glad at this point that I took it off though it was further than I ever intended to go.
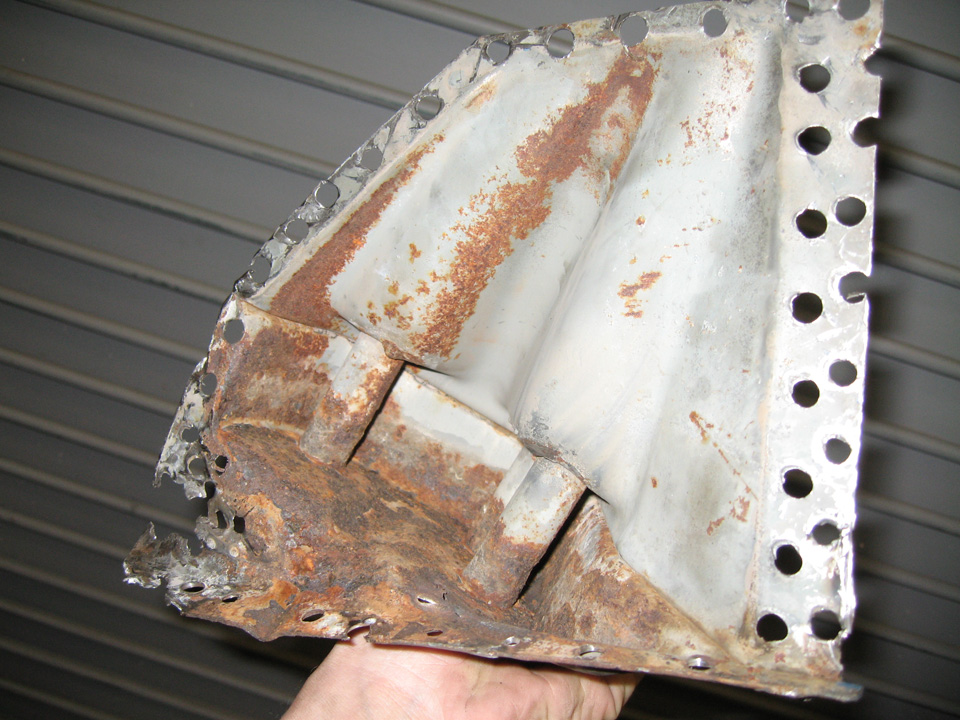
The console itself being made of thicker metal was not as bad as what lay against it.
That drip there comes from a hole that comes through the long. Why they would have situated it right there to drip down on those 2 double layer holes is proof that someone was an idiot or that they made these cars to rust on purpose.
deeper
I'd stalled a bit before getting into all that, got some glass beads, 5 gallons. I tried to upgrade my compressor, but not yet, so a lot of waiting for the tank to fill.
I've put my containment chamber about the construction.
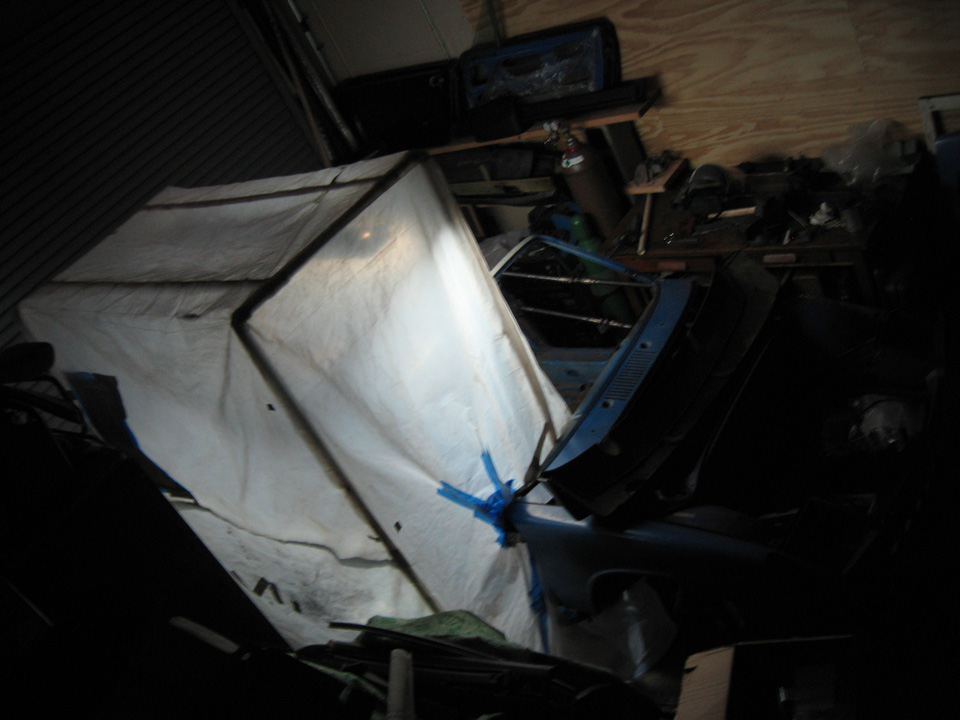
My friend made that for me, the frame of it out of pvc pipe and fittings, as a work table light support. I sewed the drop cloth surround part to contain grinding dust. I played with using it as a paint booth on a small scale. It's getting pretty rough, so I've sacrificed it, I've sectioned it around the 914, trying to contain the bead blasting.
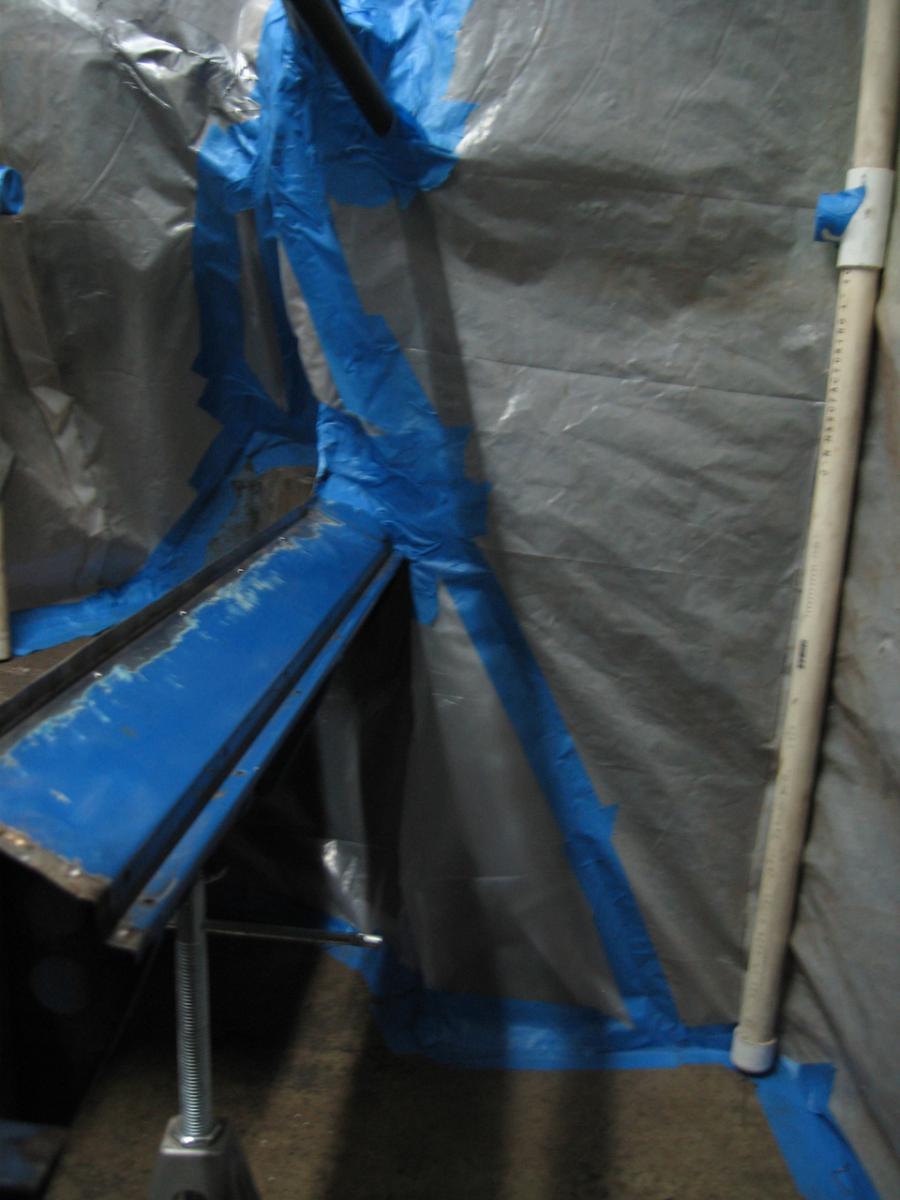
There's a glimpse of the 'jig' there for the outer suspension console. I'm trying to make that as short term as possible and also I'll be verifying placement by measurement, before trusting it at all. I may have some questions about that when the time comes (soon!).
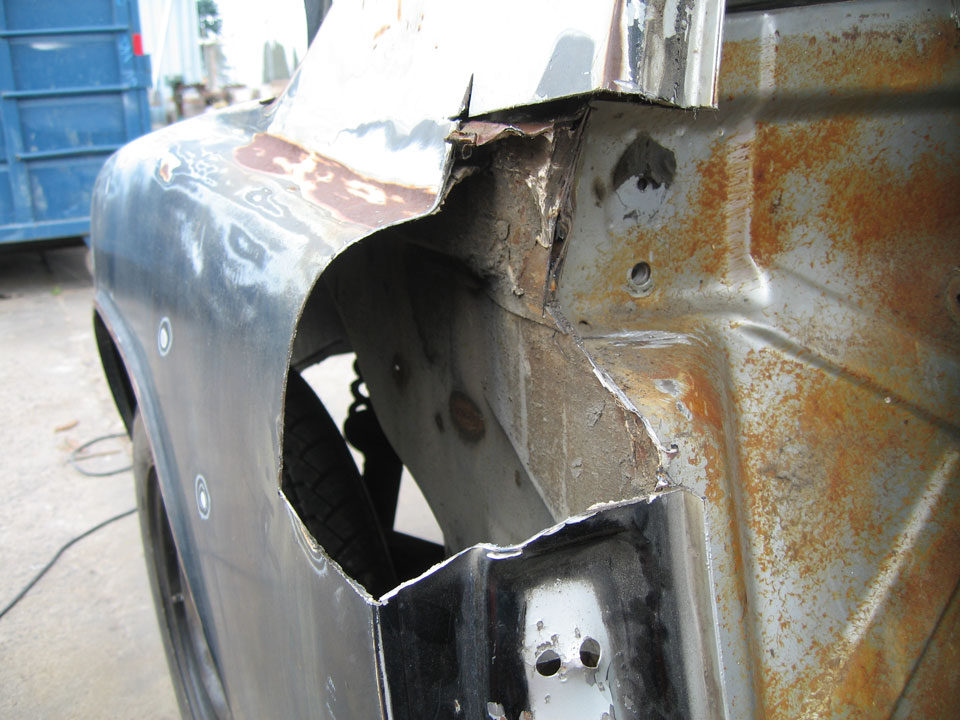
Working my way back. The rust is starting to come back already. I'll hit it again before I etch it, got to get my etching stuff. I think I'm going to the paint store this weekend.
A little thin in a place or 2 but I've finally reached something solid! The suspension console outer was held on by more than a few welds.
Still a little more blasting to do on this but looking much better
Blasting without the cabinet is a real pain in the butt. I need a hood! Can't keep the media out of my hair...or my shoes.
I've been filing that, the inner fender well upper for a few days now. I will start fitting the piece below tomorrow. I have 2 cans of 3m weld thru primer, and if I get the etch stuff, maybe I can be welding the outer suspension console back on this weekend!
I thought I had gone to the core of it, that no more rust lay hiding, but those 2 little holes kept taunting me.
Outside it looks solid of course
I'm glad at this point that I took it off though it was further than I ever intended to go.
The console itself being made of thicker metal was not as bad as what lay against it.
That drip there comes from a hole that comes through the long. Why they would have situated it right there to drip down on those 2 double layer holes is proof that someone was an idiot or that they made these cars to rust on purpose.
deeper
I'd stalled a bit before getting into all that, got some glass beads, 5 gallons. I tried to upgrade my compressor, but not yet, so a lot of waiting for the tank to fill.
I've put my containment chamber about the construction.
My friend made that for me, the frame of it out of pvc pipe and fittings, as a work table light support. I sewed the drop cloth surround part to contain grinding dust. I played with using it as a paint booth on a small scale. It's getting pretty rough, so I've sacrificed it, I've sectioned it around the 914, trying to contain the bead blasting.
There's a glimpse of the 'jig' there for the outer suspension console. I'm trying to make that as short term as possible and also I'll be verifying placement by measurement, before trusting it at all. I may have some questions about that when the time comes (soon!).
Working my way back. The rust is starting to come back already. I'll hit it again before I etch it, got to get my etching stuff. I think I'm going to the paint store this weekend.
A little thin in a place or 2 but I've finally reached something solid! The suspension console outer was held on by more than a few welds.
Still a little more blasting to do on this but looking much better
Blasting without the cabinet is a real pain in the butt. I need a hood! Can't keep the media out of my hair...or my shoes.
I've been filing that, the inner fender well upper for a few days now. I will start fitting the piece below tomorrow. I have 2 cans of 3m weld thru primer, and if I get the etch stuff, maybe I can be welding the outer suspension console back on this weekend!
All I can say is – wow, good luck. What you’re attempting to do is not for the faint of heart.
Then it looks as though you have all the resources and skill set to accomplish this project.- all the best!
Then it looks as though you have all the resources and skill set to accomplish this project.- all the best!
Looking great!
Nathan....Great job....I'm in HB and would really like to check out your car.
Let me know if this is do-able.
Ed
Let me know if this is do-able.
Ed
I cant add anything about the build other than "looks good, keep it up" but I know a little about self-surgery, I always like to get drunk first! Absinthe is great because it will numb you nicely while allowing you to keep focus, up to a point.
Also, I don't think that is a black widow. But, maybe thats a california black widow.
Also, I don't think that is a black widow. But, maybe thats a california black widow.
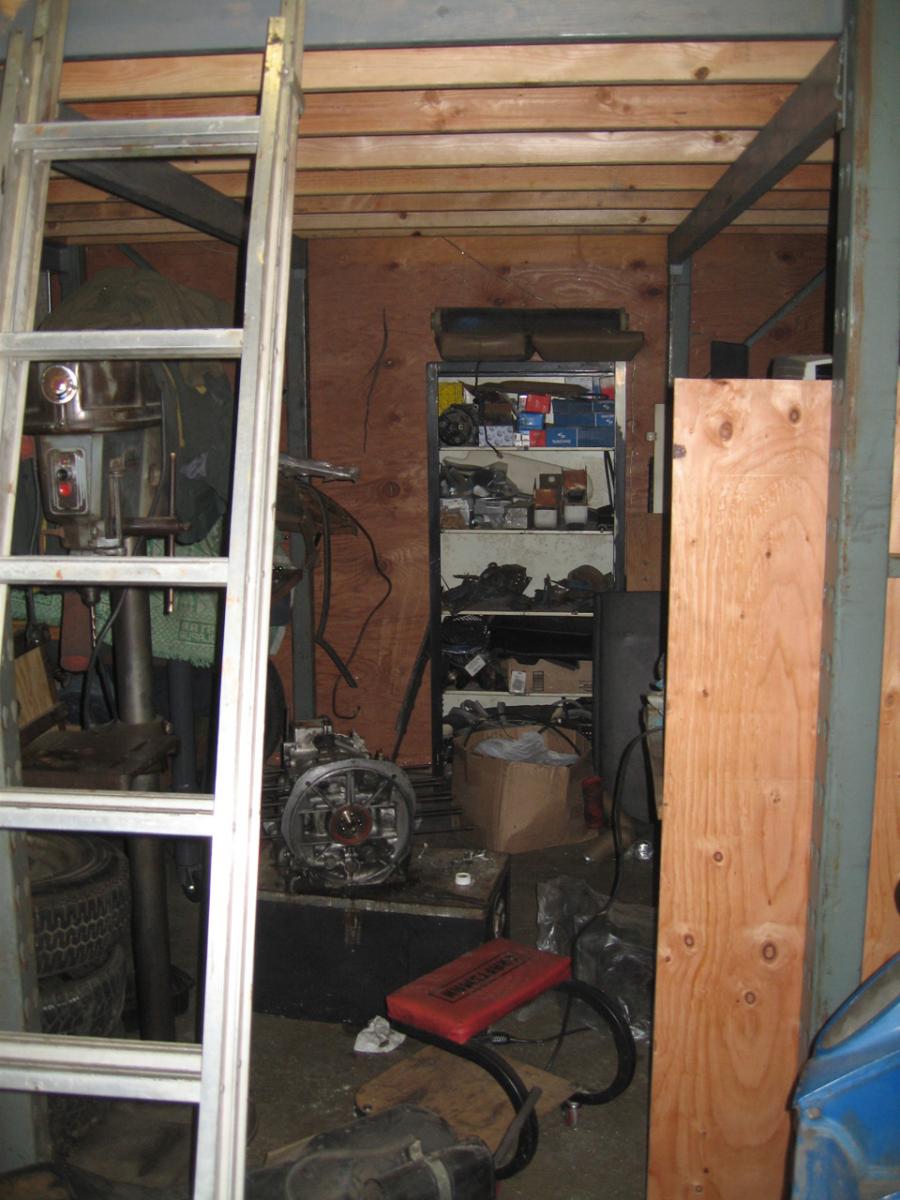
About my mess, I've got about a 25' x 25' shop and this is as clear as it gets
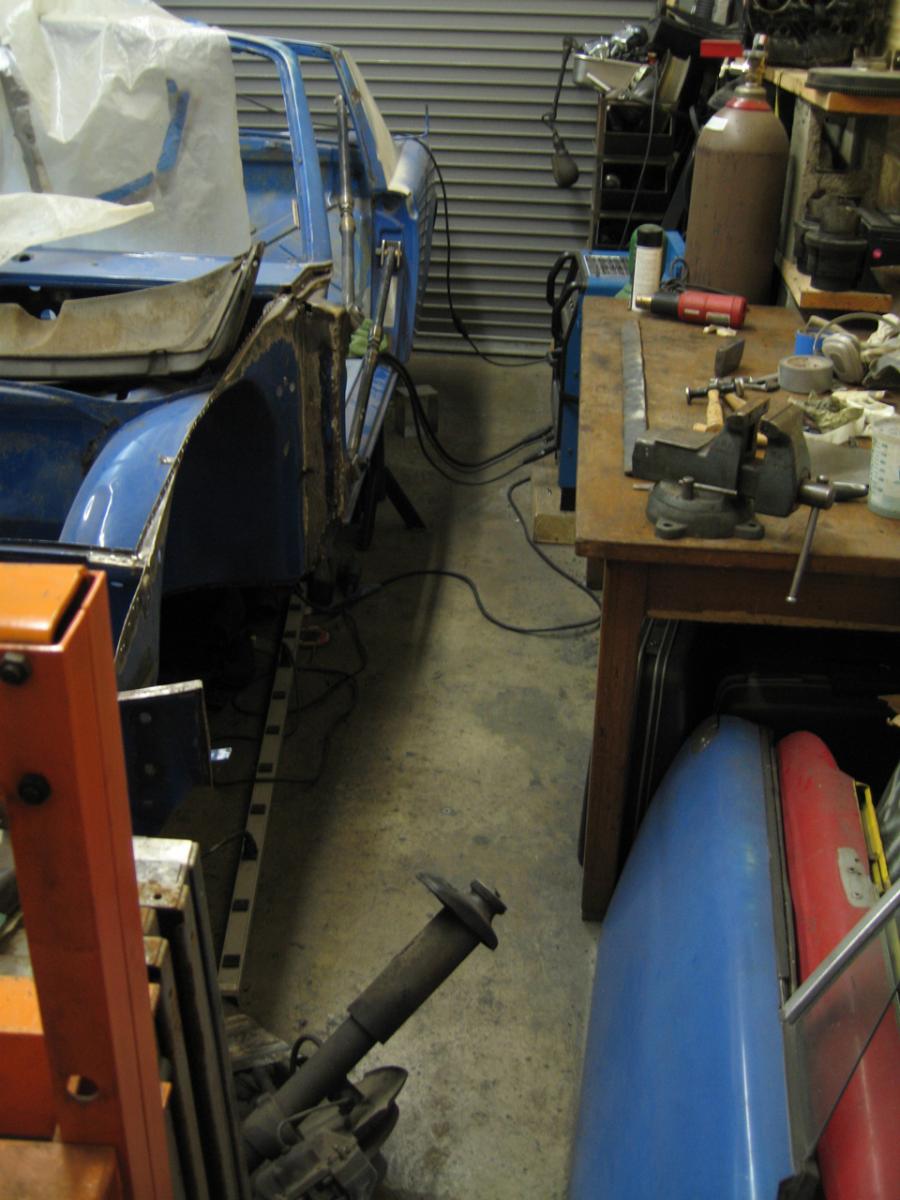
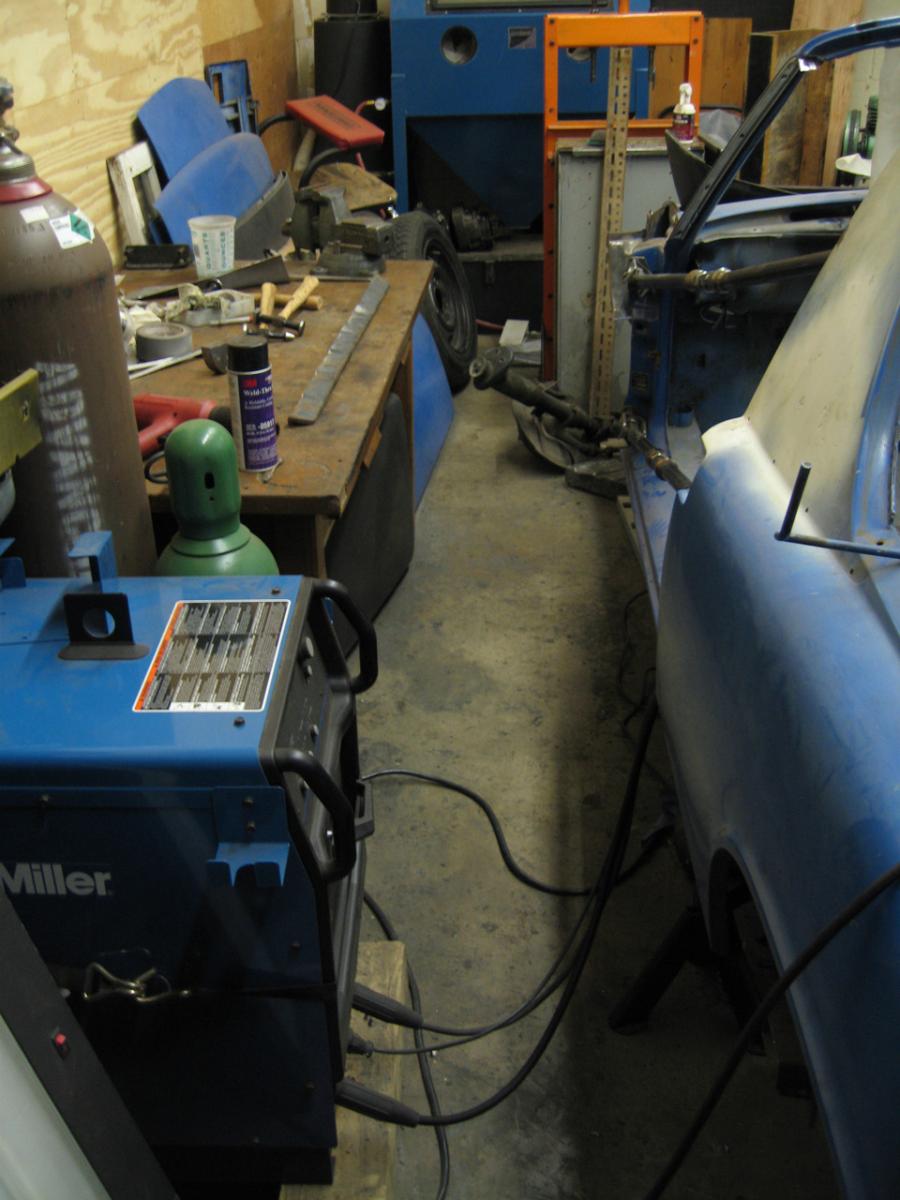
Here's the worst of it.

and this inside the chamber currently:
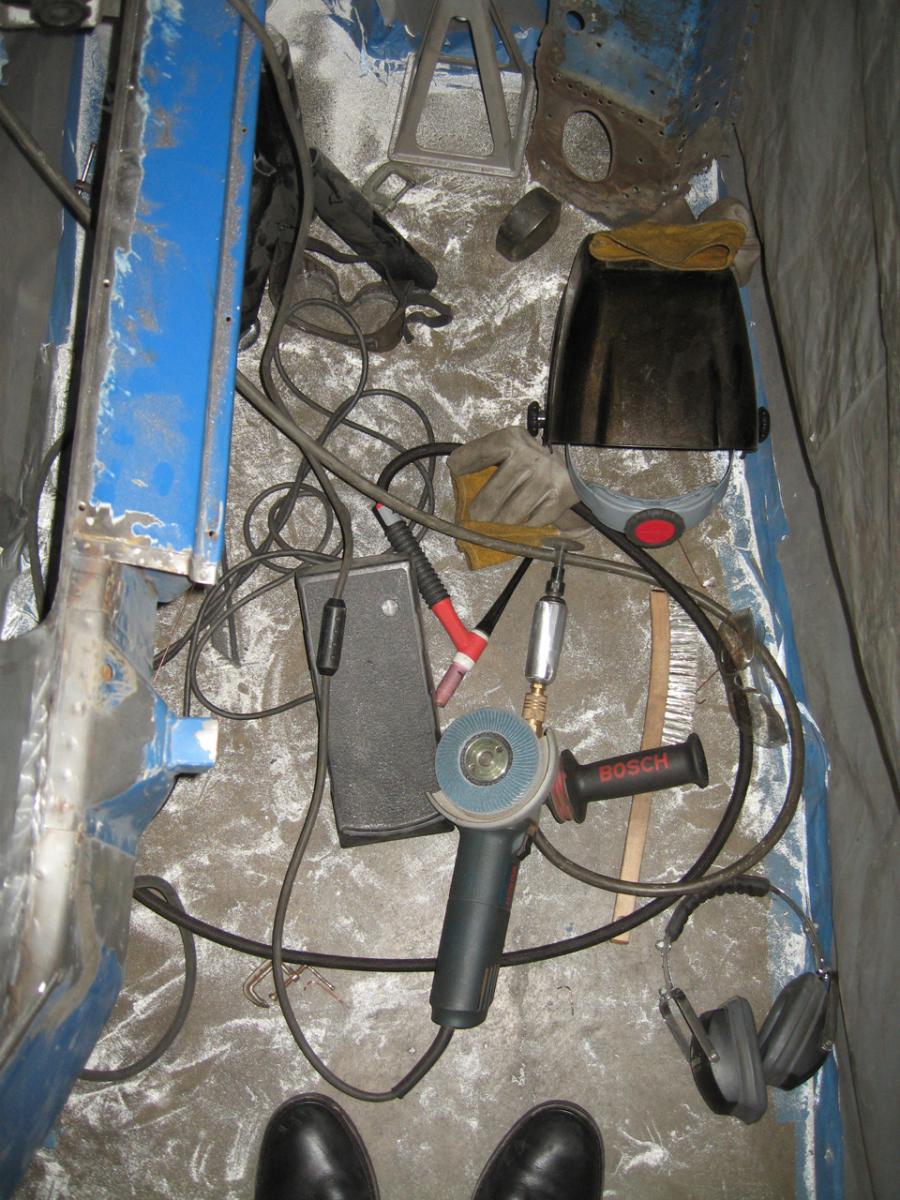
Got a little progress to show in there, the inner fender well butt welded in and ground the welds smooth. Used the diegrinder and then the flapwheel.
Besides the loft solution, I'm working on restoring a huge industrial shelving unit, so I have someplace to put all this stuff, but meanwhile that's taking up room, too.
I will hit you up when I get back and get this stuff taken care of.
Thanks for the encouragement, everyone. She's finally coming back together!
Here's the worst of it.
and this inside the chamber currently:
Got a little progress to show in there, the inner fender well butt welded in and ground the welds smooth. Used the diegrinder and then the flapwheel.
Besides the loft solution, I'm working on restoring a huge industrial shelving unit, so I have someplace to put all this stuff, but meanwhile that's taking up room, too.
I will hit you up when I get back and get this stuff taken care of.
Thanks for the encouragement, everyone. She's finally coming back together!
It's been awhile since I made an update. I can never accomplish as much as I'd like to it seems. I'd hoped for an attached outer suspension console by now, but.... well not yet. 
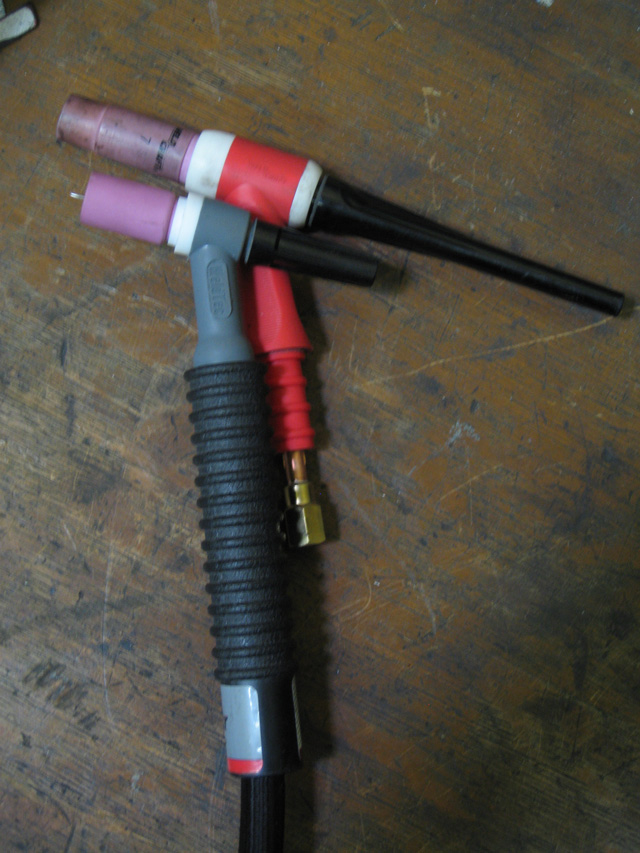
I did get my tank refilled with argon yesterday, and hooked up with a #9 smaller torch for my tig, but forgot to buy back caps for it I have ordered some from cyberweld, got long, medium, and short. The short are like nothing so I should be able to really get in there.
I sort of lost some motivation, was really bummed out about losing my girl again. We're totally incompatible, despite that she's been my girl for ...11 years? - It's been a rough 11 years. Yeah, I came back early from my little vacation, lasted about 3 days of the 14 I'd planned. The bus drove awesome though both ways, and I got a chance to work on my own projects so that's a plus.
I got my mezzanine up, took me like a week. I got the 2 units for $80 a piece of craigslist. The wood was more, even, got 3/4" plywood. I've still got to paint the rest of the floor up thereg. Got to make room for the containment chamber so I can really get my mess on.
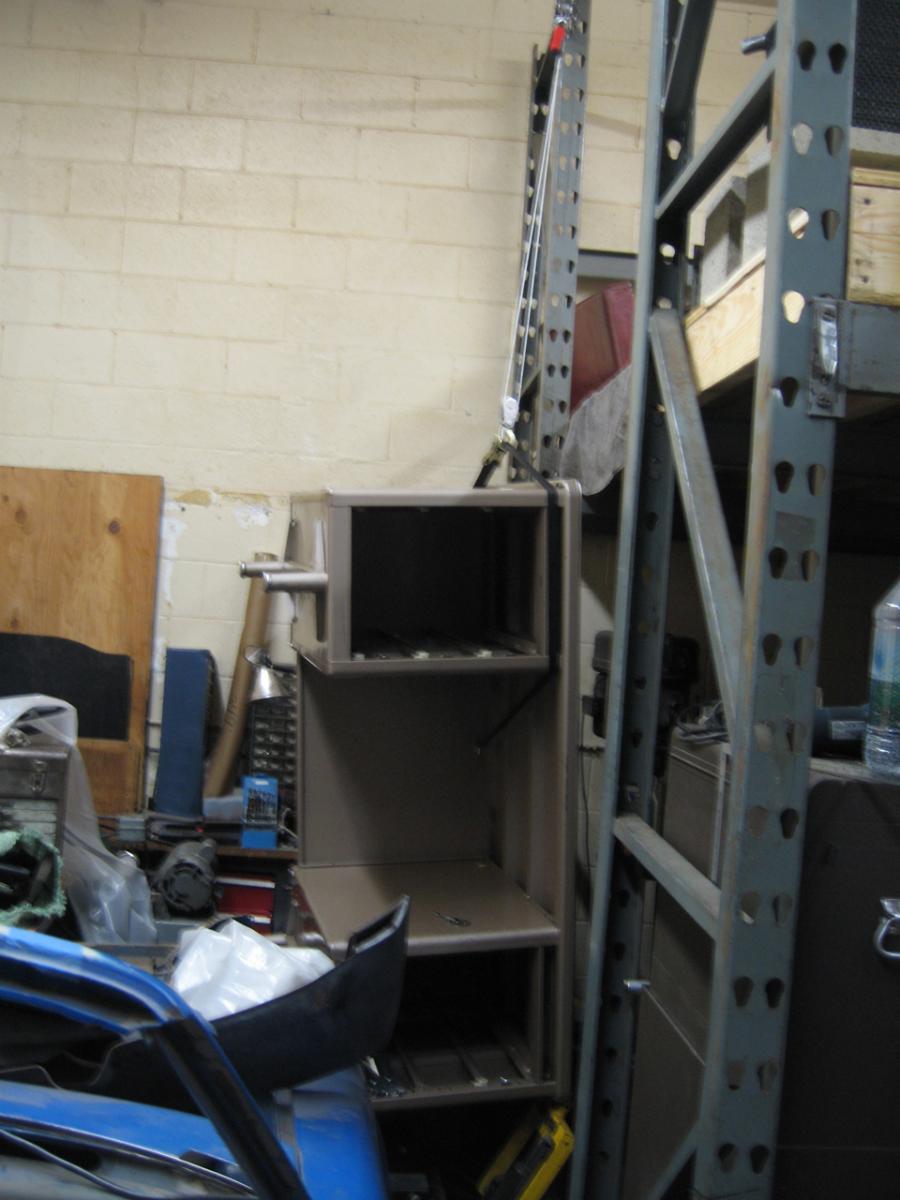
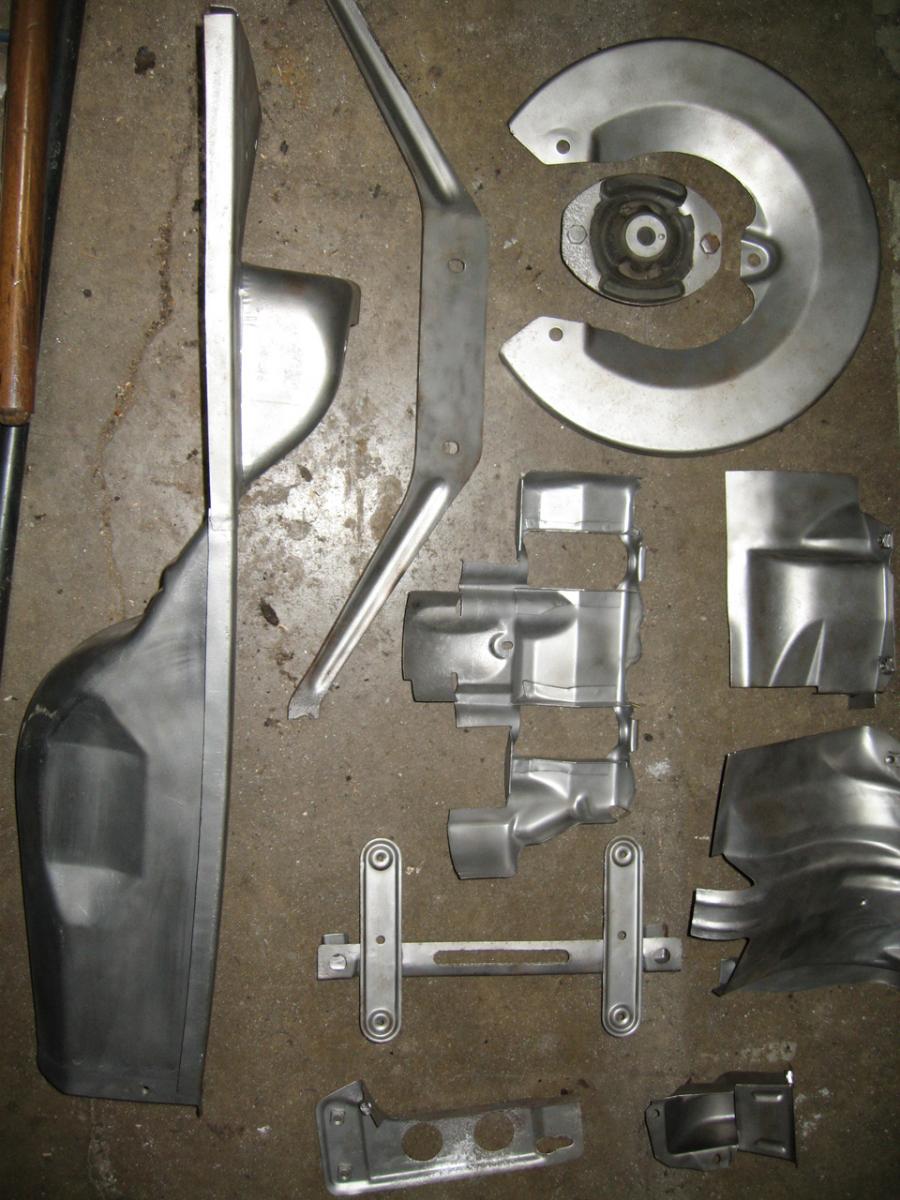
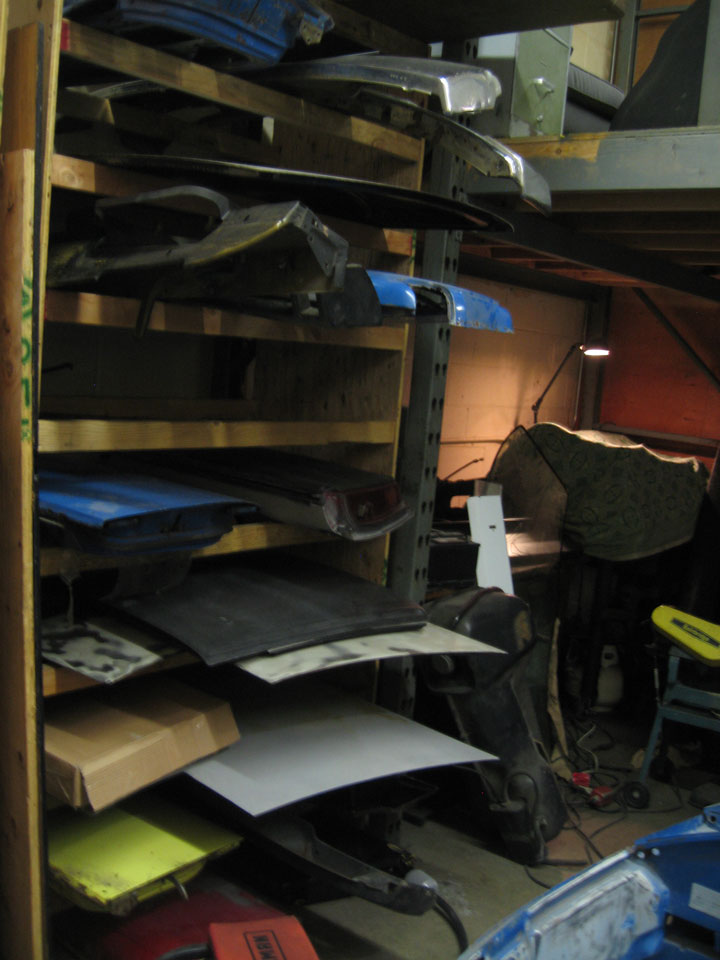
It's still a bit crowded in here, but it's not ridiculous like before. Organized some parts.
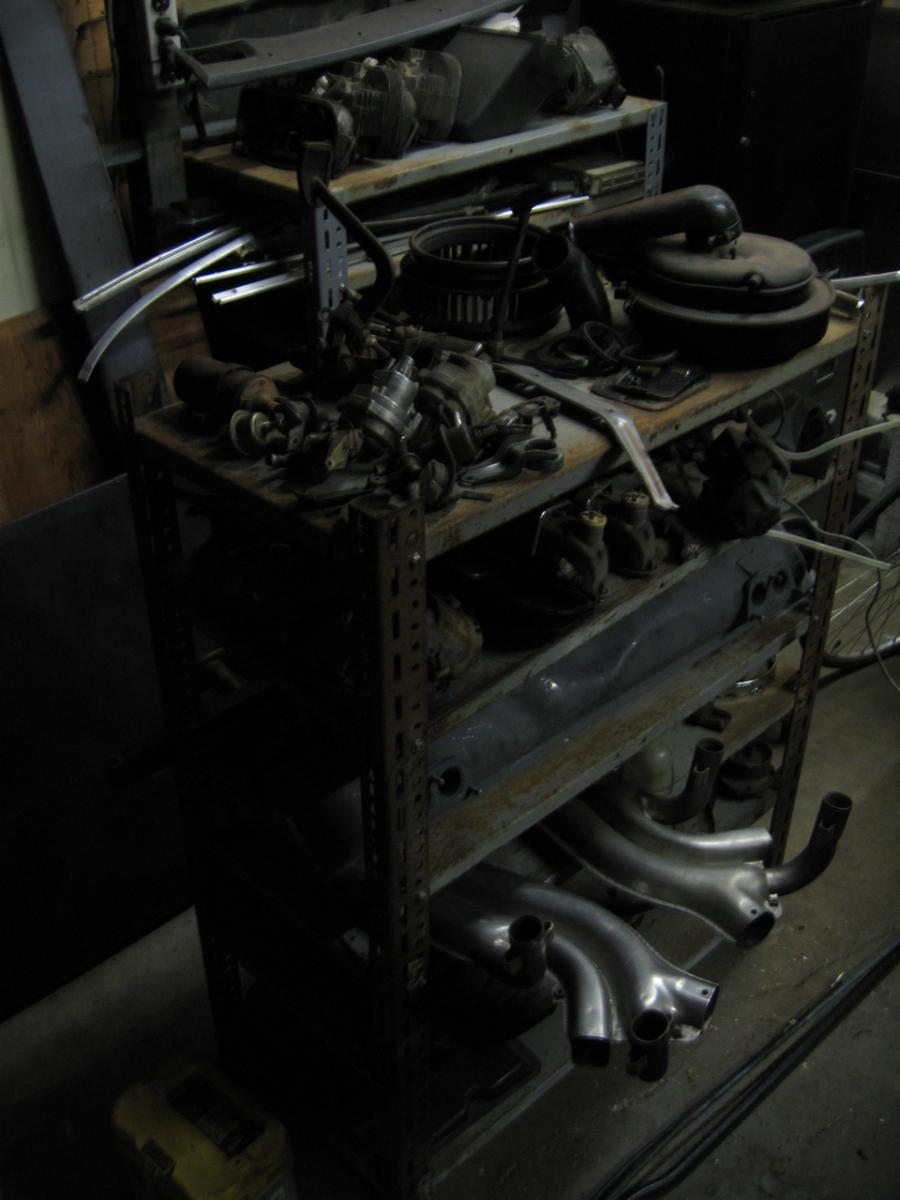
And some more parts, still need to organize a bit more.
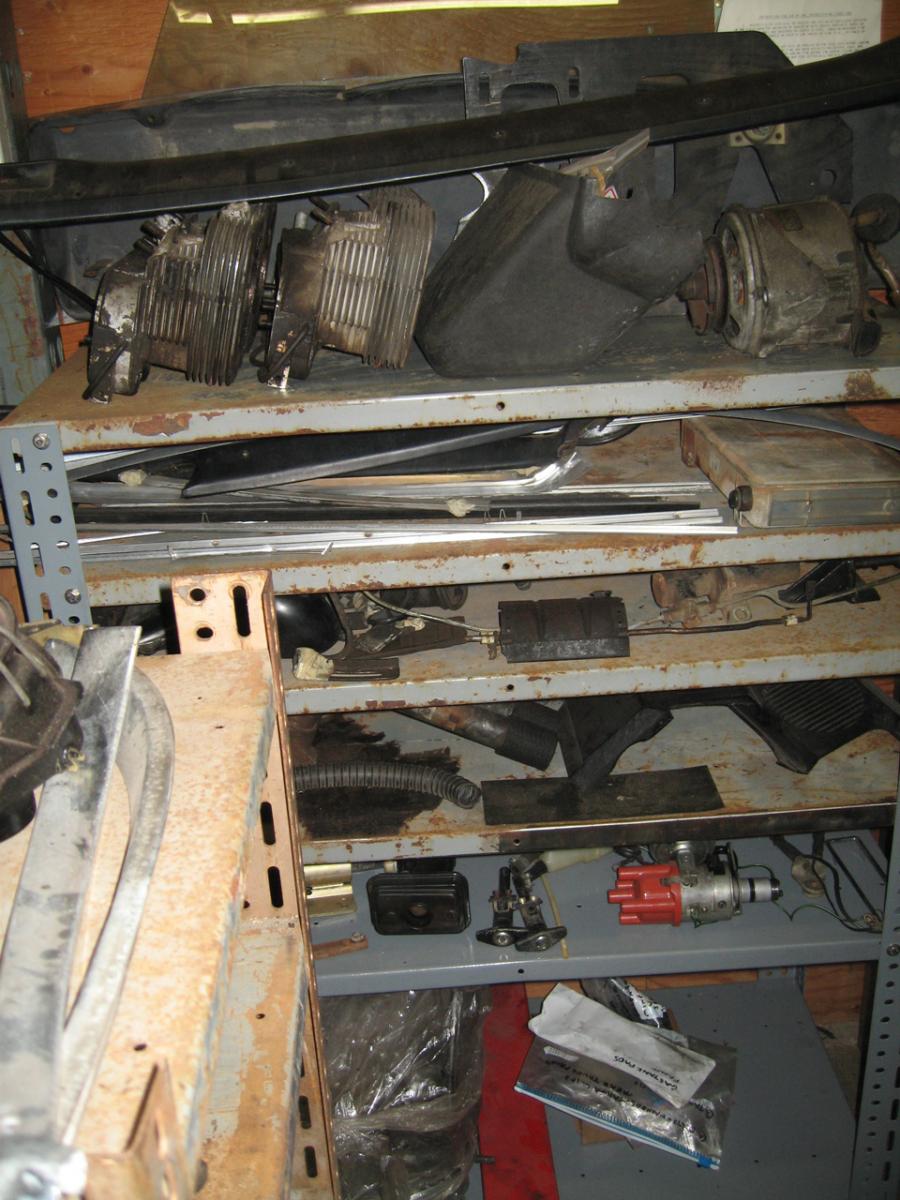
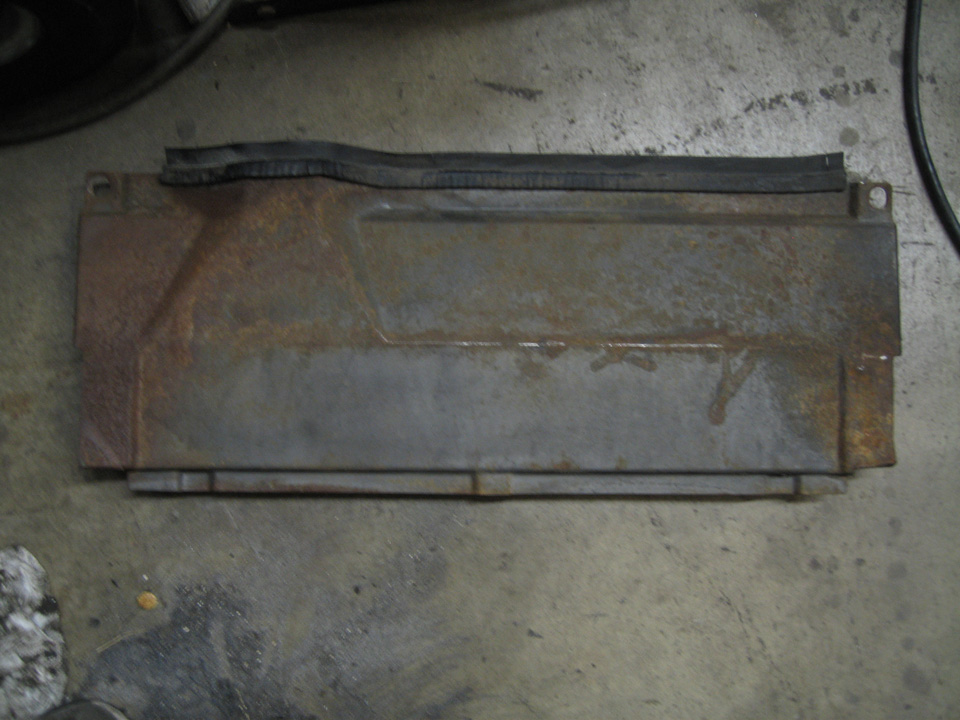
Oh, I found 1 of these. I had no idea there was anything supposed to be there, even! Is it called a splash pan?
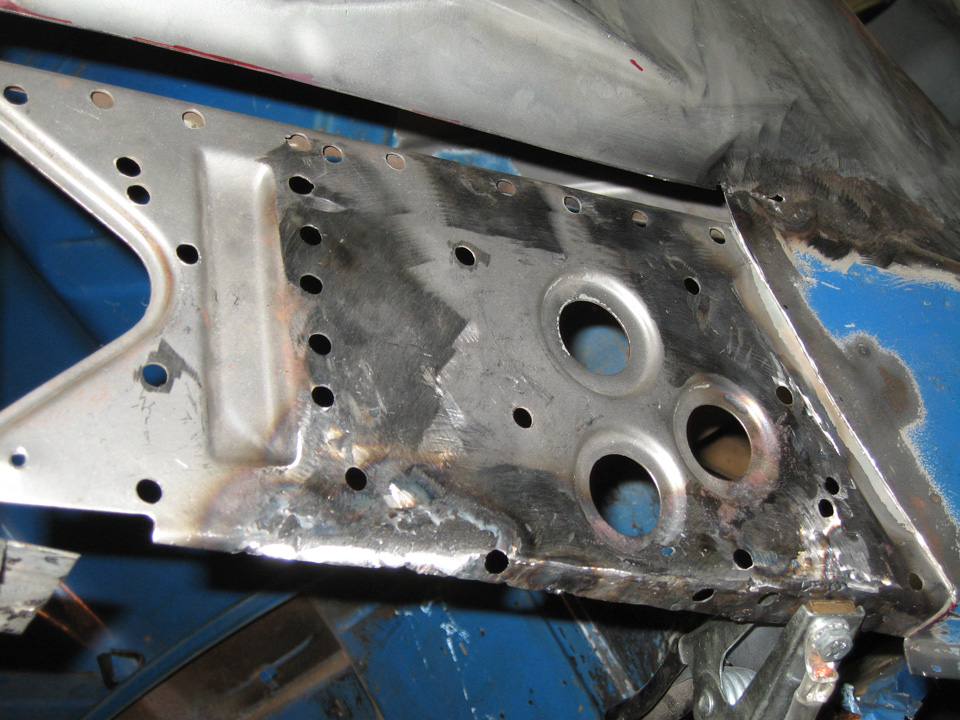
It took me forever to build up the inner inner long to get it ready for the lower inner fender well piece. I filled in like 25 holes on this thing, and built up the thin bottom section. This pic, it's not quite done. I should be putting the piece on soon so I'll have better pics then.
I did get my tank refilled with argon yesterday, and hooked up with a #9 smaller torch for my tig, but forgot to buy back caps for it
I have ordered some from cyberweld, got long, medium, and short. The short are like nothing so I should be able to really get in there. I sort of lost some motivation, was really bummed out about losing my girl again. We're totally incompatible, despite that she's been my girl for ...11 years? - It's been a rough 11 years.
Yeah, I came back early from my little vacation, lasted about 3 days of the 14 I'd planned. The bus drove awesome though both ways, and I got a chance to work on my own projects so that's a plus. I got my mezzanine up, took me like a week. I got the 2 units for $80 a piece of craigslist. The wood was more, even, got 3/4" plywood. I've still got to paint the rest of the floor up thereg. Got to make room for the containment chamber so I can really get my mess on.
It's still a bit crowded in here, but it's not ridiculous like before. Organized some parts.
And some more parts, still need to organize a bit more.
Oh, I found 1 of these. I had no idea there was anything supposed to be there, even! Is it called a splash pan?
It took me forever to build up the inner inner long to get it ready for the lower inner fender well piece. I filled in like 25 holes on this thing, and built up the thin bottom section. This pic, it's not quite done. I should be putting the piece on soon so I'll have better pics then.
Nice job on the mezzanine! Must be nice to have some more room now. Speaking of which I'm about to start on my mezzanine this weekend. Are you going to enclose the top part in to keep dust out?
QUOTE(dheming @ May 20 2011, 03:55 PM) 
Nice job on the mezzanine! Must be nice to have some more room now. Speaking of which I'm about to start on my mezzanine this weekend. Are you going to enclose the top part in to keep dust out?
Thanks, Derek. I am pretty happy with it.

I've oiled the joints and don't notice much movement when I'm doing my dance.
 I am thinking of putting in cross braces in places to tie it together, also of constructing caster mounts.
 The plan as far as enclosure is to divide the 2 halves of the shop during the sanding and primer stage with a heavy drop cloth curtain.
Currently I'm in the process of putting up the containment chamber on its own this time, need to make room by the cabinet (make the materials storage rack so I can slide the workbenchh down?) so I can blast the my valances and rockers, backs of bumpers etc.
I had been waiting the last 10 days for the parts from cyberweld, some mixup at my mailbox. They do have hookas for sale right in the place, the pack & ship.
Finally got the back caps, the small ones they sent me were wrong, were for the 17 torch instead of the 9 so pictured are the medium. Both of those are #7 cups.
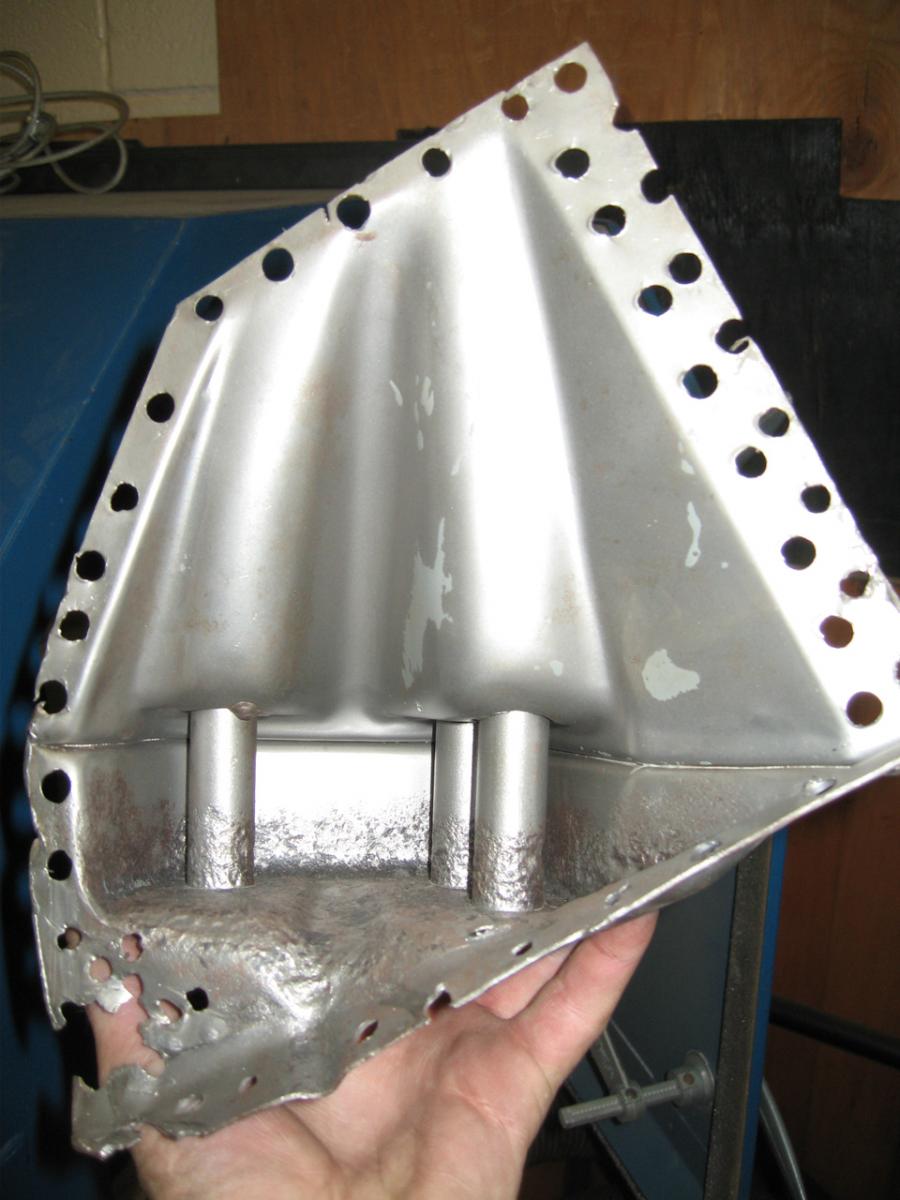
I hooked up with some weld backing options also, these from Eastwood. The triangle is my favorite so far, used it a lot for the inner inner long.
During the wait though to do more welding, I've been detailing the outside of my engine case. Various methods employed have included a bit of acetone with lots of cotton swabs and paper towels, a bit of paint thinner and a brush, simple green some.
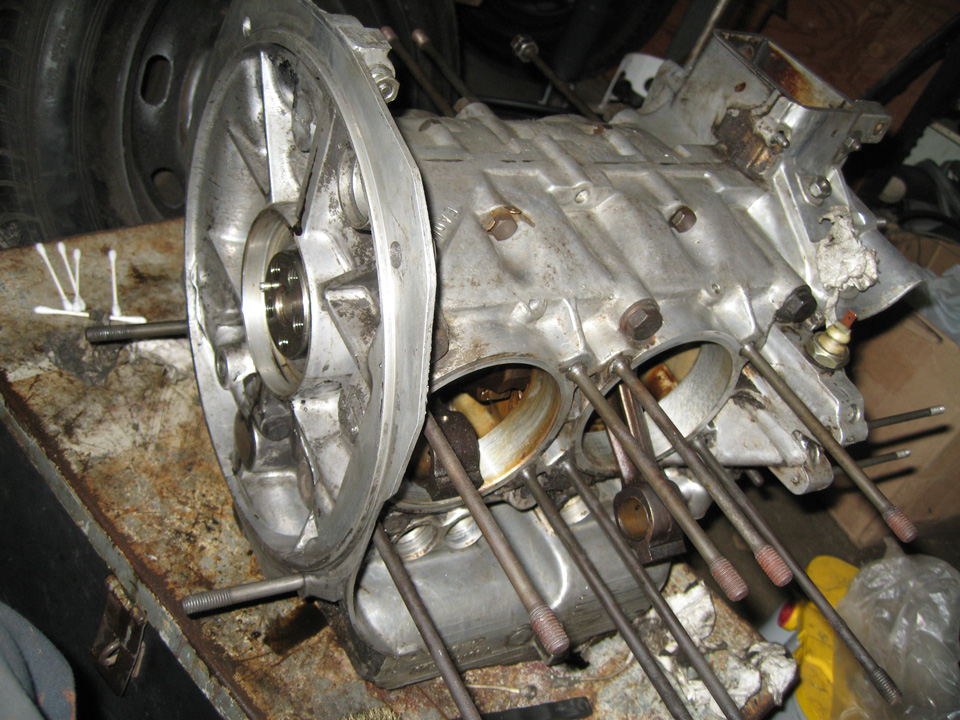
Still coming along. I won't be able to finish until I put it on the stand and that I won't bother with until I've modified it. I've purchased this yoke:
I have 2 of these coming.

I need to go to Industrial metals to get a cross beam for the front of this fan shroud murderer.
Besides that, I've been blasting a piece or so of the tin each day.
It does take awhile, the compressor is always running.

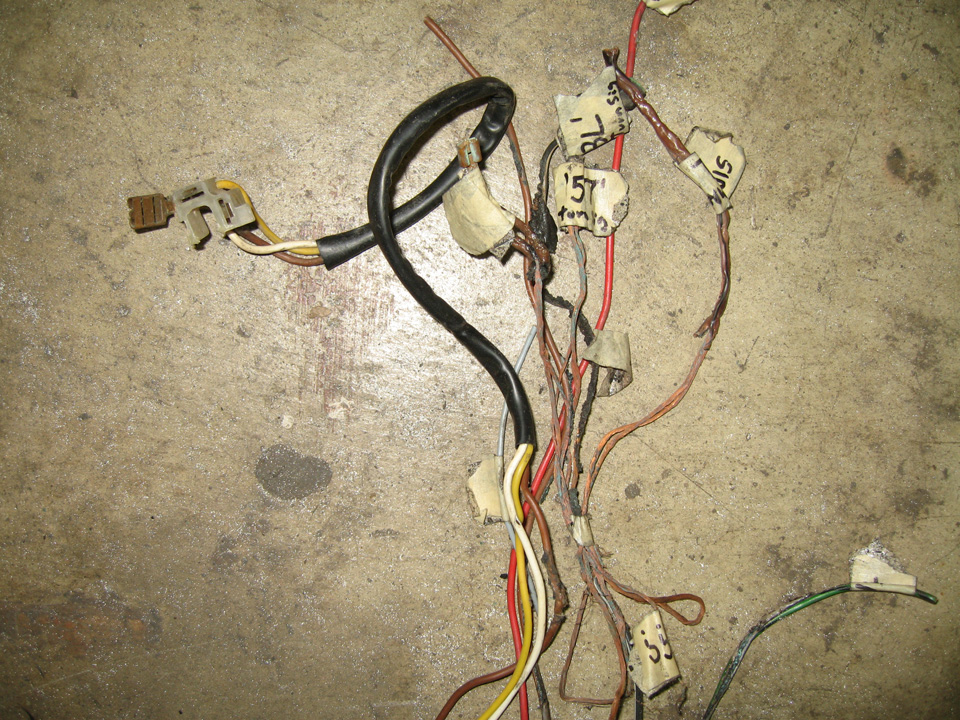
To update, it was definitely fun, meeting up with David yesterday, checked out his roller at his work in Orange. I should'a brought my camera. I got a few minor things like a seat rail with the adjustment handle intact, I finally got a replacement for the oh-so-elusive door striker back plate casting that I'd broken off a tap in the original of, I cut out this replacement section of the drivers headlight side marker light wiring harness
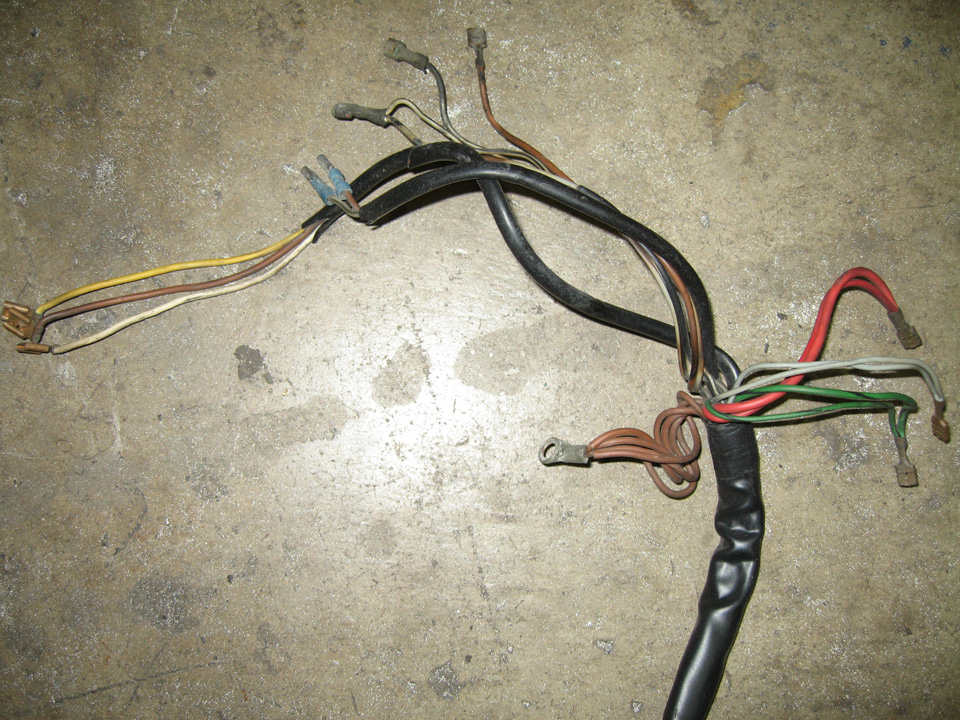
the original had got a bit toasty at some point
The first thing I did when I got back was cinderblock mockups of the mahles.
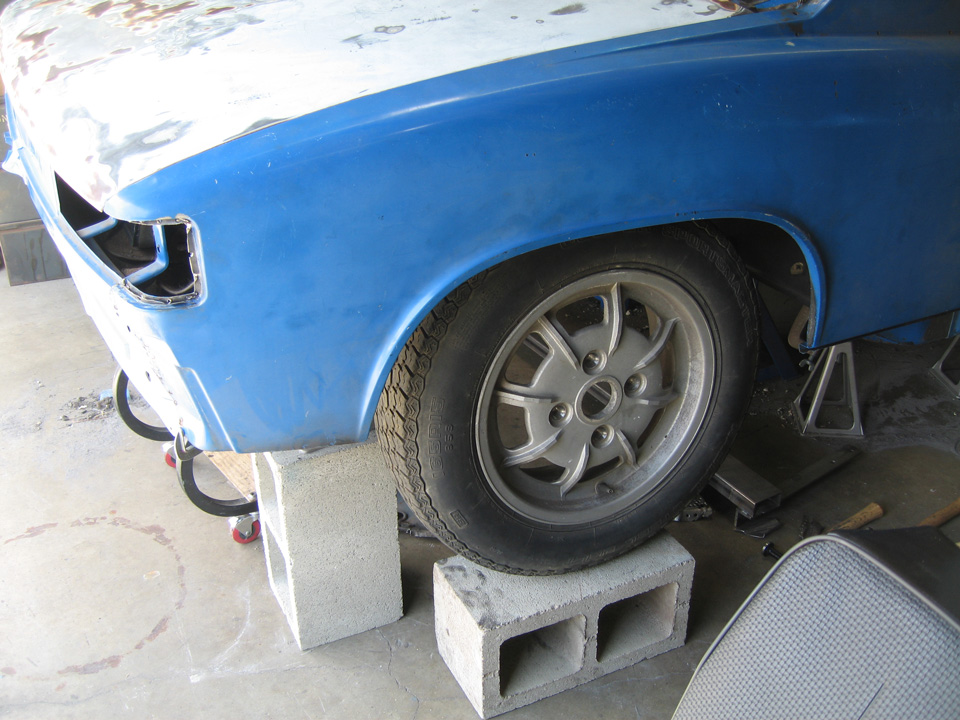
I have been just looking at them fondly from time to time. I got the lugs also, minus 4 of them. I need to find 4 more 38mm ones and I think I have 2 but need 2 more 19's for the spare I realize now. ... details. I'm pretty happy just to have them.
I got a really good deal on all of it, $420 discount. Thanks again to David for the the good times, like I'd said, my first 914 engine compartment outside my own.

the original had got a bit toasty at some point
The first thing I did when I got back was cinderblock mockups of the mahles.
I have been just looking at them fondly from time to time.
I got the lugs also, minus 4 of them. I need to find 4 more 38mm ones and I think I have 2 but need 2 more 19's for the spare I realize now. ... details. I'm pretty happy just to have them. I got a really good deal on all of it, $420 discount. Thanks again to David for the the good times, like I'd said, my first 914 engine compartment outside my own.
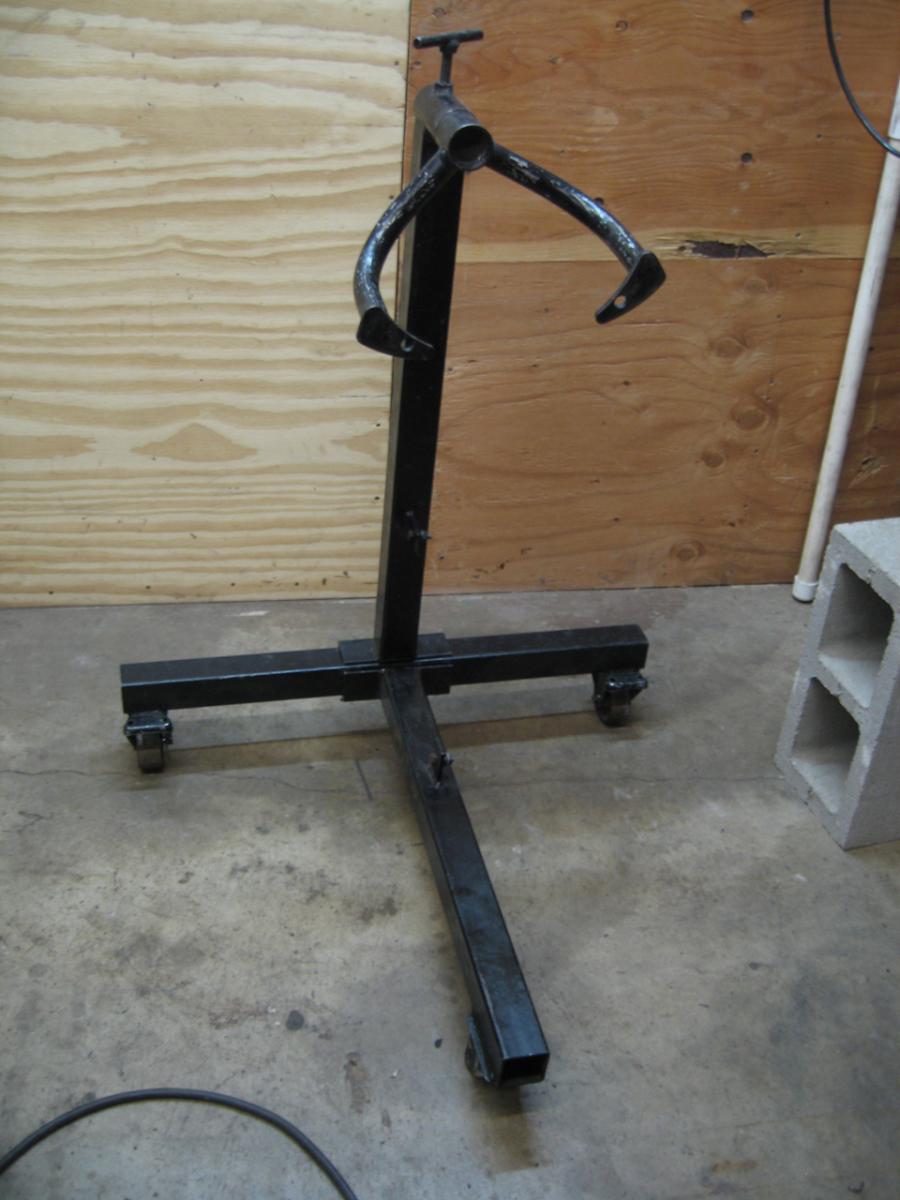
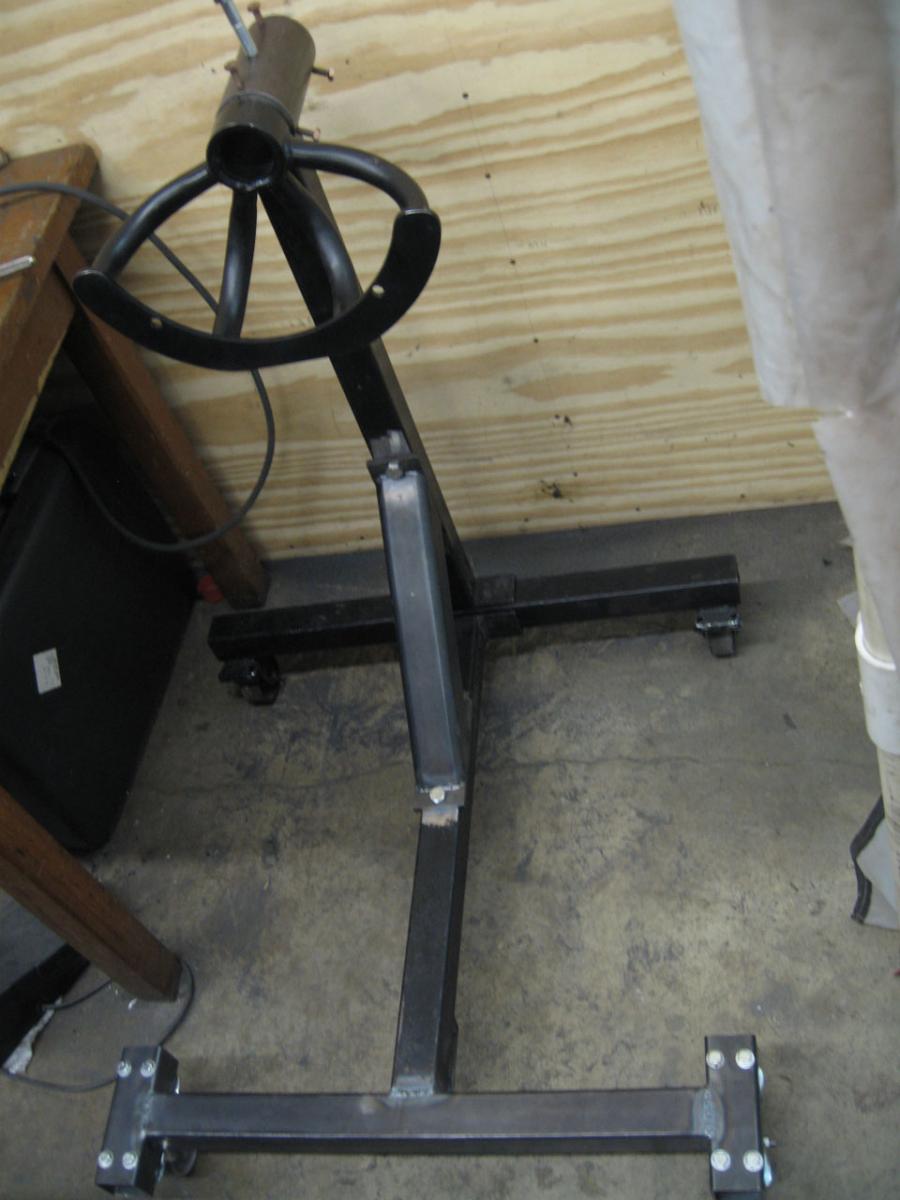
I've finished enhancing my engine stand and thought I would share. I just need to paint it, maybe shorten some bolts, and weld up the T handle to lock the yoke.
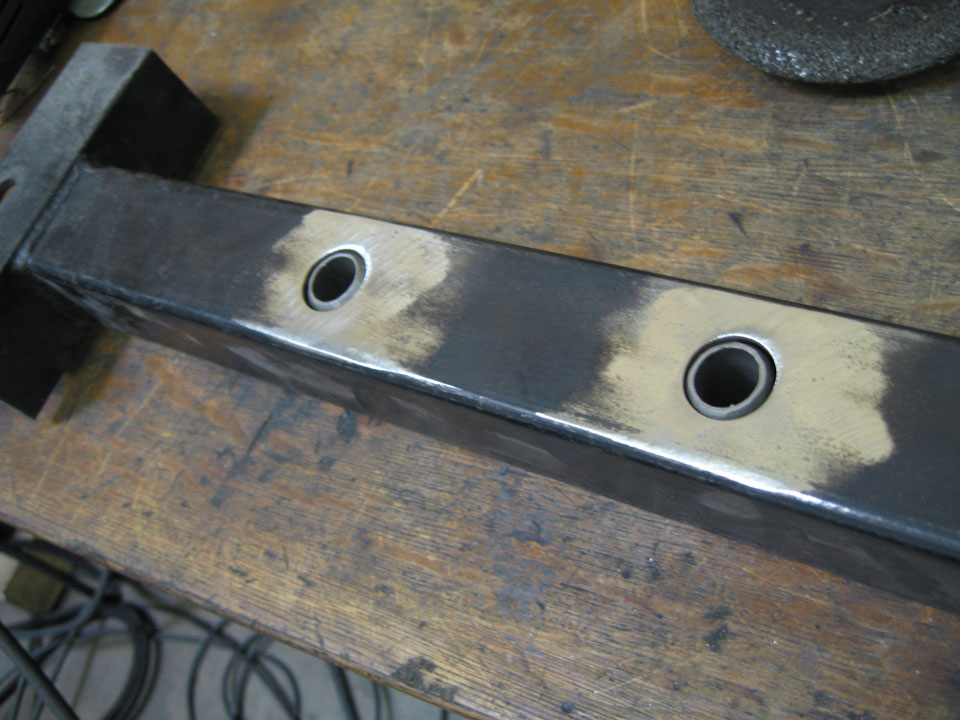
As I'd mentioned in the previous post, I'd ordered the 4 arm yoke off the guy on the samba, but did it off ebay actually. The description talks about how it will fit in a 'standard' 2 3/8 inch hole. The swivel on my empi knockoff stand is like 1 3/4 inch.
I'd thought about how easy it would be to just buy a new stand. So I talked to a bunch of people off Craigslist who were selling mostly the harbor freight stand and it seems that 1 the hole measures 2 1/4 inch? Maybe they were measuring it wrong...
With this complication, I went back to plan A, to modify my stand, and with a half day of work on friday for Memorial day, I was able to go to the metal place.
Getting started, the old swivel would have to go, thankfully.
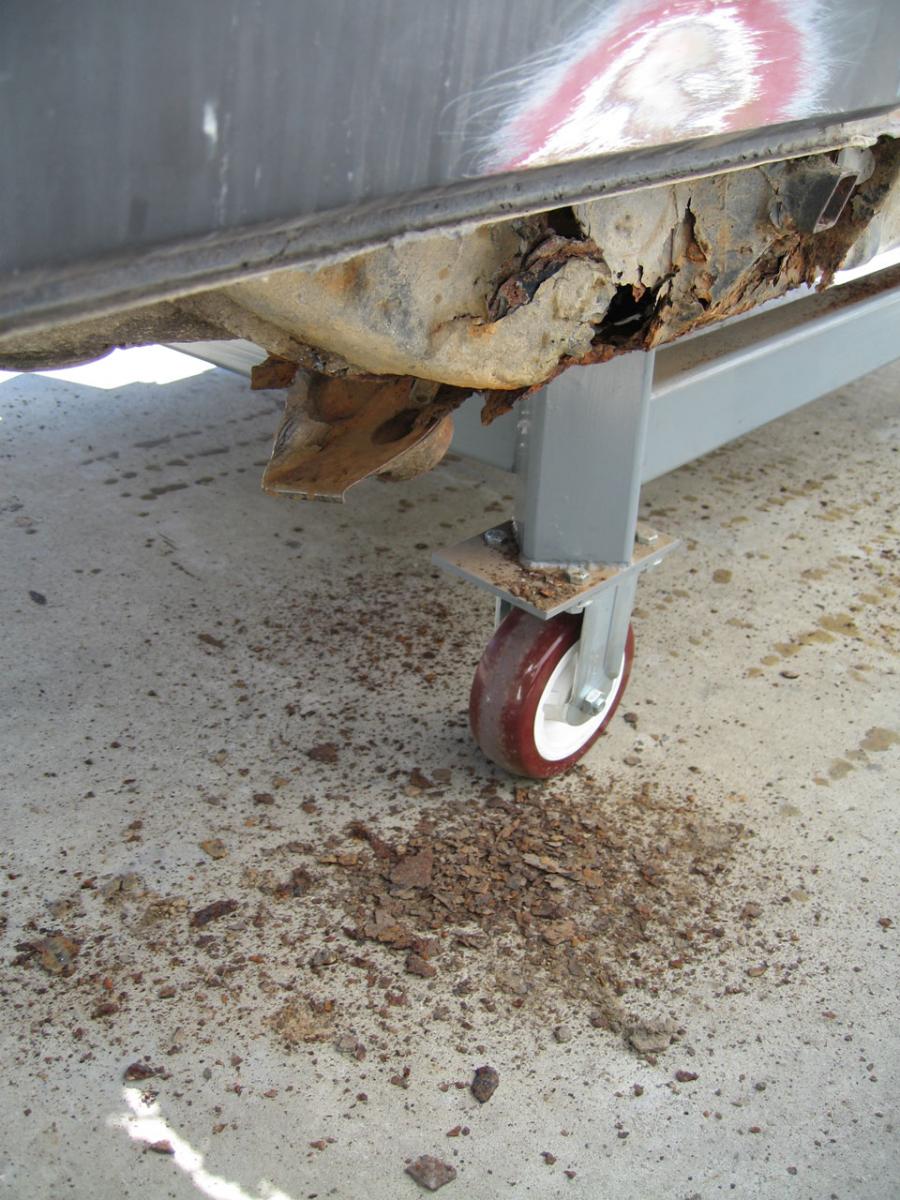
I don't have pics of it specifically but I drilled off the old swivel caster that was at the front (honestly 1 supporting leg it had out front with a swivel caster! Check the pic, that had actually broken, the pin came 'unswaged' and the wheel had fallen off )
)
Probably the biggest improvement was the stability added by the wider track front.
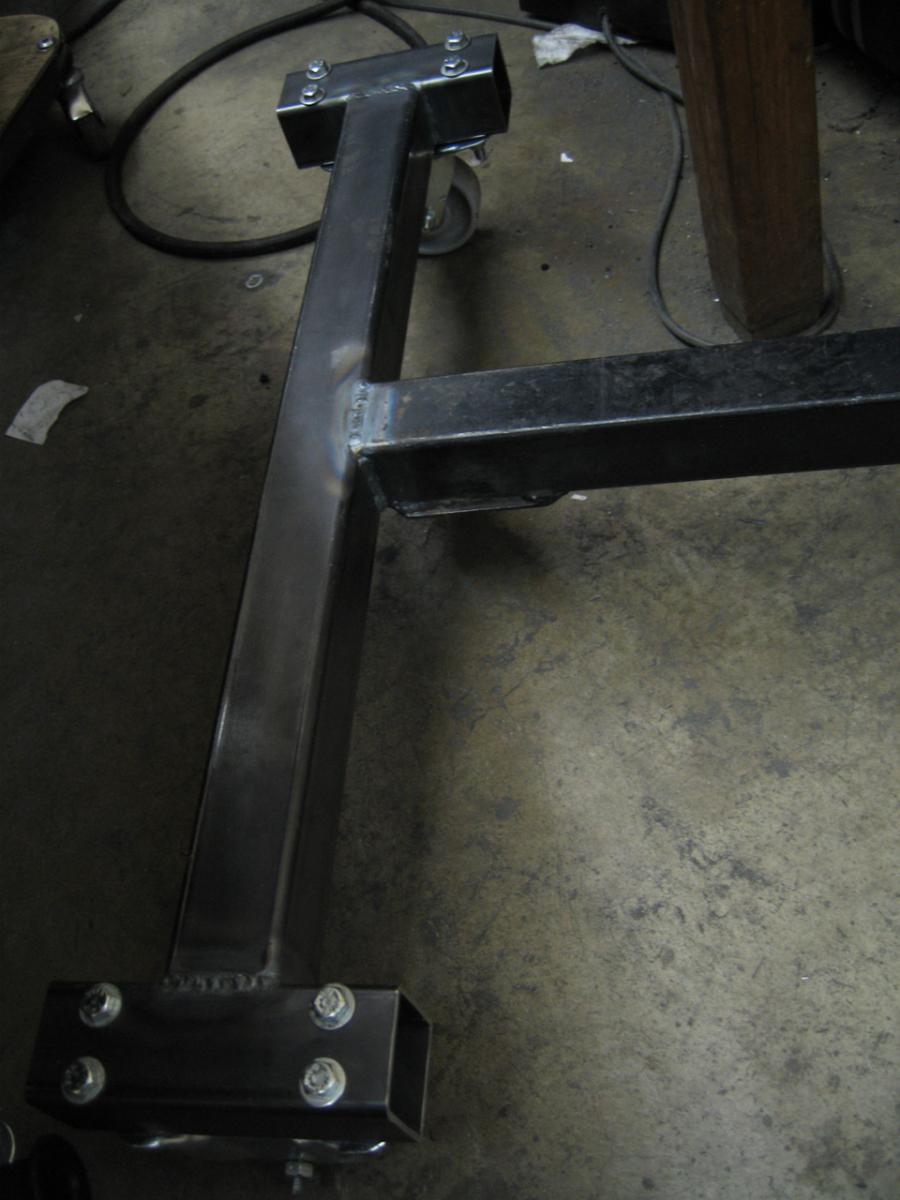
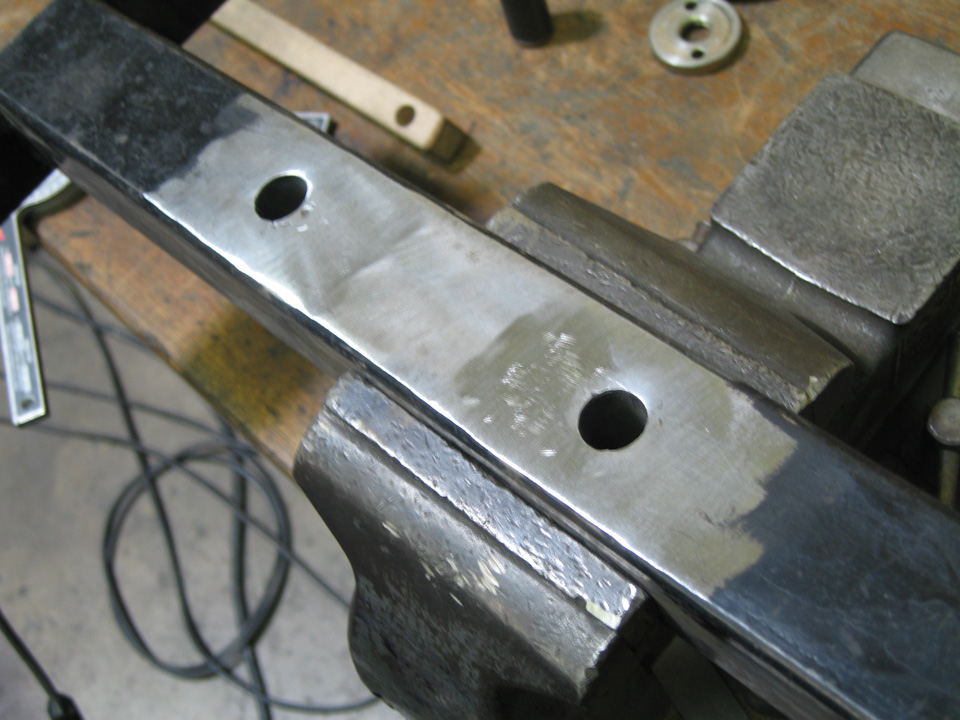
I decided to reinforce the joint between the vertical member and the lower part (previously just one bolt went through holding all pieces together, and then a flimsy cross brace above).
I welded in through-tubes to reinforce both the members were the cross beam clamps down on them.
Welded, ground and sanded down
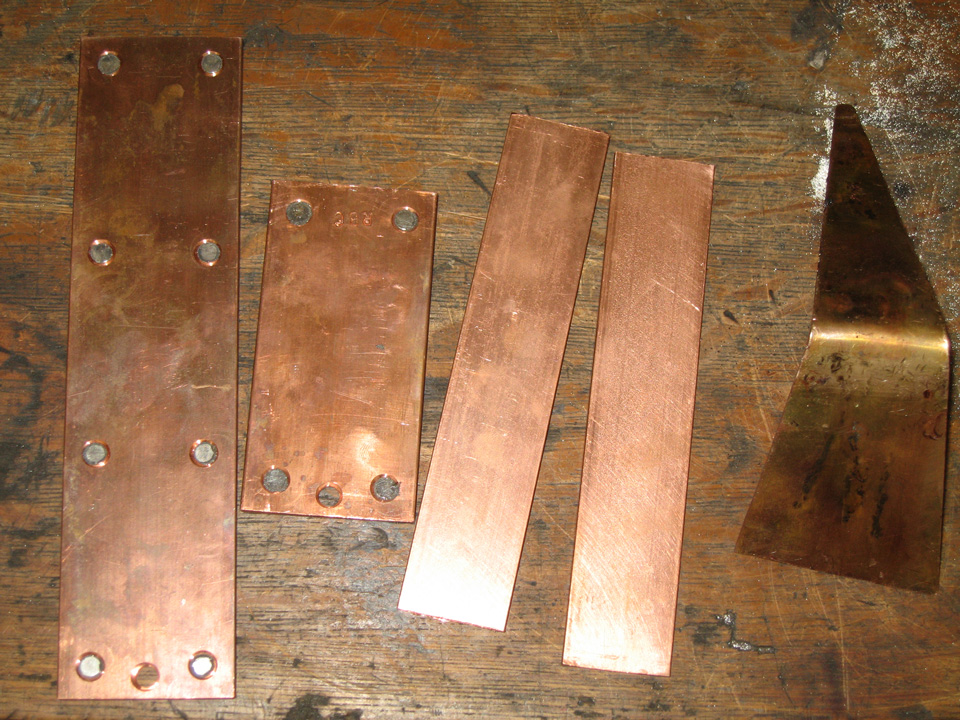
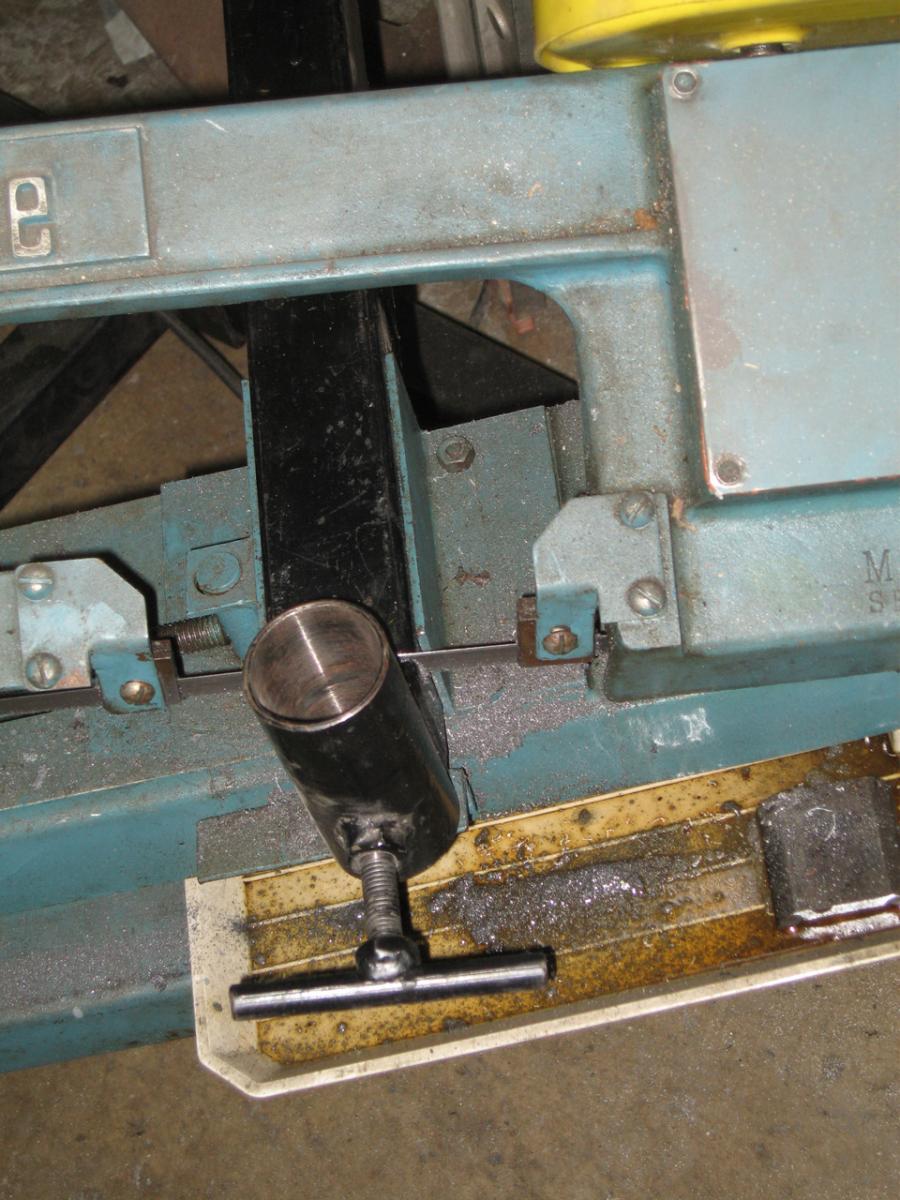
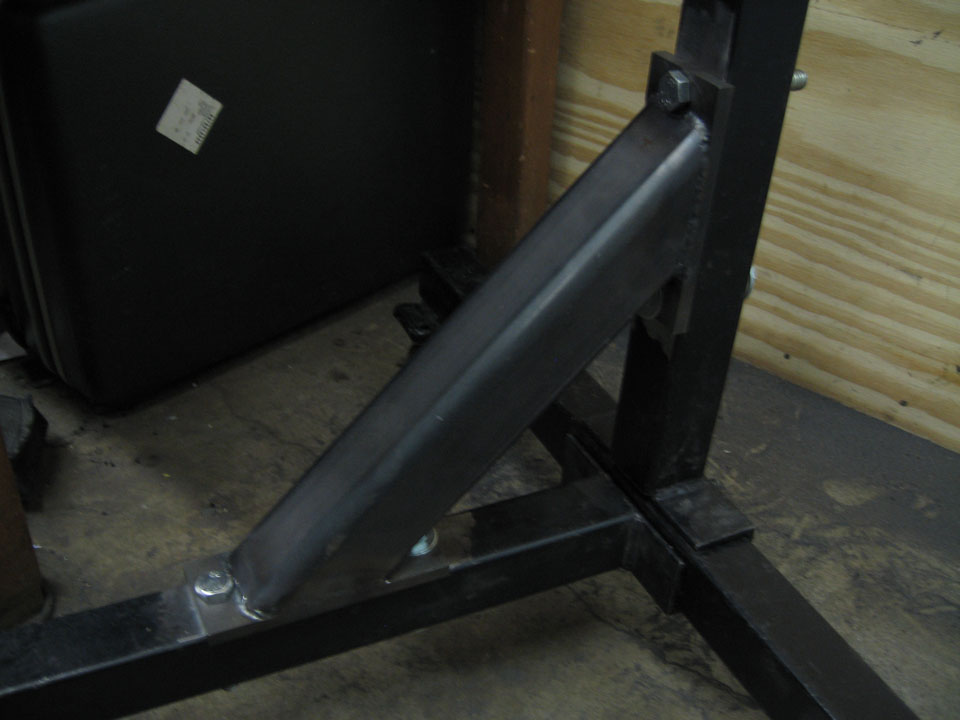
And the yoke swivel enhancement. I found the perfect stuff in the remnants section, DOM tubing, or 'drawn over mandrel' there is no weld crease evident on it and it is quite hard, maybe 1021 the guy was saying, just short of the hardness of chromoly, but weldable as a mild steel. The stuff is thick walled!
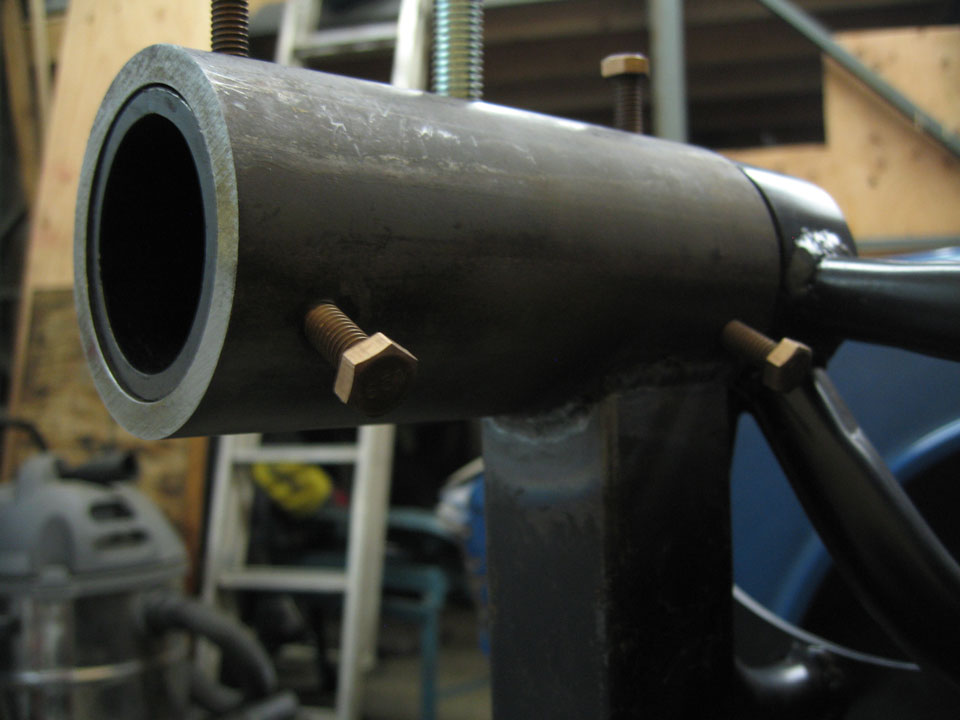
The bolts coming out are made of phosphor bearing bronze and there are 3 at 120 degree intervals at the front and the back. I'll put nuts to lock them in position. These take up the ~.015" play on either side; the difference in the id of the pipe and the od of the yoke swivel is pretty good but still a little play. 'I honed' the barrel of the yoke with fine sand paper. I think I may use way lube to check rust between. There is no drooping with the engine on it, no tendency for the engine to slide forward and out as before.
It's amazingly rigid. It feels awesome to be able to trip over it and not worry about having to 'catch' the engine or to have to leave it only in the 1 position that the yoke ears aren't strained being attached at only 2 independent points. I'm pretty happy with how it turned out.
Before: (note the tiny flat cross bar supposed to be bolted onto those tabs, is missing in the pic)

After:
As I'd mentioned in the previous post, I'd ordered the 4 arm yoke off the guy on the samba, but did it off ebay actually. The description talks about how it will fit in a 'standard' 2 3/8 inch hole. The swivel on my empi knockoff stand is like 1 3/4 inch.
I'd thought about how easy it would be to just buy a new stand. So I talked to a bunch of people off Craigslist who were selling mostly the harbor freight stand and it seems that 1 the hole measures 2 1/4 inch? Maybe they were measuring it wrong...
With this complication, I went back to plan A, to modify my stand, and with a half day of work on friday for Memorial day, I was able to go to the metal place.
Getting started, the old swivel would have to go, thankfully.
I don't have pics of it specifically but I drilled off the old swivel caster that was at the front (honestly 1 supporting leg it had out front with a swivel caster! Check the pic, that had actually broken, the pin came 'unswaged' and the wheel had fallen off
) Probably the biggest improvement was the stability added by the wider track front.
I decided to reinforce the joint between the vertical member and the lower part (previously just one bolt went through holding all pieces together, and then a flimsy cross brace above).
I welded in through-tubes to reinforce both the members were the cross beam clamps down on them.
Welded, ground and sanded down
And the yoke swivel enhancement. I found the perfect stuff in the remnants section, DOM tubing, or 'drawn over mandrel' there is no weld crease evident on it and it is quite hard, maybe 1021 the guy was saying, just short of the hardness of chromoly, but weldable as a mild steel. The stuff is thick walled!
The bolts coming out are made of phosphor bearing bronze and there are 3 at 120 degree intervals at the front and the back. I'll put nuts to lock them in position. These take up the ~.015" play on either side; the difference in the id of the pipe and the od of the yoke swivel is pretty good but still a little play. 'I honed' the barrel of the yoke with fine sand paper. I think I may use way lube to check rust between. There is no drooping with the engine on it, no tendency for the engine to slide forward and out as before.
It's amazingly rigid. It feels awesome to be able to trip over it and not worry about having to 'catch' the engine or to have to leave it only in the 1 position that the yoke ears aren't strained being attached at only 2 independent points. I'm pretty happy with how it turned out.
Before: (note the tiny flat cross bar supposed to be bolted onto those tabs, is missing in the pic)
After:
The Mahles are going to look great Nathan. They definitely look better on your car than that black roller. I think that the original color was L96D.
I've got some misc short Lugs that you can come over and pick through when you want.
Dave
I've got some misc short Lugs that you can come over and pick through when you want.
Dave
Nathan:
Great work man! I too am attempting a teener restoration in a one car garage...it is quite challenging sometimes! My ceilings are not as tall as yours though, so I had to pick up a shed that someone was giving away for parts storage.
Keep it up!
Bob
Great work man! I too am attempting a teener restoration in a one car garage...it is quite challenging sometimes! My ceilings are not as tall as yours though, so I had to pick up a shed that someone was giving away for parts storage.
Keep it up!
Bob
QUOTE(saigon71 @ May 31 2011, 05:24 AM)
Nathan:
Great work man! I too am attempting a teener restoration in a one car garage...it is quite challenging sometimes! My ceilings are not as tall as yours though, so I had to pick up a shed that someone was giving away for parts storage.
Keep it up!
Bob
Thanks, Bob.
Even as the parts are, I want them to be more 'out' so I can go over them in good order instead of just what I can get to. I can't recall where my glove box is...
Picking up here, update the thread.
I met up with David again, I'd been thinking about the fresh air vents on his roller ever since I'd seen a week or 2 before getting the Mahles. I got some pics this time.
The car is pretty crusty at the longs and jack point is floating in the rocker, lower firewall is bad, and floors. She was well done, and so with the fresh air vents being very good compared to mine
Rather barbaric, I used a .40" cutting wheel on my 4 1/2 inch angle grinder.

I got the seam sealers all out with the heat gun and scraping screw driver, some rust in there but solid. I've started blasting and it's looking great.
Will get a picture of after blasting and how I'm gonna install later.
I met up with David again, I'd been thinking about the fresh air vents on his roller ever since I'd seen a week or 2 before getting the Mahles. I got some pics this time.
The car is pretty crusty at the longs and jack point is floating in the rocker, lower firewall is bad, and floors. She was well done, and so with the fresh air vents being very good compared to mine
Rather barbaric, I used a .40" cutting wheel on my 4 1/2 inch angle grinder.
I got the seam sealers all out with the heat gun and scraping screw driver, some rust in there but solid. I've started blasting and it's looking great.
Will get a picture of after blasting and how I'm gonna install later.
It does look rusty, but honest, just a bit of pitting.
Anyway, going stronger than that,
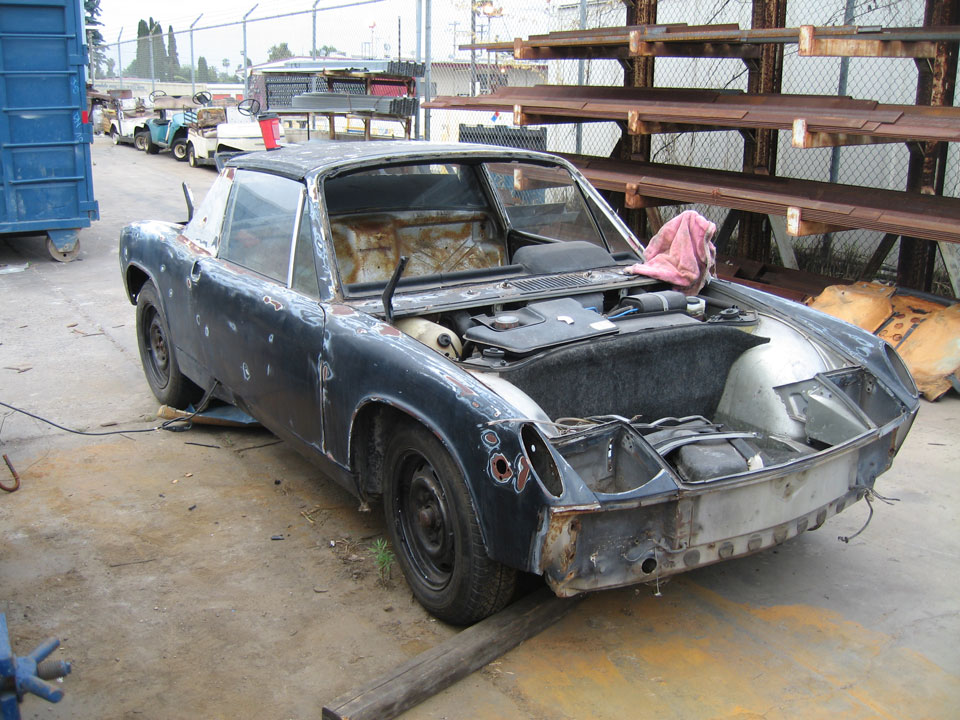
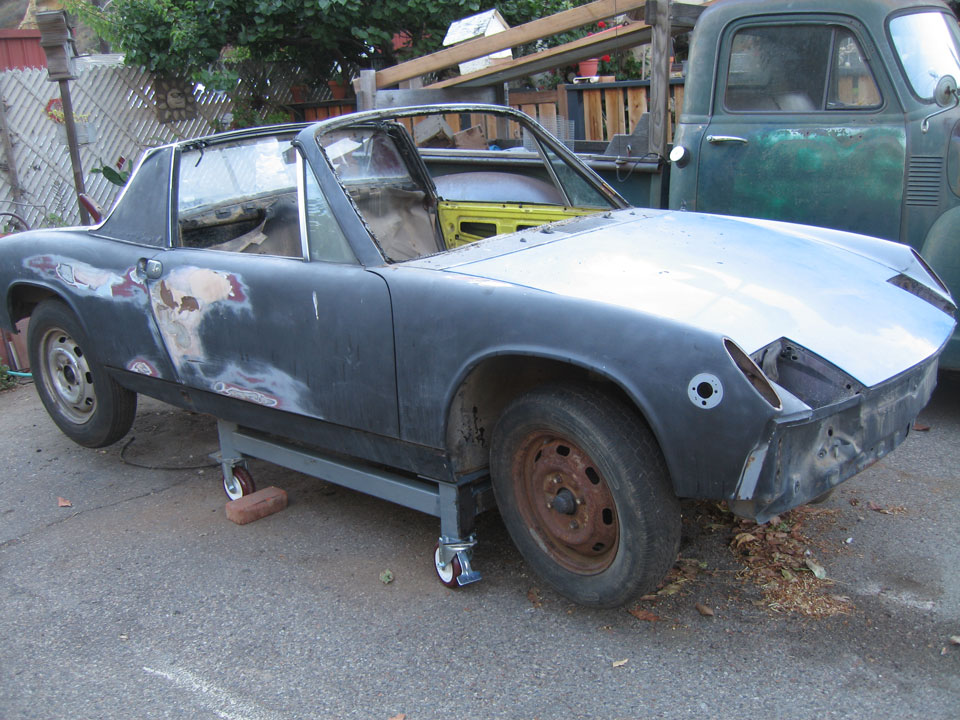
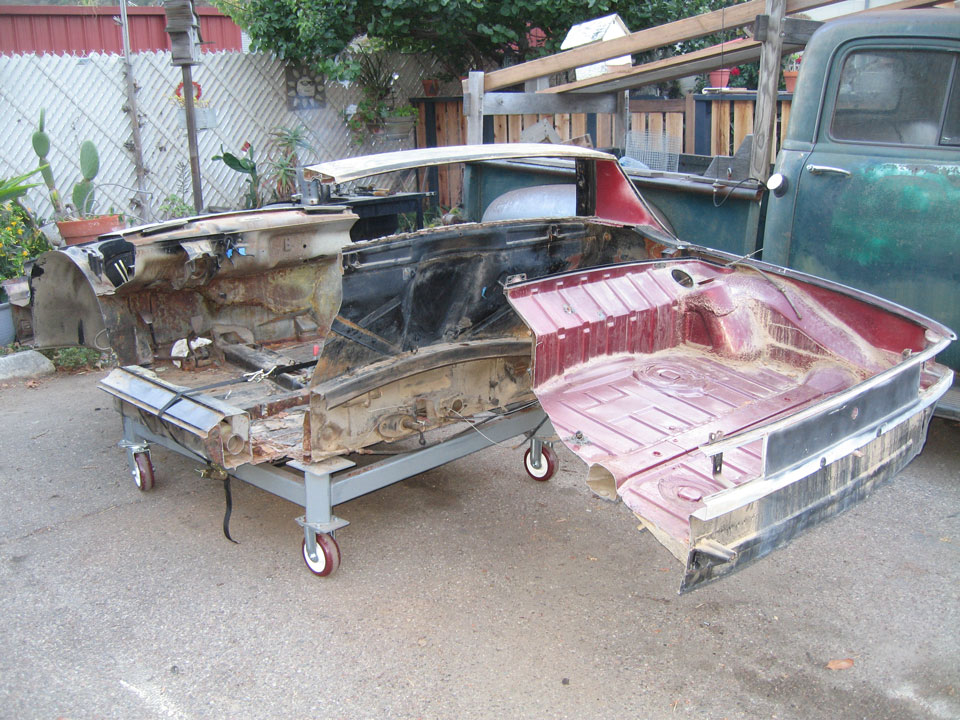
taking it to the next level, another car has come to me.
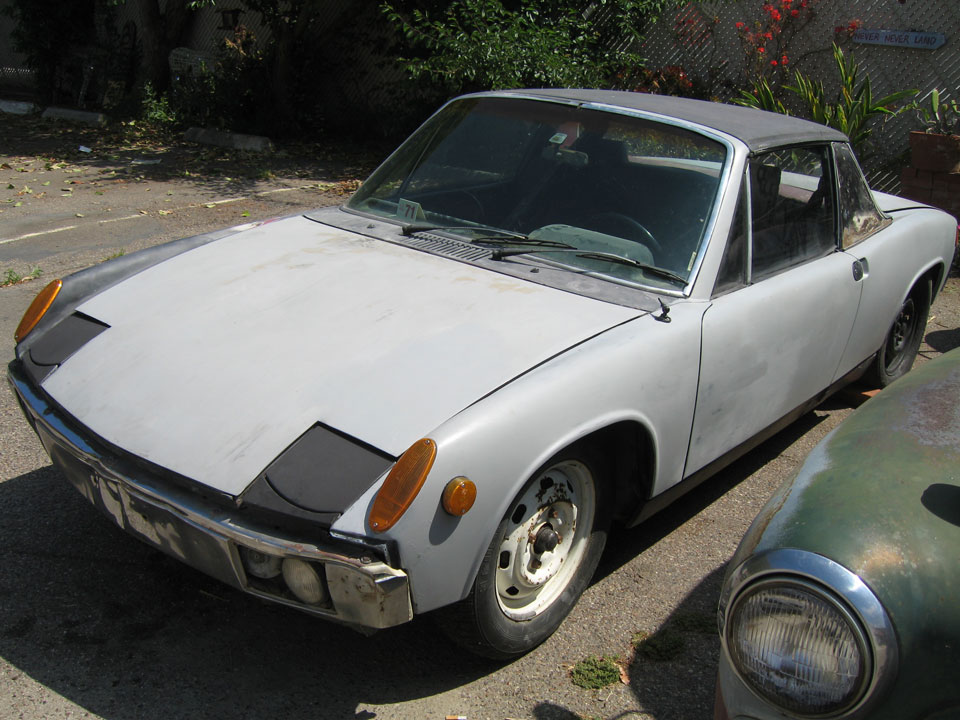
It's funny, I realized after contacting the po that it was a guy I got a $2 door handle off of the first week I had my 914, Paul, who works at Rancho Transmission in Santa Ana. He is exactly 16 miles from me and I got it towed here this morning much more affordably than the first one, thankfully, though we did have to wait it seemed 2 hours for the guy to come on his 'day off'. Good stuff though to talk shop with a guy that knows about these things, or Volkswagens anyway.
Tuning was so so, probably would have idled if it got warm. It runs, I should add. The carb is, he told me, a real one out of an actual Pinto. The valves sound good though. I will have to do a compression check. Thinking I may get it rolling with that engine while I put mine together.

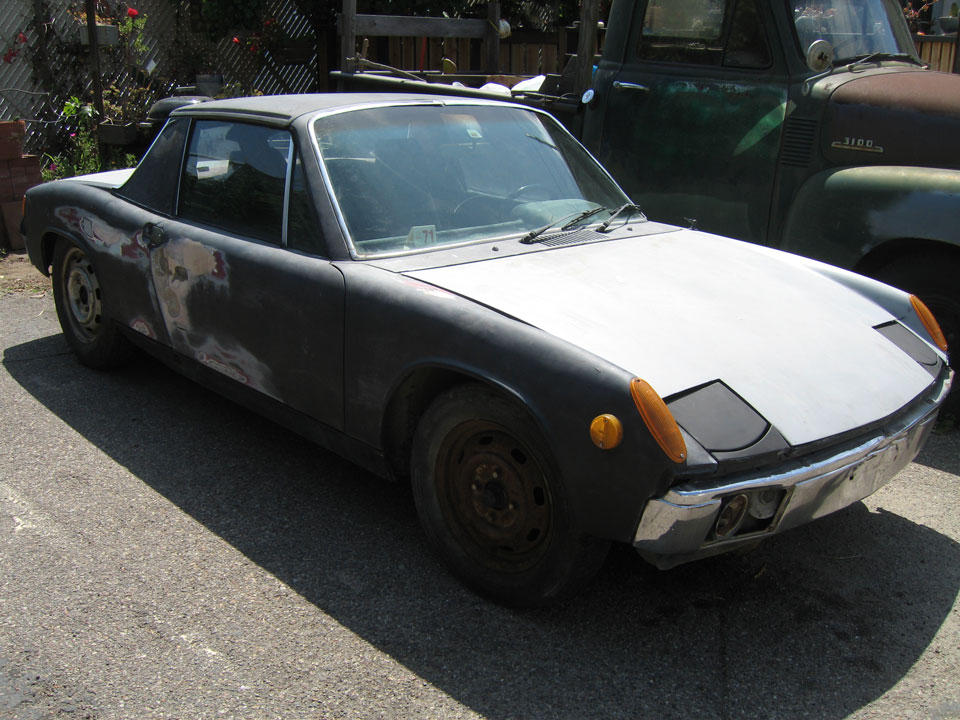
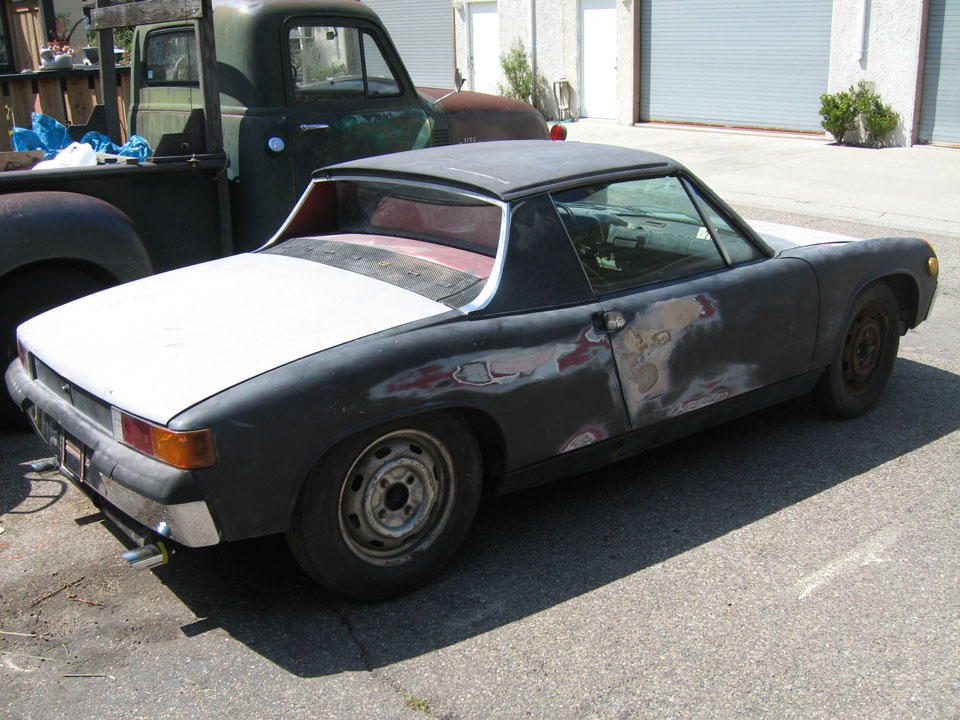
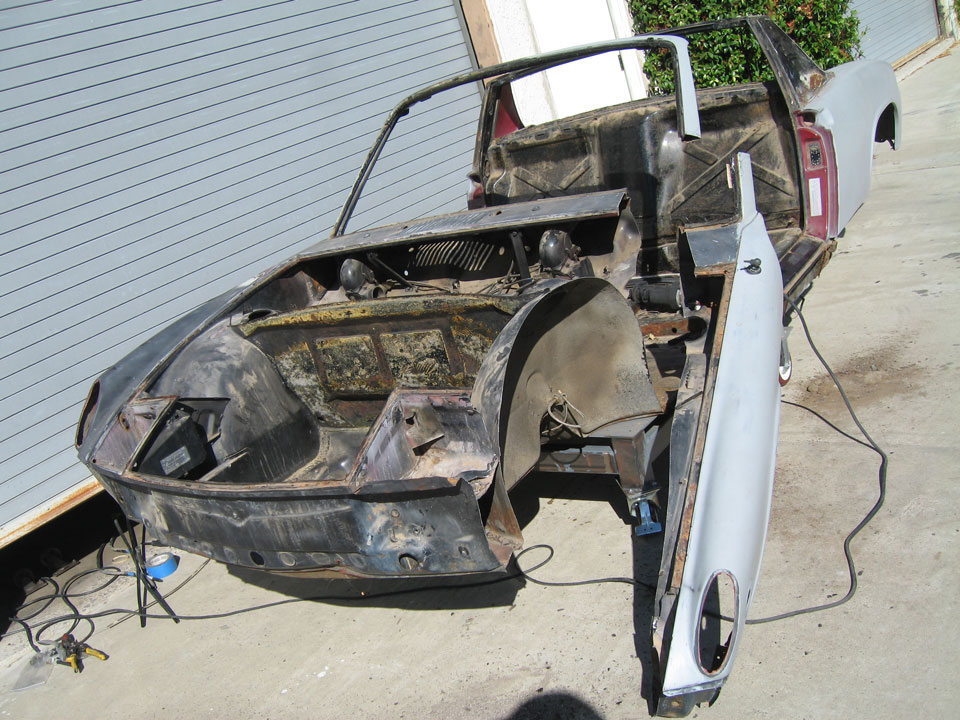
Body is pretty crusty on this one, too, mostly down low though where mine is worse above, well except the hell hole, this one is the worse, the 420 car seems solid in comparison.
A lot of the interior is there
It's got some really good stuff that came with it, all 4 rotors are German and new for 1. The driver door may be the one to use. The deck lids are better than both of what I have I think. It came with a a new carpet, black though, not sure how nice it is. The windshield is what I was looking for when I found it. I'd seen it before of course, but it really made sense more looking for a windshield. It looks to be very good, PPG. The top of the front bumper is straight and solid if I can get the chrome off. My plan is to d the bumpers the same as the wheels, in 'wheel silver'. I know it's not stock but I on' like the body color plan and have qualms about the re-chroming chrome route.
Other stuff that came with but probably won't use new-in-the-box 911 ate master cylinder, also in the box the front euro lenses, seemingly more brake calipers than the 4 (no brakes on it now), stainless soft line new. The backpad is pretty nice, early though as it's a 71.
It's pretty exciting just to have an assembled 914... to sit in.
Just wait until the battery charges (it sit's in the trunk ), I'm ganna start it. Maybe tomorrow after the Classic
Anyway, going stronger than that,
taking it to the next level, another car has come to me.
It's funny, I realized after contacting the po that it was a guy I got a $2 door handle off of the first week I had my 914, Paul, who works at Rancho Transmission in Santa Ana. He is exactly 16 miles from me and I got it towed here this morning much more affordably than the first one, thankfully, though we did have to wait it seemed 2 hours for the guy to come on his 'day off'. Good stuff though to talk shop with a guy that knows about these things, or Volkswagens anyway.
Tuning was so so, probably would have idled if it got warm. It runs, I should add. The carb is, he told me, a real one out of an actual Pinto. The valves sound good though. I will have to do a compression check. Thinking I may get it rolling with that engine while I put mine together.
Body is pretty crusty on this one, too, mostly down low though where mine is worse above, well except the hell hole, this one is the worse, the 420 car seems solid in comparison.
A lot of the interior is there
It's got some really good stuff that came with it, all 4 rotors are German and new for 1. The driver door may be the one to use. The deck lids are better than both of what I have I think. It came with a a new carpet, black though, not sure how nice it is. The windshield is what I was looking for when I found it. I'd seen it before of course, but it really made sense more looking for a windshield. It looks to be very good, PPG. The top of the front bumper is straight and solid if I can get the chrome off. My plan is to d the bumpers the same as the wheels, in 'wheel silver'. I know it's not stock but I on' like the body color plan and have qualms about the re-chroming chrome route.
Other stuff that came with but probably won't use new-in-the-box 911 ate master cylinder, also in the box the front euro lenses, seemingly more brake calipers than the 4 (no brakes on it now), stainless soft line new. The backpad is pretty nice, early though as it's a 71.
It's pretty exciting just to have an assembled 914... to sit in.
Just wait until the battery charges (it sit's in the trunk
), I'm ganna start it. Maybe tomorrow after the Classic
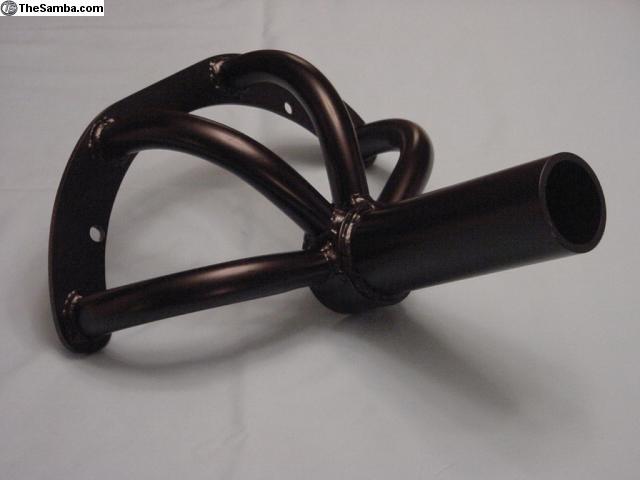
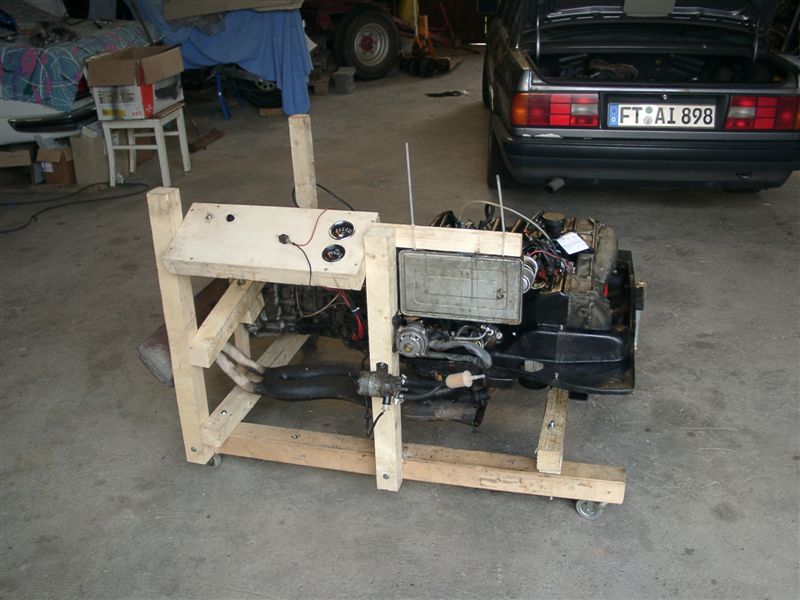
Nice score on the parts car. BTW, something like this is what I was talking about for a simple engine run stand: http://lainefamily.com/EngineStandProject.htm
QUOTE(dheming @ Jun 13 2011, 02:55 PM)
Nice score on the parts car. BTW, something like this is what I was talking about for a simple engine run stand: http://lainefamily.com/EngineStandProject.htm
You call that simple?
Here's a pic I had saved, he's got the fuel injection partially attached to it, too, 914 stuff there.
This seems like a good place to talk about how I've got to get rid of the parts car as I'm still taking things off it, and it's not ready for the classifieds section yet.
I agreed with my land lord when I got permission to get it that I could only keep it for 3 months. So 1 month to go, I've got until September 1st.
Likely the shell will be mostly useless if it comes to calling the junkyard, as I would cut off what's good of the body just because it's good. A lot of it isn't.
The thing is I have to keep it rolling I'm thinking in order to get it towed or even trailered to a ..junkyard ... I'm a little nervous actually about it, whether I can just call someone to take away my cutup shell. Plus I would hate to think of the suspension and steering stuff getting crushed.
Maybe someone local has a yard or something. I'd sell it for less than most want for just the rack & pinion. We'll see how it goes. I'm just putting it out there.
If you have the title you can junk it. They can bring a flatbed and drag it. Take the suspension off. You could make a simple wood dolly on casters to move it around.
About a week to go here and I think my landlord will be ok if I go long. Unfortunately I don't have the title. I've got 2 bills of sale from the past owners, so I'm going to cut up.
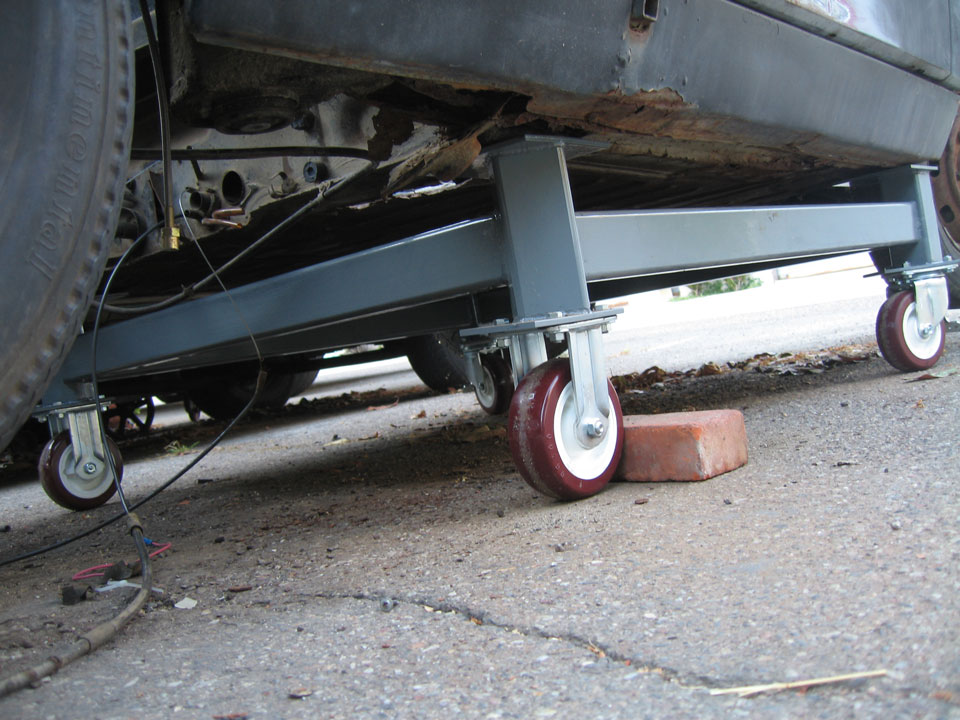
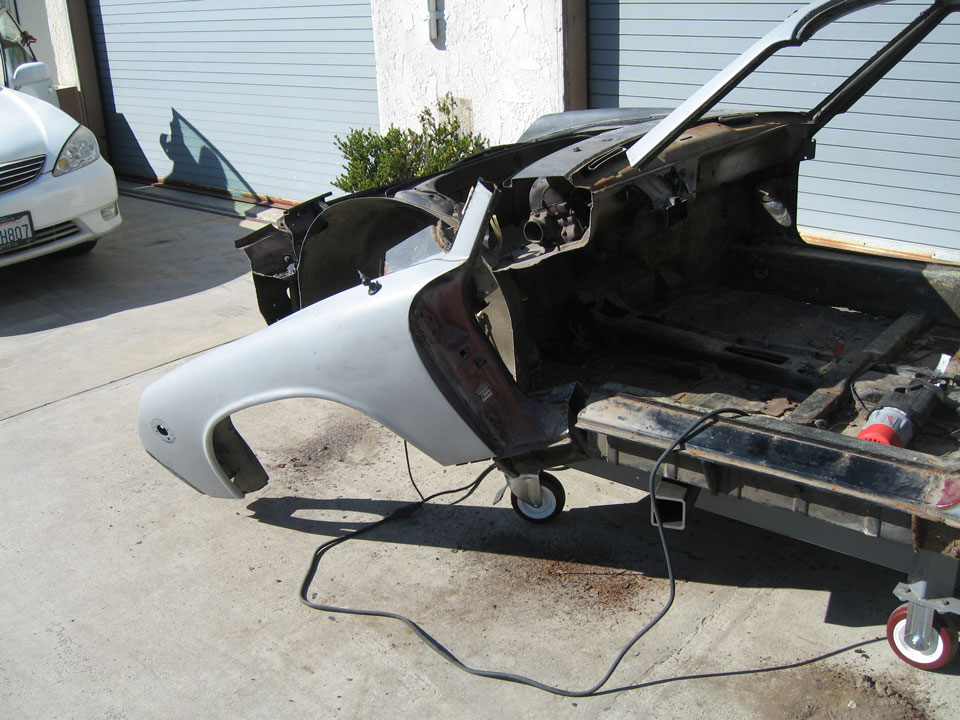
I've been busy preparing. I've got a reciprocating saw ready and i've built a dolly. Once the donor is in pieces and the 420 car is more stable, I will put it on there as I need to be able to move it around to go forward.
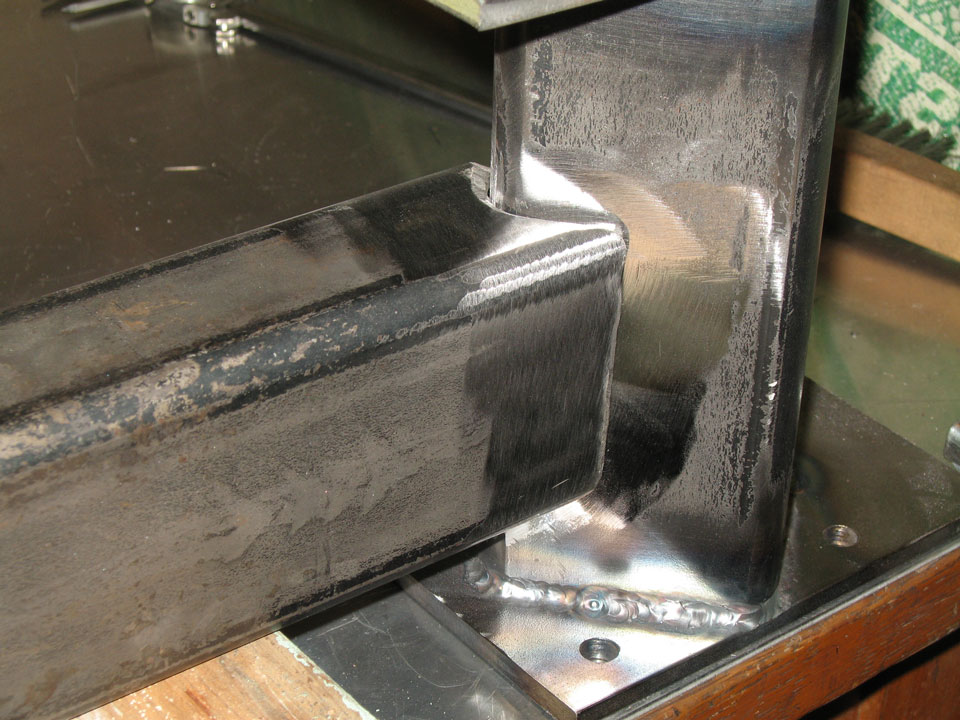
Here are some pics of the dolly construction.
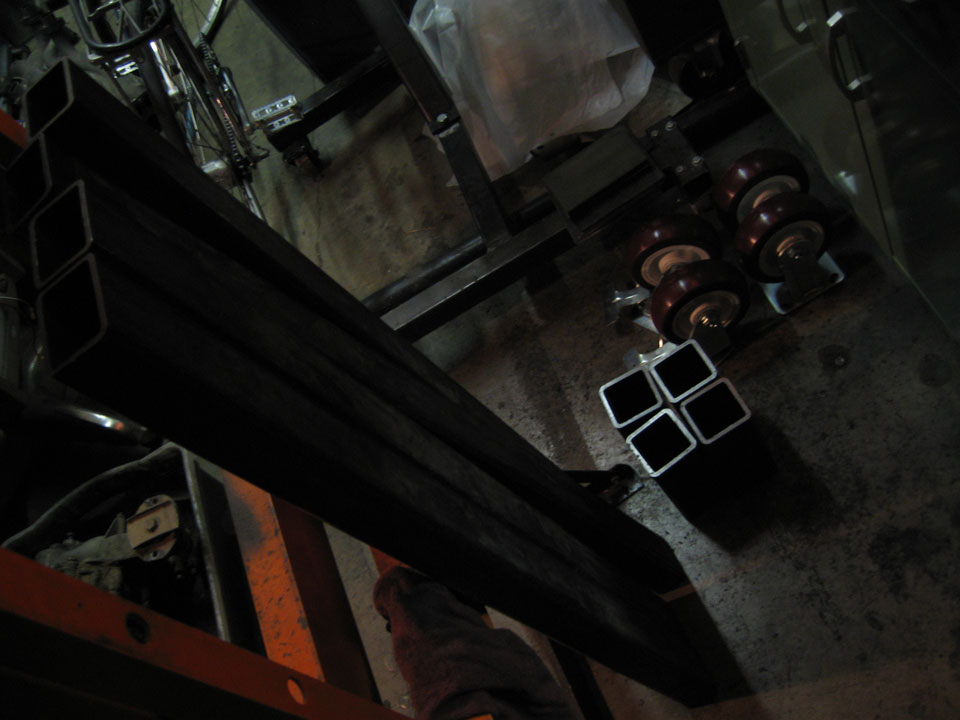
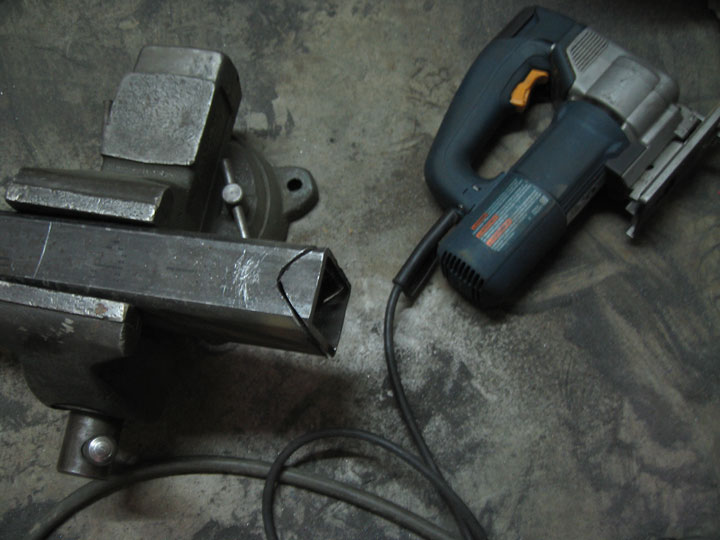
I've been busy preparing. I've got a reciprocating saw ready
and i've built a dolly. Once the donor is in pieces and the 420 car is more stable, I will put it on there as I need to be able to move it around to go forward. Here are some pics of the dolly construction.
Other progress, I upgraded my air compressor. I'd got this old old Westinghose/ homemade jobber from some guy off craigslist a few years ago and I'd been working it to death with the blast cabinet. It is I think a 35 gallon. I'd been thinking about getting something better.
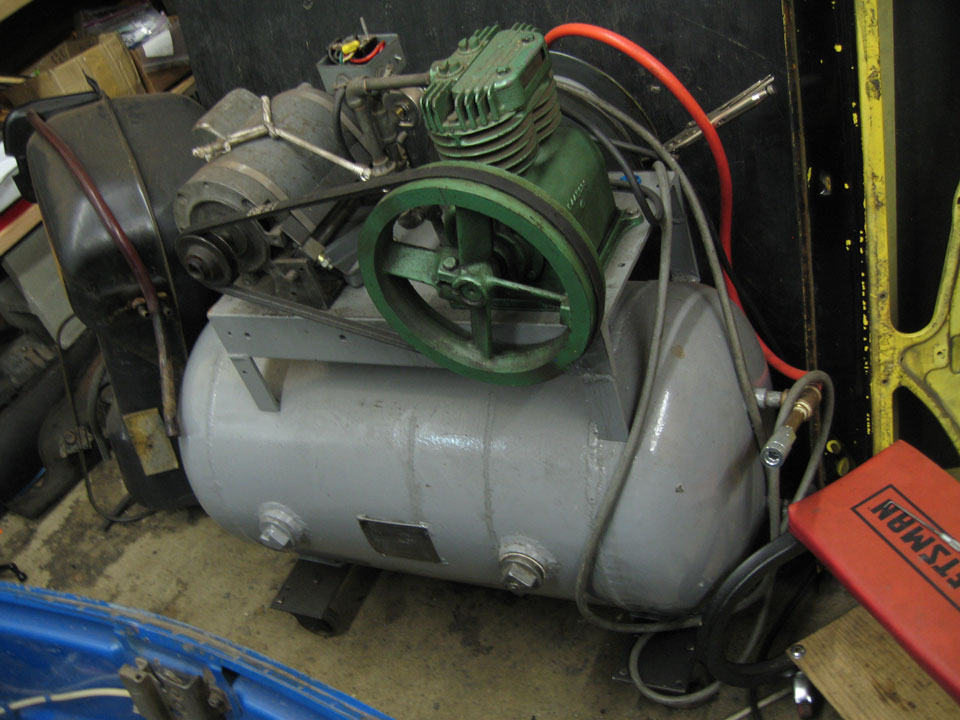
...so I found this on craigslist, got it from a tire shop in huntington Beach.
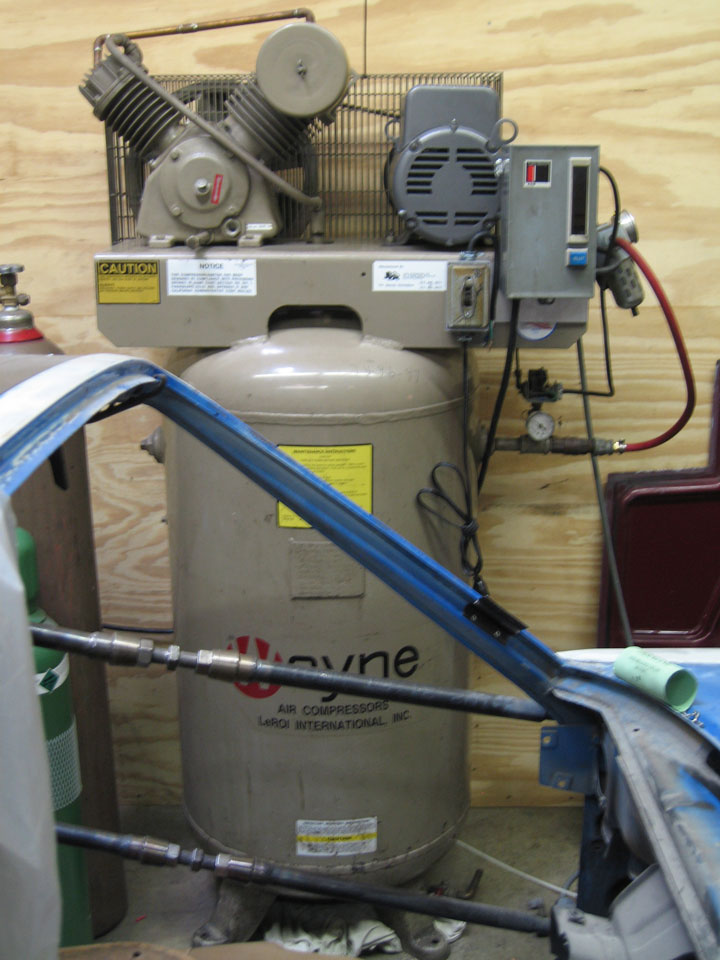
80 gallons, dual stage goes up to 175psi. It is actually made by the same company as the old one, as Westinghouse was bought by LeRoi, which actually makes this for Wayne. It is the real deal. The sort of overkill that I'd been looking for seems to come only in 3 phase, and so it was quite challenging to get it hooked up to work with single phase 220 power. I found a 5hp Baldor 220 single phase motor on eBay. It was not cheap, though I guess it could have cost a lot more for a new baldor motor of that size.
Anyway, this new compressor is a beast. I regulate it down to 90psi for the sandblast cabinet, and I can say that it does not EVER get below that. I can blast continuously and it will meet the demand. If I give it half a chance it will actually catch up and turn off.
I'd thought that the shortcomings of my cabinet were a lot due to it being not the recirculating type, but it is working a lot better with this bad boy, like it puts out a stronger 90psi than the other though I'm using the same gauge!.

...so I found this on craigslist, got it from a tire shop in huntington Beach.
80 gallons, dual stage goes up to 175psi. It is actually made by the same company as the old one, as Westinghouse was bought by LeRoi, which actually makes this for Wayne. It is the real deal. The sort of overkill that I'd been looking for seems to come only in 3 phase, and so it was quite challenging to get it hooked up to work with single phase 220 power. I found a 5hp Baldor 220 single phase motor on eBay. It was not cheap, though I guess it could have cost a lot more for a new baldor motor of that size.
Anyway, this new compressor is a beast. I regulate it down to 90psi for the sandblast cabinet, and I can say that it does not EVER get below that. I can blast continuously and it will meet the demand. If I give it half a chance it will actually catch up and turn off.
I'd thought that the shortcomings of my cabinet were a lot due to it being not the recirculating type, but it is working a lot better with this bad boy, like it puts out a stronger 90psi than the other though I'm using the same gauge!.
For future reference... There is a device called "Add A Phase". Available at most any electrical wholesale house. It uses an LC network to phase shift your house 220V into 3 pahse power. Small box, mounts on the wall close to your equipment. I've installed many in home garages needing 3 phase machines to function. Cost a couple hundred bucks... Easy install... 2 wires in, 3 wires out...
QUOTE(kg6dxn @ Aug 26 2011, 10:38 PM)
For future reference... There is a device called "Add A Phase". Available at most any electrical wholesale house. It uses an LC network to phase shift your house 220V into 3 pahse power. Small box, mounts on the wall close to your equipment. I've installed many in home garages needing 3 phase machines to function. Cost a couple hundred bucks... Easy install... 2 wires in, 3 wires out...
I researched variable frequency drives, rotary and static phase converters, and I found that the rotary converter was the only acceptable way to do it. Upwards of 3hp it gets very expensive to do it right... though it may have been about the same.
This is a true 5hp motor
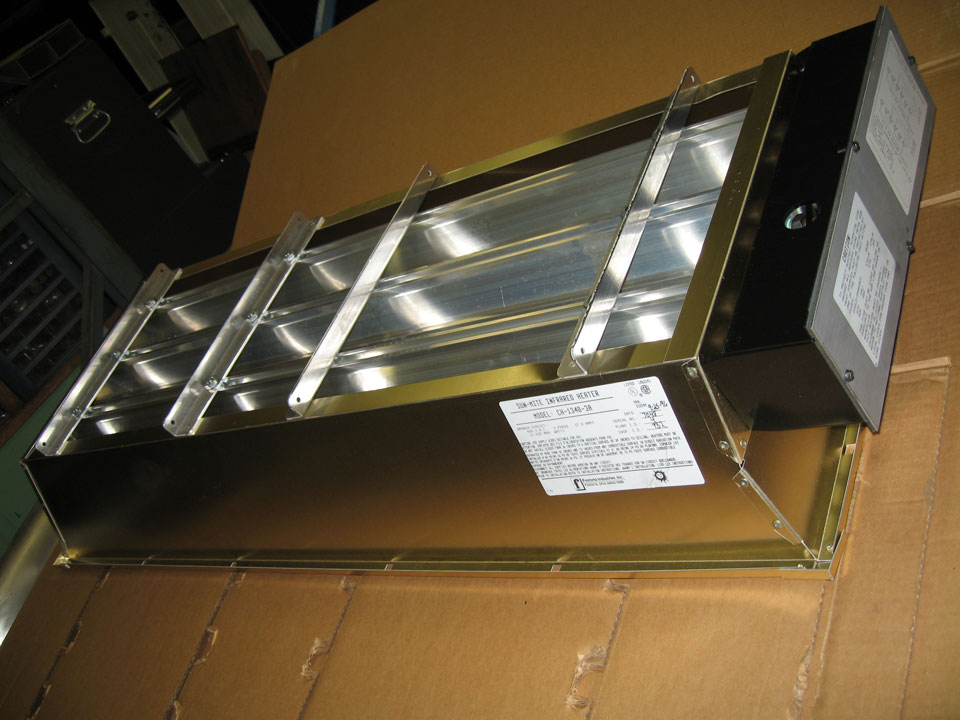
I've got some other 3 phase/ single phase stuff to figure out. It's a little easier than the motor as a heater can be wired in different ways. This crazy thing was actually out of a Chrysler plant. Running it single phase 220 will make it less effective than the 480 3 phase but it should still be quite effective. I've read that getting the paint to off gas is the secret to a professional quality paint job, either by waiting between coats or by baking. I've read that they go up to 400 something degrees at the factory, where paint shops will heat panels up to 150 or so.

Wiring costs get pretty up there with this high amperage stuff. I needed to move my welder across the room. I ended up making my own 50 amp 20 ft extension chord and it cost me $250.
I broke down and got the runner kit for it which is ridiculous in its construction. The welder weighs 300 lbs and it's held to the rear wheel assembly only by 4 1/4-20 bolts into the sheet metal. The rear wheels look like 5 lug Fuchs though so it's worth it.
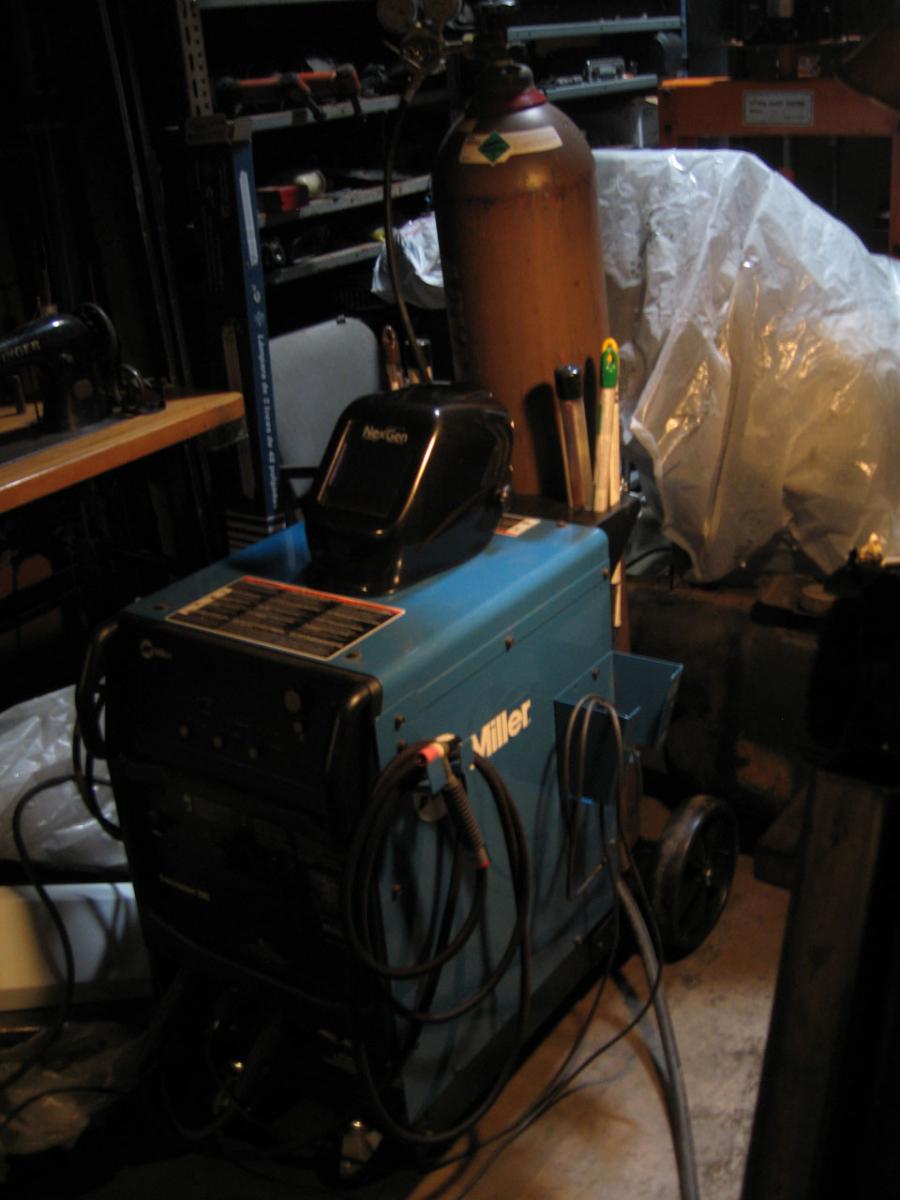
The big bolts at the rear are a bear. Oh, 3/4" Bonney!
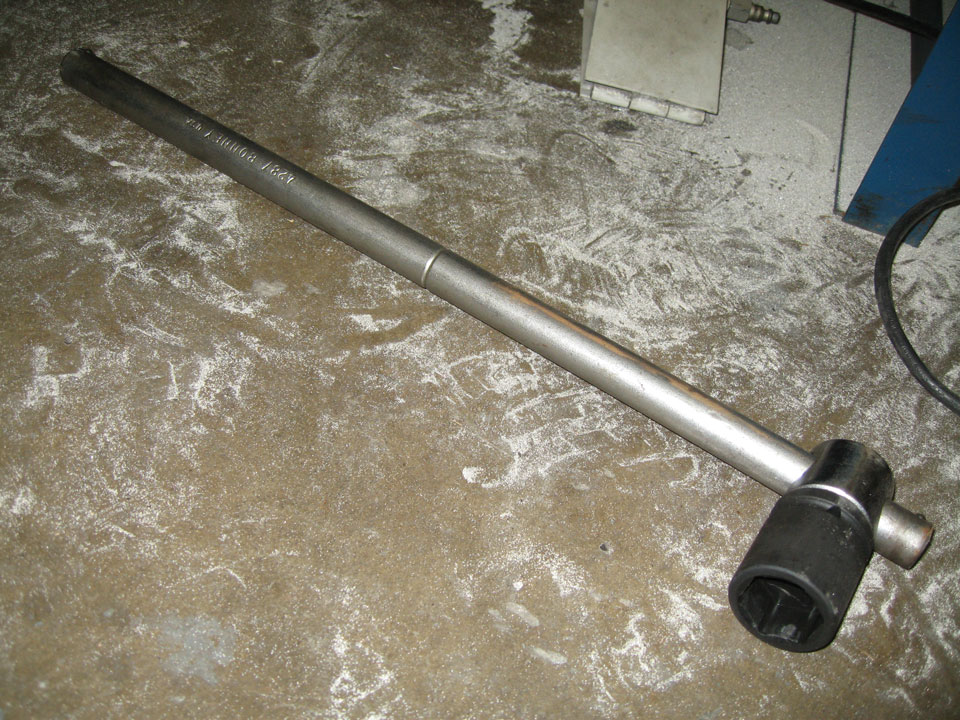
After much liquid wrench.

A giant release, a big pop and off she came.
After much liquid wrench.
A giant release, a big pop and off she came.
Some progress on the parts car. September 1st was the day I agreed to have it out of here. ... landlords and non-operational vehicles
Some guy talked my ear off All Day Long on Thursday, same guy that scavenged just the head off the old compressor that I put out with a free sign leaving me to deal with the rest. I guess I was just nervous about how to proceed that I wasn't like, "I need to get to this, mister" and be on with it.
I'd got out my new sawzall.
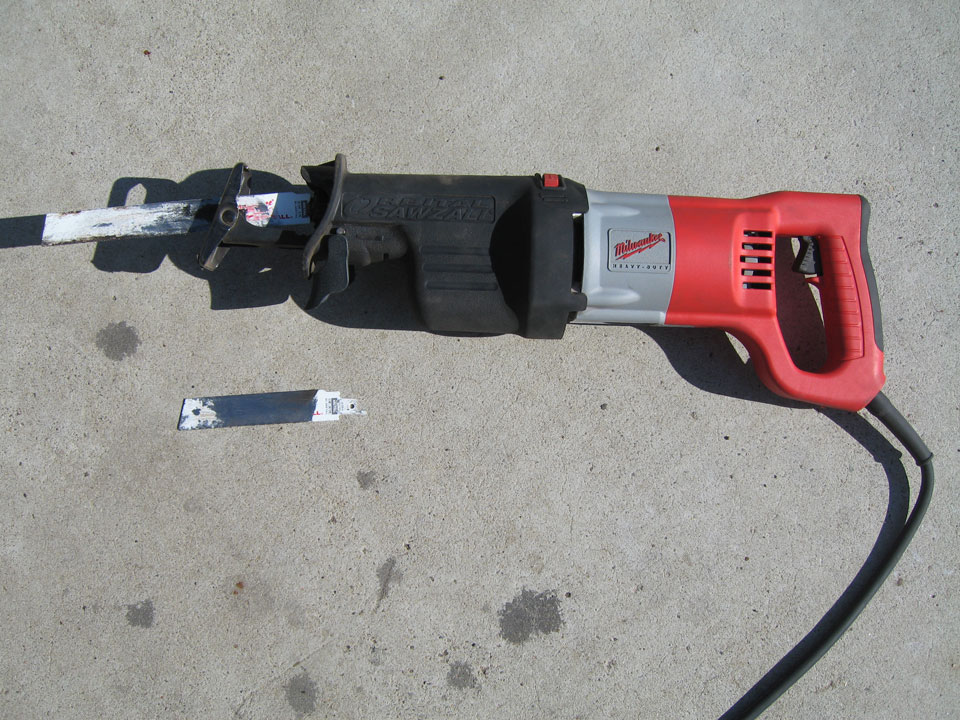
I suppose I didn't really want to cut it up. I still wonder if I should have made a jig to store it vertically. With all these parts, bring it back...
Pretty rusty in places.
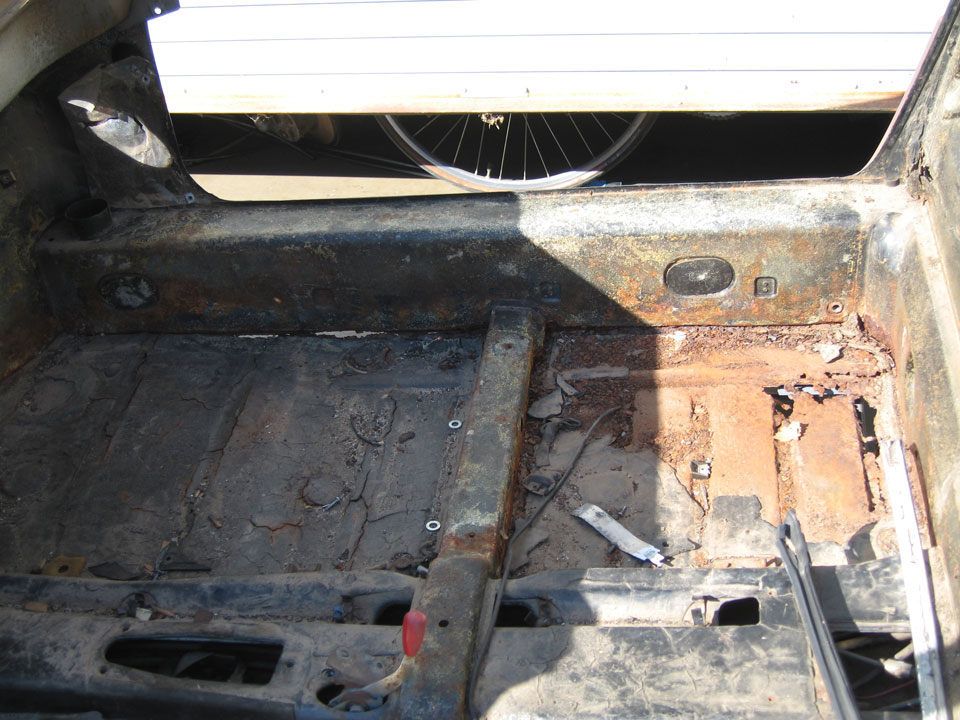
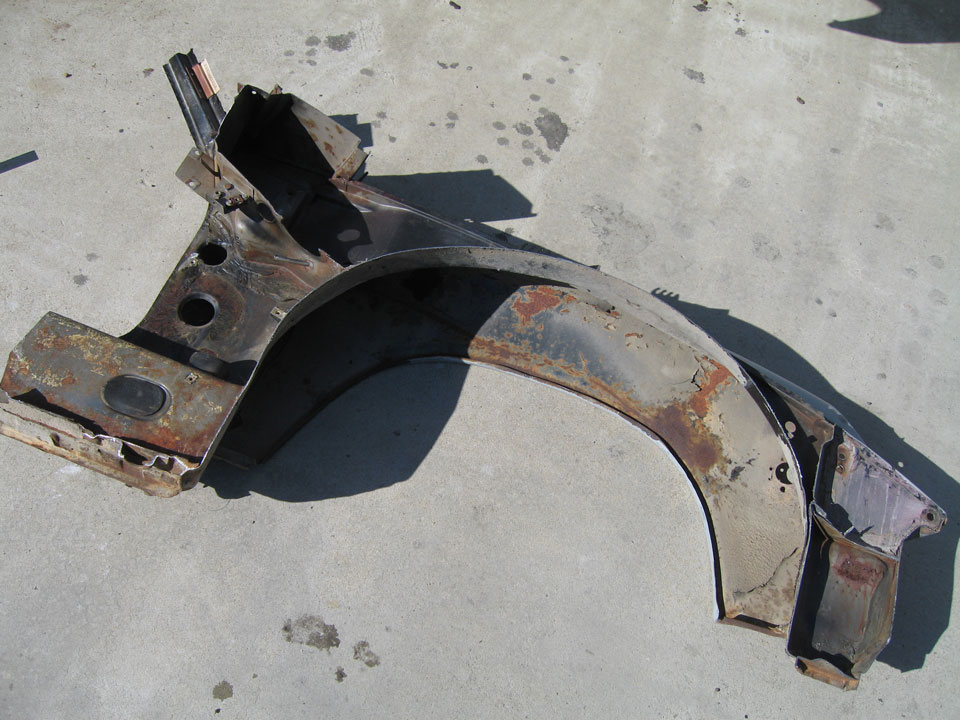
And with the deadline, on went the plan to cut it up. Someone might need the metal; I'll keep it around, will need some myself: the cowl piece may be better than mine. Thinking about modifying the driver side engine mount back to be a passenger side?
Made a rack to make some room for the chopped up car.
Things went better on Friday without Mr. Diarrhea mouth, got a fender off after work.
Today, I got off the other front and the driver rear, will do the passenger rear tomorrow.
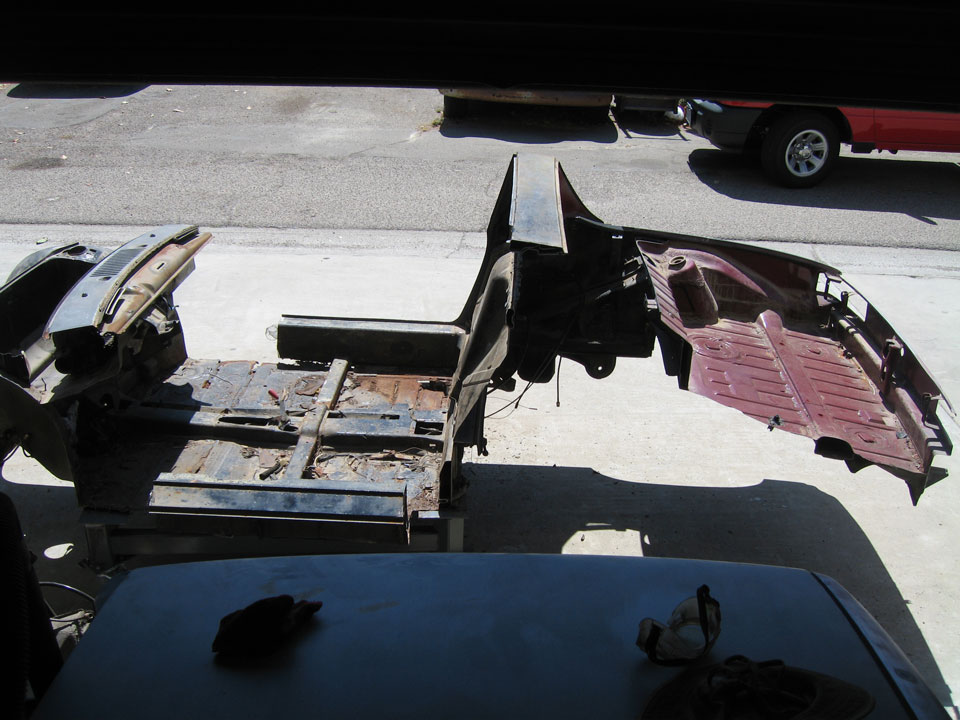
Came a long way in a week with it.
Looks like there was a fire under the dash at some point. Sure is crusty.
That's all for now. I'll finally be able to work on the blue car soon with this out of the way. It's actually almost not-blue as I've been taking off the paint, will show some of that later. Next step is ro get the blue car ready to transfer to the dolly, well after I get the rest of the donor cut and have made some room...
Some guy talked my ear off All Day Long on Thursday, same guy that scavenged just the head off the old compressor that I put out with a free sign leaving me to deal with the rest.
I guess I was just nervous about how to proceed that I wasn't like, "I need to get to this, mister" and be on with it.I'd got out my new sawzall.
I suppose I didn't really want to cut it up. I still wonder if I should have made a jig to store it vertically.
With all these parts, bring it back... Pretty rusty in places.
And with the deadline, on went the plan to cut it up. Someone might need the metal; I'll keep it around, will need some myself: the cowl piece may be better than mine. Thinking about modifying the driver side engine mount back to be a passenger side?
Made a rack to make some room for the chopped up car.
Things went better on Friday without Mr. Diarrhea mouth, got a fender off after work.
Today, I got off the other front and the driver rear, will do the passenger rear tomorrow.
Came a long way in a week with it.
Looks like there was a fire under the dash at some point. Sure is crusty.
That's all for now. I'll finally be able to work on the blue car soon with this out of the way. It's actually almost not-blue as I've been taking off the paint, will show some of that later. Next step is ro get the blue car ready to transfer to the dolly, well after I get the rest of the donor cut and have made some room...
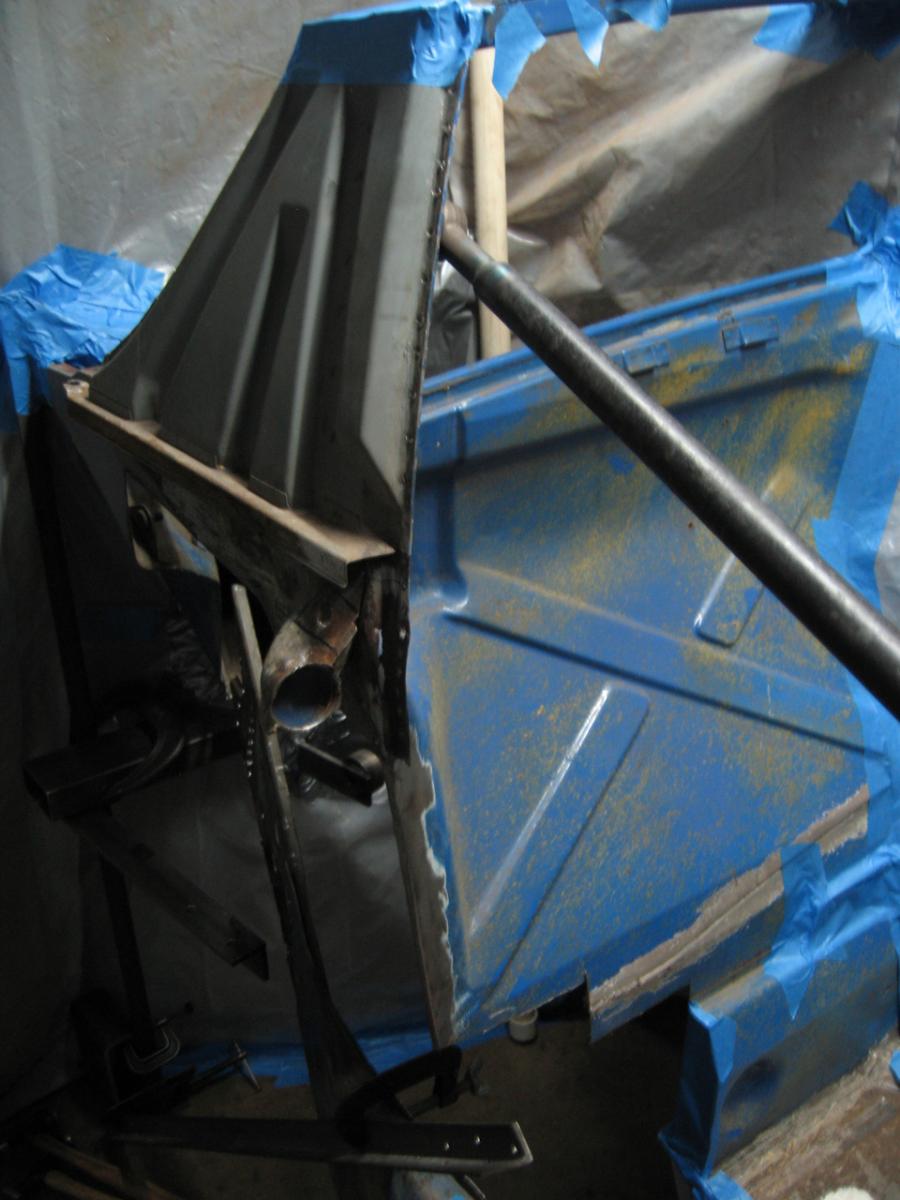
Back a step to show there has actually been progress.

Click to view attachment
It did get brutal when I removed the old suspension console, was more than a year ago.
Click to view attachment
Click to view attachment
Click to view attachment
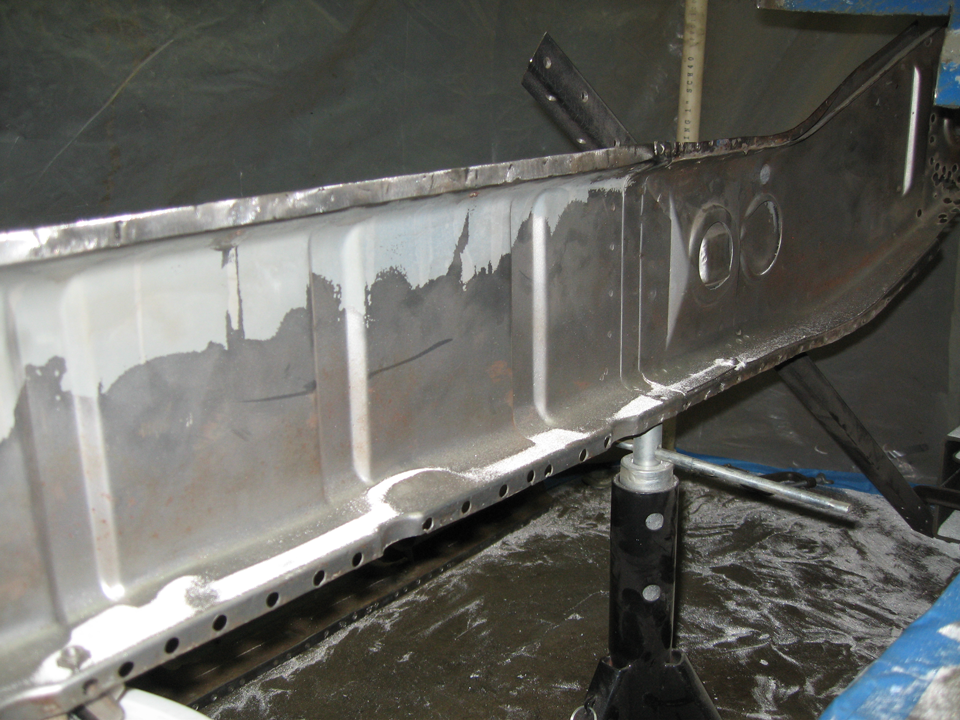
Bit of work to get both sides looking solid
Click to view attachment
bit lumpy, but passable. They don't sell this as a replacement piece afaik. 3M weld thru primer.
Click to view attachment
Click to view attachment
Click to view attachment
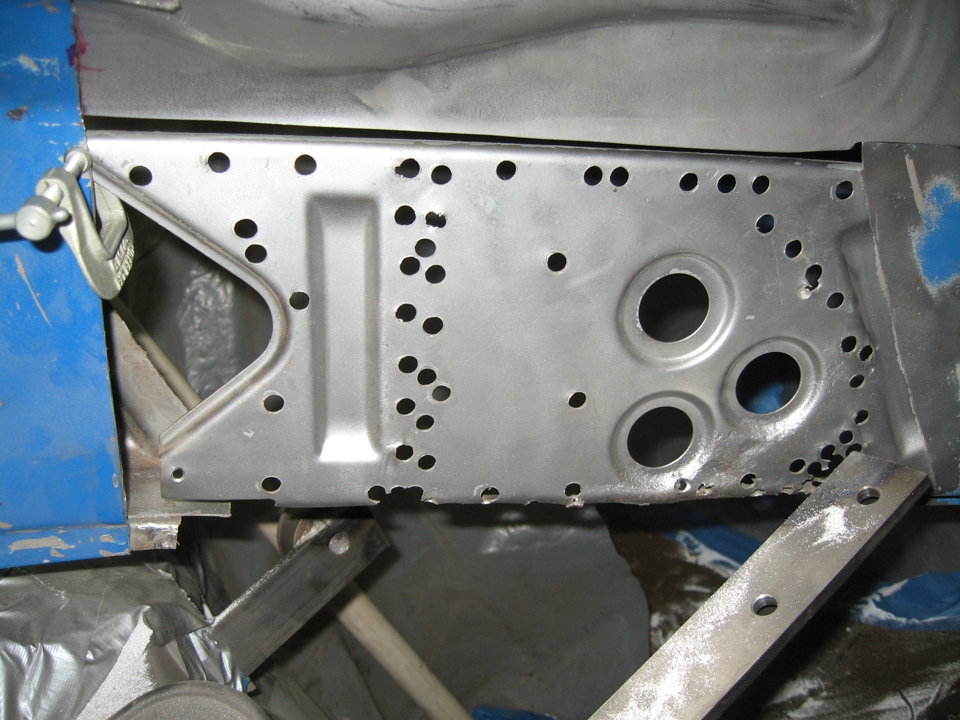
I've got some more plug welding to do; waiting on a big ass c-clamp to hold it together way in. A bit of a fit up of the outer suspension console.
Click to view attachment
The inside, fitting
Click to view attachment
I've cut out pieces of the long from the donor car to get the curvature without having to make tooling for the bender.
Click to view attachment
Click to view attachment
Got the driver engine mount off and seperated. This cleaned up nice (this is before ). I've got a paper template only, for the bottom part, the passenger-side version.
Click to view attachment
Working toward completing the inner long, those corrugations at the bottom, I can use parts of the driver-side long of the donor for the outer layer, I've got to make the inner, Richard Castro-style, as his thread is the only one I've seen really address the intricacies of the lower long.
Looked through like 3 times this many swatches. My neighbor down the way is an upholsterer and is going to help me get the interior in shape... once I get it painted.
Click to view attachment
I'm not sure if it's what I will go with as I'd like it to be more 70's 'camel', but out of all the ones he had this was the closest, it's sahara beige, a 996-7 color. This is leather, not leatherette which I think I might prefer, as he says that it will be mostly labor the cost. He's going to get me some more swatches, we'll see. I'm more concerned about camel-ish square-weave carpet.
Click to view attachment
I've sanded it a bit more, got the cowl and working on the gas tank compartment now. I ordered metal prep and primer, ppg, from the paint store. I'll need to get the long together before I can move the car onto the dolly in order to set up the ladder to move the lights and hang the divider. I can't wait to cover this metal up. I don't know how the anklebiter sits around like that.
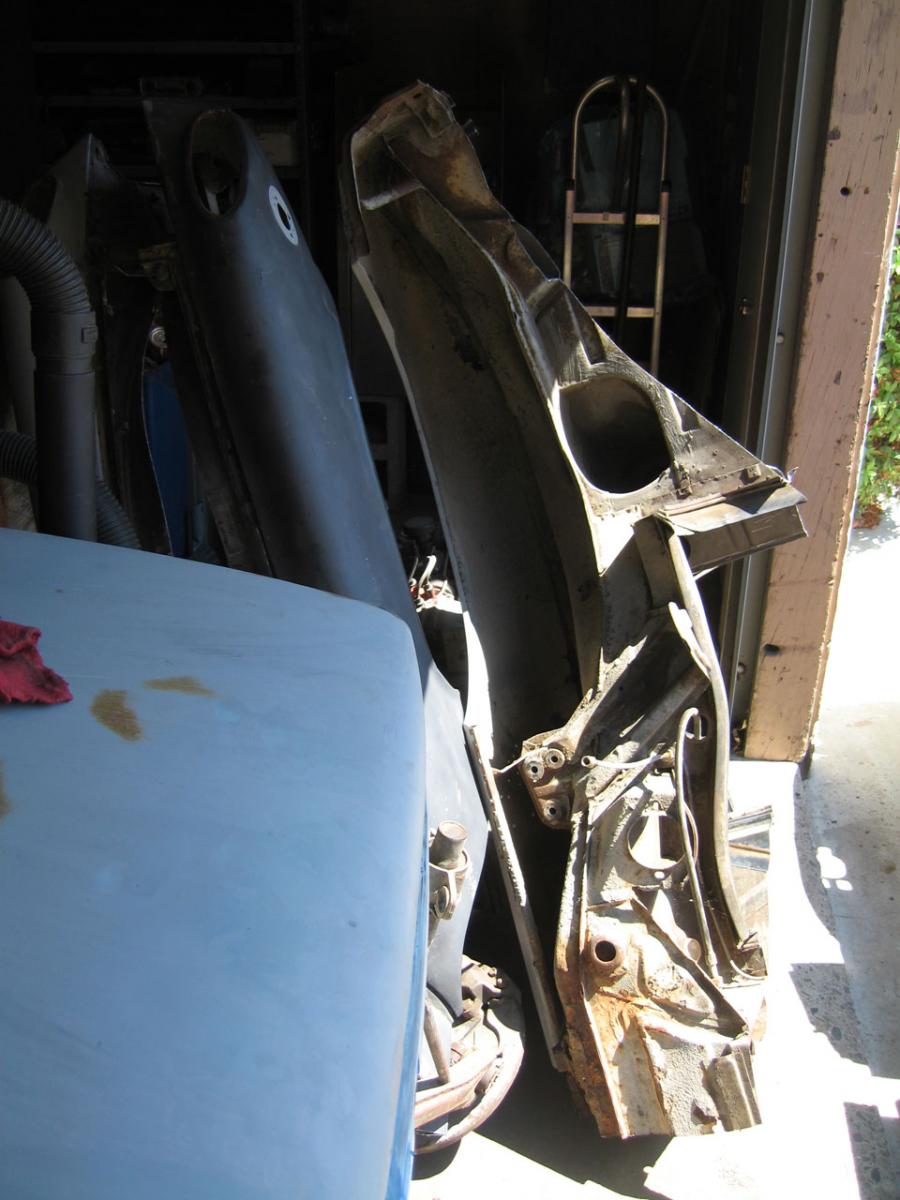
 That's the entirety of the donor car there in the corner.
Click to view attachment
It did get brutal when I removed the old suspension console, was more than a year ago.
Click to view attachment
Click to view attachment
Click to view attachment
Bit of work to get both sides looking solidClick to view attachment
bit lumpy, but passable. They don't sell this as a replacement piece afaik. 3M weld thru primer.
Click to view attachment
Click to view attachment
Click to view attachment
I've got some more plug welding to do; waiting on a big ass c-clamp to hold it together way in. A bit of a fit up of the outer suspension console.
Click to view attachment
The inside, fitting
Click to view attachment
I've cut out pieces of the long from the donor car to get the curvature without having to make tooling for the bender.
Click to view attachment
Click to view attachment
Got the driver engine mount off and seperated. This cleaned up nice (this is before
). I've got a paper template only, for the bottom part, the passenger-side version.Click to view attachment
Working toward completing the inner long, those corrugations at the bottom, I can use parts of the driver-side long of the donor for the outer layer, I've got to make the inner, Richard Castro-style, as his thread is the only one I've seen really address the intricacies of the lower long.
Looked through like 3 times this many swatches. My neighbor down the way is an upholsterer and is going to help me get the interior in shape... once I get it painted.
Click to view attachment
I'm not sure if it's what I will go with as I'd like it to be more 70's 'camel', but out of all the ones he had this was the closest, it's sahara beige, a 996-7 color. This is leather, not leatherette which I think I might prefer, as he says that it will be mostly labor the cost. He's going to get me some more swatches, we'll see. I'm more concerned about camel-ish square-weave carpet.
Click to view attachment
I've sanded it a bit more, got the cowl and working on the gas tank compartment now. I ordered metal prep and primer, ppg, from the paint store. I'll need to get the long together before I can move the car onto the dolly in order to set up the ladder to move the lights and hang the divider. I can't wait to cover this metal up. I don't know how the anklebiter sits around like that.
That's the entirety of the donor car there in the corner.
I'm pretty excited about the G&R swapmeet. Coming along slowly but surly. A few recap pics.
Click to view attachment
Click to view attachment
I finally made the 5th page.
The pics are a little large maybe? I've wondered if it is too much. I think I put too many in a post throughout.
I envisioned the thread as an immersive pictorial essay of 914 restoration.
The load time, though, may be too much?
800x600 seems ideal.
Click to view attachment
Click to view attachment
The pics are a little large maybe? I've wondered if it is too much. I think I put too many in a post throughout.
I envisioned the thread as an immersive pictorial essay of 914 restoration.
The load time, though, may be too much?
800x600 seems ideal.
Click to view attachment
Click to view attachment
To show it before and during adds drama and makes it look like I am progressing faster.
Click to view attachment
A bit of fitting up, a few pieces put together, some tricky bit to do at the bottom.
Click to view attachment
Welding is coming along, could be prettier. I will grind the butt welds though.
Click to view attachment
Almost have all the pieces.. I do have that back bit with the recessed hole for behind the inner console.
Click to view attachment
A bit of rust color there, a lot of handling going on, but well get it clean before it goes back together.
I got my big-ass clamp. Who knew 8 inches could be so big. I blasted, sanded and painted it with high temp paint.
Click to view attachment
I've got the stuff to put down epoxy primer though. A few things to do before I can spray any.
Click to view attachment
Click to view attachment
Click to view attachment
A bit of fitting up, a few pieces put together, some tricky bit to do at the bottom.
Click to view attachment
Welding is coming along, could be prettier. I will grind the butt welds though.
Click to view attachment
Almost have all the pieces.. I do have that back bit with the recessed hole for behind the inner console.
Click to view attachment
A bit of rust color there, a lot of handling going on, but well get it clean before it goes back together.
I got my big-ass clamp. Who knew 8 inches could be so big. I blasted, sanded and painted it with high temp paint.
Click to view attachment
I've got the stuff to put down epoxy primer though. A few things to do before I can spray any.
Click to view attachment
Click to view attachment

Your work is looking really good! Have you done anymore to your B pillar air vent areas yet? That is next up on mine and some photos of your work there would really help me???
Rex
Rex
QUOTE(Rex-n-effect @ Oct 20 2011, 08:53 AM)
Your work is looking really good! Have you done anymore to your B pillar air vent areas yet? That is next up on mine and some photos of your work there would really help me???
Rex
Thanks man. I really appreciate the encouragement, guys.
The plan for the air vent is to cut the old one out entirely, just behind the tube where it becomes double-layered. The new piece will have part of the door jam where it comes through and include the recess just behind the door pull, so that whole "corner".
First the long, then the engine mount, the firewall, the outer suspension console, then the inner console, the inter-ties, maybe the engine shelf, and then the fresh air duct.
The rear fender I'll be fitting at the same time.
it's as if I was doing my car again..
QUOTE(ripper911 @ Apr 5 2011, 09:52 PM)
Also, I don't think that is a black widow. But, maybe thats a california black widow.
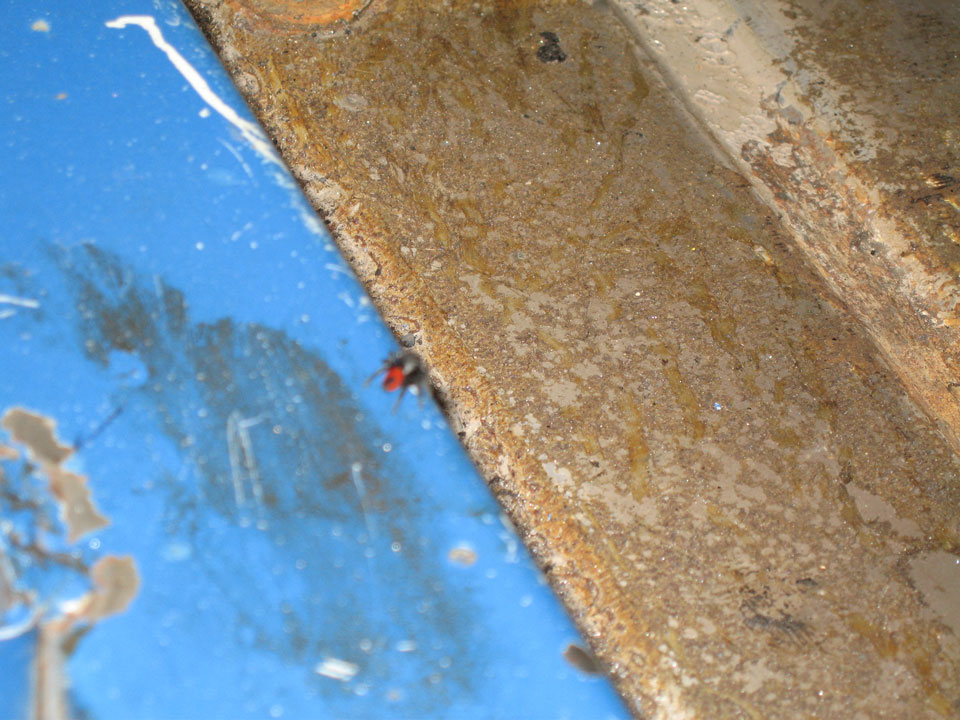
I think it's bit me, a brown widow, though. Their venom is twice as toxic as a black widow's but they inject less and it stays more localized instead of going to the whole body.

That's me in the middle of that large red area. I felt the bump on Monday last week. I think it was in my overalls. I thought it might go away, the bump, but it spread, swelled up. I ended up at the hospital on friday, and again today for intravenous antibiotic injections, and will be back there again tomorrow. Unbelievable the amount of nasty ichor, pus? that I have witnessed spout from my arm.


I'd hoped to be putting in the long on my next post here but I have been unable to work with it going on. It is a bacterial infection, fever, shaking, headache, etc. I've got some shots of where it sits, fairly impressive with almost all of the inner long welded and the firewall and floor fitted up. I will post pics soon (of the car, not the wound
)

The long is made up of like 15 different pieces.
Click to view attachment
Click to view attachment
must ... conquer ... rust ...
Click to view attachment
and the corner of the floor...
Click to view attachment
Click to view attachment
Click to view attachment
must ... conquer ... rust ...
Click to view attachment
and the corner of the floor...
Click to view attachment
QUOTE(kg6dxn @ Dec 10 2011, 09:58 PM)
I haven't documented the bite that well. I grabbed a blurry pic with my cell phone right when they took the bandage off today. I was surprised by how much pus had come out. There is a 'wick' inserted about 3/4 inch beneath my skin and yellow green pus like "shtuff" dripping out. I'd 'expressed' it the day before, in my bus, in the parking ramp at work, projectile pus-letting, was traumatized and went to the walk-in, then urgent care, then the ER.
I can only get tiny pics off my phone through verizon's online send thing as I don't have the cable/ might not work on my mac. You kind of can imagine despite being blurry/ small. That is almost peanut butter-like ooz coming off the wick.
Click to view attachment
Great work on the car. Good on ya for saving one. Was that a brown recluse spider? It's good to work on the car but make sure you're healthy first.
Cheers, Elliot
Cheers, Elliot
QUOTE(Elliot Cannon @ Dec 10 2011, 10:38 PM)
Great work on the car. Good on ya for saving one. Was that a brown recluse spider? It's good to work on the car but make sure you're healthy first.
Cheers, Elliot
brown recluses don't get this far west, I saw. Thanks
getting reorganized in the meantime.
QUOTE(nathansnathan @ Dec 10 2011, 11:46 PM)
QUOTE(Elliot Cannon @ Dec 10 2011, 10:38 PM)
Great work on the car. Good on ya for saving one. Was that a brown recluse spider? It's good to work on the car but make sure you're healthy first.
Cheers, Elliot
brown recluses don't get this far west, I saw. Thanks
getting reorganized in the meantime.We got them up north...
Next time please get video of the projectile puss...
You are a real craftsman, this is some of the most meticulous work on here.
Make sure you take care of the infection completely.
Take the time to get thorough treatment so it does not haunt you later.
John
Your craftsmanship is awesome! Our cars have similar rust issues...mine is worse down low (longs, etc) but yours took a beating on the top half.
Take good care of that spider bite! I was clearing brush at my Mom's place a few years back and got bit. Still don't know what type of spider it was...but it jacked me up pretty good and seemed to "dissolve" some of the flesh on my arm.
Great work!
Our cars have similar rust issues...mine is worse down low (longs, etc) but yours took a beating on the top half.Take good care of that spider bite! I was clearing brush at my Mom's place a few years back and got bit. Still don't know what type of spider it was...but it jacked me up pretty good and seemed to "dissolve" some of the flesh on my arm.
Great work!
Spider bite , nasty, get well.
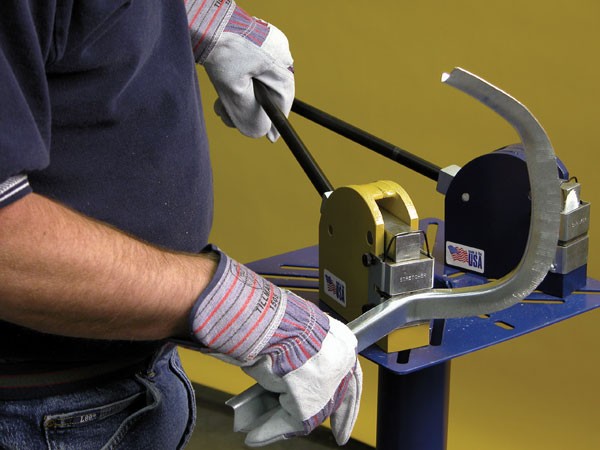
Awesome splice work, Looks like you need a shrink-er/stretch-er for your flanges.
I agree about the rotary phase converter the only way to go, I have used 4 of the little box type, I even had one switchable between 1-3HP to 3-5HP.
Yes they work, But no power, Not good for starting and stopping reversing, In the end I finally bought a rotary and love it. Esp for multiple loads.
WOW, What talent !!! I did mine in 2000 , with the help of 2 great friends.
My skills improved , but never approched yours.
You fabed most of your replacement panels, why ? Money ?
There is a place called Restoration Design that makes everything you did,
along with Egrman , and other vendors here. Seems to me that would be the
quickest way. I know there is the factor of ," Why buy it when I have the
ability to do it my self". Any way you have my admiration on both the ability,
and skill set.
Now don't you know that any 914ers garage is never clean and organized
, next will come a bigger garage , then a storage shed, this and the need
too aquire more parts cars, ( just ask Jamie Rust ) in the PNW.
There is no cure and no 12 step program to help you. Your hooked!!!!
Thanks for this thread and for saveing 2 914,s. Did you sent the vins to
Andy ? Great job ! Dave

Thanks, guys for all the compliments/ encouragement. I really can't wait to get her together!
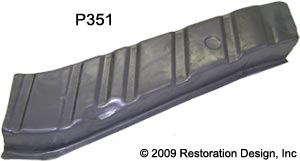
The way restoration design does the hell hole repair isn't the same as factory from what I can figure - they omit the outer piece so just the corrugated piece is used, which I didn't want to do. Like on their site, if you click on the image for '22'
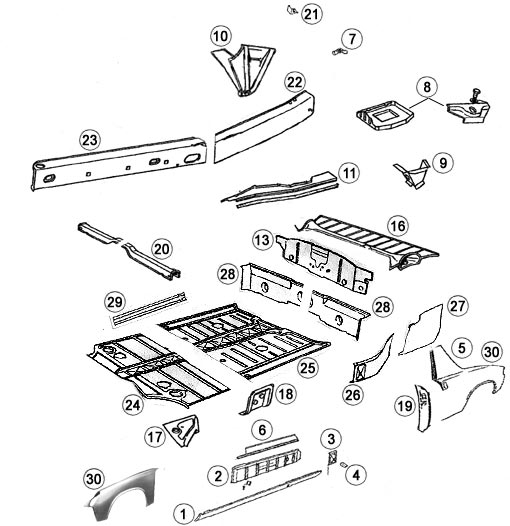
you get this, which is the inner
Auto Atlanta has the whole shebang, 22 and 23 as 1 piece, from the factory, but for a whopping $3000! I did think about that but, ... no.
So I'm doing it the hard way. The tig is a big help. A shrinker stretcher would be nice, like what Eastwood has, though I don't like how it rough the metal all up, how it works.
Oh, I'll be doing some more pus-letting soon - just got back from the 3rd trip to the hospital for antibiotic treatment and now I'm on my own. They 've instructed me on how to express it, insert a new wick, and dress it.... can't wait We'll see if I can get a video. Seriously, it's gross like you have never imagined, like having diarrhea out your arm, the nurses were all very impressed.
The way restoration design does the hell hole repair isn't the same as factory from what I can figure - they omit the outer piece so just the corrugated piece is used, which I didn't want to do. Like on their site, if you click on the image for '22'
you get this, which is the inner
Auto Atlanta has the whole shebang, 22 and 23 as 1 piece, from the factory, but for a whopping $3000! I did think about that but, ... no.
So I'm doing it the hard way. The tig is a big help. A shrinker stretcher would be nice, like what Eastwood has, though I don't like how it rough the metal all up, how it works.
Oh, I'll be doing some more pus-letting soon - just got back from the 3rd trip to the hospital for antibiotic treatment and now I'm on my own. They 've instructed me on how to express it, insert a new wick, and dress it.... can't wait
We'll see if I can get a video. Seriously, it's gross like you have never imagined, like having diarrhea out your arm, the nurses were all very impressed. QUOTE(nathansnathan @ Dec 11 2011, 12:14 PM)
The way restoration design does the hell hole repair isn't the same as factory from what I can figure - they omit the outer piece so just the corrugated piece is used, which I didn't want to do.
I'm pretty sure RD has both pieces. There was a thread about that a while ago.
They are pretty active here, PM peteyd if you have questions.

This is a "lo-fi" version of our main content. To view the full version with more information, formatting and images, please click here.